


TopRCModel FW-190
 07-08-2023, 12:31 AM
#1601
Productive day though its hard to see a lot of progress as it is all fiddly and takes time.
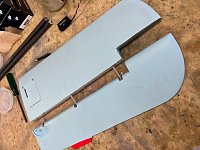
Have finished off all the hinging, used hysol slow set. Everything moving freely. Should be full cured by the time I get home from flying tomorrow.
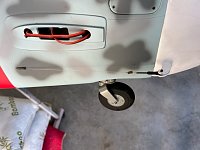
Rudder cables are done and adjusted, might need to tweak the tail wheel steering a little but its close.
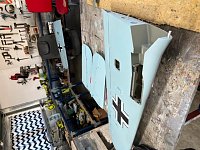
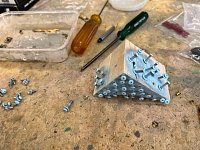
Started on the servos in the stabs, I need to spray the screws sky blue to match under surface so that will slow me down bit, hopefully I can get most of those sprayed tomorrow.
Later lurkers
me
I used Robart hinges, not the crap chinesium ones.
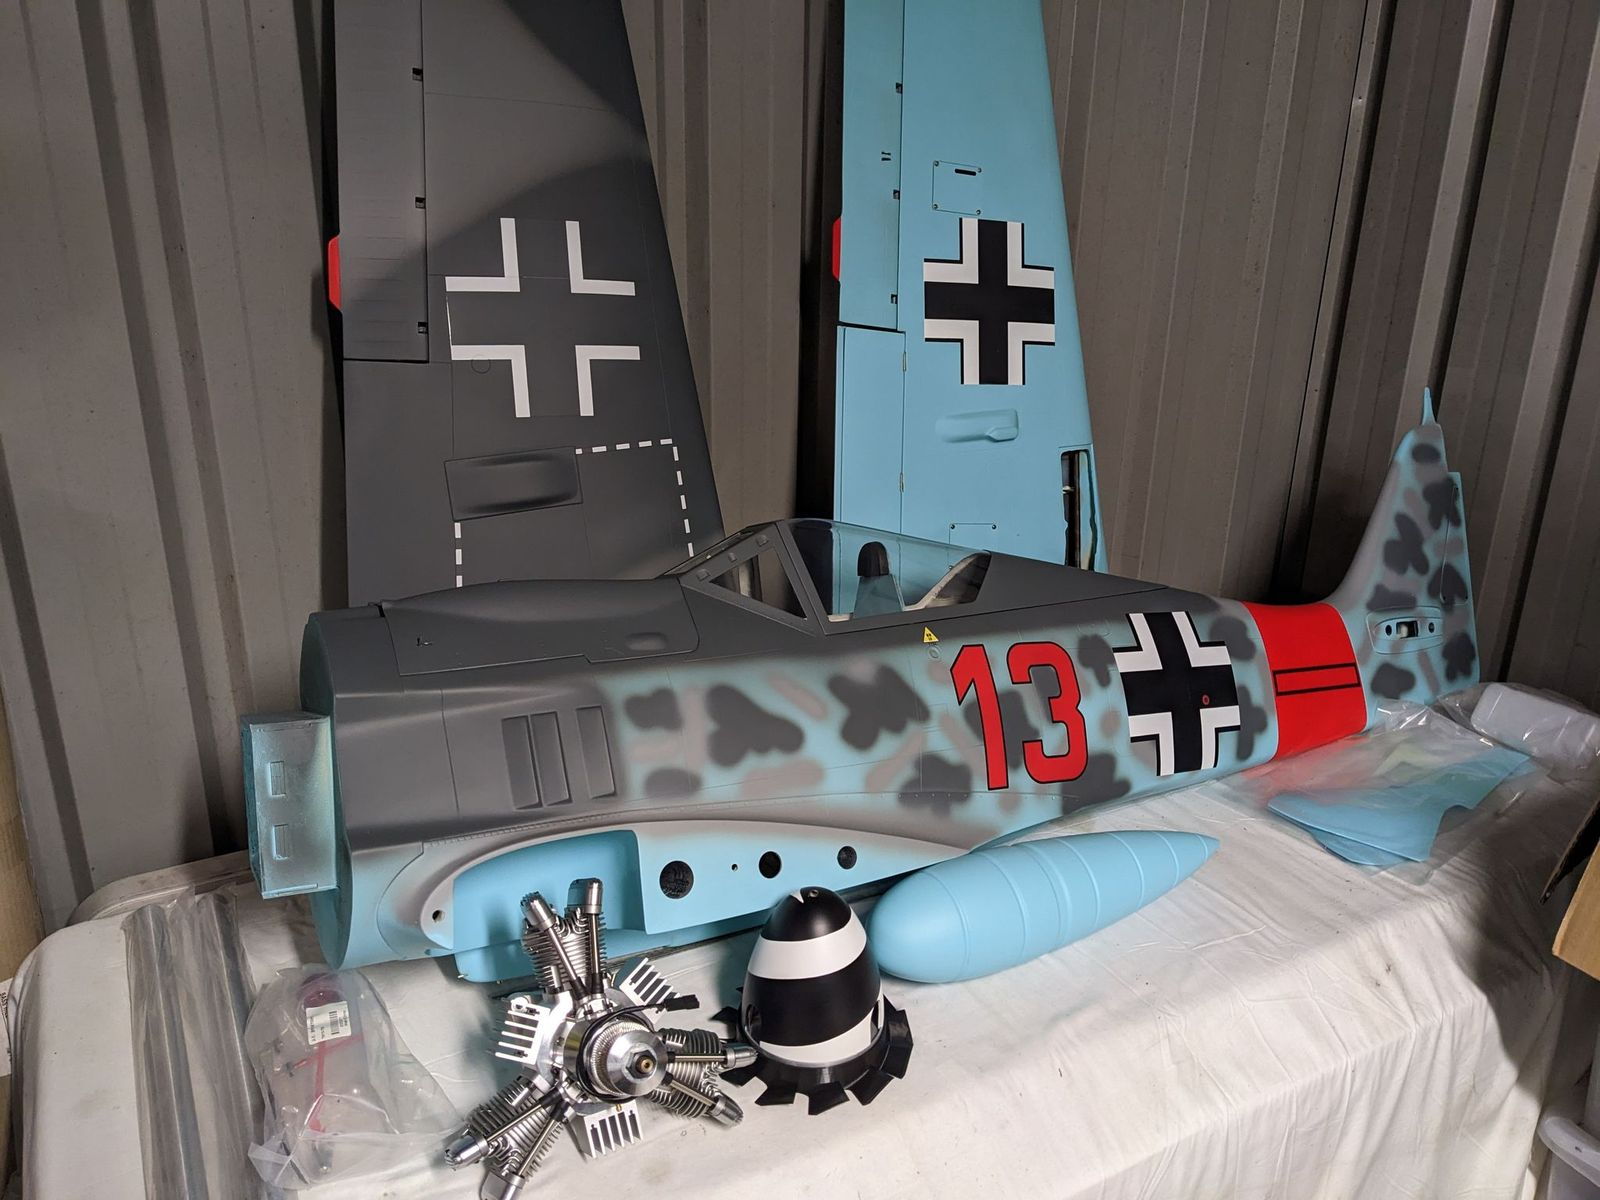
Everything hinged and fitted
Have finished off all the hinging, used hysol slow set. Everything moving freely. Should be full cured by the time I get home from flying tomorrow.
Rudder cables are done and adjusted, might need to tweak the tail wheel steering a little but its close.
Started on the servos in the stabs, I need to spray the screws sky blue to match under surface so that will slow me down bit, hopefully I can get most of those sprayed tomorrow.
Later lurkers
me
I used Robart hinges, not the crap chinesium ones.
Everything hinged and fitted
 07-08-2023, 03:08 AM
#1602
did you use the 3/16 robart hinges or the 1/8"?
just received my FW this week. AFter a few other projects are finished I will be diving into this beautiful bird. thank you for posting.
just received my FW this week. AFter a few other projects are finished I will be diving into this beautiful bird. thank you for posting.
07-09-2023, 01:10 PM
#1603
3/16th Robart hinges. Ditched the chineseum rubbish ones.
More progress on the 190, did not feel like doing the cockpit so finished off all the control surface hinging and started to fit servos and linkages.
Even sprayed all the screw heads to match the blue.
Both elevator and stabs done, might need a small mechanical adjustment but it is close.
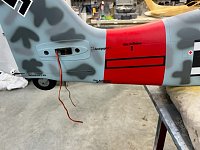
Right aileron done and started on the flap then the football came on so I got distracted watching that. Flap linkage will be internal, not external as the manual states.
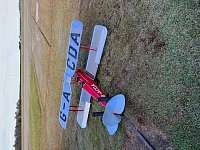
Needed a gentle Sunday fliying so took out my H9 1/4 Tiger Moth. Can putter around for 30 mins or more if I wish. Weather was perfect for it with no wind though it does like to float!
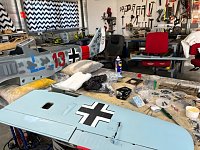
More progress on the 190, did not feel like doing the cockpit so finished off all the control surface hinging and started to fit servos and linkages.
Even sprayed all the screw heads to match the blue.
Both elevator and stabs done, might need a small mechanical adjustment but it is close.
Right aileron done and started on the flap then the football came on so I got distracted watching that. Flap linkage will be internal, not external as the manual states.
Needed a gentle Sunday fliying so took out my H9 1/4 Tiger Moth. Can putter around for 30 mins or more if I wish. Weather was perfect for it with no wind though it does like to float!
07-12-2023, 01:39 PM
#1604
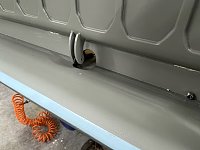
1-1/2 hours of work on the Wulf after work last night, got one flap sorted. Internal linkage.
Will replicate hopefully on the other flap so that throws / movement are consistent.
Dualsky DS589 20kg @ 6V
later lurkers

Will replicate hopefully on the other flap so that throws / movement are consistent.
Dualsky DS589 20kg @ 6V
later lurkers
07-21-2023, 01:50 PM
#1605
G'day lurkers,
been a bit crook of late so not a lot of progress going on. Crook means ill, OZ101.
Both wing halves have their aileron and flap servos in including linkages set as close as I can get them before I get the radio gear installed. Used a little JR match box.
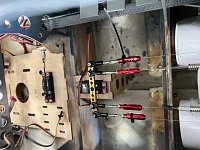
Started to get retracts installed and have run the airlines.
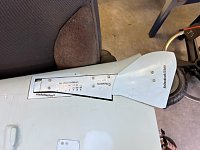
Saw this very cool shirt on insta, now I need that shirt!!


later lurkers
cheers
me
been a bit crook of late so not a lot of progress going on. Crook means ill, OZ101.
Both wing halves have their aileron and flap servos in including linkages set as close as I can get them before I get the radio gear installed. Used a little JR match box.
Started to get retracts installed and have run the airlines.
Saw this very cool shirt on insta, now I need that shirt!!
later lurkers
cheers
me


The following users liked this post:
rgoinbroke (07-23-2023)
07-23-2023, 01:16 PM
#1607
so for me I'll need XXXXXLLLLLL
07-24-2023, 12:18 PM
#1610
Sierra mains, wheels and tail retract / wheel.
07-29-2023, 02:37 AM
#1612

Just got my kit and looks really good.
I'm trying to get a hold of the Sierra retract kit with wheels but after Darrell sent me a reply that they're available i have no response from him or any reply to my emails after confirming i want to order them for a while now.
Starting to think about getting the Top RC Electric retracts, are they really that bad? might be my only option now.
Last edited by gixer47; 07-29-2023 at 03:30 AM.
07-29-2023, 03:19 AM
#1613
I sent you a PM. I just saw you are in Australia. I do not know how to ship to you. But if you like I can ship for extra charge. Best way to contact Darrel @ Sierra is by phone.
07-29-2023, 10:20 AM
#1614

Just got my kit and looks really good.
I'm trying to get a hold of the Sierra retract kit with wheels but after Darrell sent me a reply that they're available i have no response from him or any reply to my emails after confirming i want to order them for a while now.
Starting to think about getting the Top RC Electric retracts, are they really that bad? might be my only option now.
I'm trying to get a hold of the Sierra retract kit with wheels but after Darrell sent me a reply that they're available i have no response from him or any reply to my emails after confirming i want to order them for a while now.
Starting to think about getting the Top RC Electric retracts, are they really that bad? might be my only option now.
07-30-2023, 01:18 PM
#1615
mate give Darrell at call at 0700 his time, make sure you get the tail retract and scale mains and tail wheel too.
I have a 1/5th scale museum scale cockpit set by iflytailies if you are interested.
I have a 1/5th scale museum scale cockpit set by iflytailies if you are interested.
07-30-2023, 01:18 PM
#1616
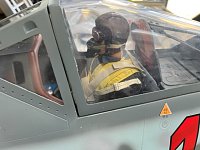
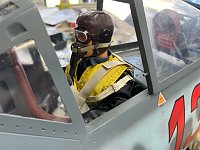
Lots of progress on the FW-190 cockpit but had to push myself. Black dog is barking at present.
Saturday I wore myself out doing 5 hours of housework, my house is nice and clean again though. Finally got out to the shed about 1430.
Flying Sunday morning, home about 1100 and straight to the shed. Was in there will dark, 1800 ish.
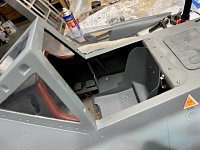
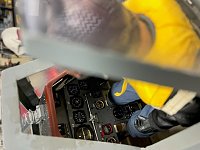
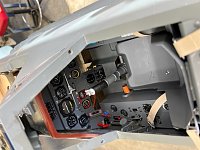
Seat belt attachment brackets, I made these from 1/8" aluminium tube hammered flat then worked to the shape, ends filed to a radius, drilled the hole each end. Plywood behind so they have something to bite into. I stiffened up the seat with 1/8" balsa under and on the rear. Minimal weight but made a huge difference to the rigidity.
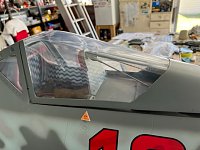
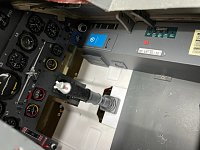
1/4 scale instrument panel is in, had a bit of trimming on the corners. Revi gunsight is also in, small blob of silicon sealer on top of the bracket.
The panel is a tad big but the 1/5 size looks way too small so I went with big.
Panel is held in with 2 screws top and one on each bottom corner.
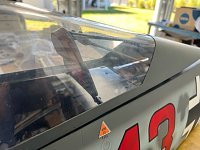
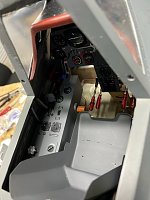
Inside the canopy armour plate and the brackets. Canopy is just sitting there and not fitted to its guides, hence why it is sitting up at an angle.
The screws holding the seat won't be visible once the side panels go on. Seat is held on by 2 screws in the bottom and 2 up top, all into 1/8 plywood.
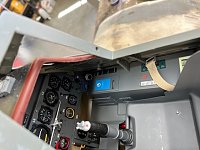
You won't see the screws with the pilot in. There is a bulkhead that goes each side of the seat at an angle, still to work out how to do that.
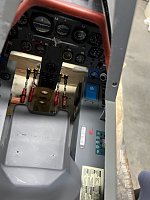
There will also be florring that extends forward of the rear section of floor. While I'd like it to go the full scale length I would not be able easily access the wing bolts so a compromise is to be made and it will extend just past the instrument panel, enough to get the rudder pedals mounted. Another thing I am yet to fully work out.
The large "wheel" that is the canopy opener is still to be fitted on right side under the coaming. Most likely use a blob of silicon sealant.
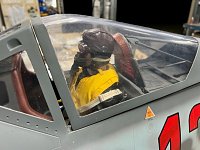
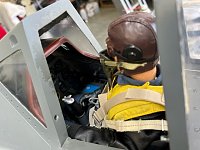
The driver seems to like his new office. Ya das goot mein Herr!
Going to dirty up the life jacket a bit, it is far too bright. A very weak wash of a grey should do it.
Glad I chose the 1/4 scale pilot as the 1/5 would look far too small.

Saturday I wore myself out doing 5 hours of housework, my house is nice and clean again though. Finally got out to the shed about 1430.
Flying Sunday morning, home about 1100 and straight to the shed. Was in there will dark, 1800 ish.
Seat belt attachment brackets, I made these from 1/8" aluminium tube hammered flat then worked to the shape, ends filed to a radius, drilled the hole each end. Plywood behind so they have something to bite into. I stiffened up the seat with 1/8" balsa under and on the rear. Minimal weight but made a huge difference to the rigidity.
1/4 scale instrument panel is in, had a bit of trimming on the corners. Revi gunsight is also in, small blob of silicon sealer on top of the bracket.
The panel is a tad big but the 1/5 size looks way too small so I went with big.
Panel is held in with 2 screws top and one on each bottom corner.
Inside the canopy armour plate and the brackets. Canopy is just sitting there and not fitted to its guides, hence why it is sitting up at an angle.
The screws holding the seat won't be visible once the side panels go on. Seat is held on by 2 screws in the bottom and 2 up top, all into 1/8 plywood.
You won't see the screws with the pilot in. There is a bulkhead that goes each side of the seat at an angle, still to work out how to do that.
There will also be florring that extends forward of the rear section of floor. While I'd like it to go the full scale length I would not be able easily access the wing bolts so a compromise is to be made and it will extend just past the instrument panel, enough to get the rudder pedals mounted. Another thing I am yet to fully work out.
The large "wheel" that is the canopy opener is still to be fitted on right side under the coaming. Most likely use a blob of silicon sealant.
The driver seems to like his new office. Ya das goot mein Herr!
Going to dirty up the life jacket a bit, it is far too bright. A very weak wash of a grey should do it.
Glad I chose the 1/4 scale pilot as the 1/5 would look far too small.
07-30-2023, 10:36 PM
#1617
Dash coaming is a bit dusty 
Everything came back out this arvo except the instrument panel. Just as well I designed it all to be removable.
The springs for the tail wheel cable were catching under the floor on the balso ribs I put on.
Fixed by gluing some very light plastic sheet on the bottom for them to slide on.
Fitted the lap seat belt anchor points, could not find details on exactly where they go so took a guess, not going to see them anyway.
Dirtied up the life jacket a bit, will see what it looks like tomorrow when it is dry.
Side panels I am going to use the 1/5th size instead of the 1/4. 1/4 they are more detailed are just going to be a bit too large.
Mind you I may look at it again tomorrow and change my mind, we shall see.


cya later lurkers
me
Everything came back out this arvo except the instrument panel. Just as well I designed it all to be removable.
The springs for the tail wheel cable were catching under the floor on the balso ribs I put on.
Fixed by gluing some very light plastic sheet on the bottom for them to slide on.
Fitted the lap seat belt anchor points, could not find details on exactly where they go so took a guess, not going to see them anyway.
Dirtied up the life jacket a bit, will see what it looks like tomorrow when it is dry.
Side panels I am going to use the 1/5th size instead of the 1/4. 1/4 they are more detailed are just going to be a bit too large.
Mind you I may look at it again tomorrow and change my mind, we shall see.
cya later lurkers
me
The following users liked this post:
gixer47 (08-07-2023)
 08-14-2023, 12:27 PM
#1620
Got back in the shed after work and did about 2 hours before my tummy got hungry. 

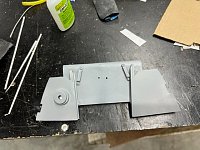
I have elected to go with the larger 1/4 scale panels though I did have to cut a bit of the forward end unfortunately. Lost some details but have to be a bit pragmatic.
I will make up a 2.5mm plywood "foot" or in actual fact "feet" as there will be two of them to mount the side panels. Said feet will be hidden by the seat and will allow easy removal.
I had to cut notches into the panels where the ribs go. Panels sit against the fuz side wall so guess I am happy with that.
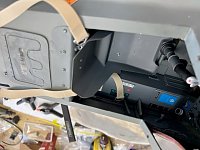
Side panels and seat are just sitting there in the photos.
Once the sides are sorted then it is onto working out how to do the forward sections of floor. It will be in 2 parts. 1st will be in front of the seat and up to the instrument panel, control stick attaches to this bit then I will do a smaller section in front of the instrument panel that the rudder pedals will be on. This piece needs to be removable easily so I can get to the wing hold on nuts.
I have elected to go with the larger 1/4 scale panels though I did have to cut a bit of the forward end unfortunately. Lost some details but have to be a bit pragmatic.
I will make up a 2.5mm plywood "foot" or in actual fact "feet" as there will be two of them to mount the side panels. Said feet will be hidden by the seat and will allow easy removal.
I had to cut notches into the panels where the ribs go. Panels sit against the fuz side wall so guess I am happy with that.
Side panels and seat are just sitting there in the photos.
Once the sides are sorted then it is onto working out how to do the forward sections of floor. It will be in 2 parts. 1st will be in front of the seat and up to the instrument panel, control stick attaches to this bit then I will do a smaller section in front of the instrument panel that the rudder pedals will be on. This piece needs to be removable easily so I can get to the wing hold on nuts.
08-15-2023, 12:30 PM
#1621
Another couple of hours last night on the wulf.
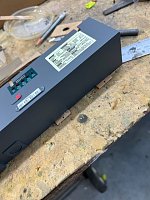
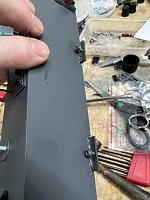
Feet and supports done on both side panels and they goo in and out easily.
Started doing a bit of scale detail that is supposed to be the seat mounting rails on full size, I am only replicating that to give it that illusion.
Need to find something that I can make the oxygen regulator out as that goes to right side of the pilot on the above piece and is quite noticable. I have a feeling I made a mold for one when I did my P51 and it will be a close shape and size.
The forward floor sections are next challenge.
Later lurkers
me
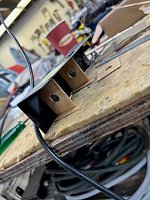
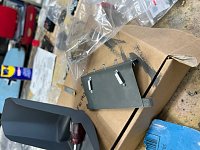
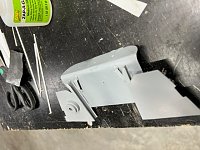
said feet
Internal support bracket
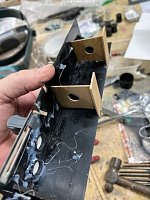
Feet with some paint on.
Feet and supports done on both side panels and they goo in and out easily.
Started doing a bit of scale detail that is supposed to be the seat mounting rails on full size, I am only replicating that to give it that illusion.
Need to find something that I can make the oxygen regulator out as that goes to right side of the pilot on the above piece and is quite noticable. I have a feeling I made a mold for one when I did my P51 and it will be a close shape and size.
The forward floor sections are next challenge.
Later lurkers
me
said feet
Internal support bracket
Feet with some paint on.
The following users liked this post:
gixer47 (08-15-2023)
08-16-2023, 01:23 PM
#1622
More work last night. Floor section fitted in, had to do some trimming and remove a section from rear of the panel area in order to be able to fit / remove said panel.
Need to do the torque tube from the control stick to where it goes to the side panel.
I cut off about 25mm from the most forward / widest section of the white flooring in order to be able to get my hand in to do the wing nuts on the wing bolts.
The aim will be to fit the rudder pedals to this cut off section and have that piece snap out and in as needed for wing nut access. I think it should work ok.
Parts made for behind and each side of the seat. Oxygen regulator made from a couple of old aluminium spacers I had in a container of bits. Made a oxy hose that I will glue to the side.
Need to then get the parts painted RLM66 and re-install everything.
08-19-2023, 07:10 PM
#1624
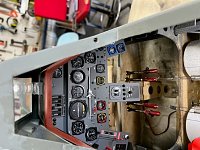
Cockpit completed. Pilot is in, not overly happy with the harness but it will do.
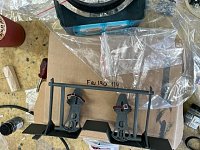
Forward section of floor with rudder pedals can easily be removed to access the wing bolts. Debatable if I leave them in place for flying or not.
As Lane aka LBJ says you won't see it at 90mph
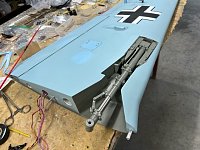
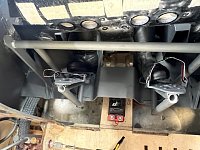
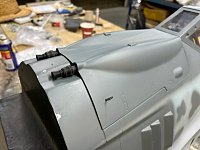
Front cowl MG131 12.7mm barrels are on, in hindsight I should have made them about 1mm higher to allow for the cowl lip. I'll sand the bottom part of them a bit and you won't see that anyway.
I mentioned earlier about the nose weight in the little Blackhorse Typhoon, check it out, that is a diver's weight from the weight belt plus all those sinkers. I'll be checking it very carefully. Manual is spot on 33% MAC so it is just checking where the actual CG sits. Would be nice to remove some of that lead.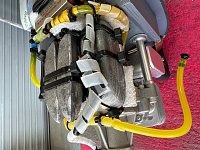

Rudder pedals assembly
Forward section of floor with rudder pedals can easily be removed to access the wing bolts. Debatable if I leave them in place for flying or not.
As Lane aka LBJ says you won't see it at 90mph
Front cowl MG131 12.7mm barrels are on, in hindsight I should have made them about 1mm higher to allow for the cowl lip. I'll sand the bottom part of them a bit and you won't see that anyway.
I mentioned earlier about the nose weight in the little Blackhorse Typhoon, check it out, that is a diver's weight from the weight belt plus all those sinkers. I'll be checking it very carefully. Manual is spot on 33% MAC so it is just checking where the actual CG sits. Would be nice to remove some of that lead.
Rudder pedals assembly
08-21-2023, 11:07 PM
#1625
ok all of the nomenclature is done except for the oleo legs, what was provided on the sheet is not suitable.
I'll check in with the German Warbirds.de to see where they got theirs done as they were highly detailed.
I'll check in with the German Warbirds.de to see where they got theirs done as they were highly detailed.