


TopRc F4U Corsair assembly
 03-13-2020, 03:08 PM
#1


I guess I am the first in the US to get one so I will do an assembly with pics. It arrived earlier this week and I have not had a chance to open it yet. I did look at the retracts and they look impressive. I plan to unbox it tonight and get a few pics loaded by tomorrow.

The following users liked this post:
jnayjaso (04-05-2020)
The following users liked this post:
jnayjaso (04-05-2020)

 Carbon Plates.

The following users liked this post:
jnayjaso (04-05-2020)

The following users liked this post:
jnayjaso (04-05-2020)
03-14-2020, 06:44 PM
#6
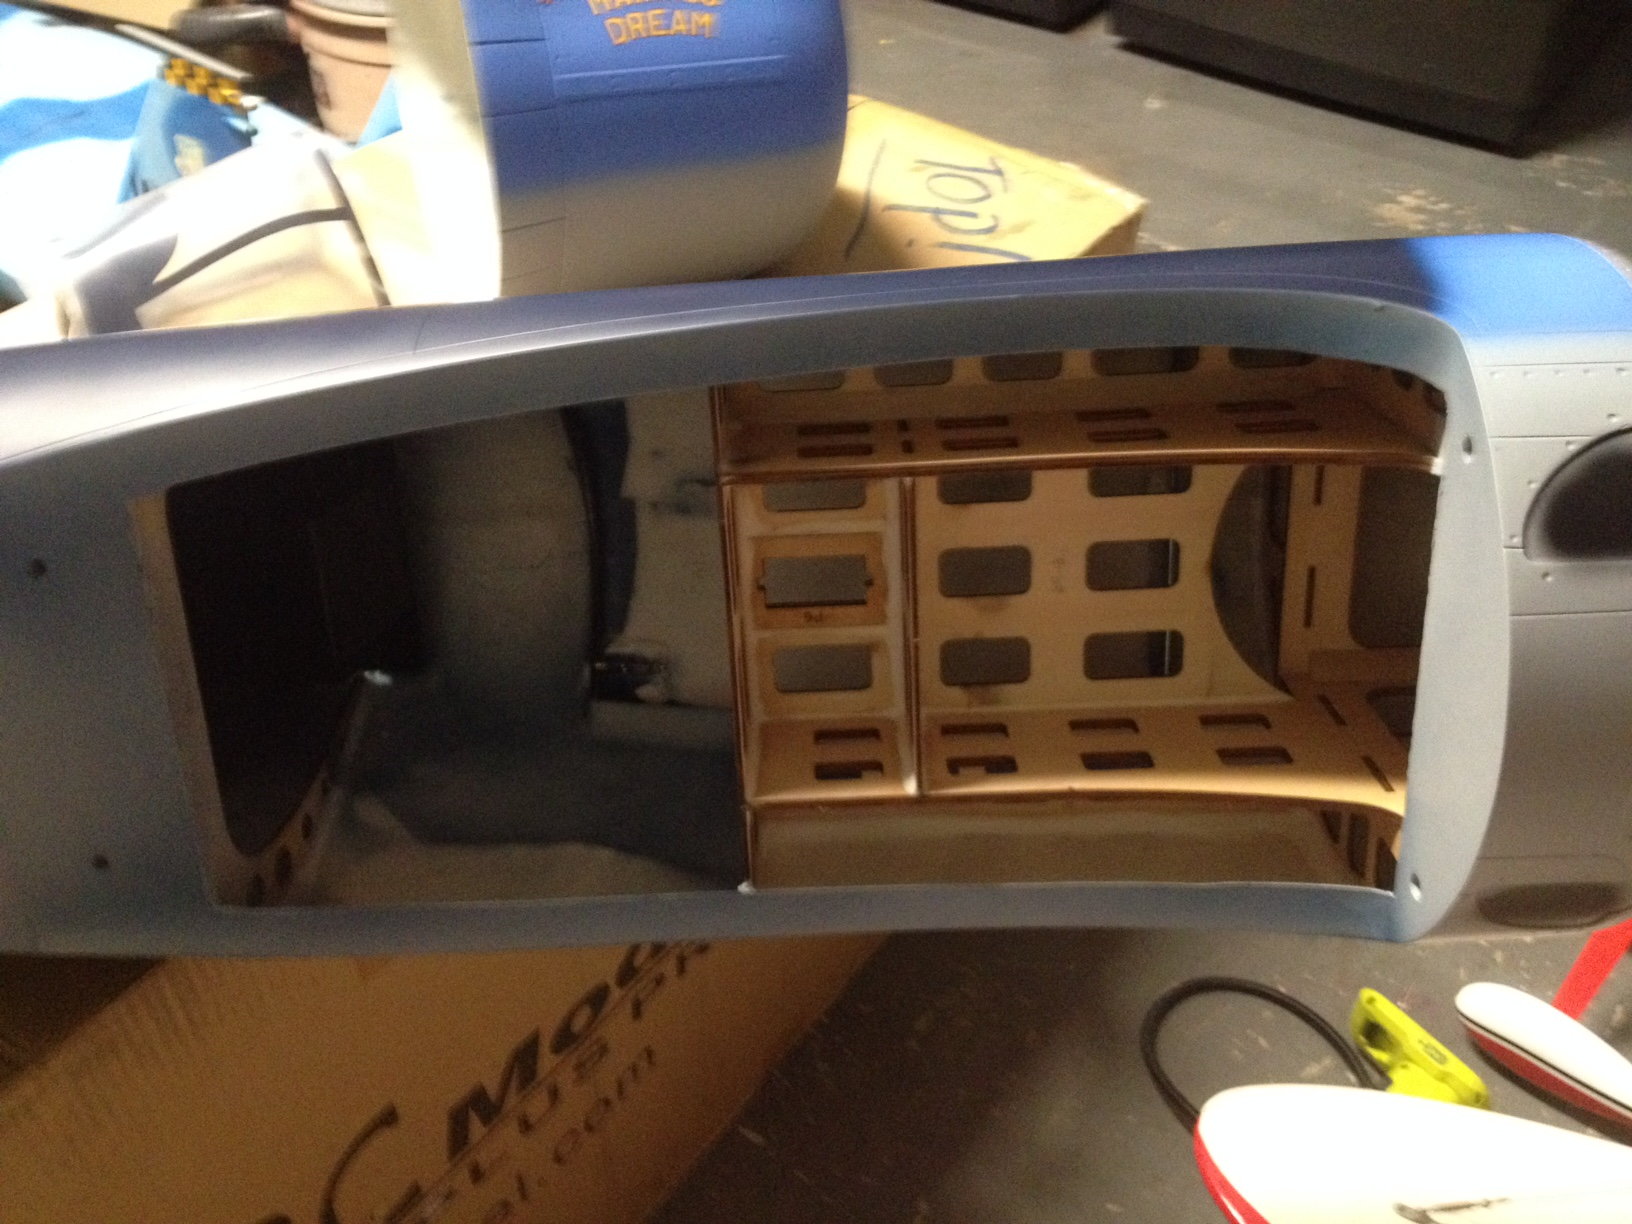
Big crutch system built in all the way to the firewall. (A+ on that).
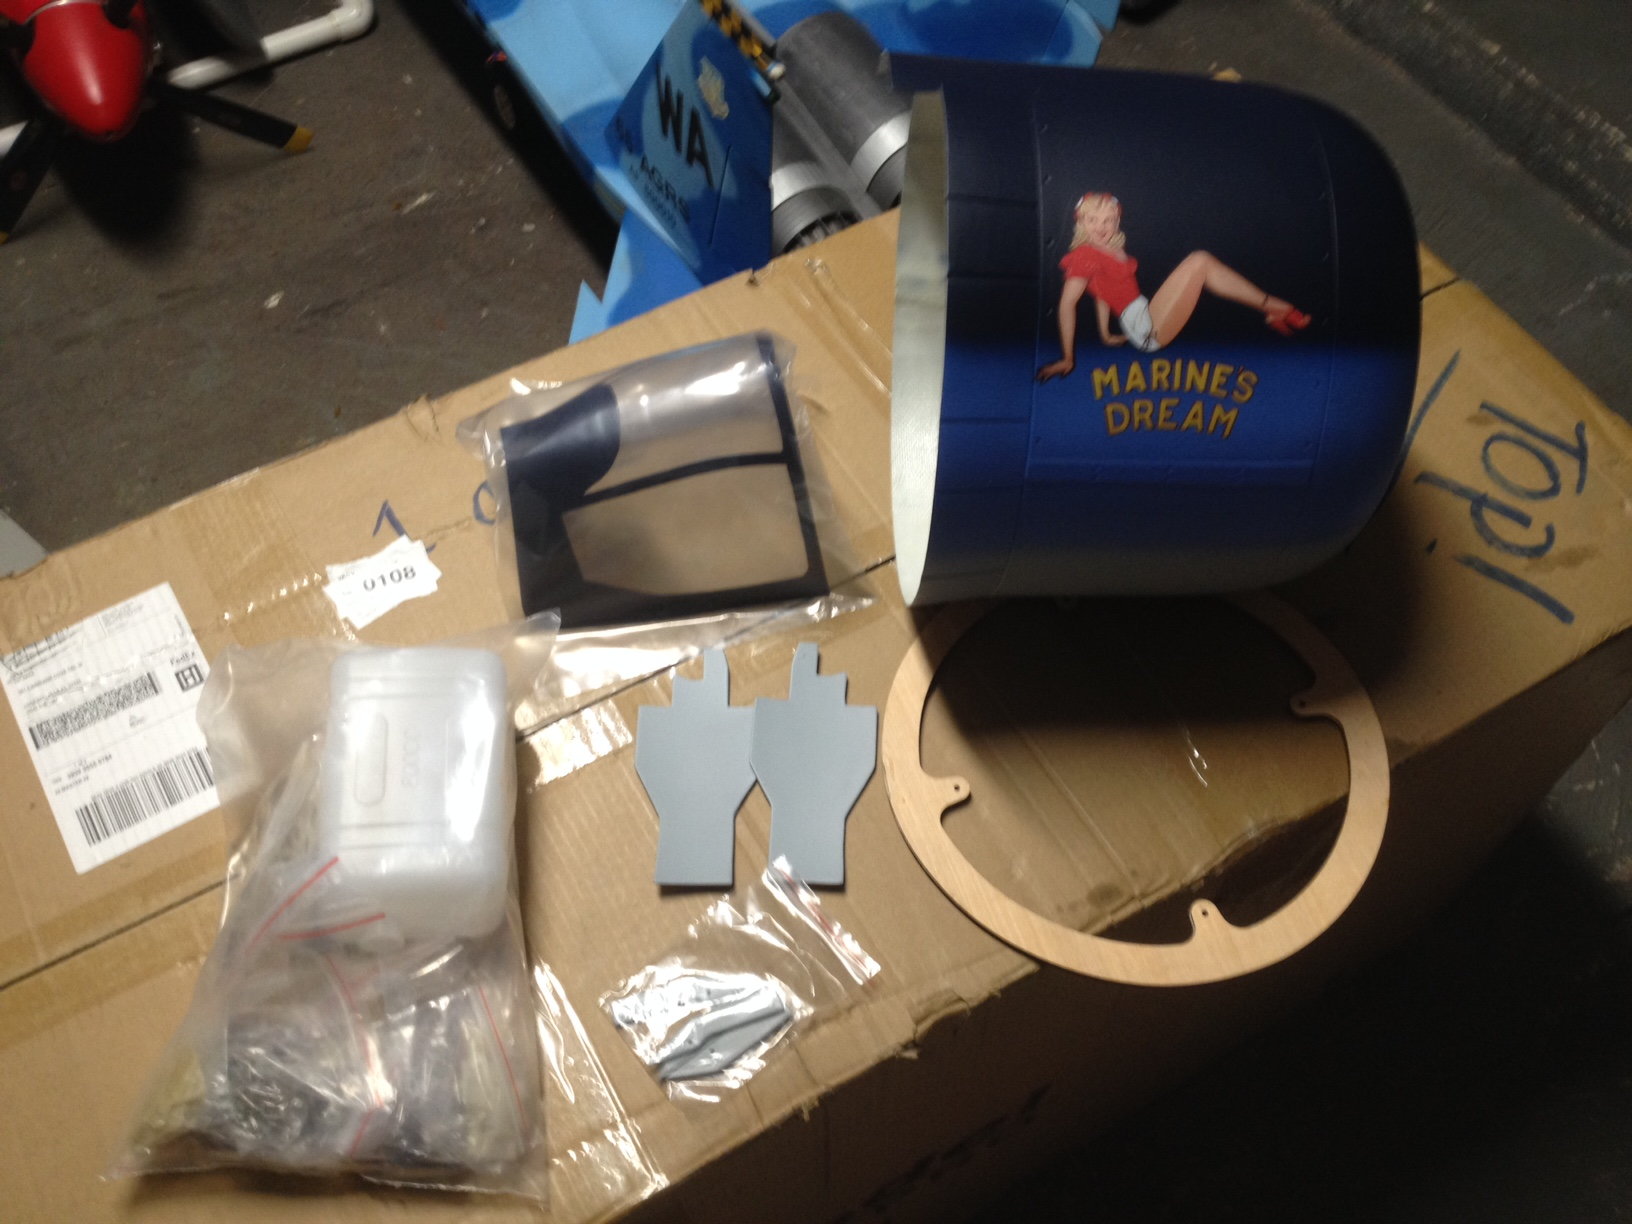
Decal on the cowl is WAY better than on previous ones. Crystal clear, NO dot matrix look,
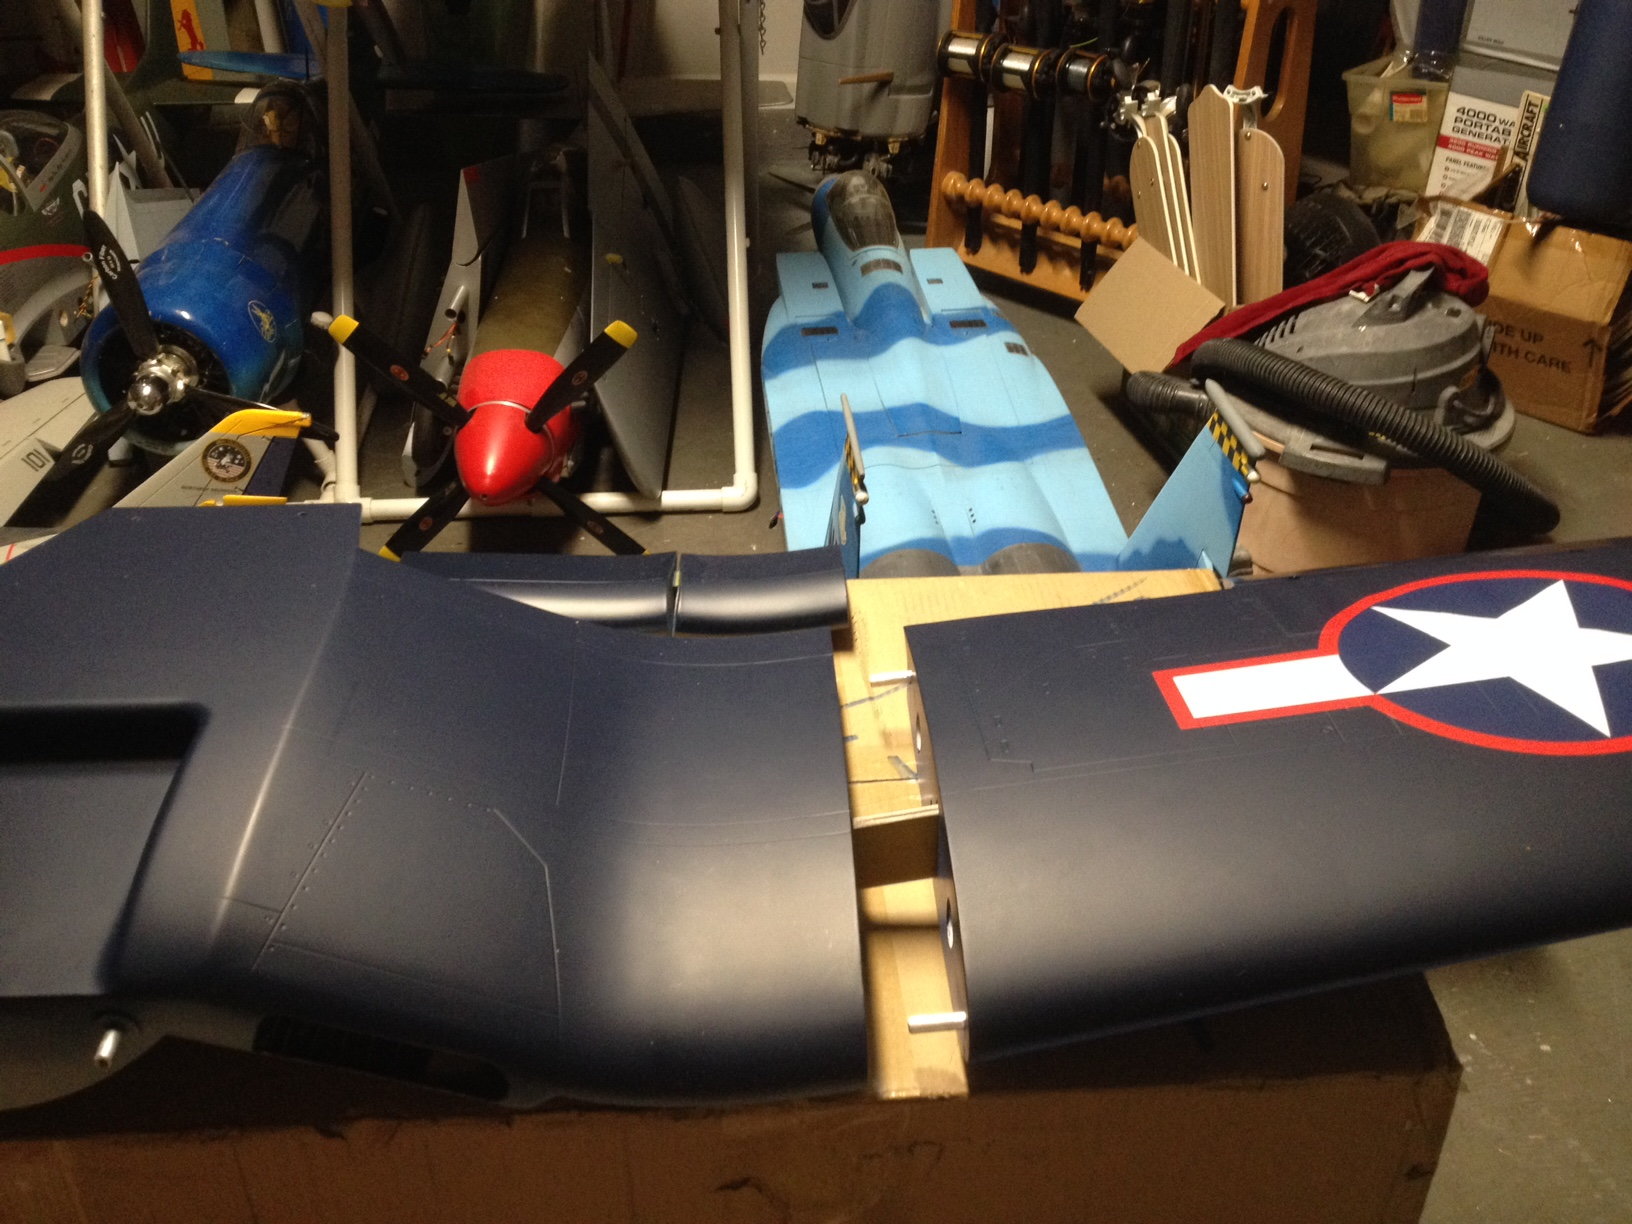
Wings are three piece with a 8mm ply and composite on both sides with two aluminum anti rotation pins.
Wing Spar

Wings have good detail on the skins. Tail feathers have the fabric covered rib stiched control surface look.
The following users liked this post:
jnayjaso (04-05-2020)
03-14-2020, 06:51 PM
#7
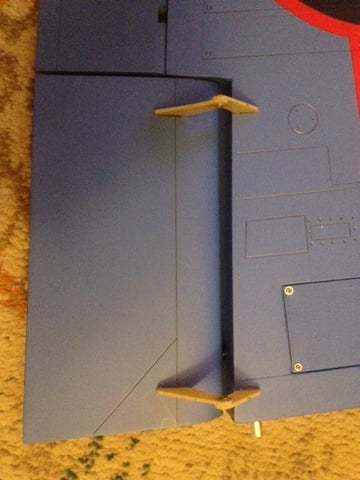
Gear doors come pre hinged. Flaps are fowler style hinged.

Inner flaps have a tounge leaf that protrudes into the next. Kinda like the TopFlite had.
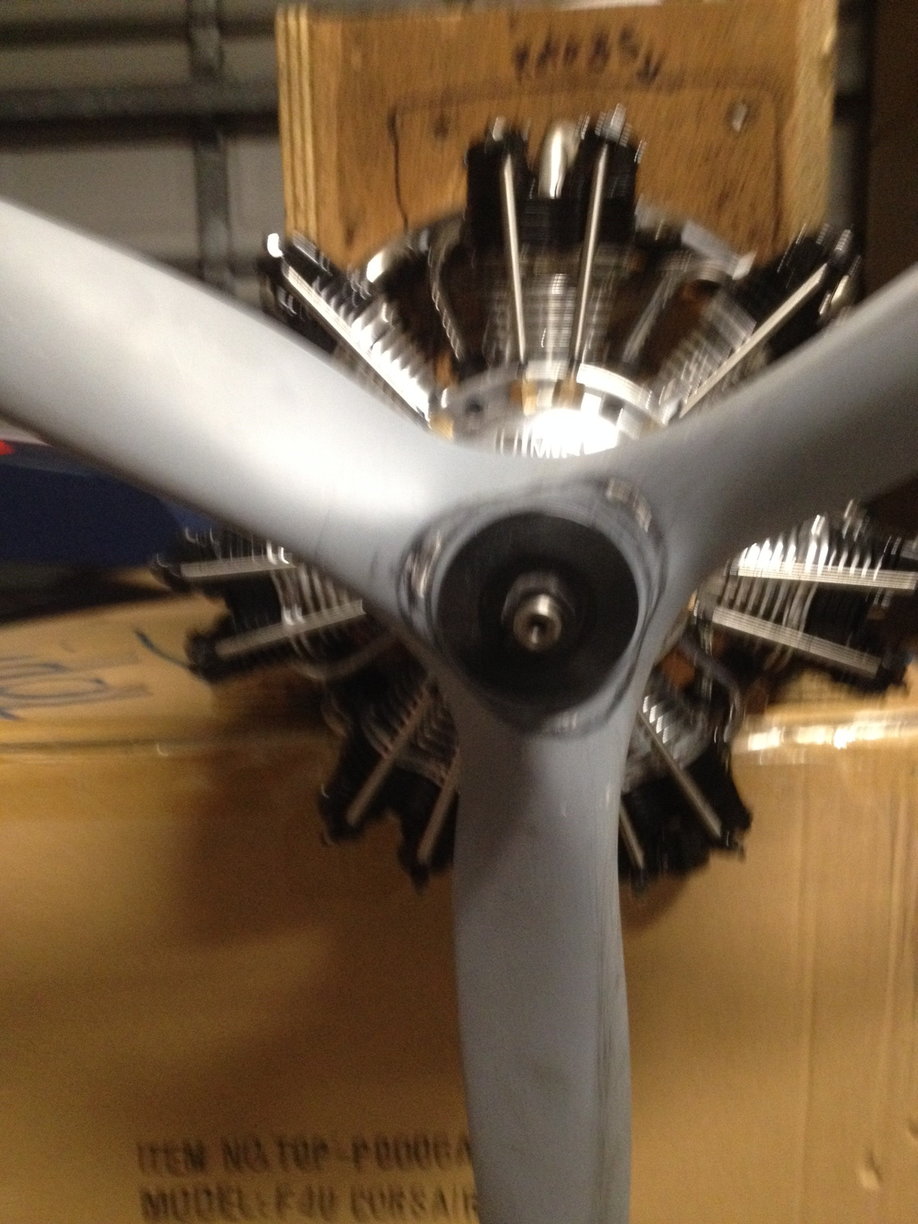
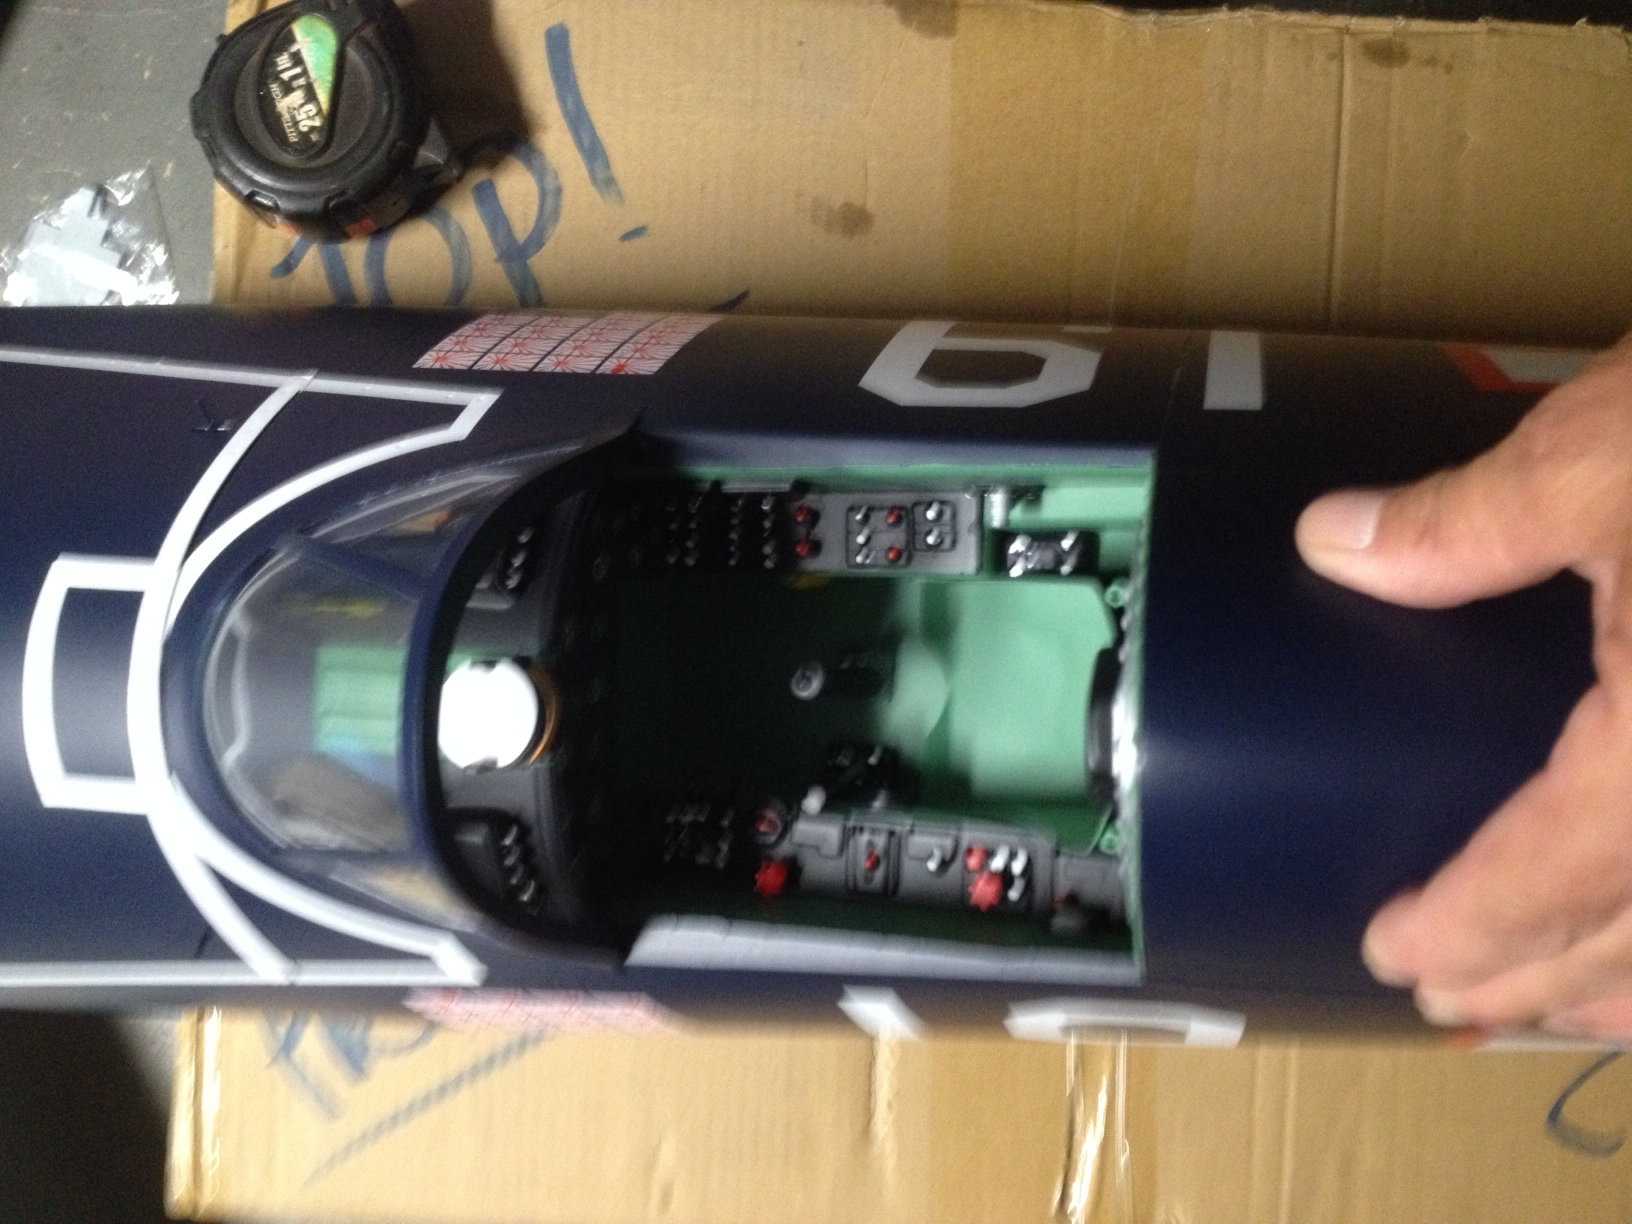
The engine I might use. A USM 7-90 seven cylinder. Have not decided yet on if I might just use a Moki 180 that I have sitting. There is enough room in the cowl . It measured 10.2" x 10.5" Tight but doable.
The following users liked this post:
jnayjaso (04-05-2020)


The following users liked this post:
jnayjaso (04-05-2020)

The following users liked this post:
jnayjaso (04-05-2020)
03-17-2020, 07:54 AM
#10
I have decided on my Electronics package. I am Big on the KISS principal (keep it simple Stupid). I plan to use a mix of Analog and Digital servos. Usually I use analog on Warbirds and Digital on Jets. Reasoning is Analog give better endurance under vibration stresses. This is based on my opinion. Yet I wanted a little more power on the tail surfaces.
Ailerons and flaps will use Hitec 645mg (130oz) totaling three per side. One aileron and two flap per panel. I have had decades of consistency with them in large scale warbirds. The rudder and both elevators will use Hitec H5585mg (195)oz . The throttle and both gear door mechs. will use H5485.
Receiver is Spektrum 12310T 12 channel, two JR heavy duty switches for electronic ignition and gear. Power is two Spektrum 6.6v 2200mah, on telemetry all I need is a engine tach, temp head probe and variometer.
The following users liked this post:
jnayjaso (04-05-2020)
03-28-2020, 06:40 AM
#12
I'm not sure if he has any. It would be best to call Mike and ask, he is a nice guy.
Well ,I am moving slow on getting work done to it, but so far here is where I am at.

I rough up all hinge gluing points with a drum sander. Just scratching the finish for a good bond.
Dry fit everything prior to gluing. I use the West system 6-10 self nozzle mixing. I shoot it into a smaller syringe so I can manage the glue better. Getting in in deeper.

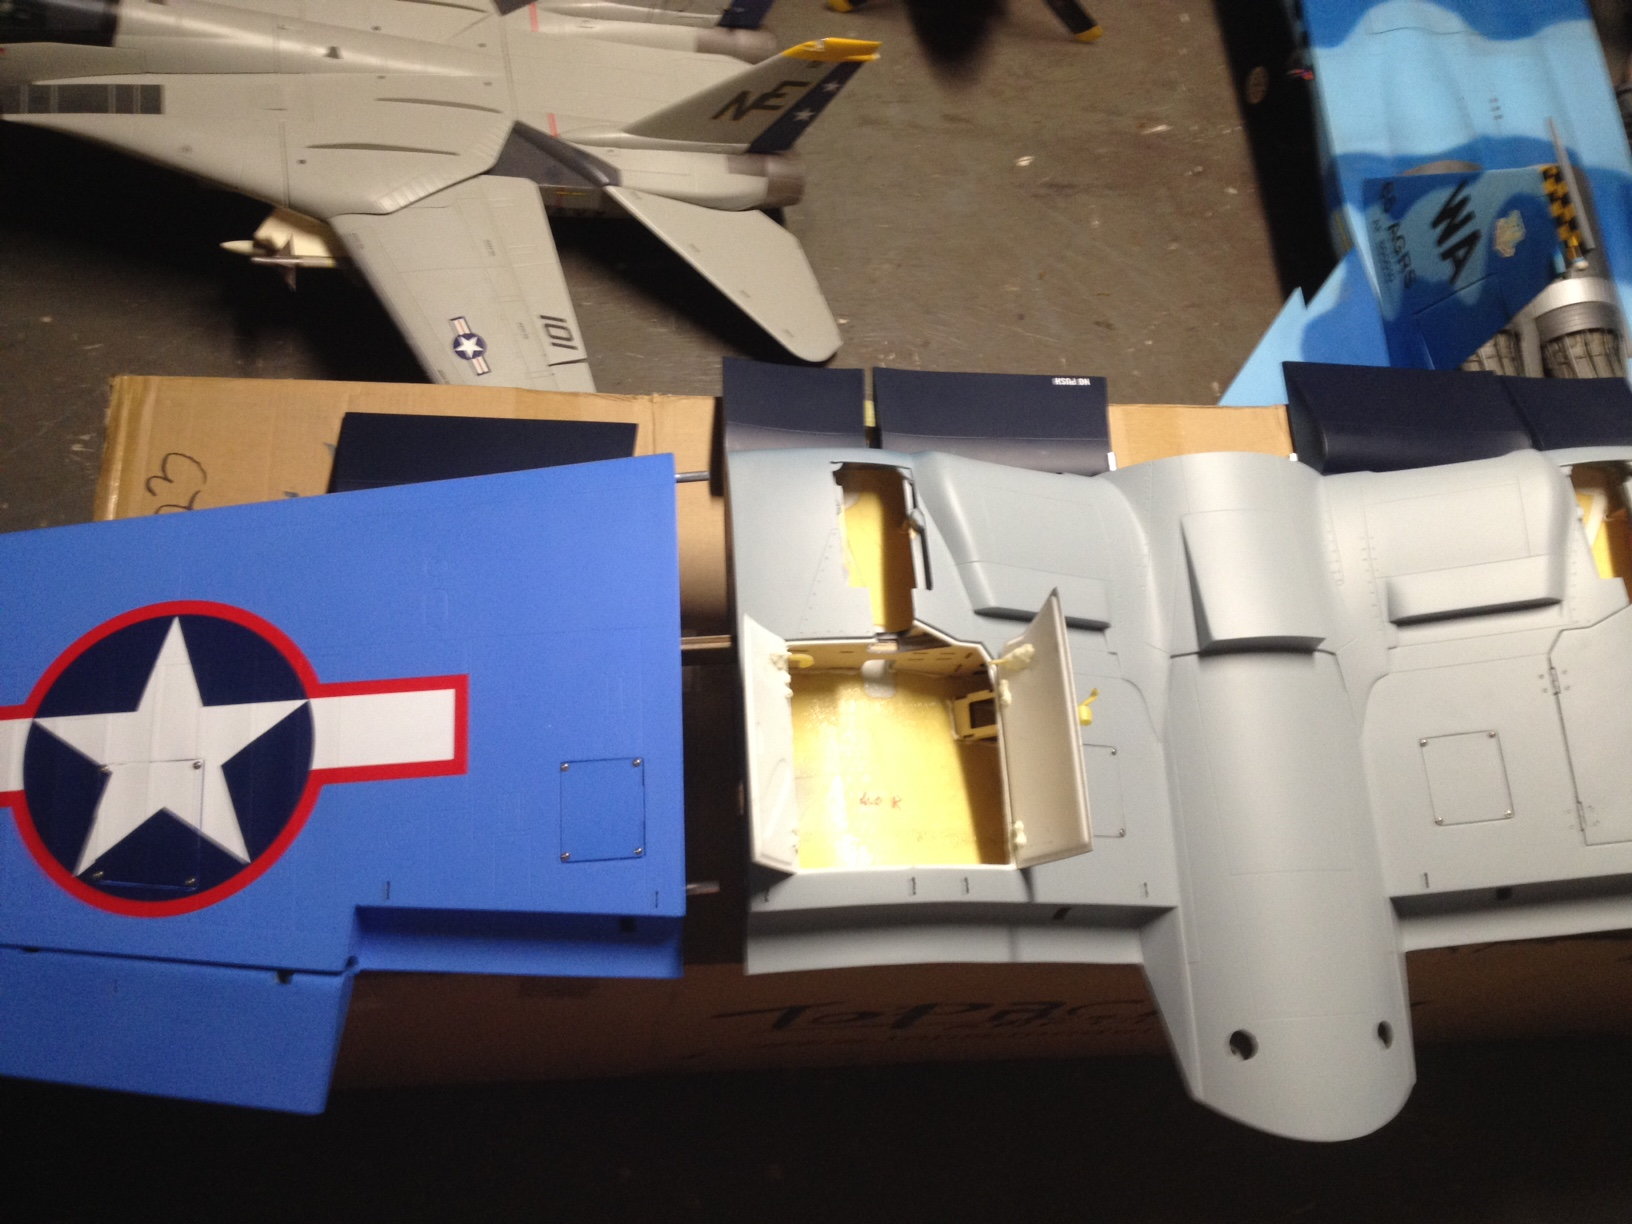
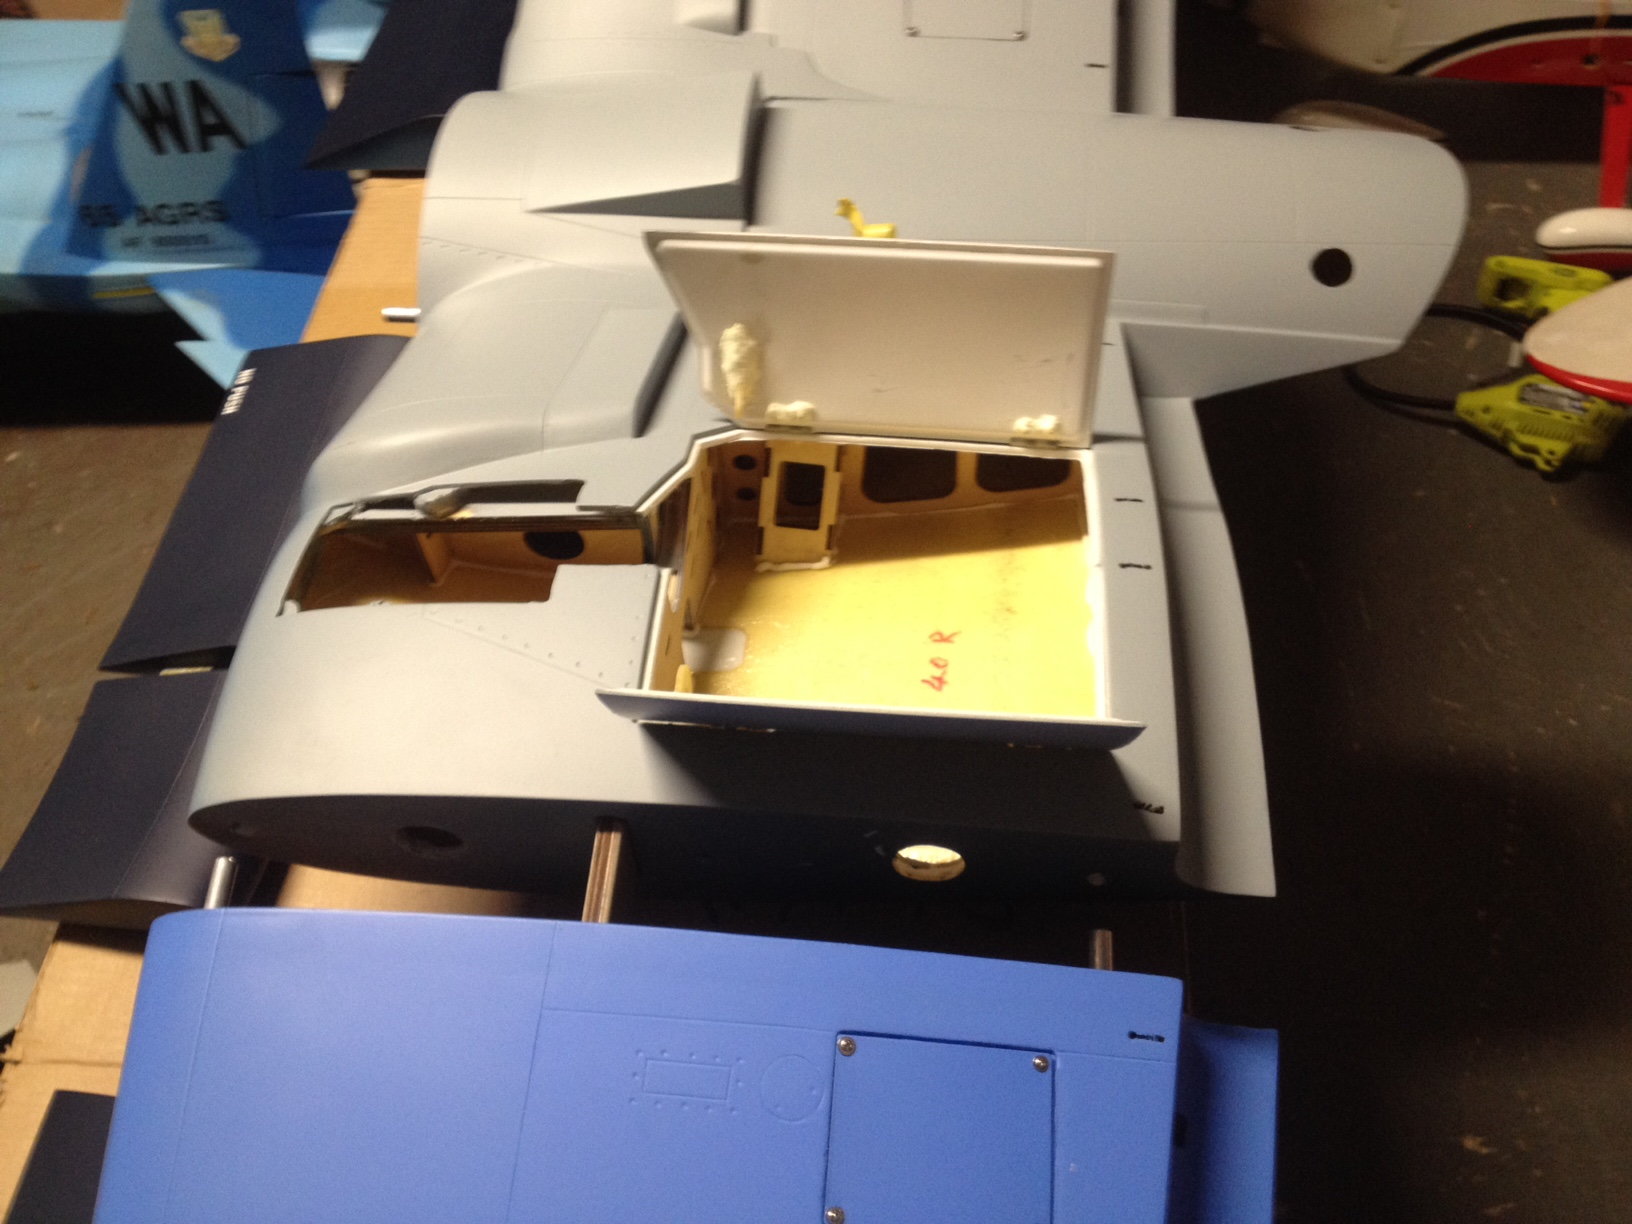
When setting the control horns I noticed that there was only one slot. Manuf missed the second hole on both ailerons. No biggie easy fix !
The instructions say to install hidden linkages. Note the hole below the aileron hatch. With that setup I was getting to much slop for my liking so I decided to go with a traditional setup.
Well ,I am moving slow on getting work done to it, but so far here is where I am at.
I rough up all hinge gluing points with a drum sander. Just scratching the finish for a good bond.
Dry fit everything prior to gluing. I use the West system 6-10 self nozzle mixing. I shoot it into a smaller syringe so I can manage the glue better. Getting in in deeper.
When setting the control horns I noticed that there was only one slot. Manuf missed the second hole on both ailerons. No biggie easy fix !
The instructions say to install hidden linkages. Note the hole below the aileron hatch. With that setup I was getting to much slop for my liking so I decided to go with a traditional setup.
03-28-2020, 06:54 AM
#14
The flap hatches are made of ply with finish coating "Strong". The Aileron hatches are made of the composite/foam core like the wing skins. I felt this to be a bit of a weak point so I added 1/64 ply to the inside of the hatch plates. This made them much much stiffer.

I also take a standard pencil and trace all panel lines and raised panels on each part as I work on them. This just helps the lines stand out a little better when out in the sun. There will be more DETAIL work towards the end. This is just the process of how I usually go.
Now hinging the center sections flaps were a bit challenging. Getting everything lined up to operate evenly took patience. ( this is something the Manuf may want to consider doing at factory). I've been modeling for 30yrs and the average newcomer may be baffled.
03-29-2020, 06:46 AM
#16

Wish they'd think about the simple things like making those hinges out of black G-10 material. This plane looks outstanding! Appreciate your efforts, Tim, but take a LOT more and bigger pictures. Please!!
The following users liked this post:
Bryan McLarty (03-29-2020)
04-04-2020, 02:59 PM
#18

Got the rudder and steering hooked up. I did not use the light weight wire supplied . I always use this leader wire. I get it from local sporting good shop 30lb leader wire. I think Walmart has it also.
Next I decided to work on the cowl a bit. It already comes with the flaps about 5-10 degree open but I wanted a bit more. This way I know air gets moving through the engine.
I tack them open where I want them with thin CA

West epoxy and a little tape. I make a little thickened with filler to fill the cracked openings.
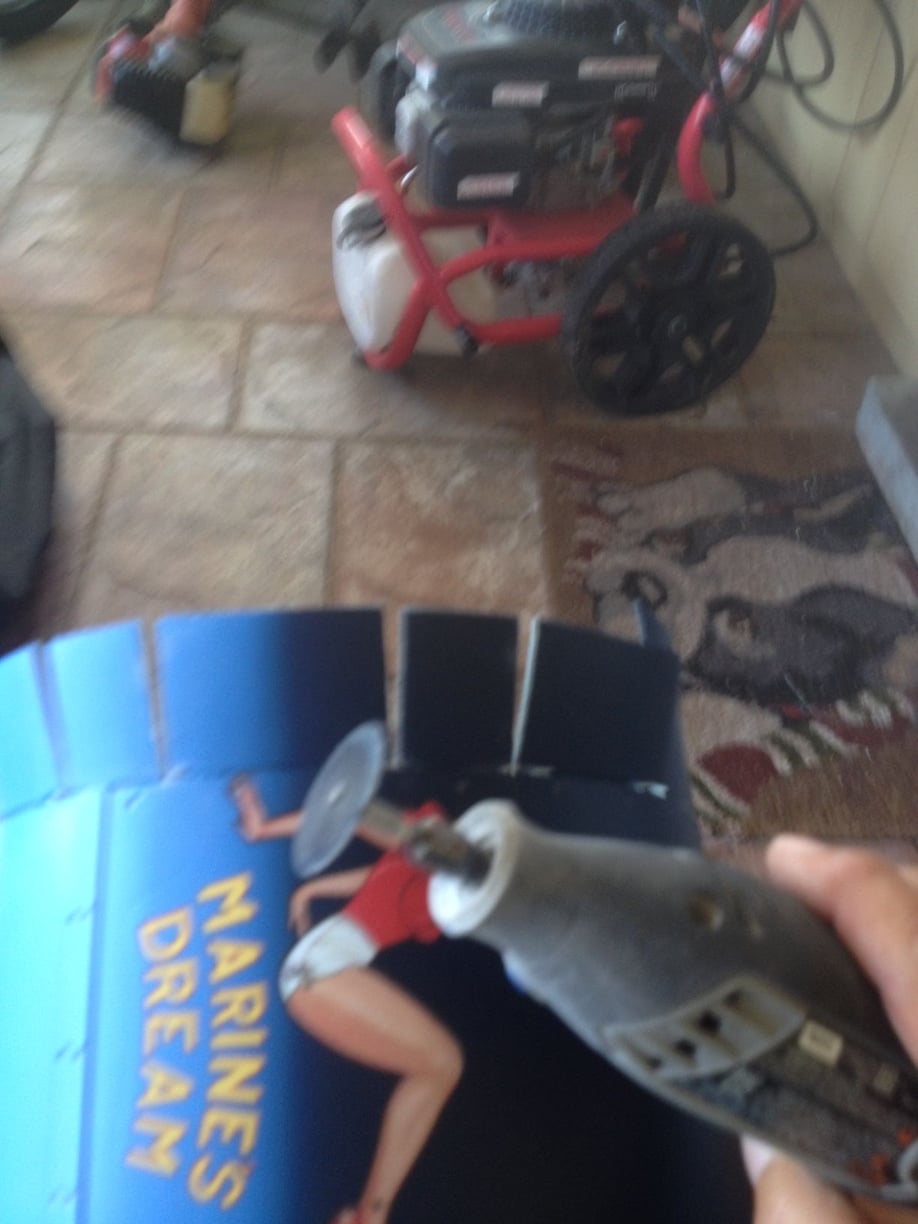
 04-04-2020, 03:05 PM
#19
Finished with a 6oz layer of tape.
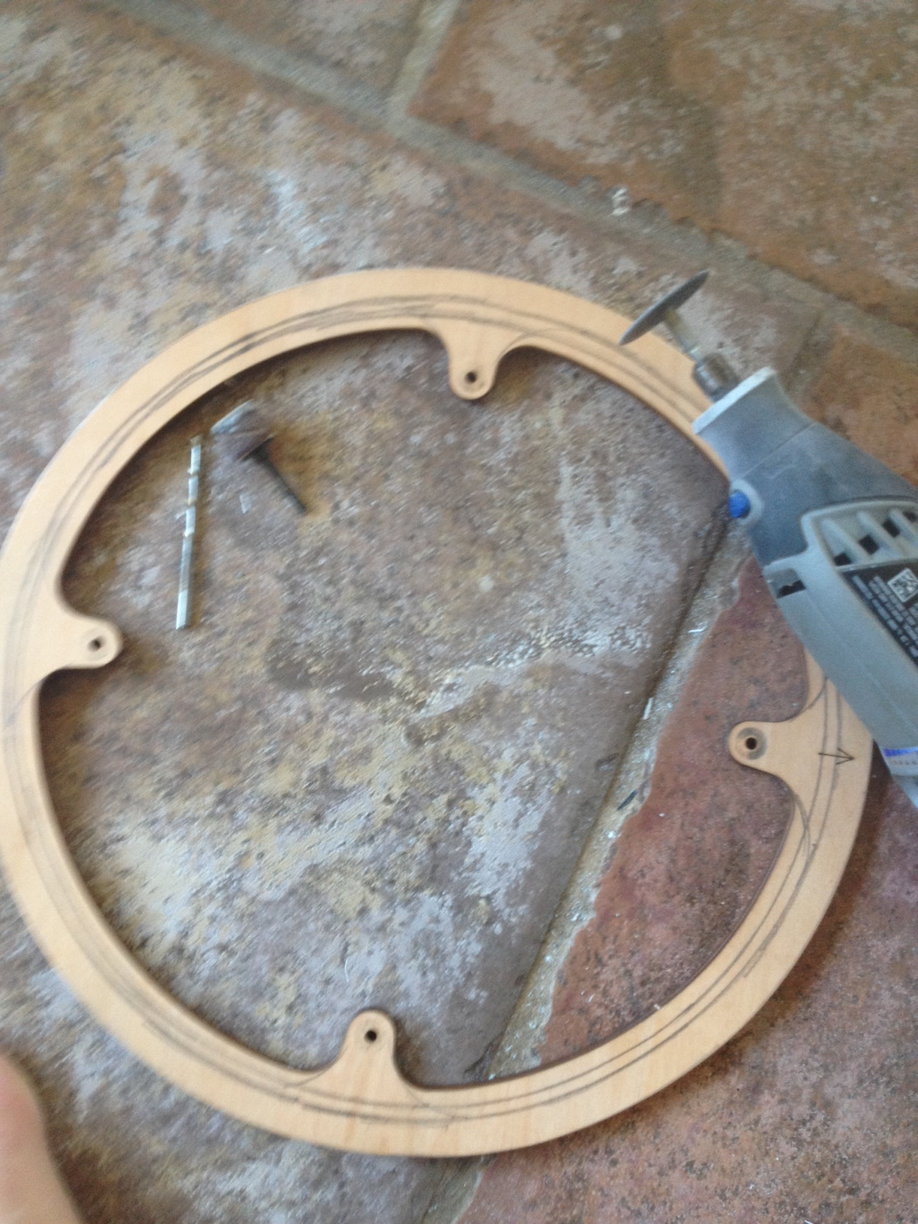
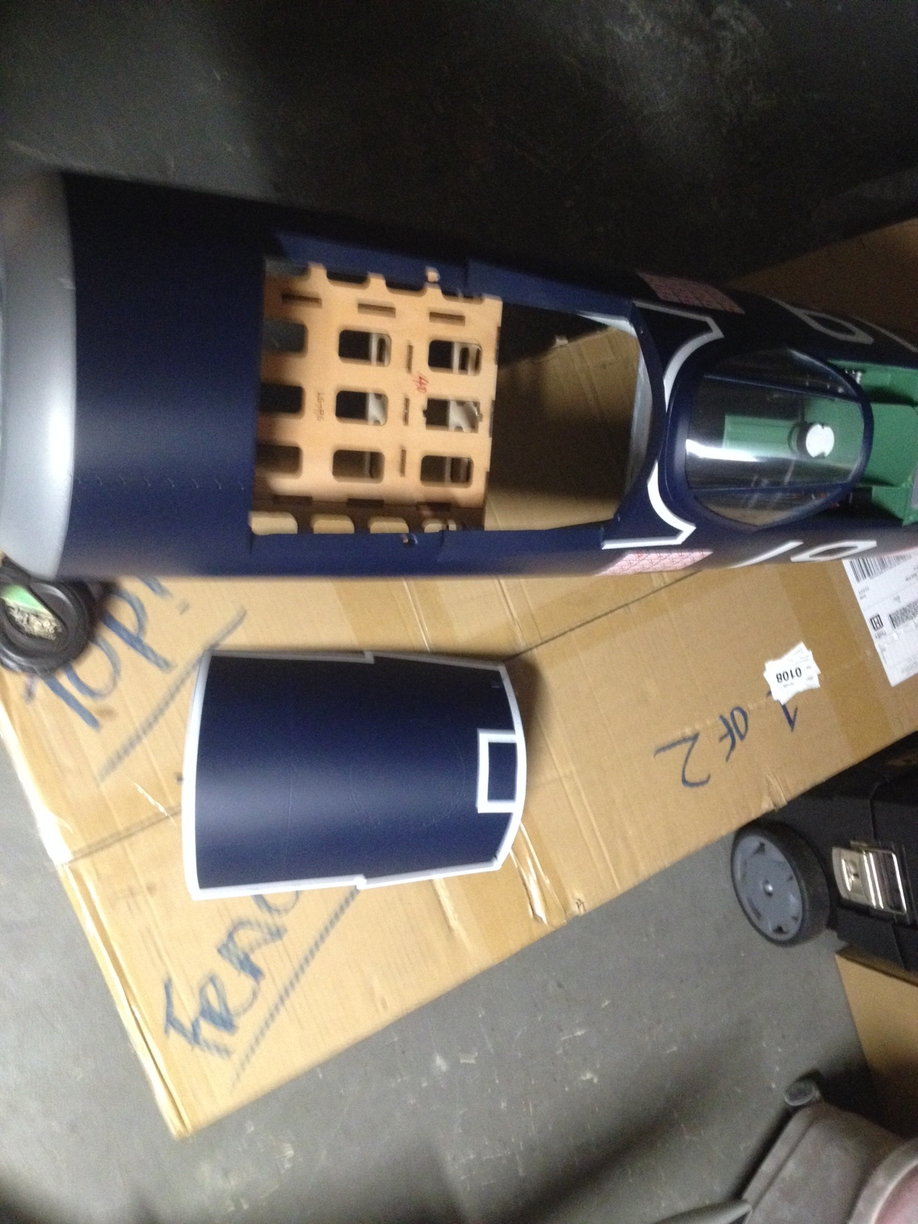
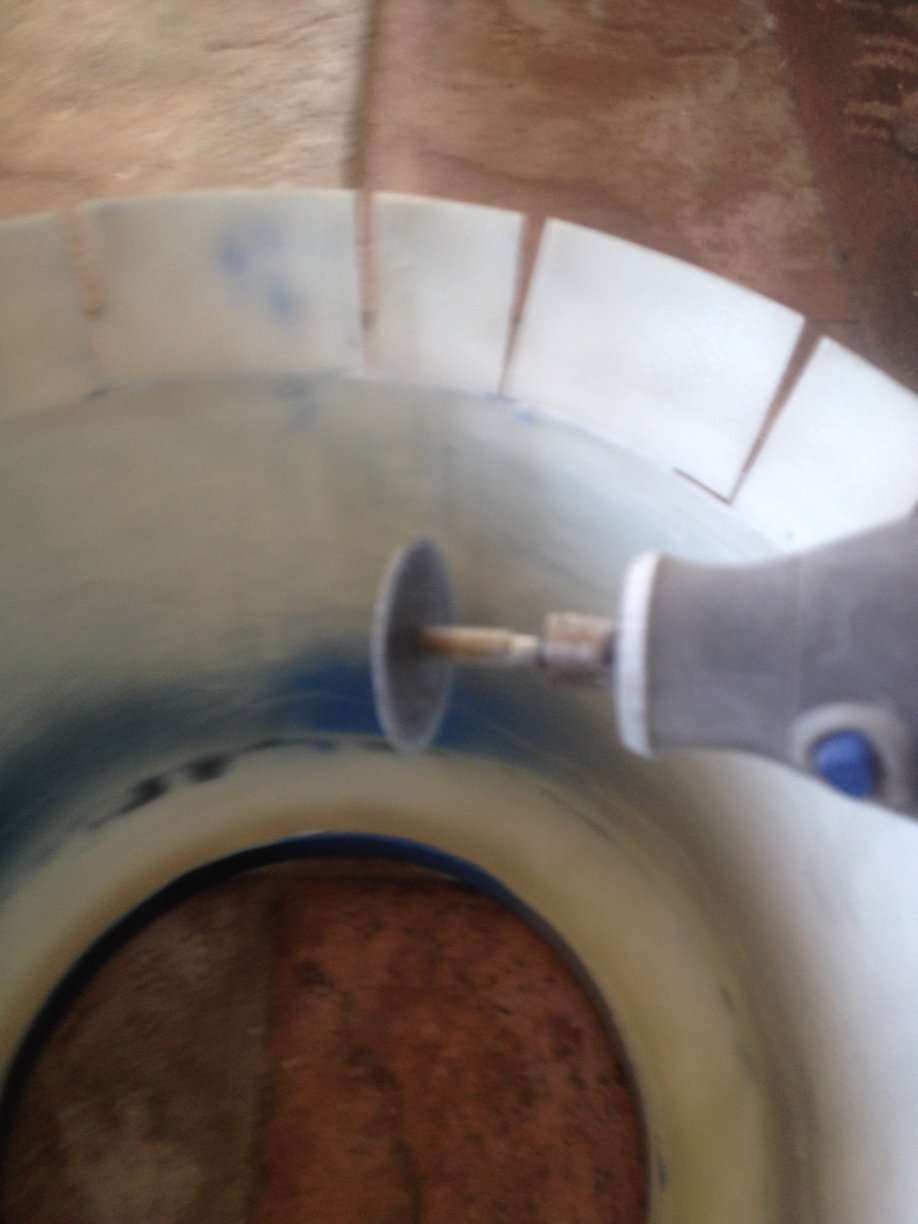
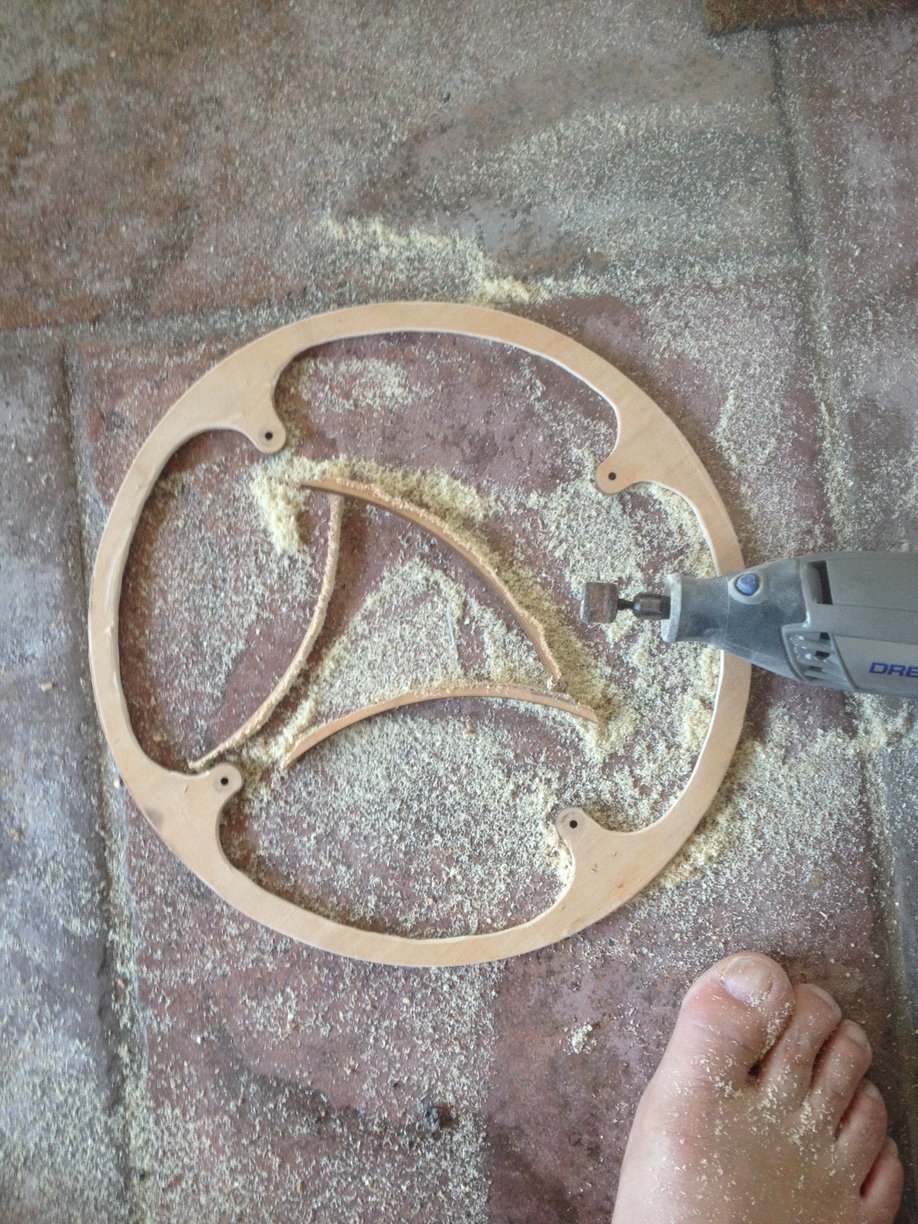
The cowl ring mount is about 3/4" in width. It is made of two layers of 1/8 ply glued together so 1/4" thick. I decided to remove about half of the material, again keeping in mind I want plenty of air moving through the cowl.
 04-05-2020, 08:18 AM
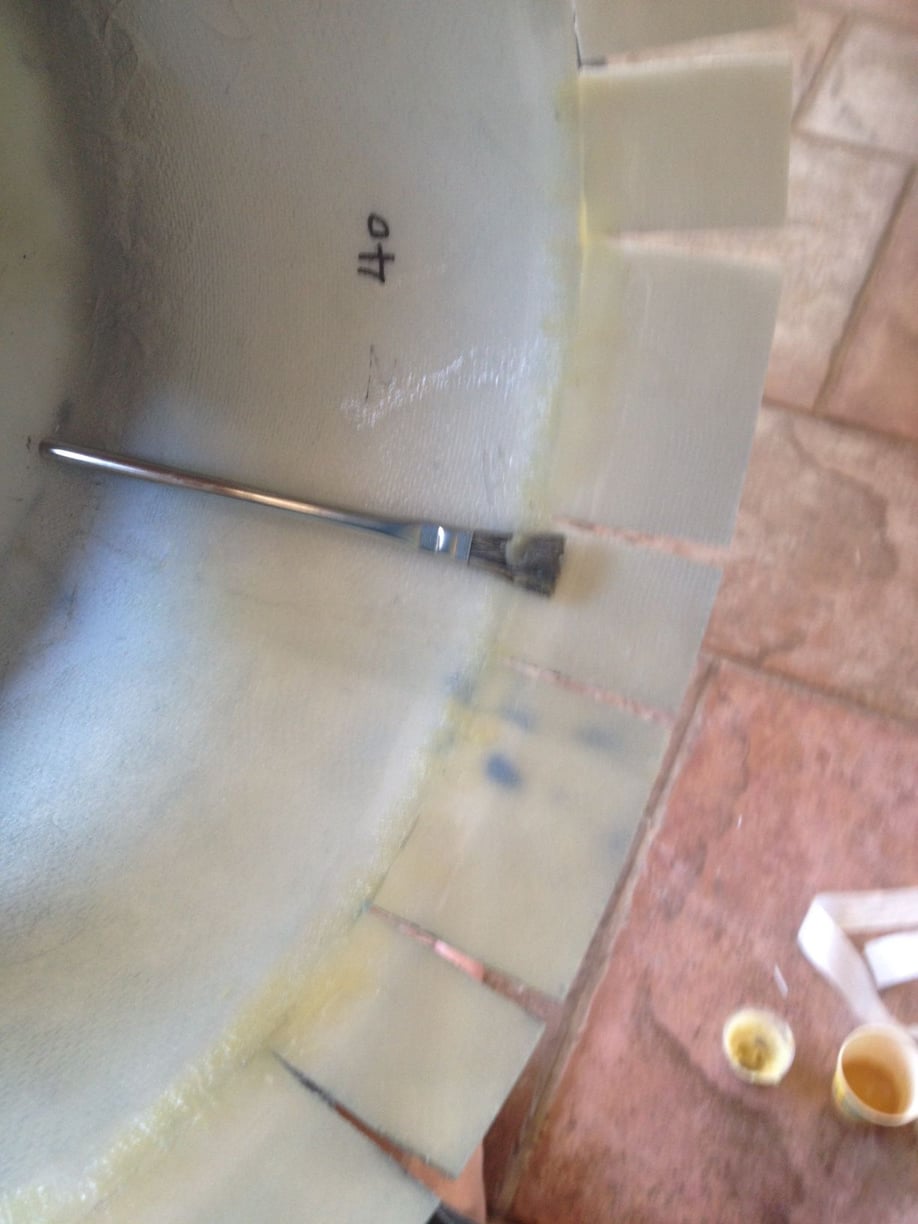
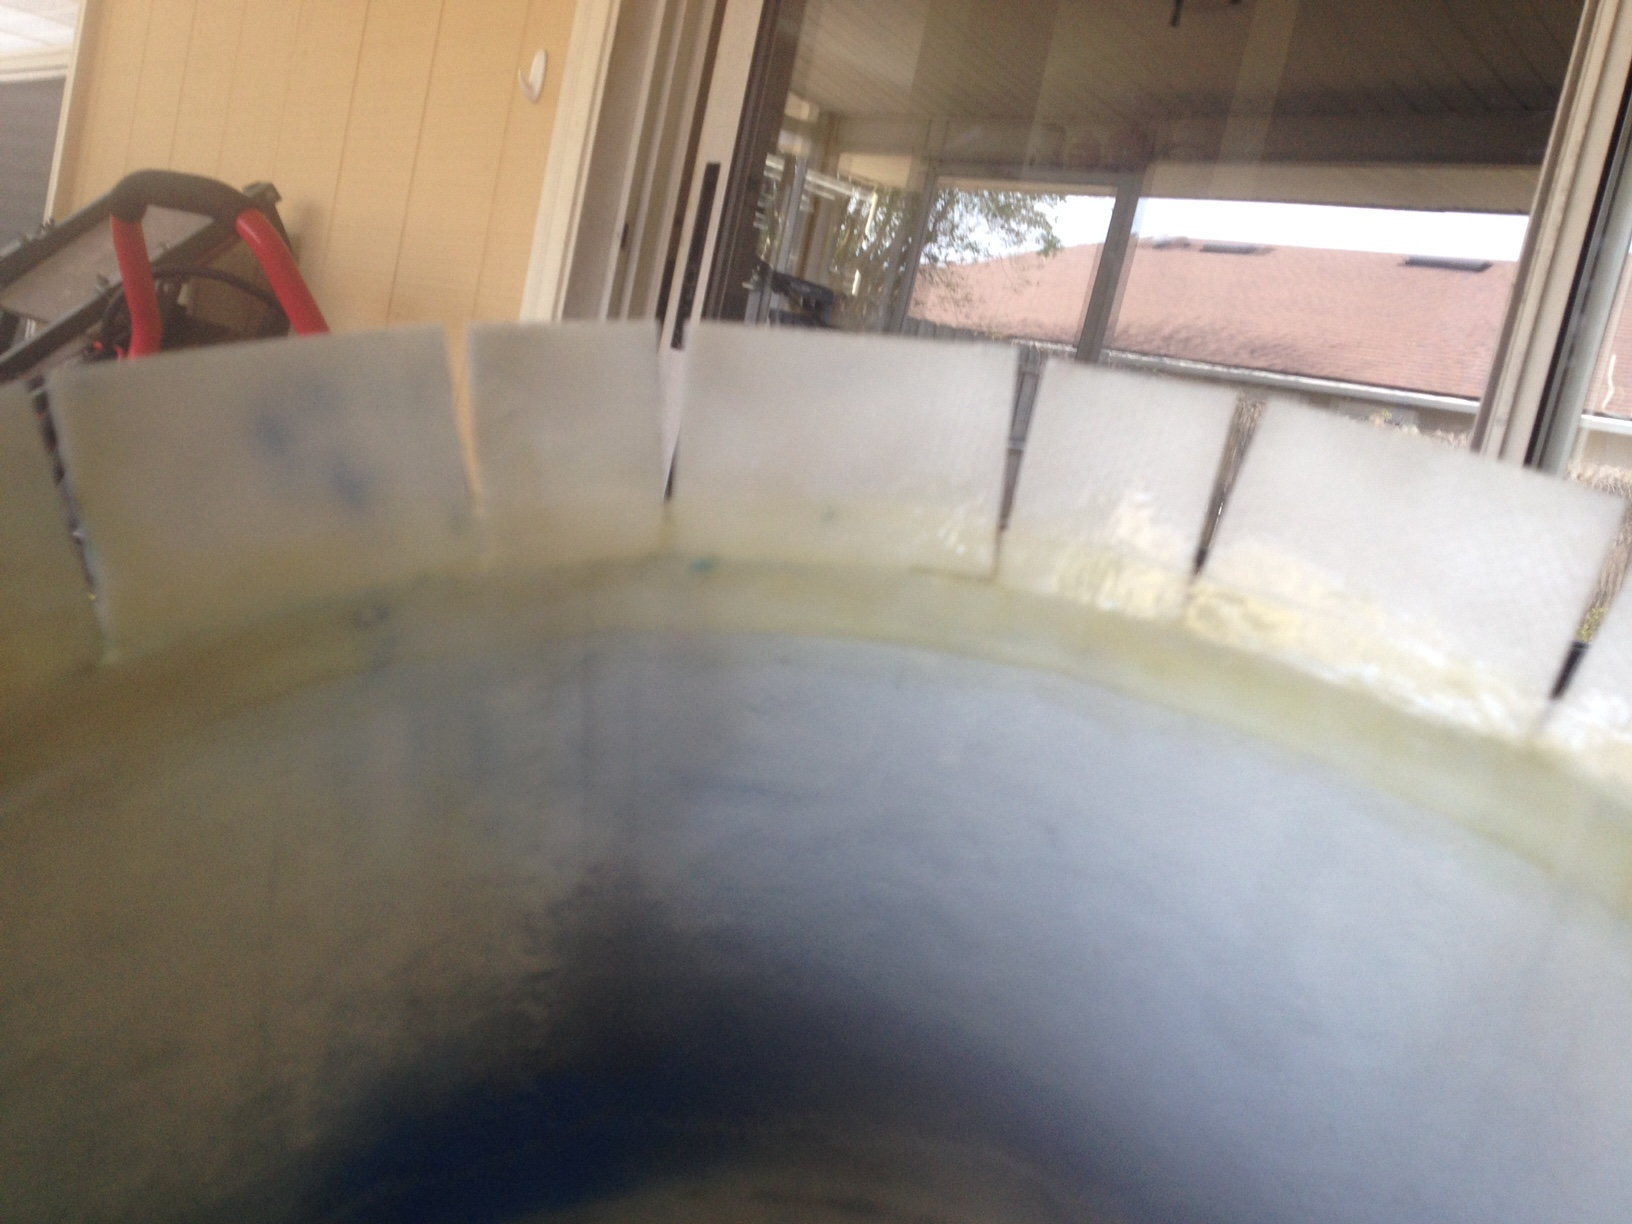
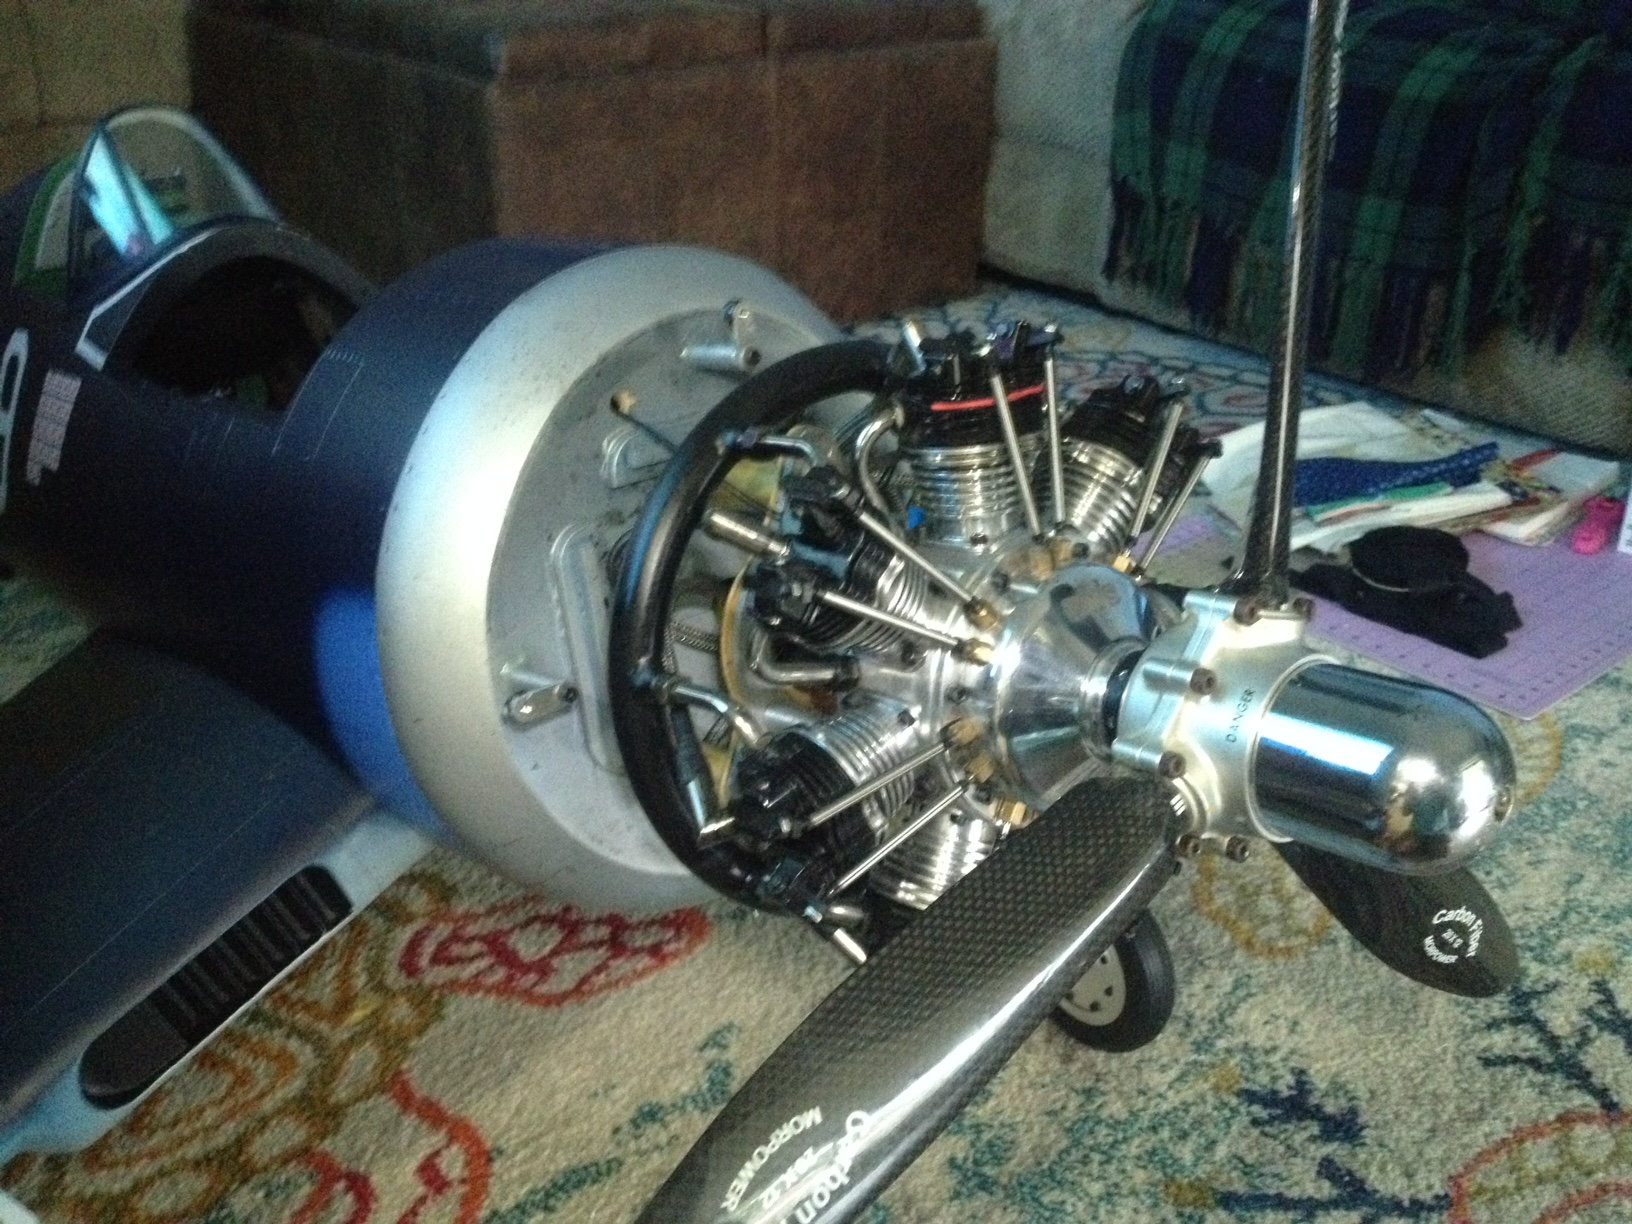
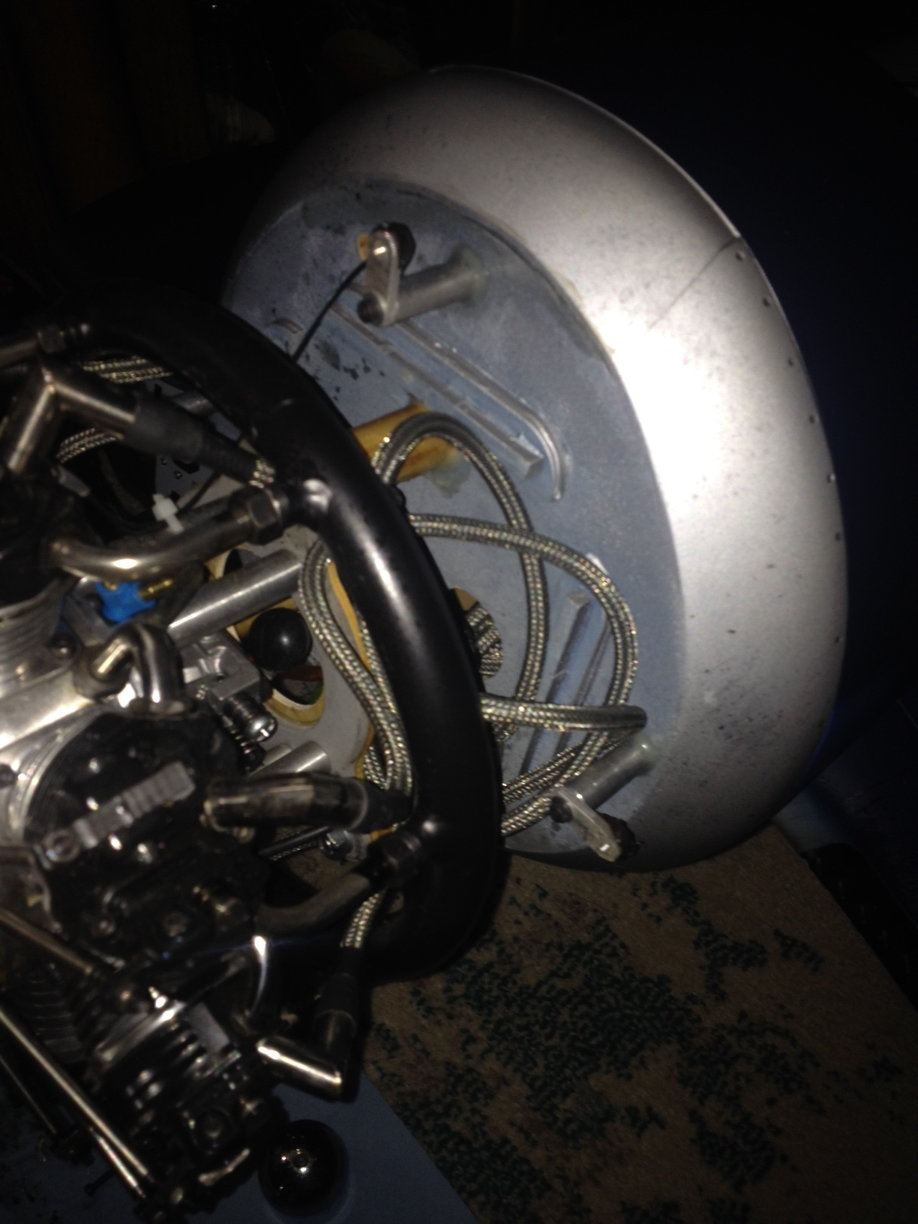
#20

Moving forward with the cowling. I set the cowl to be 1/4" past the silver of the firewall. There is PLENTY of room for air to move through now. I tak glued the ring in place with medium CA in a few spots, then removed it to epoxy the ring in place. I ran a bead on the inside and out then used some 6oz fiberglass tape to back it up.

Since I had the epoxy out , I went ahead and beaded the aluminum cowl mounts. Should add a little more strength.
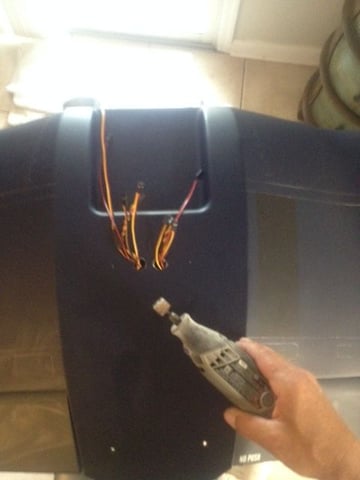
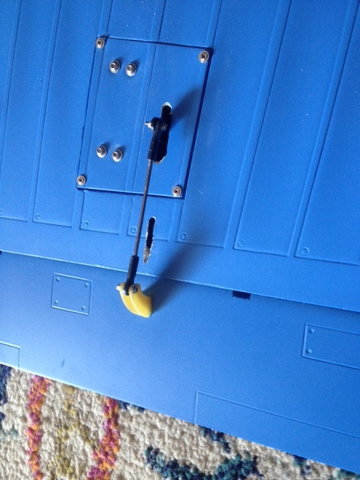
On the wing center section I decided to put my external wiring through two holes towards the middle on top.
Drilled two small holes for the elevator wires to be secured.
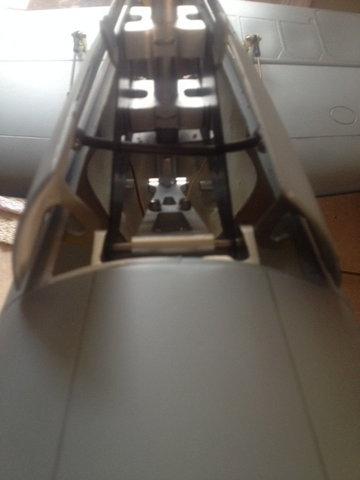
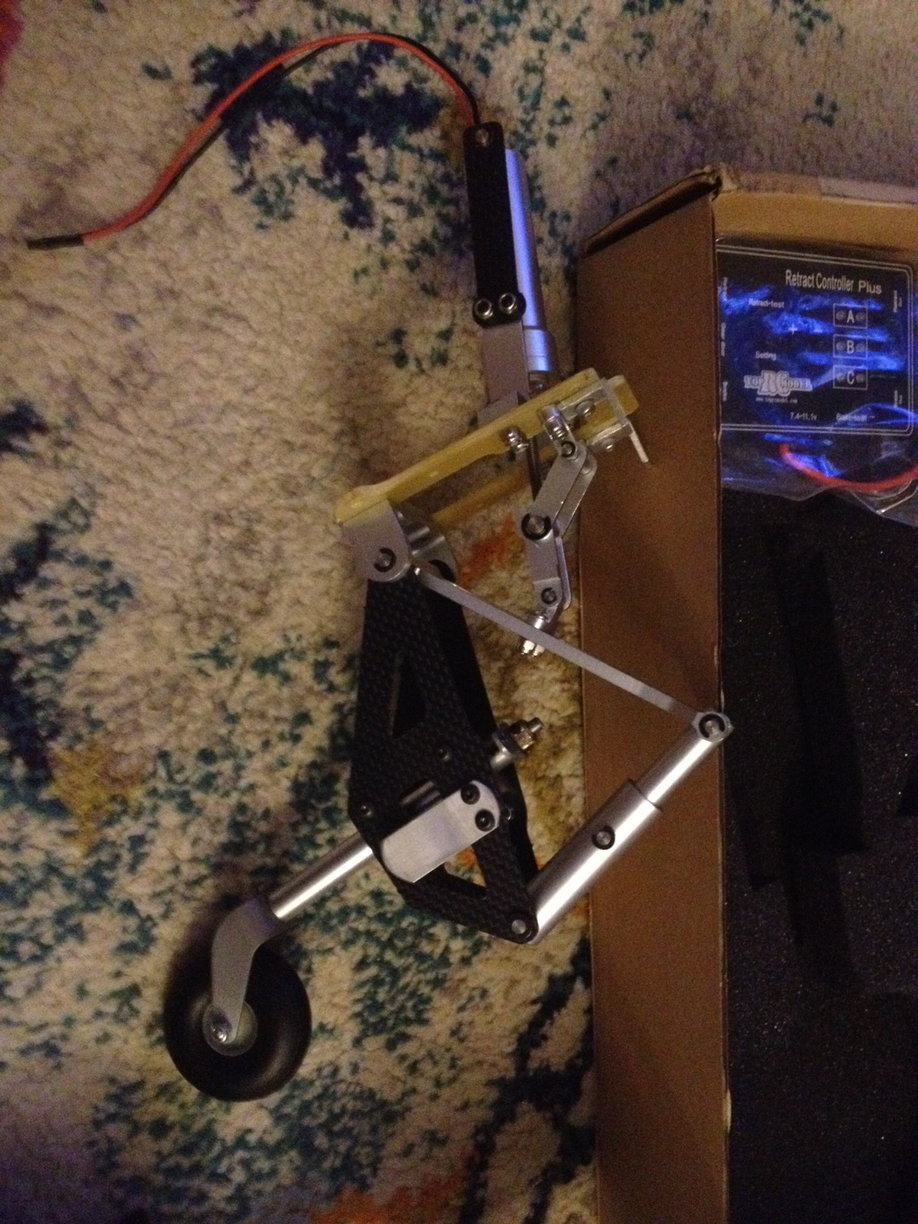
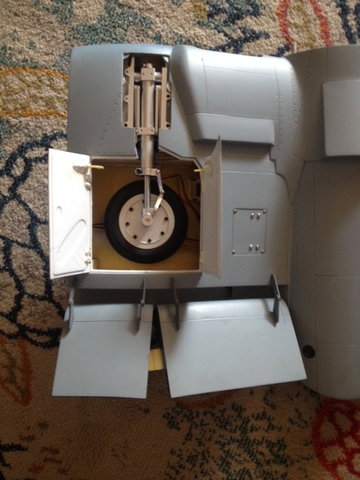
This is the tail retract doors. At first thought this is kind of a Hokey setup. A spring that goes trough the rear retract frames to each door.I have actuated it about ten times now and it works perfectly!
04-25-2020, 07:38 AM
#21
Finally had time to add more to the thread.
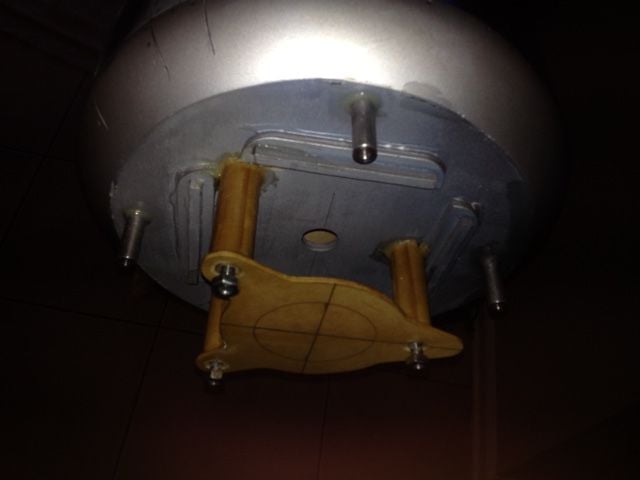
This is what I used for stand offs. I already had some 3/4" dowel so I cut 2" pieces and then drilled a 5/16 hole through the center added a 1/8 piece of ply to the end. I then used some 1/4"x 3" bolts through that. bolted it together and added thickened epoxy alll over the wood areas.
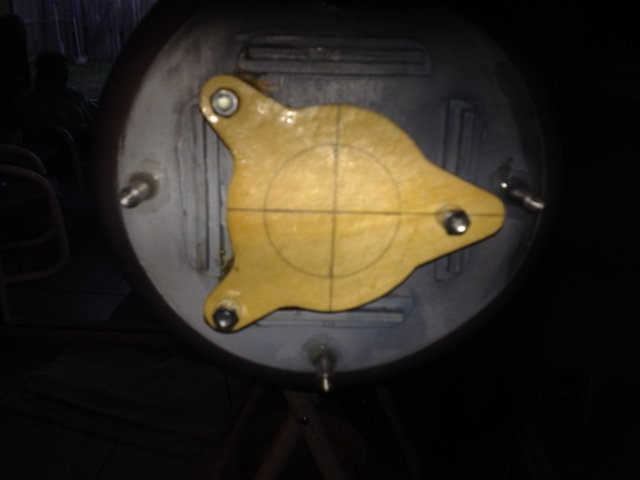
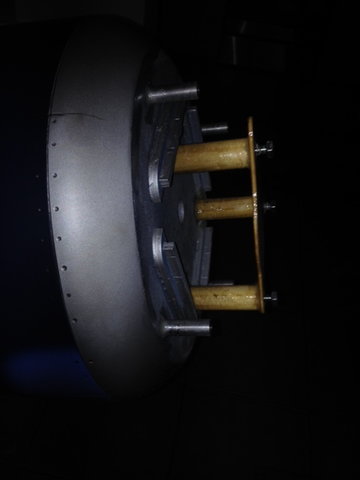
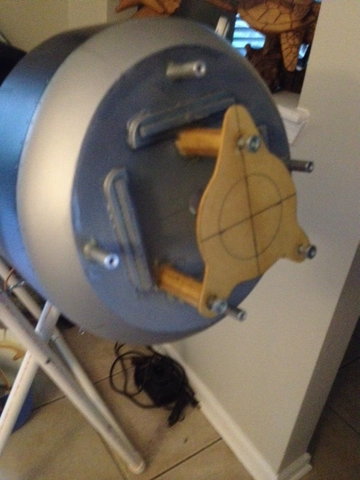
Once all was hardened I cut the center hole out with a hole saw bill.
This is what I used for stand offs. I already had some 3/4" dowel so I cut 2" pieces and then drilled a 5/16 hole through the center added a 1/8 piece of ply to the end. I then used some 1/4"x 3" bolts through that. bolted it together and added thickened epoxy alll over the wood areas.
Once all was hardened I cut the center hole out with a hole saw bill.

 04-25-2020, 07:47 AM
#23
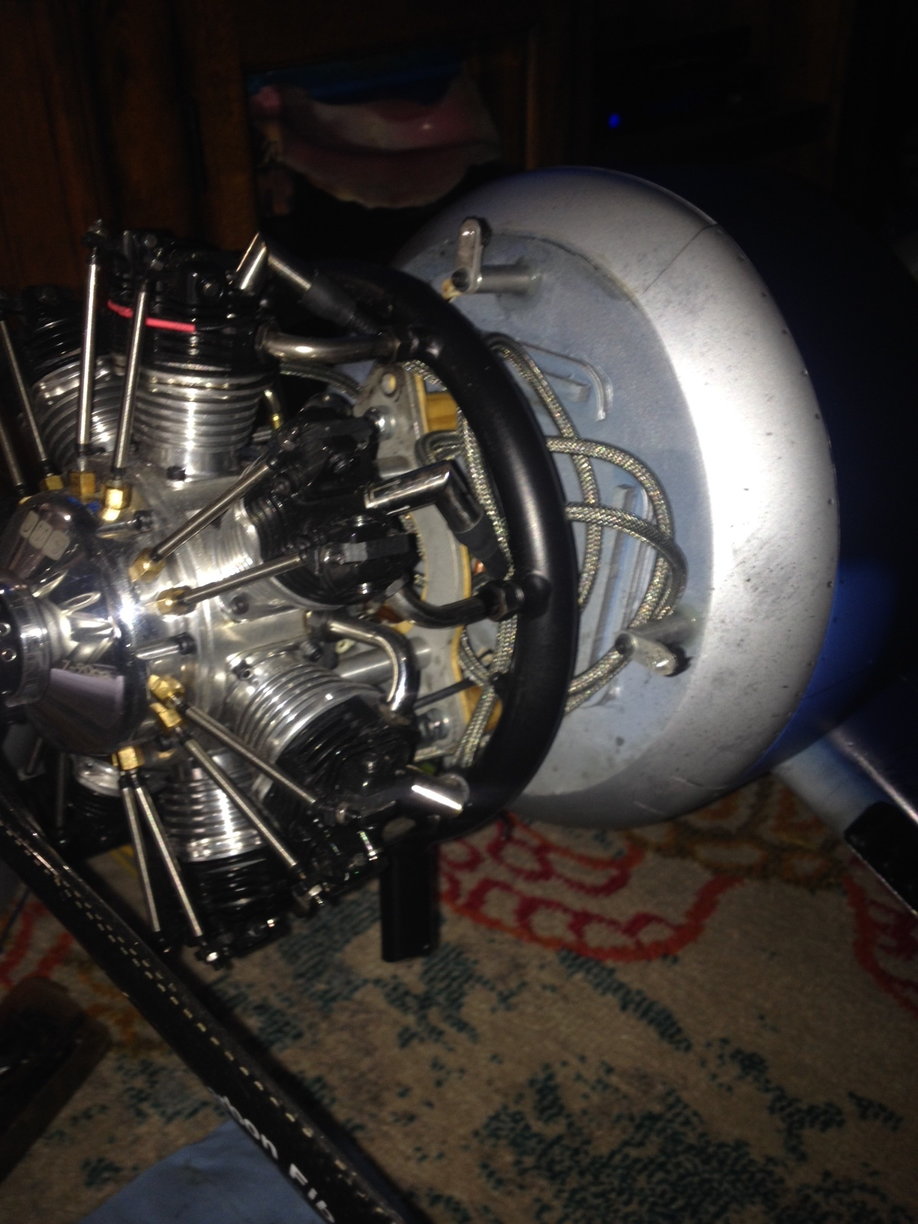
Forgot to mention that on using the USM 7-90 the cowl mounting lugs are right behind the exhaust ring so that did not work. I made aluminum extenders that go out an extra 1/2" in all directions. I had a piece of aluminum bar stock so it was not difficult. Also shortening the cowl mounting plate made it easier to get around the exhaust ring.
Last edited by TimD.; 04-25-2020 at 08:09 AM.
04-25-2020, 07:56 AM
#24
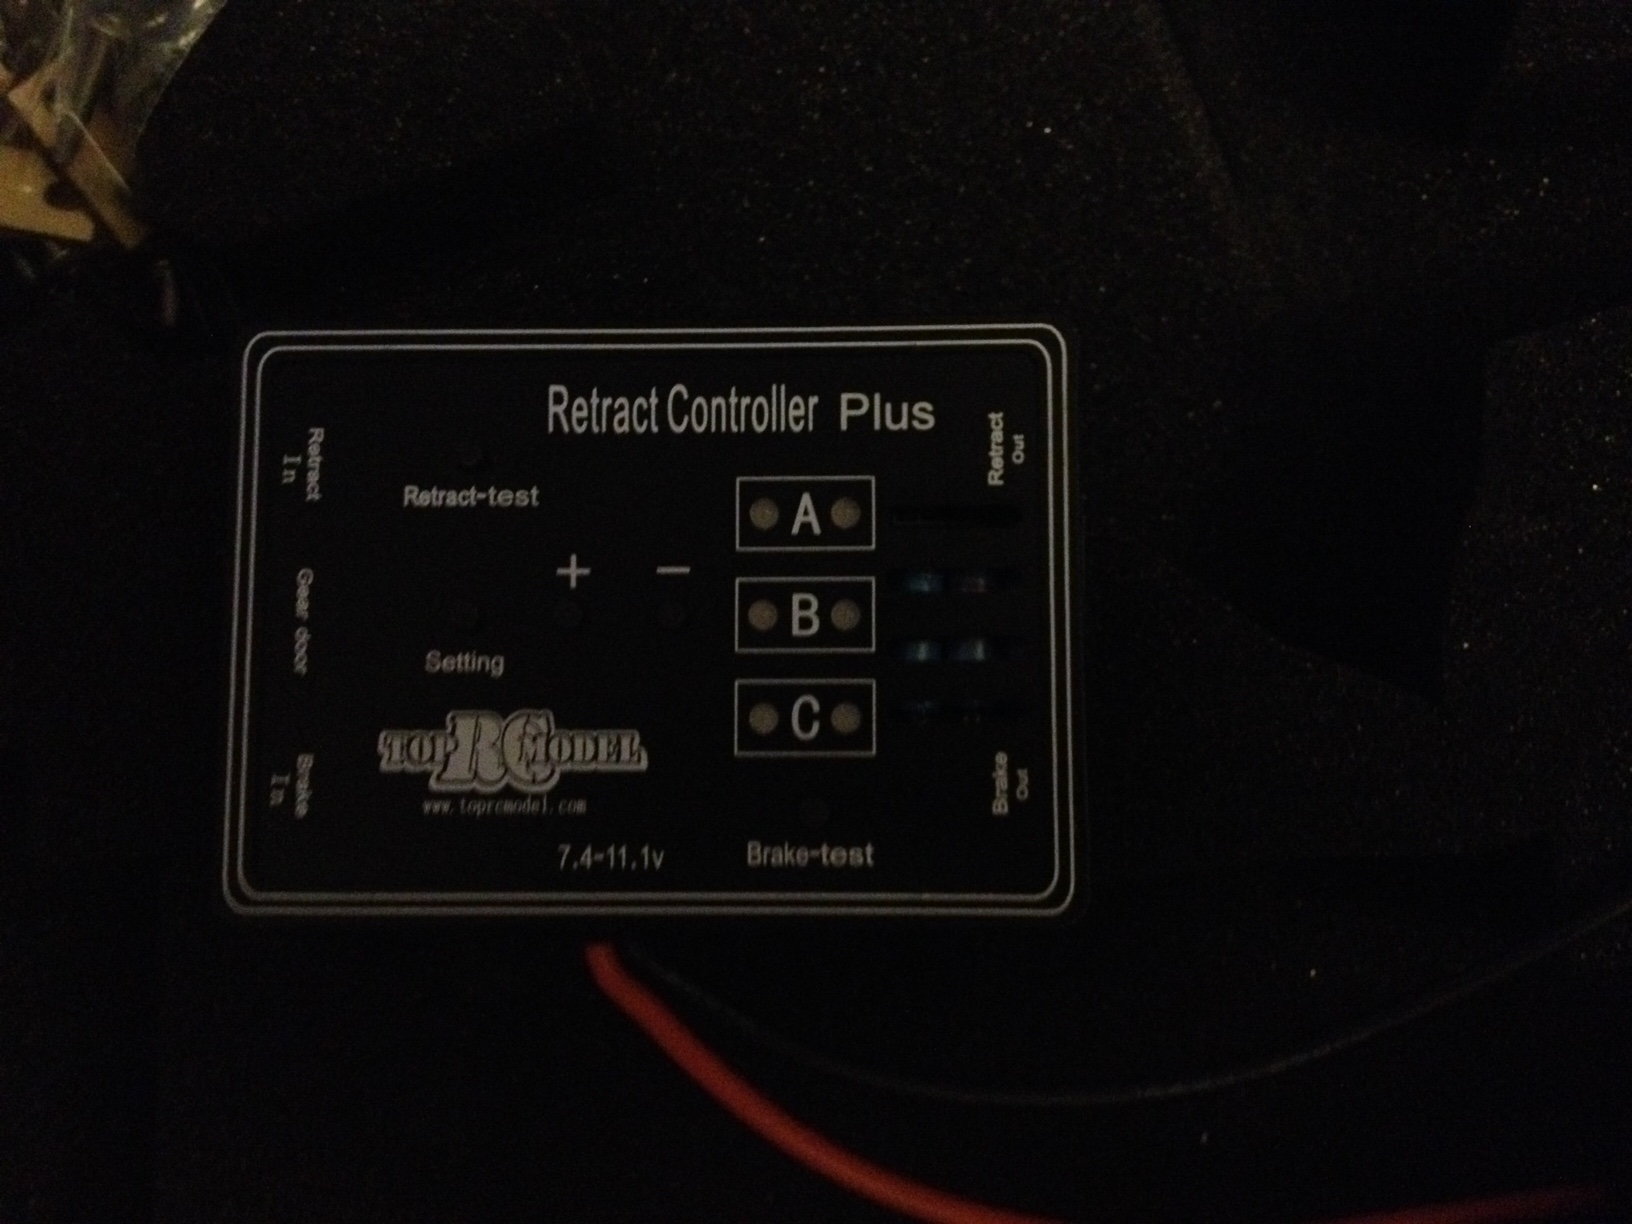
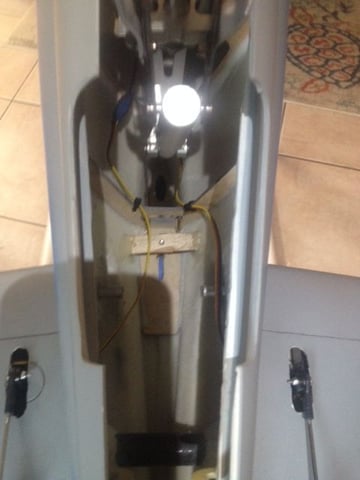
Back to wiring. The Corsair took sixteen (16) extensions to complete. Not kidding! . This one is a more advanced airplane to complete for sure. Not for the New guy. Gear doors were a bit of a nightmare (geometry wise), but I did manage to get everything spot on. Now they are all working flawlessly. I use the Gear controller to operate them.
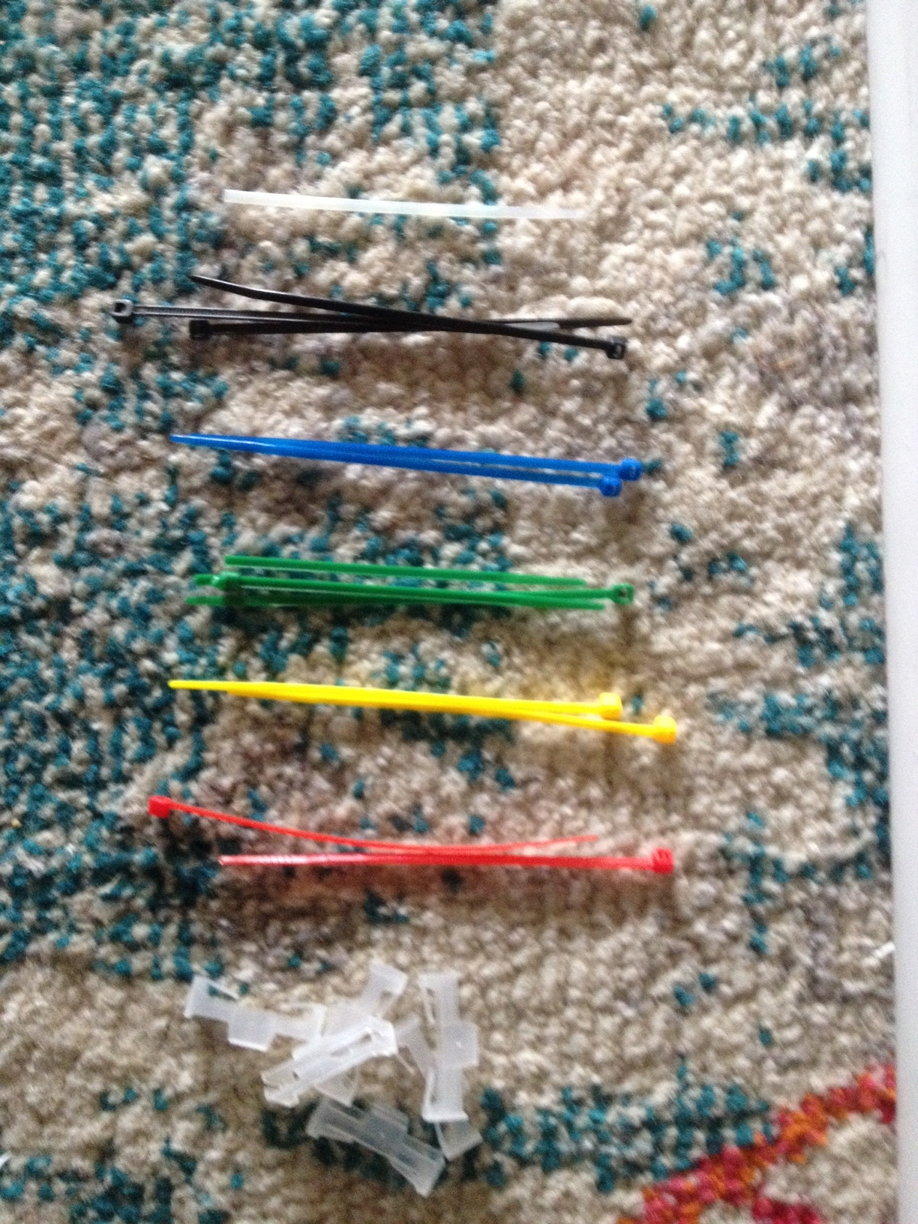
I like to use small zipties to identify my connections. It makes it so much easier when out at the field to get everything pluged up correctly.
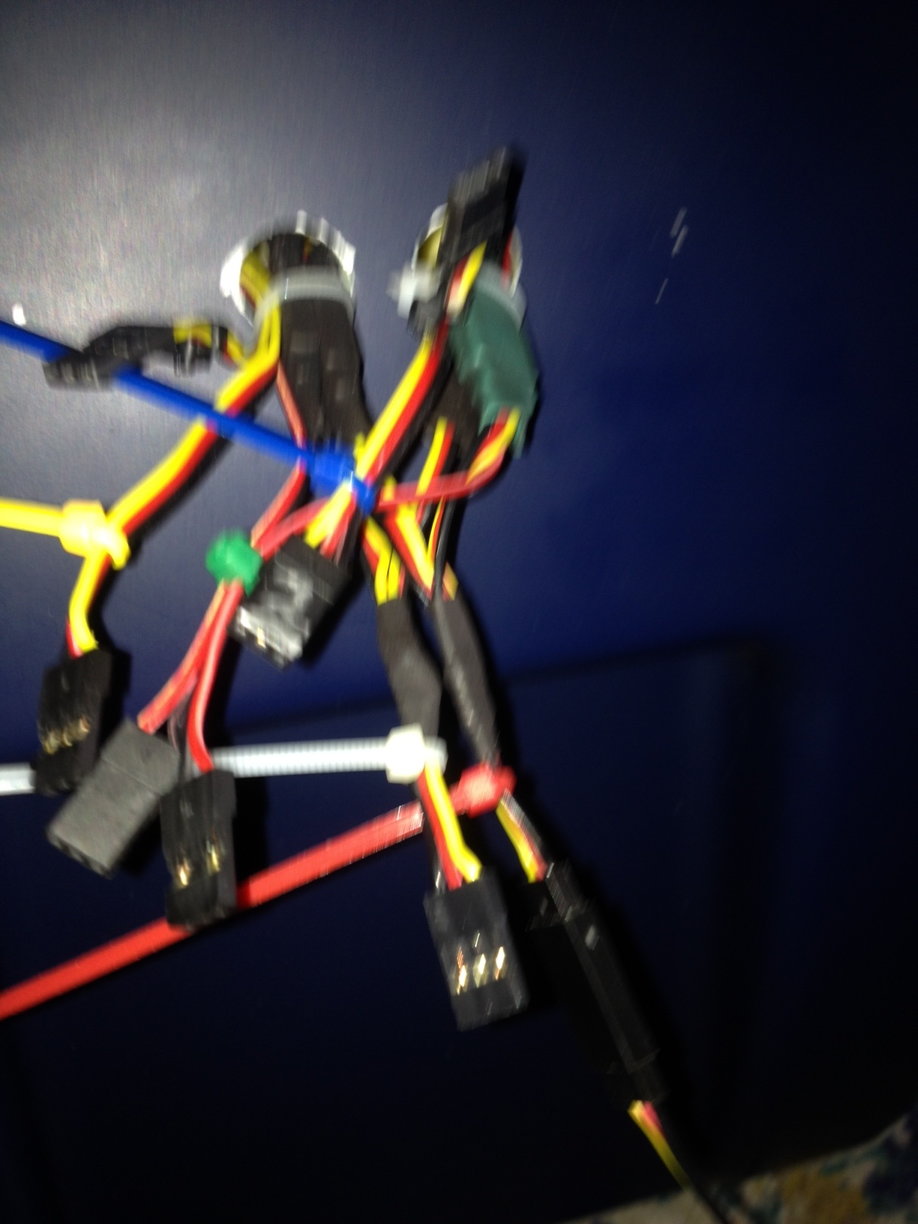
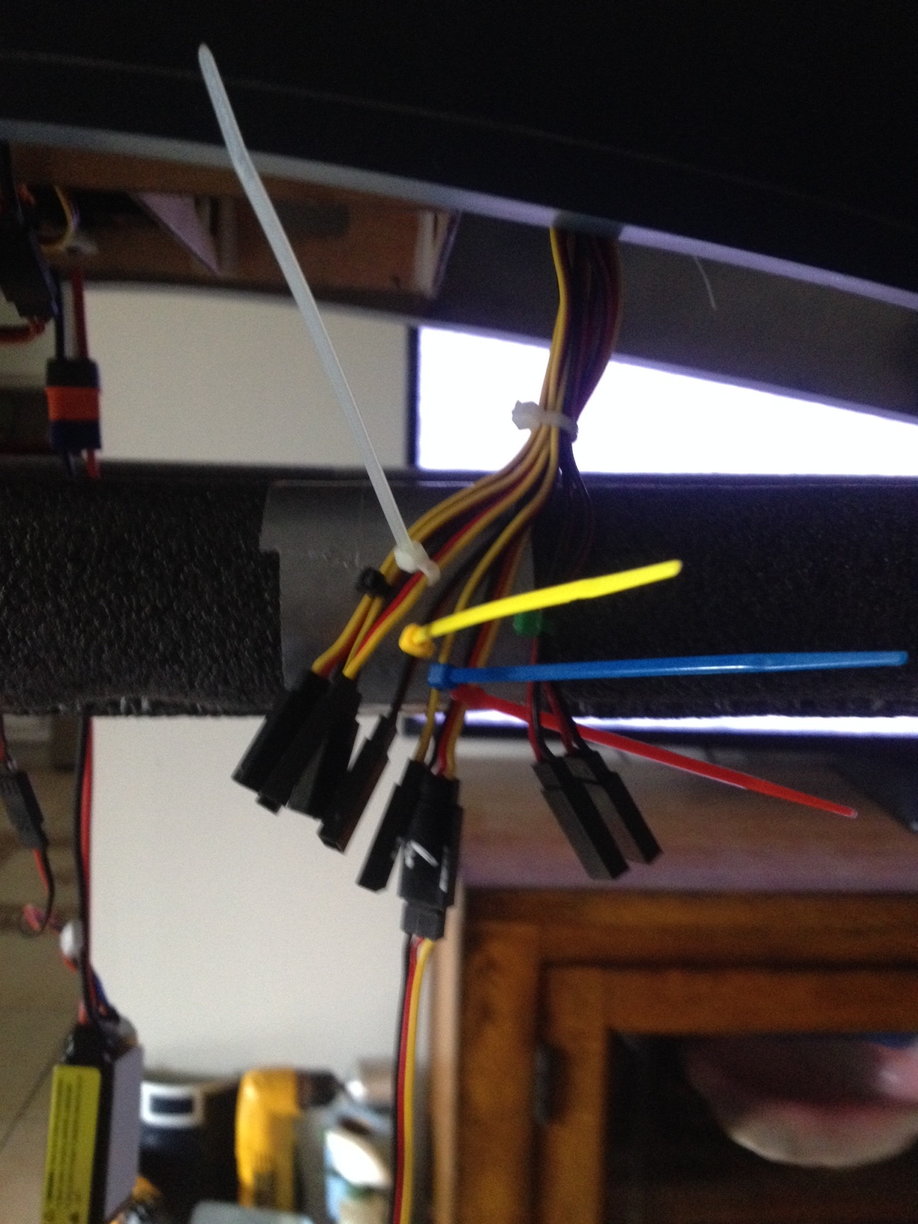

I like to use small zipties to identify my connections. It makes it so much easier when out at the field to get everything pluged up correctly.
04-25-2020, 08:03 AM
#25
I'm getting close to final on assembly. Everything is programmed and hooked up. Now I have to do a weight and balance. As of now the plane sits at 39lbs. I still have the cockpit , cosmetic detail weathering , paint gear so on and final balance. Hopefully I will not have to add weight.
I just ordered the USM 5-125 because of the weight factor. I plan to do a couple of taxi runs and if I don't feel good with the 7-90 it will get an engine upgrade.
I just ordered the USM 5-125 because of the weight factor. I plan to do a couple of taxi runs and if I don't feel good with the 7-90 it will get an engine upgrade.