


Royal-FW190A8
 02-25-2014, 10:32 PM
#401
thanks chad yea i am excited to see some color as well this plane has bee a real test bed for some ideas I had for building its been a on and off project but I see the light at the end of the tunnel.
I wanted it flyable so not to heavy and over loaded with details, but also have a few cool looking features
it got a little too late to paint since I have to run my compressor for my spray gun, so tomorrow I will post some more on my painting process as I move forward.
I wanted it flyable so not to heavy and over loaded with details, but also have a few cool looking features
it got a little too late to paint since I have to run my compressor for my spray gun, so tomorrow I will post some more on my painting process as I move forward.
 03-05-2014, 12:36 AM
#402
its been a couple of tomorrows but some more progress pics I have shot the green and done some cut backs areas of over spray or sections I went a little too far I shot with the RLM76 to reduce the size of the green and grey #75J so far its getting closer.
funny how the spray lines show up under the flash but in natural light you can't see any they will be gone once I clear coat the whole plane, now its ready for the exhaust area and a few fades and squiggles before the Iron crosses and such.marching forward its getting closer to what I want


funny how the spray lines show up under the flash but in natural light you can't see any they will be gone once I clear coat the whole plane, now its ready for the exhaust area and a few fades and squiggles before the Iron crosses and such.marching forward its getting closer to what I want
 03-05-2014, 02:44 PM
#405
it is one of the reasons I went with the yellow tail John so I could tell which way I was heading you would be surprised how well a camo plane sticks out in the air most of the upper fuse coloring was for hiding on the ground especially the later A models, the earlier A4's were brightly decorated towards the end of the war the camo became much more subdued, I am also planning on doing a yellow chin also.
been working on the black exhaust areas.
been working on the black exhaust areas.
03-05-2014, 07:02 PM
#406
ok got a few details done while watching/listening to the Warriors game, first was the exhaust area.
the wells on the side of the fuse are fairly well defined so what I did was to tape this area off using 3M Blue tape, when I have a area that is a high contrast like this one and I want a sharp edge after I tape the area off,what I do is use some clear to seal the edge so that there is little to no bleed through.
it is important to make sure the tape seam is tight because no matter how much clear you use if the seal isn't tight it will bleed, in my case one side was perfect and the other wasn't and when your doing black its highly noticeable let me tell ya, this procedure will be critical on some of the insignia's that are black.
I do like using the clean edge tape when I am doing this kind of painting but even that stuff can bleed through if your not careful so I seal the edges regardless.
another tip I have is when I peel the tape in many cases I do it when the paint is soft not wet but dry enough so I am not smudging it all over the place and so the lines tend to come out crisp which is what I am after.
for these 2 areas I wanted the paint to be heavy duty, so after taking about 1/4oz of paint in a cup and catalyzing it instead of spraying it I brushed it on using a 1" high quality paint brush not being stingy with the material since the pipes exit right there in this area, after laying on the material I used my heat gun to lightly warm the area so that I could built up the coats.
after the first application was lightly sanded, I took another 1/4oz of paint and finished the area so that it was a nice deep black color, its shiny now but after laying on my clear coat it will dull down just a bit and blend into the fuse, I did need to back cut the lines on one side because of bleed through because I didn't set my edge tighter.
03-05-2014, 07:27 PM
#407
now after peeling the tape I found some bleeding I knew I was spraying so I taped the offending edge protecting the black area and with a piece of cardboard as a shield I shot the area so as to not directly aim the spray at the tape linebut more at the actual tape so the mist would cover the excess black bleed this cleaned up nice and quick.
now I am onto the mottling and some squiggles,to do this a dialed back the paint,and air flow to near zero and shot a few practice runs on my cardboard just to get the feel of what I wanted to achieve which was a bit of random lines and dots that resembled some of my artwork I have on this model I am not making a direct scale copy of any particular plane but more of a general look.
first was to take the green #75 I had already loaded in my gun, and very carefully put some random spots not allot since the green dominates the canopy area, and my artwork shows little to no green in the mottling but just a few here and there.
next I cleaned out the gun and took some of the #74 and sort of crisscrossed the green as well as filled in some of the gaps where there was no color on the fuse I also did a few spots on the tail but left a space for the swastika I will probably add some more there after I add that to the tail area.
next will be a assessment of the overall look before I think about group markings etc.
the yellow chin of the cowl which I will mask off to do that job needs to be lined up with the fuse that will be one of the last major areas to paint.
 03-06-2014, 11:59 PM
#410
so yellow was the color of the day today.
after checking my paint supply I was getting perilously low on the yellow but thankfully I made it with what I had on hand.
I taped off the lower cowl section I was spraying, and after laying up a couple of coats I was getting a little impatient, so I started hitting the layers with the heat gun very lightly to get the process moving along just quick passesback and forth is all it takes if I aim for a particular area too long the paint pulls so I had to be very careful when using a heat gun or my prefered method a hair dryer( I killed the one my wife gave me for projects)
so far all the rest of the colors besides the Yellow have had great coverage its just so bright and clean of a color that it takes multiple coats, I also tweaked the cowl lines a bit to tighten up the lines I had dropped the darker colors down a bit and wasn't supper happy with the overall look, a few adjustments and a reapplication of the mottling and I am happy with the end results.
I had not assembled the plane since painting the wings and fuse, so I figured tonight was the night, the canopy was also getting pretty coated up and before I clear coat everything I have some clean up to do like soften the leading edges of the wing and some minor touch up that I can do with a small brush, soon it will be insignia's cant wait.
03-07-2014, 04:56 AM
#411

Join Date: May 2005
Location: milano, ITALY
Posts: 45
Likes: 0
Received 0 Likes
on
0 Posts
Cool! i have one and it fly very well!
Look at this, maybe it can help.
http://www.cockpitscale.com/product/...und-60-153-cm/
Look at this, maybe it can help.
http://www.cockpitscale.com/product/...und-60-153-cm/
03-08-2014, 02:10 PM
#412
Cool! i have one and it fly very well!
Look at this, maybe it can help.
http://www.cockpitscale.com/product/...und-60-153-cm/
Look at this, maybe it can help.
http://www.cockpitscale.com/product/...und-60-153-cm/
I was thinking I might do a reproduction of my Royal parts by making molds from plaster and Vac forming new pieces, I have been wanting to do some Vac forming and have been researching some ideas for making a simple table to pull some parts from plastic,its definitely something I have been wanting to try for some time, since I want to be able to pull canopy's and other parts not available for this and other projects
03-23-2014, 10:06 PM
#413
emblems are a challenge:
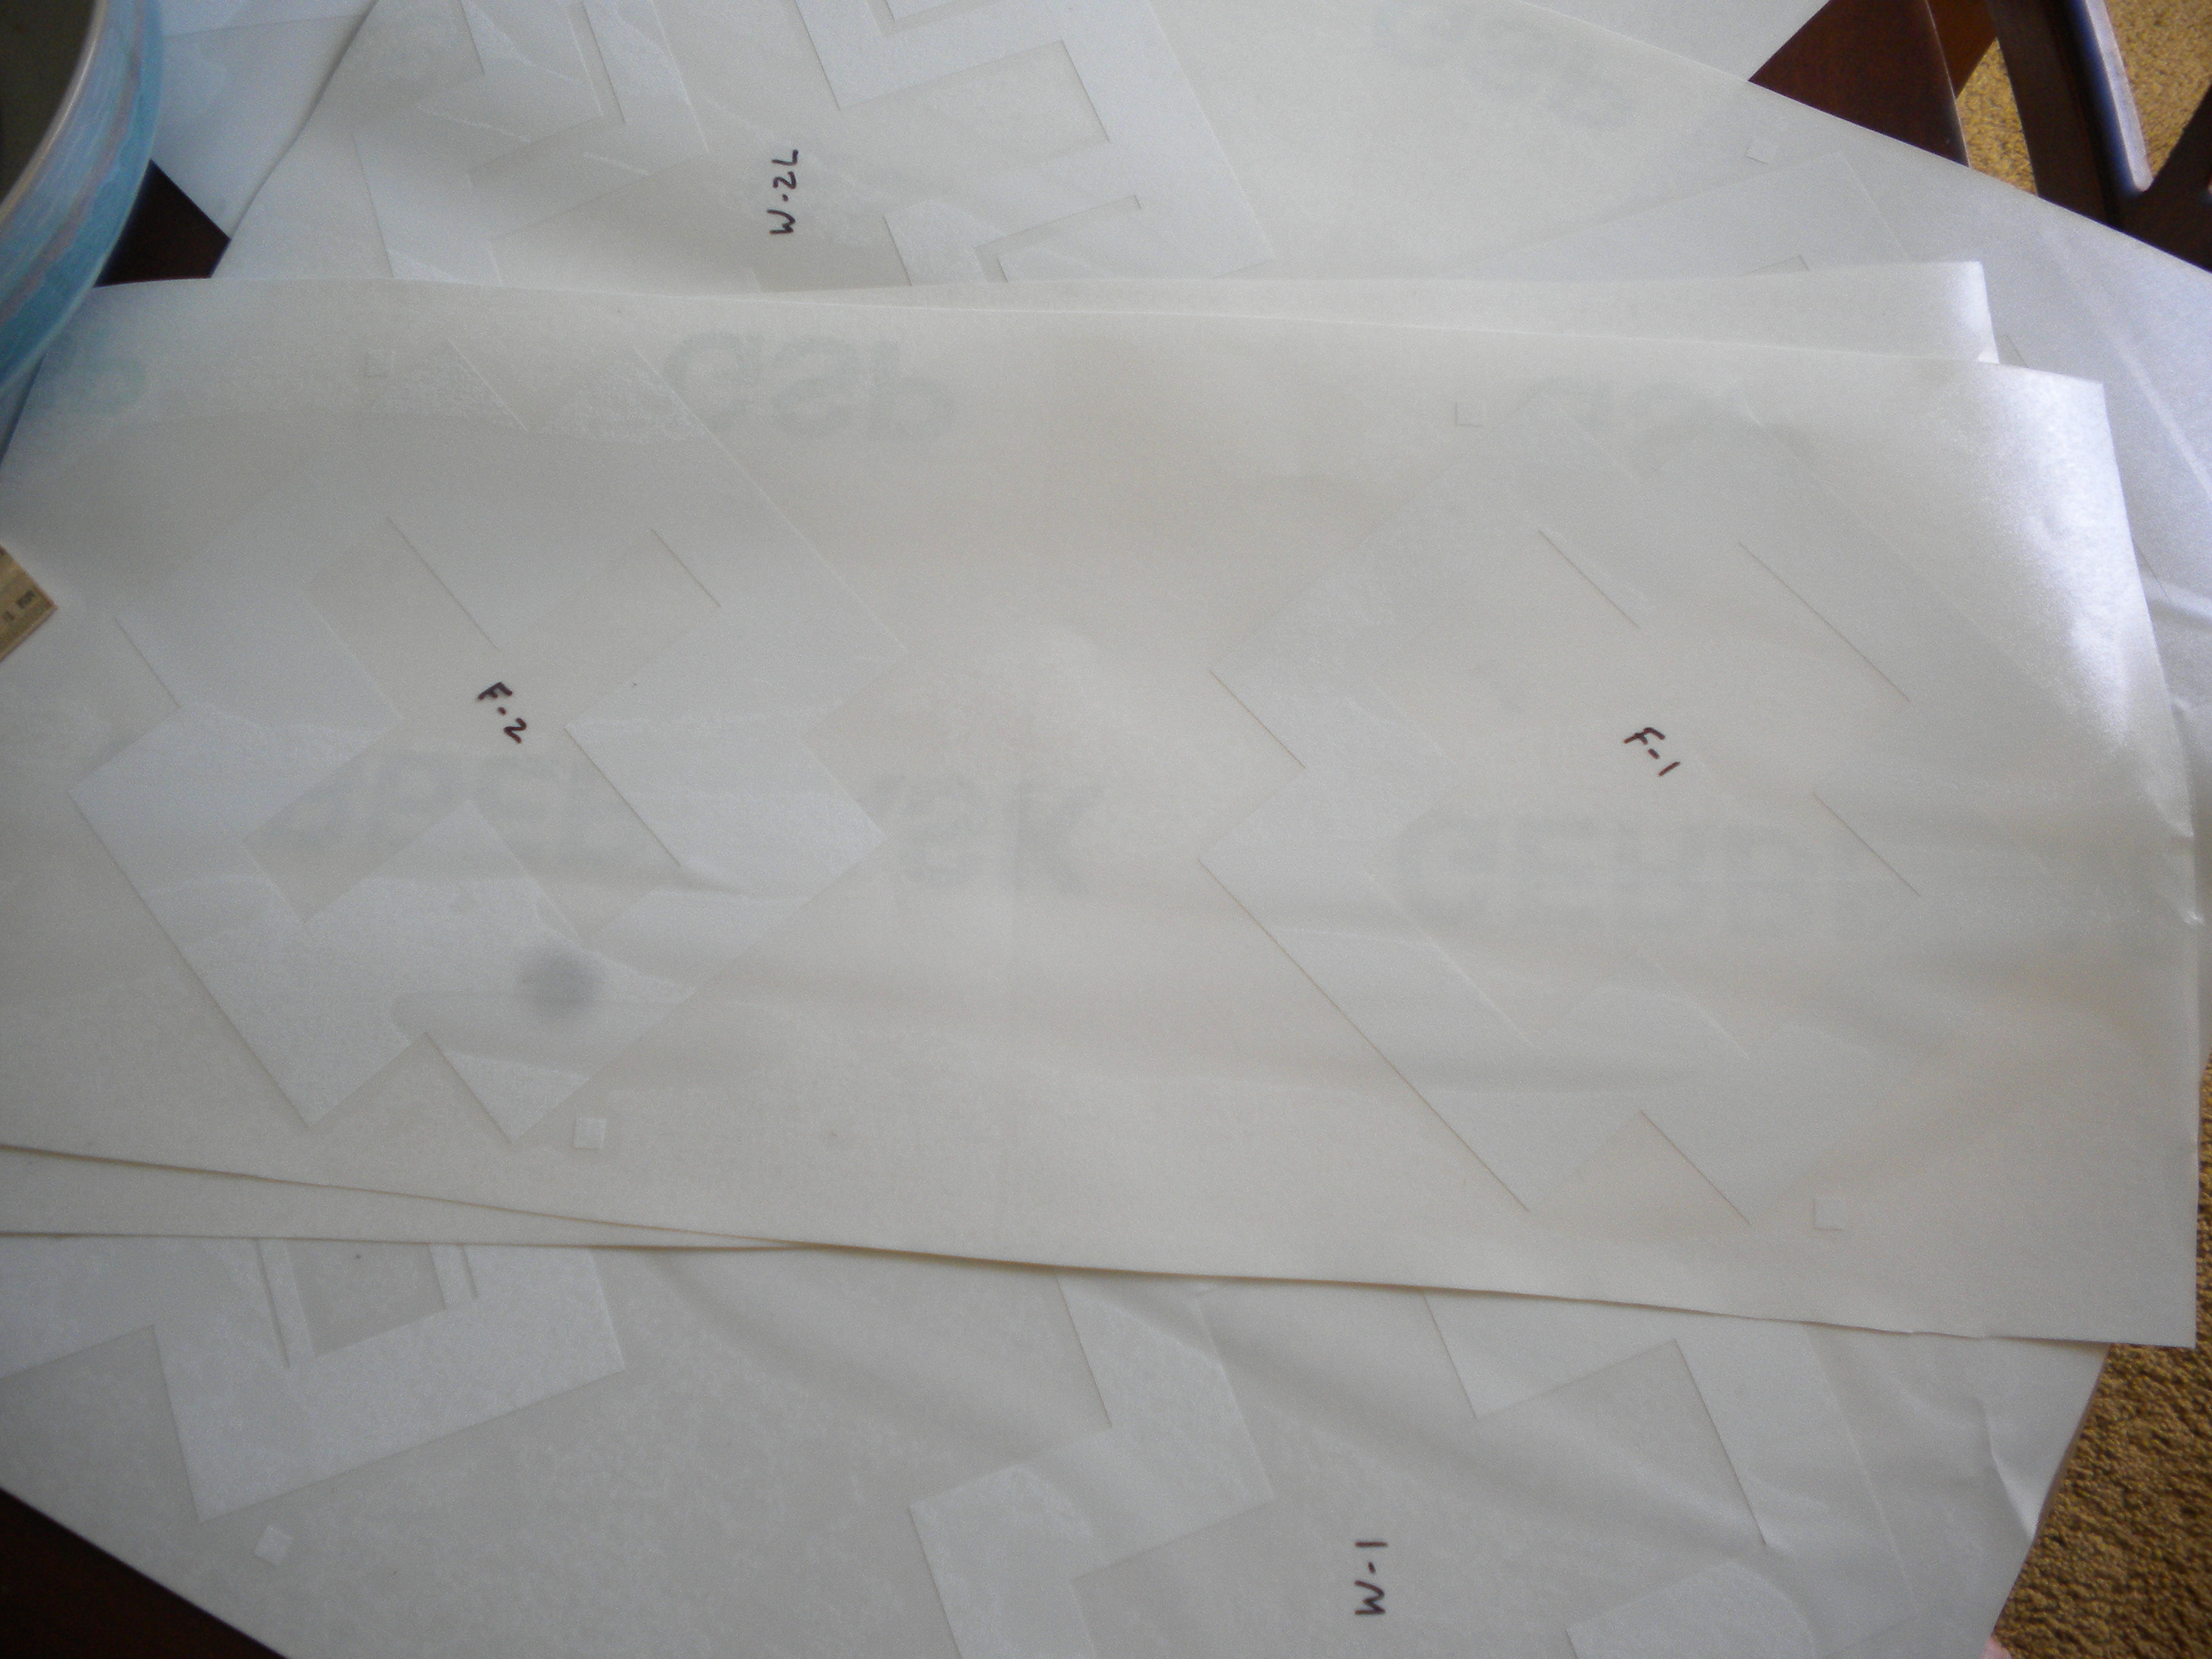
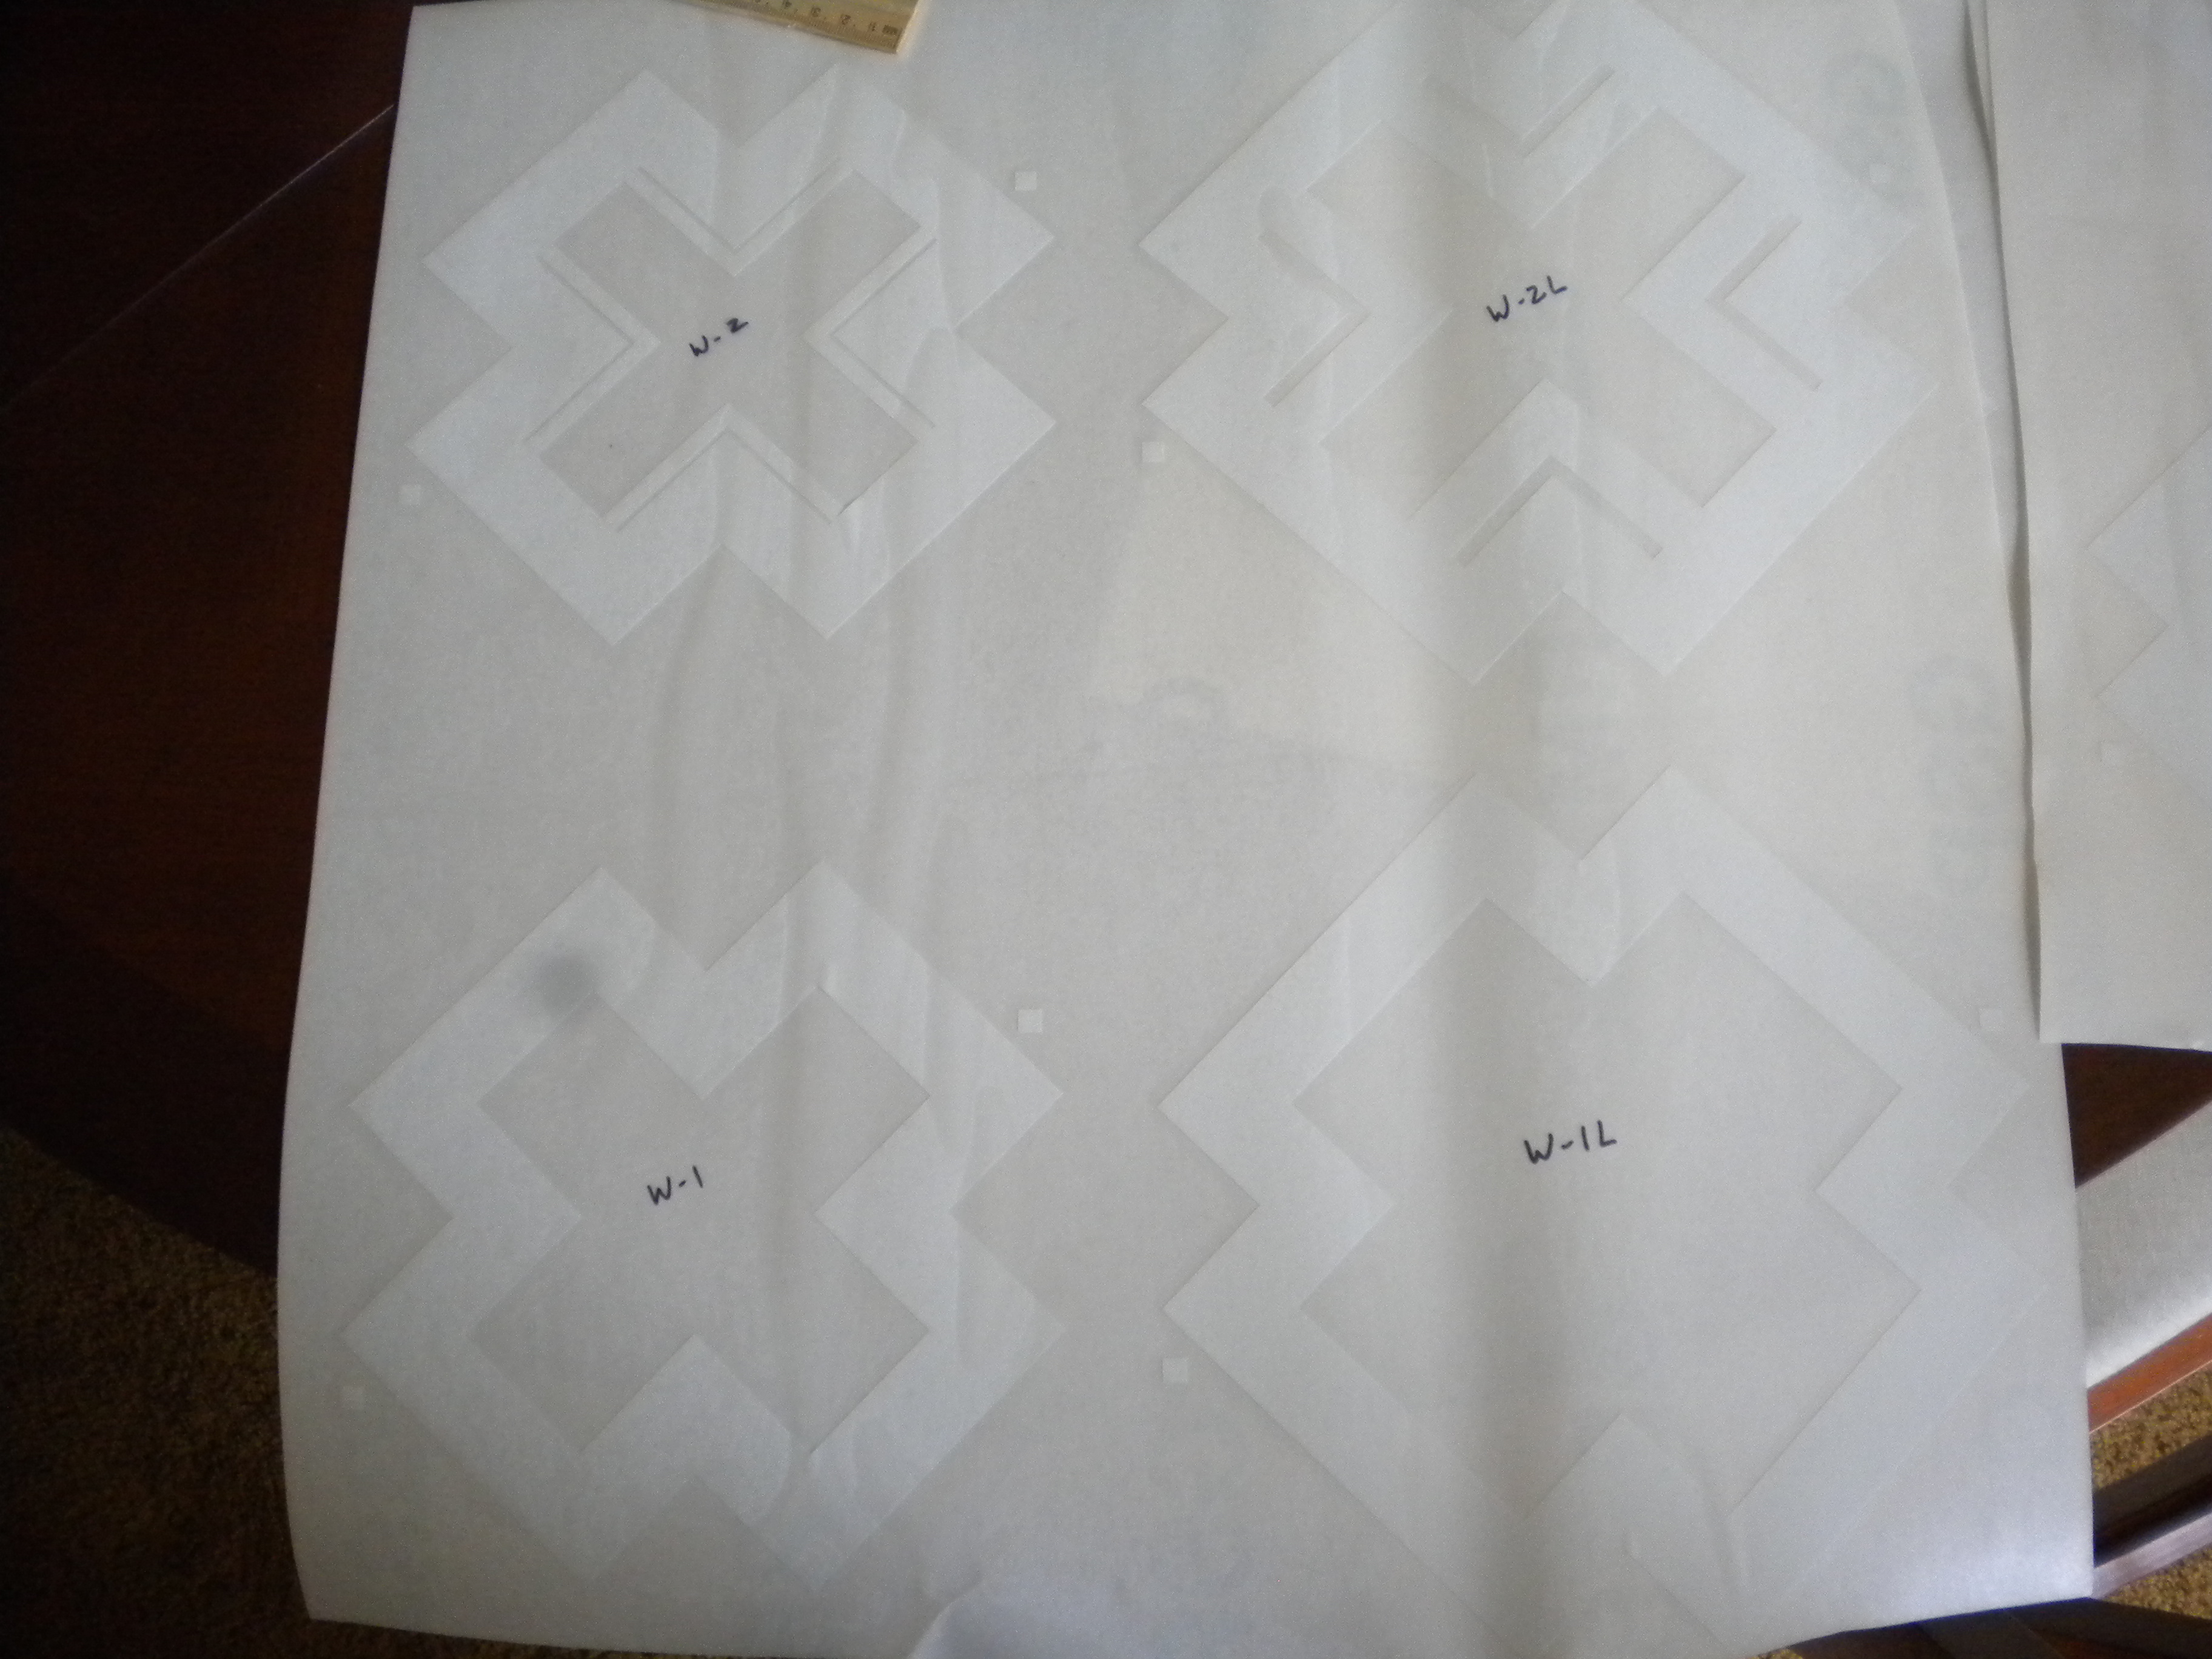
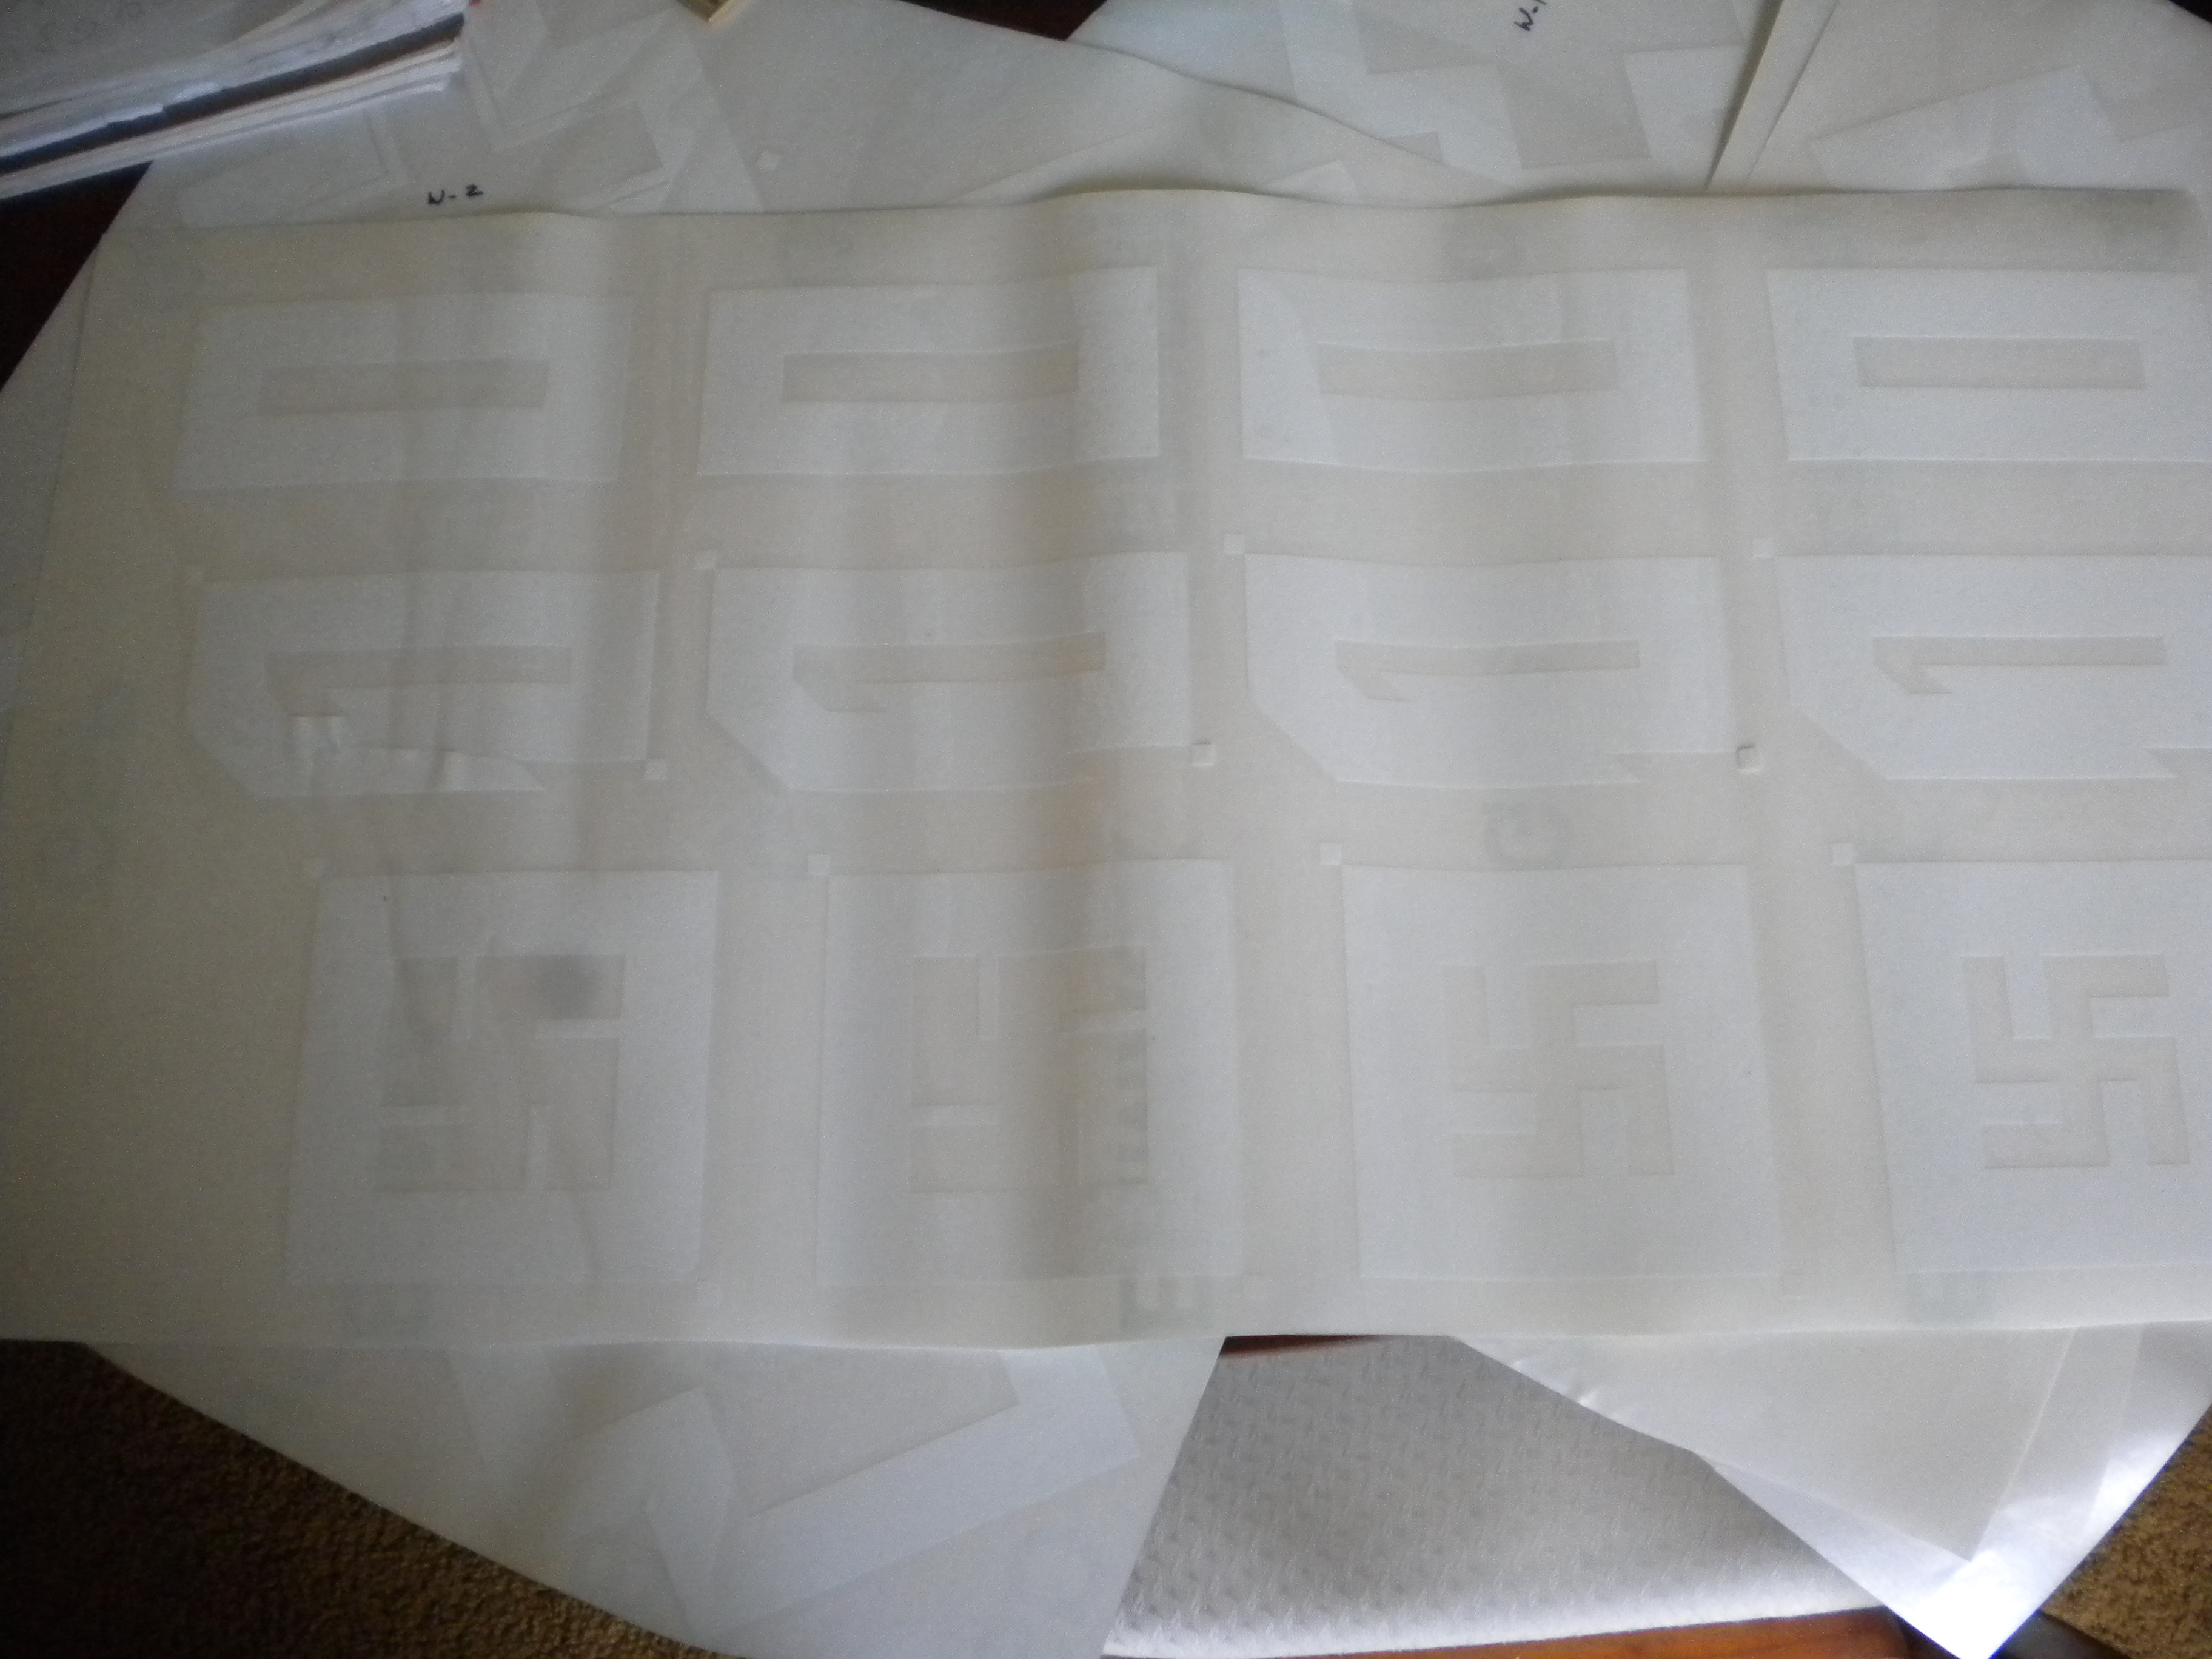
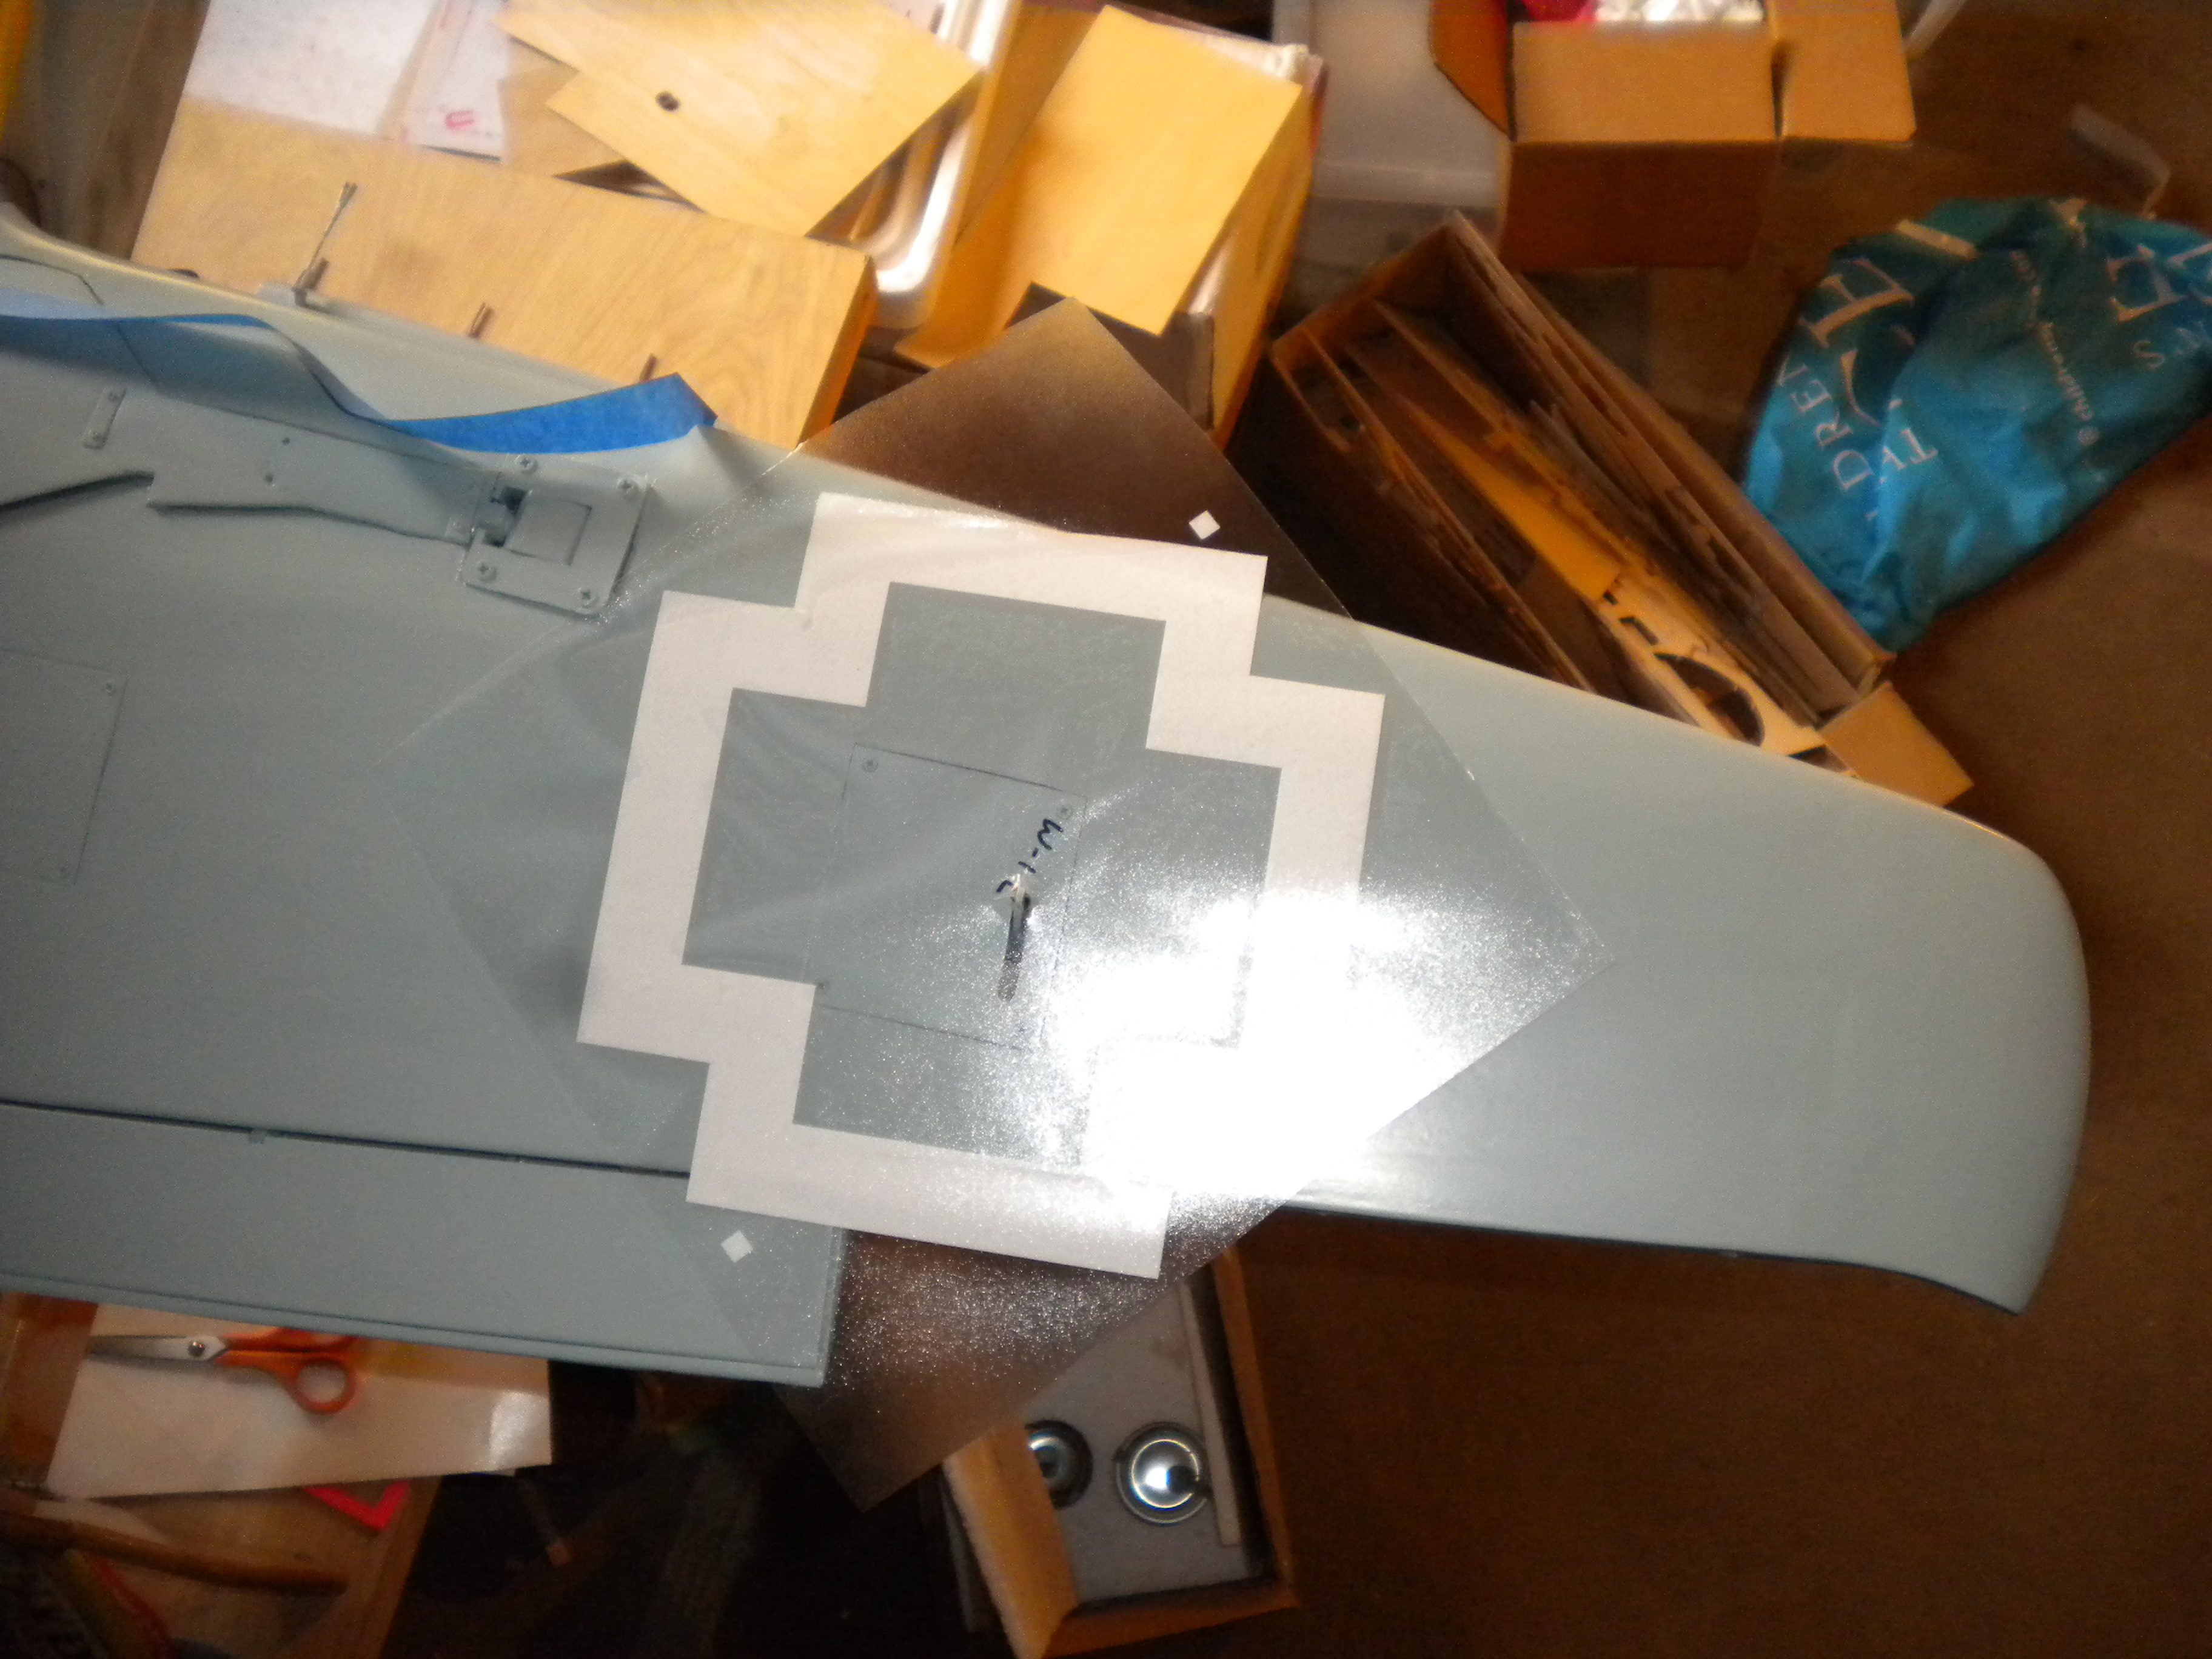
so I have a decal sheet from my kit and I also have some water slide paper my problem was my printer has no way to recognize the color white so after several attempts at trying t work the water slide idea I gave up and went to my fall back option and had some stencils made up, usually I would buy my stencils from www.getstencils.com but after sending off a sheet of graphics a while ago and getting my stencils there was some small issues that I didn't want to deal with like getting my graphics back and not having to ship them off to there shop rolling them in a tube etc..
this time I decided to go local and used a company here in San Francisco called landmark sign Co. they did a great job duplicating the graphics on my decal sheet and I am really happy with the results,I will post there address/information tomorrow if any one is interested in getting paint masks for there models, they should be cheaper than mine because the artwork has already been done now.
it cost me a little bit more than get stencils because I had to pay for the extra art work since making stencils for models isn't there main business, now they have German WWII graphics and I will probably have them do more in the future.
one thing I really liked was I got to go into there shop and make sure the stencils were just what I needed and I also had a choice in what backing I got to use, normally the stencils I had used before came with a opaque backing so lining up the graphics was a bit of a chore and required some repositioning to get them just right.
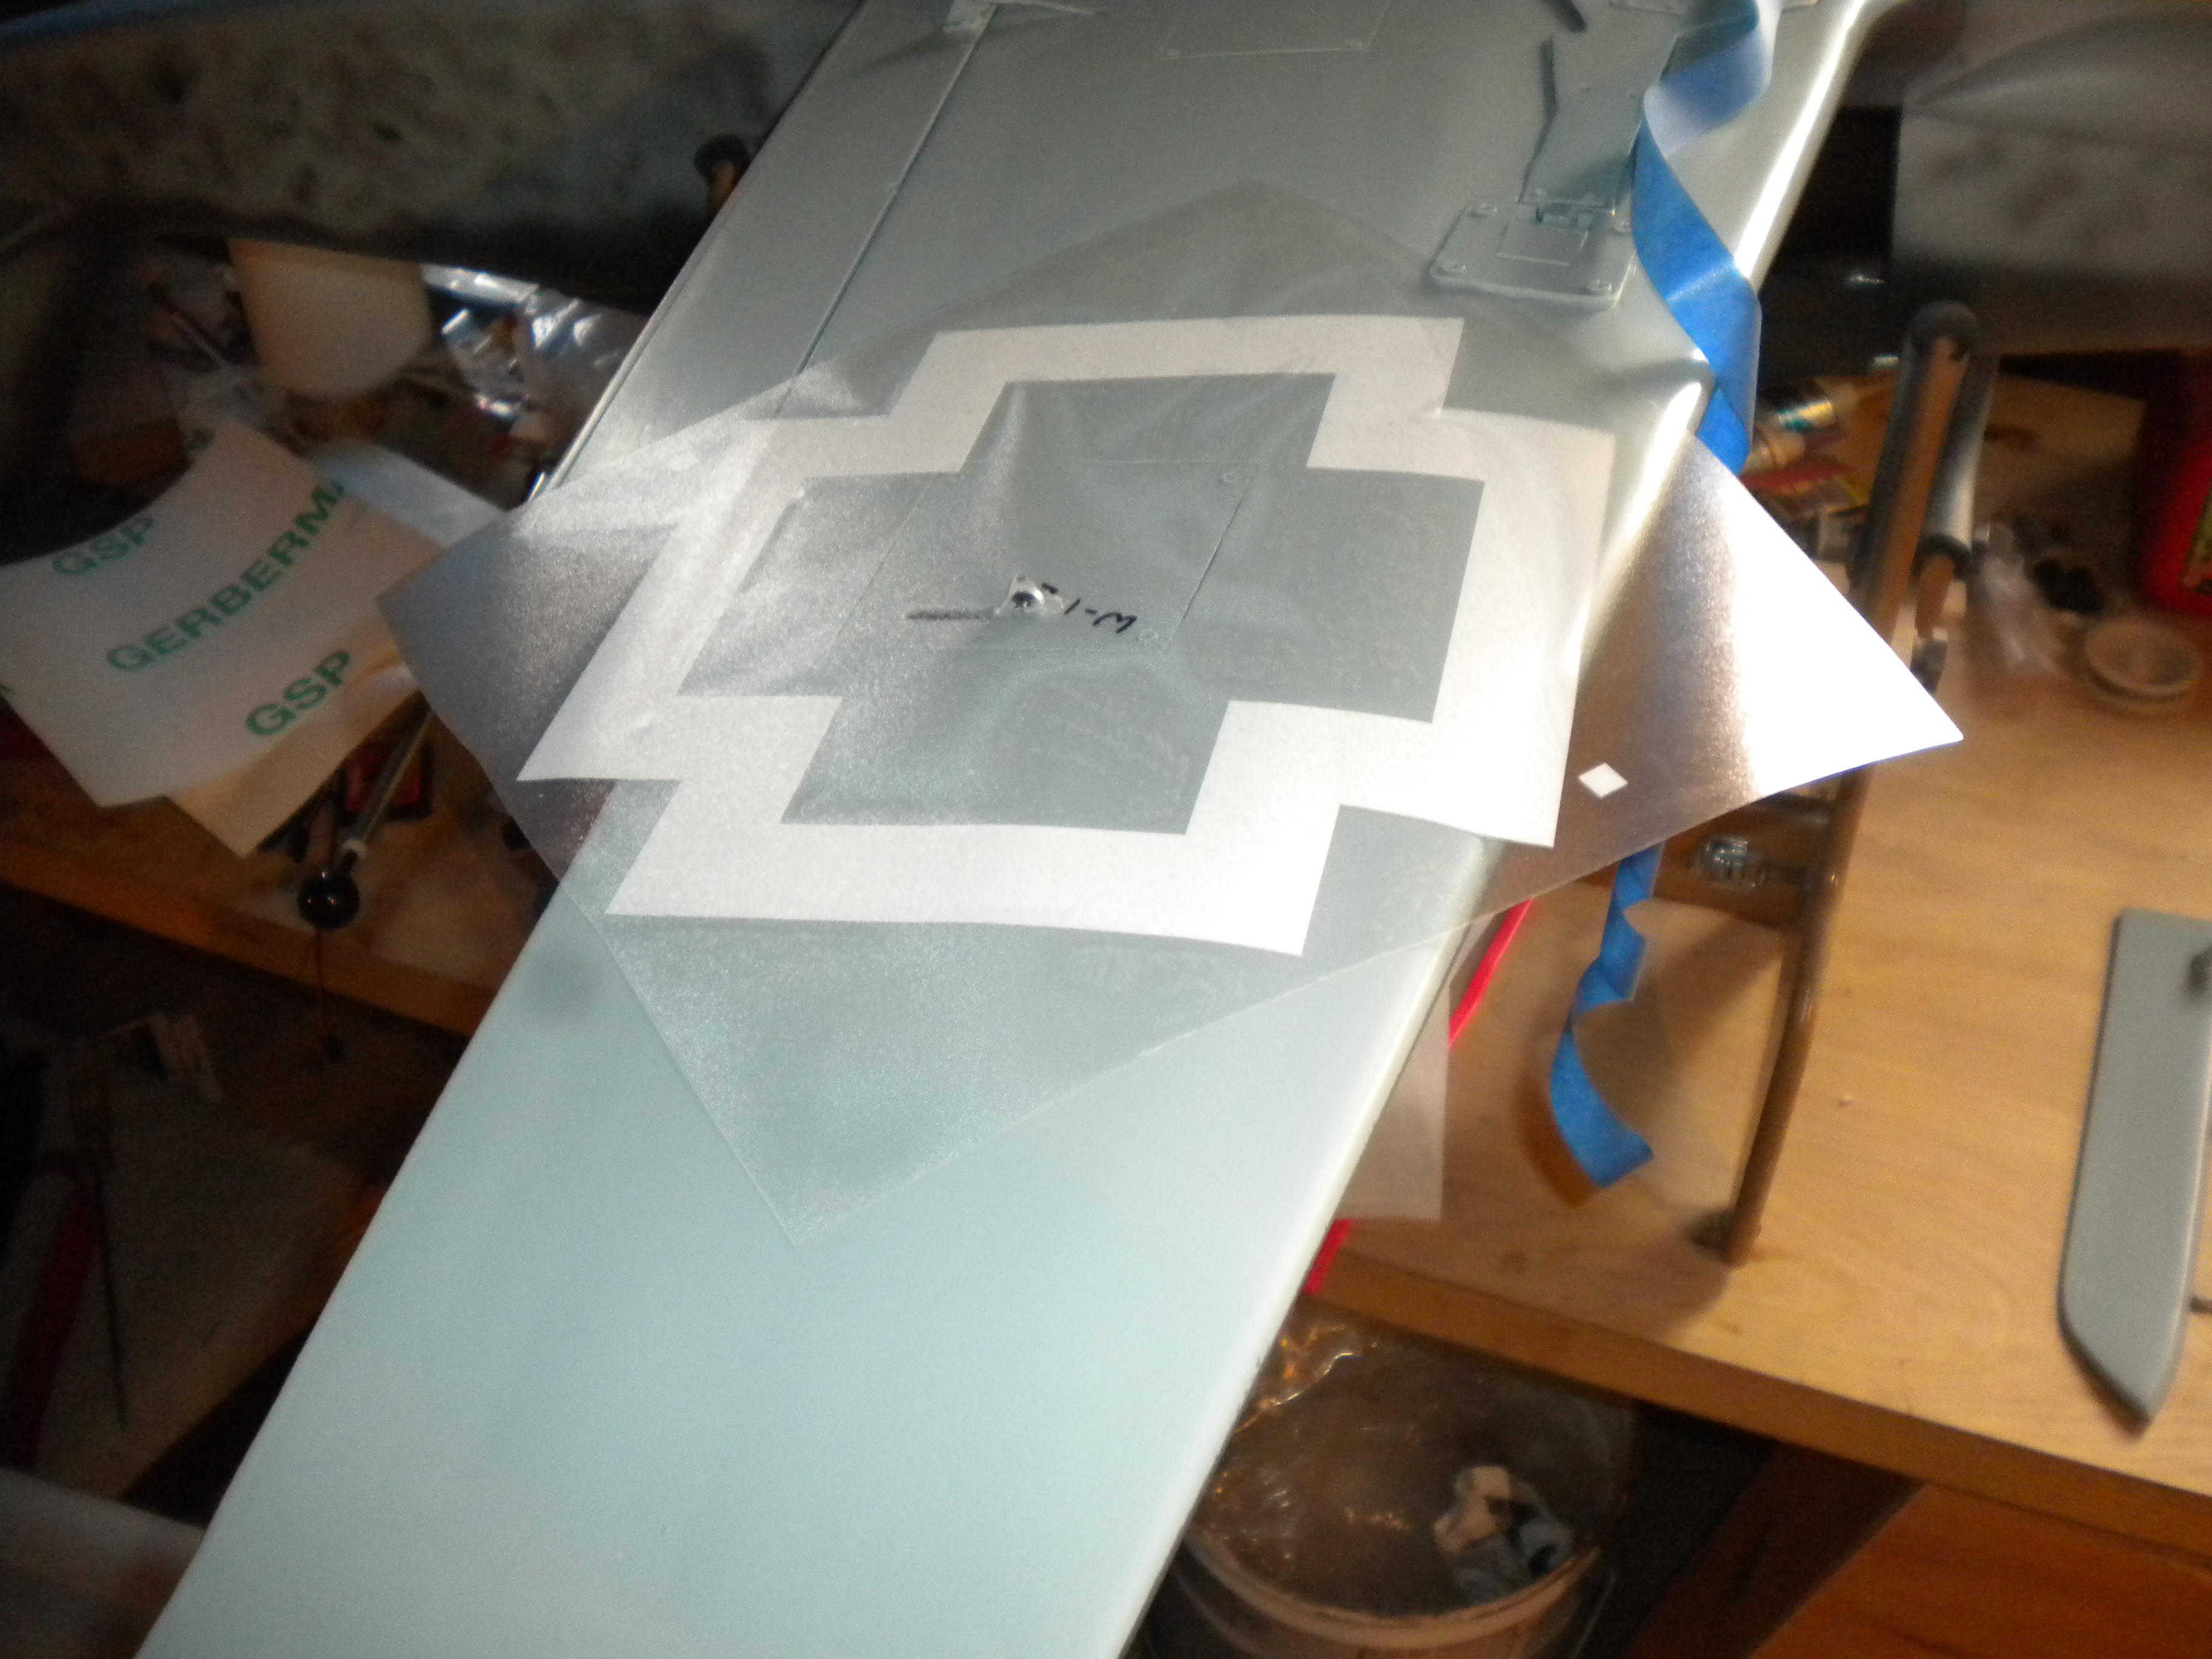
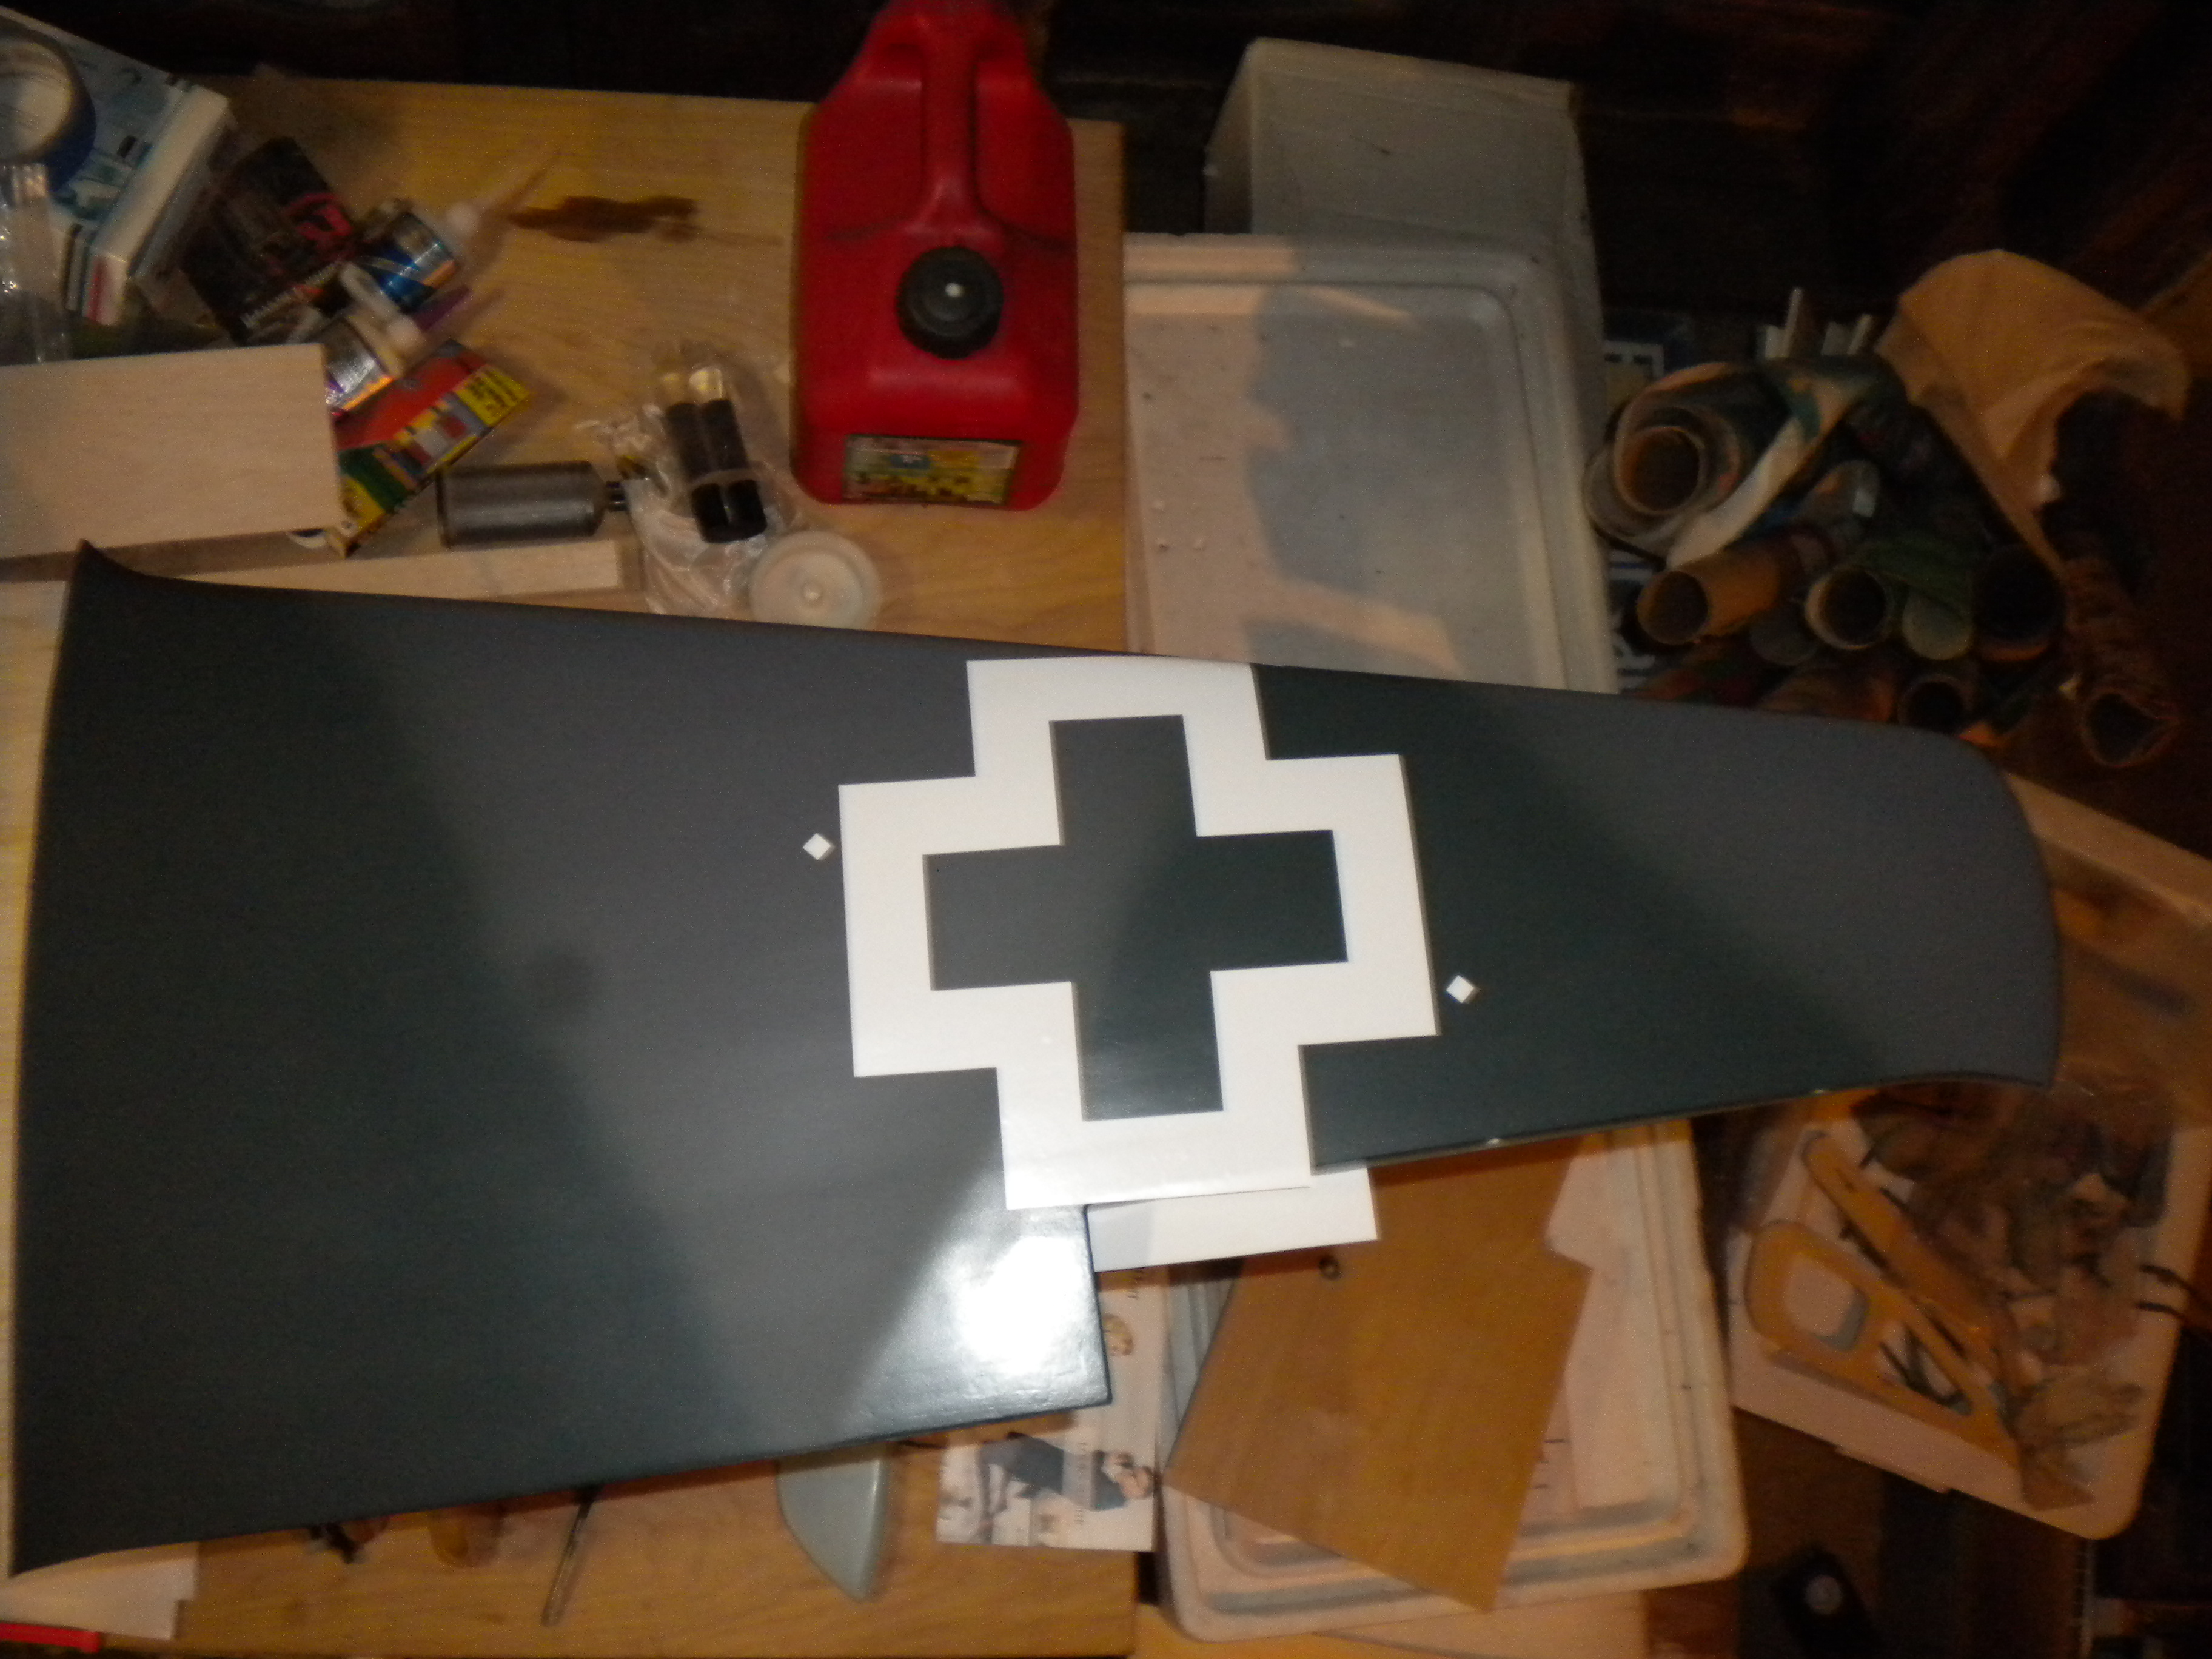
with these stencils I had the choice of getting a clear material for the application, with the clear backing lining up the masks is allot easier, its not like there all that intricate mostly strait lines but doing them in tape would have taken me some serious hours to get done all the white and black lines was mind bending.
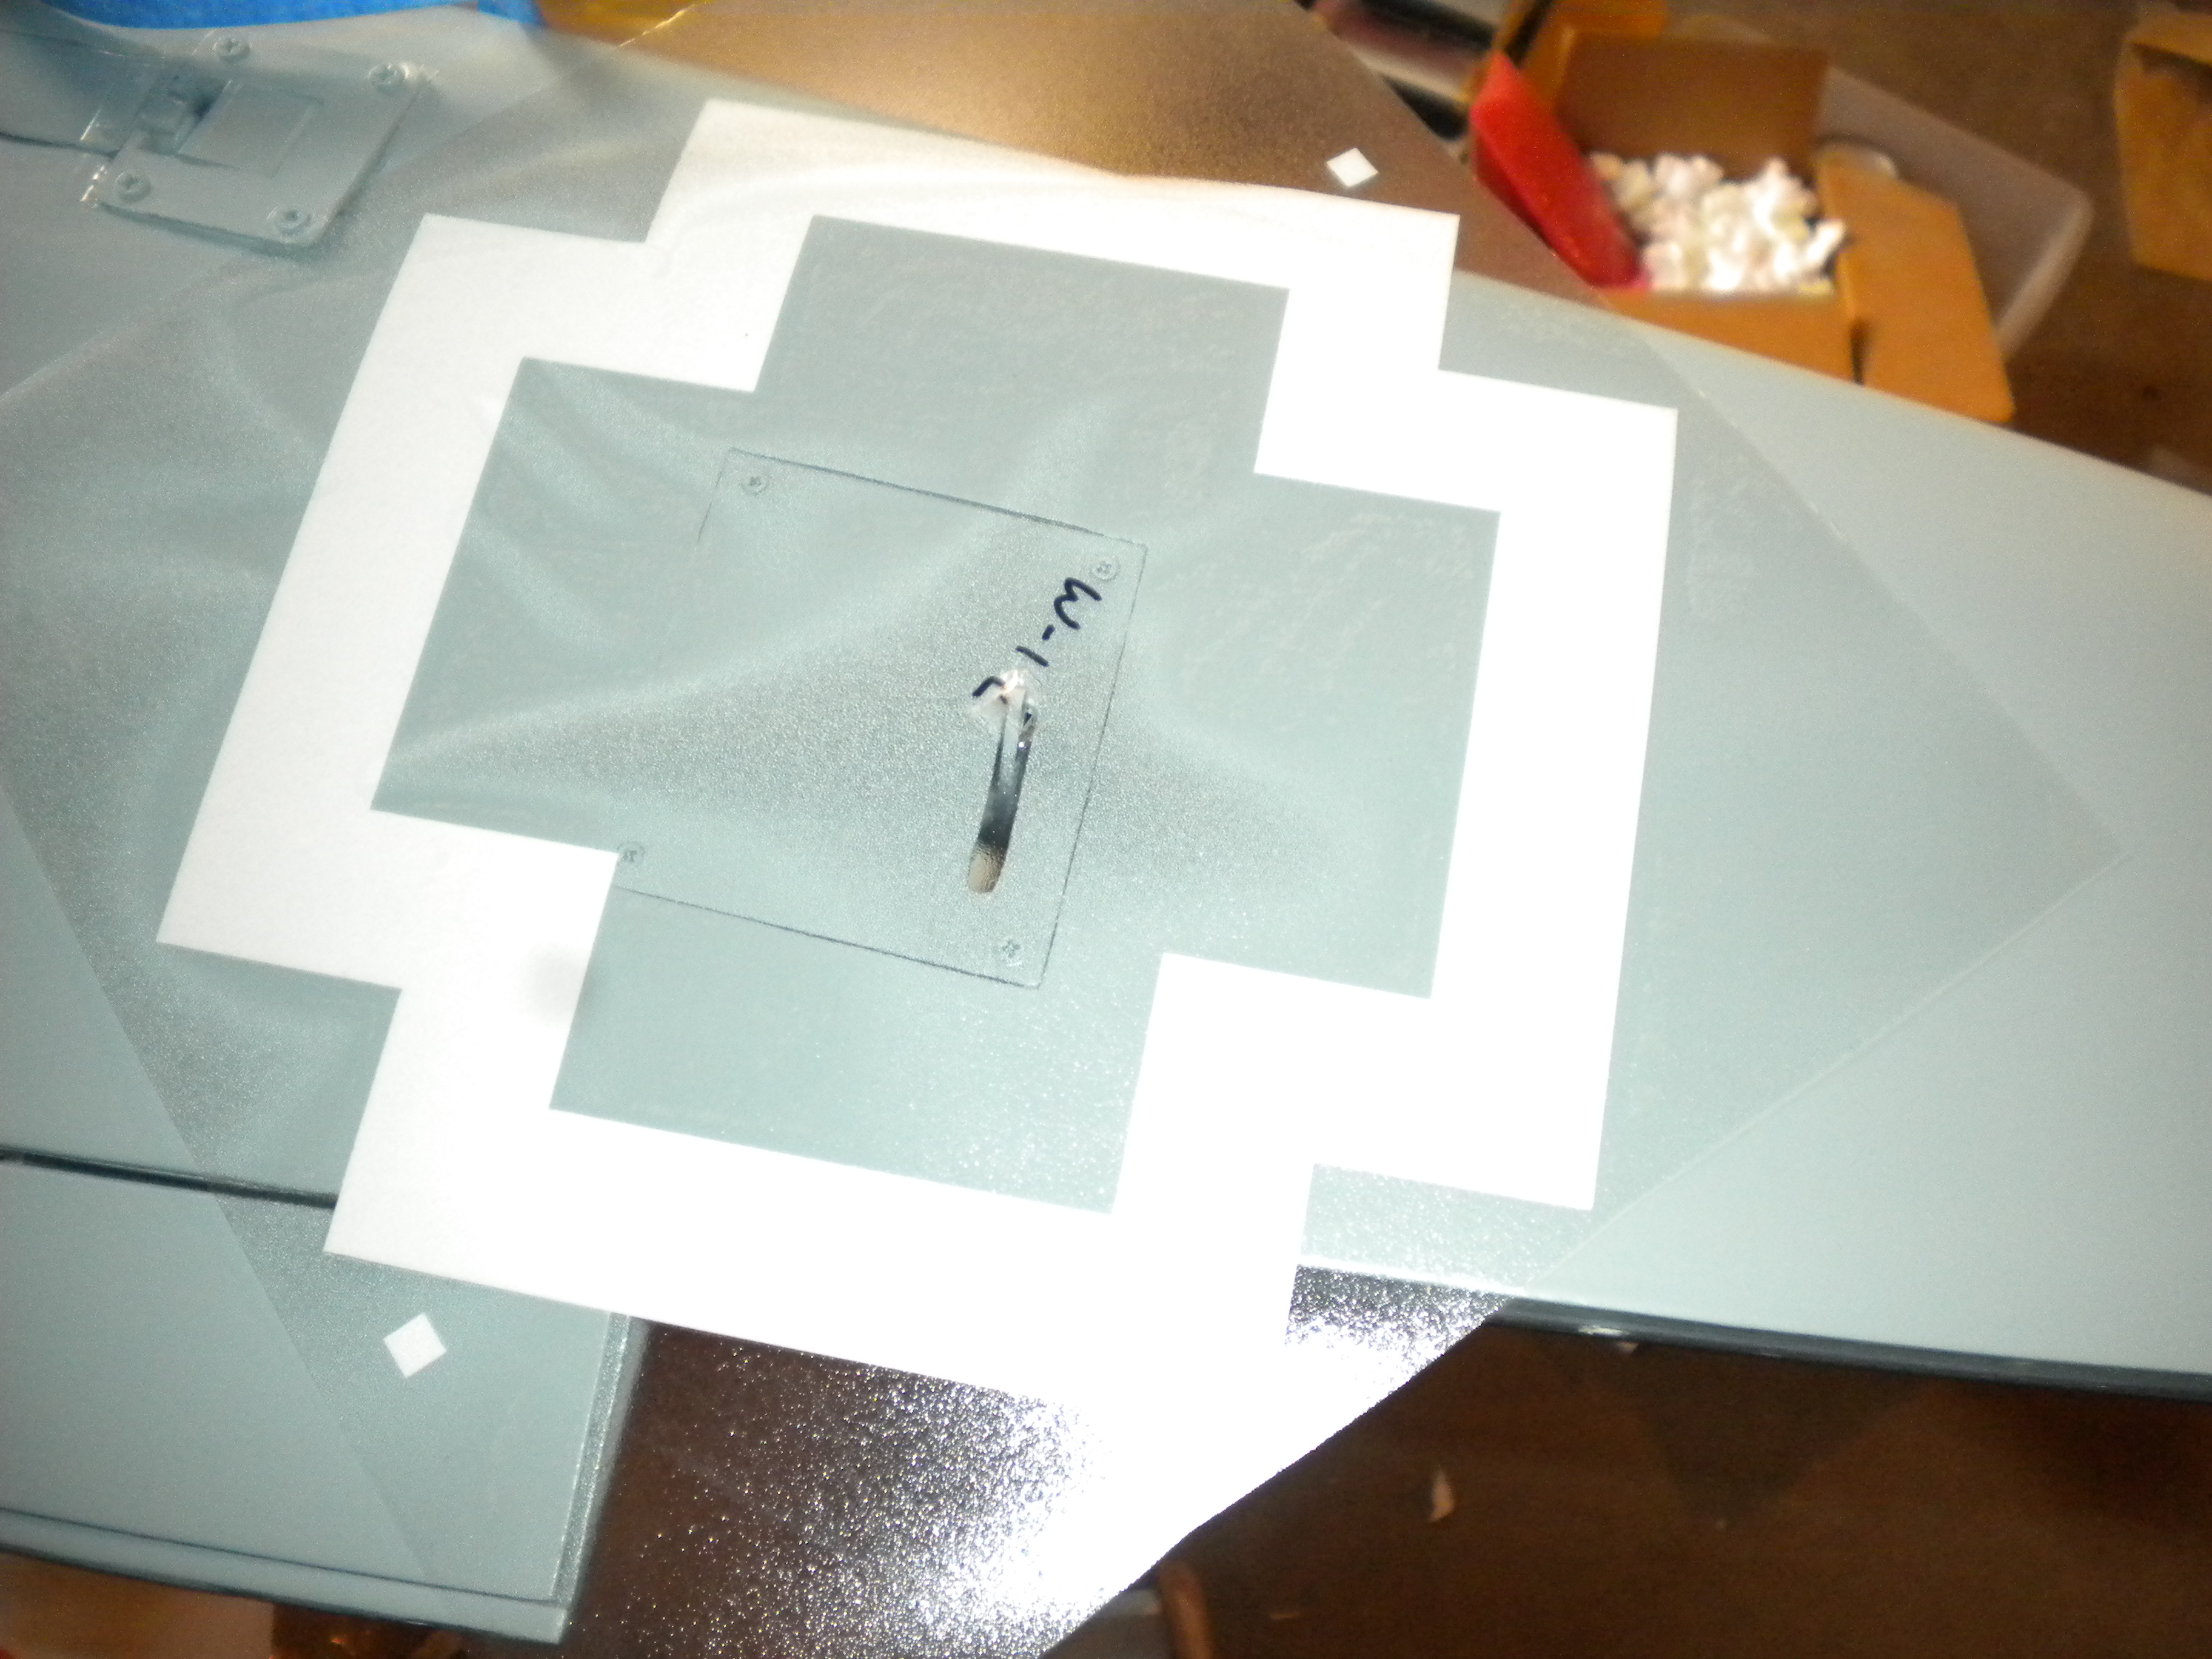
I didn't get any painting done that comes tomorrow but I did apply my base mask on the wing so that I can shoot the white portions I will add the swastika and other graphics to the fuse after I shoot the wing white portions.
here is what I got for my masks,I also removed the ailerons to get them out of the way and so the push rod didnt prevent me from laying down the mask smoothly,I will probably paint them black since there right in the middle of the crosses .

so I have a decal sheet from my kit and I also have some water slide paper my problem was my printer has no way to recognize the color white so after several attempts at trying t work the water slide idea I gave up and went to my fall back option and had some stencils made up, usually I would buy my stencils from www.getstencils.com but after sending off a sheet of graphics a while ago and getting my stencils there was some small issues that I didn't want to deal with like getting my graphics back and not having to ship them off to there shop rolling them in a tube etc..
this time I decided to go local and used a company here in San Francisco called landmark sign Co. they did a great job duplicating the graphics on my decal sheet and I am really happy with the results,I will post there address/information tomorrow if any one is interested in getting paint masks for there models, they should be cheaper than mine because the artwork has already been done now.
it cost me a little bit more than get stencils because I had to pay for the extra art work since making stencils for models isn't there main business, now they have German WWII graphics and I will probably have them do more in the future.
one thing I really liked was I got to go into there shop and make sure the stencils were just what I needed and I also had a choice in what backing I got to use, normally the stencils I had used before came with a opaque backing so lining up the graphics was a bit of a chore and required some repositioning to get them just right.
with these stencils I had the choice of getting a clear material for the application, with the clear backing lining up the masks is allot easier, its not like there all that intricate mostly strait lines but doing them in tape would have taken me some serious hours to get done all the white and black lines was mind bending.
I didn't get any painting done that comes tomorrow but I did apply my base mask on the wing so that I can shoot the white portions I will add the swastika and other graphics to the fuse after I shoot the wing white portions.
here is what I got for my masks,I also removed the ailerons to get them out of the way and so the push rod didnt prevent me from laying down the mask smoothly,I will probably paint them black since there right in the middle of the crosses .
02-04-2015, 12:44 PM
#414
Junior Member
Join Date: Sep 2011
Location: Oxford, MS
Posts: 25
Likes: 0
Received 0 Likes
on
0 Posts
Hello all,
My dad has one of these sitting under his bench in the to-build stack. He just asked me if I could find out how much one of these unassembled kits would go for these days. I believe all of the components are there/everything is intact, although the box does show its age. I could provide more details if necessary. Any input would be much appreciated!
-Mike
02-04-2015, 01:12 PM
#416
Junior Member
Join Date: Sep 2011
Location: Oxford, MS
Posts: 25
Likes: 0
Received 0 Likes
on
0 Posts
JB,
Thanks for the reply. I'll let him know.
If he decides to sell, you all will be the first ones to know about it. I'd have to do an inventory on the parts to ensure that the kit is complete and take pictures before I tried to sell it for him.
Thanks for the reply. I'll let him know.
If he decides to sell, you all will be the first ones to know about it. I'd have to do an inventory on the parts to ensure that the kit is complete and take pictures before I tried to sell it for him.
02-04-2015, 02:59 PM
#417
allot of the pricing for these kits lends its self to the box condition allot of the buyers seem to want to shelve the kits mine is still in its original box since I made a clone for this build this project has been sitting on my bench for quite some time.
I am going to pick it up again soon my son had a extended hospital stay with broken legs, and just recently has come home so I have some time now to work on models and finish up the paint work on this one.
I am going to pick it up again soon my son had a extended hospital stay with broken legs, and just recently has come home so I have some time now to work on models and finish up the paint work on this one.
02-18-2015, 05:20 PM
#418
Junior Member
Join Date: Sep 2011
Location: Oxford, MS
Posts: 25
Likes: 0
Received 0 Likes
on
0 Posts
Hey folks,
I think I've just about got my dad talked into selling his kit. I was looking at it today and it looks to be all there but one thing, decals. Did these kits originally come with decals or not? I'm just curious so I can properly advertise if they are not included in the kit.
Thanks,
Mike
I think I've just about got my dad talked into selling his kit. I was looking at it today and it looks to be all there but one thing, decals. Did these kits originally come with decals or not? I'm just curious so I can properly advertise if they are not included in the kit.
Thanks,
Mike
02-18-2015, 06:31 PM
#420
Hey folks,
I think I've just about got my dad talked into selling his kit. I was looking at it today and it looks to be all there but one thing, decals. Did these kits originally come with decals or not? I'm just curious so I can properly advertise if they are not included in the kit.
Thanks,
Mike
I think I've just about got my dad talked into selling his kit. I was looking at it today and it looks to be all there but one thing, decals. Did these kits originally come with decals or not? I'm just curious so I can properly advertise if they are not included in the kit.
Thanks,
Mike
02-20-2019, 05:44 PM
#422

Thanks Bigtim for logging your journey.
It has been invaluable in helping my build this model which I will maiden as soon as I modify my muffler (my noise output is 97db which is above my fields limit)
My build log is over at RCGroups Forums using a search for
Royal products - FW-190 A-8 - 60 size scale kit build
Or Youtube for the finished model
Royal Products 60 Size FW190 A8 Post Tuning and Pre_Maiden
Happy flying!
02-20-2019, 06:02 PM
#423
My Feedback: (4)

Join Date: Jul 2003
Location: Marietta,
GA
Posts: 148
Likes: 0
Received 0 Likes
on
0 Posts
Most forums have rules about not responding to really old topics. I think this is the one forum I have read where these archeological topics are really important to keep around. The kits have not been made for decades, so these old threads are fabulous.
@Vortrog, posterity insists that you start a new thread and chronicle your build and flying - and link back to here! Please. . And post a link here to your new thread!
Happy flying!
@Vortrog, posterity insists that you start a new thread and chronicle your build and flying - and link back to here! Please.
. And post a link here to your new thread!Happy flying!
02-20-2019, 09:44 PM
#424

Thanks Bigtim for logging your journey.
It has been invaluable in helping my build this model which I will maiden as soon as I modify my muffler (my noise output is 97db which is above my fields limit)
My build log is over at RCGroups Forums using a search for
Royal products - FW-190 A-8 - 60 size scale kit build
Or Youtube for the finished model
Royal Products 60 Size FW190 A8 Post Tuning and Pre_Maiden
Happy flying!
It has been invaluable in helping my build this model which I will maiden as soon as I modify my muffler (my noise output is 97db which is above my fields limit)
My build log is over at RCGroups Forums using a search for
Royal products - FW-190 A-8 - 60 size scale kit build
Or Youtube for the finished model
Royal Products 60 Size FW190 A8 Post Tuning and Pre_Maiden
Happy flying!
Here's a direct link-