


TBM 93" Zero ARF Build
 01-10-2013, 05:36 PM
#776

My Feedback: (49)
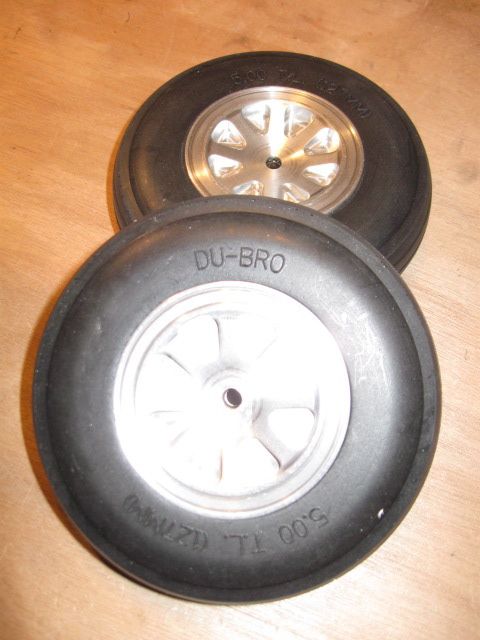
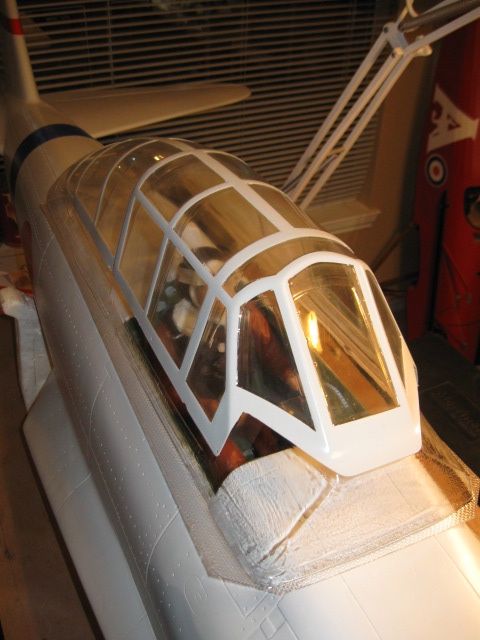
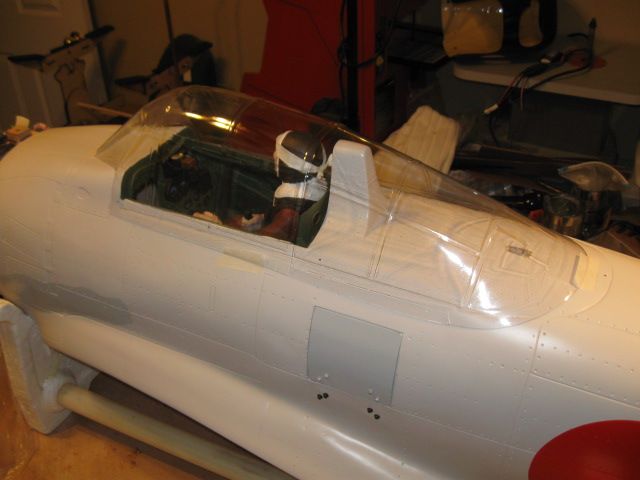
Just got a visit by the Brown Truck. Dropped off some Ziroli parts. Ordered a set of 5" wheels with aluminum hubs. Look very nice, indeed. Also, I tried a Zero canopy since the measurements looked so close to the TBM. It appears it will work and be almost perfect. It's close enough I think will go ahead and trim it out, thus voiding any chance to return to Ziroli. It may be for the Army model Zero vs the Navy model TBM Zero. But it's certainly a very close match. Now I will have to match some paint. I will save the canopy job for after a first flight. Kinda tired of working on the bird, right now.
 01-10-2013, 06:18 PM
#777

LBJ,
I hope that canopy fits! If it does I will order one myself. Was going to a while ago but was chicken to pull the trigger! Wheels look great. Looking forward to seeing you finish out this plane.
John B.
I hope that canopy fits! If it does I will order one myself. Was going to a while ago but was chicken to pull the trigger! Wheels look great. Looking forward to seeing you finish out this plane.
John B.
01-10-2013, 06:48 PM
#778
My Feedback: (49)
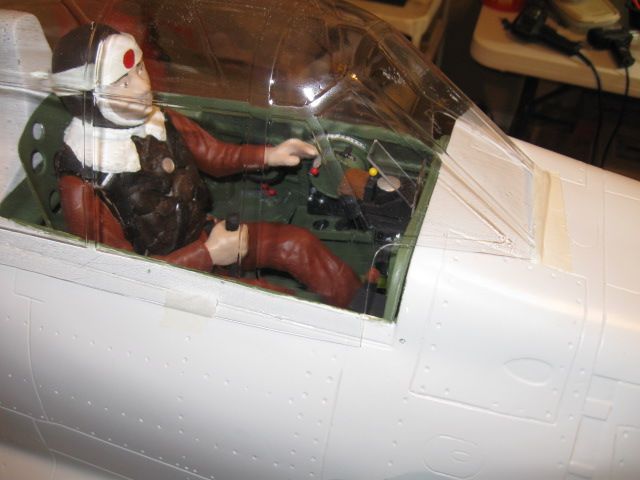
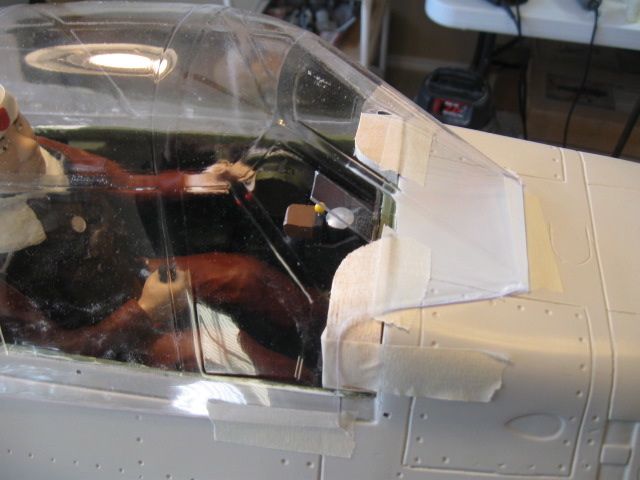
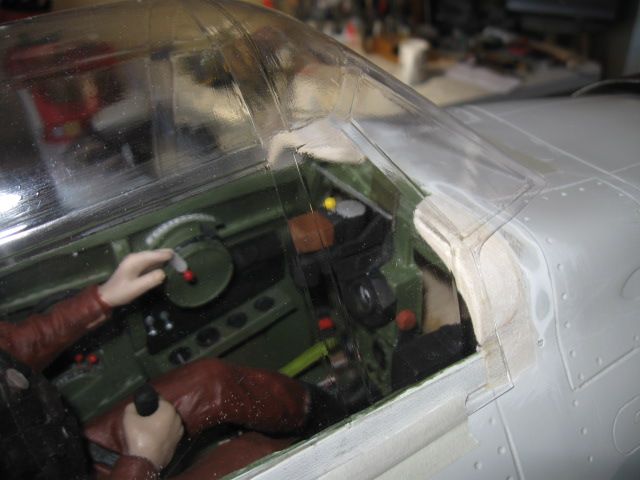
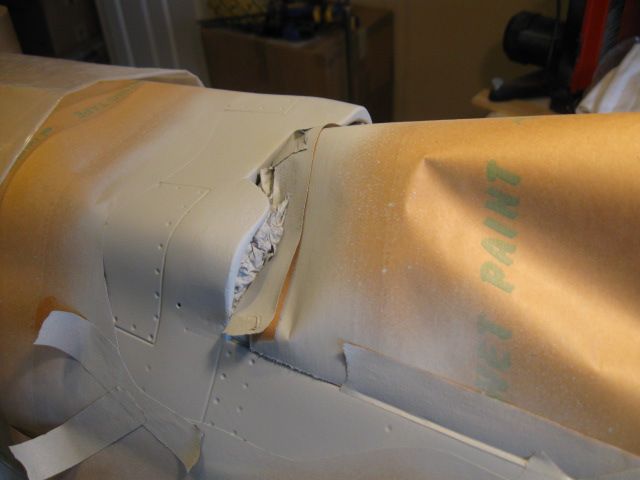
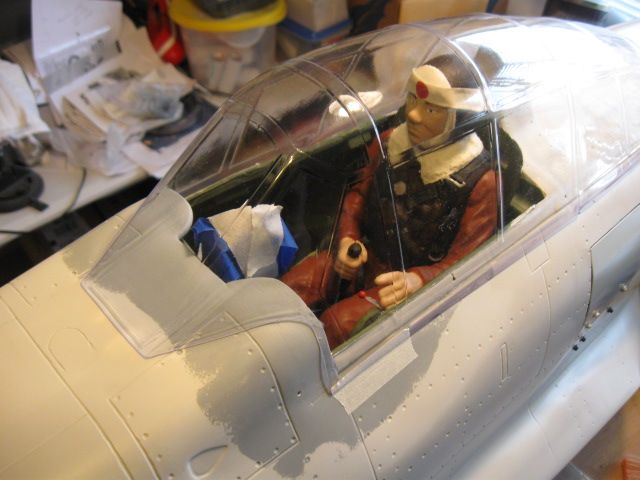
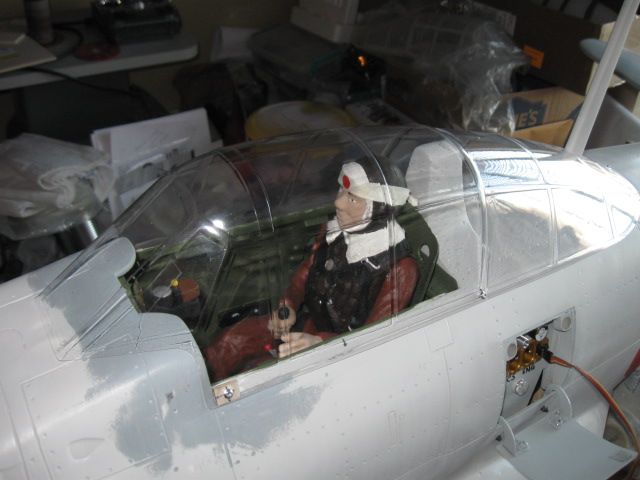
John, I couldn't wait to see if it at least fit. So I did a quick trim out. It's going to need a bit of balsa fill on the instrument panel area to fill a gap in the canopy for that area. Otherwise, the canopy will be a bit short on the rear panel lines for the canopy. I think it will be a quick fix with some 1" wide balsa stock or maybe a piece of 1/32" or 1/64" plywood wrapped around the corner there. That will get paint, so it won't really take away from anything, hardly notice.
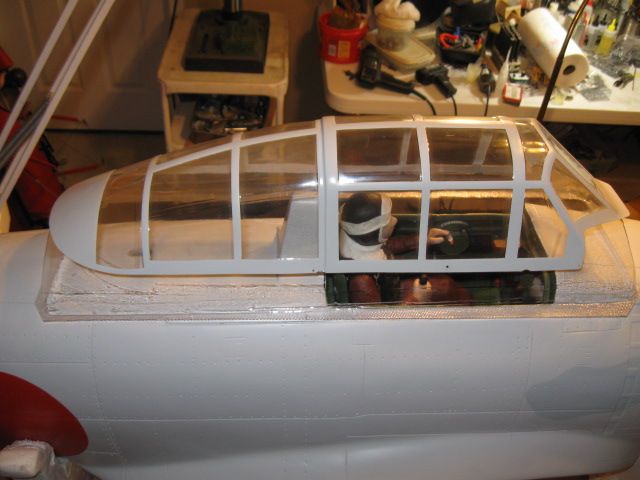
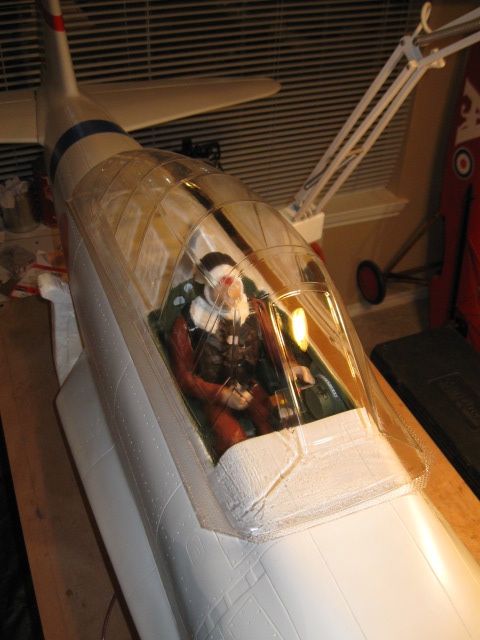
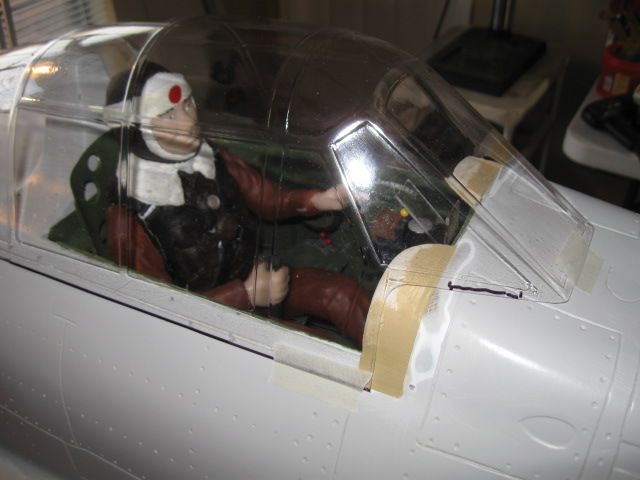
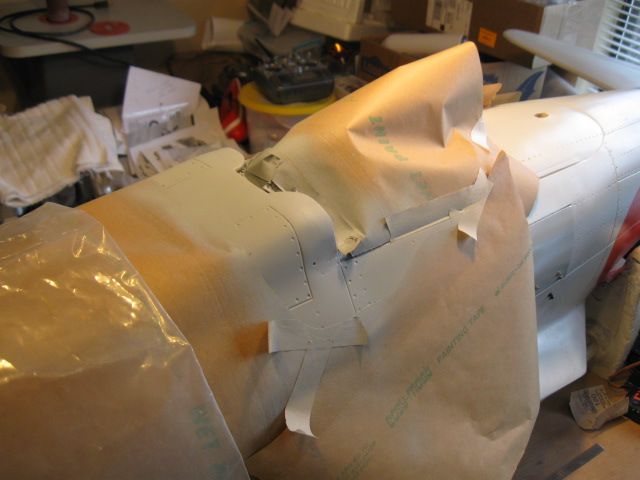
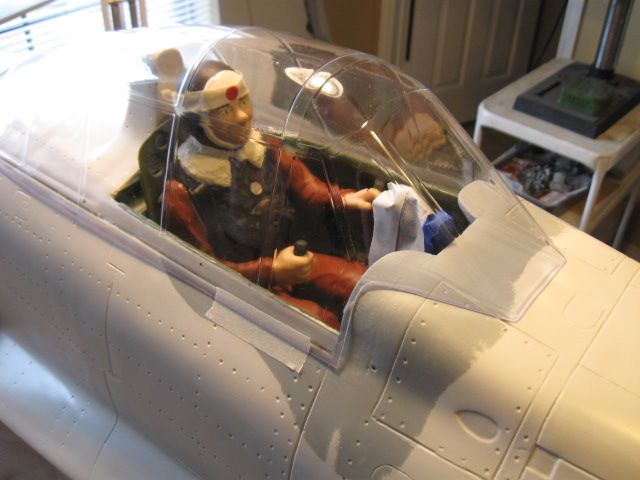
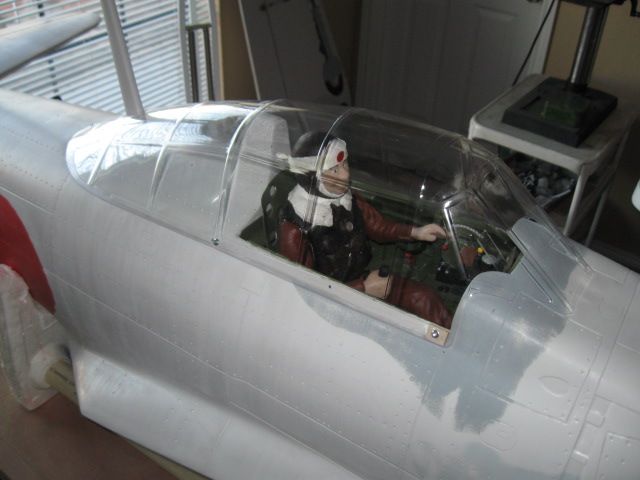
In the first pics, I show the canopy moved forward but the rear end is coming up short. Next, I show the canopy moved back a bit to cover the rear end, but leaving a gap along the instrument panel area. That should be easy to fix.
John, you might want to wait to see how it looks when I done before ordering one. It will also need some minor trimming around the rear perimeter to make it match the contour of the TBM Zero. It's quality work though, and PETG material. But, should you damage yours, it's a lead pipe cinch to order one as it's WAY better than nothing.
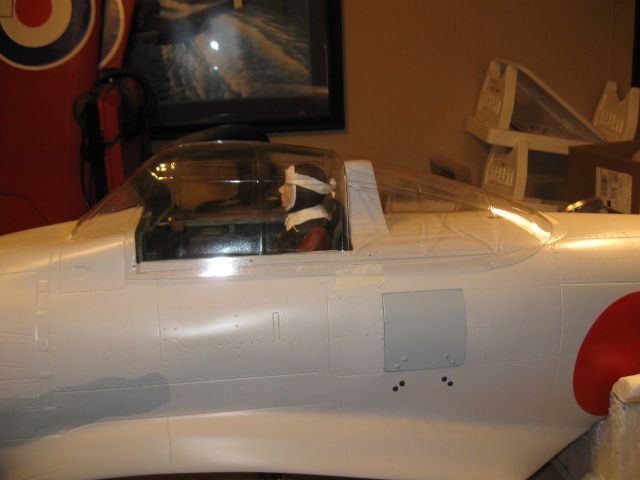
 01-14-2013, 07:47 AM
#781
My Feedback: (49)
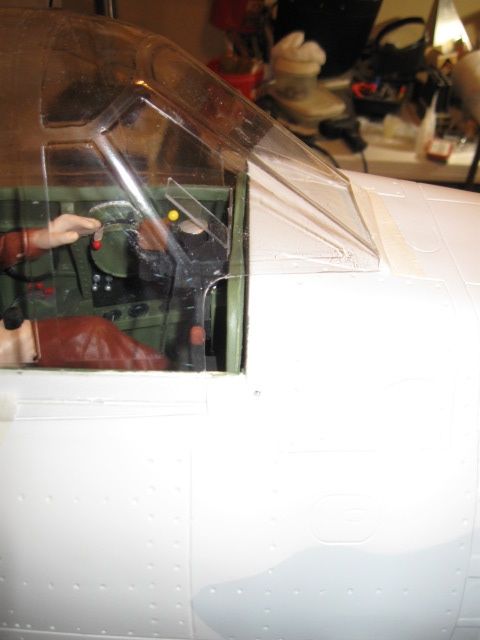
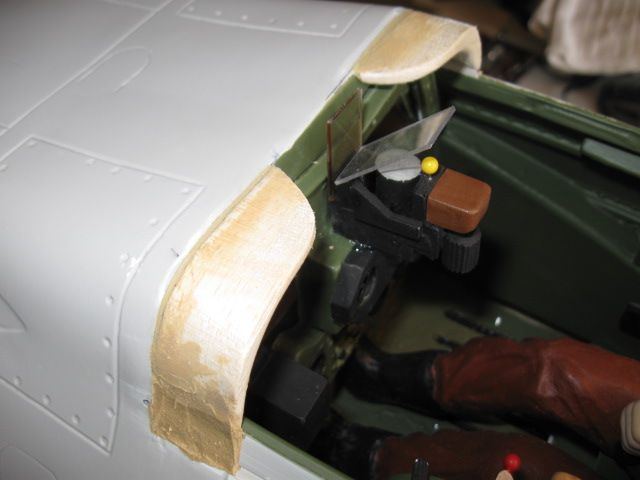
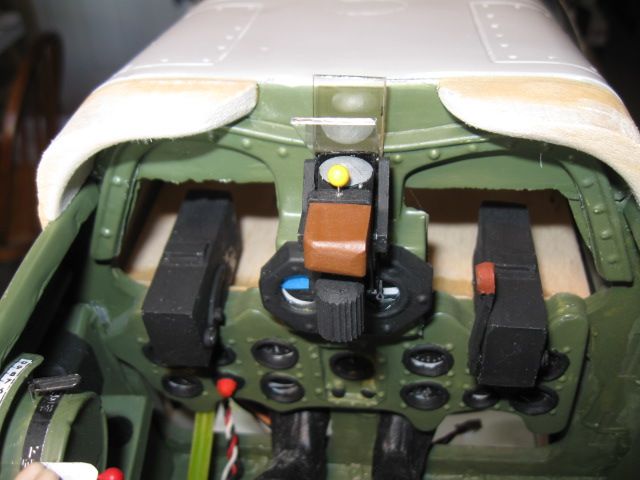
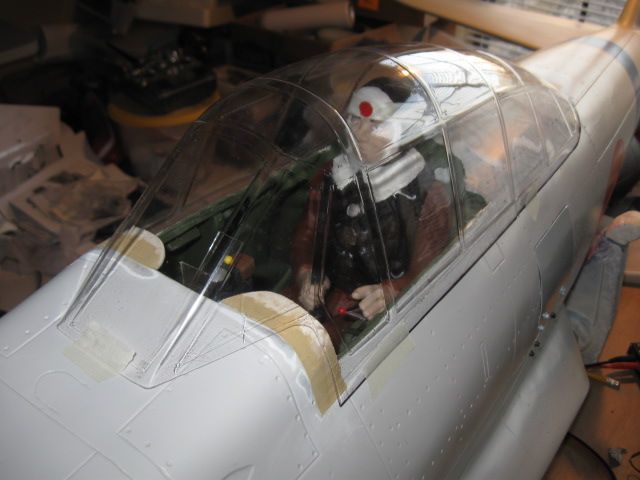
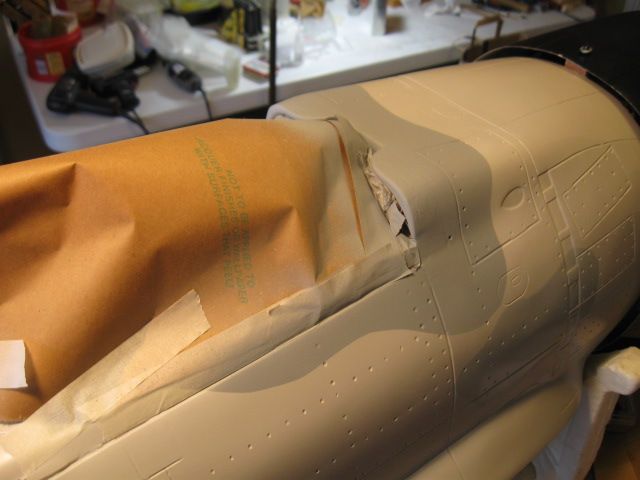
Made some "eyebrows" for the cockpit to fit the new canopy. It will need some bondo and a few fitments to make work. But, about the best idea I can think of to get the Ziroli canopy to fit up front. Not totally scale for sure, but not out of keeping with the situation at hand. Gotta make things work that are available. Of course, the whole canopy will need some trimming around the aft end to make it conform a bit better to the fuselage contours. But, need to get the front end right before I trim the aft.


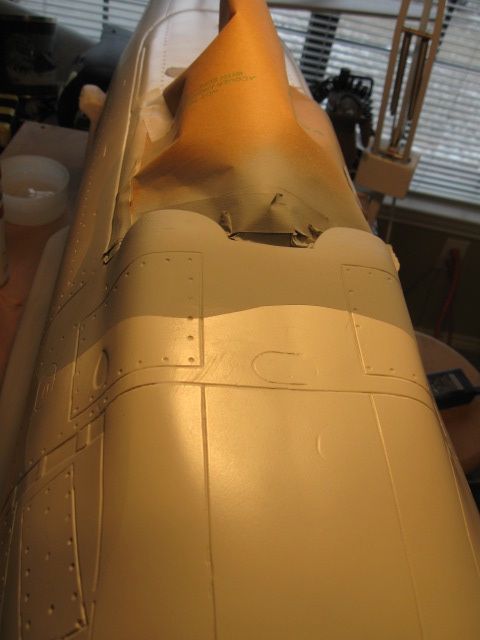
Got a bit more done. Glued the eyebrows down and filled in a bit. Cannot get all the fill done in one pass. But, one more should smooth the gaps out. I'll hit it with some thinned out epoxy for strength and then give it a light coat of primer.
Got a bit more done. Glued the eyebrows down and filled in a bit. Cannot get all the fill done in one pass. But, one more should smooth the gaps out. I'll hit it with some thinned out epoxy for strength and then give it a light coat of primer.
01-14-2013, 03:22 PM
#782
My Feedback: (49)
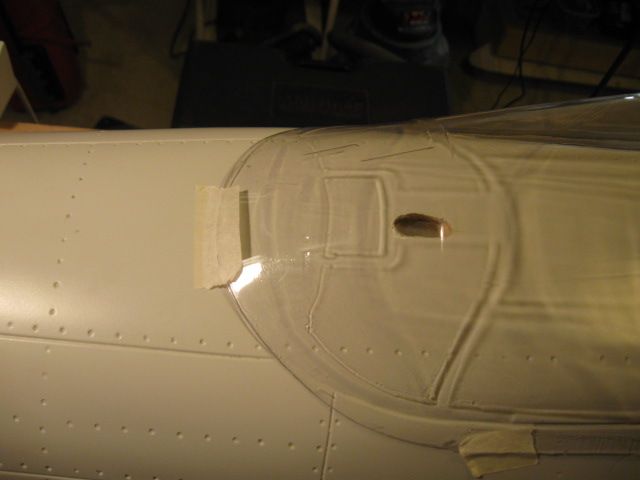
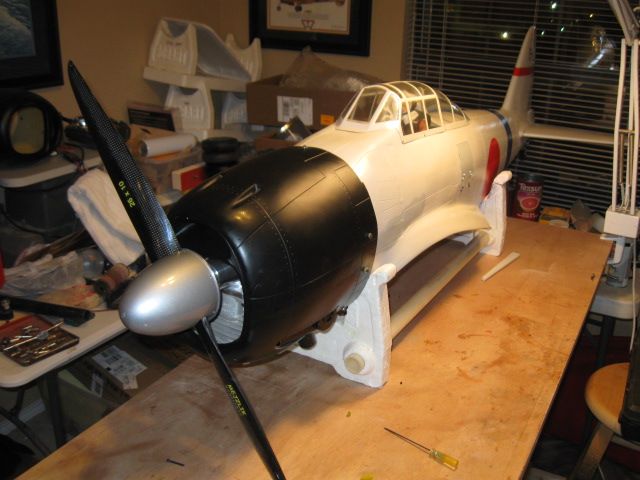
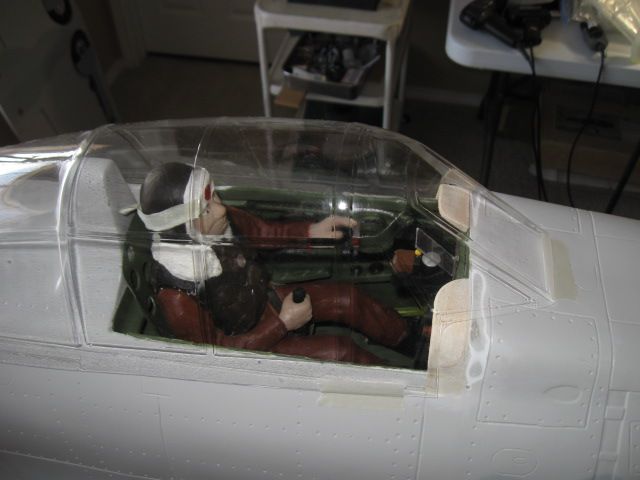
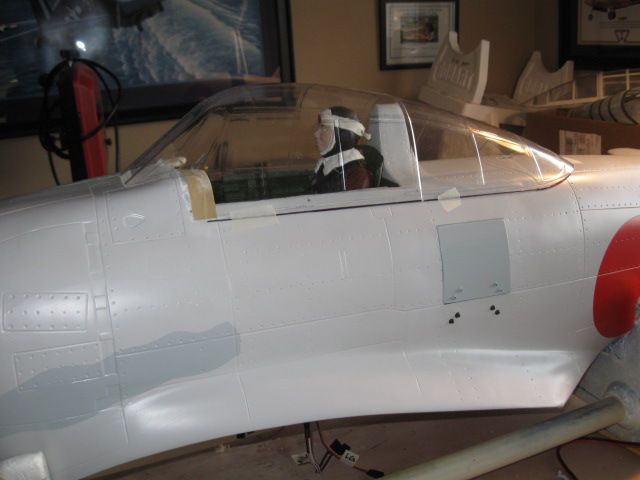
Got the canopy trimmed to be parallel with the canopy frame and matched the curve around the aft end. Looks like it's going to be a winner! With this cool weather we are having, I might be able to find some fu-fu can paint and get it installed before first fight.


 01-16-2013, 01:47 PM
#787
My Feedback: (49)
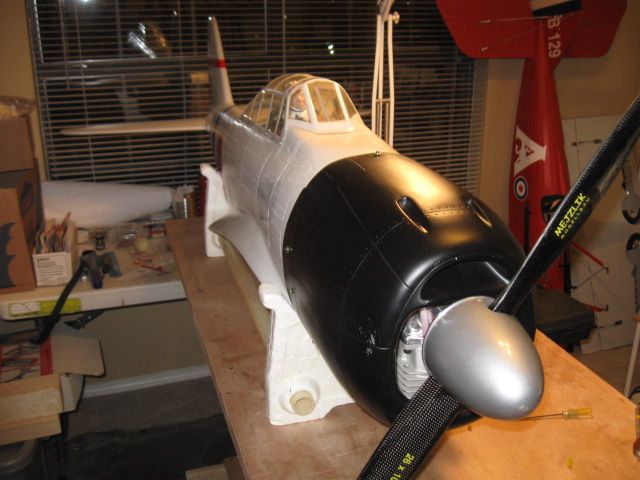
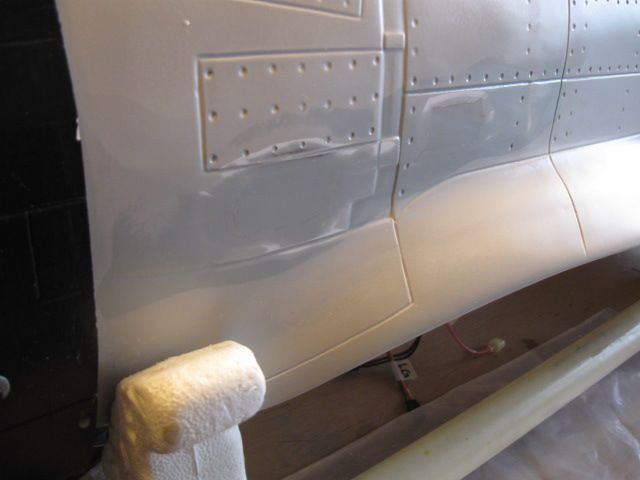
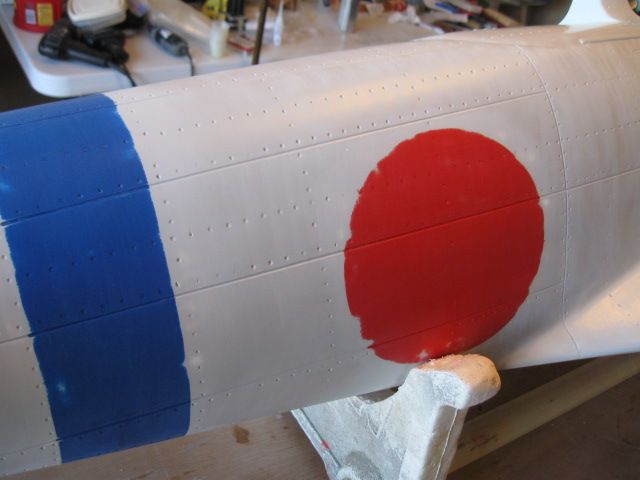
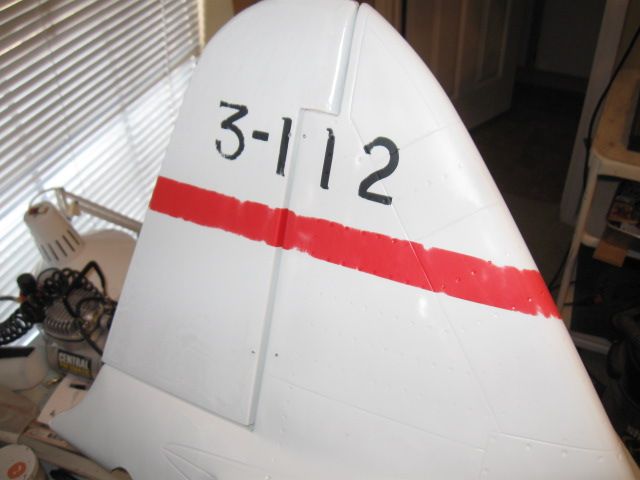
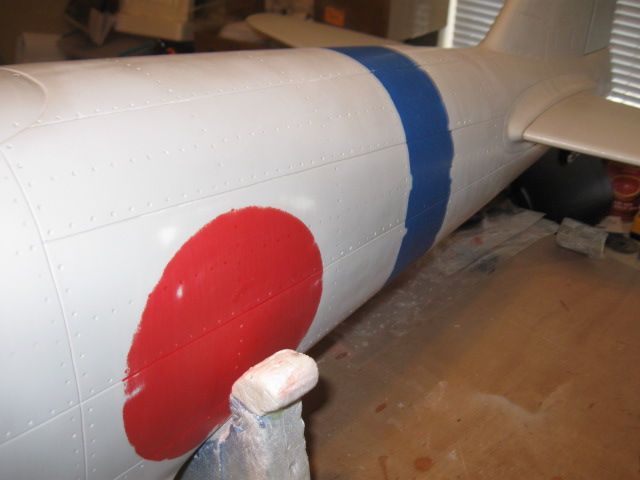
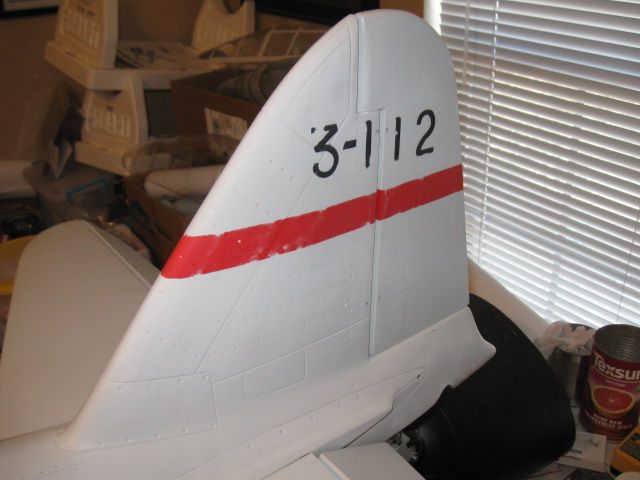
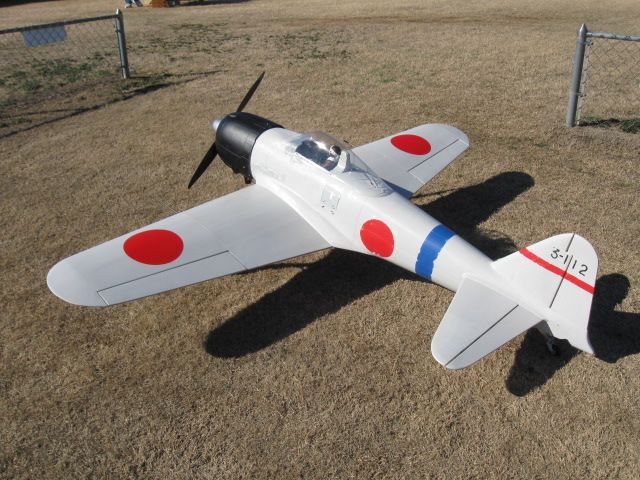
Decided to wet sand the fuselage and get her down and used looking. Most pics of Zeros in the field are rougher than a cobb. Can't hurt her, for sure. I'm sanding the fuselage strictly from top to bottom, or vertically, as that's the way she would weather. Must admit, I worked up a sweat doing this. Took about 45 minutes per side. Still have the wings to go over. I plan on leaving the finish just like it sits.

01-17-2013, 03:22 PM
#788
My Feedback: (49)
I screwed the canopy down and then marked it for final trim. I think it looks pretty good. Needs some paint, but may not get it painted before I take her out and run the engine. I can paint anytime, but not do things at the field. If the engine runs well, might get a flight in over the weekend. That'd be cool.
I plan on flying with the new canopy as I'm not sure how the old one will hold up under DA-85 vibrations. Might be fine, but since I have the new one all but finished, I'll use it.
I plan on flying with the new canopy as I'm not sure how the old one will hold up under DA-85 vibrations. Might be fine, but since I have the new one all but finished, I'll use it.
01-18-2013, 02:50 PM
#789
My Feedback: (49)
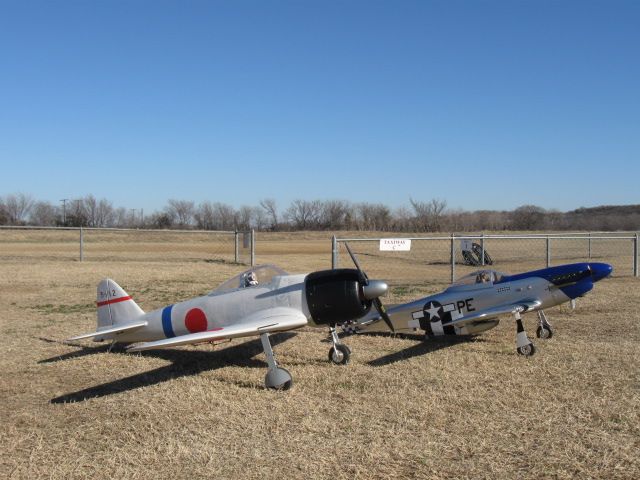
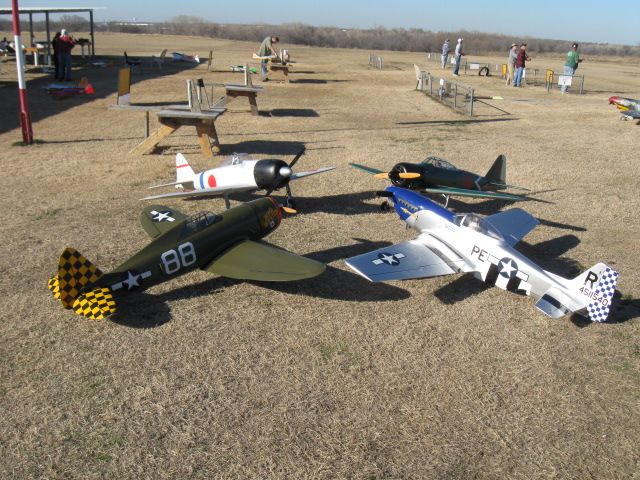
Got to the field today, but didn't fly. The carb has a problem of sorts and spewed fuel right out the back end while I was fueling up. It also spewed it right into the engine. Right now, I'm not sure what is wrong. But, after pulling the plug and draining the gas out, she fired right up, but ran only 5 seconds. Something in the carb is amiss. Will have to pull engine and see what's goionog on inside the carb. Shame, but at least I got her out and got some pics with an Aeroworks P-51D. Kind of dwarfs it.

01-20-2013, 03:16 PM
#790
My Feedback: (49)
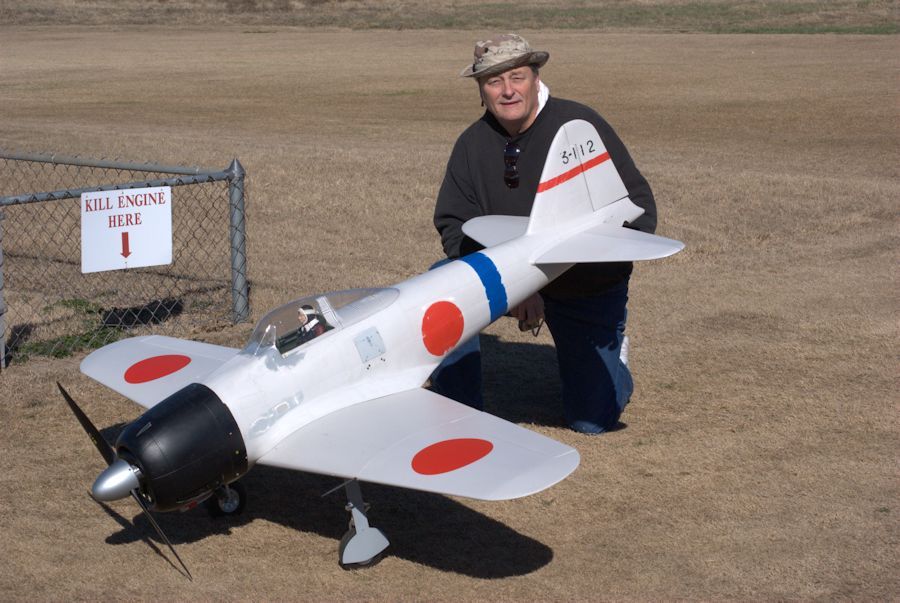
Got her flown today, Sunday Jan 20th '13. Glenn Baker got some inflight pics and a movie, maybe. Great pilot Barry Ponder flew her for me and she was just about perfect on the first flight. I might remove 3 oz of nose weight but will fly her a few times myself before I change that up. Engine started right up today after getting the carb back to normal. I cannot really think of any negative comments about the flights. Of course, I am a bit biased, hehehe.
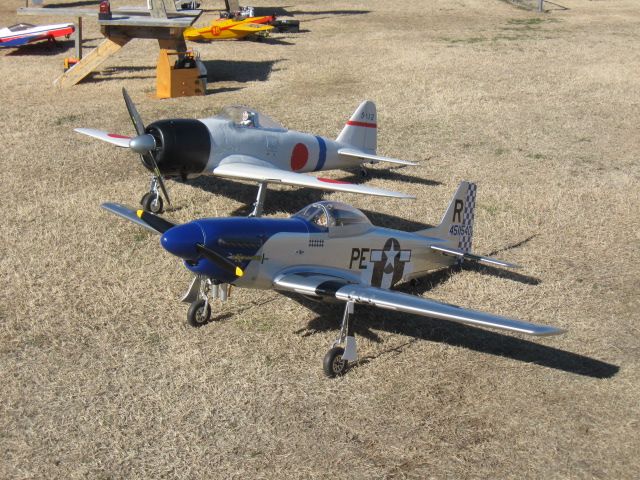
I got one pic on the ground after flight, but with the engine running, so it's not just a typical static pic I usually post. Had a pretty good warbird turnout since it was 71 degrees and wind 10 mph from the South. Don't get many days like this in January.
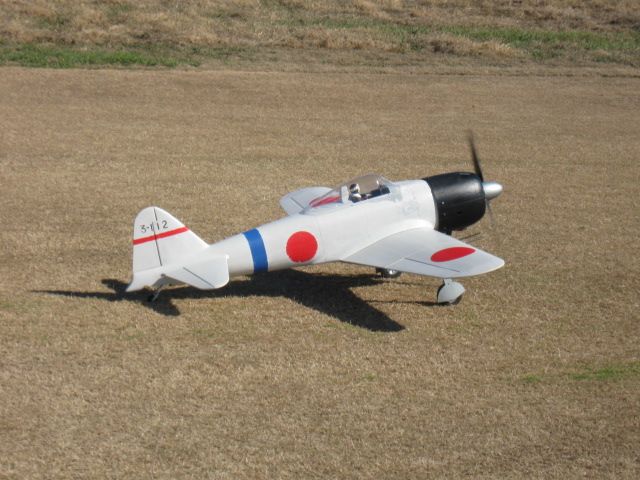

I got one pic on the ground after flight, but with the engine running, so it's not just a typical static pic I usually post. Had a pretty good warbird turnout since it was 71 degrees and wind 10 mph from the South. Don't get many days like this in January.
01-21-2013, 03:57 PM
#792
My Feedback: (49)
Glenn Baker took this video of the Zero and a couple of other planes on Sunday. Zero is second on the film. Wasn't too long, but at least shows her inflight.
http://www.youtube.com/watch?v=2oCiK...ature=youtu.be
http://www.youtube.com/watch?v=2oCiK...ature=youtu.be
01-22-2013, 03:18 PM
#793
My Feedback: (49)
I finally flew the lady today! Great weather, even better than Sunday. She was gentle and easy to fly, just like all had told me. Very sweet. Felt light as a feather. Never felt like a 31 pound plane. Felt as easy to fly as my smaller 80" CMP Zero with DLE-55. I did have a bit of a learning curve on landings as I had to make a couple of wave offs on the 2nd flight to get in the proper landing groove. But, she slowed down nicely and I am quite happy with the bird. Barry Ponder flew her too and put on a WARBIRD SPECIAL show at the end of the day. Man, this is a WARBIRD SHOWBIRD for sure. COMES BY FAST AND LOUD!!!!!! Gosh Golly Gee! We were trying to guess at the speed and several thought 90 to 100 mph. Likely so. Very pleased.
 01-22-2013, 06:38 PM
#795
LBJ,
Very happy to see your zero flying. Watched the video and noticed on take off the tail wheel was barely up and the plane was airborne. Curious if the tail was being intentionally held down or not? On mine need to hold some up elevator to keep her from nosing over. I let her build up some speed then once the tail comes up and speed is enough then take off. Also were is your CG?
Also, your gear doors really add to the Zero look. I see I will be adding them to mine before flying season starts.
John B.
01-22-2013, 07:45 PM
#796
My Feedback: (49)
John, I flew her twice today (my first flights) and had to hold back pressure to keep from nosing over at first. I let off and she tried to nose over and I over-compemsated a bit and she almost got airborne, but I let off a bit and had a better takeoff. That video was shot with a friend Barry Ponder flying for me. He was just holding a bit of aft stick and she broke ground. Neither one of us ever hit full power on takeoff.
My CG is at 30 percent MAC or 6" aft of the LE at dead center of the wing. This also is equal to the 4.5" aft of the LE at the outside wing joint (where the outboard wing section joins in).
The doors really add to the scale look. I don't know why the TBM staff or model designers or whomever got carried away with the way they did their doors.
I will say the VicRC CG stand was very useful in doing the CG figuring. No way can you hold that plane on your fingertips! ha
I forgot to add that the TBM spinner broke on the last flight. One of the screws came out and another one cracked the CF clean. I ordered a Vortech 4" aluminum spinner tonite in the P-51 style as that's the closest they have to a Zero. No one makes a true Zero spinner that I know of. Vortech's are nice spinners, they attach at the center of the cone with one machine screw. Nothing to spin out under centrifugal force.
Pic by fellow RC flyer Bill Glen-Walker
01-28-2013, 09:23 AM
#797
My Feedback: (49)
I think the proper word here is "baffle" not shield. Couldn't think of it at the moment I wrote this.
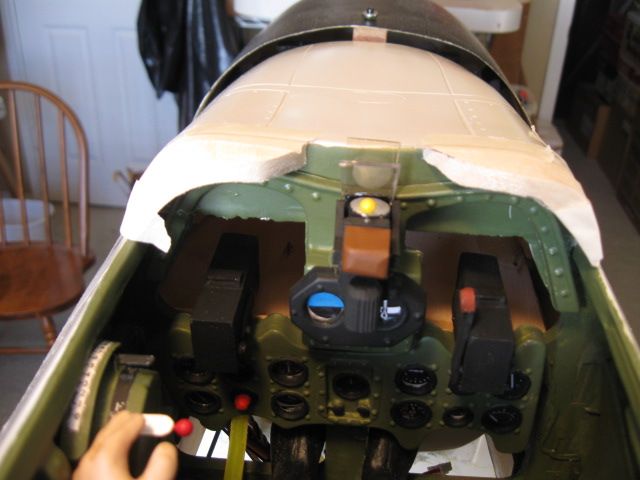
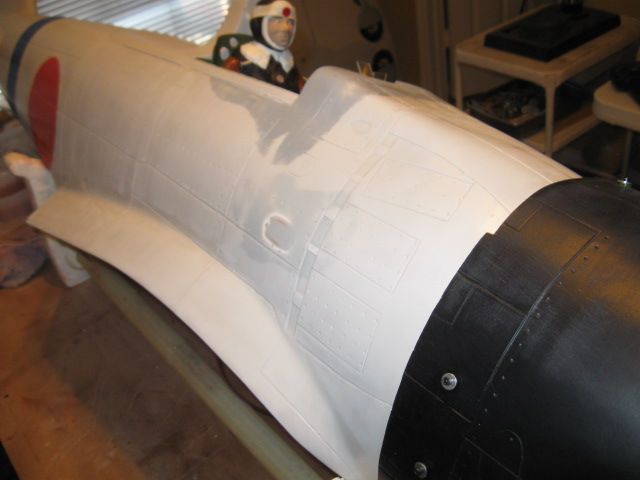
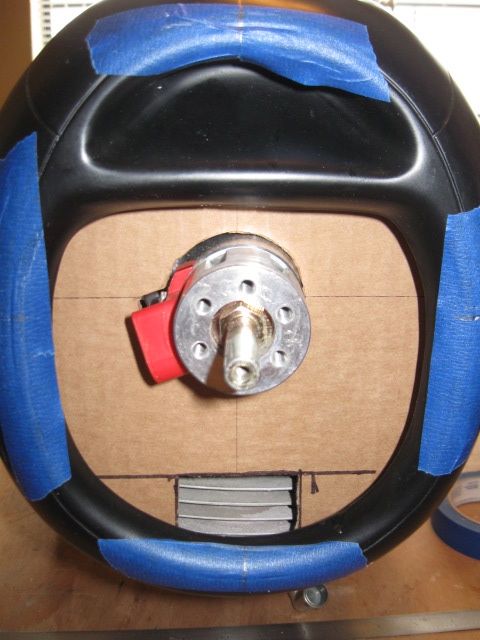
Continuing on the Zero mods. This is an engine shield to force cooling air thru the one hole at bottom, but mainly to stop the engine popping. DA suggested doing this since the huge amount of air coming thru the cowl is likely the cause of the popping and rough running by overpressurizing the carb. This is certainly a good idea just on the merit of proper cooling during summer months. So, it will come in handy no matter if it does not fix the popping and rough running. Not to mention giving the cowl some real strength on flip over (that hasn't happened yet).
First was a paper template followed by a cardboard template so I could actually fit it to the cowl. Next will be the plywood part itself. I will glass it to the cowl with some 2 inch tape and seal it all the way around.
The air intake is bigger than it looks on the first pic. It extends down further than shows in the pic. There is a gap of about 1 inch from the cowl front to the plywood shield. The hole seems small, but if all the air is forced thru that hole, it will work. It can be enlarged a bit after flight testing if the temps are still too warm. The spark plug has to be pulled to get the cowl on with the shield in place. Not a big deal once it is all done and tested.
The blue tape on the cowl is to establish the engine centerline.
I can supply a paper template of this pattern to anyone who wants to do theirs.

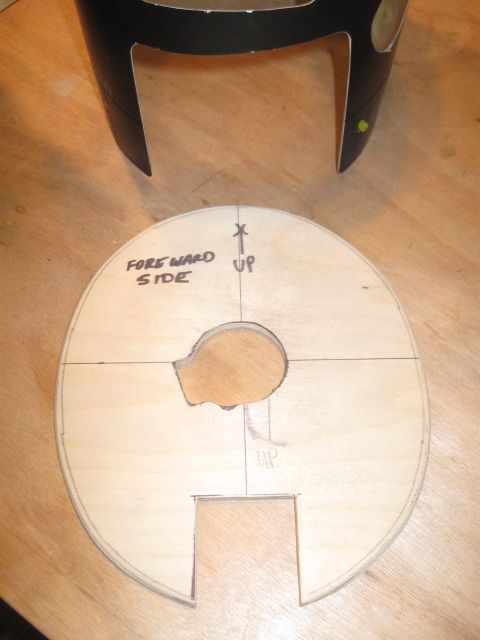
Got the plywood cut, drilled, and sanded. Spindle sander works well for this and makes things a breeze.
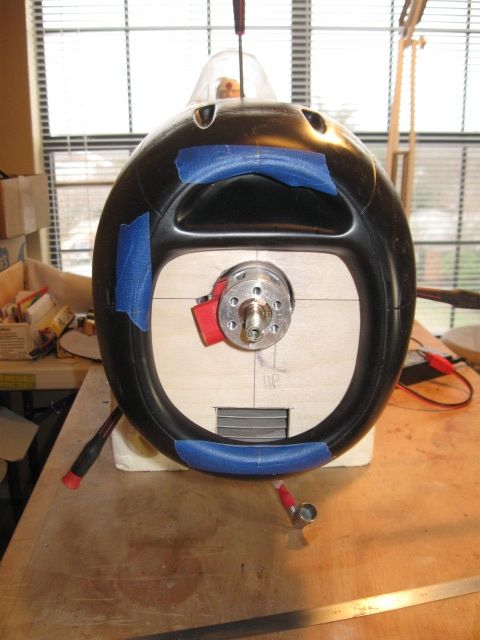
Continuing on the Zero mods. This is an engine shield to force cooling air thru the one hole at bottom, but mainly to stop the engine popping. DA suggested doing this since the huge amount of air coming thru the cowl is likely the cause of the popping and rough running by overpressurizing the carb. This is certainly a good idea just on the merit of proper cooling during summer months. So, it will come in handy no matter if it does not fix the popping and rough running. Not to mention giving the cowl some real strength on flip over (that hasn't happened yet).
First was a paper template followed by a cardboard template so I could actually fit it to the cowl. Next will be the plywood part itself. I will glass it to the cowl with some 2 inch tape and seal it all the way around.
The air intake is bigger than it looks on the first pic. It extends down further than shows in the pic. There is a gap of about 1 inch from the cowl front to the plywood shield. The hole seems small, but if all the air is forced thru that hole, it will work. It can be enlarged a bit after flight testing if the temps are still too warm. The spark plug has to be pulled to get the cowl on with the shield in place. Not a big deal once it is all done and tested.
The blue tape on the cowl is to establish the engine centerline.
I can supply a paper template of this pattern to anyone who wants to do theirs.
Got the plywood cut, drilled, and sanded. Spindle sander works well for this and makes things a breeze.
01-28-2013, 07:17 PM
#798
LBJ,
Decided after seeing your nice work it was time to add the gear doors to my Zero. Here are a couple of pictures. Mine has the 5.0" Sullivan wheels. As you can see in the retracted position they stick out a fair amount. The gear on the left in the picture especially does. These wheels measure 1.75" wide. Can you tell me how wide the Dubro tires on the Ziroli hubs are?
Withe the gear down you can see how the door lines up. While not in exact location you can see that the wheel is very likely just too wide. Of course do not expect the doors to fit perfectly but thinking I am pretty far off and if the wheel were even .25" narrower it would be a big help.
I look forward to hearing from you.
Regards,
John B.
01-28-2013, 07:58 PM
#799
My Feedback: (49)
John, you can shim the gear mount-end a bit to raise it up a tad and thus push the tire end down a bit in the well. That's what I did. Put a brass wheel collar or a washer or two under the far end mounting hole on both sides and that should do the trick. Just don't screw the middle two screws on each side in too hard without a support under them too. Warping the plates will lead to retract problems. My tires measure 1.5" wide. I really don't think you will have a problem with yours as they don't really show inflight. The main reason I re-made my doors is for Gear Down and taxiing around and static display. Those doors that came with the Zero are made out of some tough stuff, like G10, but are butt ugly and hardly scale. If you feel the need, you can order new Ziroli 5" aluminum hubbed wheels for $35 each, which I consider a real good deal. Plastic wheels won't always hold up on a hard landing. Yours may be aluminum already, so that should work, except for possibly the width. Again, the doors are for on the ground viewing enhancement, to me anyway. As long as they don't come off inflight, they aren't that critical in the air. The whole project is an easy one as far as mods go. One more thing, remember, the weight of the plane will compress the gear struts and lower the doors more than with weight off the gear, so don't let the doors go lower than the axle shaft without weight on wheels.
01-29-2013, 07:22 PM
#800
LBJ,
Measured everything up and know what I need to do to fit the doors. To keep the doors from rotating is that accomplished by the door laying flat against the top flat part of the strut? How did you attach it at the top? Did you simply glue it on there? Will certainly use the Velcro as you did.
Also going to get the thinner profile Dubro wheels. That .25" less thickness will really help to get the door at a more pro typical angle. The Sullivan wheels while still serviceable really need to be replaced. Thought about Ziroli wheels but figure I plan to fly this ship for at most 3 more seasons so will try the Dubros.
Regards,
John