


Balsa nose cone construction
 03-19-2016 | 02:18 PM
#1
Thread Starter
Senior Member
My Feedback: (2)
Joined: Jan 2004
Posts: 636
Likes: 0
Received 0 Likes
on
0 Posts
From: Helena,
MT
I was hoping someone in this section could help me out on this one. To start off, I am scratch building a 60 size twin engine plane. It will be powered by 2 - 36 engines. The fuse will have a nose wheel and a bulkhead directly in front of the nose retract. My dimensions of the bulkhead are right about 4" tall by 3" wide. The nose has been drawn up elliptical both directions and will end just about 4" in front of the bulkhead.
And now now for the million dollar question. How do most builders construct the nose cone for a plane like this.
My original idea was to make a ply template of the bulkhead and glue a large balsa block 3 x 4 x 4 on the template. Drill a hole through the center of it and place a bolt or dowel through it and then chuck it in the lathe and turn and sand it down from the rectangle end transitioning to the round nose. I would then hog out all the balsa from inside the cone until I had about 1/4" thickness. I would then cut it off the template and sand and glue it to the bulkhead. Finally I would Sand it to flow into the fuse.
Does this his sound about right? Any tips our other methods out there?
thanks for any comments you may have.
 03-19-2016 | 04:46 PM
#3

fast approach would be to turn the whole thing using a 4 " diameter to a small radius at nose,allowing a bit for trimming,then take out a 1 inch chunk in the middle about half way,slice it and paste back together and sand to smooth.In other words,the cone is sliced along twice for 2" and cut across once,with the band saw.The shape is then very close to being what you need.
 03-20-2016 | 12:44 PM
#5
Thread Starter
Senior Member
My Feedback: (2)
Joined: Jan 2004
Posts: 636
Likes: 0
Received 0 Likes
on
0 Posts
From: Helena,
MT
I was thinking of doing it in fiberglass but couldn't figure out how to get the joint between the fiberglass and fuse to look seem less. Even if I could get the joint smooth, I can never find paint the same color as my covering material. I have tried to use plastic covering over fiberglass with less than desirable results.
03-23-2016 | 06:02 AM
#7


+1 Foam is the quickest and easiest way to get the form you want .
03-24-2016 | 11:04 AM
#8
Thread Starter
Senior Member
My Feedback: (2)
Joined: Jan 2004
Posts: 636
Likes: 0
Received 0 Likes
on
0 Posts
From: Helena,
MT
I already bought a super light balsa block from hobby lobby with a 40% off coupon and glued it up. I glued the top and side profiles on the block, cut them out on the band saw then tack glued it to the front of the fuse and sanded round. This is what I came out with so far. I still need to remove it and hollow out the inside some. Total cost of just the nose cone is $4.50. Kind of a expensive piece of wood but it is done now. 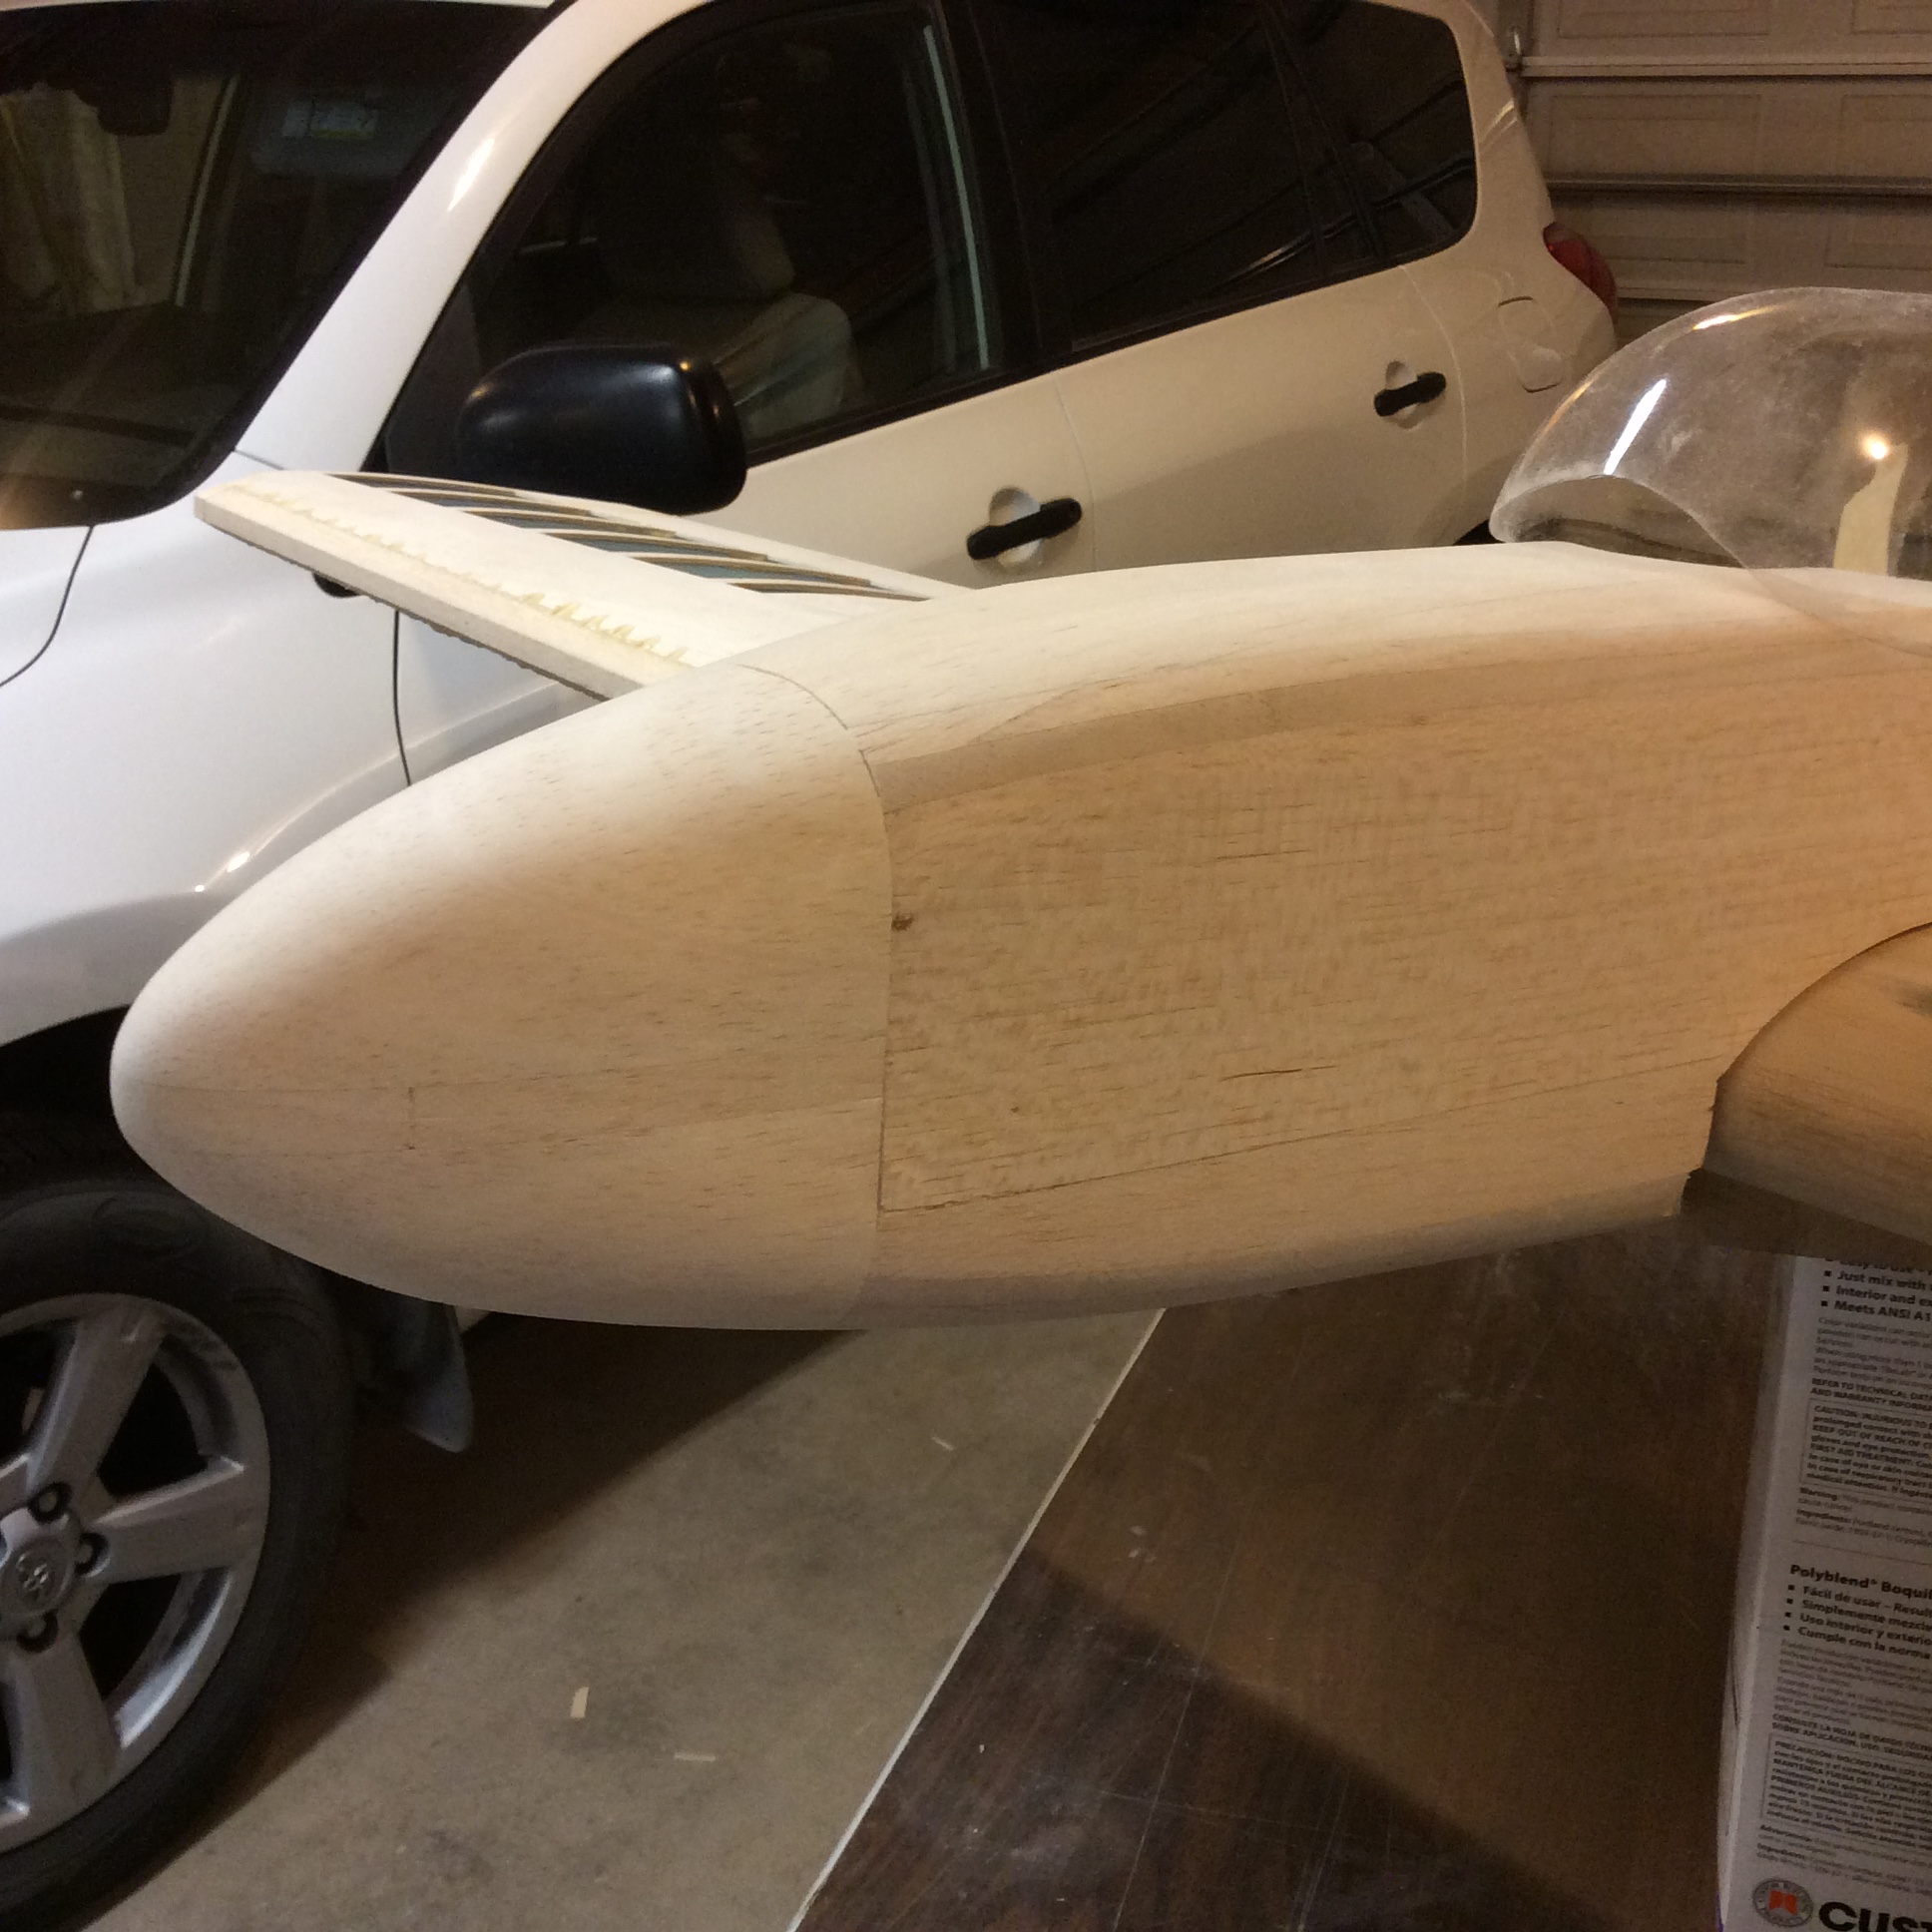
03-24-2016 | 11:10 AM
#9
Thread Starter
Senior Member
My Feedback: (2)
Joined: Jan 2004
Posts: 636
Likes: 0
Received 0 Likes
on
0 Posts
From: Helena,
MT
Going back to the foam and fiberglass method, if you wanted to use covering film over it, will it work. That was my only reservation to that method. I never can seem to find the right color paint to match my covering
03-25-2016 | 08:24 AM
#11


John, for someone that was worried about their skills you did better than most that would feel they didn't need any advice. That looks lovely.
My only suggestion is to leave the wood block a lot thicker than 1/4 inch. And in fact for durability against any nasty landings and given that many of our models often need nose weight anyway you might want to consider leaving it solid. In particular if you started with a block that was softer and lighter.
If you hollow it at all maybe it would be just to add any additional nose weight. So given all this I'd suggest that you leave the block only tacked in place for now. Finish off the model and cover the wings and tail. Place the components and check for balance. Then bust the tack glue spots and depending on any weight trim either just glue the block on as solid or hollow it to lighten or hollow to allow placing the lion's share of any ballast you need. THEN glue it into position permanently and cover the fuselage for a seamless look.
If you have access to the rear of the block through the nose bulkhead via the nose gear well you might also consider a small hollowed area and a plug in the plywood bulkhead to allow you to feed in and remove some lead shot as an aid for final trimming with flight testing. After all the further forward it is the less you need.
03-26-2016 | 06:59 AM
#12
Thread Starter
Senior Member
My Feedback: (2)
Joined: Jan 2004
Posts: 636
Likes: 0
Received 0 Likes
on
0 Posts
From: Helena,
MT
That's some good advise bMatthews. I never thought that far ahead. I am hoping for no additional ballast as my battery and servos were going to be placed last. I will leave it in place until nearly complete then.
04-03-2016 | 10:53 AM
#13
Senior Member
Joined: Dec 2010
Posts: 210
Likes: 0
Received 0 Likes
on
0 Posts
From: merrill, WI
it can also be shaped from thick laminations. use light, soft 1/2" sheet stock and cut "u-shaped" laminations that graduate in size to make the general shape, with the two outside laminations being full pieces. the mas should be cut a bit larger than the smallest dimension each lamination will be shaped to. then, sand it to final shape. I find this method easier than shaping a solid block because the profiles of each lamination become guides to the final shaping. if you keep roughly 1/4 to 3/8 inch lap on each graduating lamination, you will end up with roughly that same wall thickness when sanded to final shape.
it's always worked for me .
it's always worked for me .


