


Scratch Build New Dog Plane From Coroplast
 12-06-2020, 05:04 AM
#26


Looking good. I’ve followed this and your Biplane build. I’ve built a few models of the SPAD Debonair. I tested coroplast with E6000 glue and found it quite strong. Just a small piece but didn’t check for cure time. I’m going to test again to see if it is good for a build. I’ve used CA in my past builds.
Where do you buy your coroplast? I have one, maybe, supplier in my area. I need to check them out. Most of my supply is from old political signs. Thanks.
Where do you buy your coroplast? I have one, maybe, supplier in my area. I need to check them out. Most of my supply is from old political signs. Thanks.
 12-06-2020, 06:59 AM
#27

Thread Starter

Thanks for following. I'd like to see more people try building with this material.
I have good luck with the slow CA. I clean it first with Windex and flash it with a torch. When gluing Coroplast to Coroplast, it takes a long time to dry for a full cure, I wait about three days to be sure and I just use dots of it like rivets. That was suggested by the guy who built the 8 foot Piper Cub and it seems to work well. I bought two four oz bottles of it a while back and so far I've only used about three oz.
I get the Coroplast from Reece Supply Company in Dallas, they are in a few other cities in TX and five other states. The price is around $12 per 4x8 foot sheet. I tried to get some from a sign company but they wanted $40 a sheet, which I thought was robbery. Home Depot has it in white at some locations, depending on the manager, and based on my past experience, they may order other colors for you and the price will be at least double what they charge at Reece.
One thing I haven't figured out so far is an easy way to cut the flutes off of it so I have one side of the material with no flutes, just the flat sheet. I'd like to make some thin inspection panels or strips to join parts together.
12-06-2020, 05:08 PM
#28
Thread Starter
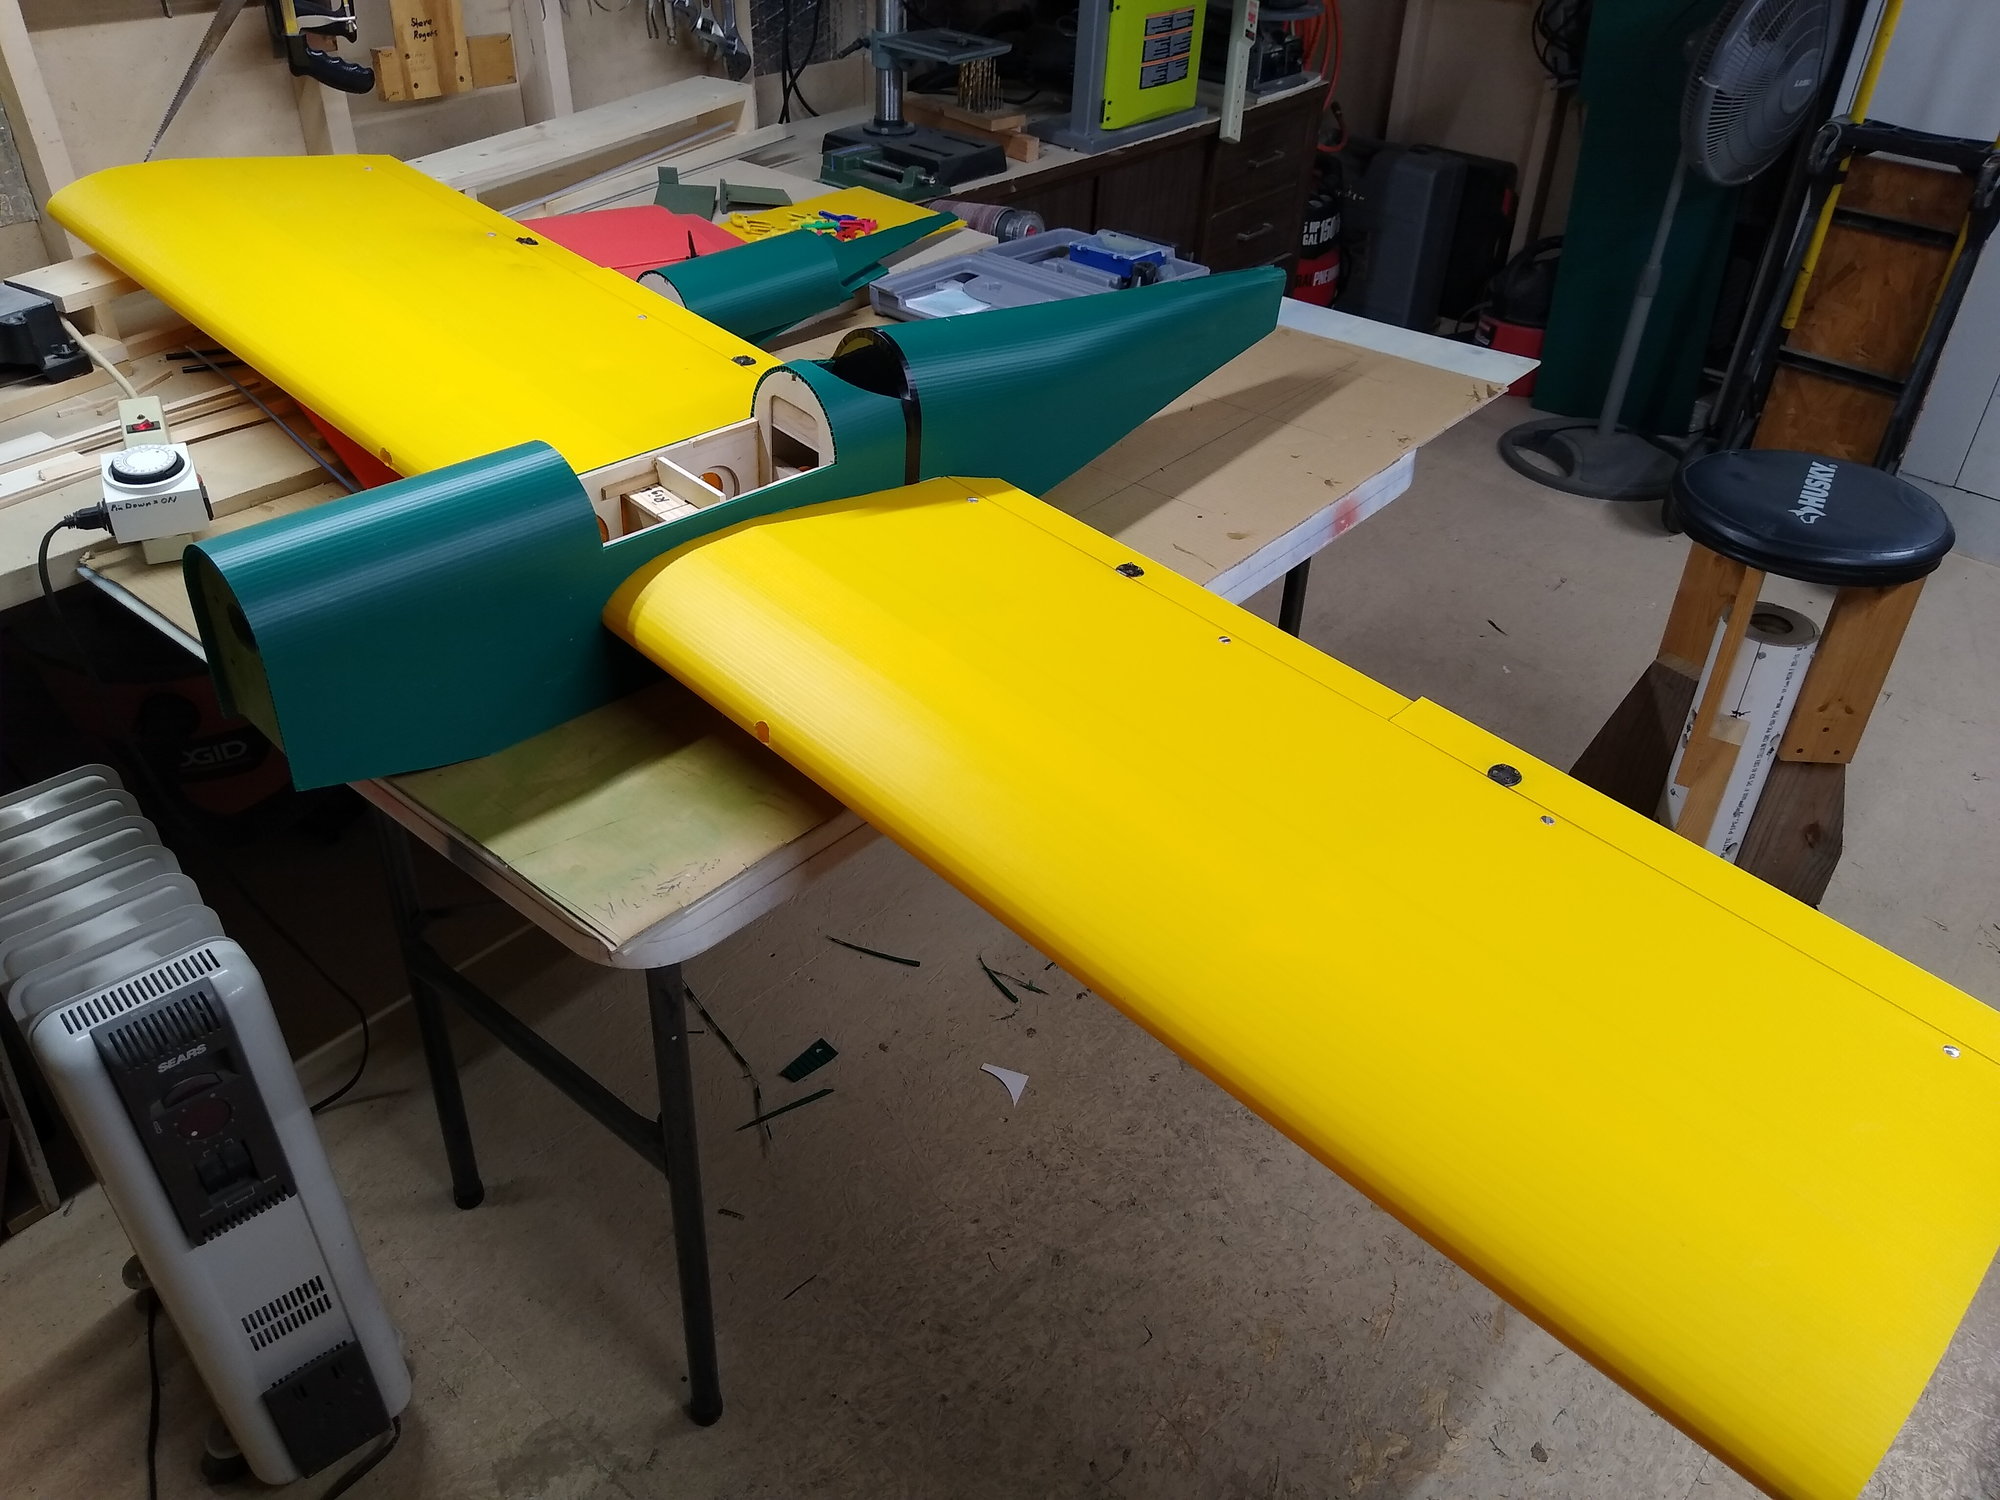
Finally finished the fuselage covering. Now all I need to do is put on the servos, tail feathers, engine, fuel tank, receiver, switches, batteries, landing gear and I'll be done.

12-07-2020, 05:23 AM
#29
Thanks for the info on Reese Supply Company. Closest are Dallas and Houston. I will remember if I make a trip to those cities. I will check with a local area plastics supplier to see if they sell coroplast. I bought one sheet from a local sign company but they have closed down. I’m left with political signs.
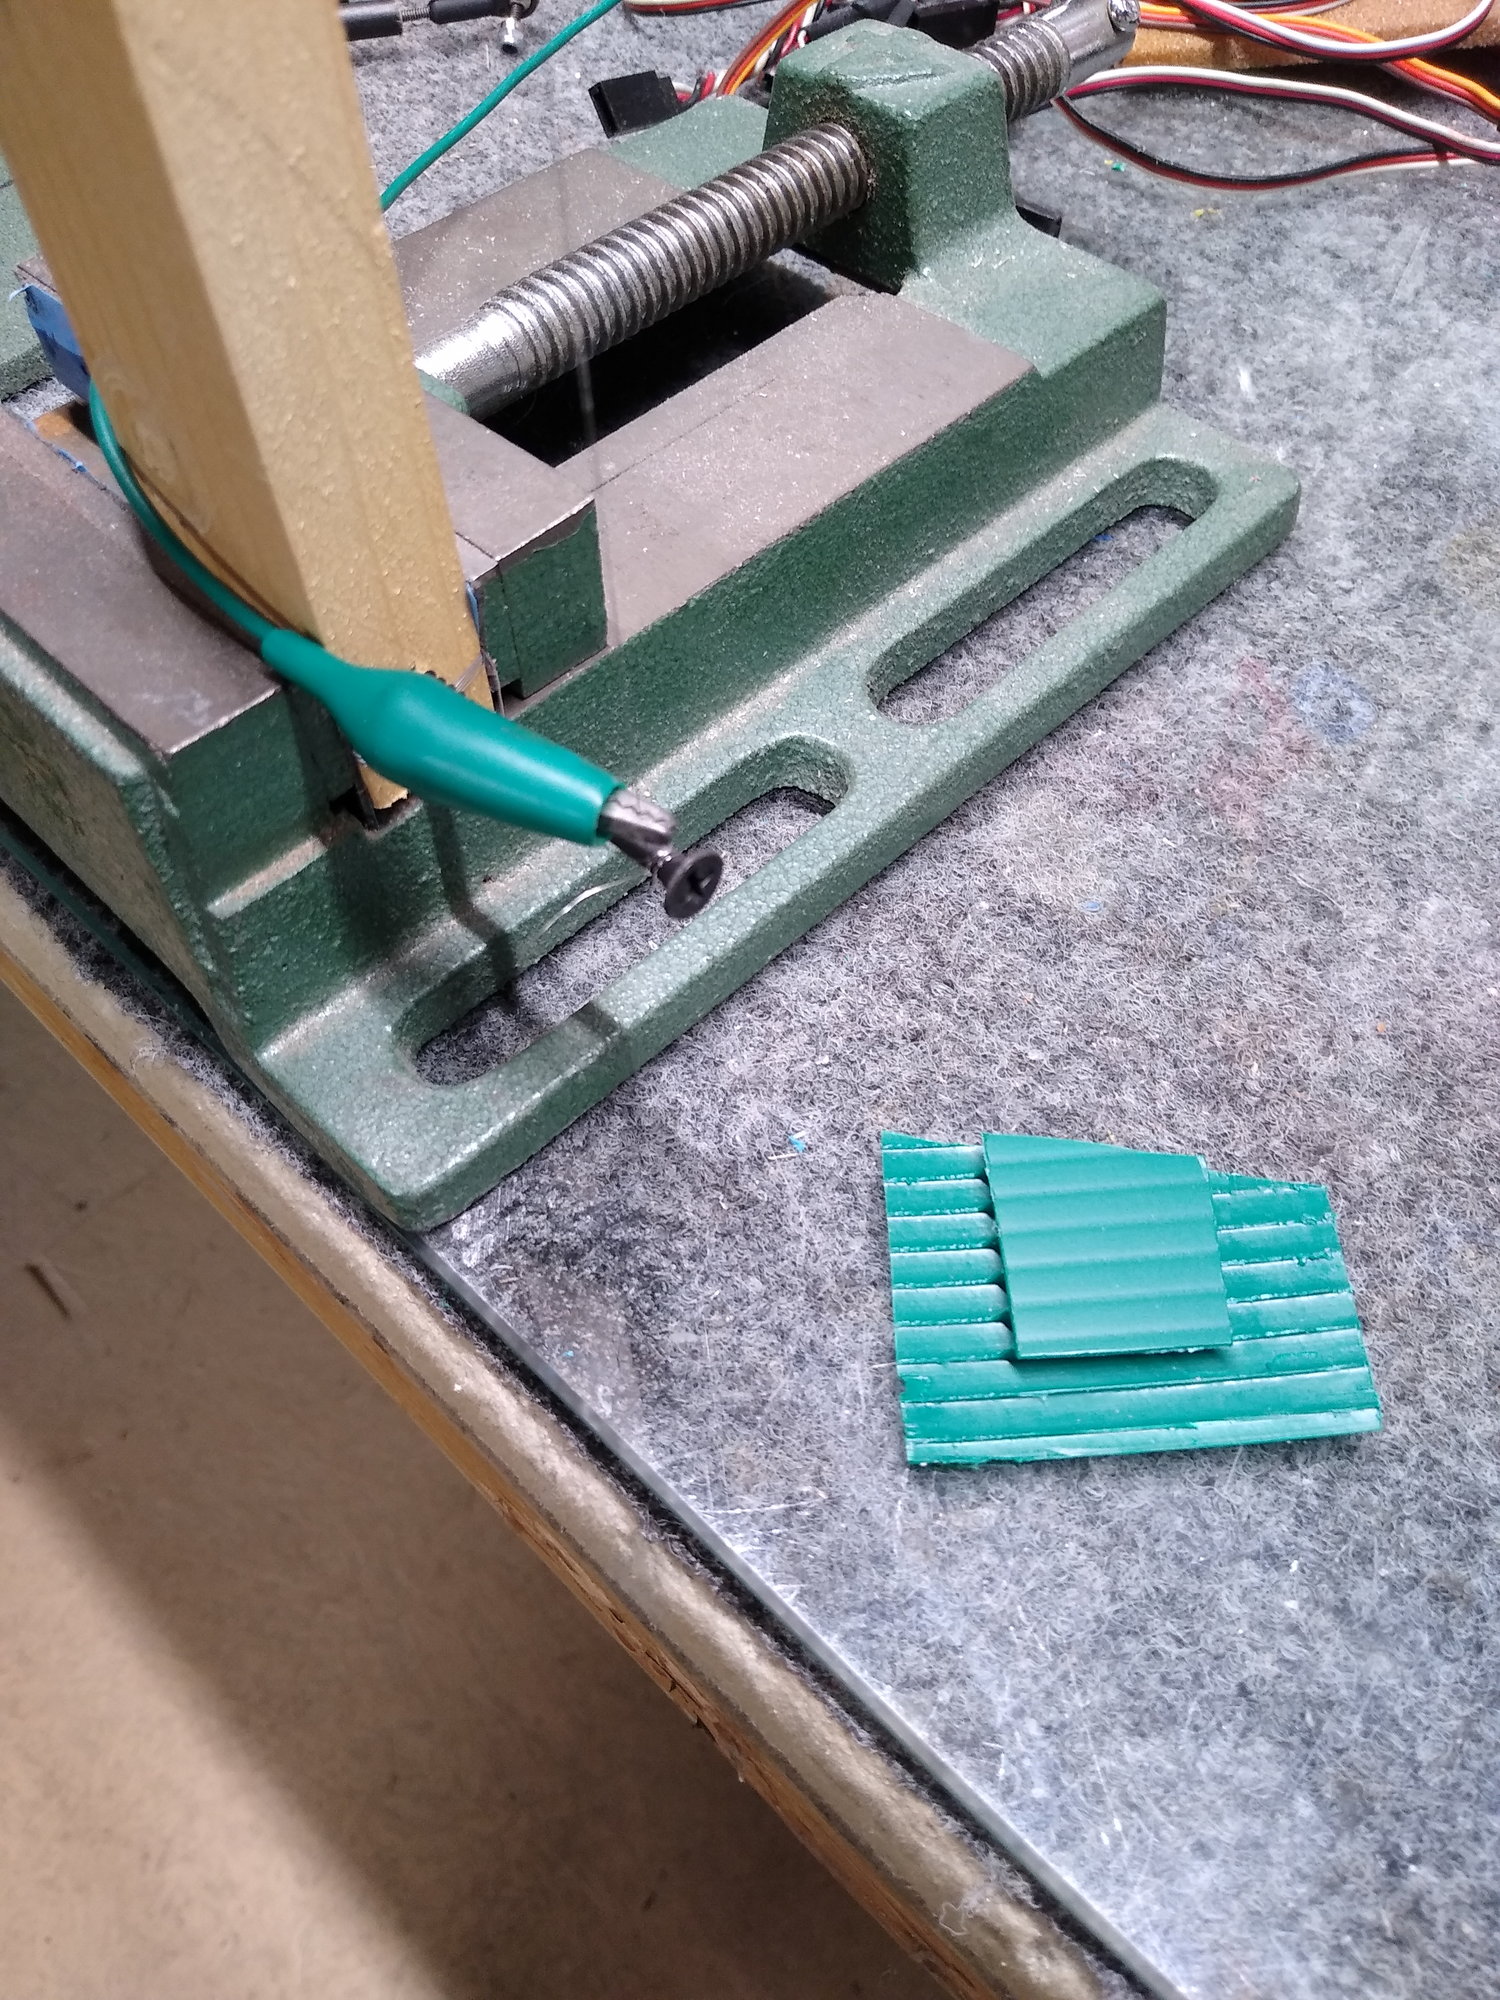
Here is a tool I made for cutting a flute for a hinge. The curved blade prevents from cutting the lower sheet. Also you can run it, gently, along a vertical beam to make a straight cut. Works good.
For cutting coroplast to make a flat sheet area you can try hot wire cutting if you are set up for that. I had the same thought and I tried cutting a scrap piece with hot wire. It was a hand cut so a bit wavy but the plastic cut was easy. Making the right cutter, it may be doable. I’m starting on foam airplanes. I made a jig to cut the 45* angle used at the hinge line. A jig like that could make the angle cut you show in your drawing. Just a thought.
Here is my Debonair and starting bench on their better day. Lol.
12-07-2020, 05:47 AM
#30
Thread Starter
That's the type of tool I use for cutting flutes.
I tried hot wire, I used it a lot on foam wings, but it didn't work well for cutting the flat sheet. The thin parts tend to warp and curl.

Two bladed cutter for flutes

Two bladed cutter for straight cuts between flutes
I tried hot wire, I used it a lot on foam wings, but it didn't work well for cutting the flat sheet. The thin parts tend to warp and curl.
Two bladed cutter for flutes
Two bladed cutter for straight cuts between flutes
Last edited by Joystick TX; 12-07-2020 at 05:53 AM.
12-07-2020, 02:23 PM
#32
Your starting bench looks interesting.
I posted another design here at: Model Aircraft Starting Bench (GSWAM Style)
I posted another design here at: Model Aircraft Starting Bench (GSWAM Style)
Regarding hot wire coroplast cutting I believe the answer is getting the right wire temperature for the cut. I didn’t have the problem as you state. I’ll have to test another piece next time I set up my hot wire cutter. I have found, for my needs, that I have to regulate the wire heat for different cuts. For foam freehand cutting following a line I like low heat for a slow cut. It gives me better control. For cuts with the wire moving along the side of a metal ruler, I like high heat and a fast cut. I also like high heat for plunge cutting following a pattern. I try to set the heat with scrap pieces I may have.
 12-07-2020, 07:31 PM
#33
Thread Starter
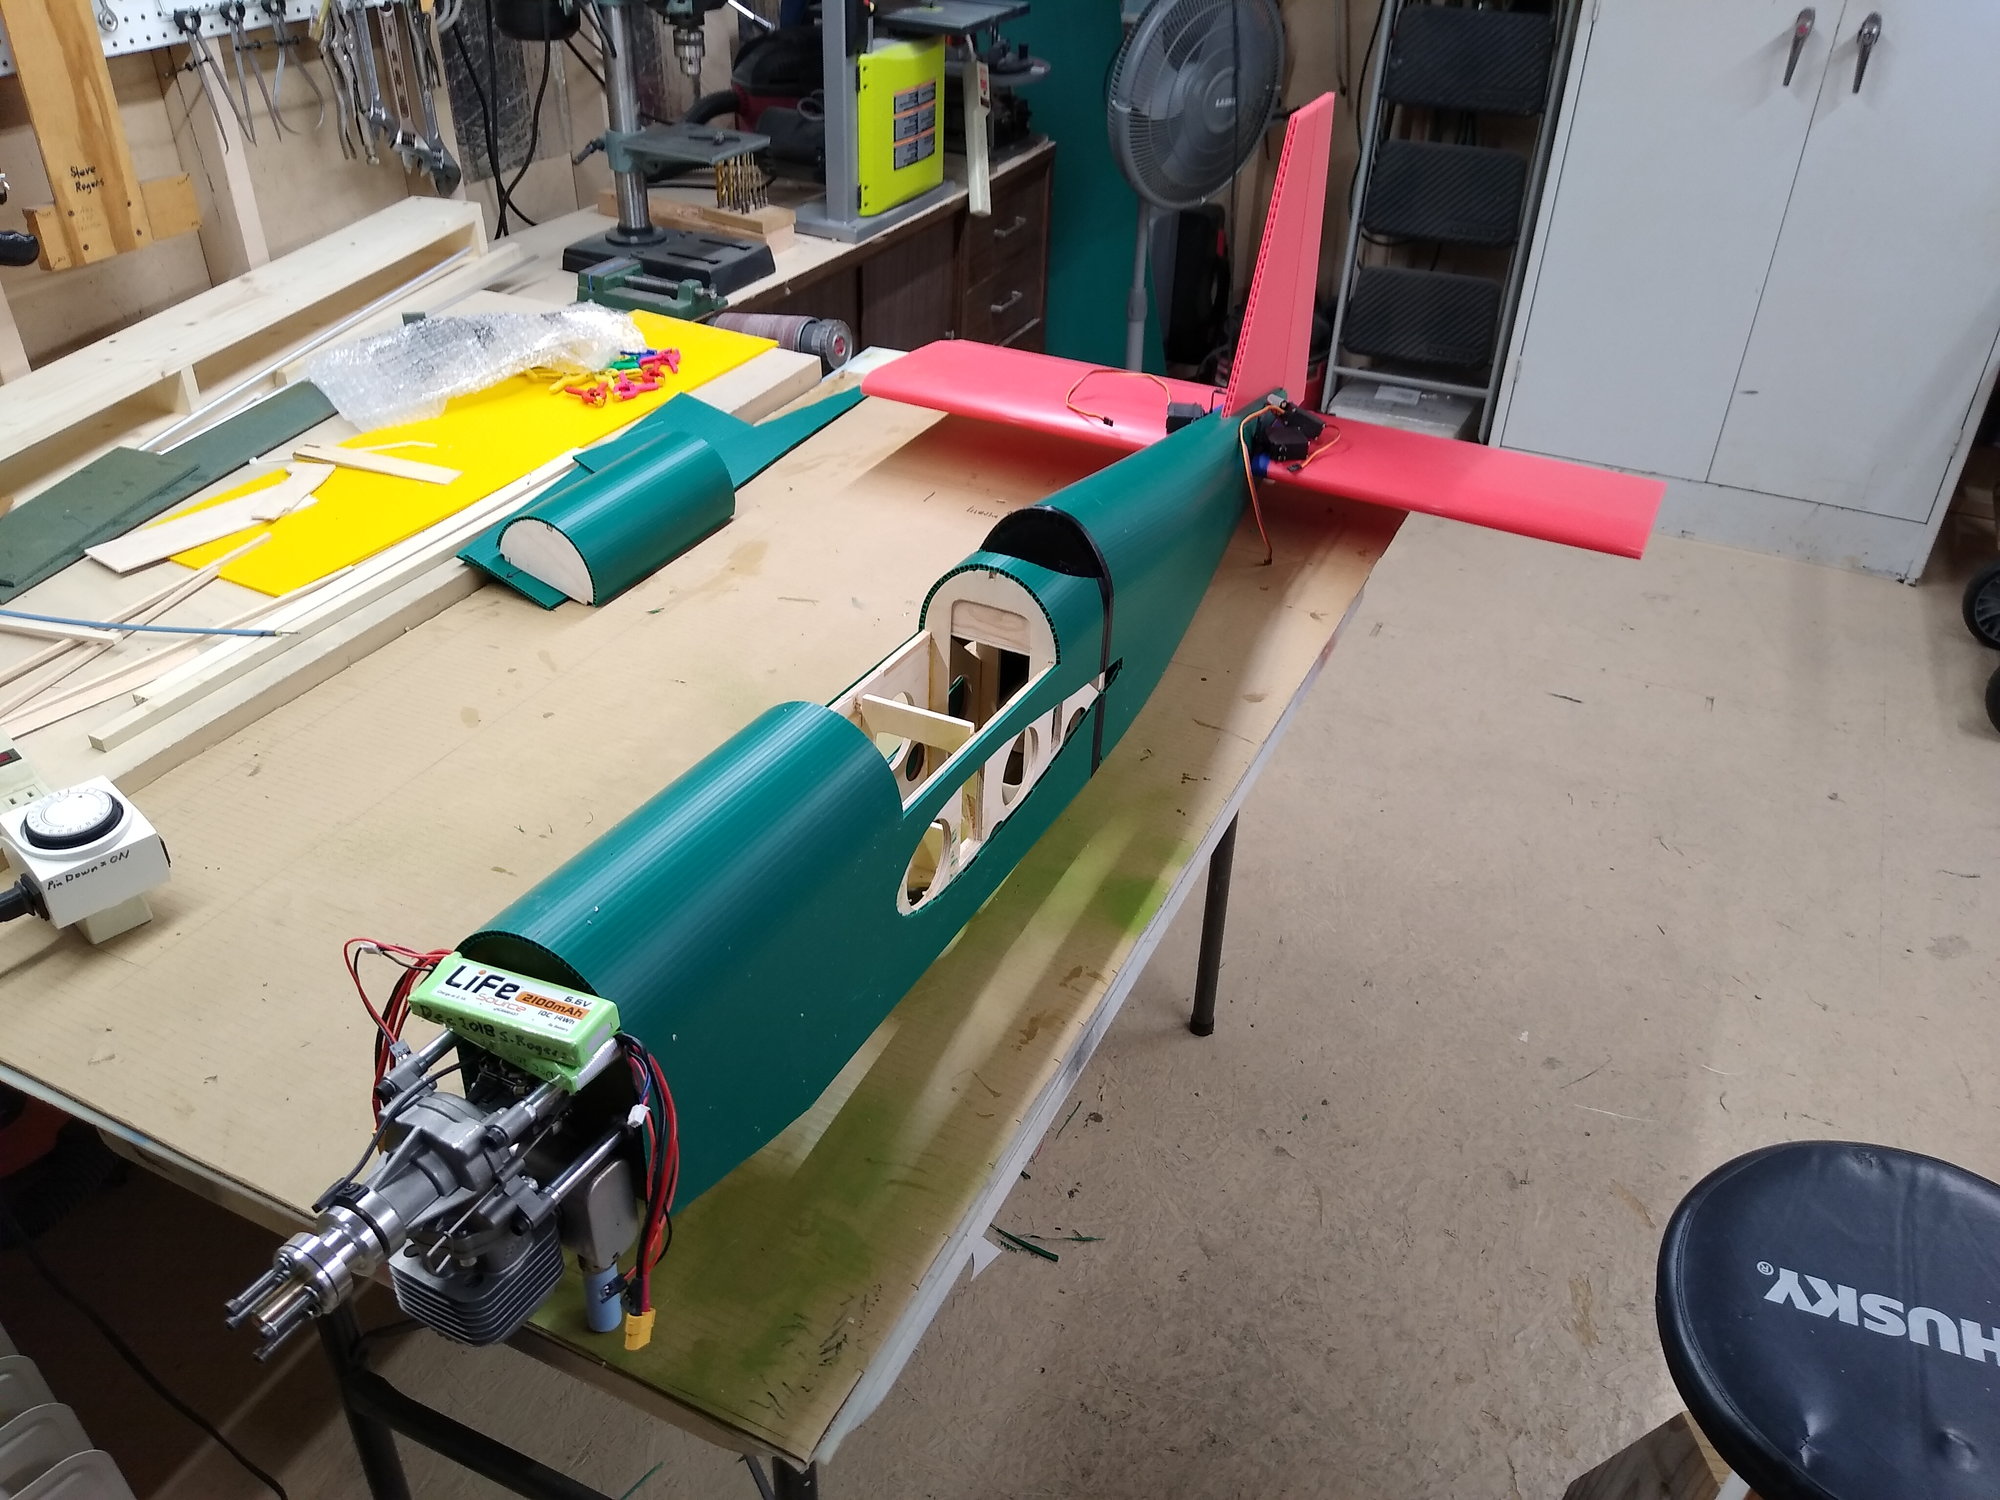
Got the engine and ignition on.
The wings fit pretty well.
Did a rough CG check with the servos and batteries on the fuselage. Looking good so far. I don't think any lead will be required.
It appears that the build time will be close to 160 hours which is going to be close what it took for the LA Bipe.
The wings fit pretty well.
Did a rough CG check with the servos and batteries on the fuselage. Looking good so far. I don't think any lead will be required.
It appears that the build time will be close to 160 hours which is going to be close what it took for the LA Bipe.
12-13-2020, 02:07 PM
#34
Thread Starter
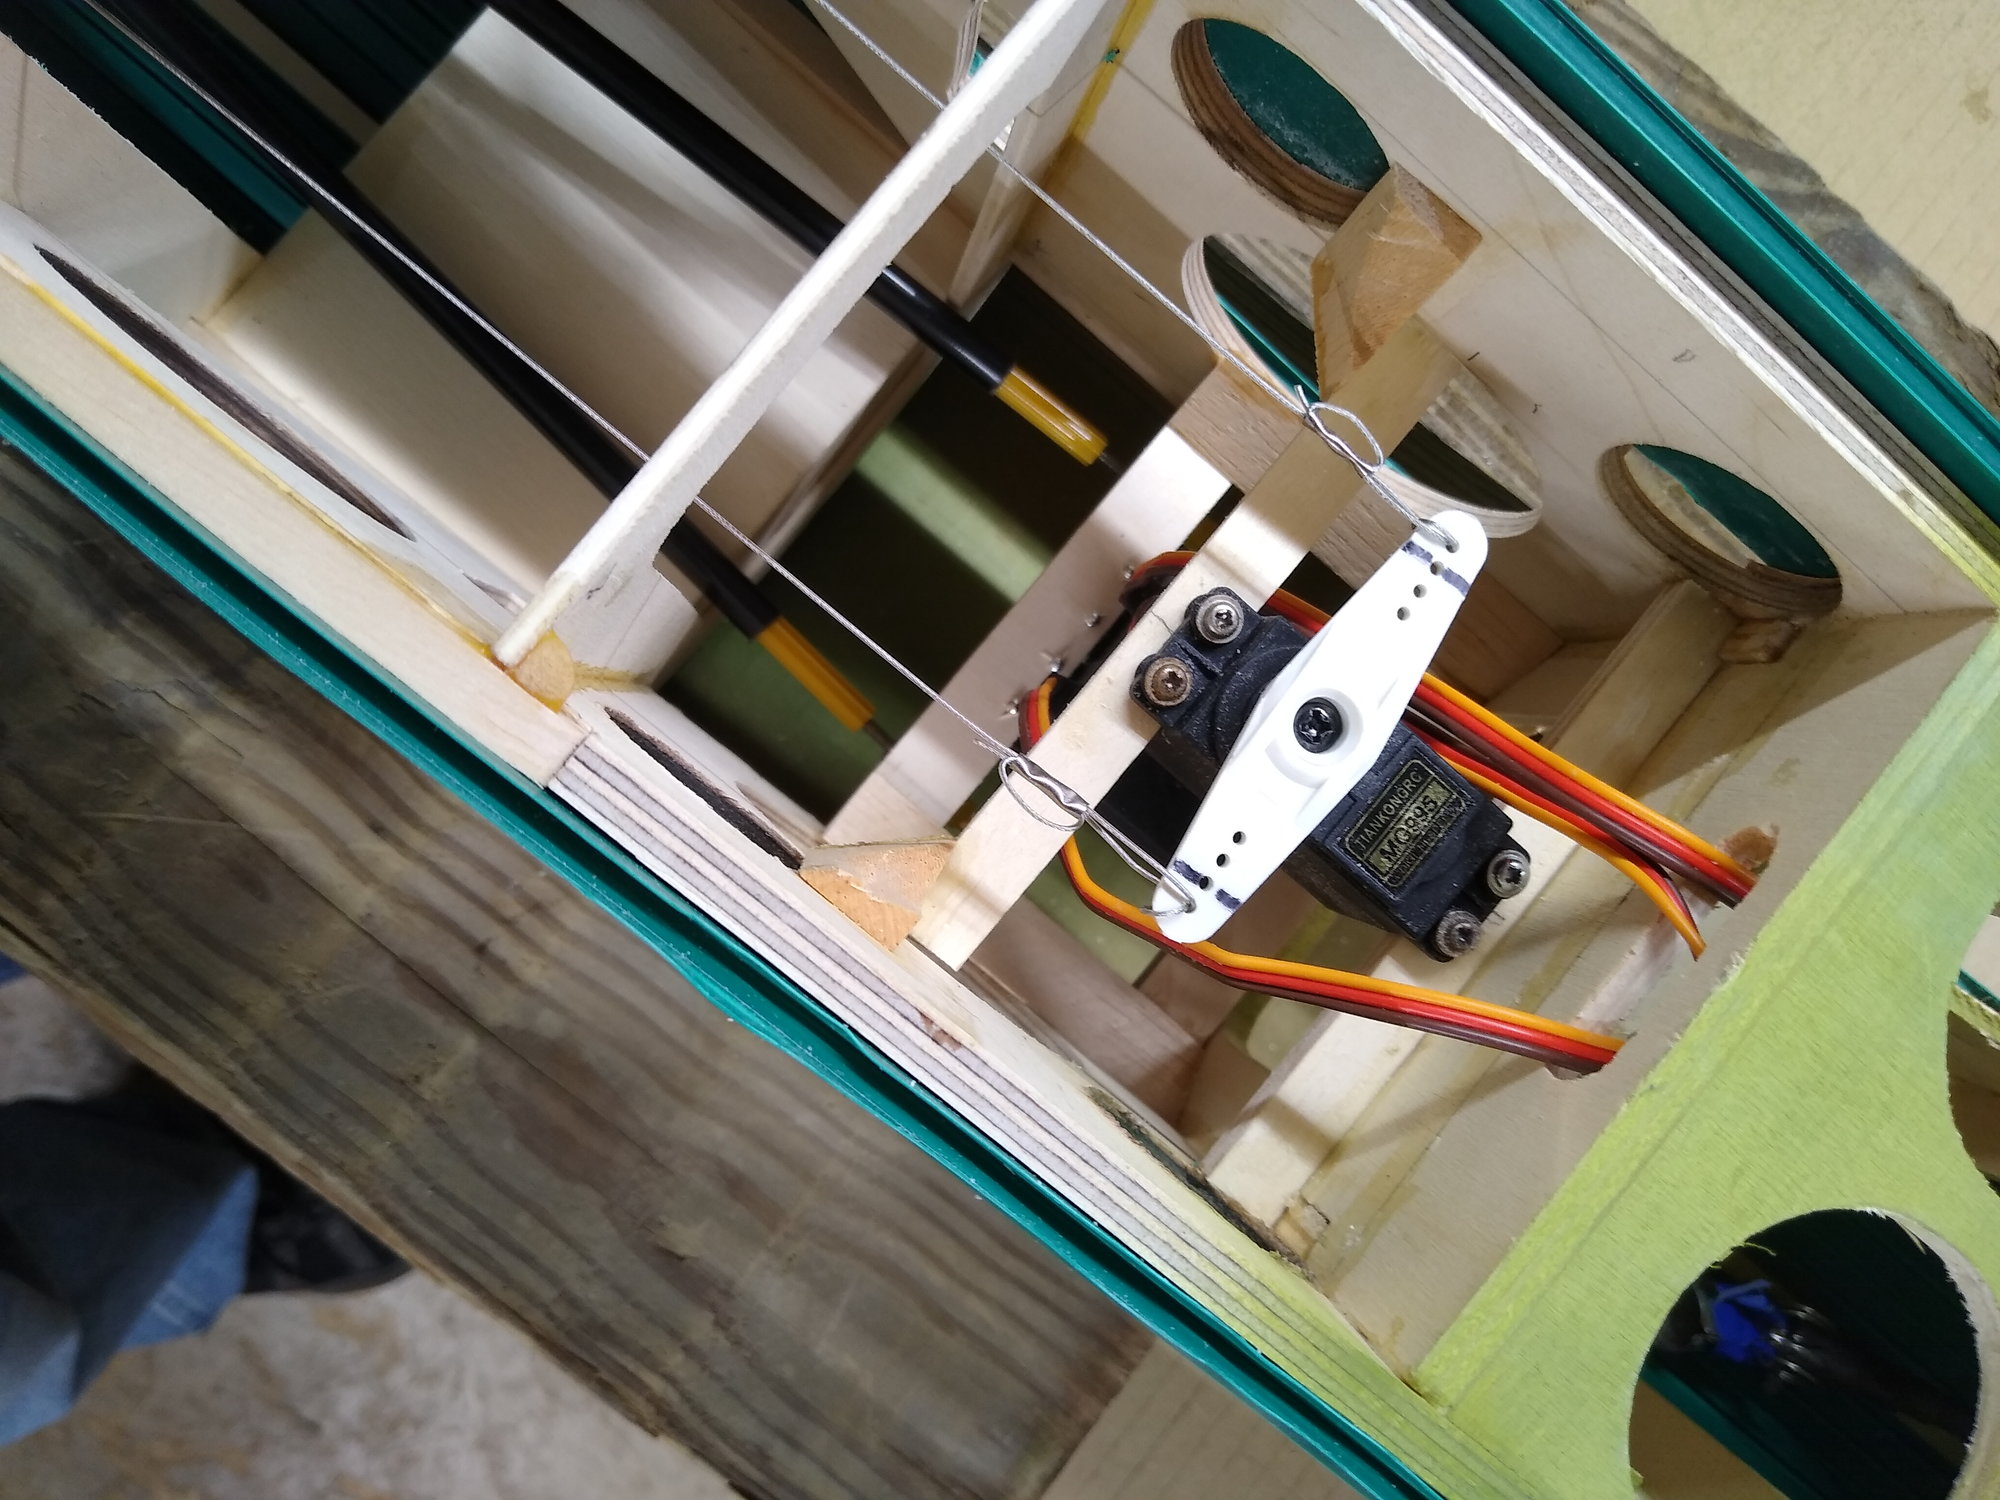
Been working on reducing the weight in the tail to get the plane to balance without adding weight to the nose.
Had to take out the three servos from the tail and move them closer to the CG. That reduced the tail weight by 7 or 8 oz. It may be enough to get the plane in range without adding weight.
I decided to use the pull-pull for the rudder. No springs for the tailwheel control, had too much trouble with them over the years. The rod works better on the grass runway.
I really hate using long rods for the elevator, but at least it reduces some tail weight.
I also found some really thin wire for my hot wire cutter and tried it on the coroplast. It works a little better than my thicker wire, there is less warping as long as I keep the voltage low and go slow. It's fun to play with.
Moving slowly now due to colder and windier weather, no reason to hurry right now.
12-13-2020, 02:36 PM
#35

Pull-pull on rudder is easy and positive so that is a logical move. On the elevator, are you making a Y push-pull rod or twin rods from the servo? The latter is extra weight and really doesn't make anything better. When I use a rod for elevator, I will always put it in tension for UP elevator, to eliminate unnecessary slop in the movement.
12-14-2020, 05:21 AM
#36
Thread Starter
I use two servos for the elevator. I used the Y setup on small glow powered planes, but never on large gas powered planes. I like redundancy, it has saved a lot of planes.
I use fairly heavy rods for each elevator half. This will not be a high speed plane, or dive bomber, so I don't need to run the rods on the top of the elevator to get tension in the up direction.
I use fairly heavy rods for each elevator half. This will not be a high speed plane, or dive bomber, so I don't need to run the rods on the top of the elevator to get tension in the up direction.
12-15-2020, 05:05 AM
#37
Thread Starter
Working at the slowest possible rate. My building frenzy mood is over for sure. I want to fly.
Got the fuel tank in, working on the throttle servo installation and power switches today.

Got the fuel tank in, working on the throttle servo installation and power switches today.
12-16-2020, 06:52 PM
#38
Thread Starter
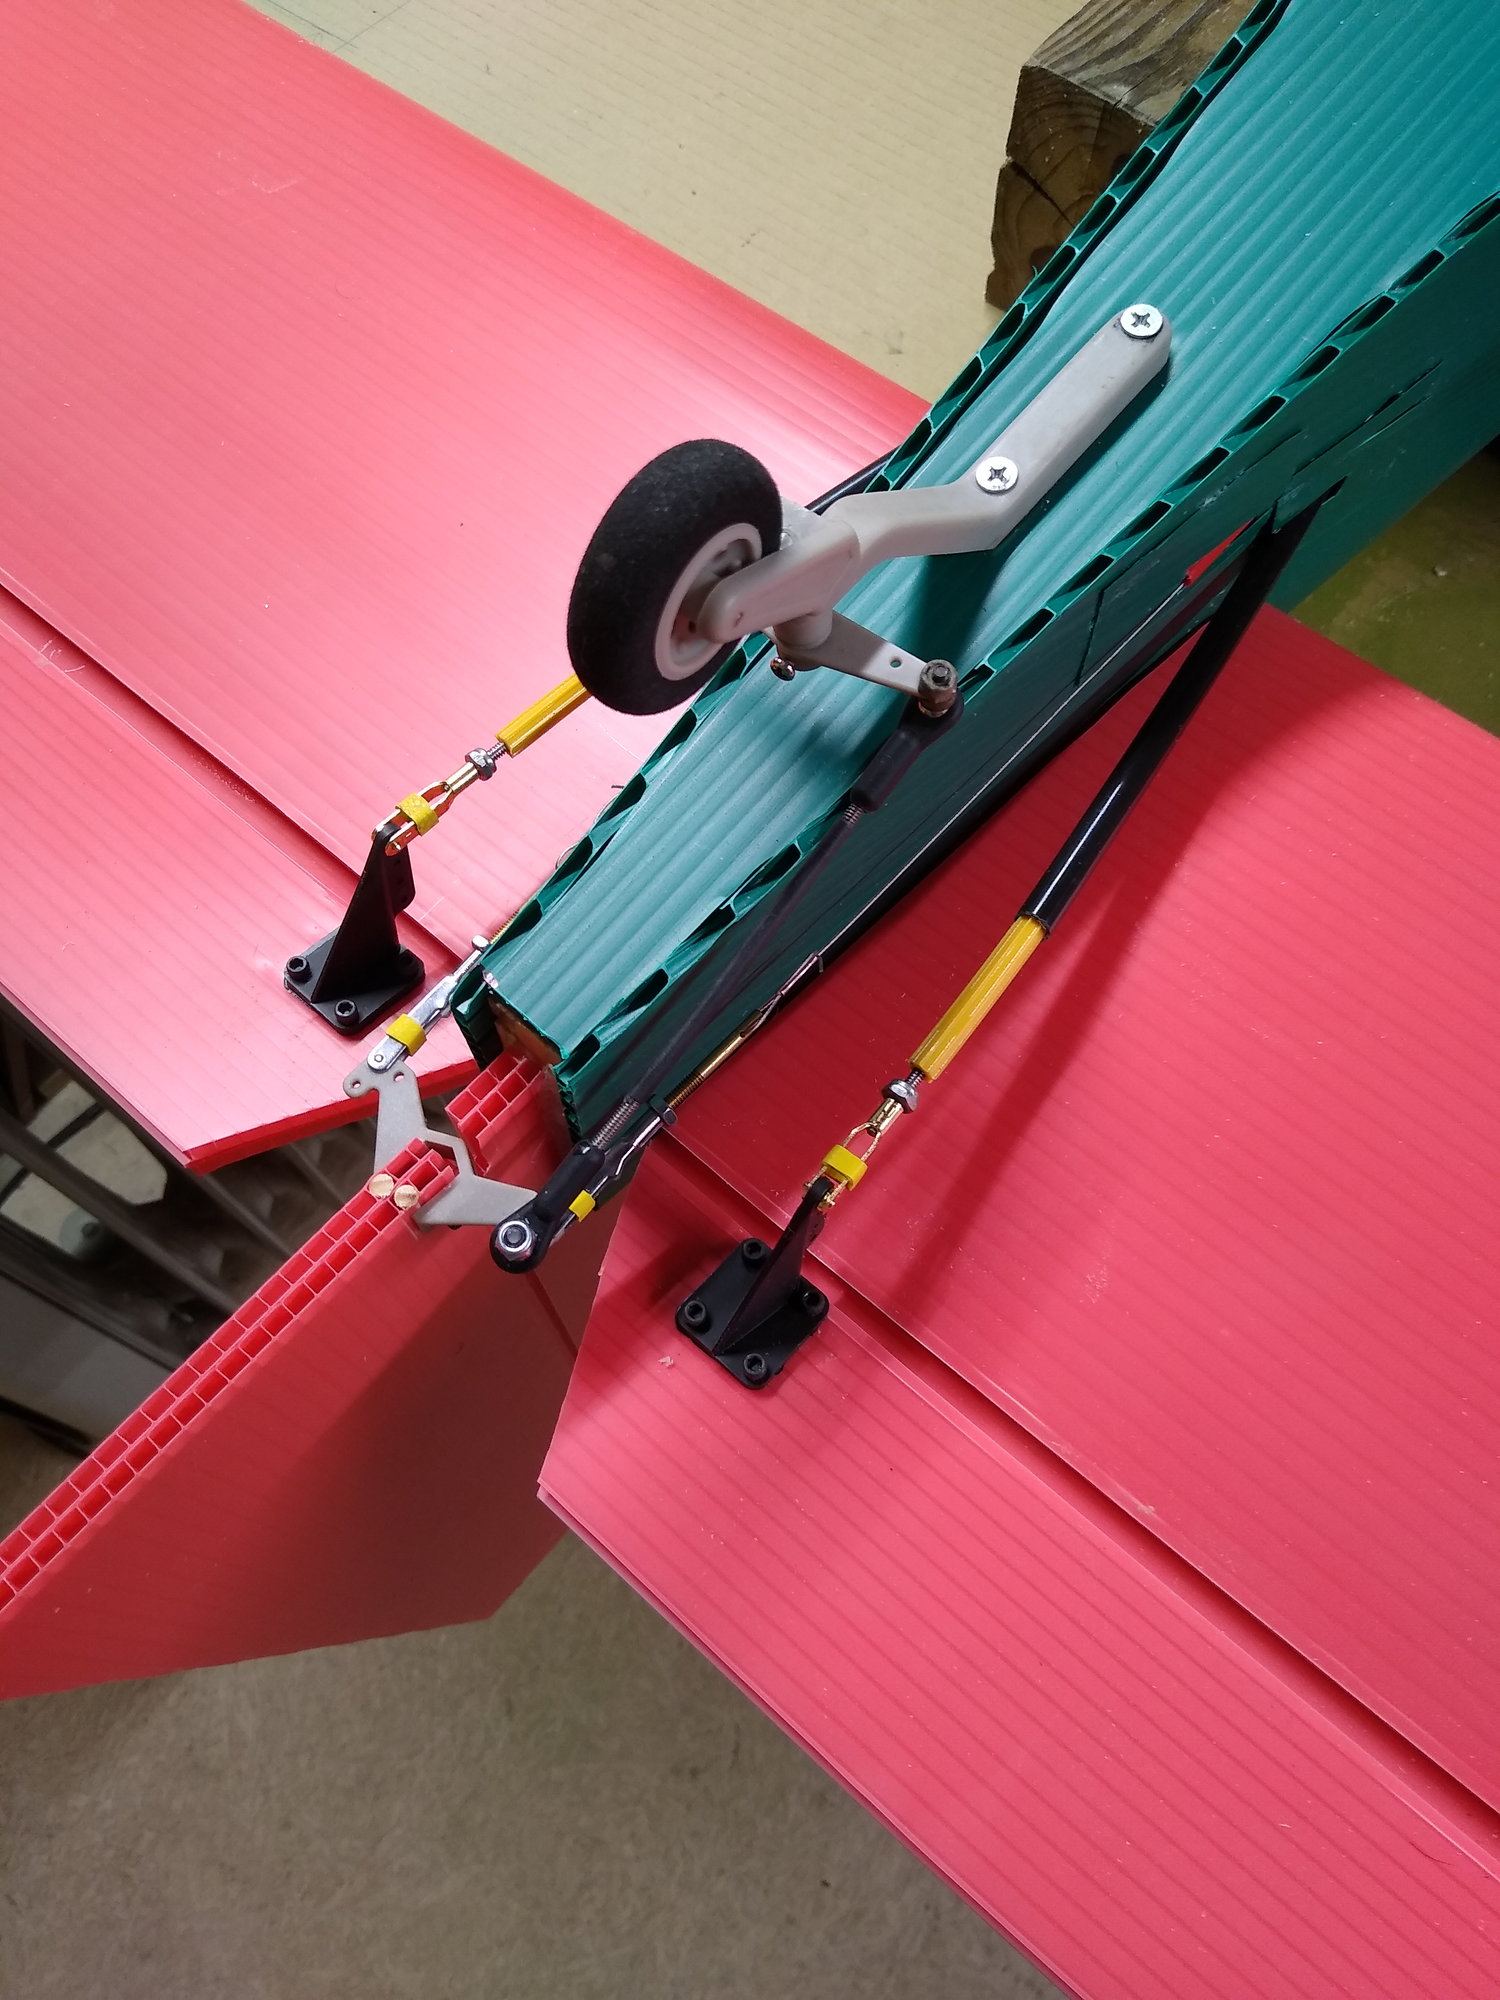
Got everything in and it's on the wheels now.
I may need to move the LG forward a little to prevent noseovers on our grass strip.
Will try to fly it tomorrow even though it's not completely finished. At least I'll taxi it and check out the ground handling.
I may need to move the LG forward a little to prevent noseovers on our grass strip.
Will try to fly it tomorrow even though it's not completely finished. At least I'll taxi it and check out the ground handling.
12-17-2020, 05:02 AM
#39
Thread Starter
Last check of the servo setup in the shop.
Need to put on the spinner and make a few more checks then take it out to the field.
It's 29 degrees right now, so I need to wait a little while for it to warm up. The plane will be okay, but I may ice up and that wouldn't be good.

Need to put on the spinner and make a few more checks then take it out to the field.
It's 29 degrees right now, so I need to wait a little while for it to warm up. The plane will be okay, but I may ice up and that wouldn't be good.
The following users liked this post:
Joystick TX (12-17-2020)
12-17-2020, 12:47 PM
#41
Thread Starter
I got in two flights this morning. It flew great, like a big old trainer. Slow flight and landing speeds are great. The 18 lb weight does not seem to be an issue at all.
It had some rudder flutter at high speed, but I already know what to do to fix that. I'll just beef up the control horn attachment. The flying wires were not on the tail yet, adding those will keep the rudder in place a lot better.
Ground handling was okay, but I'm going to move the LG forward a little to help it in the high grass.
The New Dog II design changes won't be required.

Now it just needs some finishing touches to make it look a little better.
It had some rudder flutter at high speed, but I already know what to do to fix that. I'll just beef up the control horn attachment. The flying wires were not on the tail yet, adding those will keep the rudder in place a lot better.
Ground handling was okay, but I'm going to move the LG forward a little to help it in the high grass.
The New Dog II design changes won't be required.
Now it just needs some finishing touches to make it look a little better.
Last edited by Joystick TX; 12-17-2020 at 12:51 PM.
12-17-2020, 12:54 PM
#42
Thread Starter
Hope you can build a plane using coroplast, it's different and fun to work with. Let me know if you need any help or advice.
 12-19-2020, 06:40 PM
#44
Thread Starter
Got the gear moved forward, the flying wires on the tail, and the large control horn mounted on the rudder.
Will give it another flight tomorrow and wring it out a little more to see if any other changes are required. Will also do the inverted 45 degree upline to check the CG. I suspect it's a little tail heavy, but it didn't seem to be overly sensitive in pitch.

Will give it another flight tomorrow and wring it out a little more to see if any other changes are required. Will also do the inverted 45 degree upline to check the CG. I suspect it's a little tail heavy, but it didn't seem to be overly sensitive in pitch.
 12-21-2020, 11:29 AM
#47
Thread Starter
Had four more flights today, only a couple of minor problems.
Lost a servo screw on the right aileron, didn't notice much difference in flight, it just had a slower roll rate than normal.
My rudder control horn was slipping, I had the wrong one for that servo, it was an easy fix.
I really rang it out today with 40 minutes of flying. The inverted 45 degrees climb CG check was good, no changes are required. Stalls were mostly straight ahead. Flap to elevator mix was okay. I needed a little down trim in the elevator. Engine ran great. I did lots of touch and goes, the new LG position is perfect.
The plane does not fly like it's heavy at all. Climb is not unlimited but slows down a lot at around 300 feet and sort of hovers. It still may be climbing but if it is, it's really slow.
I'm very happy with the plane.
Last edited by Joystick TX; 12-21-2020 at 11:40 AM.
12-21-2020, 12:40 PM
#48
I find this product to be interesting but am having a lot of trouble with the primitive boxy results. I really like to have attractive models to fly and if they aren't, I am not interested.
Are there ways to make this material more "aesthetic"? I am thinking of tapered surfaces with possibly carved ends? I have designed models with straight wings but carved tips make a world of difference in appearance and - to an extent - aerodynamic performance.
The material doesn't lend itself to tapered wings and tail feathers but it seems like it could be managed - with measurable improvements in overall appearance.
What do you think?
12-21-2020, 04:10 PM
#49
Thread Starter
It's possible to curve it in all directions, but it requires heat and skill. You might try experimenting with it and see what you can come up with.
Another option is to use wood, or foam to shape curved parts and glue them to the coroplast. You can paint the parts to match the coroplast color. It may be possible to find a paint that will work on it, I just can't do that now.
This material was not my normal choice for building planes. It takes a lot of thinking to make it work. I'm sure it won't catch on all that well, but it does have some good features.
I'm fighting cancer and can't tolerate paint fumes and a lot of chemicals. I'm also 78, have had cancer for over five years, some cancer surgery and a stroke this year. Right now, I'm only interested in building, as easily as possible, a functional and durable sport plane.
My manual dexterity right now is on the level of a six year old which is why I don't want to use any tiny bolts or screws to put my planes together at the field. I drop most small things I try to handle. I may be using velcro on the next one.

