


Sig Spacewalker 1/3 scale (by rookie)
 08-24-2014, 07:39 AM
#301

My Feedback: (1)
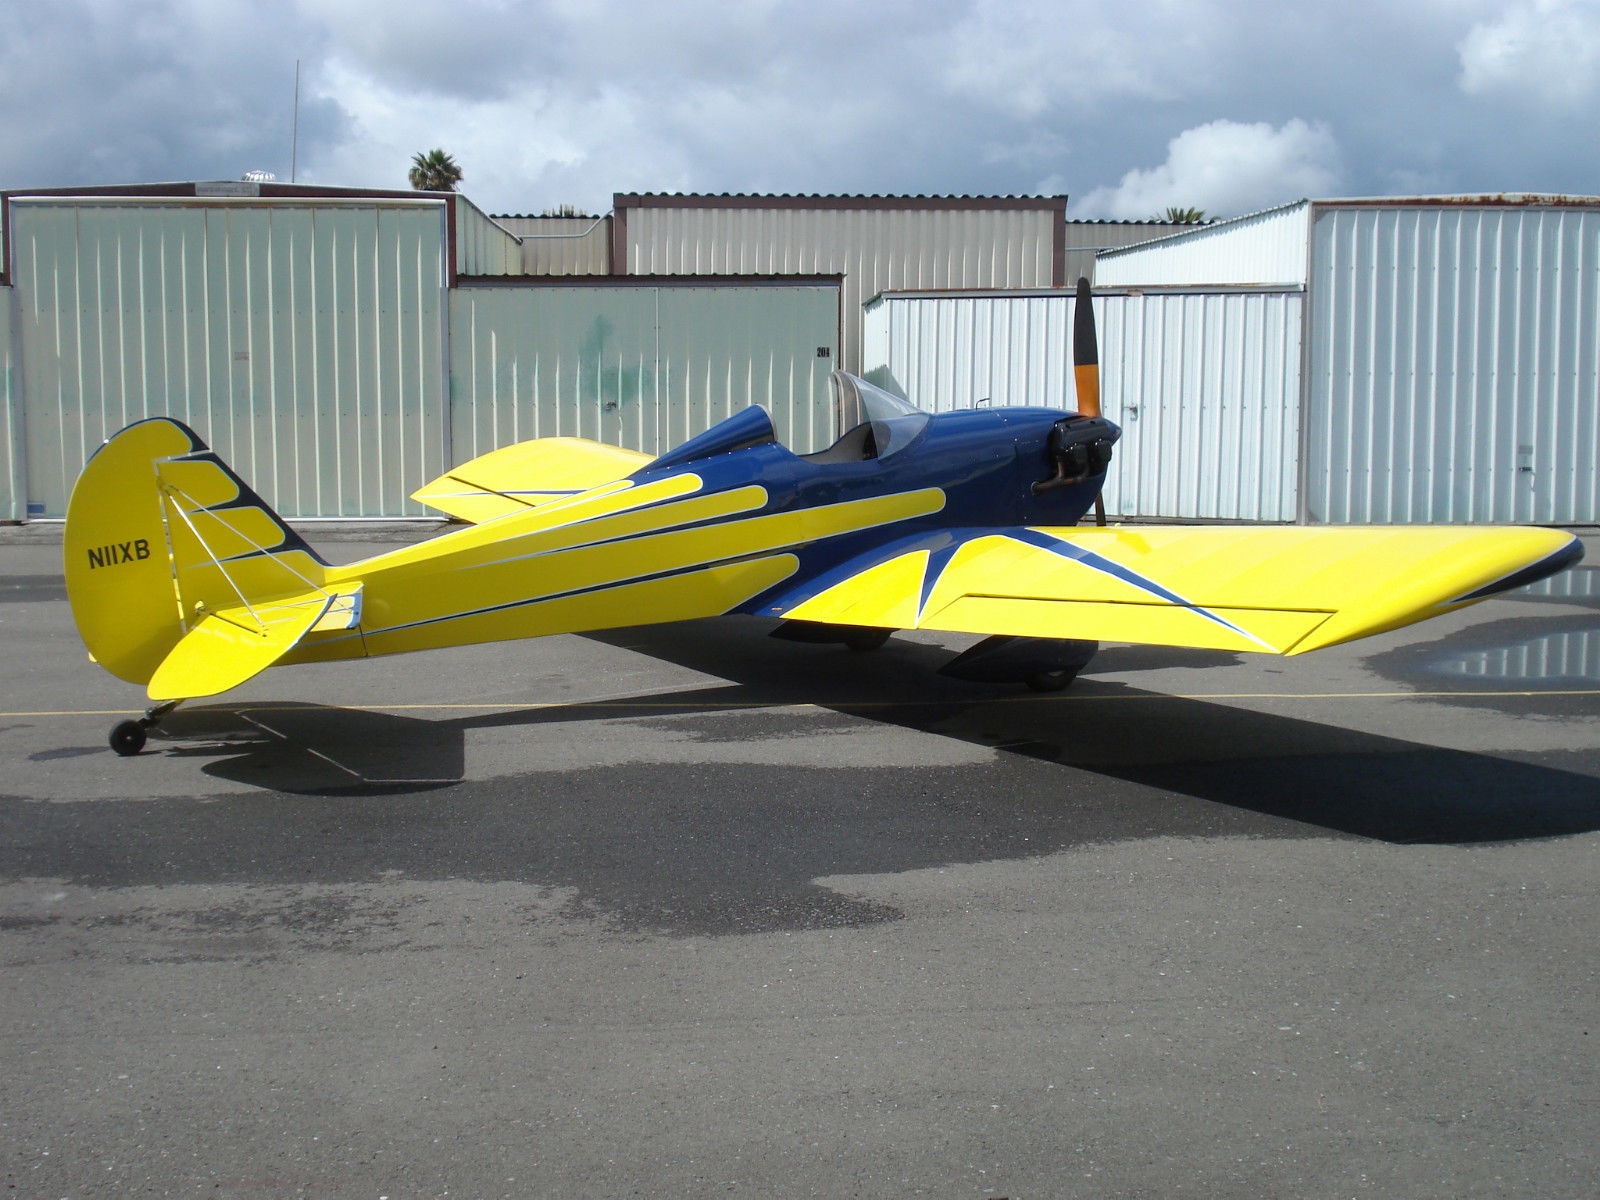
Excellent build thread. I recently bought a SW of the 1:1 type, so in my spare time I have been searching the web for info. There was an article in Kitplanes on the Spacewakers that Maxey Hester built for himself and Hazel Sig. His first one took a bit under 5 months to build, but the second one took only 7 weeks! He went on to build a third one to experiment with an auto engine conversion and also built the prototype of the SWII, because he told Jessie Anglin that nobody could build it as fast. The one I bought was built from a kit that was sold by Jessie Anglin. It's serial number is #108.
 08-24-2014, 07:43 AM
#302


Join Date: Sep 2006
Location: The Sunshine state, when it's not raining!
Posts: 8,131
Likes: 0
Received 2 Likes
on
2 Posts
Excellent build thread. I recently bought a SW of the 1:1 type, so in my spare time I have been searching the web for info. There was an article in Kitplanes on the Spacewakers that Maxey Hester built for himself and Hazel Sig. His first one took a bit under 5 months to build, but the second one took only 7 weeks! He went on to build a third one to experiment with an auto engine conversion and also built the prototype of the SWII, because he told Jessie Anglin that nobody could build it as fast. The one I bought was built from a kit that was sold by Jessie Anglin. It's serial number is #108.
08-24-2014, 09:01 AM
#303
Thread Starter

Join Date: Jul 2012
Location: Missouri
Posts: 1,127
Likes: 0
Received 0 Likes
on
0 Posts
Thanks, High Plains.
How cool to have your own airplane. Flying around in an open cockpit on a beautiful day must be outstanding.
As for the thread, I am trying to find some motivation to proceed. I am sitting here on my laptop reading another fine build and telling myself :
(sung to the tune " You Should Be Dancing by the BeeGees" ) What you doing in your chair ? You should be building yaaaaa, you should be building Yaaaaa.
I'm off to find my give a damn!")
Kevin
How cool to have your own airplane. Flying around in an open cockpit on a beautiful day must be outstanding.
As for the thread, I am trying to find some motivation to proceed. I am sitting here on my laptop reading another fine build and telling myself :
(sung to the tune " You Should Be Dancing by the BeeGees" ) What you doing in your chair ? You should be building yaaaaa, you should be building Yaaaaa.
I'm off to find my give a damn!
Kevin
Last edited by Melchizedek; 08-24-2014 at 09:03 AM.
08-24-2014, 11:19 AM
#304
Join Date: Sep 2006
Location: The Sunshine state, when it's not raining!
Posts: 8,131
Likes: 0
Received 2 Likes
on
2 Posts
Thanks, High Plains.
How cool to have your own airplane. Flying around in an open cockpit on a beautiful day must be outstanding.
As for the thread, I am trying to find some motivation to proceed. I am sitting here on my laptop reading another fine build and telling myself :
(sung to the tune " You Should Be Dancing by the BeeGees" ) What you doing in your chair ? You should be building yaaaaa, you should be building Yaaaaa.
I'm off to find my give a damn!
Kevin
08-24-2014, 04:13 PM
#305
Thread Starter
Join Date: Jul 2012
Location: Missouri
Posts: 1,127
Likes: 0
Received 0 Likes
on
0 Posts
Well Robert, I found it.......
Not initially, I had to apply the 40/60 principle. What is the 40/60 principle ? Well (some may have slightly dif ratio), 40% of life is just plane showing up. If you get the first 40% right, the 60% usually takes care of itself. Duff the first 40 and, well lets just say you end up in the cart that your neighbor is pulling.
So, today it was 98 with a starting humidity at 7 am at 98 % . Nothing outsidish was going to hit my itinerary today. So I decided to not waist the day and drag 40% of me down to the shop.
And what do you know ??? I found my givadamn hiding under some dirty laundry in the corner. So I said, "come on, lets go"
Onward.......
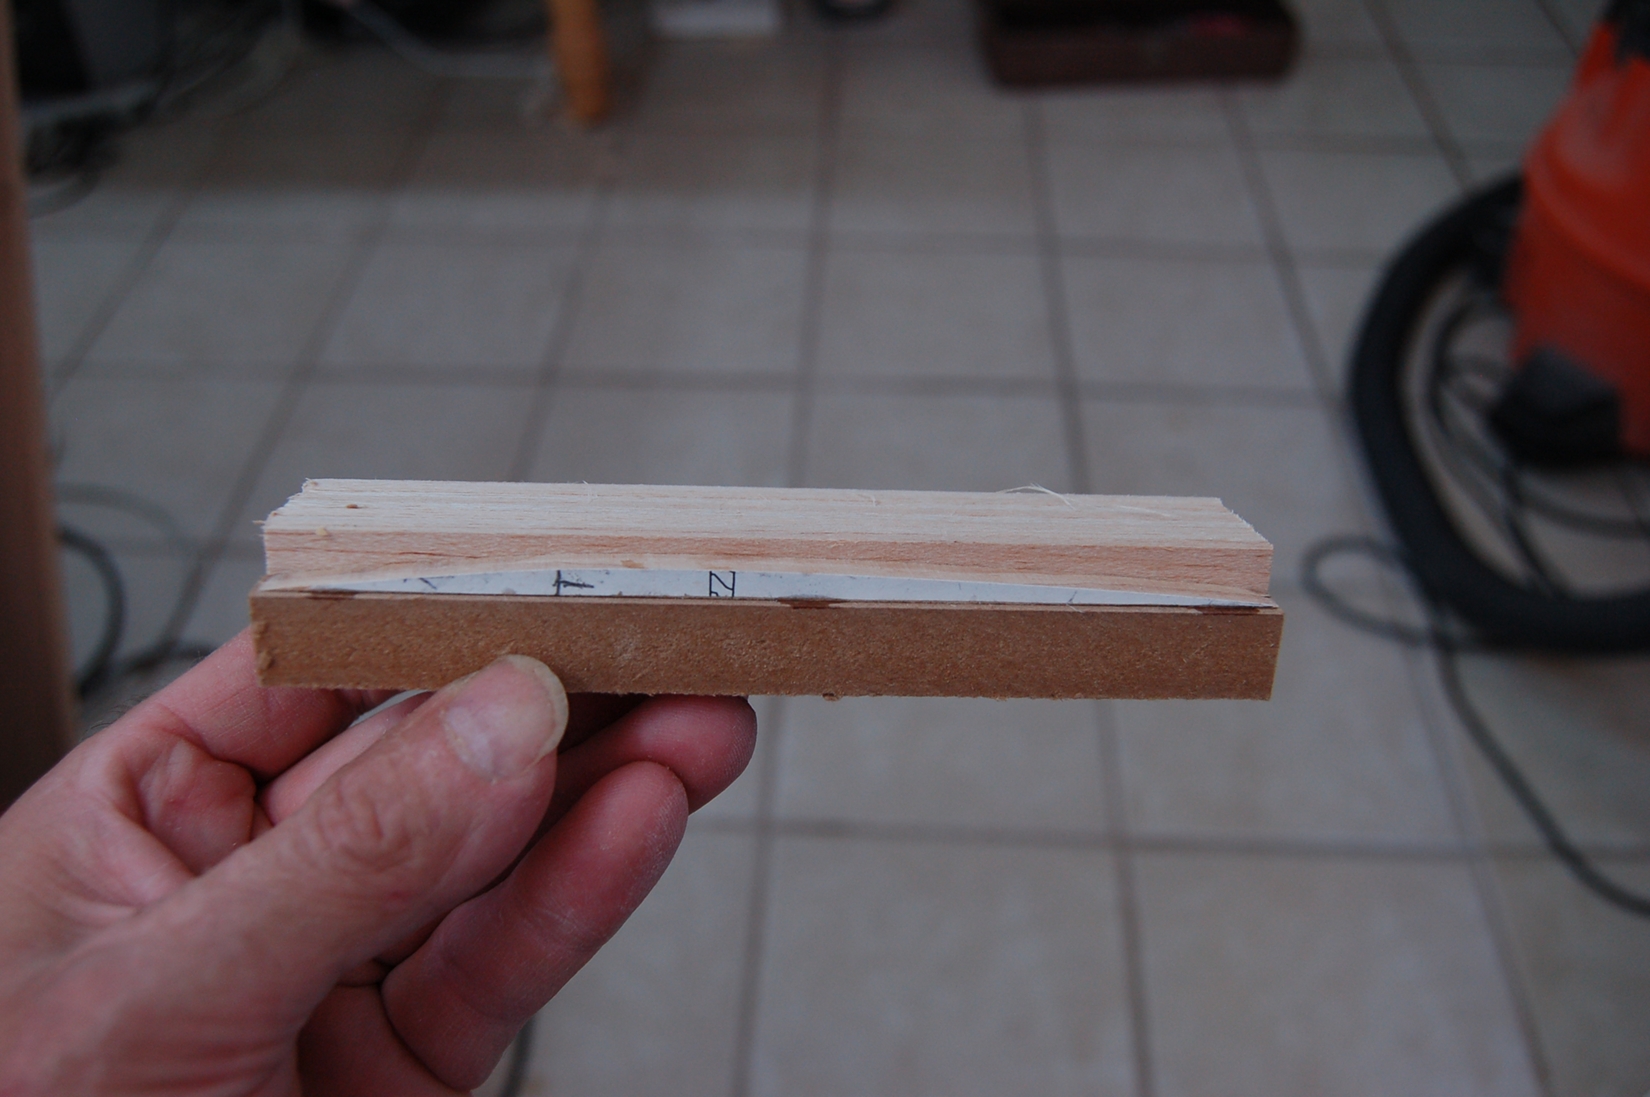
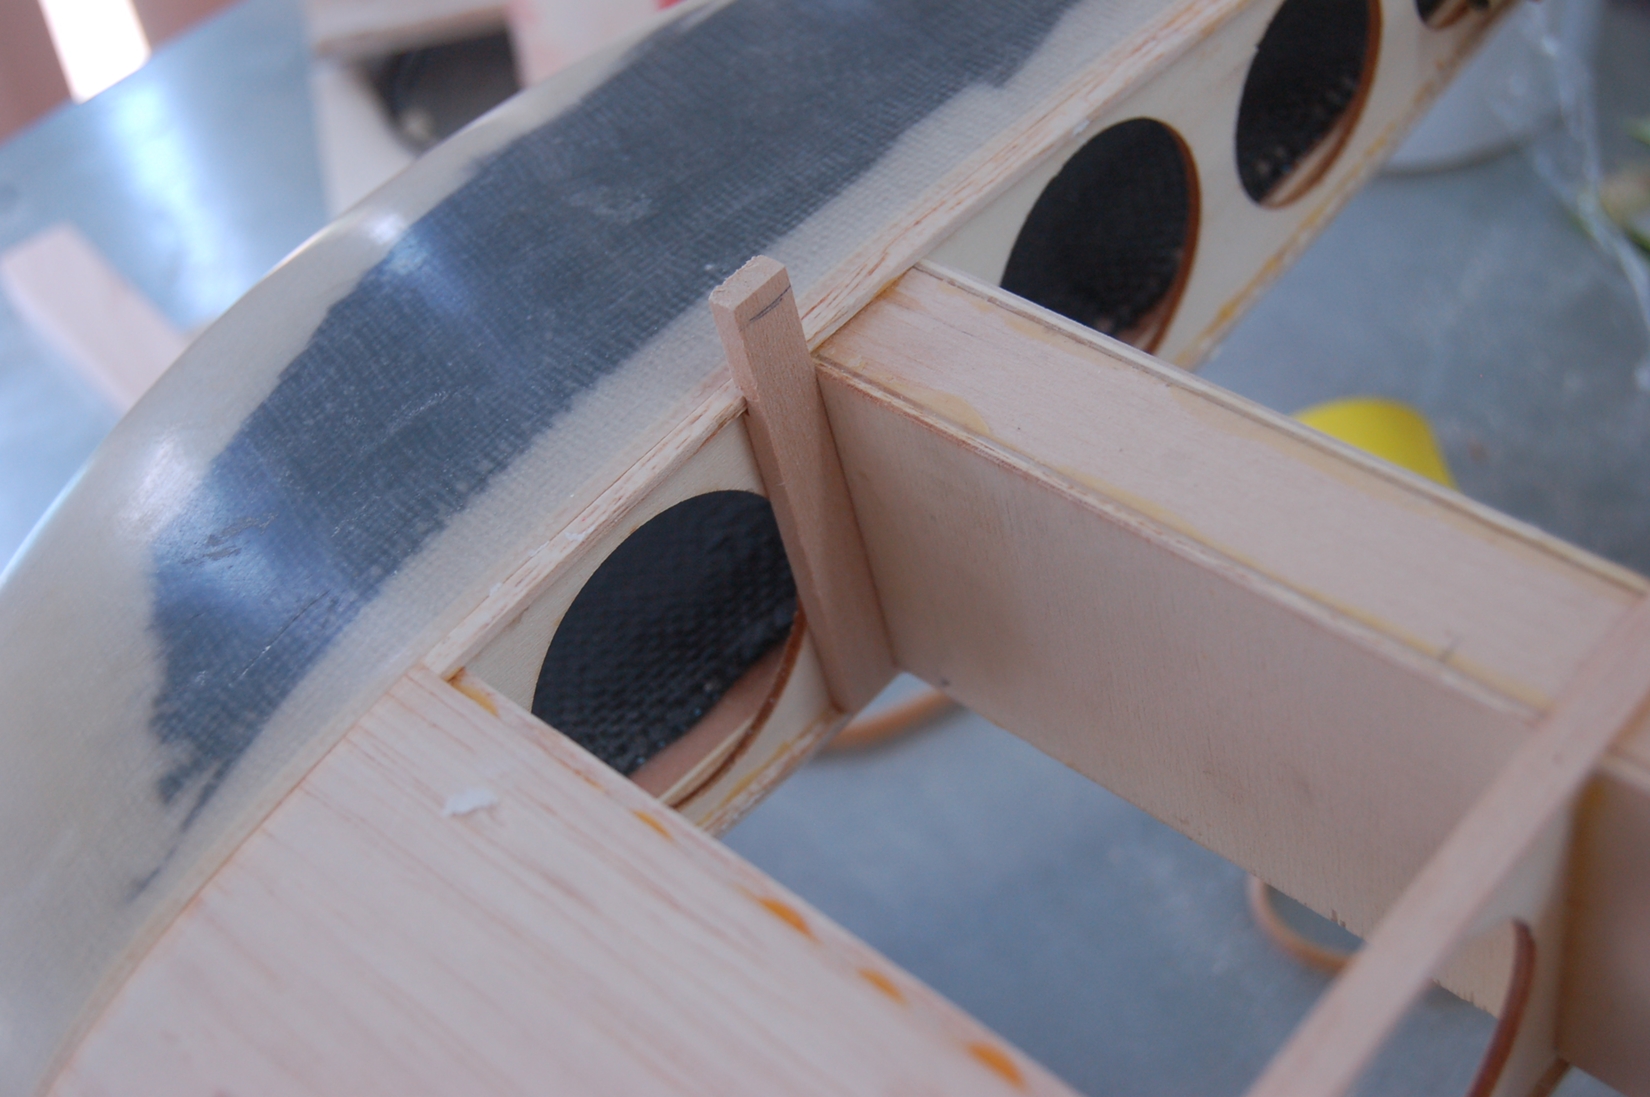
The plans called for a 1/8 x 3/8 spruce longeron down the side of the fuse. The covering is to bend over that longeron and make 2 flatish sides. Since I am sheeting the fuse I decided I wanted to round out the fuse a little. In the first pic the curved line is what my fuse will look like. Notice the curve is asymmetrical to the fuse side. That happens as the fuse size is reduced as you get to the tail feathers. At the largest part of the fuse the arc becomes more symmetrical.

So I made some former add-on's to make my fuse rounder. Also cut the 3/8 longeron down to 1/4- .
I cut 2 ribs out of maple and made a jig to shape 1/8 balsa ribs. The balsa got sandwiched between the maple and sanded to shape.
Since the formers are asymmetrical I marked the tops with 2 lines to keep them oriented.
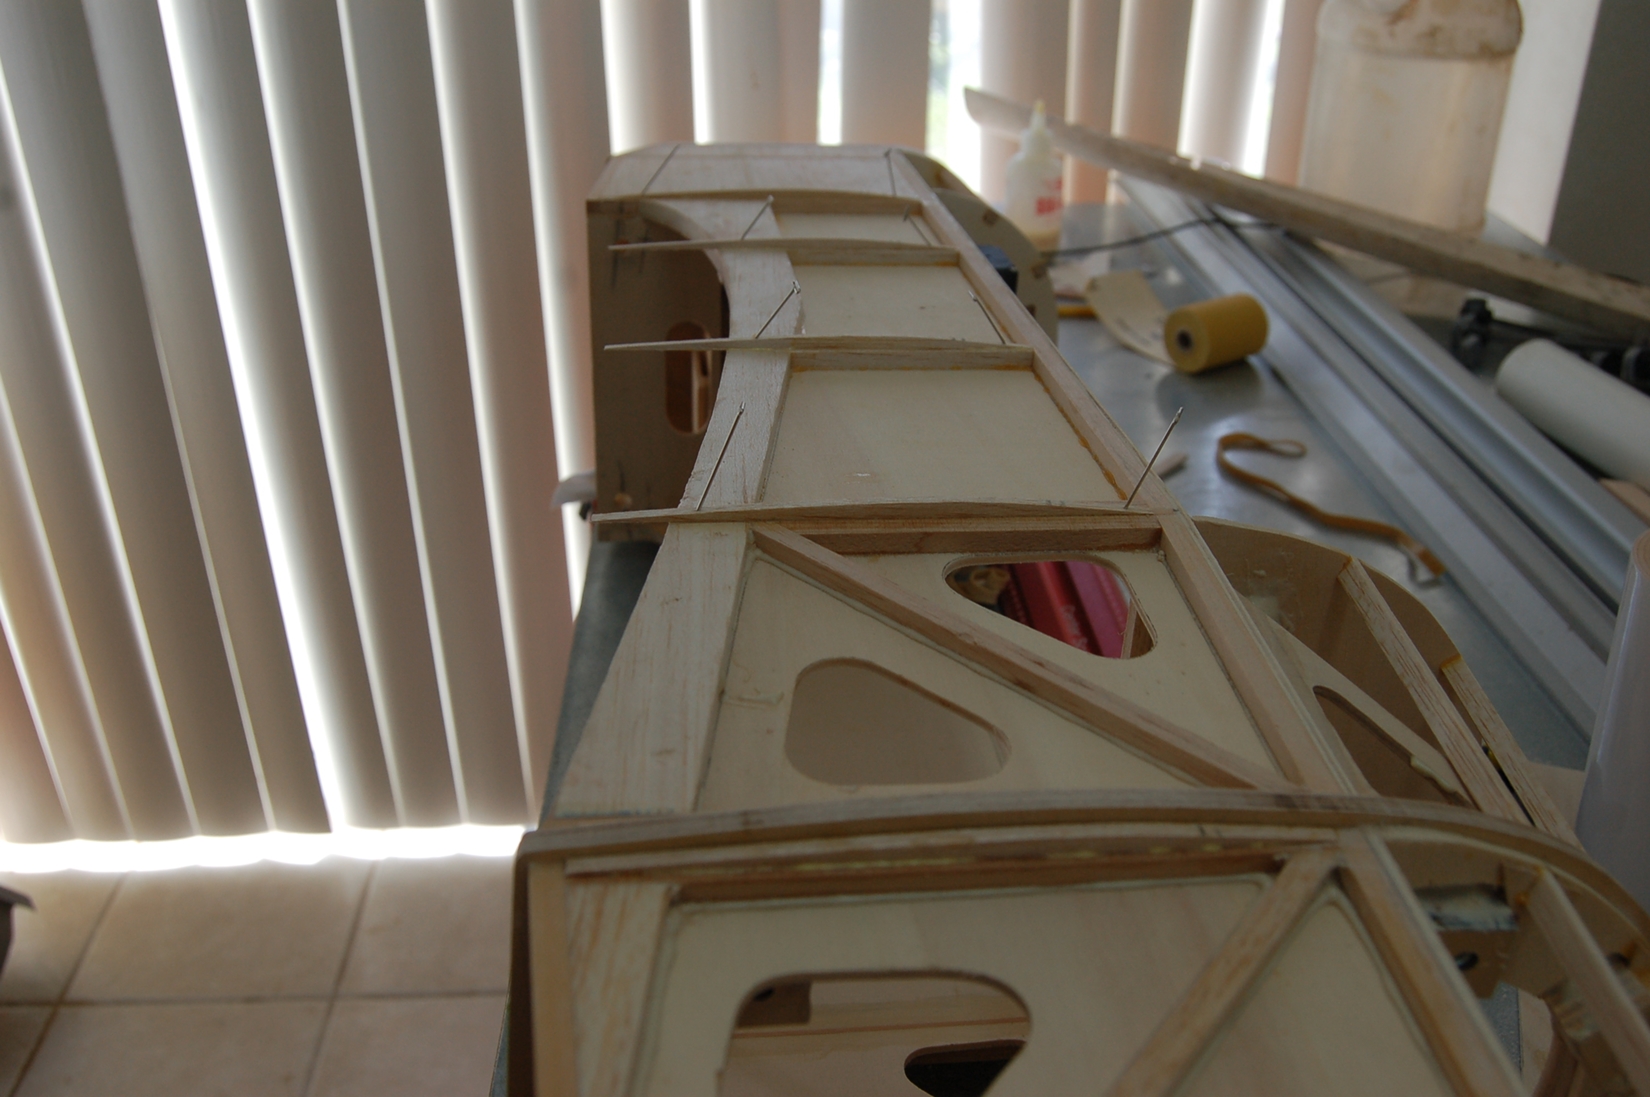
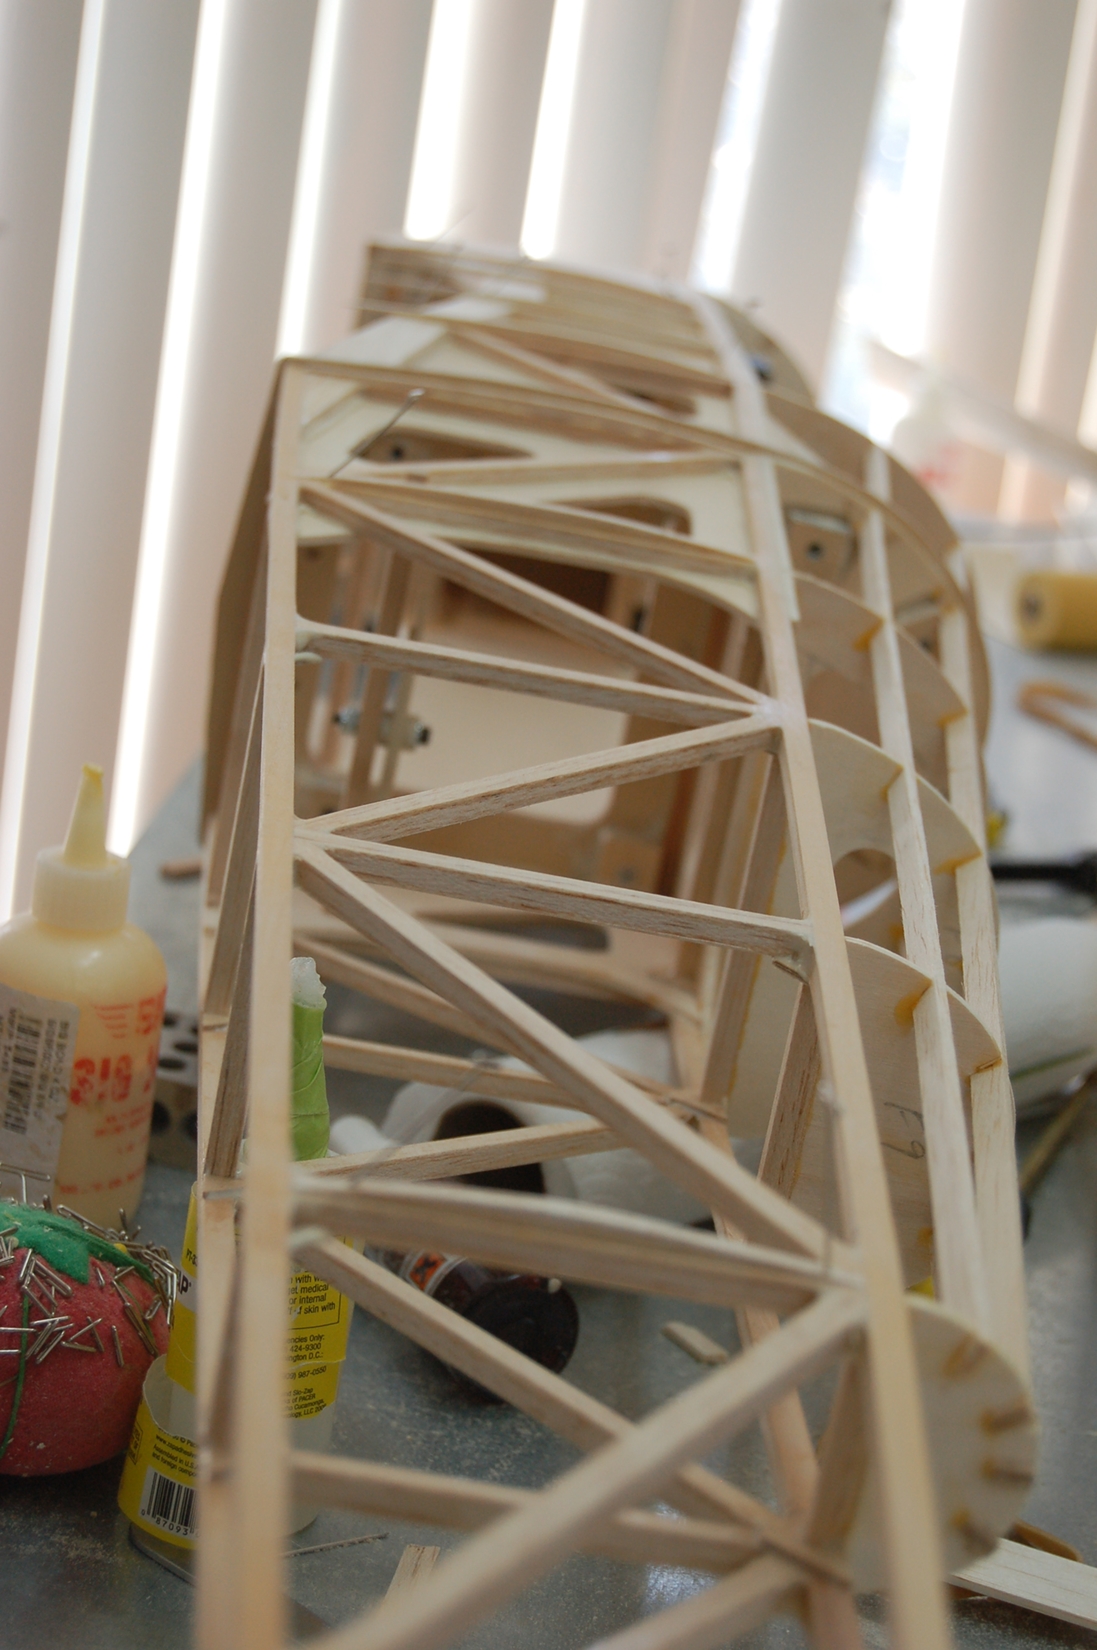
Now as the fuse gets smaller at the back, the arced former gets smaller. So I made the last former and glued it in place and cut some oversized formers for the middle. Then sanded the middle formers to the correct conical plane. At the very back of the fuse it goes flat again. So the very last former was glued down oversized and sanded in to the last small arched one and the flat tail to make a transition rib.

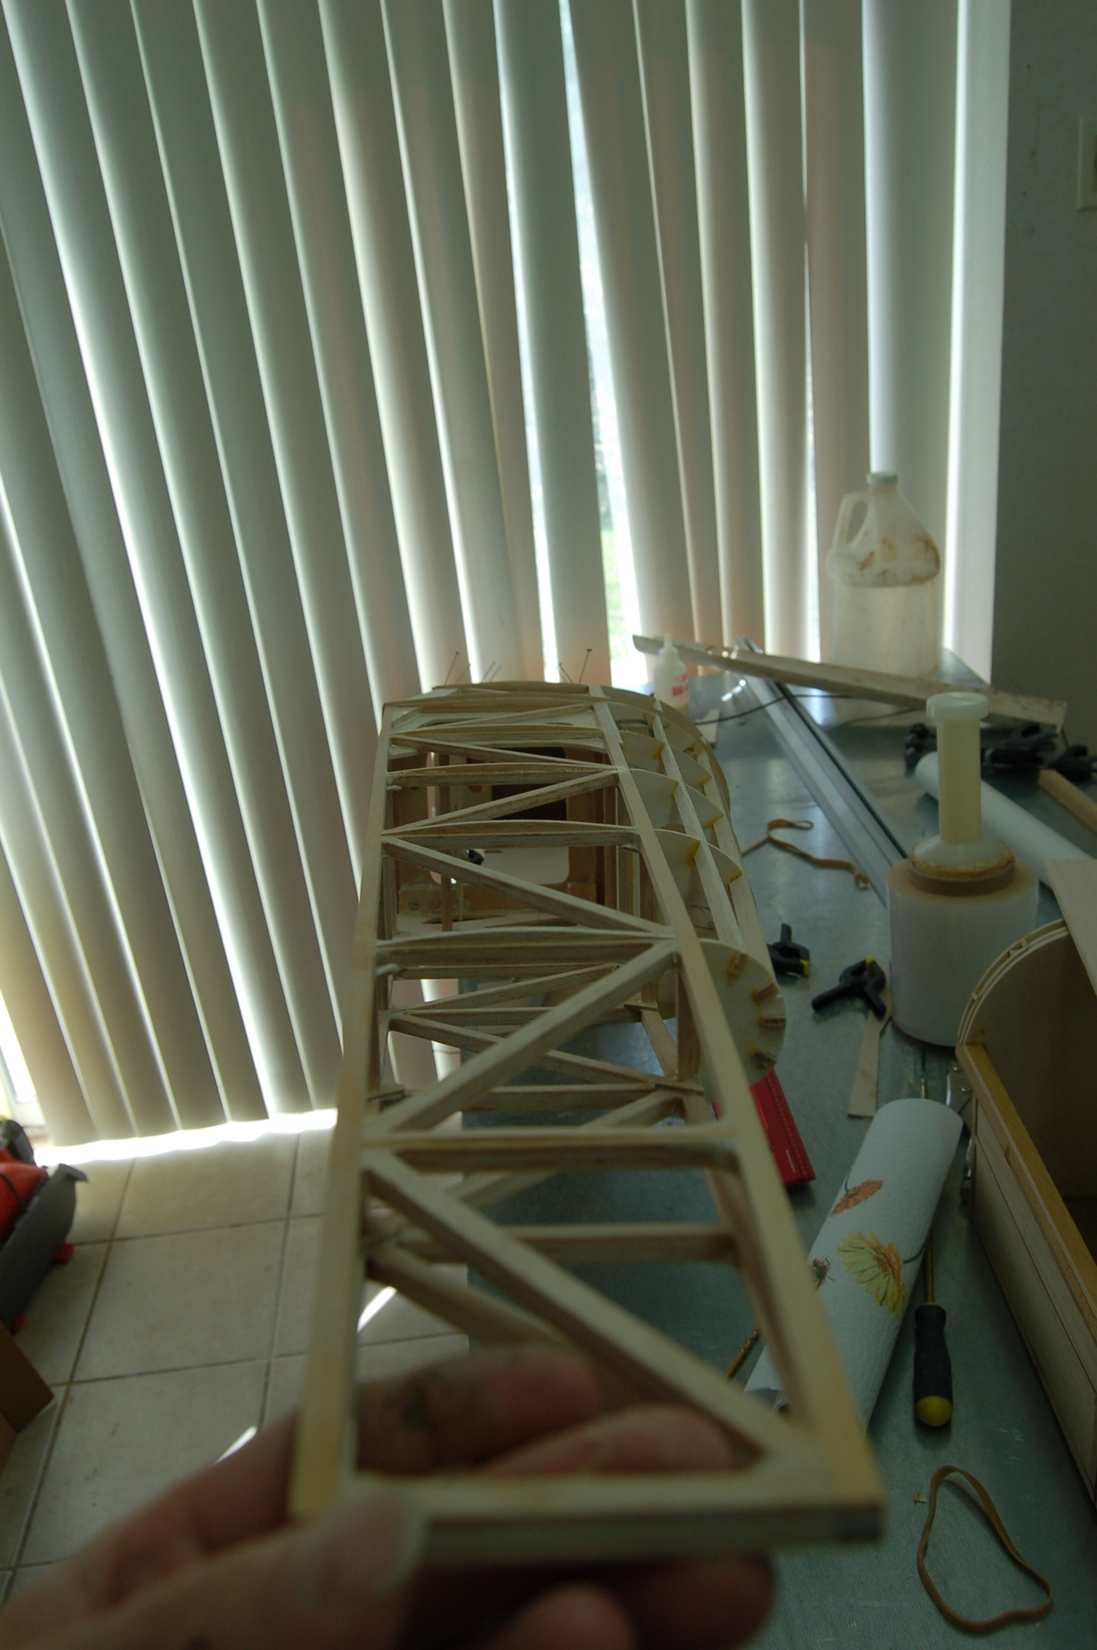
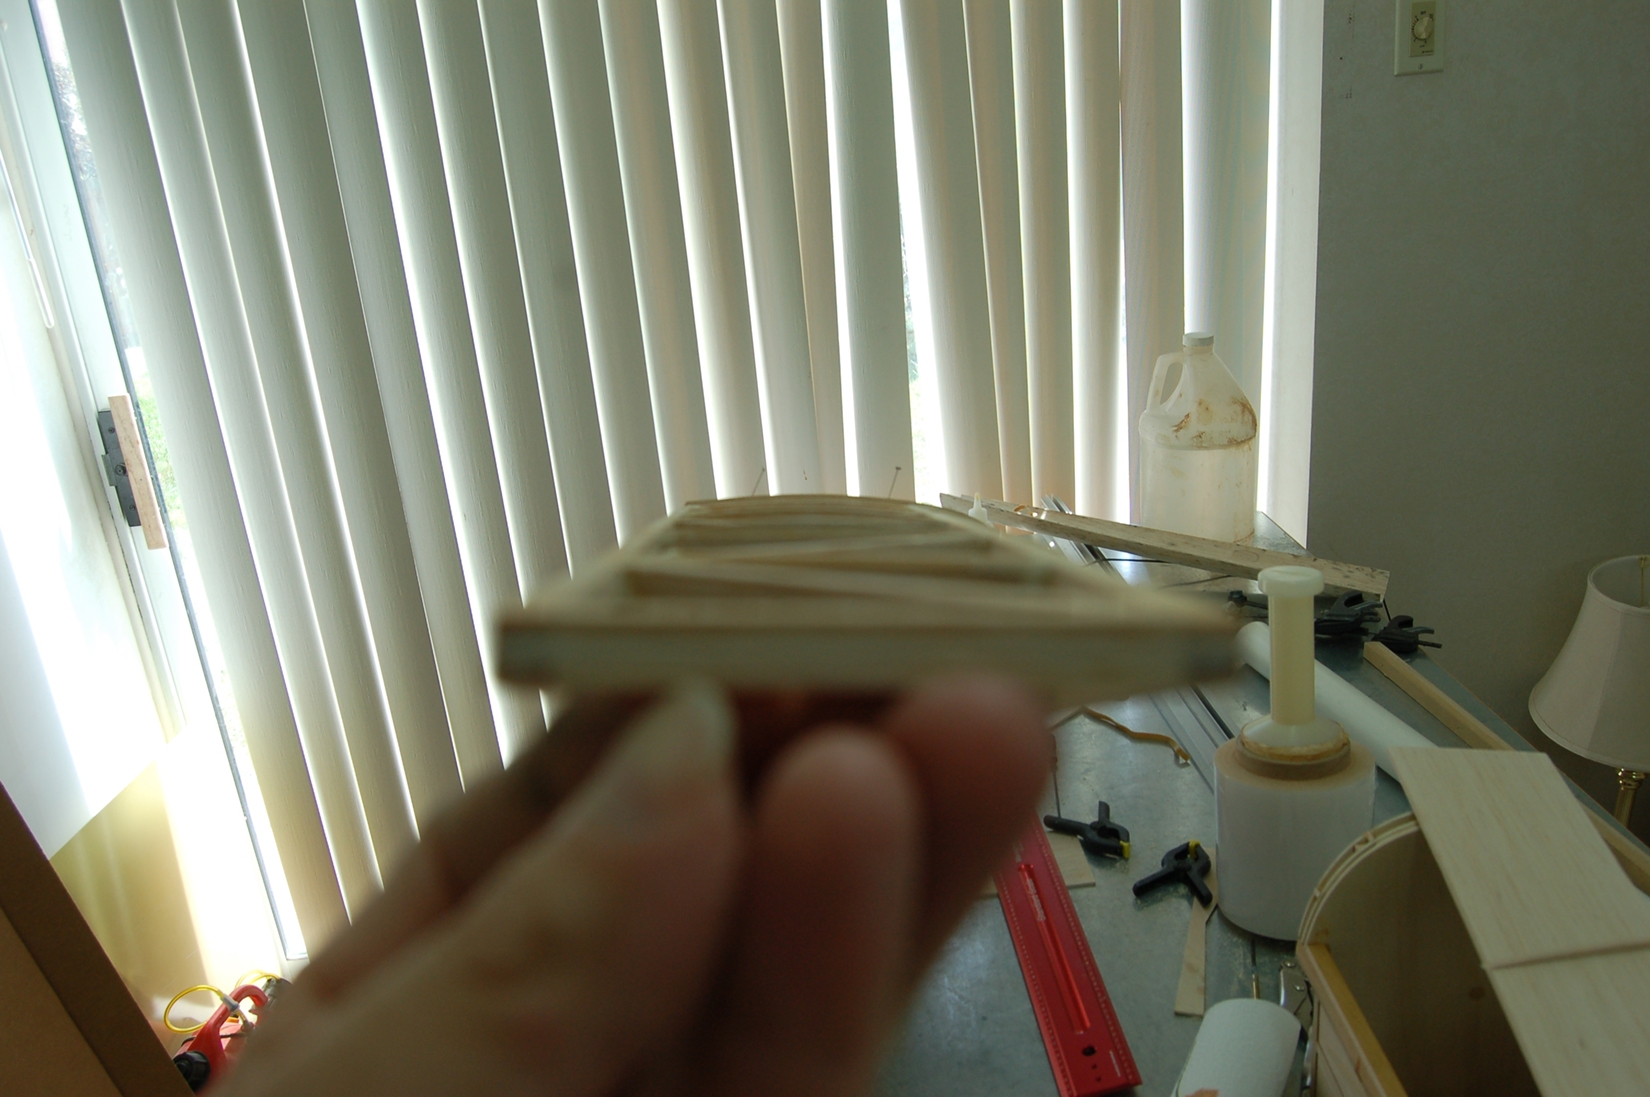
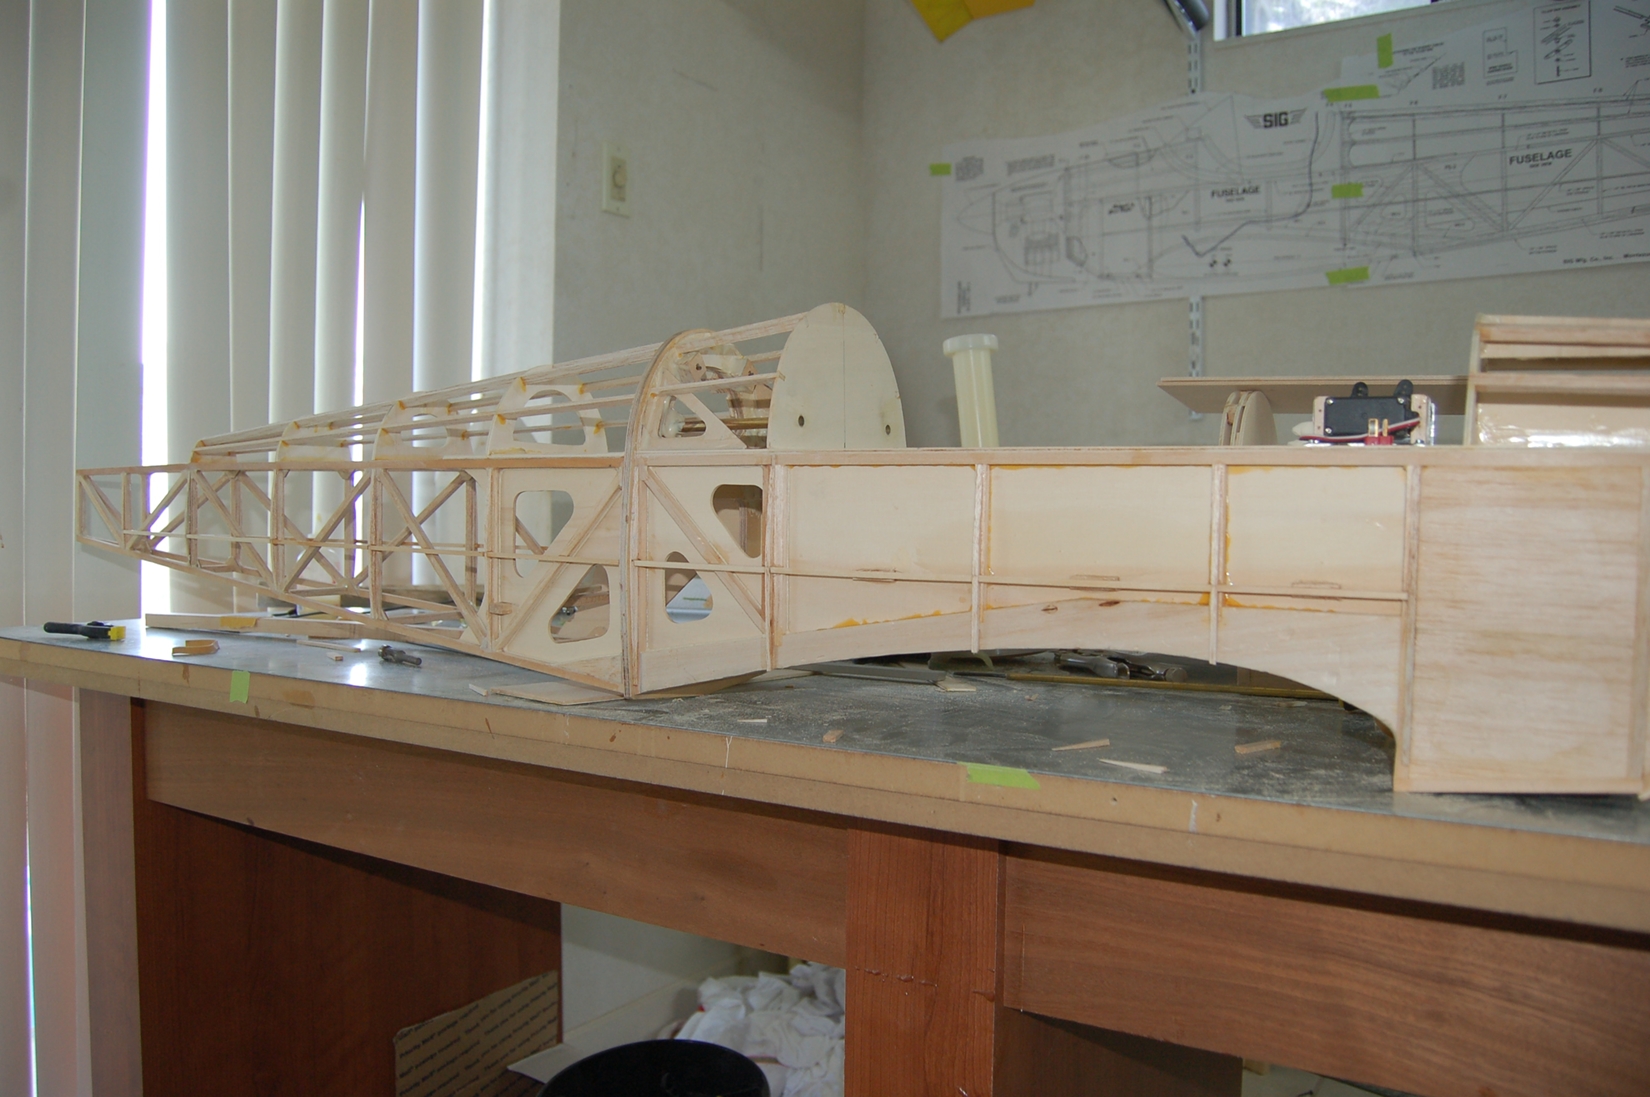
Getting a little closer to sheeting the fuse. So glad I didn't duff the 40%. Have to remember that tomorrow when the alarm goes off.
Kevin
Not initially, I had to apply the 40/60 principle. What is the 40/60 principle ? Well (some may have slightly dif ratio), 40% of life is just plane showing up. If you get the first 40% right, the 60% usually takes care of itself. Duff the first 40 and, well lets just say you end up in the cart that your neighbor is pulling.
So, today it was 98 with a starting humidity at 7 am at 98 % . Nothing outsidish was going to hit my itinerary today. So I decided to not waist the day and drag 40% of me down to the shop.
And what do you know ??? I found my givadamn hiding under some dirty laundry in the corner. So I said, "come on, lets go"
Onward.......
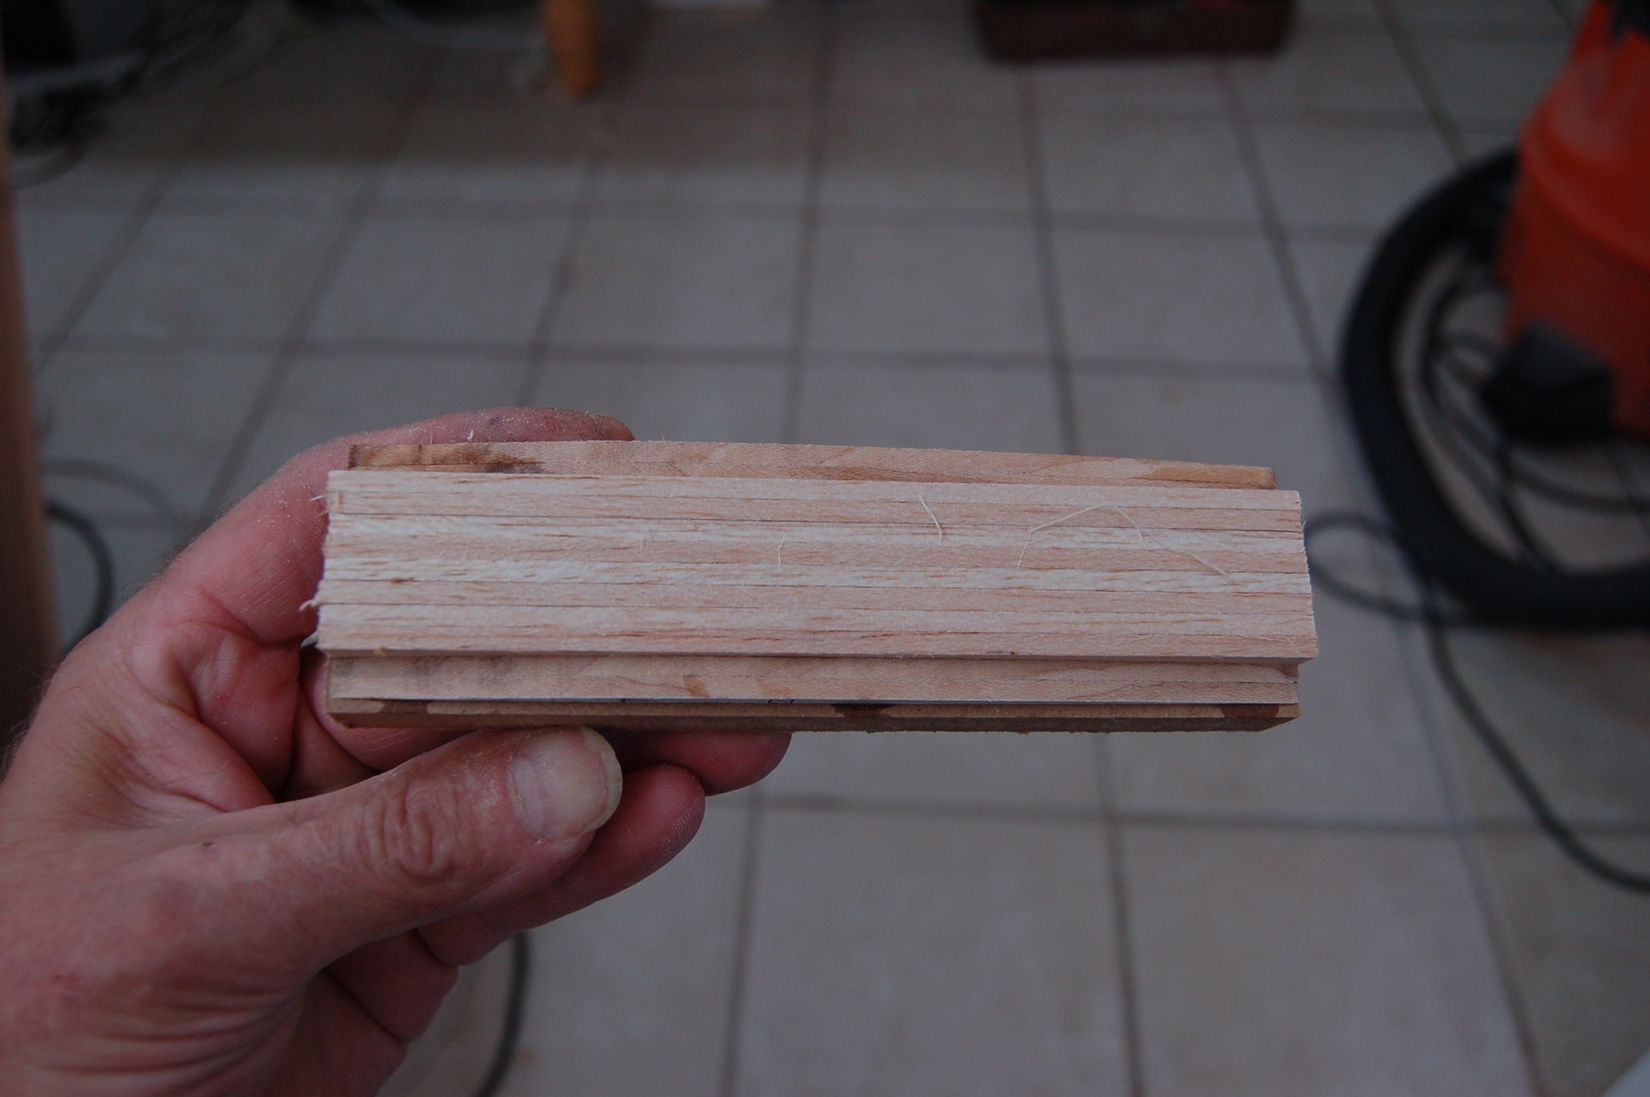
The plans called for a 1/8 x 3/8 spruce longeron down the side of the fuse. The covering is to bend over that longeron and make 2 flatish sides. Since I am sheeting the fuse I decided I wanted to round out the fuse a little. In the first pic the curved line is what my fuse will look like. Notice the curve is asymmetrical to the fuse side. That happens as the fuse size is reduced as you get to the tail feathers. At the largest part of the fuse the arc becomes more symmetrical.
So I made some former add-on's to make my fuse rounder. Also cut the 3/8 longeron down to 1/4- .
I cut 2 ribs out of maple and made a jig to shape 1/8 balsa ribs. The balsa got sandwiched between the maple and sanded to shape.
Since the formers are asymmetrical I marked the tops with 2 lines to keep them oriented.
Now as the fuse gets smaller at the back, the arced former gets smaller. So I made the last former and glued it in place and cut some oversized formers for the middle. Then sanded the middle formers to the correct conical plane. At the very back of the fuse it goes flat again. So the very last former was glued down oversized and sanded in to the last small arched one and the flat tail to make a transition rib.
Getting a little closer to sheeting the fuse. So glad I didn't duff the 40%. Have to remember that tomorrow when the alarm goes off.
Kevin

 08-28-2014, 02:16 PM
#308
Some of the guys get to have all the fun. Me, I have been so busy with other things I'm not flying or building a plane and this Friday I'm going up on the river to spend Labor day weekend, other words I need a break, sounds like Kevin could use one also. I have a full scedual when I get back, same old grind and I can't wait to get back in the air again.
Kevin at least your getting something done and it's looking good, Robert is nearly done with his beauty and most threads are moving slow as snails. I don't get in here much these days and I'm looking foward to another late fall/winter build doing what I really like.
Take care,
Leroy
Kevin at least your getting something done and it's looking good, Robert is nearly done with his beauty and most threads are moving slow as snails. I don't get in here much these days and I'm looking foward to another late fall/winter build doing what I really like.
Take care,
Leroy
08-28-2014, 02:30 PM
#309
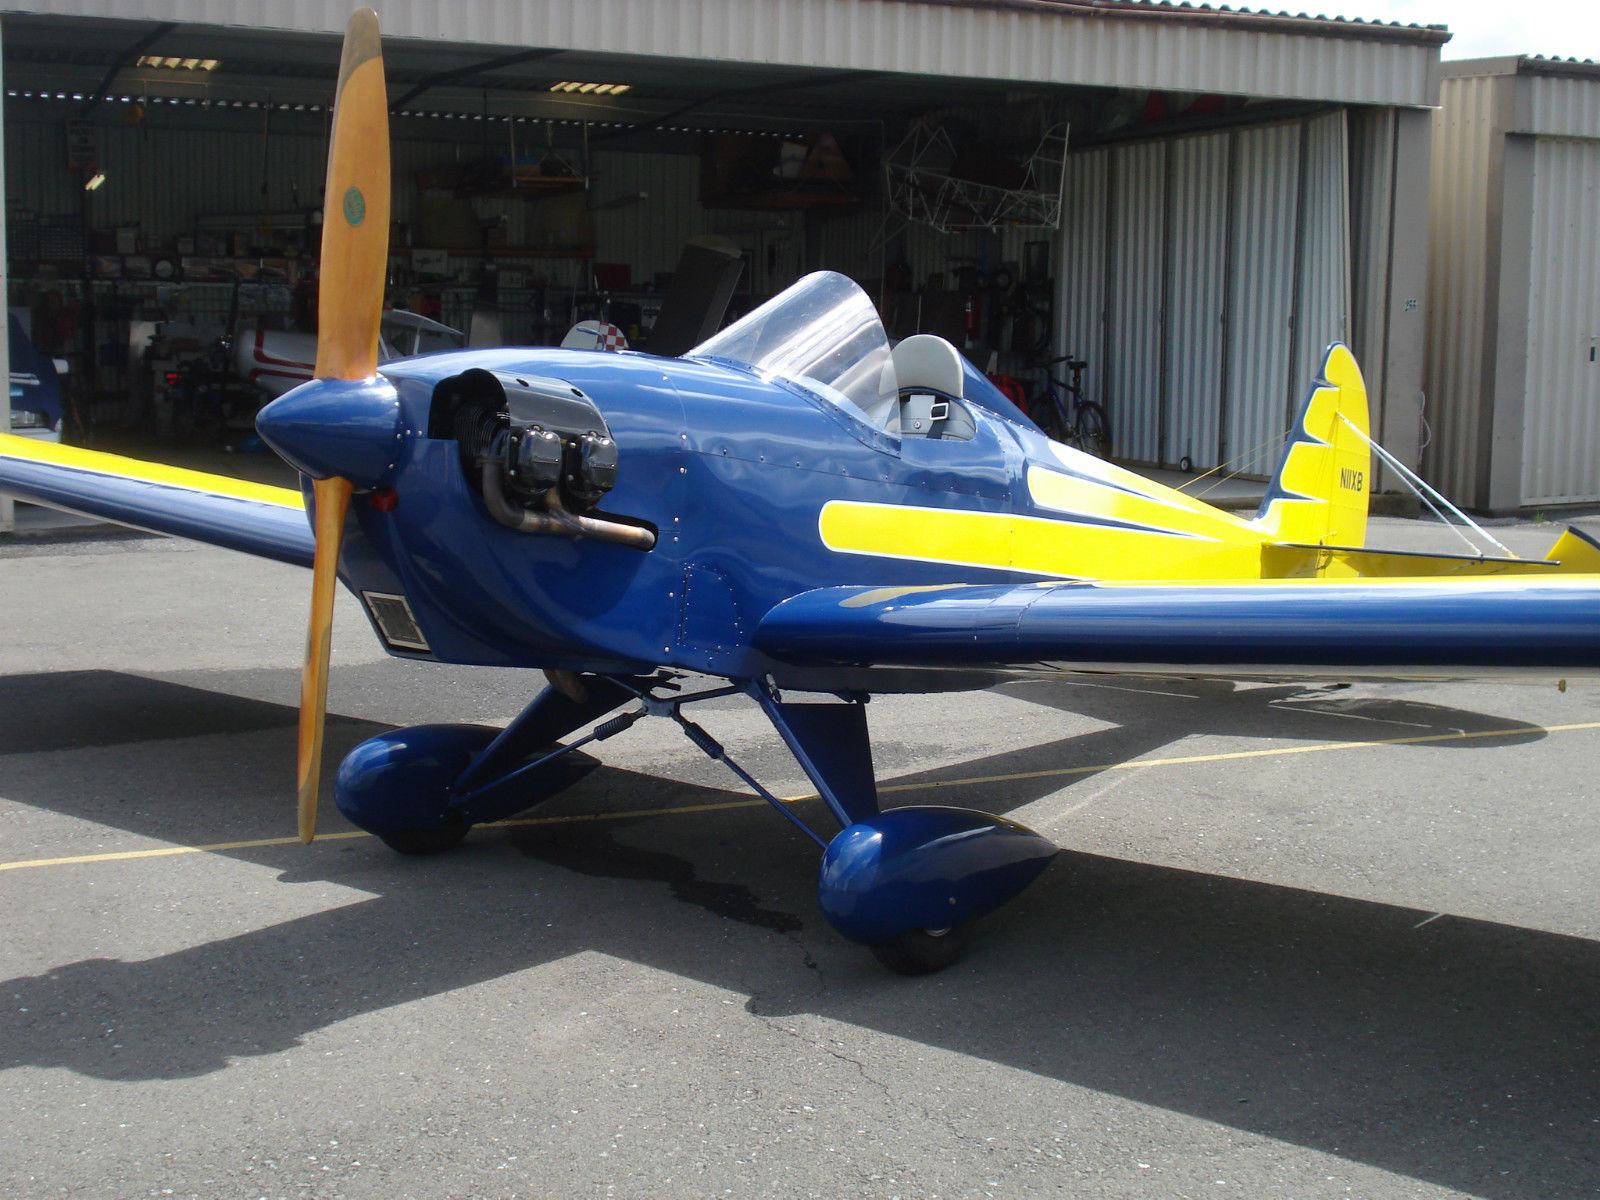
Excellent build thread. I recently bought a SW of the 1:1 type, so in my spare time I have been searching the web for info. There was an article in Kitplanes on the Spacewakers that Maxey Hester built for himself and Hazel Sig. His first one took a bit under 5 months to build, but the second one took only 7 weeks! He went on to build a third one to experiment with an auto engine conversion and also built the prototype of the SWII, because he told Jessie Anglin that nobody could build it as fast. The one I bought was built from a kit that was sold by Jessie Anglin. It's serial number is #108
Highplains thats a beauty compared to the SW11., and the color is even nice for a change. The more central cockpit and head rest give it nice ballance.
Highplains thats a beauty compared to the SW11., and the color is even nice for a change. The more central cockpit and head rest give it nice ballance.
Leroy
08-29-2014, 01:06 PM
#314
Thread Starter
Join Date: Jul 2012
Location: Missouri
Posts: 1,127
Likes: 0
Received 0 Likes
on
0 Posts
HighPlains, thanks for the added info on the Space Walker.
Leroy, of course I don't mind. I always love the chance to take another look at your creation.
As far as the engine, since it has been brought up. I, like Leroy, am going to add the Top Notch engine kit to this SW. As Leroy stated, it is beautiful . It is the cherry on the sunday, or the Star/Angle on the tree. Wouldn't feel right without it. Only hope it looks as good on mine as it does on his. . I also will not cover it.
Flyer,
Thanks for the labor day wishes. I am a teetotaler though. Not cause I am a prude, cause I have difficulty saying when. There was a line in the movie ( A Beautiful Mind) that I found profound. It Goes " Like a diet of the mind, I choose not to indulge certain appetites " I'll tip my soda to ya in a toast. Happy Labor Day
Kevin
Leroy, of course I don't mind. I always love the chance to take another look at your creation.
As far as the engine, since it has been brought up. I, like Leroy, am going to add the Top Notch engine kit to this SW. As Leroy stated, it is beautiful . It is the cherry on the sunday, or the Star/Angle on the tree. Wouldn't feel right without it. Only hope it looks as good on mine as it does on his.
. I also will not cover it. Flyer,
Thanks for the labor day wishes. I am a teetotaler though. Not cause I am a prude, cause I have difficulty saying when. There was a line in the movie ( A Beautiful Mind) that I found profound. It Goes " Like a diet of the mind, I choose not to indulge certain appetites " I'll tip my soda to ya in a toast. Happy Labor Day
Kevin
08-30-2014, 06:58 PM
#315
Thread Starter
Join Date: Jul 2012
Location: Missouri
Posts: 1,127
Likes: 0
Received 0 Likes
on
0 Posts
Well, have you ever started a session in the shop and wish you had done 30 min prep one of the five days before.
That was me. The center wing section needs to be attached to the fuse to finish up the framing on the underside of the fuse. That's what I was going to do today. Although I am gluing the center wing to the fuse it still needs to be indexed to finish the fuse ( will glue it at later date). The wing bolts that I wont be using required wood blocks in the fuse that I didn't put there. As I was centering the wing I decided I would need those blocks after all. I decided to use dowels to index and for sheer strength. So epoxy in blocks and wait to dry.
I had tac glued measuring points to center the wing with the tail..


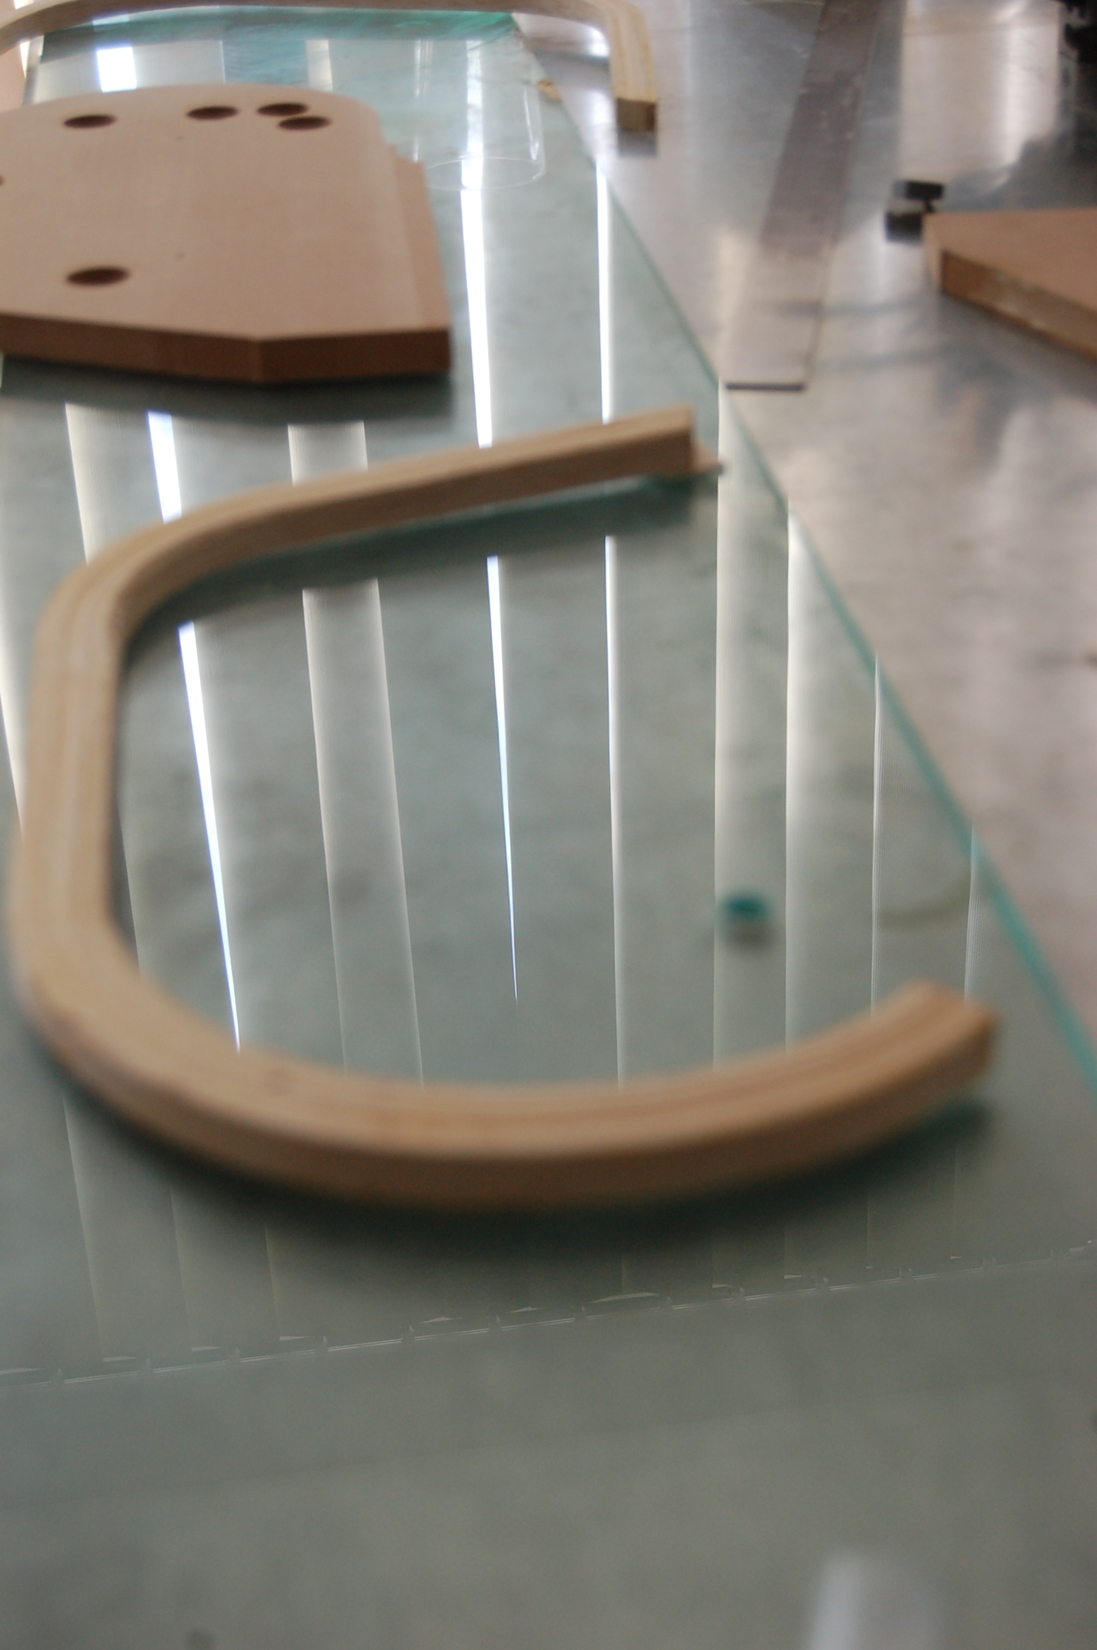
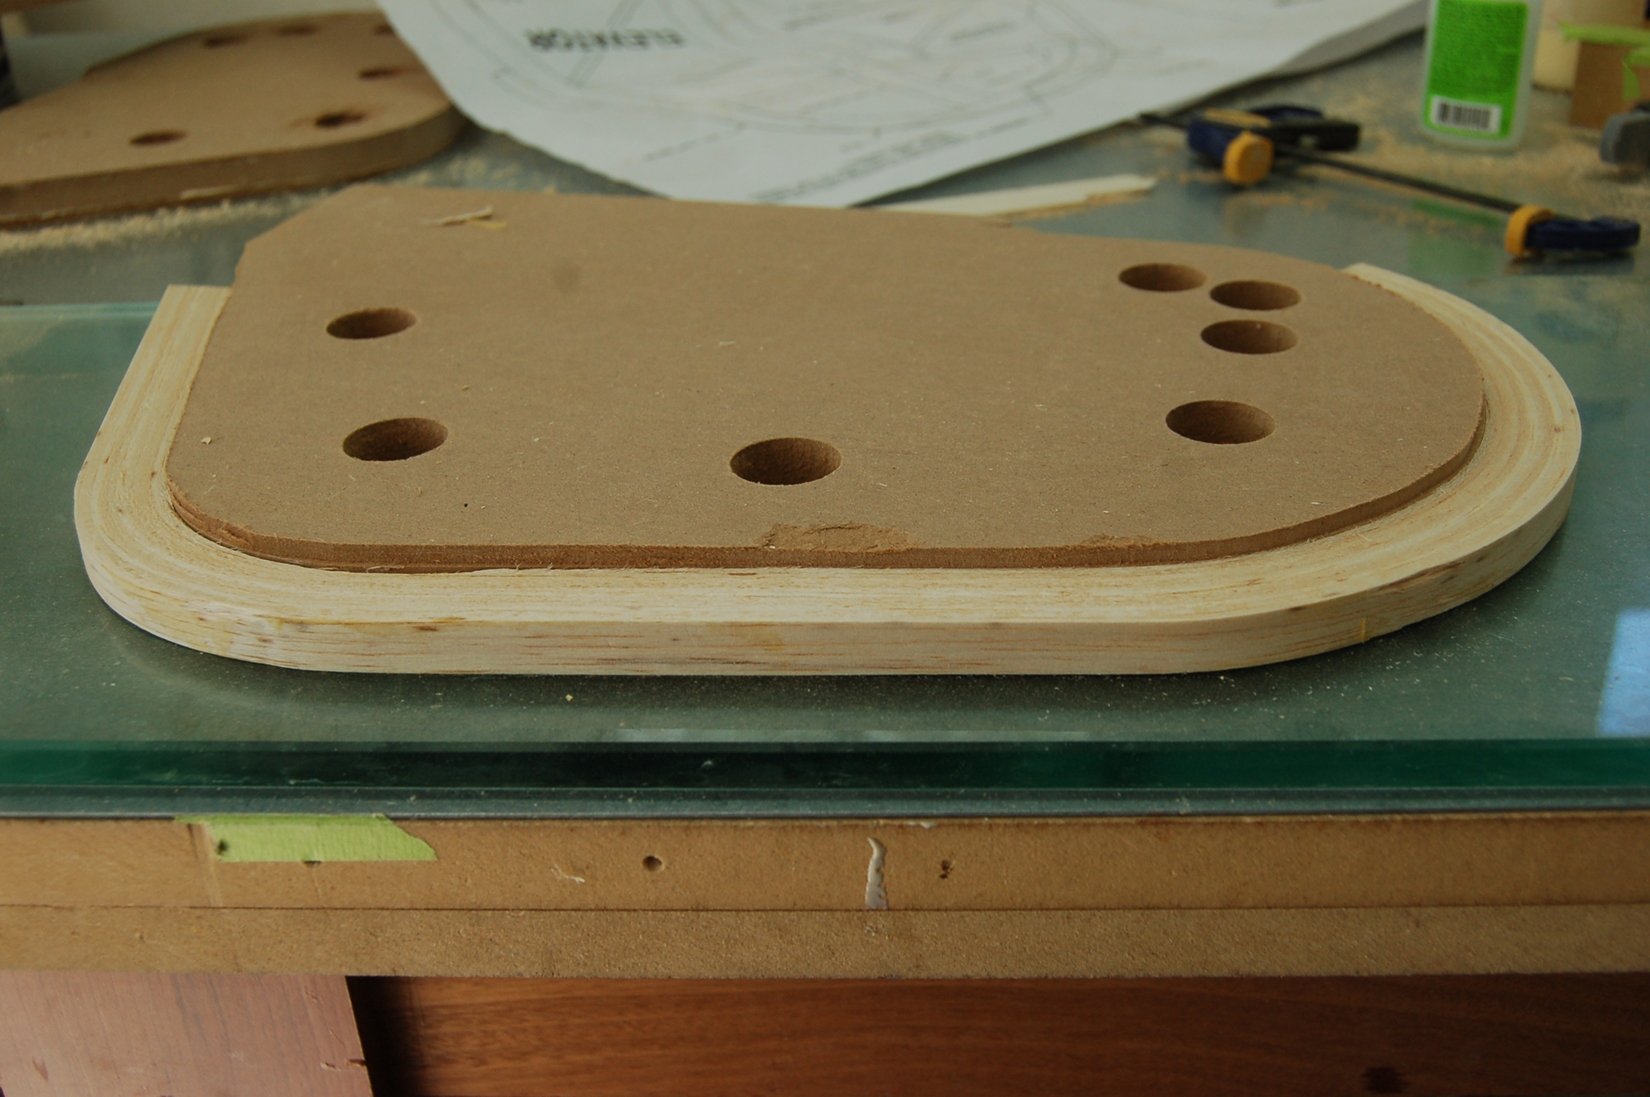
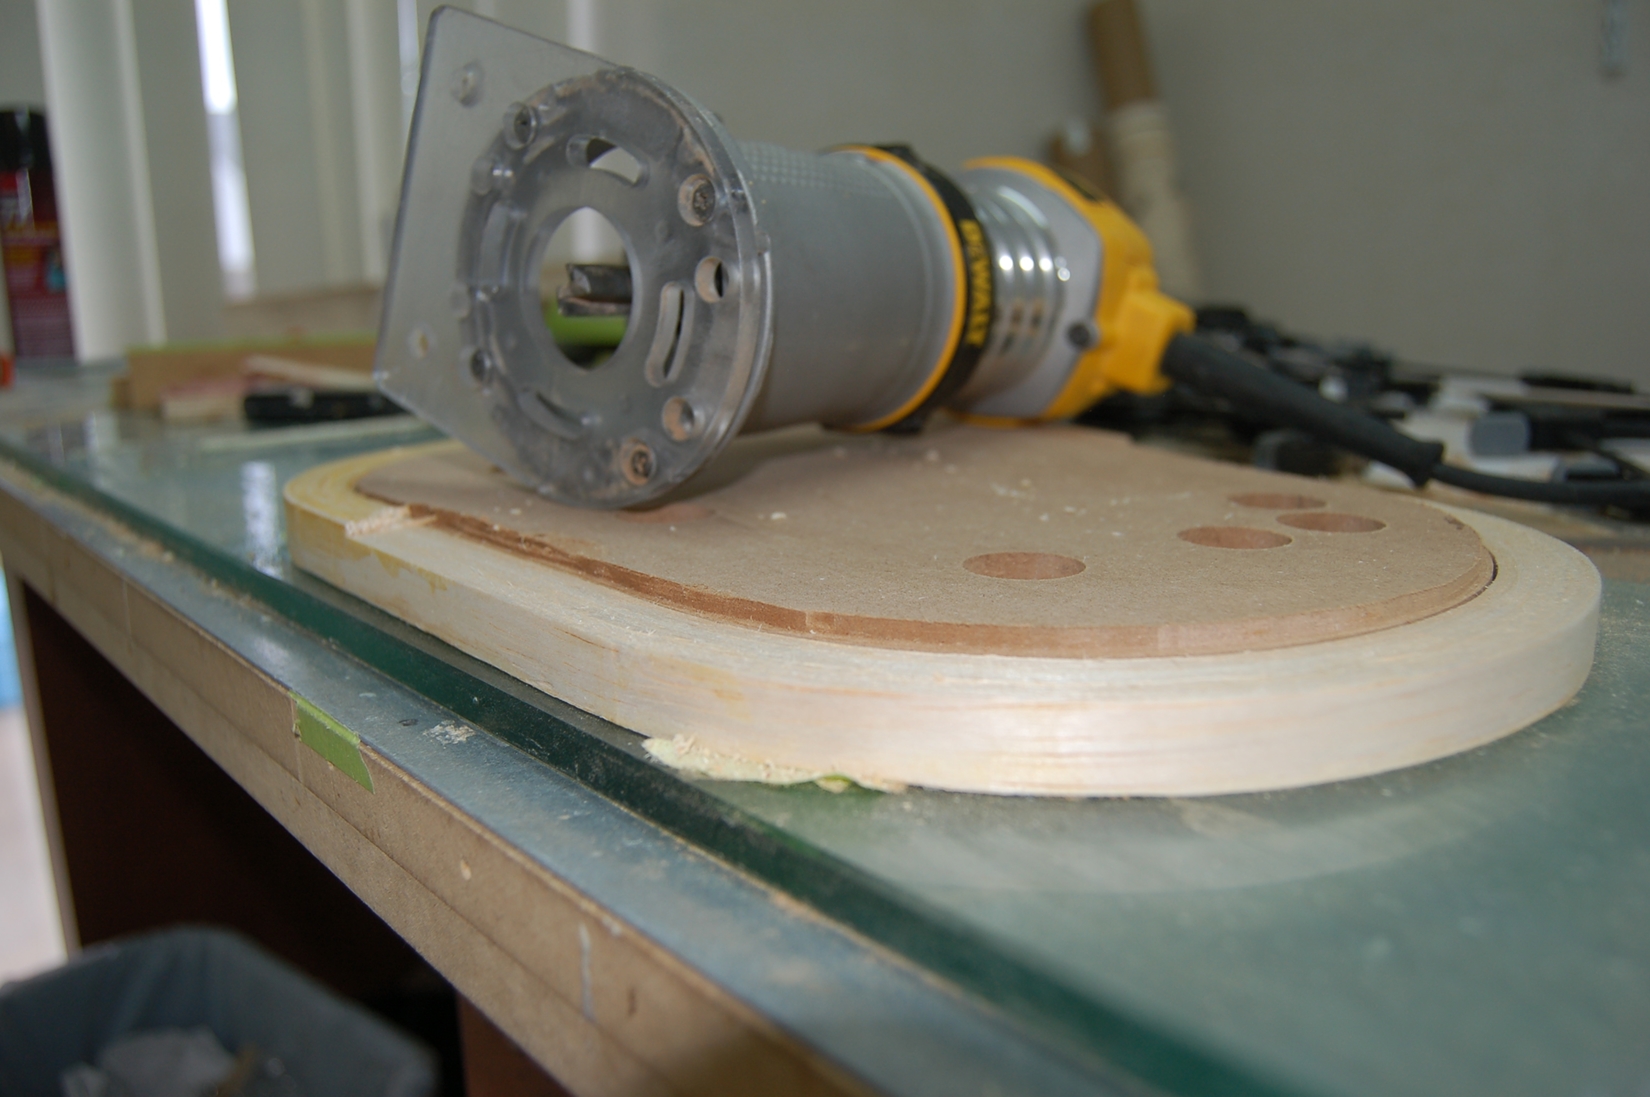
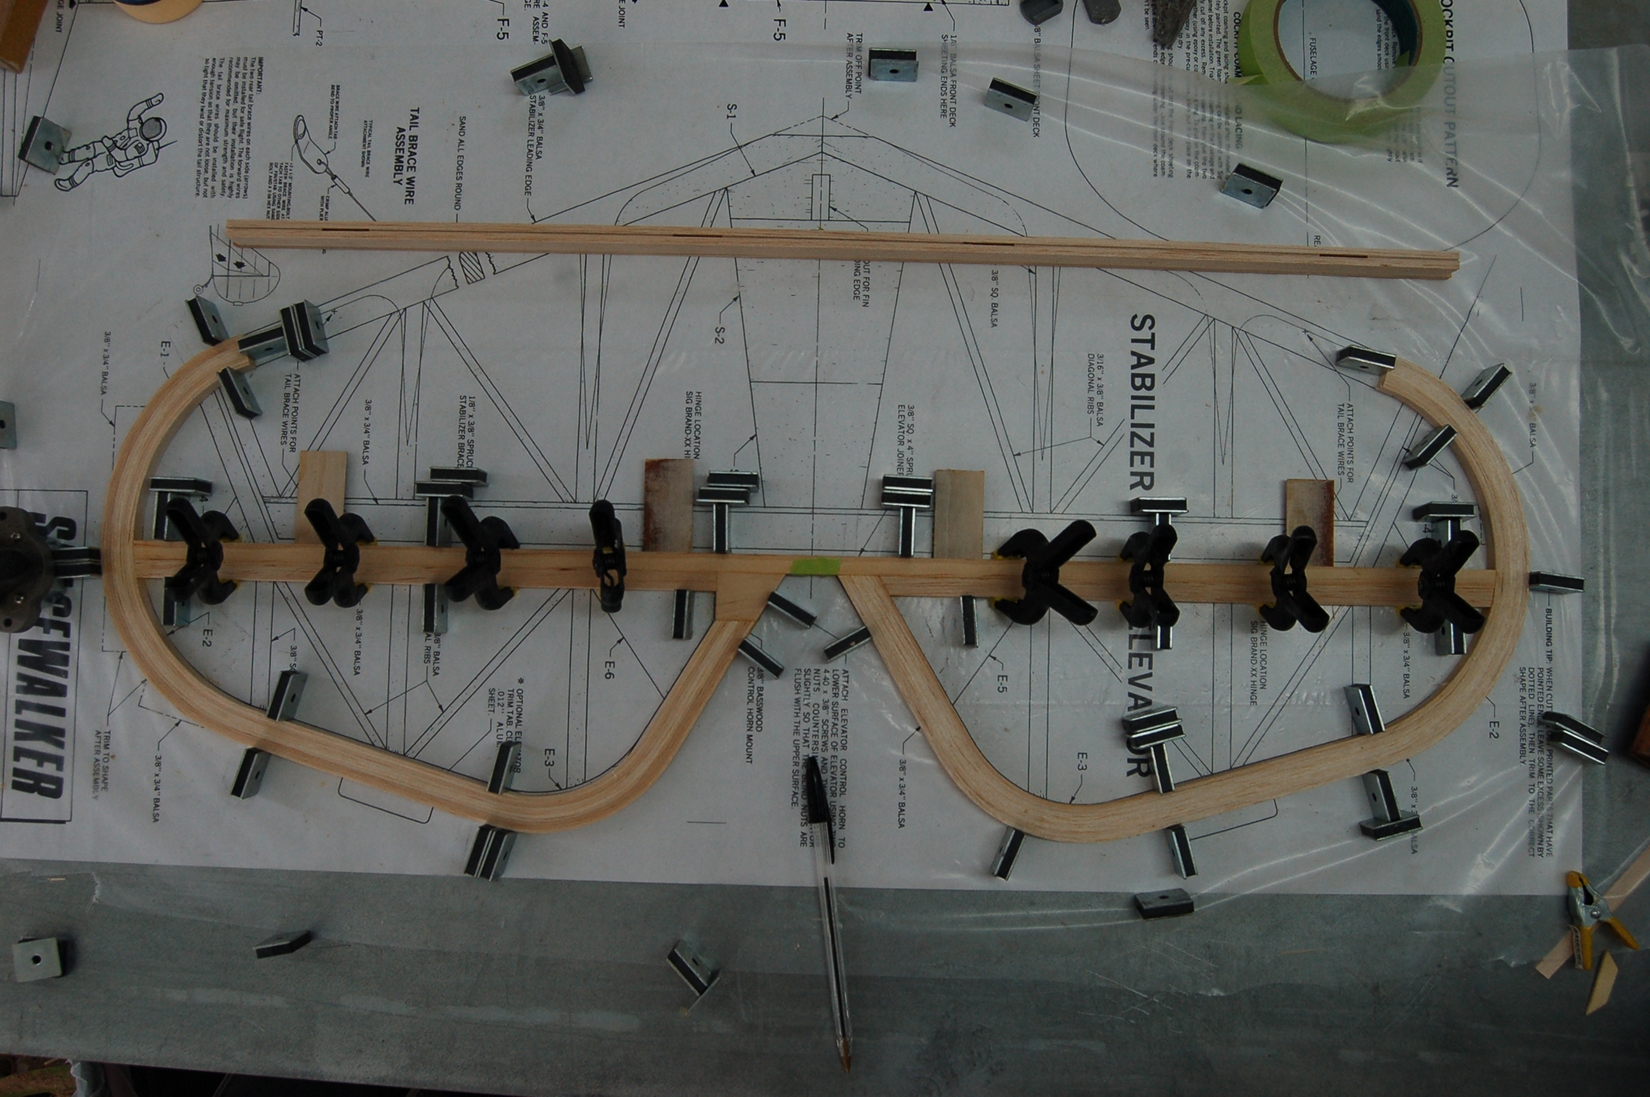
At this point I decided I needed the wing mount blocks. So I cut them fit them and glued them in. While that was drying I decided to turn my attention to the tail feathers. The kit comes with sectional cut parts for the curves on the tail surfaces. I decided to laminate the curved portions of the tail . I cut a template for the elevators then used a flushing bit to cut an exact duplicate.
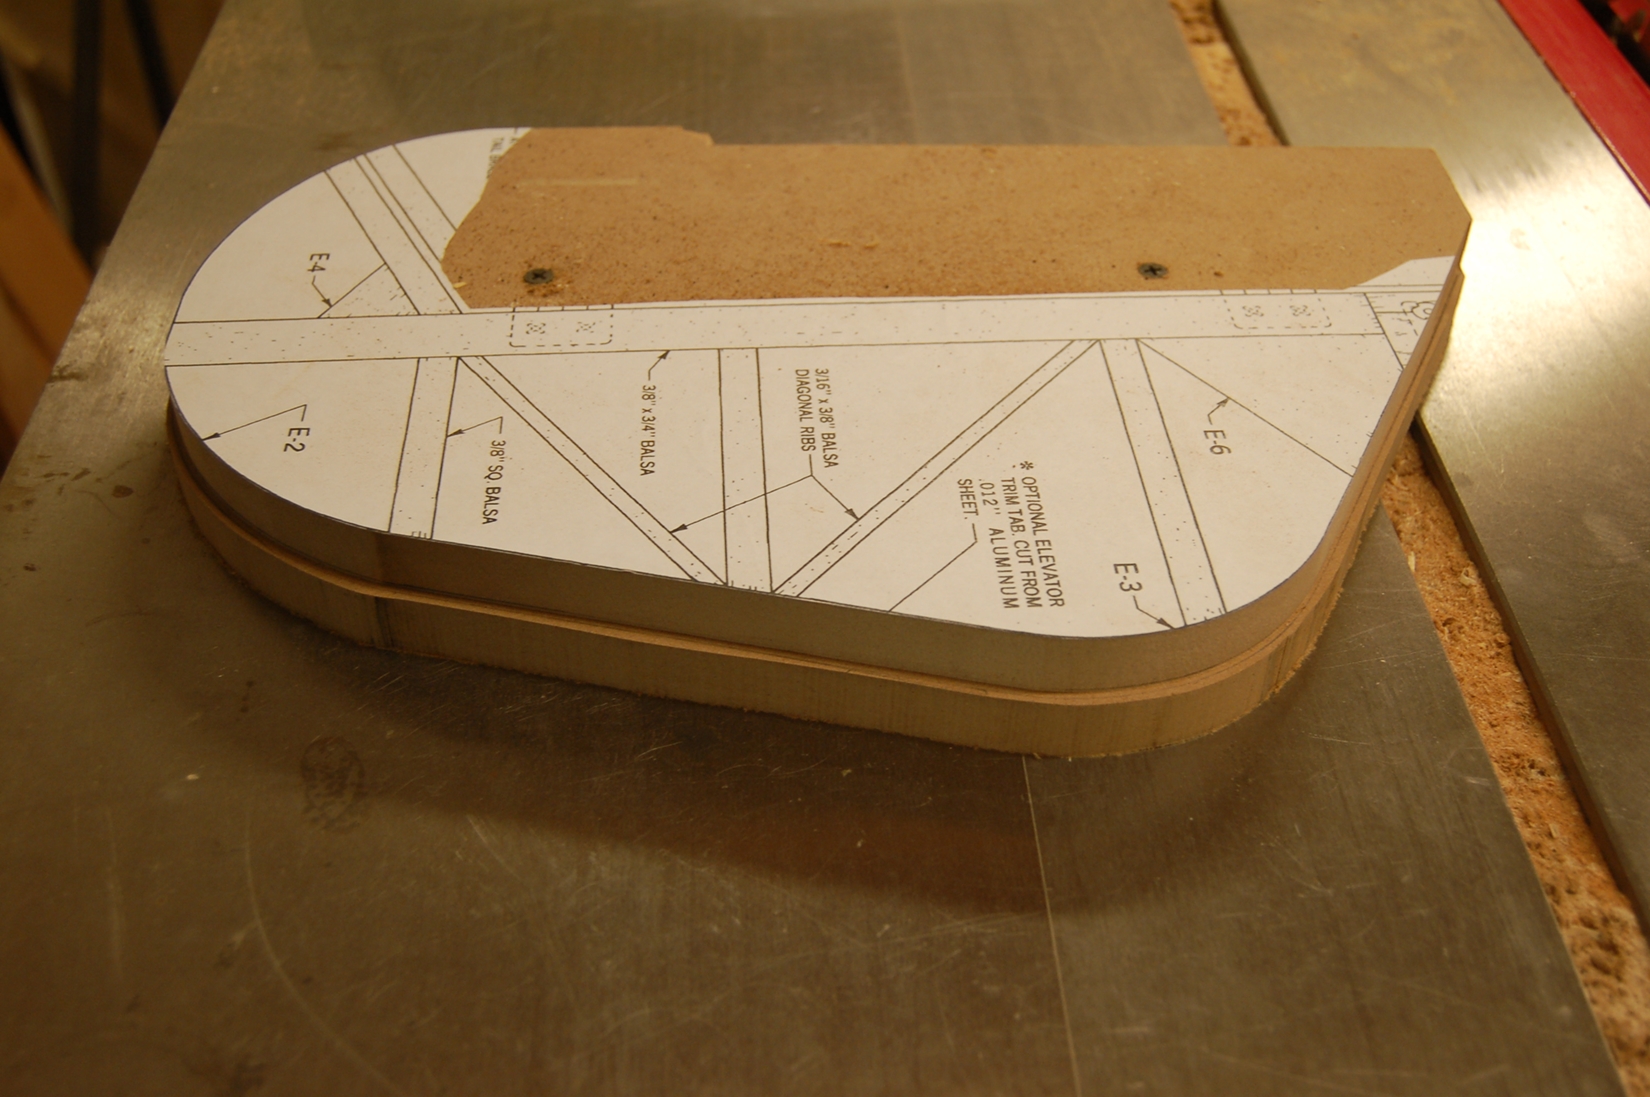
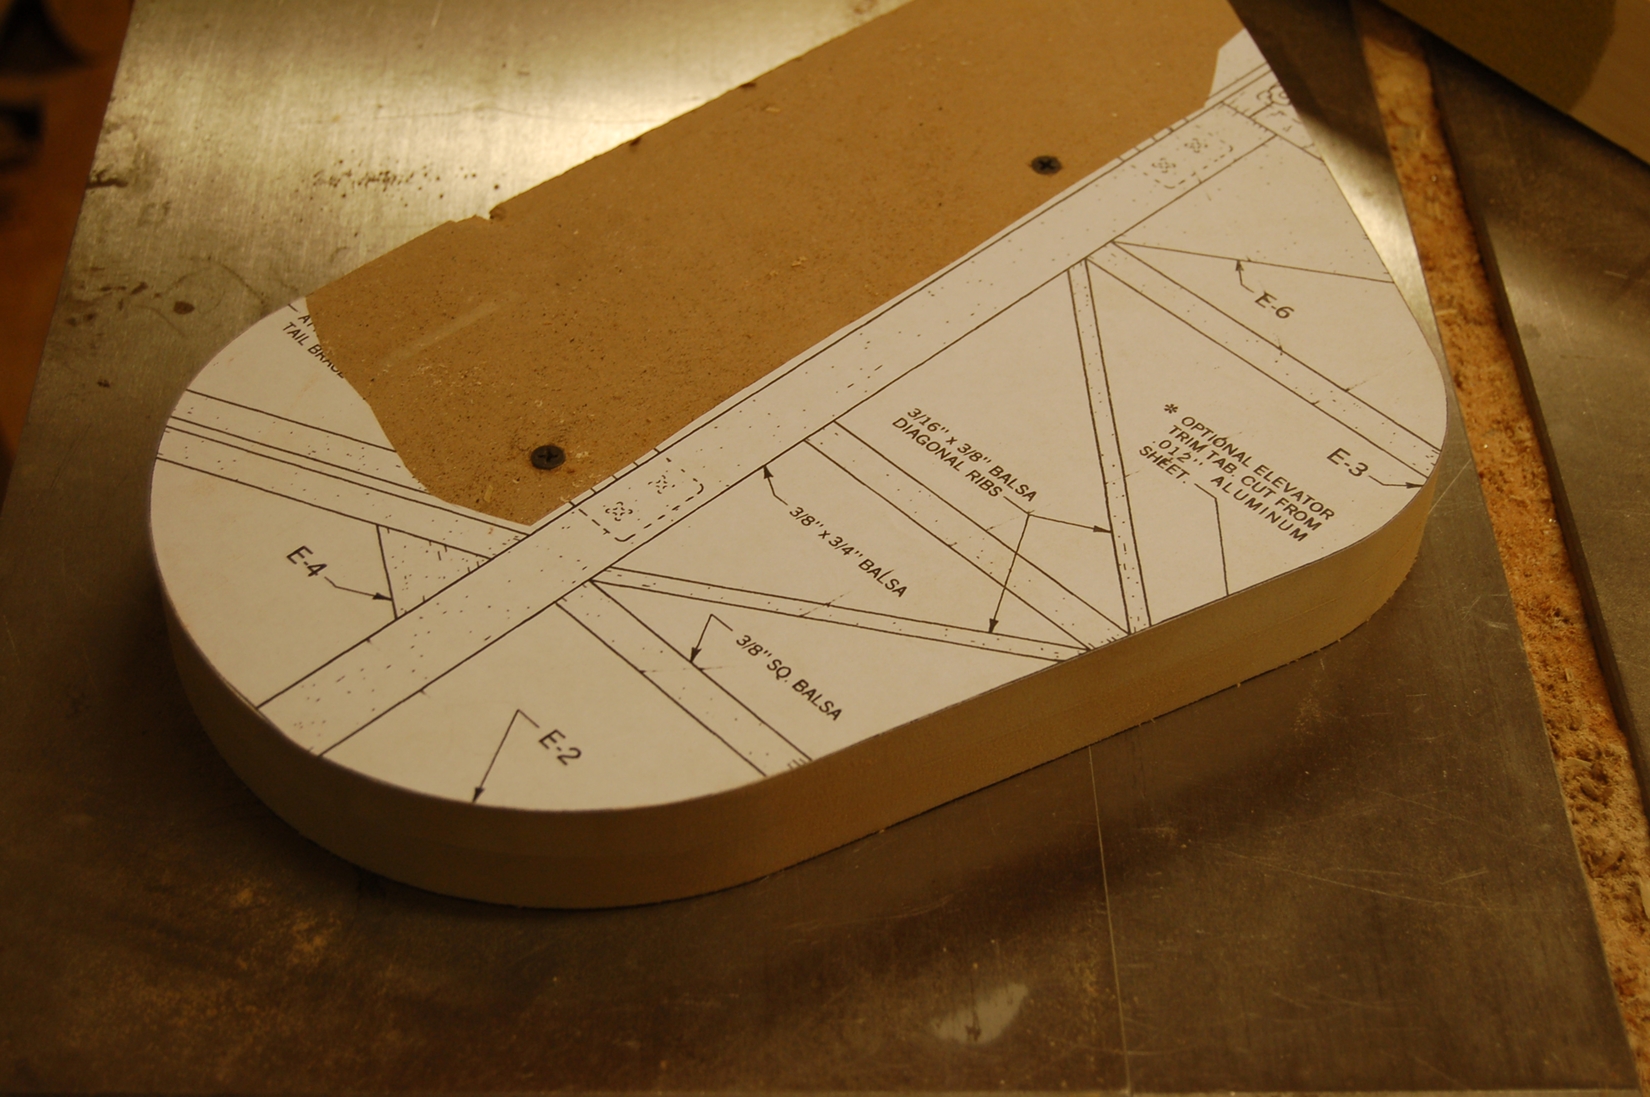
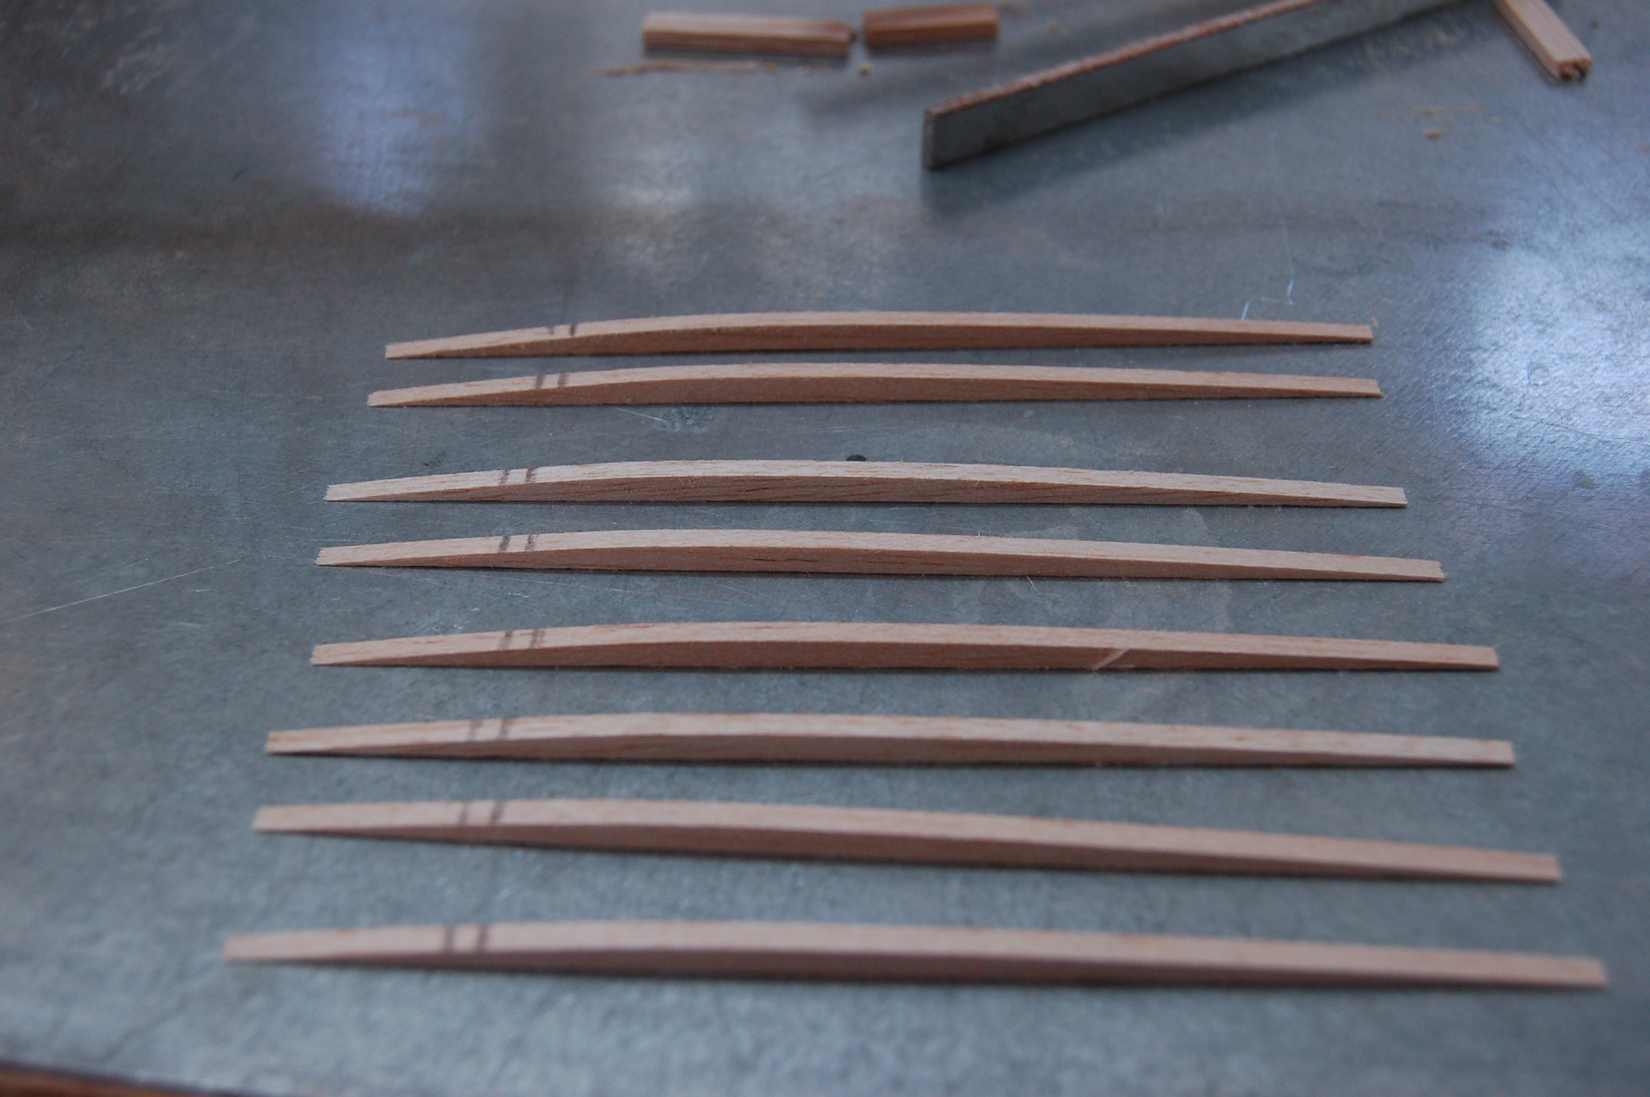
My initial plan was to use 6 pieces of 1/8 inch balsa to make the curve. This was too thick, even after soaking in a bucket of water the strips wanted to fracture at the tightest bend. So plan B. Went to 10 pieces a hair under 3/32 and that bent fine.
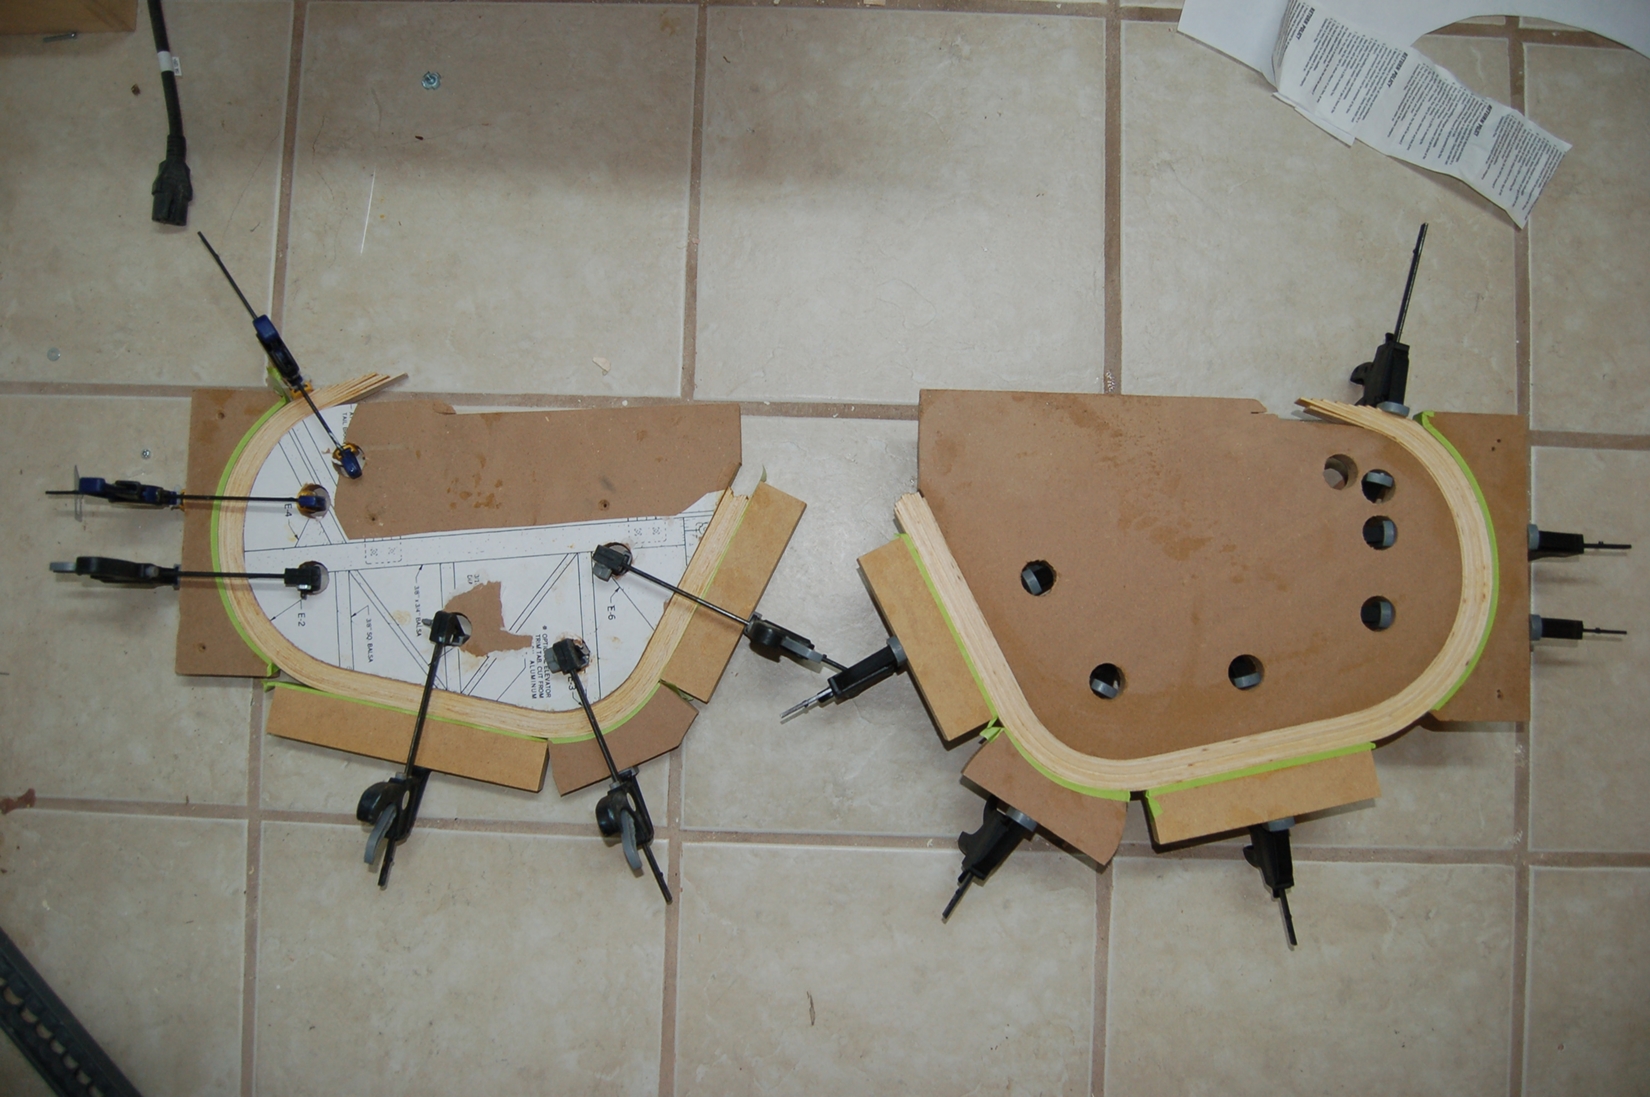
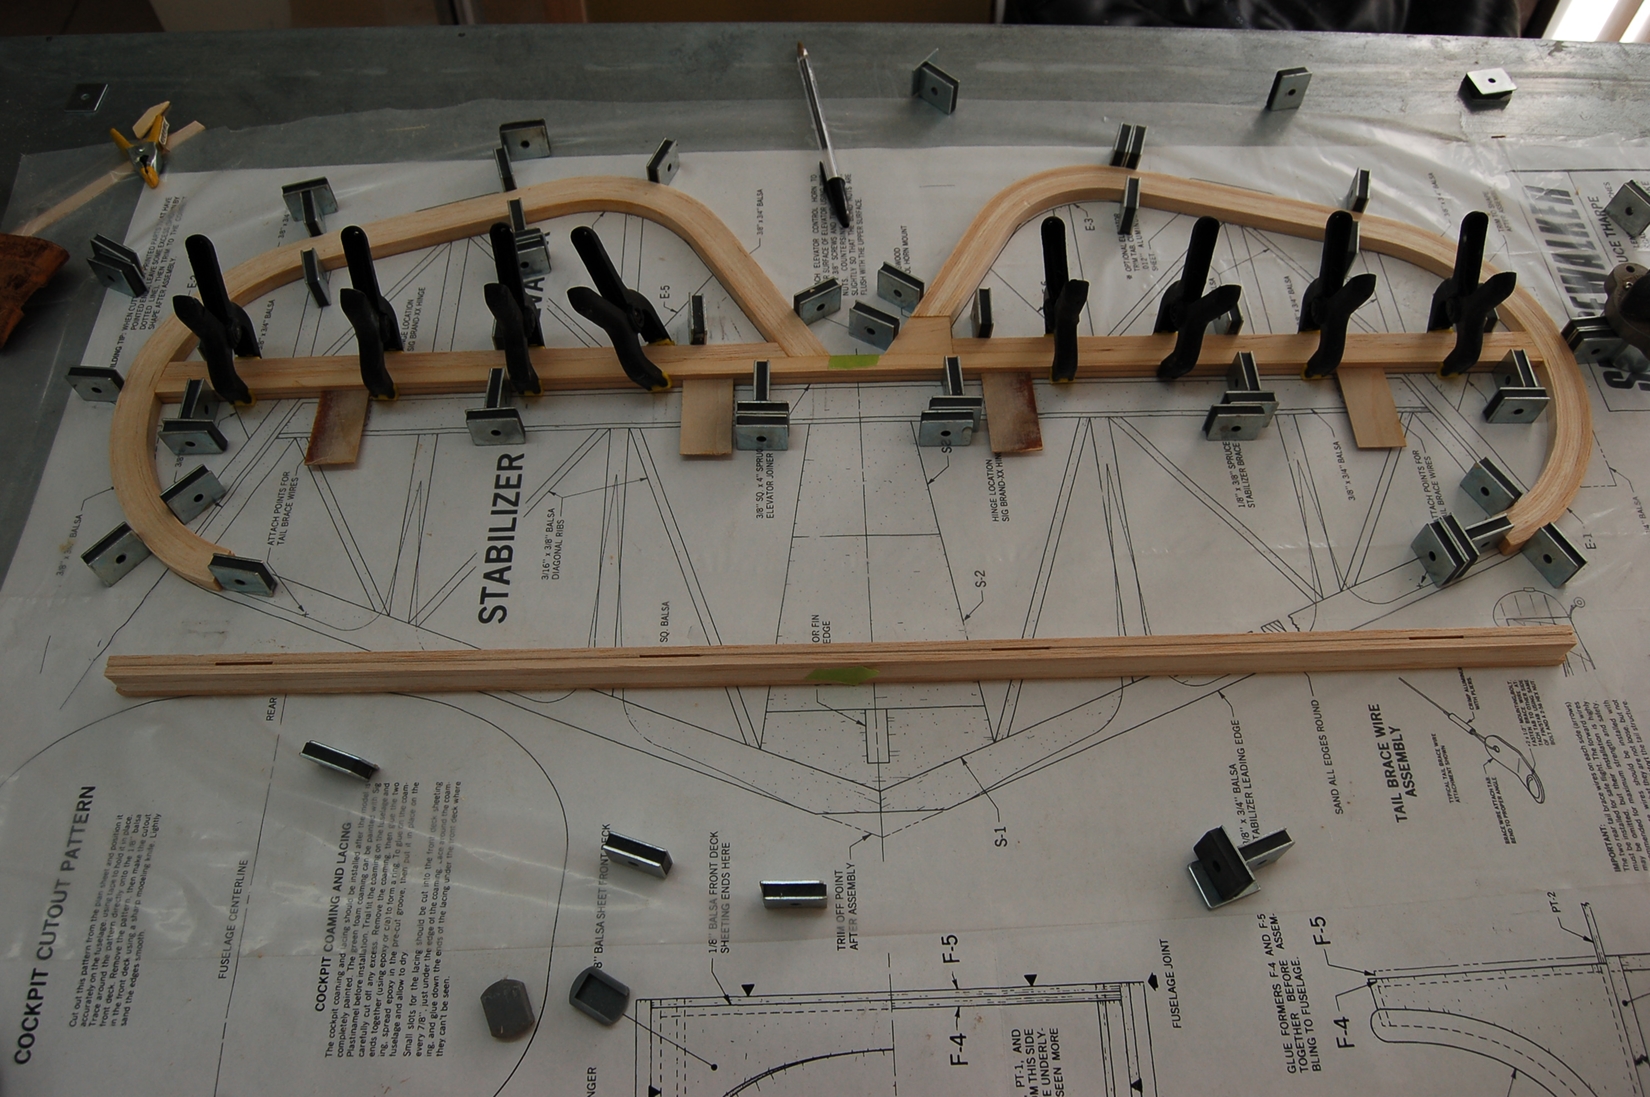
As you can see I used a sectional cawl to clamp the elevators. Although this worked it was not ideal.
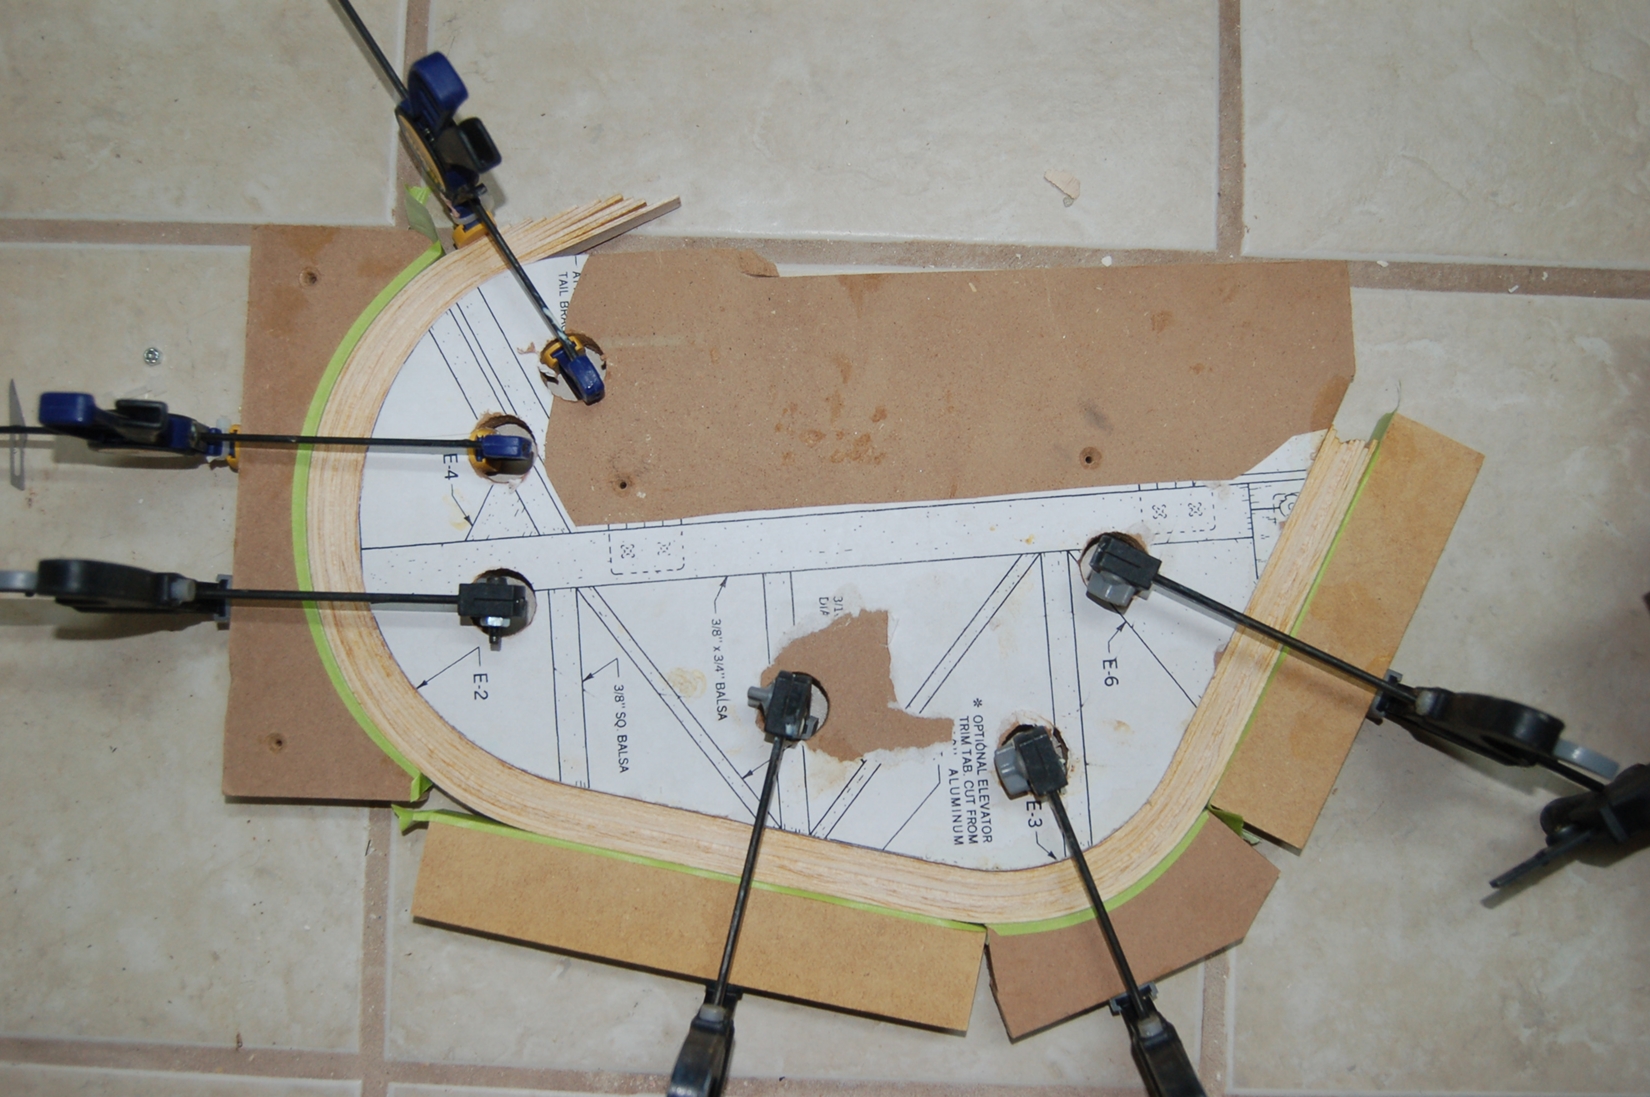
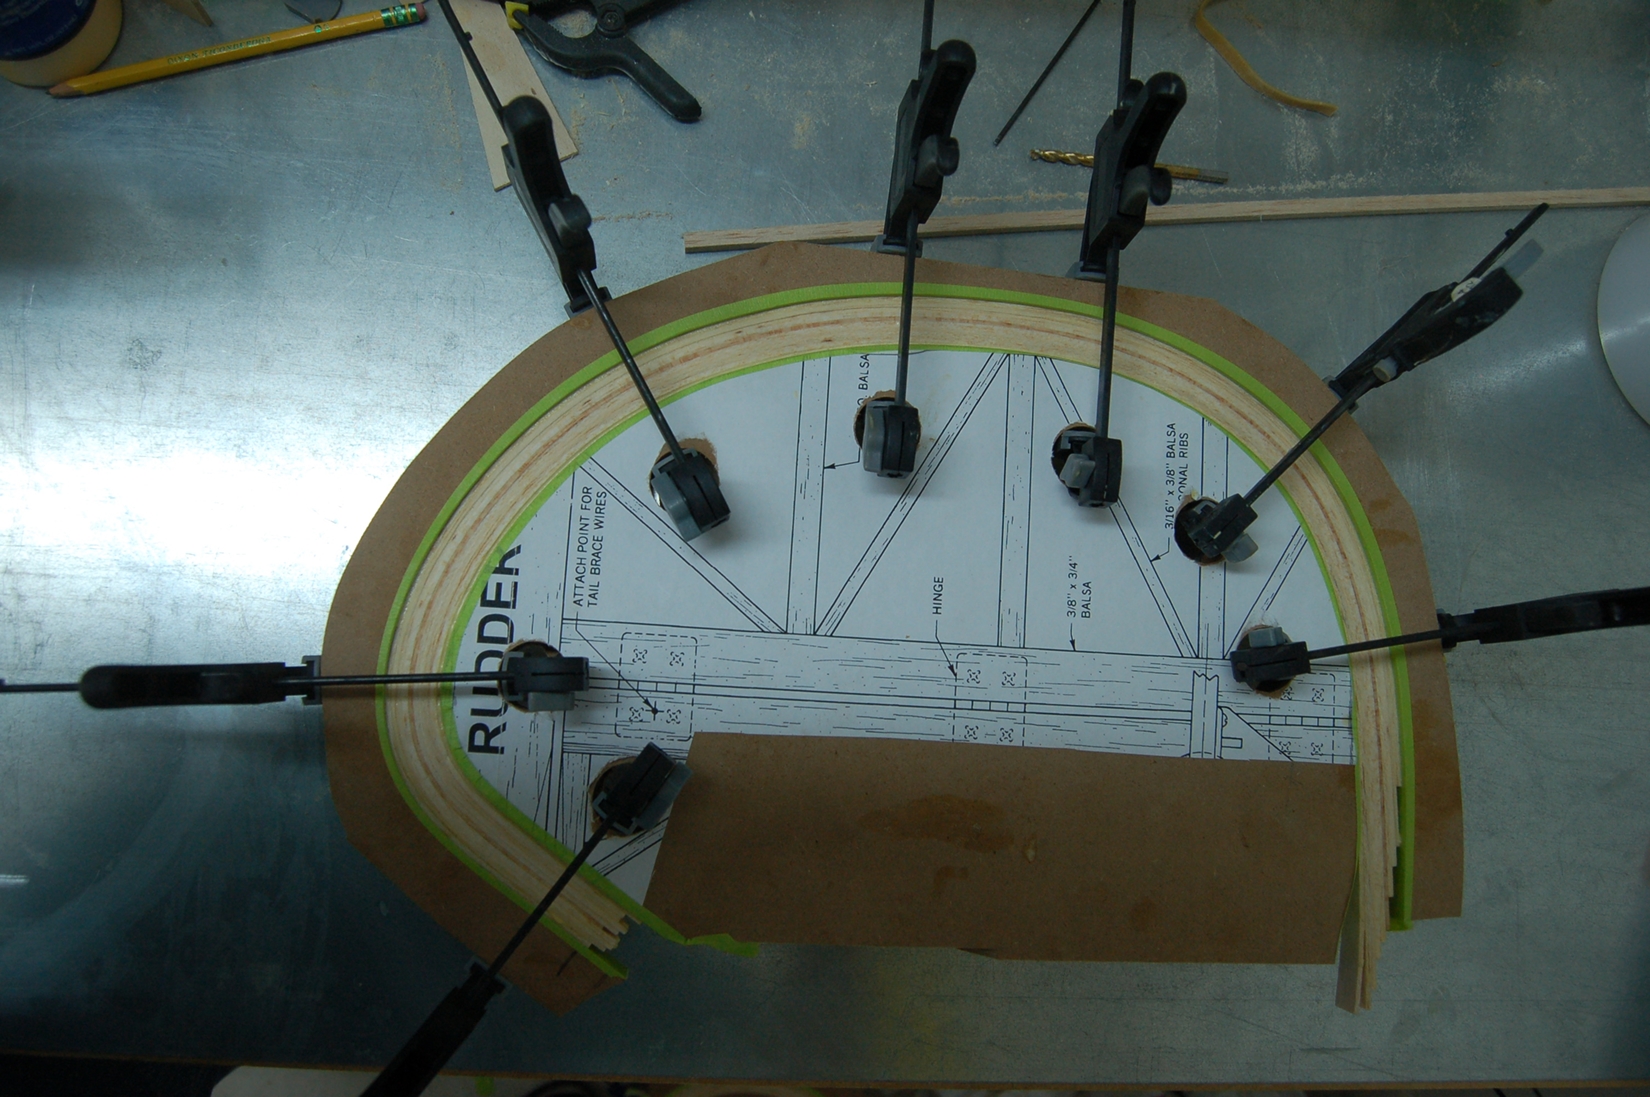
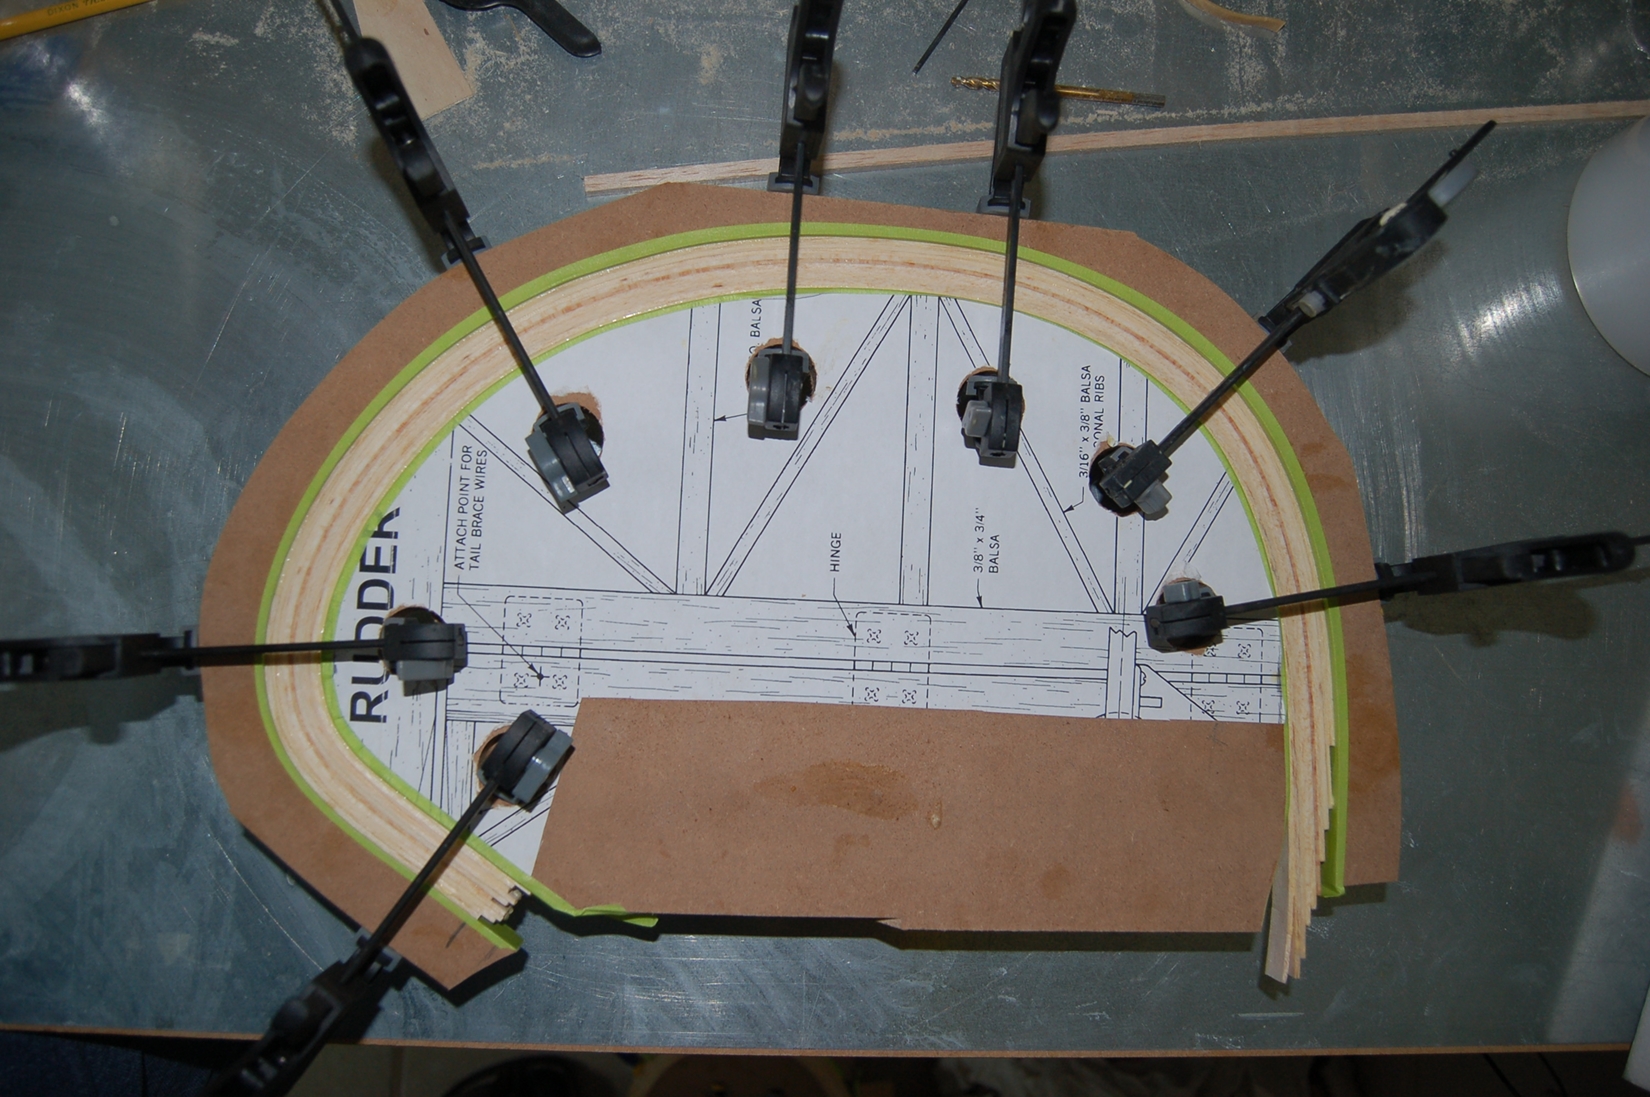
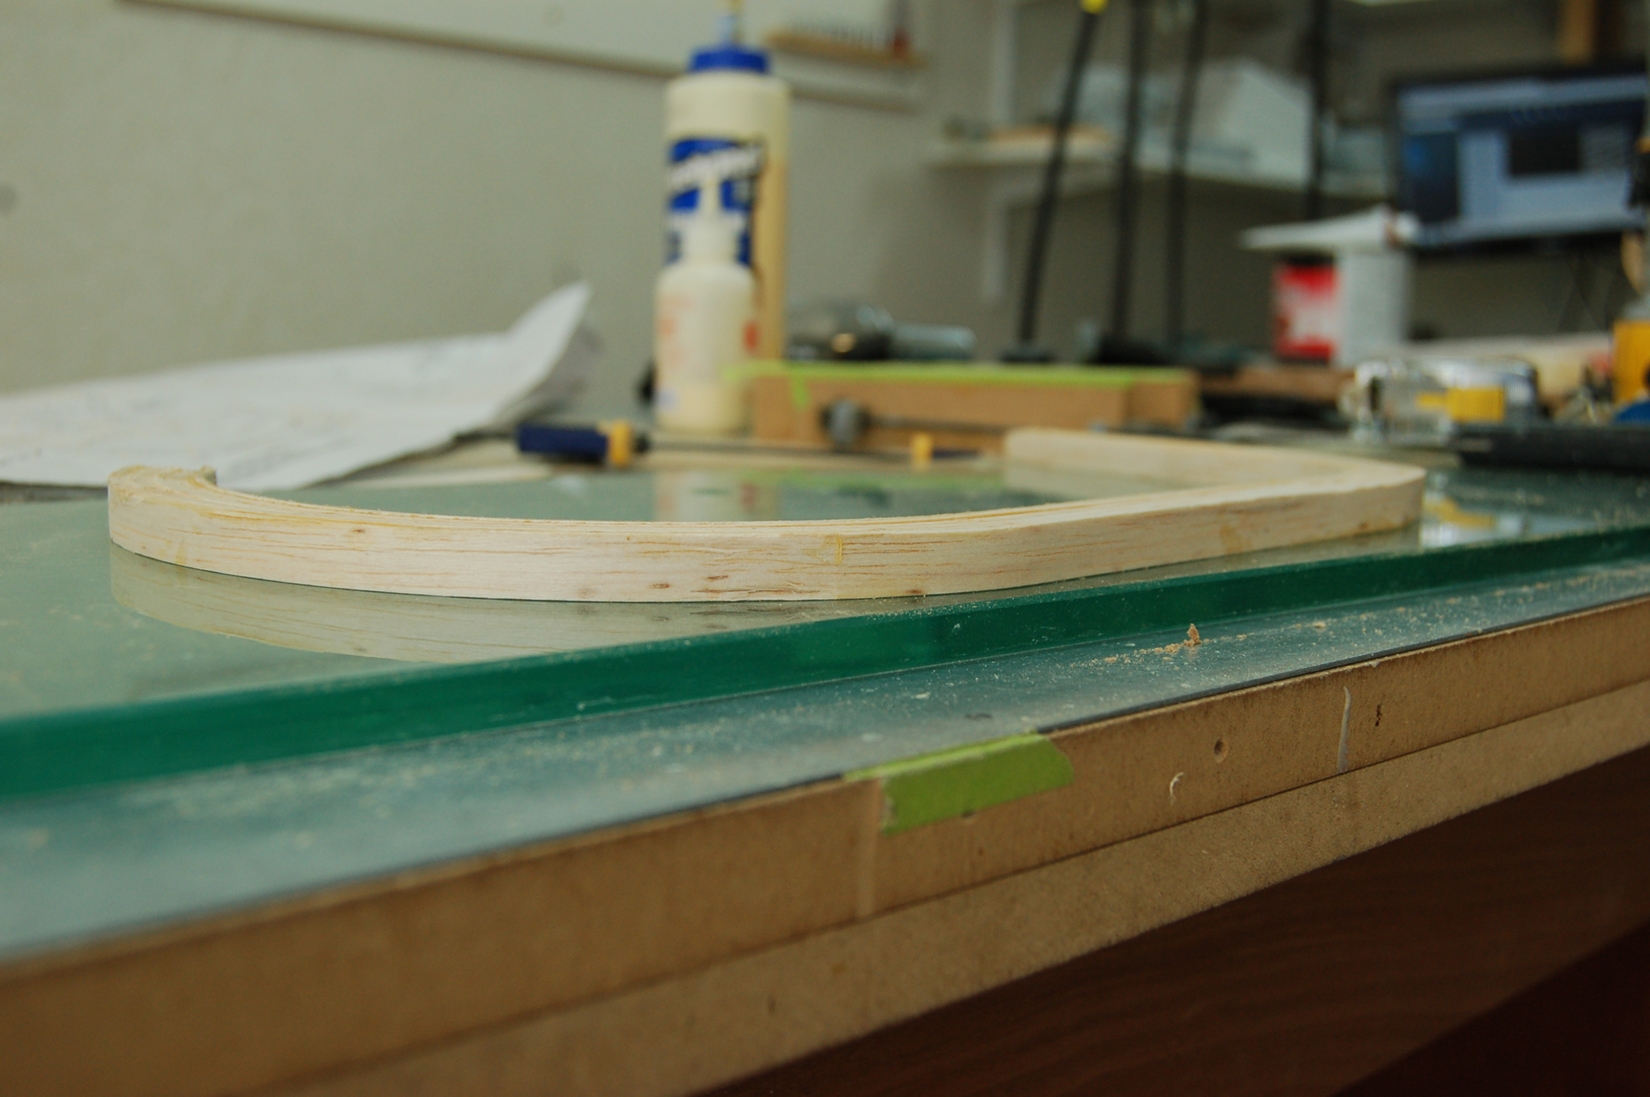
With the rudder I decided to make a flexible wrap around cawl. I used a 3/4 spacer to scribe the outer shape from the inner jig.
MDF when cut narrow is somewhat flexible. So if say you cut the cawl a fuzz small or large it will flex into place as you pull it around.
I started clamping at the tight curve at the top of the rudder and worked around the horn. This was lamination heaven. No muss no fuss simple and squeezed up real nice.
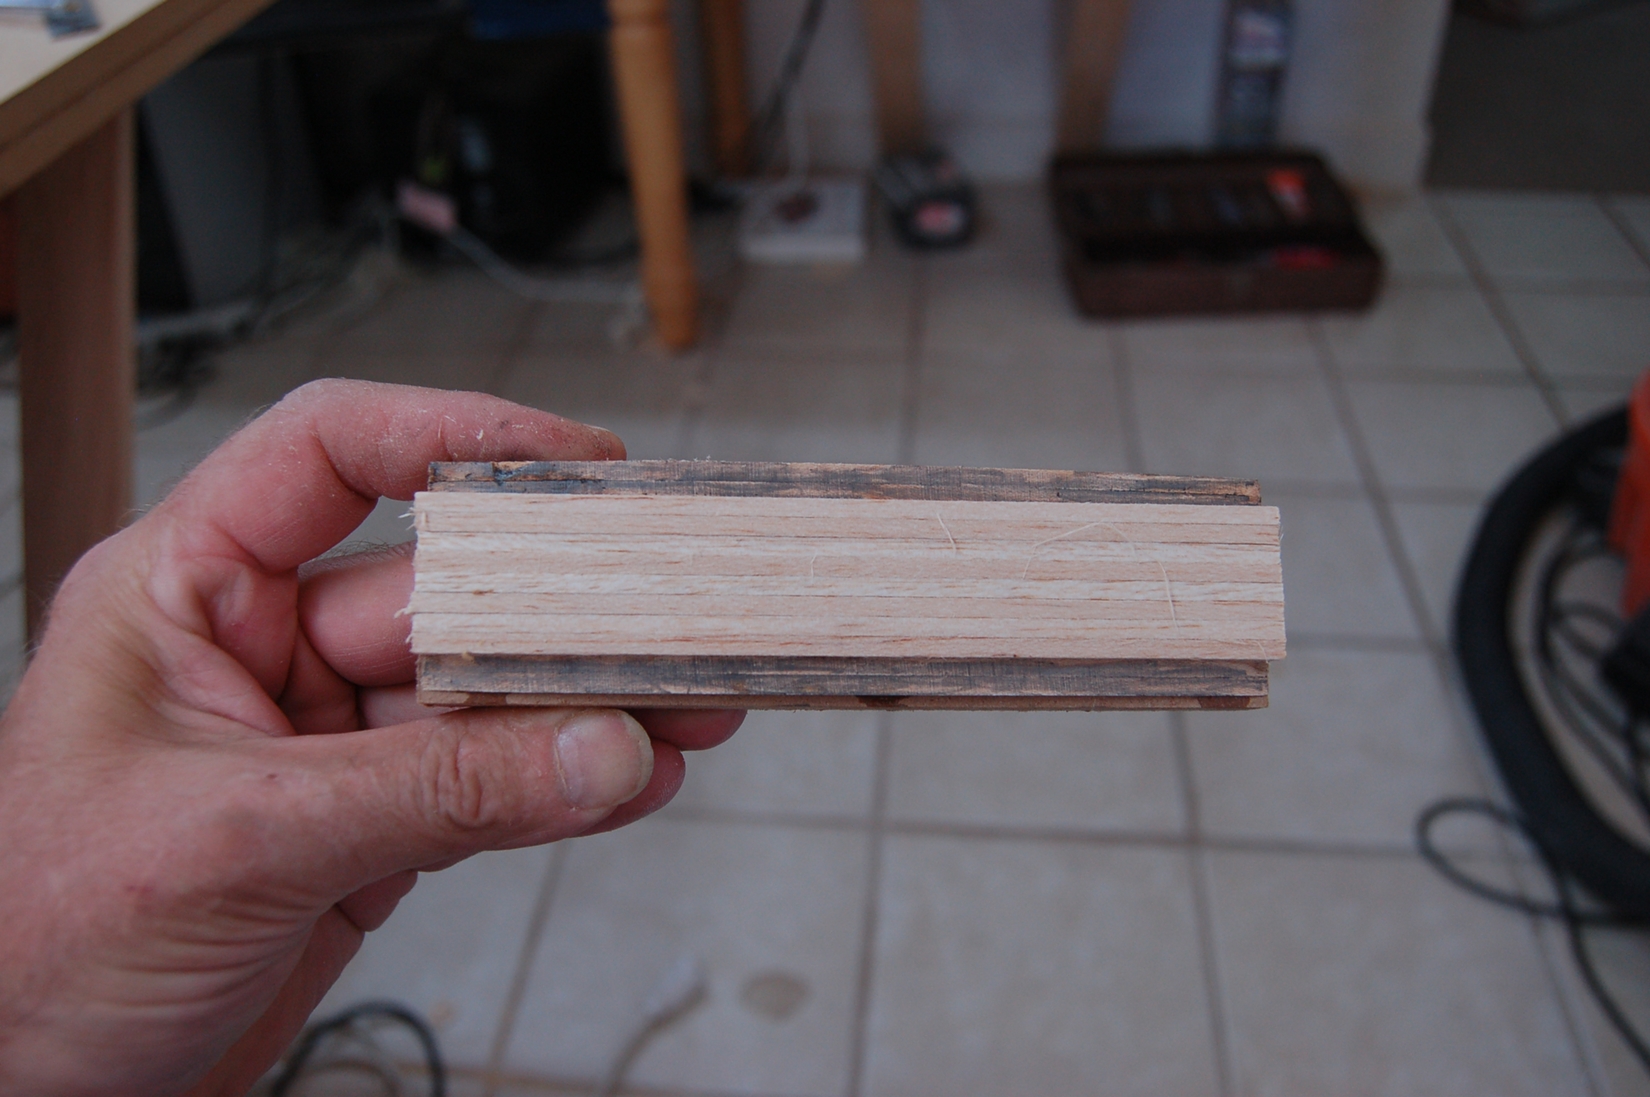
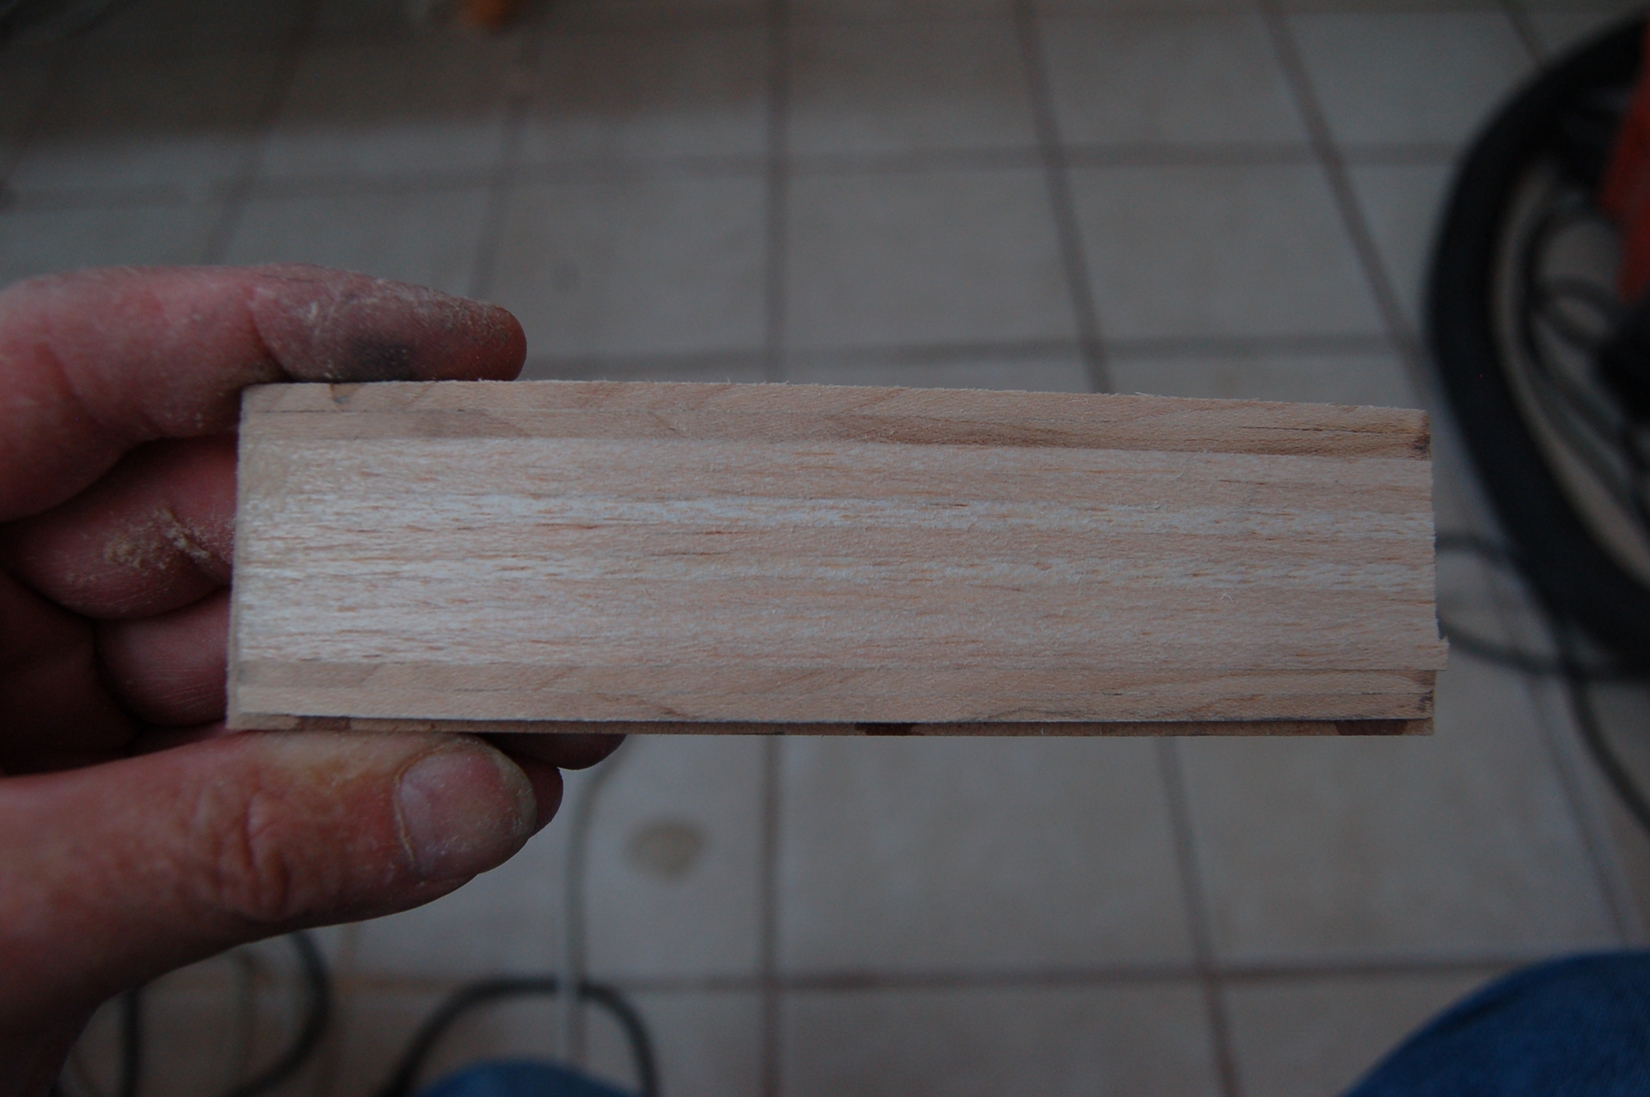
The elevators and rudder will finish out at 3/8 thick. They are currently 1/2 inch thick. When they are dry I will set them on the table and machine one side flat. Then true the other side parallel. Finishing out at 3/8 thick.
Kevin
.That was me. The center wing section needs to be attached to the fuse to finish up the framing on the underside of the fuse. That's what I was going to do today. Although I am gluing the center wing to the fuse it still needs to be indexed to finish the fuse ( will glue it at later date). The wing bolts that I wont be using required wood blocks in the fuse that I didn't put there. As I was centering the wing I decided I would need those blocks after all. I decided to use dowels to index and for sheer strength. So epoxy in blocks and wait to dry.
I had tac glued measuring points to center the wing with the tail..
At this point I decided I needed the wing mount blocks. So I cut them fit them and glued them in. While that was drying I decided to turn my attention to the tail feathers. The kit comes with sectional cut parts for the curves on the tail surfaces. I decided to laminate the curved portions of the tail . I cut a template for the elevators then used a flushing bit to cut an exact duplicate.
My initial plan was to use 6 pieces of 1/8 inch balsa to make the curve. This was too thick, even after soaking in a bucket of water the strips wanted to fracture at the tightest bend. So plan B. Went to 10 pieces a hair under 3/32 and that bent fine.
As you can see I used a sectional cawl to clamp the elevators. Although this worked it was not ideal.
With the rudder I decided to make a flexible wrap around cawl. I used a 3/4 spacer to scribe the outer shape from the inner jig.
MDF when cut narrow is somewhat flexible. So if say you cut the cawl a fuzz small or large it will flex into place as you pull it around.
I started clamping at the tight curve at the top of the rudder and worked around the horn. This was lamination heaven. No muss no fuss simple and squeezed up real nice.
The elevators and rudder will finish out at 3/8 thick. They are currently 1/2 inch thick. When they are dry I will set them on the table and machine one side flat. Then true the other side parallel. Finishing out at 3/8 thick.
Kevin
09-01-2014, 01:50 PM
#318
Thread Starter
Join Date: Jul 2012
Location: Missouri
Posts: 1,127
Likes: 0
Received 0 Likes
on
0 Posts
Thank you kindly Robert, Vincent
Great Galloping Horny Toads, Batman !!!! Are we really going to do this one over ?
Why yes Robin, there are some things you just can't let go by.
Well, I ended up doing my elevators over. First mistake was to not wax the tape. It did release but kept some balsa. Second mistake was not do do a wrap around cawl instead of a sectional on. Ended up with some dents and slight misshape on the outer perimeter.
I went ahead and trued them up. I could have made them work but like Batman told the boy wonder. Nope.
The rudder turned out fine, its a keeper.
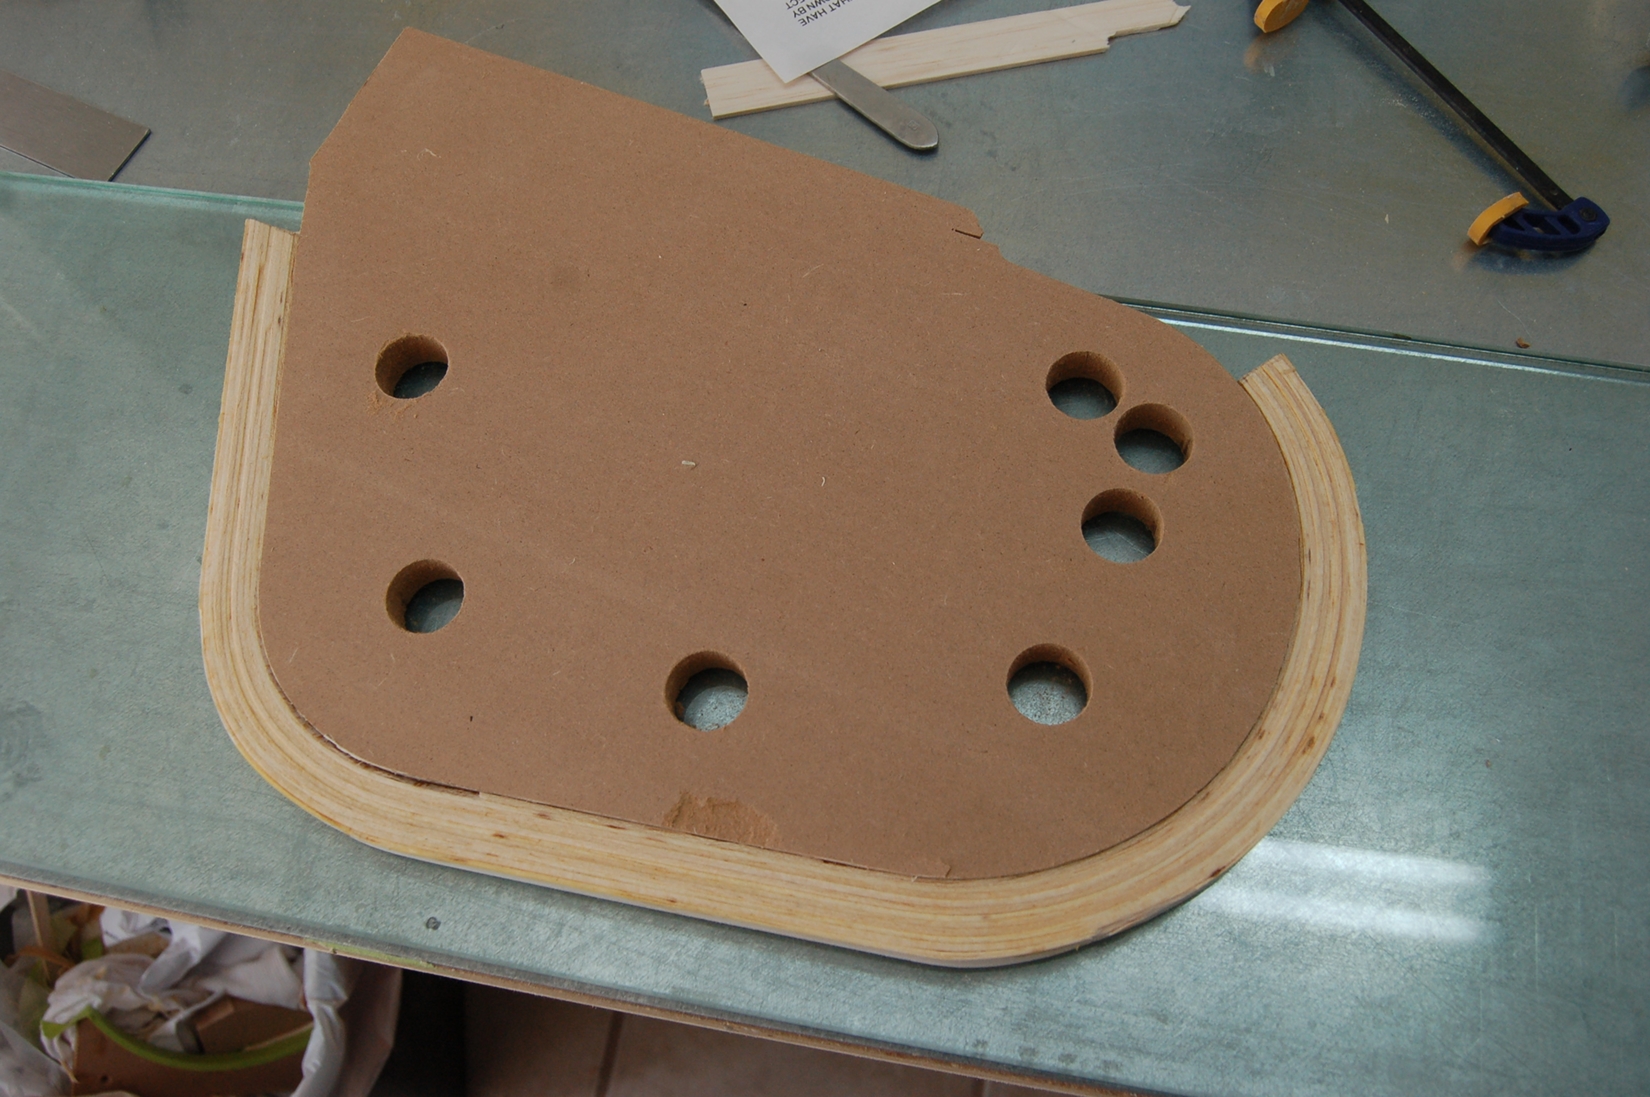
Any way this is how I trued them up.
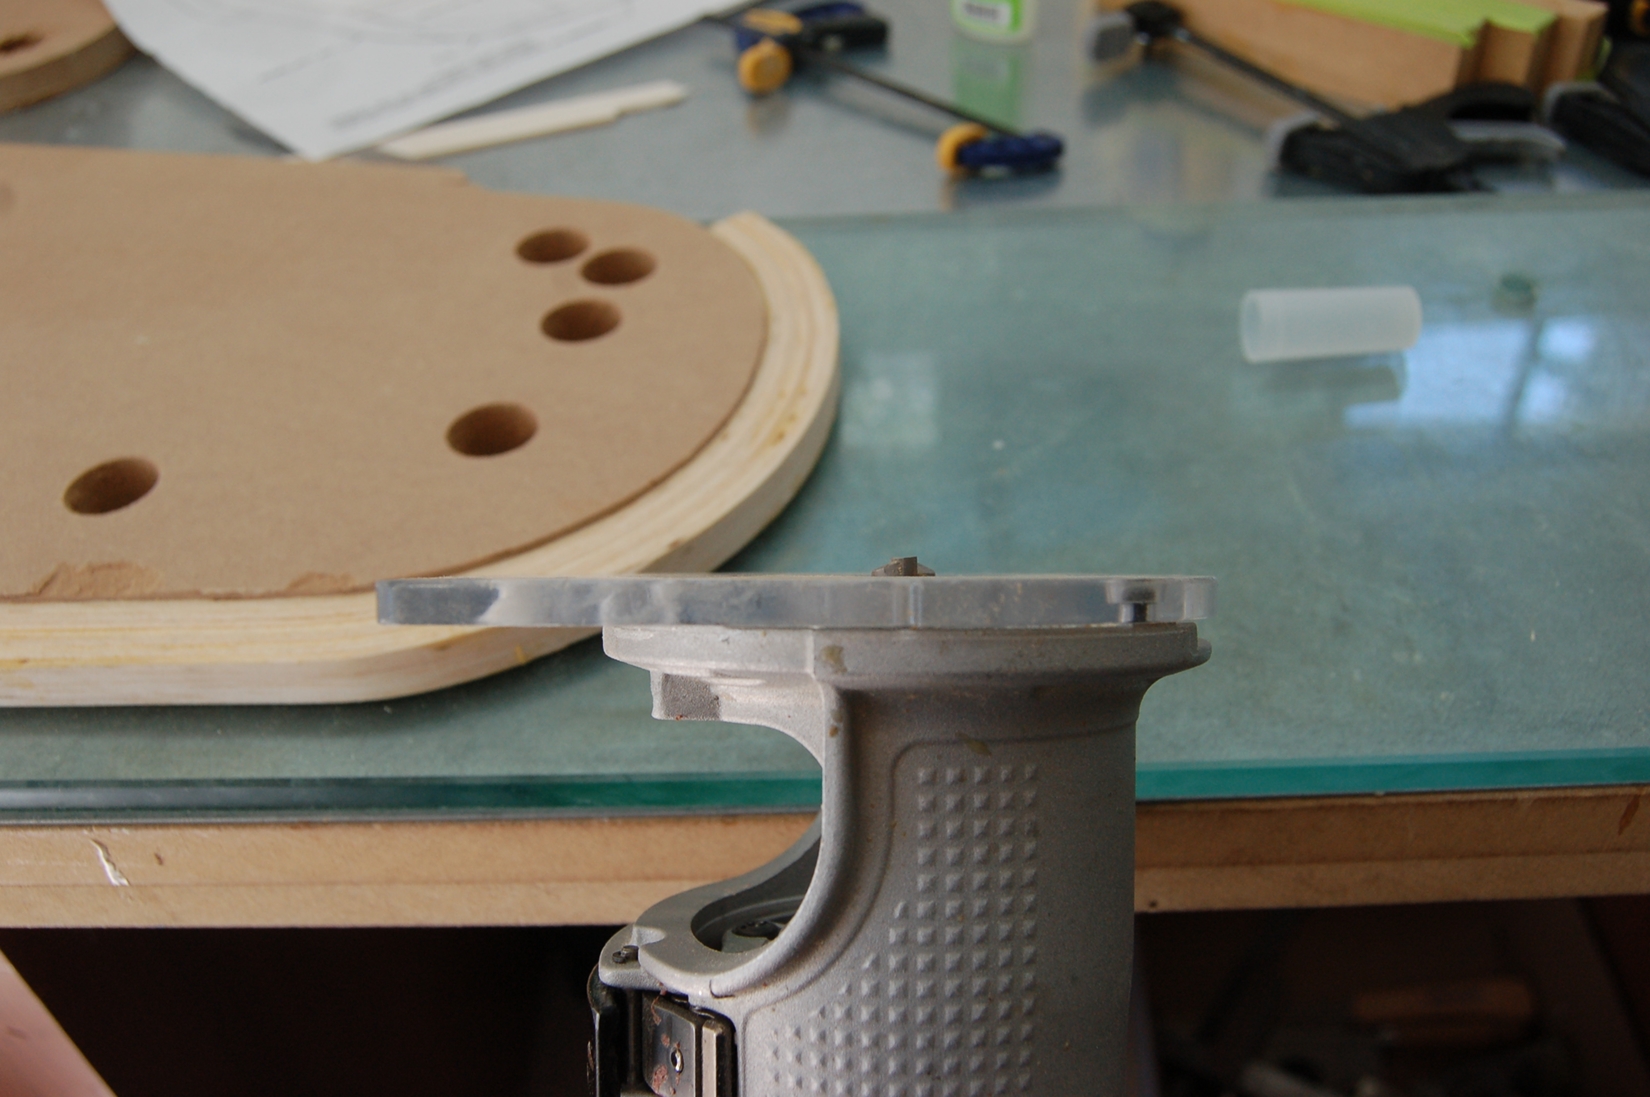
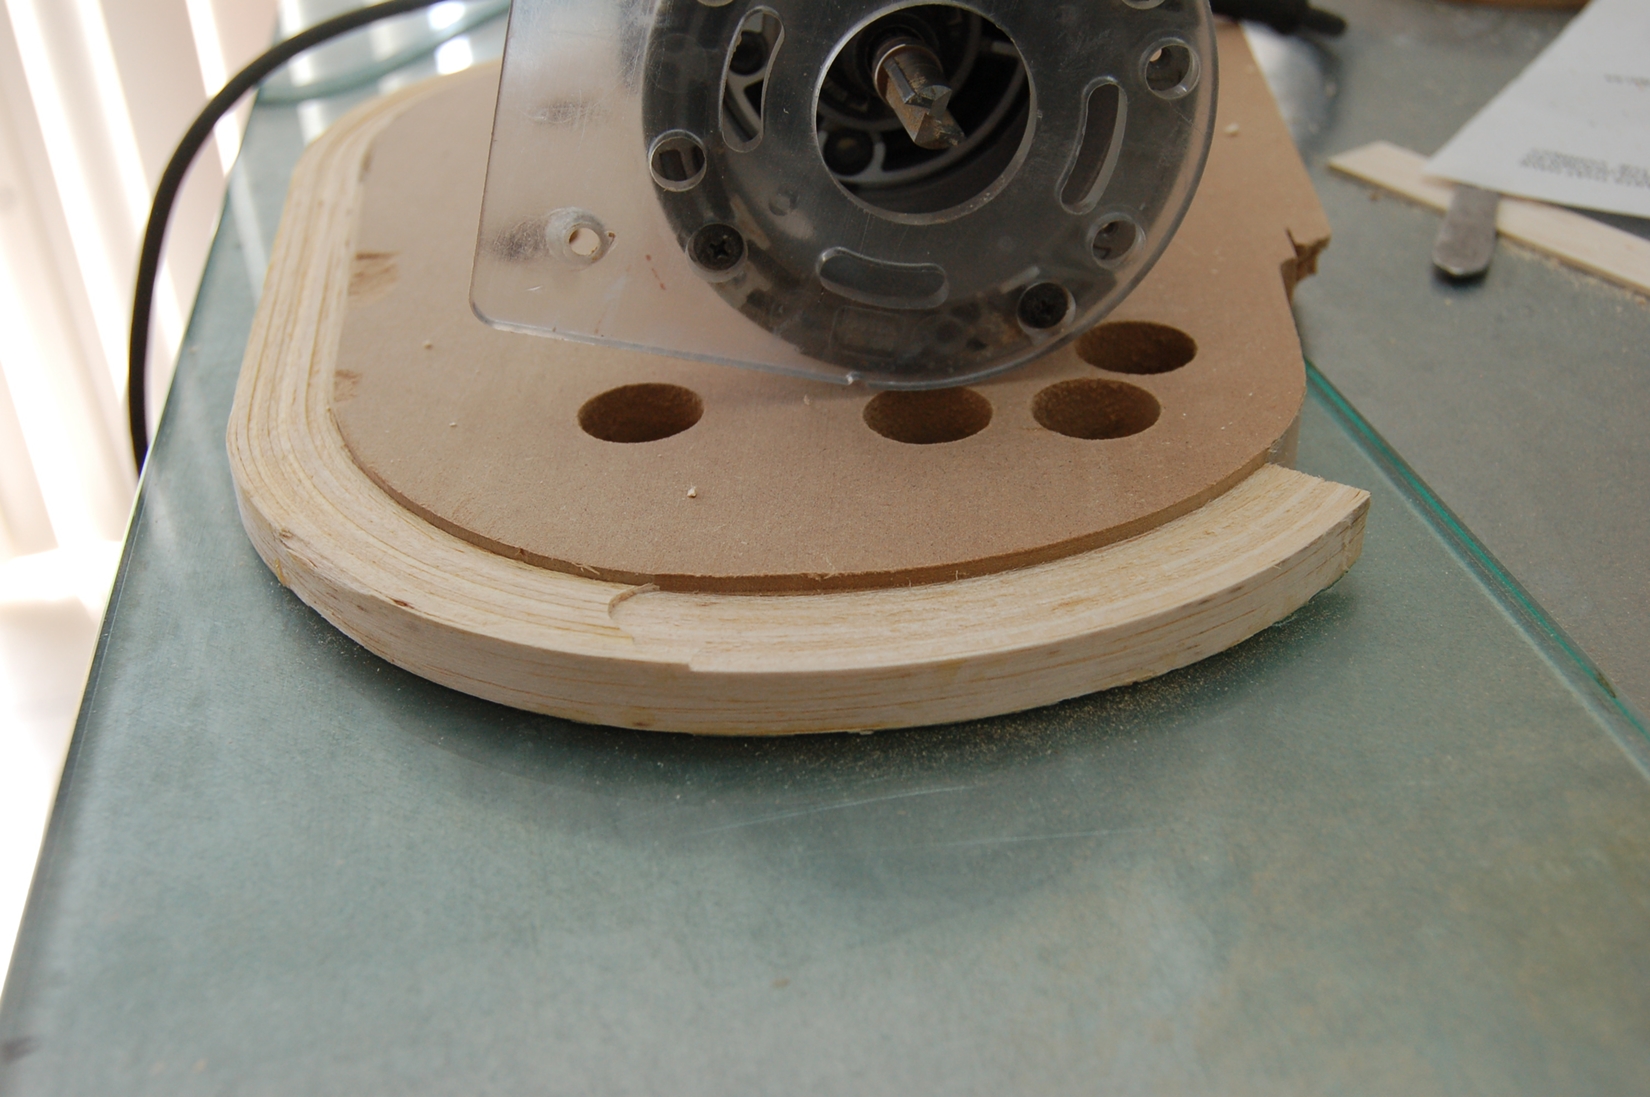
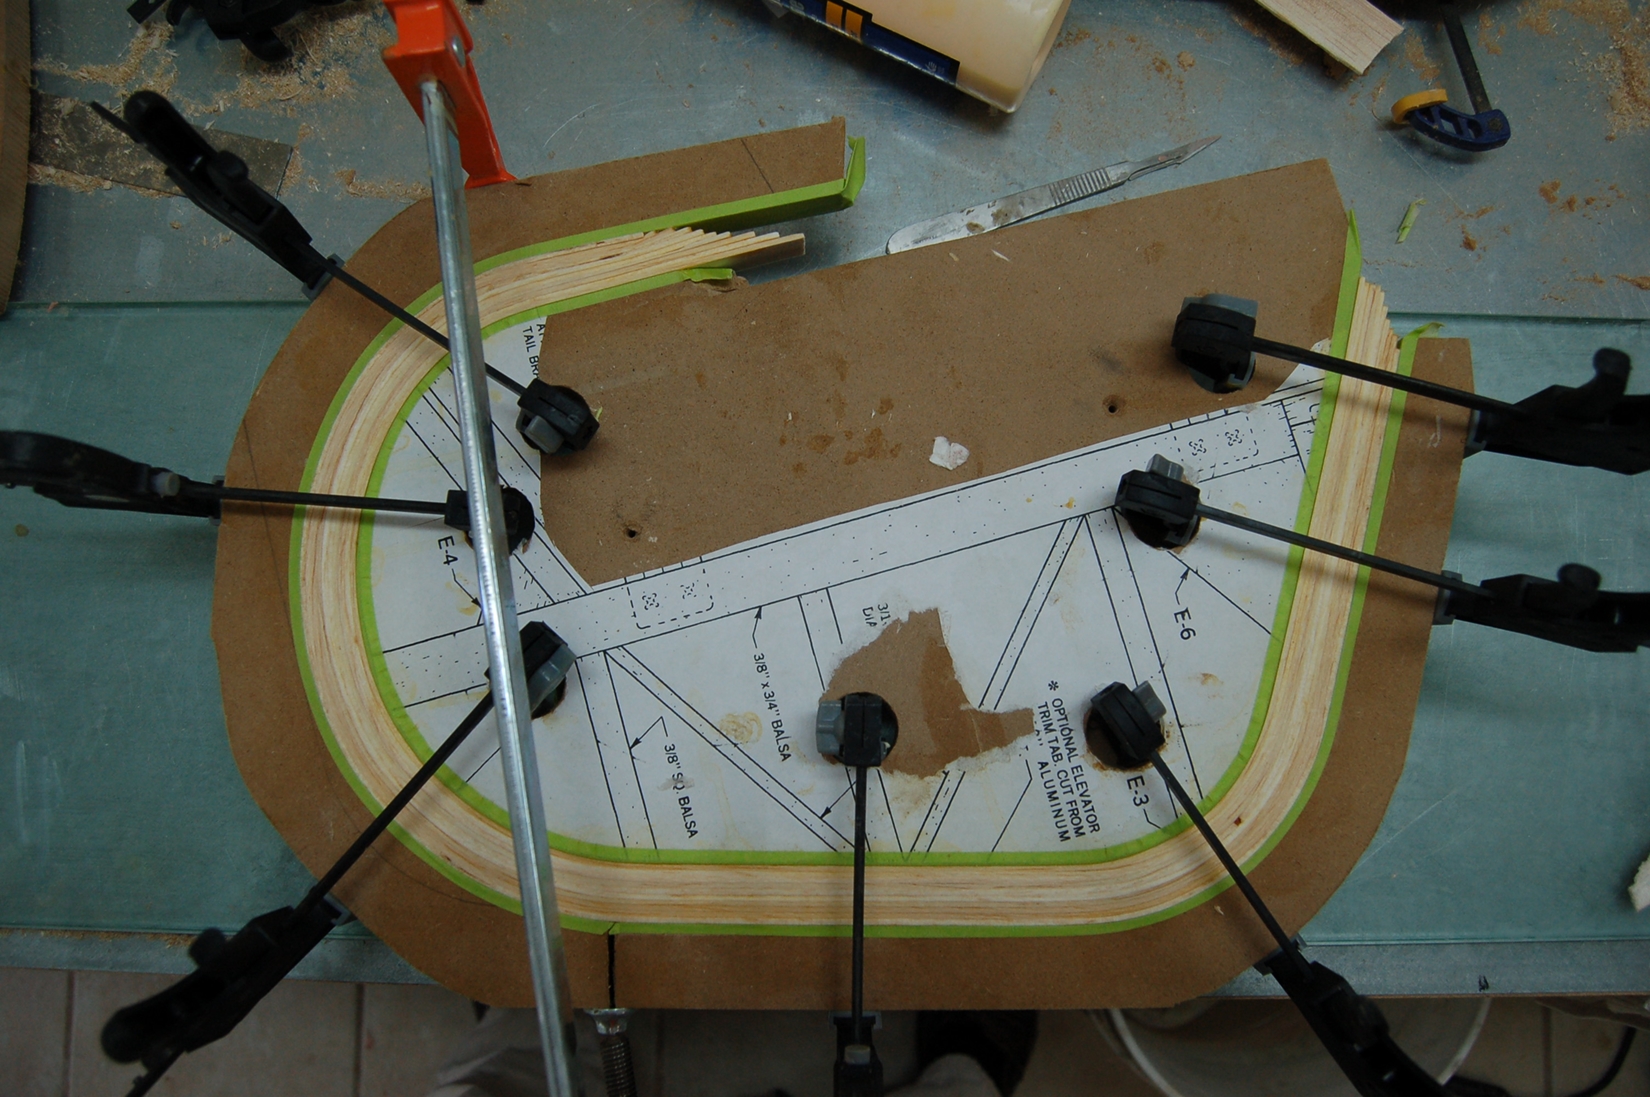
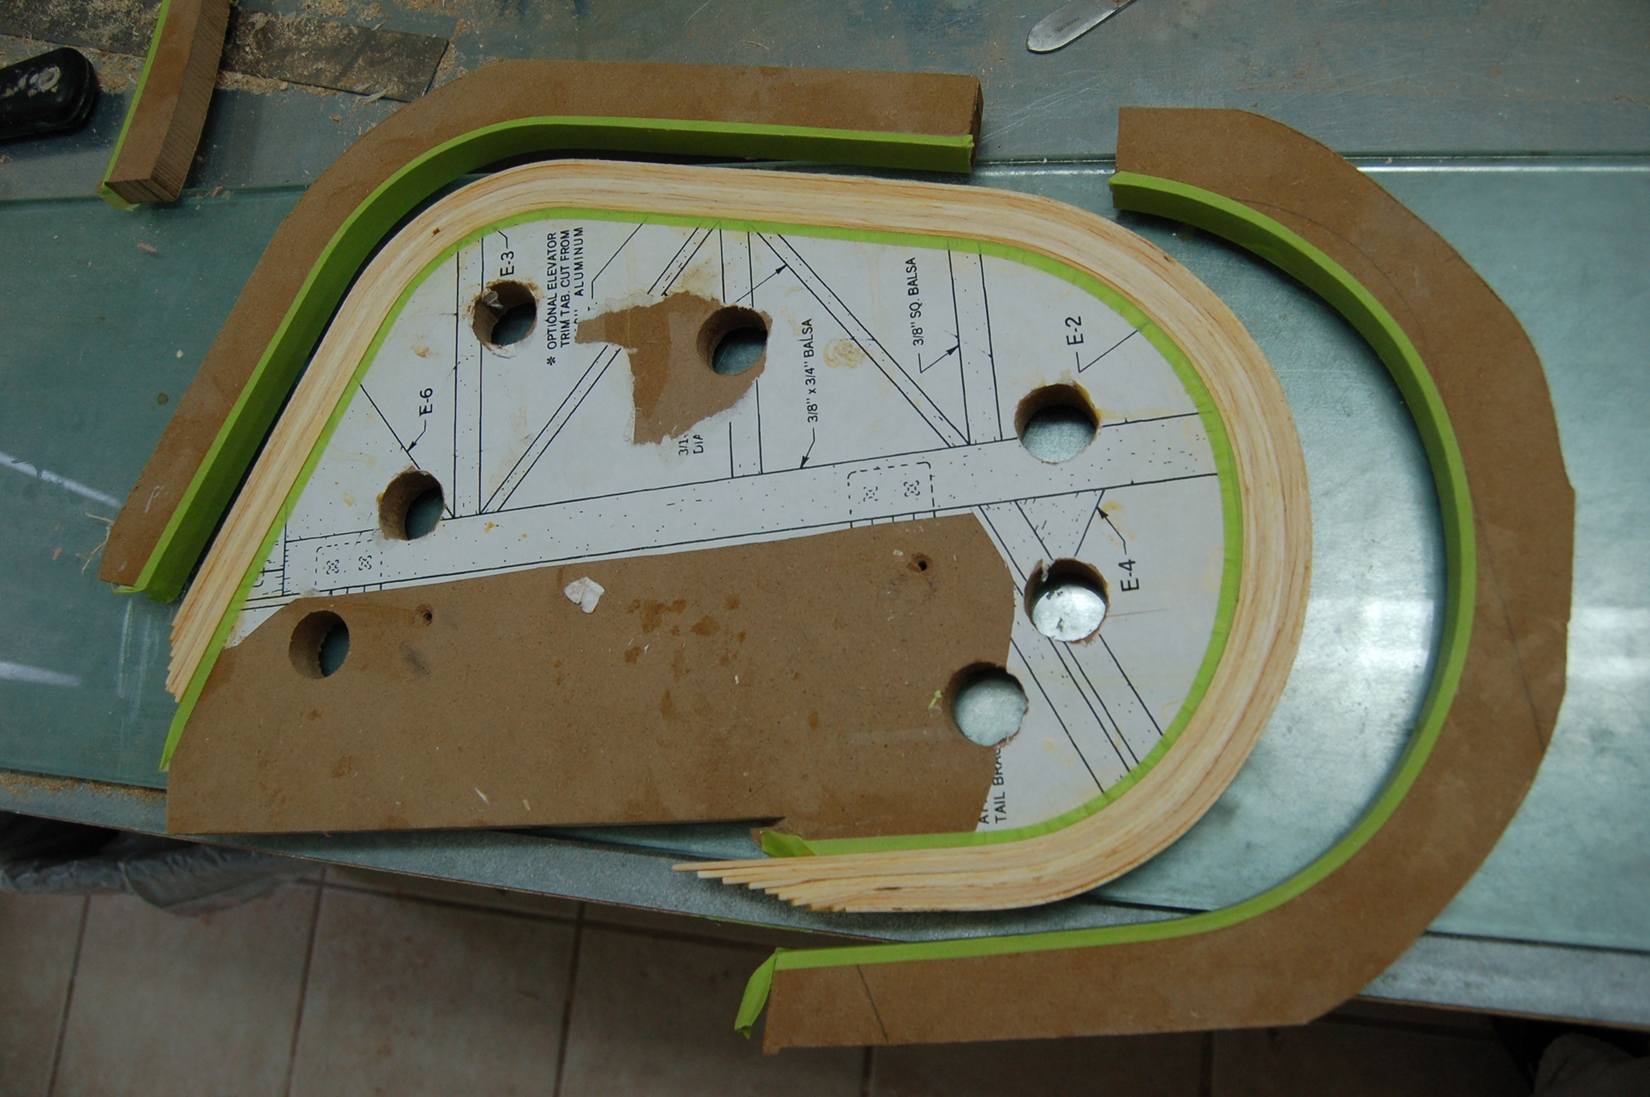
Got my glass out so I could CA the shapes down to the table. It's real easy to get a razor blade between the glass and what ever you got glued to it. Before gluing them down I shimmed the high spots so it would sit flat then glued it to the glass. Then set one of my forms in the shape and used it for a flat plane. Then ran a router around it to cut one side flat.
If you look at the first photo you will see the high end with a shim under it.
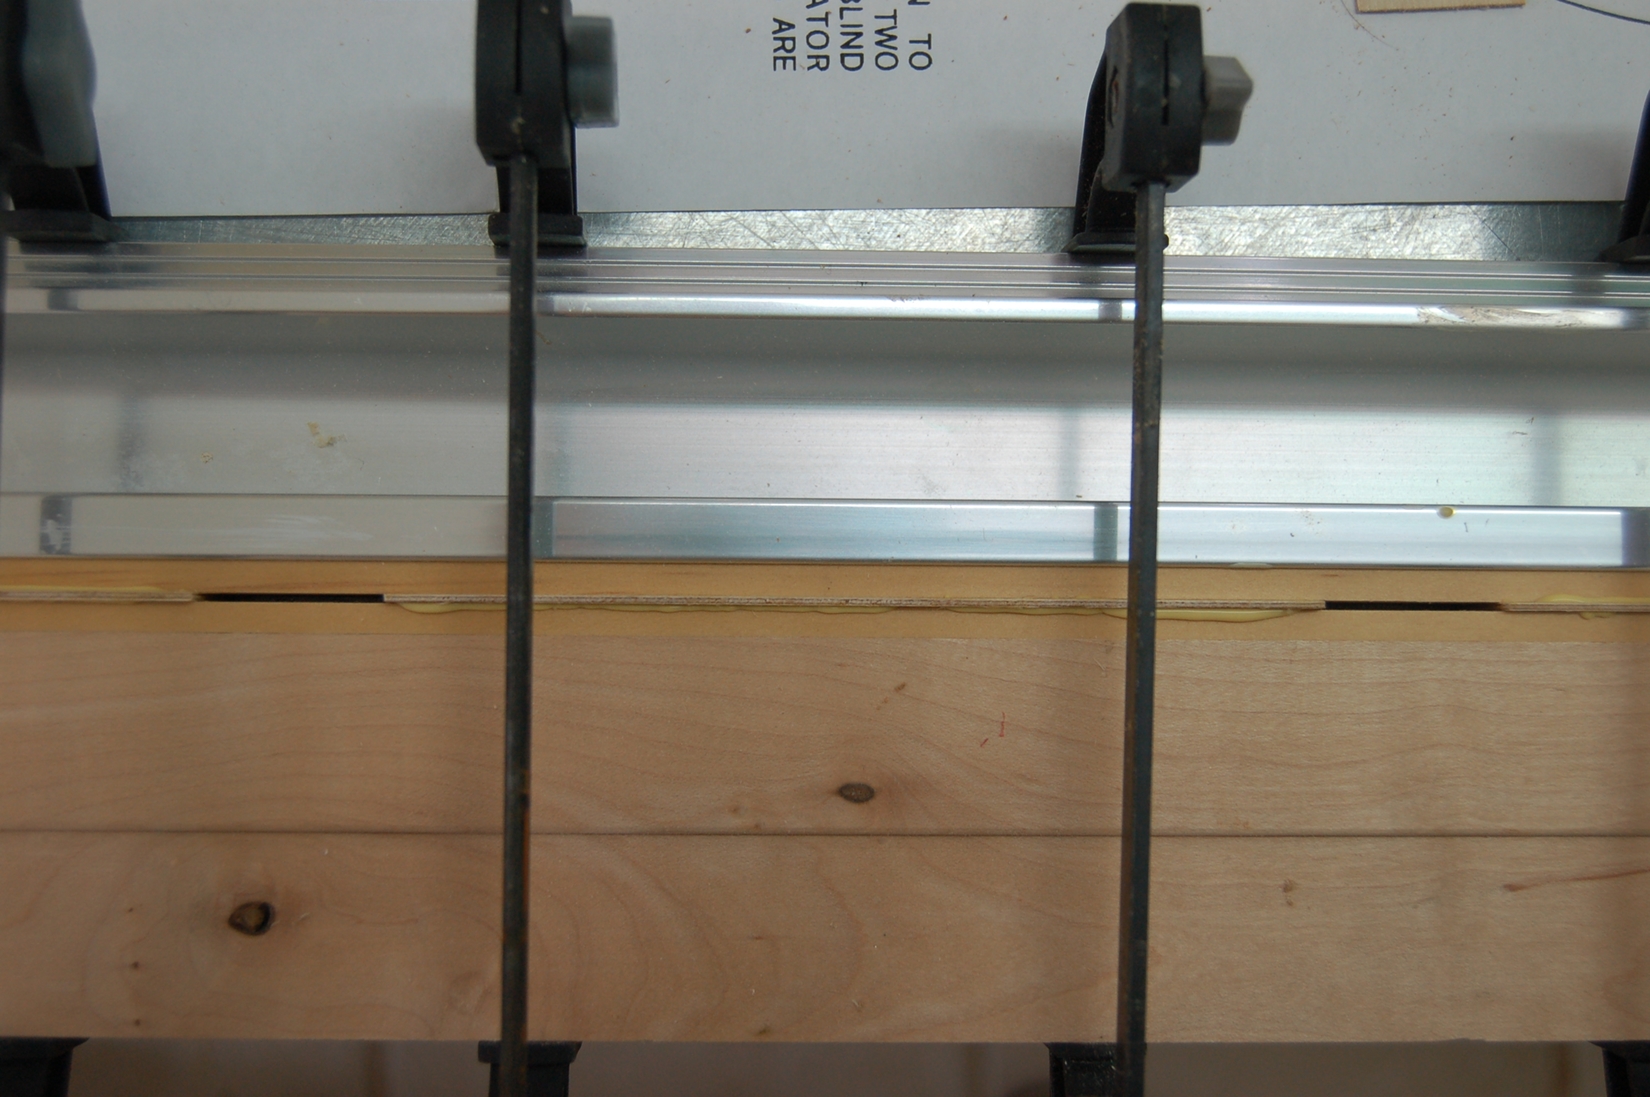
This is where the do over began. I did a wrap around cawl then split it for ease of clamp up.
Oh, I used wax this time.
To cut the other side, you just tack the now flat side down to the table and parallel cut the untrue side. I went a slightly different route though. I trued the other side with my 12 in drum sander.
Next up was to begin assembly. I decided to use the kit hinges on the tail surfaces. The one thing I didn't like was a short 3/8 by 3/8 by 4 inch piece of spruce that ties both elevators together. This seemed to me a little week. So I ran the 3/8 by 3/8 all the way across the two elevators. I used a piece of clear straight pine for this. I split this piece and made some hinge pockets and made the adjoining piece the same way. The inner sandwich is 1/6 aircraft ply sanded to 3/64 (hinge thickness).
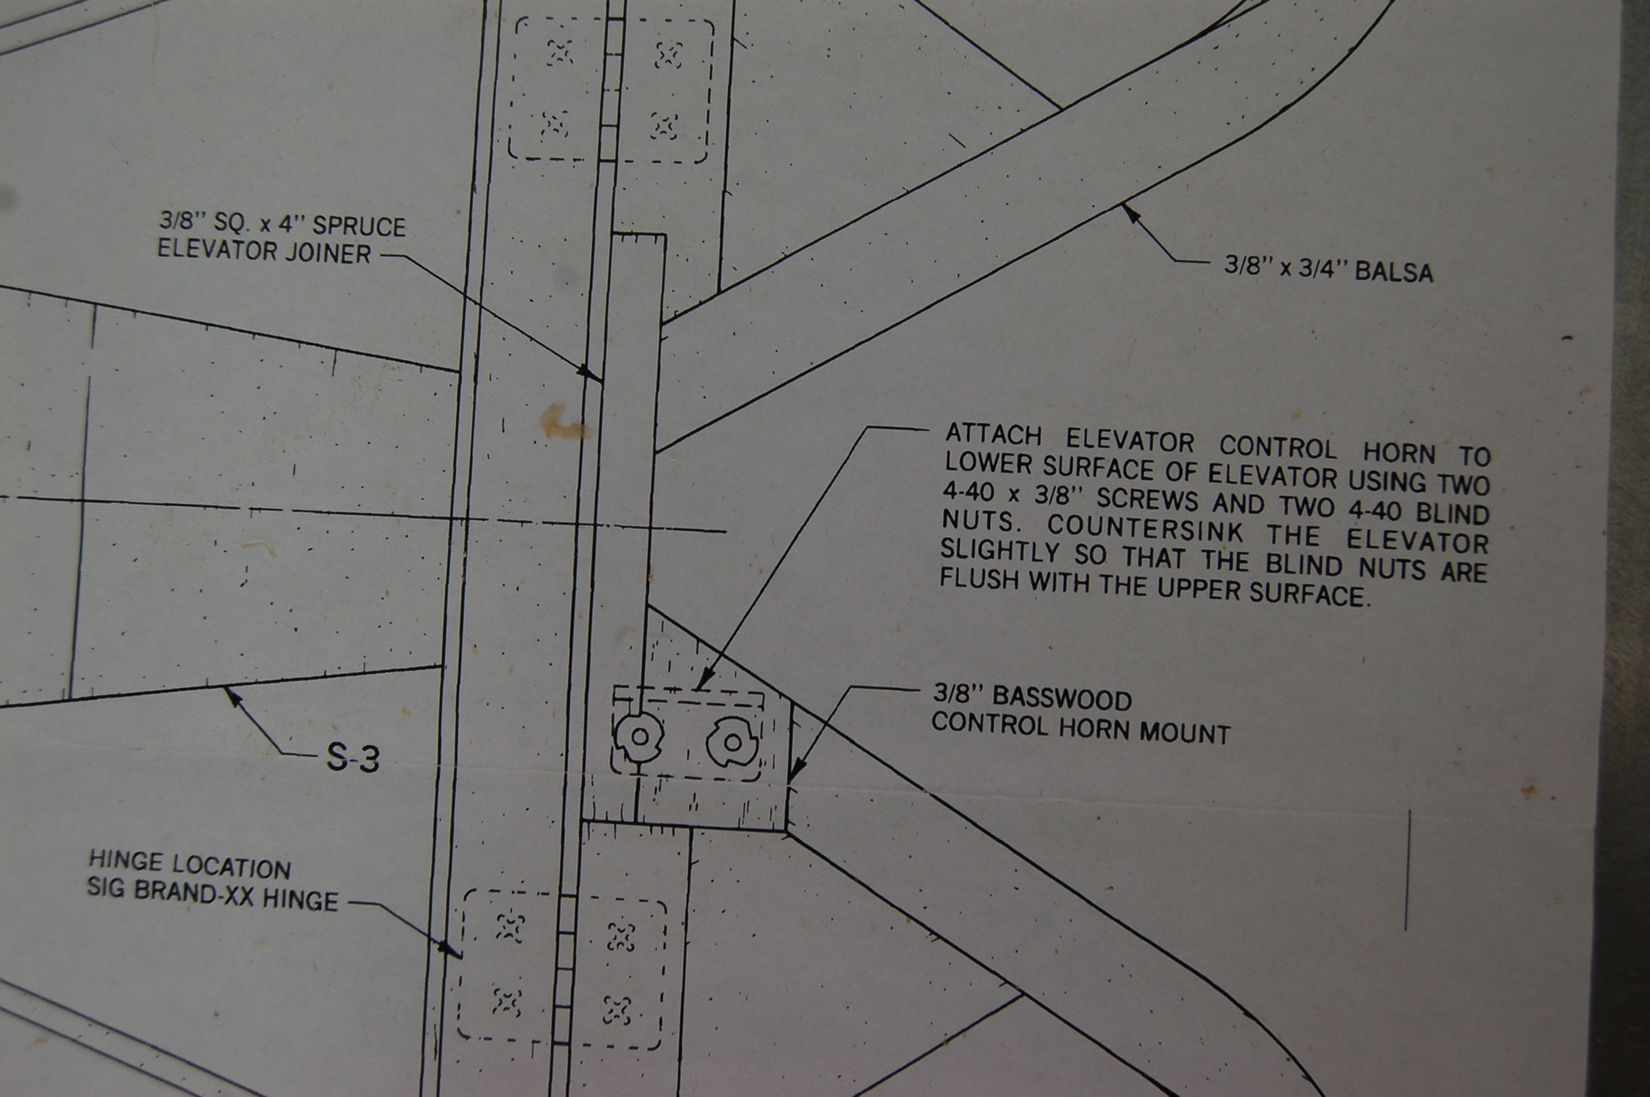
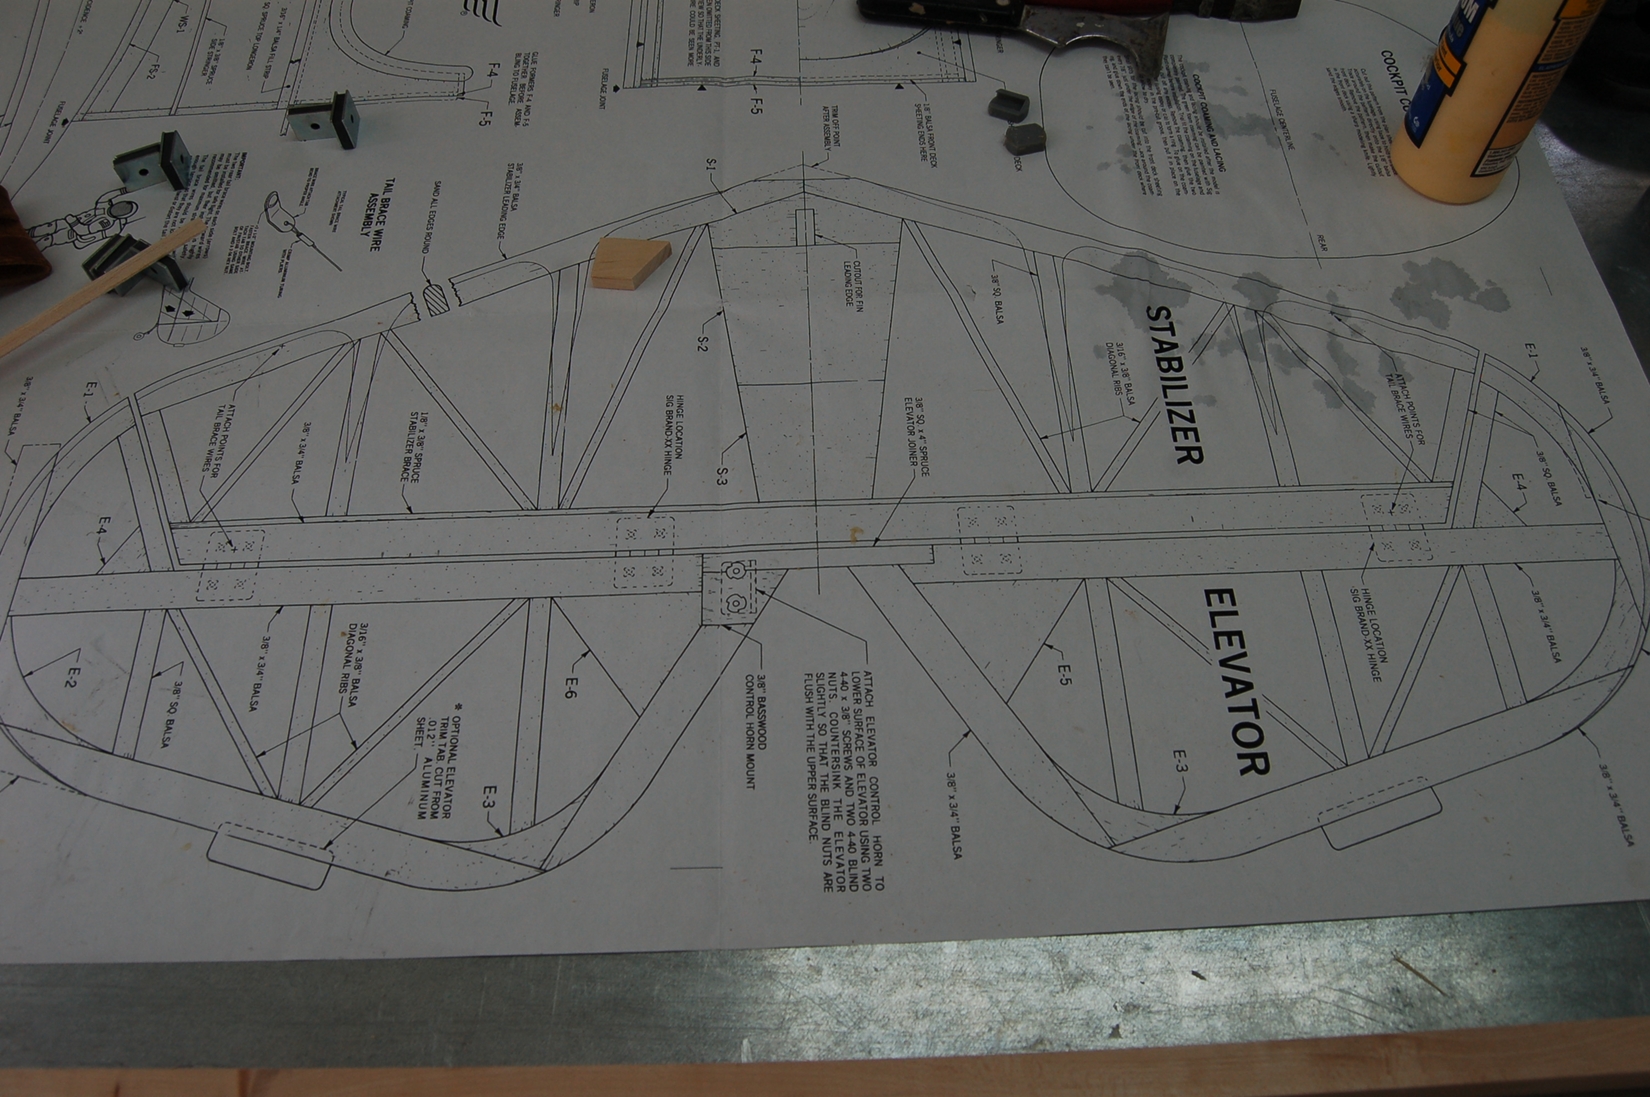
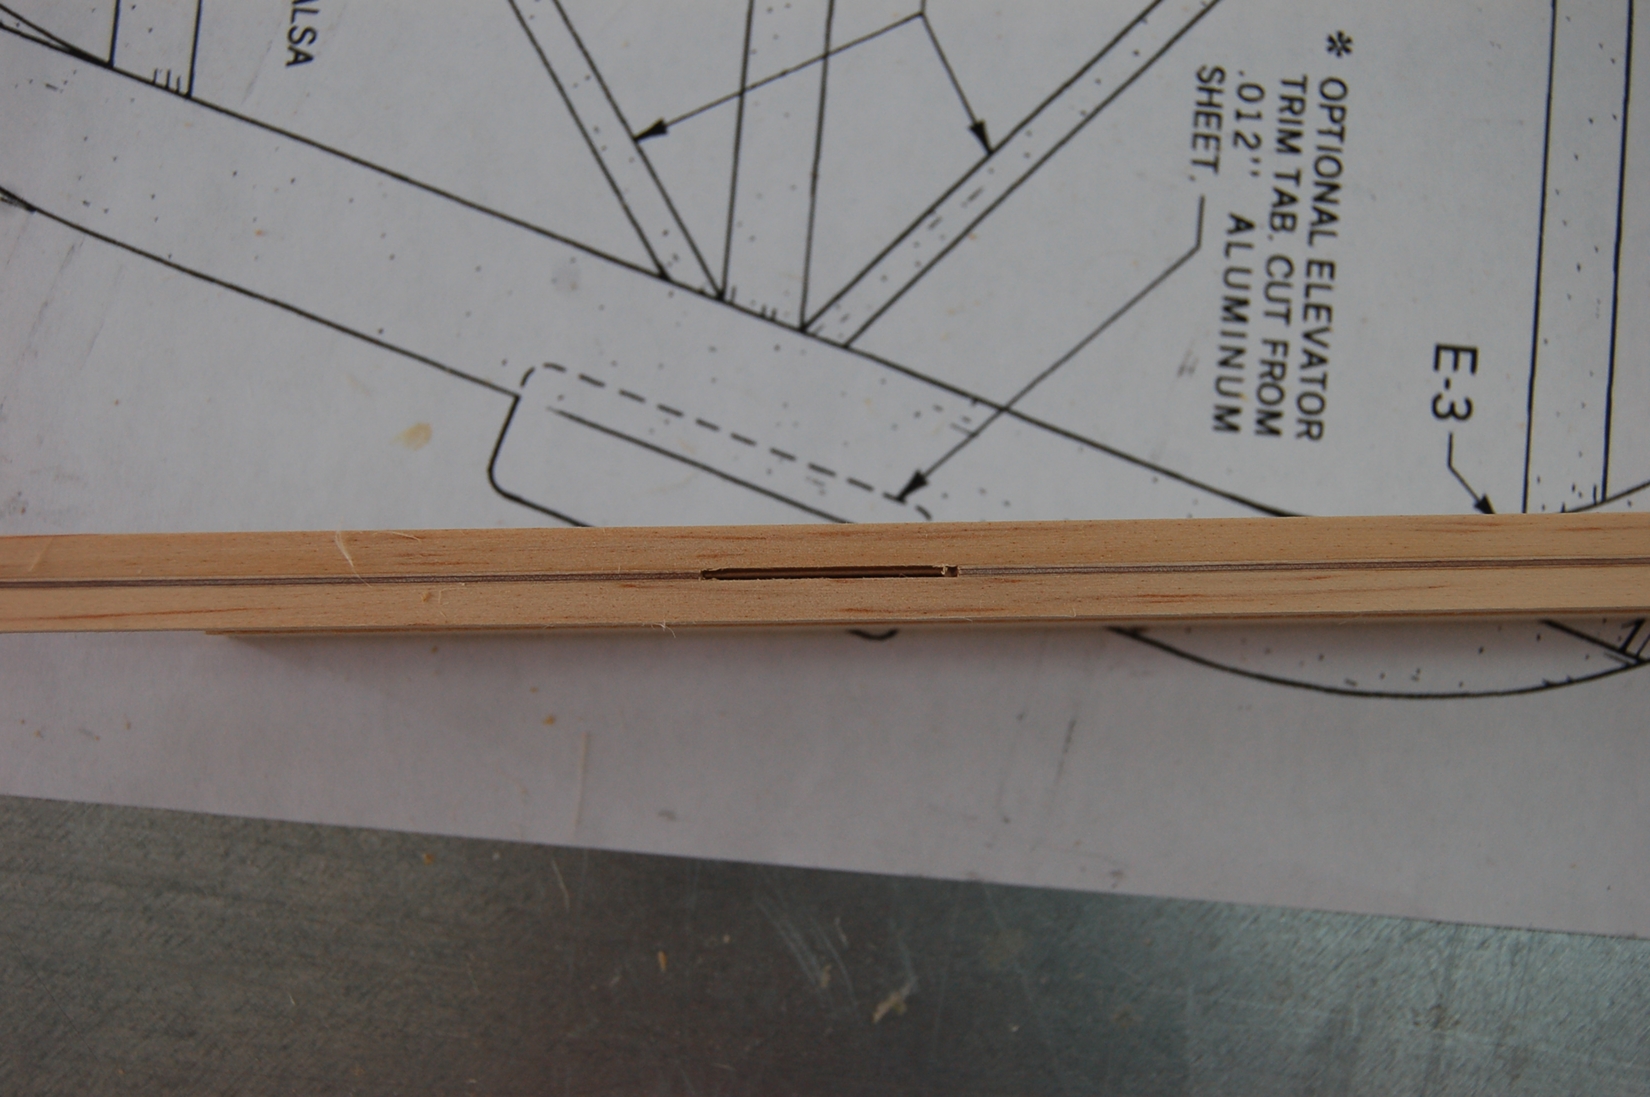
The plan called for the adjoining piece on the horizontal stab to be 3/8 by 3/4 balsa with a 1/8 by 3/8 piece of spruce glued to the back of it. I used the balsa but split it and put the ply hinge spacers in it. Then glued the spruce stiffener to it.
Then began to assemble the elevator.
As long as I cut the trailing edge centered the hinge pockets should be dead on.
Kevin
Great Galloping Horny Toads, Batman !!!! Are we really going to do this one over ?
Why yes Robin, there are some things you just can't let go by.
Well, I ended up doing my elevators over. First mistake was to not wax the tape. It did release but kept some balsa. Second mistake was not do do a wrap around cawl instead of a sectional on. Ended up with some dents and slight misshape on the outer perimeter.
I went ahead and trued them up. I could have made them work but like Batman told the boy wonder. Nope.
The rudder turned out fine, its a keeper.
Any way this is how I trued them up.
Got my glass out so I could CA the shapes down to the table. It's real easy to get a razor blade between the glass and what ever you got glued to it. Before gluing them down I shimmed the high spots so it would sit flat then glued it to the glass. Then set one of my forms in the shape and used it for a flat plane. Then ran a router around it to cut one side flat.
If you look at the first photo you will see the high end with a shim under it.
This is where the do over began. I did a wrap around cawl then split it for ease of clamp up.
Oh, I used wax this time.
To cut the other side, you just tack the now flat side down to the table and parallel cut the untrue side. I went a slightly different route though. I trued the other side with my 12 in drum sander.
Next up was to begin assembly. I decided to use the kit hinges on the tail surfaces. The one thing I didn't like was a short 3/8 by 3/8 by 4 inch piece of spruce that ties both elevators together. This seemed to me a little week. So I ran the 3/8 by 3/8 all the way across the two elevators. I used a piece of clear straight pine for this. I split this piece and made some hinge pockets and made the adjoining piece the same way. The inner sandwich is 1/6 aircraft ply sanded to 3/64 (hinge thickness).
The plan called for the adjoining piece on the horizontal stab to be 3/8 by 3/4 balsa with a 1/8 by 3/8 piece of spruce glued to the back of it. I used the balsa but split it and put the ply hinge spacers in it. Then glued the spruce stiffener to it.
Then began to assemble the elevator.
As long as I cut the trailing edge centered the hinge pockets should be dead on.
Kevin
Last edited by Melchizedek; 09-01-2014 at 01:58 PM.
09-01-2014, 05:05 PM
#320
Thread Starter
Join Date: Jul 2012
Location: Missouri
Posts: 1,127
Likes: 0
Received 0 Likes
on
0 Posts
Yes you are Robert. But I know your glad you did and so am I.
Do overs are a pain for a time, but the feeling of a job well done stays for a time, time and half a time.
Kevin
Do overs are a pain for a time, but the feeling of a job well done stays for a time, time and half a time.
Kevin
09-02-2014, 09:13 AM
#323
Thread Starter
Join Date: Jul 2012
Location: Missouri
Posts: 1,127
Likes: 0
Received 0 Likes
on
0 Posts
I had not planed on it Vince. That is why I ran the 3/8 bby 3/8"lumber end to end in the elevator.
The plan calls for just one control horn on the port side.
Do you think that is insufficeint on a elevator this size ?
The plan calls for just one control horn on the port side.
Do you think that is insufficeint on a elevator this size ?
09-02-2014, 09:39 AM
#324
Kevin, what the plans call for is sufficient for how this plane is supposed to be flown, having said that, it makes no accomodations for redundancy. So it's a personal, comfort thing for me, I'm not saying that you need to do it, as it will fly just as well if you don't. It's my belief that as our planes get bigger and more expensive, redundancy is a good thing... should you go down that path, now is the time to make the alterations. When I built my 1/4 scale SW I had intended on splitting the elevator halves but last minute revisions caused my to change course ( fancy talk for me not spending more money on another servo and another receiver that had more channels). With my 27% Edge I did split the elevators.
Last edited by VincentJ; 09-02-2014 at 09:53 AM.
09-02-2014, 10:15 AM
#325
Thread Starter
Join Date: Jul 2012
Location: Missouri
Posts: 1,127
Likes: 0
Received 0 Likes
on
0 Posts
Thank you for the explanation. I will ponder it. I do have an extra servo and channel. It would be a good experience thing for me to set that up.
Pondering ..............................................
Kevin
Pondering ..............................................
Kevin