topflite elder 40 build
 06-09-2012, 06:28 PM
#351

My Feedback: (1)
Michel, I took my Elder to the field last weekend but it was way to windy to fly it (chicken). I went back with it today and it was still windy but doable so I took her up. Kind of fun in the wind as it is a challenge. I thought of your "it flys like a cow" statement as I was fighting the wind. After landing I was asked "how do you get an airplane to fly so slow?" PUTT,PUTT,PUTT.. good times! Glad your engine combo worked out to your liking.
 06-09-2012, 07:23 PM
#352
Senior Member
Join Date: Jan 2011
Location: Gulf Shores,
AL
Posts: 118
Likes: 0
Received 0 Likes
on
0 Posts
Hello to all on this thread Recently traded with a guy on one of these kits having thought about building one for a while now. I have an os 48 fs that i plan to use for power. It has been dragging around a Toledo Special (really fun airplane) for a year and a half or so now. (Pat, you answered my question about the suitability of this engine for an Elder, thanks!). I have built several airplanes over the years, but this is my first WW1 venture.
Michel, Congratulations on the sucess of you project.............Say it flys like a cow, huh? My last build was a 9.5 lb. Hog Bipe that lands like a fat sow, so i ought to be right at home with this cowbird. (good nickname for this new rc/girlfriend......Cowbird This thing has to have a ton of drag, just looking at it. I am getting jazzed up about the project, and the kit should arrive soon! Again, Greetings and Salutations to All! steve
Recently traded with a guy on one of these kits having thought about building one for a while now. I have an os 48 fs that i plan to use for power. It has been dragging around a Toledo Special (really fun airplane) for a year and a half or so now. (Pat, you answered my question about the suitability of this engine for an Elder, thanks!). I have built several airplanes over the years, but this is my first WW1 venture. Michel, Congratulations on the sucess of you project.............Say it flys like a cow, huh? My last build was a 9.5 lb. Hog Bipe that lands like a fat sow, so i ought to be right at home with this cowbird. (good nickname for this new rc/girlfriend......Cowbird
This thing has to have a ton of drag, just looking at it. I am getting jazzed up about the project, and the kit should arrive soon! Again, Greetings and Salutations to All! steve
09-19-2012, 03:17 AM
#355
Hi
And good morning .
After many , many flights , this kit is worth building . I find it amazing how slow this bird is , and at the same time , how stable it is . I most certainly don,t regret the saito 56 . I have also learnt that the magic to learn flight is , " not " in fast flight , but in control of slow flight .
A real different breed of plane .
Michel
 01-07-2013, 12:56 PM
#358
Banned
ORIGINAL: Michel
Hi
Here is a video of the Elder . The ugly dude is me .
http://www.youtube.com/watch?v=g7cWm...ure=plpp_video
Michel
Hi
Here is a video of the Elder . The ugly dude is me .
http://www.youtube.com/watch?v=g7cWm...ure=plpp_video
Michel
A very pleasant video to watch.
You did a super job on this model.
Zor
01-07-2013, 03:55 PM
#360
My Feedback: (6)
Join Date: Jul 2009
Location: Granite Falls,
WA
Posts: 15
Likes: 0
Received 0 Likes
on
0 Posts
After the wings are joined, see the section on finishing the bottom of the wing.
ORIGINAL: pektoralis
Hi!
When sheathing the bottom of the wing?
This was nothing in the manual.
01-07-2013, 08:08 PM
#361
Banned
ORIGINAL: Michel
Hi
Thanks Zor
How have you been Buddy ? Haven,t heard from you in a while
Michel
Hi
Thanks Zor
How have you been Buddy ? Haven,t heard from you in a while
Michel
Hobby wise I am working on the design of a PA30 Piper Twin Comanche but having a hard time finding time since the beginning of the Holiday Season.
Being a hobby there is no rush.
Looking forward to the flying season.
Zor
Edited 09 Jan 2013 to correct sincc to since
07-02-2013, 12:55 PM
#363
Banned
ORIGINAL: LCM
I am having truble opening the pictures posted by Michel. Any ideas why or how to open them?
I am having truble opening the pictures posted by Michel. Any ideas why or how to open them?
Zor
12-09-2013, 06:50 PM
#364
Senior Member
Join Date: Jan 2011
Location: SorrentoBritish Columbia, CANADA
Posts: 2,018
Likes: 0
Received 0 Likes
on
0 Posts
I realize this is an old thread but I have been reading it and really enjoying it . I am presently building an Elder .. One thing that I have noticed that I would like to point out to anybody that is building one is that the wing bolt plate is placed backwards in the plans.. There is an amendment telling us to lower it .. this helps it to clear the aileron torque rods.. If you turn it around the way it should be you can bring it right up to the 1/4" bass longerons and the torque rods will clear...I am really enjoying building this plane ..It is taking a lot more time than I thought it would but I think its going to be a real eye catcher. I am just starting the covering process..
12-09-2013, 07:08 PM
#365
My Feedback: (6)
Join Date: Jul 2009
Location: Granite Falls,
WA
Posts: 15
Likes: 0
Received 0 Likes
on
0 Posts
I realize this is an old thread but I have been reading it and really enjoying it . I am presently building an Elder .. One thing that I have noticed that I would like to point out to anybody that is building one is that the wing bolt plate is placed backwards in the plans.. There is an amendment telling us to lower it .. this helps it to clear the aileron torque rods.. If you turn it around the way it should be you can bring it right up to the 1/4" bass longerons and the torque rods will clear...I am really enjoying building this plane ..It is taking a lot more time than I thought it would but I think its going to be a real eye catcher. I am just starting the covering process..
12-10-2013, 01:00 AM
#366
Senior Member
Join Date: Jan 2011
Location: SorrentoBritish Columbia, CANADA
Posts: 2,018
Likes: 0
Received 0 Likes
on
0 Posts
Yes thats one way around it .. I almost went that way myself but I decided that on an old time style plane like this one I would go back to the old torque rod single servo way . It still works . I Wish I had Spotted your tip on soldering the landing gear inboard of the axles though before it was too late .. I saw that someplace else too when I was scouting around .. I really wish I had done that ..
12-10-2013, 08:54 PM
#367
My Feedback: (1)
bikerbc, In regard to the wing bolt plate placement.....even following the "update supplement" instructions I found there was still binding in the aileron links at near full throw. Michel, who was building his slightly after I built mine found the same problem. We discuss it in posts #259 and #261 in this thread. Refer back and be aware when you assemble and test your plane. I just knotched the plate with a round file till it cleared and Michel fabed some different plates to move stuff to clear. Anyway, the mod in the instructions isn't enough to fix the problum, you will need to do more. What are you going to power yours with?
12-11-2013, 04:16 AM
#368
Senior Member
Join Date: Jan 2011
Location: SorrentoBritish Columbia, CANADA
Posts: 2,018
Likes: 0
Received 0 Likes
on
0 Posts
I believe following the update that was in my kit was the wrong thing to do . It advised me to lower the wing bolt plate .. If you do this it will interfere with the other servos if you aren't careful . They have it placed backwards in the plans . What needs to be done is turn it around .. You can then bring it right up to the longerons .You place it so that the torque rods fit in the u shaped cut out and the control arms can go forward to the servo .. ...Anyway I am planning on using an ASP 61 in my Elder...It is four stroke...I haven't run it before.. My buddy donated it to the project .Its brand new .. It Calls for an 11-6 prop .. What do you have in yours ? I am getting kind of excited to see mine finished ..
12-11-2013, 06:37 PM
#369
bikerbc, In regard to the wing bolt plate placement.....even following the "update supplement" instructions I found there was still binding in the aileron links at near full throw. Michel, who was building his slightly after I built mine found the same problem. We discuss it in posts #259 and #261 in this thread. Refer back and be aware when you assemble and test your plane. I just knotched the plate with a round file till it cleared and Michel fabed some different plates to move stuff to clear. Anyway, the mod in the instructions isn't enough to fix the problum, you will need to do more. What are you going to power yours with?
That ,............. was well explained ,.......... Thank You .
BTW ,............. I have had many flights ,................ and hope , I will continue , to do so .
I use a12 X 6 , on my Saito 56 , Fly,s extremely , "SCALE " .
Michel
12-11-2013, 09:44 PM
#370
Senior Member
Join Date: Jan 2011
Location: SorrentoBritish Columbia, CANADA
Posts: 2,018
Likes: 0
Received 0 Likes
on
0 Posts
I think the Saito's have more more snort than the ASP's .. I hope the ASP will be enough motor. I do have an OS46 AX and an OS55 AX that I could use but I want the four stroke put put . . I would like to build a set of floats for it , possibly so I can maiden it in the winter on the snow.. I think I might even have a set that might fit .. Has any body tried it out on floats ?
01-29-2015, 05:15 AM
#373
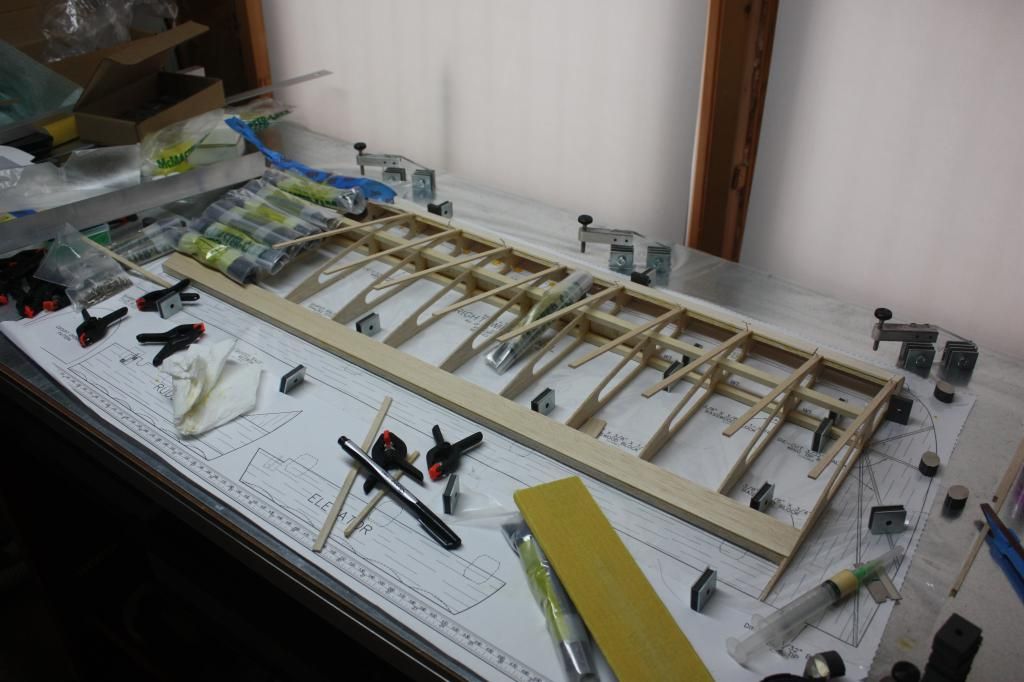
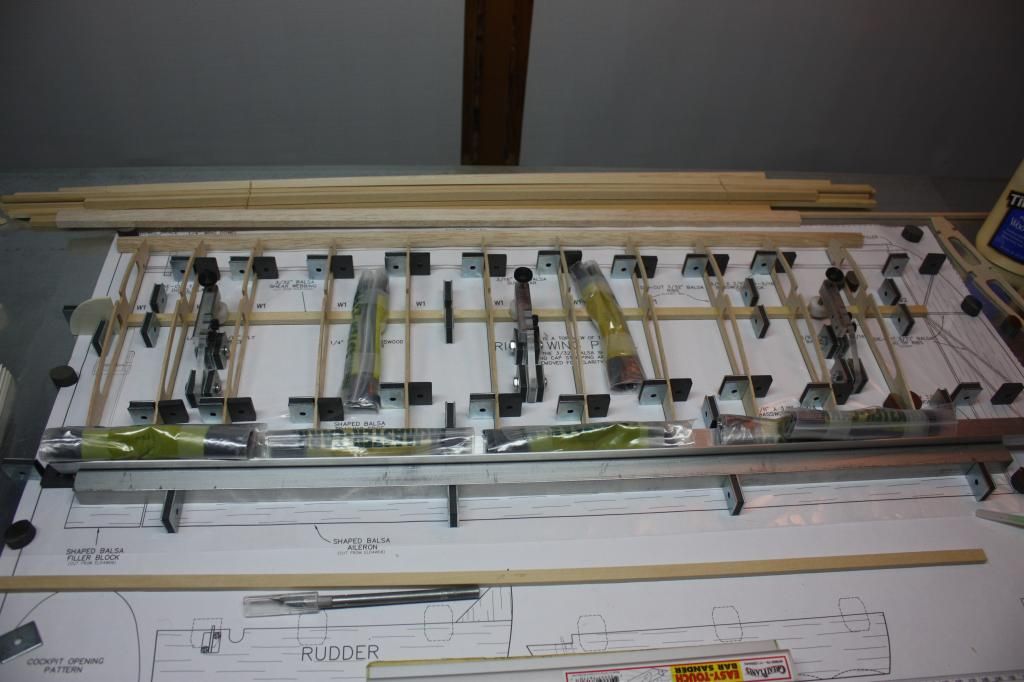
I had started a build log over at RCGroups, but no one seems too interested in this model. So, I thought I'd revive this thread and share my experience with this kit. Thought I'd share this since I'm building using a magnetic fixturing system. I take no credit for the design of the fixtures. That belongs to Paul K. Johnson of Airfield Models http://www.airfieldmodels.com/index.html . If you haven't been to his website. there's a ton of useful info there. I made my fixtures, since I have access to CNC equipment and CAD software. Mine are made from 1/4" plexiglass because I had a bunch of it. I plan to post CAD files and possibly solid models (for you part printer guys) for the fixtures at some future date. I want to see if Paul has any objection first. Anyway this was my second build after a 40+ year hiatus from the hobby. I go back to when you had to build if you wanted to fly. I don't object to ARFs, but nothing is as satisfying (or heartbreaking?) as launching a model you built.
On to the build. First the tail feathers. Nothing special here but the pics show how the magnets work.
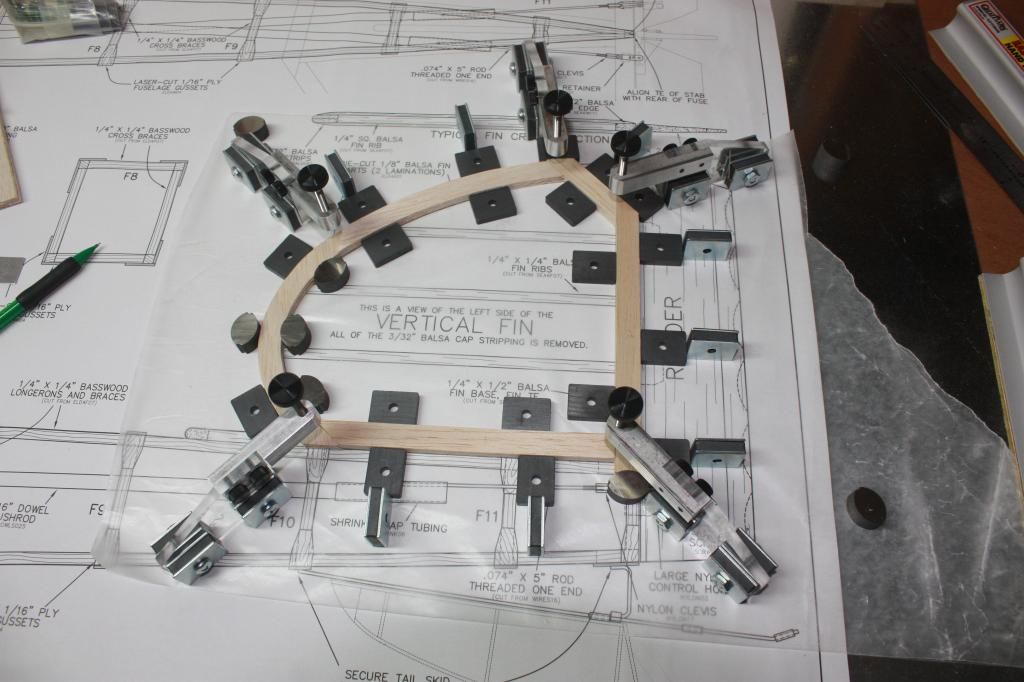
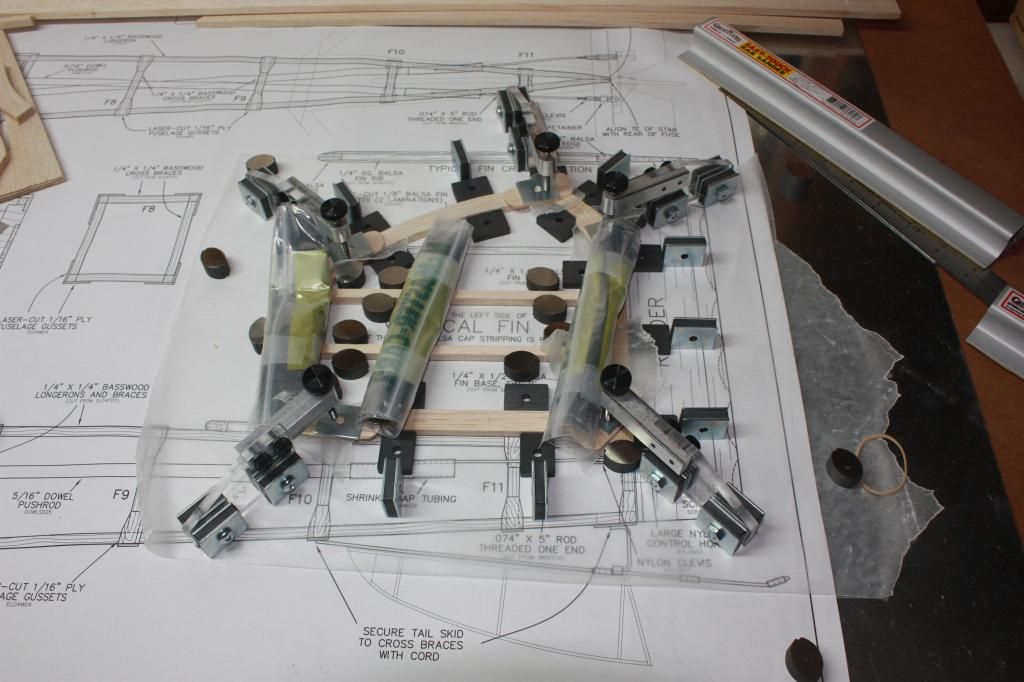
On to the build. First the tail feathers. Nothing special here but the pics show how the magnets work.
01-29-2015, 05:28 AM
#374
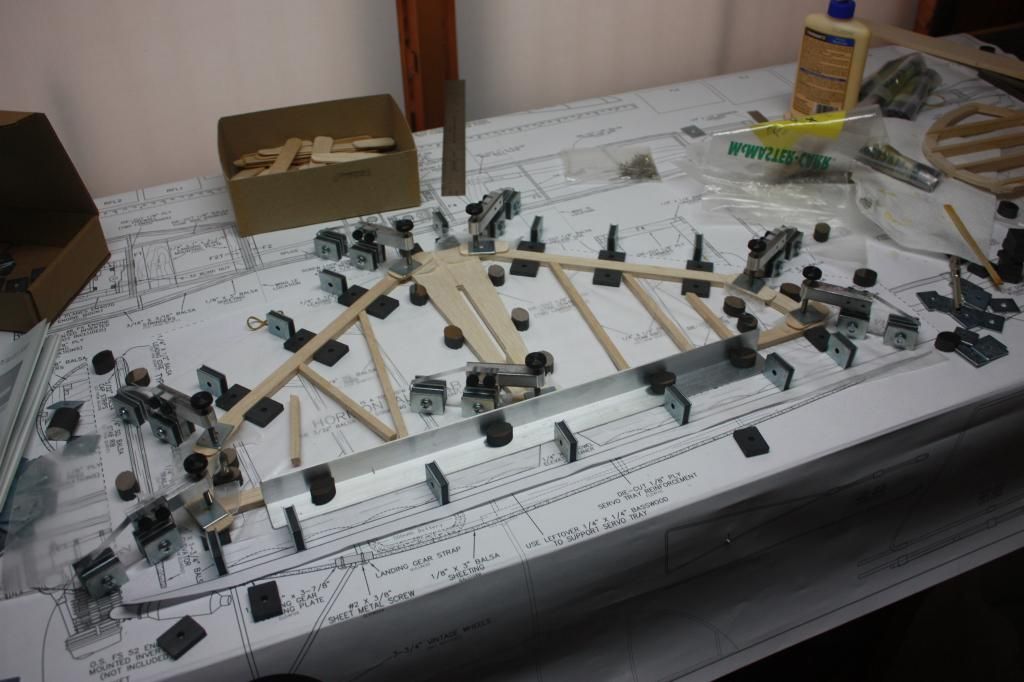
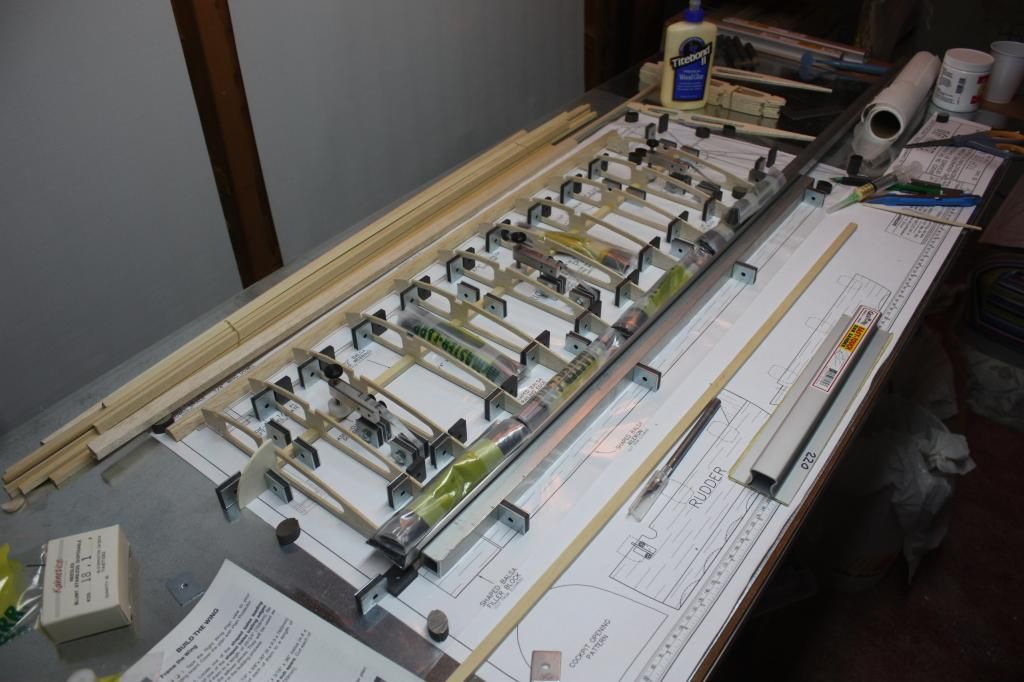
On to the wings. The magnets make it easy to keep the ribs vertical. The clamps keep the spar flat against the work bench. Note the dihedral gauge held in place while the glue dries. I build with a combination of Titebond and CA. Epoxy for major structural points.

01-29-2015, 05:30 AM
#375
Leading edge sheeting and cap strips. I used Titebond to attach one end of the cap strip. Then I had to wait for it to dry before I could bend them down and glue them to the ribs. On the remainder, I tacked them at the front with medium CA and then applied medium CA to the top of each rib and pressed the cap strip in place. This was much more efficient.