


topflite elder 40 build
 01-29-2015, 05:39 AM
#376

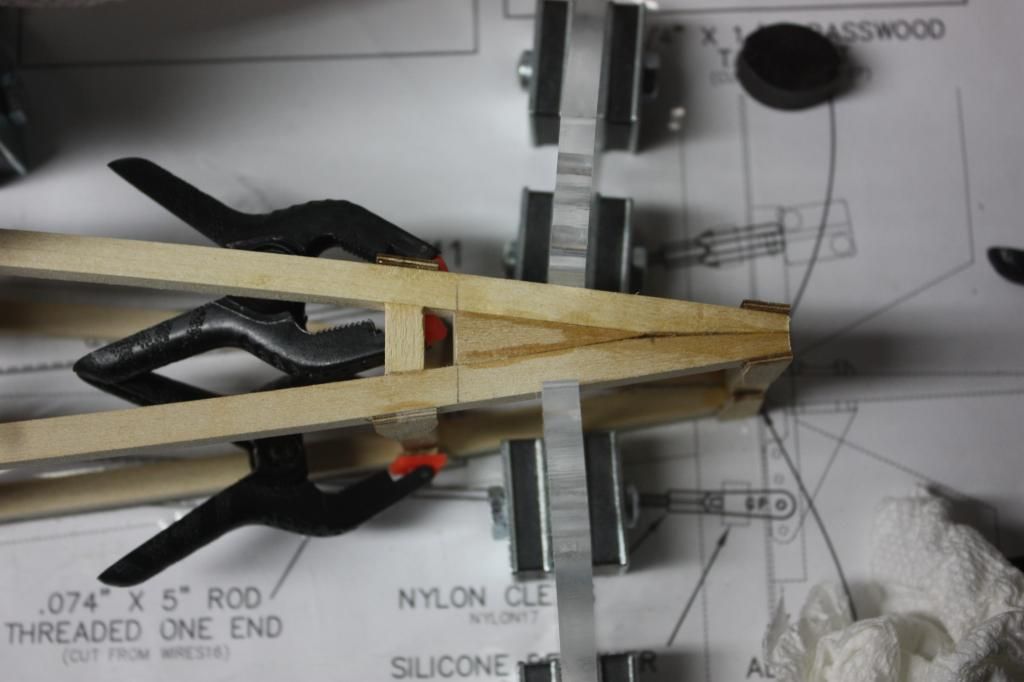
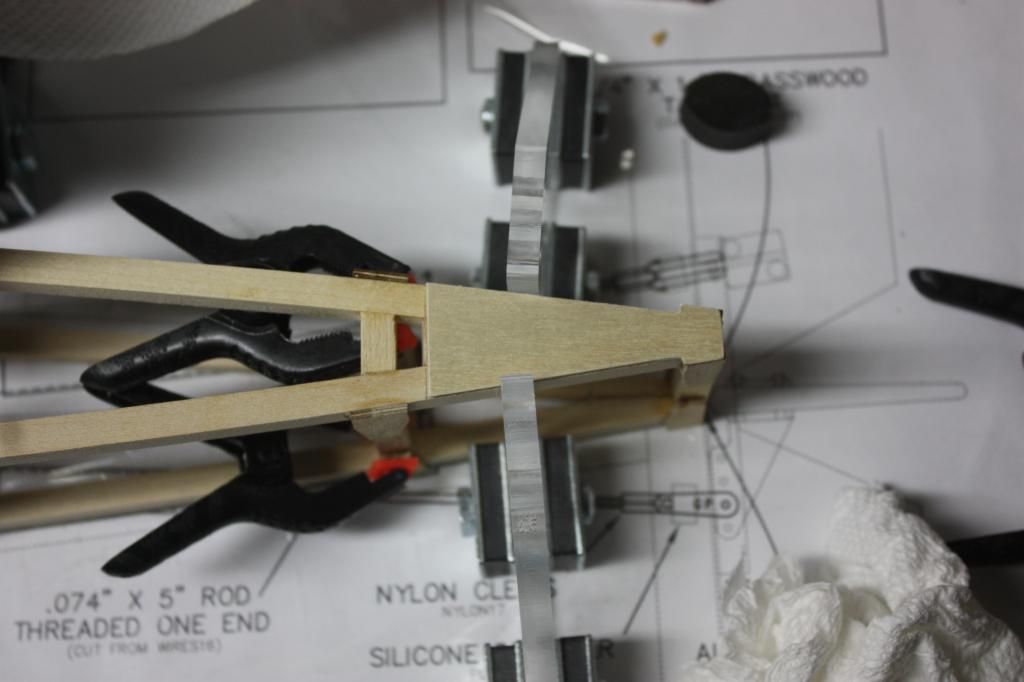
I decided I would detail the cockpit and add the rigging wires. So, I thought this would be a good time to make the upper kingpost. Instructions don't give a lot of detail. Here's how I did it.
1) Cut 4 pcs of 1/4" dowel 4- 1/2" long. This is per the instructions.
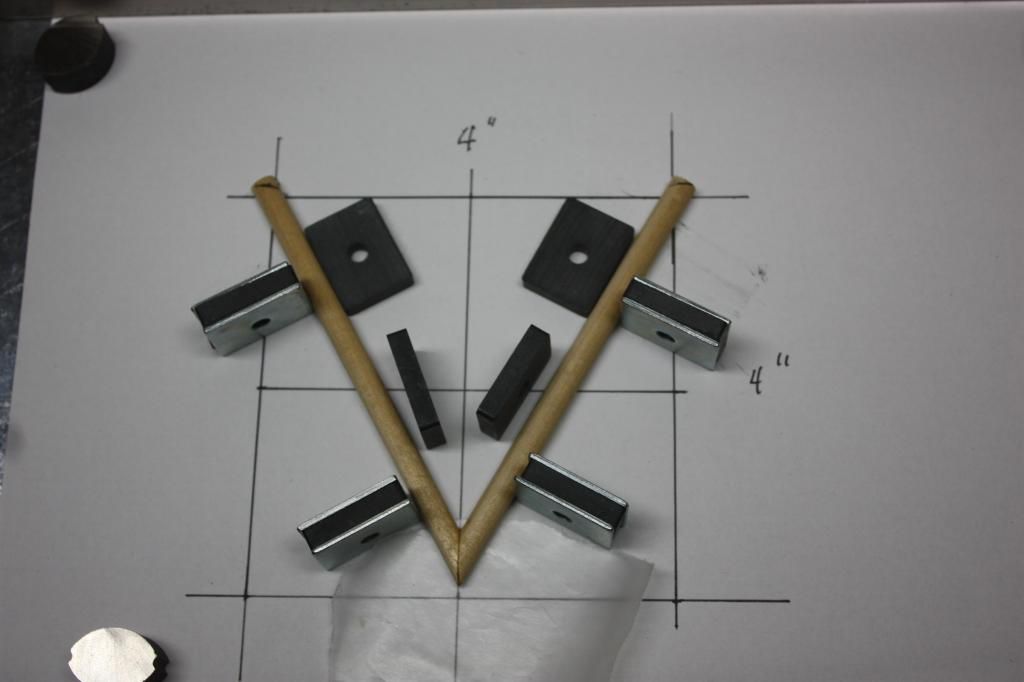
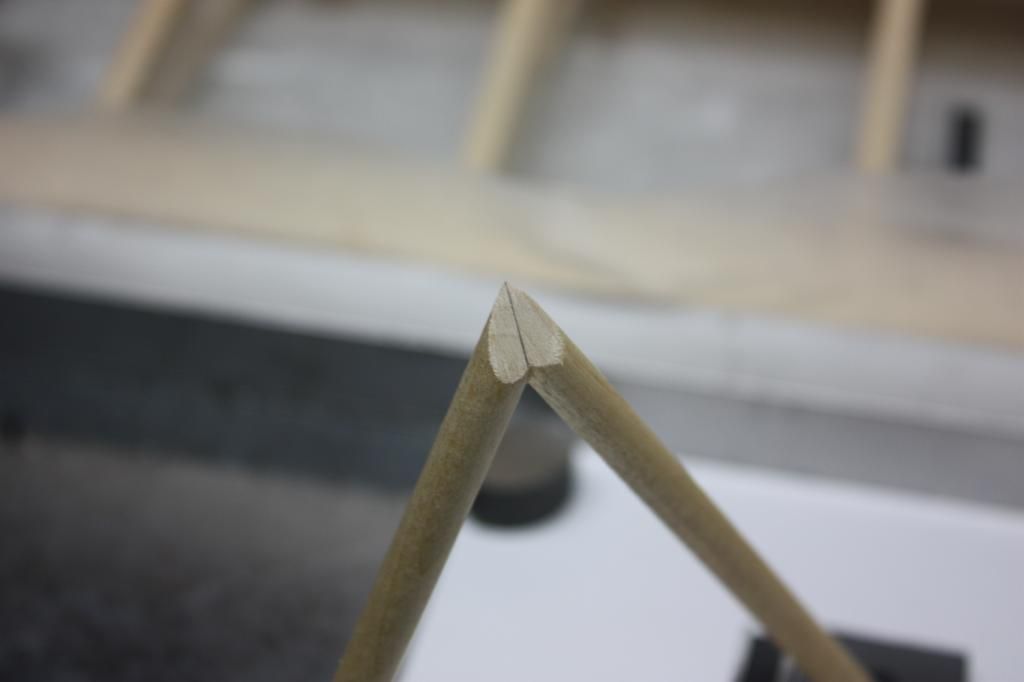
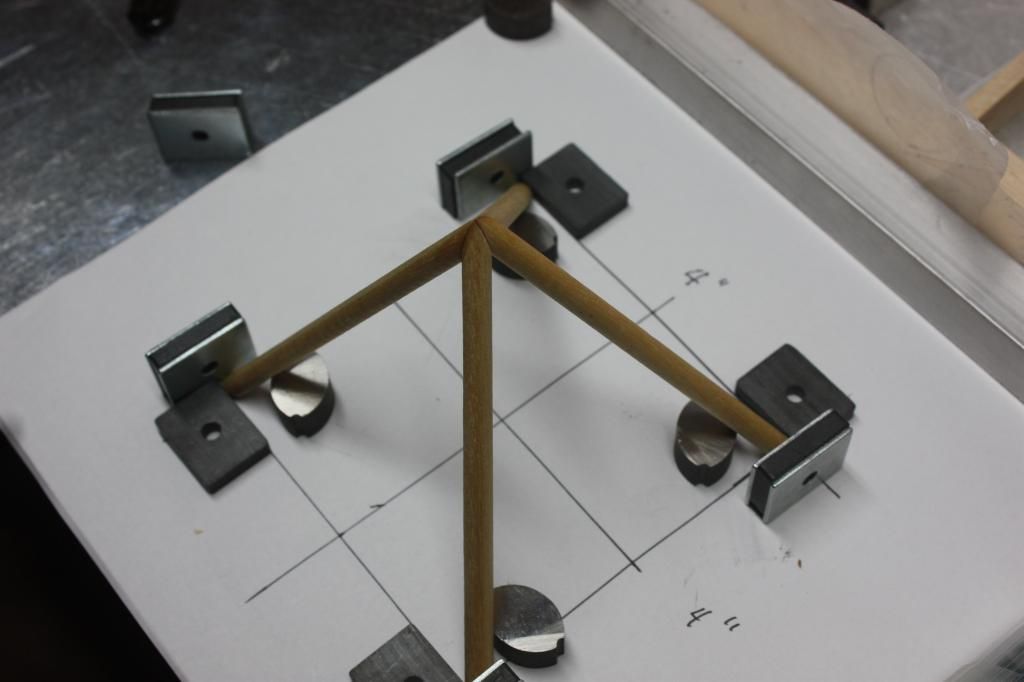
2) I made a 4" x 4" grid drawing (see pic) and beveled the ends of 2 pcs to form a symmetrical "V". Epoxy the ends and let it cure. Note the marks on the legs at the top. I beveled the ends to get "close to what will be needed to match the wing later.
3) Repeat step 2.
4) Bevel the ends of the joined pieces as shown in the pics.
5) Epoxy the 20 assemblies together so that hey form a symmetrical pyramid. See last pic.
Later, I drilled a small hole down the middle for a small cotter pin. After the wing is assembled, bevel the bottom of the legs to match the wing.
1) Cut 4 pcs of 1/4" dowel 4- 1/2" long. This is per the instructions.
2) I made a 4" x 4" grid drawing (see pic) and beveled the ends of 2 pcs to form a symmetrical "V". Epoxy the ends and let it cure. Note the marks on the legs at the top. I beveled the ends to get "close to what will be needed to match the wing later.
3) Repeat step 2.
4) Bevel the ends of the joined pieces as shown in the pics.
5) Epoxy the 20 assemblies together so that hey form a symmetrical pyramid. See last pic.
Later, I drilled a small hole down the middle for a small cotter pin. After the wing is assembled, bevel the bottom of the legs to match the wing.
 01-29-2015, 05:46 AM
#377
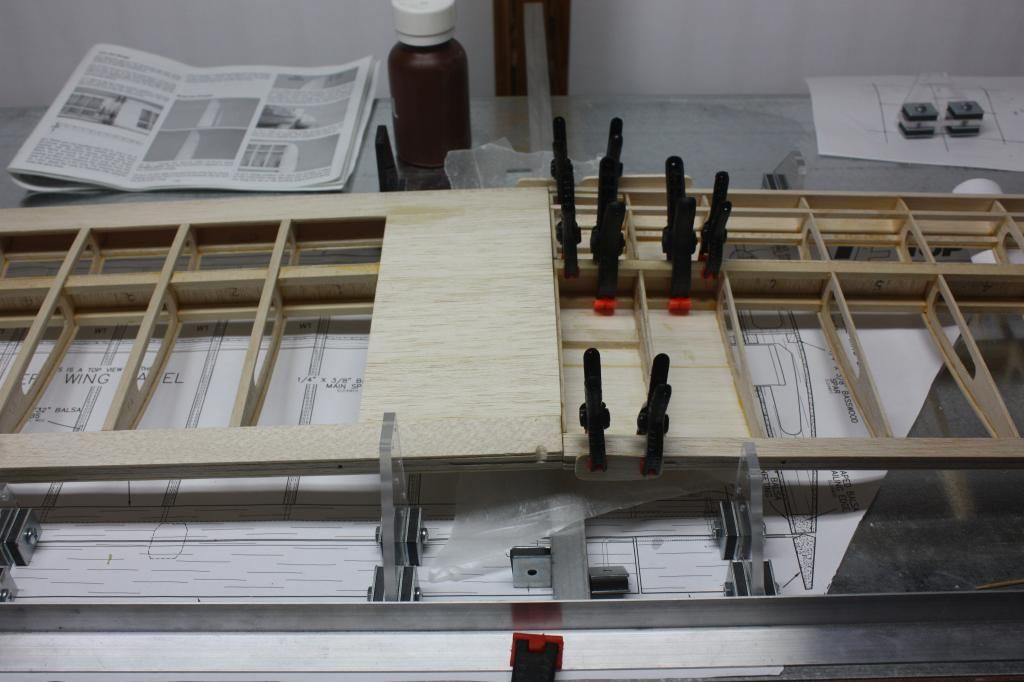
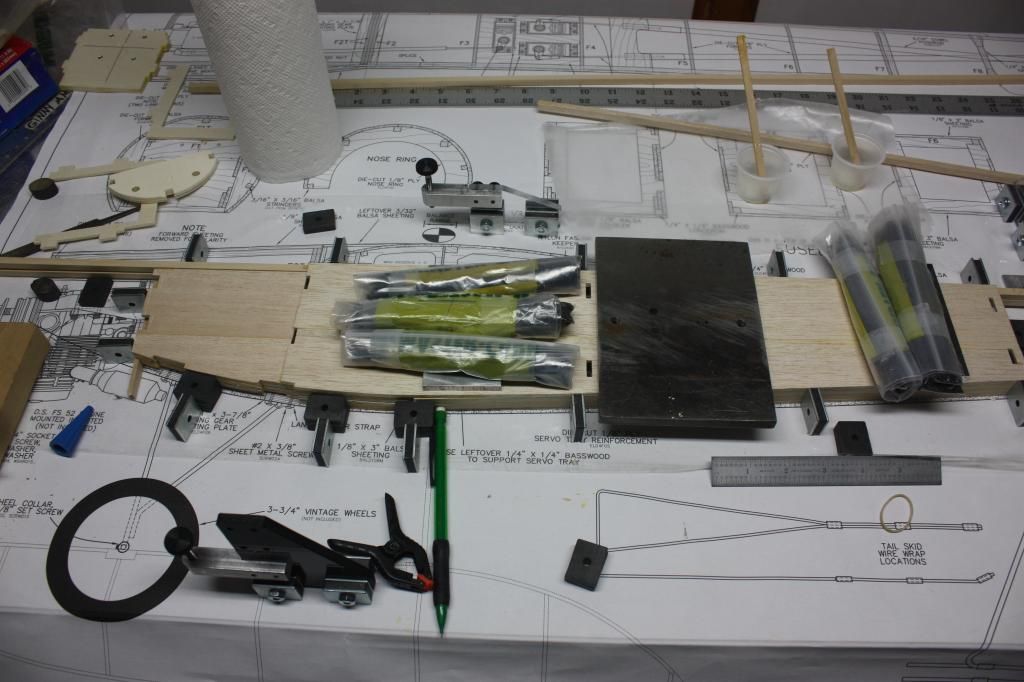
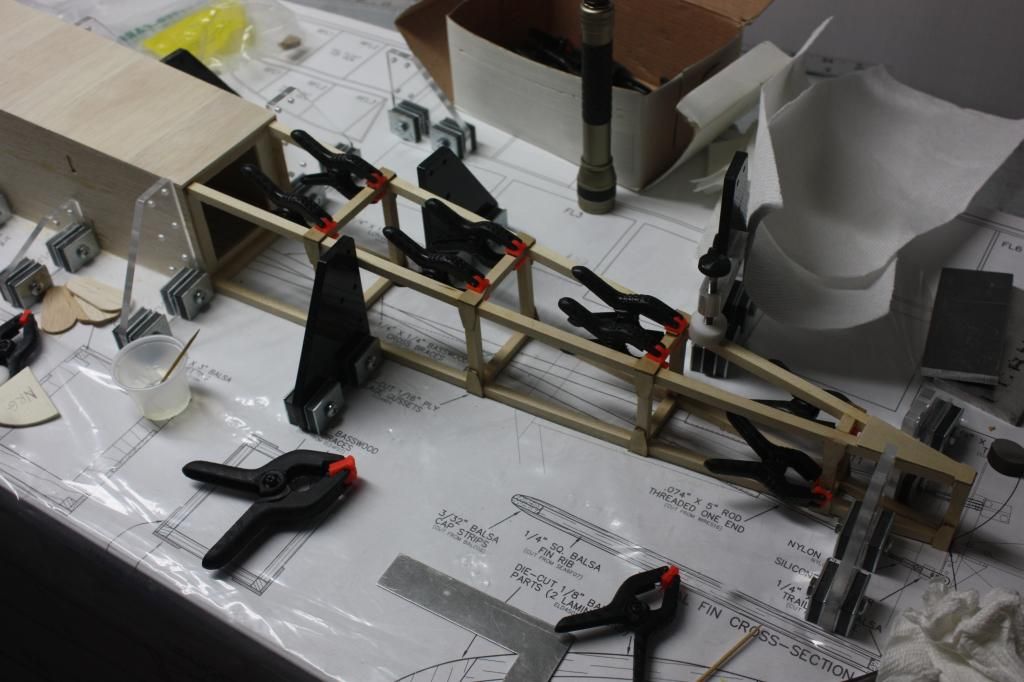
Back to the wings. Before I put the bottom center sheeting on, I determined where the kingpost legs will rest when I finally assembled it to the finished model. I figured that sometime that kingpost would get hit and it wouldn't take a lot of force to punch a hole in the top of the wing. The legs land fairly close to a rib, which is a plus, but I thought an extra block of balsa behind wouldn't hurt. You can see the blocks in the pic.
The instructions have you lay one wing panel flat on the bench and the raise the othe tip to the correct height for the dihedral. I didn't like that as that was going to make clamping the spar doublers difficult to clamp. So I did it by assembling the wing upside down and raising the center section by half the specified amount in order to get the proper dihedral. This made it muck easier to work on and remove excess epoxy. You will note the long piece of angle to keep it all straight.
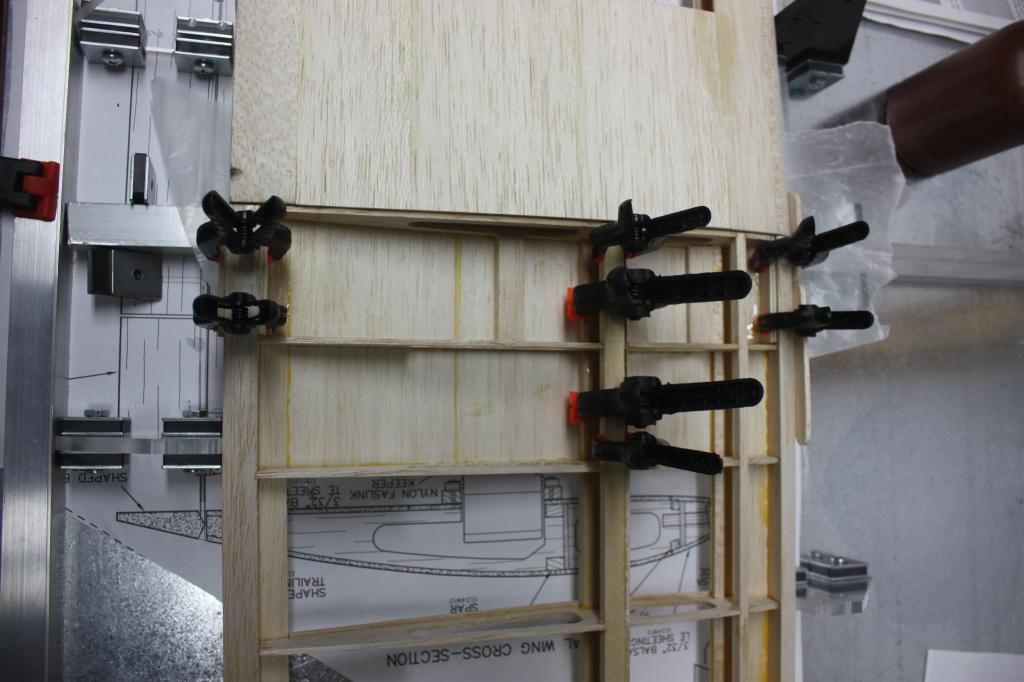
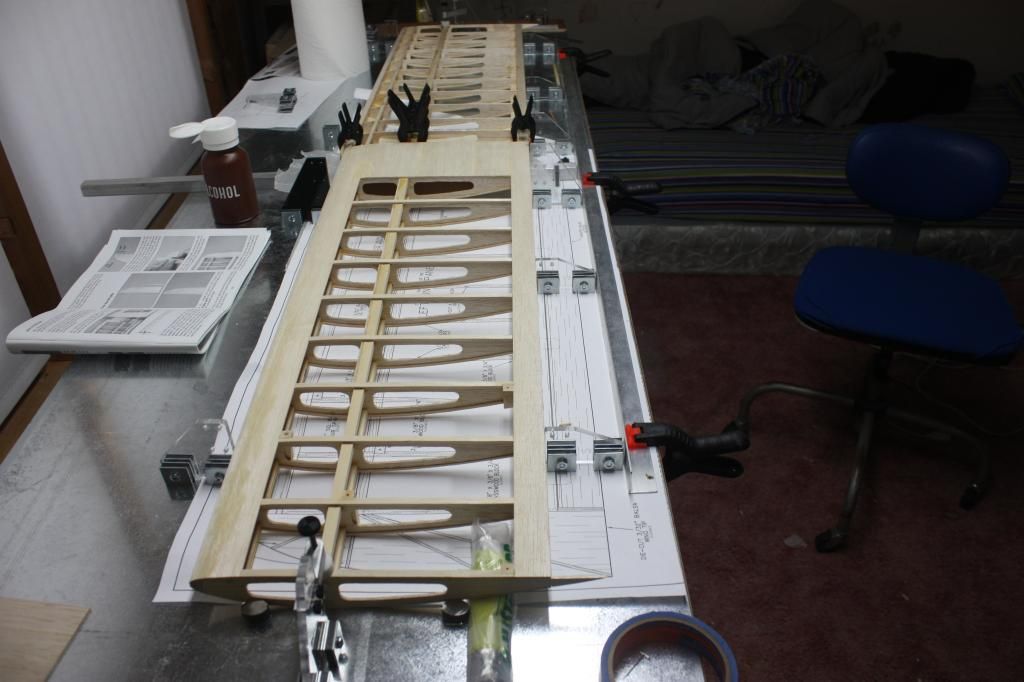
The instructions have you lay one wing panel flat on the bench and the raise the othe tip to the correct height for the dihedral. I didn't like that as that was going to make clamping the spar doublers difficult to clamp. So I did it by assembling the wing upside down and raising the center section by half the specified amount in order to get the proper dihedral. This made it muck easier to work on and remove excess epoxy. You will note the long piece of angle to keep it all straight.
01-29-2015, 05:58 AM
#378
Time for the fuselage. I build really quick don't I? All of this has taken place in a matter of minutes 
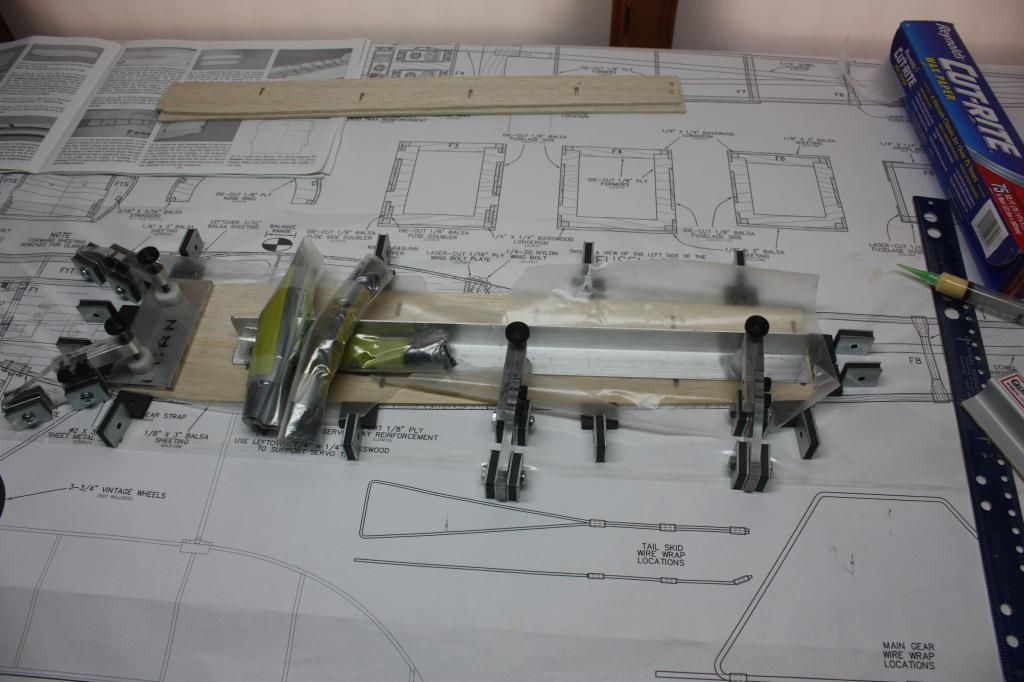
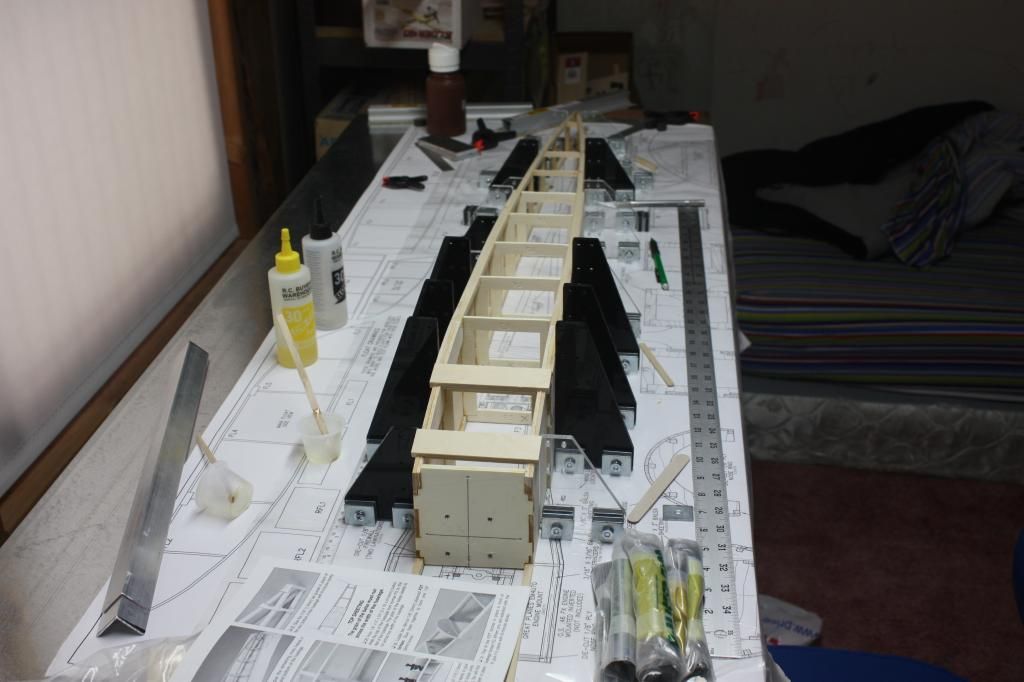
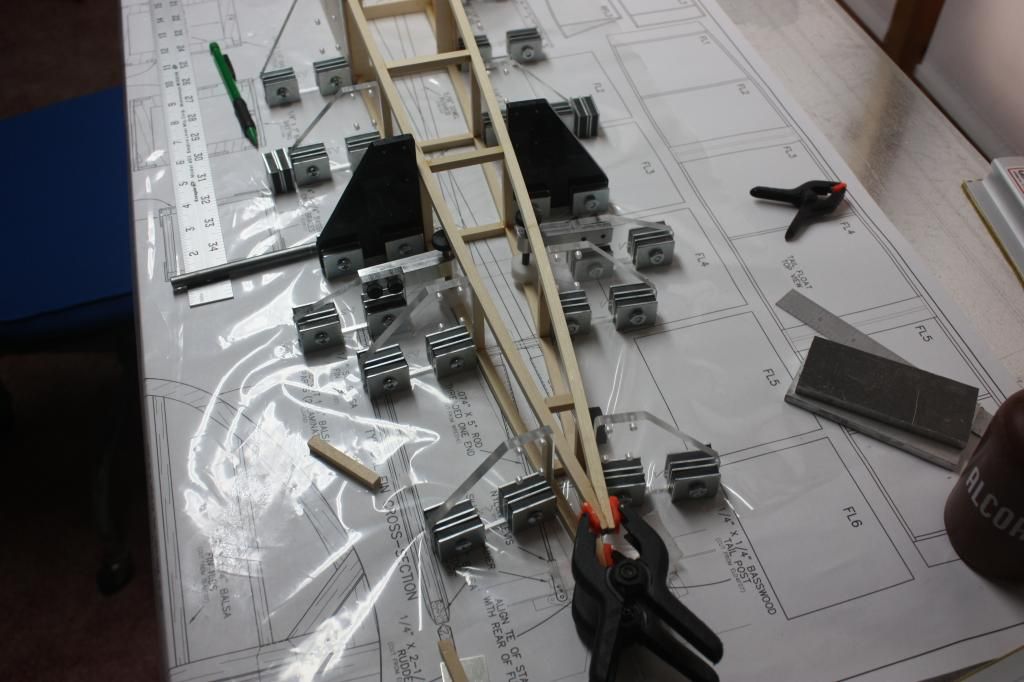
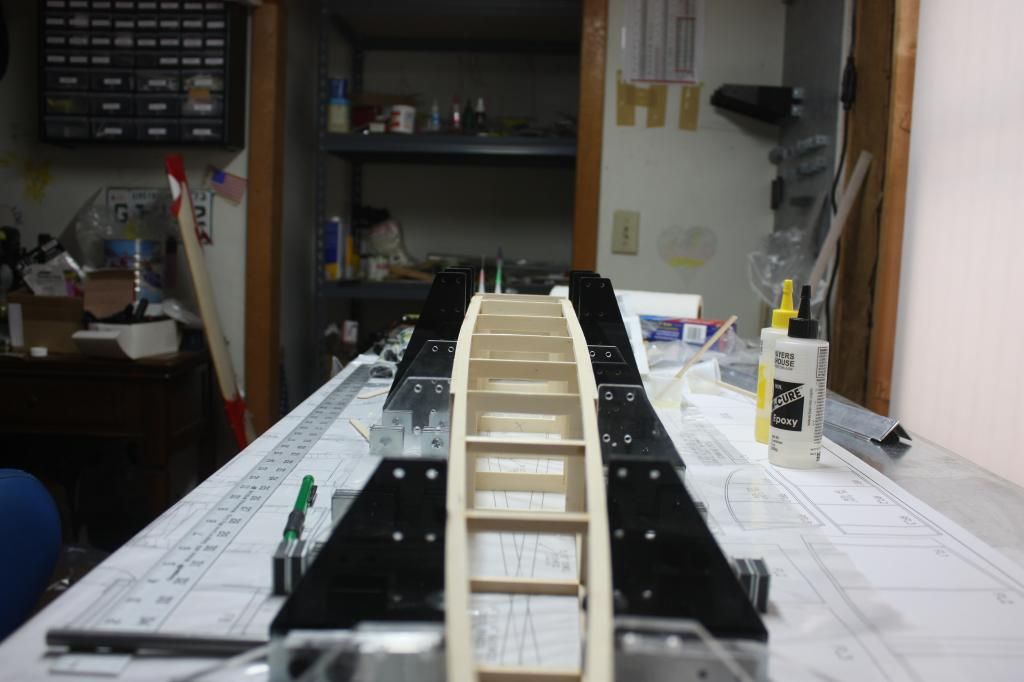
This is where the magnetic fixtures really pay off. I did a couple things differently than suggested by the instructions.
1) I did not glue any formers (including the firewall) in place until the assembly was jigged into position. Keep in mind that the firewall angle is reversed from the plan should you assemble it this way.
2) The left side is built on top of the right (normal practice). Be sure and put some 1/8" shims under the longerons at the rear to keep everything in a flat plane.
3) I beveled the ends of the longerons prior to assembly as I felt it would be easier to do then. I left a little room to sand to the final fit.
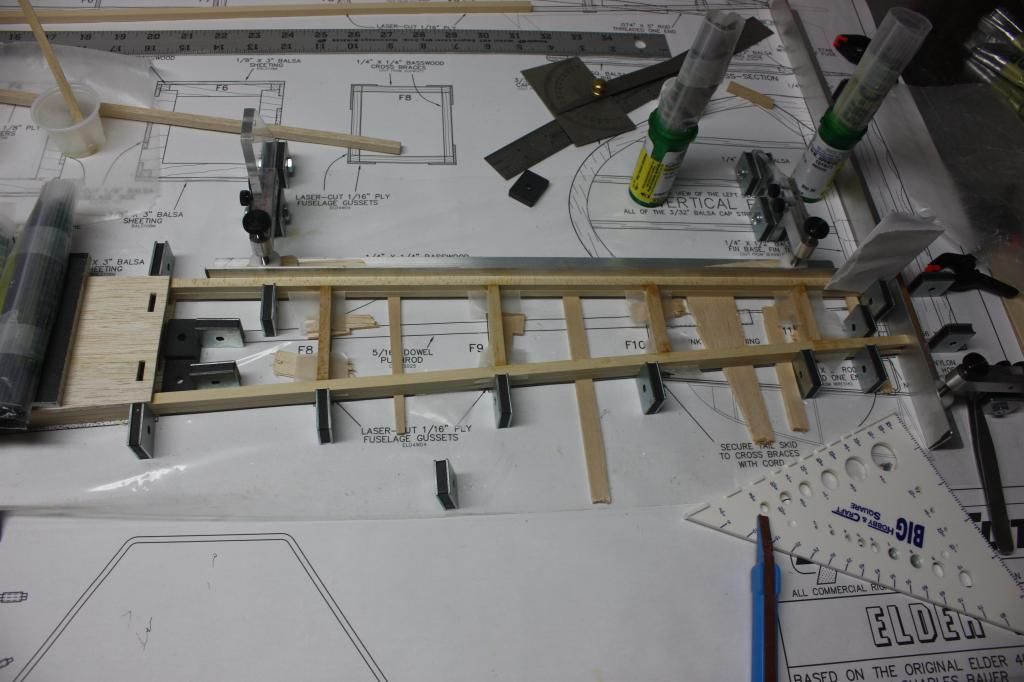
4) I did not install the last vertical post (tailpost) as they tell you. I plan to use a Sullivan tailwheel assembly, not the supplied one. By putting the tailpost in later, I can put in the hinge slot while it's off the model which is much easier.
5) I added a filler piece of basswood at the rear and made a new gusset plate for the Sullivan tailwheel. See pics.
The beauty of this fixturing system is you can remove things to make adjustments or whatever, and they'll go right back where they were when you put them back.
This is where the magnetic fixtures really pay off. I did a couple things differently than suggested by the instructions.
1) I did not glue any formers (including the firewall) in place until the assembly was jigged into position. Keep in mind that the firewall angle is reversed from the plan should you assemble it this way.
2) The left side is built on top of the right (normal practice). Be sure and put some 1/8" shims under the longerons at the rear to keep everything in a flat plane.
3) I beveled the ends of the longerons prior to assembly as I felt it would be easier to do then. I left a little room to sand to the final fit.
4) I did not install the last vertical post (tailpost) as they tell you. I plan to use a Sullivan tailwheel assembly, not the supplied one. By putting the tailpost in later, I can put in the hinge slot while it's off the model which is much easier.
5) I added a filler piece of basswood at the rear and made a new gusset plate for the Sullivan tailwheel. See pics.
The beauty of this fixturing system is you can remove things to make adjustments or whatever, and they'll go right back where they were when you put them back.
01-29-2015, 06:07 AM
#379
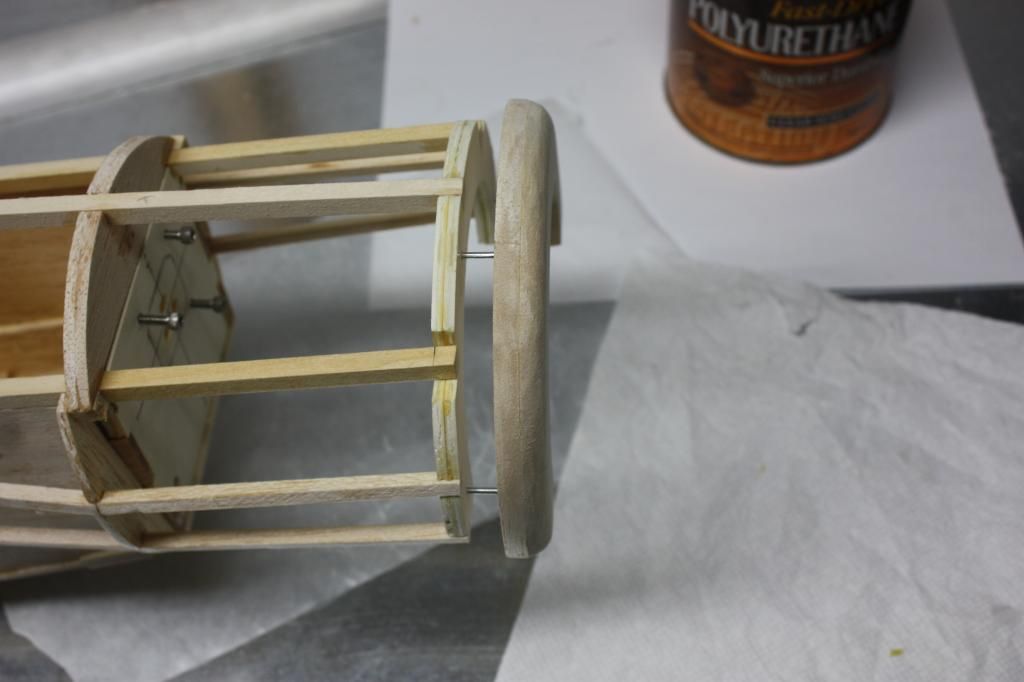
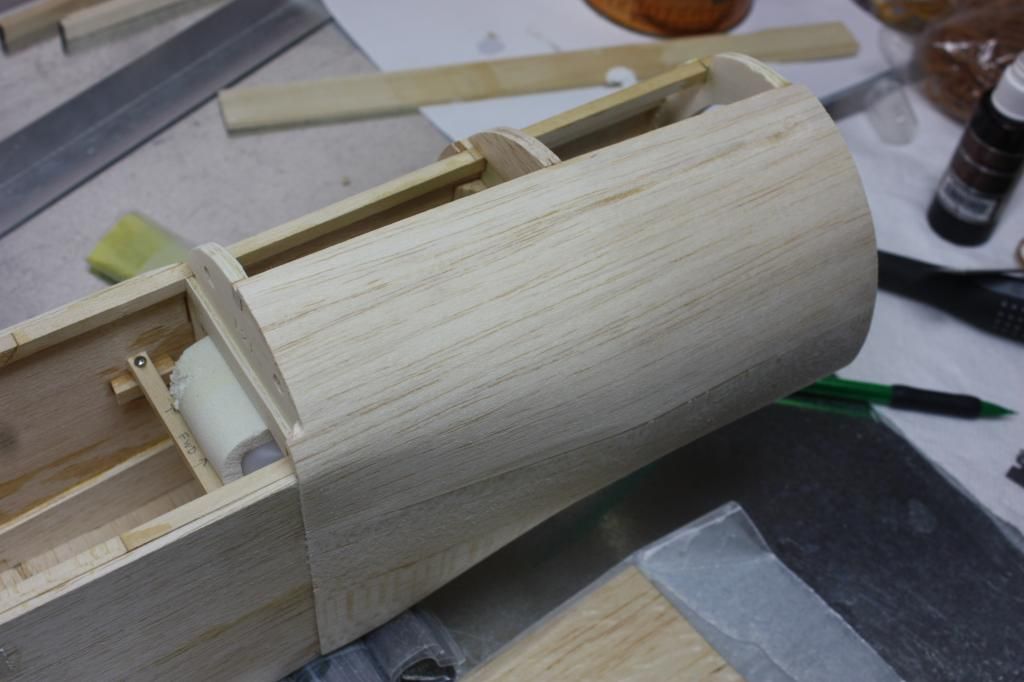
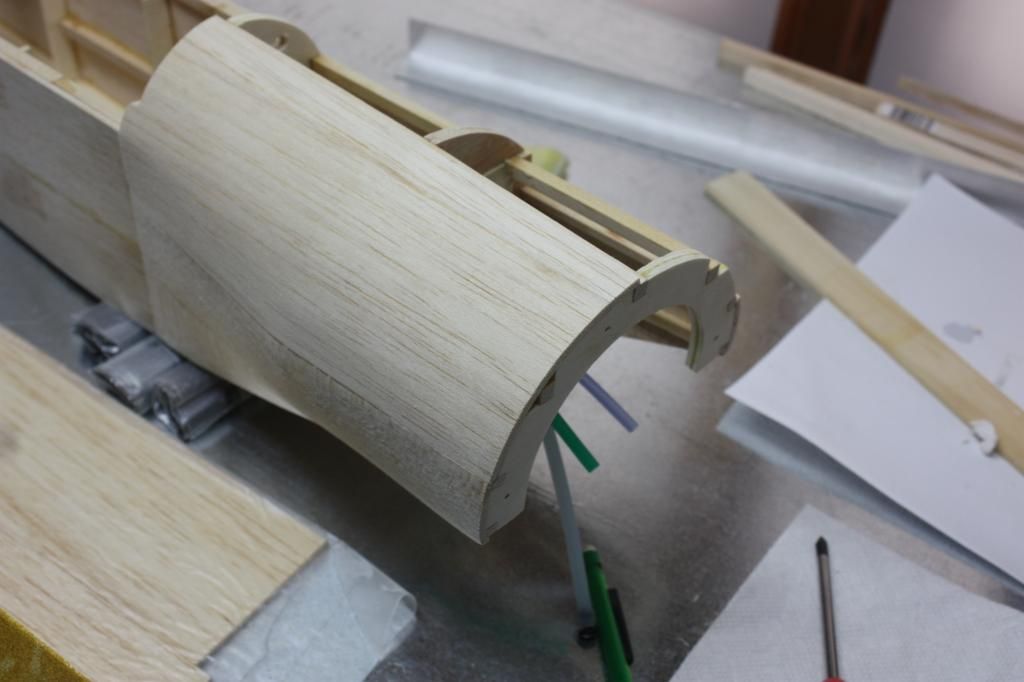
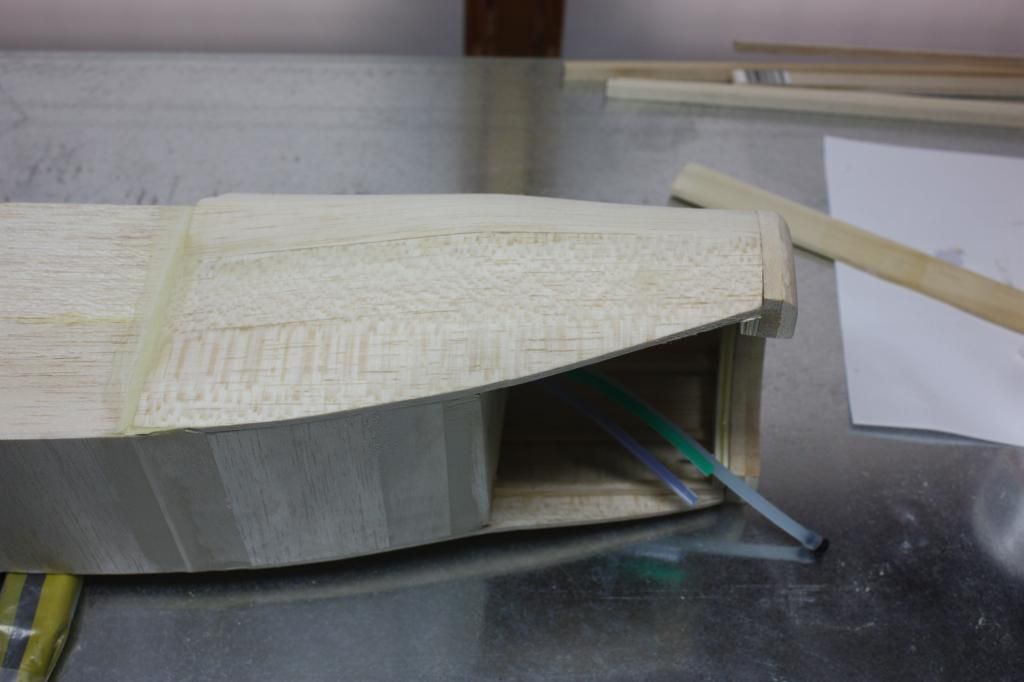
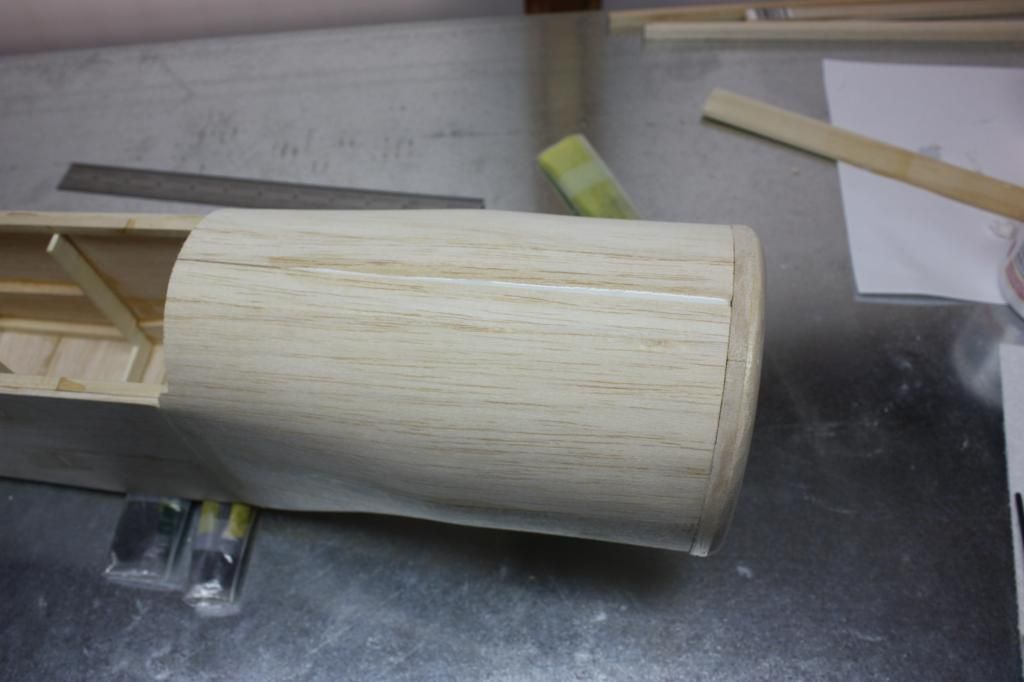
Now for the fun part (he says jokingly). Sheeting the cowl. All I can say is this part is a real PITA! But I did learn a few things while getting this done. I had read earlier in this thread where the builder did not like the flat nose as designed. I agree. No cowling should be flat like that. I took a slightly different approach. I moved the nose former back 1/2". Then I cut out a 1/2" balsa nose ring and clamped it to the kit nose ring. I drilled (3) 1/16" holes through the plywood and into the balsa nose. Then I tack glued 3 short pins into the nose piece so I can easily put it back in place. I don't know yet if I'm going to cover that piece in a different color and I figured it would be easier to do as a separate part. Edit: I also sealed any gaps between the firewall and the cowl formers with epoxy and microballoons.
Other things:
1) Buy some extra 1/8" balsa sheet before you begin in case of an Oh SH*T! (Ask me about that).
2) Maybe it's just me, but 50% isopropyl alcohol seem to work better that 70%.
3) I found that soaking it in the alcohol and wrapping it in wax paper (keeps the evaporation to a minimum) for at least 10 minutes made a big difference.
4) I formed it around the fuselage bit by bit without gluing anything until It would start to keep the shape I wanted. I had beveled my pieces so they overlapped the fuselage side by about 3/8". That gave me a strong bonding area at the rear.
5) I did find that the accelerator did come in hand at times, but you have to be careful not to get it on the areas you haven't done yet or you may be in for an unpleasant surprise.
6)Patience, patience, patience. There's probably a cold beer ready for when you get through this.
Last edited by rammon3; 01-29-2015 at 12:54 PM.
01-29-2015, 07:39 AM
#380
My Feedback: (2)
I'm enjoying the build. Sign me on as a lurker. Have you heard how well this plane balances??? Does it need a lot of nose weight, for example. Just curious.
I'm about to start on a different kit project so I will only be peeking in on this one in the eventuality that I do one of these down the road. Too many irons in the fire for now...
Bob
I'm about to start on a different kit project so I will only be peeking in on this one in the eventuality that I do one of these down the road. Too many irons in the fire for now...
Bob
01-29-2015, 12:47 PM
#382
As far as balance goes, I haven't read of any major issues. I'm using an OS 52 FS for power (I had one). I will be checking CG prior to covering. That way if any major shifts are necessary, it will be less messy. I also correct any lateral balance issues prior to cover as well. I'll keep posting with pics as I progress along, since there is interest.
01-29-2015, 04:06 PM
#383
My Feedback: (1)
rammon3, On the C/G question; I powered my Elder with a 2 stroke O.S. 46 FX and it required a heavy spinner nut, a 1 oz prop washer and 1/2 oz of lead weighs to achieve balance. Not a lot, and your 52 four stroke likely weighs a little more than my 2 stroke so you should be close. I can't remember any issue with lateral balance ( built mine 5 yrs ago) so it must not have required much. I did that before covering the wing so I can't look and give you an exact weight needed. I mounted my engine inverted @ a 45 degree angle with the stock muffler ending up hanging almost dead center below the engine. Engine mounting position will have an effect on lateral balance, so each build is unique. When you buy 50% alcohol, the other 50% in the bottle is plain old H2O, yea water! Buy the stronger stuff and add a little tap water if you need to slow the evaporation rate. I buy only 90% as I can tell the difference in cleaning ability between 70% and 90%. Sheeting that cowl was a lot of fun for me too . Looks like your doing a great job with the build. Carry on and enjoy.
. Looks like your doing a great job with the build. Carry on and enjoy.
02-13-2015, 06:33 AM
#384


Join Date: May 2007
Location: Kirbyville,
TX
Posts: 333
Likes: 0
Received 0 Likes
on
0 Posts
I built this plane back when there was a 20 size and a biplane version of it. I have the 20 size in the box still and I am looking for the biplane version to build. I do not remember any issues with the balance, just move the battery for or aft to get it and of course build the tail as lite as possible. (No extra reinforcement or glue)
what at do you have under the plane for the magnets to hold to? And what are you using to ensue a flat surface?
what at do you have under the plane for the magnets to hold to? And what are you using to ensue a flat surface?
10-06-2018, 01:55 PM
#389
I think you'll be fine with that. Mine has an OS FS52 and it flies fine. It has a pretty light wing loading, so it's not my first choice on a windy day, but it's fun to fly. I would also recommend increasing the rudder by a 1/4" or so as you will find that this is definitely not a "bank and yank" model.
