


CARF Ultra Flash Evo build thread +
 03-24-2023, 01:42 AM
#551

I have the gear door for the art scholl scheme
I can put them in an envelope and send them to you because i'm not gonna use them.
i have to send them from the netherlands in europe


The following users liked this post:
Auburn02 (03-27-2023)
03-28-2023, 11:34 AM
#556
So is a dremel cutoff wheel the best thing to use for trimming the canopy and the cockpit tubs? Get it close with the cutoff wheel and then fine tune with some sanding blocks?
I’ve sort of been dreading that part of the build but I’m getting to the point were I need it to CG the plane and figure out battery placement.
I’ve sort of been dreading that part of the build but I’m getting to the point were I need it to CG the plane and figure out battery placement.
Last edited by camss69; 03-28-2023 at 04:28 PM.

The following users liked this post:
camss69 (03-28-2023)
03-28-2023, 01:57 PM
#559
Thread Starter
So is a dremel cutoff wheel the best thing to use for trimming the canopy and the cockpit tubs? Get it close with the cutoff wheel and then fine tune with some sanding blocks?
I’ve sort of been dreading that part of the build but I”m getting to the point were I need it to CG the plane and figure out battery placement.
I’ve sort of been dreading that part of the build but I”m getting to the point were I need it to CG the plane and figure out battery placement.
I’m sure I covered the technique in this thread somewhere
03-28-2023, 08:17 PM
#561


dude, just call me and I'll do the canopy for you!!!! I've done a few of them, so I have a system to do them right!!! It's probably the most "challenging" part of the build, meaning the most frustrating!!!
Tom
Tom
03-29-2023, 05:44 AM
#562
My Feedback: (1)
My 1st canopy went in fine, I trimmed it with Fiskar scissors and polycarbonate scissors. I used the white canopy glue and many magnets to hold it down.
Then I painted it from the inside and it came out horrible (I was trying a black to silver fade). So, I ordered replacement canopy.
The second one I left clear and put the cockpit in. I liked the way Dave W's came out, but I didn't have a pilot at the time. It looked good.
But one day, I dropped it and the canopy cracked. And since I hot glued the cockpit in, I cannot take it apart without destroying it. I may have went overboard with the glue.
So, I order a new frame and canopy. I have to paint the frame and make it fit the fuselage. The more I think about the work , the more I accept living with the cracked canopy.
Be careful with the plastic, CARF charges $60+ for it and $50+ shipping. I would never order one at a time again, because the shipping for two is the same as one.
The RC car body manufacturers do such a better job at making the polycarbonate bodies than the canopy for the jets. They use better materials and they are crystal clear without distortion. I like how they have a protective plastic wrap too. The car bodies take a lot on abuse, if my canpoy was made from the same material it wouldn't have cracked from a the small drop.
03-29-2023, 06:00 PM
#563
Hey jvaliensi:
Man that sucks you broke two of them!! They crack so easy when they are glued into the frame. So when I start on the cuts of the clear to cut off the excess, I put the polycarbonate over the frame, then trace out with a sharpie, around the perimeter so that gives me some guideline to start the initial cut. Then tape off the entire outside of the "glass" so that when it comes time to trial fit it inside the frame, you don't scratch the hell out of it! At this point, it's trial fit....trim more...trial fit....trim more...trial fit...ect!!! Baby steps here as the goal is to get the damn "glass" to fit inside the frame with no binding. Then like you, when the "glass" is fit inside the frame, I take the tape off the part that will be glued to the frame, scratch (rough up) the parts of the "glass" that will touch the frame so the glue has something to "bite" into. I use that white canopy glue as well. Then a ton of magnets around the perimeter of the frame and the hoop. I use a wet paper towel to wipe off excess the put the whole assy onto the fuselage to cure over night. The next day, from the inside of the canopy assembly, I run a bead of Hysol to kinda "trap" the "glass" onto the frame. I'll see if I can post some pics here
For painting the inside of the frame, I use the Tamiya smoke color for polycarbonate and lightly spray the inside to get that smoke. I make a bunch of passes until the small can runs out, waiting like 10 minutes or so between coats
03-29-2023, 06:09 PM
#564
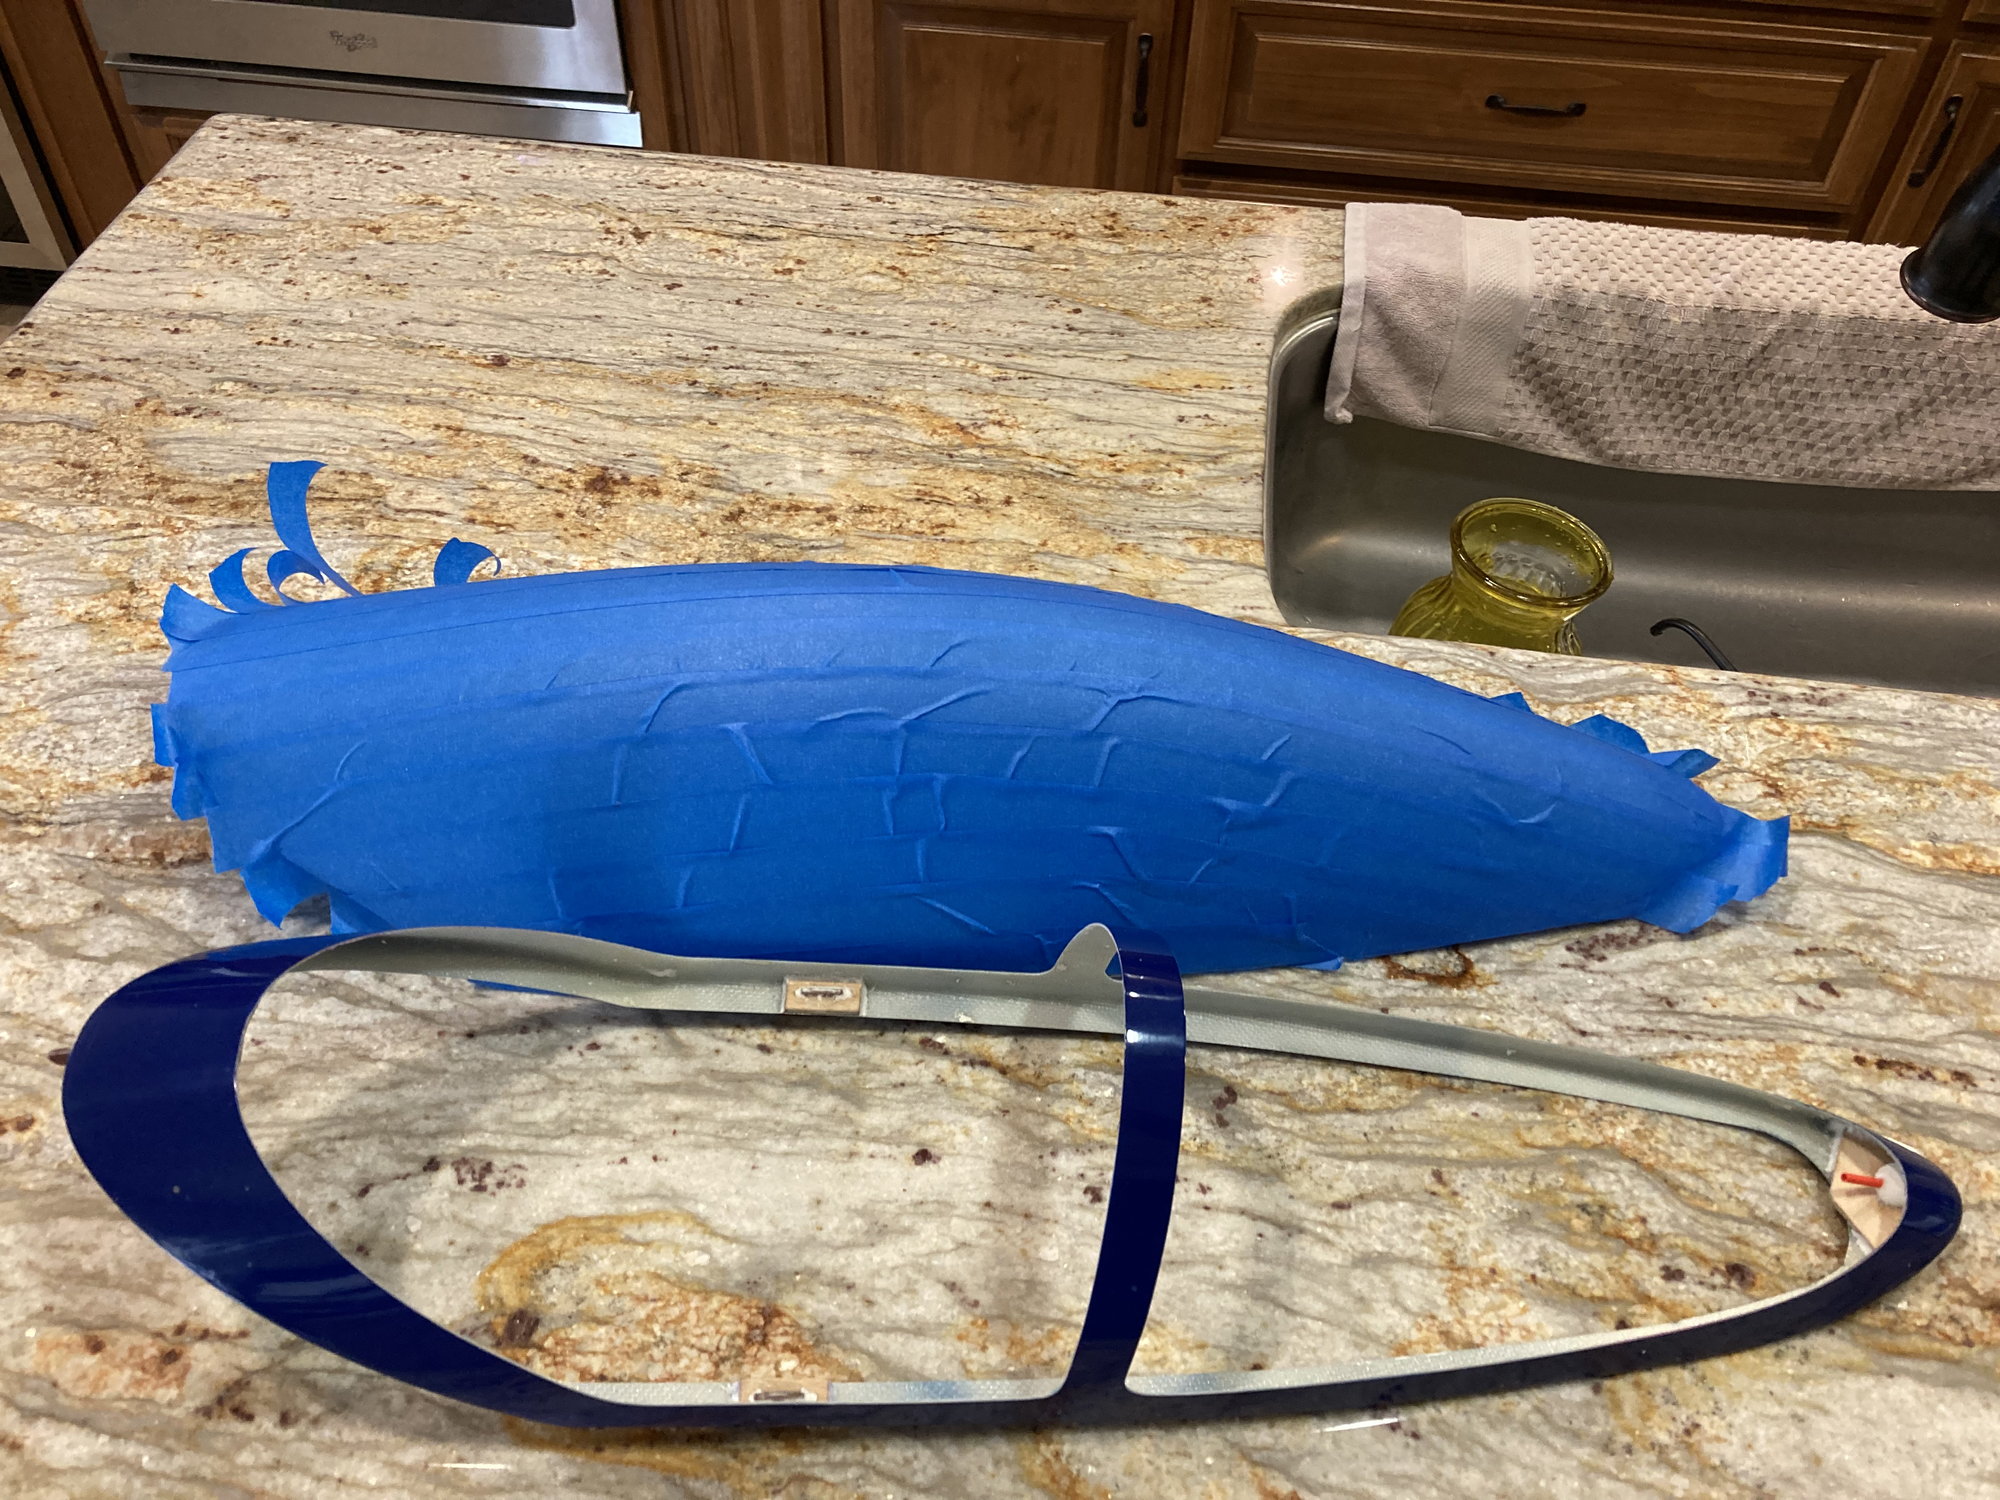
Trial fitting
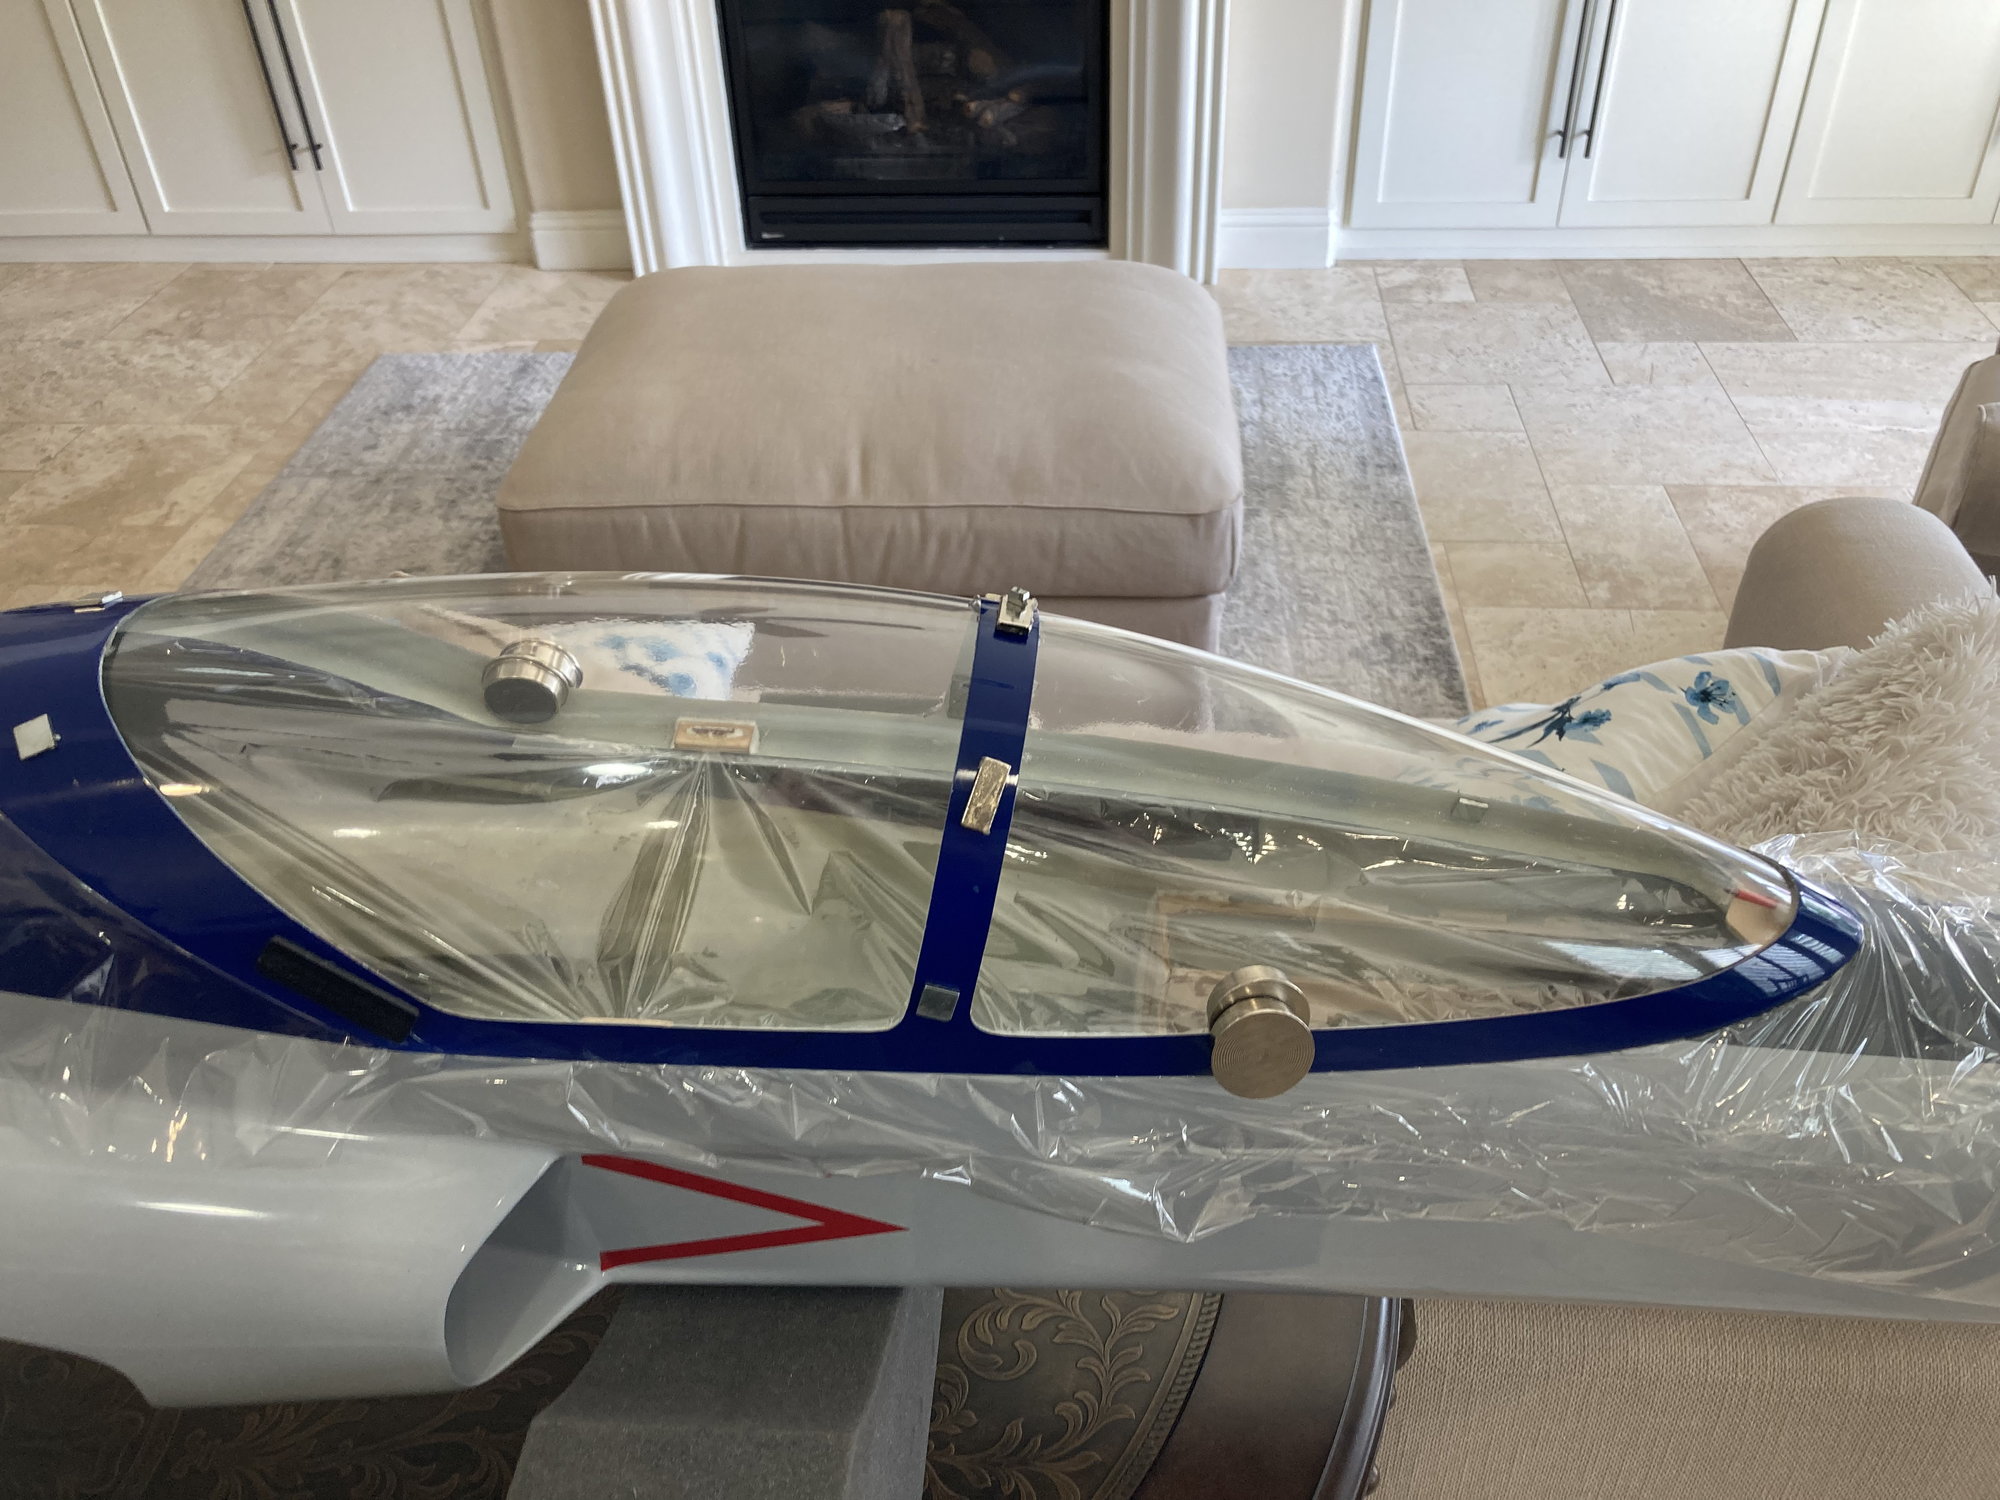
Curing on the fuselage
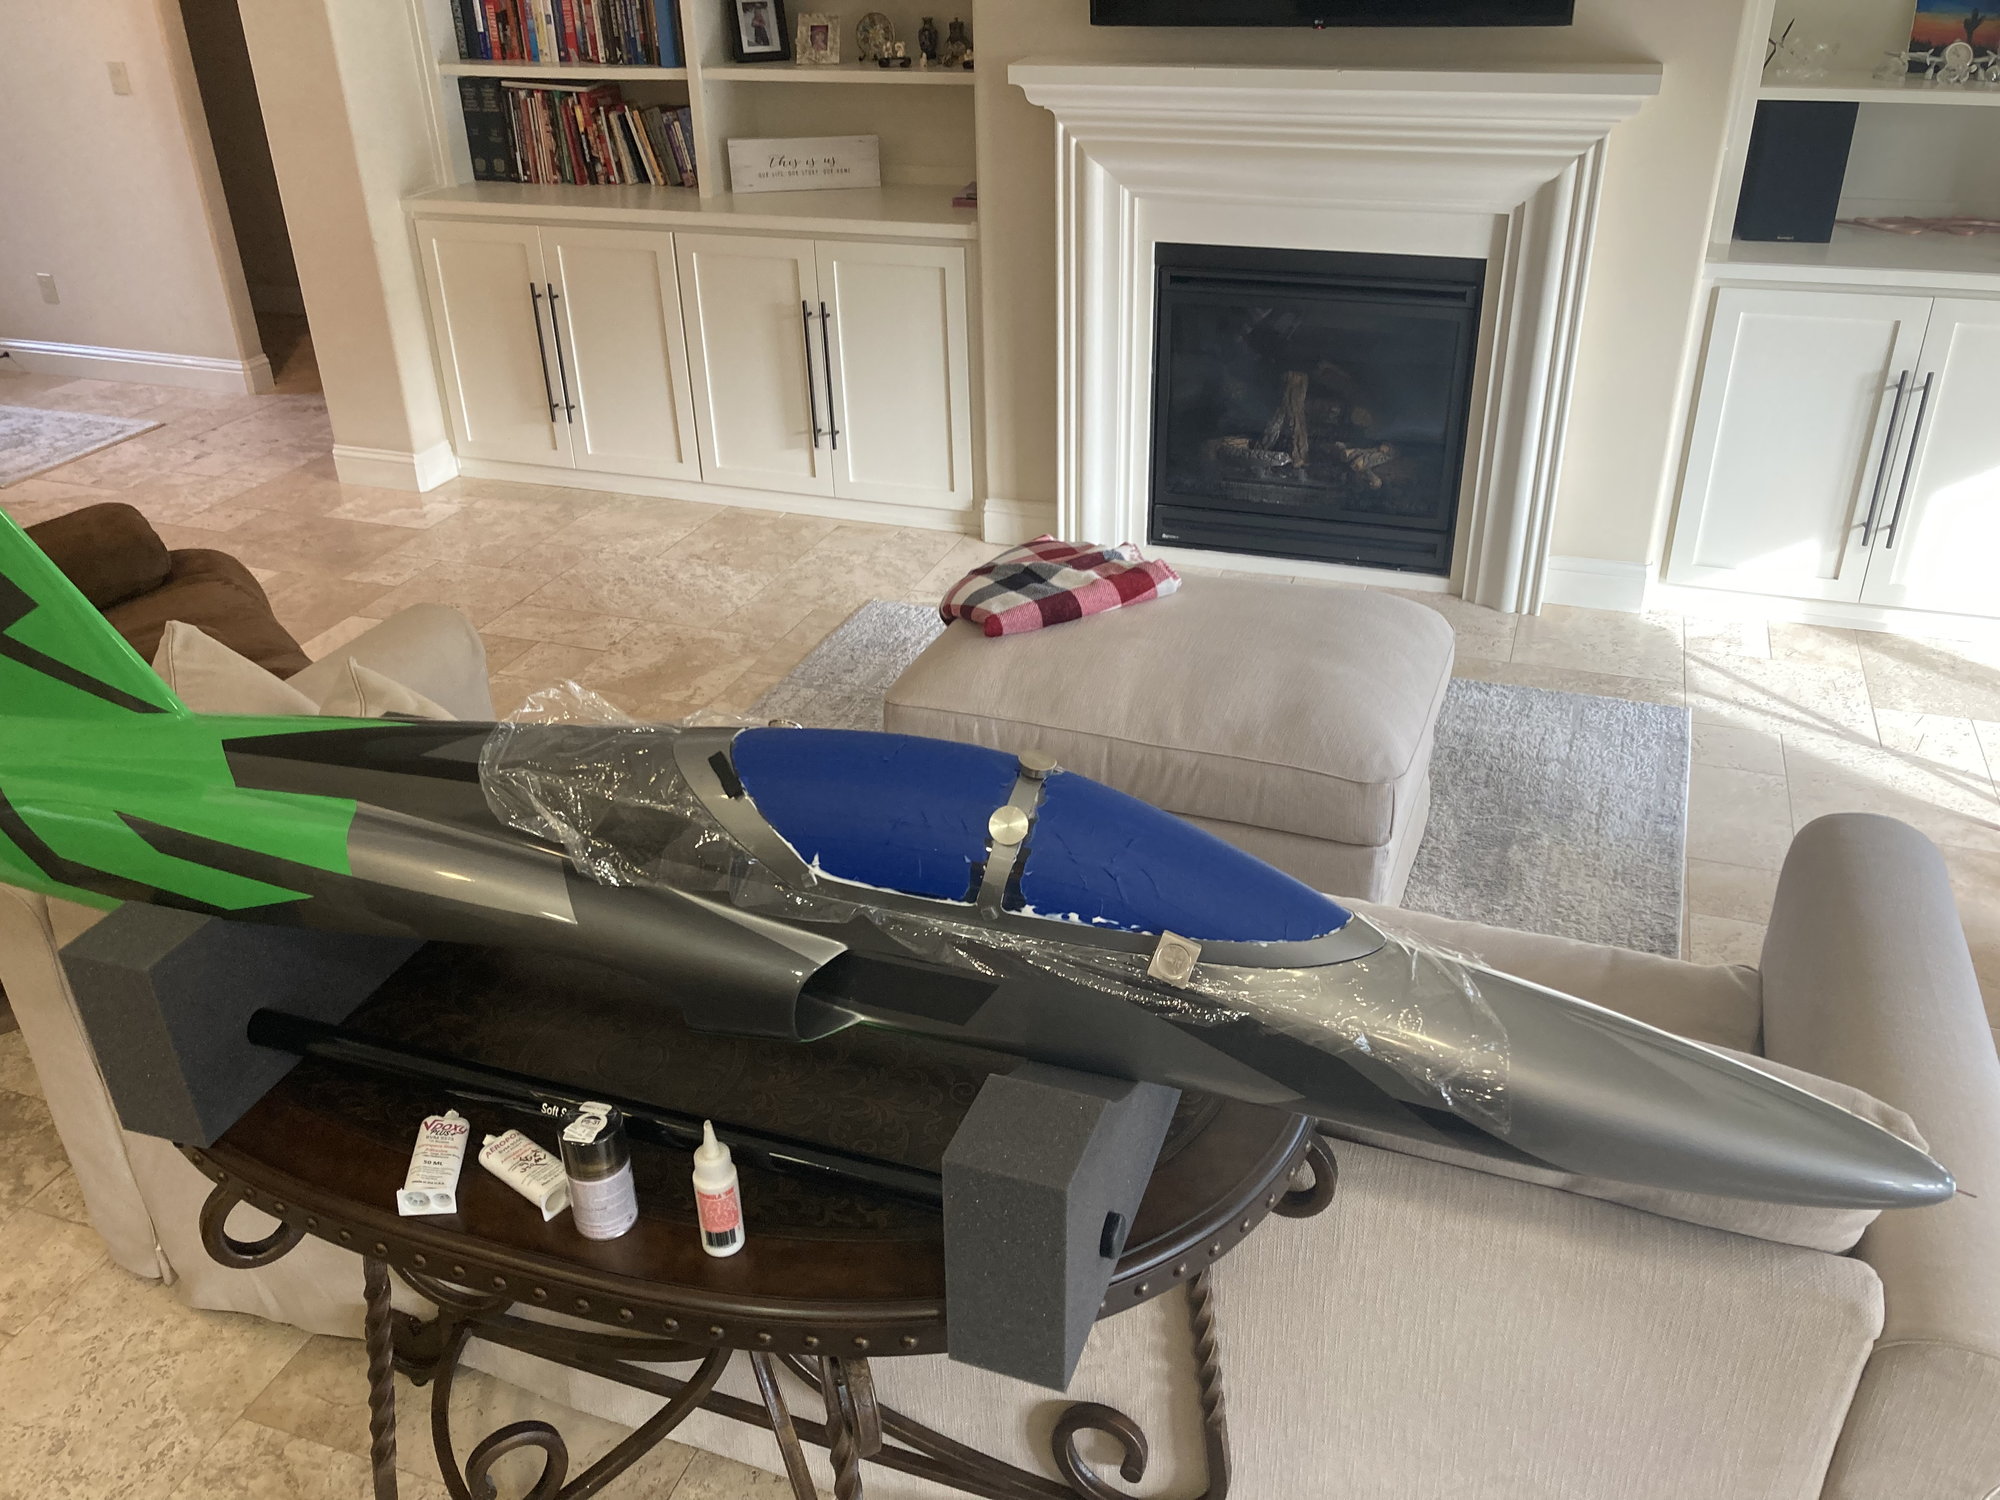
Another one I did
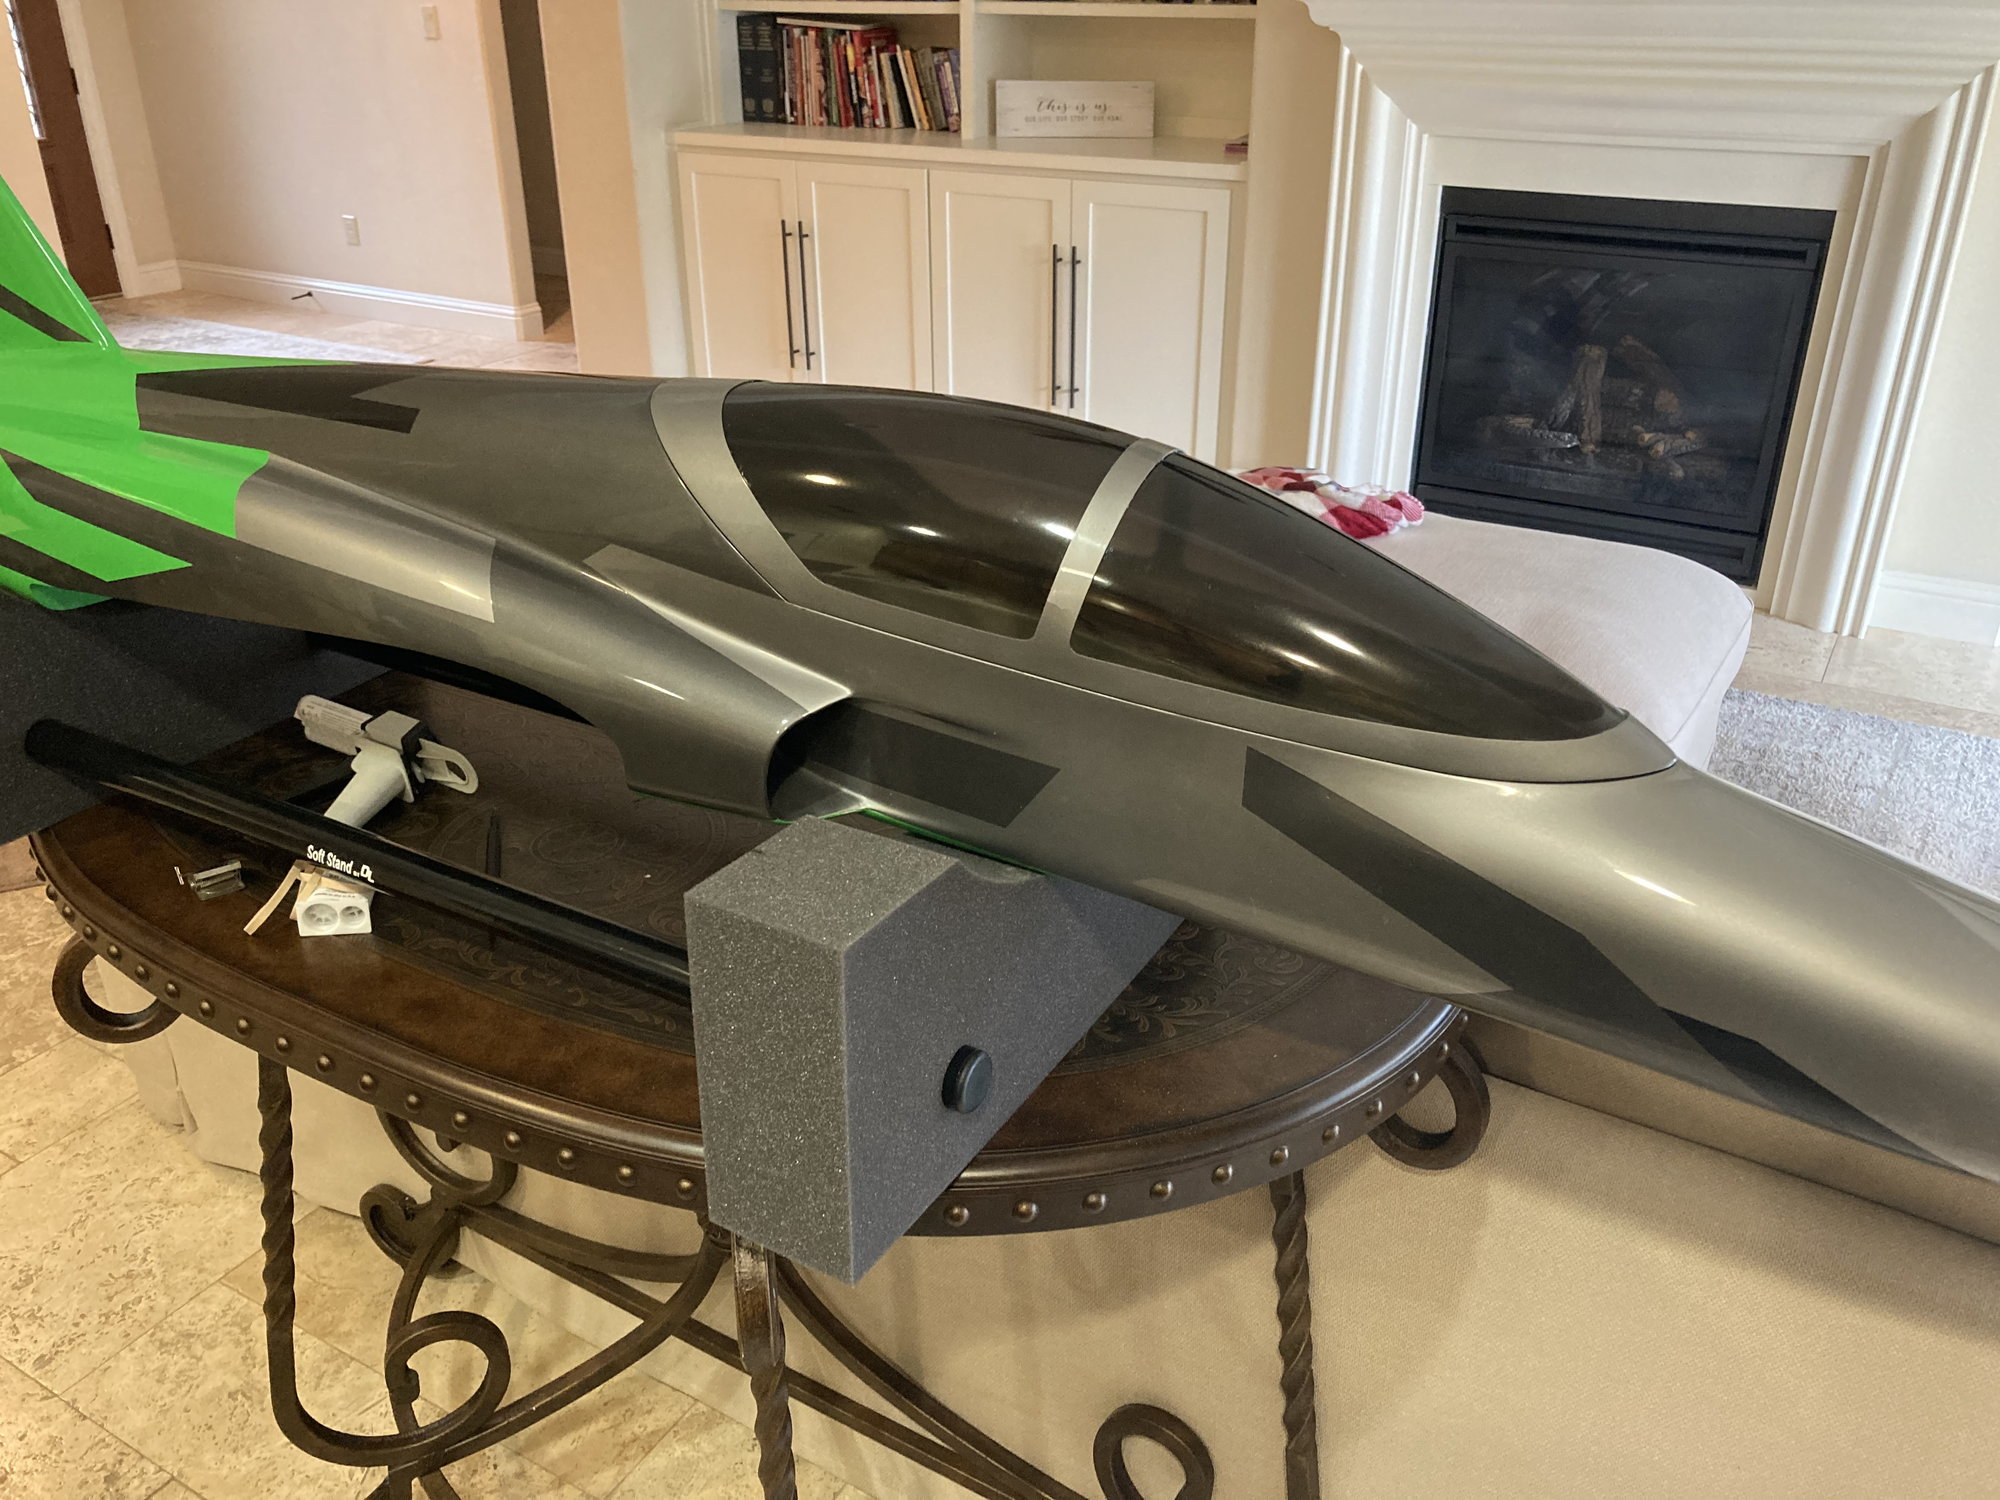
This is after the Tamiya smoke
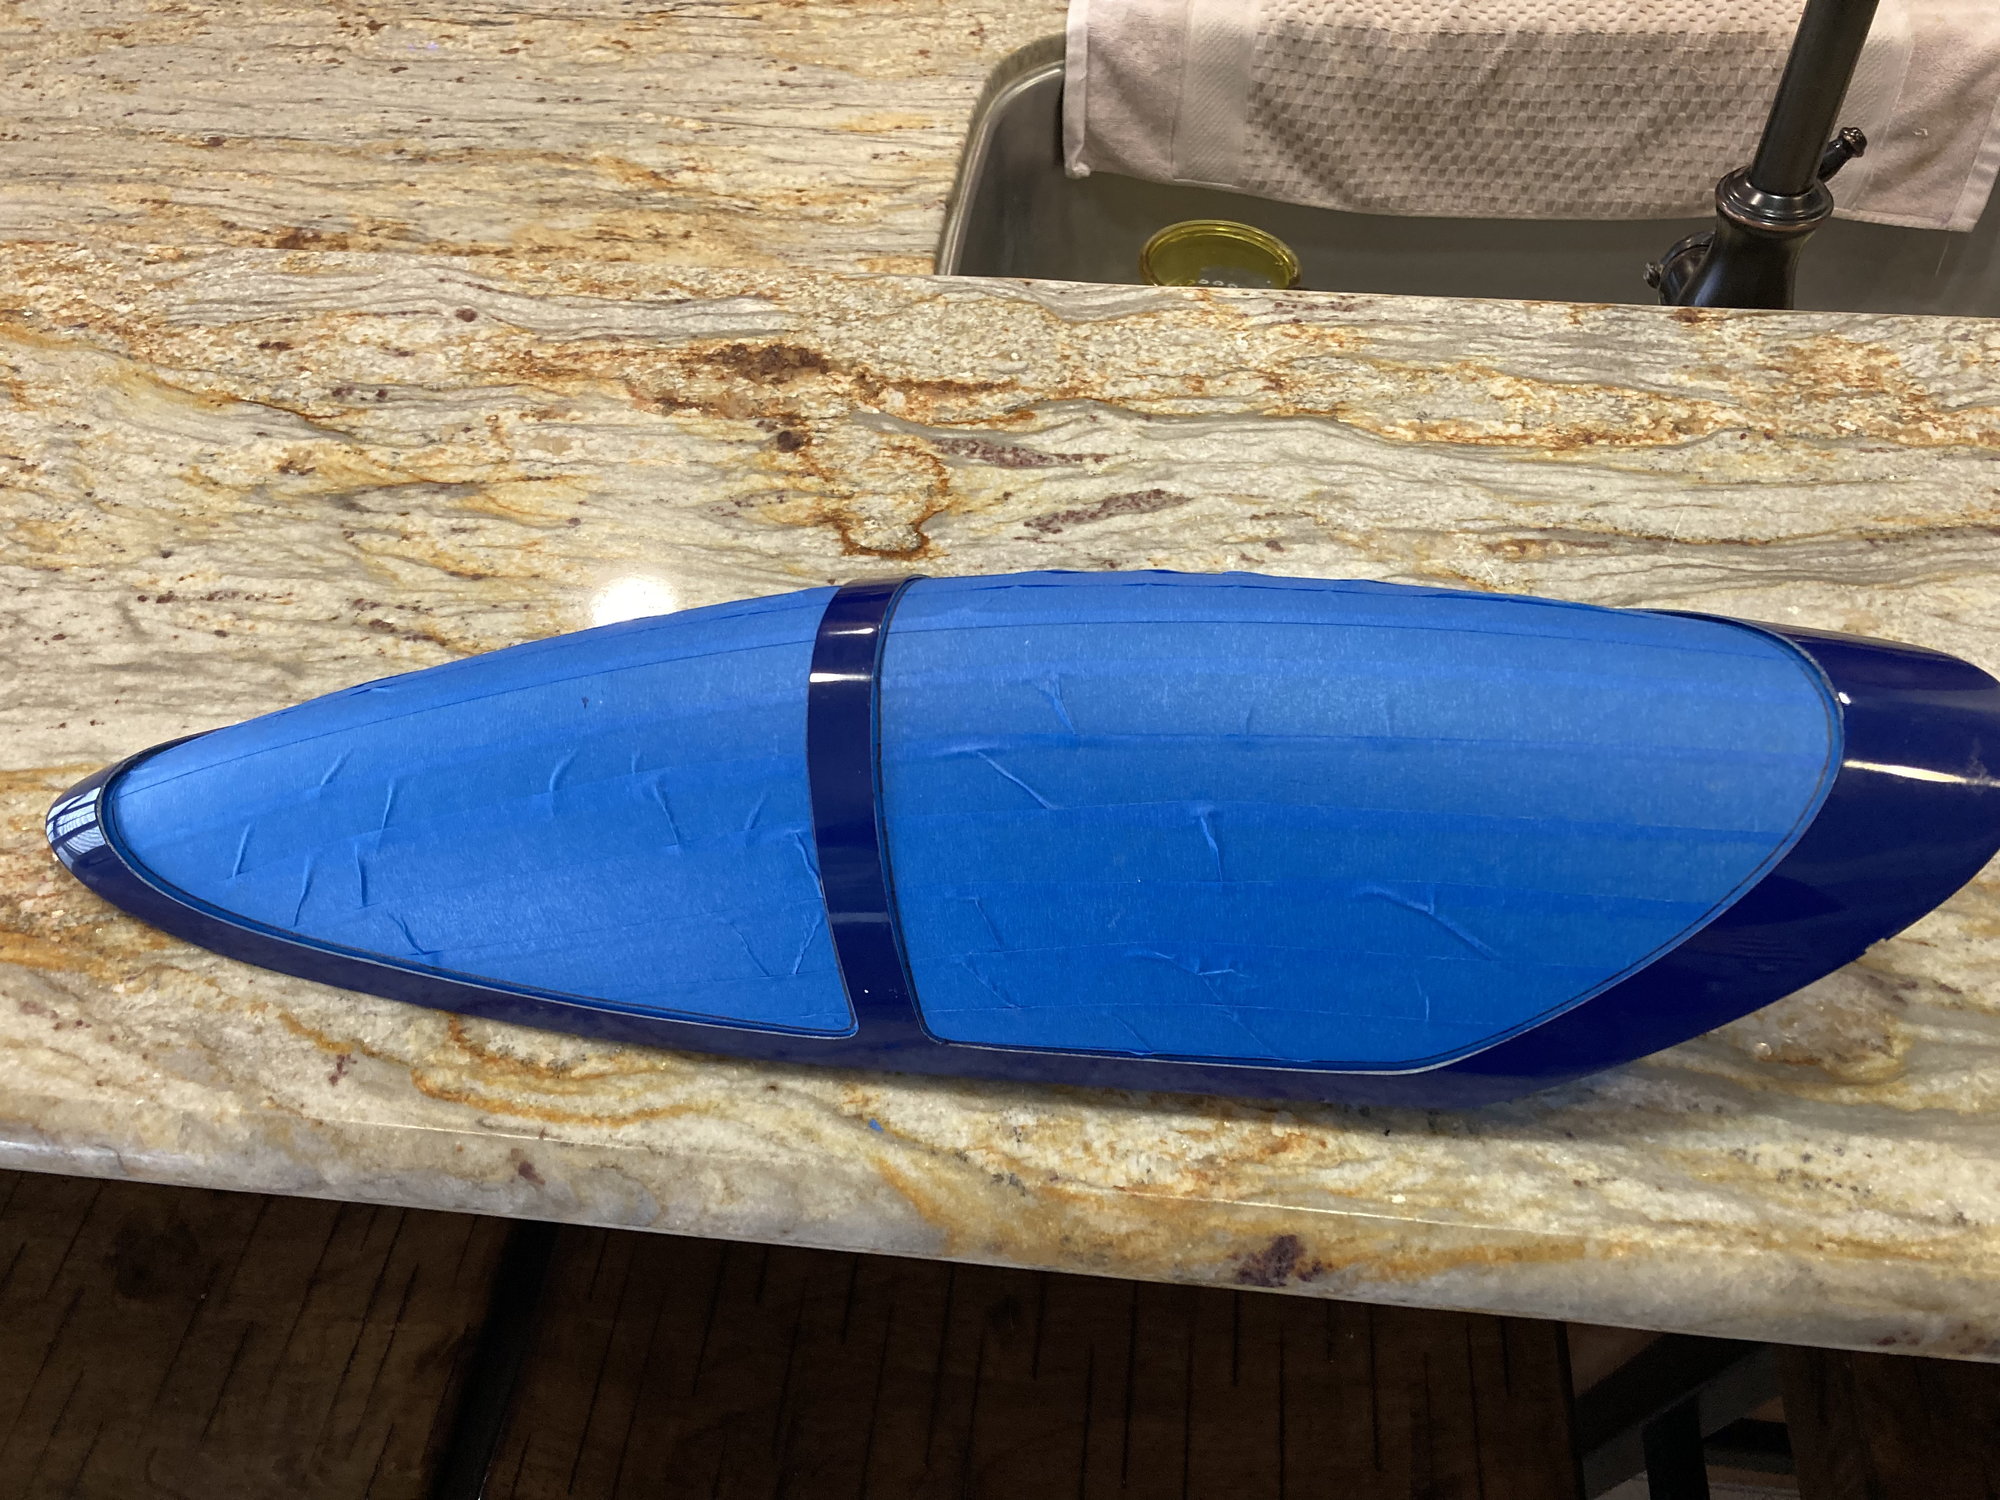
Another canopy fitting. You can see with the "glass" in place, I traced out the frame on the blue tape so that I would know how much of the tape needed to be peeled back to expose the part that need roughing up and gluing
Last edited by 737Driver; 03-29-2023 at 06:13 PM. Reason: add comment
The following users liked this post:
camss69 (04-06-2023)
03-29-2023, 06:12 PM
#565
Hey jvaliensi:
Man that sucks you broke two of them!! They crack so easy when they are glued into the frame. So when I start on the cuts of the clear to cut off the excess, I put the polycarbonate over the frame, then trace out with a sharpie, around the perimeter so that gives me some guideline to start the initial cut. Then tape off the entire outside of the "glass" so that when it comes time to trial fit it inside the frame, you don't scratch the hell out of it! At this point, it's trial fit....trim more...trial fit....trim more...trial fit...ect!!! Baby steps here as the goal is to get the damn "glass" to fit inside the frame with no binding. Then like you, when the "glass" is fit inside the frame, I take the tape off the part that will be glued to the frame, scratch (rough up) the parts of the "glass" that will touch the frame so the glue has something to "bite" into. I use that white canopy glue as well. Then a ton of magnets around the perimeter of the frame and the hoop. I use a wet paper towel to wipe off excess the put the whole assy onto the fuselage to cure over night. The next day, from the inside of the canopy assembly, I run a bead of Hysol to kinda "trap" the "glass" onto the frame. I'll see if I can post some pics here
For painting the inside of the frame, I use the Tamiya smoke color for polycarbonate and lightly spray the inside to get that smoke. I make a bunch of passes until the small can runs out, waiting like 10 minutes or so between coats
Man that sucks you broke two of them!! They crack so easy when they are glued into the frame. So when I start on the cuts of the clear to cut off the excess, I put the polycarbonate over the frame, then trace out with a sharpie, around the perimeter so that gives me some guideline to start the initial cut. Then tape off the entire outside of the "glass" so that when it comes time to trial fit it inside the frame, you don't scratch the hell out of it! At this point, it's trial fit....trim more...trial fit....trim more...trial fit...ect!!! Baby steps here as the goal is to get the damn "glass" to fit inside the frame with no binding. Then like you, when the "glass" is fit inside the frame, I take the tape off the part that will be glued to the frame, scratch (rough up) the parts of the "glass" that will touch the frame so the glue has something to "bite" into. I use that white canopy glue as well. Then a ton of magnets around the perimeter of the frame and the hoop. I use a wet paper towel to wipe off excess the put the whole assy onto the fuselage to cure over night. The next day, from the inside of the canopy assembly, I run a bead of Hysol to kinda "trap" the "glass" onto the frame. I'll see if I can post some pics here
For painting the inside of the frame, I use the Tamiya smoke color for polycarbonate and lightly spray the inside to get that smoke. I make a bunch of passes until the small can runs out, waiting like 10 minutes or so between coats
Between that and DW’s posts I think I’m good to give it a shot tomorrow night. Taping off the entire outside to keep it from scratching while trial fitting is a good tip. Just going to go really slow. My canopy frame is slightly warped so once I get it all setup I’ll install it on the fuse while the glue dries and hopefully that will keep it straight afterward.
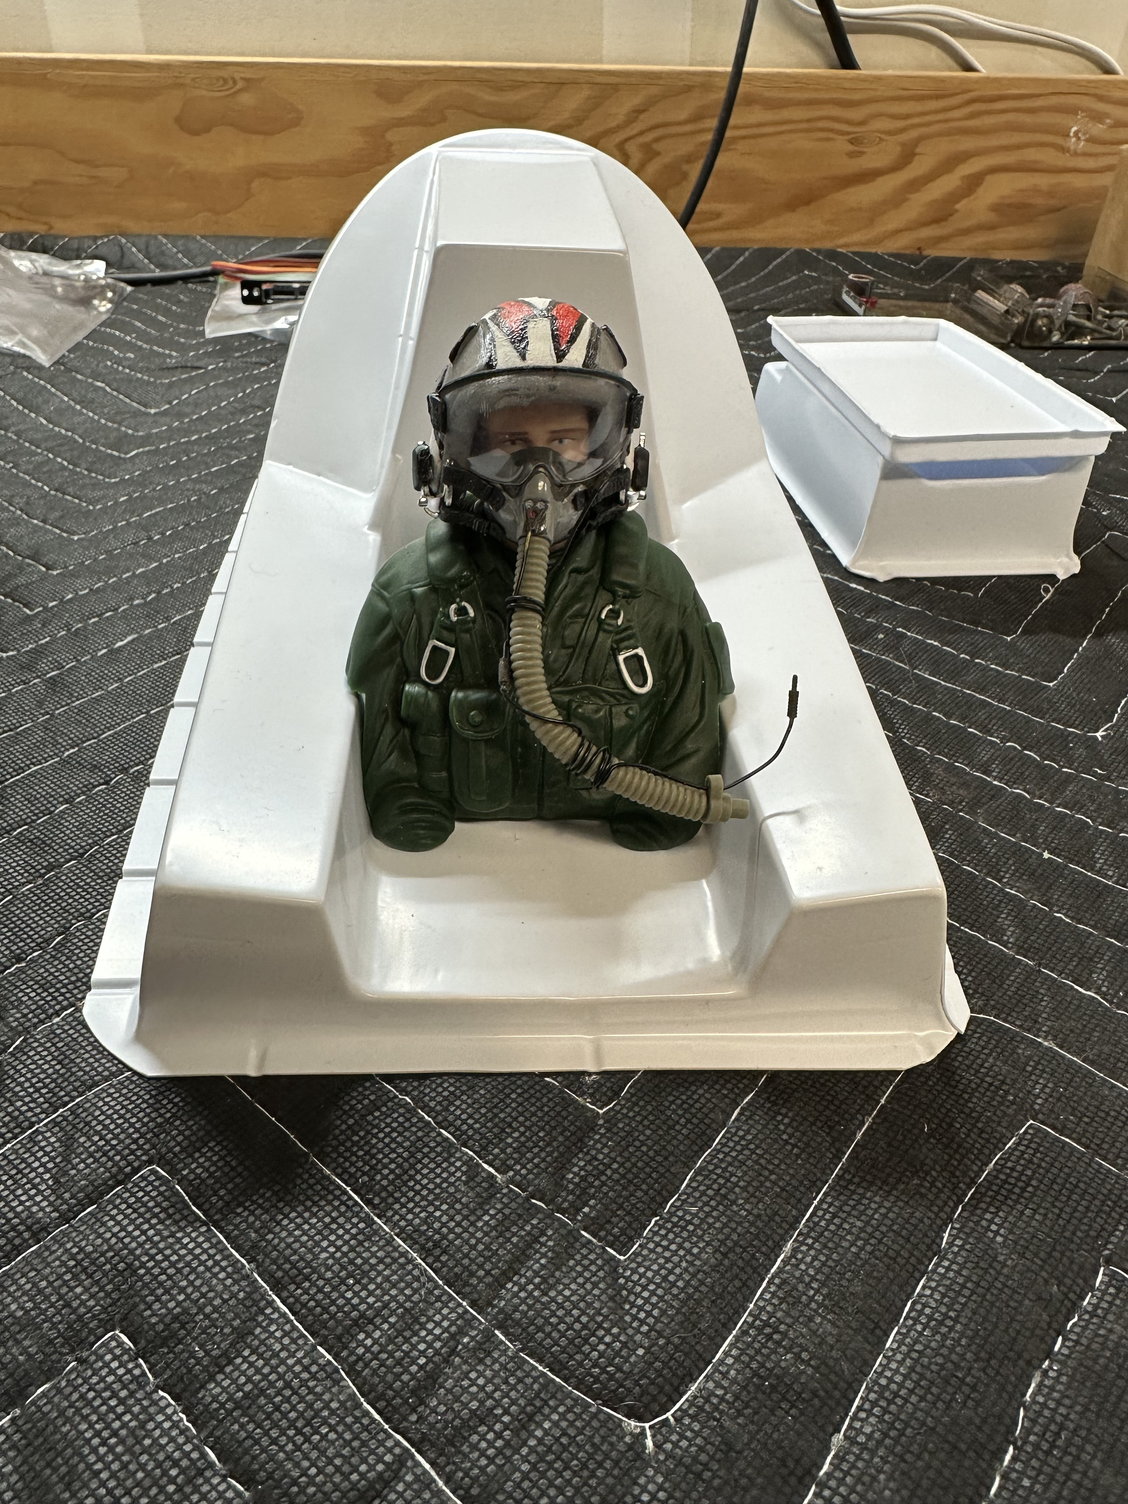
Was slicing off the pilots arms a little at a time on the table saw last night to get him to fit.
Last edited by camss69; 03-29-2023 at 06:21 PM.
04-04-2023, 04:46 PM
#567
Got my UF today! I was looking at the tail section where the elevator bolts on, how do you need your wires from coming in contact with the pipe? Do you use something like the BVM ceramic wrap to insulated it?
04-04-2023, 05:02 PM
#568
an abundance of caution, but I wrap that section of the thrust tube with a heat blanket. I use little plastic clamps glued to the fuselage to keep servo wires away from the thrust tube.
Tom
04-04-2023, 05:09 PM
#569
Okay. I was hoping to use a 2 in 1 servo connector back there and mount the one side inside the fuse but it’s pretty tight in there lol
04-04-2023, 08:58 PM
#570
Thread Starter
I place Velcro on the fuselage side and put a loop of Velcro strap around the wire, as you close the tail I attach the hoop to the side. It keeps it away from the pipe.
But I have a wire each side as I hate single points of failure.
Actually the outer tube wall is not crazy hot back there because of the moving air between the two pipes. My outer pipe just touches the tailpipe skin and you don’t see any real heating in the paint.
But I have a wire each side as I hate single points of failure.
Actually the outer tube wall is not crazy hot back there because of the moving air between the two pipes. My outer pipe just touches the tailpipe skin and you don’t see any real heating in the paint.
04-05-2023, 02:20 AM
#571
My Feedback: (1)
I saw in a German forum routing of the elevator servo wires in the lower fin. They put a Multiplex 6-pin connector inside it, so the wires never get near the pipe. It is pretty clever.
See post #156:
https://www.rc-network.de/threads/ve...1817724/page-8
04-06-2023, 02:34 PM
#572

I place Velcro on the fuselage side and put a loop of Velcro strap around the wire, as you close the tail I attach the hoop to the side. It keeps it away from the pipe.
But I have a wire each side as I hate single points of failure.
Actually the outer tube wall is not crazy hot back there because of the moving air between the two pipes. My outer pipe just touches the tailpipe skin and you don’t see any real heating in the paint.
But I have a wire each side as I hate single points of failure.
Actually the outer tube wall is not crazy hot back there because of the moving air between the two pipes. My outer pipe just touches the tailpipe skin and you don’t see any real heating in the paint.
Doesn’t that setup give you TWO independent single points of failure? One for the left elevator cable and one for the right elevator cable? My apologies if I have misunderstood you somehow.
I also split my cables when I did my routing and I glued a plastic mount (for use with zip ties) to a couple of places on each side of the rear fuselage. If the glue or the zip tie releases (very unlikely as opposed to Velcro) I figure that I’ve got bigger problems to deal with such as the fuselage breaking in two, lol.
Regards,
Jim
04-06-2023, 08:53 PM
#573
Thread Starter
Jim
Err yes, the chance in both cables unplugging unless the tailplane has come off is so low. If one unplugged you still have some pitch control-rather than none!
Cable routing as the pictures I CA the cables in place and in the rear fuselage cover it with adhesive foil tape. 20+ years of doing that none have ever come loose.
04-10-2023, 07:25 AM
#574
When i put the canope frame without the glas on the fuseand slide the front pin in it goes easy
when i put the glas in and hold it with magnetsin place the front of the canopy frame come off off the airframe then i have to push it down to slide the pin in.
so the canopy frame is under tension
i did cut the glas as is discribed here i'm about to give up
i don't know what to do
when i put the glas in and hold it with magnetsin place the front of the canopy frame come off off the airframe then i have to push it down to slide the pin in.
so the canopy frame is under tension
i did cut the glas as is discribed here i'm about to give up
i don't know what to do