


TOPRC/GatorRC P-51 Mustang 89"


 01-19-2022, 03:40 PM
#456
Senior Member
jpwarbirds.com
Last edited by Txmustangflyer; 01-19-2022 at 04:06 PM.
01-19-2022, 03:56 PM
#457
Senior Member
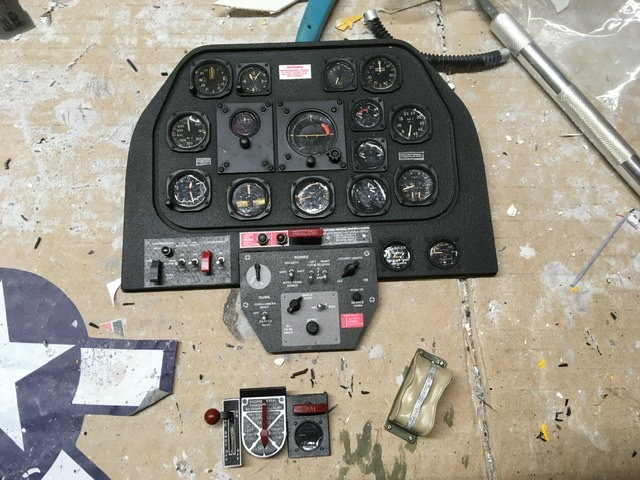
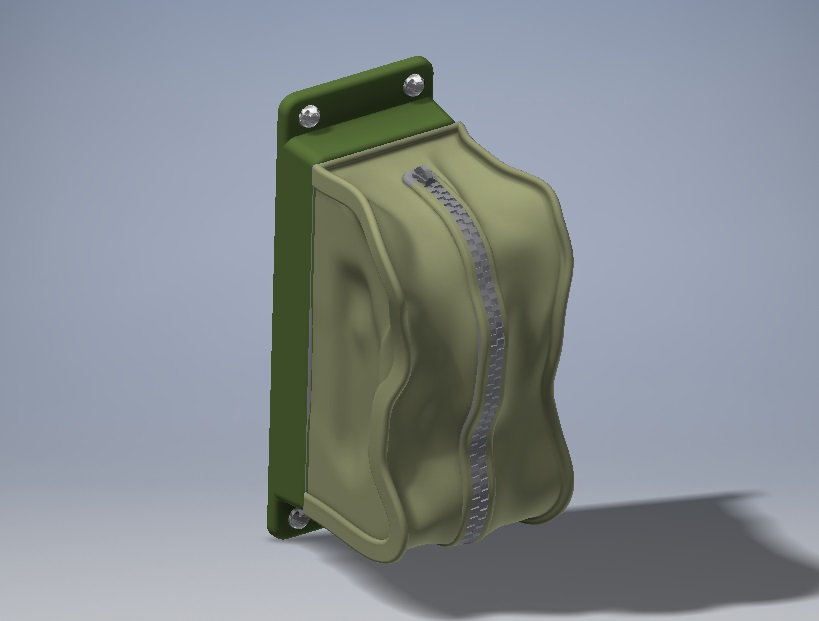
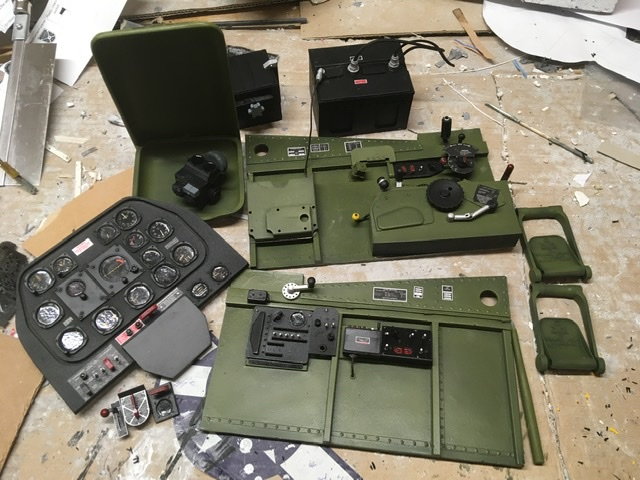
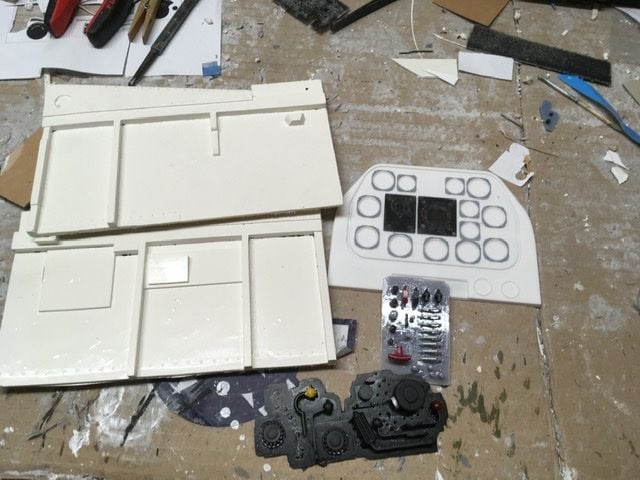
This is how they start out..no balsa, resin. It is then hand painted, small details then glued and very tiny decals put in for guages, warnings and labels. Jiri is meticulous. He uses automotive grade paints so all parts are fuel resistant.
Last edited by Txmustangflyer; 01-19-2022 at 04:09 PM.
03-12-2022, 08:14 AM
#458

My Feedback: (26)
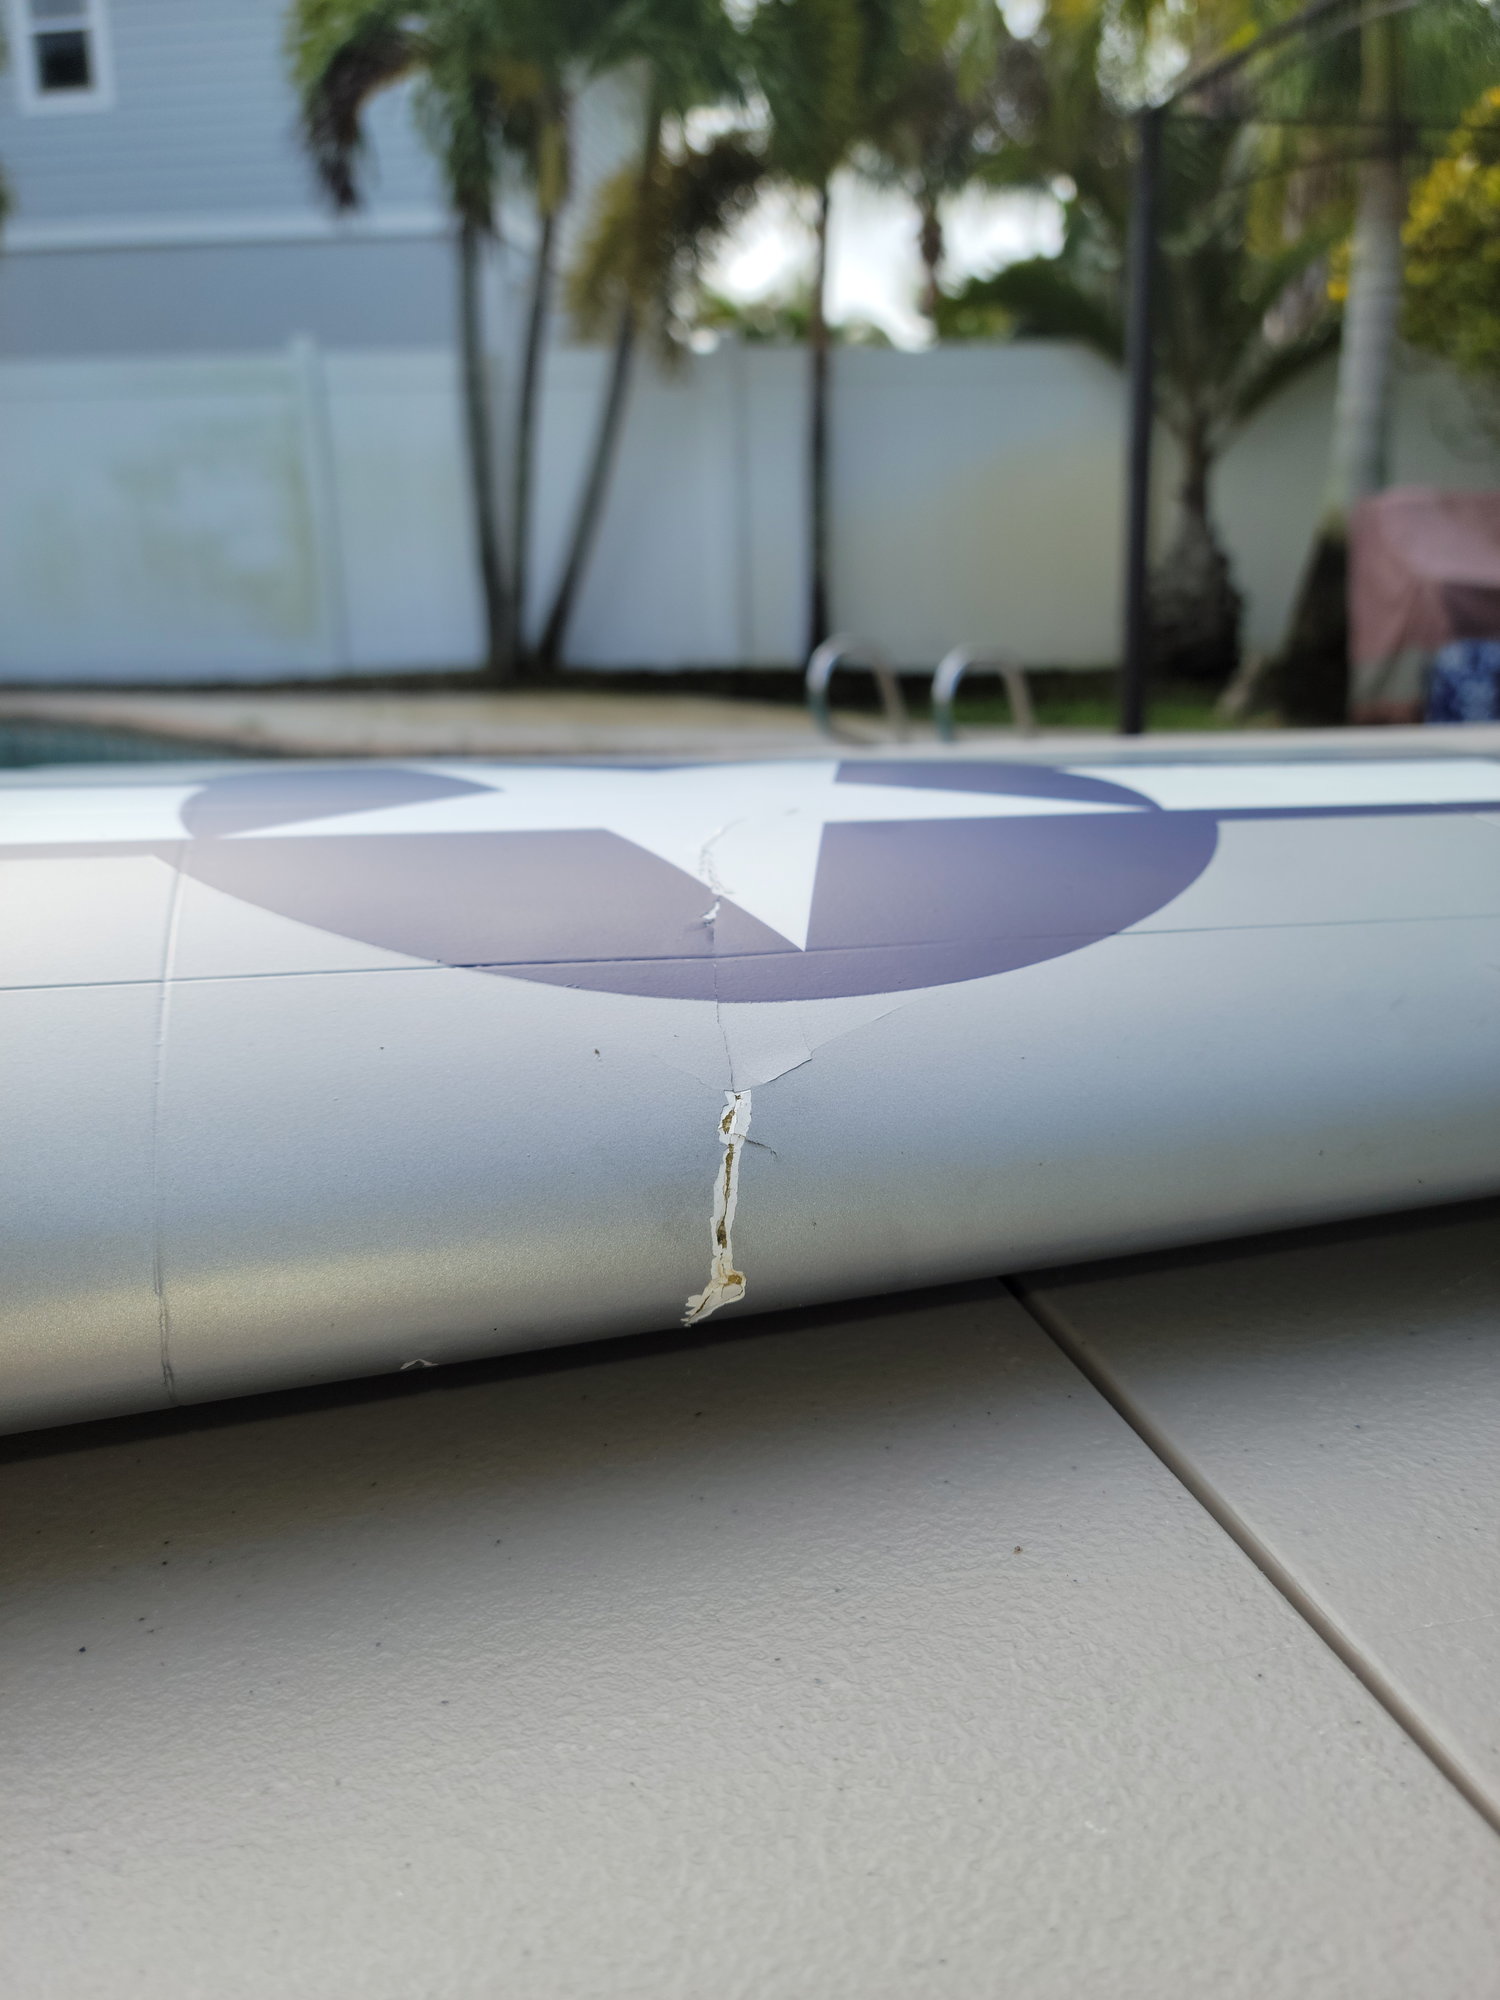
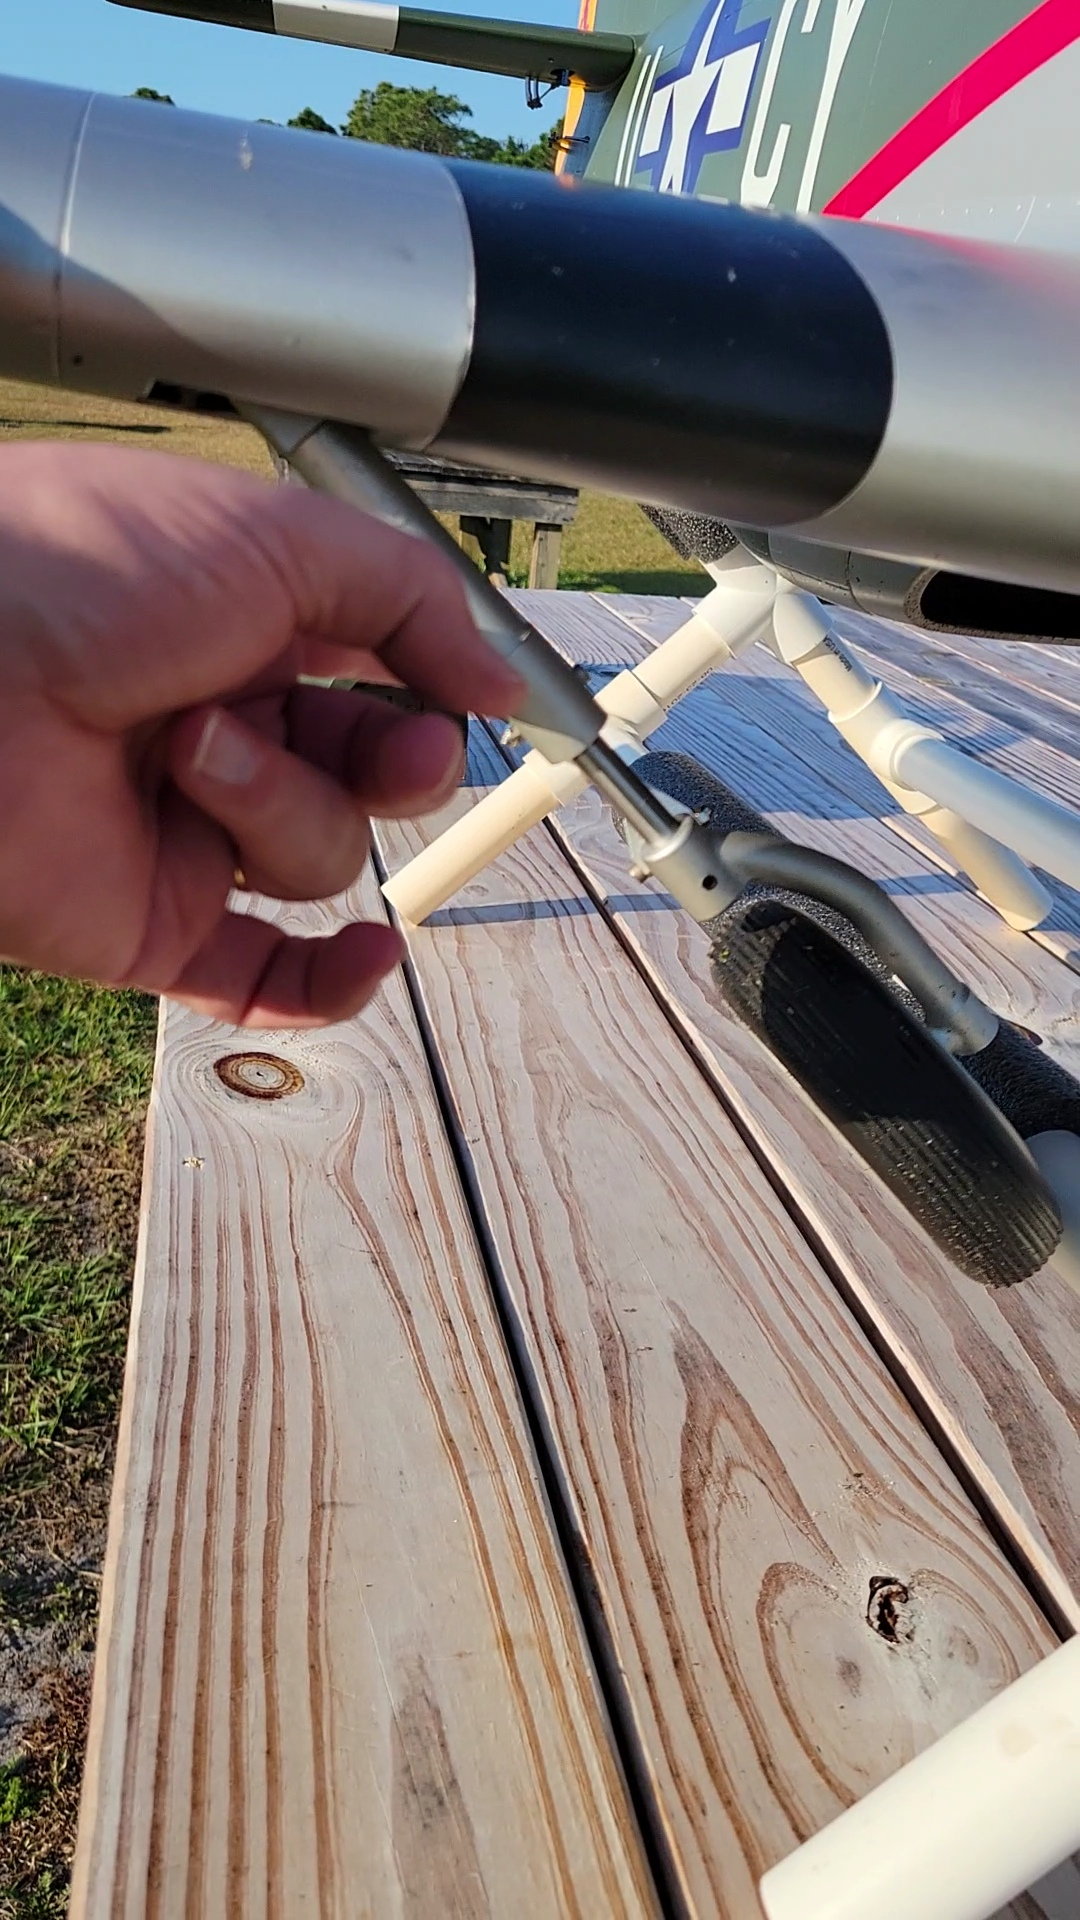
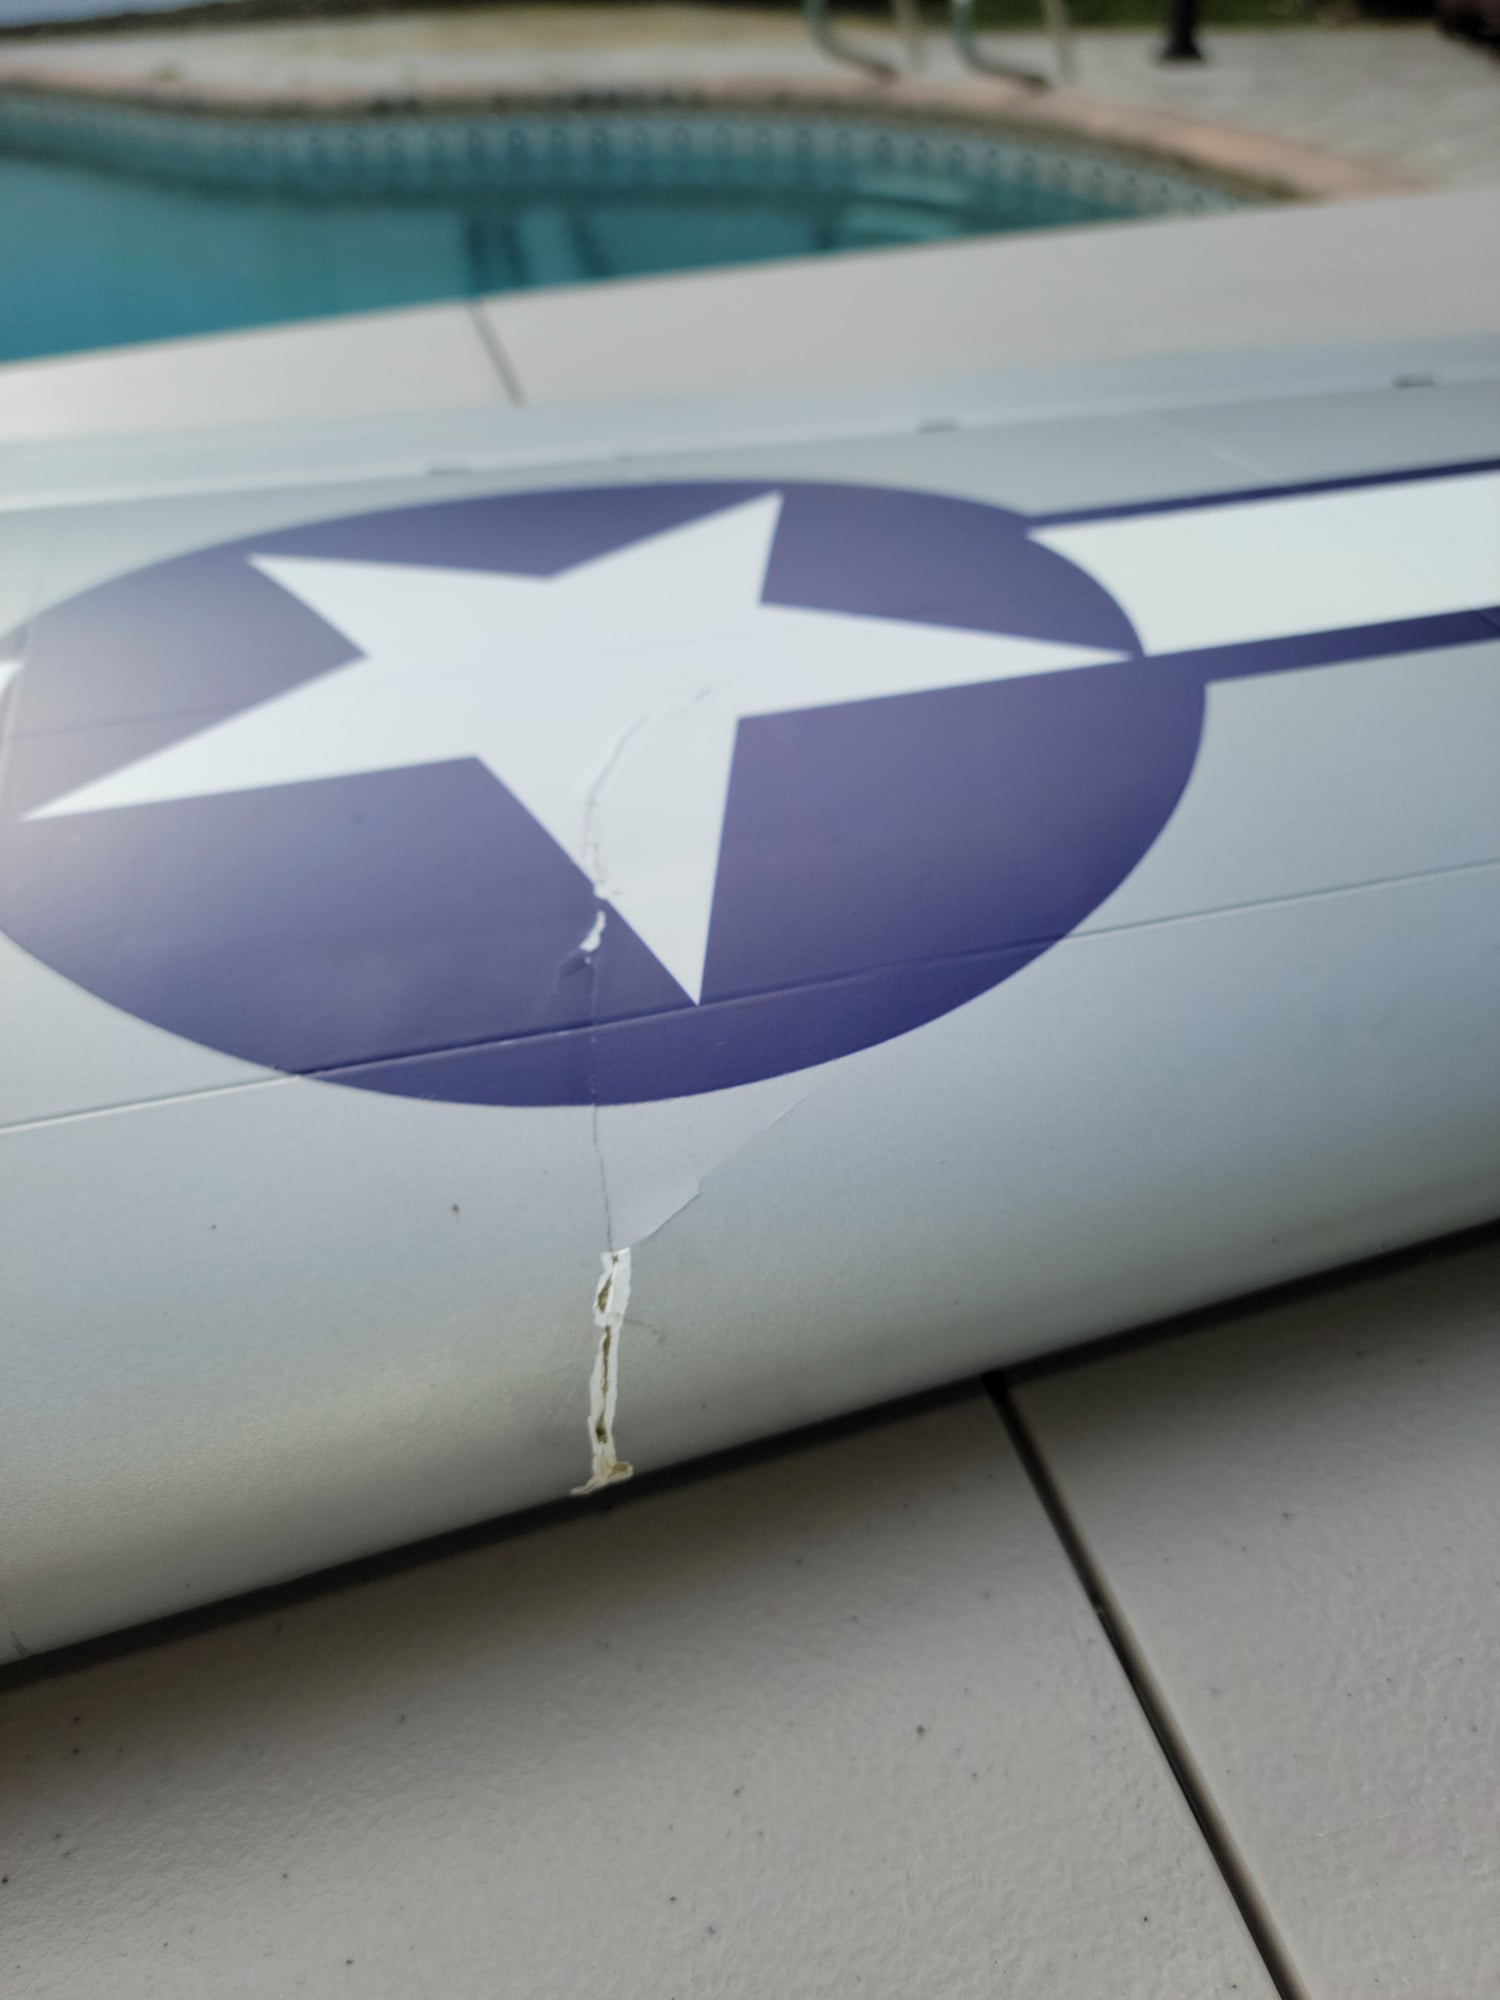
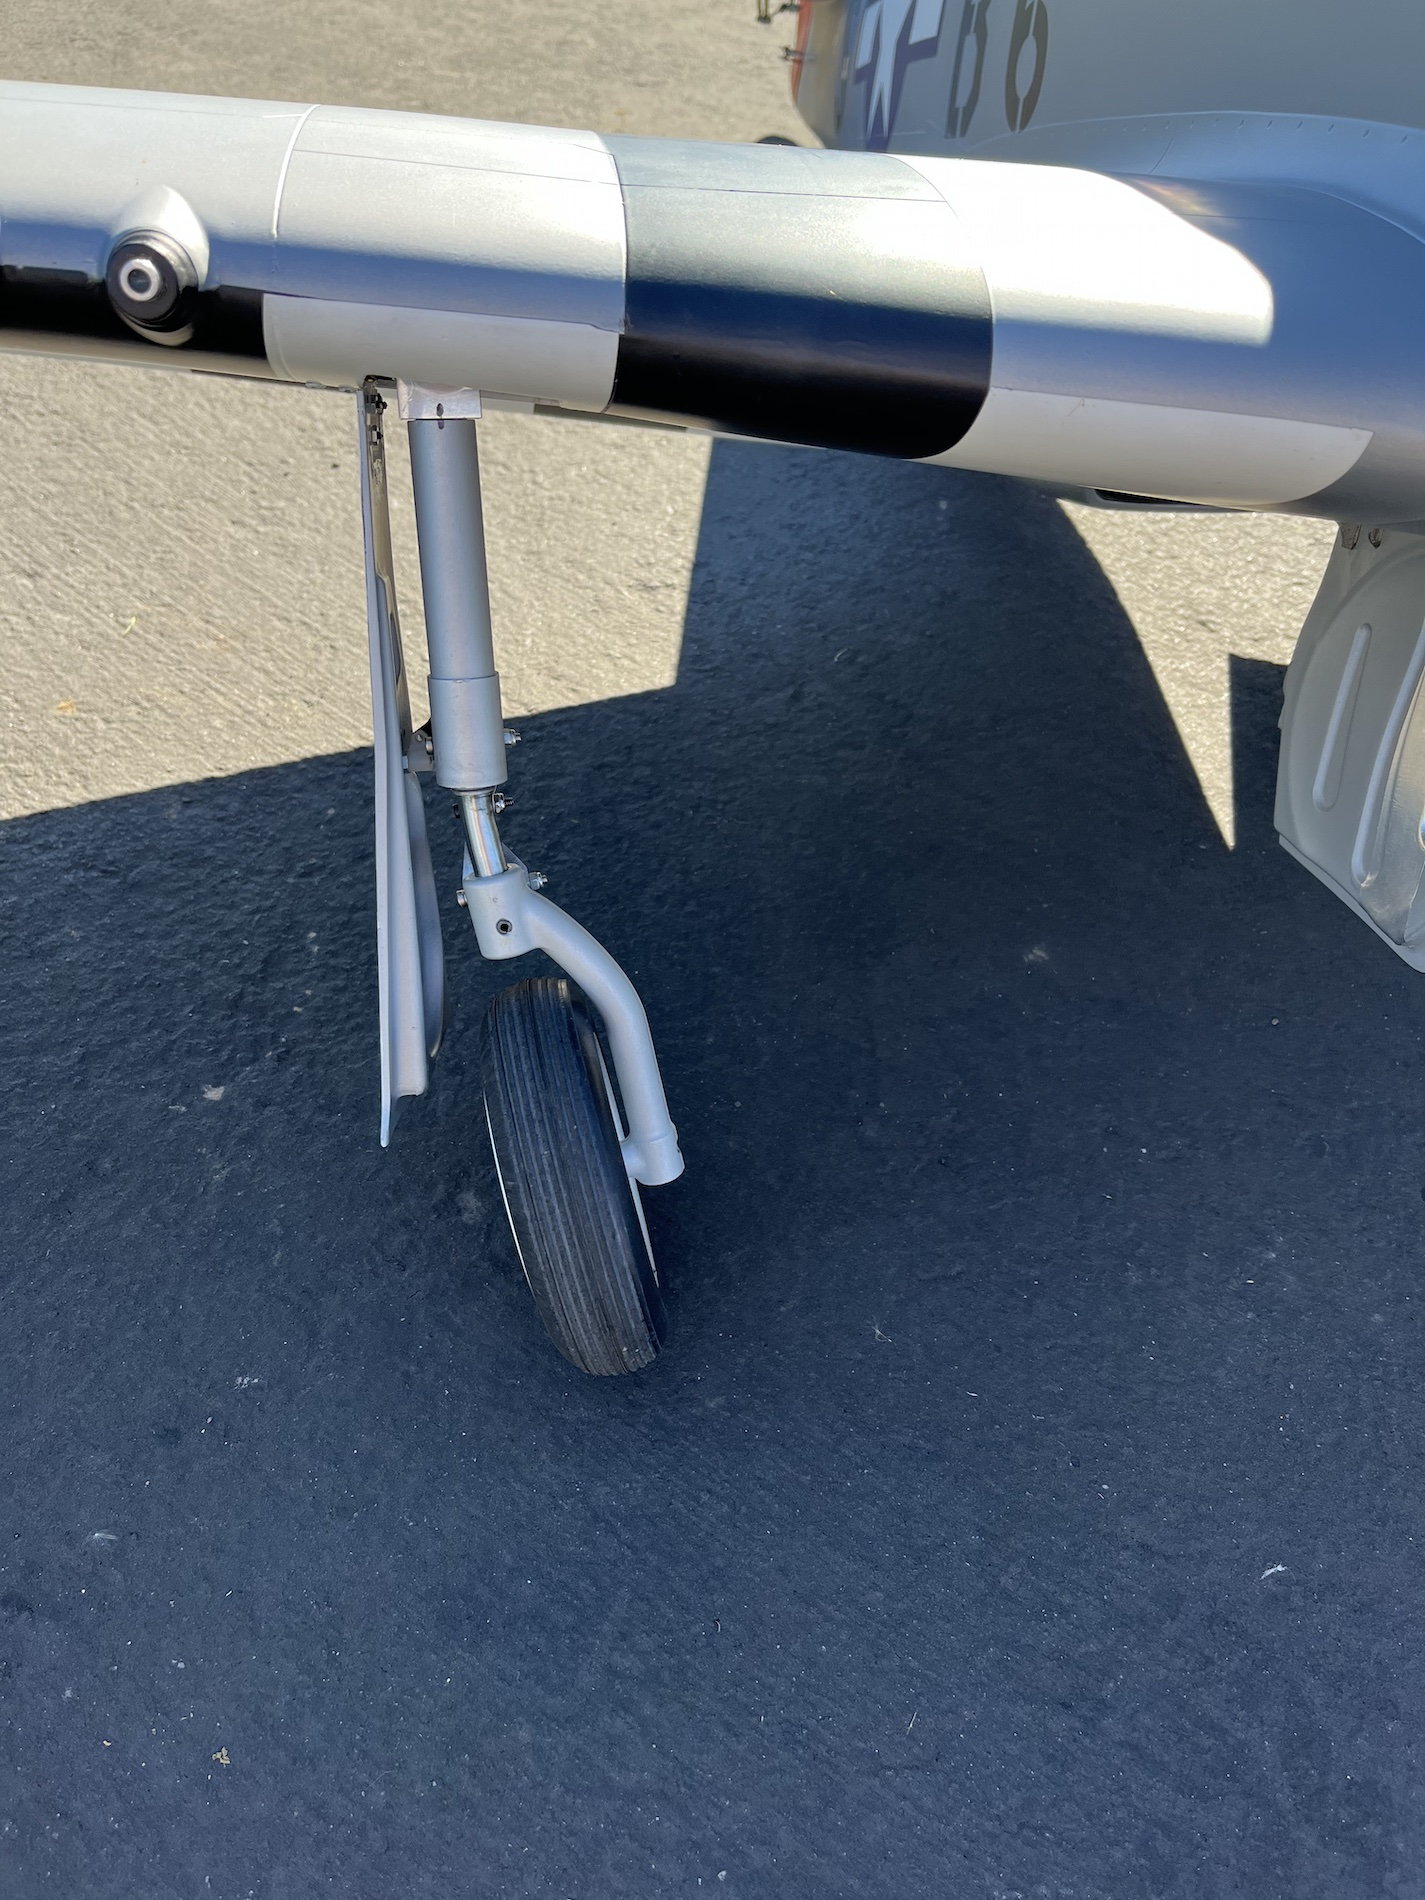
Seeking advice from this P51 group again as I am still new to large gassers. First, I give up on the TopRC Electric gear! Going to switch to Sierra or Robart pneumatic gear (probably Sierra mains, with Robart tailwheel and Robart Deluxe EZ Connect Air Kit). That Top RC gear has been too fragile. I land really softly…. Really! While our field is grass and not perfect, this is the only plane in my fleet that has issues landing there. On my latest flight, I replaced a fractured trunnion with a new one (free of charge) and left the gear down for that day’s first flight for simplicities sake. Checked that both mains were locked before takeoff. Right before touching down the gear with the new trunnion was flopping in the breeze (see post landing pic of me just pushing the gear). It was too late to go around, so using aileron, I kept that wing off the ground as long as possible. That carried me over to some high grass and even though I was nearly at the end of the landing roll, it flipped and cracked/creased the upper skin as you can see in the photos. Grrrr… The plane flies great! Landing anxiety will make me have to see a psychologist though. This long story brings me to the request for advice.
Does anyone know the construction of these wings from the factory? I was thinking of cutting a slot in the leading edge and taking a peek to see if any internal structure was damaged. Hopefully there is no spar in the way a few inches back from the leading edge. As far as residual strength, I can’t twist or bend the wing in the direction of the crease, but I still would be concerned air loads are stronger than my ability to cause a deflection and the upper skin could buckle causing a really bad day. If there is no internal damage, I was thinking of laying a 6-inch-wide ply of 6 oz glass over the upper skin and calling that good enough for a structural repair. Thoughts and thanks in advance for your input?
Mike C
03-12-2022, 08:35 AM
#459

It is probably has some damage to the structure under the skin. If it were mine I would use a dremmel with a disk and cut out the damaged section. Just cut deep enough to go though the skin.
Repair the removed section from the inside with fiberglass. Repair the inside structure if necessary. Then using thin aircraft ply clamp and epoxy sections on the inside of the hole you made. You will end up with a flange that you can epoxy the removed section and it will be stronger then before.
Fill, sand, and paint.
My steering control gave way on mine and it crashed into a chain link fence on landing. Banged up the wing good. That's how I fixed mine. It looks perfect except for the missing panel line.
03-12-2022, 10:44 AM
#460
Fixing a hollow core wing isn't too bad. Another similar method to use is cutting out the damaged section, and filling the area with a hard foam like blue dense spyder foam. This thread is a good example of that type of repair: https://forum.scalesoaring.com/forum...sailplane-wing
Yes the stock TopRC Gear are garbage. I had a dirty motor in one actuator from the start. I tried to use the stock struts when I changed to Electrons - very minimal sideload and this is what happened to the gear. The material is very soft. I ended up with Electron ER-40eVo and Robart 673 struts. All good now.
Yes the stock TopRC Gear are garbage. I had a dirty motor in one actuator from the start. I tried to use the stock struts when I changed to Electrons - very minimal sideload and this is what happened to the gear. The material is very soft. I ended up with Electron ER-40eVo and Robart 673 struts. All good now.
03-12-2022, 01:54 PM
#461
My Feedback: (2)
Join Date: Feb 2008
Location: Fullerton, CA
Posts: 101
Likes: 0
Received 0 Likes
on
0 Posts
I have had Sierra Giant mains from the beginning. Having to buy their electric gear is what kept me from buying the Corsair and P47. I too installed the Robart tailwheel. My tail wheel mounting structure did give way. I highly recommend reinforcing it now before it breaks. As far as your wing damage I would consider using the spray in tite cell foam. I used that in my belly pan which gave it lots of strength and added almost no weight
03-13-2022, 03:52 AM
#463
My Feedback: (26)
Thanks Gents for the feedback. I will be getting the surgery underway shortly.
Lou, after epoxying the patch back on, did you glass over the repaired region from the outside as well?
LuvarAir, same thing happened to me with those struts. ANY sideways pressure on the gear and the strut tube bend. Winds up becoming a self fulfilling prophecy, as the bent gear keeps bending and causing a chain reaction problem. I think the cracked trunnion wound up being caused by the side load a bent strut initiated.
Harry, I will reinforce the tailwheel region when putting in the new gear. Thanks for the advice.
03-13-2022, 04:18 AM
#464
In your case it is not nessary to add a layer of glass over the top. If it was really messed up you could sand it and add a layer of 2oz. Just use filler and sand before painting (or leave it alone if you don't mind seeing the crack). On the inside you could use a couple of 4 or 6 ounce or glass and that would do it. The reason I suggest cutting away the damaged section is to be able to repair the spars and structure inside.
By the way I have the Sierra pneumatic main gear which are great. Only issue is you will be able to see how weak the gear mounts are. 4 thin layers of liteply is not equivalent to a block of maple the same size. Thankfully there is room below the mounts to reinforce it.
I used a Sierra tail wheel which is super srrong and very scale but it is so heavy that I needed a lot of nose weight to balance although it still flies great. Go with the Robart tail wheel.
Lou Cetrangelo
04-19-2022, 08:04 PM
#465


Join Date: Oct 2003
Location: Mesa Arizona
Posts: 61
Likes: 0
Received 0 Likes
on
0 Posts
Hello
I'm building the TopRc P-51 Mustang. I am making it electric. Could I please get an actual measurement of were the CG is on the plane. I have seen the instruction and the construction article.
Could you please share with me its location you have determined and how the model balance out.
thanks
Regards
Steve G
04-20-2022, 03:02 AM
#466
Hi Begills:
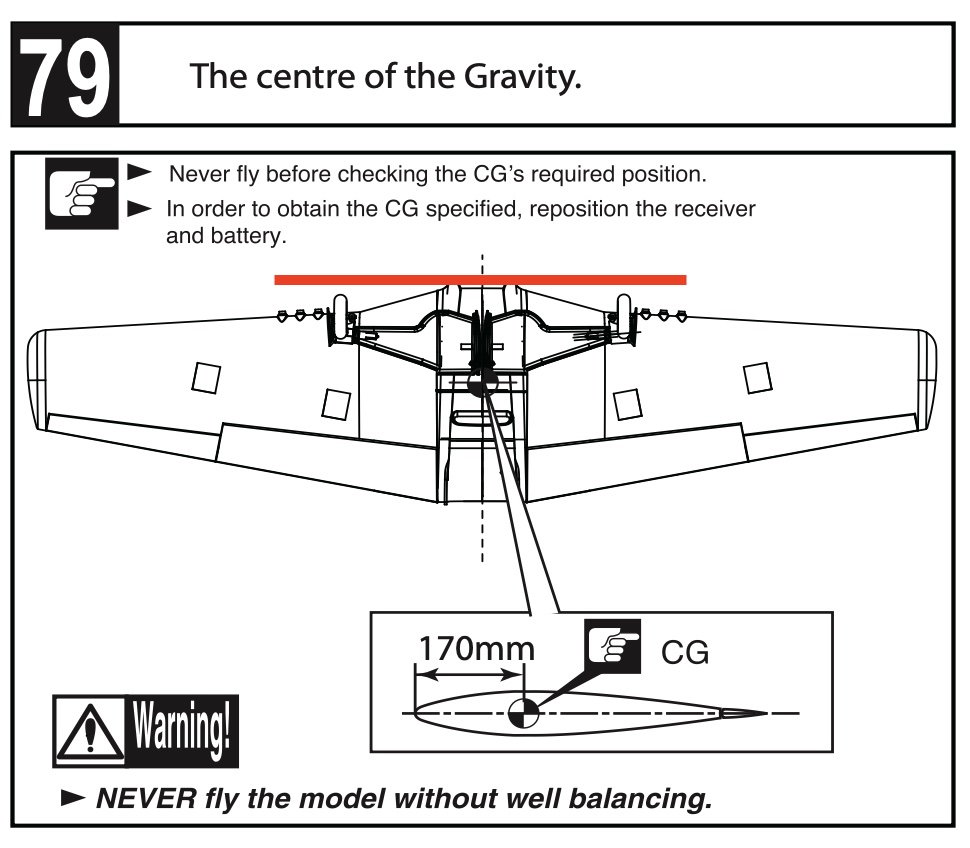
I set mine up to what the manual calls for. It's right on the bottom of the first page
C.G: 170mm back from the leading edge at wing root
I did it with the gear down suspended from a cealing beam with a plumb line so that I could adjust the plane to be level at the same time taping a zip lock bag with lead shot untill it was balanced. When the CG was in the right place mix up the lead shot with epoxy and add it to the fuse where you.
taped it on.
It may be clearer with a photo.
04-20-2022, 08:48 AM
#467
Join Date: Oct 2003
Location: Mesa Arizona
Posts: 61
Likes: 0
Received 0 Likes
on
0 Posts
Hi Begills:
I set mine up to what the manual calls for. It's right on the bottom of the first page
C.G: 170mm back from the leading edge at wing root
I did it with the gear down suspended from a cealing beam with a plumb line so that I could adjust the plane to be level at the same time taping a zip lock bag with lead shot untill it was balanced. When the CG was in the right place mix up the lead shot with epoxy and add it to the fuse where you.
taped it on.
It may be clearer with a photo.
Thanks for the reply. This question may appear again in this thread, sorry for this.
Could you show me an actual spot on the bottom of the fuse were you set the CG, I find the diagram a bit confusing. I never know if the point should be measured from the wing root and fuse intersection , or the apex of the wing leading edges inside the fuse, Thanks
Regards
Steve G
Last edited by Bigells; 04-20-2022 at 08:51 AM.
04-21-2022, 08:09 PM
#468
Start your measurement from the beginning of the leading edge knee (red line). The book value is a little conservative. Mine is closer to 180mm.
Thanks for the reply. This question may appear again in this thread, sorry for this.
Could you show me an actual spot on the bottom of the fuse were you set the CG, I find the diagram a bit confusing. I never know if the point should be measured from the wing root and fuse intersection , or the apex of the wing leading edges inside the fuse, Thanks
Regards
Steve G
Could you show me an actual spot on the bottom of the fuse were you set the CG, I find the diagram a bit confusing. I never know if the point should be measured from the wing root and fuse intersection , or the apex of the wing leading edges inside the fuse, Thanks
Regards
Steve G
 04-25-2022, 08:11 AM
#471
Senior Member
A number of ways to cg a bird. But, if you have, or planning on having, more than just a couple of planes around, a dedicated setup, of some type, thats easily transportable, is not a must have, but a good to have item, especially when dialing in a new aircraft.
We can always set cg to the book, but thats always kind of a starting point. CG is tunable to a point based on flying style and skill. Cuda might like his CG back a bit for more responsiveness to the elevator, I might want it on cg, another guy might want it slightly nose heavy. Thing is, it takes flying the plane and deciding what it needs based on how it "feels"
Doing a flight or two, then having to pack up, go back to the house to tweak the cg...its kinda a drag. Sure, you can keep flying it as it is, but if it doesn't feel right, you aren't confortable with how it handles, etc, should you? No.
Find a good, portable, cg setup you can set up at the field for tweaking it. Keep some weights and some 5 minute epoxy with you first few trips. That way, you can land, pump her dry, throw her on the cg rig, and tweak as needed so a. Its fresh in your head, and b. You get to keep flying.
If you have a lot of planes and projects, being able to have something that doesn't take a ton of storage space is also kinda top of the list.
Even if you make a cg rig, take that into account. CG is the single thing we can control that can take a docile plane and turn it into a hand full fast so if you tune from the book and adjust..do so in very small increments. Too much one way or another and you have an empty stall in the stable and some full trash bags
Last edited by Txmustangflyer; 04-25-2022 at 08:17 AM.
06-26-2022, 11:01 AM
#472
My Feedback: (26)
As a follow up to my post #458 and the subsequent repair advice (thanks again everyone), I have structurally fixed my damaged wing (cosmetic to come later) and I am going to replace the problematic TopRC electric retracts with Robart’s pneumatic gear set. Robart let me know that due to supply chain issues, it might be a while before the retracts can be completed to their standards. I would like to get this airplane back in the air by mechanically locking the electric retracts down, but I am not sure why the right main with the replacement trunnion failed in the first place. As a reminder, despite leaving the gear down for the flight, that right main was flopping side to side right before. After landing, I could just push the gear up and pull it down. I do not remember if I left the battery hooked up to the retracts, but since the trunnion was not stripped nor had an oversized hole, all I can think of is maybe I disconnected the retract battery to prevent inadvertent retraction and the with no power to the motor, the vibration from the flight allowed the screw drive to just turn. Since TopRC gear do not have an over center detent in up or down position, the gear was able to slide in the track. My plan to lock them down was to put a sleeve on the screw drive and lock it in place with two nuts. I only need a sleeve because the screw drive is REALLY long and running a nut down 1.5 inches was a pain. Even if the motor tried to turn, the preload of the threads against the trunnion will prevent movement. Thoughts anyone on the reasoning for the failure and the lock down plan I have come up with?
08-24-2022, 10:55 AM
#473
Join Date: Dec 2007
Location: OCALA, FL
Posts: 5
Likes: 0
Received 0 Likes
on
0 Posts
I'm having trouble with my Gunfighter that I purchased used about 2 years ago. I bought the new gear door controller and cannot get it to work. It's driving me crazy. Any thoughts?