


BH Twister
 08-05-2012 | 02:43 PM
#1

This is another defunct RTA airplane that I couldn't pass up from Hobby People. I believe it was on sale at the time & at a price I couldn't resist. It is of conventional design, shoulder wing, constant chord, tail dragger, with approx 540 sq. in. of wing area for a .35 to .45 size 2-stroke and is built in Vietnam. Upon initial inspection, the bump that represents a canopy has to go. The main gear is too far forward and in my opinion, has to move back behind the leading edge rather than where the mfg located it fwd of the LE. The "pinned" piano-style hinges also bother me particularly since it looks like hot-melt glue was used to install them.
 08-05-2012 | 02:54 PM
#2

Senior Member
Joined: Mar 2010
Posts: 194
Likes: 0
Received 0 Likes
on
0 Posts
From: Leeds, UNITED KINGDOM
Ah, i remember my old twister!....had bags of fun with this & i had an OS 46AX initially..then upped it to an AX55 ...silly thing to do!, flew the wings off this for a few seasons until i got a little daft & plowed it into the ground 'from an unrecoverable flat spin'.....i had no problems with the hinged & pinned controls surfaces at all...
This will do most manouvers with the utmost ease...you can take off & land this with your eyes closed...honest!, you'll get super~over confident with it...enjoy.
Marc.
This will do most manouvers with the utmost ease...you can take off & land this with your eyes closed...honest!, you'll get super~over confident with it...enjoy.
Marc.
08-05-2012 | 03:18 PM
#3
ORIGINAL: Neo gold
Ah, i remember my old twister!....had bags of fun with this & i had an OS 46AX initially..then upped it to an AX55 ...silly thing to do!, flew the wings off this for a few seasons until i got a little daft & plowed it into the ground 'from an unrecoverable flat spin'.....i had no problems with the hinged & pinned controls surfaces at all...
This will do most manouvers with the utmost ease...you can take off & land this with your eyes closed...honest!, you'll get super~over confident with it...enjoy.
Marc.
08-05-2012 | 04:00 PM
#4
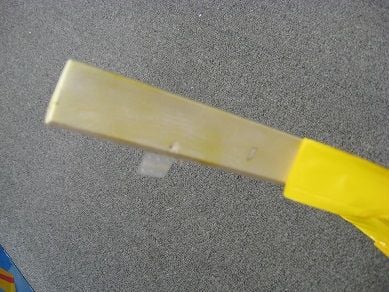
The cowling was way too thin and damaged with chipped paint missing so I decided to add thickness. Because epoxy doesn't seem to do well over polyester and my old K&B resin looked like Jello, I decided to buy a quart at the local auto parts store. I wet sanded the paint off the cowl, cut patterns from stiff paper, cut lft, rt, top, and bottom pieces of 6 oz glass and applied them to the inside of the cowling to triple the thickness...

 11-10-2017 | 04:04 PM
#7
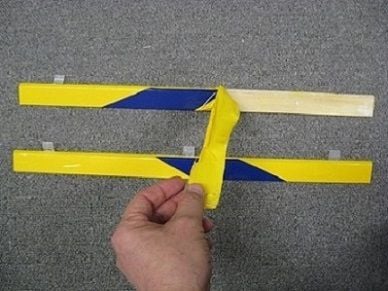
Some other things I don't like include color scheme, number of hinges, hinge gap, a spinner that's not yellow, and control surfaces without enough thickness taper. I decided after all to begin removing the hinges with the assistance of heat and lots of pulling...
Last edited by H5606; 11-11-2017 at 08:58 AM.
11-11-2017 | 09:47 AM
#8
Good practice here harvesting the covering material and hinges for use down the road on similar or smaller-sized airplanes so that when in post-apocalyptic world will have developed these skills already. Uncovering elevators, horizontal stab, vertical stab, and rudder. The existing hinge slots are wide enough to drive a tank through. Used partially installed screws to hammer out the blind nuts on the gear plate in the fuselage and took off the canopy blister.
Last edited by H5606; 11-11-2017 at 10:15 AM.
11-11-2017 | 10:34 AM
#9
Cleared covering from fuselage and over-wing hatch. There's no instructions in the owner's manual about covering removal so you're on your own here. Getting better at uncovering now - reversed the mfg's covering process which was covering top and bottom first, then sides. Naked fuse feels heavy and weighs 9 and 5/8 oz. Just for fun, checked covering removed is 3/4 oz.
Last edited by H5606; 11-11-2017 at 10:47 AM.
01-28-2018 | 03:34 PM
#10
Used heat to facilitate removal of the main-gear mounting plate; if it is actually hot-melt glue, it only becomes gummy under the heat gun but will let go under significant leverage.
Ran bolts thru fender washers to spread out the load on the gear plate and clamped on Vice-grip pliers to give a handle to pry on - prying it out lifted the adjacent bottom sheeting.
Partially installed landing gear screws and some spacers under plate allow quick removal of the blind nuts using light tapping.
Removed forward bottom sheeting and used additional heat with chisel to remove gear doublers from fuselage sides; there is no fuel proofing in this area so will now have better access to do so.
02-04-2018 | 02:48 PM
#11
Continuing somewhat destructive de-construction; removed top sheeting of fuse from LE of wing aft. Used punch to remove hatch latch. Tried heat on sheeting but ended up using brute force, a planer, and aggressive sanding tools. Looking to deepen fuselage by an inch and a half or so to make it TLAR. Wood is strange - very brittle - think they call this Luan.
Also began pulling off ailerons and uncovering wing panel.
Also began pulling off ailerons and uncovering wing panel.
02-25-2018 | 06:07 PM
#13
Continued covering removal - now similar treatment to left wing panel. Being Oracover/Ultracoat it's fairly easy to remove.
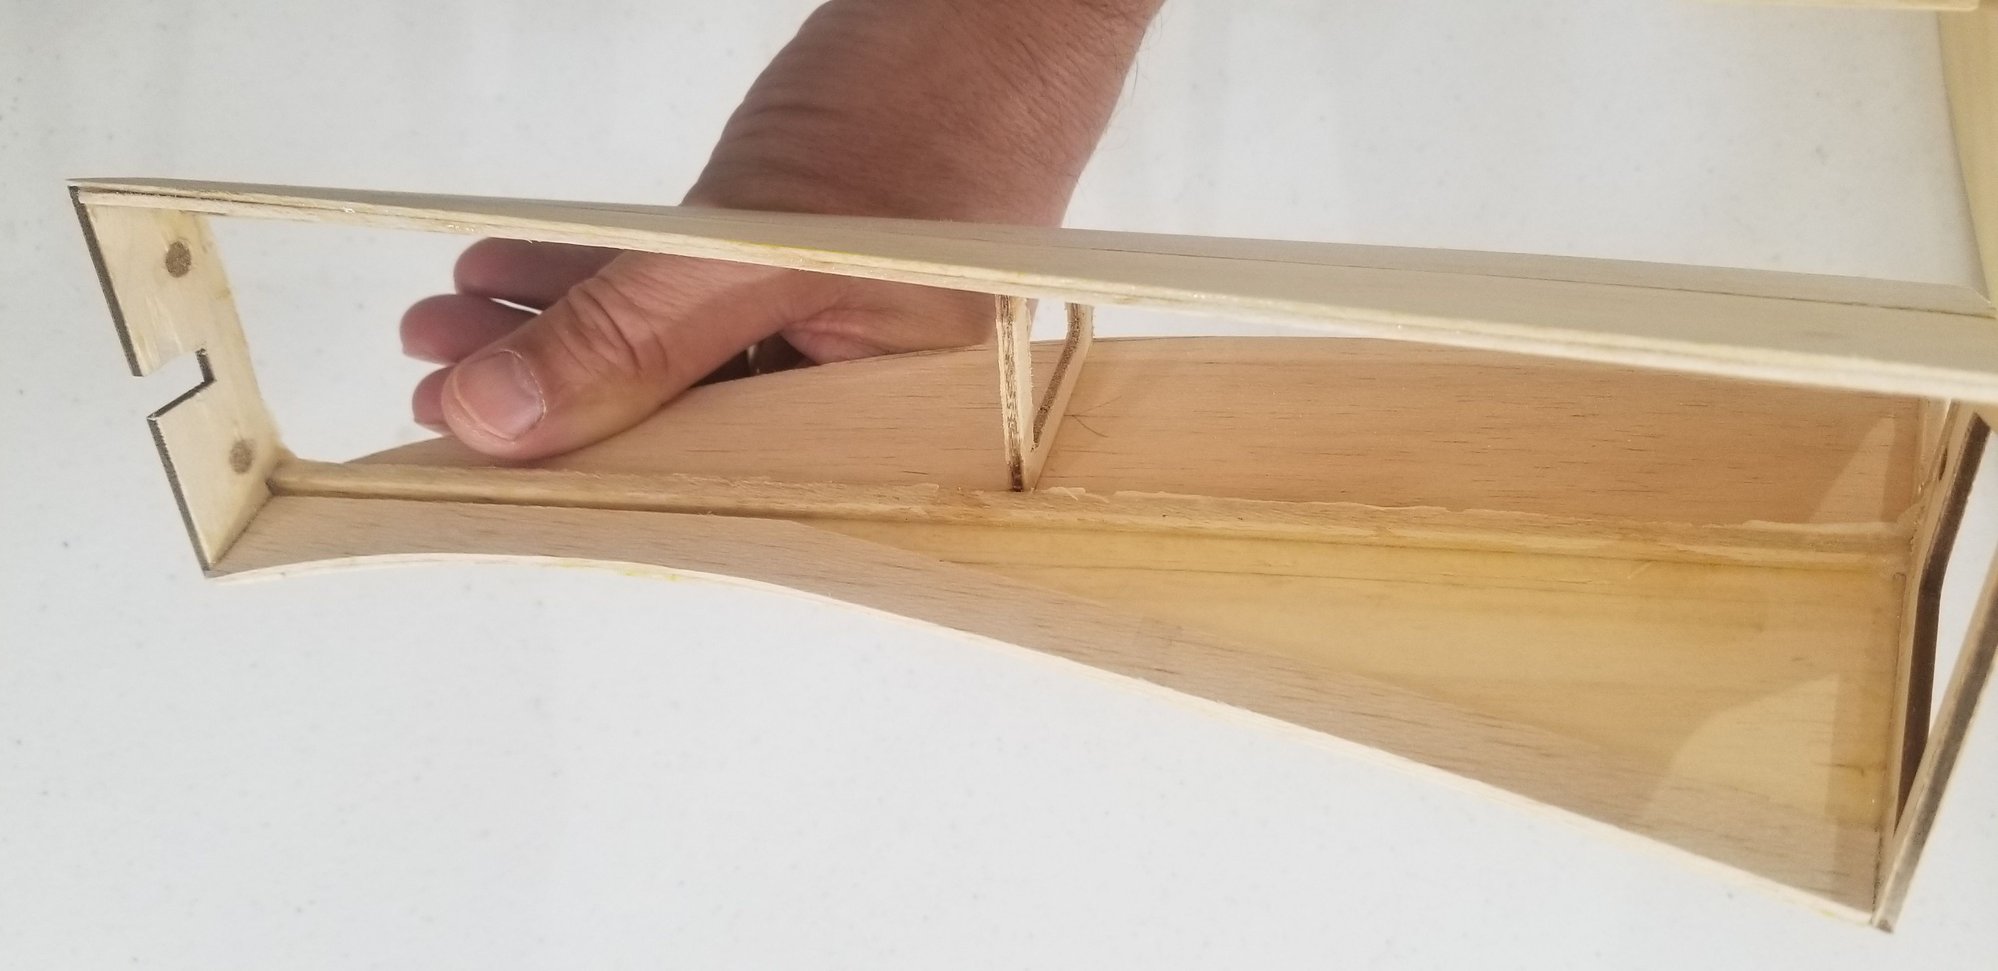
Closeup of an outboard rib shows one that looks like a warped noodle the mfg is willing to pass as acceptable for general populace.
Began modifying existing construction by adding additional trusses (and weight, of course) to horizontal flying surface - inboard next to center section - looked like it had way too much unsupported area...
Last edited by H5606; 02-25-2018 at 06:09 PM.
01-20-2019 | 05:02 PM
#14
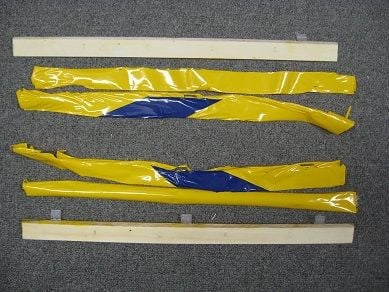
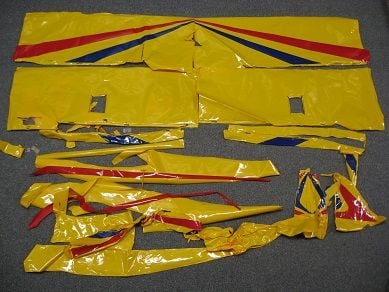
Finished covering removal from the airframe.
Ailerons shown here as covering removal begins. Experienced eureka moment - the strip ailerons are not solid wood - they're actually built-up structures! Additional pics show ailerons bare with covering removed; note the factory "X" pen marks - perhaps used to denote the bottoms of both ailerons...
Second to last pic shows all the covering from the airframe that was salvaged to cover other projects down the road or can be used to cover another BH Twister.
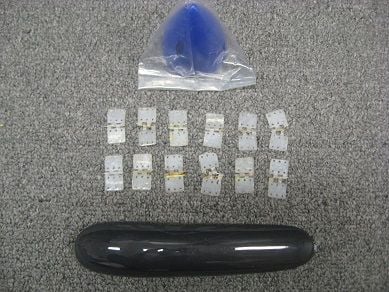
Last pic shows pristine spinner, hinges, and canopy salvaged from this airplane that can be used to support other projects in the future.
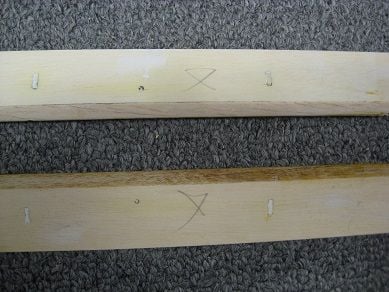
Ailerons shown here as covering removal begins. Experienced eureka moment - the strip ailerons are not solid wood - they're actually built-up structures! Additional pics show ailerons bare with covering removed; note the factory "X" pen marks - perhaps used to denote the bottoms of both ailerons...
Second to last pic shows all the covering from the airframe that was salvaged to cover other projects down the road or can be used to cover another BH Twister.
Last pic shows pristine spinner, hinges, and canopy salvaged from this airplane that can be used to support other projects in the future.
Last edited by H5606; 01-21-2019 at 04:56 PM.
01-21-2019 | 04:47 PM
#15
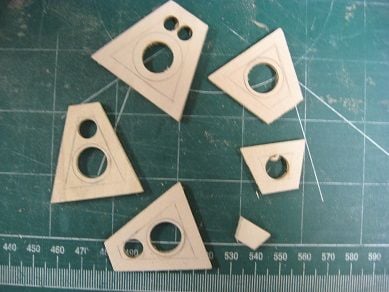
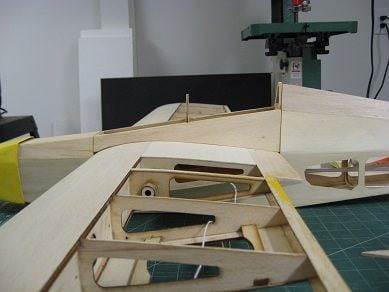
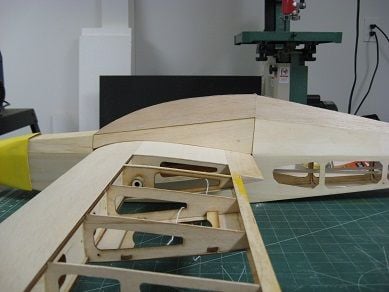
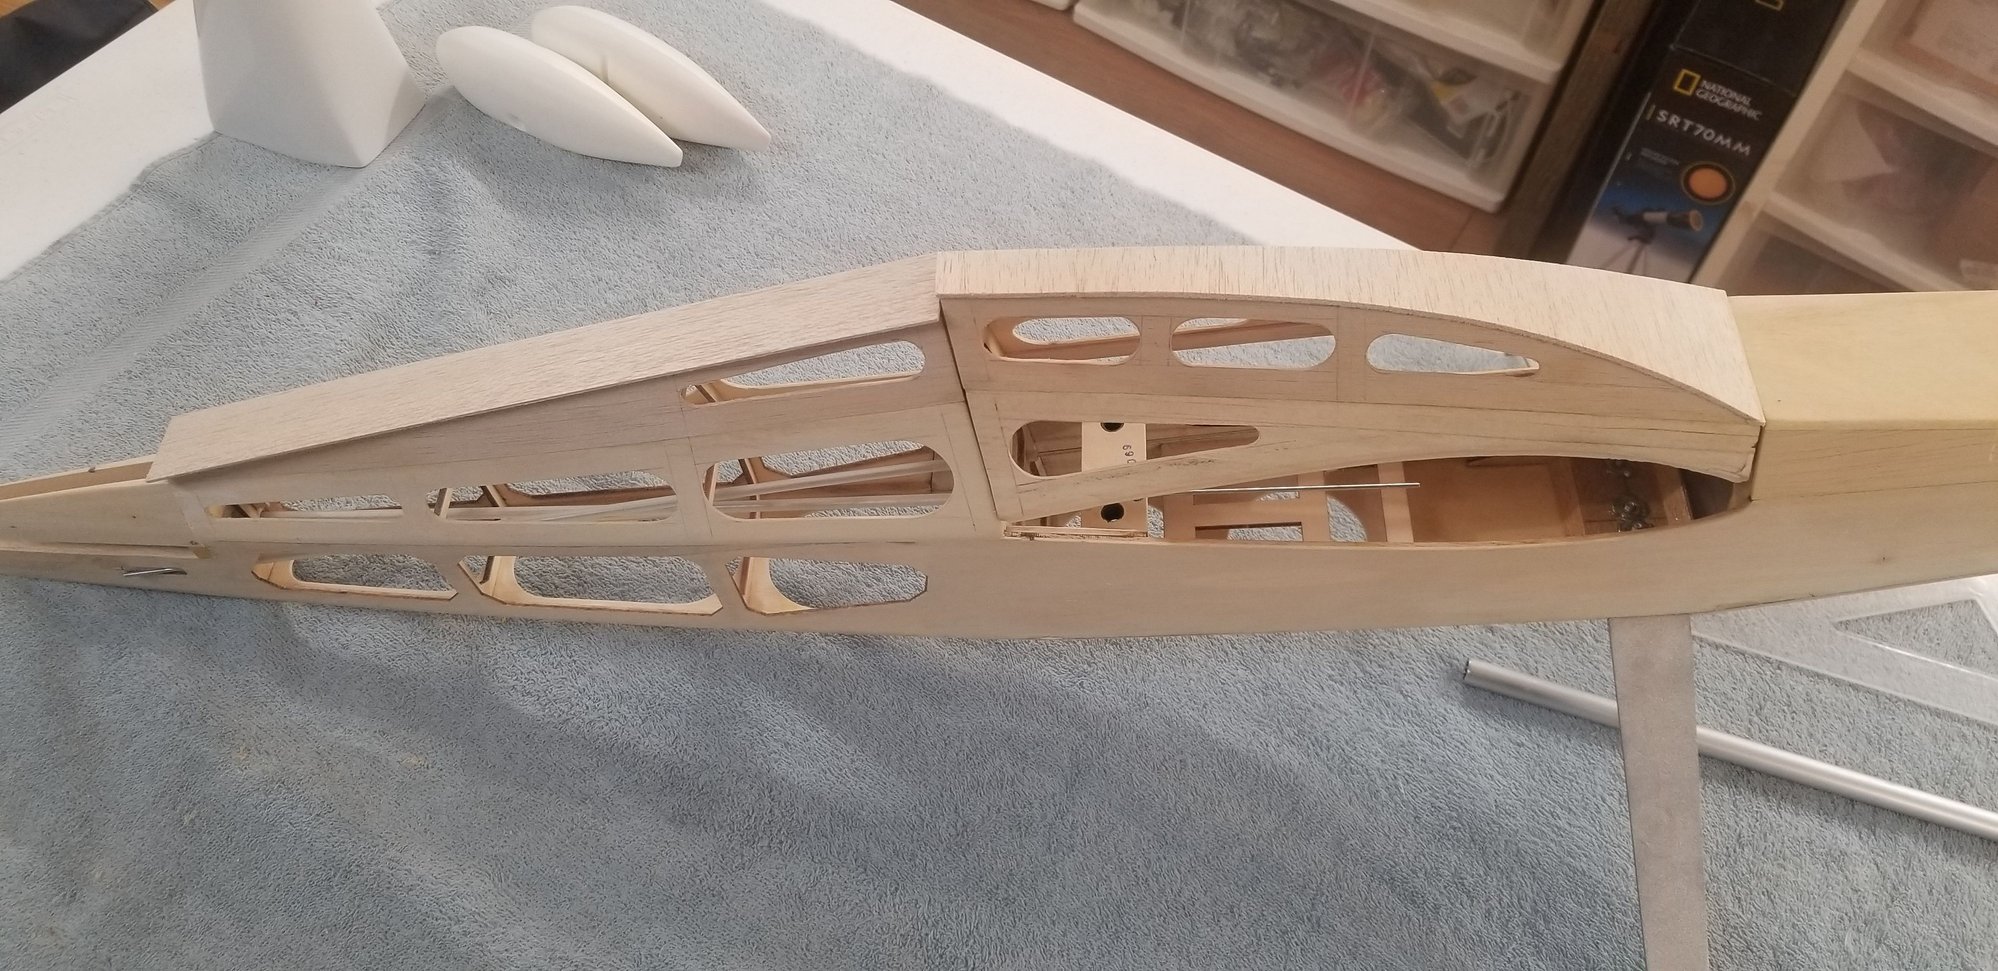
Starting with the addition of 1.5" to the top of the apex (former at the wing TE), a line connecting the apex to the existing tail block defines the top of the additions for the other formers. Accounting for skin thickness offset, cut these formers from scrap 1/8" lite-ply and removed mat'l from the centers.
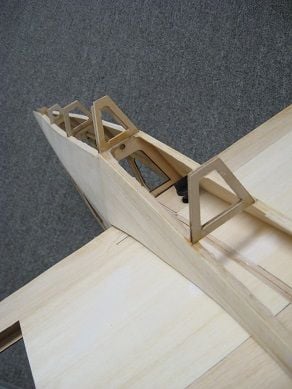
Bonded these former extensions to the tops of the formers including one on the top of the over-wing hatch fairing to support sheeting at center point. Cut and installed 1/16" sheeting to aft fuselage top.
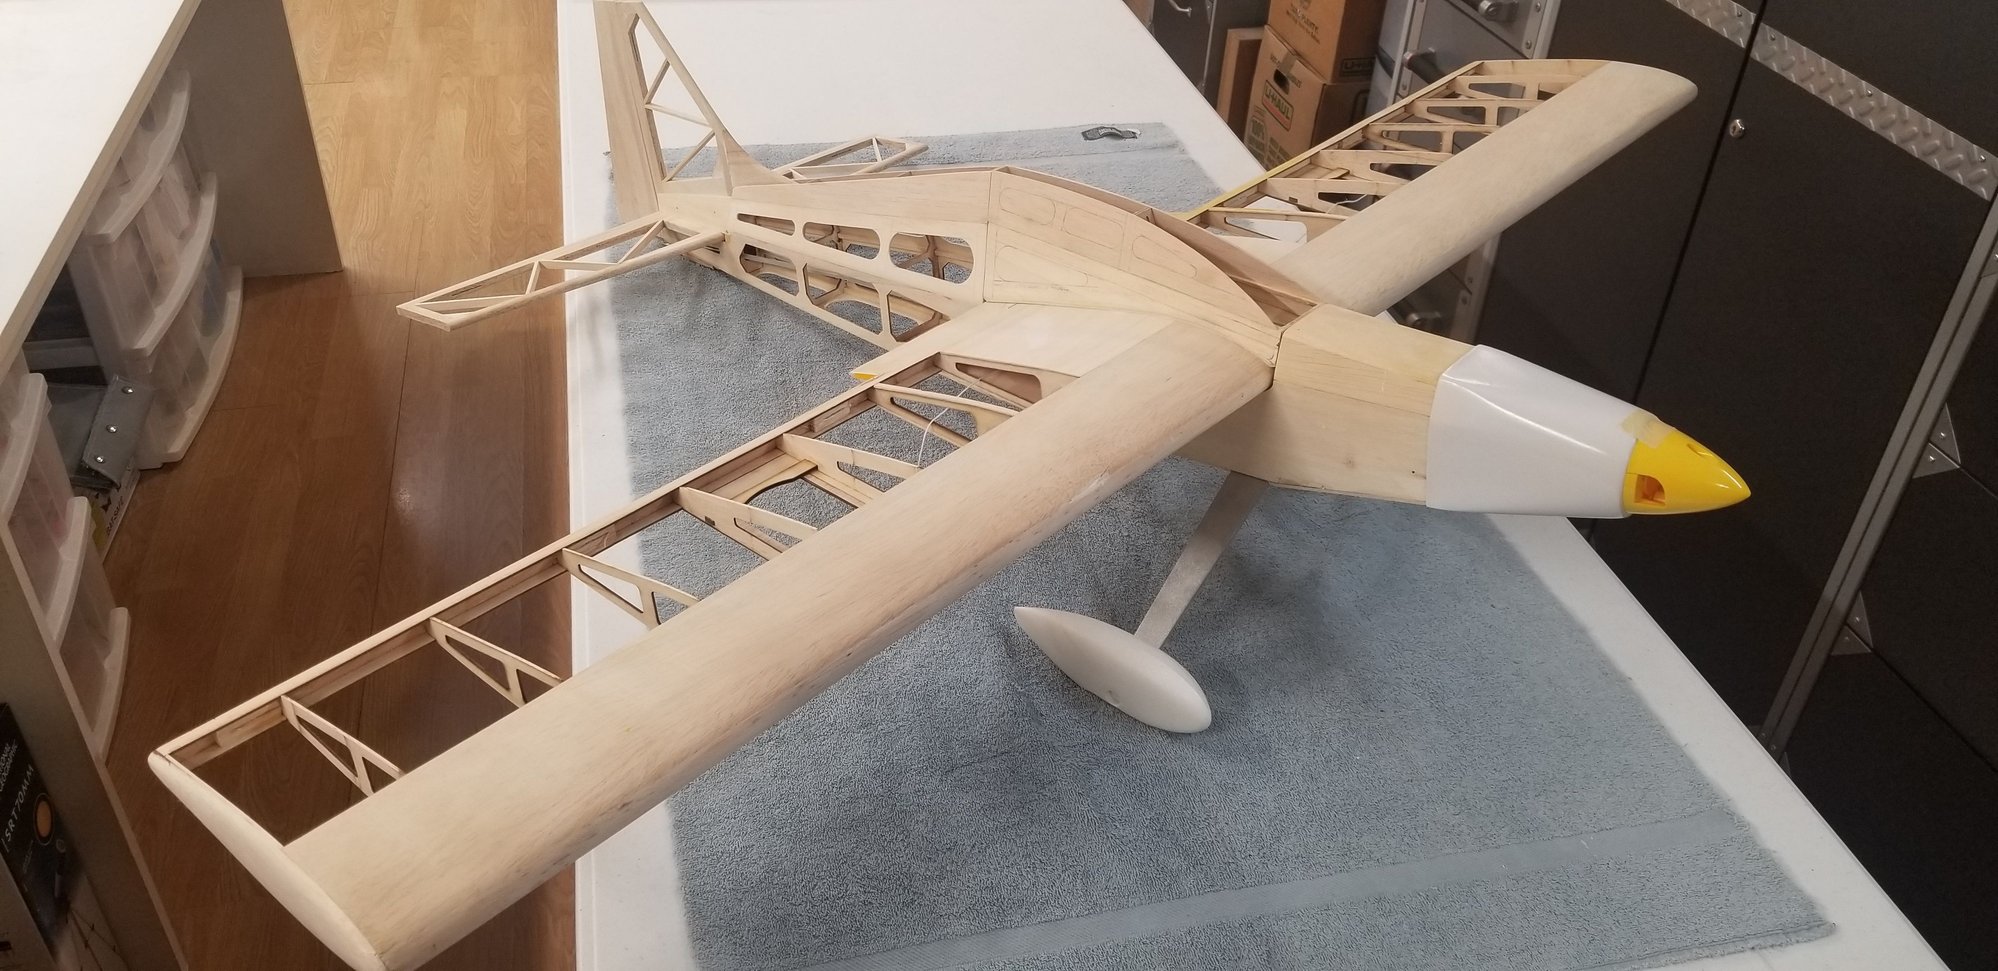
Debated about the area fwd of the apex, thinking about simplicity of straight line to remain "Hots-like" or introducing complexity with a curve. Decided to create curve with the intention of gaining even more area over wing and hopefully supporting knife-edge flight.
Last pic shows dry fit of fwd area sheeting with canopy-like curve to center section hatch to judge general outline.

Bonded these former extensions to the tops of the formers including one on the top of the over-wing hatch fairing to support sheeting at center point. Cut and installed 1/16" sheeting to aft fuselage top.
Debated about the area fwd of the apex, thinking about simplicity of straight line to remain "Hots-like" or introducing complexity with a curve. Decided to create curve with the intention of gaining even more area over wing and hopefully supporting knife-edge flight.
Last pic shows dry fit of fwd area sheeting with canopy-like curve to center section hatch to judge general outline.
Last edited by H5606; 01-21-2019 at 05:07 PM.
01-27-2019 | 05:56 PM
#16
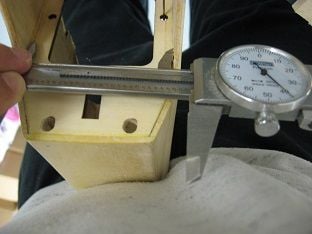
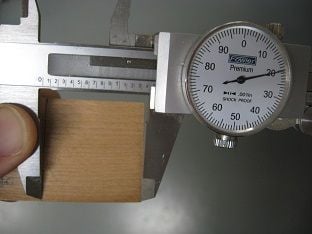
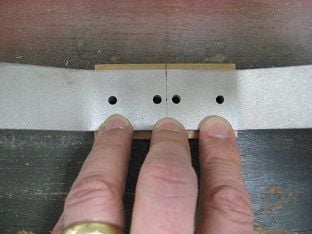
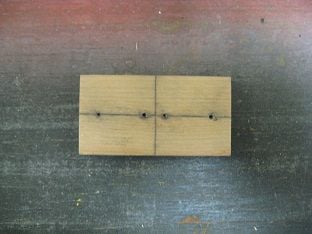
Took measurements of fore and aft areas for new, repositioned gear plate. Transferred measurements to scrap 1/4" ply and fabricated new gear mounting plate. Drew center lines.
Positioned L&R gear legs over center-line showing mfg's skewed butt joint. Sanded butt joint to true, and marked/center-punched gear plate for blind nuts resulting in slightly narrower gear-track.
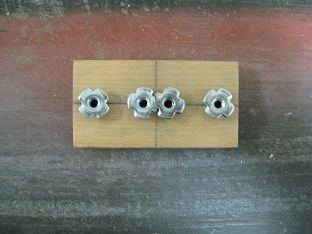
Drilled gear plate for blind nut installation. Sanded blind nut flanges for overlap clearance at center point and added to gear plate.


Positioned L&R gear legs over center-line showing mfg's skewed butt joint. Sanded butt joint to true, and marked/center-punched gear plate for blind nuts resulting in slightly narrower gear-track.
Drilled gear plate for blind nut installation. Sanded blind nut flanges for overlap clearance at center point and added to gear plate.
 01-28-2019 | 02:16 PM
#18
Yeah, and its still not done. How is it that ARF's are for modelers that don't have the time to spend building?
Ends up being an exercise in wasting part of yer life away; very difficult to stay focused on it when there's more rewarding stuff around to build or fly.
Ends up being an exercise in wasting part of yer life away; very difficult to stay focused on it when there's more rewarding stuff around to build or fly.
01-13-2026 | 09:31 AM
#19
With the original gear mounting plate and new gear mounting plate dry-fit into their respective positions, the holes move back 1⅝" and the wheel locations correspondingly move aft 2⅜" by virtue of the angle change -

The following users liked this post:
mgnostic (01-14-2026)
01-26-2026 | 09:33 AM
#20
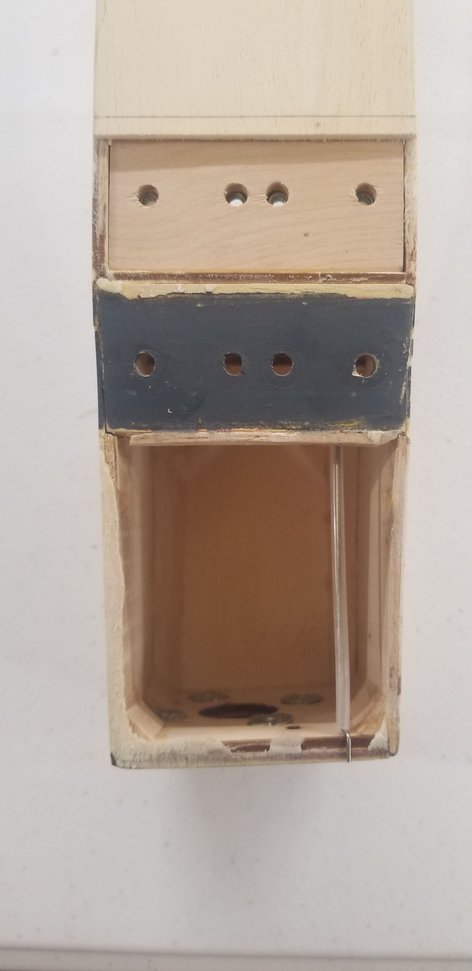
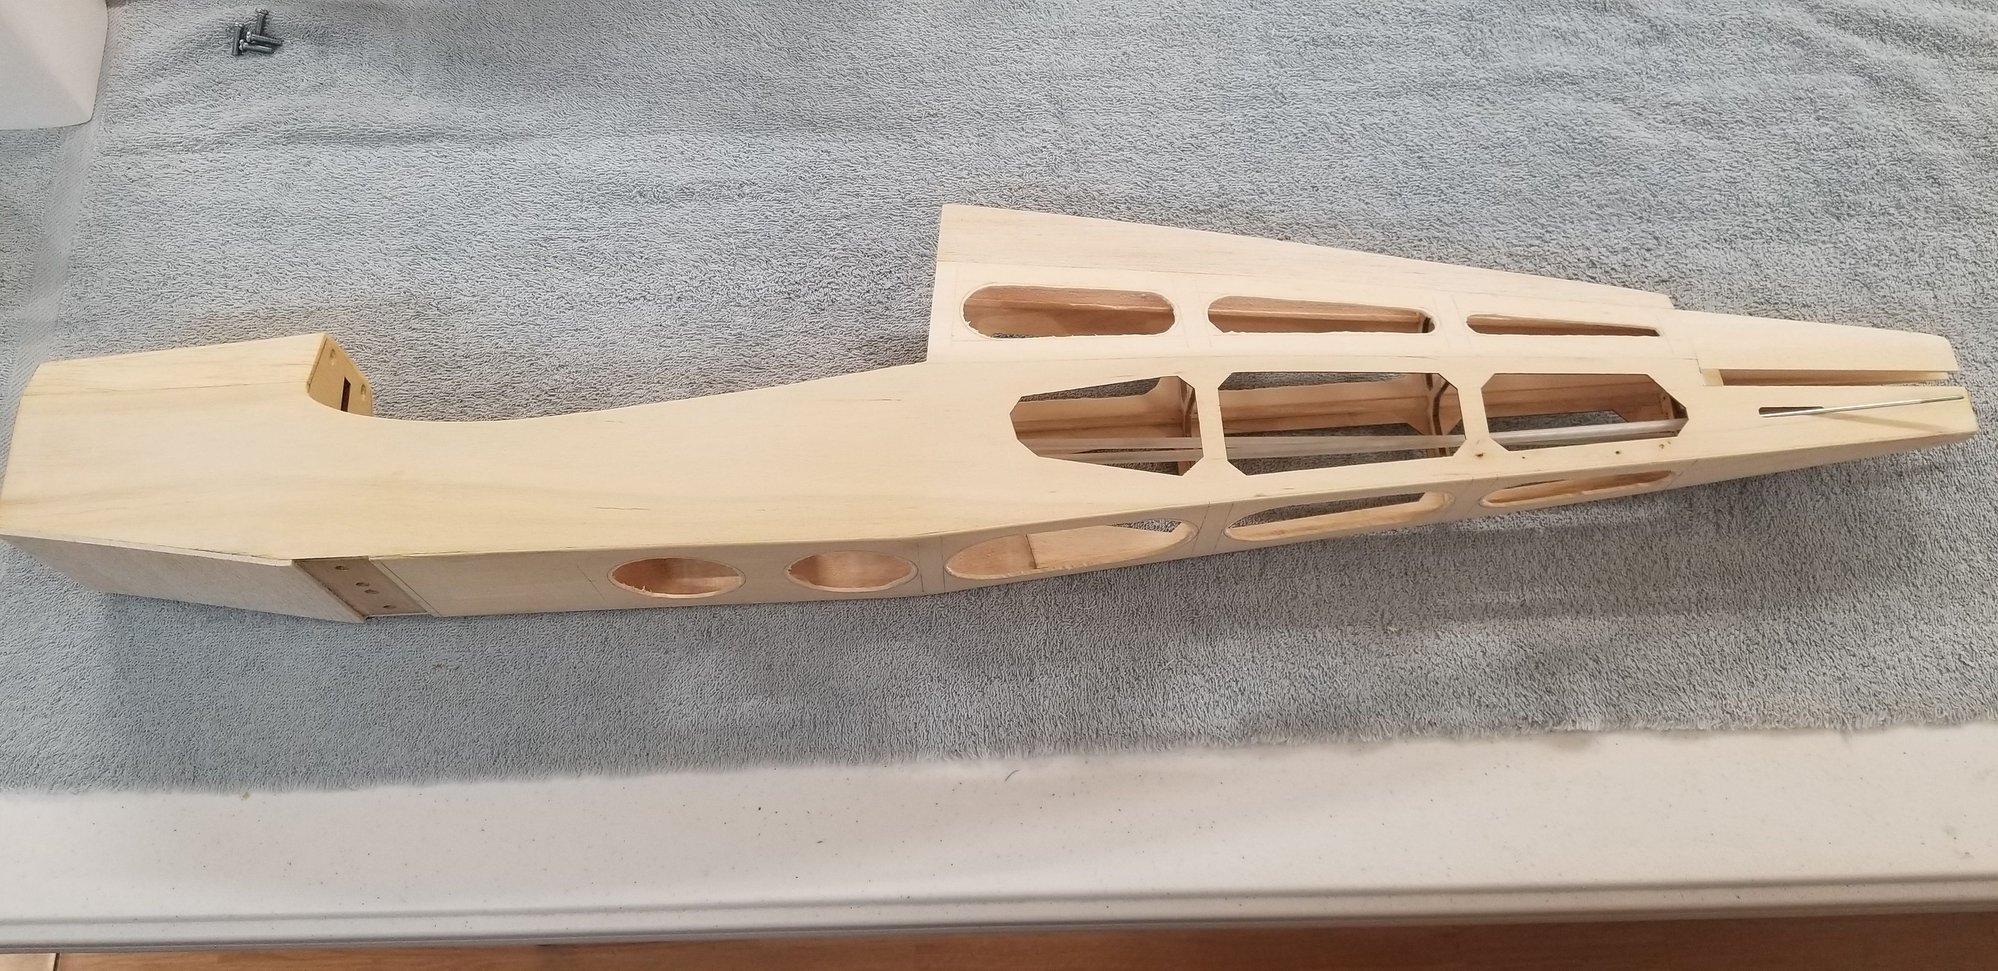
The new gear mounting plate is bonded in and notched, scab doublers added to each side.
Balsa pieces fill the original gear mount notches and the tank bay is sealed with 30-minute epoxy.
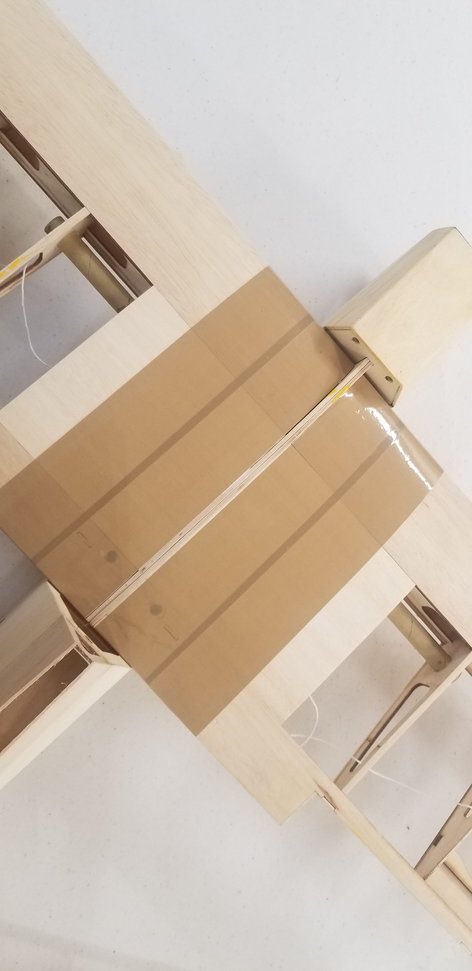
The over-wing hatch fit needed attention so wing saddle doublers were added and the wing root was covered with packaging tape. 3 coats of wax to the taped area and 30-minute epoxy mixed with liberal amount of baking soda applied to the saddles before the squeeze. Outside edge of slurry addressed with a fingertip fillet.
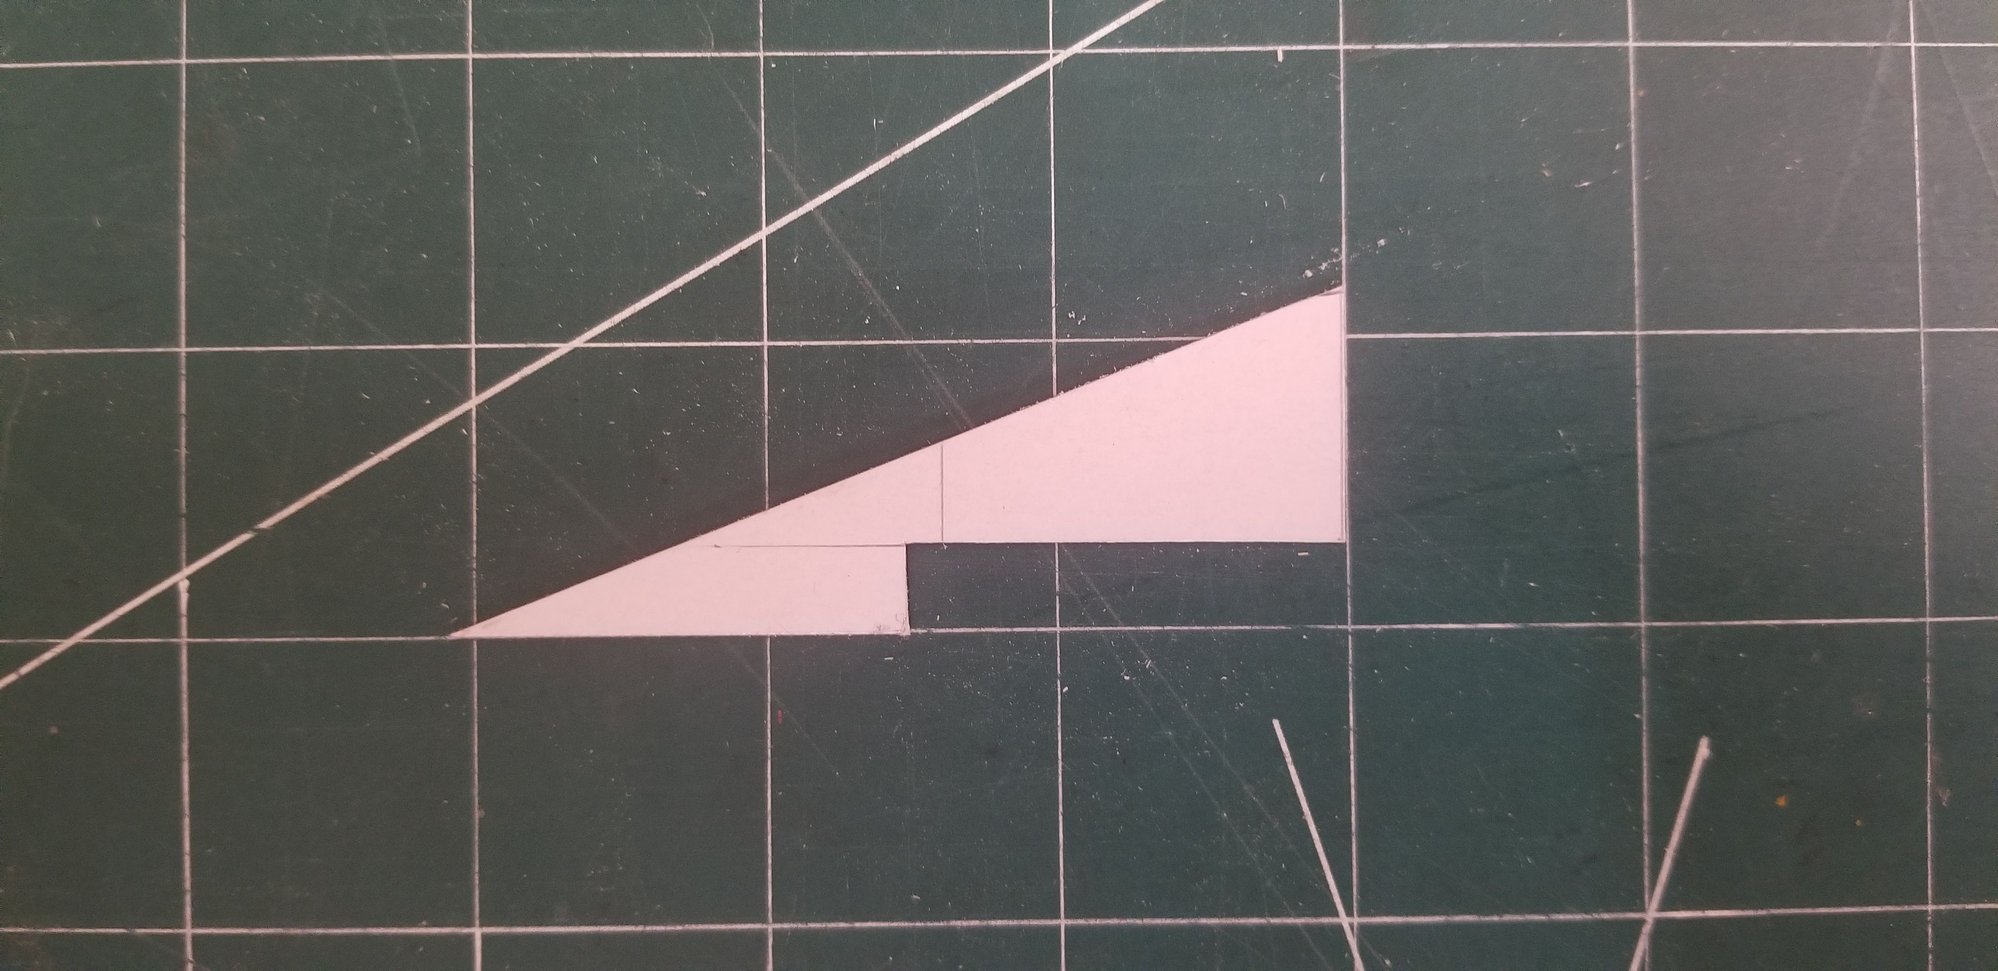
Cardstock template to make gear mounting plate scab doublers -
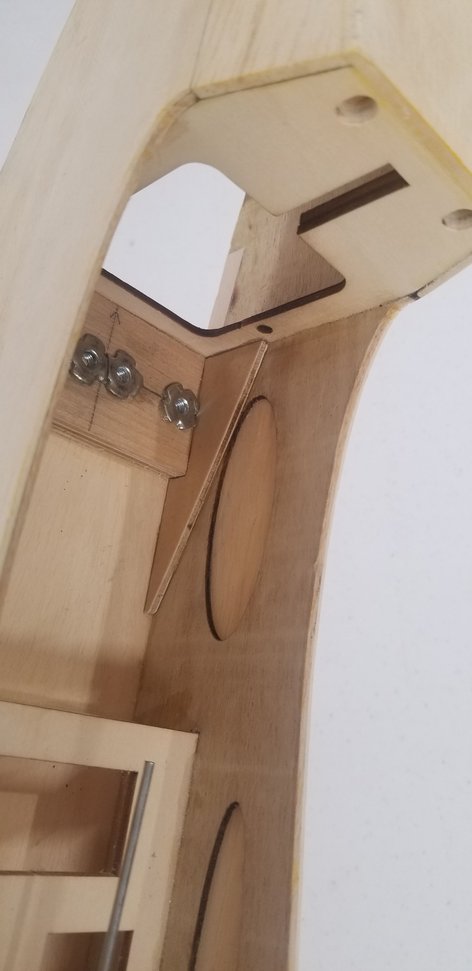
New scab doublers capture gear plate -

OEM gear plate notches filled and tank bay fuel-proofed -
Saddle doublers add thickness for the slurry squeeze to wing fitment -
Tape waxed for release -

Shaped popsicle stick used for fillet -
Balsa pieces fill the original gear mount notches and the tank bay is sealed with 30-minute epoxy.
The over-wing hatch fit needed attention so wing saddle doublers were added and the wing root was covered with packaging tape. 3 coats of wax to the taped area and 30-minute epoxy mixed with liberal amount of baking soda applied to the saddles before the squeeze. Outside edge of slurry addressed with a fingertip fillet.
Cardstock template to make gear mounting plate scab doublers -
New scab doublers capture gear plate -
OEM gear plate notches filled and tank bay fuel-proofed -
Saddle doublers add thickness for the slurry squeeze to wing fitment -
Tape waxed for release -
Shaped popsicle stick used for fillet -
01-27-2026 | 07:39 AM
#21
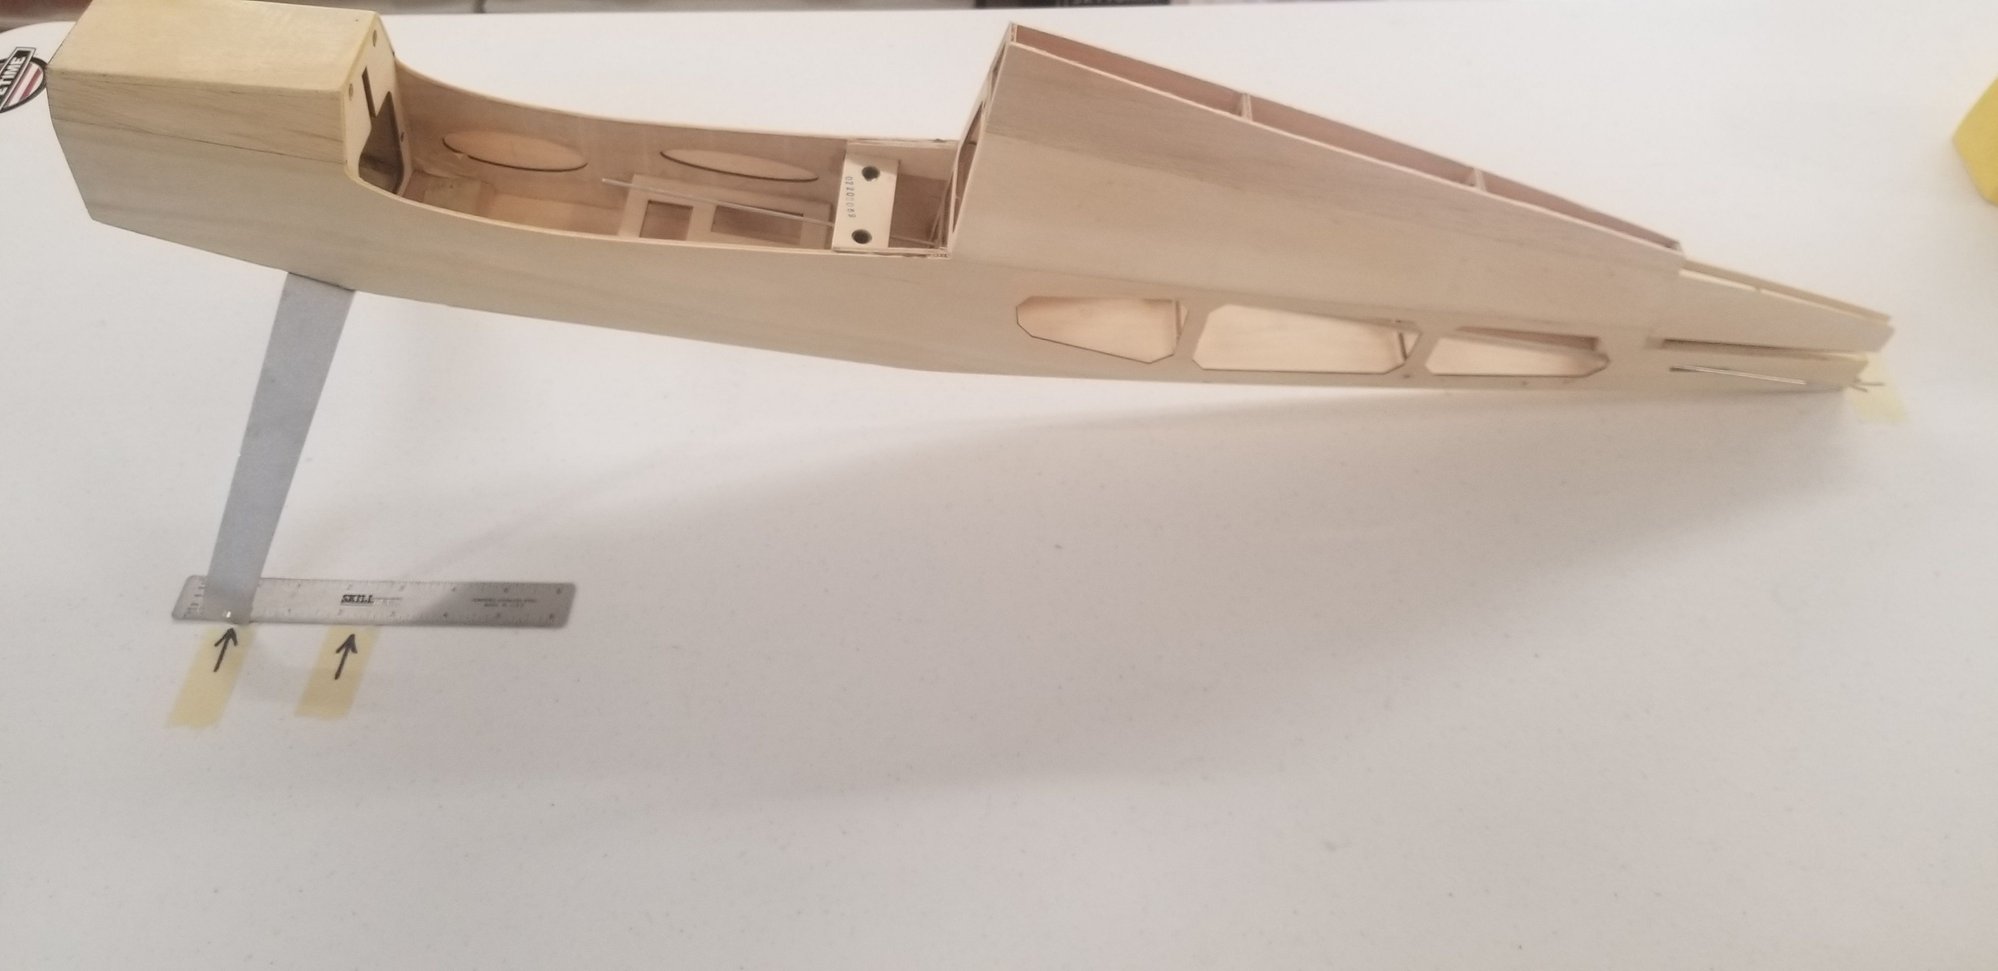
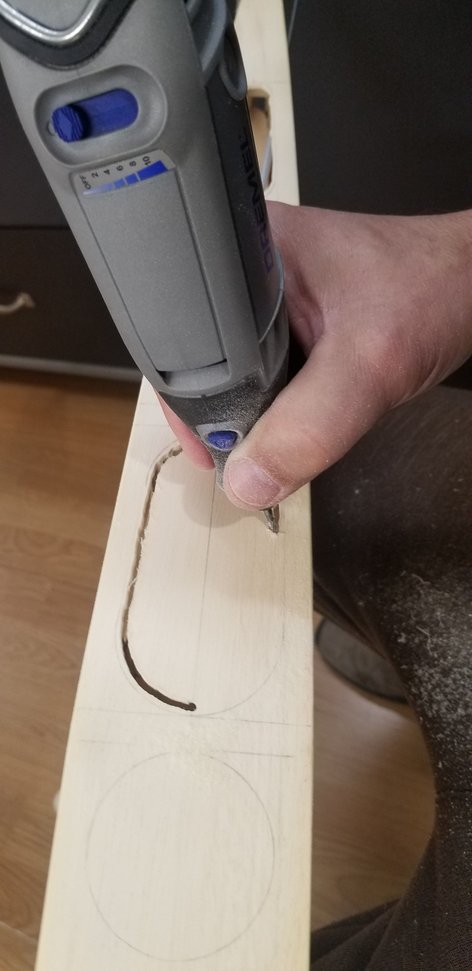
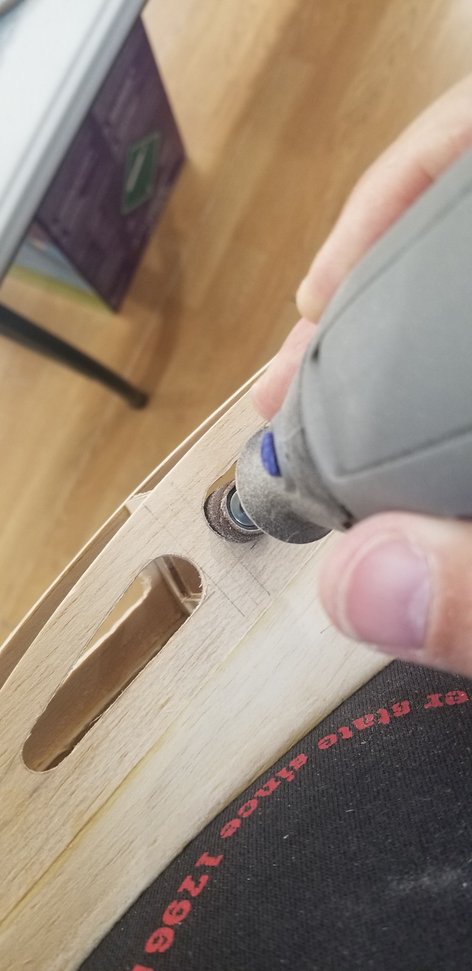
The tank bay was sheeted with cross-grain 3/32" balsa and the landing gear legs clamped in a bench-vise to adjust for a lower front end stance.
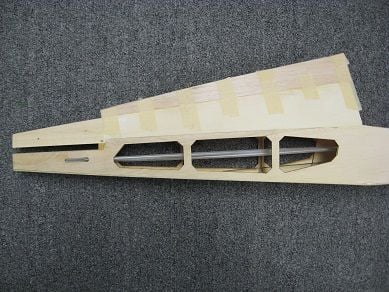
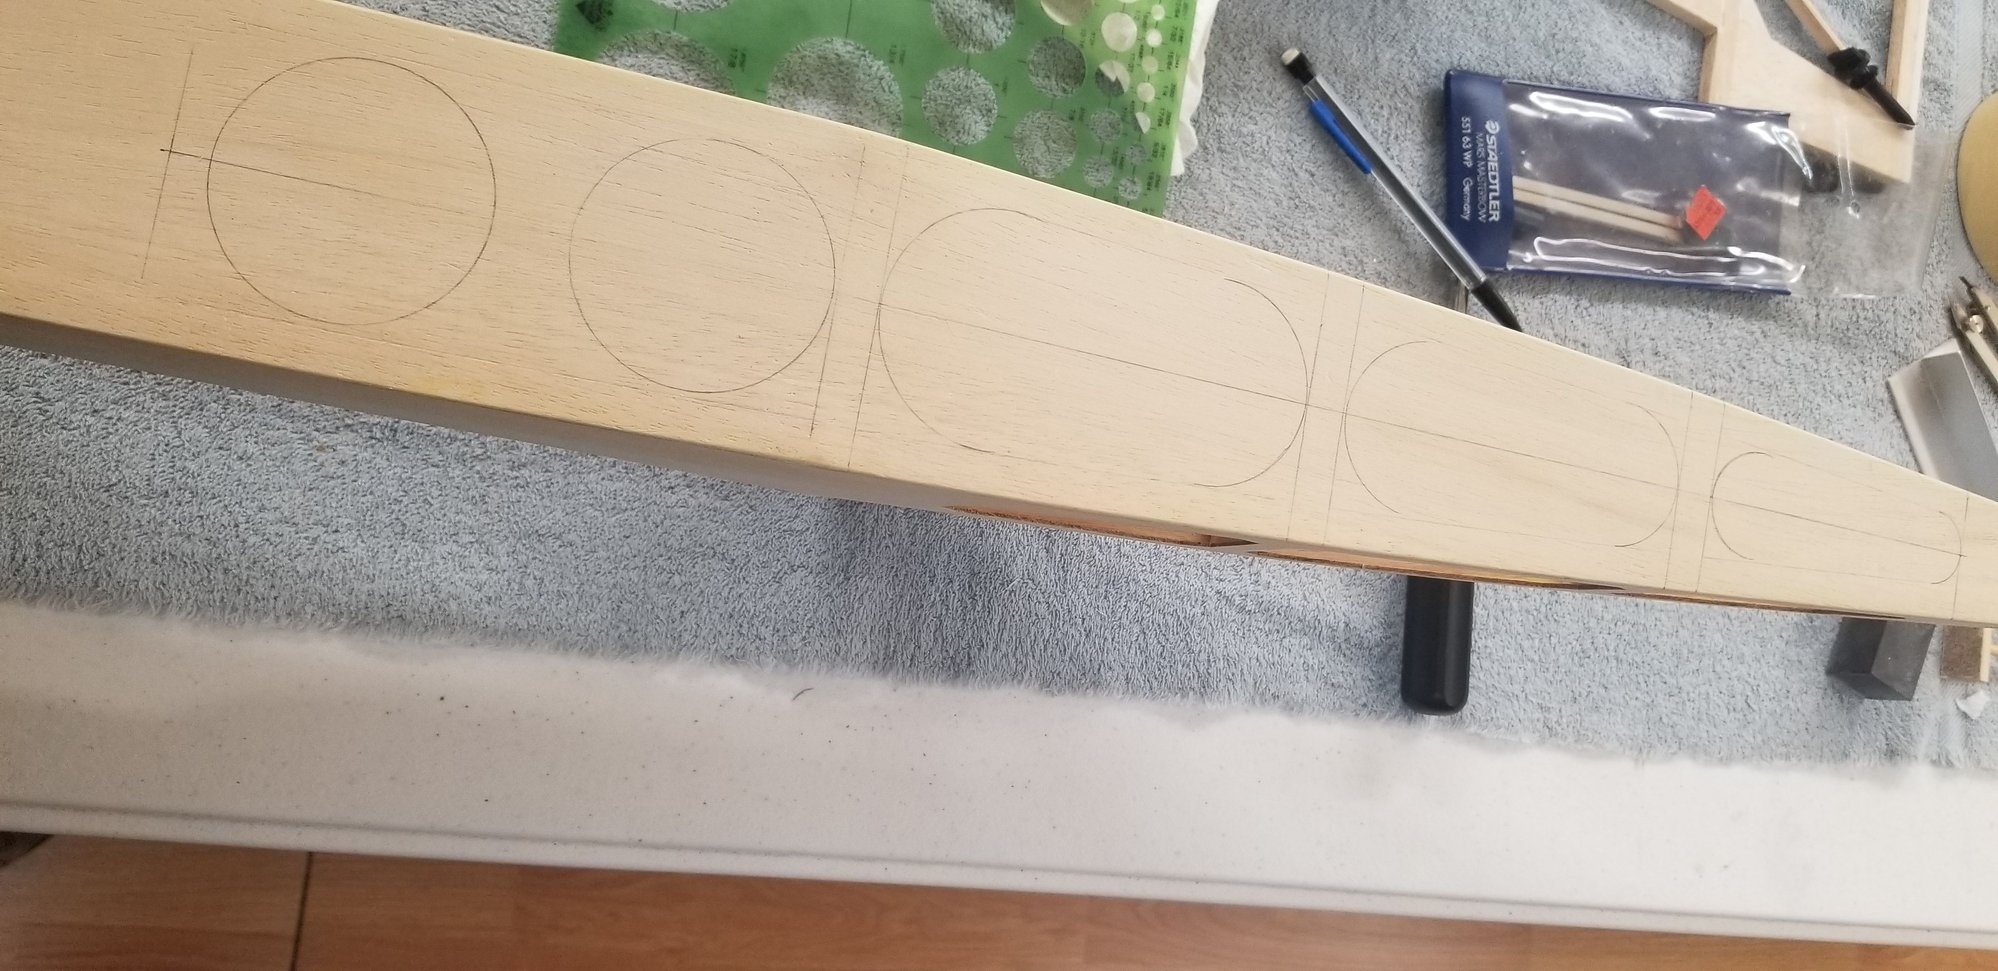
Pencil lines laid out on fuselage using a straight-edge and circle template gives boundaries to follow when removing wood in an effort to lighten things.
A Dremel with carbide burr was used to make the initial cutouts followed with a drum-sander and Permagrit tools to sneak up to the lines -
Tank bay sheeted over after moving gear mounting plate to new location -
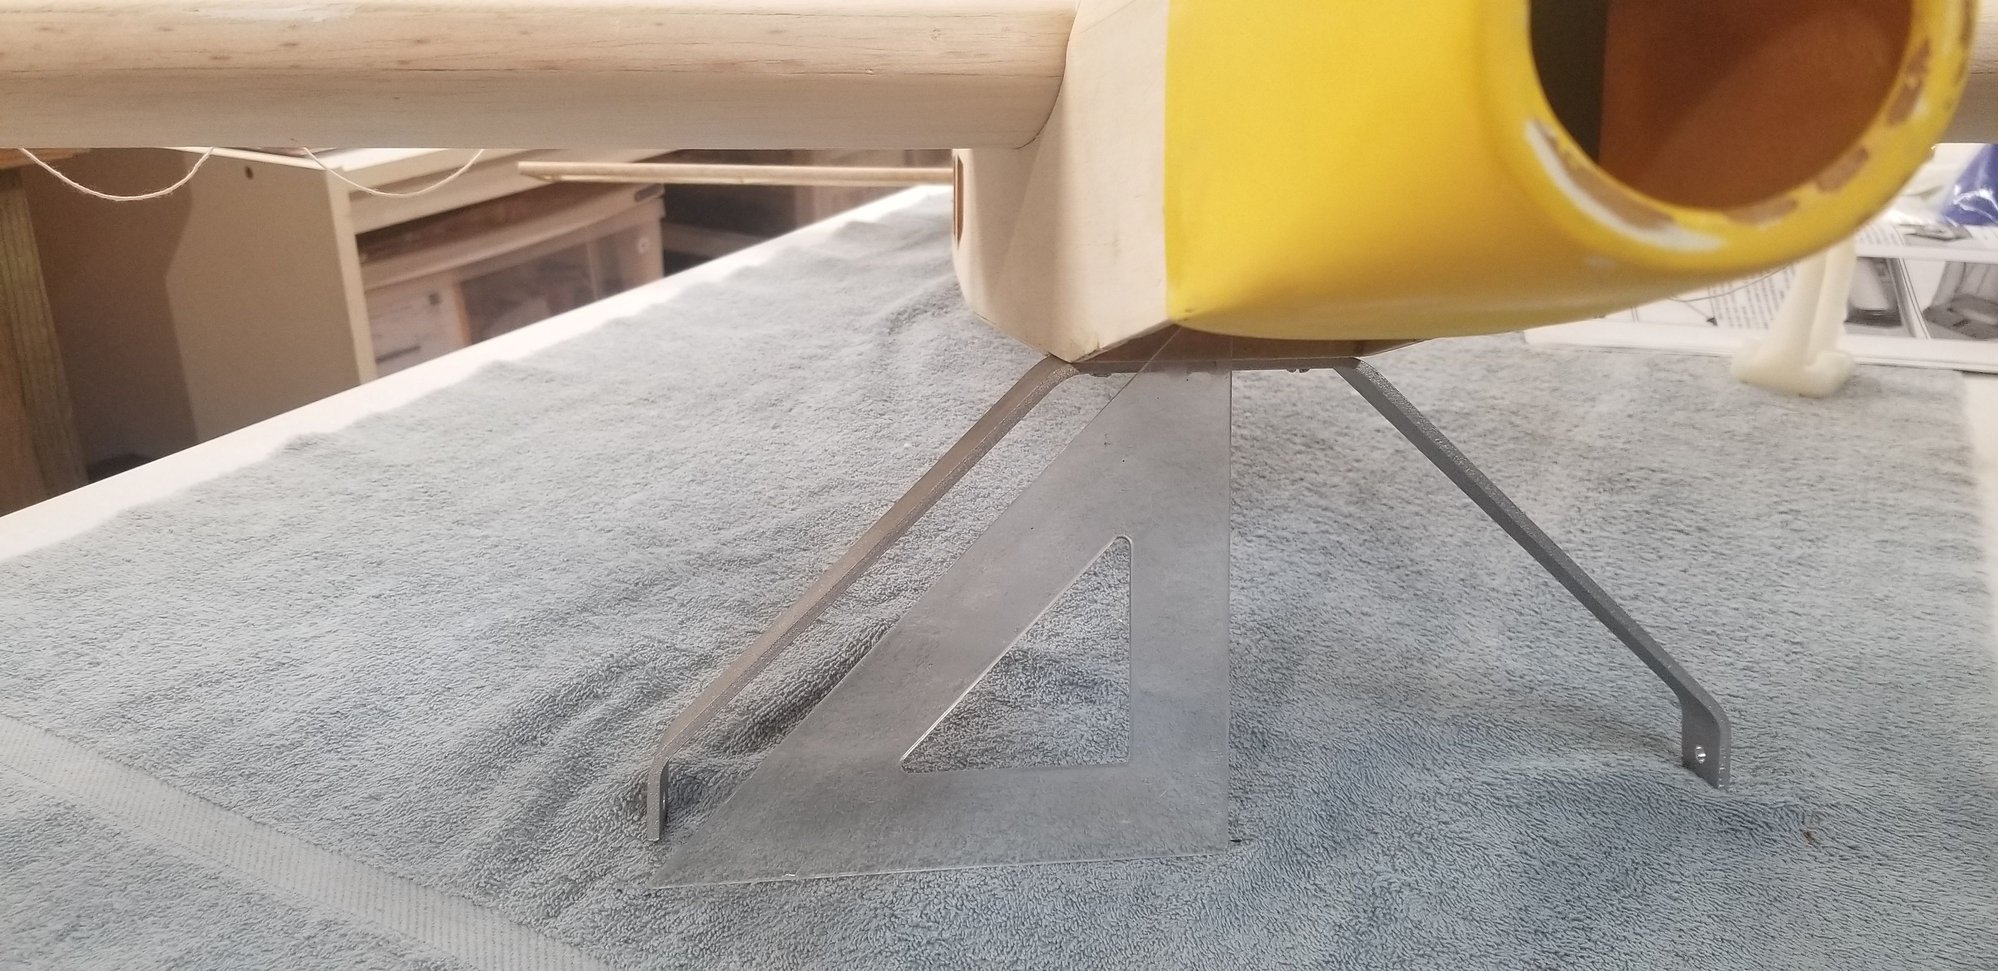
Stock landing gear stance -
Bending gear widen and lower L/G stance -
Modified gear stance -
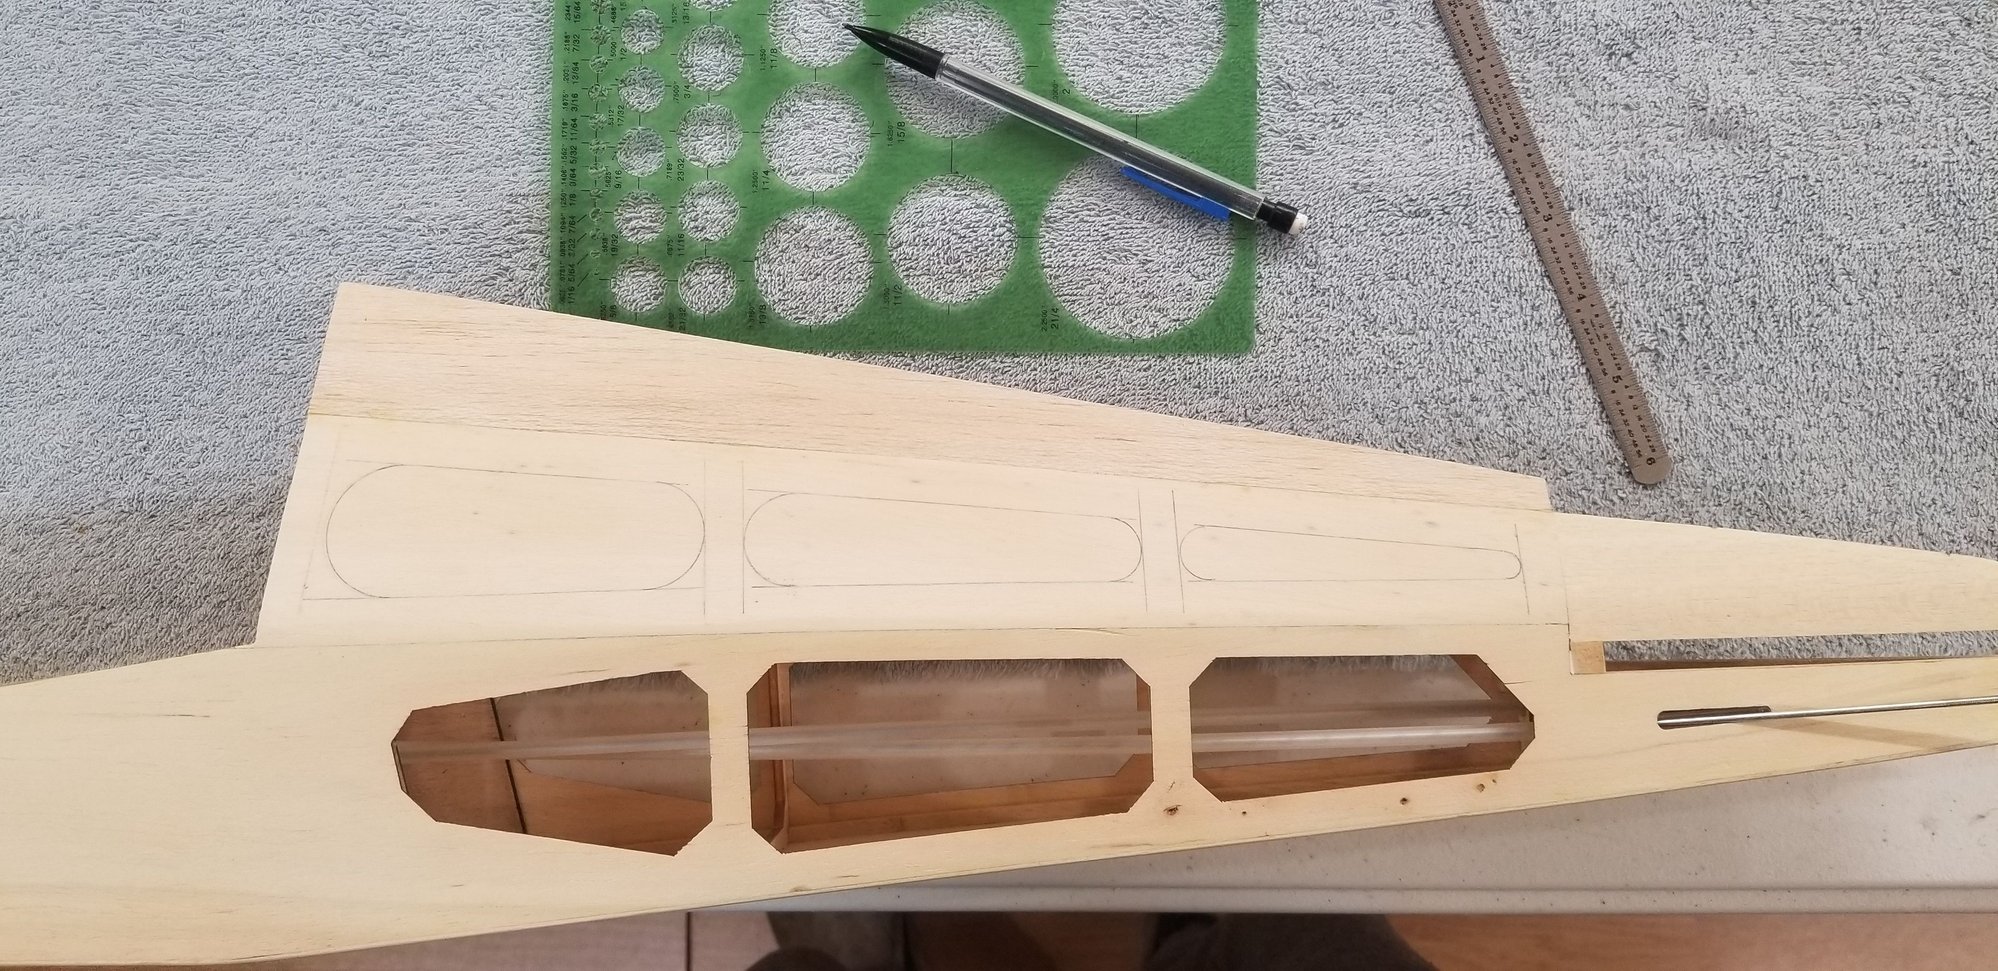
Boundary lines laid out ahead of cutouts to remove material weight -
Fuselage belly laid out ready to make cuts -
Belly cutouts -

Carbide burr cuts to stay inside lines -
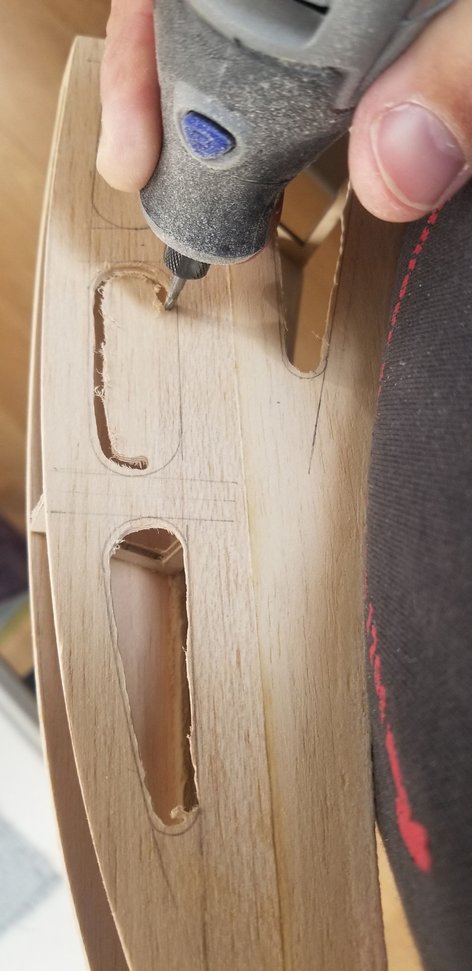
Over-wing hatch cutouts with carbide burr -
Followed with drum-sander -
Pencil lines laid out on fuselage using a straight-edge and circle template gives boundaries to follow when removing wood in an effort to lighten things.
A Dremel with carbide burr was used to make the initial cutouts followed with a drum-sander and Permagrit tools to sneak up to the lines -
Tank bay sheeted over after moving gear mounting plate to new location -
Stock landing gear stance -
Bending gear widen and lower L/G stance -
Modified gear stance -
Boundary lines laid out ahead of cutouts to remove material weight -
Fuselage belly laid out ready to make cuts -
Belly cutouts -
Carbide burr cuts to stay inside lines -
Over-wing hatch cutouts with carbide burr -
Followed with drum-sander -
04-25-2026 | 10:12 AM
#22
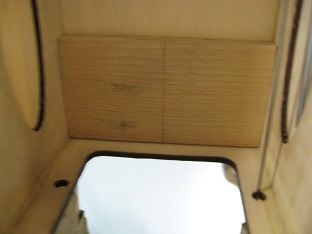
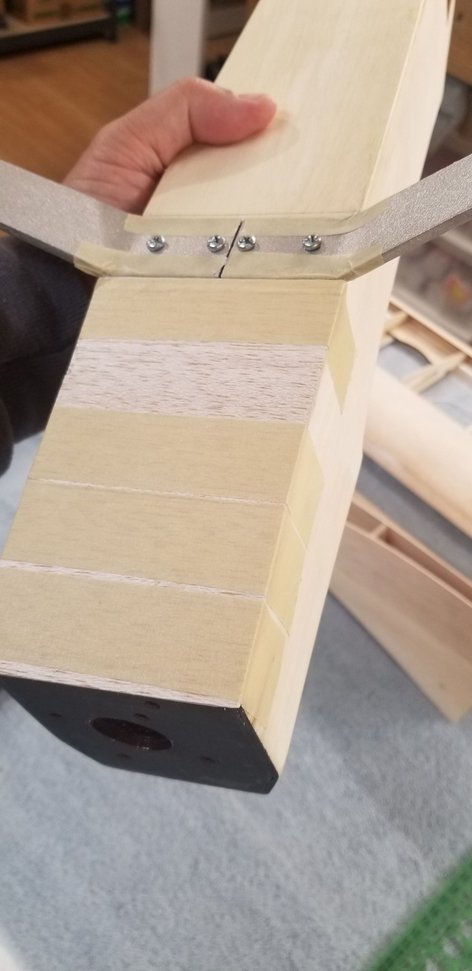
Top sheeting was added to the over-wing hatch and turtledeck.
Lightening holes carried on through the rudder with rudder and elevator tapered to 1/16" TE's.
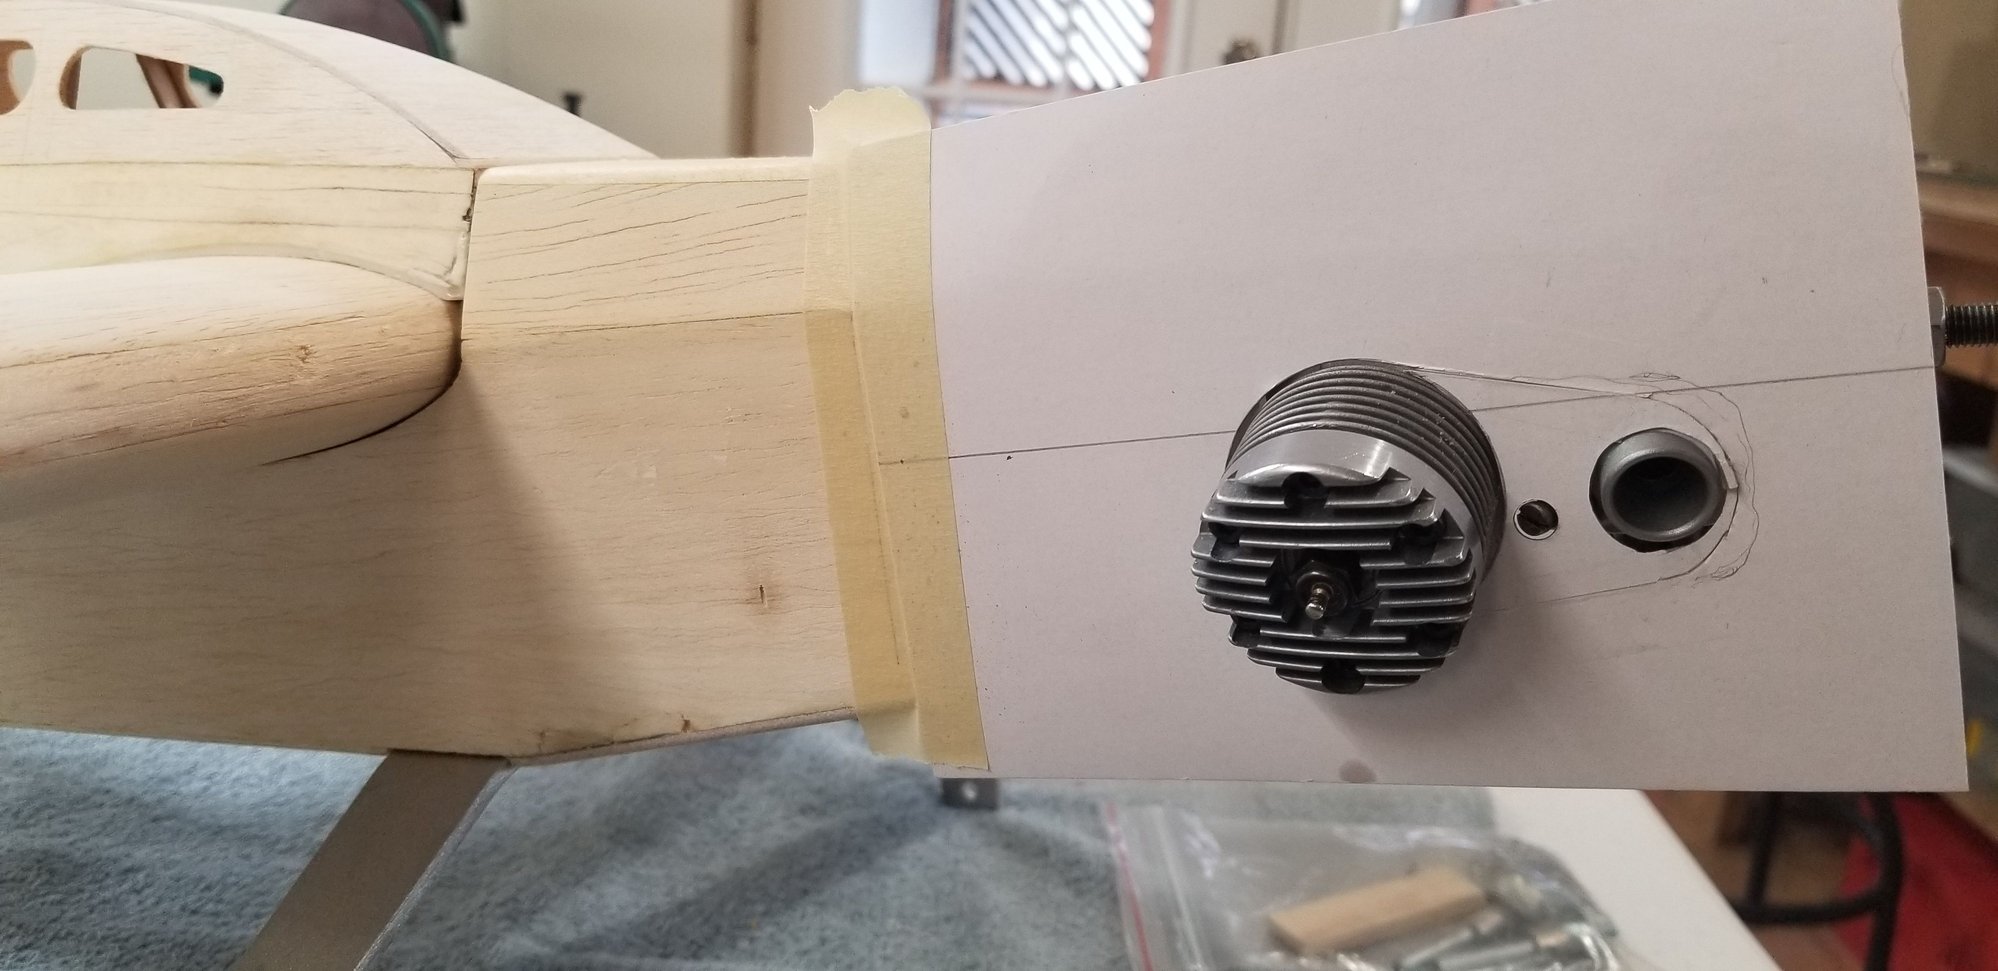
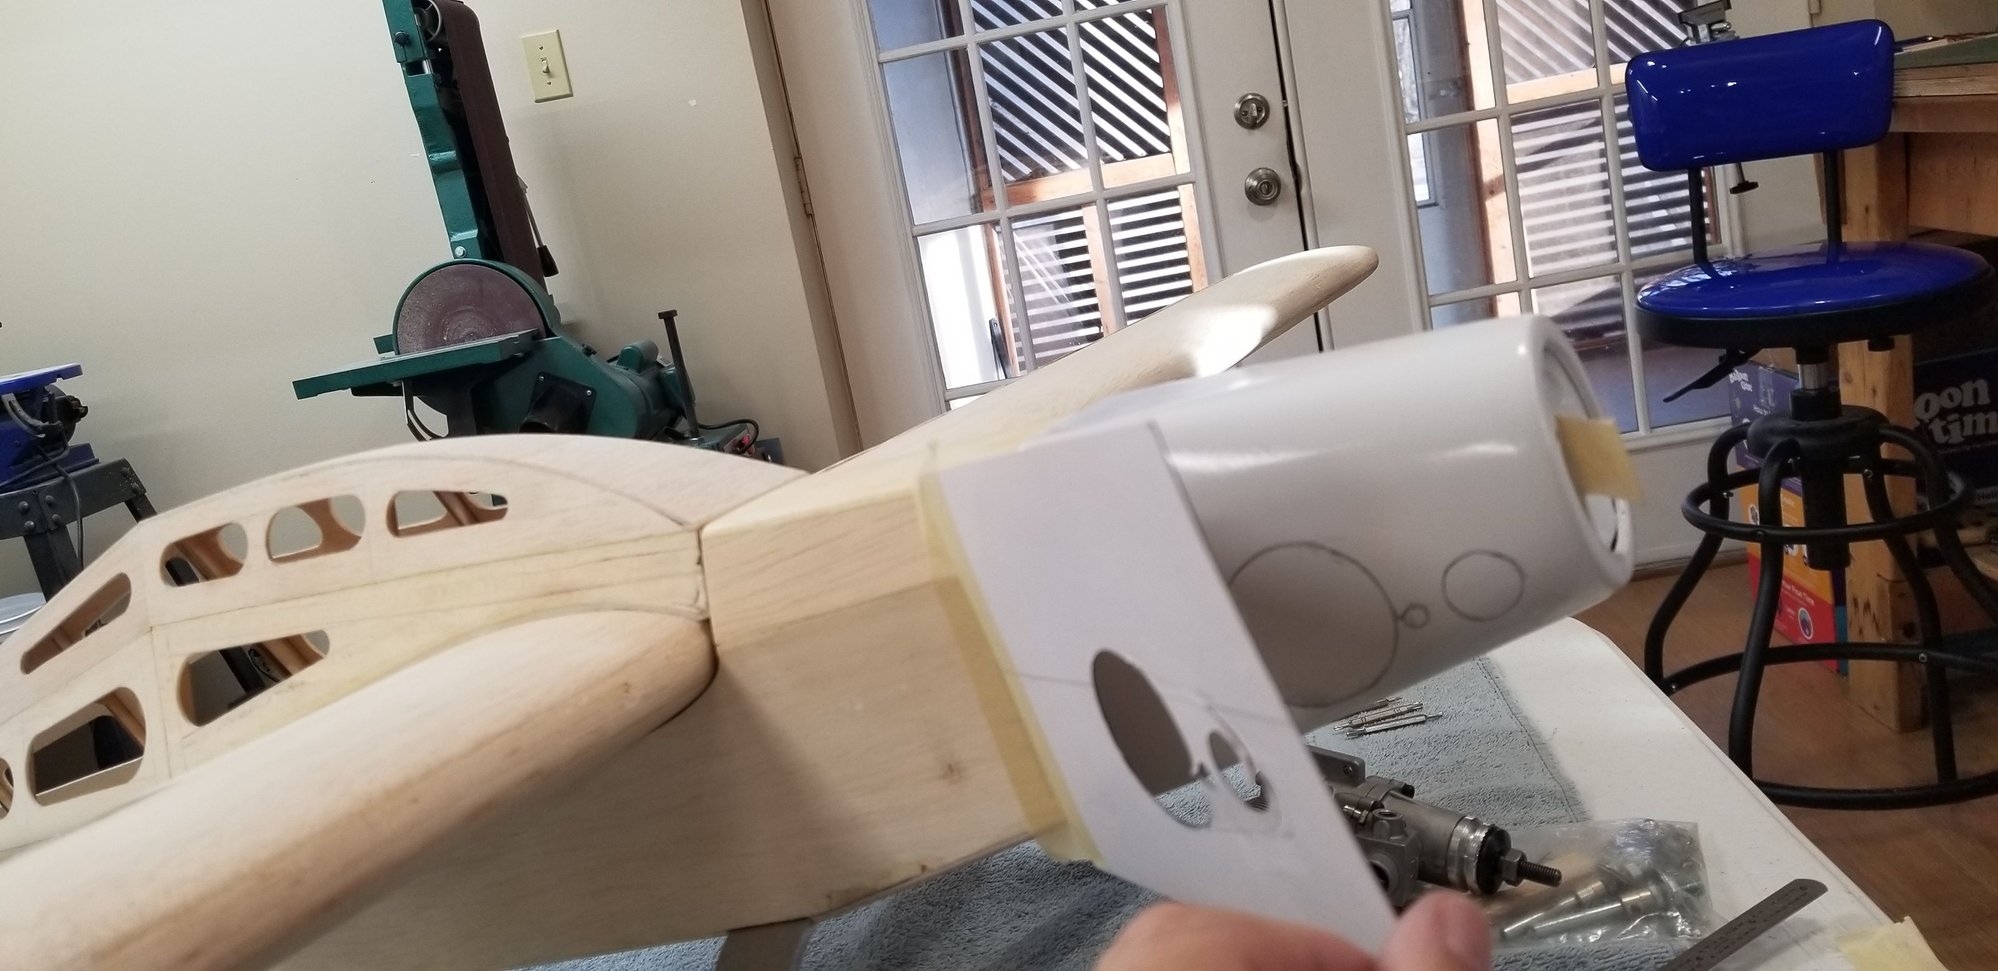
Cardstock flaps were used to locate engine and muffler relief holes in the cowling.


Tapering TE doubler in horizontal stab -


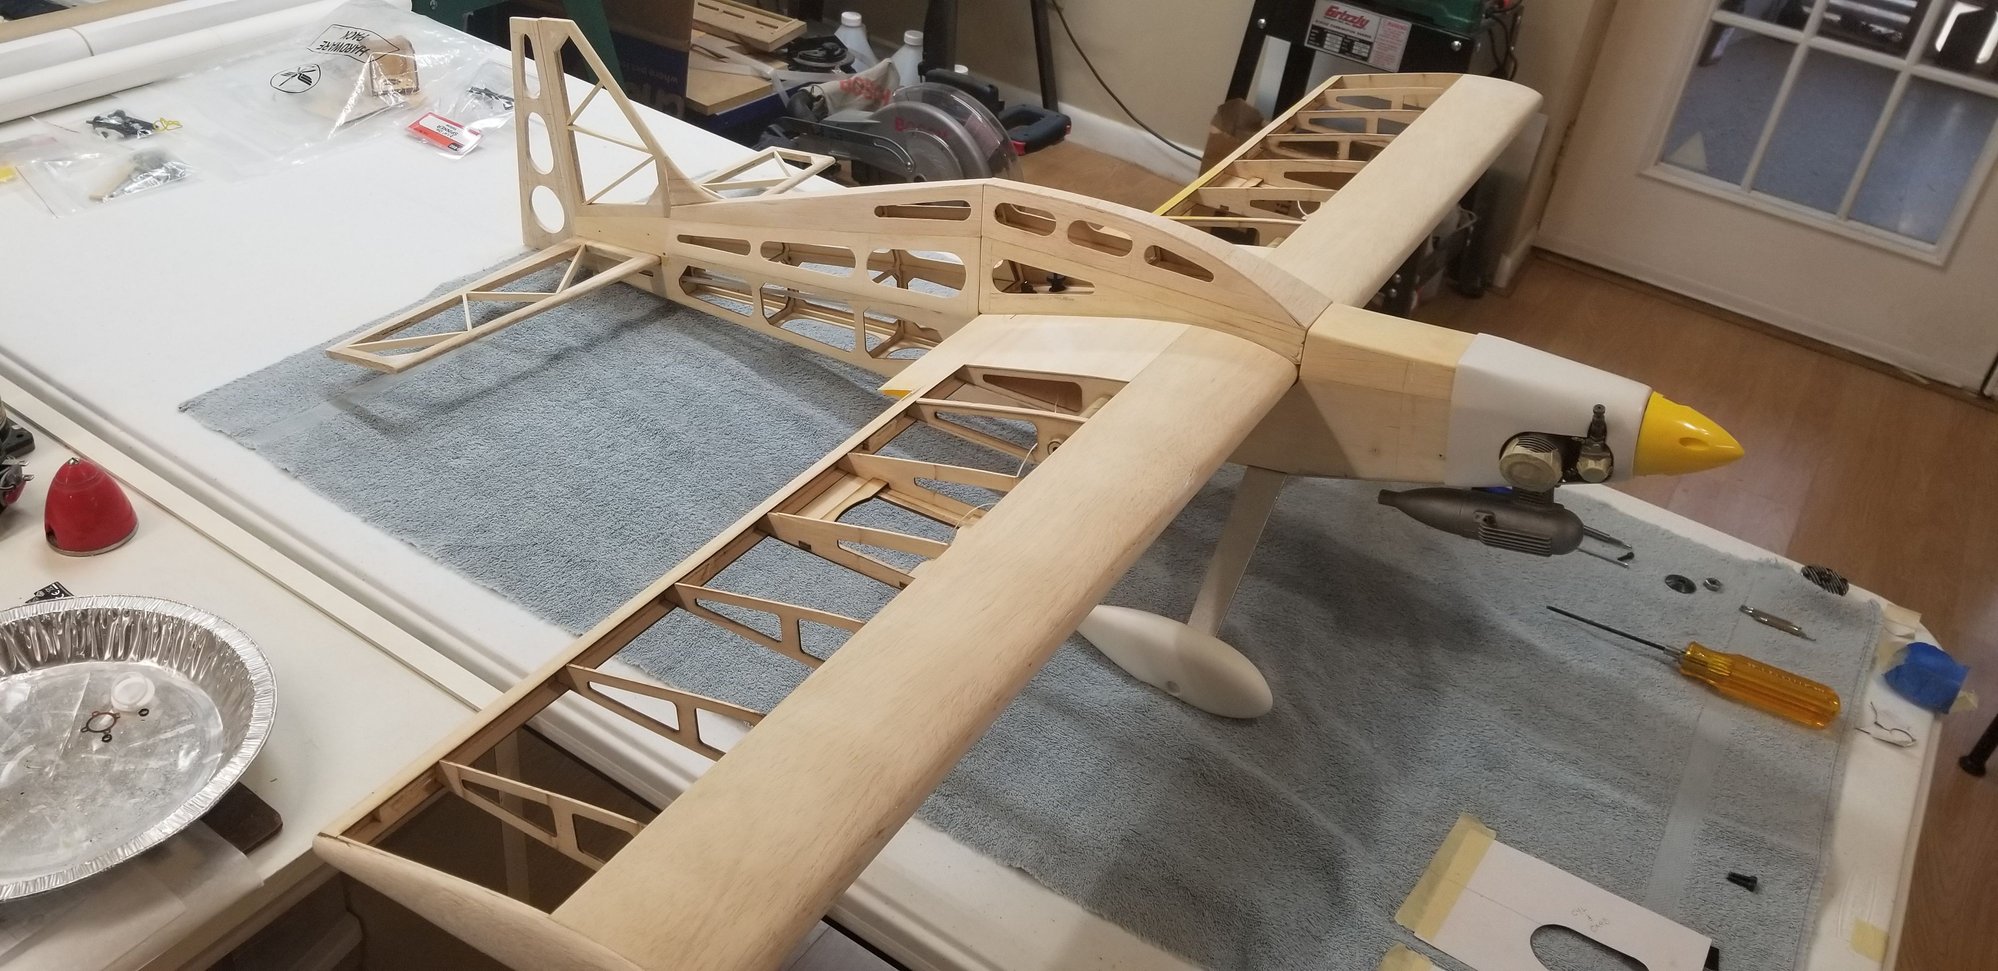
Lightening holes carried on through the rudder with rudder and elevator tapered to 1/16" TE's.
Cardstock flaps were used to locate engine and muffler relief holes in the cowling.
Tapering TE doubler in horizontal stab -
Last edited by H5606; 04-25-2026 at 10:20 AM.


