


ThunderTiger Rare Bear
 10-03-2013 | 04:06 AM
#1751
Junior Member
Joined: Sep 2013
Posts: 5
Likes: 0
Received 0 Likes
on
0 Posts
From: Germany
Hi Folks,
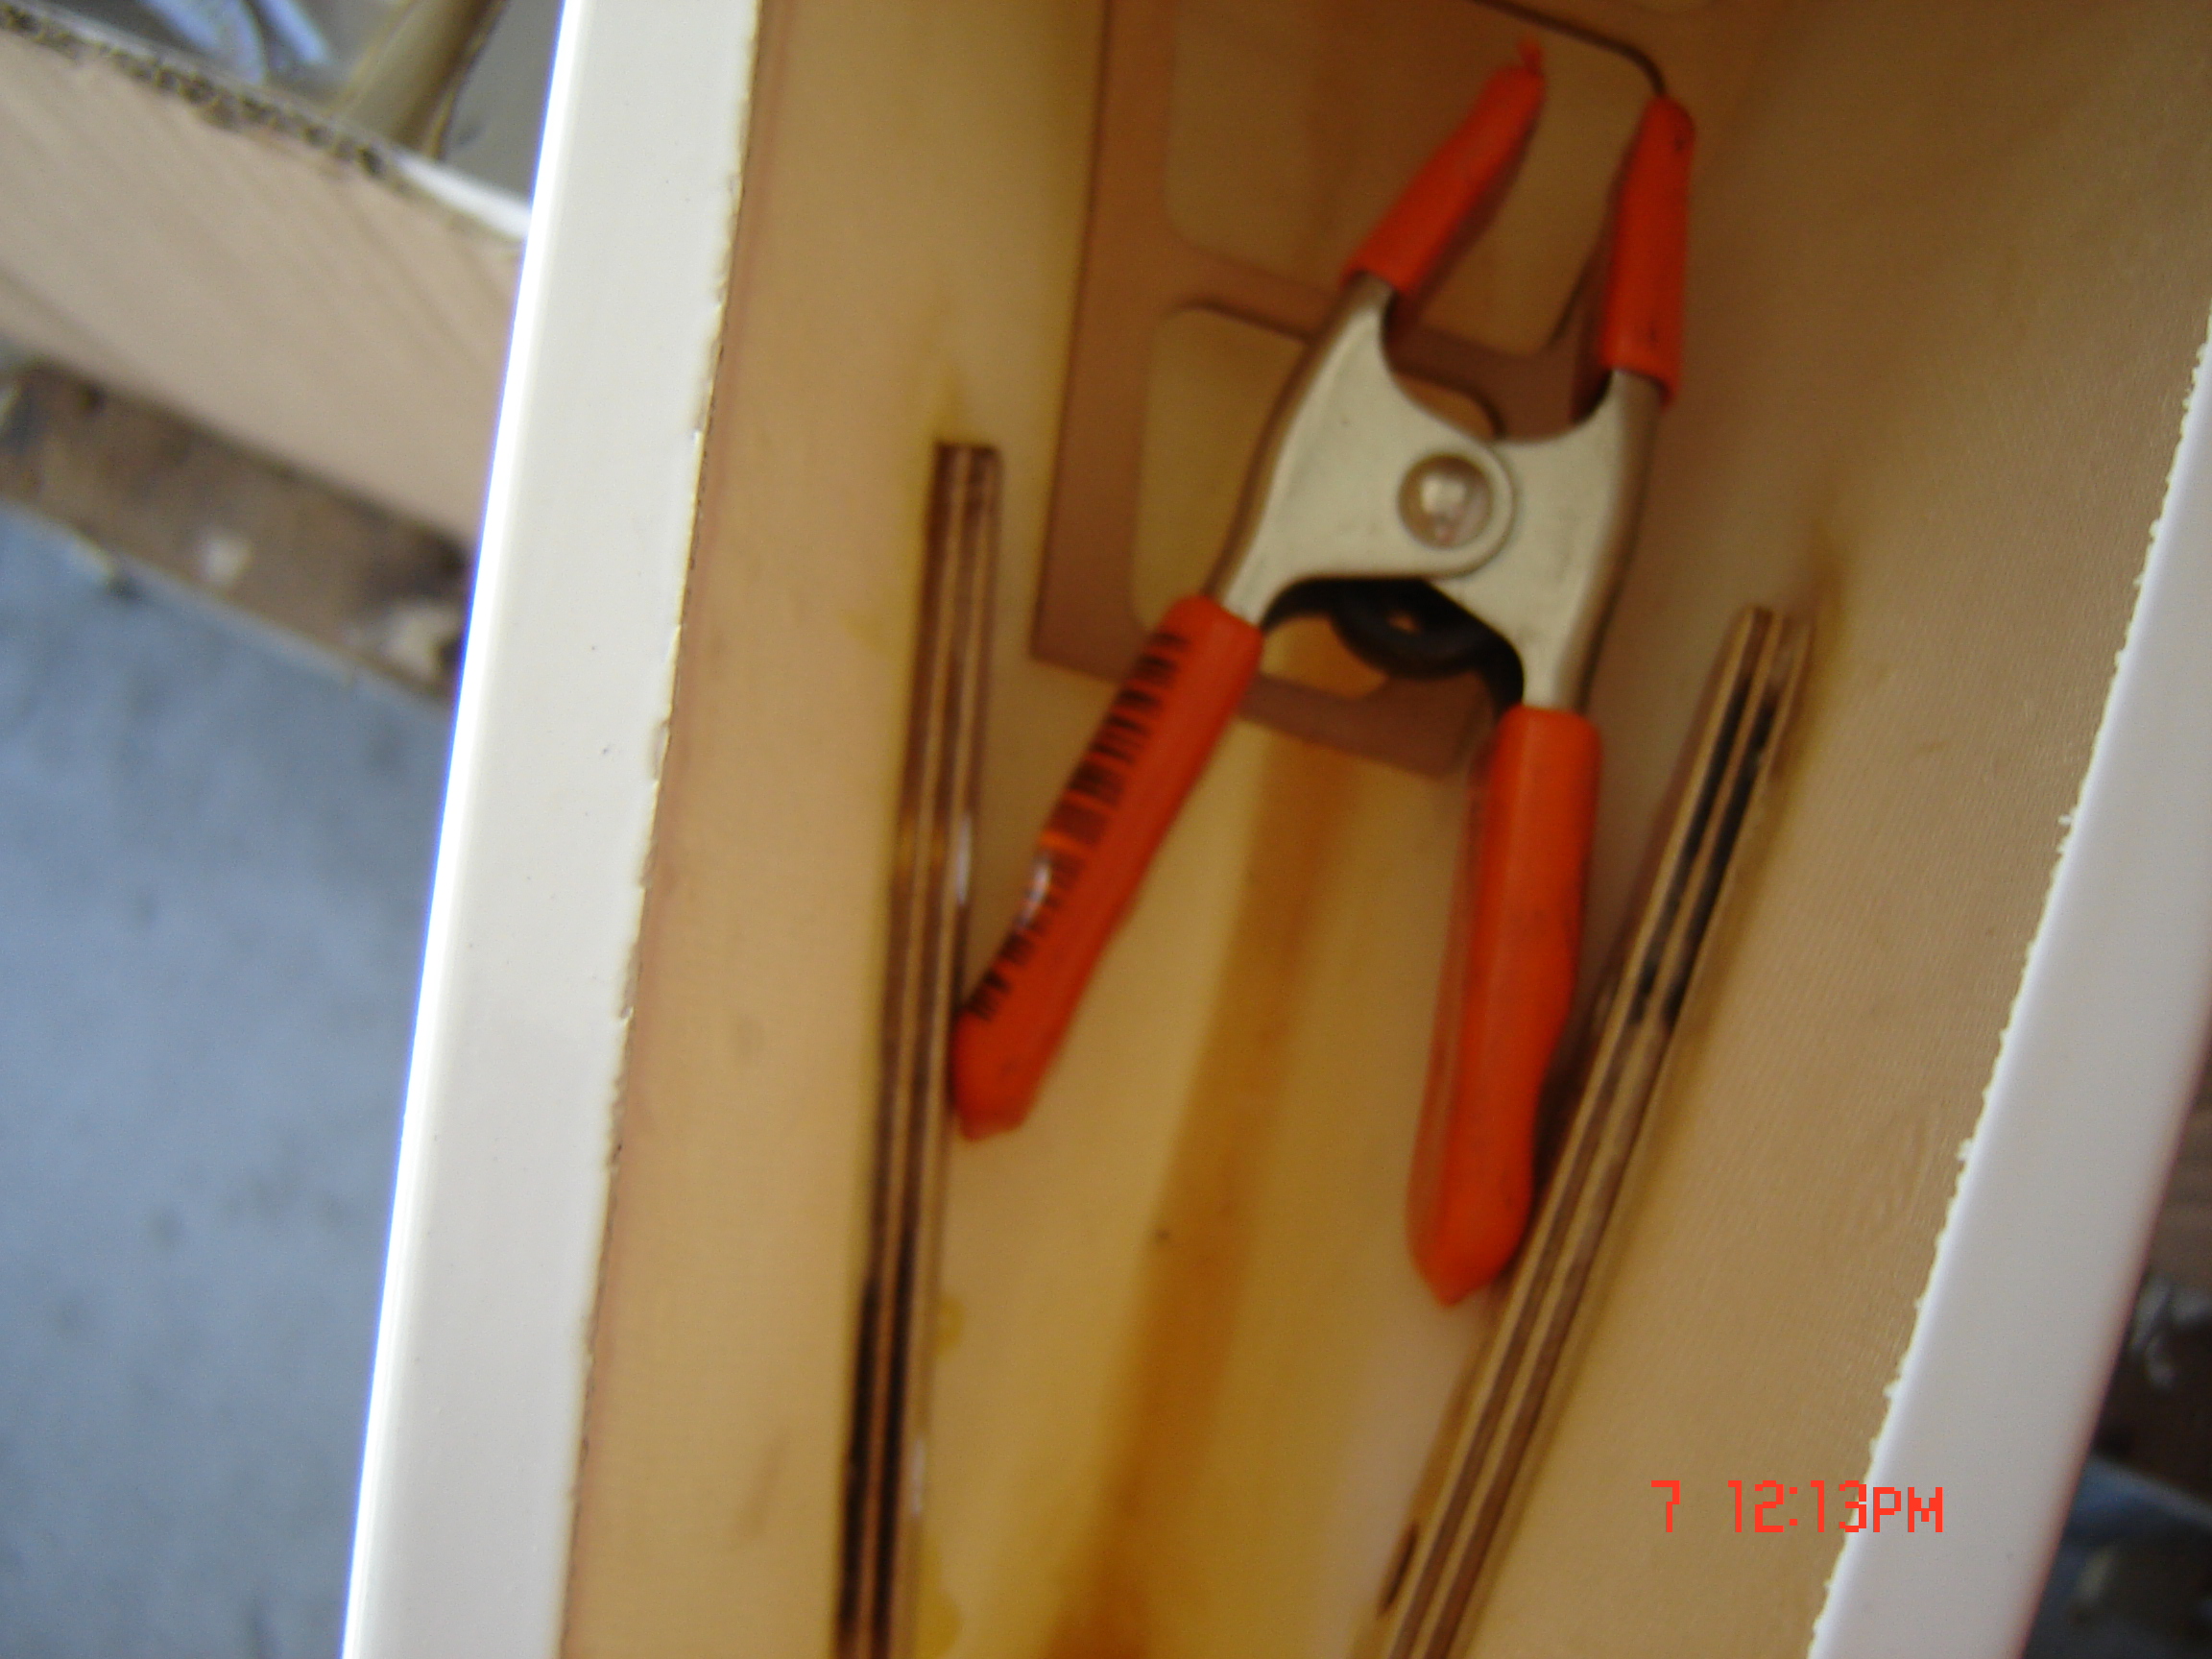
I made some progress on the Rare Bear. Inspired by this impressive long thread I inspected the wings a bit closer. Two things came up: The planking has to be redone as it shows very little glueing to the ribs. By appying a litte pressure through the rips I can lift the planking so much that it almost cracks on its own :-( To be honest, this is no suprise, but i had hope to not having to do this... Next thing is: The foil is old, and has dissolved into its incredients... See for yourself, some pictures are included.


So I take this chance to redo the wings and rectract mounts and so on. Ah, by the way my rectract is a electrical one from Giezendanner, the EL-7 suits a airplane with up to 7kilograms weight. Each leg comes with its own electrical drive, is spring loaded, made of alloy and is really robust :-) They work like a charm and have their own power supply. On the other hand I found a OS Max 120 AX, and have ordered a custom made muffler adapter to mount it to the Thunder Tiger Rare Bear muffler. The muffler itself is currently being processed by german customs *hooray*
@willyuk: Sounds good regarding your setup. I consider myself an intermediate level pilot too, this model will be my biggest and -hopefully- fastest model in my hangar. Let's see how well mine will perform.
Regards,
Kai
I made some progress on the Rare Bear. Inspired by this impressive long thread I inspected the wings a bit closer. Two things came up: The planking has to be redone as it shows very little glueing to the ribs. By appying a litte pressure through the rips I can lift the planking so much that it almost cracks on its own :-( To be honest, this is no suprise, but i had hope to not having to do this... Next thing is: The foil is old, and has dissolved into its incredients... See for yourself, some pictures are included.
So I take this chance to redo the wings and rectract mounts and so on. Ah, by the way my rectract is a electrical one from Giezendanner, the EL-7 suits a airplane with up to 7kilograms weight. Each leg comes with its own electrical drive, is spring loaded, made of alloy and is really robust :-) They work like a charm and have their own power supply. On the other hand I found a OS Max 120 AX, and have ordered a custom made muffler adapter to mount it to the Thunder Tiger Rare Bear muffler. The muffler itself is currently being processed by german customs *hooray*
@willyuk: Sounds good regarding your setup. I consider myself an intermediate level pilot too, this model will be my biggest and -hopefully- fastest model in my hangar. Let's see how well mine will perform.
Regards,
Kai
Last edited by crazypenguin; 10-03-2013 at 06:50 AM.
 10-04-2013 | 12:47 PM
#1753
Junior Member
Joined: Sep 2013
Posts: 5
Likes: 0
Received 0 Likes
on
0 Posts
From: Germany
Looks good - it's a real beauty ;-) This is how mine looks at the moment. I took those pictures earlier this year to show off to my friends. It's almost unchanged since then. The litte yellow fellow on top is a Wonder XXS from hoelleinshop.com, a german flight model shop. Nice model, but this one now looks a bit... ehm... crumpled... ") Reason: It went through a treetop :-( The other one is a GWS Spitfire.
Reason: It went through a treetop :-( The other one is a GWS Spitfire.


Reason: It went through a treetop :-( The other one is a GWS Spitfire.
10-20-2013 | 11:00 PM
#1756

Junior Member
Joined: Oct 2013
Posts: 5
Likes: 0
Received 0 Likes
on
0 Posts
Well, I ordered the TT Rare Bear from Tower yesterday at 335.00...I guess theres one born every day but I couldn't resist this sweet looking plane
Its currently on back order so when I get it (early May) I'll post some pics and give my initial impression of the quality. It better be darn good!! Now what power plant....TT .91 FS?
Its currently on back order so when I get it (early May) I'll post some pics and give my initial impression of the quality. It better be darn good!! Now what power plant....TT .91 FS?
170 radial
10-22-2013 | 11:50 AM
#1758


Hi Guys -
Every once in awhile one of these shows up on EBay. As a matter-o-fact there's one out there now....pricy though. I finally decided to have a set of Ziroli plans blown up to 1/4 scale and then had Michael from Cornell Kit Cutting make me a gorgeous machine cut kit from it. When I get around to building it I will be putting either a DA 120 or a 3M 140 into it. Would love to put one of the new Evolution gas radials into it but man the cost $$!!
Tom
10-27-2013 | 10:40 AM
#1759
Junior Member
Joined: Sep 2013
Posts: 5
Likes: 0
Received 0 Likes
on
0 Posts
From: Germany
Hi Folks,
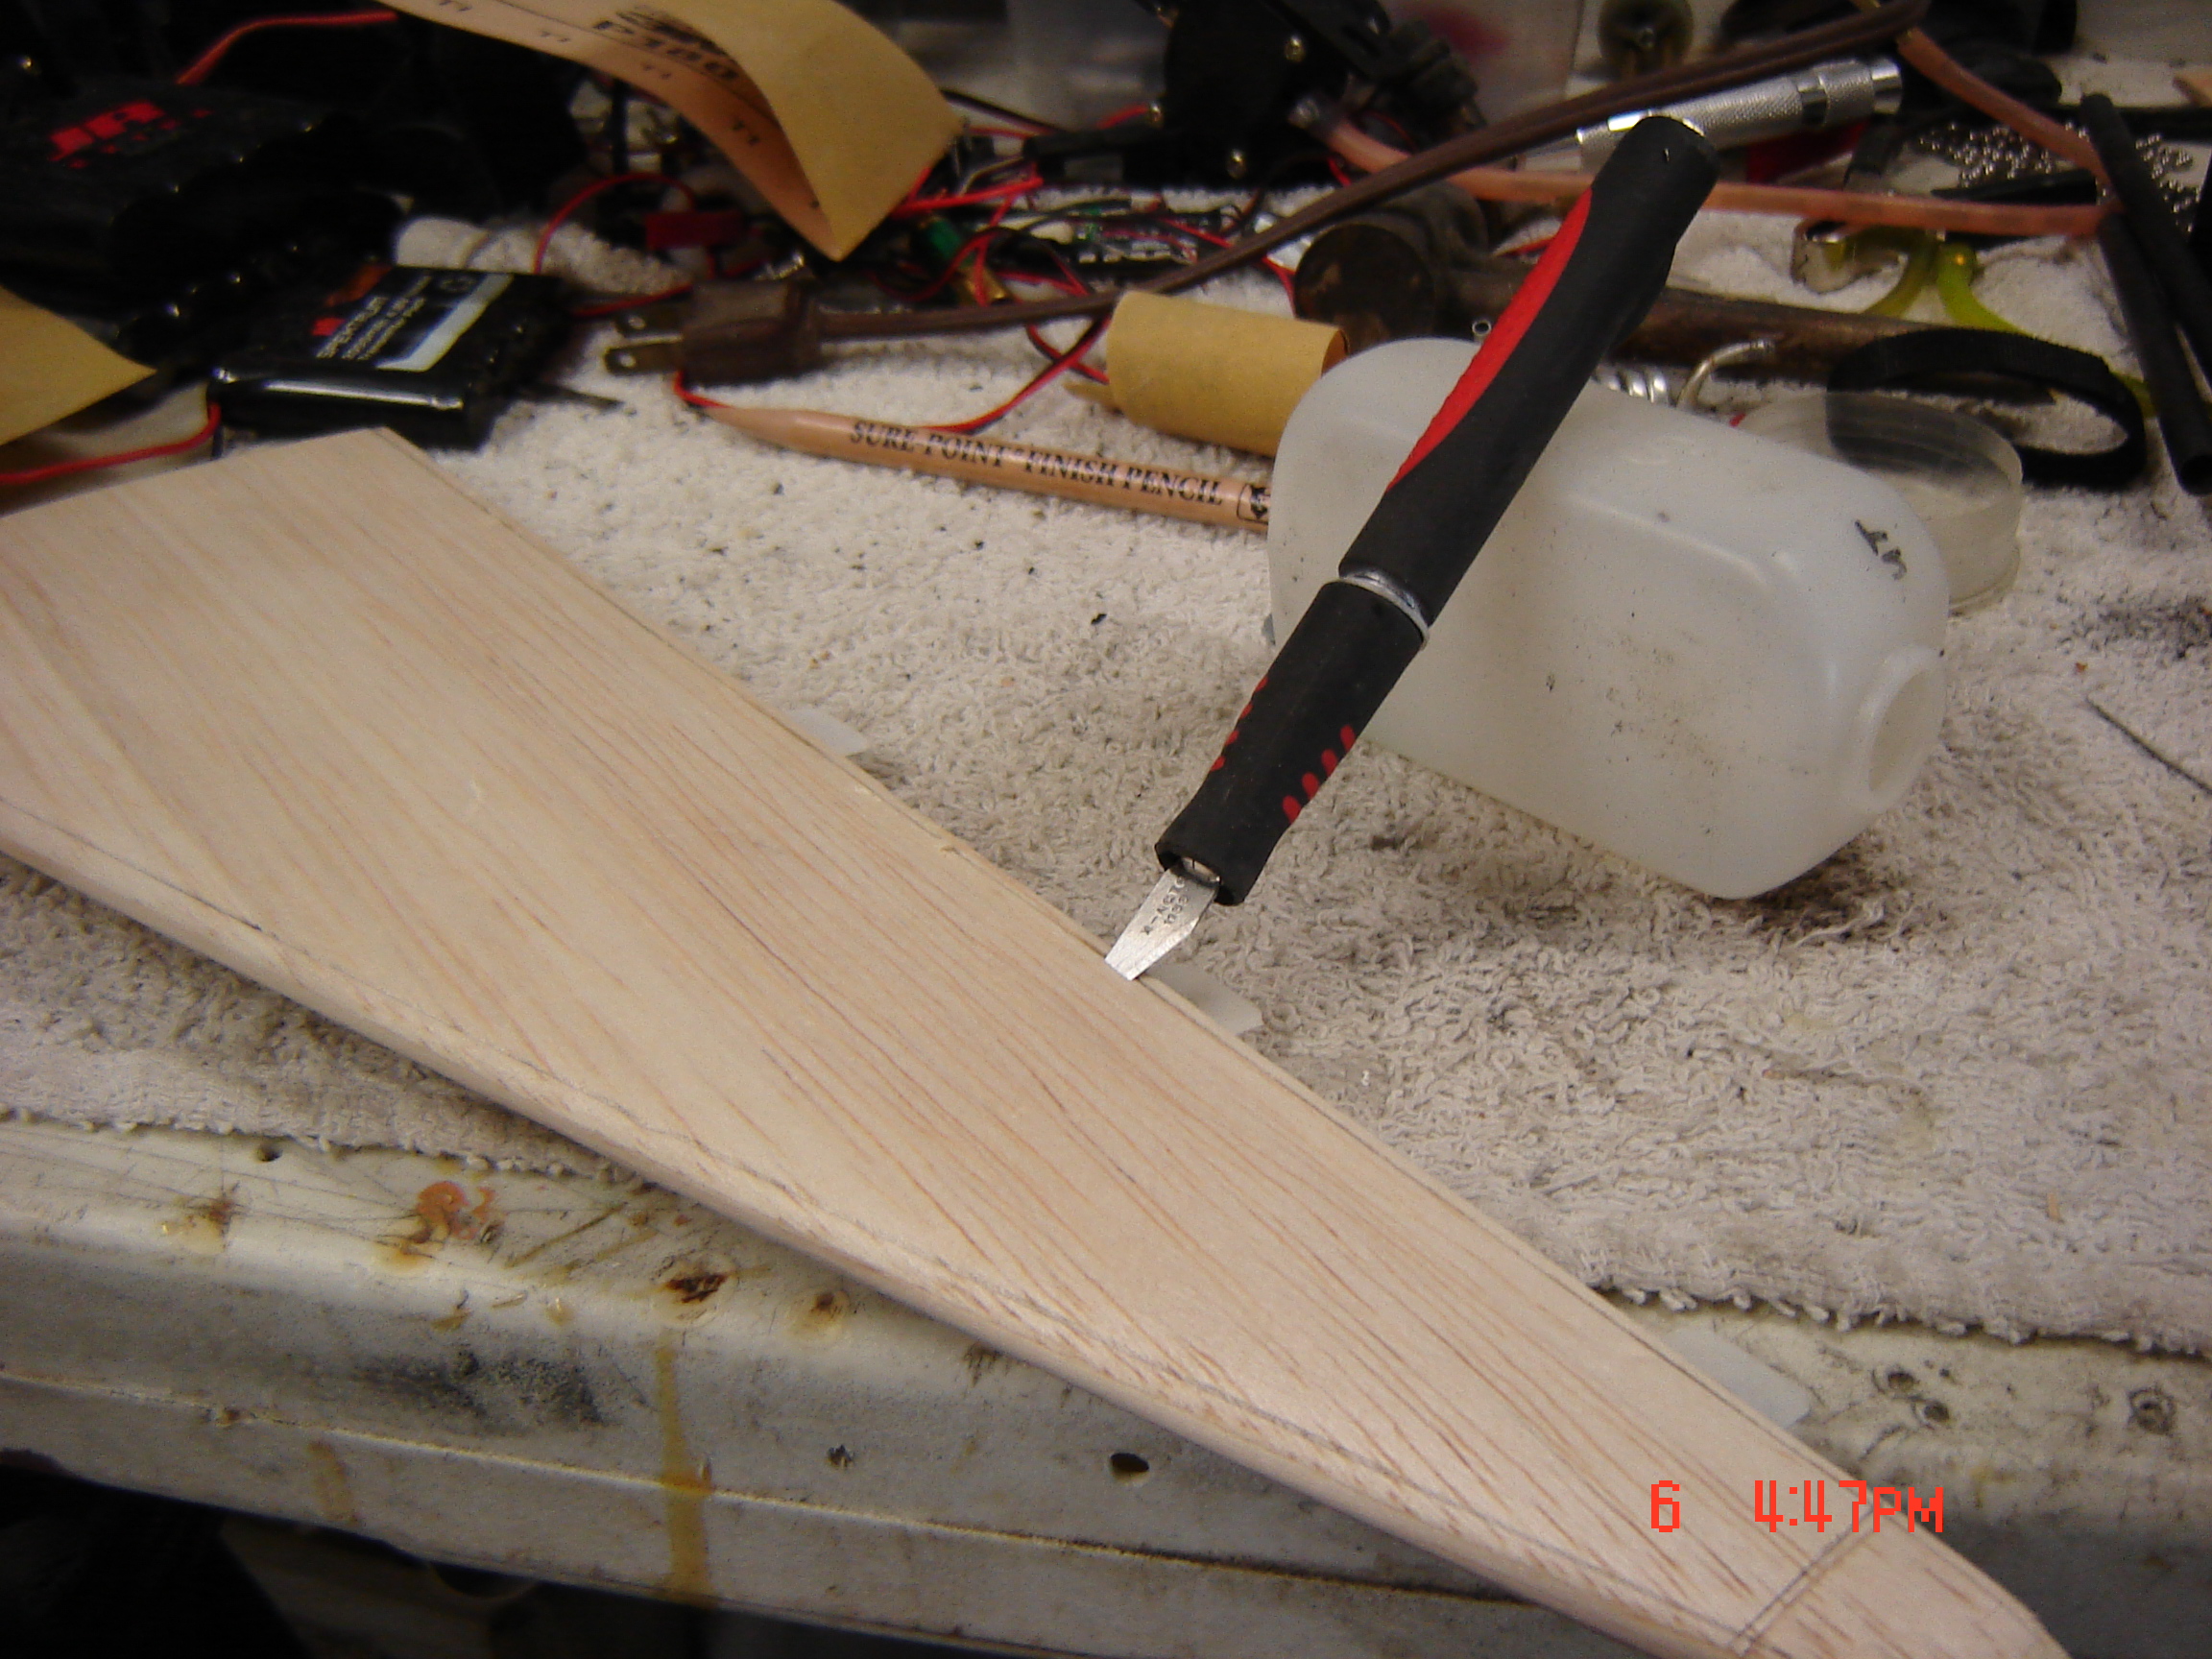
I need to redo some rips around the reactract mounts. I found a webpage stating the Rare Bear has a symmetrical profile. Do you know if it's the NACA 0015? Or something similar?
Thanks for your advise!
Kai
I need to redo some rips around the reactract mounts. I found a webpage stating the Rare Bear has a symmetrical profile. Do you know if it's the NACA 0015? Or something similar?
Thanks for your advise!
Kai
12-27-2013 | 09:32 AM
#1760
Senior Member
Joined: Nov 2004
Posts: 111
Likes: 0
Received 0 Likes
on
0 Posts
From: Spring,
TX
About the wing profile, I don't have any idea what NACA profile TT used for this model. When I rebuilt the landing gear mounts on my 1st generation TT Rare Bear, I traced the rib pattern using copier paper. I made patterns.by using small slightly over sized blocks / rectangles of paper, laying it up against the rib, then pushing the paper against the joint where the rib met the skin with the edge of a popsicle stick. I then carefully cut out the pattern, and checked the shape against the rib I had just traced. If it wasn't exact, I made small adjustments of the original pattern by transferring the original to another piece of paper with the appropriate changes.
Rich
Rich
Last edited by Rbeav533; 12-27-2013 at 09:37 AM.
12-27-2013 | 09:43 AM
#1761
Senior Member
Joined: Nov 2004
Posts: 111
Likes: 0
Received 0 Likes
on
0 Posts
From: Spring,
TX
Wow, it's hard to believe this thread is still active.
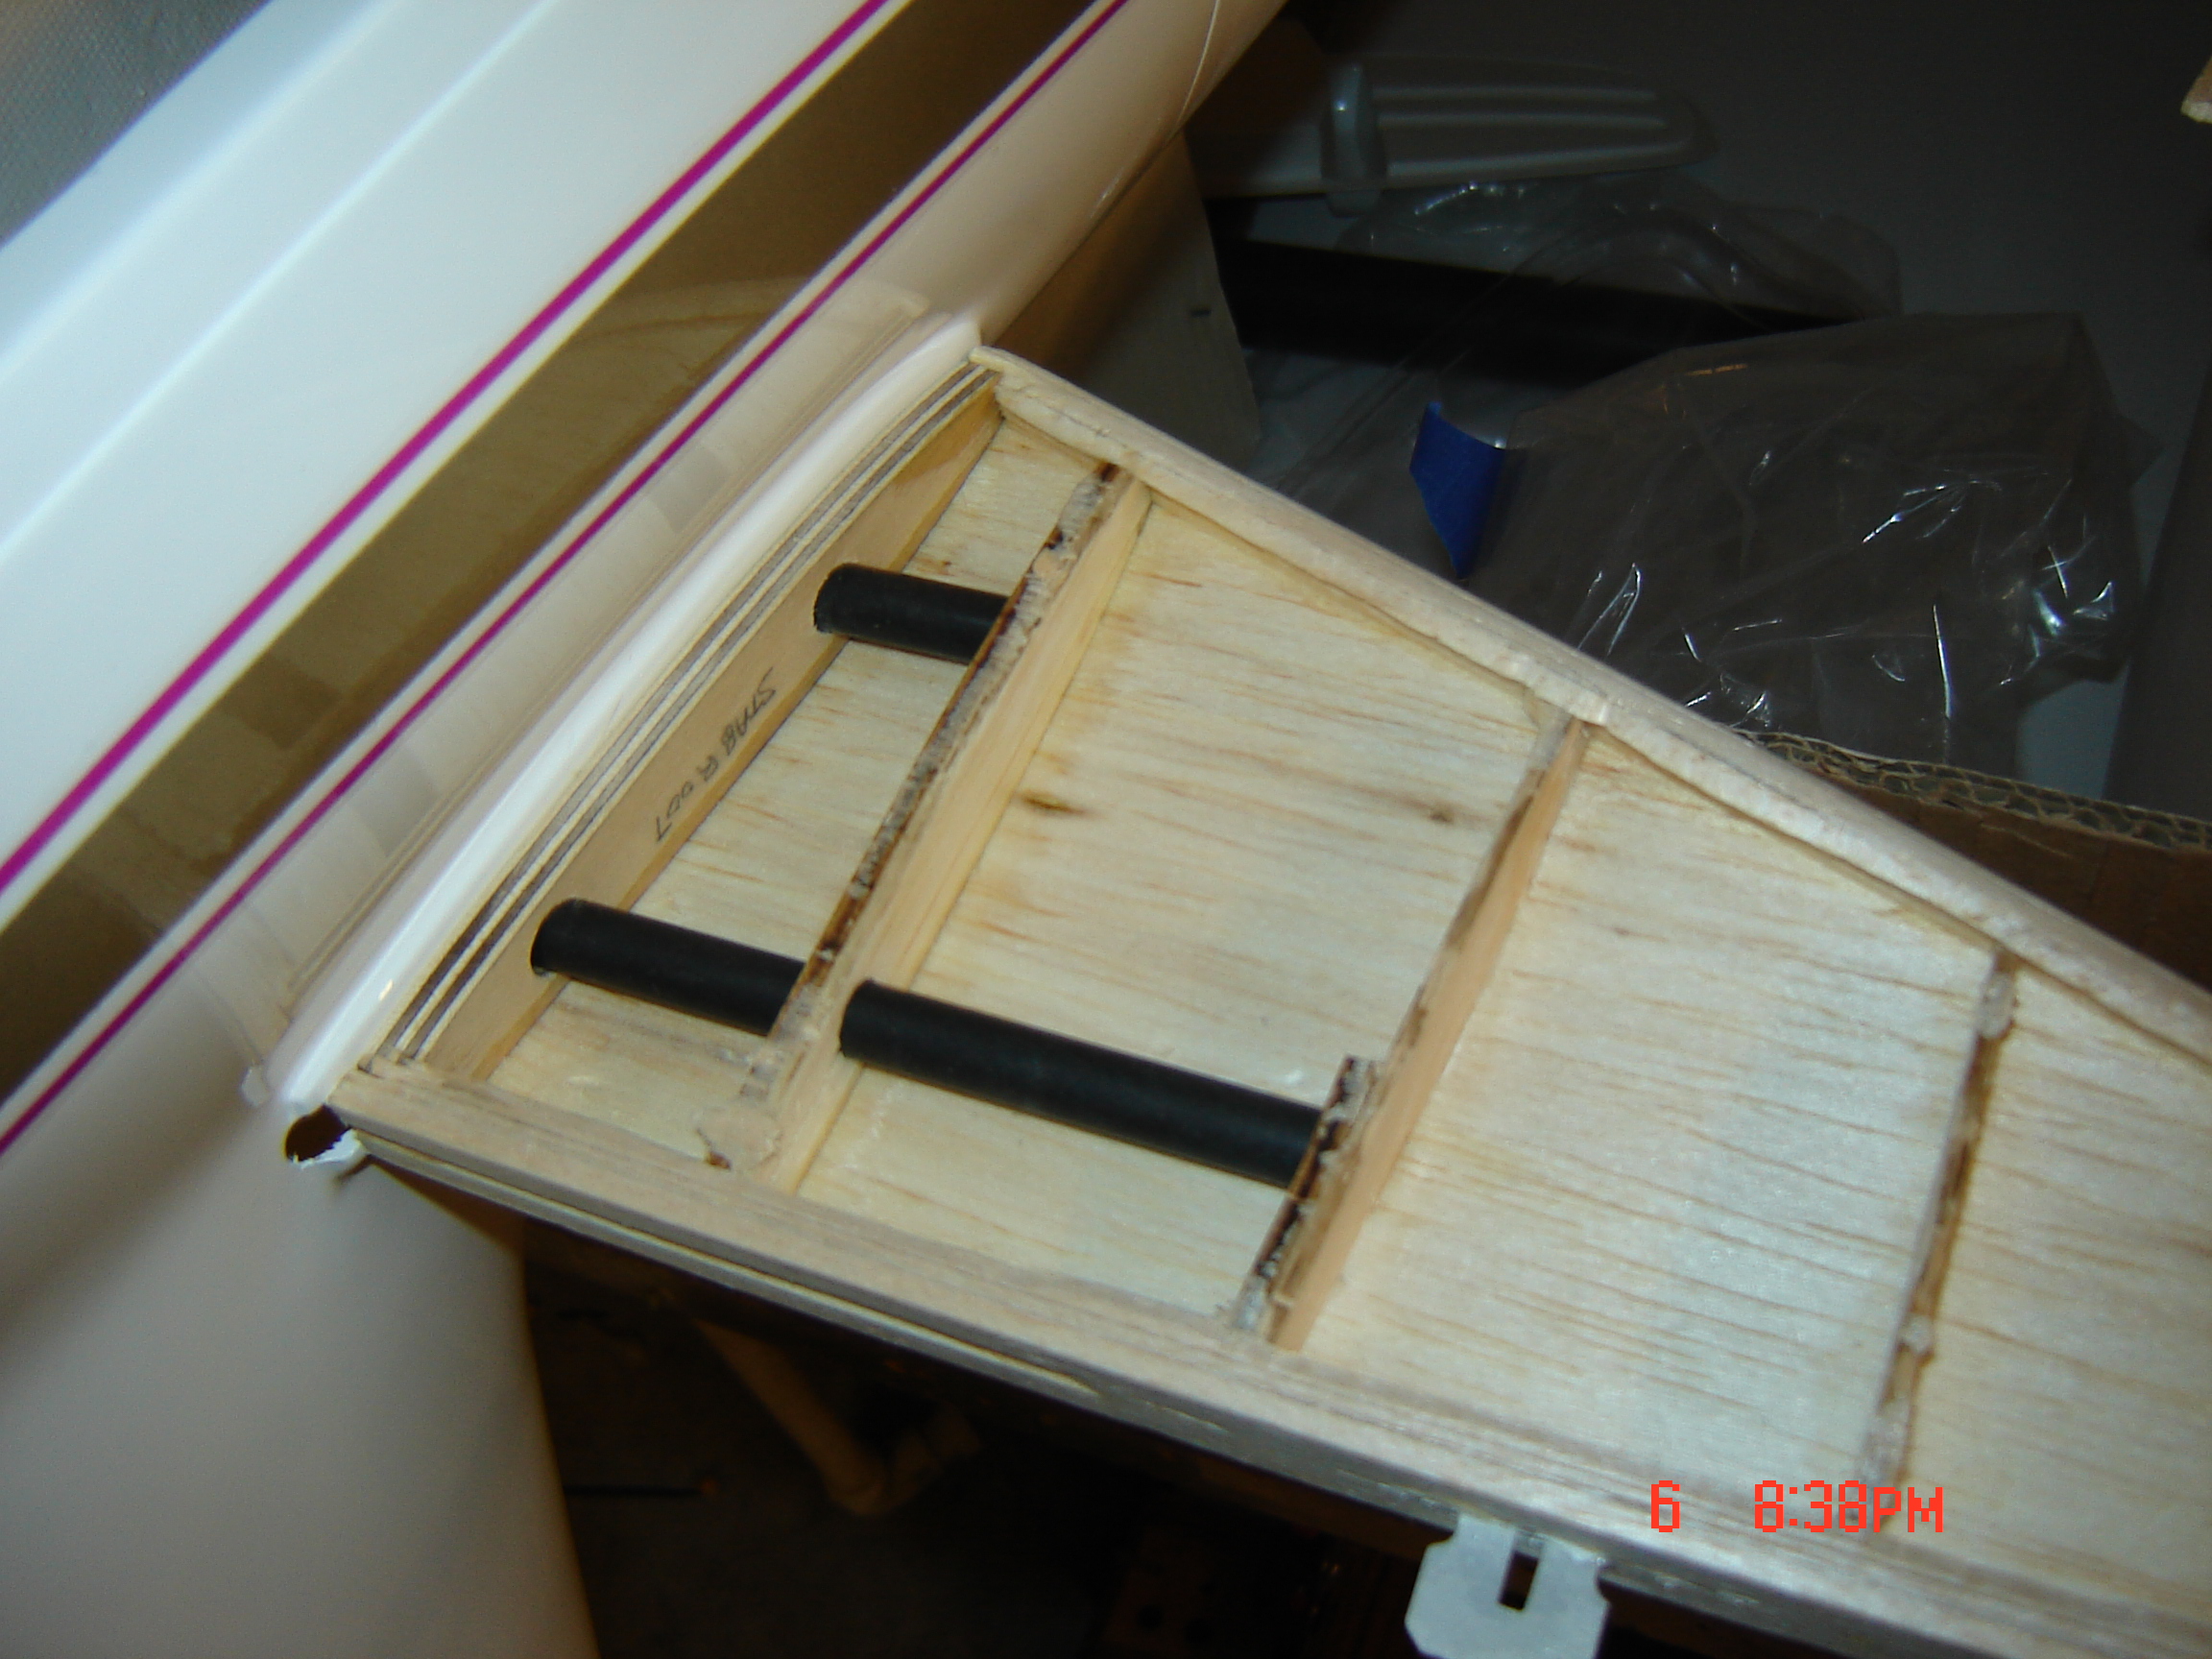
I still have my Rare Bear, haven't flown it for several years and decided to pull it out and get it air worthy again. I'm currently replacing the Spring Air retracts with electrics and F8F patterned struts from HK. The struts are 1/2" too short, so I'll add a spacer between the retract trunnion and the main strut body. I originally powered my RB with an old ASP 1.08 Redhead, it's being replaced with a GSM 1.20 I have lying about. I hope to have it ready to fly this upcoming Sunday, weather permitting.
I still have my Rare Bear, haven't flown it for several years and decided to pull it out and get it air worthy again. I'm currently replacing the Spring Air retracts with electrics and F8F patterned struts from HK. The struts are 1/2" too short, so I'll add a spacer between the retract trunnion and the main strut body. I originally powered my RB with an old ASP 1.08 Redhead, it's being replaced with a GSM 1.20 I have lying about. I hope to have it ready to fly this upcoming Sunday, weather permitting.
12-27-2013 | 11:21 AM
#1762

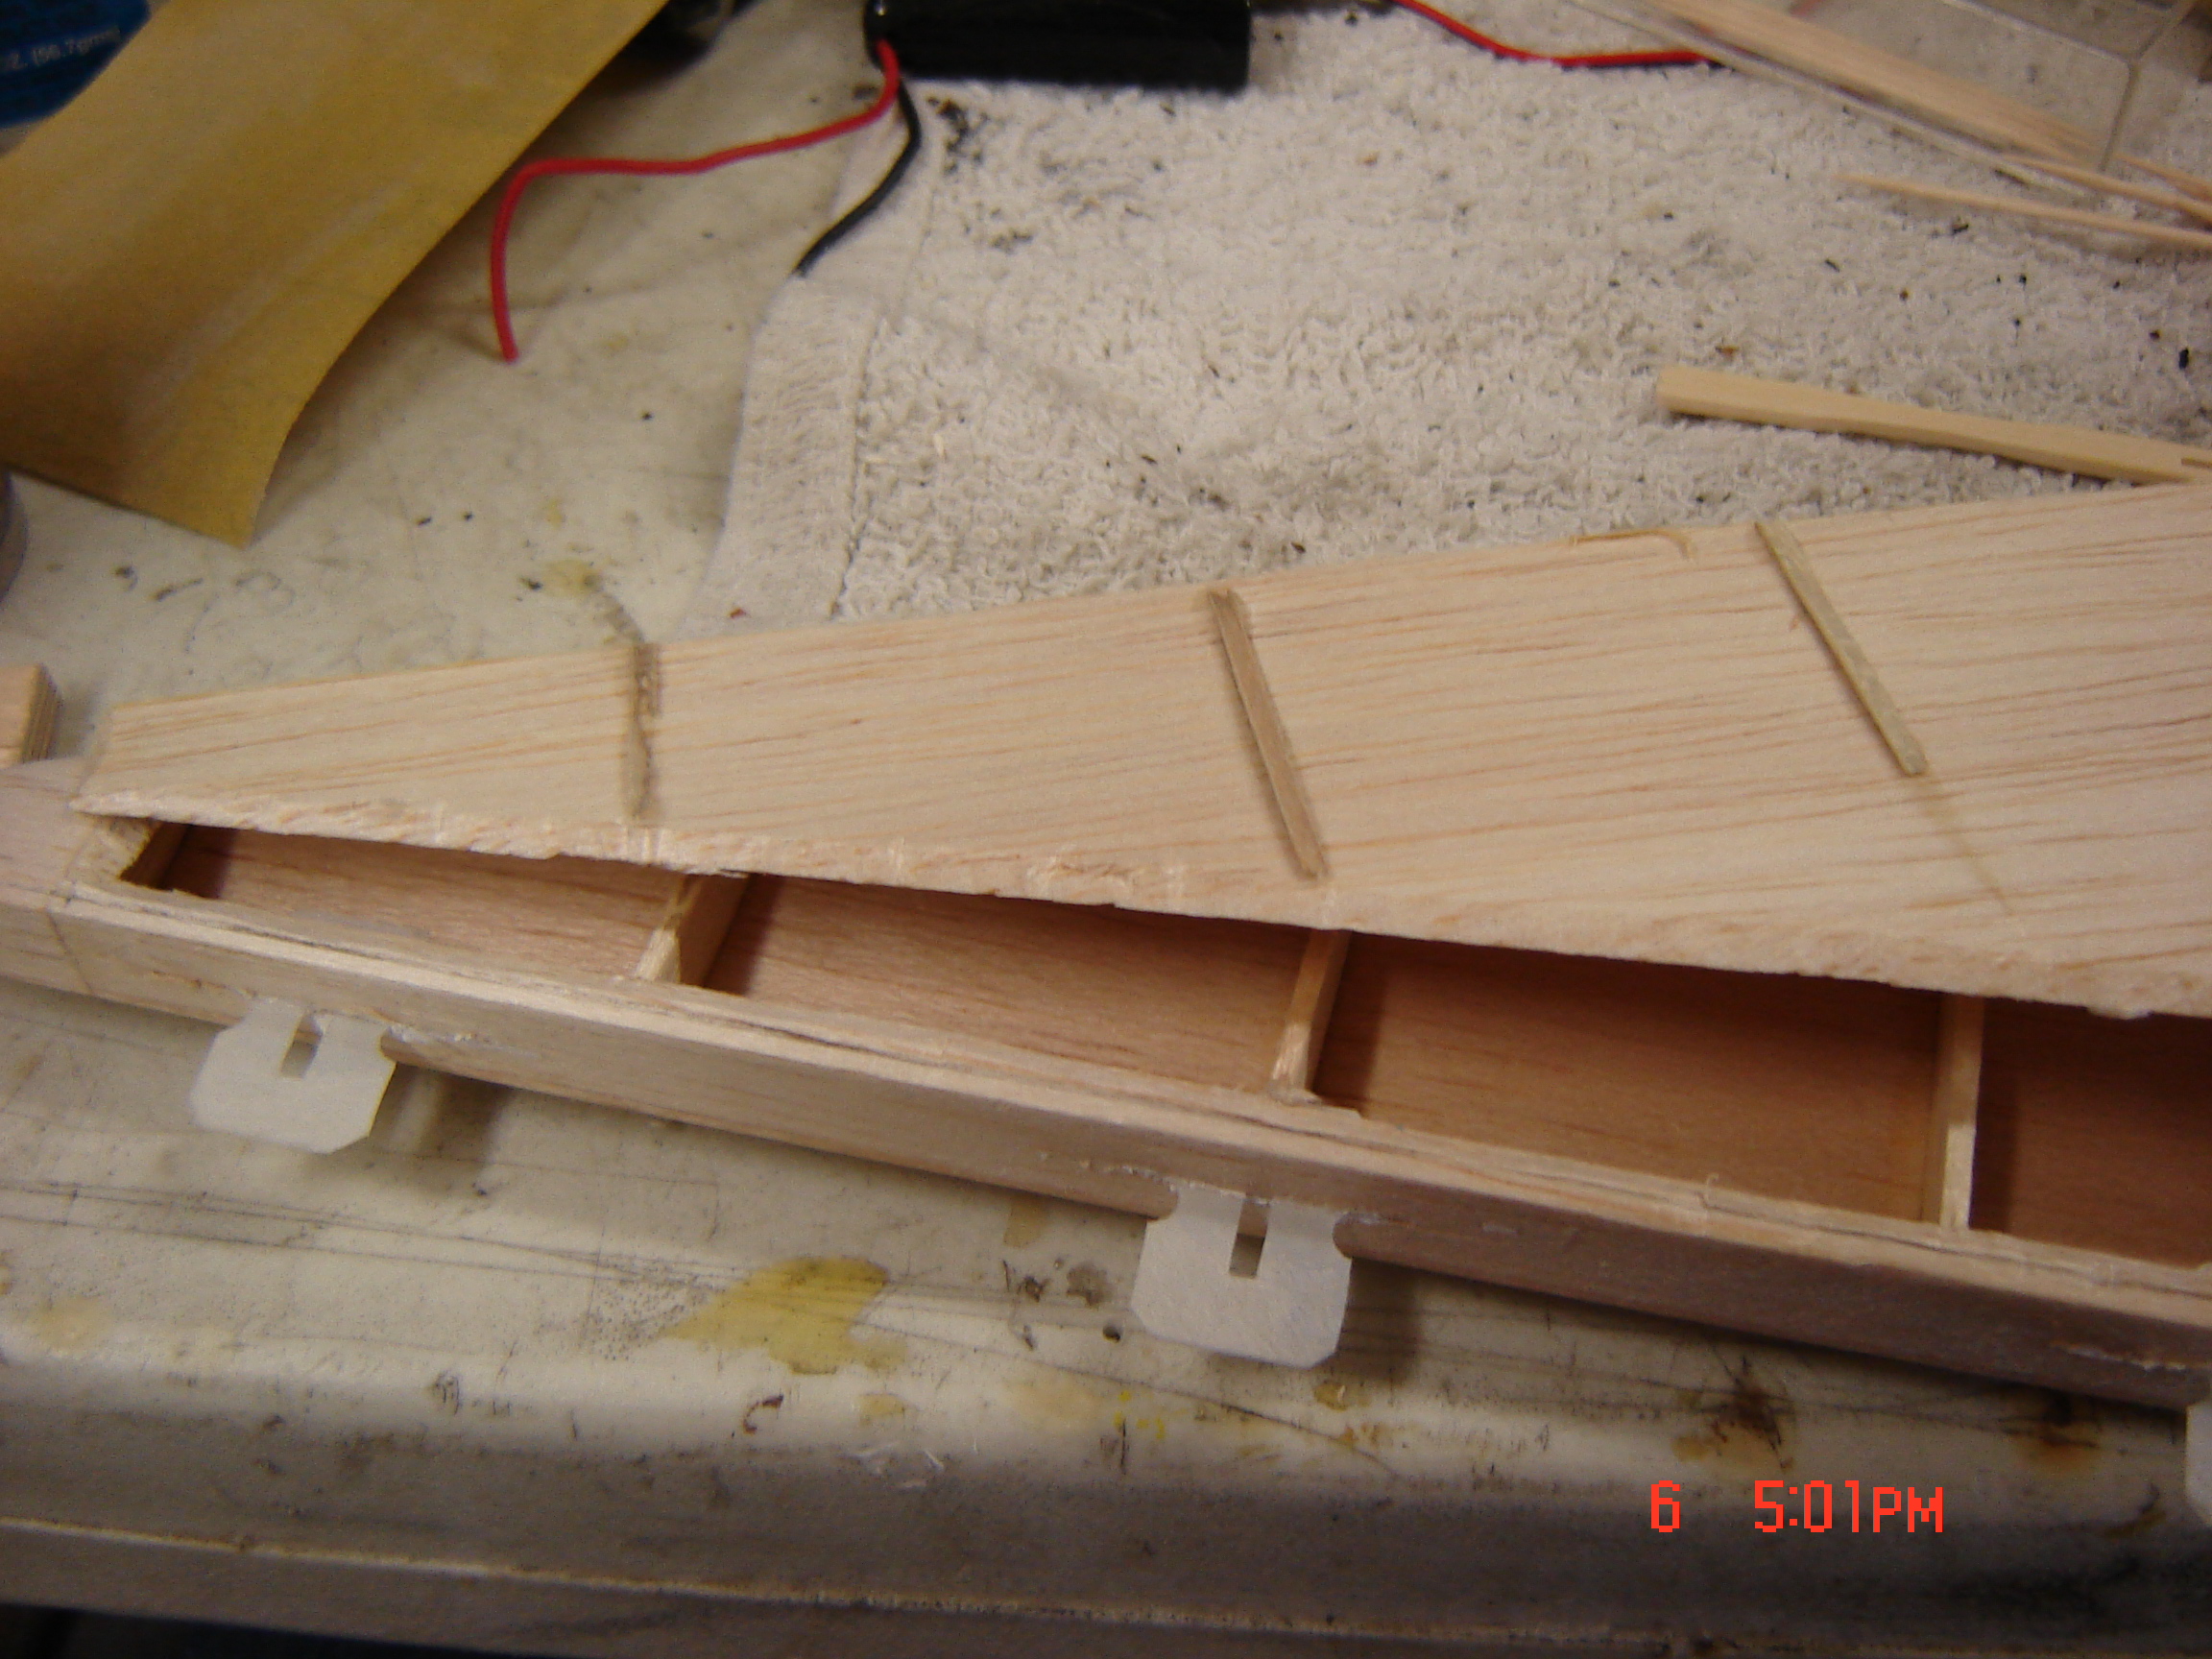
I just hinged my elevators and rudder on mine :-)
Im going to use a pull/pull system on the rudder, and carbon pushrods for the elevators, and mount the servos as far fwd as possible.
I was going to mount the servos in the elevators themselves, but its just too much weight aft of the CG.
After reading lots about the Thunder Tiger rare bear and the blue F-8F Bearcat, almost all of them suffer from tail flutter.
So making it stock is not an option.
Depending on the weight needed in the nose, I will be installing either the Saito 125a, or an YS 120
01-14-2014 | 06:01 AM
#1763

Senior Member
My Feedback: (3)
Very true about this one ending up tail heavy, but I likely contributed by moving the elevator servo to above the tailwheel.
The rudder already is a Pull/Pull system. I would advise to fit in some form of synthetic bushing for the bottom of the steering rod as wood is not the best when under the friction this system can induce. If you look back I found it relatively easy to do during construction. C/F pushrods are also very rigid, as long as the threaded wire at each end is kept short. I just replaced that setup in a 1/5 Waco I'm getting ready for next season. Both had 4/40 rods exiting the fuse, with the elevator pushing close to 12" to clear everything. There was a lot of flex under load, but the biggest losers were the 2/56 wire fit into the servo ends. This system was guaranteed to be sloppy, if not extremely dangerous if I honked on it. There is also the concern of vibrations setting up along the rod length if you hit resonance or a multiple at certain engine RPMs. That was why I opted to remove them entirely for the Waco as there was no way to install a frictionless support system with the fuse already covered. As I fly 72 MHz, there was also the worry that C/F rods could blank the antenna, or worse, rubbing against fiberglass under these conditions could generate considerable RF. Ever see what happens with a loose muffler?
Unless you plan to go orbital the Saito 125a should have more than enough power. In fact, I find I throttle back a lot in cruise. The only consideration would be to mount a 2-blade wooden prop. You need the diameter to get past that huge cowl and with the long legs this plane has a tendency to fall on its nose A LOT!
By the way, I'm bolting another 125a into the Waco. That one has a huge cowl, as well.
Last edited by Cougar429; 01-14-2014 at 06:06 AM.
04-04-2014 | 08:02 PM
#1766
Senior Member
My Feedback: (3)
dougwilber, I would advise you to spend some time reading through this entire thread. However,here is the short version:
There were some serious weaknesses in the horizontal tail, to the point there was an updated design with thicker joiner tubes and supposedly better structural bonding. If you have any build experience at all, it would still be a good idea to even strip one surface from each stab and ensure good glue joints. Covering is not a problem as white Ultracote is a perfect match.
There are other issues with the tail. Regardless of tail version, the tubes were slightly too long, so if you tried to fit the stabs tight to the fuse sides you would almost guarantee you forced your way into one or more ribs.
Their original elevator control linkage was also suspect, Since I went with a servo in the tail and a direct, short linkage I have had no problems, but IMO, the stock linkage contributed to flutter which resulted in the tail failures.
The other common problem was a very weak gear mounting area. The wood is soft and retracts have no side support, (something I believe is critical in any retract mounting). If you support the retract body sides you reduce or completely eliminate stresses focusing on the mounting flange/body area by preventing torquing.
04-05-2014 | 10:06 PM
#1767
Junior Member
My Feedback: (6)
Joined: Nov 2009
Posts: 20
Likes: 0
Received 0 Likes
on
0 Posts
From: las vegas, NV
I managed to review all 1766 posts about this BEAR and I'm torn to sell and when I look at it I want to keep it. I would do electric if I keep it. Do you or anyone know if there are any other TTRB out there for sale? Reading all of the posts to this thread was like a dear Abby in places and a mistery novel in others. But for all the builbing experience I have I did certainly learn a few things reading it..
04-06-2014 | 01:06 AM
#1768
Joined: Nov 2005
Posts: 55
Likes: 0
Received 0 Likes
on
0 Posts
From: , UNITED KINGDOM
I built mine to the TT spec with an OS91fs , i did reinforce the undercarriage and carry out a few of the suggested mods. I originally reduced the downthrust as per the suggestions here but found I needed to add a little back, it flies just fine, no problems with the stab so far. I feel too many people just stuck oversize engines in, added all sorts of extras and put the wieght up and then had problems. Not trying to defend TT but i think if one sticks to the recommended powerplants it is less likely to be a problem
04-06-2014 | 10:14 PM
#1770
Junior Member
My Feedback: (6)
Joined: Nov 2009
Posts: 20
Likes: 0
Received 0 Likes
on
0 Posts
From: las vegas, NV
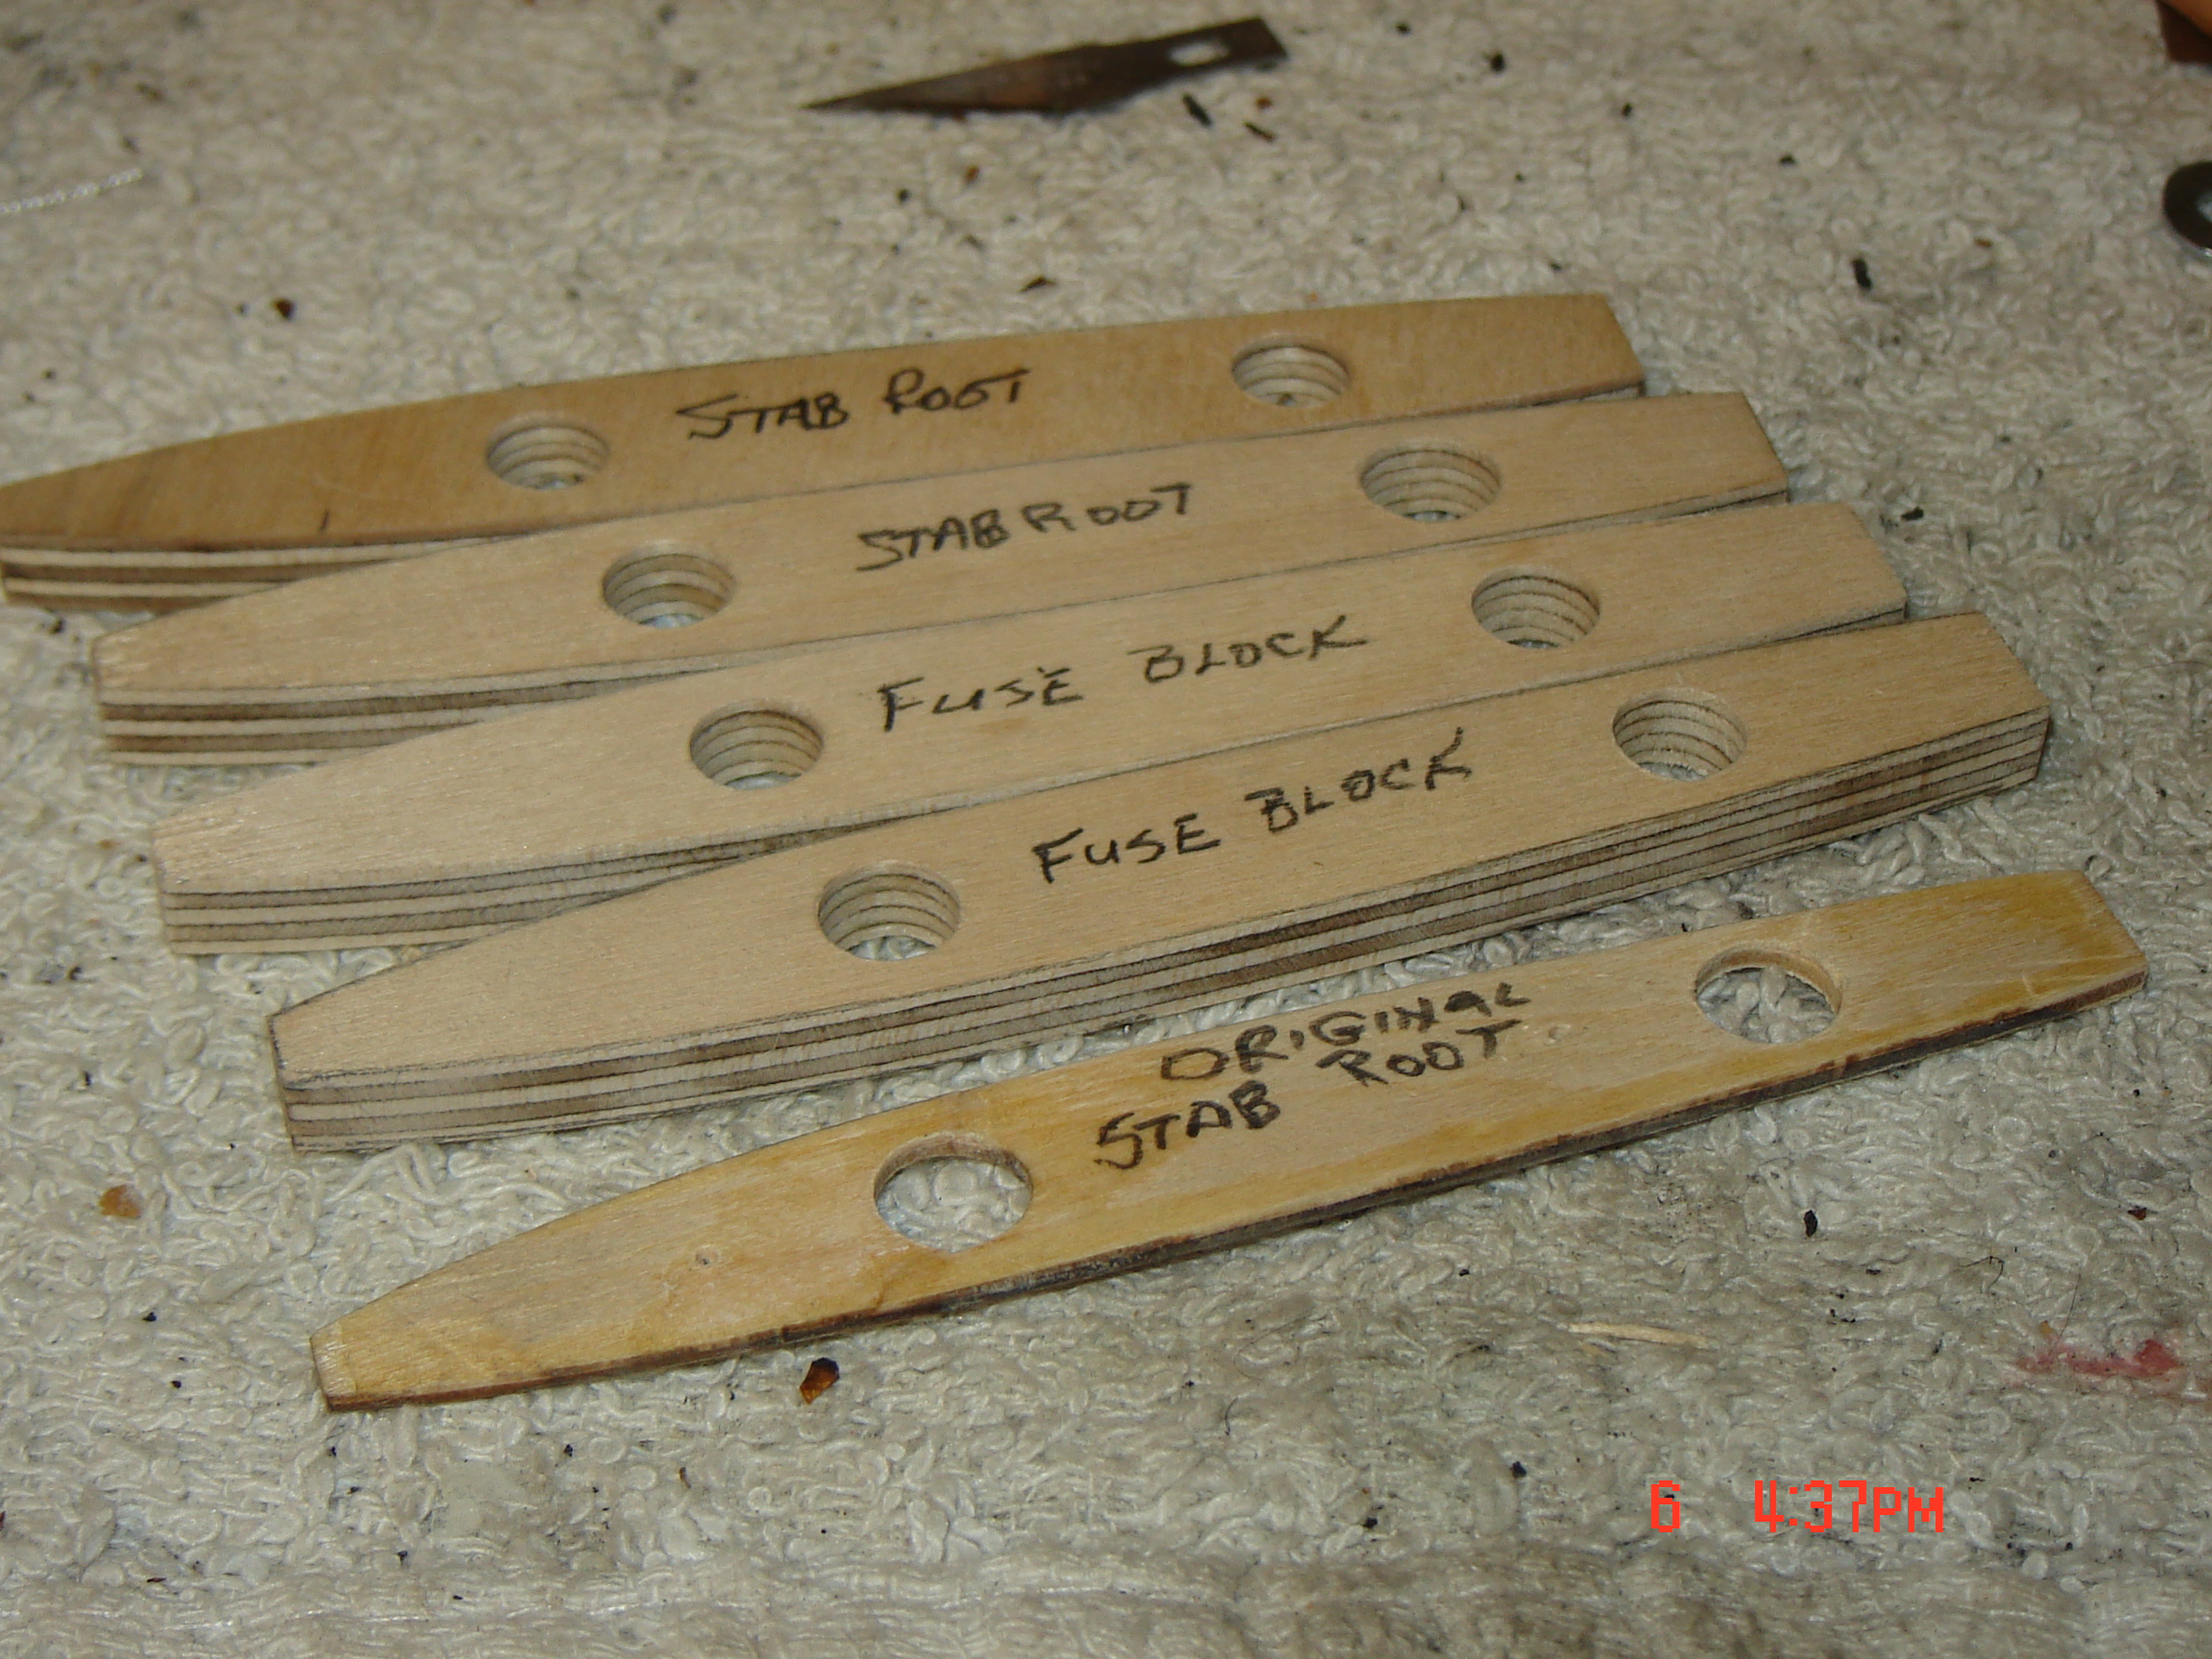
Well after great thought I have deceided to revise the plane. The mfg. date on my RB was 8/28/03. I would be a ? mark if it had been modified by TT. I stripped the horizontal and opened it up, sure enough I'm glad I did. I cut the bottom sheeting by carefully cutting the balsa @ a 45degree so when I glue it back on I will have a strong diafram for strength, I cut 1/4" behind the LE and 1/4" in front of the TE. The root rib was a peice of junk it was1/16" thick. I replaced it with high quality 5 layer 1/4" ply. I also duplicated the root ribs so as to sandwich them on the inside of the fuse at the stab location. That area has flex movement and needs to be stiffened. It might have contributed to the high speed flutter and stab failure. The CF tubes are 21/32" if you choose to copy my mods to drill the root rib. Like other owners my CF tubes were to long and had I forced them in I would have broken the seat ribs.I reglued all of the ribs as again they were not done correctly. I will be installing the elevator servo's, HI Tech HS125MG. in each stab for optimum function and eliminate the potential for flutter, it's added weight in the tail, I would rather compensate than crash. I will be adding more comments and photo's as I proceed with this build.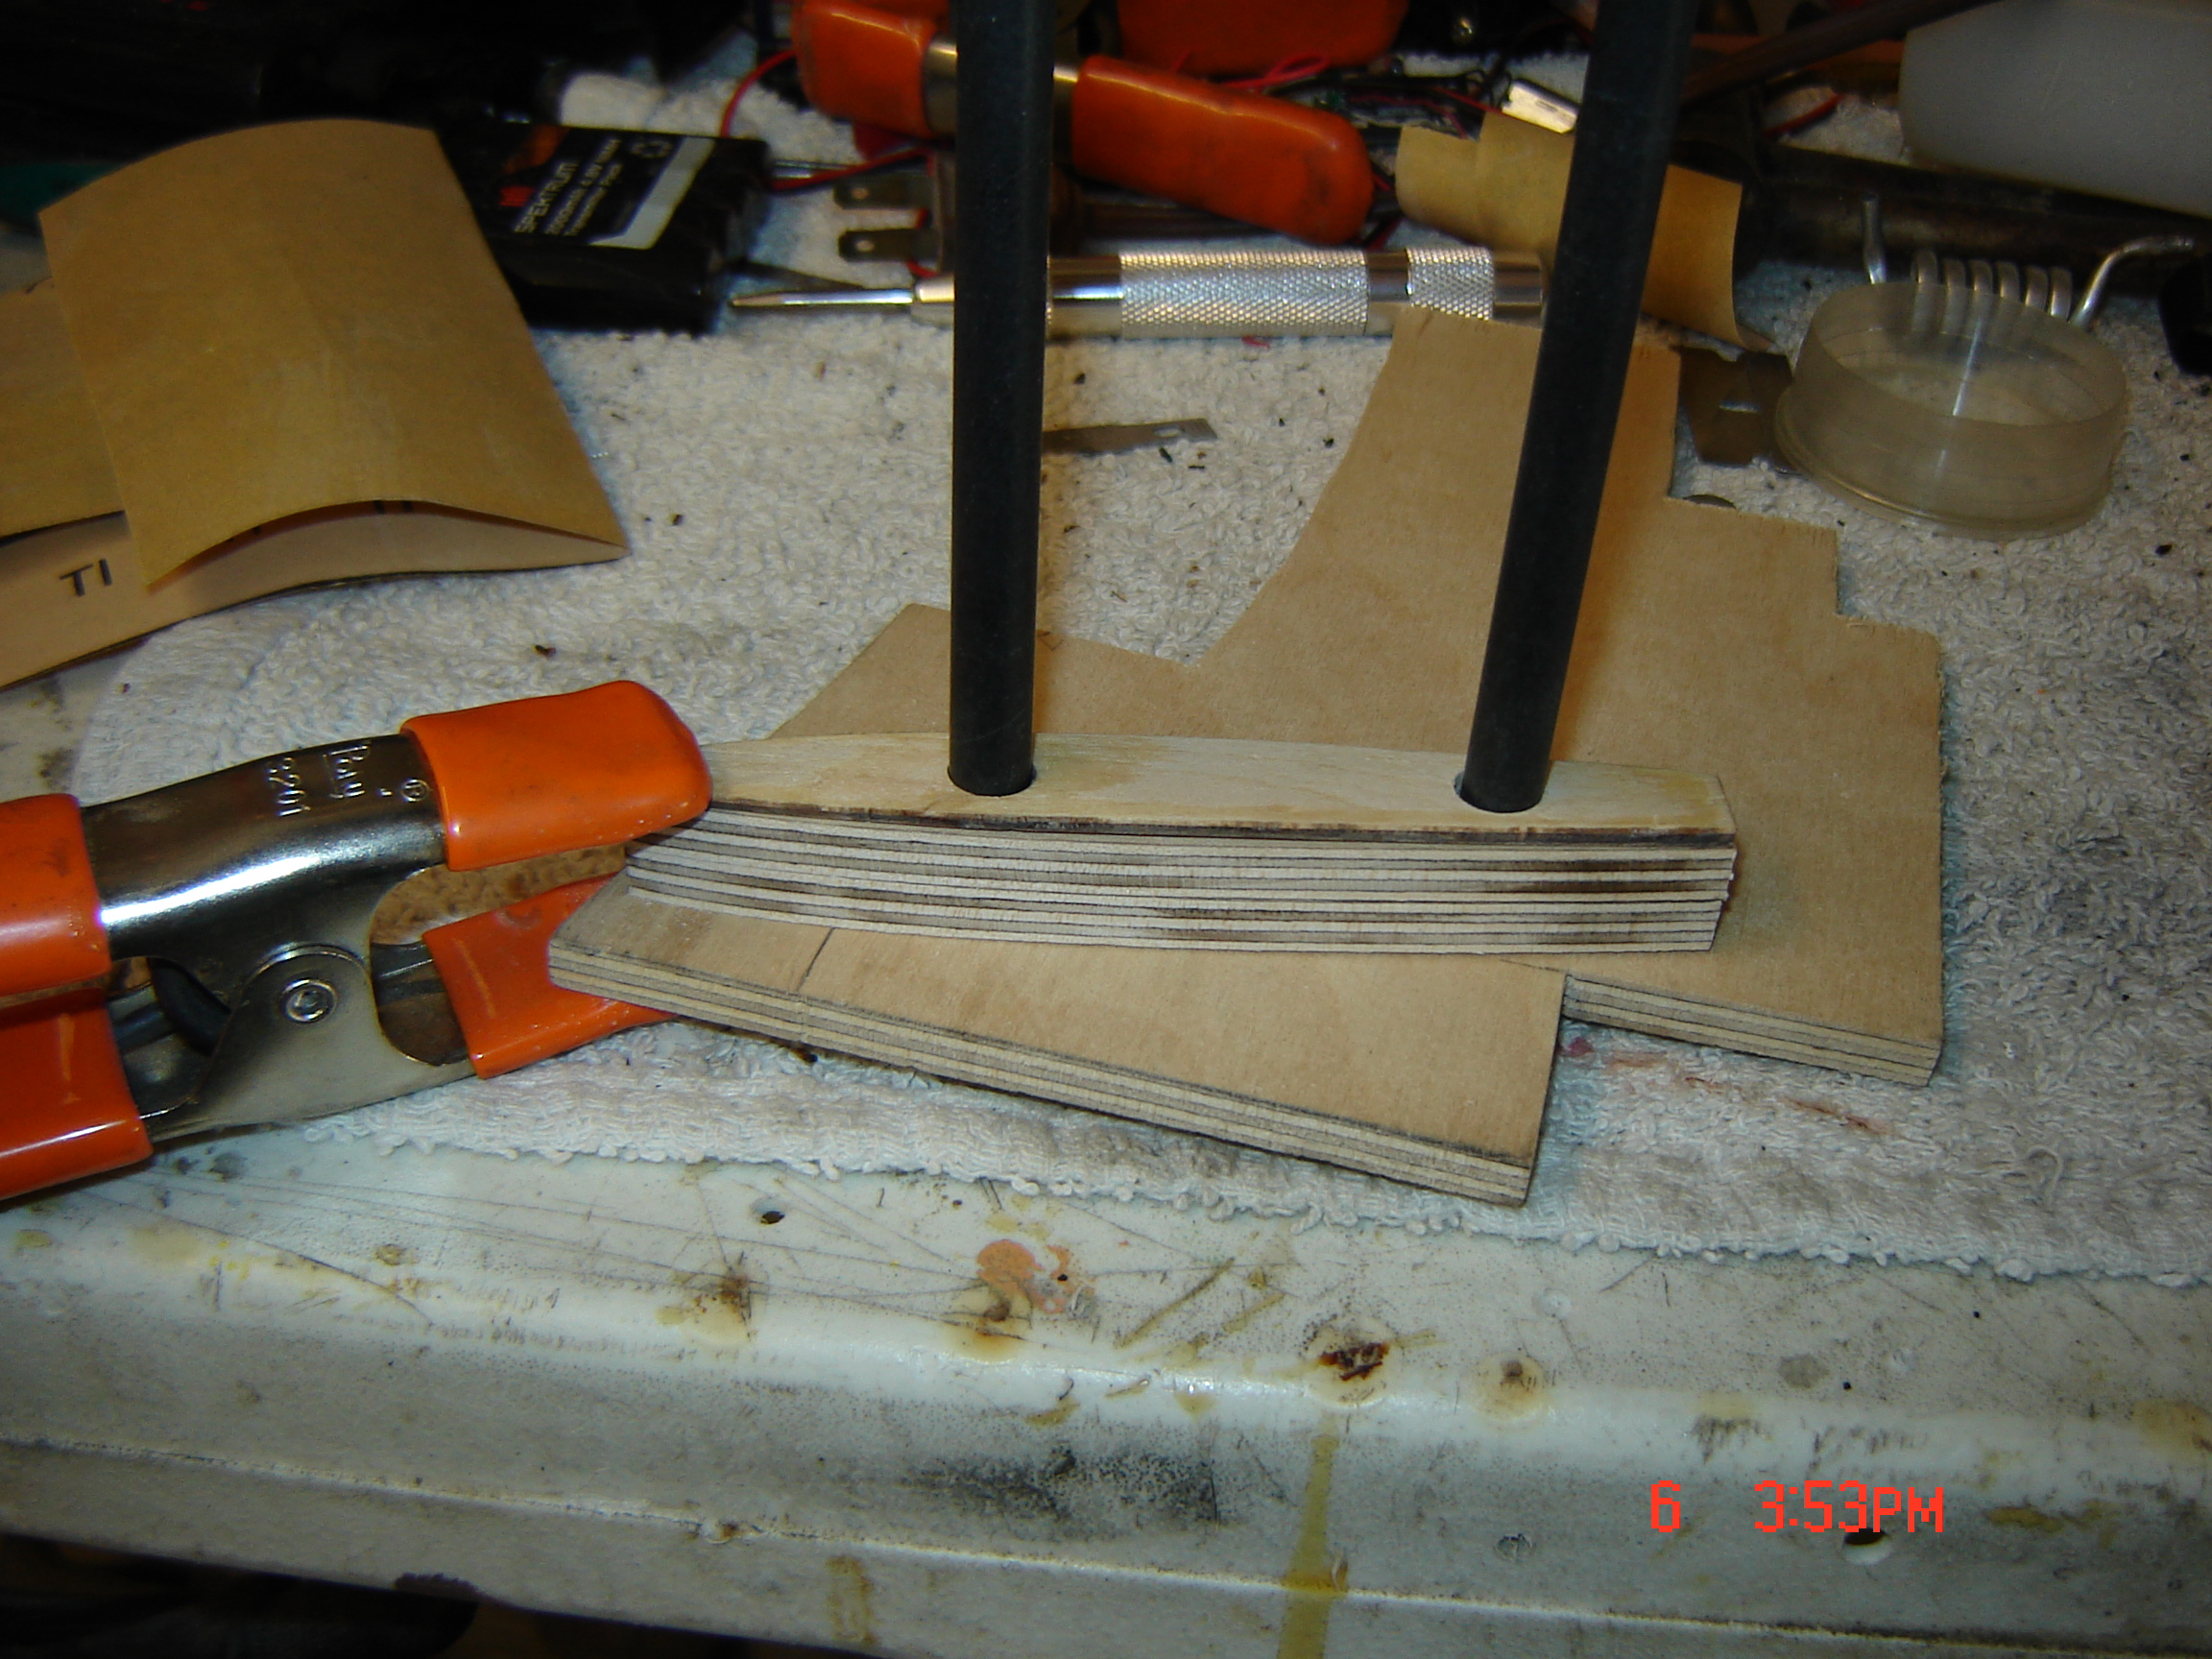


04-07-2014 | 04:48 AM
#1771
Senior Member
My Feedback: (3)
Great pics and description, (can tell a fellow card-carrying builder).
A servo in each stab has been posted here before, but with the improvements in linkages and design that may unnecessarily complex now. I placed my servo above the wheel and even that could have been moved forward. As with any copy of a radial warbird, the nose on the 'Bear is short-coupled, to the point they moved the battery above the engine. It's difficult to balance weight added to the tail.
You obviously have the skill and tools. You may want to strip the bottom surface of the wings, as well. You will be shocked at the construction, especially in how they mount the wing tube. If you copy my setup for the gear mounting it will be bulletproof and you can tailor it to fit whatever retracts you decide to run.
It would have been nice to add inner gear doors and really not that hard to form by lamination. Unfortunately I have so many systems stuffed in there a central micro servo and linkage would be difficult or impossible to add at this stage.
Was curious to know if anyone has measured the wing washout of the stock build. When I redid the Bear I built in 2 1/2 deg negative and it's behavior was radically different.
04-07-2014 | 06:45 AM
#1772
Junior Member
My Feedback: (6)
Joined: Nov 2009
Posts: 20
Likes: 0
Received 0 Likes
on
0 Posts
From: las vegas, NV
Thanks Cougar. I will be powering this Bear with elect. The lipos will be up front, 2 (4s) in series. I have a CG balance program link I can use to pin point the CG so with that I hope it will minimize the total AC weight. I need to select the size motor and the electric retracts for this Bear, if you have any advice I would be greatful.
04-07-2014 | 07:19 AM
#1774
Senior Member
My Feedback: (3)
I was looking at power options for my 9-10lb NitroPlanes Seawind and came up with this:
http://www3.towerhobbies.com/cgi-bin/wti0001p?&I=LXLWV7
Already have a Saito 100 set aside, but since I also run 450-600 class electric helis, have most of the electric gear handy.
I cannot remember if it was in this thread, but there was someone out in California that electrified his a while ago. I imagine the motor and ESC options are even better now.
As for retracts, the sky is the limit. Along with the Eflite 60-120 units I have mounted in mine, (approx $180 CDN for the main set) there are now electric versions of Robart, (I believe in a cooperation with Down & Locked) and Century Jet is doing conversions to their own and other mechanical setups.
04-10-2014 | 10:16 PM
#1775
Junior Member
My Feedback: (6)
Joined: Nov 2009
Posts: 20
Likes: 0
Received 0 Likes
on
0 Posts
From: las vegas, NV
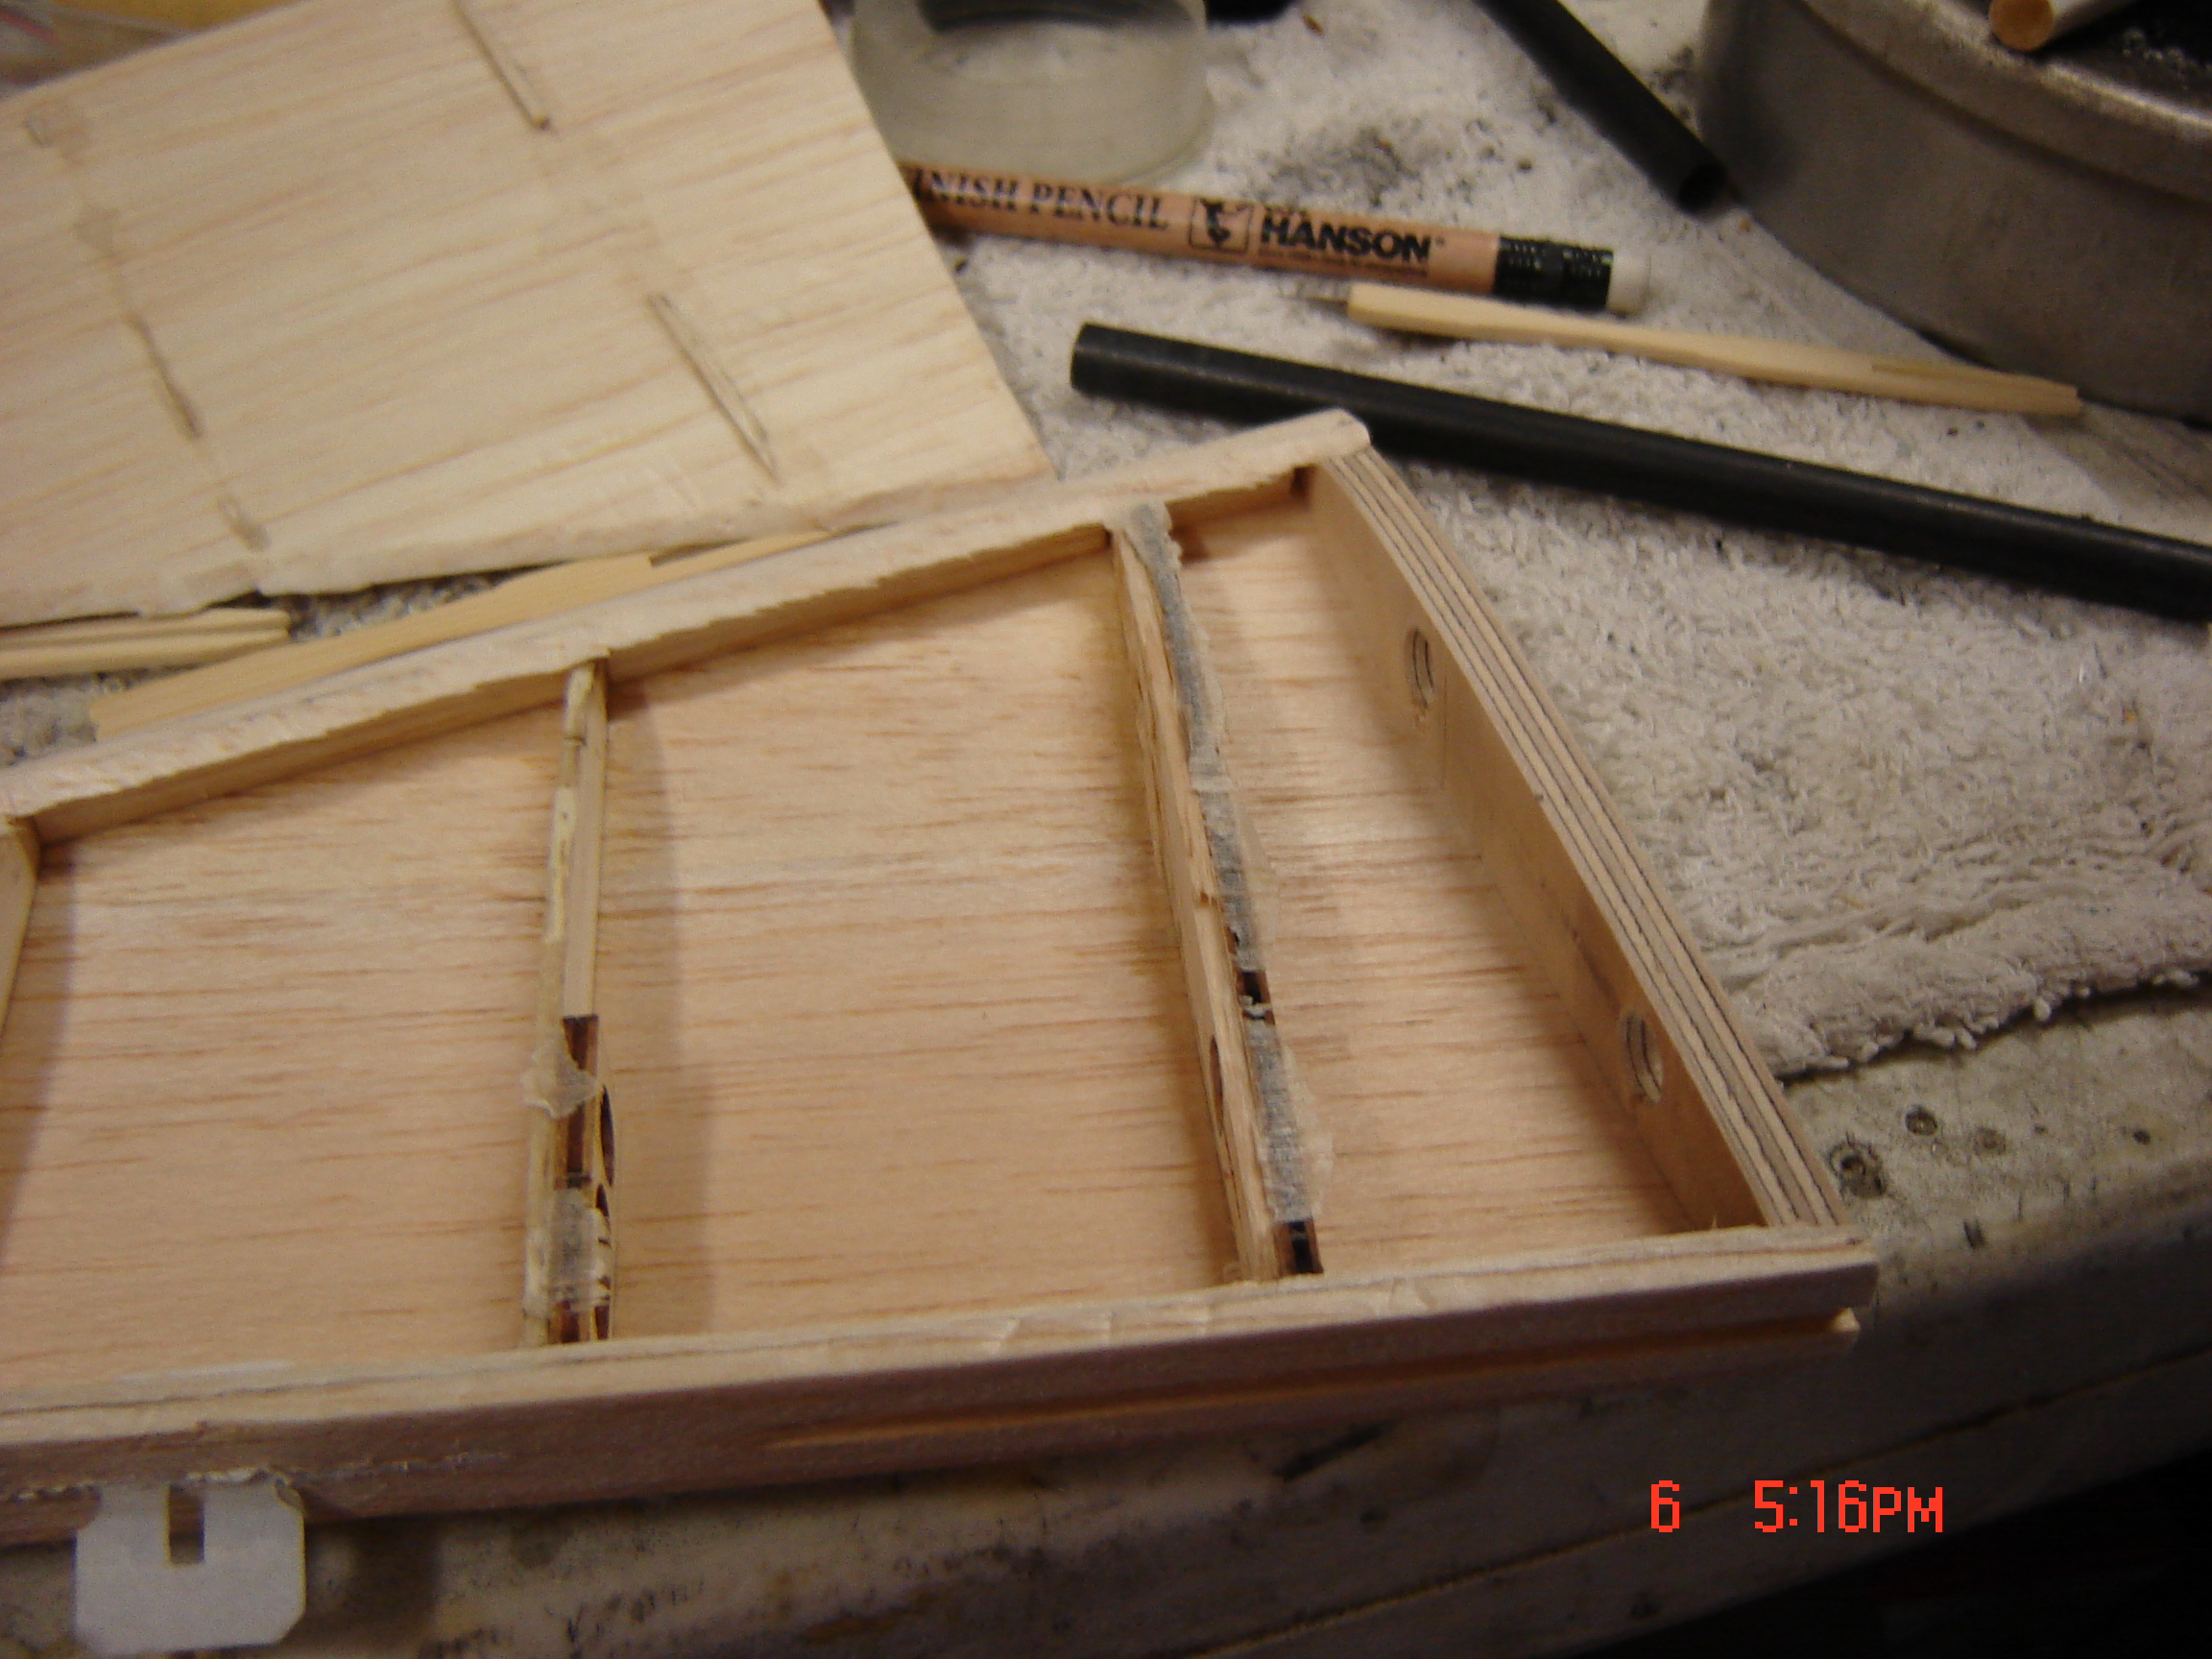
Well its been a few days and I have made some progress on the Rare Bear. When I left I was in the process of reenforcing the horizontal stab. After making new root ribs and another set for the inside of the fuse. I installed two slimline servos for the elevator, I also discarded the original fiberglass arrow shaft spars and replaced them with carbon fiber spars that will offer more strength. after many trial fittings to the fuse and everything fit I drilled holes in the root ribs and fuse supports to install 440 screws and t-nuts (blind nuts) to securly attach the stabs to the fuse. Every thing looked good and fit well. I made the cutouts for the servos and reInstalled the sheeting using CA and gorilla glue. The existing hinges


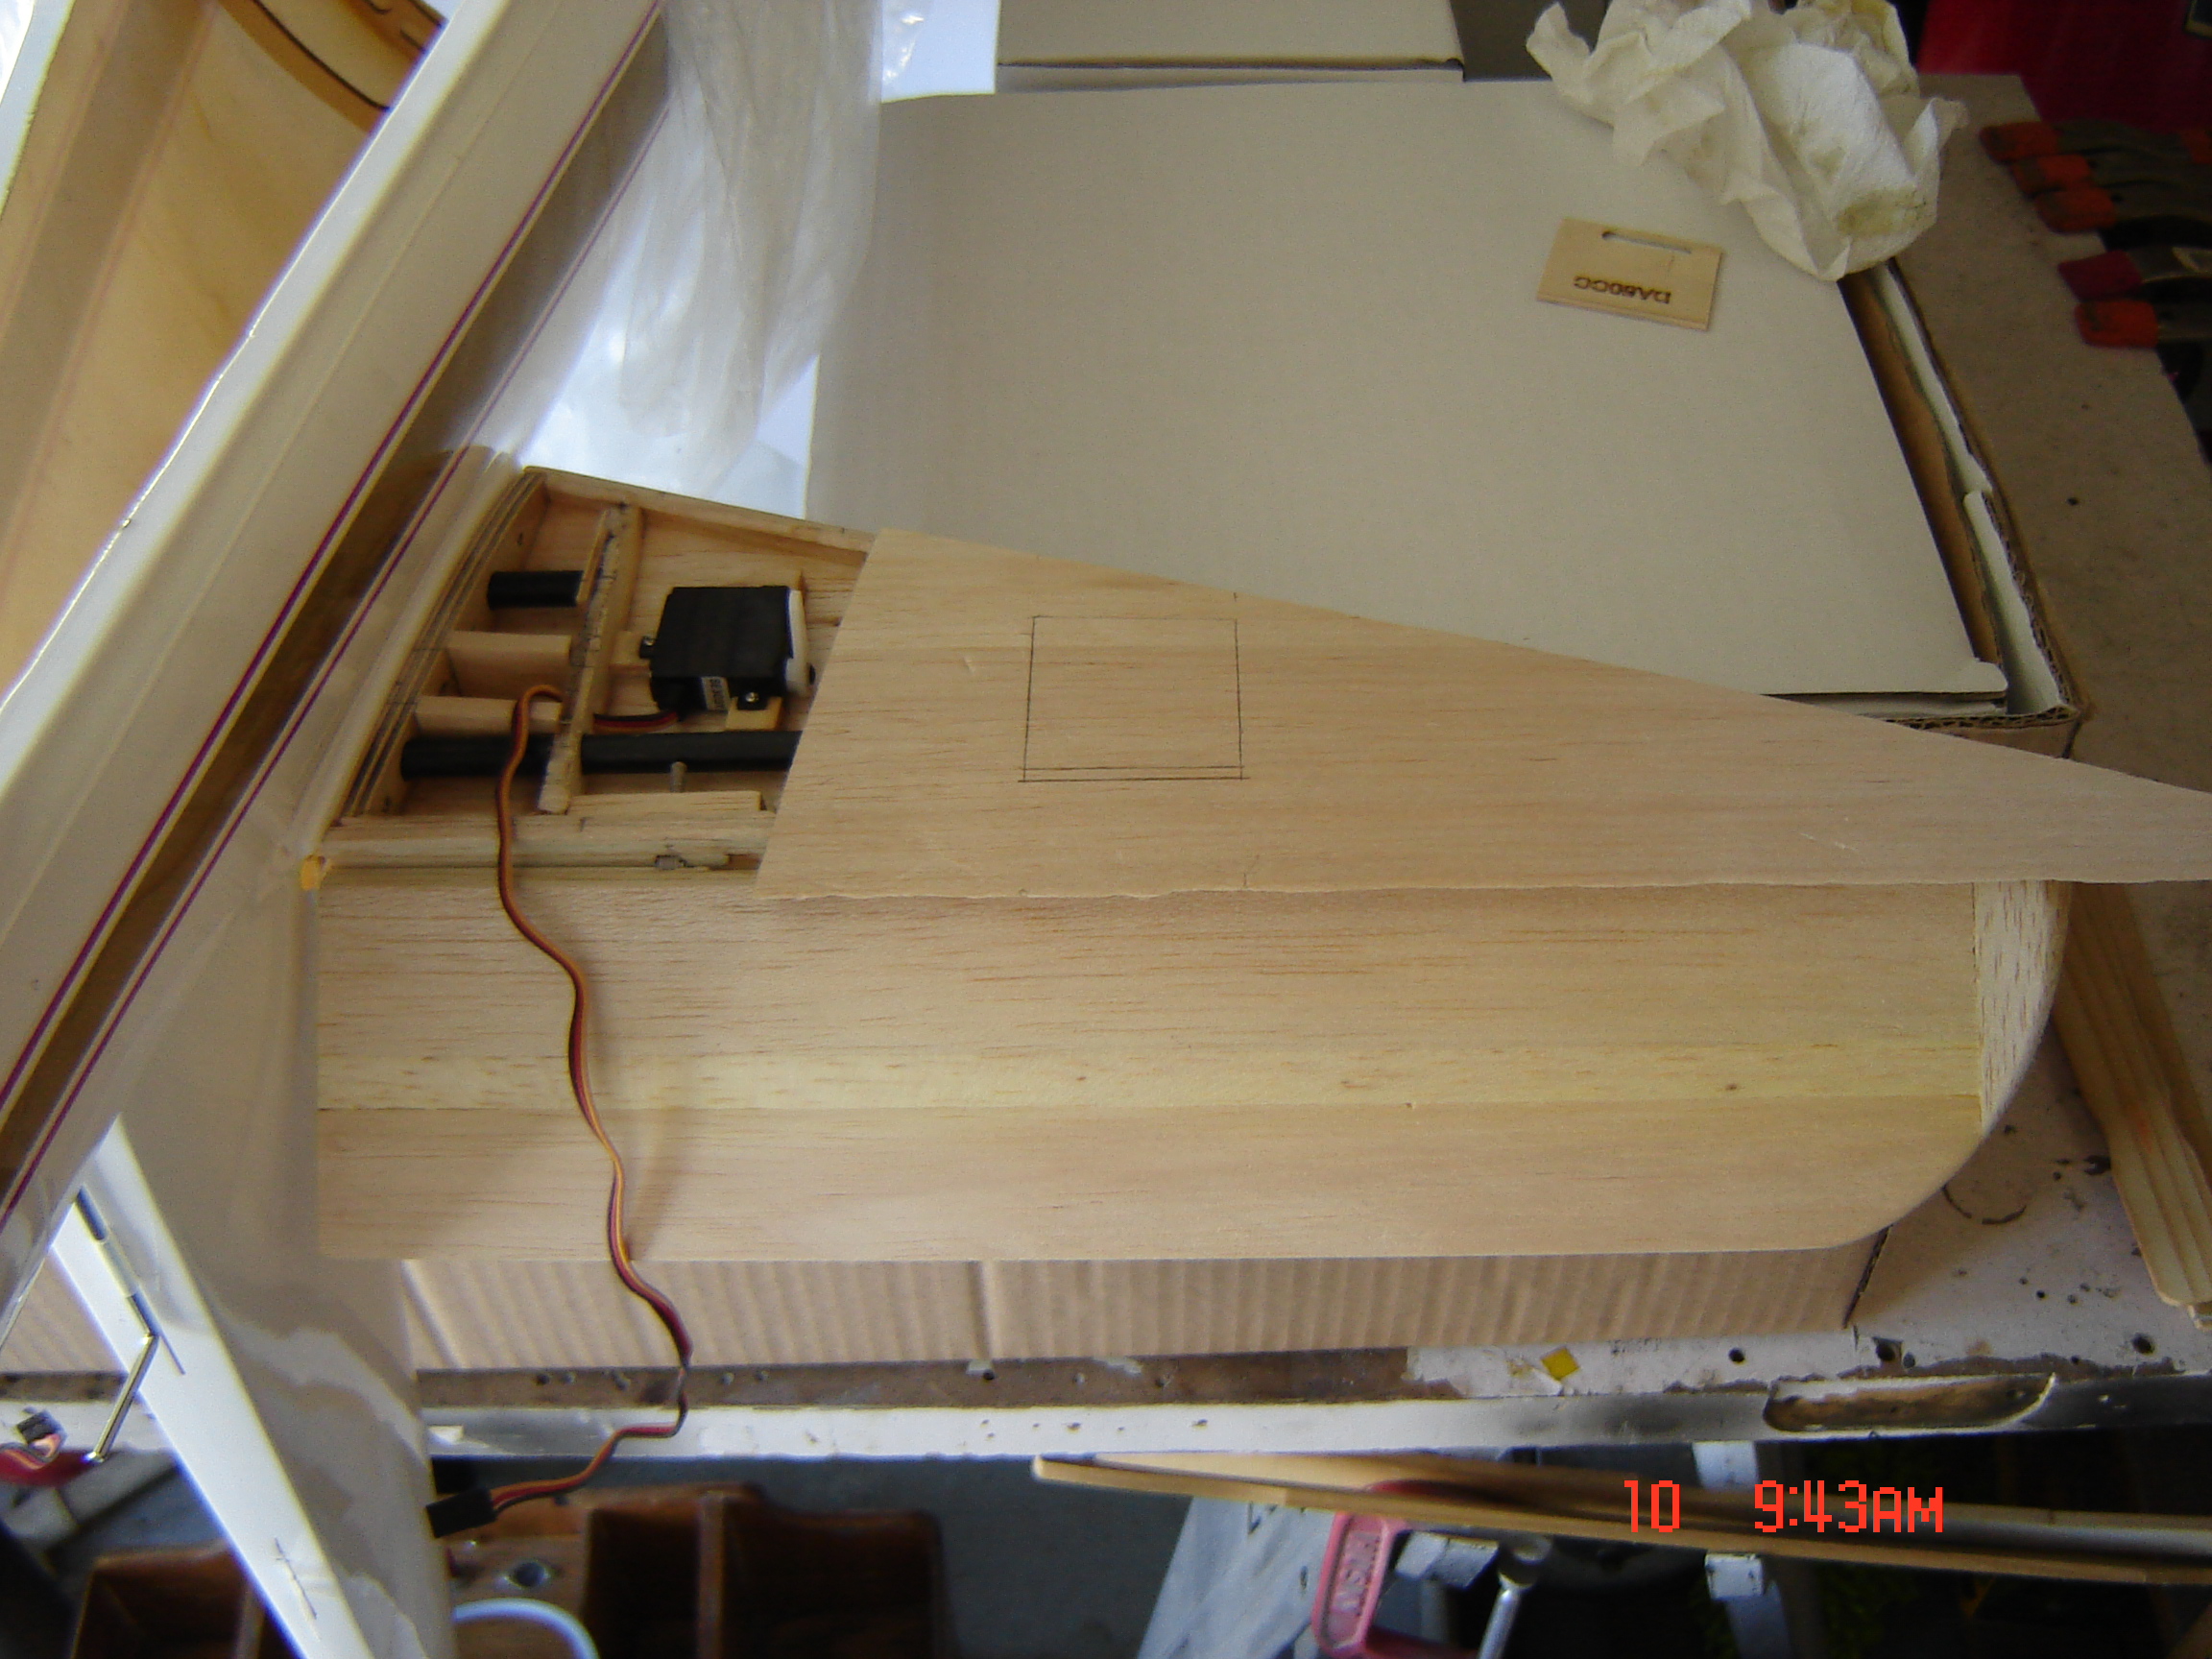


 were replaced with Robart hinges.Some sanding and more trial fitting I have started to re-cover the stabs. See photos. If anyone has questions feel free to ask.

