


Dave Patrick super cub
 07-29-2004 | 11:35 PM
#51
Thread Starter
Senior Member
My Feedback: (1)
Joined: Sep 2002
Posts: 897
Likes: 0
Received 0 Likes
on
0 Posts
From: Mt Airy, MD
Orvel,
That's not the one I saw, this device apparently mates the speed of the two servo's somehow. Picture I saw had one in between the two servo's. I have seen an article in the past on it but never paid much attention. I have so darn many mags. Now it's really bugging me as to where I saw it. What about servo reversing via the radio? My Futaba does.
That's not the one I saw, this device apparently mates the speed of the two servo's somehow. Picture I saw had one in between the two servo's. I have seen an article in the past on it but never paid much attention. I have so darn many mags. Now it's really bugging me as to where I saw it. What about servo reversing via the radio? My Futaba does.
 07-29-2004 | 11:55 PM
#52
Thread Starter
Senior Member
My Feedback: (1)
Joined: Sep 2002
Posts: 897
Likes: 0
Received 0 Likes
on
0 Posts
From: Mt Airy, MD
Here ya go orvel,
http://www2.towerhobbies.com/cgi-bin...?&I=LXCTS1&P=7
if you have a JR radio it's called a matchbox. I have Futaba so i'll be getting one.
http://www2.towerhobbies.com/cgi-bin...?&I=LXCTS1&P=7
if you have a JR radio it's called a matchbox. I have Futaba so i'll be getting one.
07-30-2004 | 12:42 AM
#53


Joined: Oct 2003
Posts: 2,065
Likes: 0
Received 0 Likes
on
0 Posts
From: Paducah, KY
Bud,
Check out the SAITO twins! They look awesome! I think the valve covers look better that O.S.'s valve COVER. Also You could get the Black Knight version whic would look sweet!
Check out the SAITO twins! They look awesome! I think the valve covers look better that O.S.'s valve COVER. Also You could get the Black Knight version whic would look sweet!
07-30-2004 | 04:48 AM
#54
Senior Member
Joined: Jan 2003
Posts: 271
Likes: 0
Received 0 Likes
on
0 Posts
From: westerville,
OH
hum, match box seen them advertized but paid no attn to them, now where did I see that? better pay a little more attn to the elv issue, was fiquaring on maybe stepping to 440 rods in place of 256, but orvel has a point !
07-30-2004 | 05:25 AM
#55
Senior Member
Joined: Jan 2003
Posts: 271
Likes: 0
Received 0 Likes
on
0 Posts
From: westerville,
OH
Iceman, looked into the saitos182 ,good quality, and have many of there single four strokes but the idea of two carbs ? but the plane could maybe use the extra hp if adding any details,let us know if you go this way be intersting to here, measuring, it will fit!
07-30-2004 | 01:10 PM
#56
Thread Starter
Senior Member
My Feedback: (1)
Joined: Sep 2002
Posts: 897
Likes: 0
Received 0 Likes
on
0 Posts
From: Mt Airy, MD
Ice, Saito twins are georgeous but I really like OS only a day or so away from ordering the 160.
Jim, If you're using JR here's the link to the matchbox
http://h1070530.hobbyshopnow.com/ser...=ALL&tag=qsrch
Bud
Jim, If you're using JR here's the link to the matchbox
http://h1070530.hobbyshopnow.com/ser...=ALL&tag=qsrch
Bud
 07-30-2004 | 02:30 PM
#58
Senior Member
Joined: Jan 2003
Posts: 271
Likes: 0
Received 0 Likes
on
0 Posts
From: westerville,
OH
Bud looked over that web site, are they the twin pack? also I think that maybe one of the servos is reversed? but are they high torque?or Iam not sure what Iam looking at!
07-30-2004 | 02:46 PM
#59
Senior Member
Joined: Jan 2003
Posts: 271
Likes: 0
Received 0 Likes
on
0 Posts
From: westerville,
OH
Bud ,never mine Ive fiquared it out,Its the power match system, wow could be used on the flaps also , sons will tell me if the jr 6100 series will do anything for this. Iam sure, they love telling me these things on these computer radios!!!! ,thank you for the info and web site jim
07-30-2004 | 03:06 PM
#60

Senior Member
My Feedback: (1)
Joined: Jun 2002
Posts: 274
Likes: 0
Received 0 Likes
on
0 Posts
From: Allentown,
PA
T. Bob I'm going to have two servos on the same receiver channel, I want to reverse the direction of only one of the servos, how do I do that? I have a JR XP783 computer radio but if I hit the reverse function for that channel it would reverse the travel of both servos! Maybe there are more advanced radios that can do that, but not this one!
07-30-2004 | 03:28 PM
#61
Senior Member
Joined: Jan 2003
Posts: 271
Likes: 0
Received 0 Likes
on
0 Posts
From: westerville,
OH
Orvel, Iam not sure but I believe youll need a servo reverser, and Ive decited to use one servo and 440 rod as dave patrick intened, Ive got to watch the weight, os 160 jim
07-31-2004 | 04:04 PM
#63
Thread Starter
Senior Member
My Feedback: (1)
Joined: Sep 2002
Posts: 897
Likes: 0
Received 0 Likes
on
0 Posts
From: Mt Airy, MD
John,
It's such a fantastic ARF and most of the guy's who bought them have waited a long time to get one...7 month's in my case. Think most of them are still drooling but good luck in getting someone to part with one. I'm sure now that Dave has them in your wait for one would be short if you order one.
Bud
07-31-2004 | 09:22 PM
#64
Senior Member
My Feedback: (1)
Joined: Jun 2002
Posts: 274
Likes: 0
Received 0 Likes
on
0 Posts
From: Allentown,
PA
Well Bud, after much thought I've decided to go with the one servo set-up for the elevator as called for on the kit. I figured if anybody knows his stuff is Dave Patrick, had he thought the elevator needed two he would have built it into the design. Don't you think? Anyway, I'm going with 106.93 in.oz torque MG645 HITec's on the elevator, rudder, and ailerons. For the flaps I'm using Futaba 72 in.oz. 3010's. That should be a good set-up for it. I plan to start putting it together soon and hopefull post some pictures. I agree with your post to John, I waited 3 months for mine and I don't think I'm parting with mine now! He should try ordering through Dave, I know that everything that came in was already sold, but who knows he might have an extra one.
Happy Flying!
orvel
Happy Flying!
orvel
08-01-2004 | 01:10 AM
#65
Member
My Feedback: (1)
Joined: Nov 2003
Posts: 42
Likes: 0
Received 0 Likes
on
0 Posts
From: La Quinta, CA
A little bloom is off the rose...
1. Mounted the gear, so sweet every thing fits, but..... The manual was obviously written for a prototype, not the current production model. Photos on the lift strut mount show lock nuts but are blind nuts on the production unit, should keep this in mind as assembly progresses. Same with gear assy, photos do not match.
Page one took a few minutes to figure out the springs and bungee cover were already assembled and I was not missing any parts, nice touch..... but the spring and strut assembly that is supposed to slide is like it is welded together. Pulled off the bungee cover, put one end of the strut in a vise and pulled the other end with vice grips just short of breaking it, no give.
2. After sitting in my hot garage for a few days the covering got really baggy and wrinkled, no problem a heat gun took it right out, but on the wingtips there is almost no overlap of the covering, heat pulled it right away, have to get some material and recover one wingtip. Good overlap on the fuse, no problen reshrinking.
3. Most of the hardware appears to be excellent, but the screws are the same old cheap crap you find on most ARFs. While mounting the lift strut brackets they kept snapping with very little torque applied. Broke 4 of them before I got wise and consigned them to the trashcan. Throw all the kit supplied screws away and use a domestic make. No biggie but kinda irritating.
Still think it is the best ARF I have seen (at least the equal of the Pacific Aeromodels GBY, great airplane with a ZDZ 40) and I am excited about getting it in the air.
08-01-2004 | 07:49 AM
#66
Senior Member
Joined: Jan 2003
Posts: 271
Likes: 0
Received 0 Likes
on
0 Posts
From: westerville,
OH
I think you are right orvel, cant see adding the weight for the extra servo and match box. Dont think I like the off set rudder pull, but the proto is that way. Iam like Bud ,have a PA16 piper to button up before I can get serious on the super , this one is to be intered in a show in sept, havent covered it yet
08-01-2004 | 08:32 AM
#67

Senior Member
My Feedback: (3)
Looks like we missed the $599 price tag on this thing for a Cub. "If anybody knows his stuff, it's Dave Patrick. If this is true, then I'm sure it also comes with standard hardware worth about $6.99. I hope you throw that out and replace it.
I'm sorry for a slam here but you just don't put this kind of crap with a nice ARF and expect buyers to use it because your the great Dave Patrick. When these things start going in because "Dave Says" use his hardware, we'll see how great his refund policy is.
If "Dave" expects you to buy his $599 Arf, then he should also expect you to pay another $100 and supply some quality name brand hardware with the plane. He is better off not supplying it at all.[sm=thumbdown.gif]
(RCadmin edit: fixed price...actually is $599 not $699. Ok'd with snoop first)
08-01-2004 | 10:13 AM
#68
Thread Starter
Senior Member
My Feedback: (1)
Joined: Sep 2002
Posts: 897
Likes: 0
Received 0 Likes
on
0 Posts
From: Mt Airy, MD
Where did the $699.00 figure come from? They're $599.00. I'm glad to see a posting of small problems with this ARF.....these are gonna happen no matter who makes them and how much they cost, whether you buy an ARF or a kit. Hardware has been an issue for most modelers and is most likely one of the first things we look at when we open the box. I have always replaced nuts, bolts, linkage etc. to my liking and what I know works for me. How many modelers really go with what's supplied and then put an engine in that they have sitting around the shop that may not be quite enough power but to them it's good enough because they didn't want to spend more money and when something goes wrong they bash the manufacturer? How experienced are these guy's that when they post negative comments about an ARF that we tend to listen to them and bypass that model we had been eyeballing?
Common sense and some experience go a long way. I believe somewhere it's stated...this is not a beginners kit! I'm not that great at flying power since i'm just getting back to it after 25 years. My flying has always been sailplanes but I have been building all my life and am a retired industrial model builder so with any thing I build I take caution. While i'm on my soapbox I might as well say I'm a total scale nut and my Proctor Jenny is next after the cub. Orvel, i've decided to use two servo's with Futaba's unit like the matchbox, I really don't think the extra weight is too much of an issue with the O.S.160 up front. I'm using the TS-70 MG Hi tec 106.7 oz. torque on the elevator and rudder with the pull pull. The ailerons and flaps will have the low profile TS-59 with 61 oz. torque. O.K. I'll get down from my soapbox now. Dr.pepper, thanks for the data...keep it coming, i'm printing all comments and saving them for when I start mine.
Cyclic Hardover,
CHINOOKS RULE!!!
08-01-2004 | 06:57 PM
#72

My Feedback: (23)
I played around with slow speed and found that the ailerons become pretty useless when slow. They work, just not well. I got it onto the edge of a stall and played with the ailerons to see what would happen. They're very effective right up until the point that it enters a spin. The spin entry is very predictable and easily recoverable. I let it develop into about a half turn and then recovered. Stalls are likewise predictable and easy to recover from. I was suprised how much altitude was lost between the start of recovery and positive climb rate being established. That's probably due to the high weight of this plane.
Landing was fun. I'm still not comfortable with the plane yet so I ended up a little fast on landing. The mains touched but I decided to abort and go around. Amazing amount of torque upon slow speed application of full power. It took me a minute before I realized it, but going forward I am committed to thinking of this airplane as the full scale and flying the rudder all the time.
The second landing attempt was better althought I was still too fast. I made a wheel landing and let it run out. As with all taildraggers, the tail wanted to swap ends with the nose but this time I was ready and counted with rudder. I don't think anyone watching even knew this happened.
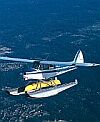
Sorry about the fuzzy pic.
Landing was fun. I'm still not comfortable with the plane yet so I ended up a little fast on landing. The mains touched but I decided to abort and go around. Amazing amount of torque upon slow speed application of full power. It took me a minute before I realized it, but going forward I am committed to thinking of this airplane as the full scale and flying the rudder all the time.
The second landing attempt was better althought I was still too fast. I made a wheel landing and let it run out. As with all taildraggers, the tail wanted to swap ends with the nose but this time I was ready and counted with rudder. I don't think anyone watching even knew this happened.
Sorry about the fuzzy pic.
08-01-2004 | 07:05 PM
#73
Senior Member
My Feedback: (3)
ORIGINAL: Bud Faulkner
CHINOOKS RULE!!!
CHINOOKS RULE!!!
Good one!
We had three locals lose their DP Edge and Extras. The DP planes are nice, but according to the heavy duty Imac locals who were around, that cheap hardware that came with it was the cause. So I would be surprised if these Cubs did not have the same junk with them.
08-01-2004 | 08:58 PM
#74
Thread Starter
Senior Member
My Feedback: (1)
Joined: Sep 2002
Posts: 897
Likes: 0
Received 0 Likes
on
0 Posts
From: Mt Airy, MD
Ben,
How difficult was it to get the numbers and lightning bolt from the fuse side and what did you clean it with. Nice pic's.
Bud
How difficult was it to get the numbers and lightning bolt from the fuse side and what did you clean it with. Nice pic's.
Bud
08-01-2004 | 09:14 PM
#75
My Feedback: (23)
The strips and N numbers are just vinyl so they come right off. Happily, I found that they scribed an ink line down the side to align their graphics. I used the same line to place my stripe. On one side there was also a vertical line that would have shown so I had to take it off. I found that citrus cleaner worked well, then when I prepped the surface with windex prior to applying the stripe I saw more of the remaining line disappearing. So, it comes off easily.

