


Need help with figuring out how to hinge this arf
 07-30-2014, 04:04 PM
#26

My Feedback: (-1)
Yep, that's what his photo showed. Just getting in another 1/8 piece would do the trick. When I'm building a plane I always add in extra wood so the hinges have something to hang onto but ARFs are often a pain to get into. 1/8 doesn't even give you room to pin them if you wanted to.


 Whats your secret?
07-30-2014, 05:25 PM
Whats your secret?
07-30-2014, 05:25 PM
#29
Join Date: May 2011
Location: Jupiter,
FL
Posts: 231
Likes: 0
Received 0 Likes
on
0 Posts
I like to use Gorilla glue on robart style hinges. When you wet the wood first it really kicks off the GG and allows it to expand. When the hinge pushes through the backside of the hole, the GG does to and will expand and mushroom behind it. This adds a lot of strength when the hole is shallow. I've tested these hinges after a crash and found the wood to fail long before the bond, even when there is not a lot of wood to bond to but 1/8" might be pushing it
07-30-2014, 05:32 PM
#30
Never putting a wedding ring on again! lol Muttdog thats a good idea but a drop of vasoline on the the middle of the hinge is what i do then epoxy but GG should work great also maybe be even better . If you use CA hinges and i do on small foam scratch builds i mark the center of each hinge with a colored crayon on both sides . It shows you where the center is and the crayon fills the weave and wont let CA in the line so its a smooooooth working hinge when done with no hard CA gumming it up.CA hinges on this one . joe
Last edited by joebahl; 07-30-2014 at 05:44 PM.
07-30-2014, 06:01 PM
#33
Thanks guys you can find plans from the master himself Ivan . Email him for prices and he is in his 80s and busy so it could take a while but he will get them to you. Check out the wing loadins and weights on his desighns and Luke Zs thread on Ivans planes also. joe http://www.ivansplans.com/
 07-30-2014, 06:59 PM
#36
Senior Member
Thread Starter
My Feedback: (13)
Join Date: Jul 2005
Location: Nutley,
NJ
Posts: 2,322
Likes: 0
Received 0 Likes
on
0 Posts
So started poking around and marking where the formers were... Ive made 1/2" cut outs in between the formers. Ill be using these as access points for dropping in thicker balsa blocks.
Wasnt sure if i should have done the cut outs like this or just cut out the entire length of balsa sheeting. Figured start small and take it from there.
Looking to drop in 1 inch long x 1/4 inch pieces of balsa...


Wasnt sure if i should have done the cut outs like this or just cut out the entire length of balsa sheeting. Figured start small and take it from there.
Looking to drop in 1 inch long x 1/4 inch pieces of balsa...
Last edited by ro347; 07-30-2014 at 07:03 PM.
07-31-2014, 05:51 AM
#38
Senior Member
Thread Starter
My Feedback: (13)
Join Date: Jul 2005
Location: Nutley,
NJ
Posts: 2,322
Likes: 0
Received 0 Likes
on
0 Posts
[QUOTE=ro347;11851876]So started poking around and marking where the formers were... Ive made 1/2" cut outs in between the formers. Ill be using these as access points for dropping in thicker balsa blocks.
Wasnt sure if i should have done the cut outs like this or just cut out the entire length of balsa sheeting. Figured start small and take it from there.
Looking to drop in 1 inch long x 1/4 inch pieces of balsa...
[/QUOTE
For the reason youve mentioned, it will probably be GG.
Wasnt sure if i should have done the cut outs like this or just cut out the entire length of balsa sheeting. Figured start small and take it from there.
Looking to drop in 1 inch long x 1/4 inch pieces of balsa...
For the reason youve mentioned, it will probably be GG.
07-31-2014, 06:06 AM
#39
I always like room to work and also to see my work so i think i would try to get everything out of my way to make sure everything i glue in is glued in very strong. I dont own any balsa arfs except one and it has no blocks for the control horns to be screwed in . I will make ply control horns with a long tail and glue it to the side of ply rib they had in . It was a American made ARF so i cant even B%&ch China out :-( lol joe
07-31-2014, 11:47 AM
#40
Senior Member
Thread Starter
My Feedback: (13)
Join Date: Jul 2005
Location: Nutley,
NJ
Posts: 2,322
Likes: 0
Received 0 Likes
on
0 Posts
It was much simpler than first thought. I guess once you take a little time to map out what you're going to do, it just comes to you.
I opened up the access holes just up to the formers( There were only formers on the bottom half of the tail, On the top half only sheeting.)
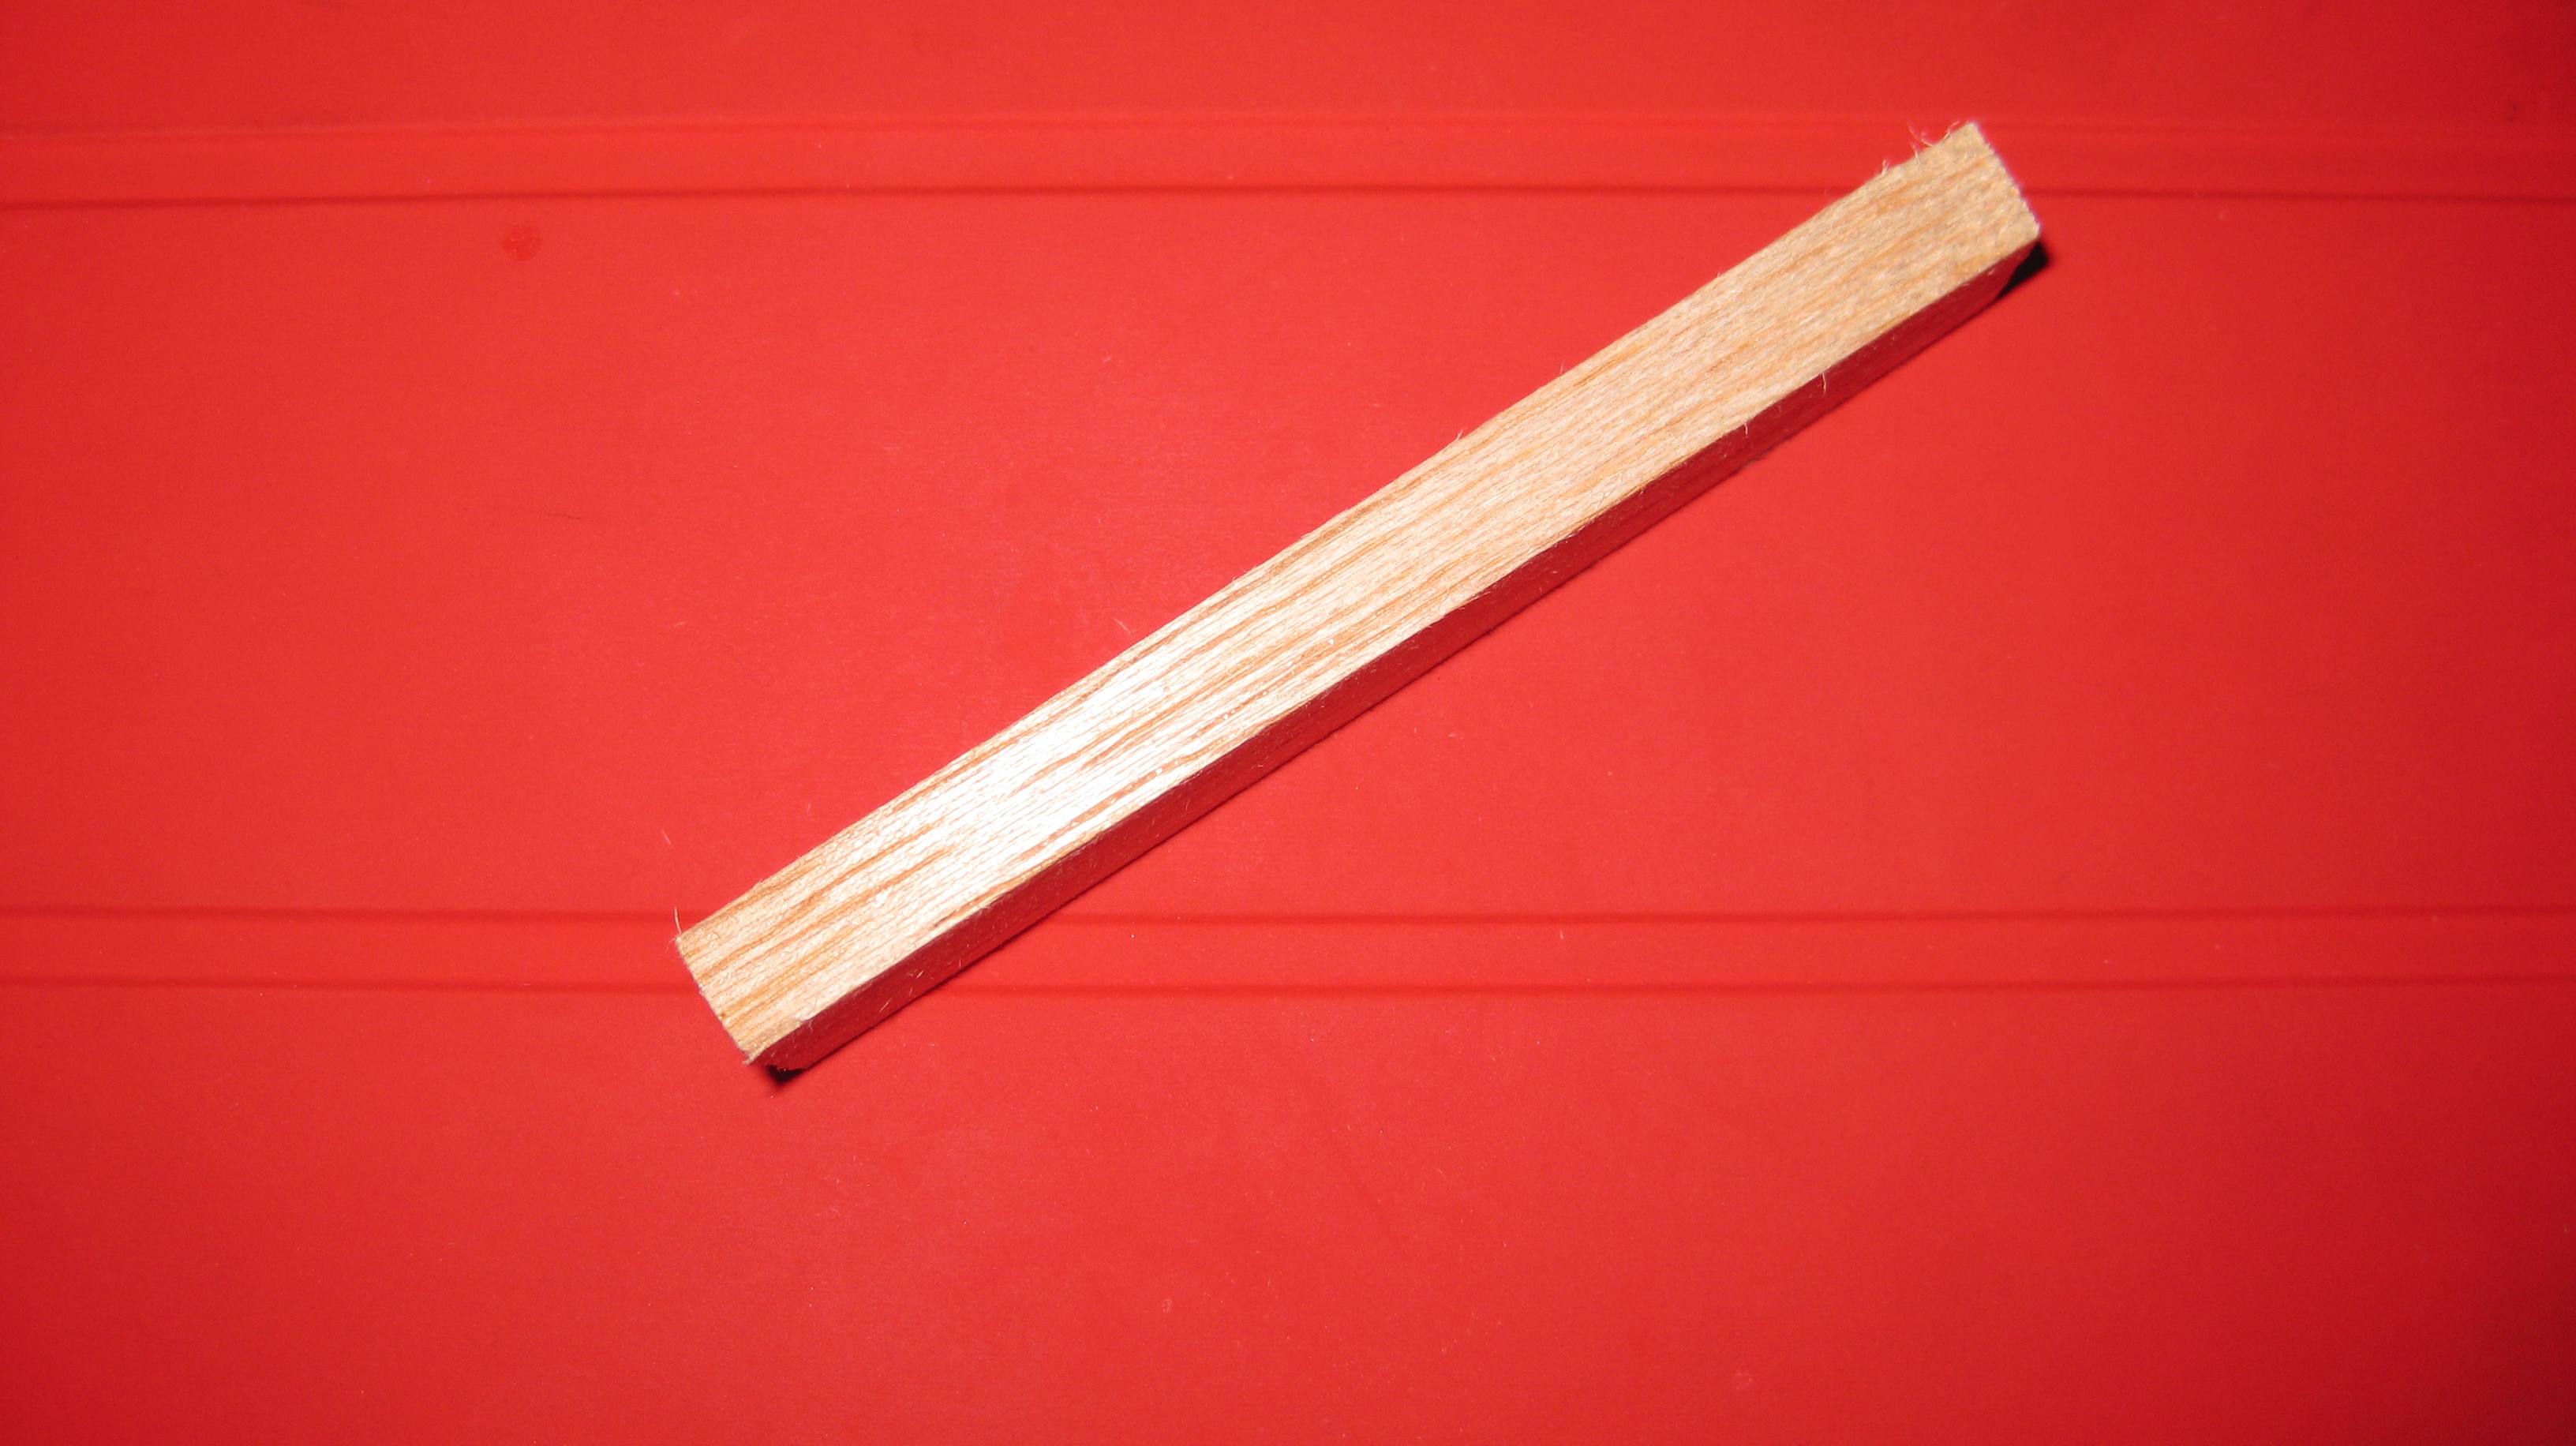
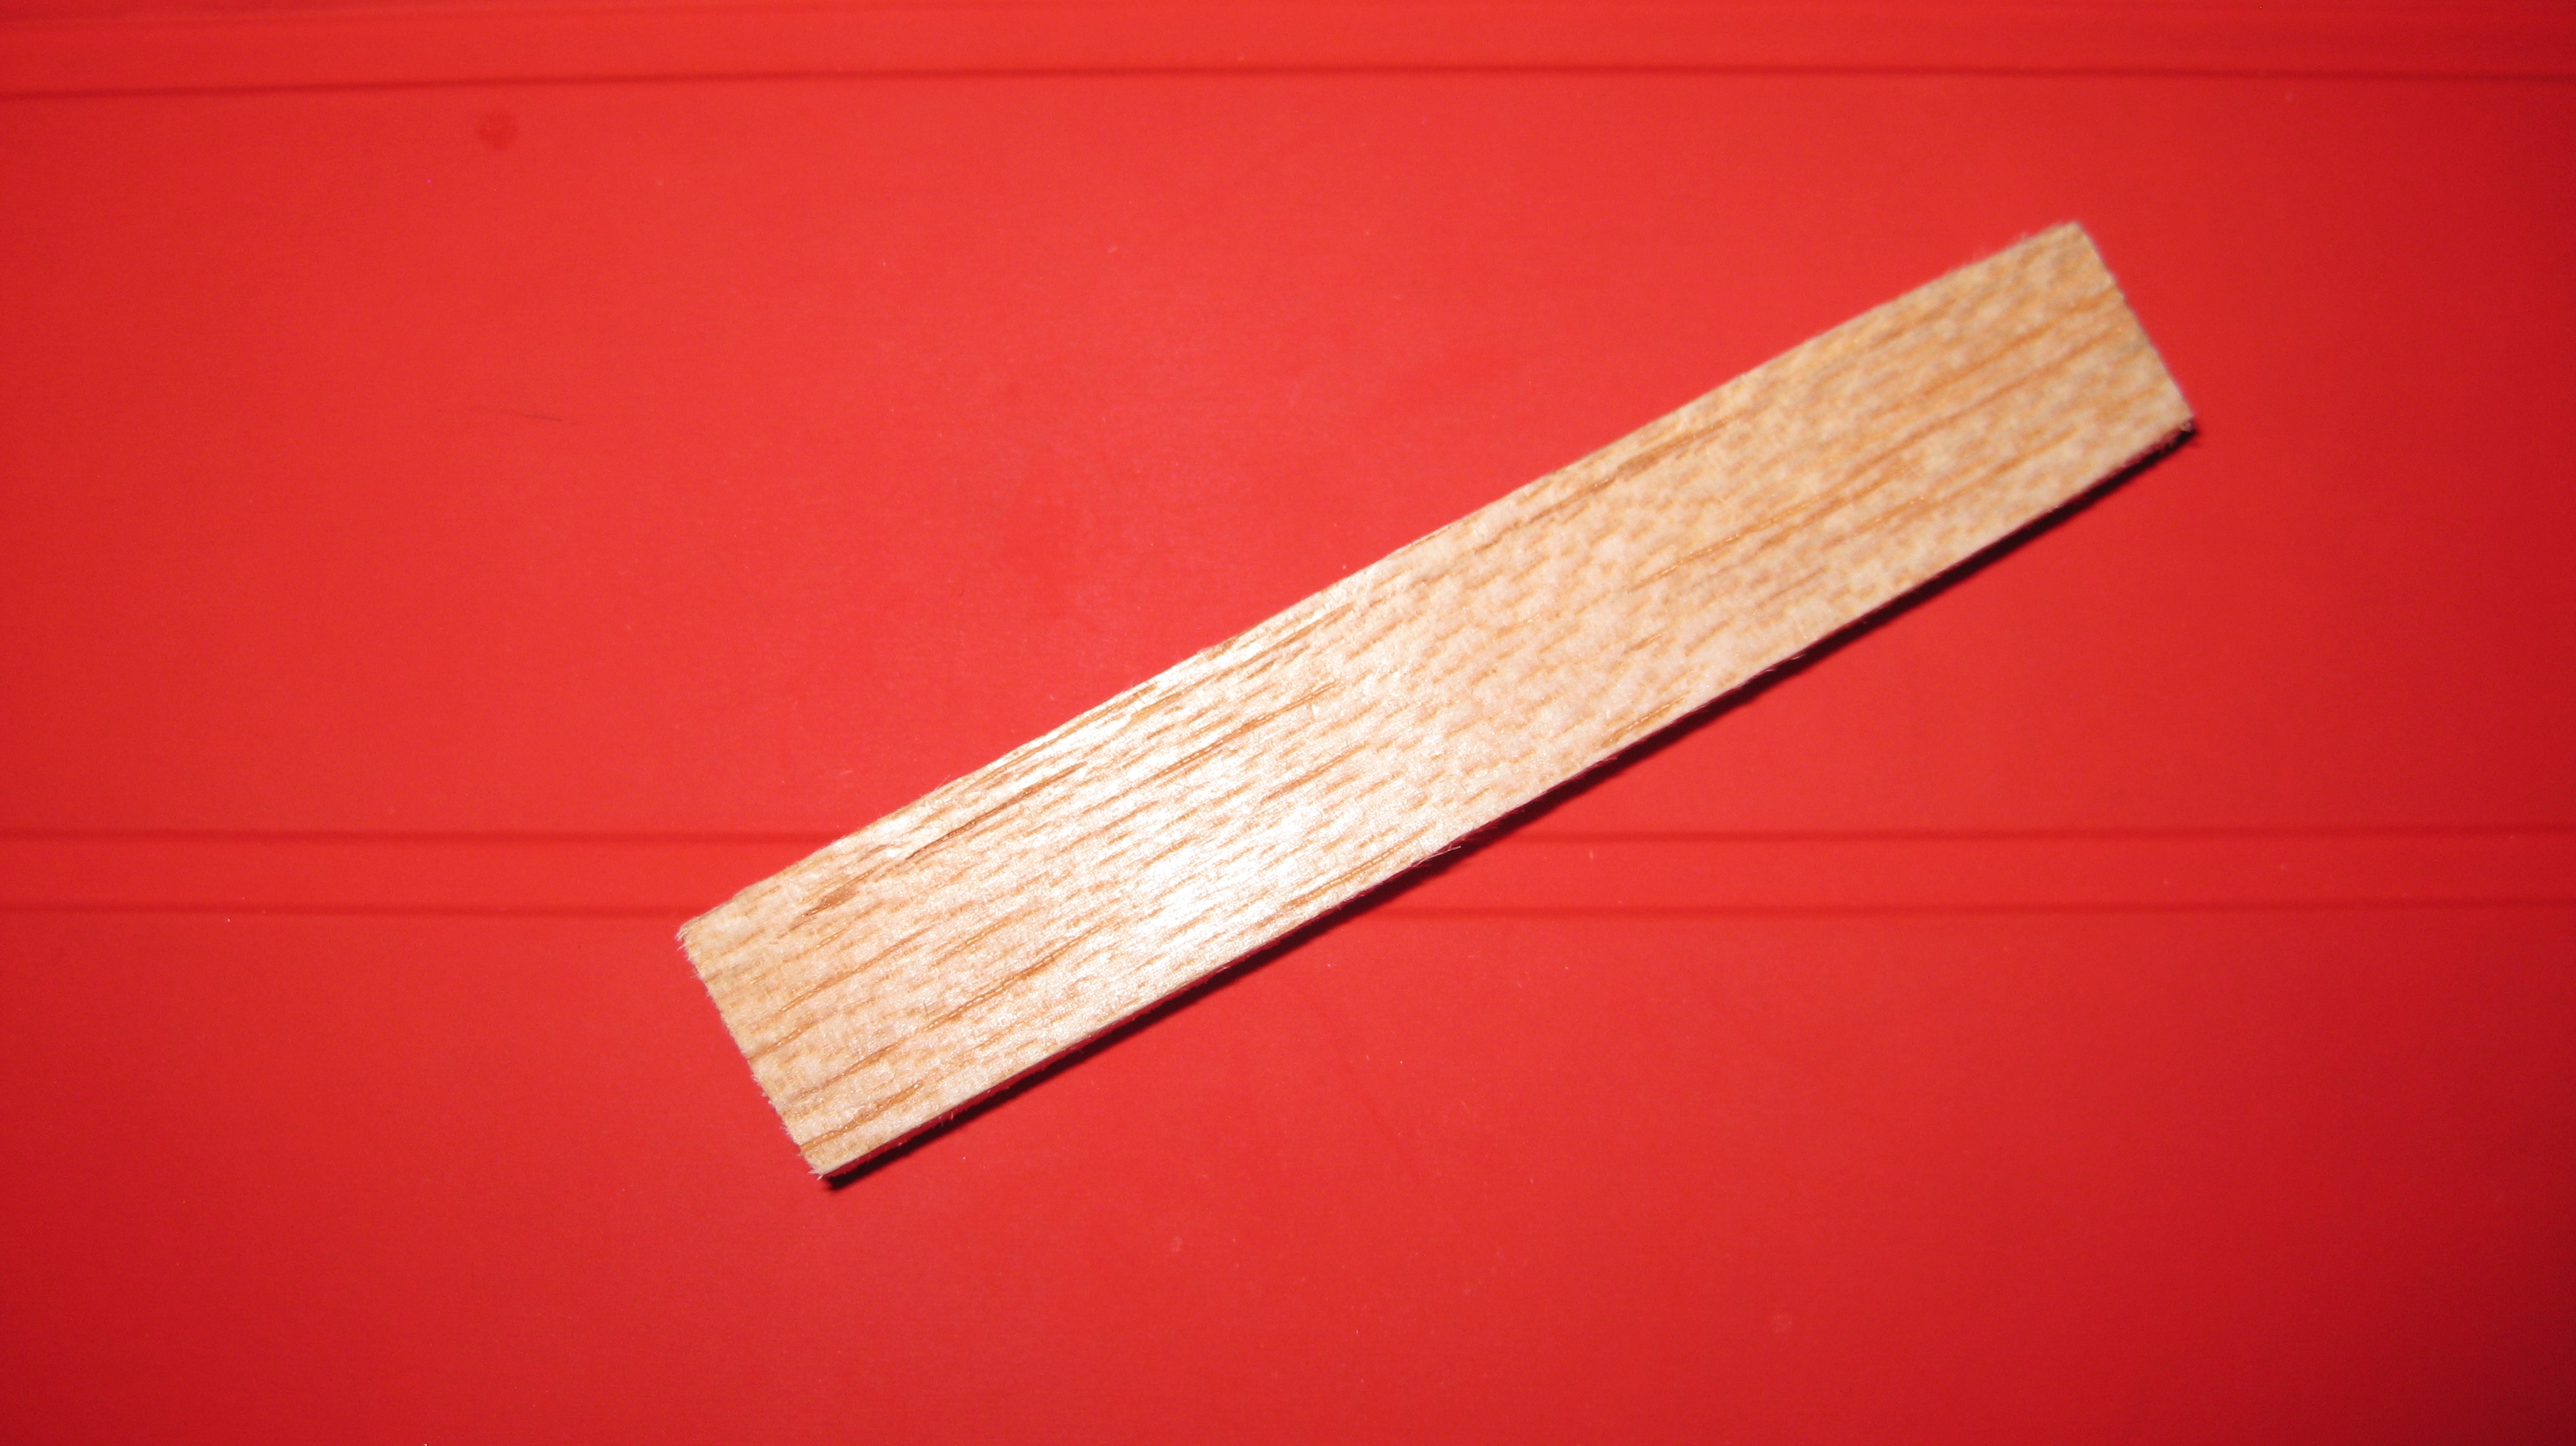
Cut balsa sticks to length... then had to sand the edges a little to get just enough of a snug fit. When installing the balsa, I used dental floss to help me maneuver the wood into place as I wanted. Will tack in place with CA, cut floss, and glue all around. Will then replace sheeting and cover it back up.
Thanks guys!

I opened up the access holes just up to the formers( There were only formers on the bottom half of the tail, On the top half only sheeting.)
Cut balsa sticks to length... then had to sand the edges a little to get just enough of a snug fit. When installing the balsa, I used dental floss to help me maneuver the wood into place as I wanted. Will tack in place with CA, cut floss, and glue all around. Will then replace sheeting and cover it back up.
Thanks guys!
07-31-2014, 11:58 AM
#41
Nice job it turned out good. I dont own any wood arfs anymore and only some foam ones that i like. I scratch build all mine now so every thing can get got to easy .lol Iam working on a 84 inch wingspan Twin Otter ,another of Ivans plans and hope to fly it next year. Thinking about the US Army Golden knights sky diving team colors . joe
07-31-2014, 12:18 PM
#42
Join Date: Mar 2013
Location: Winnipeg,
MB, CANADA
Posts: 751
Likes: 0
Received 0 Likes
on
0 Posts
Glad to hear(and see) you got it figured out, it looks good I like the dental floss idea, lots of uses that stuff. Joe, that is one light looking structure, should fly like a dream, you should do a build thread on it.
Calvi
Calvi
 08-01-2014, 03:20 AM
#45

