


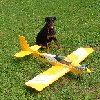
Here's our trainer! (A work in progress)
 01-03-2005 | 10:26 AM
#1
Thread Starter

My Feedback: (1)
Back in '91, I built an rc airplane which I really enjoyed until it met its untimely demise due to my over confidence on a solo flight. At the time, I was working as a flight instructor and didn't make much to be spending on rc. I ended up concentrating on my aviation career and let rc slide. Jump forward about a decade, and with a good job, a family, a bit more spending cash (not to mention a quite a bit of new, grey hair), I decided that I wanted to get back into rc.
Two years ago, I ended up hunting down two kits of the same plane that I had built back in '91. The idea is to have a matching pair. One for my wife, Eva (she's a pilot, too!), and one for me. Maybe at least one of them will survive!
Eva bought me a couple of Irvine .53's last Christmas for the planes, and this year she got me a new JR XP6102 radio set and a copy of Reflex XTR! I hope XTR will help extend the lives of our new planes in addition to easing the stress and strain on our instructor when we get one.
I wanted to start this thread to show you the stages of us building our first of two Coverite Black Baron Specials. The kits were manufactured about 15 years ago and really are pretty cool! Basically, they employ a box fuselage and a flat bottom wing. The kit adds a turtle deck (which makes it look like it has a shoulder mounted wing) and cowling to give it a kind of '30's racer look. You can build it as a trike or tail dragger. We're doing the tail dragger.
The plane will have a 56 inch span should weigh in at about 5 lbs. The plans call for a .40 size two stroke, but we're gonna hang an Irvine .53 on each of them, heh, heh! That should make these alot of fun when you open the throttle up a bit.
It will take some time to put them together (my wife says I always am too anal when it comes to this stuff). I plan on posting some pics of our progress for you. Here are some to get it started.

 01-03-2005 | 05:03 PM
#3


Joined: Oct 2004
Posts: 579
Likes: 0
Received 0 Likes
on
0 Posts
From: Birmingham, UNITED KINGDOM
So Sweeeeeeet............
Your Wife is letting you build on the Kitchen Bench... Nice... [8D]
I cleaned my Airplane on the Kitchen Bench the other day and my Mum went NUTS!!!!
Now she's grumpy again because I have my Aircraft living in the dining room while I paint my room...
Good Luck... Why don't you make one Airplane with a Trike Gear just to get you back into it, then you can convert it back later...
Matt
01-03-2005 | 09:53 PM
#4
Senior Member
My Feedback: (12)
Joined: Sep 2004
Posts: 654
Likes: 0
Received 0 Likes
on
0 Posts
From: Diana,
TX
Gosh, not only, is that a sweet looking plane, but you get to use the counter top in the kitchen and the "boss," the other sweet looking thing, no not you, assists you. You are in heaven, and just don't know it.
Keep posting pics. I am going to start a Top Flite Contender in the near future. Wish my wife would let me use the counter top, table or anything else. in the house. It gets so cold in the garage.
Keep posting pics. I am going to start a Top Flite Contender in the near future. Wish my wife would let me use the counter top, table or anything else. in the house. It gets so cold in the garage.
01-04-2005 | 12:31 AM
#5
Thread Starter
My Feedback: (1)
Thanks for the interest! Minn, you know, now that I look at it compared with the other trainers out there, you are right it is a shoulder wing! I don't know why I didn't see it before. By the way, thanks again for giving my Snoopy some speed. Every time I see him, it brings a grin.
Sukhoi, I think you probably have a good idea about building the plane as a trike, but I just can't get past how goofy it looks in the picture with the nose wheel![:'(] I have always loved the looks of the airplanes from the golden age of the 30's. They were such beautiful works of art! I'm just gonna have to make sure I get lots of practice on the sim and then hope it transfers over to the field. I think I'll do fine. I didn't have too much difficulty with the first plane that I built, and it was a tail dragger, too.
Eva really has been great for letting me use the counter top. We have an agreement, I watch the kids for her in the morning so she can get some sleep after getting up all night long for our 7 month old and I get to spread sawdust all over the kitchen! I try to make sure I get it all cleaned up each night for her, though. Building sure does create a mess! It sure would be nice to have a shop!
Here's where we are tonight. We have the vertical and horizontal stabilizers mated up and the elevator assembled. All pieces are still in need of shaping and finish sanding. Today, we started work on the left wing panel. If I had ever convinced Eva that I knew everything about anything , I blew it today! I already had to make two trips down to the hobby store to buy balsa. It really sucks when you find that you just glued your self into a corner. I don't remember having this much difficulty building this plane 10 years ago! Maybe its the fact that I think I remember how I did it. Better start paying attention to the details, or I'll end up building two left wings.
The important thing is to have fun (which I think we are successfully accomplishing), and enjoy our time together. I just can't wait to see this thing taxiing around!
Safebet, when you start to build be sure to keep us posted on your new contender. I want to see some pics!
Sukhoi, I think you probably have a good idea about building the plane as a trike, but I just can't get past how goofy it looks in the picture with the nose wheel![:'(] I have always loved the looks of the airplanes from the golden age of the 30's. They were such beautiful works of art! I'm just gonna have to make sure I get lots of practice on the sim and then hope it transfers over to the field. I think I'll do fine. I didn't have too much difficulty with the first plane that I built, and it was a tail dragger, too.
Eva really has been great for letting me use the counter top. We have an agreement, I watch the kids for her in the morning so she can get some sleep after getting up all night long for our 7 month old and I get to spread sawdust all over the kitchen!
I try to make sure I get it all cleaned up each night for her, though. Building sure does create a mess! It sure would be nice to have a shop! Here's where we are tonight. We have the vertical and horizontal stabilizers mated up and the elevator assembled. All pieces are still in need of shaping and finish sanding. Today, we started work on the left wing panel. If I had ever convinced Eva that I knew everything about anything
, I blew it today! I already had to make two trips down to the hobby store to buy balsa. It really sucks when you find that you just glued your self into a corner. I don't remember having this much difficulty building this plane 10 years ago! Maybe its the fact that I think I remember how I did it. Better start paying attention to the details, or I'll end up building two left wings.The important thing is to have fun (which I think we are successfully accomplishing), and enjoy our time together. I just can't wait to see this thing taxiing around!
Safebet, when you start to build be sure to keep us posted on your new contender. I want to see some pics!
01-04-2005 | 01:02 AM
#6
Senior Member
My Feedback: (12)
Joined: Sep 2004
Posts: 654
Likes: 0
Received 0 Likes
on
0 Posts
From: Diana,
TX
Well, it looks like you and Eva are balancing family and fun very nicely. It's nice to hear about a husband and wife who share not only the duties of raising a family, but a hobby, also. Yes, when I get started, I will post pics. I am a beginner, and this will be my first kit (since I was a teen some 45 years ago).
I am really looking forward to it. My problem is I have to make a living, durnnitt, so I can pay for this wonderful hobby.
Good Luck, keep pics coming.
I am really looking forward to it. My problem is I have to make a living, durnnitt, so I can pay for this wonderful hobby.
Good Luck, keep pics coming.
01-04-2005 | 01:04 AM
#7
Joined: Oct 2004
Posts: 579
Likes: 0
Received 0 Likes
on
0 Posts
From: Birmingham, UNITED KINGDOM
ORIGINAL: thejetgod
Sukhoi, I think you probably have a good idea about building the plane as a trike, but I just can't get past how goofy it looks in the picture with the nose wheel![:'(] I have always loved the looks of the airplanes from the golden age of the 30's. They were such beautiful works of art! I'm just gonna have to make sure I get lots of practice on the sim and then hope it transfers over to the field. I think I'll do fine. I didn't have too much difficulty with the first plane that I built, and it was a tail dragger, too.
Sukhoi, I think you probably have a good idea about building the plane as a trike, but I just can't get past how goofy it looks in the picture with the nose wheel![:'(] I have always loved the looks of the airplanes from the golden age of the 30's. They were such beautiful works of art! I'm just gonna have to make sure I get lots of practice on the sim and then hope it transfers over to the field. I think I'll do fine. I didn't have too much difficulty with the first plane that I built, and it was a tail dragger, too.
Just don't want to see it get banged up...
But if you are confident... Sweet... [8D]
Matt
01-04-2005 | 09:04 PM
#8
Senior Member
Joined: Jul 2003
Posts: 1,483
Likes: 0
Received 0 Likes
on
0 Posts
From: coal township, PA
Ooooh boy am I gonna get murdulated here. I suggest you build them and keep them for a bit. Those planes do indeed fly great. But they are not for a beginner. You should get a trainer first. A kadet LT-40 would do it. Make that a community project. Get another engine (another 53 wouldnt hurt). It would allow you to get back into the swing easier. And teach her as well. You are a lucky man. You could build the kit together. At the same time, Know what I mean, know what I mean, nudge, nudge. Good luck with the BB planes they are goodies. And please do not kill them with a nose wheel, please!
Mark Shuman
. Good luck with the BB planes they are goodies. And please do not kill them with a nose wheel, please!Mark Shuman
01-04-2005 | 10:35 PM
#9
Thread Starter
My Feedback: (1)
Guys!
We're still slaving away in the kitchen, and making quite a bit of headway. I wanted to take it easy a few times today, but started catching flack from the wife. She was really wanting us to get the second wing built up today. When I asked if she was getting excited about the airplane, she just flashed me a quick grin and got back to work[sm=biggrin.gif] we may have an addict on our hands later!
Phread59, I just might do that. I loved my first BBS and it was a sickening sound to hear when it hit the dirt. I was attempting an aileron roll and didn't have enough speed as I entered it. It dropped out of the top and of course lost altitude. Too bad I didn't have any of it in the bank. All I remember is the crackling sound followed by silence. You know that sound. It was a very sad day, indeed! I very well might get us something else to fly before taking these up. You know, you never can have too many airplanes!
Well, here's what's been cooking in the kitchen:
01-13-2005 | 11:07 PM
#10
Thread Starter
My Feedback: (1)
Well, it's been a few days since our last post, so we figured we would bring you up to speed on how things are going on the first of our two Black Baron Specials.
Working in the kitchen was NOT a good idea! Guys, it really is great if your girl will let you carve wood in the house, but I have found that there is a threshold beyond which even I cannot tolerate the mess! We moved our operation down to the basement three days ago. I am much happier now. I can work in peace without worries of how long the mess will take for cleanup and I don't feel guilty for trashing the place. It was beginning to feel like we were remodeling. If you have never lived in a house that is being remodeled, it SUCKS!
We ran into problems when the plans gave us a template for setting the angle for the innermost rib of each wing panel. After getting both wing panels built using the supplied template, we went to join the panels and found they didn't meet on the top when using the supplied dihedral brace.
We went out and got a protractor and measured the template and the dihedral brace. They both measured 5 degrees. Formula: 1 Dihedral brace of 5 degrees = 2(template of 5 degrees). That doesn't compute! We were 5 degrees out of tolerance. Doh![:@] Lesson learned. We've changed our template to 2.5 degrees for kit number two.
We joined the wings and filled the gap. Used epoxy to fill it (before I asked for advice). It may be heavier than it needed to be, but we're slapping an Irvine 53 (heh, heh!) on it, so it should be able to carry the extra weight.
We still have to wrap the joint between the two wing panels in fiberglass/epoxy and then add ailerons, hardware and the servo. The plans call for one servo to drive both ailerons. The wings have been shaped now and are really starting to look like an airfoil.
We have the vertical stabilizer, horizontal stabilizer, elevator and rudder done and waiting to be mounted to the fuselage.
For the past couple of days, Eva and I have been working on the fuselage. We installed the firewall, which has been drilled out for fuel lines, the engine mount and the throttle control. We then added fuselage doublers to the area under where the wing is mounted, and some diagonal stiffeners toward the tail.
Things are coming along nicely right now. Here are the latest pics:
01-13-2005 | 11:54 PM
#11
Senior Member
My Feedback: (50)
Joined: Mar 2002
Posts: 5,405
Likes: 0
Received 0 Likes
on
0 Posts
From: Mira Mesa, CA
Wow! Nice work! That really is a 2nd or 3rd airplane but you could easily throw an ARF together to start learning while you take your time on these babies! (Tail Dragger or bust!)
I even saw a Monty Python reference on this thread (hint, hint, nudge nudge..) which is good stuff-
I love those Irvines, just stick with 5% nitro, an OS-8 and something in the range of 11x6 for sport flying--(Keep in mind the Tower-46 muffler fits the Irvine, and it adds power if you need it down the road for $15-)
Cheers!
01-14-2005 | 10:24 AM
#12
Thread Starter
My Feedback: (1)
Razor,
Thanks for the reply! I've got a few OS #8 plugs that I just picked up from the shop, and we have plans to hang a 12x6 APC prop on each plane. I read a bunch of posts that the guys had made regarding the Irvines. I had decided the same as you... that we would try running 5% nitro through them. What do you think about the 12x6?
Thanks for the reply! I've got a few OS #8 plugs that I just picked up from the shop, and we have plans to hang a 12x6 APC prop on each plane. I read a bunch of posts that the guys had made regarding the Irvines. I had decided the same as you... that we would try running 5% nitro through them. What do you think about the 12x6?
01-14-2005 | 11:40 AM
#13

Senior Member
Joined: Oct 2003
Posts: 999
Likes: 0
Received 0 Likes
on
0 Posts
From: _,
no fair i want a 6 foot long hard wood counter! looks great... much better than my first *notes the circle of life* have fun and keep it up, it only gets more fun from the frist one... and more addictive each time... eventualy ull stop using the book too... just the plans... and then.... ull make your own plans.... and it will all be fun fun fun fun fun.
looks great... much better than my first *notes the circle of life* have fun and keep it up, it only gets more fun from the frist one... and more addictive each time... eventualy ull stop using the book too... just the plans... and then.... ull make your own plans.... and it will all be fun fun fun fun fun.
01-14-2005 | 02:16 PM
#14

I usually save the 12-6 props for 60 size or larger engines. The Irvings seem to have more torque however so it will probably be a good match for pulling power. If you are after speed I would stick an APC 11-7 on it and hang on! [8D]
01-14-2005 | 02:38 PM
#15
Hi!
Hope you don't think this is a trainer aircraft...it isn't! If you are new to R/C get a high winged trainer aircraft like the Kyosho Calmato ARF trainer.
A 12x6 APC would be just fine if you are going to use a 10cc engine.
Regards!
Jan K
Sweden
Hope you don't think this is a trainer aircraft...it isn't! If you are new to R/C get a high winged trainer aircraft like the Kyosho Calmato ARF trainer.
A 12x6 APC would be just fine if you are going to use a 10cc engine.
Regards!
Jan K
Sweden
01-14-2005 | 07:59 PM
#16
Senior Member
Joined: Aug 2002
Posts: 868
Likes: 0
Received 0 Likes
on
0 Posts
From: West Middlesex,
PA
I'll chime in with some of the others here. Get a trainer!!!! Buy the Nexstar arf, $109 or something like that. Use your current radio
and put on an OS .46 AX or Thunder Tiger .46 Pro. Flying the Nexstar will give you great confidence and stick time in order for you to try out the new beauties that your currently building.
Dave...
and put on an OS .46 AX or Thunder Tiger .46 Pro. Flying the Nexstar will give you great confidence and stick time in order for you to try out the new beauties that your currently building.
Dave...
03-29-2005 | 10:22 PM
#17
Thread Starter
My Feedback: (1)
It's been a while since we have been able to post our progress on the Black Baron. Here's the latest news:
We've mounted the Irvine .53. First try wasn't successful. Didn't get the mounting holes drilled straight (no press) and had to do them again. Second time was the charm. We had to relieve the mount to accept the engine, but after that, it went in perfect. The Irvine is a pretty engine, don't you think? Hopefully it will stay that way!
We decided to install a fueling valve so that we wouldn't have to mess with the fuel lines for fueling. They will be cowled fairly tightly and I didn't want to have to spend lots of time fighting with the plane instead of flying it. We've made sure to epoxy all surfaces that may come incontact with fuel. The fuel tank is in, and will be surrounded with a thin layer of foam.
03-29-2005 | 10:38 PM
#18
Thread Starter
My Feedback: (1)
We've installed the horizontal and vertical stabs. We've also added the landing gear structure.
The gear is made of wire, bent to shape, and bound together at the axle with wire and solder. We still have to sheet the gear and cover up all that ugly wire. Still trying to figure out what we will use. We are open to suggestions!
The gear is made of wire, bent to shape, and bound together at the axle with wire and solder. We still have to sheet the gear and cover up all that ugly wire. Still trying to figure out what we will use. We are open to suggestions!
03-29-2005 | 10:47 PM
#19
Senior Member
My Feedback: (1)
Joined: Aug 2004
Posts: 2,424
Likes: 0
Received 0 Likes
on
0 Posts
From: Springtown,
TX
looks good so far! Sheet the gear? I'm not sure I understand that. You're going to cover up the wire with sheeting? That irvine does look sweet! However, if it's tightly cowled, then it won't matter too much if it stays "perty."
03-29-2005 | 11:03 PM
#20
Thread Starter
My Feedback: (1)
Our latest work has been to install the servos and pushrods. We also put in a combination charging jack/power switch. The wing bolts on with 10-24 nylon bolts and they're not quickly removed or installed. They make the plane look really clean, though. No rubber bands to look at!
The servos and rods went in easily. Added a few braces to guard against flex in flight. We've got the engine hooked up to its servo, but we are waiting on the rudder and elevator.
I am thinking about covering the control surfaces before we install them. Maybe not. Still undecided. It's probably time to watch that Monokote video we bought!
The kit called for a wire for a tailskid. We put a tailwheel in instead.
03-29-2005 | 11:09 PM
#21
Thread Starter
My Feedback: (1)
2slow2matter, what I meant by "sheeting" the gear was to do something to get the landing gear structure to look like that on a Piper Cub. I was thinking of using ply that was grooved to accept the wires. The ply would be placed on the outside and inside to "sandwich" the structure. I've got to figure out how to do that somehow.
03-29-2005 | 11:10 PM
#22
Senior Member
My Feedback: (4)
Joined: Aug 2004
Posts: 489
Likes: 0
Received 0 Likes
on
0 Posts
From: Lone Grove,
OK
You're gonna want to take that switch off to cover, that way the switch covers up the covering where you cut the hole in the fuse. It's much cleaner looking...
03-29-2005 | 11:30 PM
#23
Thread Starter
My Feedback: (1)
We've got the switch just pushed into place for the pics. We did have plans to cover first and then do the permanent installation afterwards. Thanks for your advice, twistr.
BTW, does anyone have input on whether we should cover the rudder, ailerons and elevator before or after they are installed? How do you guys do it?
BTW, does anyone have input on whether we should cover the rudder, ailerons and elevator before or after they are installed? How do you guys do it?
03-30-2005 | 12:50 AM
#24
Senior Member
My Feedback: (6)
Joined: Jul 2003
Posts: 213
Likes: 0
Received 0 Likes
on
0 Posts
From: West Chester , OH
I would do them prior to install makes for a cleaner look and less stressfull when you go to cover everything.
Redard's
Redard's

