


Bridi Super Kaos Build
 04-12-2011, 11:28 AM
#126

My Feedback: (3)
Join Date: Apr 2008
Location: Montreal,
QC, CANADA
Posts: 5,200
Likes: 0
Received 5 Likes
on
5 Posts
Ah, that's reassuring. In that case your fuse will be straight as an Arrow and not Kaotic ! 
Try using laminating epoxy with the CF - the other stuff is too thick and cures too fast. Roughen up the wood surface a tad before applying the CF - the epoxy will hold better otherwise it can "shear" off. The fast cure stuff also becomes brittle quite quickly. PU glue sounds like it works fine too - dunno if it foams up leaving bumps.
David.
 04-12-2011, 05:07 PM
#127

ORIGINAL: doxilia
I have to share Jeff's thoughts - nicely done Brian!
That's some thinking outside of the box! [8D].
A couple of further ones: One of the things I was never crazy about with HW rail mounts was the difficulty in finishing the cowl interior and the gradual weakening of the wood due to the work done on it by the engine... but, this was the way we did it back then. A suggestion in that regard would be to glass the cowl area to the extent possible and make it nice and solid prior to the finish. Another possibility would be to layup CF on the rail tops (and sides if you have the space) now that you are into using composites. The F3A guys use CF all around up front now. Not that it is closely related but you might want to check out this fantastic bipe build:
http://www.rcuniverse.com/forum/m_10322254/tm.htm
I found it very educational - nice building Tuny is doing! Bulldozing speed...[:-]
Another thing I found with using clamps like the ones you are using to hold things together is that it is a good idea to back the fuse sides up with some scrap 1/4'' wood (or so). Former cutouts work nicely for this and spread the clamp pressure over a wider area. It prevents the clamps from producing small indentations in your fuse sides which arguably don't need a great deal of deep sanding. I also found that with the bigger clamps (I like the smaller ones that just are wide enough for 40 and 60 size fuses - I think you have one on the FW area), the weight of the arm can produce an undesirable torque on the joint even if counterbalanced by another clamp in the other direction (as you have it). This can lead to skewed and nonparallel fuse sides. You usually don't appreciate it until the clamps are removed and then you end up with a fuse that ''rocks'' slightly rather than one that is 100% flat on top (as in the Kaos) - it leads to major hassles later, don't ask how I know.
Anyhow just a couple of things to watch out for. Hey, I recall seeing a fuse jig in your shop! - why is it not being used?
Keep up the good work.
This gives me ideas though.
One plane at a time... I'll figure it out. At least we are shown how it is done!
Brian
04-12-2011, 05:52 PM
#128
My Feedback: (3)
Join Date: Apr 2008
Location: Montreal,
QC, CANADA
Posts: 5,200
Likes: 0
Received 5 Likes
on
5 Posts
ORIGINAL: Ilikebip
After viewing Tuny's thread, I can honestly say this gentleman has forgotten more than I know. Just like 8178. I feel OVERWHELMED! (And seriously out of my league!)
This gives me ideas though.
After viewing Tuny's thread, I can honestly say this gentleman has forgotten more than I know. Just like 8178. I feel OVERWHELMED! (And seriously out of my league!)
This gives me ideas though.

Told you! Outstanding skills eh? There is an art in putting threads together too and his is clear and to the point - lots of good well lit pictures.
Glad you enjoyed that. At some point you should also check out the build of another F3A model (not a bipe) by Elias in Greece. His plane is called the Neutrino. Went from napkin concept to final execution full steam, 7 hours a day for a year or so. Here's his thread:
http://www.rcuniverse.com/forum/m_83..._1/key_/tm.htm
David.
04-14-2011, 08:40 PM
#129
In the jig and glued!
I like how nice the retracts work. I need to thank 8178 for showing me how this gets done!!!
I also heated and shaped the tank to fit and use padding.
This is exciting to see.
Brian
I like how nice the retracts work. I need to thank 8178 for showing me how this gets done!!!
I also heated and shaped the tank to fit and use padding.
This is exciting to see.
Brian
04-14-2011, 09:09 PM
#130
My Feedback: (3)
Join Date: Apr 2008
Location: Montreal,
QC, CANADA
Posts: 5,200
Likes: 0
Received 5 Likes
on
5 Posts
Good stuff Brian!
A couple of ideas. I find it helpful to plan for the forward pushrods before framing up with glue. Drilling the F2 former where they will pass is easier to do before the fuse is built. It just becomes a matter of routing them through the holes/supports you have made. Of course its not so bad if you have to do it afterward, its just sometimes tricky to get a drill in position. A dremel is helpful here especially the kind with an extension shaft (which I wish I had).
Since you will have tristock (big one by the looks of it) along the fuse sides in the fuse front bottom (in the retract bay), I find it preferable to trim the 1/4" tristock against the front of the F2 former a little short so that you can butt up the larger stock against the former. If you jig the assembly before hand as you have done, you can even cut and sand each tristock so that they mate at 45 degrees for a nice tight and strong structure.
Nicely done job on the gear setup!
David.
04-15-2011, 08:11 AM
#131
Thanks for the advice, David.
I am at the point in Joe Bridi's instructions that tell you to button up the bottom of the airplane. But before I do this, I have some more planning to do. I need to decide where to install the pull-pull. Most people might do this before the construction of the fuse. Honestly, I don't have much experience with pull-pull. I used it once on the Dave Patrick Ultimate, but I do not think I did it correctly, even though it worked great. So I have waited to see what I am working with to plan this. Hopefully it won't bite me too bad for doing this.
I have read I am supposed to have a slight amount of slack in the side not pulling. For some reason I cannot wrap my head around this. If there is any slack in the line, the rudder would never be stable at neutral... Where is my thinking going wrong?
Because of the extra weight added to the nose, I was thinking I may want to install the rudder servo further back into the fuse. With this, I will need to route the elevator pushrod over the servo.
At the moment I am wondering if I should use pull-pull.
I am looking through the RCU search engine for something I can imitate. I am on hold until I decide something.
Brian
04-15-2011, 09:13 AM
#132


Hi Brian.
I don't agree with the statement that there should be slack in the line. Just make sure the servo horn connection points are the same width as the rudder control horn connection points. I put pull-pull in my Dirty Birdy and it worked very well.
I don't agree with the statement that there should be slack in the line. Just make sure the servo horn connection points are the same width as the rudder control horn connection points. I put pull-pull in my Dirty Birdy and it worked very well.
04-15-2011, 09:30 AM
#133
AllTheGoodNamesAreTaken-
Hi Brian.
I don't agree with the statement that there should be slack in the line. Just make sure the servo horn connection points are the same width as the rudder control horn connection points. I put pull-pull in my Dirty Birdy and it worked very well.
Hi Brian.
I don't agree with the statement that there should be slack in the line. Just make sure the servo horn connection points are the same width as the rudder control horn connection points. I put pull-pull in my Dirty Birdy and it worked very well.
I actually was studying these pics just before you sent them.
Question: Did you cross the lines going out the back of the fuse?
Brian
04-15-2011, 10:06 AM
#134
No, I didn't cross the lines. The hardest part is making the exit holes. After you measure and determine where the exit hole should be, poke a small hole with a T pin and thread the cable through. Hook everything up and let the cable "saw" the correct location by cycling the servo. Once the correct location is finalized, thread the cable through a section of inner and outer nyrod. Open the hole in the fuse to accomidate the outer nyrod tube. Glue the outer nyrod in place, then remove the cable and inner nyrod. Sand the outer nyrod flush. Now the cable will be perfectly centered in the outer nyrod "guide". Hope that makes sense.
 04-15-2011, 06:08 PM
#136
My Feedback: (1)
Join Date: Dec 2004
Location: Farrell,
PA
Posts: 825
Likes: 0
Received 0 Likes
on
0 Posts
ORIGINAL: Ilikebipes
I have read I am supposed to have a slight amount of slack in the side not pulling. For some reason I cannot wrap my head around this. If there is any slack in the line, the rudder would never be stable at neutral... Where is my thinking going wrong?
I have read I am supposed to have a slight amount of slack in the side not pulling. For some reason I cannot wrap my head around this. If there is any slack in the line, the rudder would never be stable at neutral... Where is my thinking going wrong?
At neutral rudder both lines should be adjusted so they are tight. Depending on the geometry, the non pulling side could go slack as the rudder is deflected.
If the cable spacing on your servo is wider than the spacing of the cables on the rudder horns then the non pulling side will go slack when the rudder is deflected. As it returns to neutral both cables tighten up again. This is desirable.
If the cable spacing on the servo is narrower than on the rudder then the non pulling cable will actually tighten and cause your servo to strain/bind. Not desirable.
The distance the rudder horn is from the hinge line also factors in. The closer to the hinge line the better.
Hope this makes sense!
Great work on the build! Keep it up!

RG
04-19-2011, 06:58 PM
#139
Hi again...
I am looking over my work and am pleased so far. However...
Can anyone tell me of anything I may be doing (other than the retracts themselves) that throws red flags as far as weight penalties? I was thinking the motor mounts, but I would have added weight by adding fuse doublers and fiberglass mount. I am hoping the differences cancel themselves out.
I suppose I could have built it with a modern mount and used CF veil for fuse doublers...
I hope to save a few ounces with pull-pull.
I am using Hitec 625 MG's all around except for throttle. Using 2 servos out in the wings will hurt me. I'd love to glass it, but I am thinking I might be better off with monokote...
I'll be using a 2 3/4" GP aluminum backed spinner...
I'll be going to foam tires for flying...
Suggestions please.
Brian
04-19-2011, 08:27 PM
#140
Senior Member
ORIGINAL: Ilikebipes
Hi again...
I am looking over my work and am pleased so far. However...
Can anyone tell me of anything I may be doing (other than the retracts themselves) that throws red flags as far as weight penalties? I was thinking the motor mounts, but I would have added weight by adding fuse doublers and fiberglass mount. I am hoping the differences cancel themselves out.
I suppose I could have built it with a modern mount and used CF veil for fuse doublers...
I hope to save a few ounces with pull-pull.
I am using Hitec 625 MG's all around except for throttle. Using 2 servos out in the wings will hurt me. I'd love to glass it, but I am thinking I might be better off with monokote...
I'll be using a 2 3/4'' GP aluminum backed spinner...
I'll be going to foam tires for flying...
Suggestions please.
Brian
BTW, back then the servos we used were nothing compared to today's stuff. Servos of a reasonable size to fit the available room, struggled to make more than 40 in-oz of torque, and they were analog. MG servos are heavier than you need as is any servo larger than mini size putting out 50 in-ozs.
Recommend the pull-pull on rudder. Maybe use a JR9411sa or similar Hitec on rudder. Used pull-pull since the Arrow days of the early to mid 80's on both the glass version and the wood version. The only trick on the wood version is to use a length of small carbon tube with sandpaper glued on as a sanding tool to carefully and precisely open the sides of the fuse at the correct angle to allow bind free actuation.
Recommend kevlar lines rather than steel. Use small eye-bolts for the kevlar, and tie the cord in the eyes. A drop of thin ca on the kevlar will secure it. Eye bolts can be really small; just make sure the threaded part isn't so small that it is a sloppy fit in clevises
Hope this helps a little
04-19-2011, 08:33 PM
#141
I agree, I don't think weight will be an issue. Mine has extra epoxy and added servos and it's still under 7 lbs. It flew like a rocket the other day. I think it's the perfect weight, any lighter and it may get tossed around. You'll also have the wheels tucked in so that's going to help.
What engine are you using?
Tim
What engine are you using?
Tim
04-20-2011, 05:14 AM
#142
ORIGINAL: Ilikebipes
I have taken the easy way out in most things in my life and it has done nothing good for me. If a thing is worth doing, than it is worth doing it right. If my goal is a tail dragger, than there is no problem to that regard. But if my goal is to recreate a golden part of our histroy using modern equipment and in many cases, techniques, and to try and increase interest in CPA type events, then the taildragger would be cheating myself, and everyone I want to fly along side. I would have learned nothing, and unable to pass on nothing.
Regarding the weight issue...
Jim Whitley had an interesting concept. With his Daddy Rabbit, he originaly built it over 9 lbs. His second one was well over 8lbs.
His reason:
When you fly at many different flying sites in so many different locations, you never run into a consistant weather pattern. Weight is your friend in these conditions.
With an airframe that is designed to weigh around 7 1/2lbs WITH retracts, I am not at all concerned about weight.
For me, my VERY BEST flying airplanes (60 sized) weigh in between 8 1/2 to 9lbs. I am also going to be using composite materials. I'll try to keep the weight down in the build as the fuse and tailgrouping will be fiberglassed, and the wing will be Koverall. If there was ANYONE in my area that could teach me how to use silk, I would rather go that route as I have read this is how Mr. Bridi finished his aircraft.
I have never enjoyed the way my lighter aircraft fight the wind.
Brian
Hey Brian. Your build is looking great! I attached the above quote for you to re-read since you are now unnessasarily questioning yourself.
You talk about taking the easy way out and not learning anything by doing so. If you originally wanted to glass and Koverall your airframe, why are you changing to Monokote now?
04-20-2011, 07:25 AM
#143
rangerman-
What engine are you using?
What engine are you using?
HB .61 with PDP
AllTheGoodNamesAreTaken-
Hey Brian. Your build is looking great! I attached the above quote for you to re-read since you are now unnessasarily questioning yourself.
You talk about taking the easy way out and not learning anything by doing so. If you originally wanted to glass and Koverall your airframe, why are you changing to Monokote now?
How heavy do you think it will be? I've built 3 Super Kaos's 30 years ago give or take, and none weighed more than 7 lbs (the one I silked and doped). Even the 7 pounder flew light but the 6 1/4 pounders (monokoted) flew even lighter, of course.
BTW, back then the servos we used were nothing compared to today's stuff. Servos of a reasonable size to fit the available room, struggled to make more than 40 in-oz of torque, and they were analog. MG servos are heavier than you need as is any servo larger than mini size putting out 50 in-ozs.
BTW, back then the servos we used were nothing compared to today's stuff. Servos of a reasonable size to fit the available room, struggled to make more than 40 in-oz of torque, and they were analog. MG servos are heavier than you need as is any servo larger than mini size putting out 50 in-ozs.
Thanks.
I have had problems with standard servos centering, even at 6volts. I also like the speed the current servos travel: .15 @ 6 volts... However, I am not antithetical to rethinking my servo options. They may change as this would help in weight penalty if the airframe gets much over 7lbs.
It's looking like I am aiming for 7lbs. I have been using the lightest wood I can. Most of the wood from the Eureka short kit has been very light and great quality. I believe Don told me he orders his wood from The Balsa Store.
Kevlar vs steel wire.... hmmmm.
Brian
04-28-2011, 08:01 AM
#144
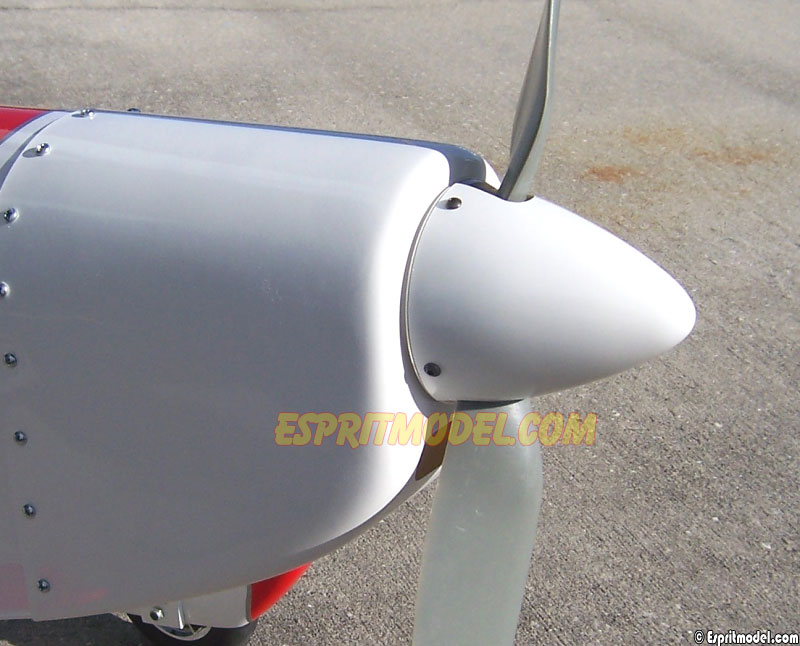
I'm Bummed!!!! Tower doesn't carry a 2 3/4" aluminum backplate plastic spinner!!! I really like this product. 
Maybe I'll just have to bit the bullet and go with the Tru Turn 120 slot now.
Bummer...
Brian
Maybe I'll just have to bit the bullet and go with the Tru Turn 120 slot now.
Bummer...
Brian
04-28-2011, 09:12 AM
#145
My Feedback: (3)
Join Date: Apr 2008
Location: Montreal,
QC, CANADA
Posts: 5,200
Likes: 0
Received 5 Likes
on
5 Posts
Brian,
you could use a Dave Brown Vortech - a little cheaper, a little heavier (0.2 oz)
http://www3.towerhobbies.com/cgi-bin...?&I=LXB948&P=7
http://www3.towerhobbies.com/cgi-bin...?&I=LXKD70&P=7
That's a big spinner! Is that what the plans show? I would have thought 2.5" would be plenty.
David.
you could use a Dave Brown Vortech - a little cheaper, a little heavier (0.2 oz)
http://www3.towerhobbies.com/cgi-bin...?&I=LXB948&P=7
http://www3.towerhobbies.com/cgi-bin...?&I=LXKD70&P=7
That's a big spinner! Is that what the plans show? I would have thought 2.5" would be plenty.
David.
 04-28-2011, 09:48 AM
#147
ORIGINAL: doxilia
Brian,
you could use a Dave Brown Vortech - a little cheaper, a little heavier (0.2 oz)
http://www3.towerhobbies.com/cgi-bin...?&I=LXB948&P=7
http://www3.towerhobbies.com/cgi-bin...?&I=LXKD70&P=7
That's a big spinner! Is that what the plans show? I would have thought 2.5'' would be plenty.
David.
Brian,
you could use a Dave Brown Vortech - a little cheaper, a little heavier (0.2 oz)
http://www3.towerhobbies.com/cgi-bin...?&I=LXB948&P=7
http://www3.towerhobbies.com/cgi-bin...?&I=LXKD70&P=7
That's a big spinner! Is that what the plans show? I would have thought 2.5'' would be plenty.
David.
I ordered the nylon spinner to see if I'll want to use it, but I like the 120 slot Tru Turn because it fits APC props perfectly and I won't have to hack at the aluminum- throwing it out of balance. (Wow! Major run-on sentence. Ms. Kraft would be beating me over the head with a stick by now if I were still in high school!)
Jeff-
Great looking spinners, but nothing is in my size. [
 ]
]Brian
04-28-2011, 11:50 AM
#149
My Feedback: (3)
Join Date: Apr 2008
Location: Montreal,
QC, CANADA
Posts: 5,200
Likes: 0
Received 5 Likes
on
5 Posts
2.75" seems to be an odd size. For some reason nobody but TT makes them! Unless they are all nylon.
Well, TT are nice spinners...
I think I'm going to use a 3 blade prop on my next model - they're kinda cool.
David.
Well, TT are nice spinners...
I think I'm going to use a 3 blade prop on my next model - they're kinda cool.
David.
05-21-2011, 12:16 PM
#150
Still not sold on the GP spinner in the photo, but I would work.
I am having a hard time sleeping at night. I am dreaming about this airplane finished and in the air. I was honestly shocked after carving all that balsa; there is a lot of shape inside that wood! I can now affirm the thinking that a Bridi airplane is simply a box with a wing on it is dead wrong. The only difference between this fuse and another is the technology involved. To make the shape, you don't need a Phd in aeronautic engineering to come up with correct templates.
A lot of work, but it pays off enormously.
I have 2 canopies I am playing with. The first has a flat angle to the front of it, and the other is more "Bridi" like. I purchased it from Tower Hobbies. I think I have settled on the Tower canopy. I don't know if you'll notice it in the pics or in person, but I know the difference and I like it.
Pics:

