


BJ Craft Etude
 12-15-2016, 07:26 PM
#51
Member

Join Date: Mar 2016
Location: Mesa Arizona
Posts: 33
Likes: 0
Received 0 Likes
on
0 Posts
This is a very nice model. Couple of negatives, though. The canopy retaining mechanism is a little hard to use. It can be replaced with a center pin, but really shouldn't need to do that. The large size of the canopy, and the light material it is made of, makes it pretty flimsy and difficult to line up to install on the fuselage. I dealt with that by cross-bracing with balsa strips, but again, shouldn't have to. One side of my stab wouldn't snug up to the fuselage without working over the two bracing tube sockets. Finally, if you've assembled many ARFs and know what you're doing, then the limited assembly information available will be adequate. If you haven't, be aware there is very little assembly instruction information available for this model. You will be sifting through pictures and limited descriptions from the archive of other BJ Craft models that may (or may not) be similar. I for one would have really appreciated some form of assembly instructions specifically for this version of this model. I have experience assembling ARFs from SebArt, BJ Craft, Precision Aerobatics, Sig, World Models, Aeroworks and TopRCModel, but this one has been frustrating to get right through guess work. On the plus side, this is a great looking model that should fly at least as good as the other BJ Craft models I've flown, which have been great.
Last edited by cactusblues; 12-15-2016 at 07:29 PM.
 12-18-2016, 09:49 AM
#53
Member
Join Date: Mar 2016
Location: Mesa Arizona
Posts: 33
Likes: 0
Received 0 Likes
on
0 Posts
Be happy to share what I can on the assembly of the model. Just post your question(s) on this thread, and I'm sure you'll get more answers that you can count. Right ones and wrong ones.
12-18-2016, 11:18 AM
#54

My Feedback: (8)
Thanks for the offer, now on to a question.
I'm headed in the direction of using using the Himax 6330, 210 motor. In my Caelus I used a rear mount motor mount (supplied by F3A) and it seemed to work out just fine. In putting together my build list they (F3A) does not offer a ready made mount, I'm trying to convince F3A to make them and offer it for sale.
In the meantime I read about a front mount conversion kit for the Himax motor, whats the deal with the front mount versus the rear?.
I have no clue, other than the obvious difference between a rear or front mount.
12-18-2016, 12:09 PM
#55
Member
Join Date: Mar 2016
Location: Mesa Arizona
Posts: 33
Likes: 0
Received 0 Likes
on
0 Posts
My Etude included a rear mount firewall in the box. I'm sure it would be appropriate for the Himax motor, as I used it to rear mount my Motrolfly 4330 motor. You will likely have to ream out the motor hole in the front of the fuselage to accommodate removal of the motor if that is ever needed. Also, while I was waiting for F3A to get the Etude in stock, Mike sent me a template for the rear firewall so I could cut one out for myself, but didn't need to when one came in the box unexpectedly.
Last edited by cactusblues; 12-18-2016 at 12:17 PM.
12-18-2016, 06:34 PM
#57
Member
Join Date: Mar 2016
Location: Mesa Arizona
Posts: 33
Likes: 0
Received 0 Likes
on
0 Posts
I rear mounted a Himax 6330 in my Caelus too. Rear mounting that style of motor is my preference over a front mount. If you were installing a Pletty or one of the F3A style Hackers, a front mount would make sense. I think a rear mount on the firewall supplied with the model put in place with Hysol is just simpler and effective. I'm sure others here will see it differently. If you installed the Himax in your Caelus, it is exactly the same process in the Etude.
Last edited by cactusblues; 12-19-2016 at 11:58 AM.
12-28-2016, 03:33 AM
#58
Senior Member

Join Date: Sep 2004
Location: Claremore,
OK
Posts: 117
Likes: 0
Received 0 Likes
on
0 Posts
I'm rear mounting a Himax in my E'tube and used the included ply pieces. The nose ring will need to be opened up to allow motor removal. Kit also comes with ply pieces to front mount if you choose. I tried both options before gluing and decided rear mount was best for motor cooling.
Jim


Jim
Last edited by 32Ford; 12-28-2016 at 04:00 AM.
01-08-2017, 08:00 AM
#61

My Feedback: (41)
Also the planes are released for sale again.
Thanks, Mike
http://www.f3aunlimited.com/bj-craft...gn-spring-2016
and these are in stock:
http://www.f3aunlimited.com/bj-craft...n-not-finished
Thanks, Mike
http://www.f3aunlimited.com/bj-craft...gn-spring-2016
and these are in stock:
http://www.f3aunlimited.com/bj-craft...n-not-finished
01-08-2017, 10:09 AM
#62
Member
Join Date: Mar 2016
Location: Mesa Arizona
Posts: 33
Likes: 0
Received 0 Likes
on
0 Posts
Mike: What wheel pants are those installed on the Etude flight pics you have posted on your site? The ones that came with my model are pretty poor quality and would to replace them.
01-08-2017, 02:24 PM
#63
Senior Member
Join Date: Sep 2004
Location: Claremore,
OK
Posts: 117
Likes: 0
Received 0 Likes
on
0 Posts
01-08-2017, 02:44 PM
#64
Senior Member
Join Date: Sep 2004
Location: Claremore,
OK
Posts: 117
Likes: 0
Received 0 Likes
on
0 Posts
cactus, I was a little disappointed in my pants and gear legs as well. They are not painted. They are just left in gelcote. And the clear on my fuse is a little on the satin side. In fact the covering is a tad more shiny. A buddy of mine is going touch up the chip spots left from cutting cooling holes, paint my pants and gear legs and shoot another lite coat of clear on the fuse so it can be buffed.
Jim
Jim
01-08-2017, 03:14 PM
#65
Senior Member
Join Date: Sep 2004
Location: Claremore,
OK
Posts: 117
Likes: 0
Received 0 Likes
on
0 Posts
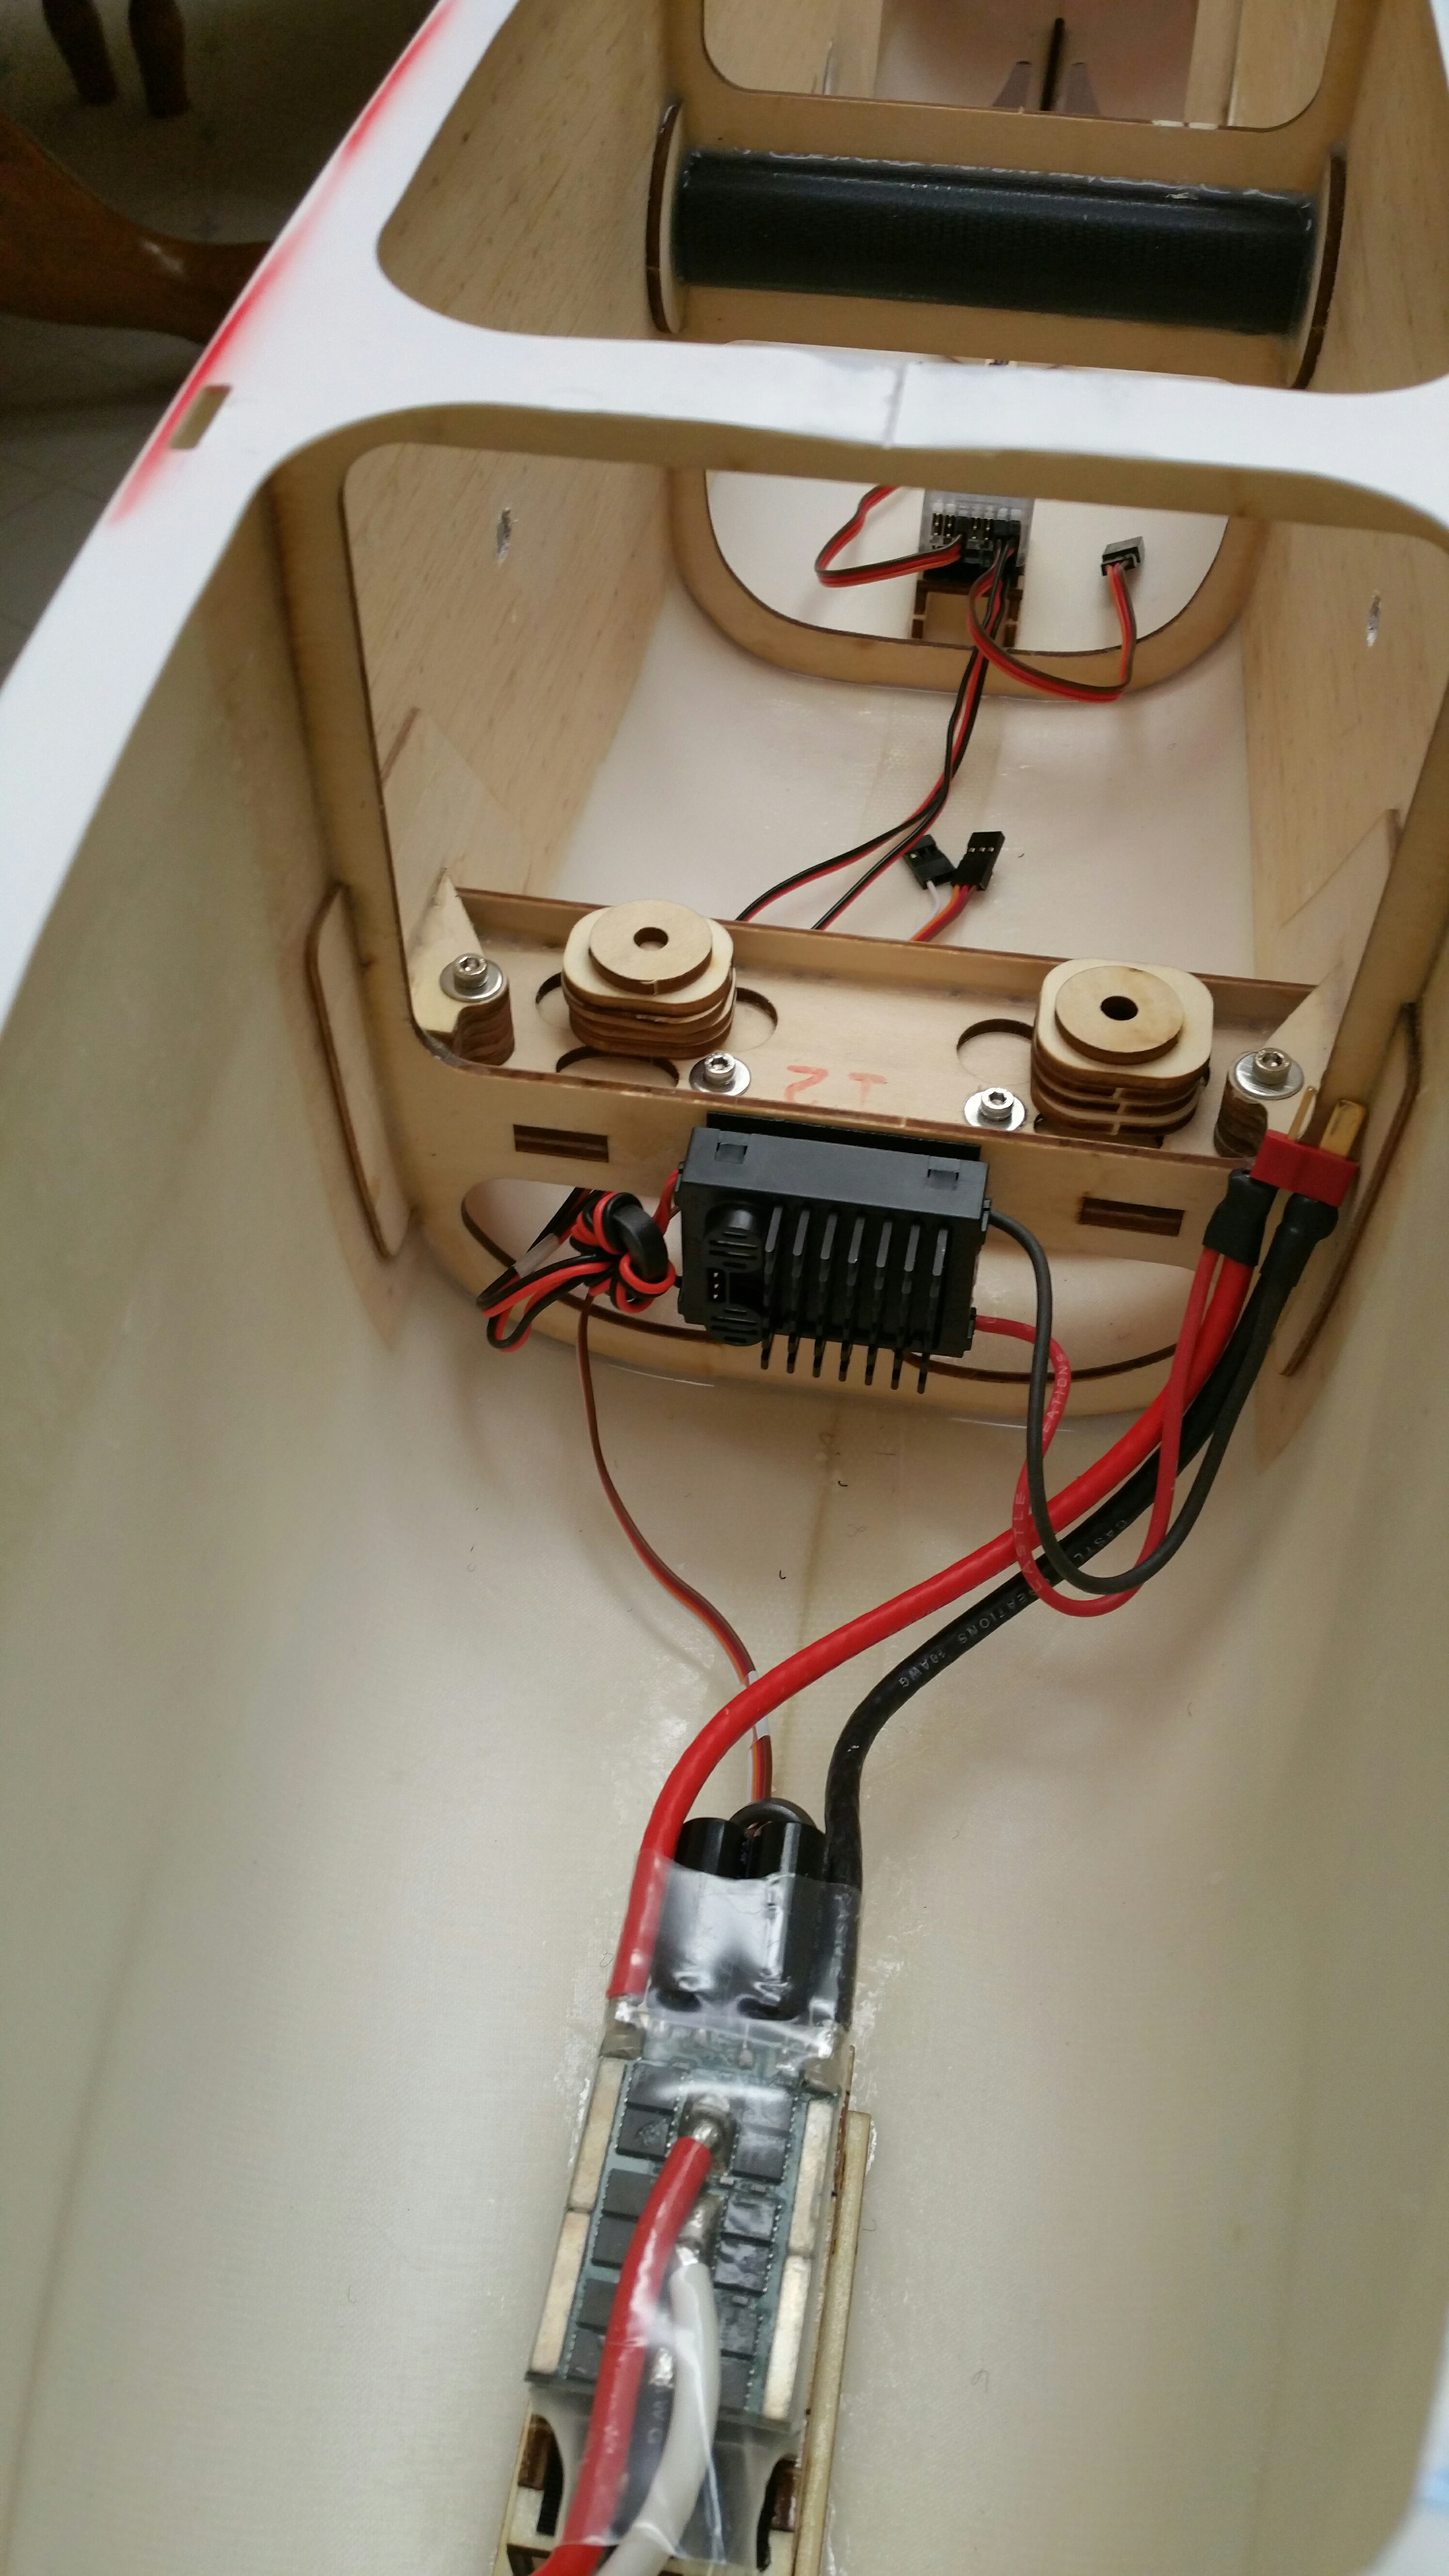
Some more pictures. I used Gator RC receiver and ESC mounts. I also used a piece of carbon fiber rod to reinforce the air exit cutout and another piece glued to the formers the attach my servo wires to.
Jim


Jim
01-08-2017, 04:54 PM
#66
Member
Join Date: Mar 2016
Location: Mesa Arizona
Posts: 33
Likes: 0
Received 0 Likes
on
0 Posts
Thanks, Jim. I've got some CF gear legs that I bought from Mike some time ago that I'll probably install on the Etude in the near future. I've also got a pair of CF pants I purchased from Precision Aerobatics for my Extra MX that I've never installed, which will look good on the Etude, too. I like the CF tube on the central line of the fuse bottom around the vent holes you installed, as that area is really thin/flimsy after cutting those holes. I just Hysol'd a popsicle stick in mine to stiffen it up. Worked fine.
Compared to other BJ models I've done, this Etude seems to be a lot thinner and lighter in the fuse area. Hope it holds up.
Compared to other BJ models I've done, this Etude seems to be a lot thinner and lighter in the fuse area. Hope it holds up.
01-09-2017, 05:26 PM
#68
Senior Member
Join Date: Sep 2004
Location: Claremore,
OK
Posts: 117
Likes: 0
Received 0 Likes
on
0 Posts
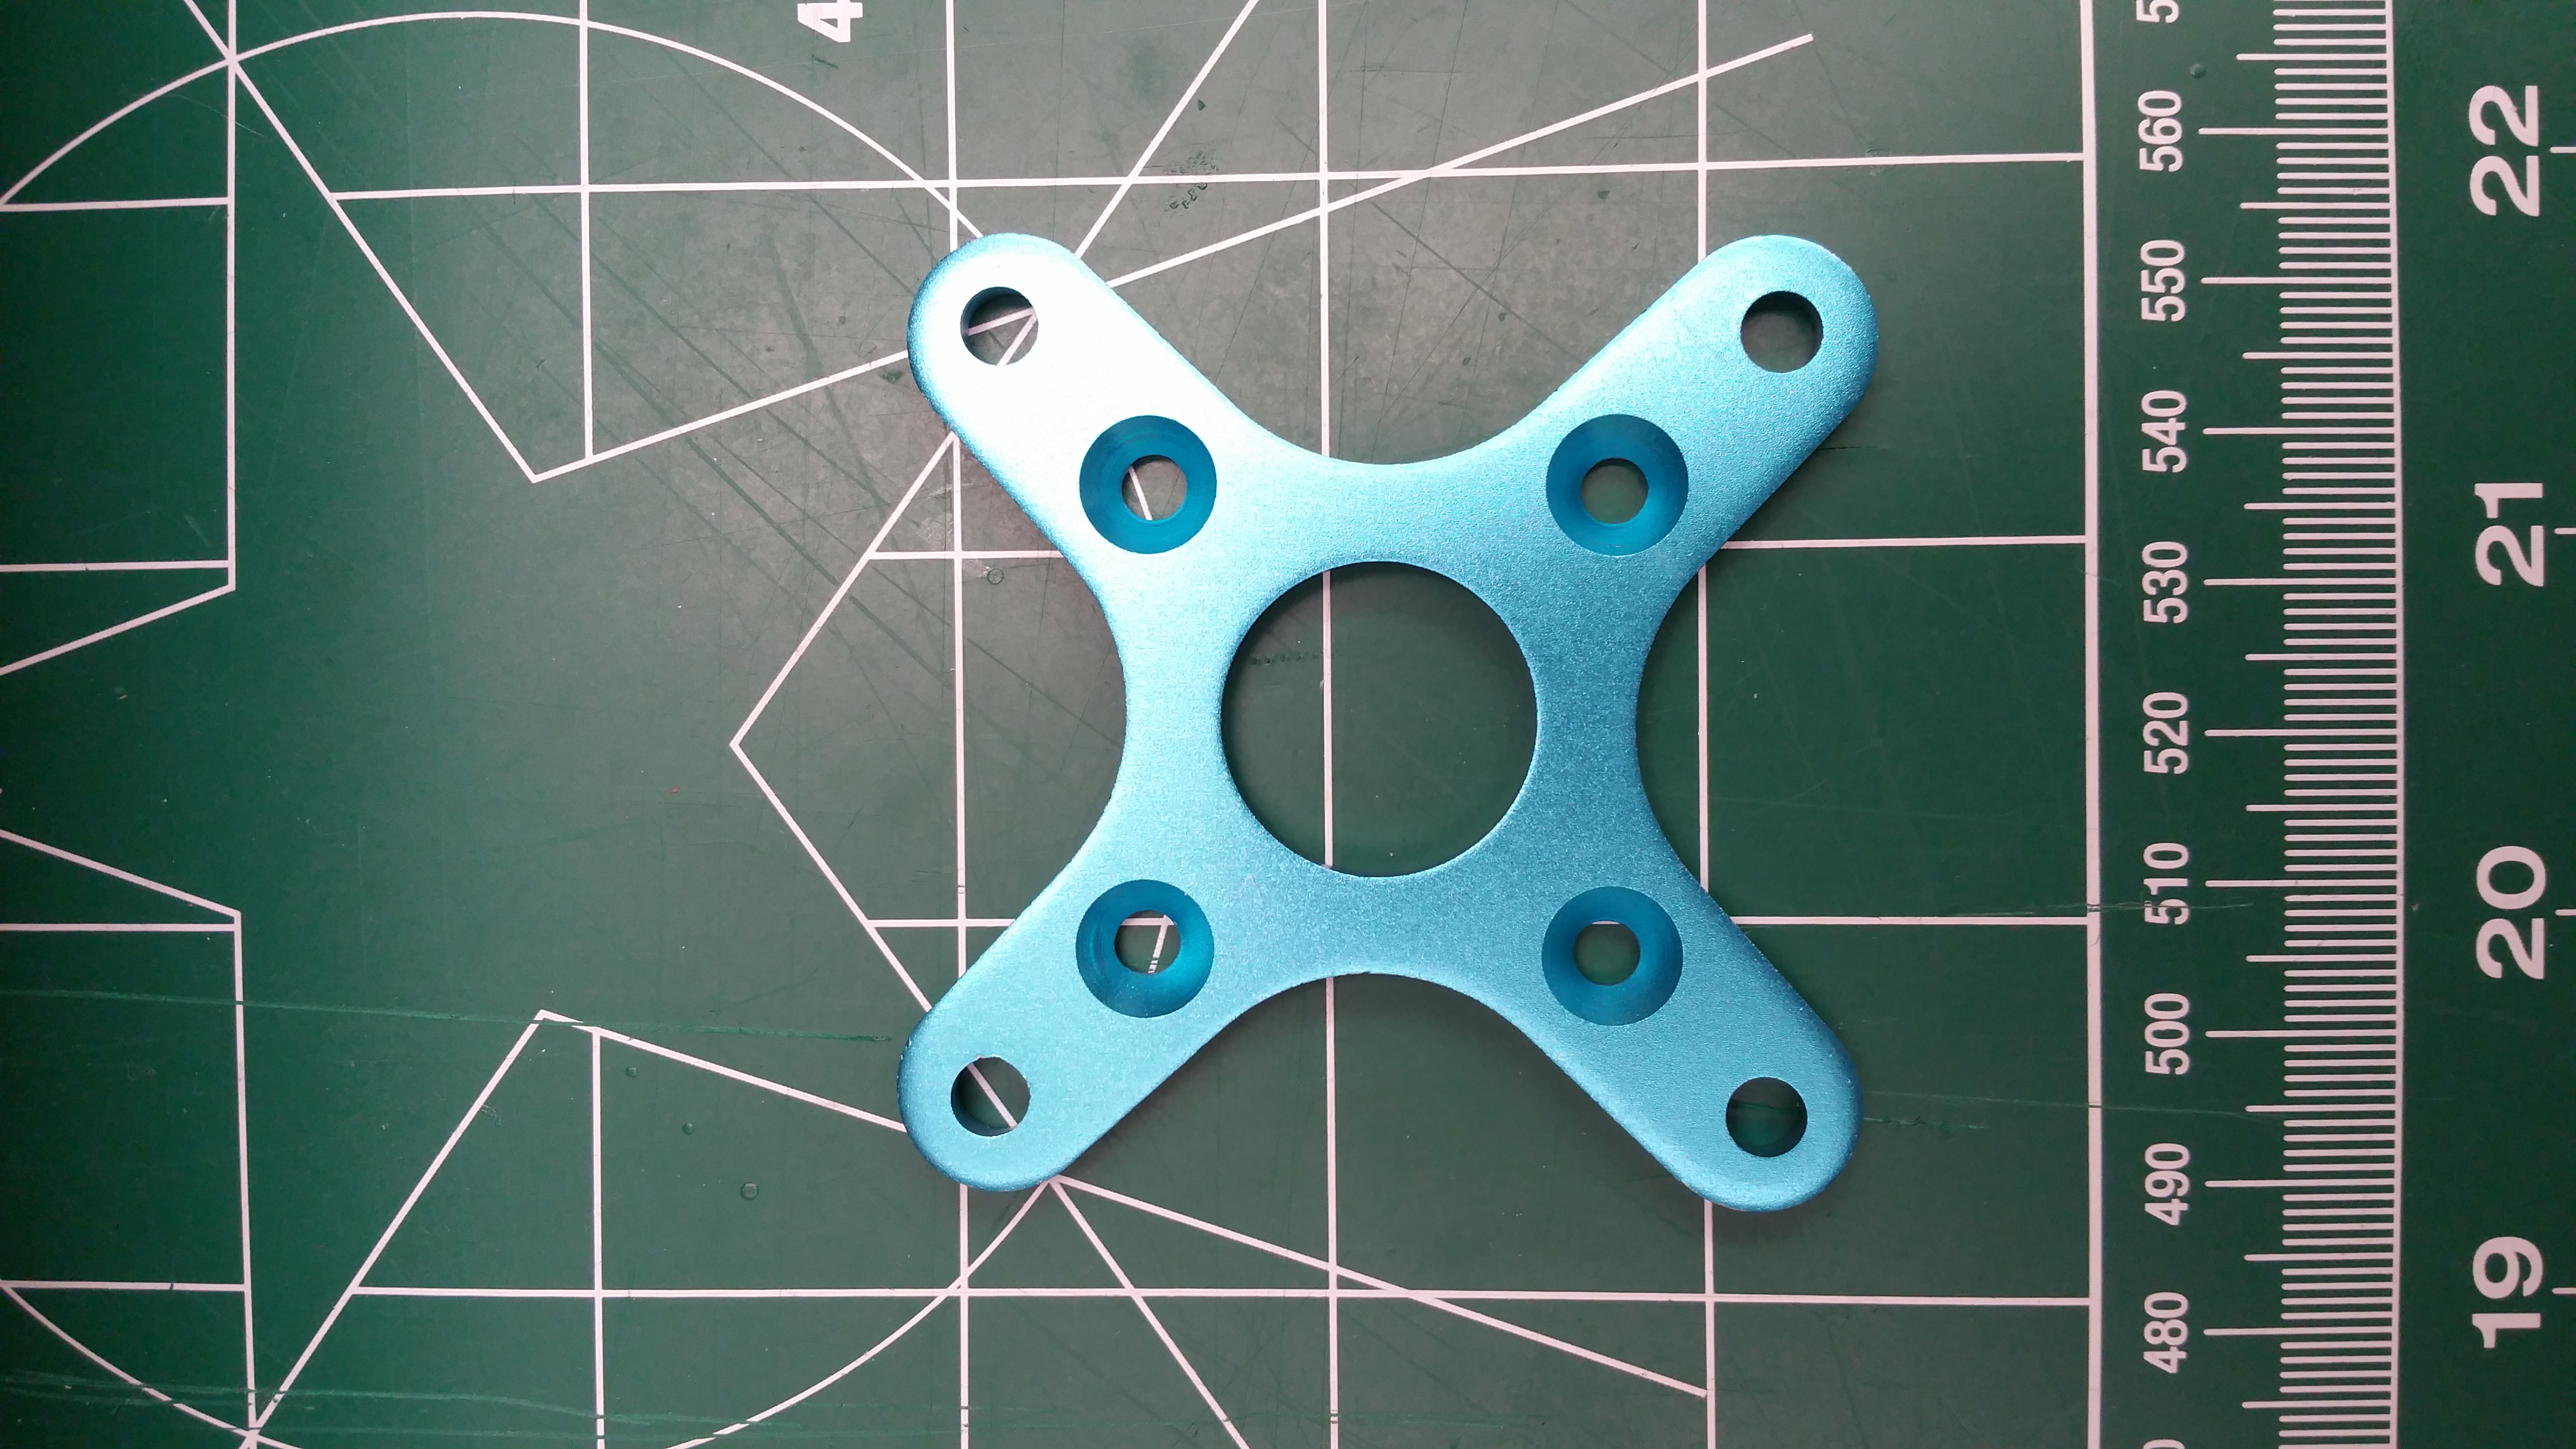
The Himax has 2 mounting patterns on the back. One is a 4 bolt pattern that matches the aluminum "X" mount it comes with. The other and slightly smaller pattern is a 3 bolt that is the same as the Plettenberg.
Jim
Jim
01-10-2017, 04:35 AM
#69
Senior Member
Join Date: Sep 2004
Location: Claremore,
OK
Posts: 117
Likes: 0
Received 0 Likes
on
0 Posts
Decided to put some decent rear adjusters in last night. When I checked my wing incidence the left was +.5 and the right was +.7. The kit comes with some adjusters but they are pretty crude and can be tedious to use when it comes to locking them down. Stabs are not adjustable but fortunately both of mine are zero.
Jim


Jim
01-10-2017, 06:04 AM
#70
Member
Join Date: Mar 2016
Location: Mesa Arizona
Posts: 33
Likes: 0
Received 0 Likes
on
0 Posts
I used the Gator incidence adjusters that F3A sells. I moved the adjustment area to the leading edge, and then used the kit provided adjusters to lock down the trailing edge tube. Worked out pretty well.
01-11-2017, 03:03 PM
#72
My Feedback: (41)
http://www.f3aunlimited.com/falcon-f...heel-pants-set
I think they changed to this.
The BJ Craft Wheel pants are actually very popular and bought by a lot of customers. Their fairly robust and hold up well.
Thanks, Mike
I think they changed to this.
The BJ Craft Wheel pants are actually very popular and bought by a lot of customers. Their fairly robust and hold up well.
Thanks, Mike
01-18-2017, 02:31 PM
#73
http://www.f3aunlimited.com/falcon-f...heel-pants-set
I think they changed to this.
The BJ Craft Wheel pants are actually very popular and bought by a lot of customers. Their fairly robust and hold up well.
Thanks, Mike
I think they changed to this.
The BJ Craft Wheel pants are actually very popular and bought by a lot of customers. Their fairly robust and hold up well.
Thanks, Mike
They have held up fine and I expect they will last considerably longer.
02-01-2017, 08:27 AM
#74
My Feedback: (8)
The Bird arrived yesterday.
I unpacked most of the parts and accessories and all seems to be in order. The paint work on the plane top notch as well as the covering. As mentioned multiple times here, no manual exists.
In looking at various BJ Craft photos as it relates to the rudder servo, it just looks odd the way they do it. Anyone care to share how you did the install or did you follow the way BJ did it.
02-01-2017, 08:59 AM
#75
The Bird arrived yesterday.
I unpacked most of the parts and accessories and all seems to be in order. The paint work on the plane top notch as well as the covering. As mentioned multiple times here, no manual exists.
In looking at various BJ Craft photos as it relates to the rudder servo, it just looks odd the way they do it. Anyone care to share how you did the install or did you follow the way BJ did it.
I was a bit concerned at first but it has not been a problem although I replace the ty-wrap at the beginning of each flying season.