


Wendell Hostetler 35% RV-4 Build
 12-10-2014 | 12:28 PM
#26

Joined: Aug 2002
Posts: 170
Likes: 0
Received 0 Likes
on
0 Posts
From: Washburn,
ME
You are welcome Snoopy. Yes the split cowl is nice. Fibertech did a very nice job on it as it even has a splice piece of fiberglass tape inside. I just drilled my holes and screwed it together then I removed the screws and epoxied 1/4 inch ply doublers over the screw holes. Makes for a decent job . You will find the cowl, pants, canopy and small scoop from them is top quality.
Frank
Frank

 12-29-2014 | 01:24 PM
#31
Joined: Aug 2002
Posts: 170
Likes: 0
Received 0 Likes
on
0 Posts
From: Washburn,
ME
Well fellow builders here's a couple picture of where I am at. I am having black square cut for the checkerboard on the rudder and wing tips and will finish trimming out then. Still have a long ways to go.
Frank
01-01-2015 | 11:08 AM
#34
Joined: Aug 2002
Posts: 170
Likes: 0
Received 0 Likes
on
0 Posts
From: Washburn,
ME
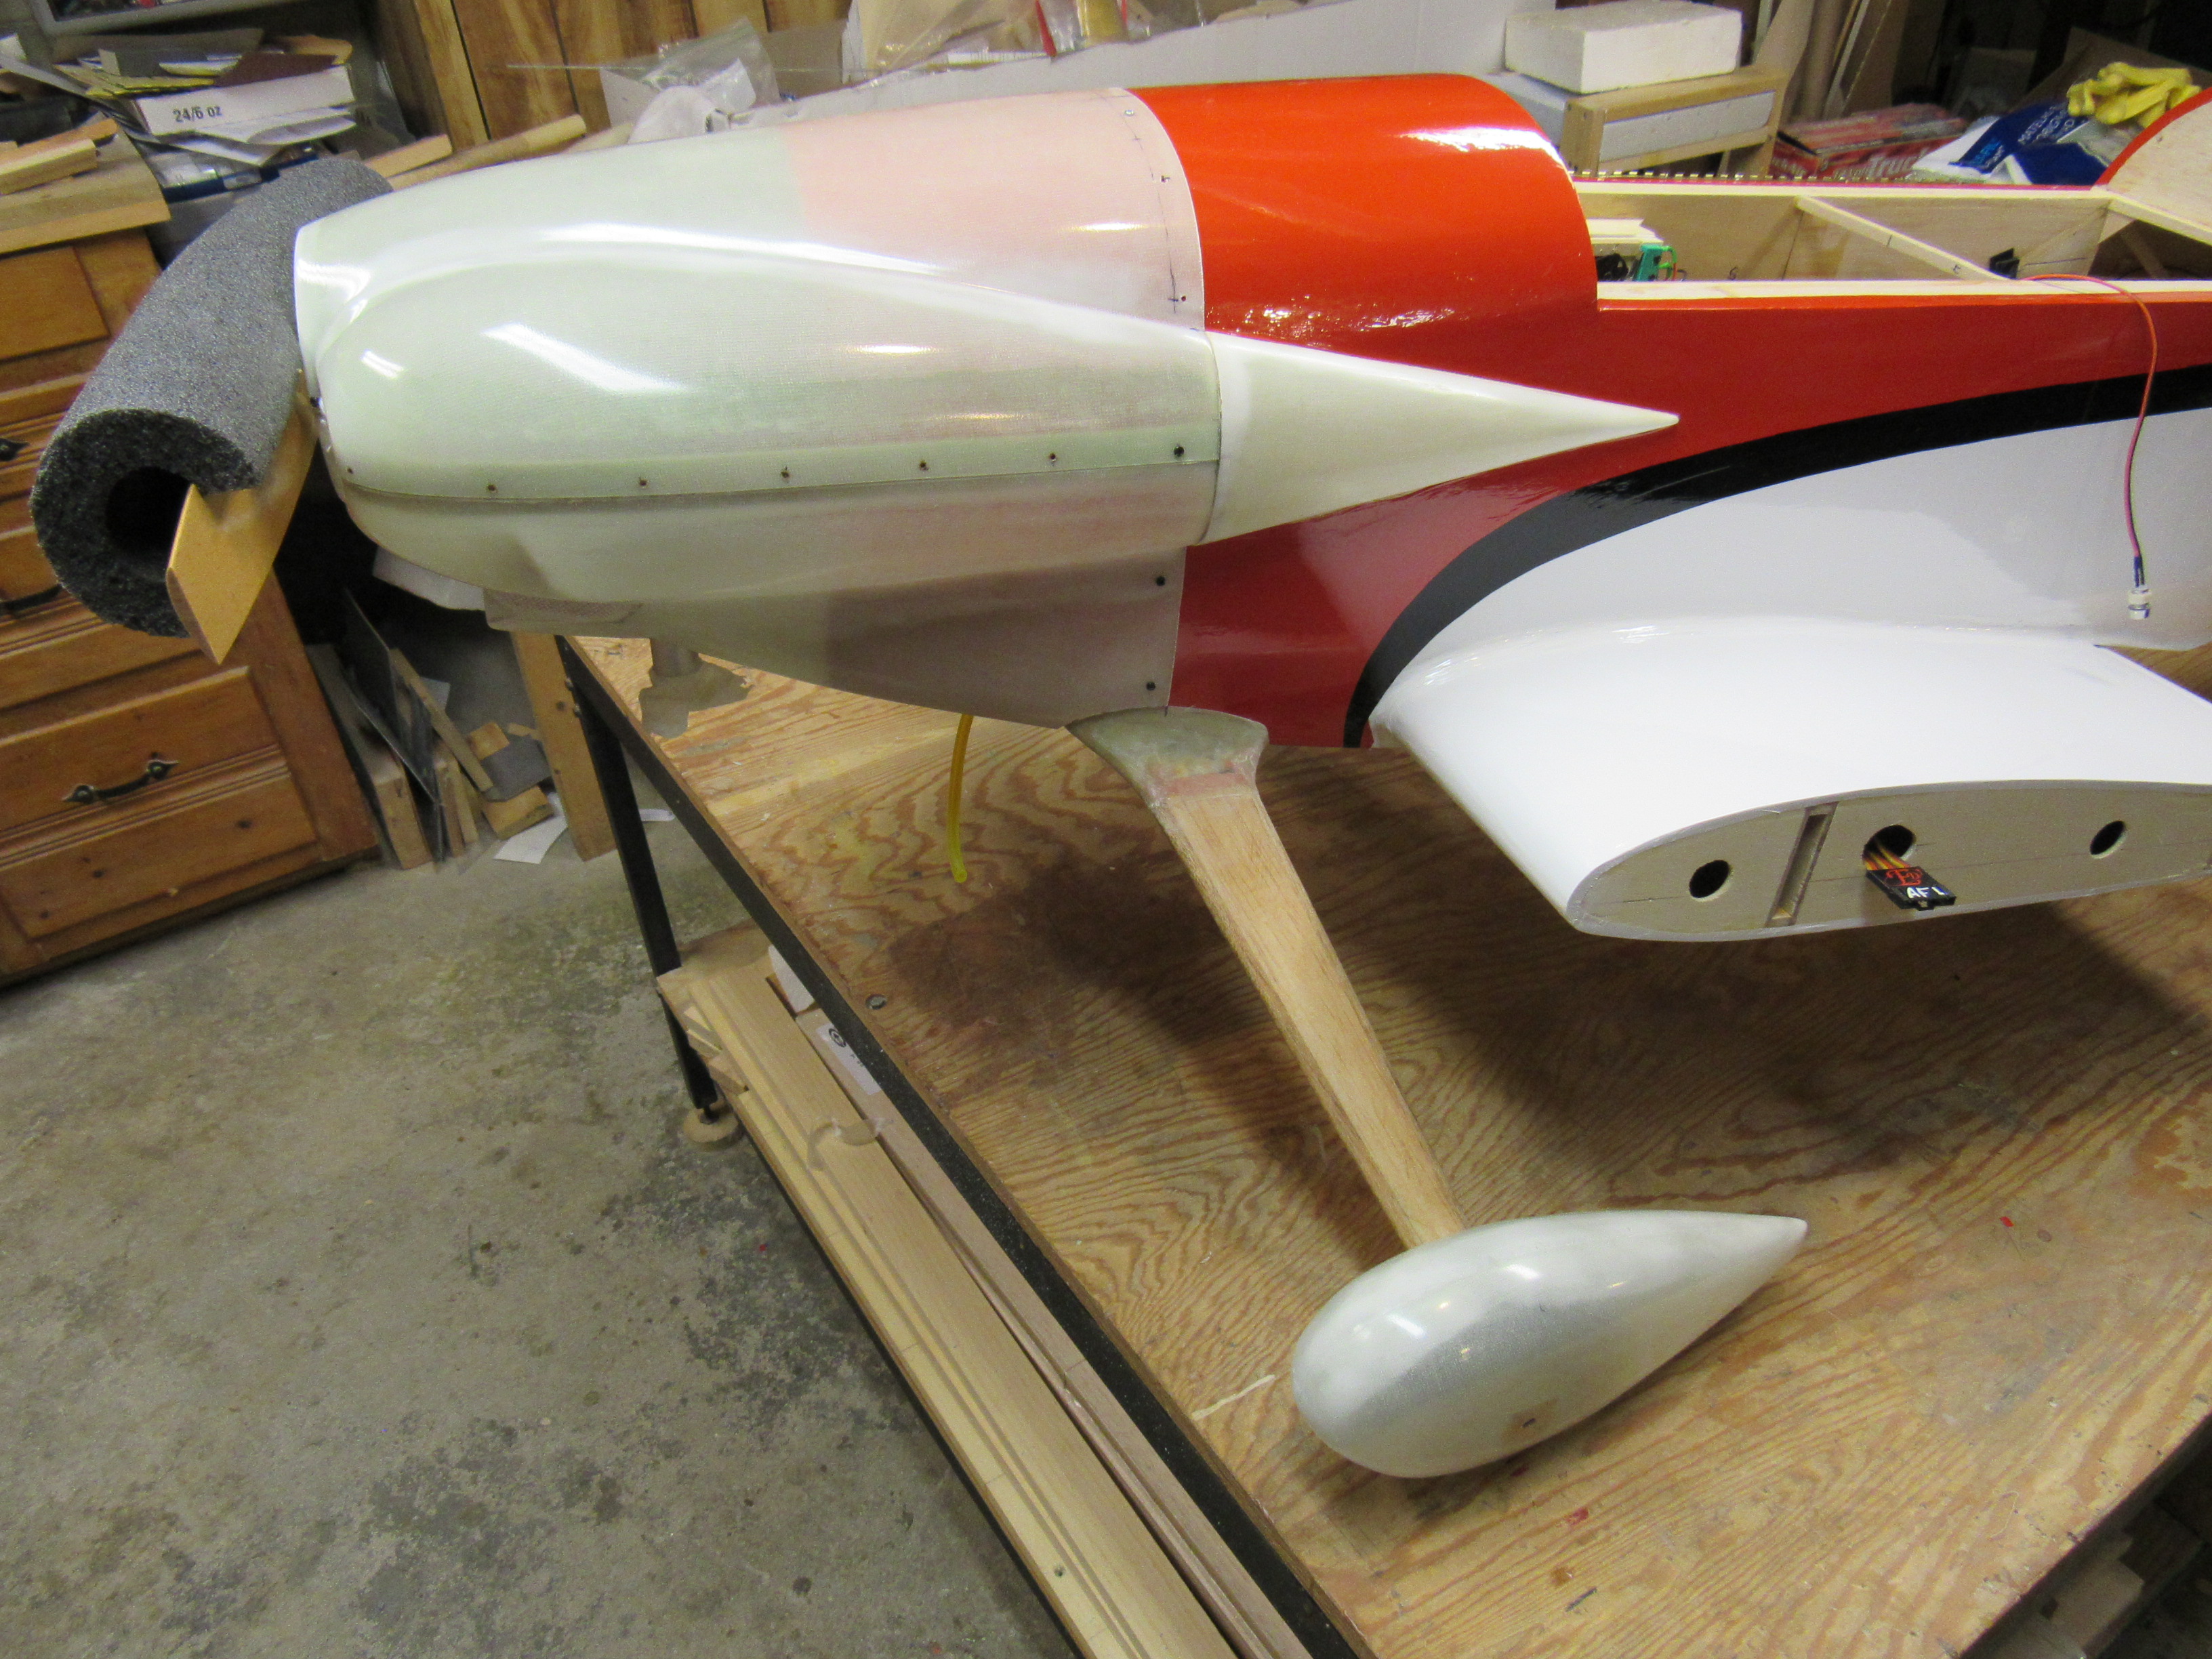
I started working on the cowling today and ran in to a big problem with the mufflers. The plans show modifying the mufflers so they will be fully enclosed but for some reason mine would need a lot of modifying and quite an extra expense. I am using the DLE 60 twin, just like Wendell shows, but the fronts of the mufflers would need to be tapered back quite a bit. As soon as I get it fitted around the mufflers I'll post a photo or two. I am cutting the cowl around the mufflers up front and the cuts will be below the teardrops, in the radius of the teardrops. It's a bummer but I had to do it.
Frank
Frank
 01-02-2015 | 04:12 AM
#37

I started working on the cowling today and ran in to a big problem with the mufflers. The plans show modifying the mufflers so they will be fully enclosed but for some reason mine would need a lot of modifying and quite an extra expense. I am using the DLE 60 twin, just like Wendell shows, but the fronts of the mufflers would need to be tapered back quite a bit. As soon as I get it fitted around the mufflers I'll post a photo or two. I am cutting the cowl around the mufflers up front and the cuts will be below the teardrops, in the radius of the teardrops. It's a bummer but I had to do it.
Frank
Frank
I had this done on my 50 twin. It wasn't all that expensive. If it isn't too late, you may want to check prices before cutting up your cowl.
01-02-2015 | 04:49 AM
#38
Joined: Aug 2002
Posts: 170
Likes: 0
Received 0 Likes
on
0 Posts
From: Washburn,
ME
Tom, I had one done for my Mustang and it cost me around $35.00. I figured this would have cost me at least another $100.00 to chop and channel them so I elected to cut the cowling. You can see by these photos that it could be expensive since it would be cutting in to the screw areas and that would need additional welding. I think it will be okay once the cowl is painted and all pictures taken from the top. I do plan on cutting the muffler exhaust pipes two inches shorter.
01-02-2015 | 04:54 AM
#39
Tom, I had one done for my Mustang and it cost me around $35.00. I figured this would have cost me at least another $100.00 to chop and channel them so I elected to cut the cowling. You can see by these photos that it could be expensive since it would be cutting in to the screw areas and that would need additional welding. I think it will be okay once the cowl is painted and all pictures taken from the top. I do plan on cutting the muffler exhaust pipes two inches shorter.
Yours doesn't look bad at all. I wouldn't worry about it.
01-02-2015 | 07:12 PM
#40
Thread Starter

My Feedback: (25)
Joined: Jul 2003
Posts: 48
Likes: 0
Received 0 Likes
on
0 Posts
From: HEBER CITY,
UT
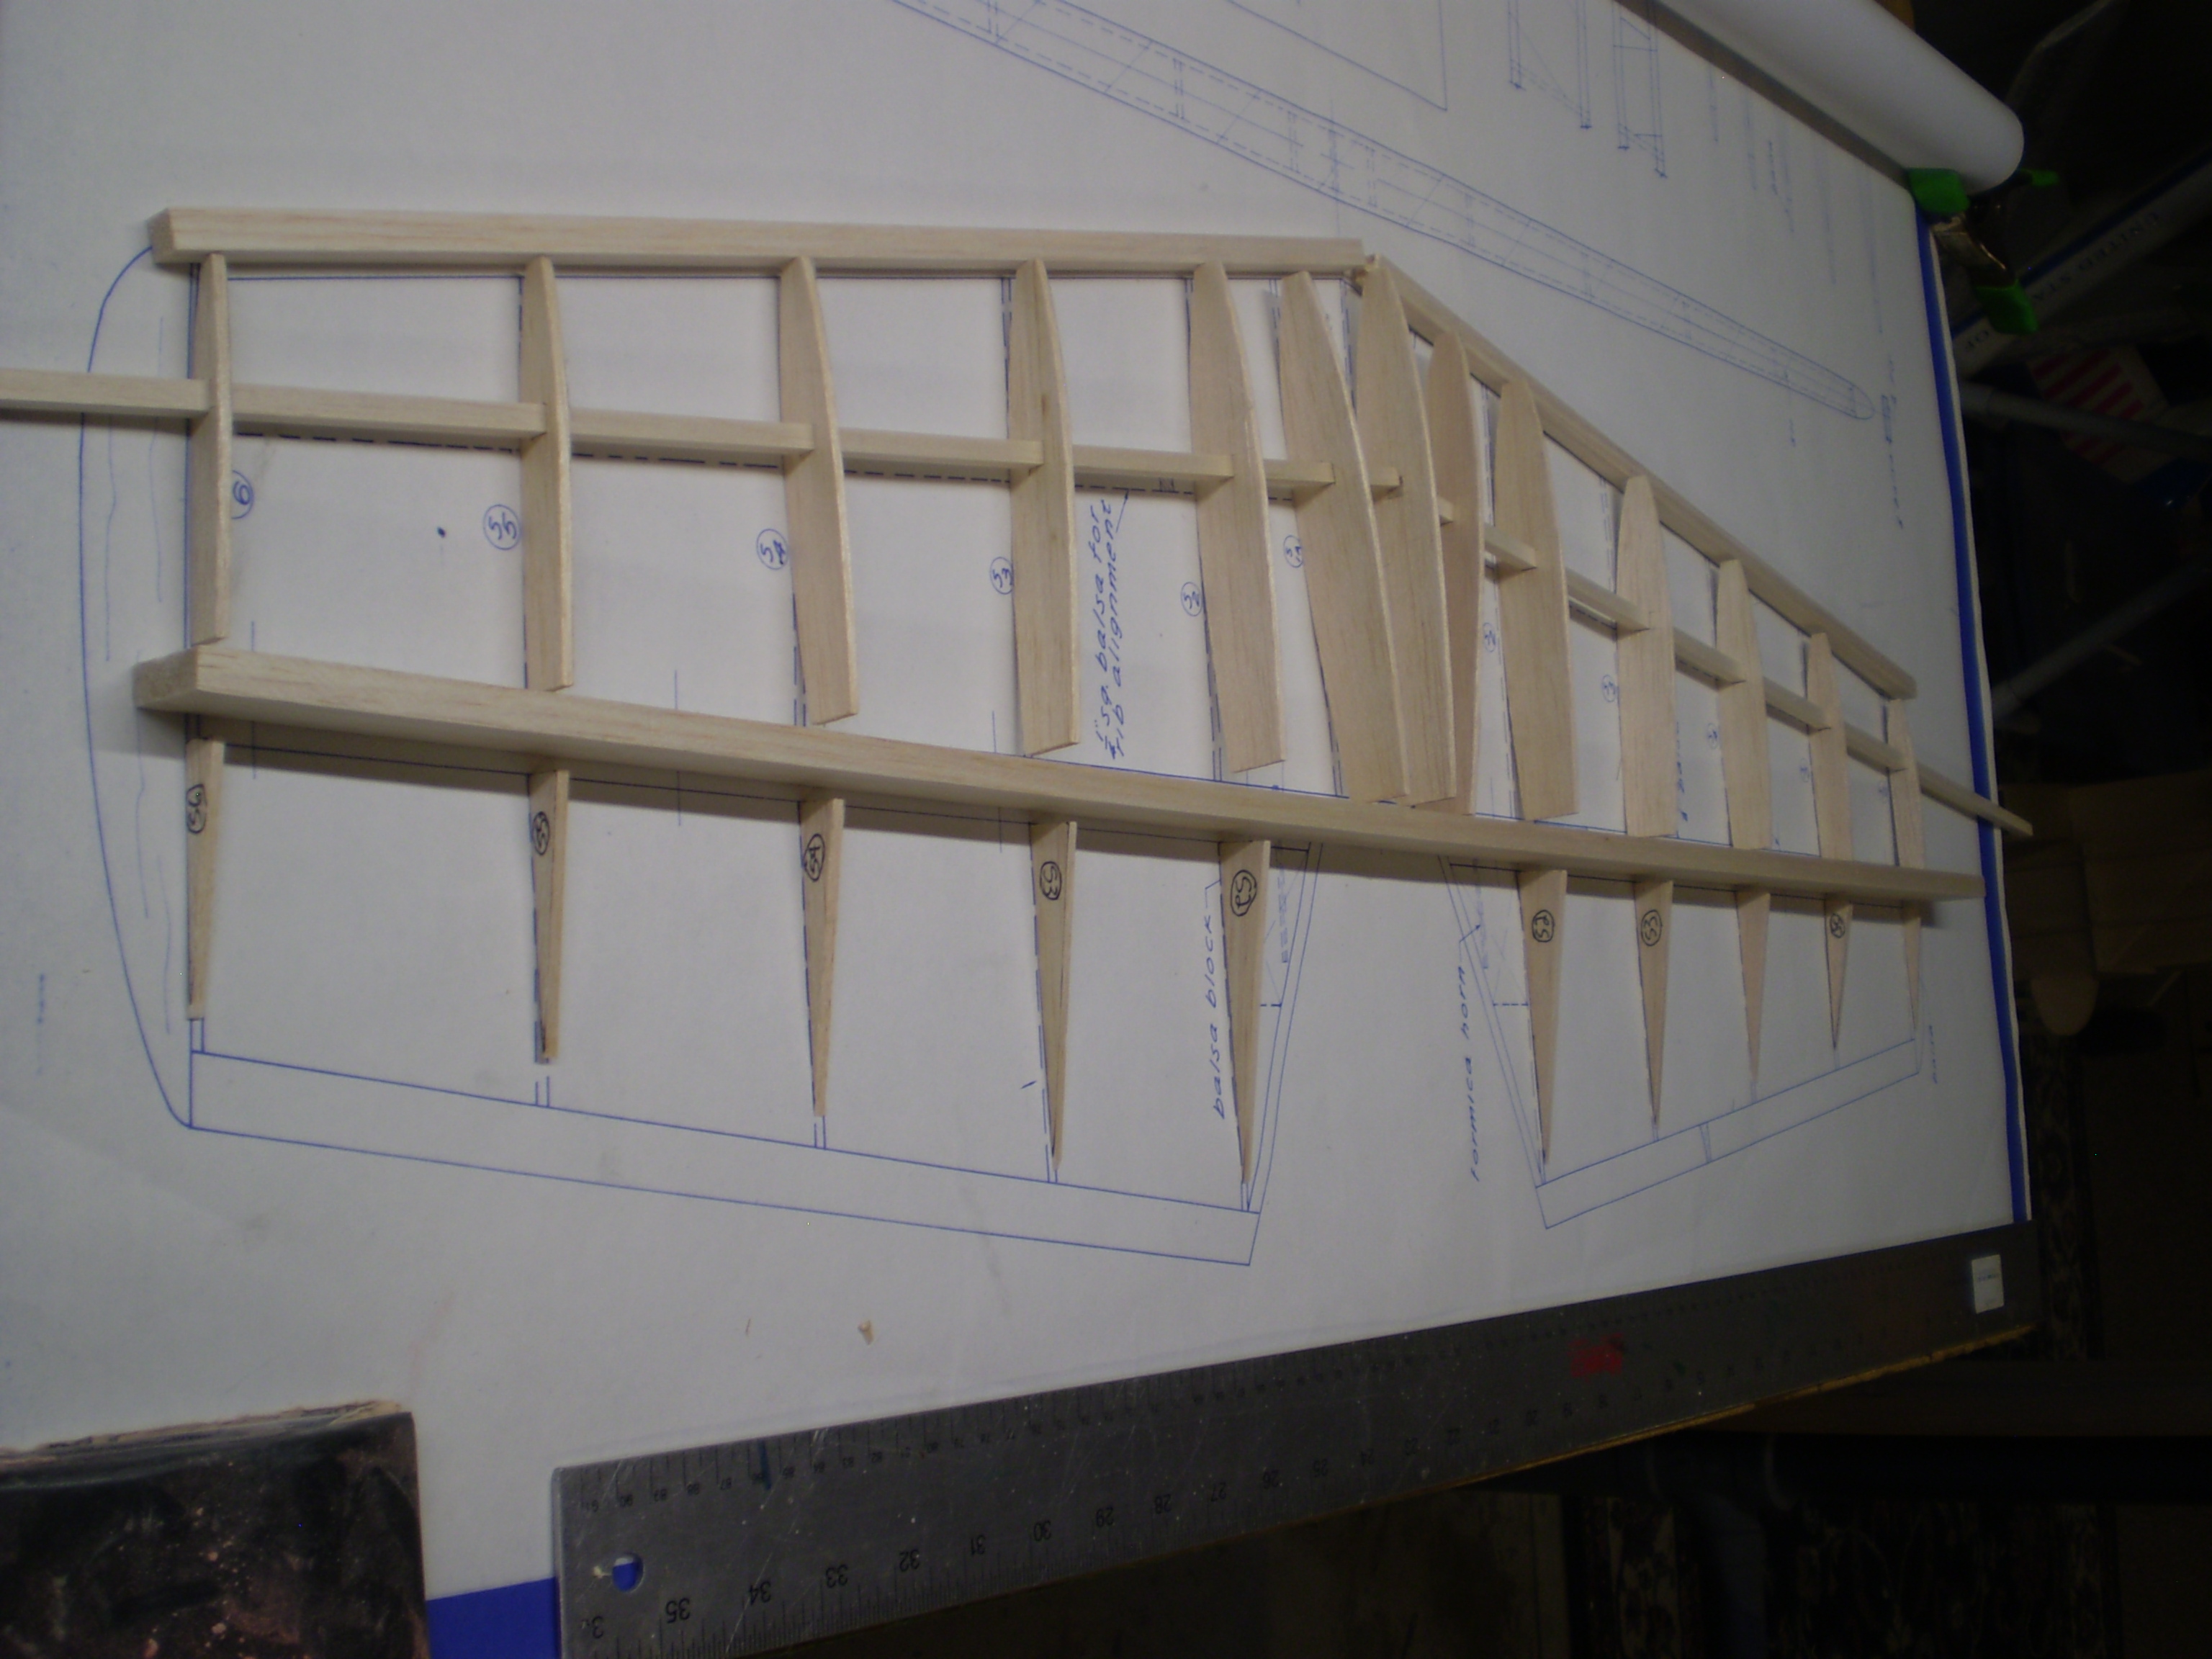
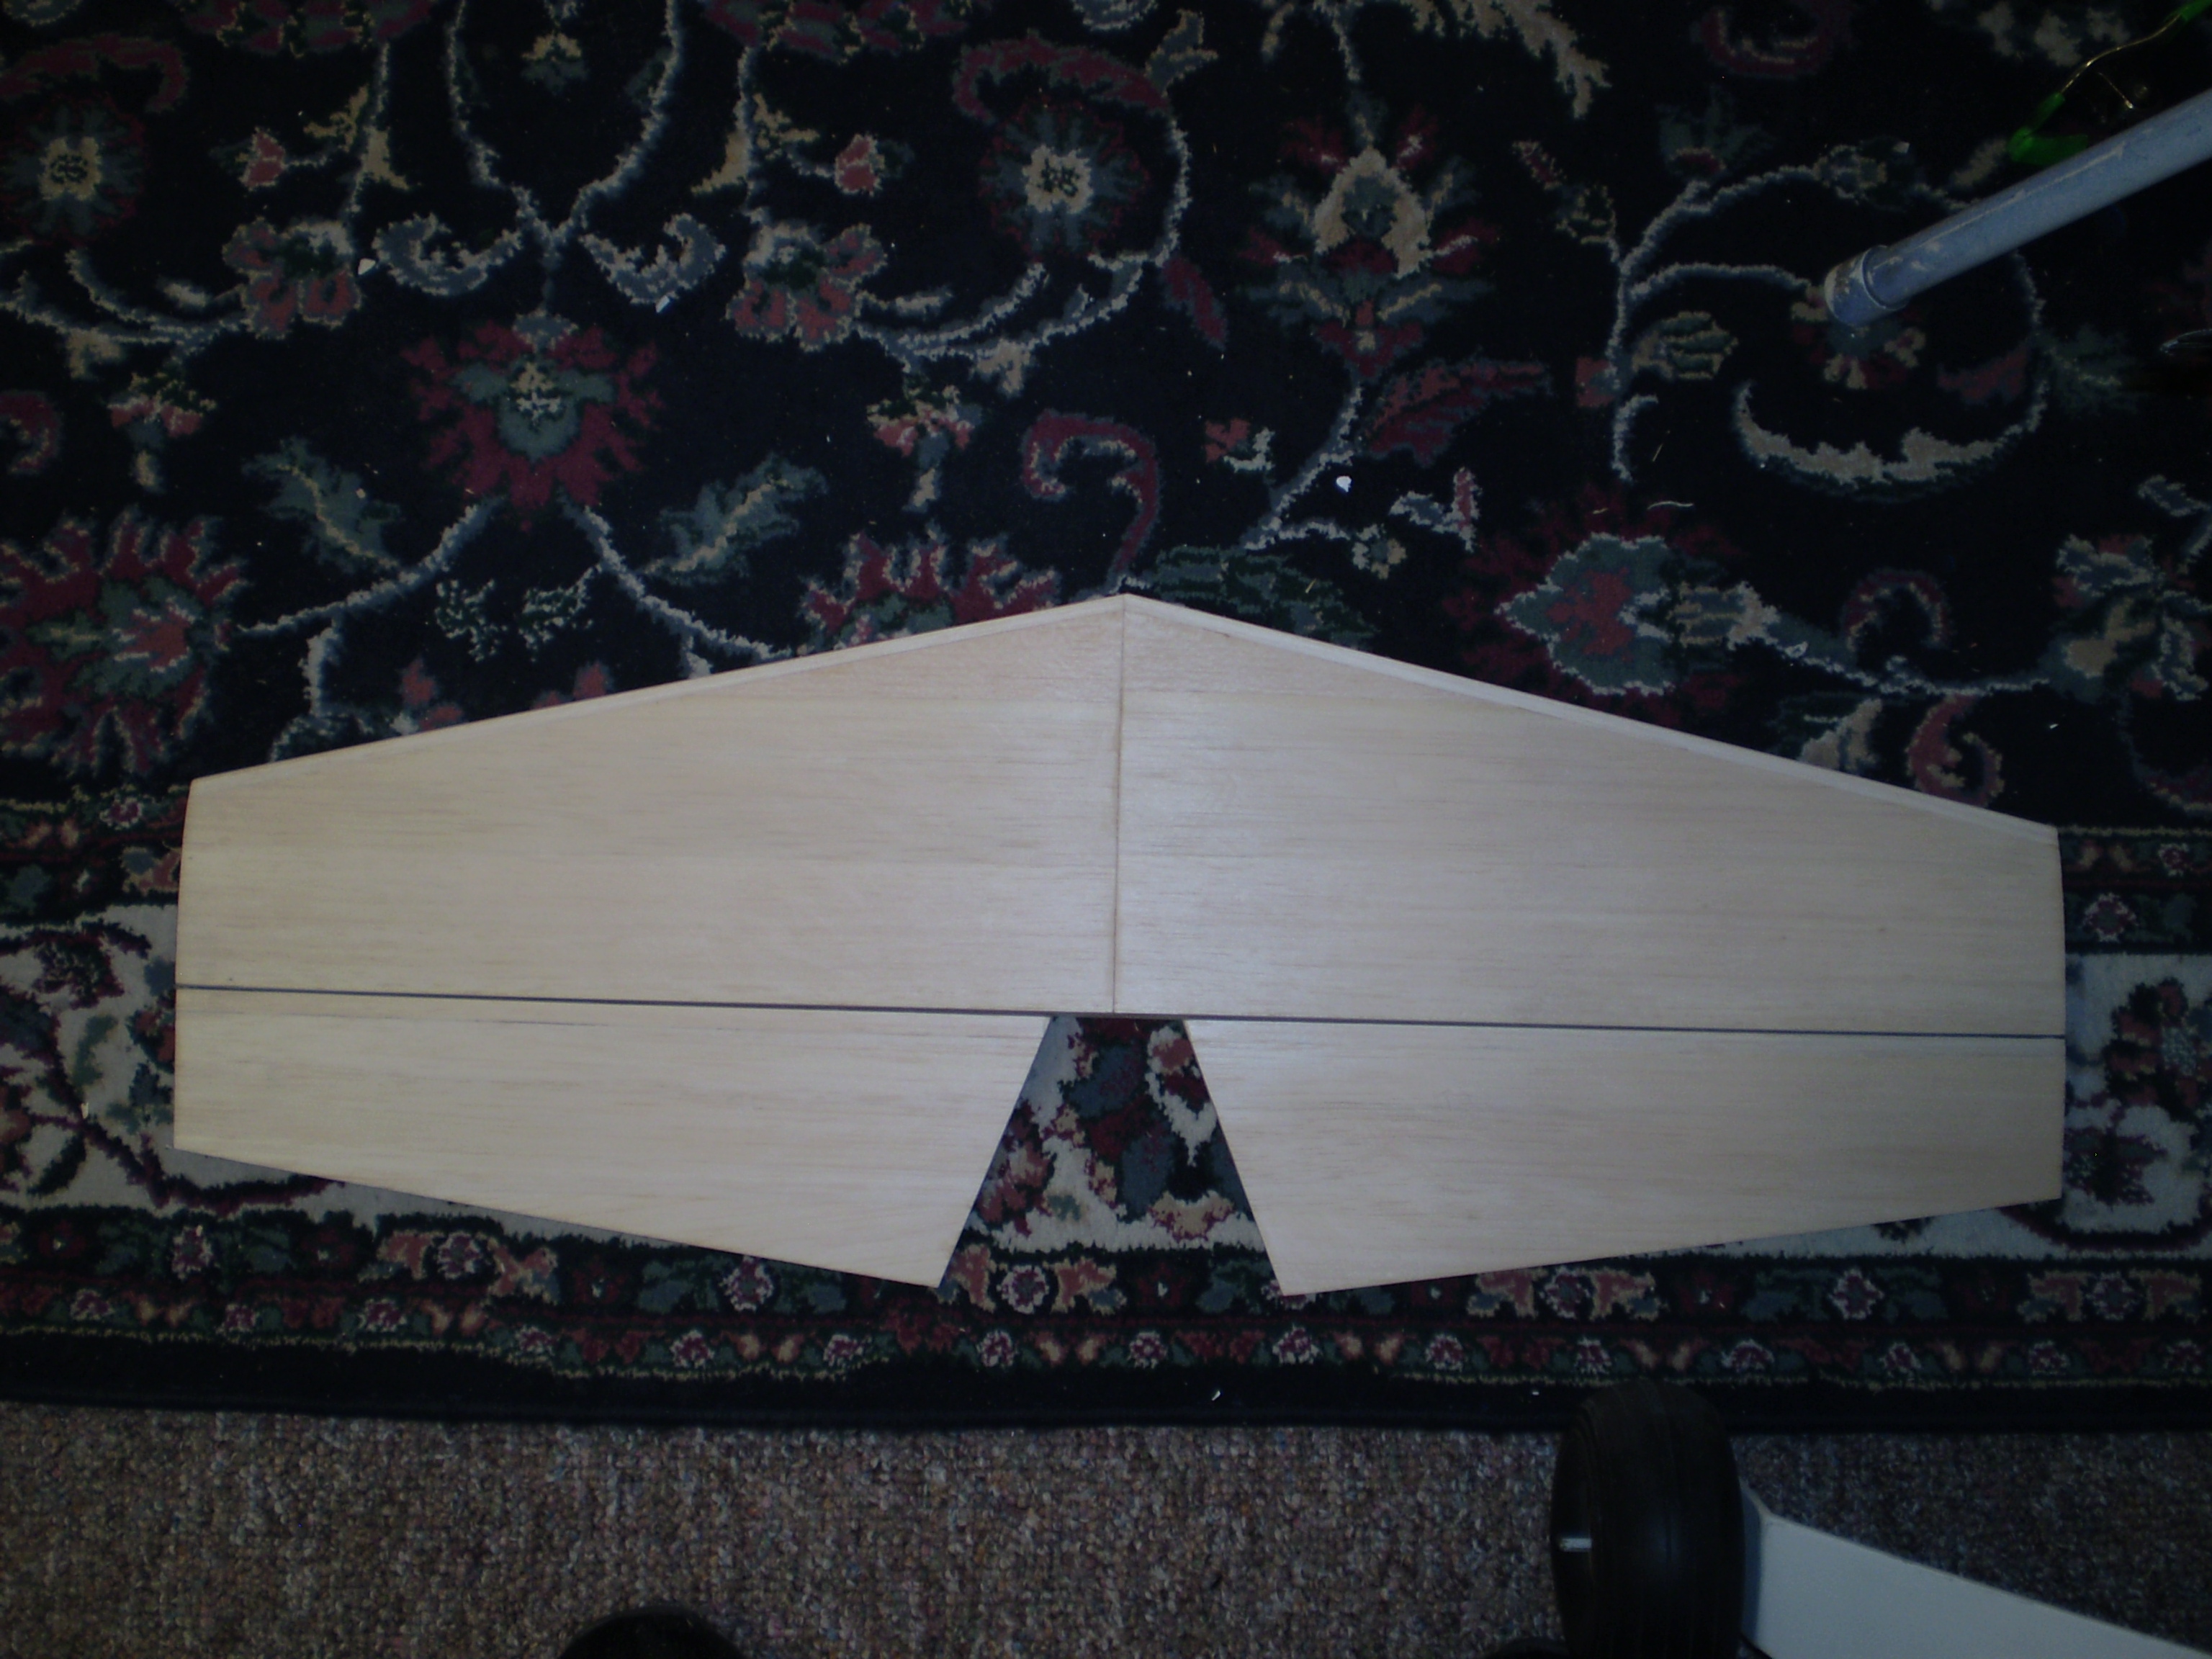
I have been working on the main wings and now have both sides completed. I also have the horizontal stab and elevators done and sheeted. I am currently working on the vertical stabilizer and rudder and hope to have that completed tomorrow. I am hoping to receive my fiberglass parts and landing gear soon.


01-03-2015 | 12:59 AM
#42
Joined: Aug 2002
Posts: 170
Likes: 0
Received 0 Likes
on
0 Posts
From: Washburn,
ME
Thanks jperkins for the boost in my endeavors.
Your model is coming along very nice and hope you get great satisfaction from it. I wish I could paint indoors but the fumes are pretty bad especially when they waft upstairs. It will be April/may before I can do painting.
Your model is coming along very nice and hope you get great satisfaction from it. I wish I could paint indoors but the fumes are pretty bad especially when they waft upstairs. It will be April/may before I can do painting.
01-21-2015 | 08:36 PM
#43
Thread Starter
My Feedback: (25)
Joined: Jul 2003
Posts: 48
Likes: 0
Received 0 Likes
on
0 Posts
From: HEBER CITY,
UT
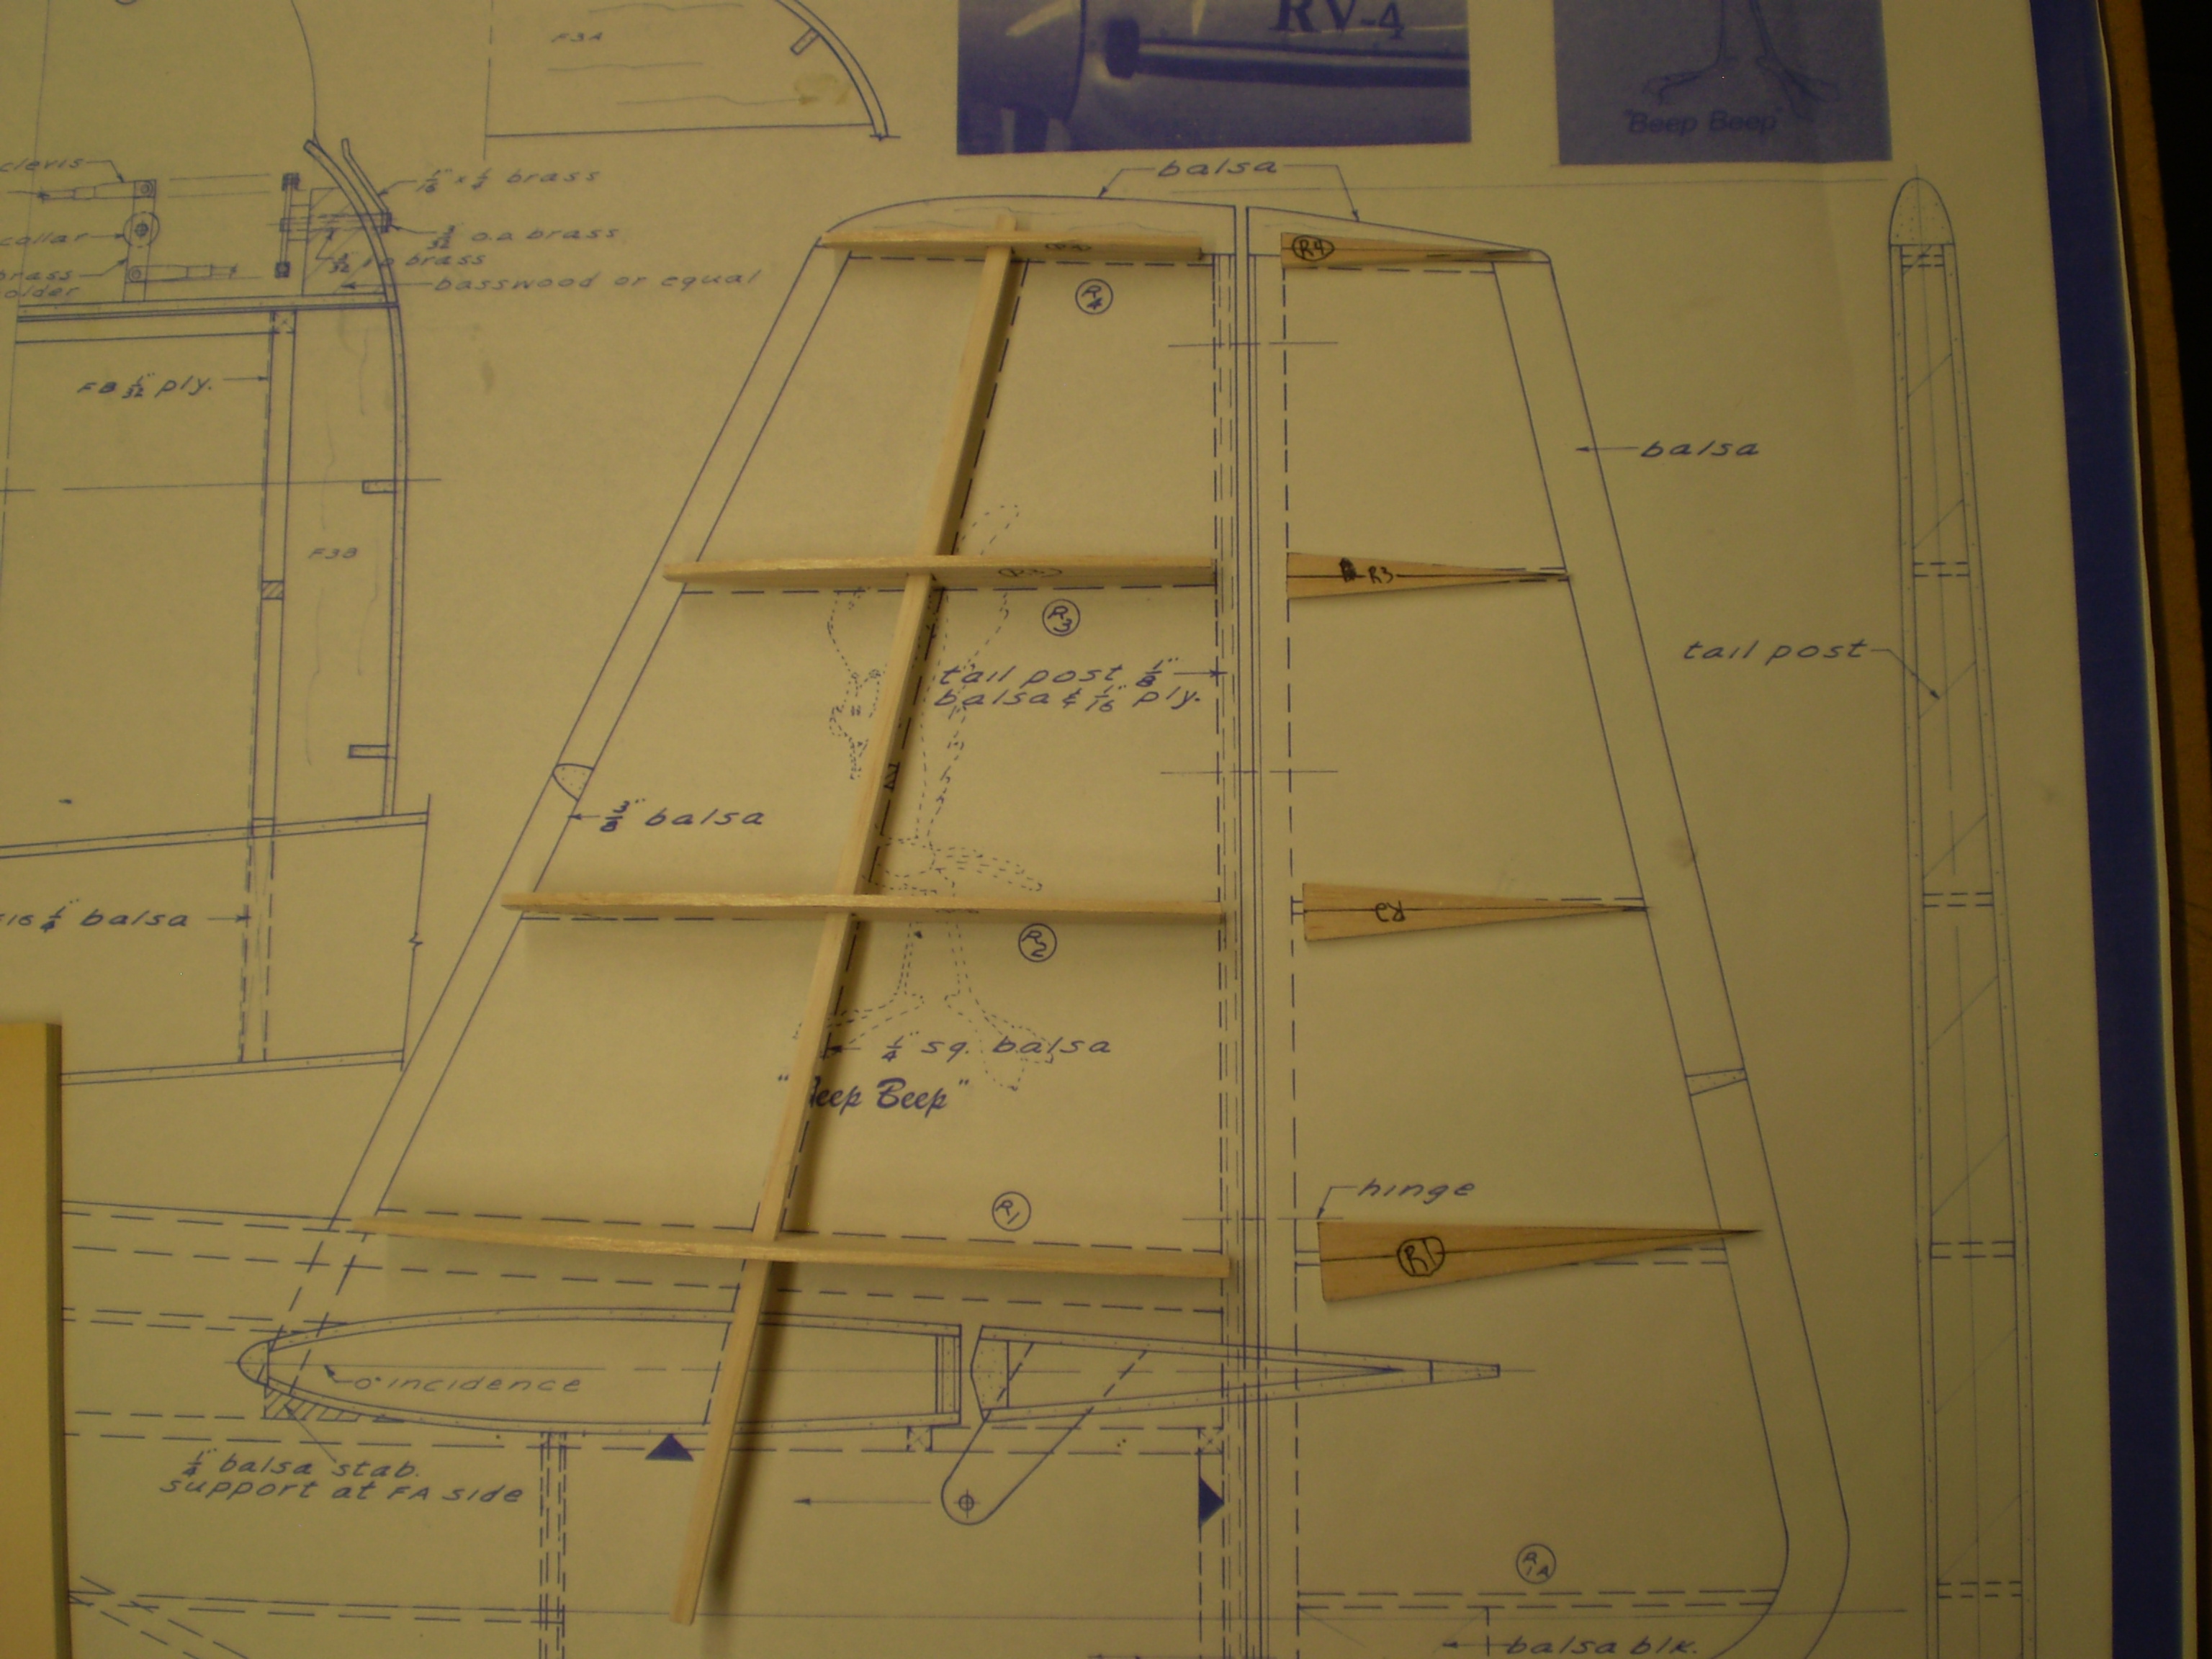
I had a good friend of mine who is a Hot Rod builder/ fabricator make me a set of aluminium landing gear this week and they turned out awsome. If anybody is interested in a set I know he will make more. I completed my vertical stab and rudder and have been rough fitting the tail group. Also received my cowl this week from Fibertech N More and it looks great.[h=2][/h]
Last edited by jperkinstrades; 01-24-2015 at 07:24 PM.
02-01-2015 | 10:39 AM
#45
Joined: Aug 2002
Posts: 170
Likes: 0
Received 0 Likes
on
0 Posts
From: Washburn,
ME
Well here is the landing gear fairing pictures. Took me 2 weeks just to get this far. Can't work on them all the time as I have to many irons in the furnace. I did finish my rudder cables and steering cables today and now I'm almost at a standstill until Spring so I can paint and finish up the small stuff. I can sand some between other projects to get her ready.
Frank


Frank
02-02-2015 | 06:53 AM
#47
Joined: Aug 2002
Posts: 170
Likes: 0
Received 0 Likes
on
0 Posts
From: Washburn,
ME
Frank
02-13-2015 | 01:34 PM
#48
Junior Member
Joined: Jul 2002
Posts: 26
Likes: 0
Received 0 Likes
on
0 Posts
From: Canada
The faring looks great and must take time and patience. Have a question when landing and the aluminum gear flexes will the balsa not snap off or have you done this before and worked if it does I am very interested in this. How thick is the balsa. It must look great.
02-14-2015 | 12:19 AM
#49
Joined: Aug 2002
Posts: 170
Likes: 0
Received 0 Likes
on
0 Posts
From: Washburn,
ME
Frank

