Go Back  RCU Forums > RC Airplanes > Kit Building
Reload this Page >

Chipmunk Brotherhood.

Community
Search
Notices
Kit Building If you're building a kit and have questions or want to discuss kit building post it here.

Chipmunk Brotherhood.

Thread Tools
 
Search this Thread
 
Old 03-04-2024, 11:19 AM
  #176  
gow589
My Feedback: (1)
 
Join Date: Aug 2004
Location: evansville, IN
Posts: 863
Received 33 Likes on 28 Posts
Default

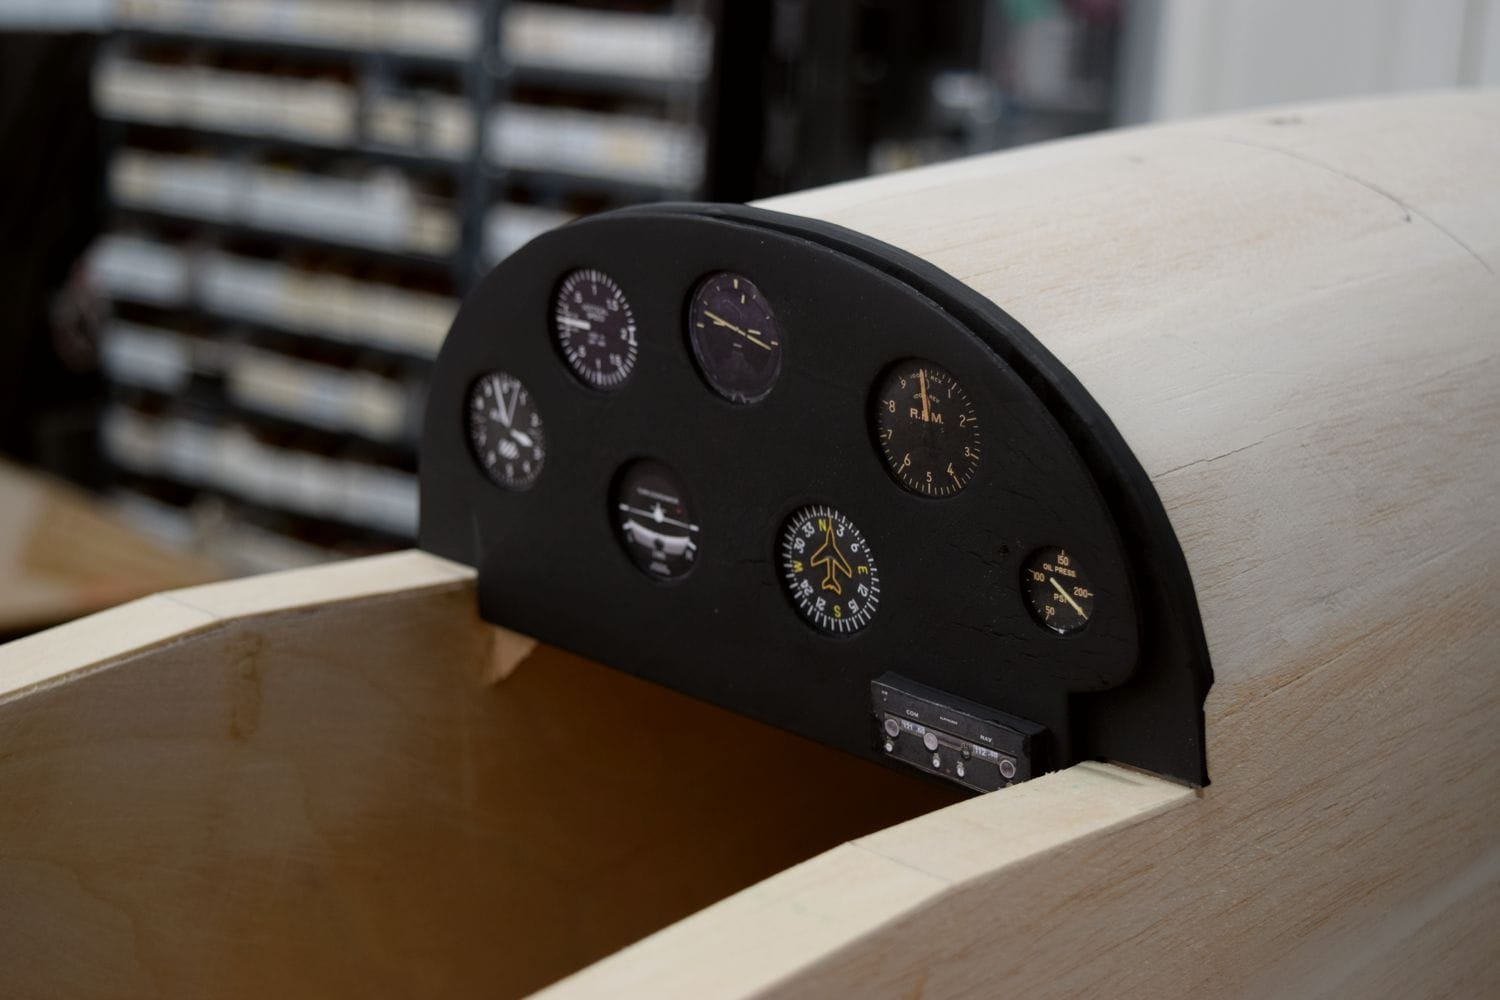
There are no good photos I can find of 14V dash but I know it's a two cockpit airplane. It looks as if the rear dash is cut down so it is unknown what resides there. I doubt the dash was laid out original but I tried to come up with something similar to the time period he flew the plane. I got a set of graphics from Callie Graphics which are very nice but the dash does not exactly fit. I think the fuselage in the Hostetler Chipmunk is a little wider than scale. That's all fine. I am not going after a master class plane here. I came up with graphics and laid out a dash. I 3d printed some parts.:

Old 03-04-2024, 11:20 AM
  #177  
gow589
My Feedback: (1)
 
Join Date: Aug 2004
Location: evansville, IN
Posts: 863
Received 33 Likes on 28 Posts
Default

I threw the 3d files and print file for the dash here if anyone want's it:

Index of /chip
Old 03-04-2024, 11:22 AM
  #178  
gow589
My Feedback: (1)
 
Join Date: Aug 2004
Location: evansville, IN
Posts: 863
Received 33 Likes on 28 Posts
Default

Next I am working on 3d gear fairings:


The following users liked this post:
mchandrayan (03-04-2024)
Old 03-06-2024, 09:00 AM
  #179  
gow589
My Feedback: (1)
 
Join Date: Aug 2004
Location: evansville, IN
Posts: 863
Received 33 Likes on 28 Posts
Default

BTW, I did not like the way the plans lock the wings. I can see the spar getting mashed, split and continually being a problem so I drilled and tapped mine 1/4-20. The forward bolt goes into the landing gear block too:


Old 03-12-2024, 12:20 PM
  #180  
gow589
My Feedback: (1)
 
Join Date: Aug 2004
Location: evansville, IN
Posts: 863
Received 33 Likes on 28 Posts
Default

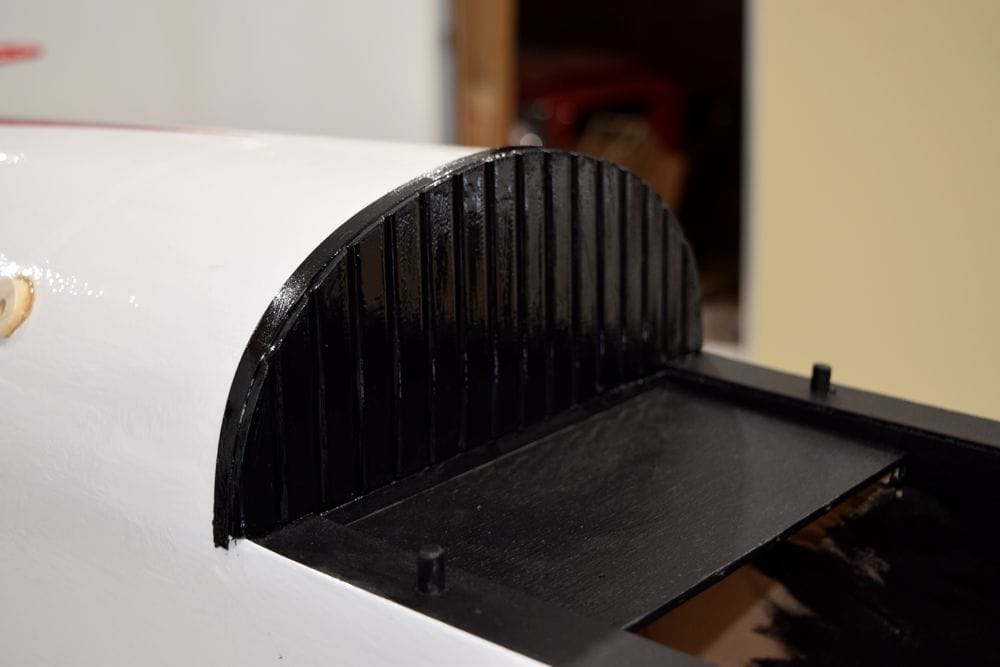
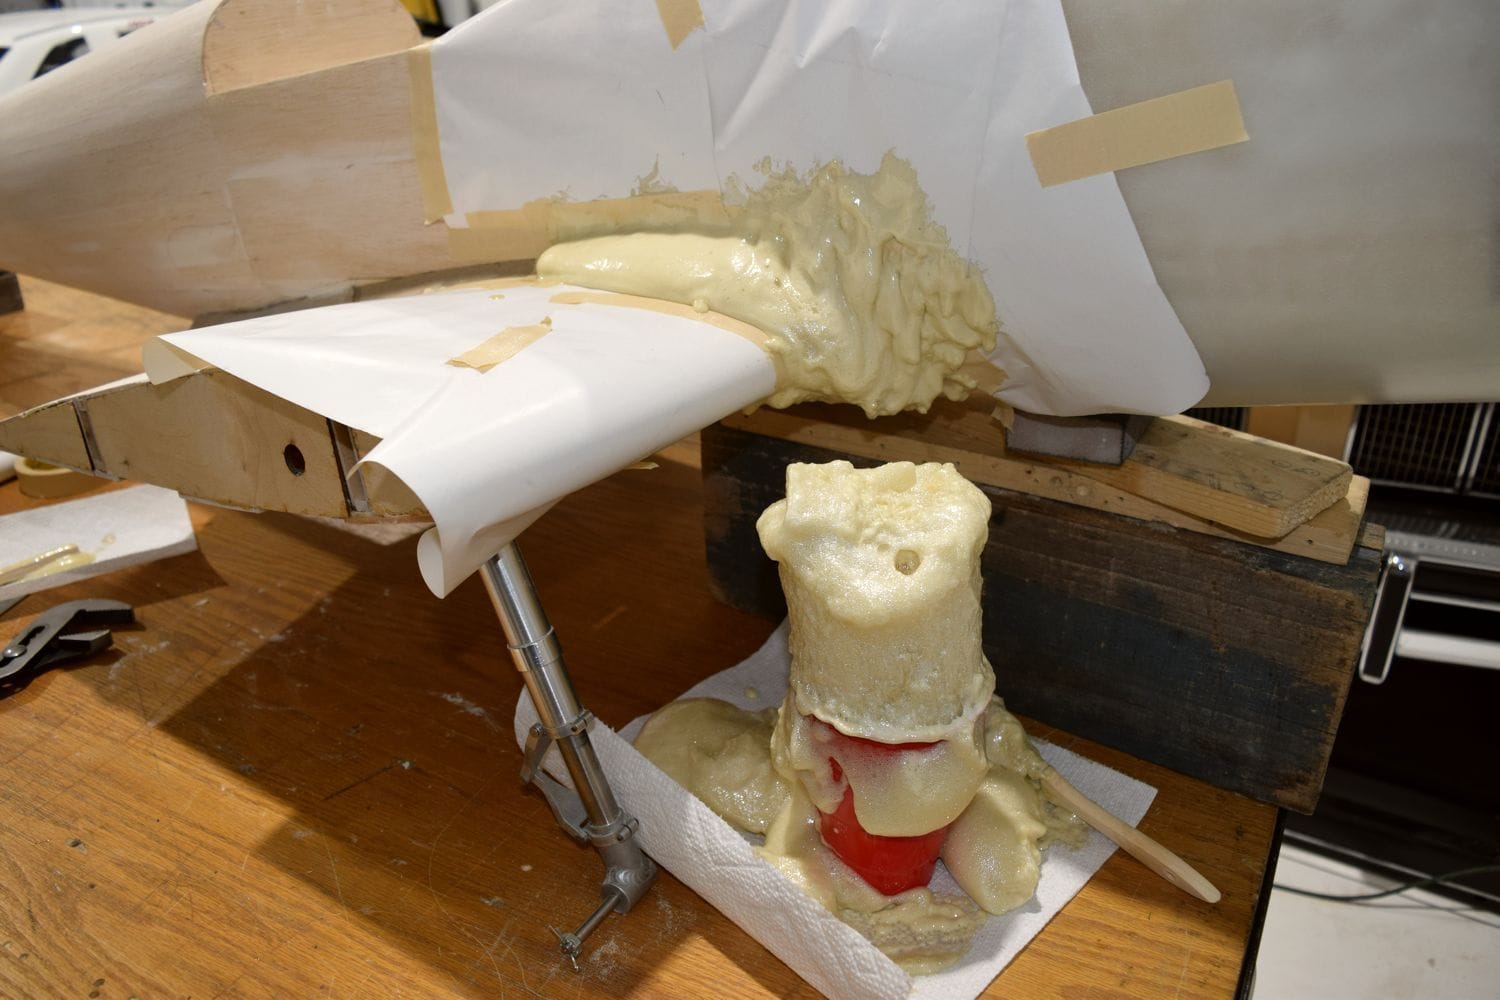
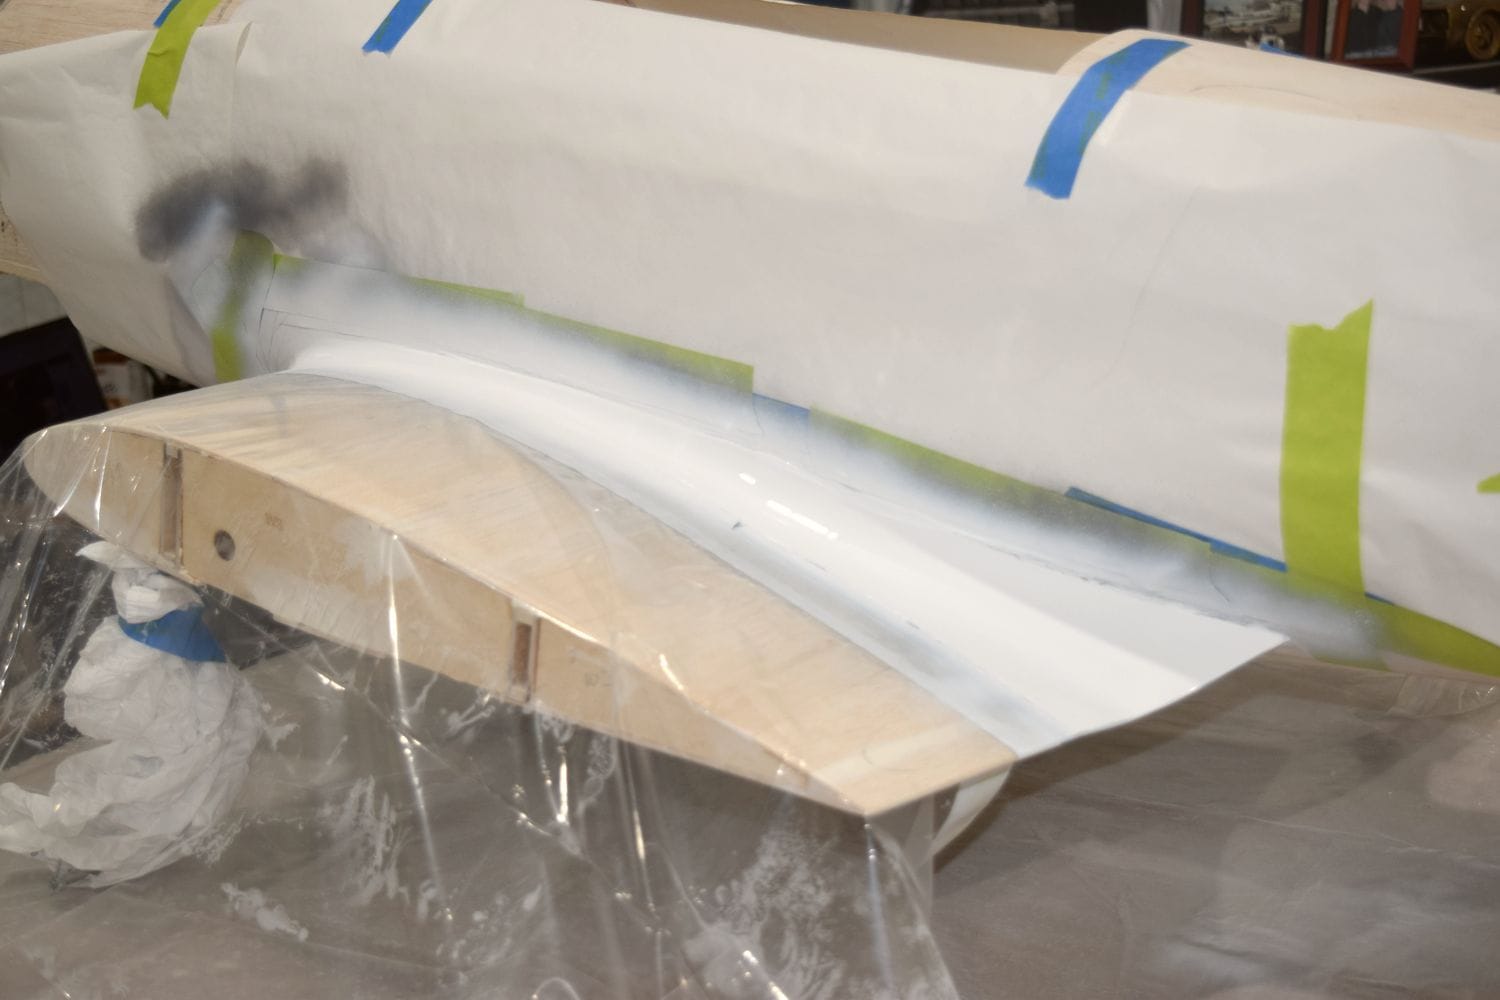
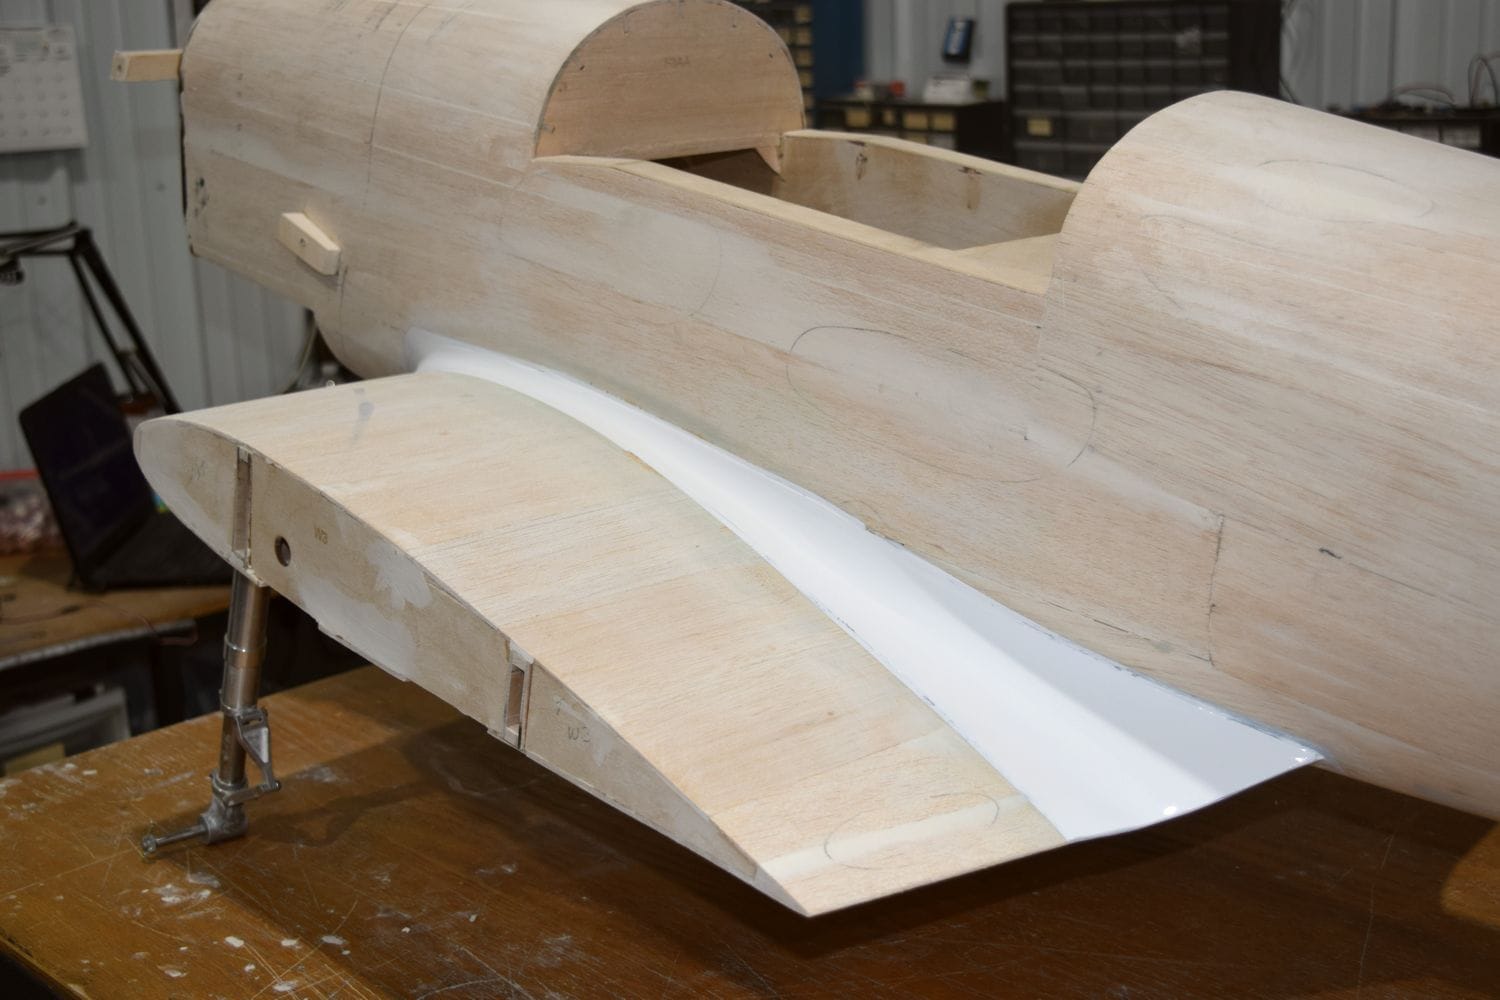
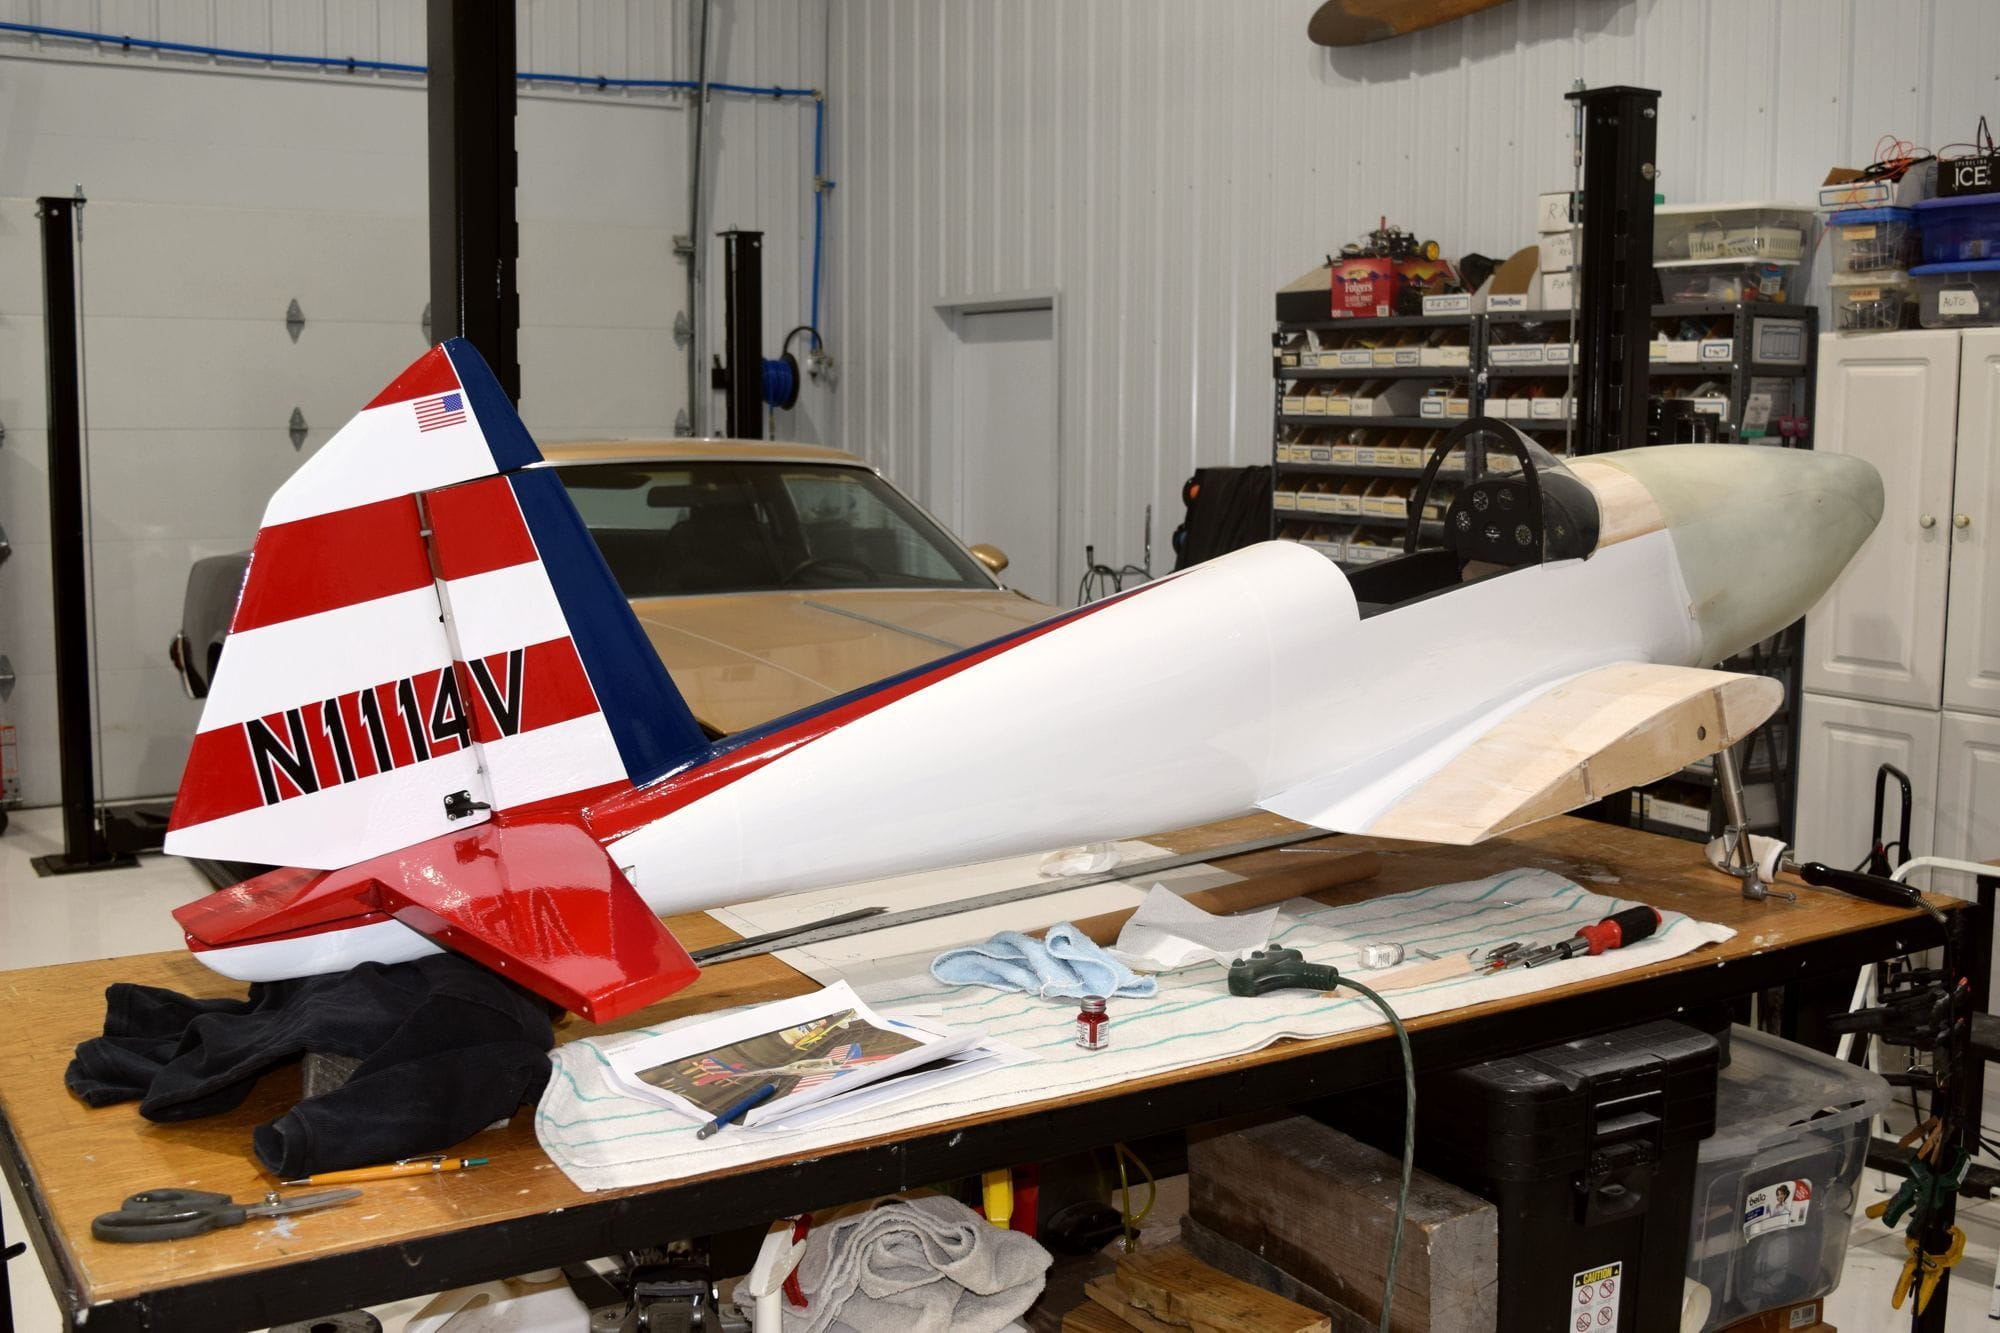
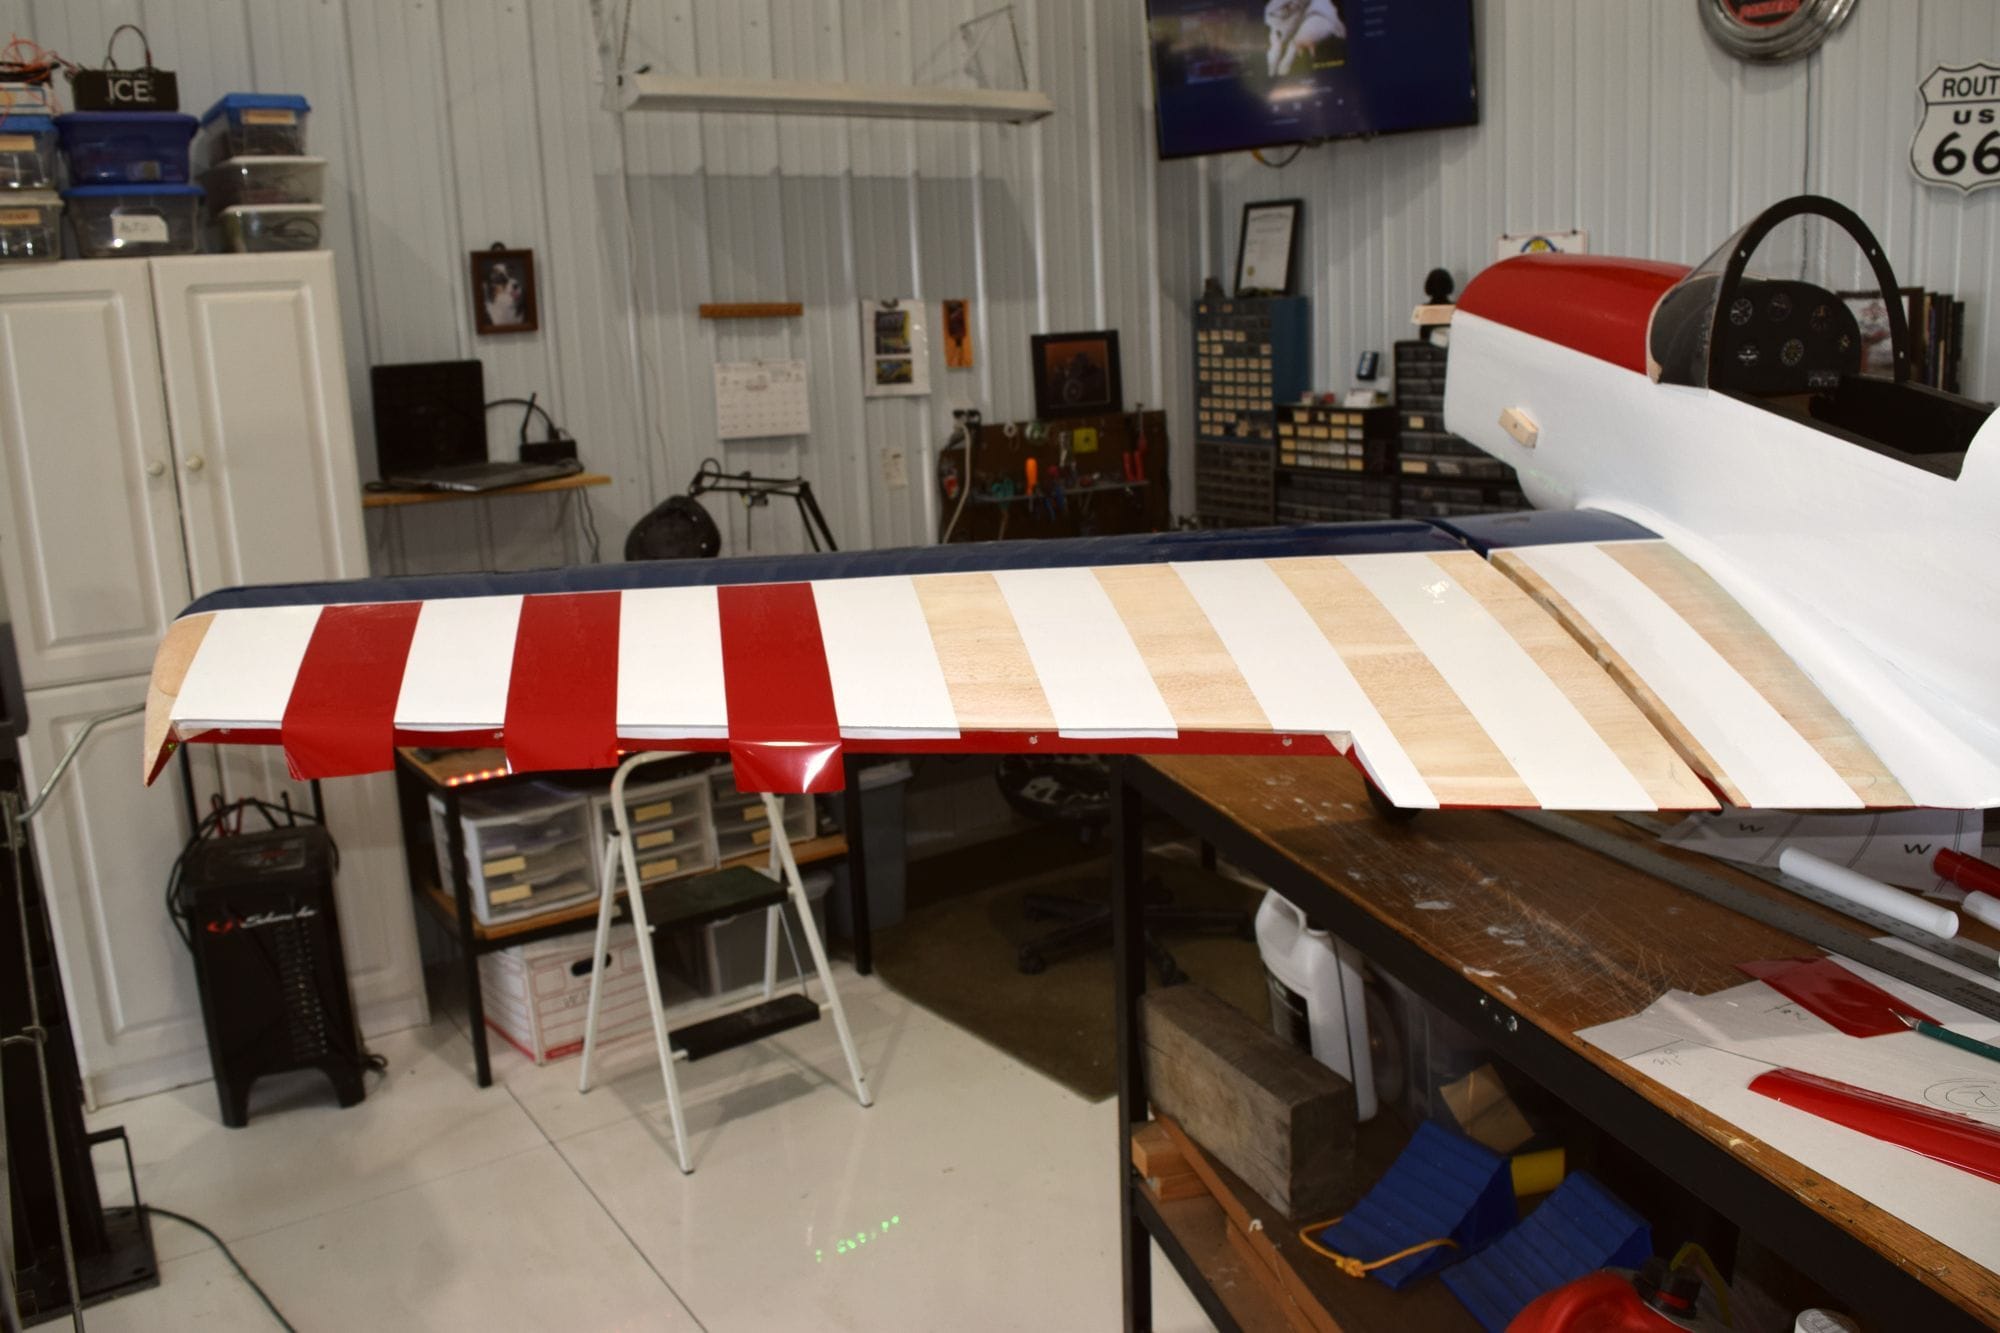
Finishing the wing fillet's took a little time. The rear section is light ply, the center section is actually cardboard. The front is expandable foam brushed on then carved (yes I mixed too much). The fillit is then covered in fiberglass cloth using Z-poxy. Sanded then skim coat of auto body filler to smooth then auto body polyester primer for final smooth sanded 400. Painted with Rust-oleum primer then white. I think they came out pretty well.


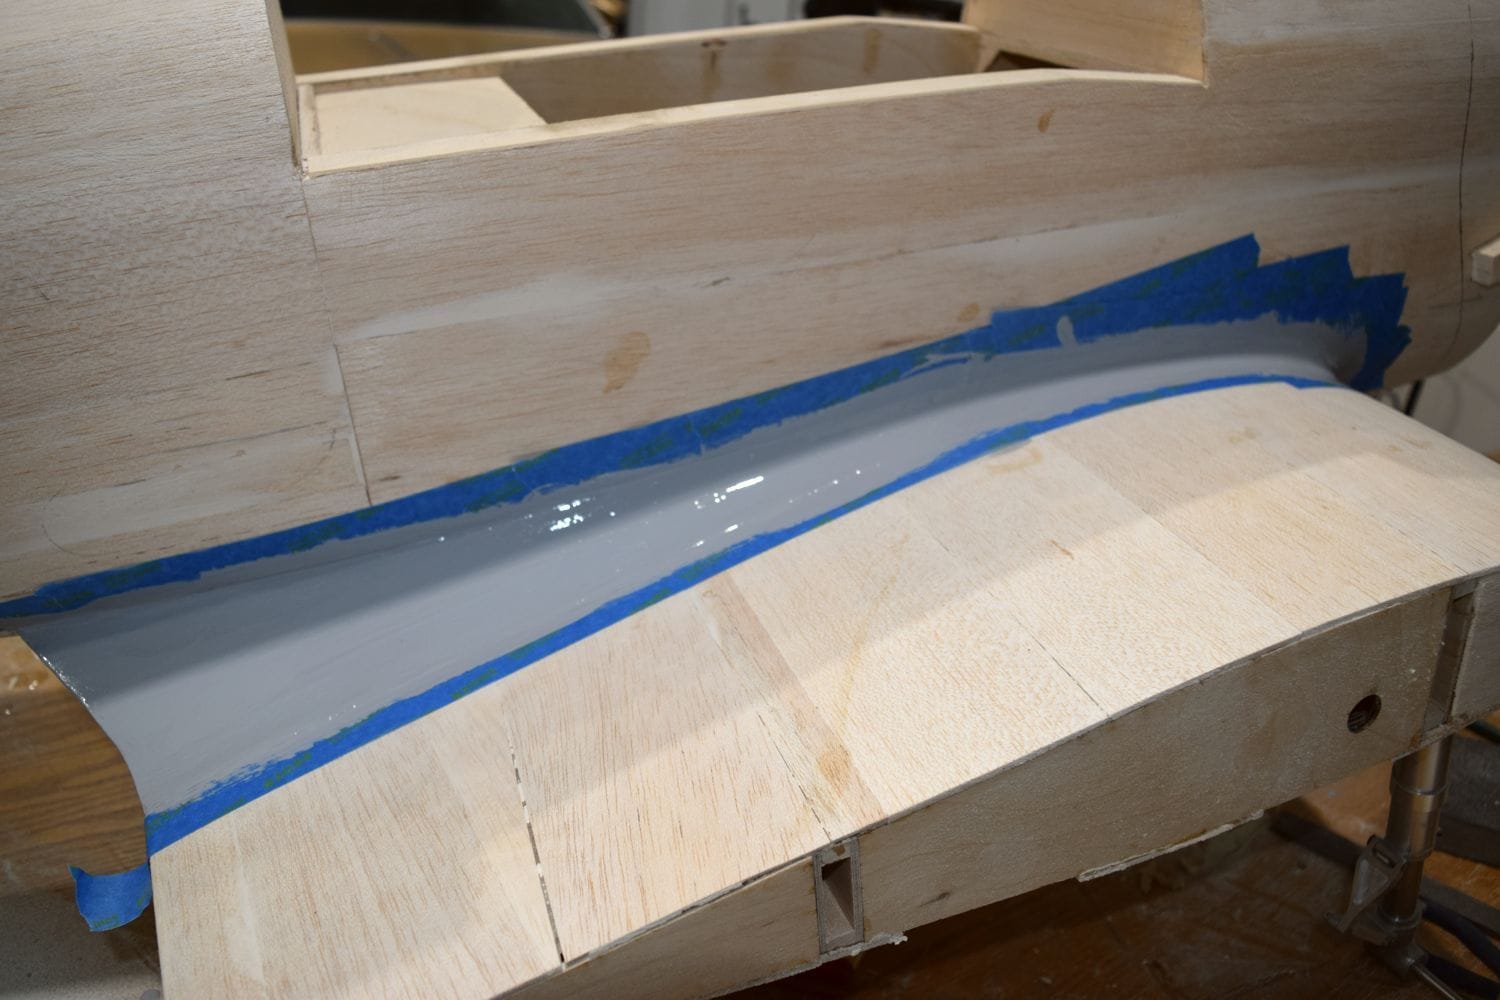
Last edited by gow589; 03-12-2024 at 12:22 PM. Reason: gramar, grammer, uhm, words!
Old 03-12-2024, 01:33 PM
  #181  
RICKSTUBBZ
 
RICKSTUBBZ's Avatar
 
Join Date: Oct 2007
Location: Hempstead, TX
Posts: 1,525
Received 28 Likes on 25 Posts
Default

WOW..
What a freaking mess.
That is certainly not a project for the spare bedroom...

But, a cool idea on how to do it.
In the end the finished product makes it all worthwhile.
Old 03-12-2024, 02:39 PM
  #182  
gow589
My Feedback: (1)
 
Join Date: Aug 2004
Location: evansville, IN
Posts: 863
Received 33 Likes on 28 Posts
Default

The foam wasn't as bad as it looked. A saw took 80% off. 40 grit sand paper made short work of the shaping.


Originally Posted by RICKSTUBBZ
WOW..
What a freaking mess.
That is certainly not a project for the spare bedroom...

But, a cool idea on how to do it.
In the end the finished product makes it all worthwhile.
Old 03-22-2024, 02:24 PM
  #183  
gow589
My Feedback: (1)
 
Join Date: Aug 2004
Location: evansville, IN
Posts: 863
Received 33 Likes on 28 Posts
Default

Covering process. Covering round airplanes

a lot easier than slab sided airplanes......NOT!
The following 3 users liked this post by gow589:
mchandrayan (03-23-2024), RICKSTUBBZ (03-22-2024), Tony Hallo (03-23-2024)
Old 03-23-2024, 05:20 AM
  #184  
Tony Hallo
 
Join Date: Jan 2003
Location: Springdale, PA
Posts: 1,833
Received 50 Likes on 48 Posts
Default

What are you covering with?
Old 03-23-2024, 07:14 AM
  #185  
gow589
My Feedback: (1)
 
Join Date: Aug 2004
Location: evansville, IN
Posts: 863
Received 33 Likes on 28 Posts
Default

Originally Posted by Tony Hallo
What are you covering with?
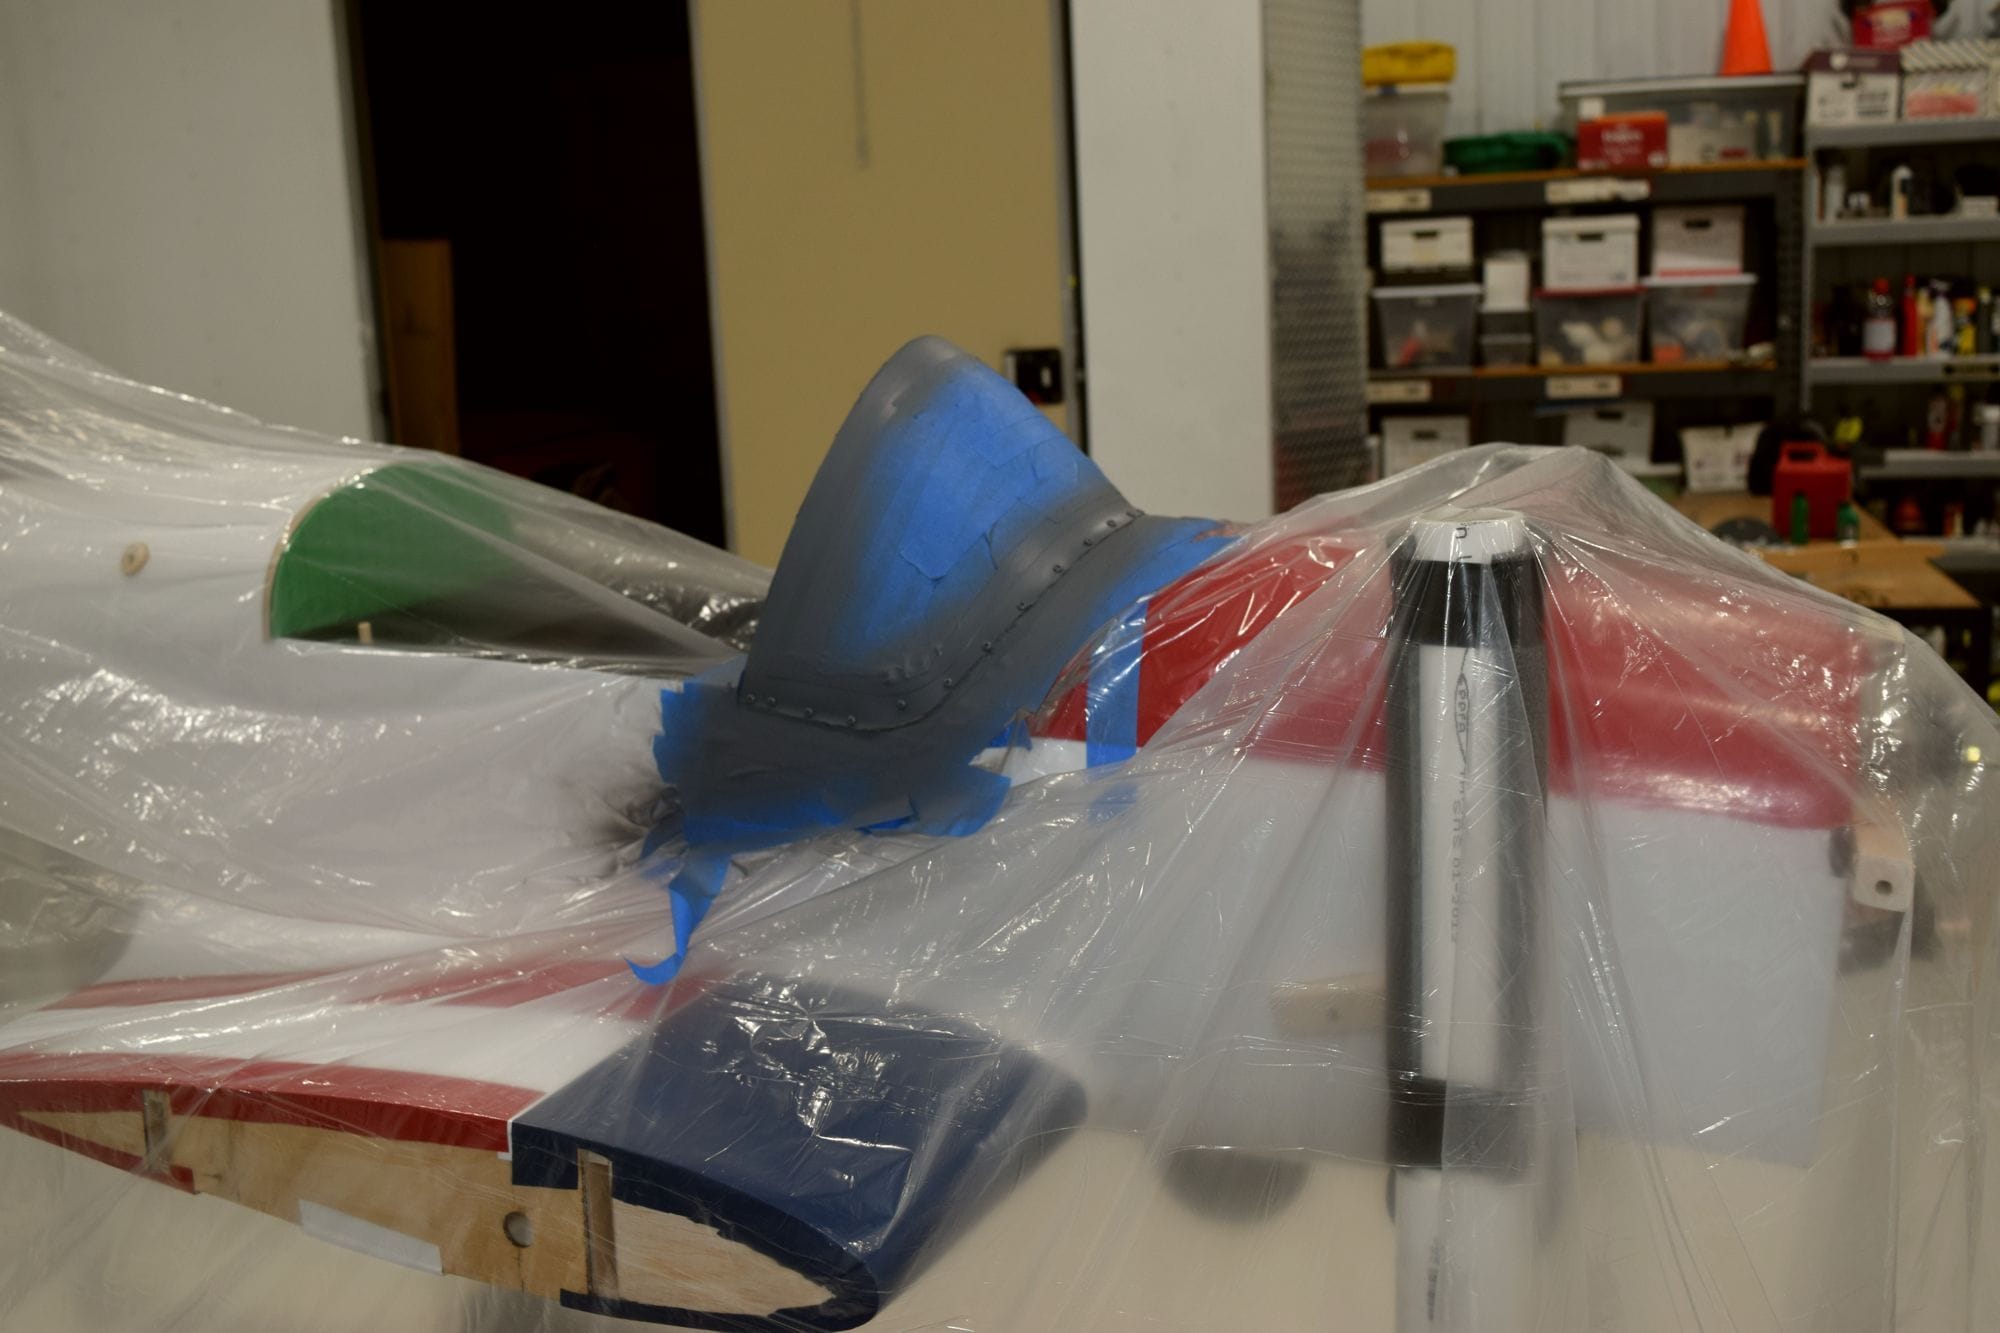
Most is Monocoat. Some of the white is Neucover. The colors I got from Neucover were not what I needed so I will use them for something else. I think I like the shrink on the Neucover just slightly better.

For adhesion, on the control surfaces I use a dusting of 3m 77 spray adhesive (or any average spray adhesive, not the super adhesive). It is what I prefer but it was easier to brush something on the Fuselage. I can't get Stik-it any more or Balsaright. I got cover Grip from Horizon hobby. It's like thinned down Elmers Glue. I am using it but will find something else next time.
Old 03-23-2024, 07:15 AM
  #186  
gow589
My Feedback: (1)
 
Join Date: Aug 2004
Location: evansville, IN
Posts: 863
Received 33 Likes on 28 Posts
Default

Originally Posted by Tony Hallo
What are you covering with?
I toyed with Fiberglass or iron on. Initially I was going to fiberglass and paint. After mulling it over I decided to get it going at first with Iron on then see how the weight is. I can redo it later.
Old 03-30-2024, 12:18 PM
  #187  
gow589
My Feedback: (1)
 
Join Date: Aug 2004
Location: evansville, IN
Posts: 863
Received 33 Likes on 28 Posts
Default

Well aren't stripes fun! ! ! !


Old 03-30-2024, 12:18 PM
  #188  
gow589
My Feedback: (1)
 
Join Date: Aug 2004
Location: evansville, IN
Posts: 863
Received 33 Likes on 28 Posts
Default


Old 03-31-2024, 03:53 AM
  #189  
RICKSTUBBZ
 
RICKSTUBBZ's Avatar
 
Join Date: Oct 2007
Location: Hempstead, TX
Posts: 1,525
Received 28 Likes on 25 Posts
Default

Originally Posted by gow589
Well aren't stripes fun! ! ! !
Not nearly as much fun as tapered checker boards (parallelograms)
But tedious none the less...

Your Plane is looking good .
The following users liked this post:
gow589 (03-31-2024)
Old 04-14-2024, 12:27 PM
  #190  
jtisch
 
jtisch's Avatar
 
Join Date: Apr 2005
Location: Federal Way WA
Posts: 749
Likes: 0
Received 0 Likes on 0 Posts
Default

Would any of you fine people have a set of the Don's Custom Models 100" Super Chipmunk plans they would be willing to part with (or copy)? I picked one up yesterday but with no plans, clear canopy or rudder. Rudder is no problem, Plans aren't an insurmountable problem, but i would like to have them. Canopy? I have the means to make one but it would be an effort to make the plug.
Any help appreciated.. BTW, I had a Goldberg Chipmunk in the late '80's- early 90's and I put more hours on that plane than on any other plane I have had before or since. Sweet plane to fly.

J
Old 04-14-2024, 10:05 PM
  #191  
Tony Hallo
 
Join Date: Jan 2003
Location: Springdale, PA
Posts: 1,833
Received 50 Likes on 48 Posts
Default

I believe a fellow that goes by the name of frequent flyer is selling that plane again.
Old 04-18-2024, 12:42 PM
  #192  
gow589
My Feedback: (1)
 
Join Date: Aug 2004
Location: evansville, IN
Posts: 863
Received 33 Likes on 28 Posts
Default

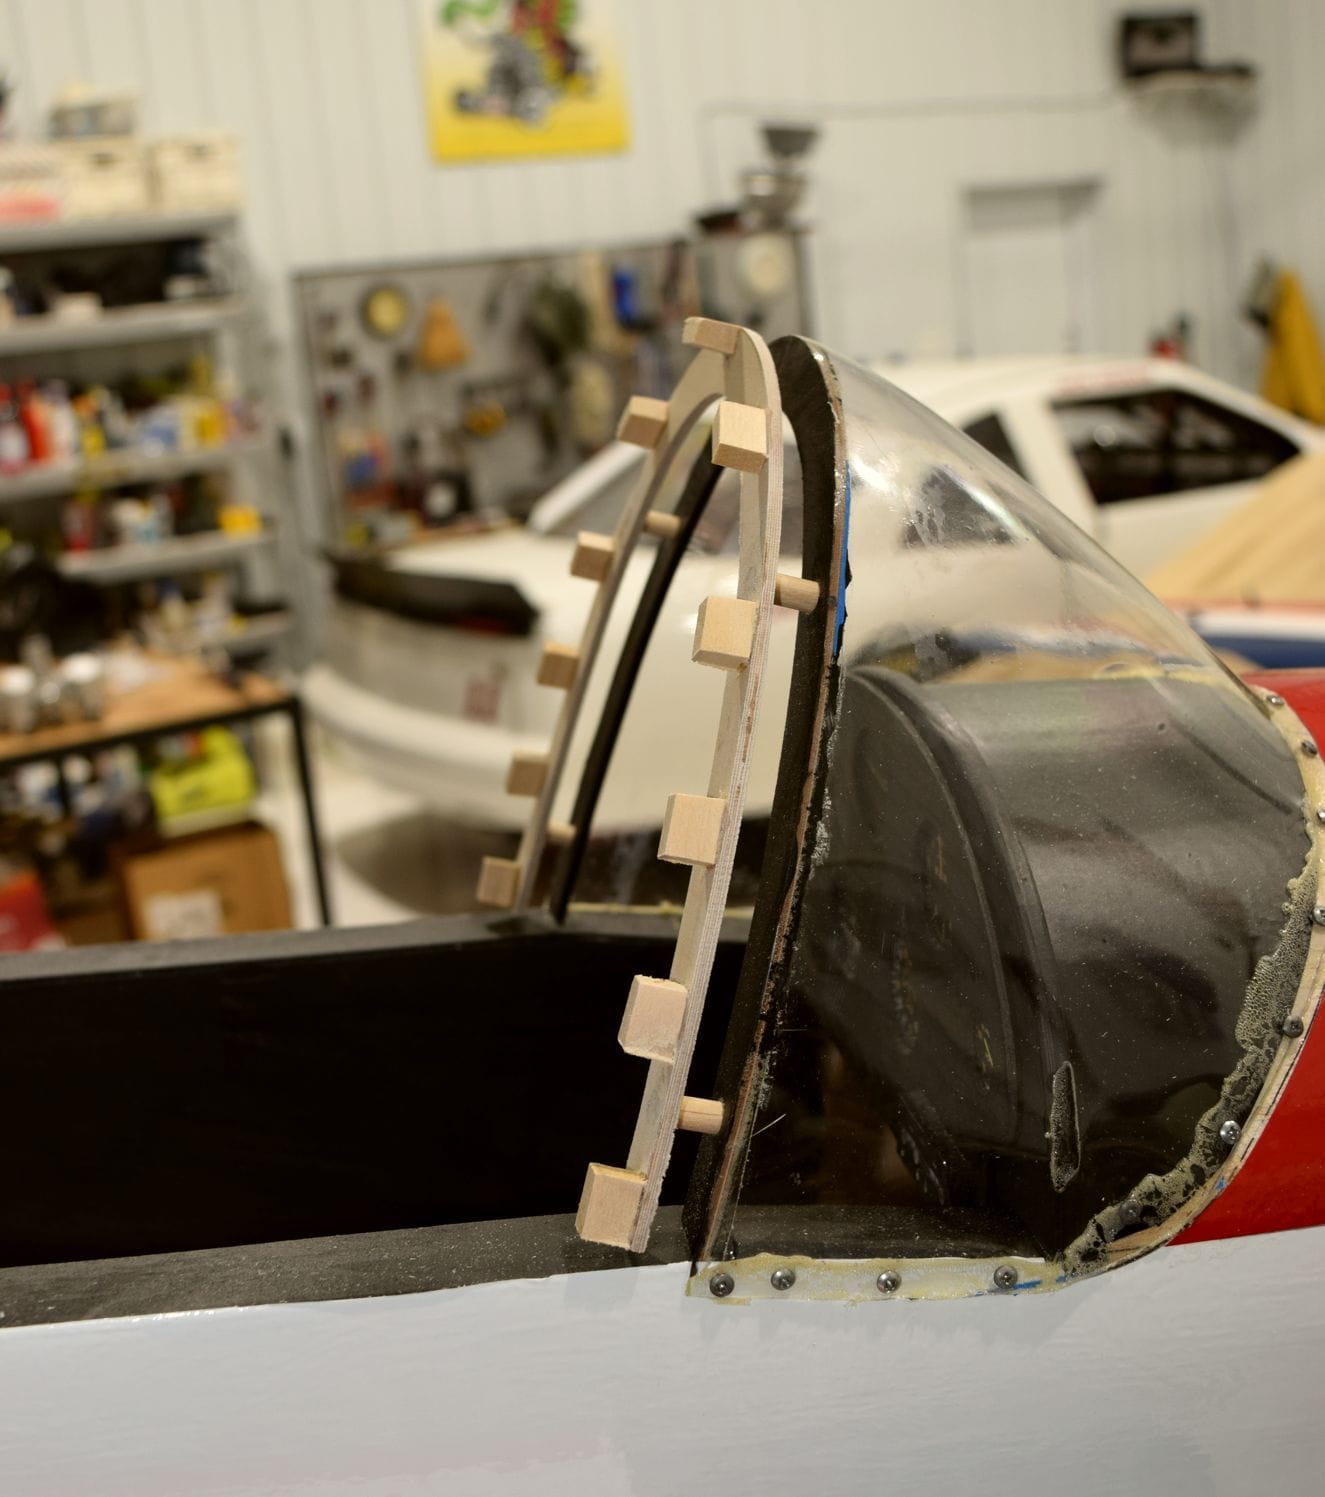
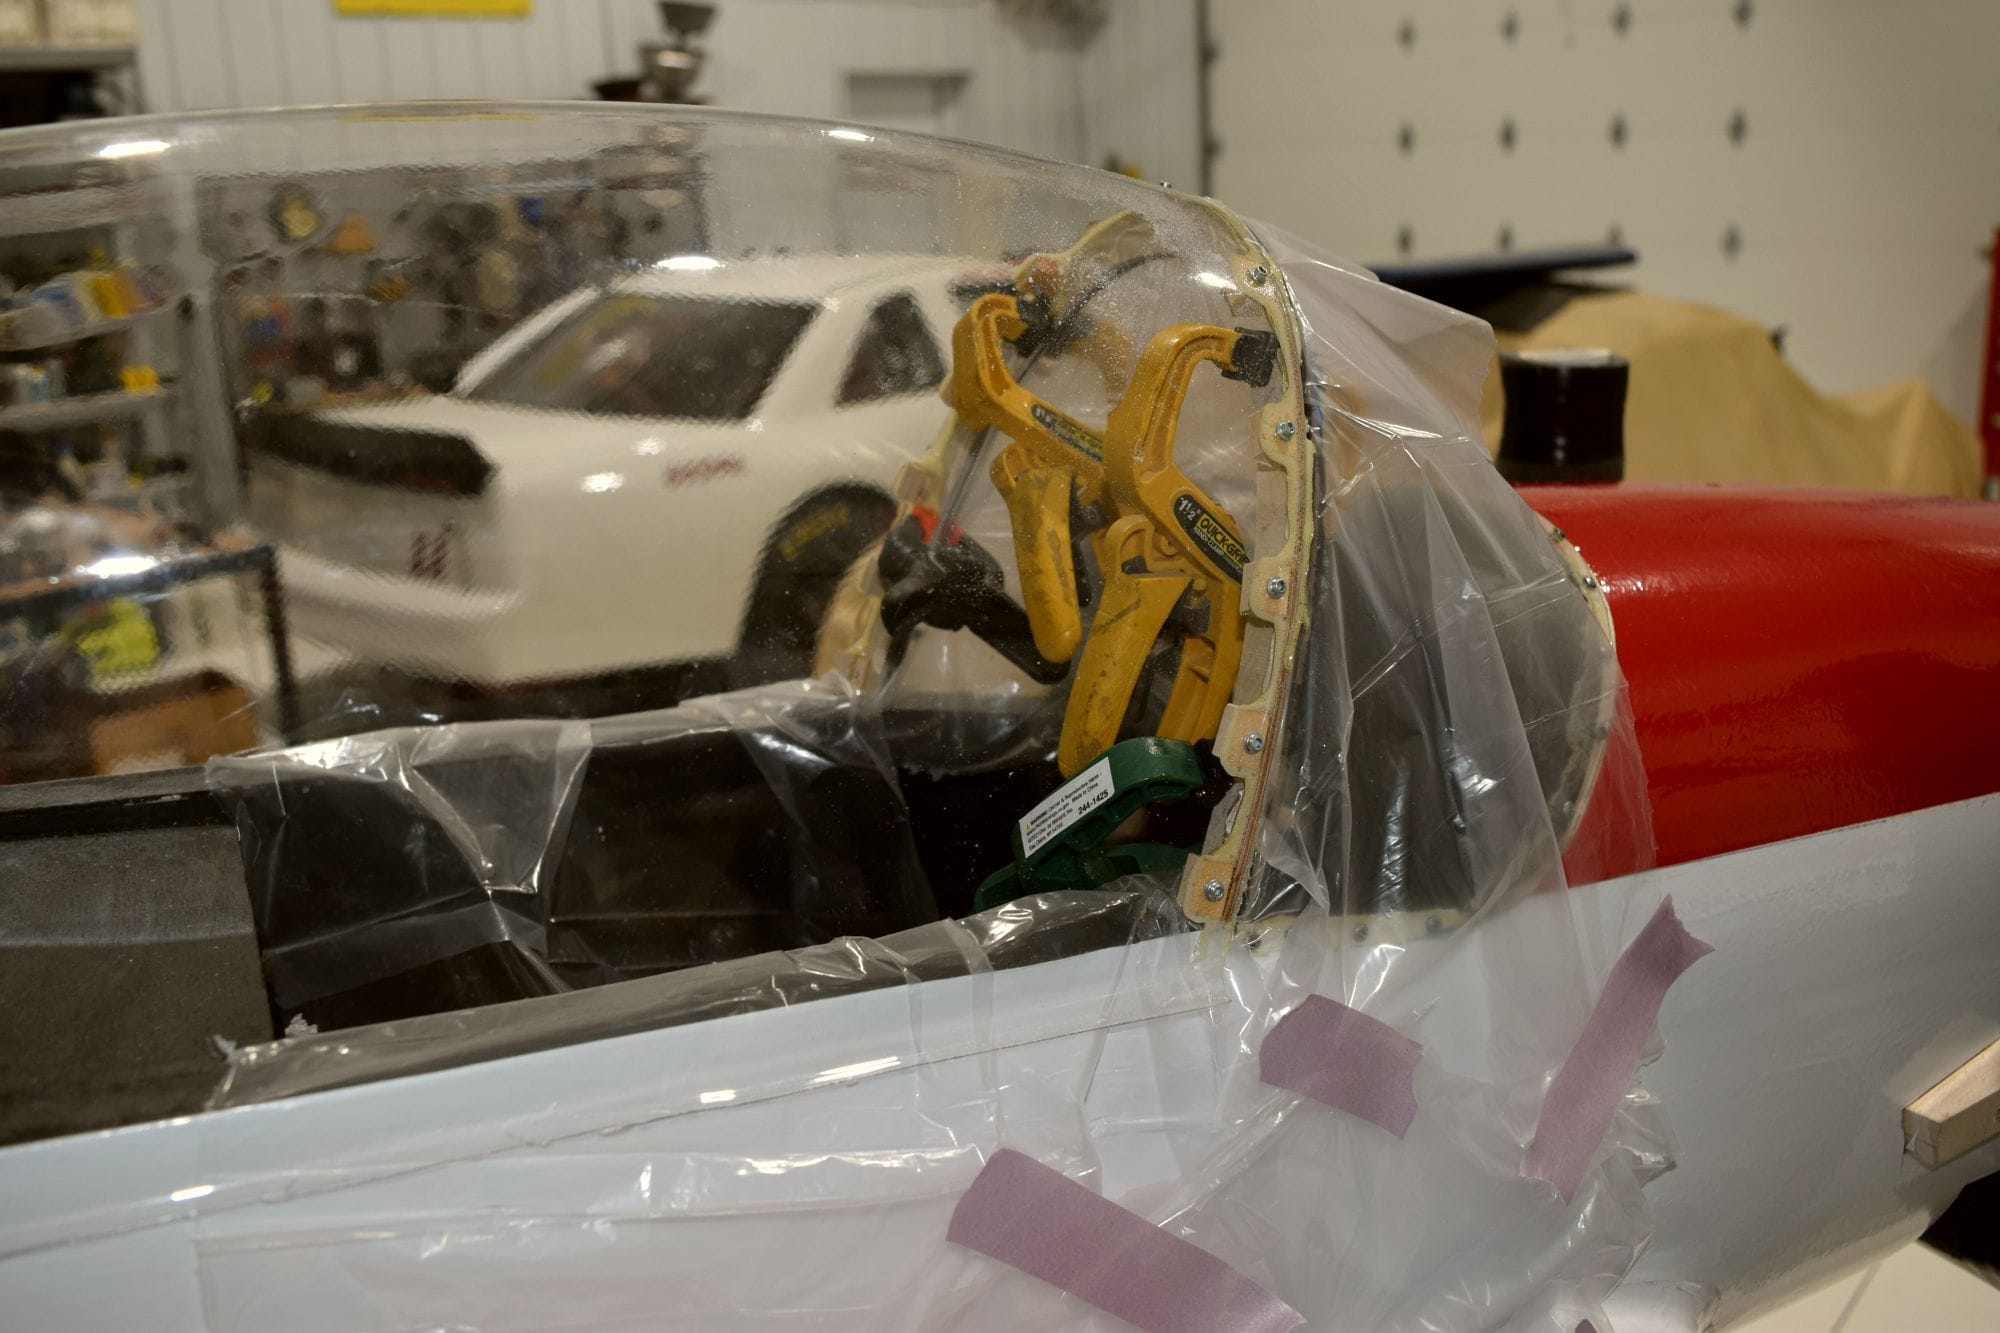
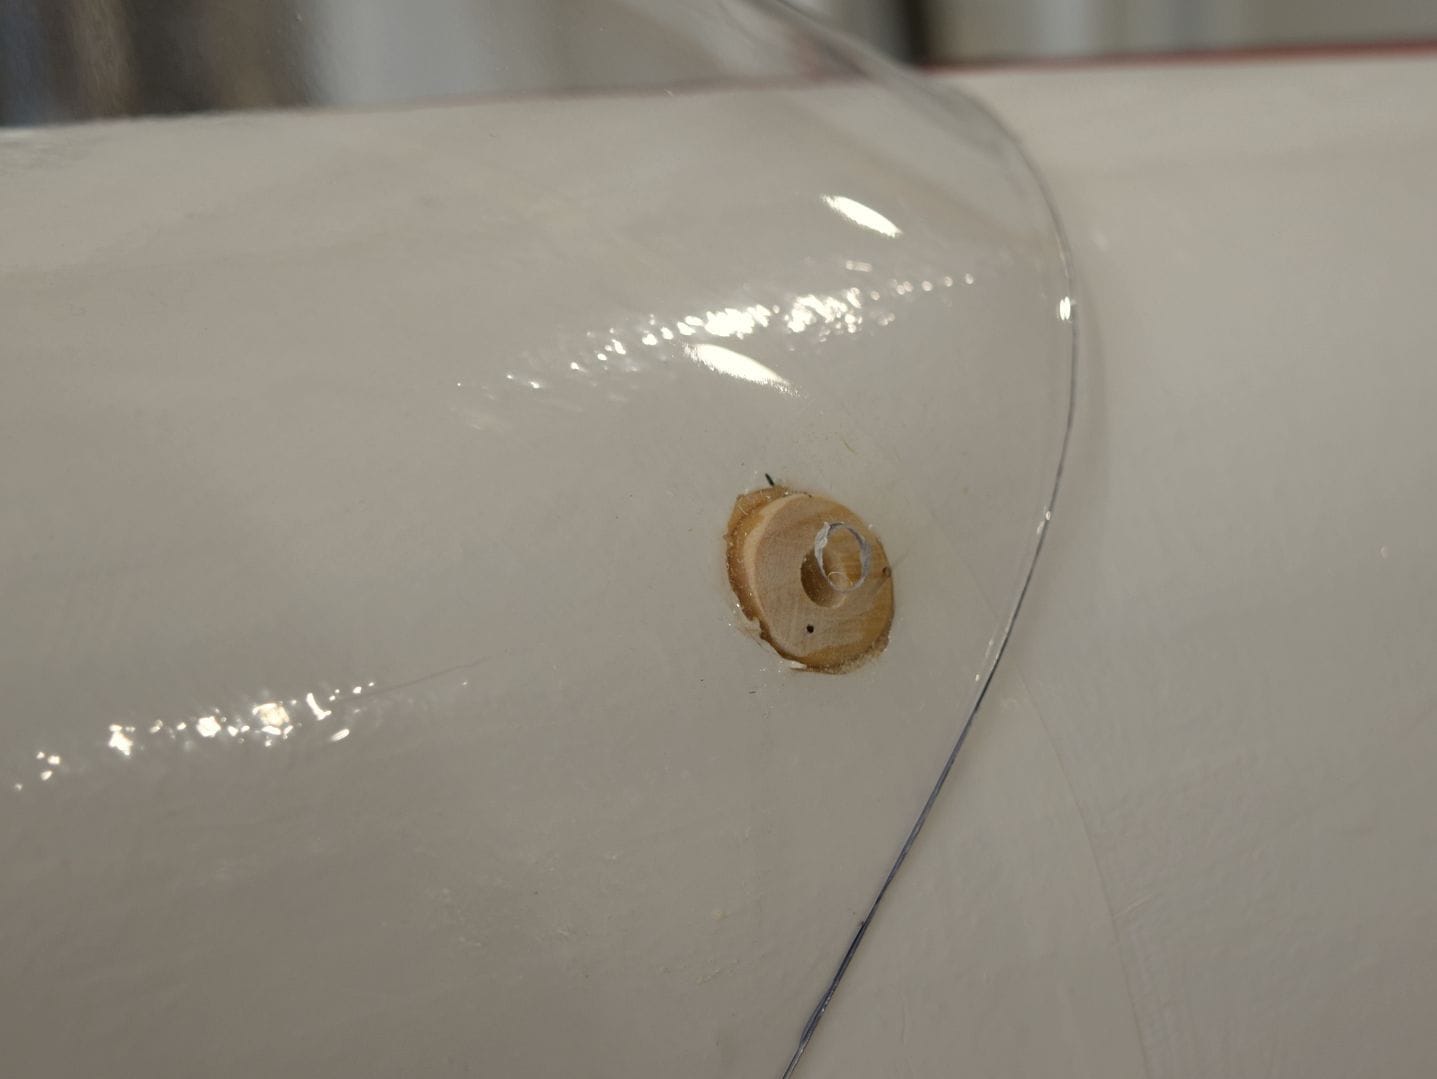
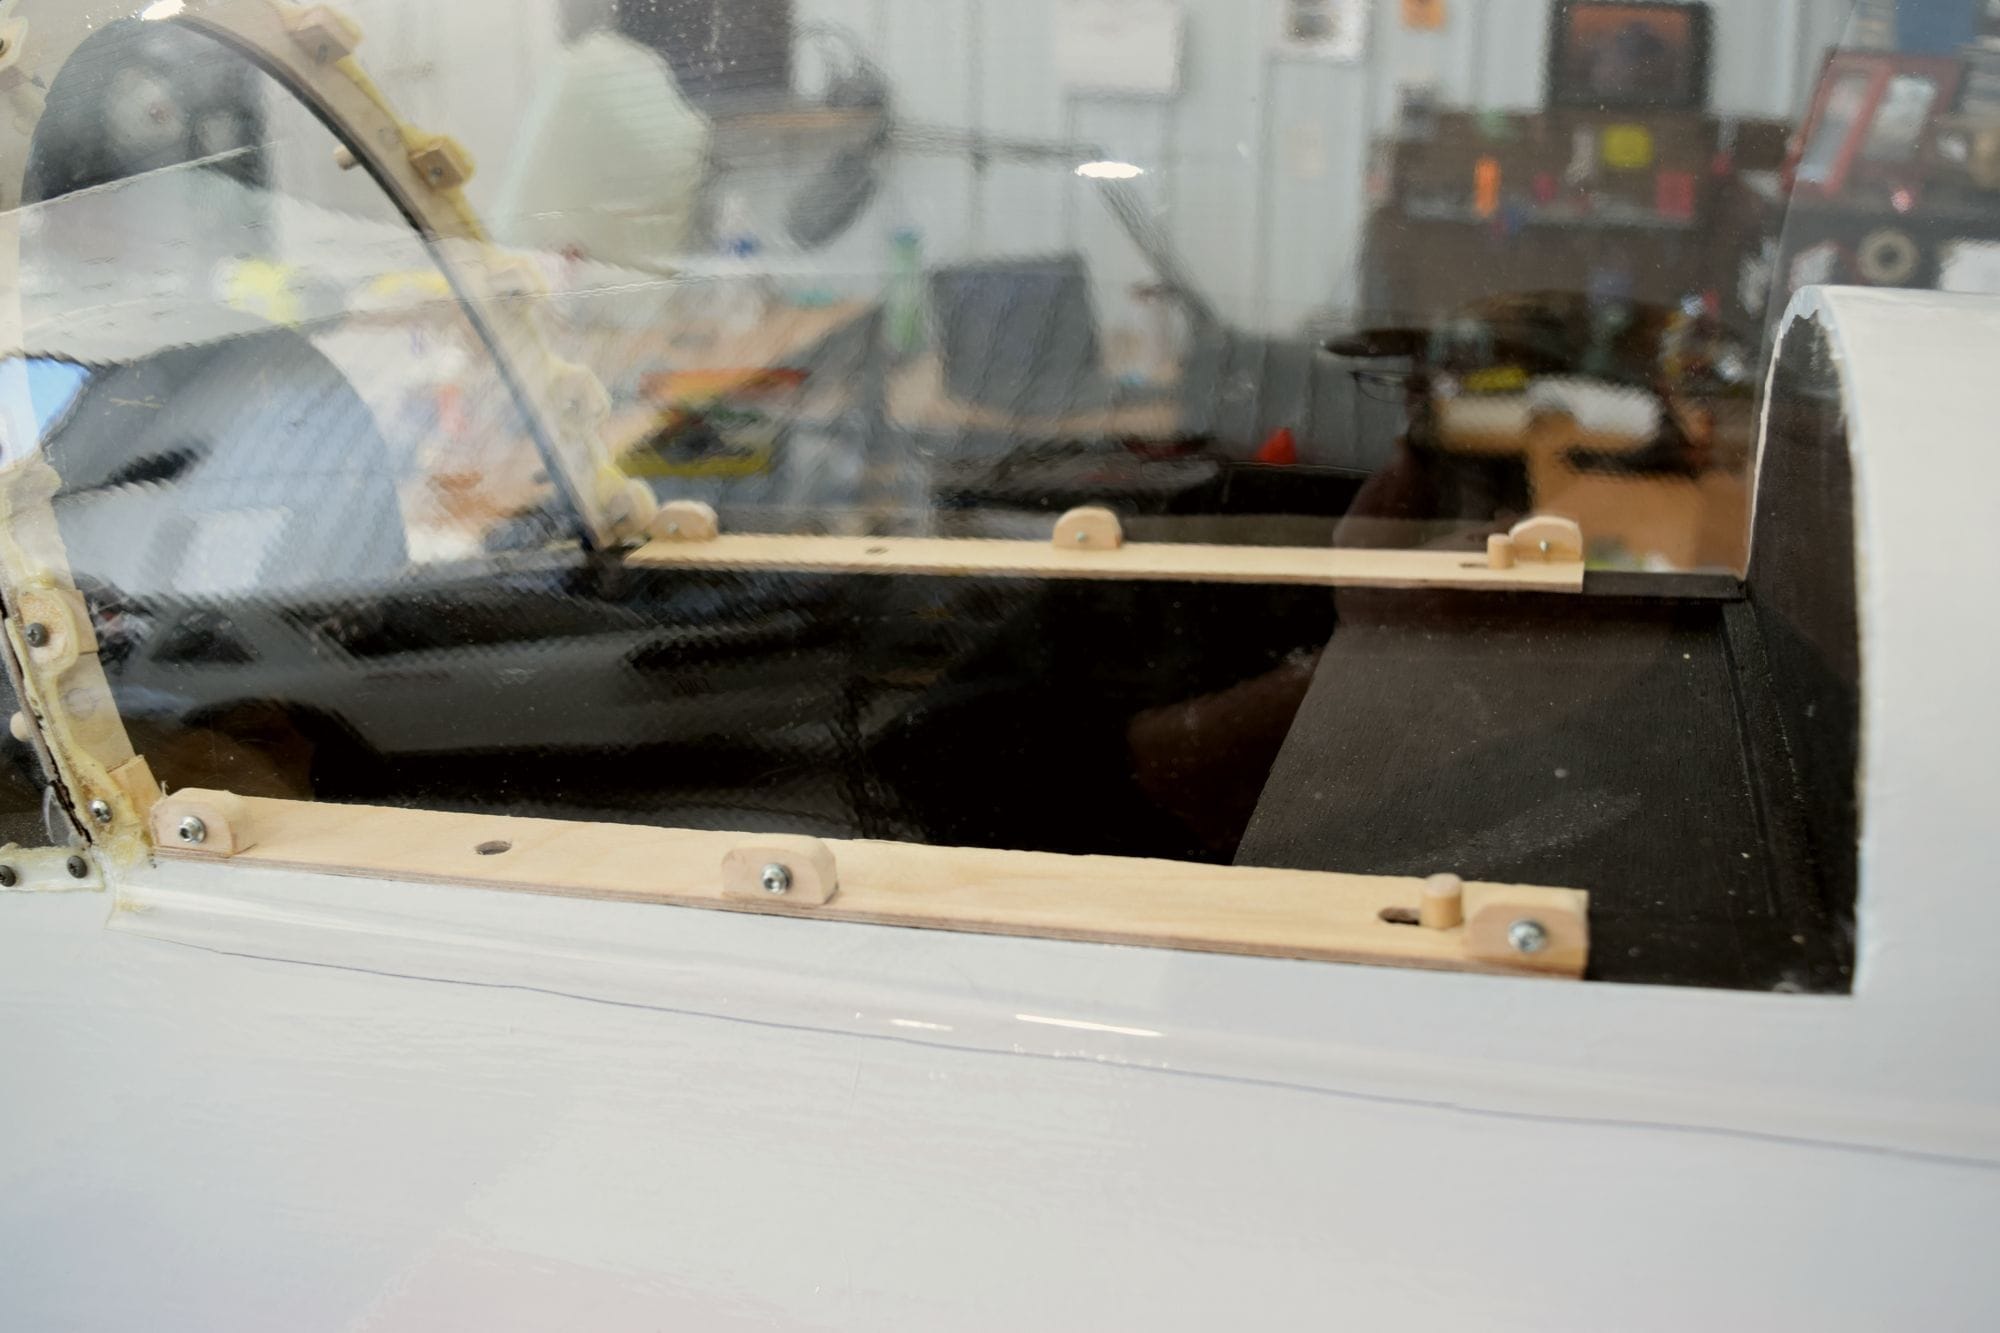
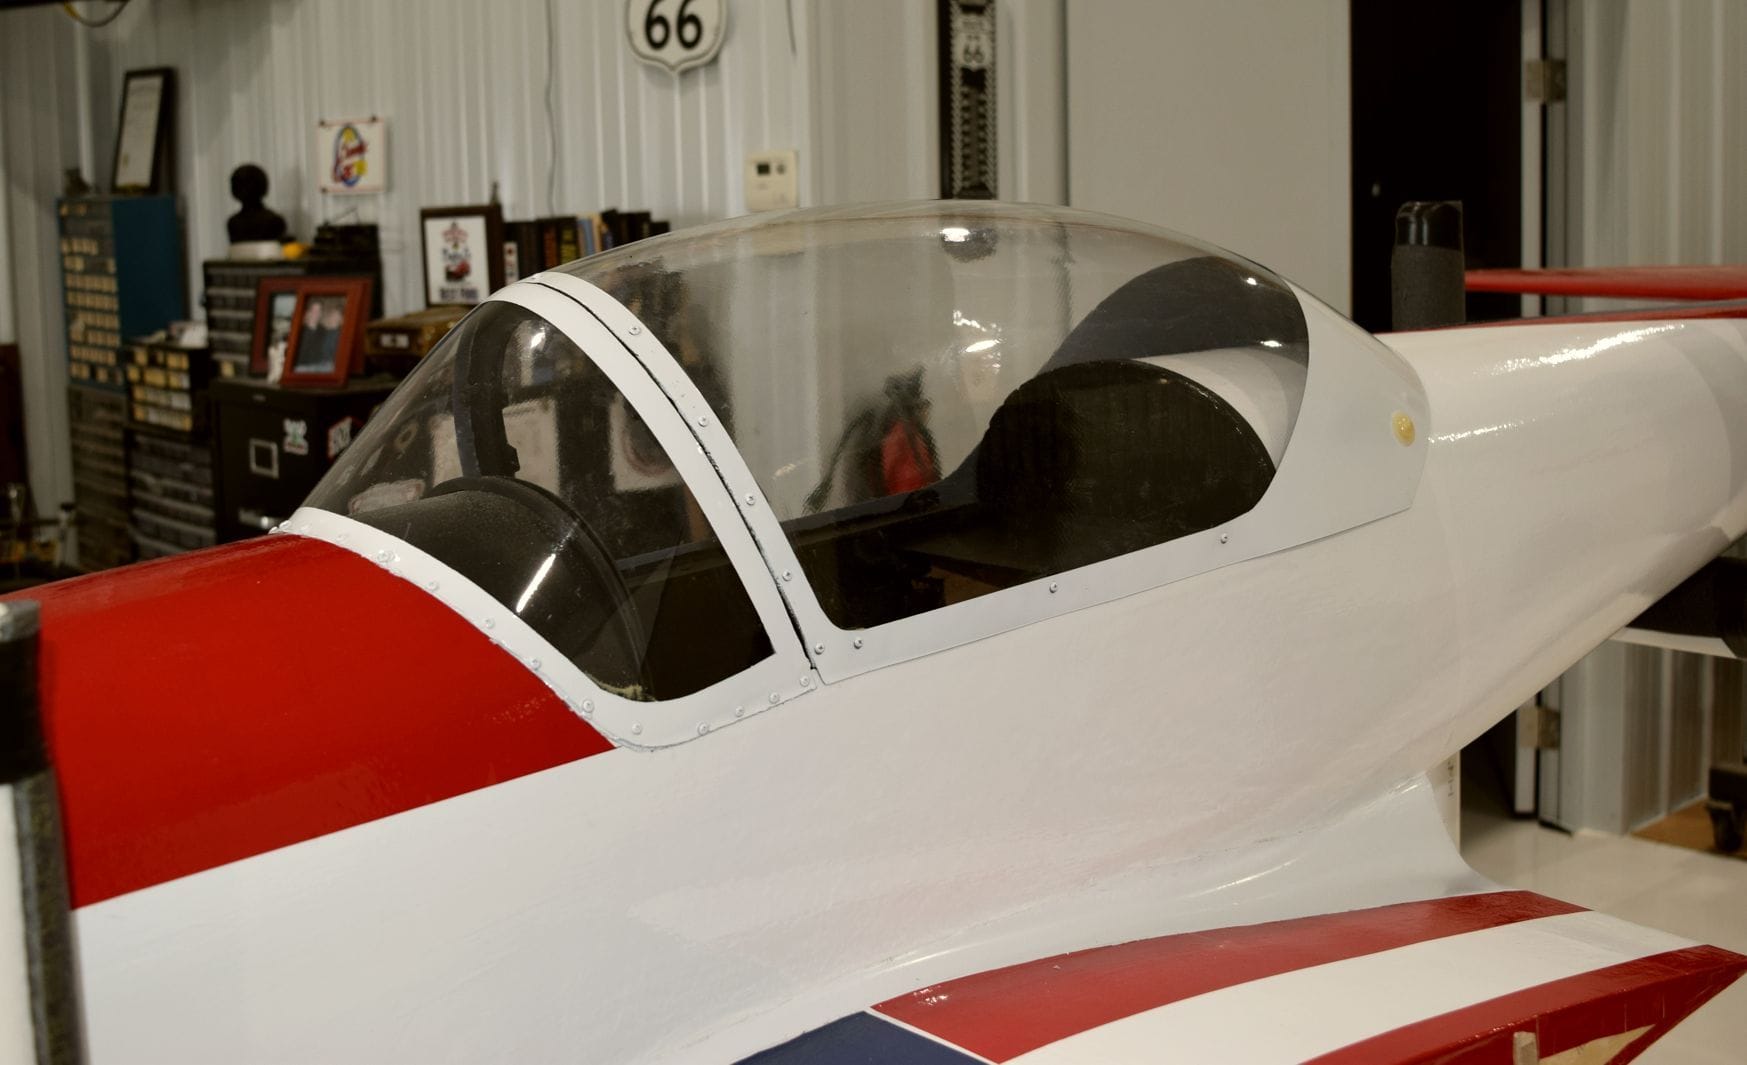
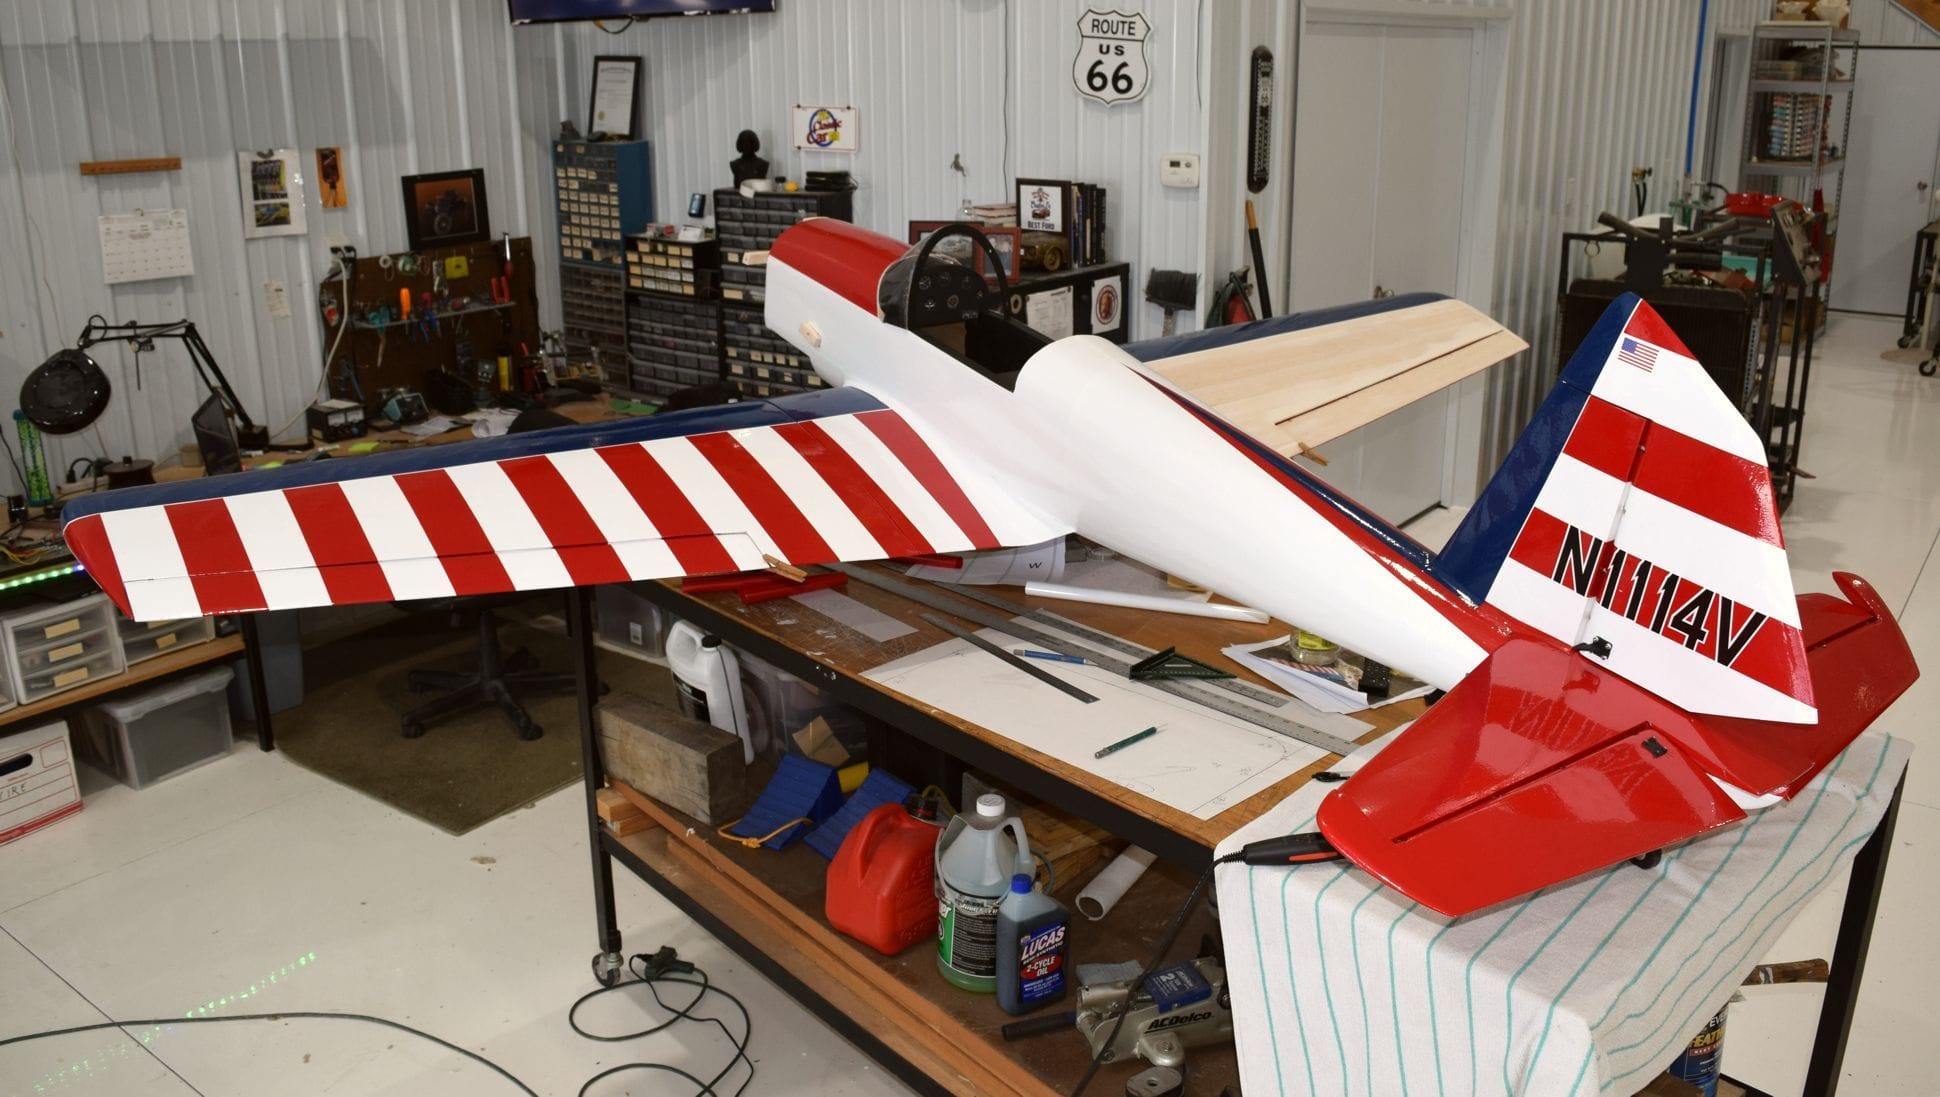
Getting the canopy on took some time. Not my favorite part of the build. The canopy needs to be removable for access to the inside of the plane. I have seen some people glue the canopy on and then make that section of the body removable. I really did not care for that. On the flip side, for a sport plane I was not going to the trouble to make it slide. The first thing I did was make new bows for the canopy. The ones included in the National Balsa cut kit were not close to the fuselage width. I set up 2 bows with doll pins. The forward part was cut and #2 screws used to help hold it in place. Small hard wood blocks glued inside the fuselage where the screws are. Originally assembled with Gorilla glue and socket head screws to help the process. When the glue dried, the screws were swapped for small head Philips.
Old 04-18-2024, 12:43 PM
  #193  
gow589
My Feedback: (1)
 
Join Date: Aug 2004
Location: evansville, IN
Posts: 863
Received 33 Likes on 28 Posts
Default

The rear canopy was screwed and glued on as well:
Old 04-18-2024, 12:44 PM
  #194  
gow589
My Feedback: (1)
 
Join Date: Aug 2004
Location: evansville, IN
Posts: 863
Received 33 Likes on 28 Posts
Default


The rear plywood canopy arch was not even close. I glued in hard wood dolls, drilled and tapped them 1/4-20:

Last edited by gow589; 04-18-2024 at 12:50 PM.
Old 04-18-2024, 12:45 PM
  #195  
gow589
My Feedback: (1)
 
Join Date: Aug 2004
Location: evansville, IN
Posts: 863
Received 33 Likes on 28 Posts
Default

Side rails added with a rear doll pin to keep the sides from bowing out. A slot was made so it can be removed. A front hole was drilled in case I needed it:

Old 04-18-2024, 12:46 PM
  #196  
gow589
My Feedback: (1)
 
Join Date: Aug 2004
Location: evansville, IN
Posts: 863
Received 33 Likes on 28 Posts
Default

Rear cushion 3d printed:


Old 04-18-2024, 12:47 PM
  #197  
gow589
My Feedback: (1)
 
Join Date: Aug 2004
Location: evansville, IN
Posts: 863
Received 33 Likes on 28 Posts
Default

Canopy painted with rustoleum:


Old 04-18-2024, 12:48 PM
  #198  
gow589
My Feedback: (1)
 
Join Date: Aug 2004
Location: evansville, IN
Posts: 863
Received 33 Likes on 28 Posts
Default

The canopy is rock solid and simple to remove with 2 screws. For a simple sport plane I am pleased. Pilot is 3d printed but needs to be finished.


Old 04-18-2024, 01:10 PM
  #199  
gow589
My Feedback: (1)
 
Join Date: Aug 2004
Location: evansville, IN
Posts: 863
Received 33 Likes on 28 Posts
Default

Welded scrap steel together for engine stand. Table is on wheels so I will need to strap it to my truck.


Old 04-18-2024, 02:25 PM
  #200  
RICKSTUBBZ
 
RICKSTUBBZ's Avatar
 
Join Date: Oct 2007
Location: Hempstead, TX
Posts: 1,525
Received 28 Likes on 25 Posts
Default

Sure is looking nice!

I bet there are not very many people with an engine test stand like that one.


Contact Us - Archive - Advertising - Cookie Policy - Privacy Statement - Terms of Service -

Copyright © 2024 MH Sub I, LLC dba Internet Brands. All rights reserved. Use of this site indicates your consent to the Terms of Use.