


Earnies Kadet SR.
 01-06-2015 | 04:04 PM
#1
Thread Starter

My Feedback: (12)
OK guys and gals. I have a friend at the field who likes to fly but does not like to build or cover. Loves his Kadet and LT 40. But does like the scheme or dihedral in the ARF Sr. So he asked me to build him one from the kit version, take out the dihedral, add ailerons and cover with yellow (cub yellow? TBD). While having some experience building over the past 5 years (first kit build a Great Planes Stik 60, then a Top Flite Contender, followed by a Top Flite P-47, then another Contender [no, I didn't crash the first one. Just wore it out] and now working on an old Dave Platt 65" T-28), I decided to take on this project. Looking on RCU I could find little, if any build forums to assist with the intended modifications and so I decided to start this thread hoping to get some feedback and input on ideas, etc. Would welcome your comments and insight, as others may benefit. Meanwhile see below my previous builds and will post progress when getting time.
Ok its been a long time. Need to figure out how to get my pics uploaded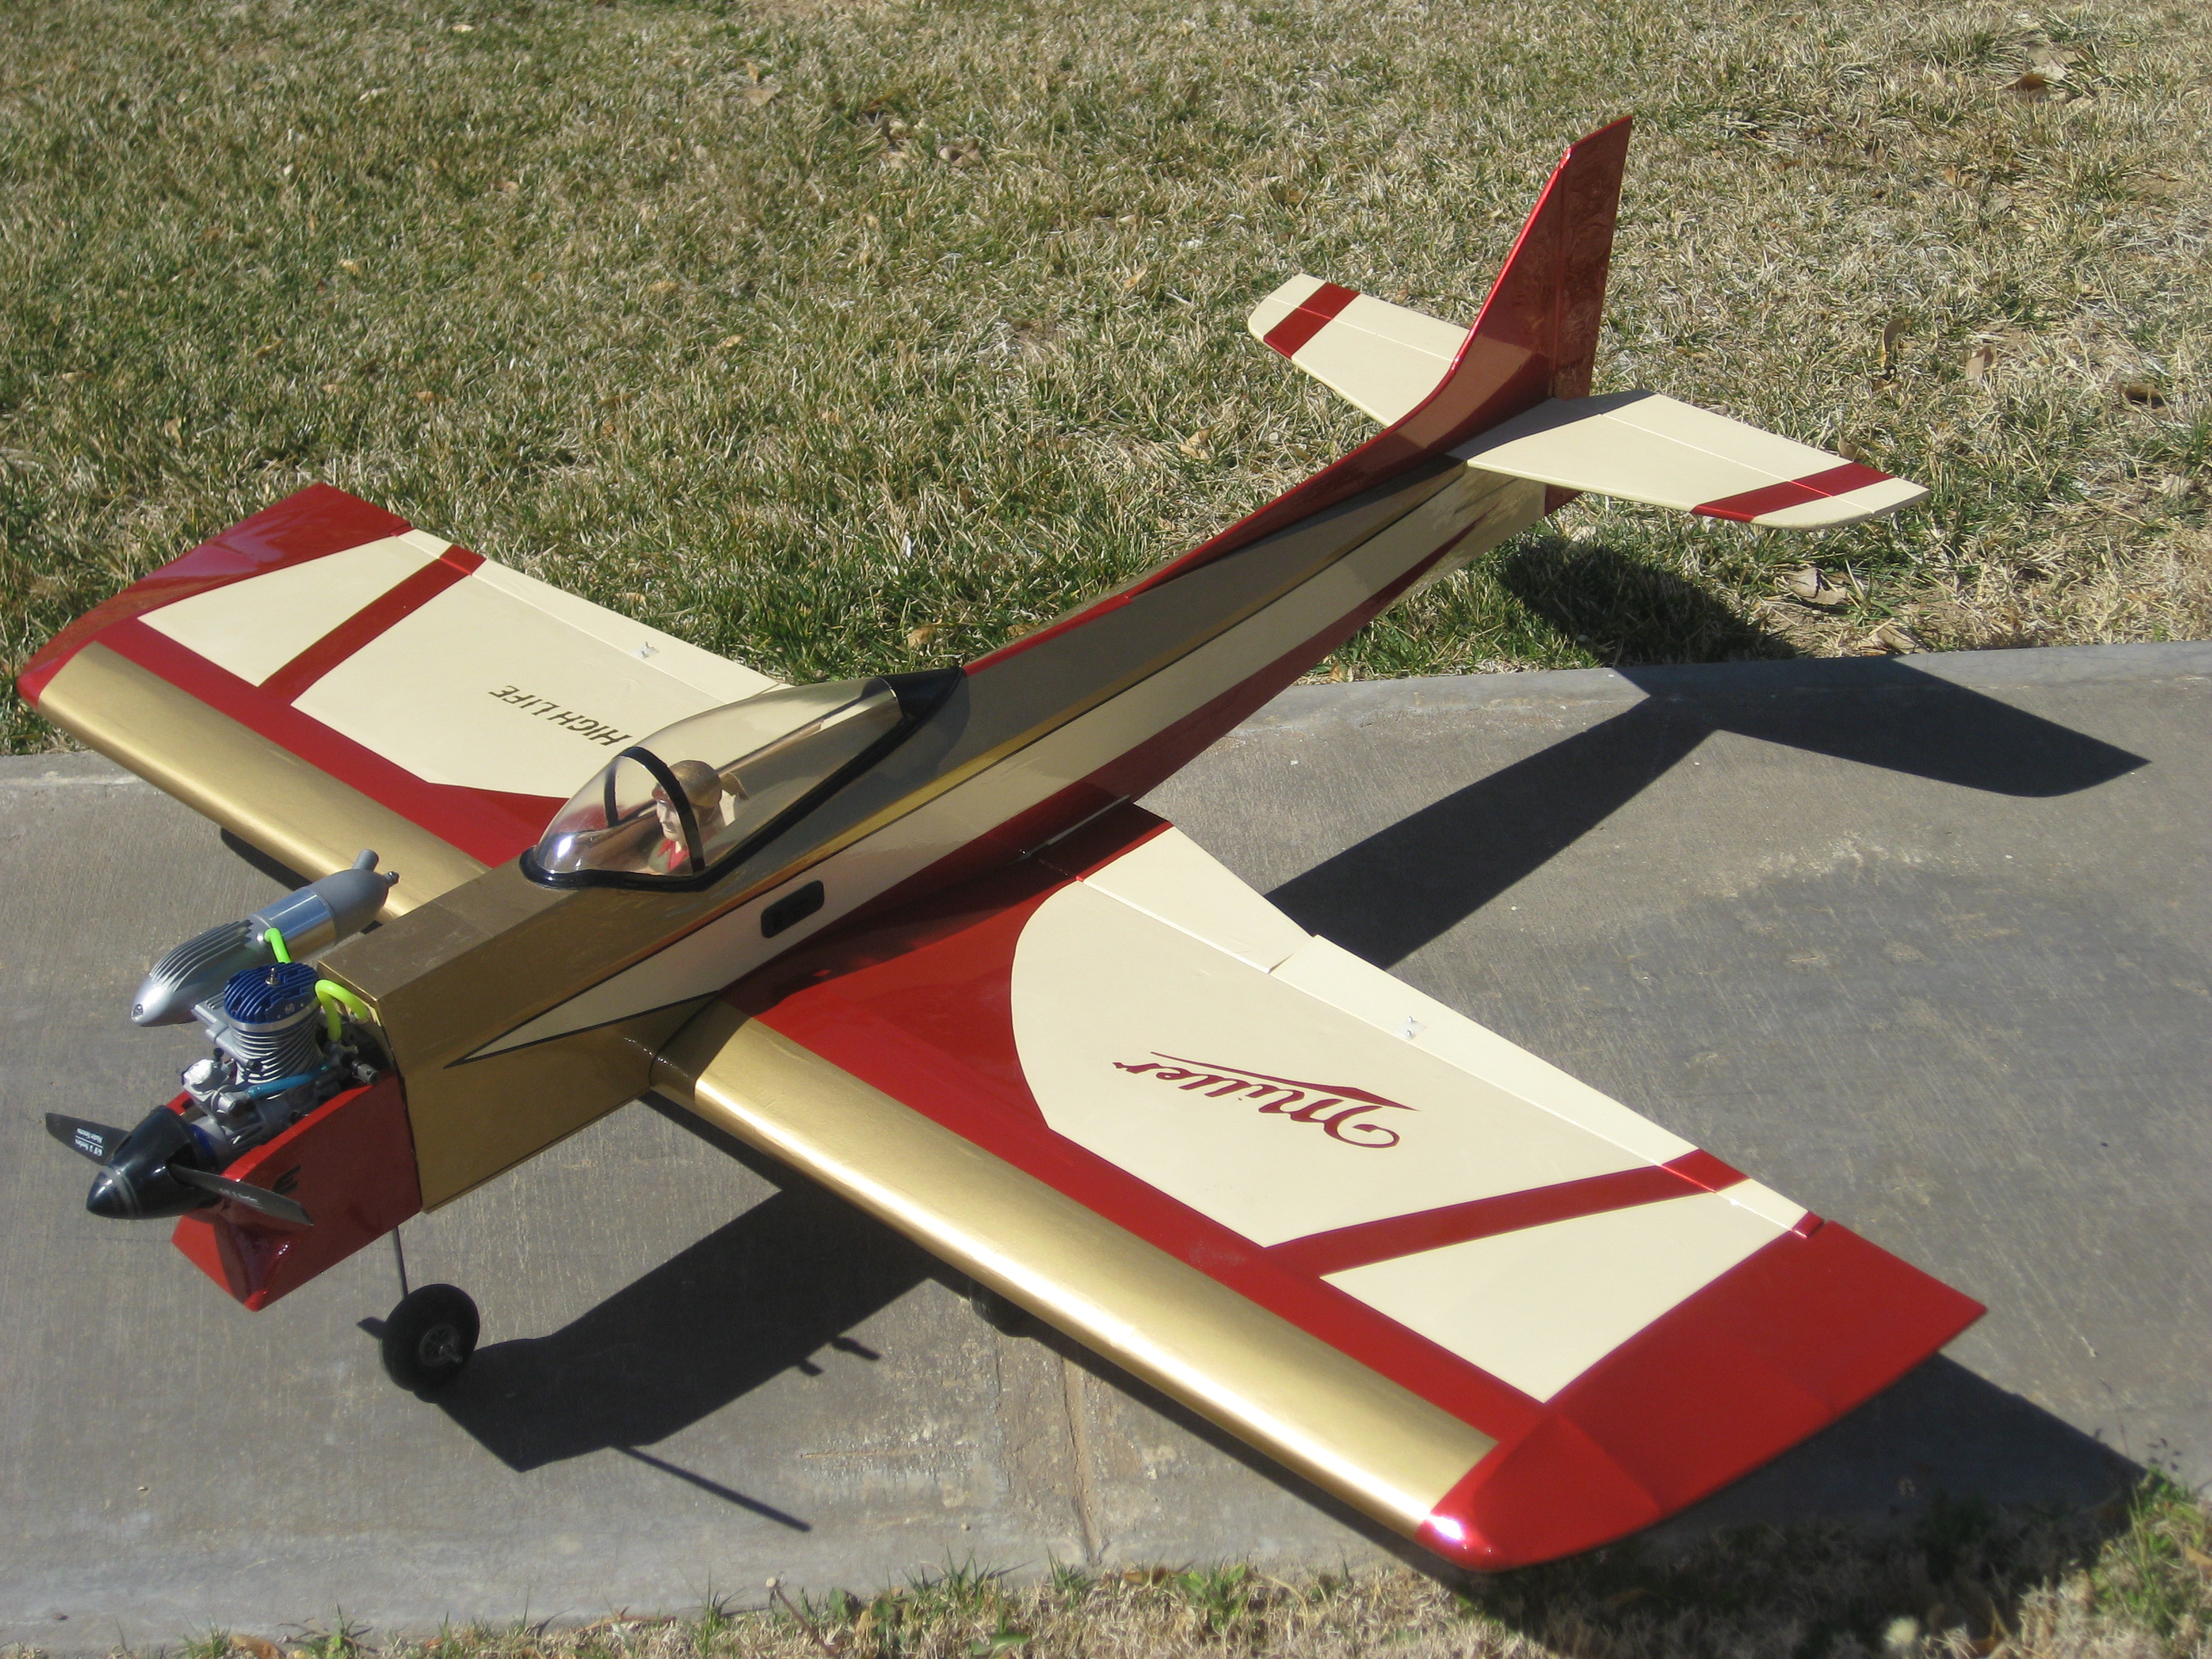
 OK. thats a start. will post on the Kadet later after I see how this turns out.
Ok its been a long time. Need to figure out how to get my pics uploaded
Last edited by adreliable661; 01-06-2015 at 04:16 PM. Reason: Post pics

 01-07-2015 | 04:14 AM
#3

You'll enjoy this project. I know, as I just finished a Kadet Senior, modifying it into a Kadet Senior Sport.
If you are interested, here's a link to my build thread. http://www.rcuniverse.com/forum/kit-...ior-sport.html
It shows how I went about doing the mods, but it certainly isn't the only way to go about doing it.
I'll follow along, and see what you come up with.
Also, if you're interested, you may want to join the Kadet Brotherhood. http://www.rcuniverse.com/forum/kit-...otherhood.html
It's a bunch of guys discussing the Kadet versions, and modifications to them.
01-07-2015 | 05:46 PM
#5
Thread Starter
My Feedback: (12)
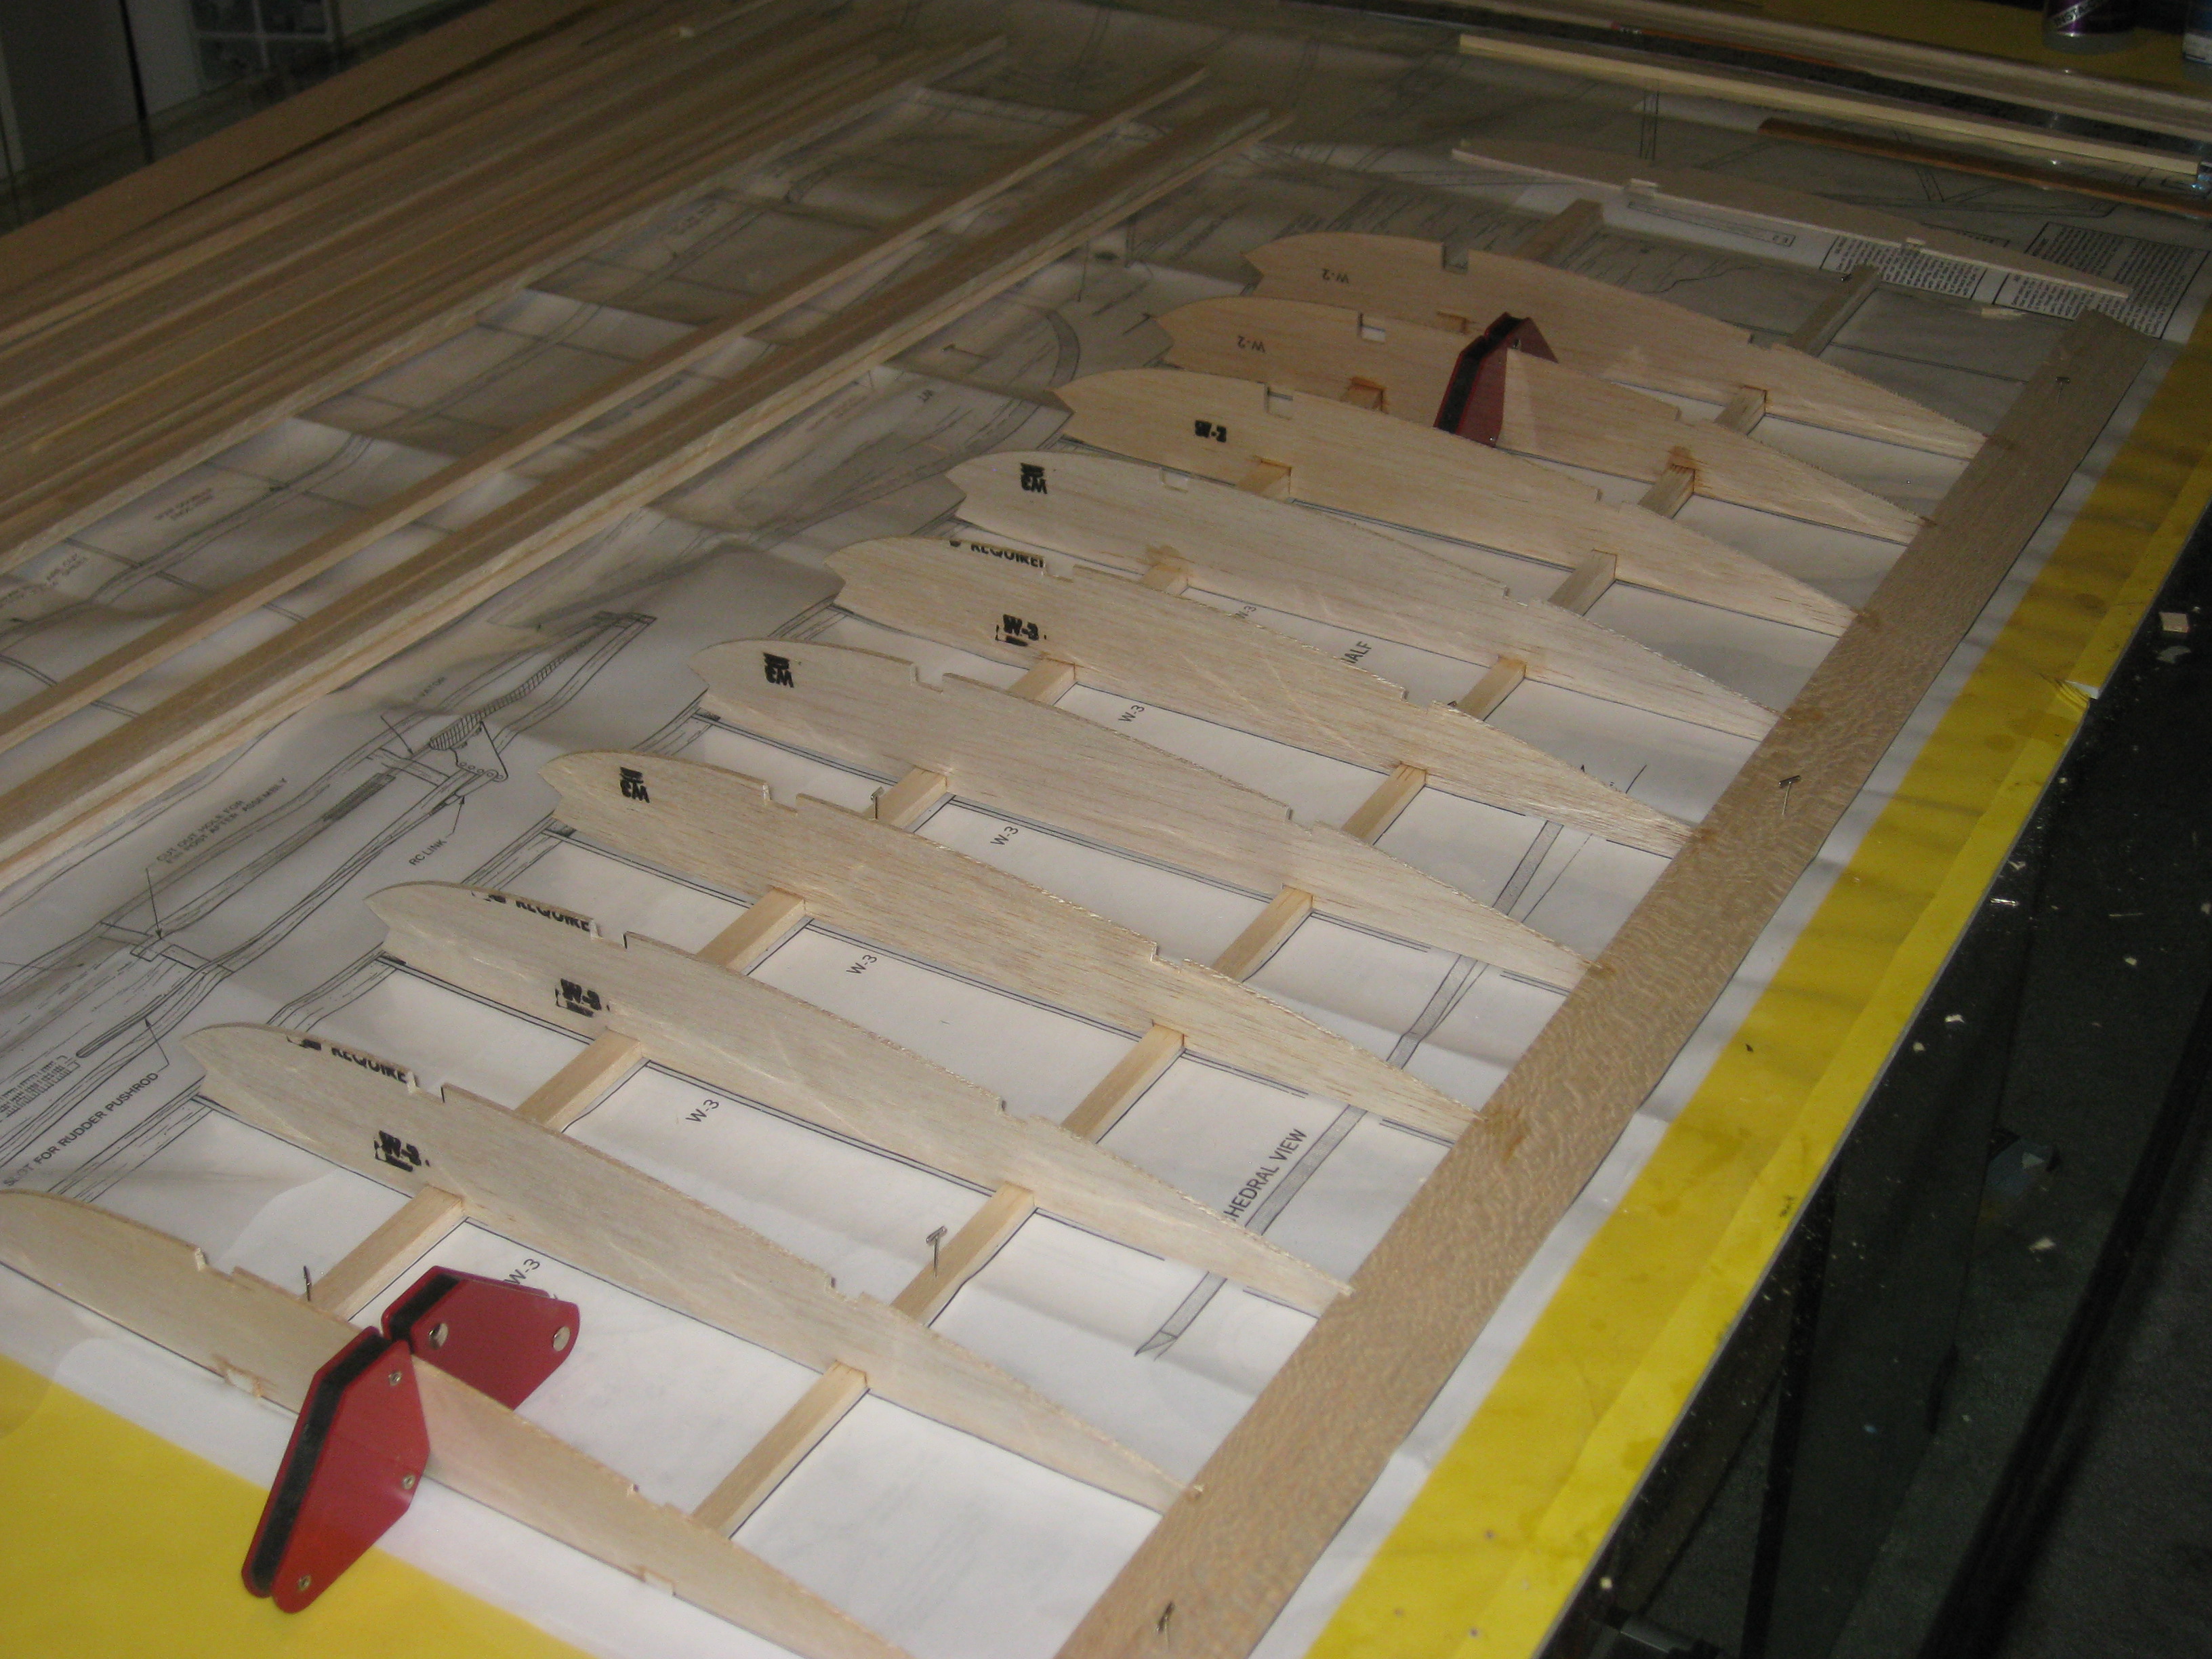
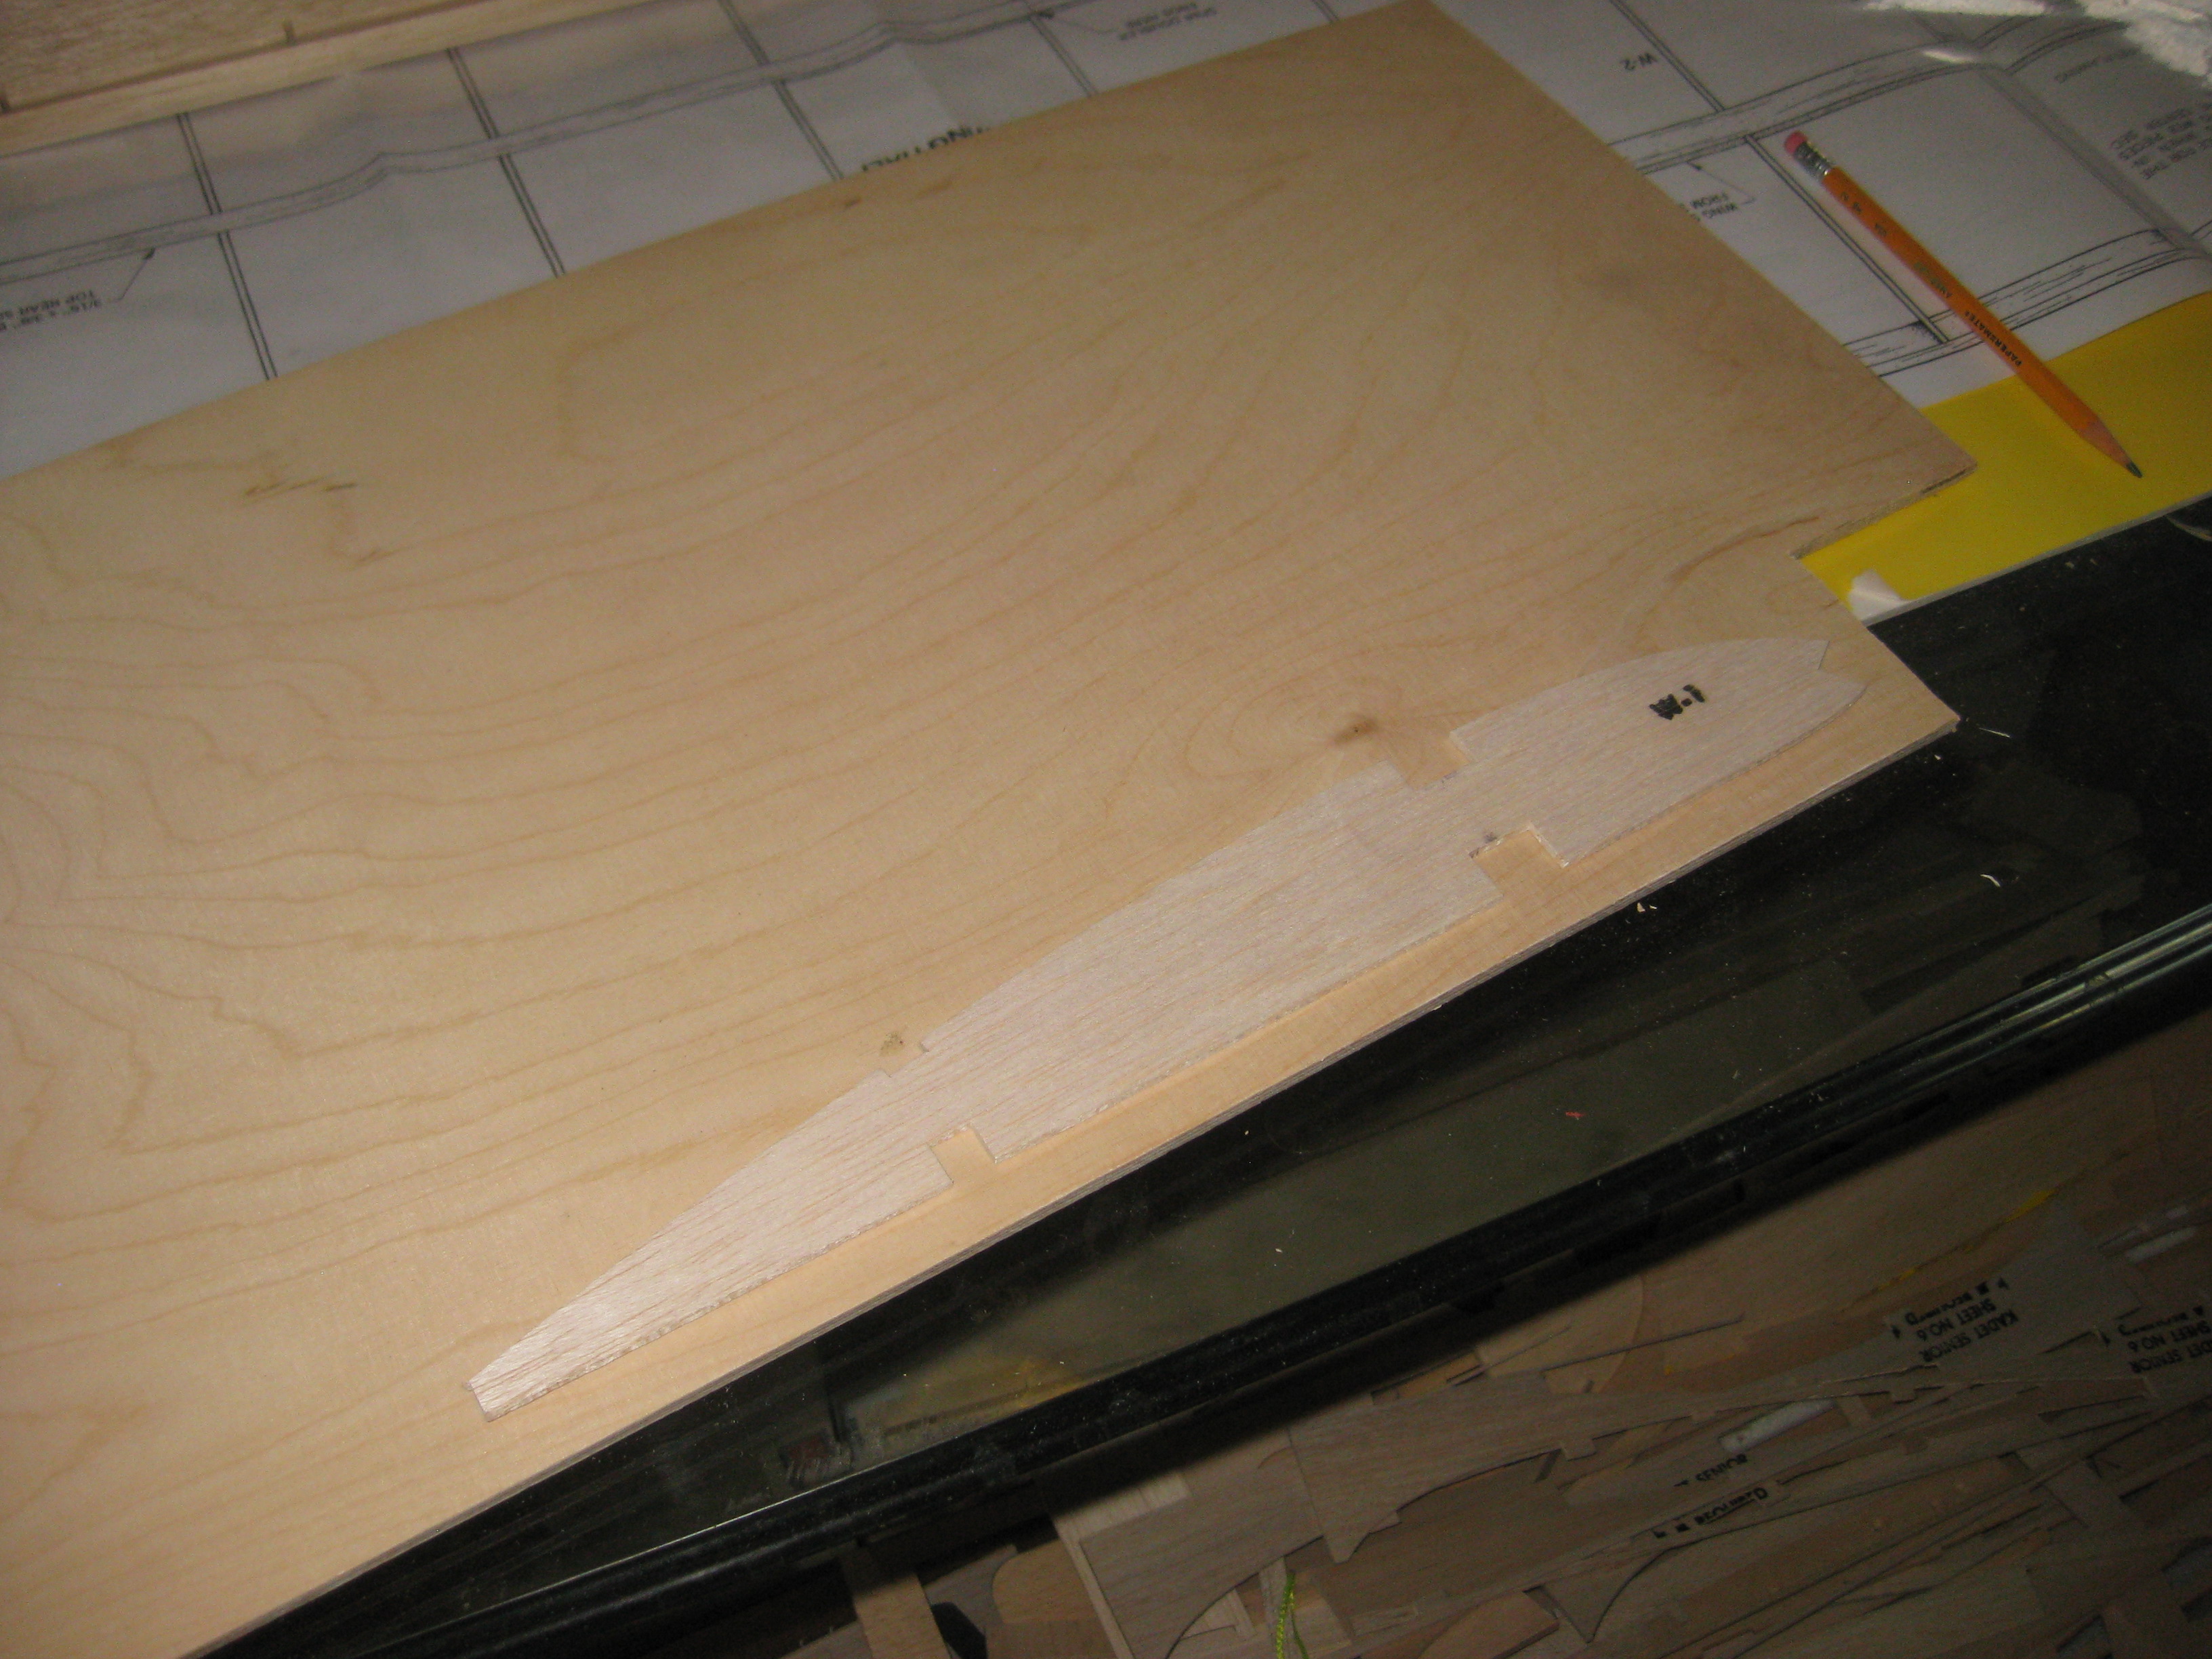
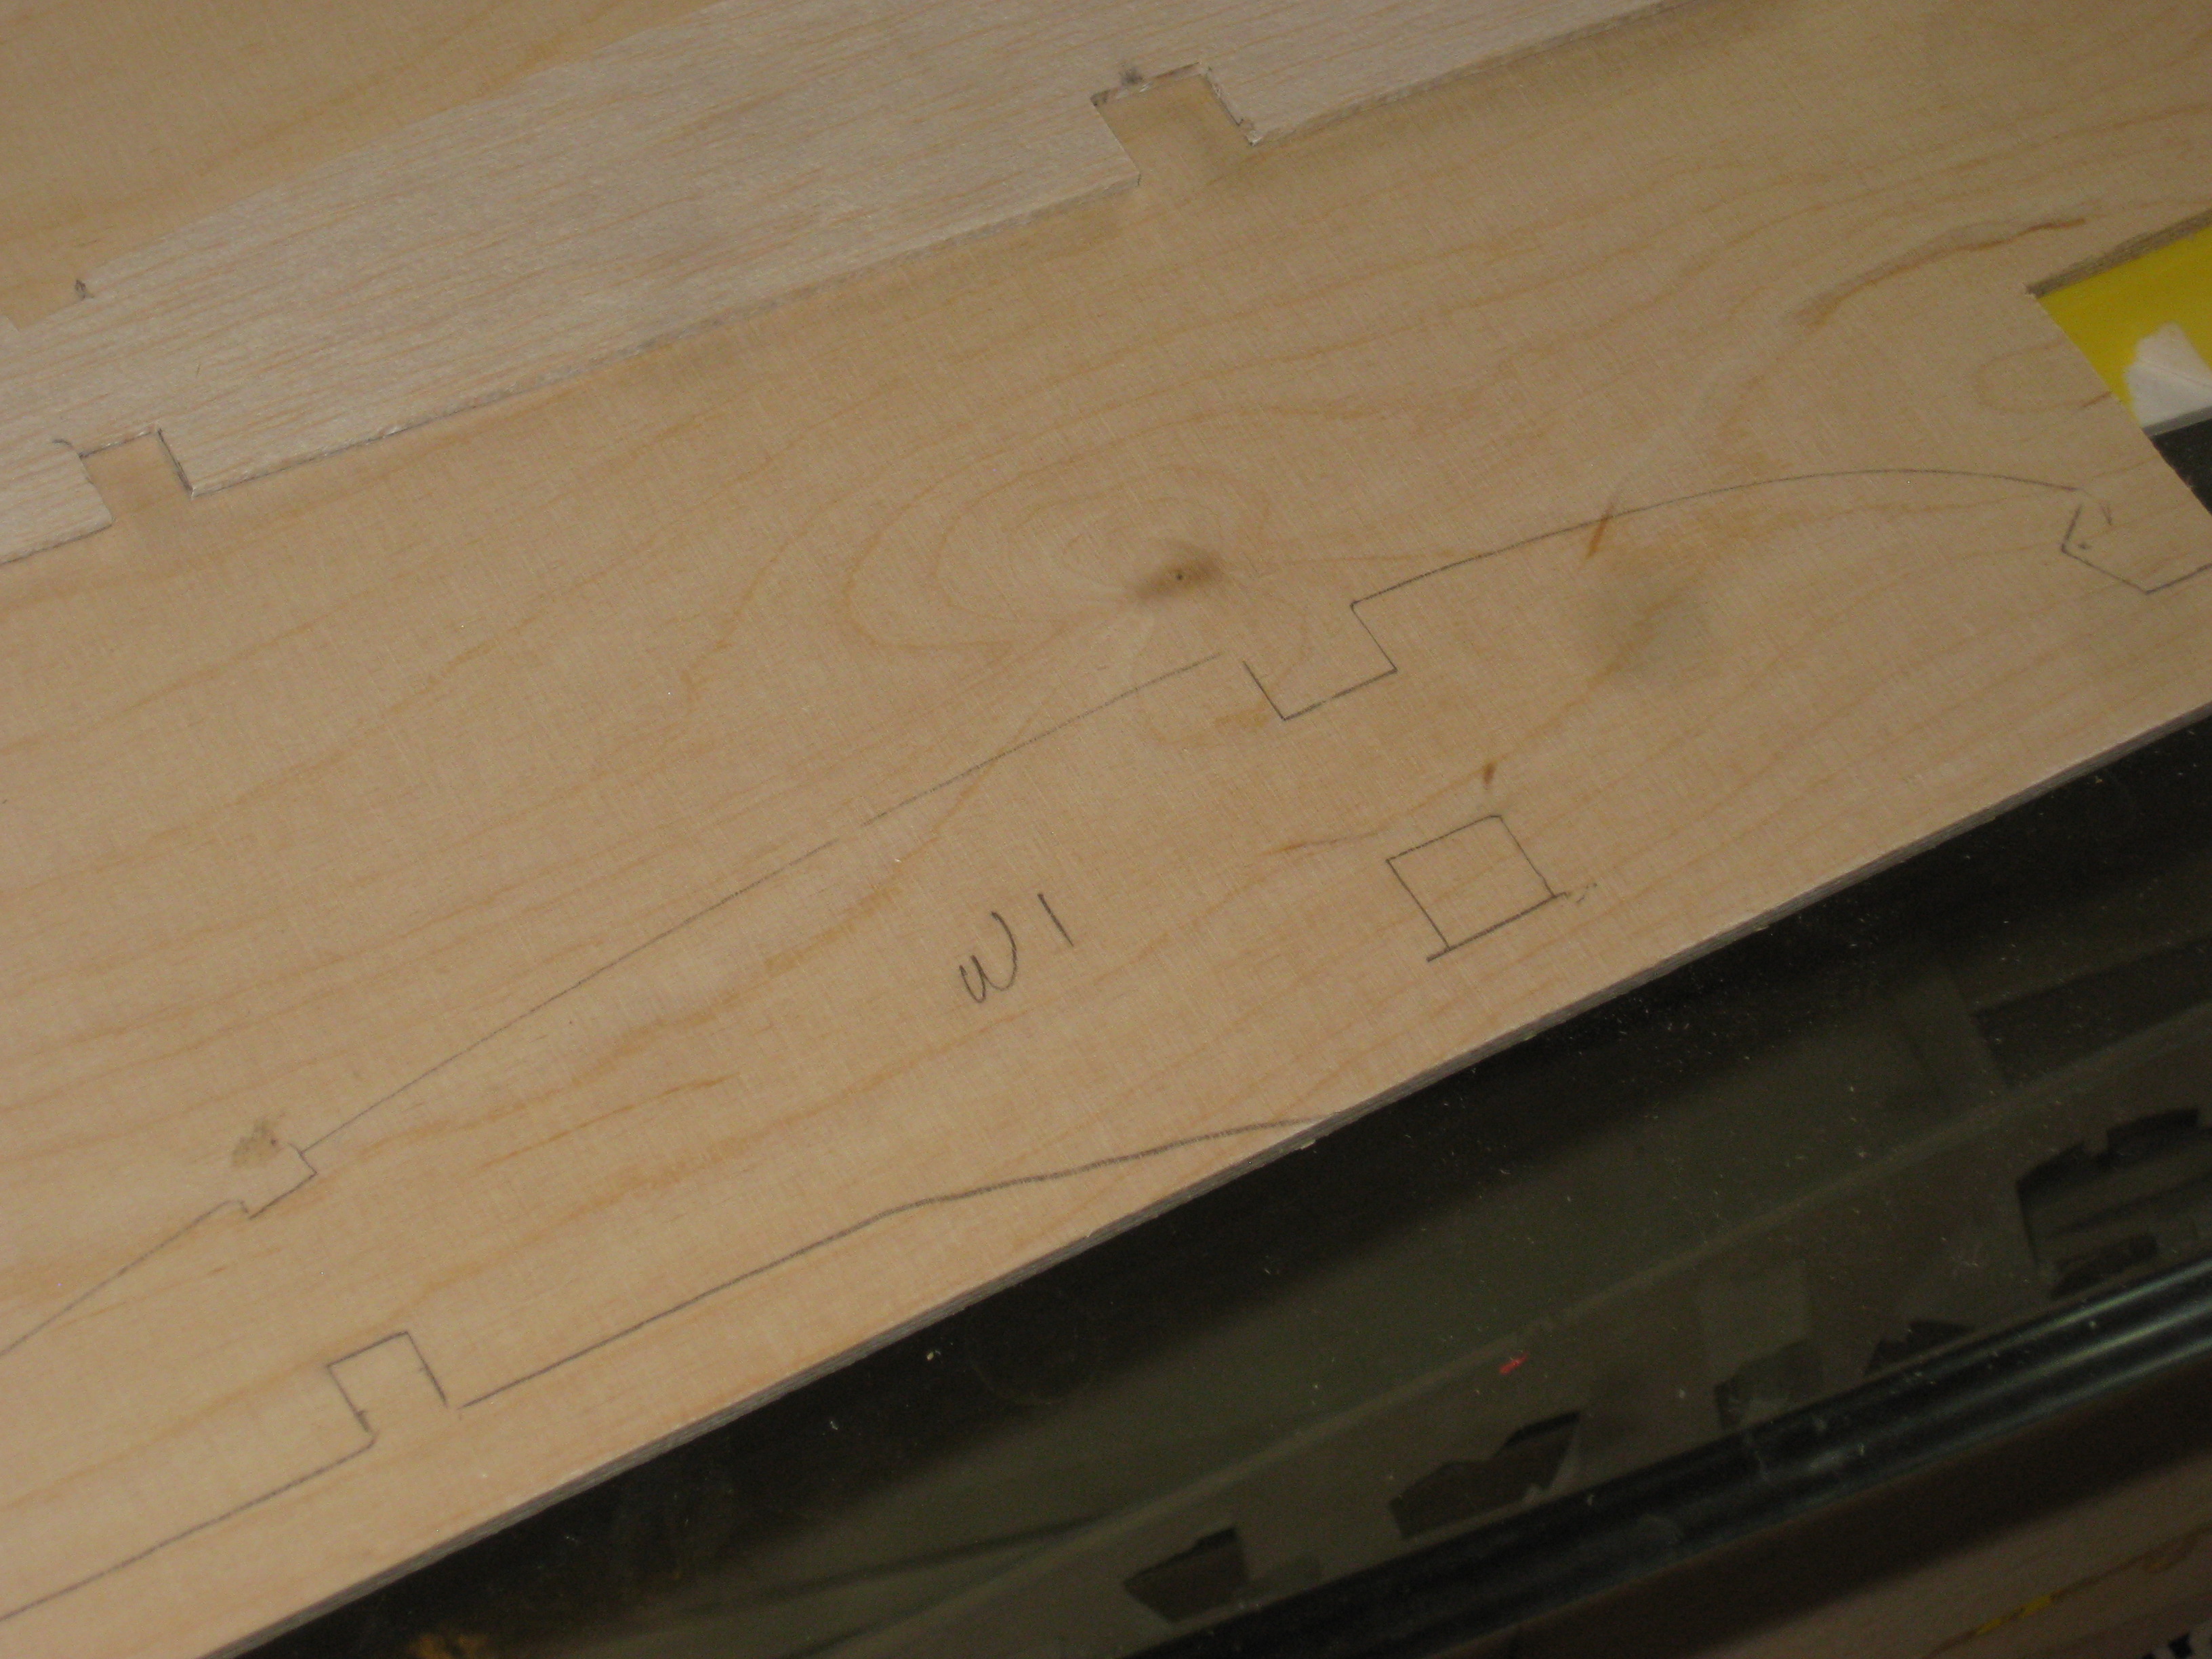
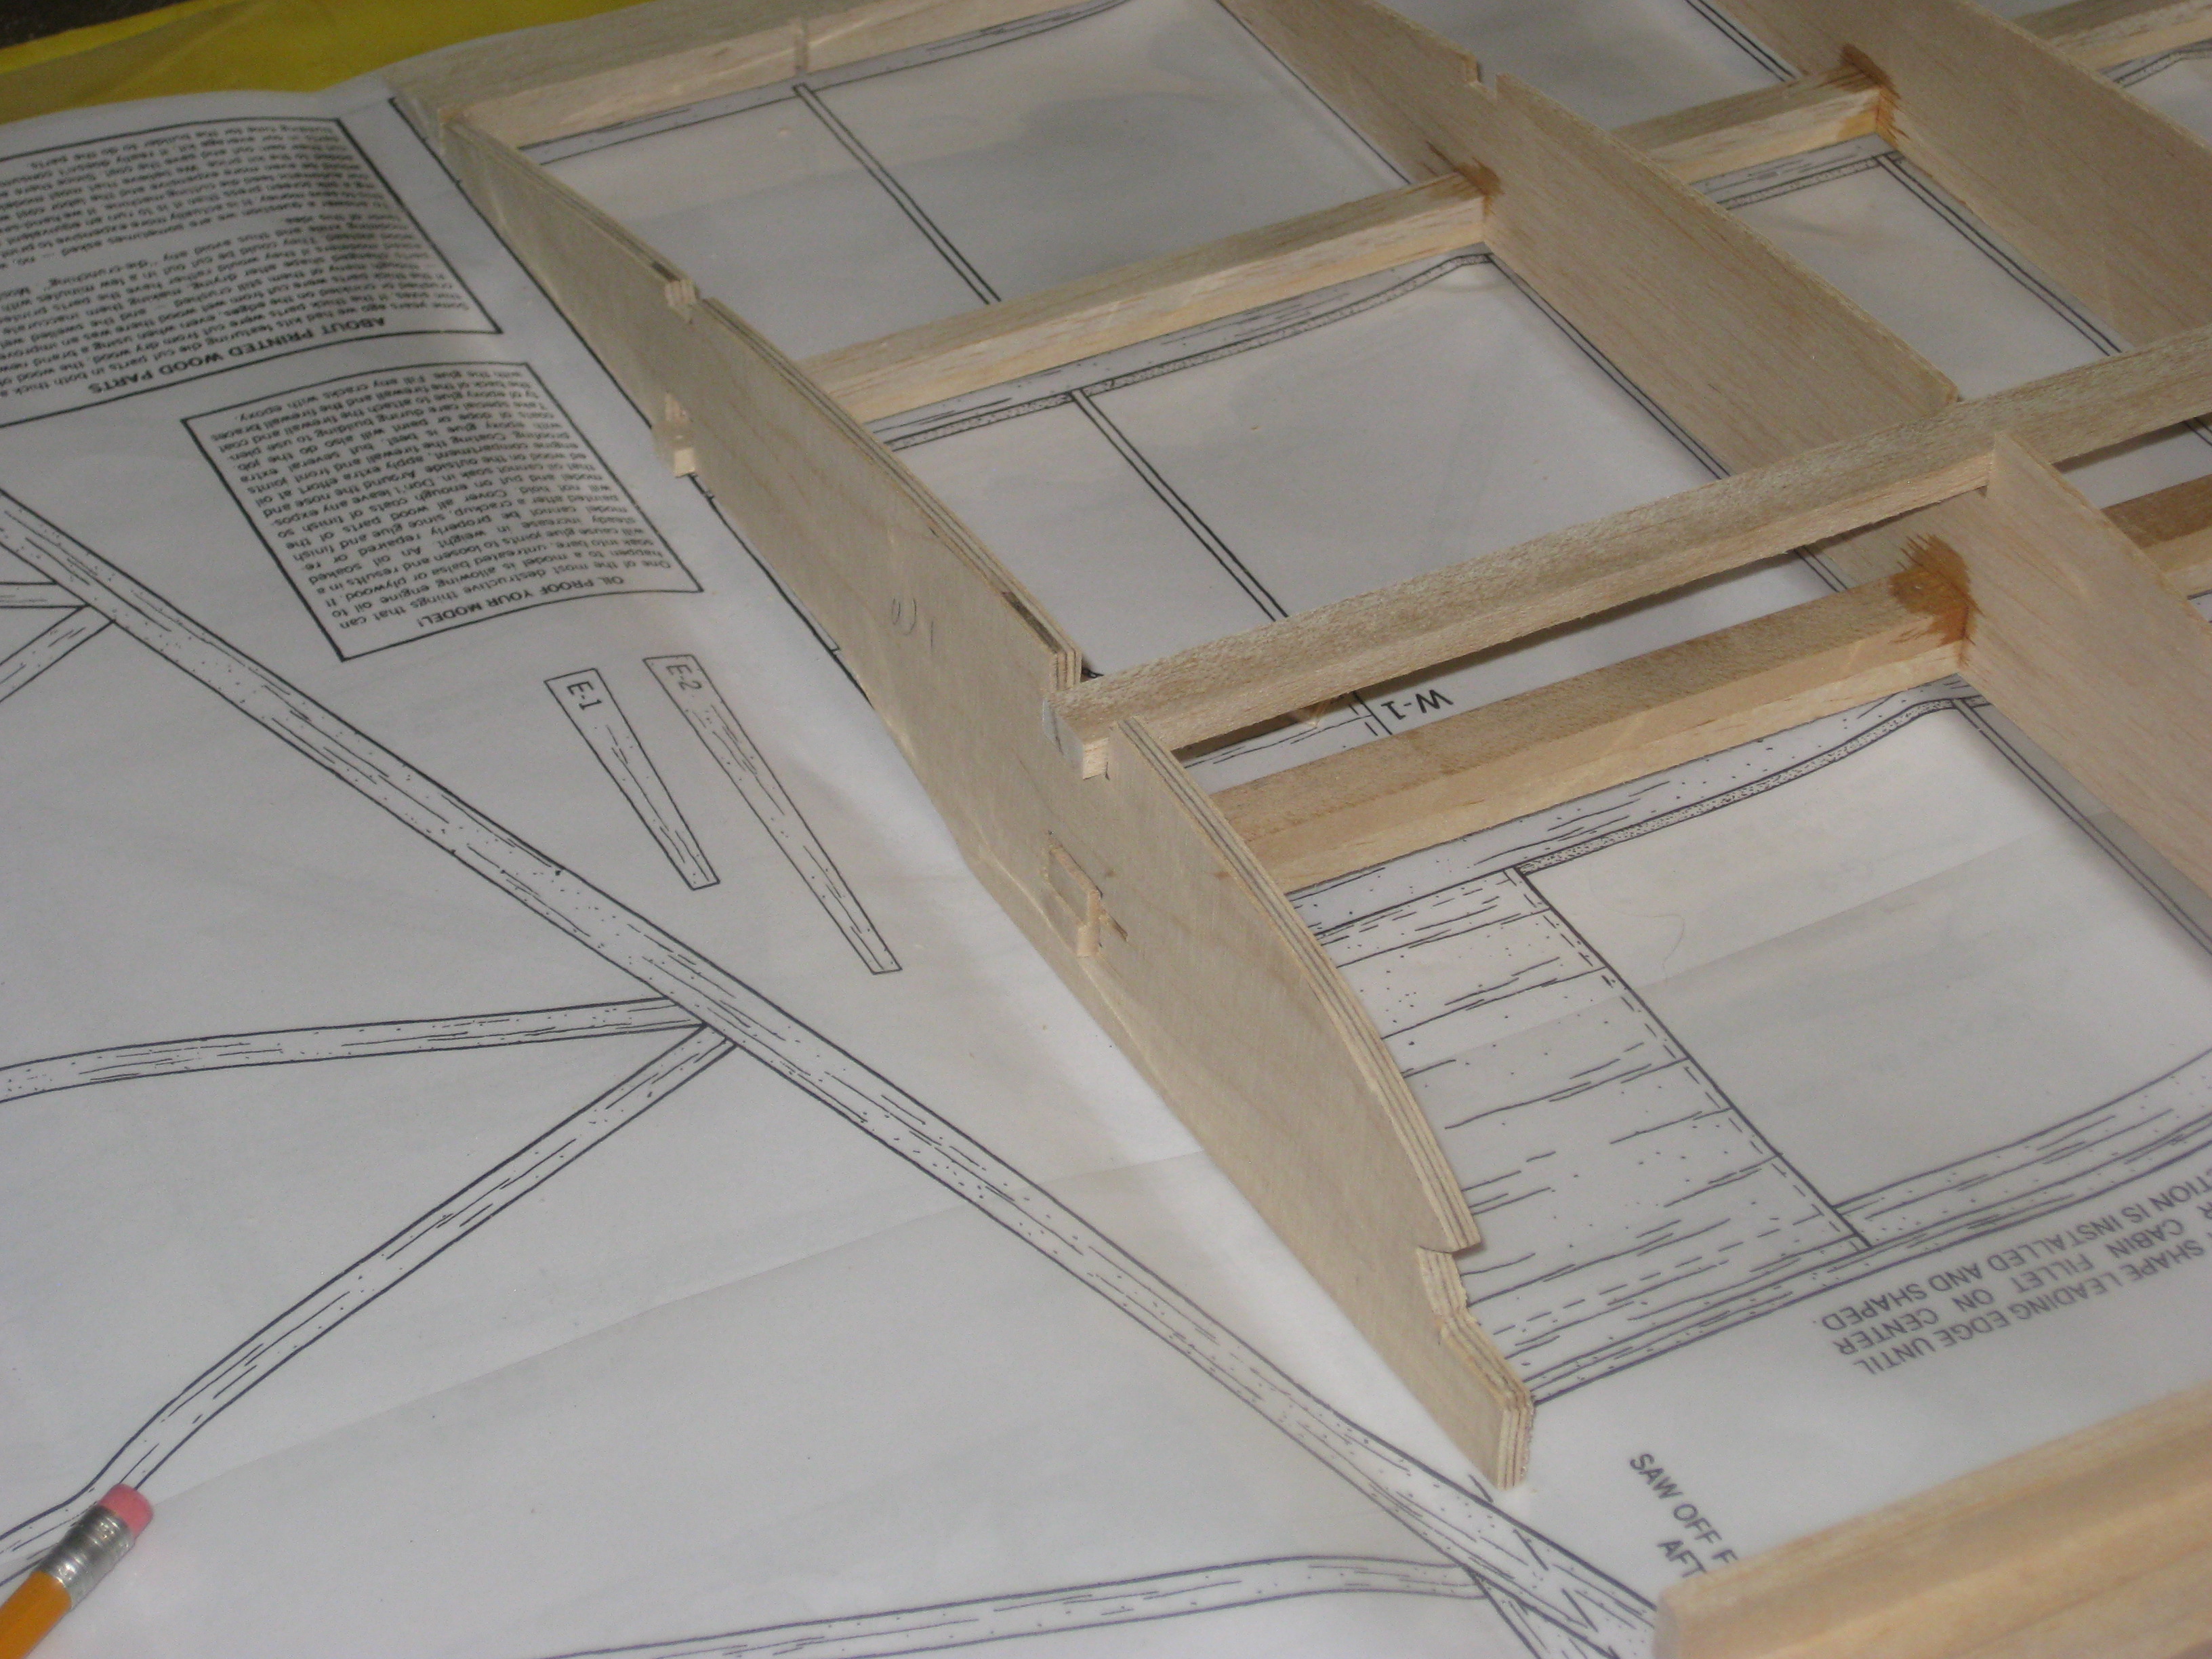
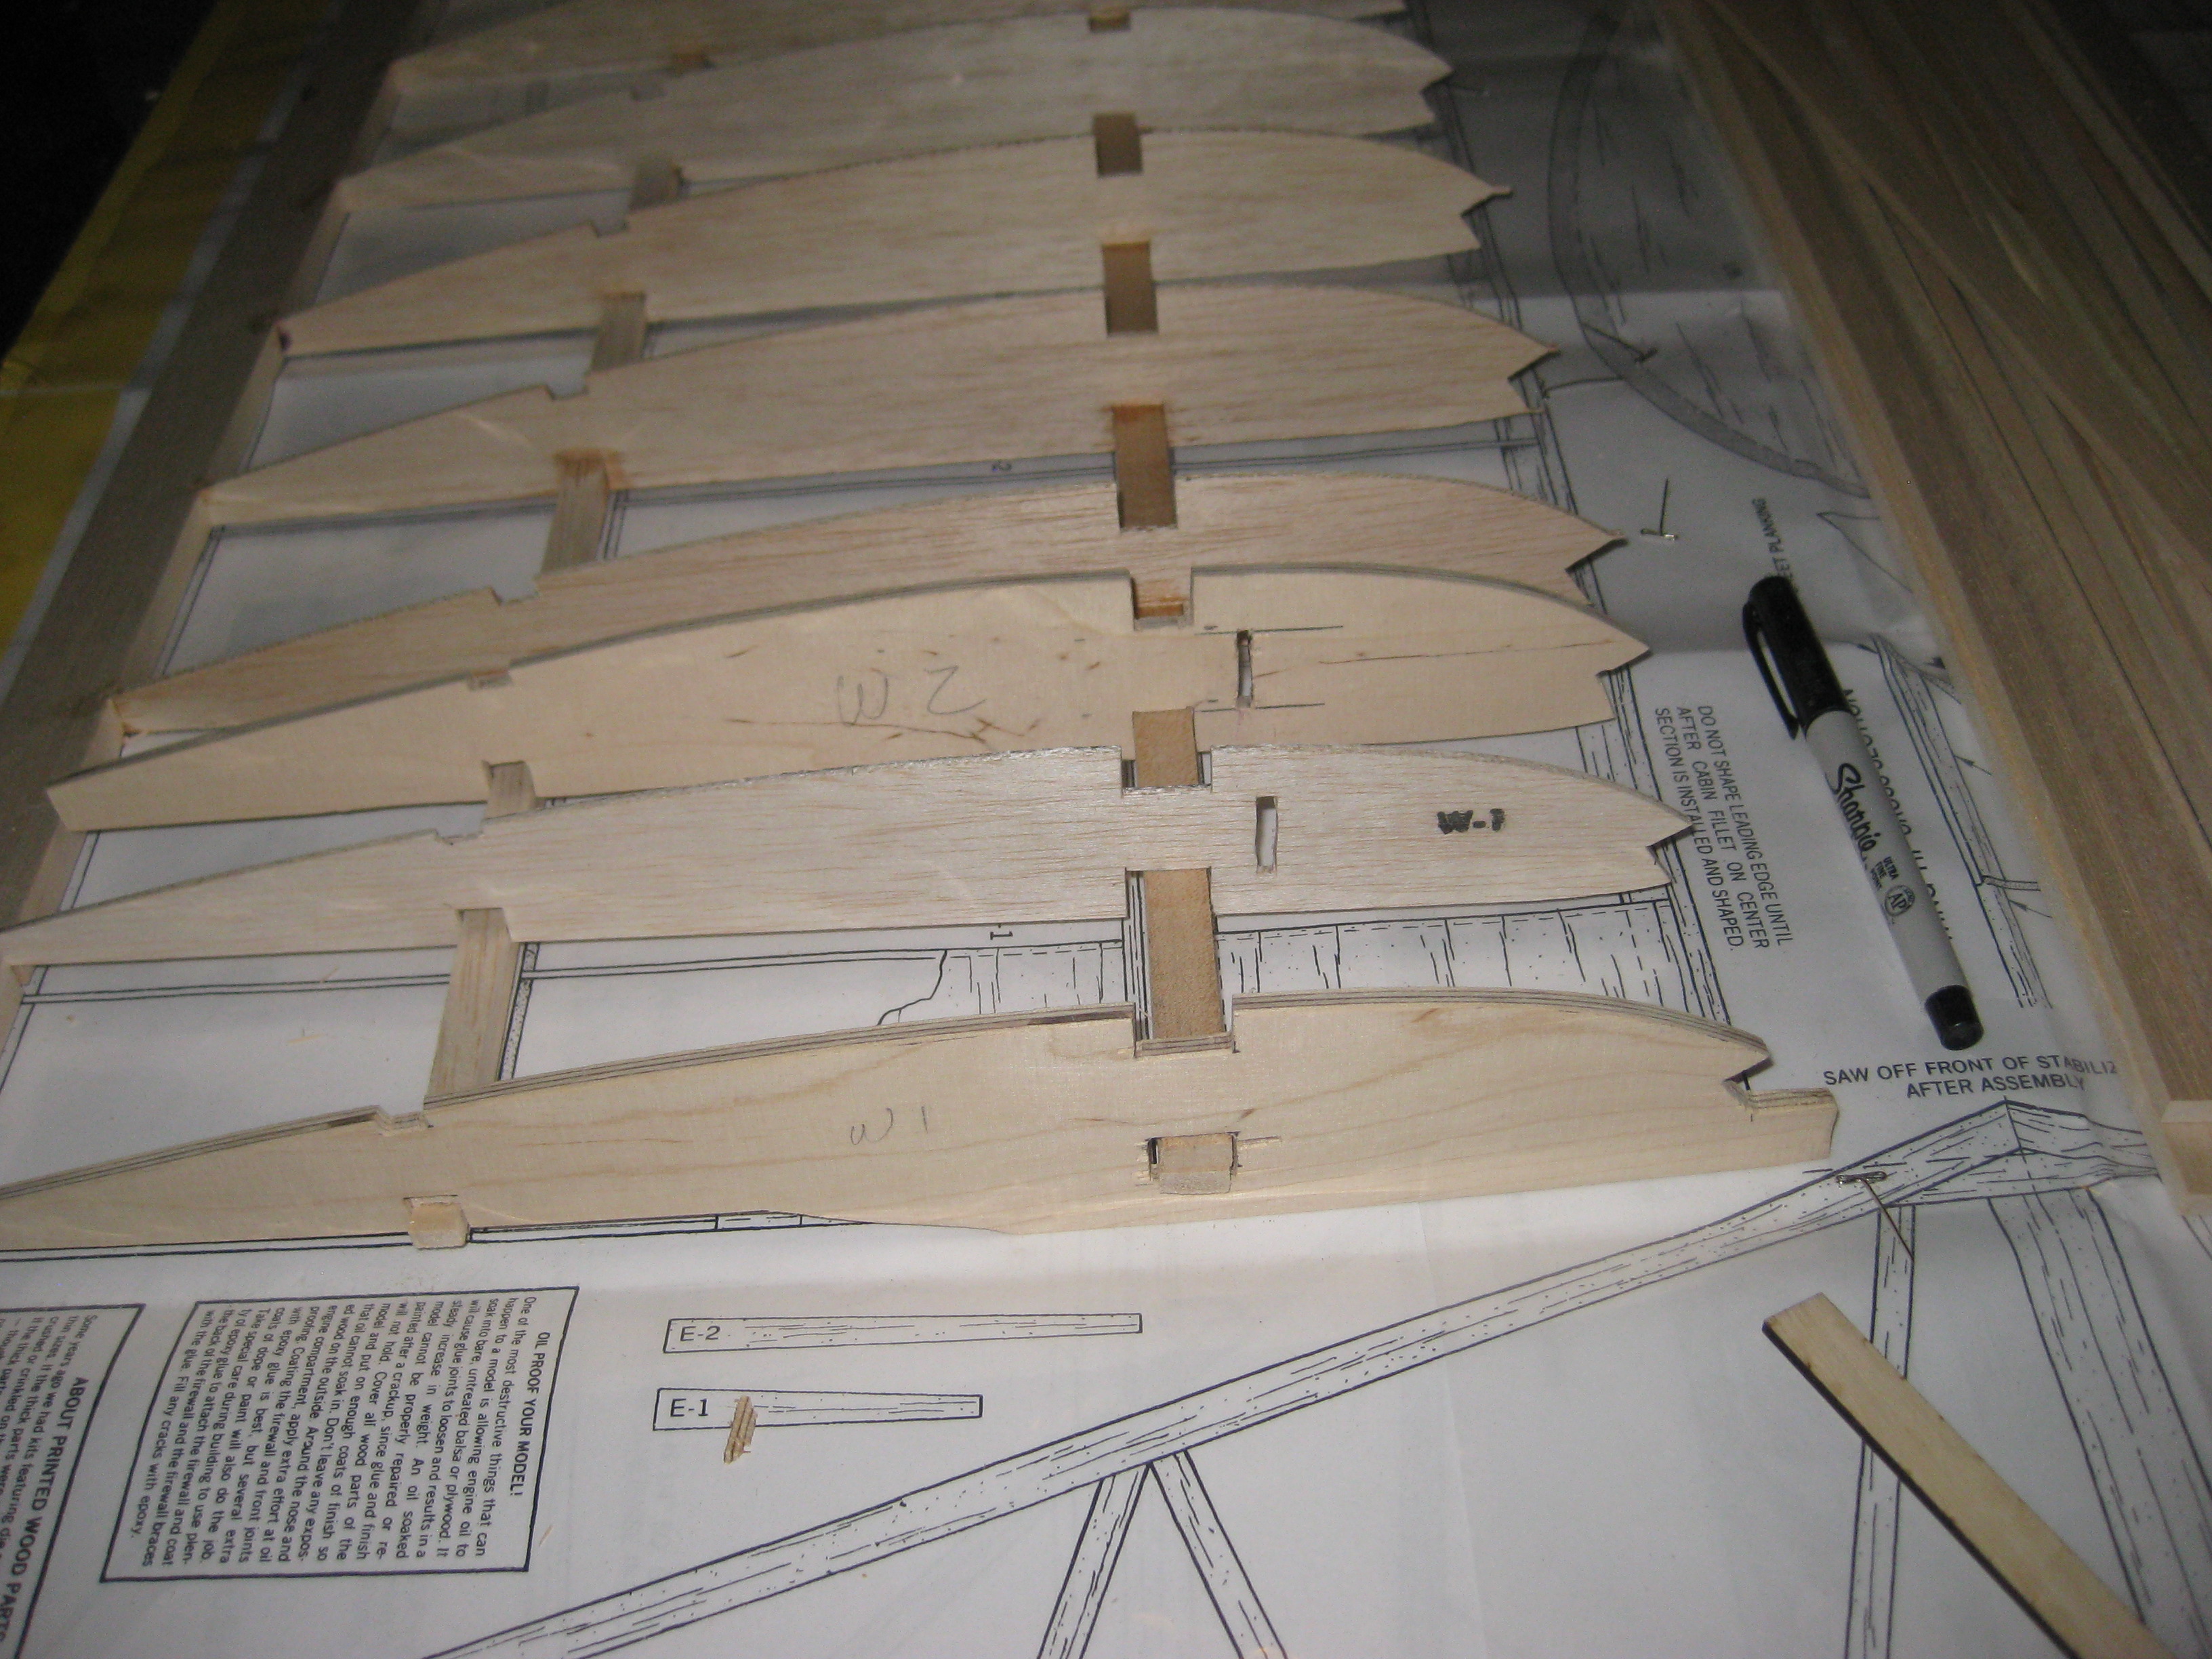
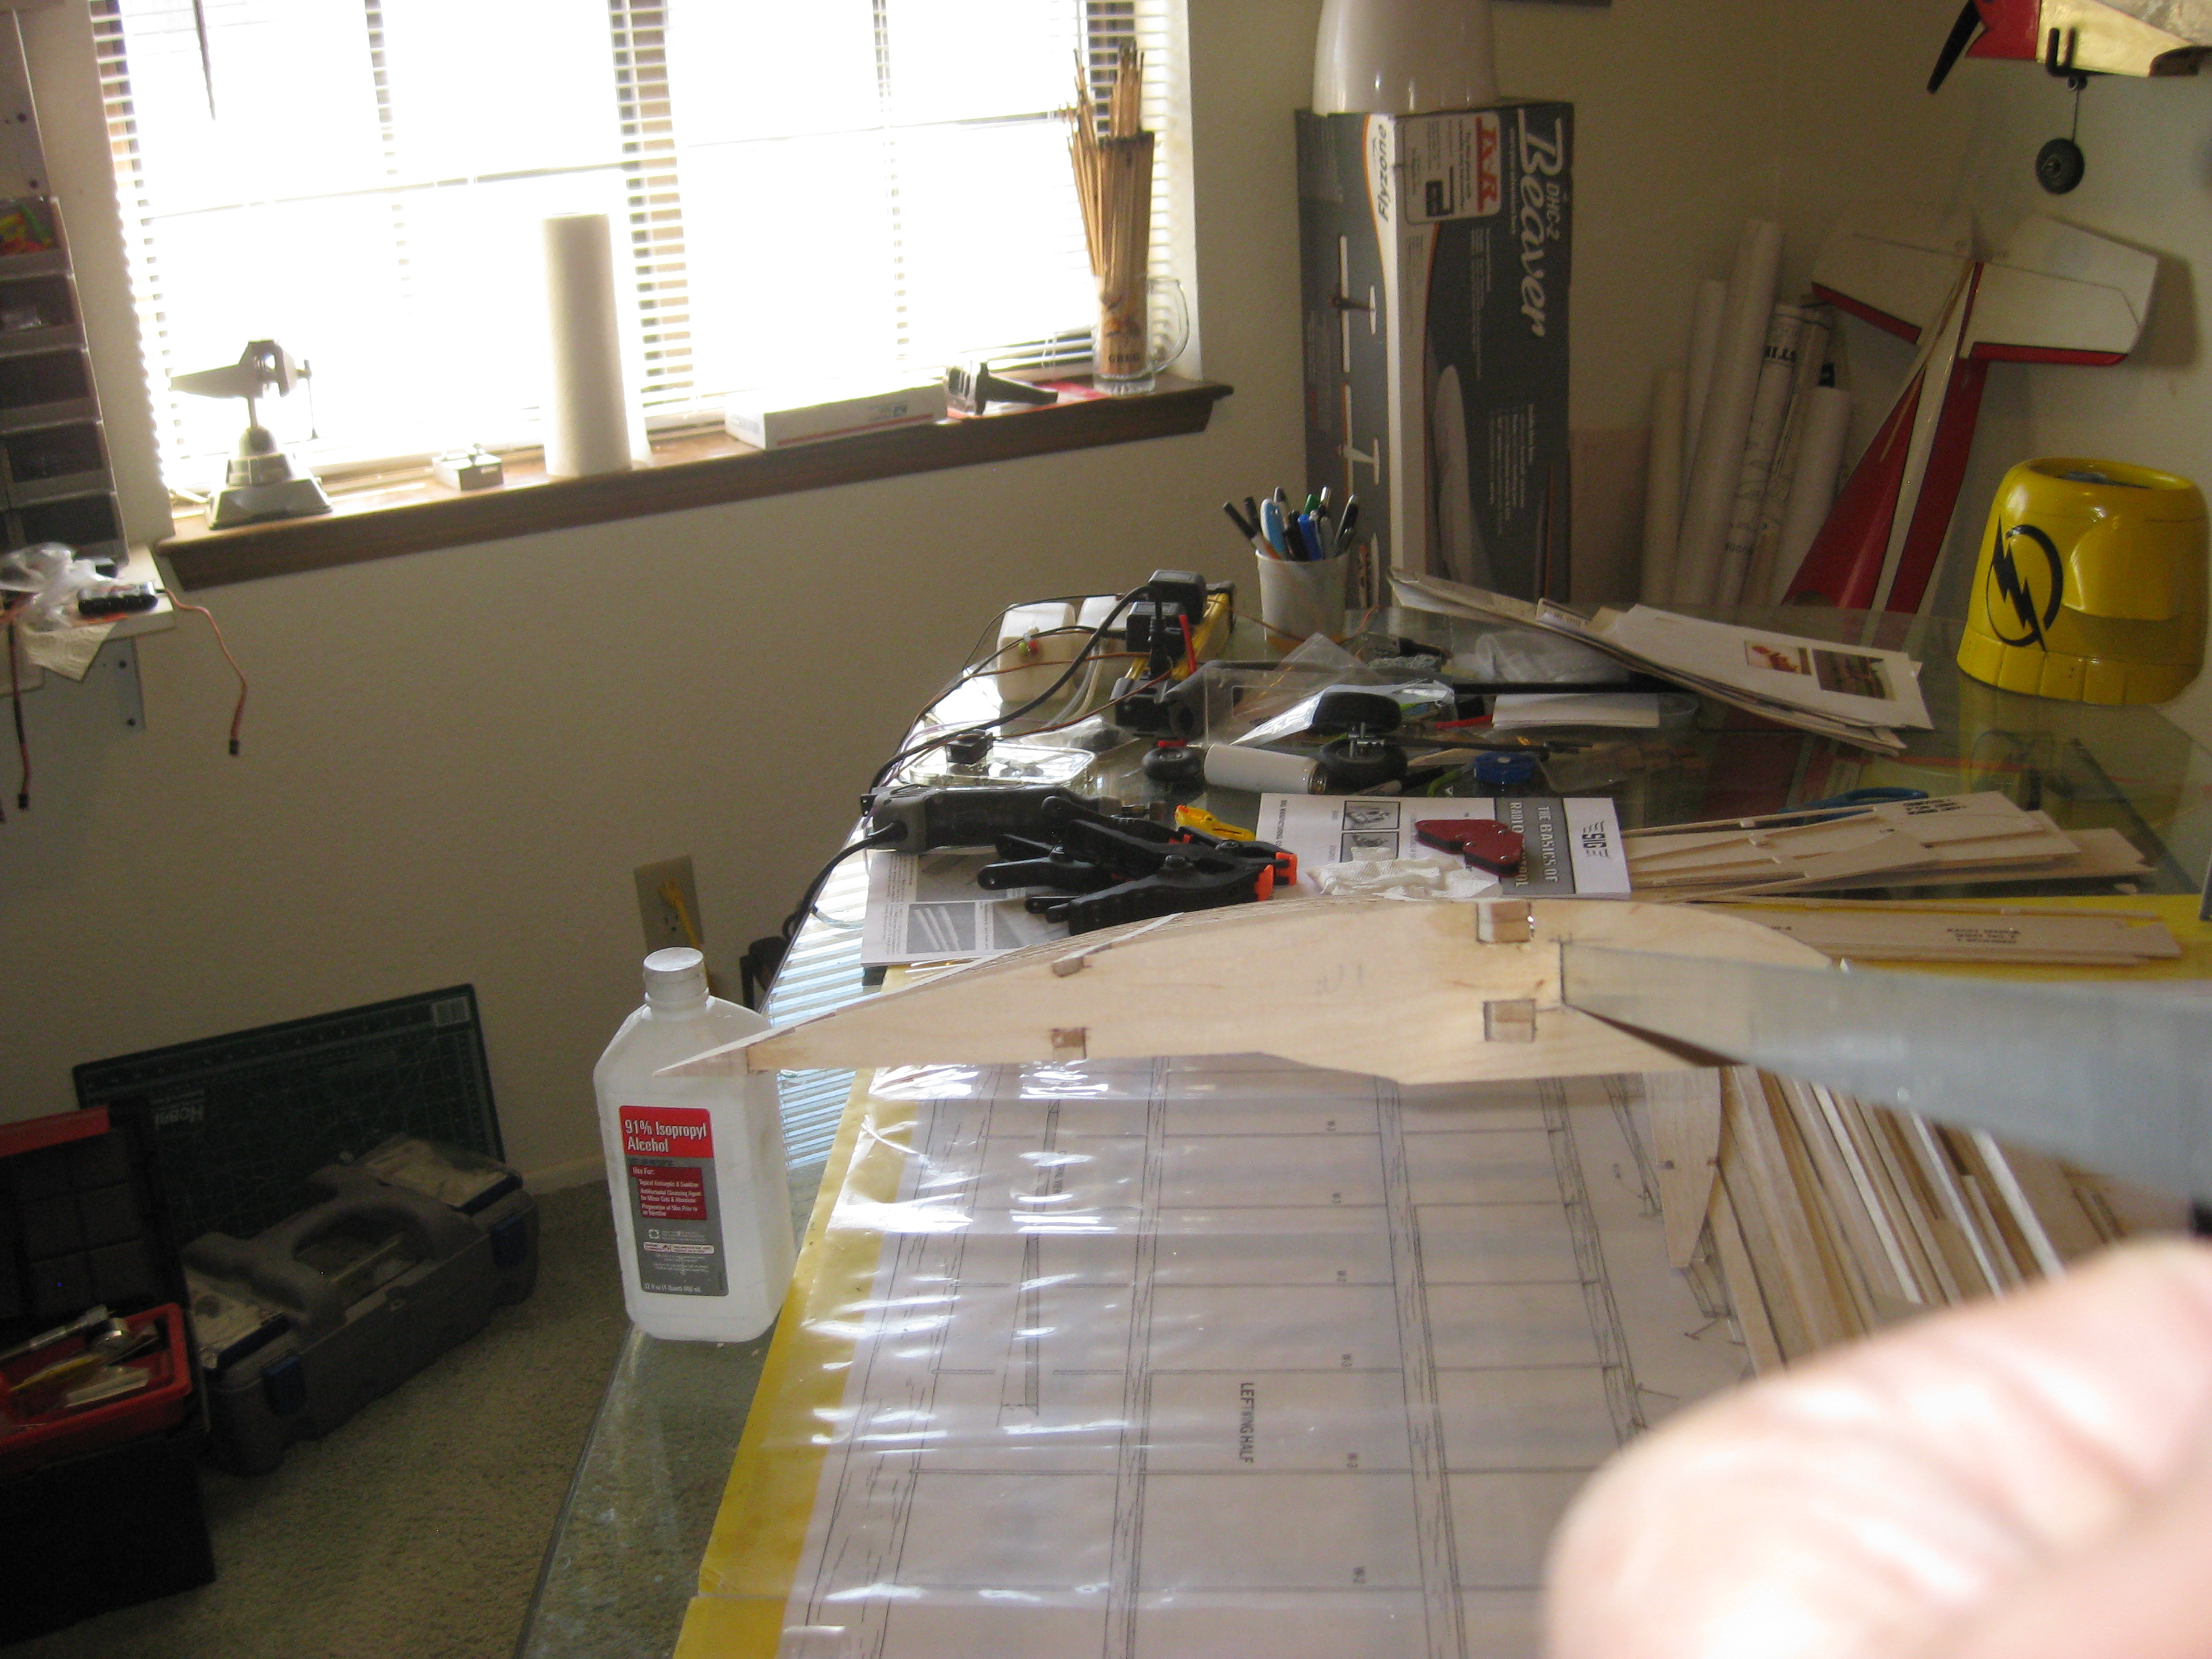
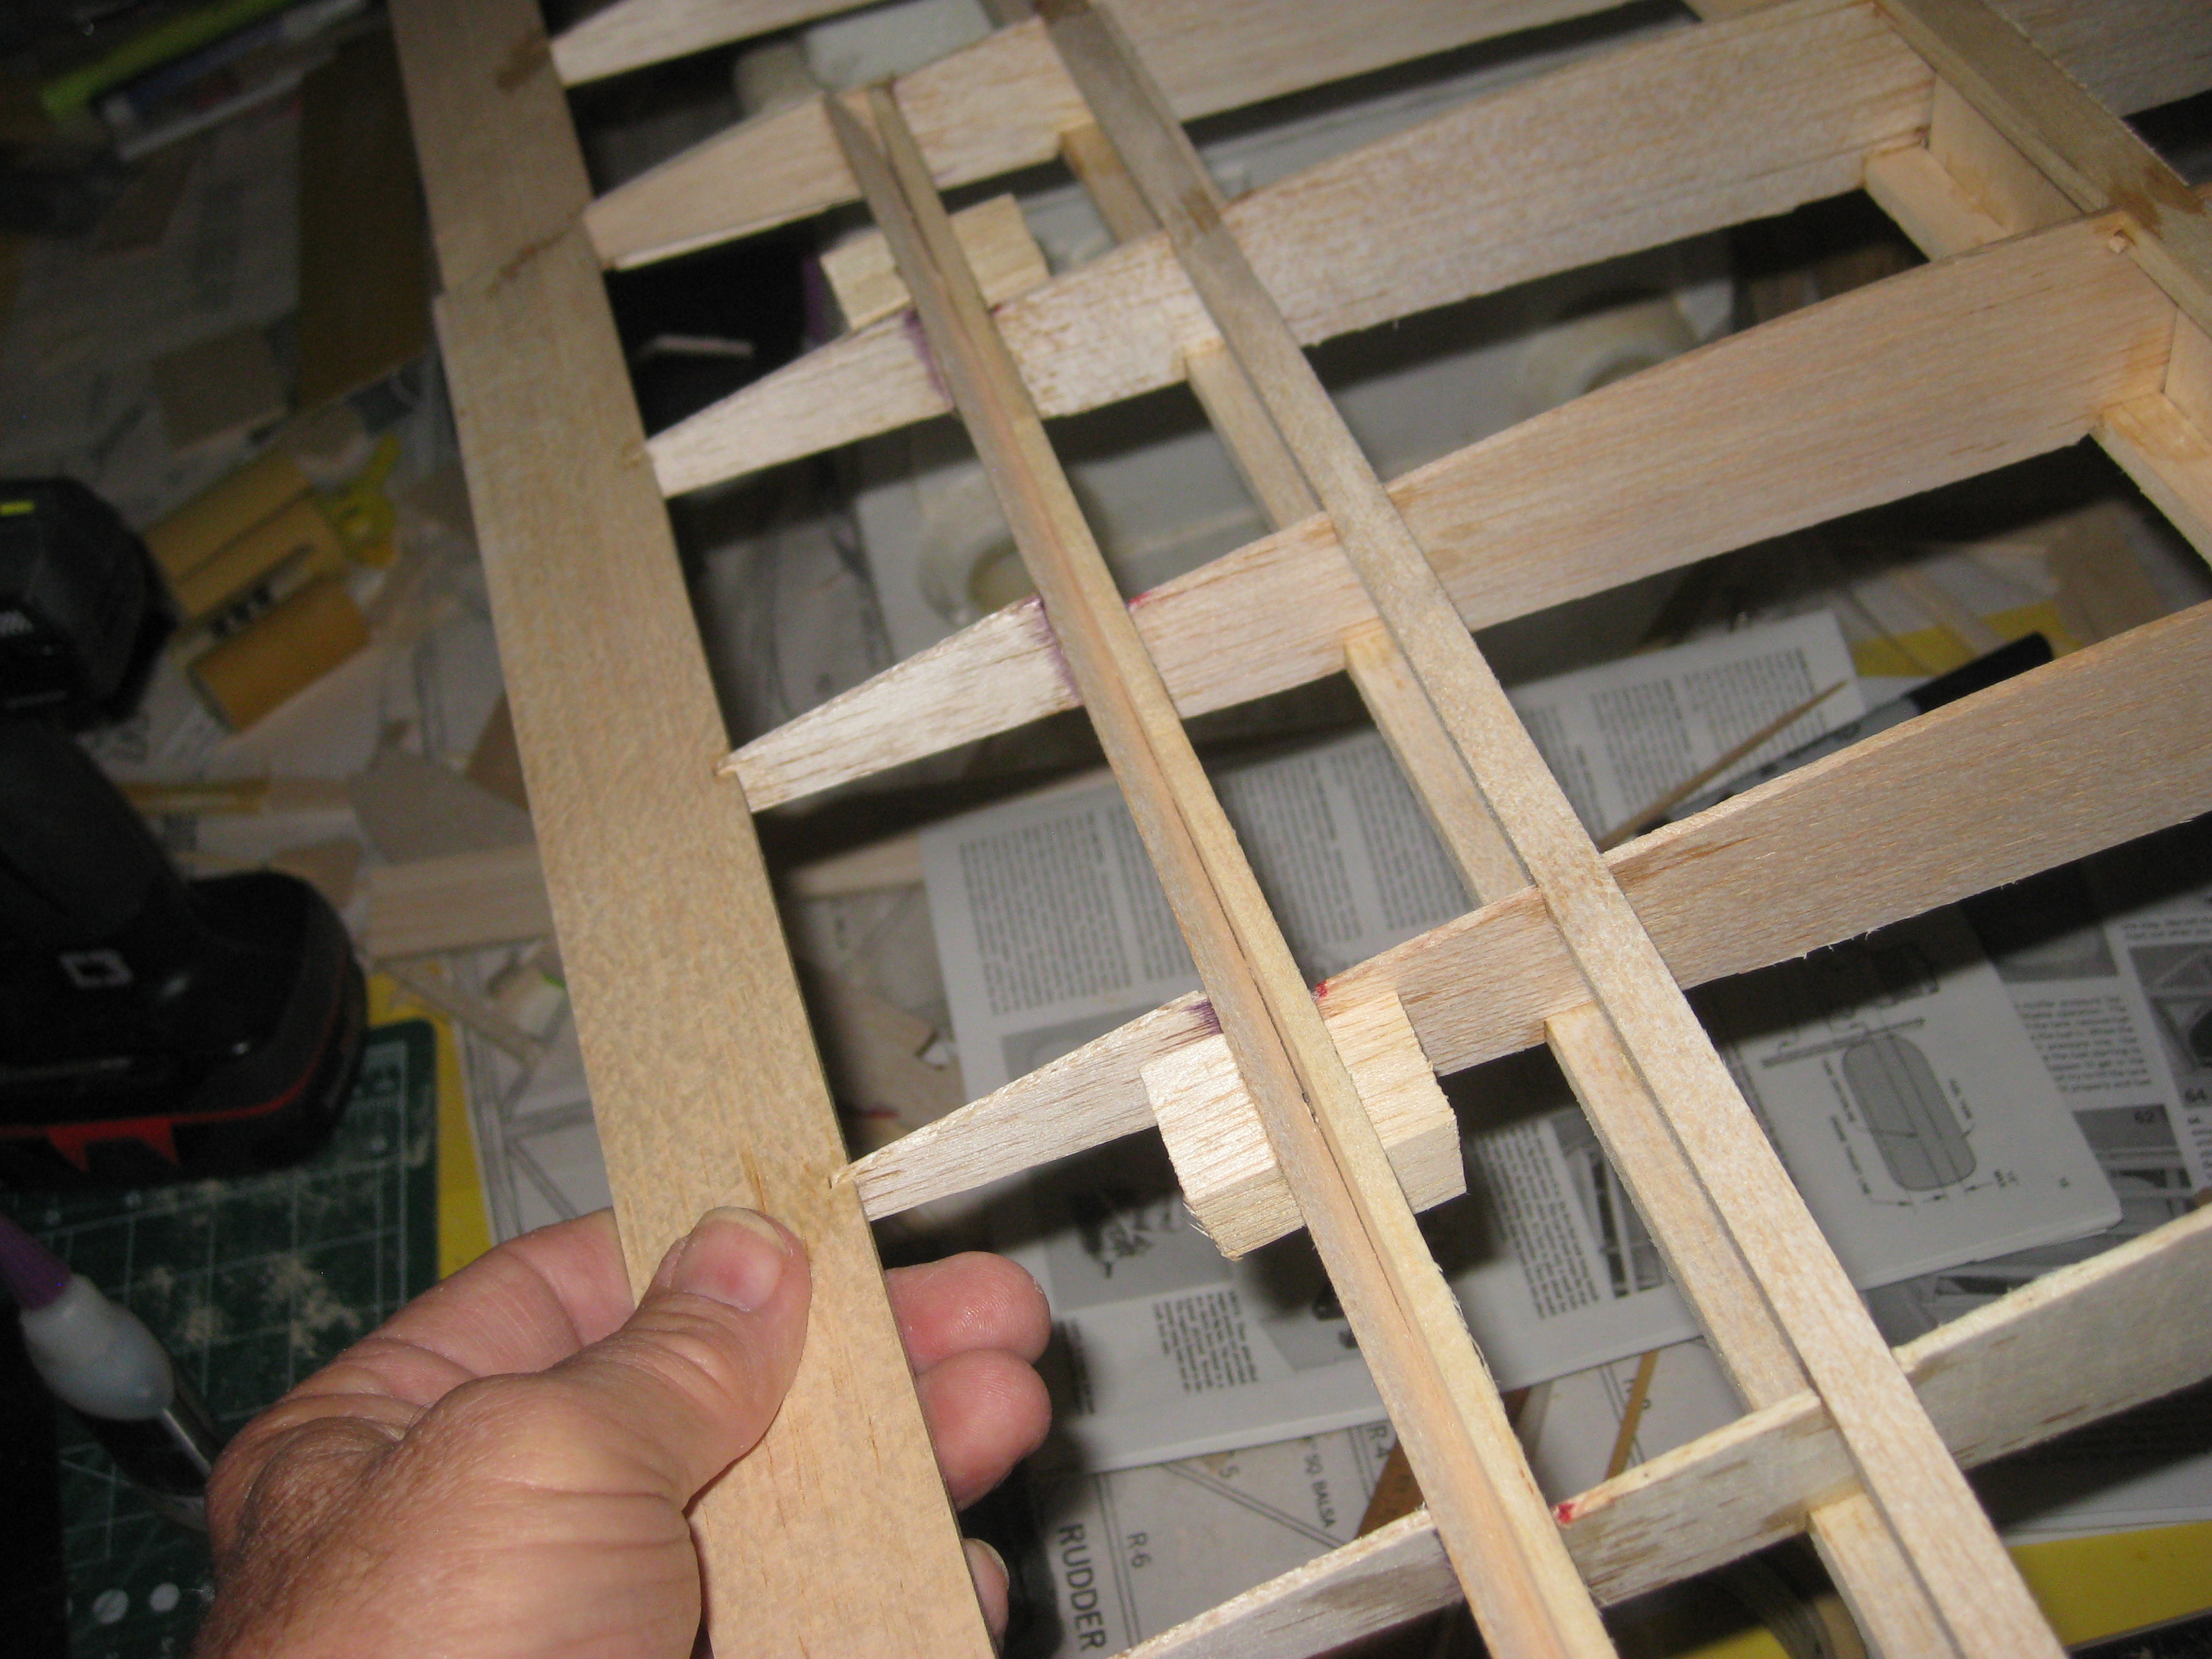
Now to start with the left wing. another complication for me is that Earnie wants a 2 piece wing similar to the ARF. I like using these magnets to hold ribs perpendicular to table. I get the shakes when trying to hold things in place. Due to the 2 piece wing I have made rib doublers out of 3/16 birch ply for the outer rib W1 and the first W2, cutting out area for a straight piece of aluminum bar to join the wing (as with the ARF version). I made the inner W1 to kick out below and with a nose in the leading edge that, hopefully will set into a receiving notch in the cabin to lock in the leading edge and help keep the 2 piece wing together in flight. Straight and level so far........ok now trying to figure how to get these pics in again!!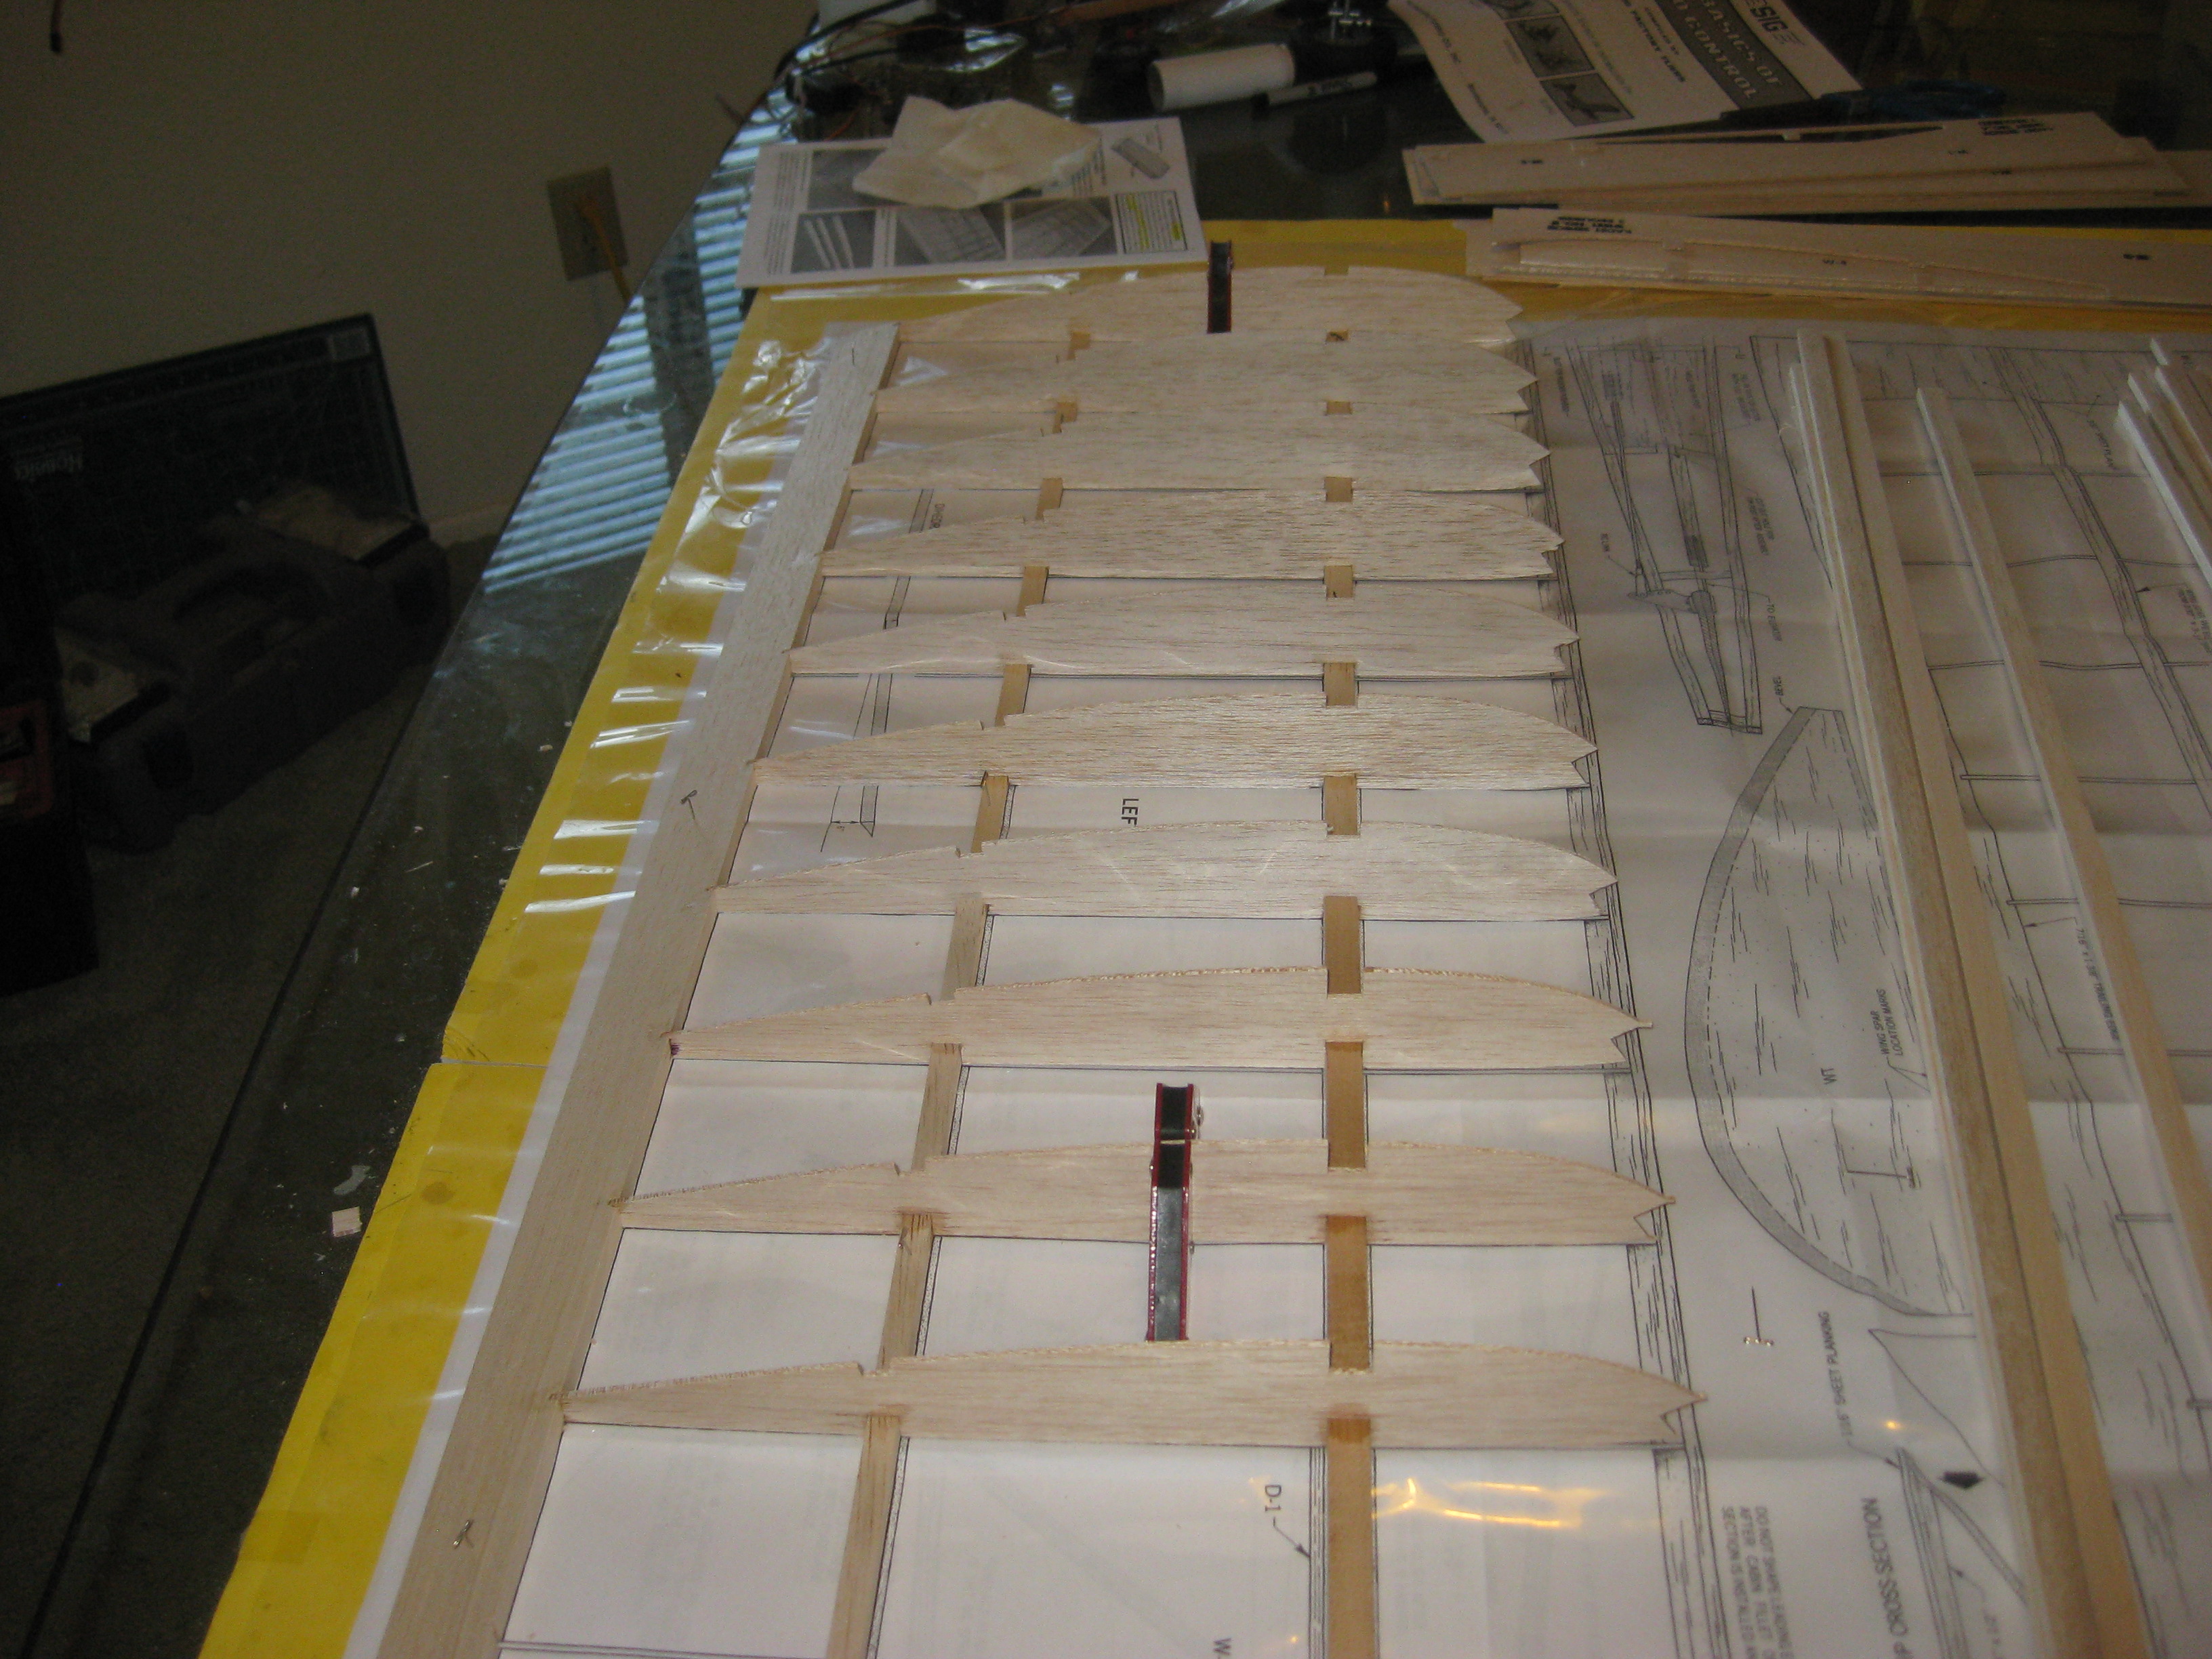


01-11-2015 | 12:53 PM
#9
I would HIGHLY recommend building in a bomb drop.. a senior really is fun to use that way.
http://www.rcuniverse.com/forum/atta...p;d=1375591917
http://www.rcuniverse.com/forum/kit-...ts-pieces.html
http://www.rcuniverse.com/forum/atta...p;d=1375591917
http://www.rcuniverse.com/forum/kit-...ts-pieces.html
01-13-2015 | 06:10 AM
#13
Boxcar's right - that IS a nice looking plane.
01-15-2015 | 04:52 PM
#14


My Feedback: (98)
Joined: Feb 2002
Posts: 4,677
Likes: 0
Received 0 Likes
on
0 Posts
From: The Villages, Florida NJ
He builds on a glass table, this is a serious builder, I'm going to watch and learn. The only other person I saw do that is Dave Platt, I priced the glass once, I still build on hollow wood doors. Beautiful planes BTW.
I've just started a build of a Sr, but it's going to be pretty much stock.
Beautiful planes BTW.I've just started a build of a Sr, but it's going to be pretty much stock.
01-15-2015 | 05:18 PM
#15
Thread Starter
My Feedback: (12)
Don't know about this 'serious builder' business. As far as the glass table is concerned, before I retired and just as I was getting into the hobby I rehabbed houses for investors and sometime had to clear out what was left behind. This was one of my "acquisitions". Comes in handy for sure
01-15-2015 | 05:31 PM
#16
Check with commercial office window replacers. They sometimes have pieces of plate glass that they sell reasonably. I got some years ago and used some for glass shelves and built on one larger piece. I have also built on a glass top patio table and coffee table. Pins don't stick in the glass very well though, you have to modify your build technique. CA made use of glass building surfaces more practical. Lots of weights helps also. And, DON"T use a hammer on the glass (duh).
Sincerely, Richard
Sincerely, Richard
03-12-2015 | 03:30 PM
#17
Thread Starter
My Feedback: (12)
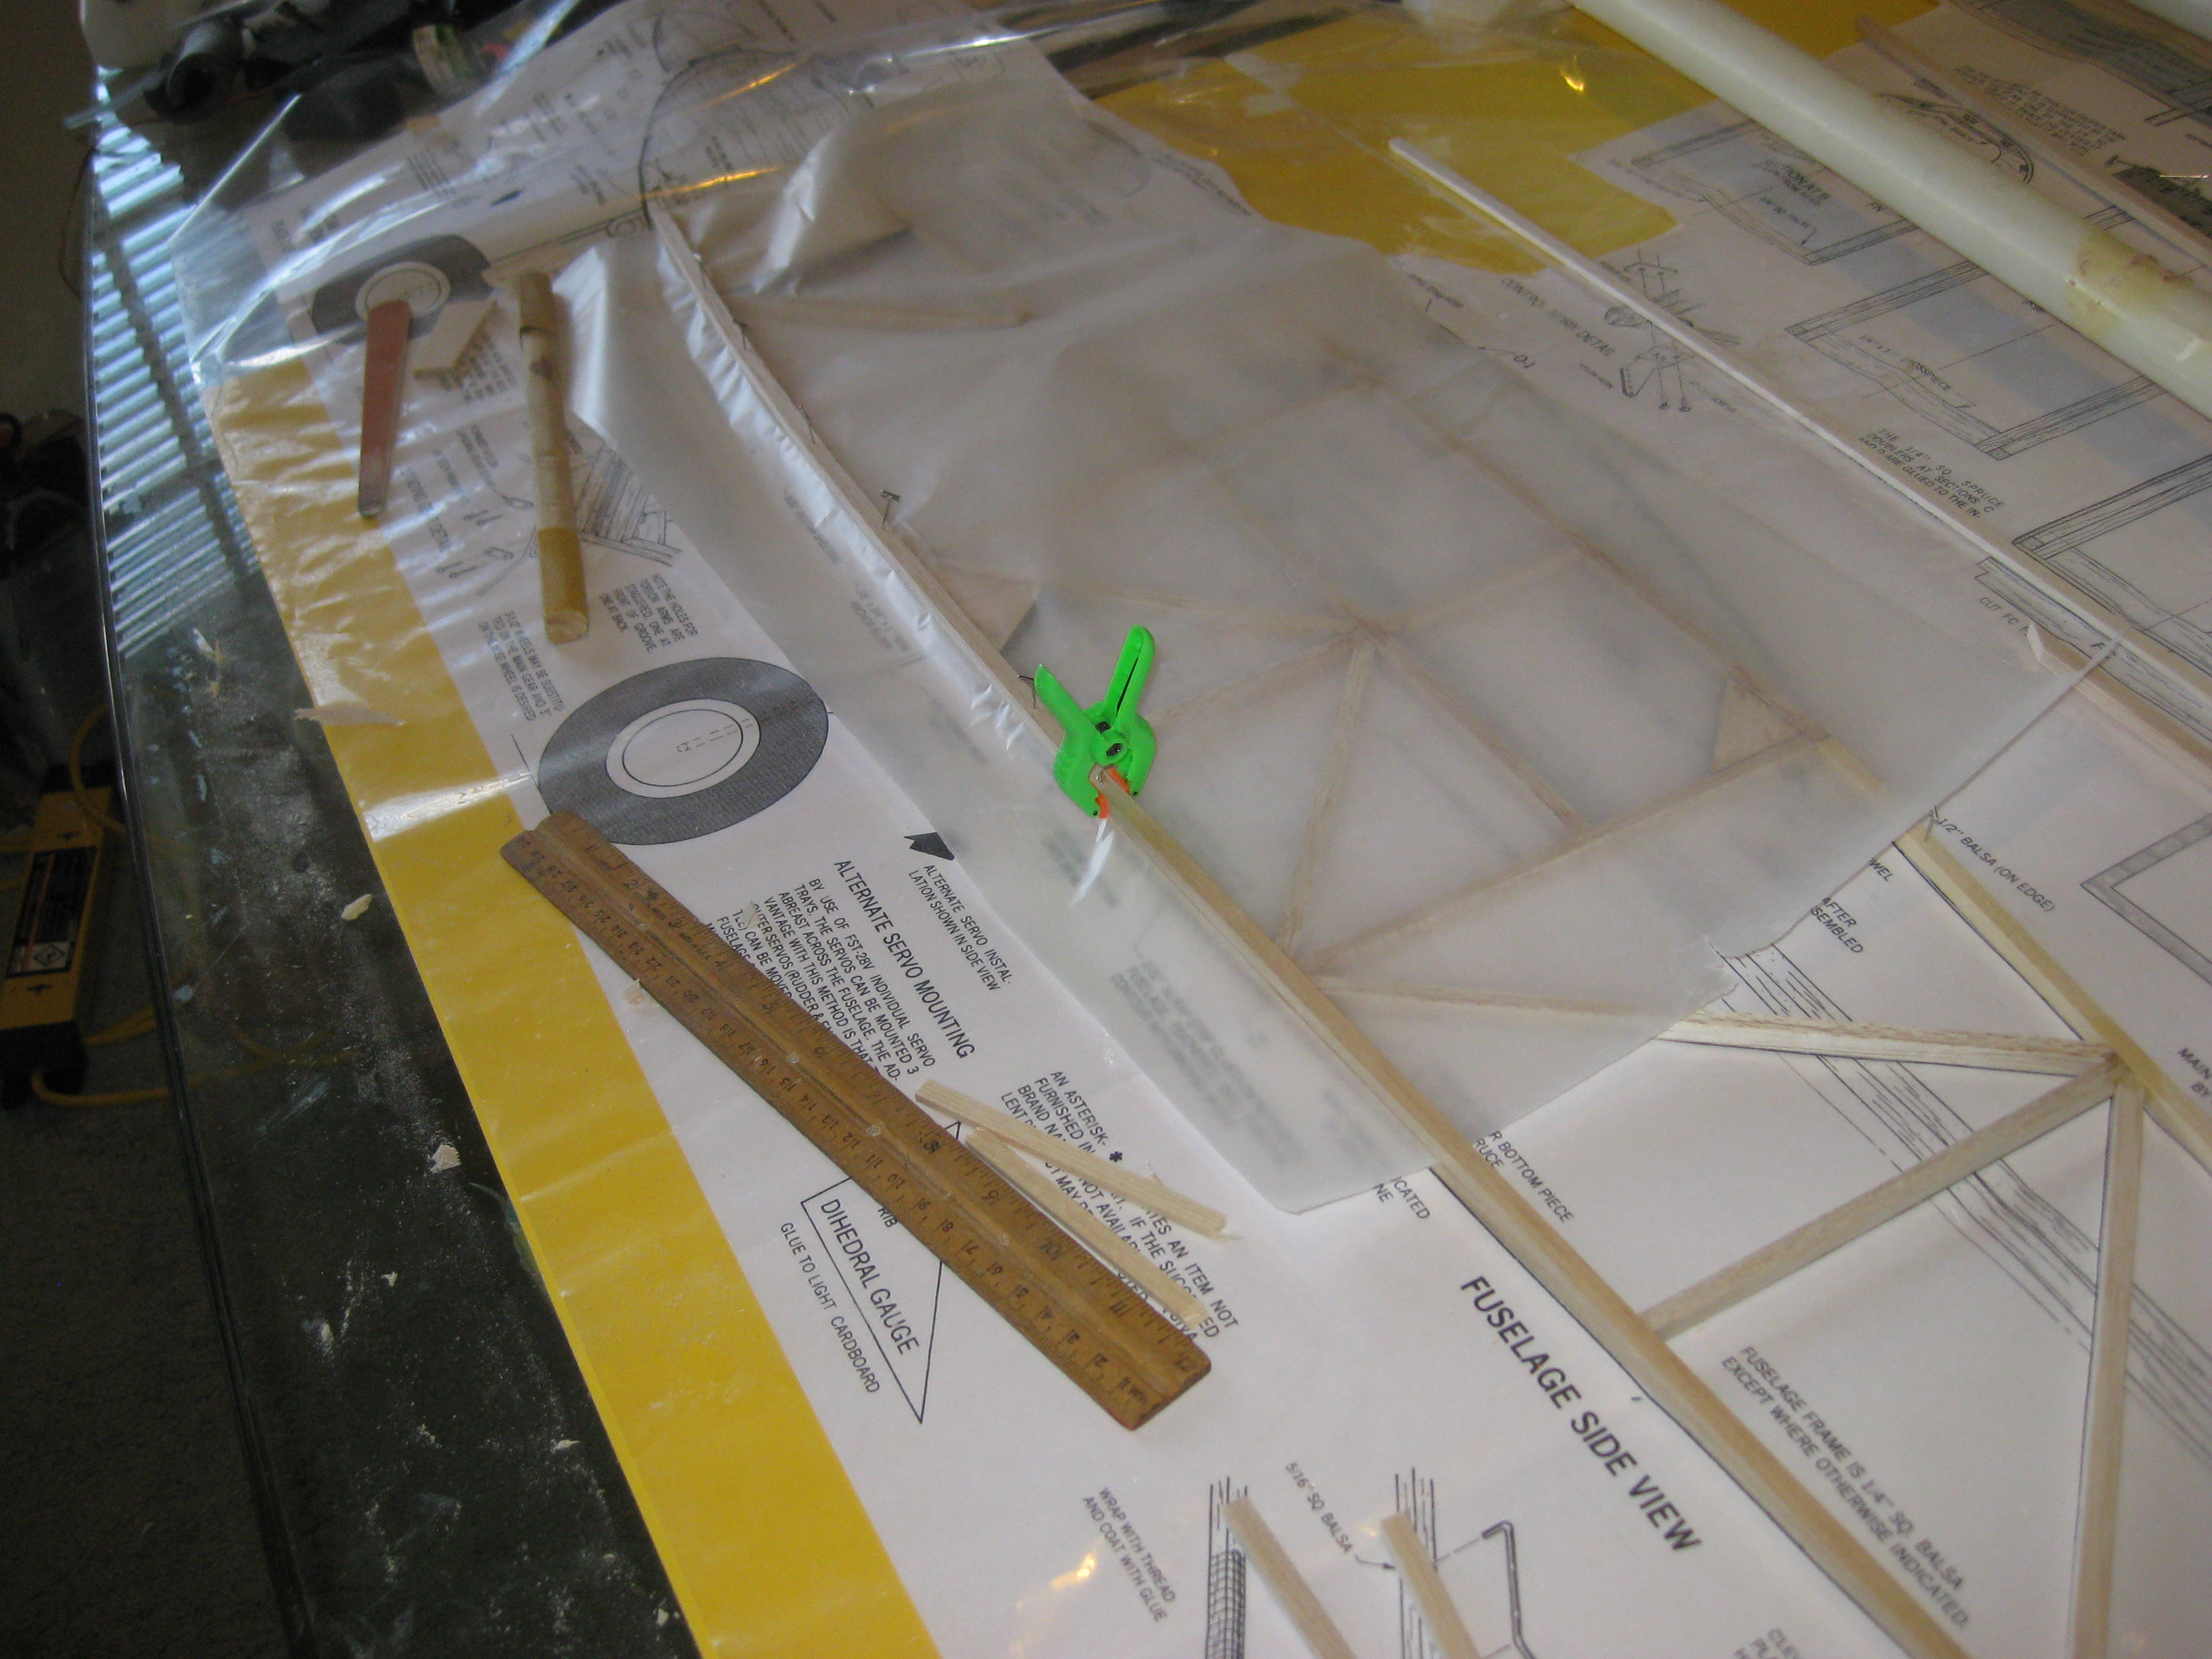
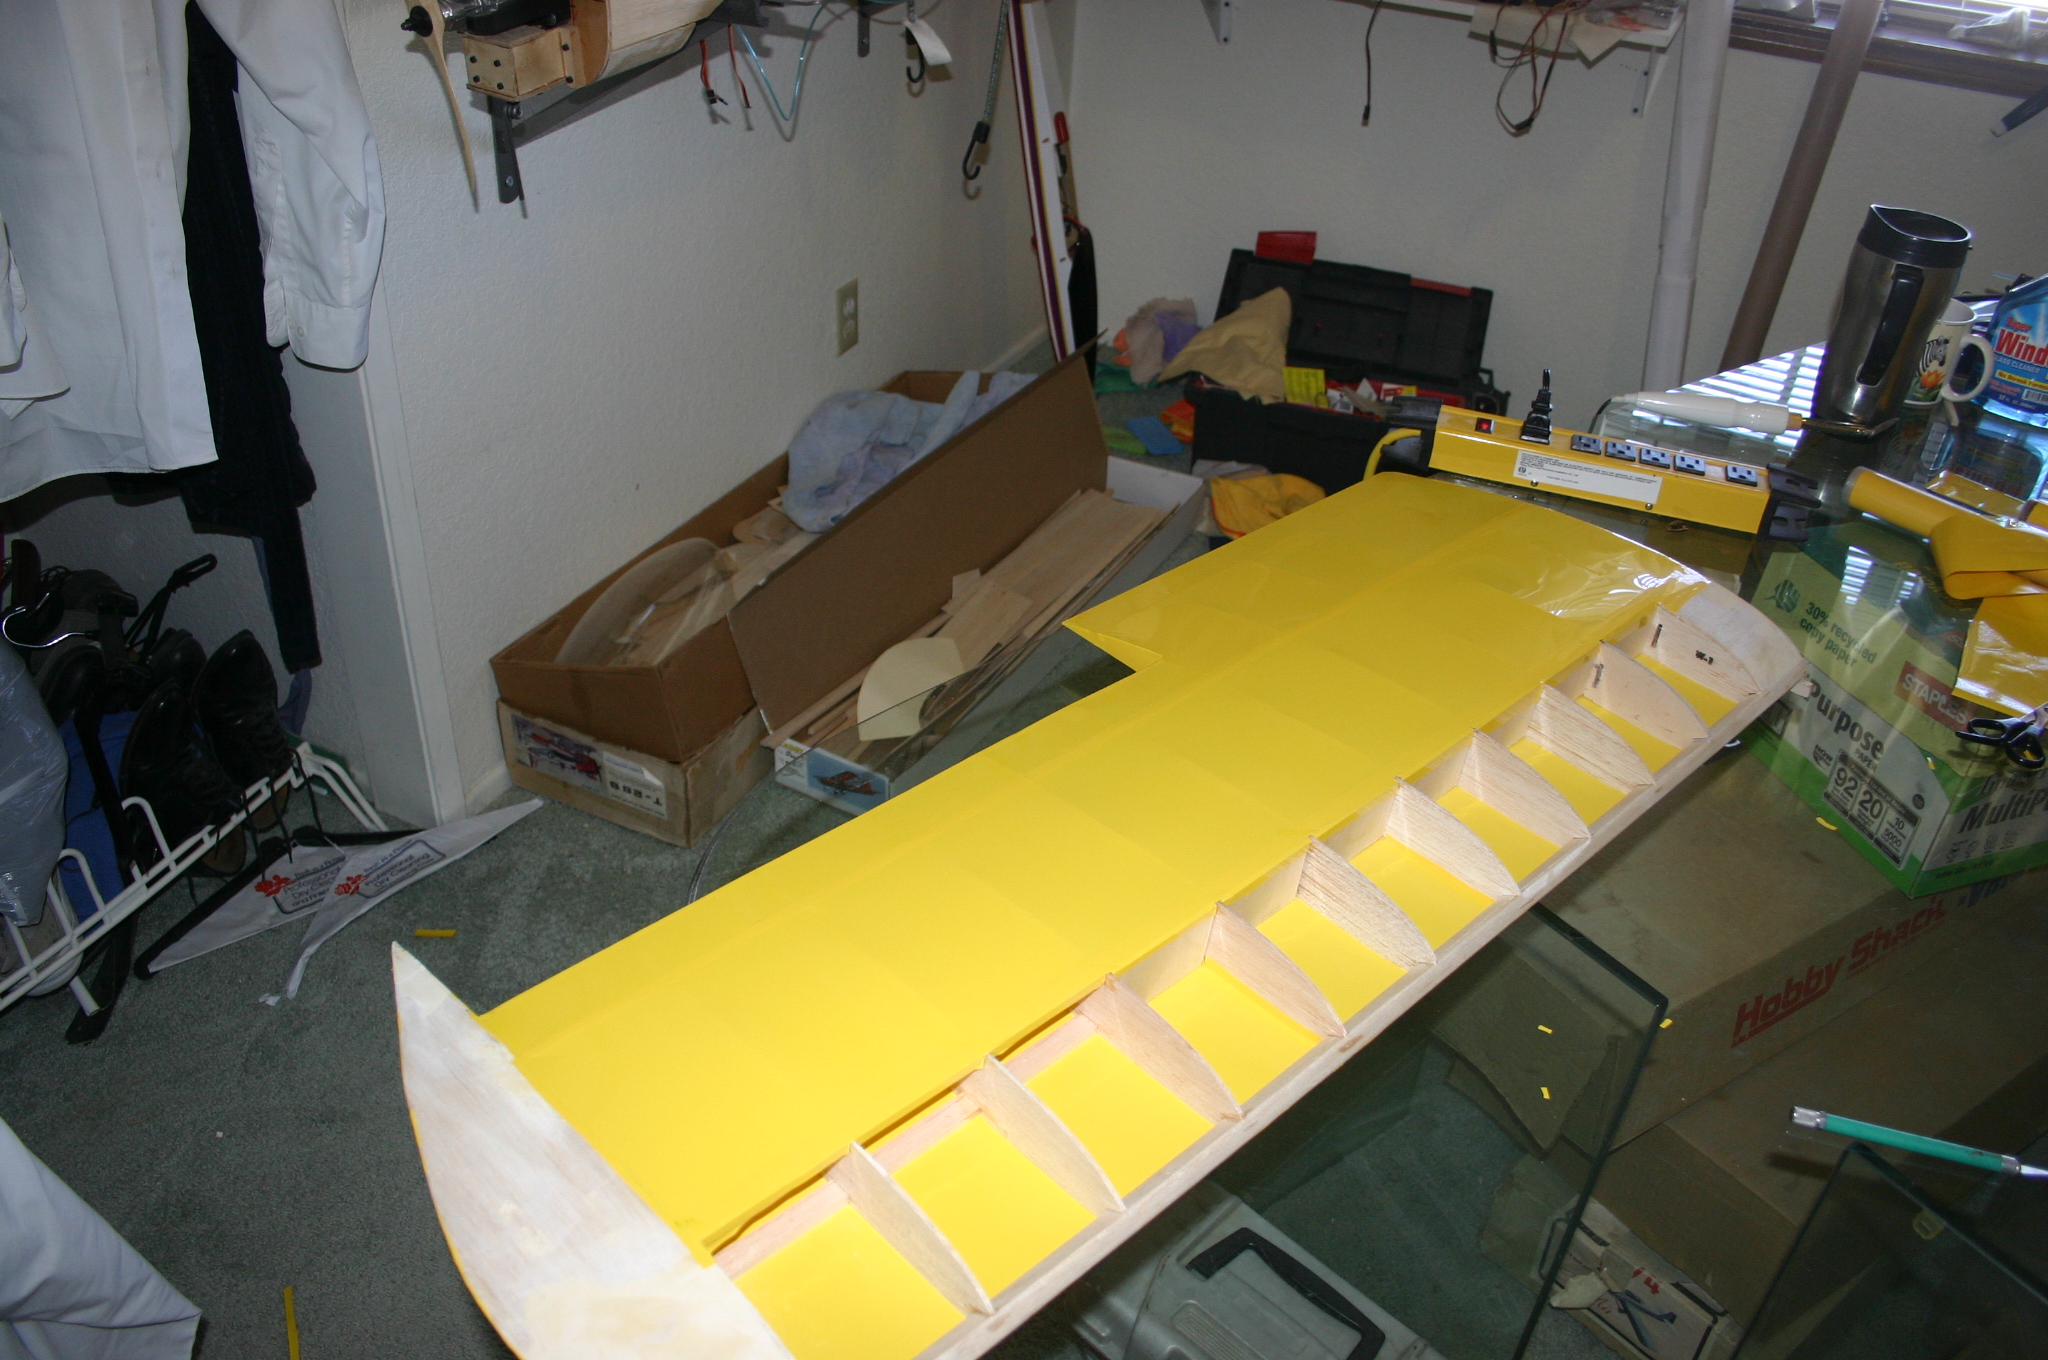
Must appologize for delay. Weather has been just too nice here is SoCal that I havn't had much time for building and posting. Taken the opportunity to FLY! But over the last couple of weeks I have been able to get back to the Kadet. So here are some pics of the progress with the wing. I have also started the fuse, but will post that later.
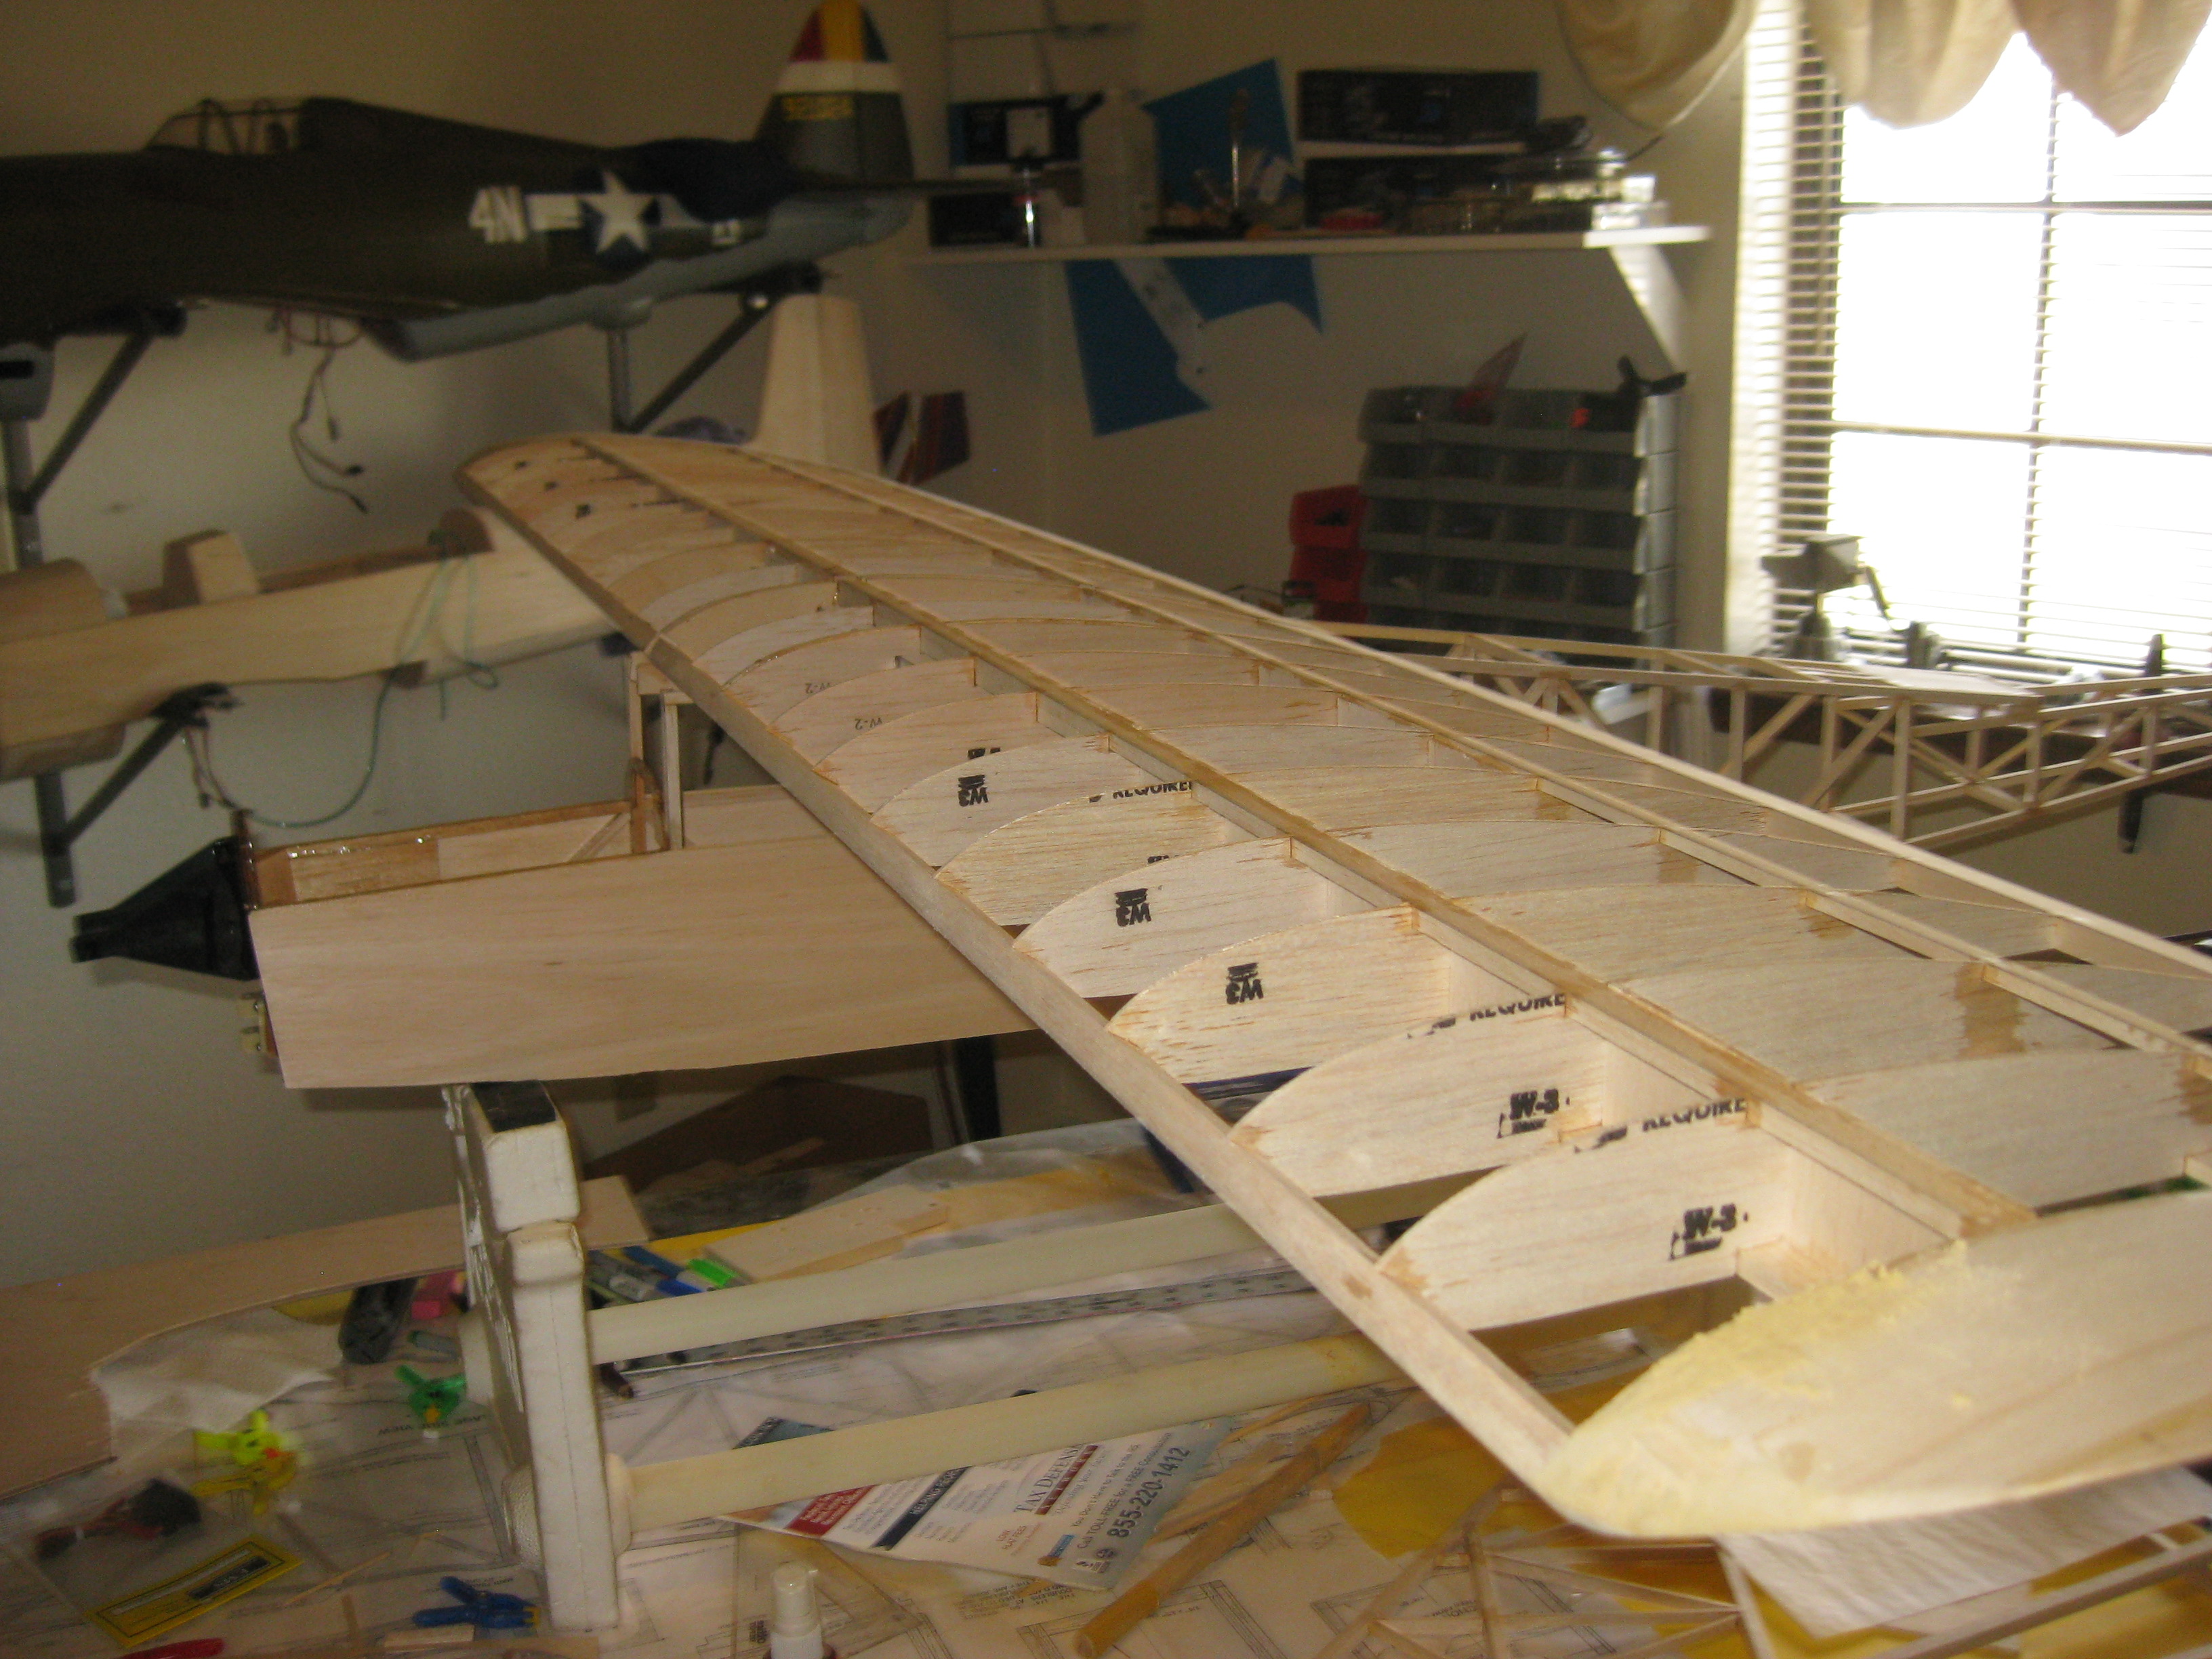
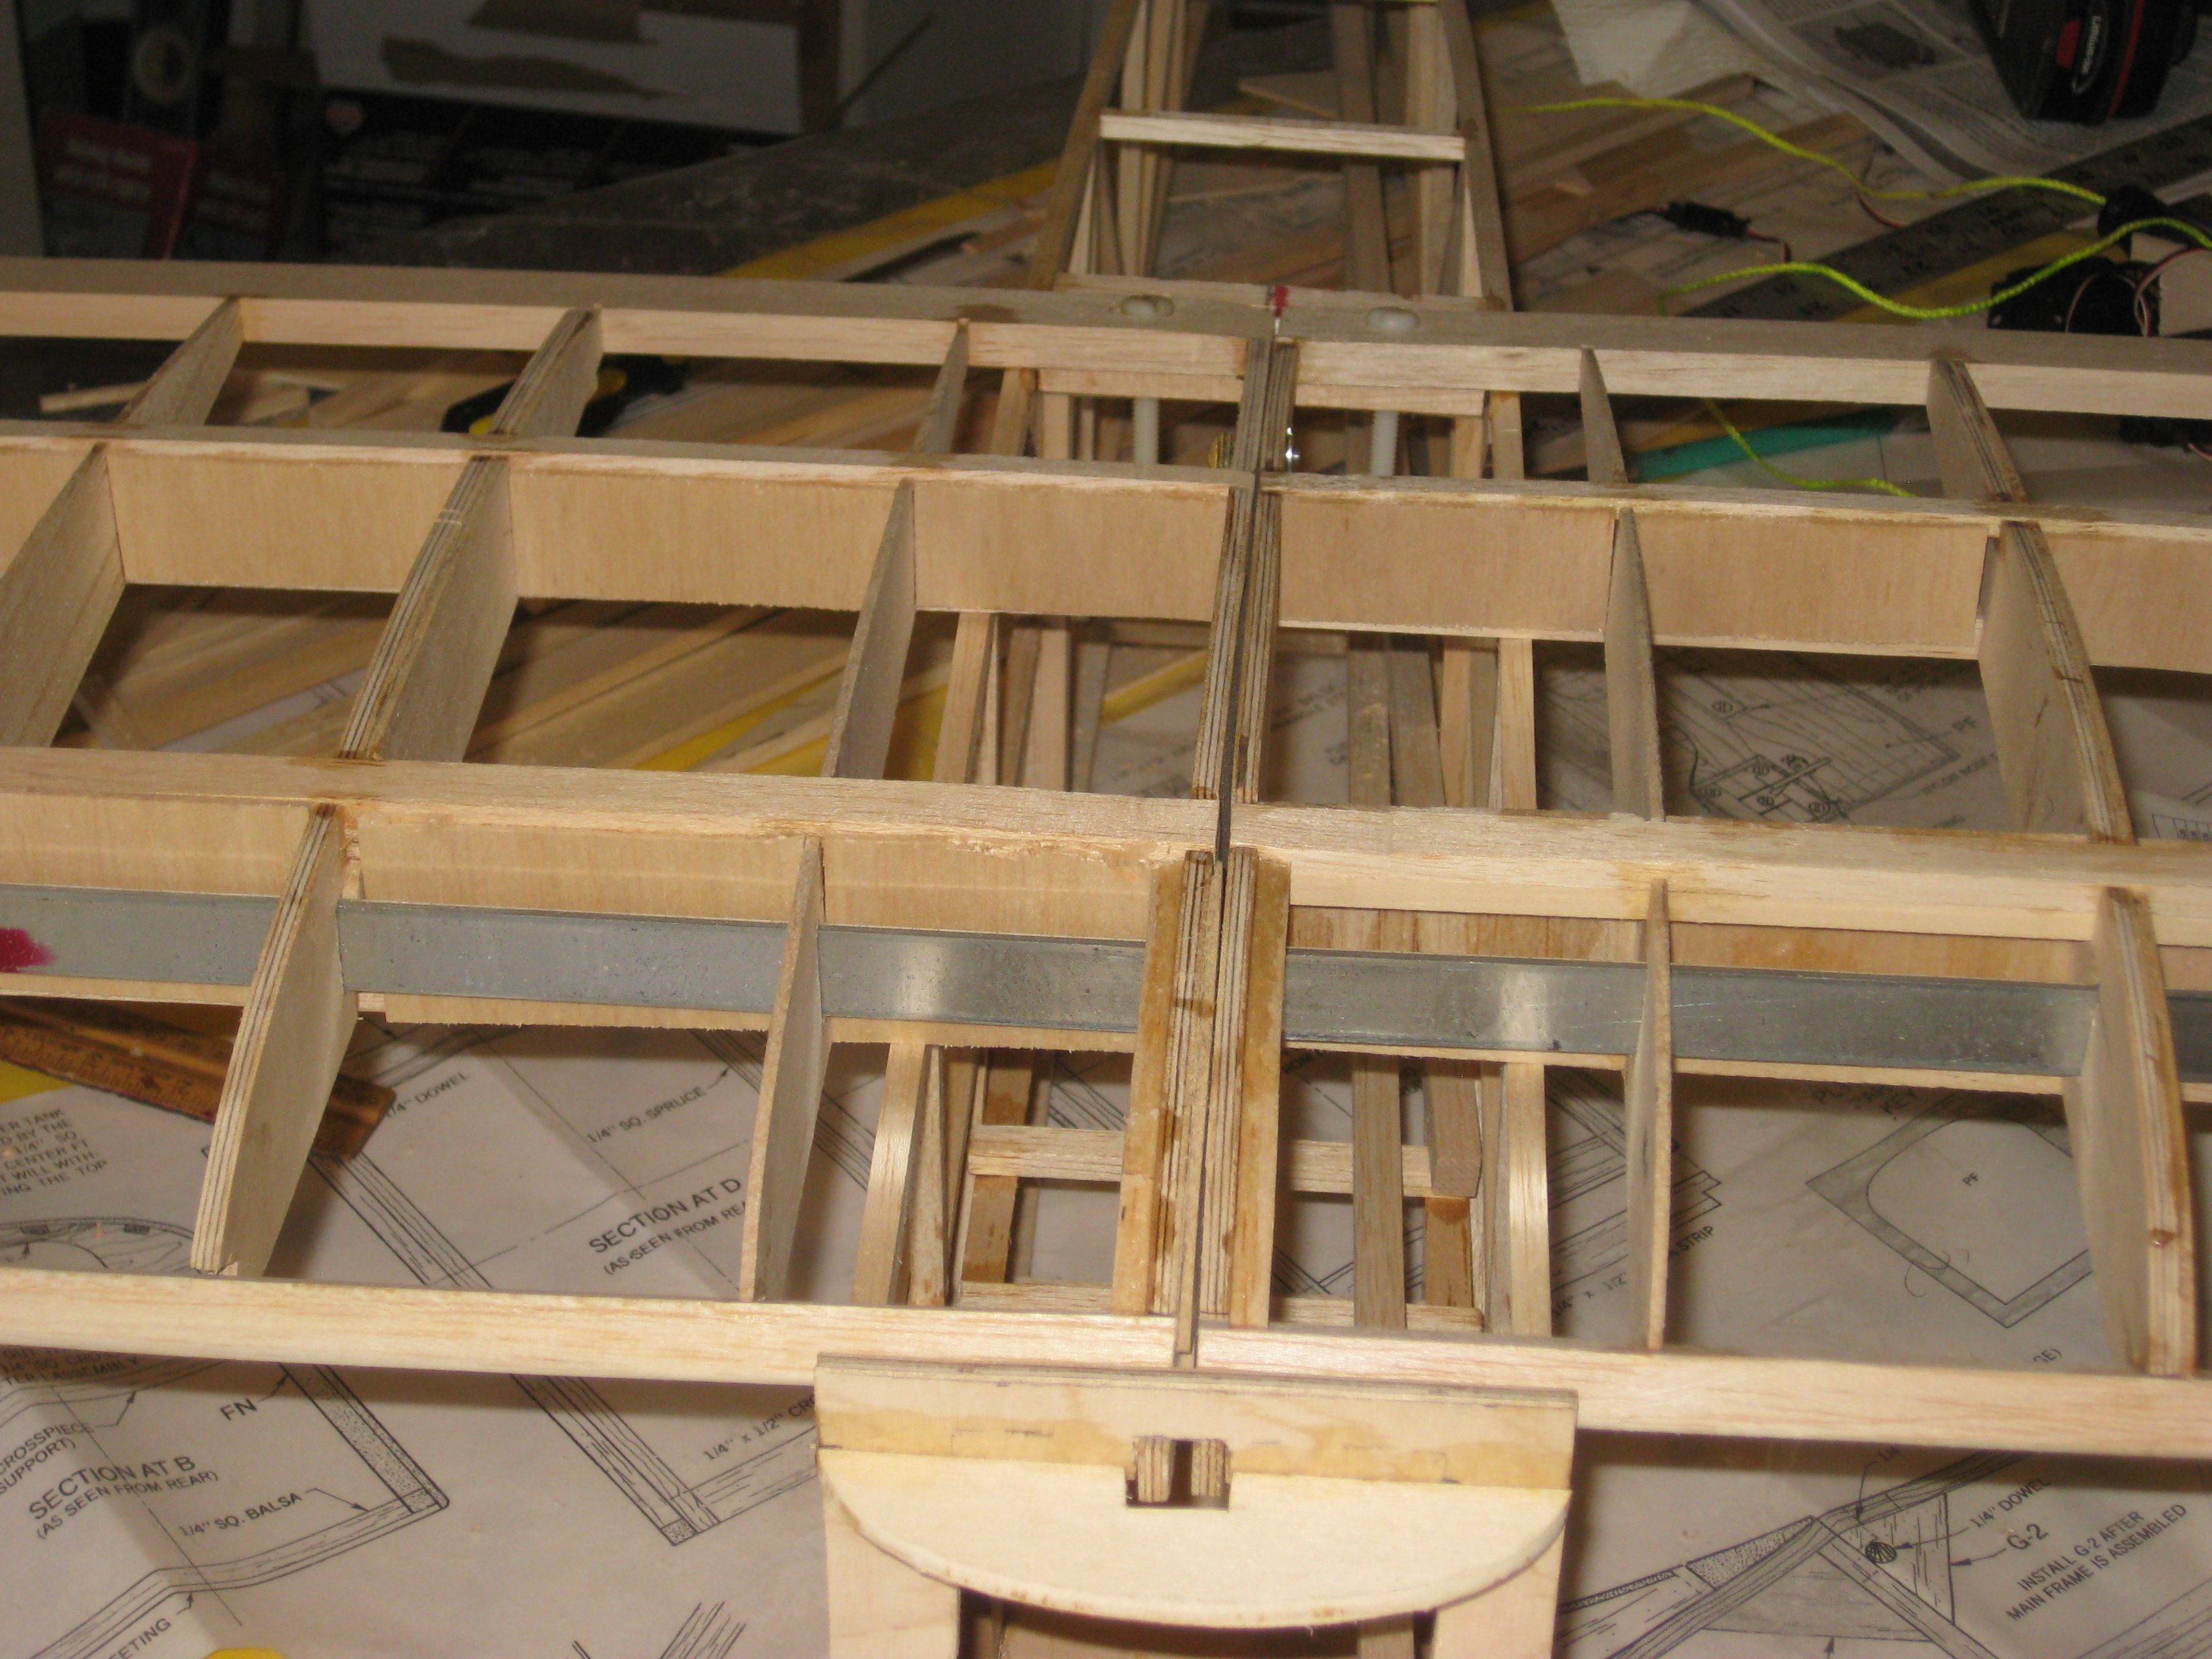
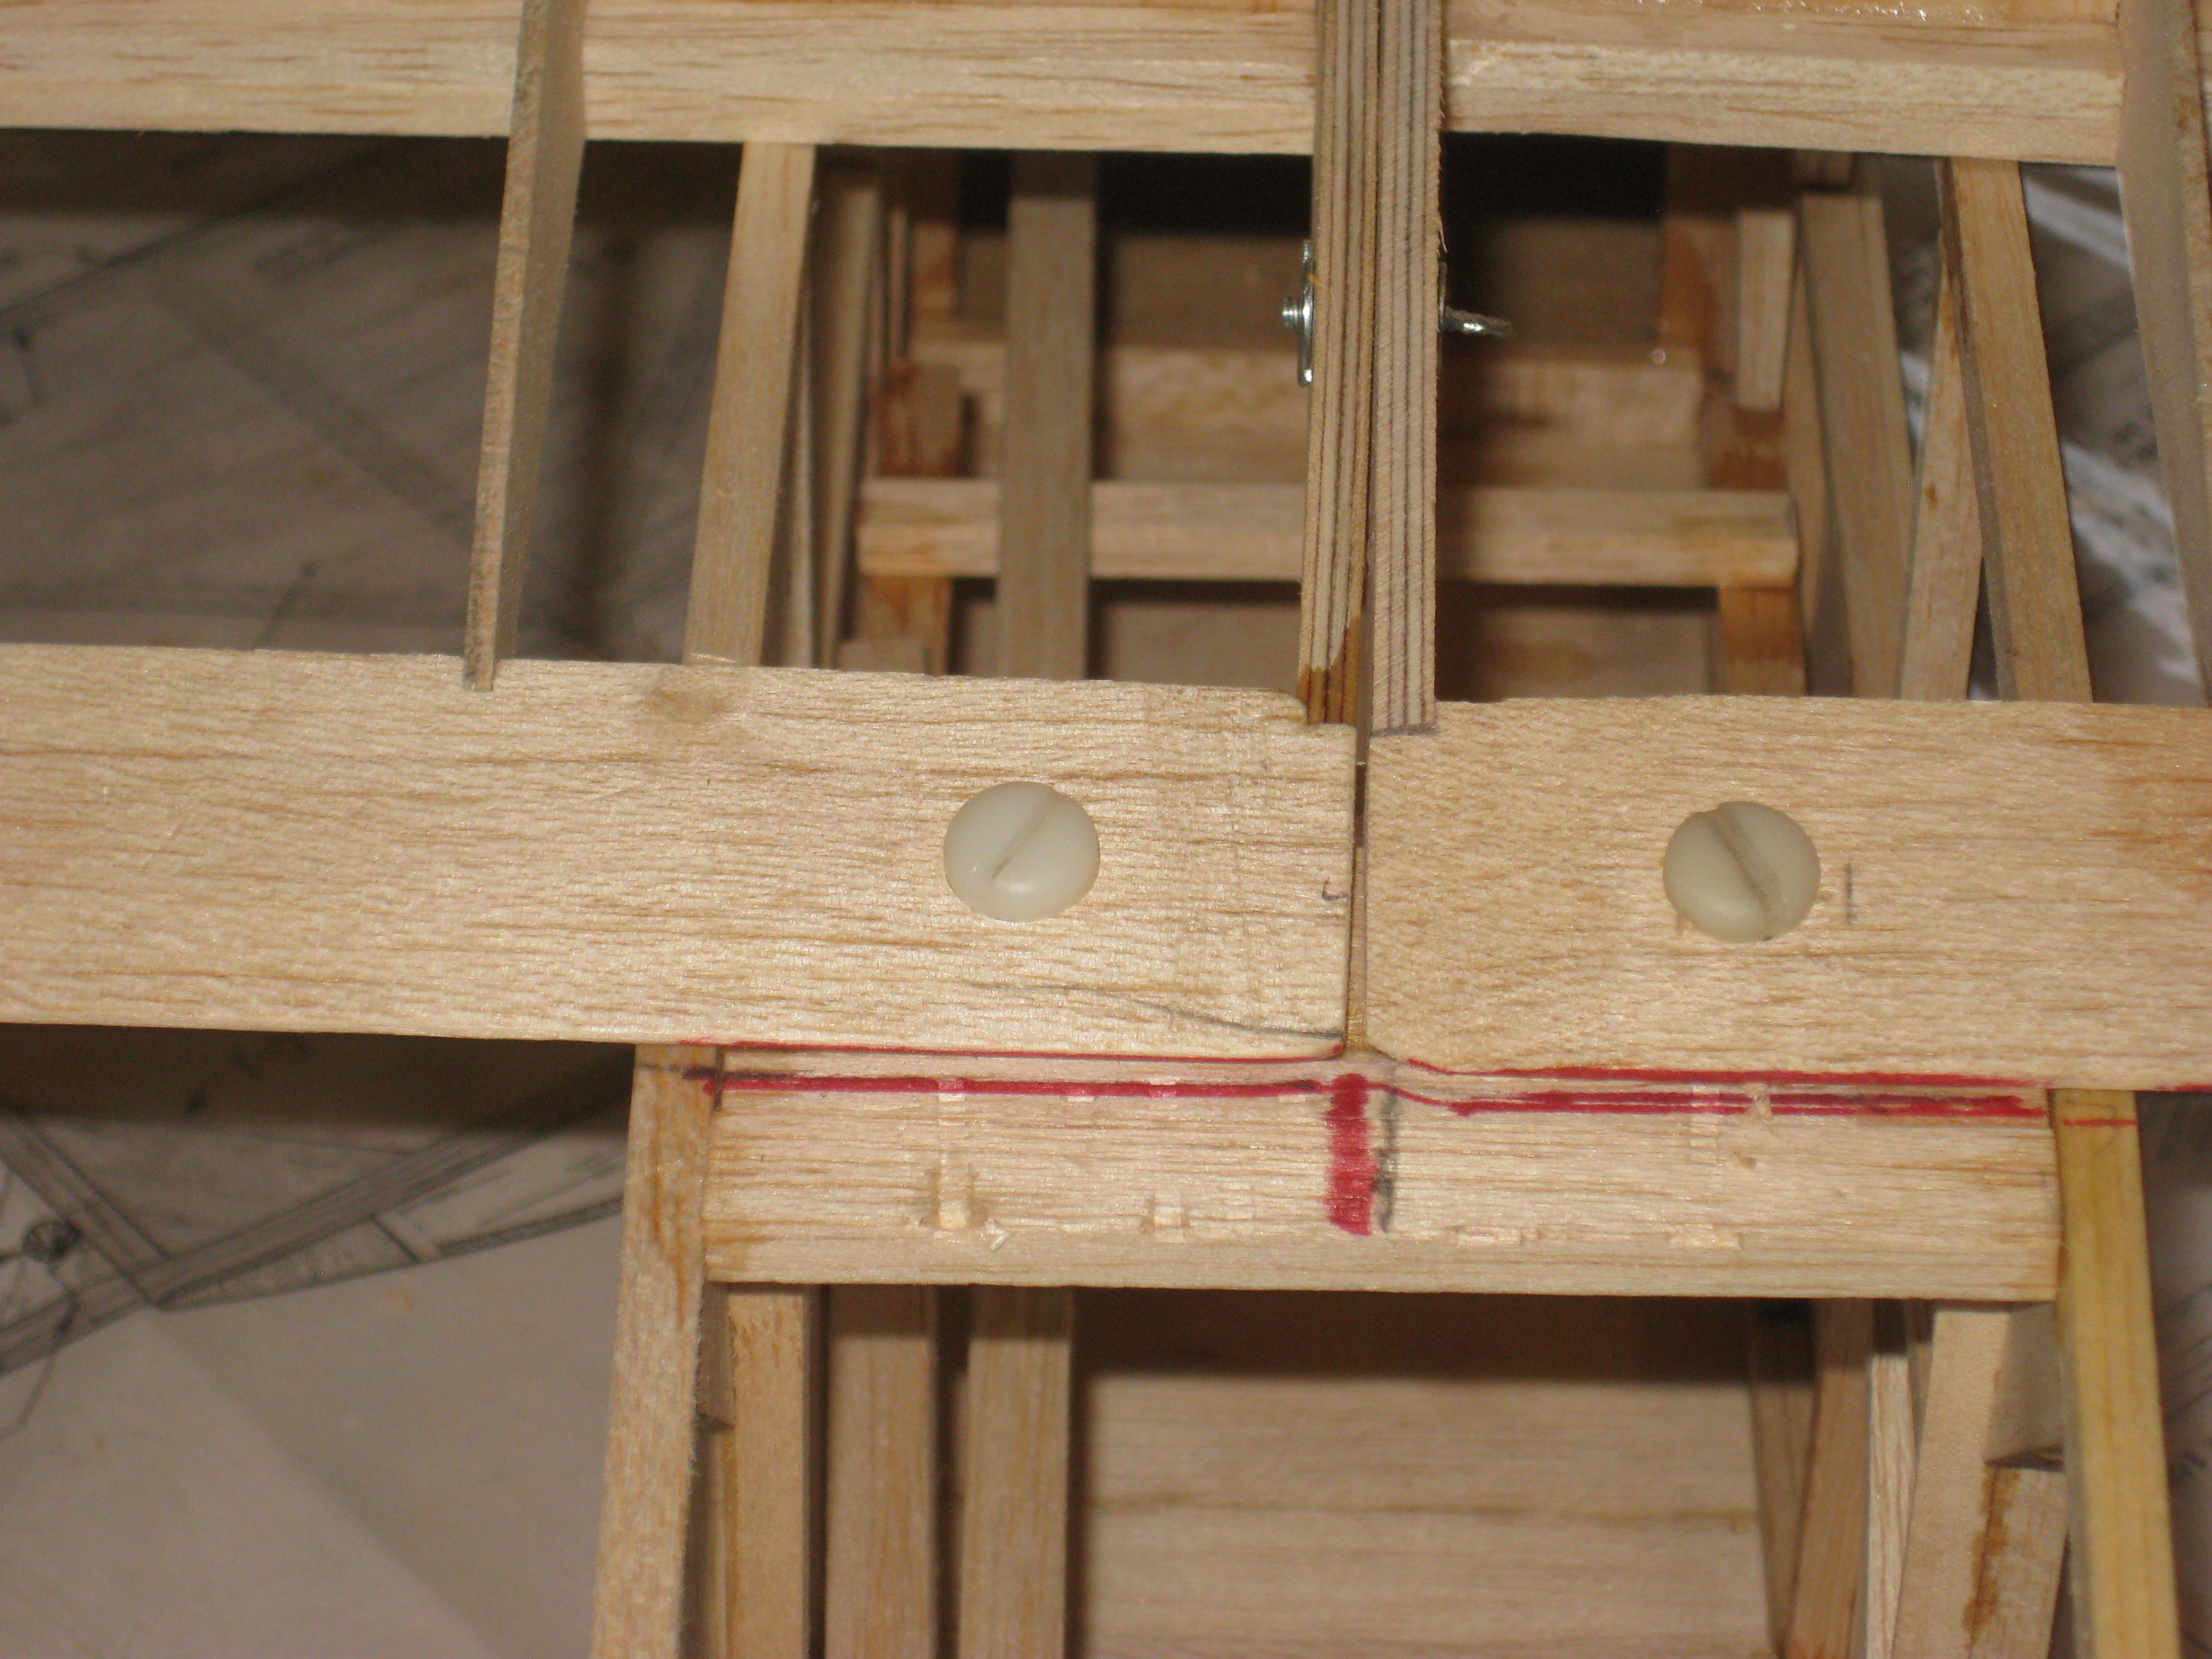
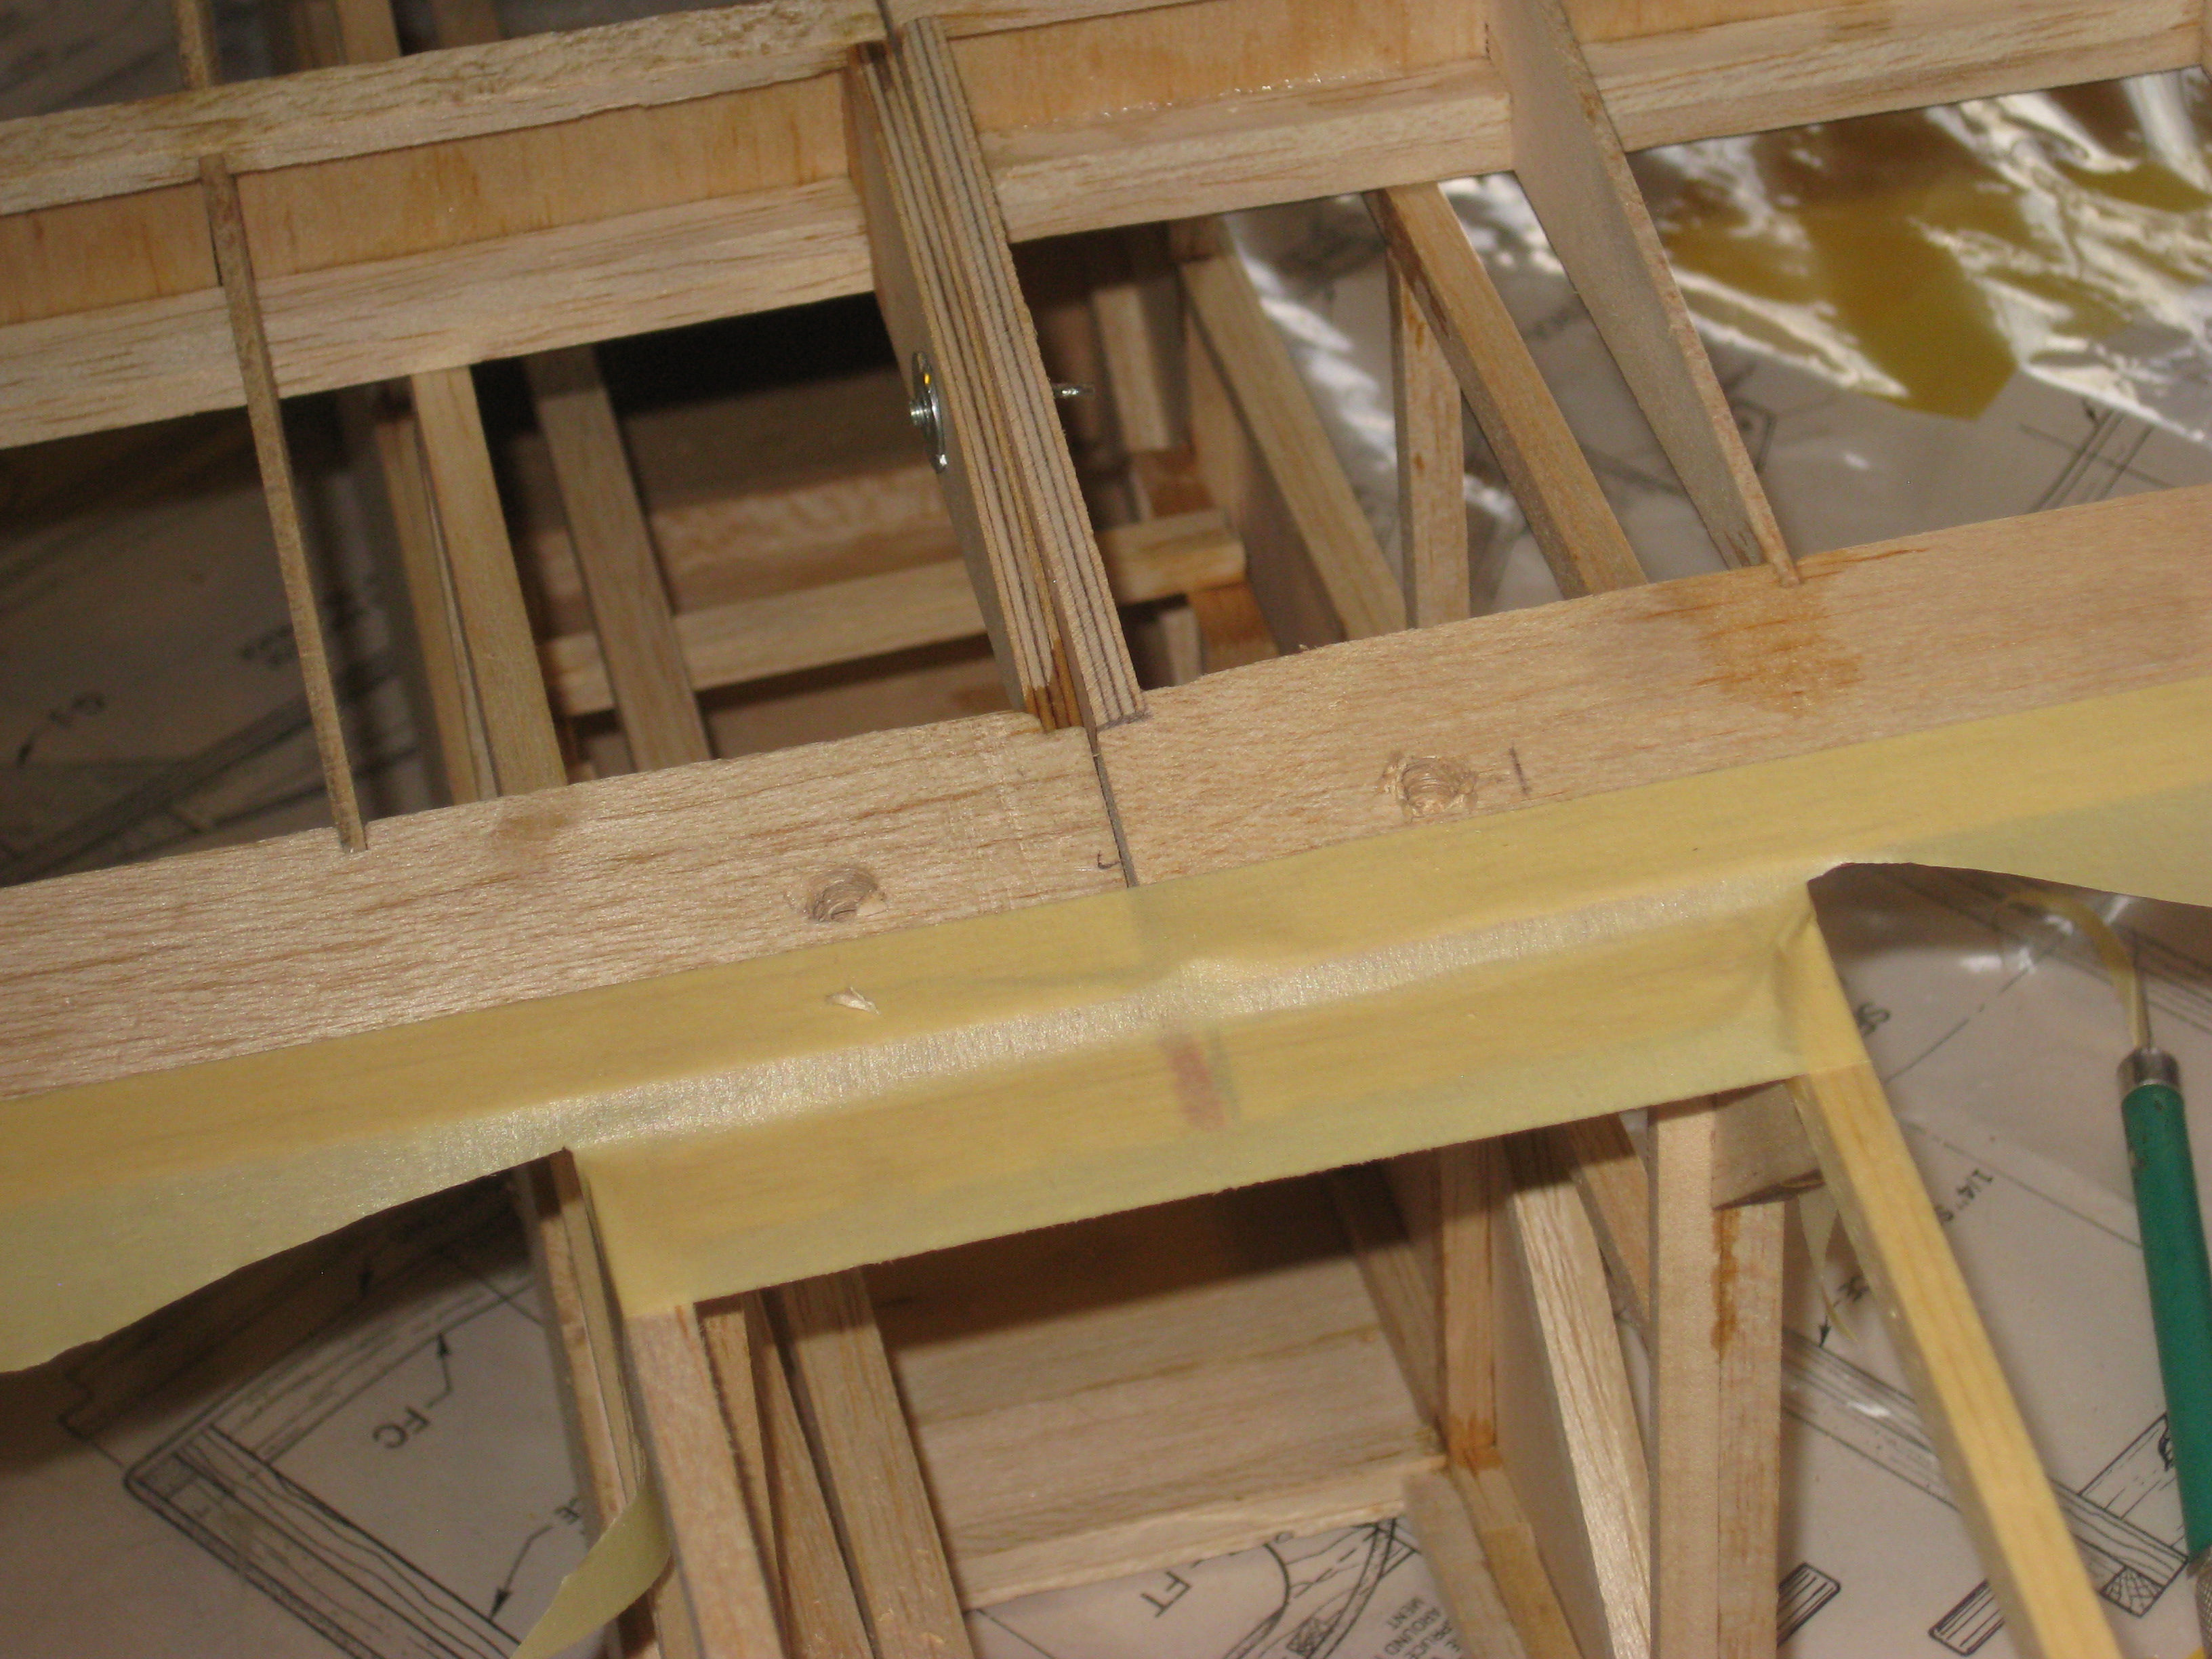
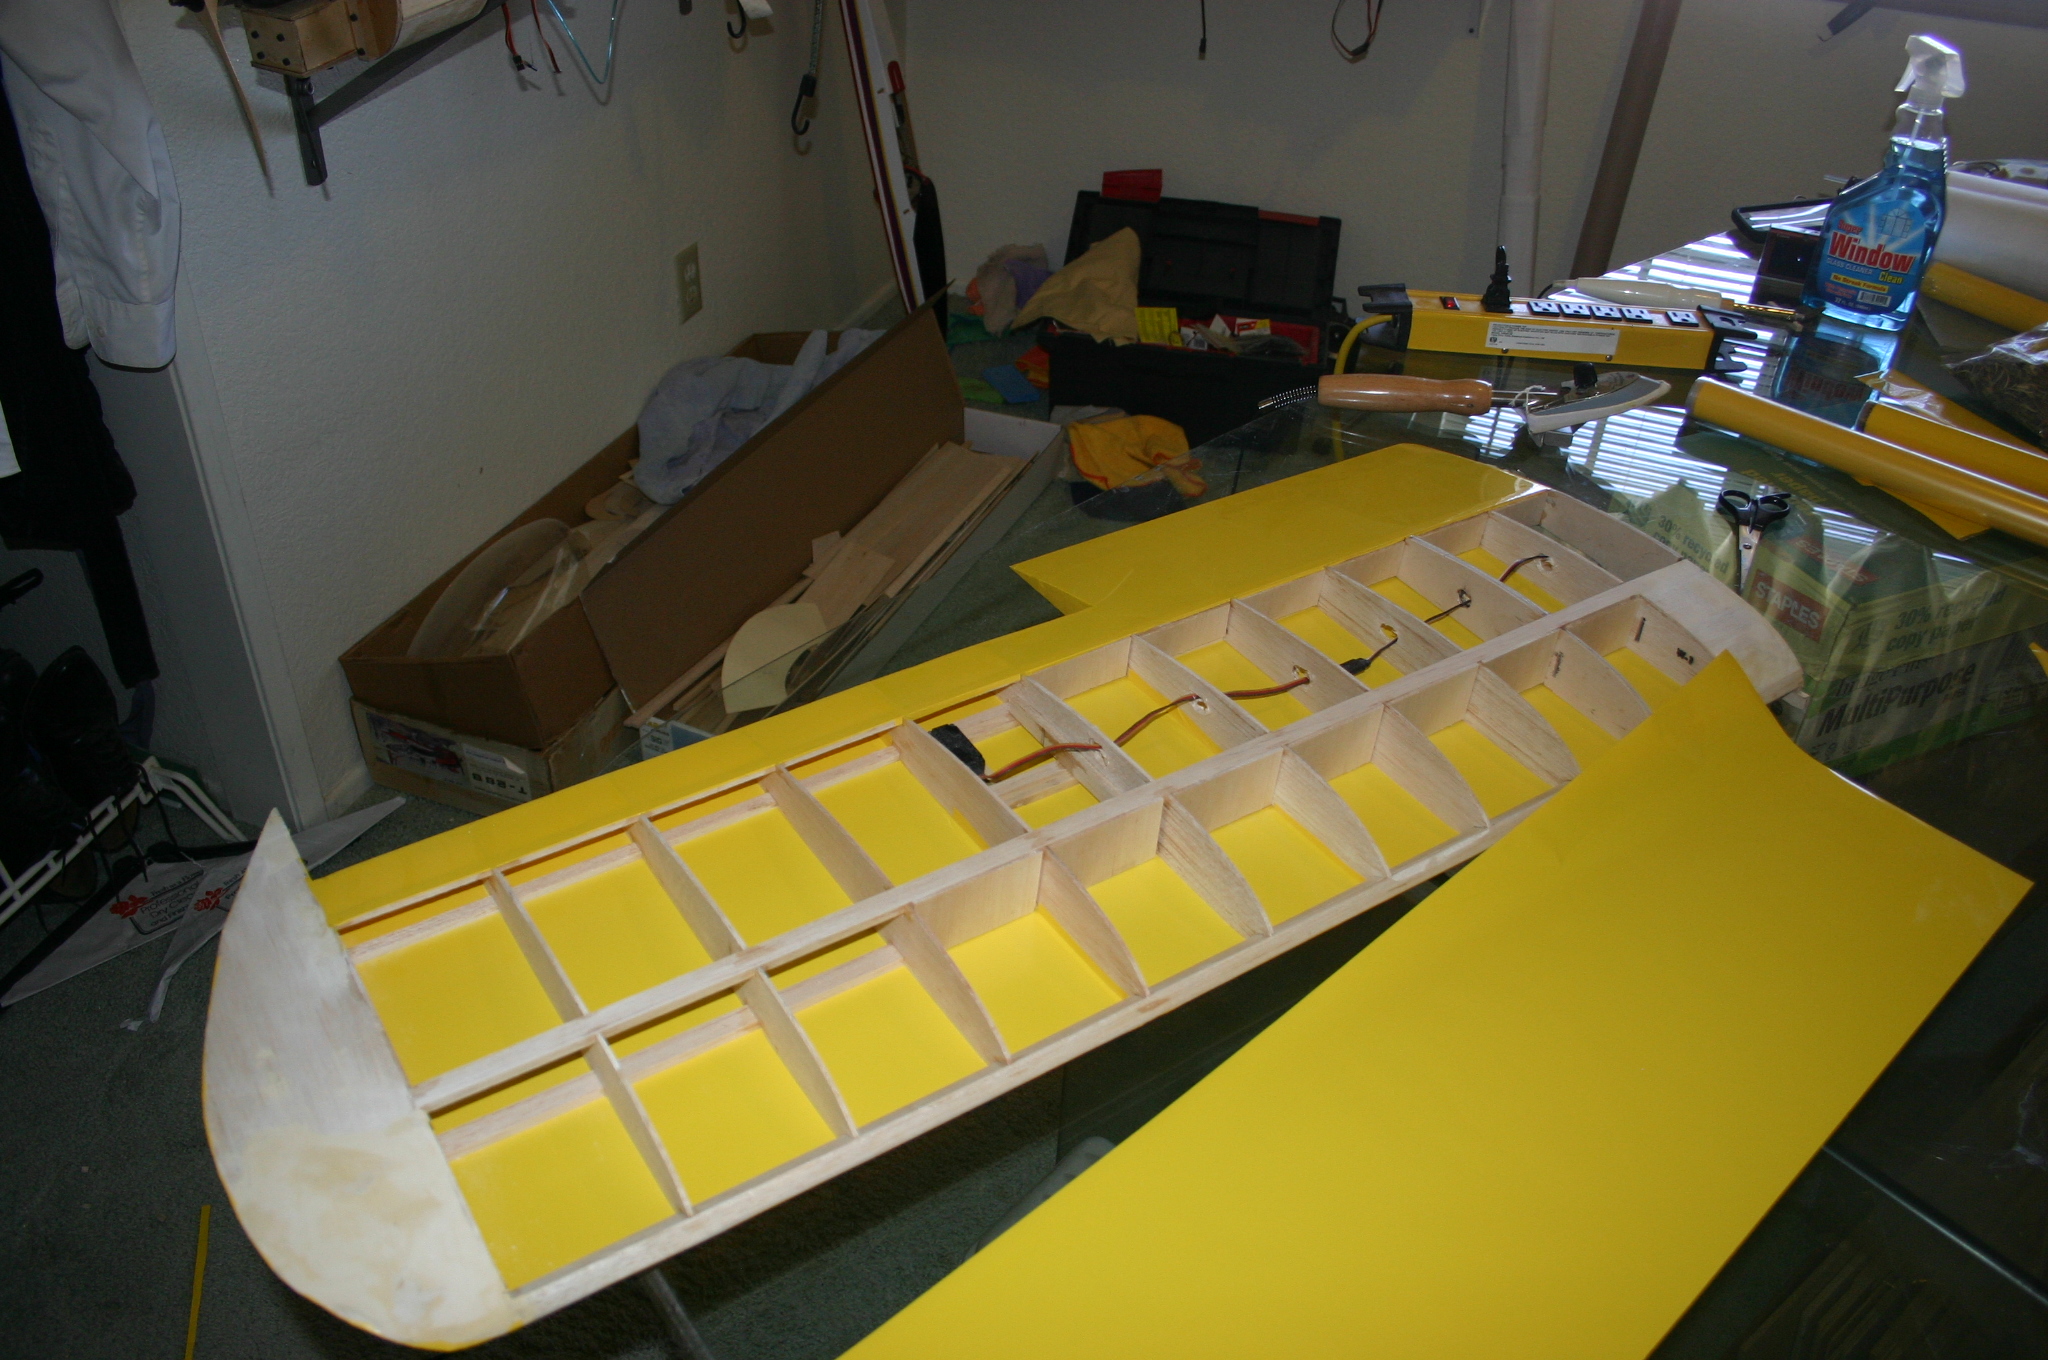
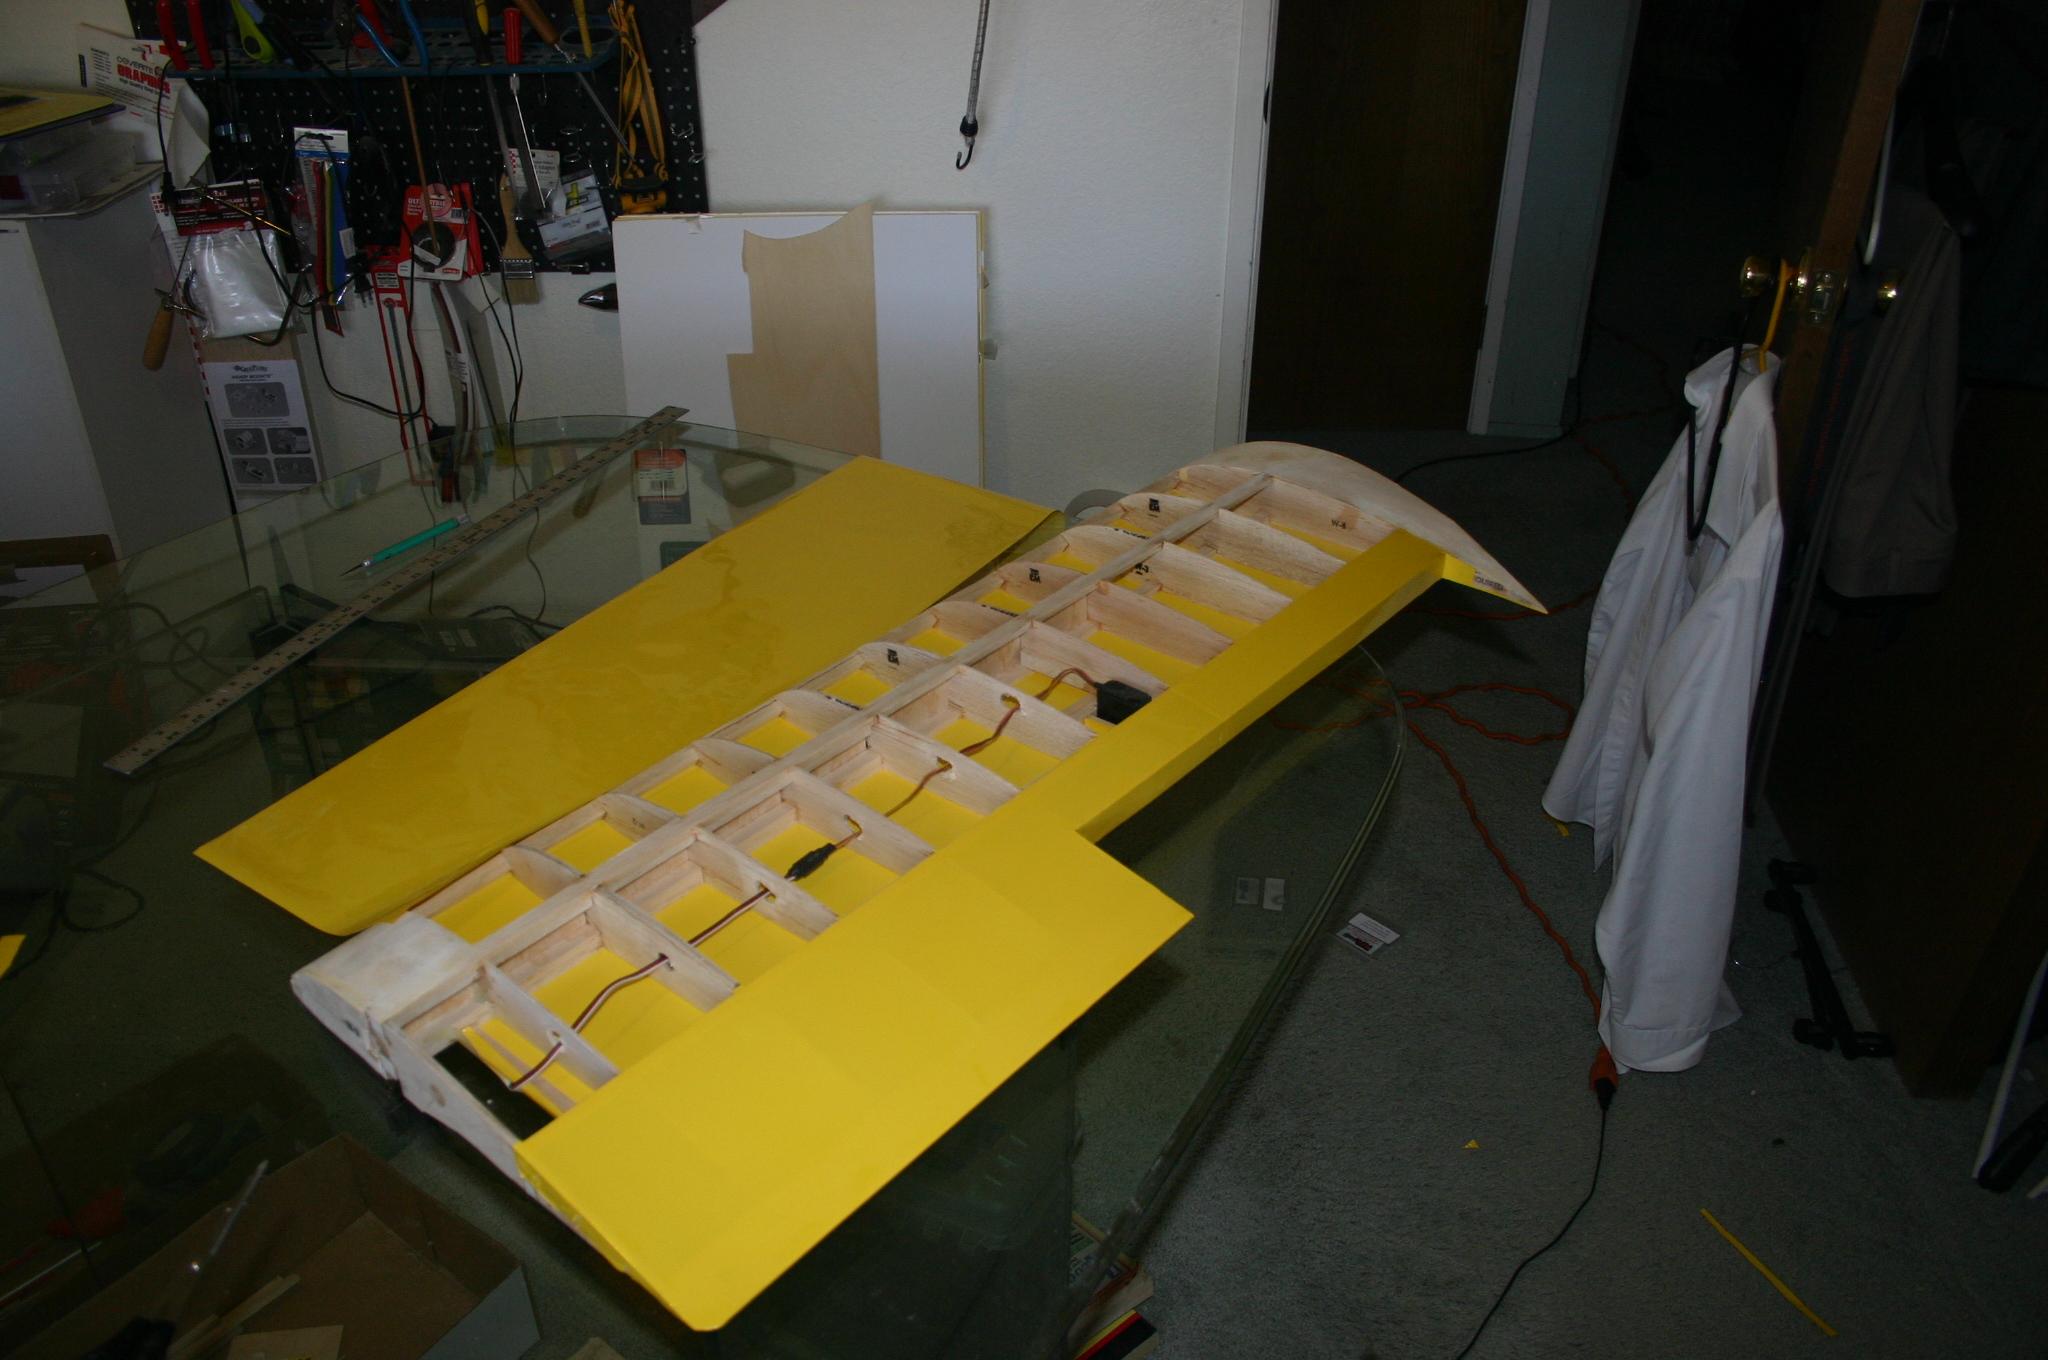
The attached pics should help to describe how I have tried to 'bash' this kit form to a two-piece flat (no dihedral) wing so that Earnie can haul it around in his car. You will note some rib doublers made out of 5/16 ply for strength to take the pressure from the removable aluminum 'spar' that will keep the wings together in flight. Also note the W1 ribs where the two wings join are ply and have a 'tab' nose that will fit into a slot in the front cabin former to hold the wing in place (same as came in the old ARF version). One problem I had with this is getting it to line up from the leading edge to the trailing edge. To accomplish this you should see that in the front and rear of the W1 ribs I installed blind nuts that will be accessible from the underside of the wing that fits over the cabin. Also included is the cut outs I made for the 'bashed' ailerons. Hope these pics take after all this typing. And yes I will have pics of the fuse to follow shortly.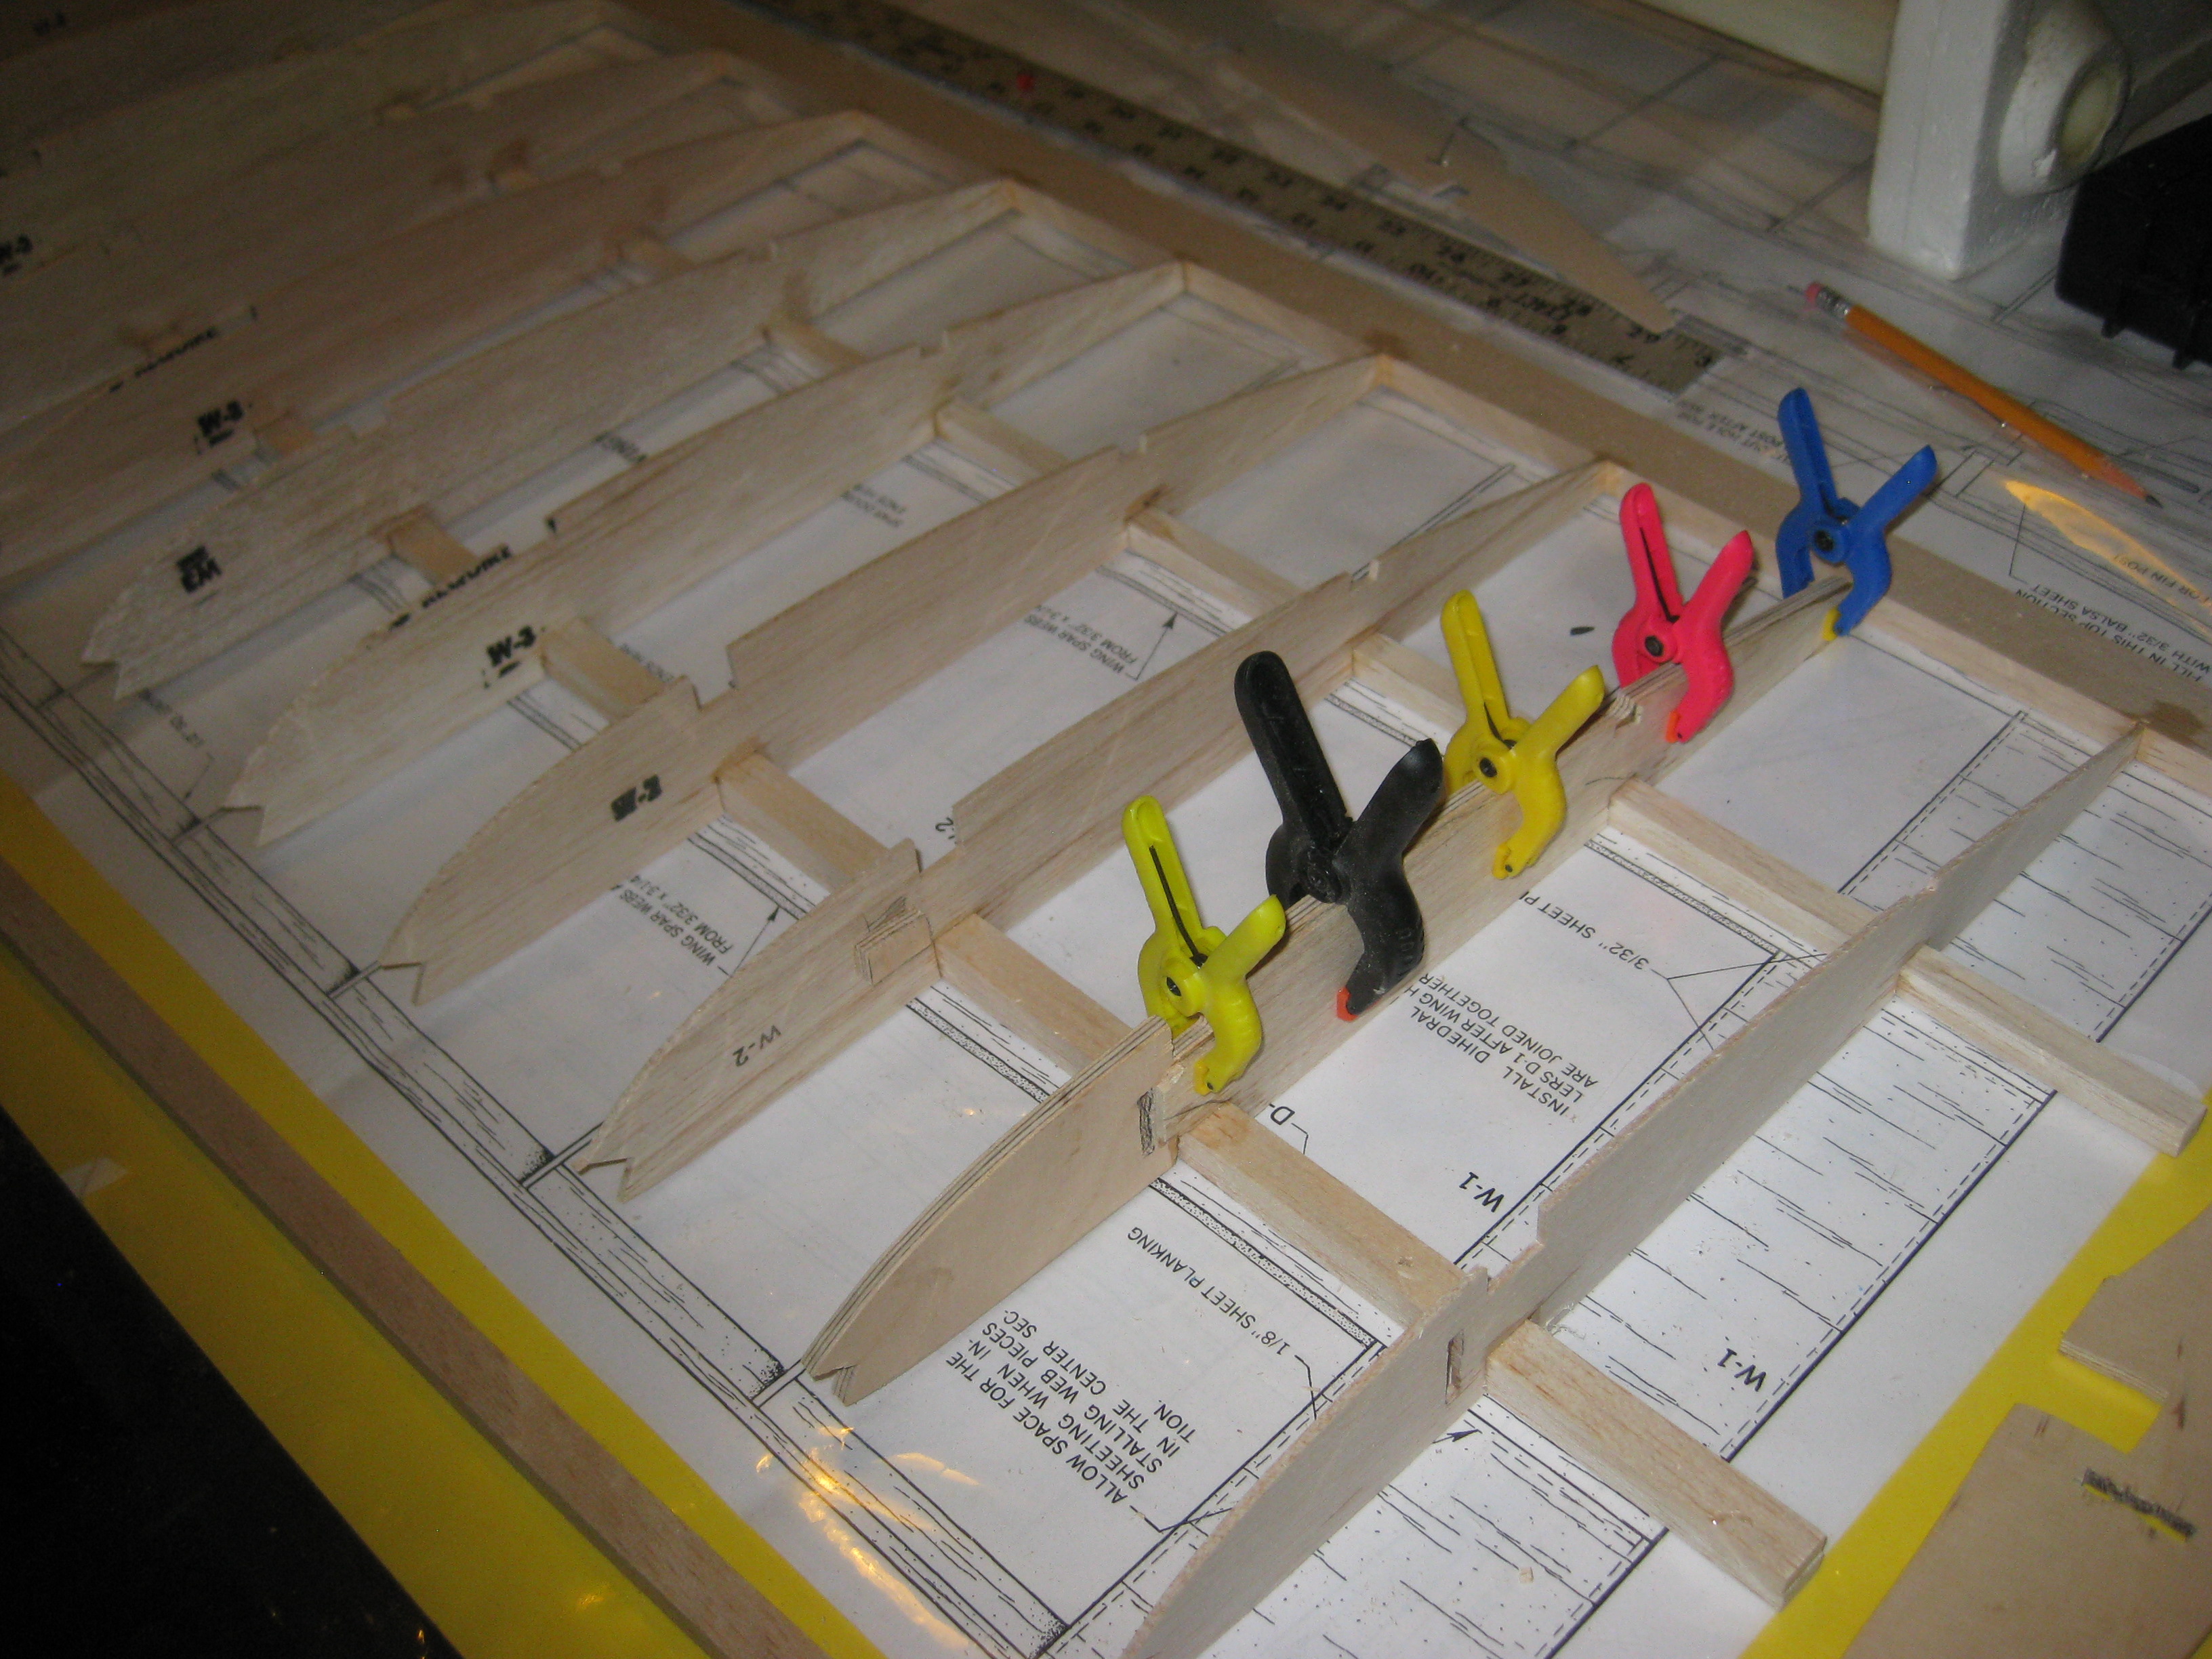


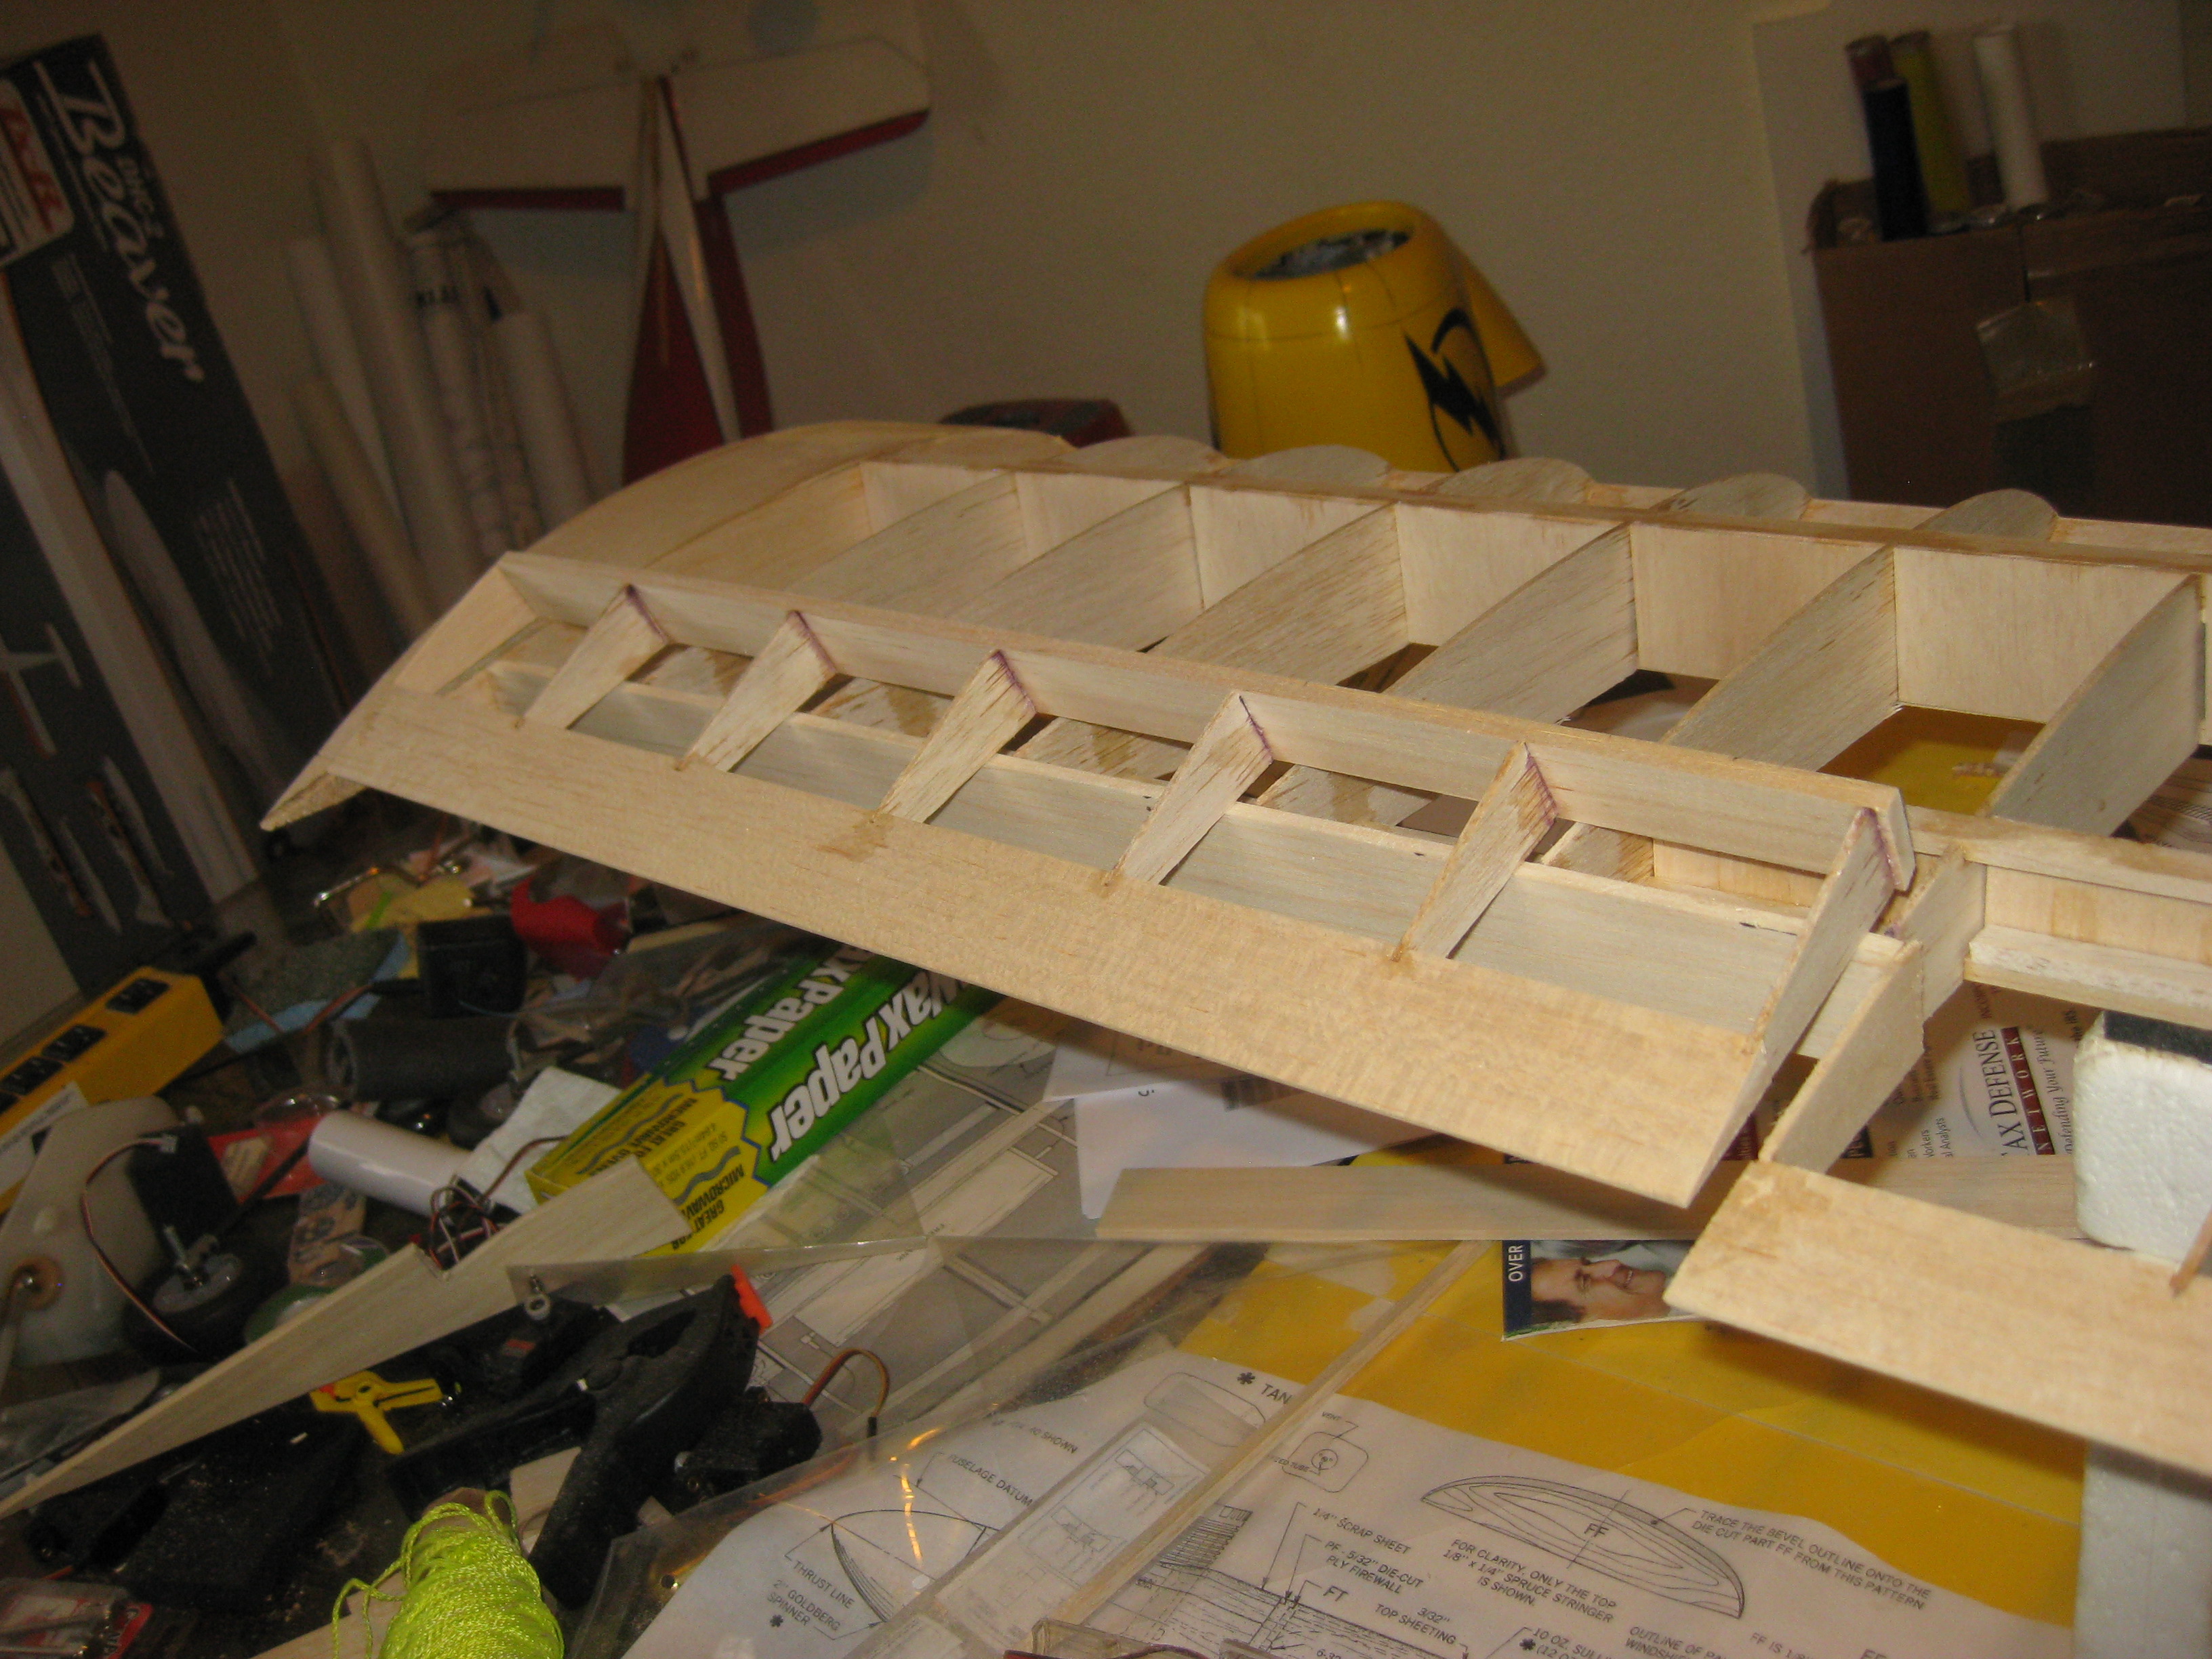
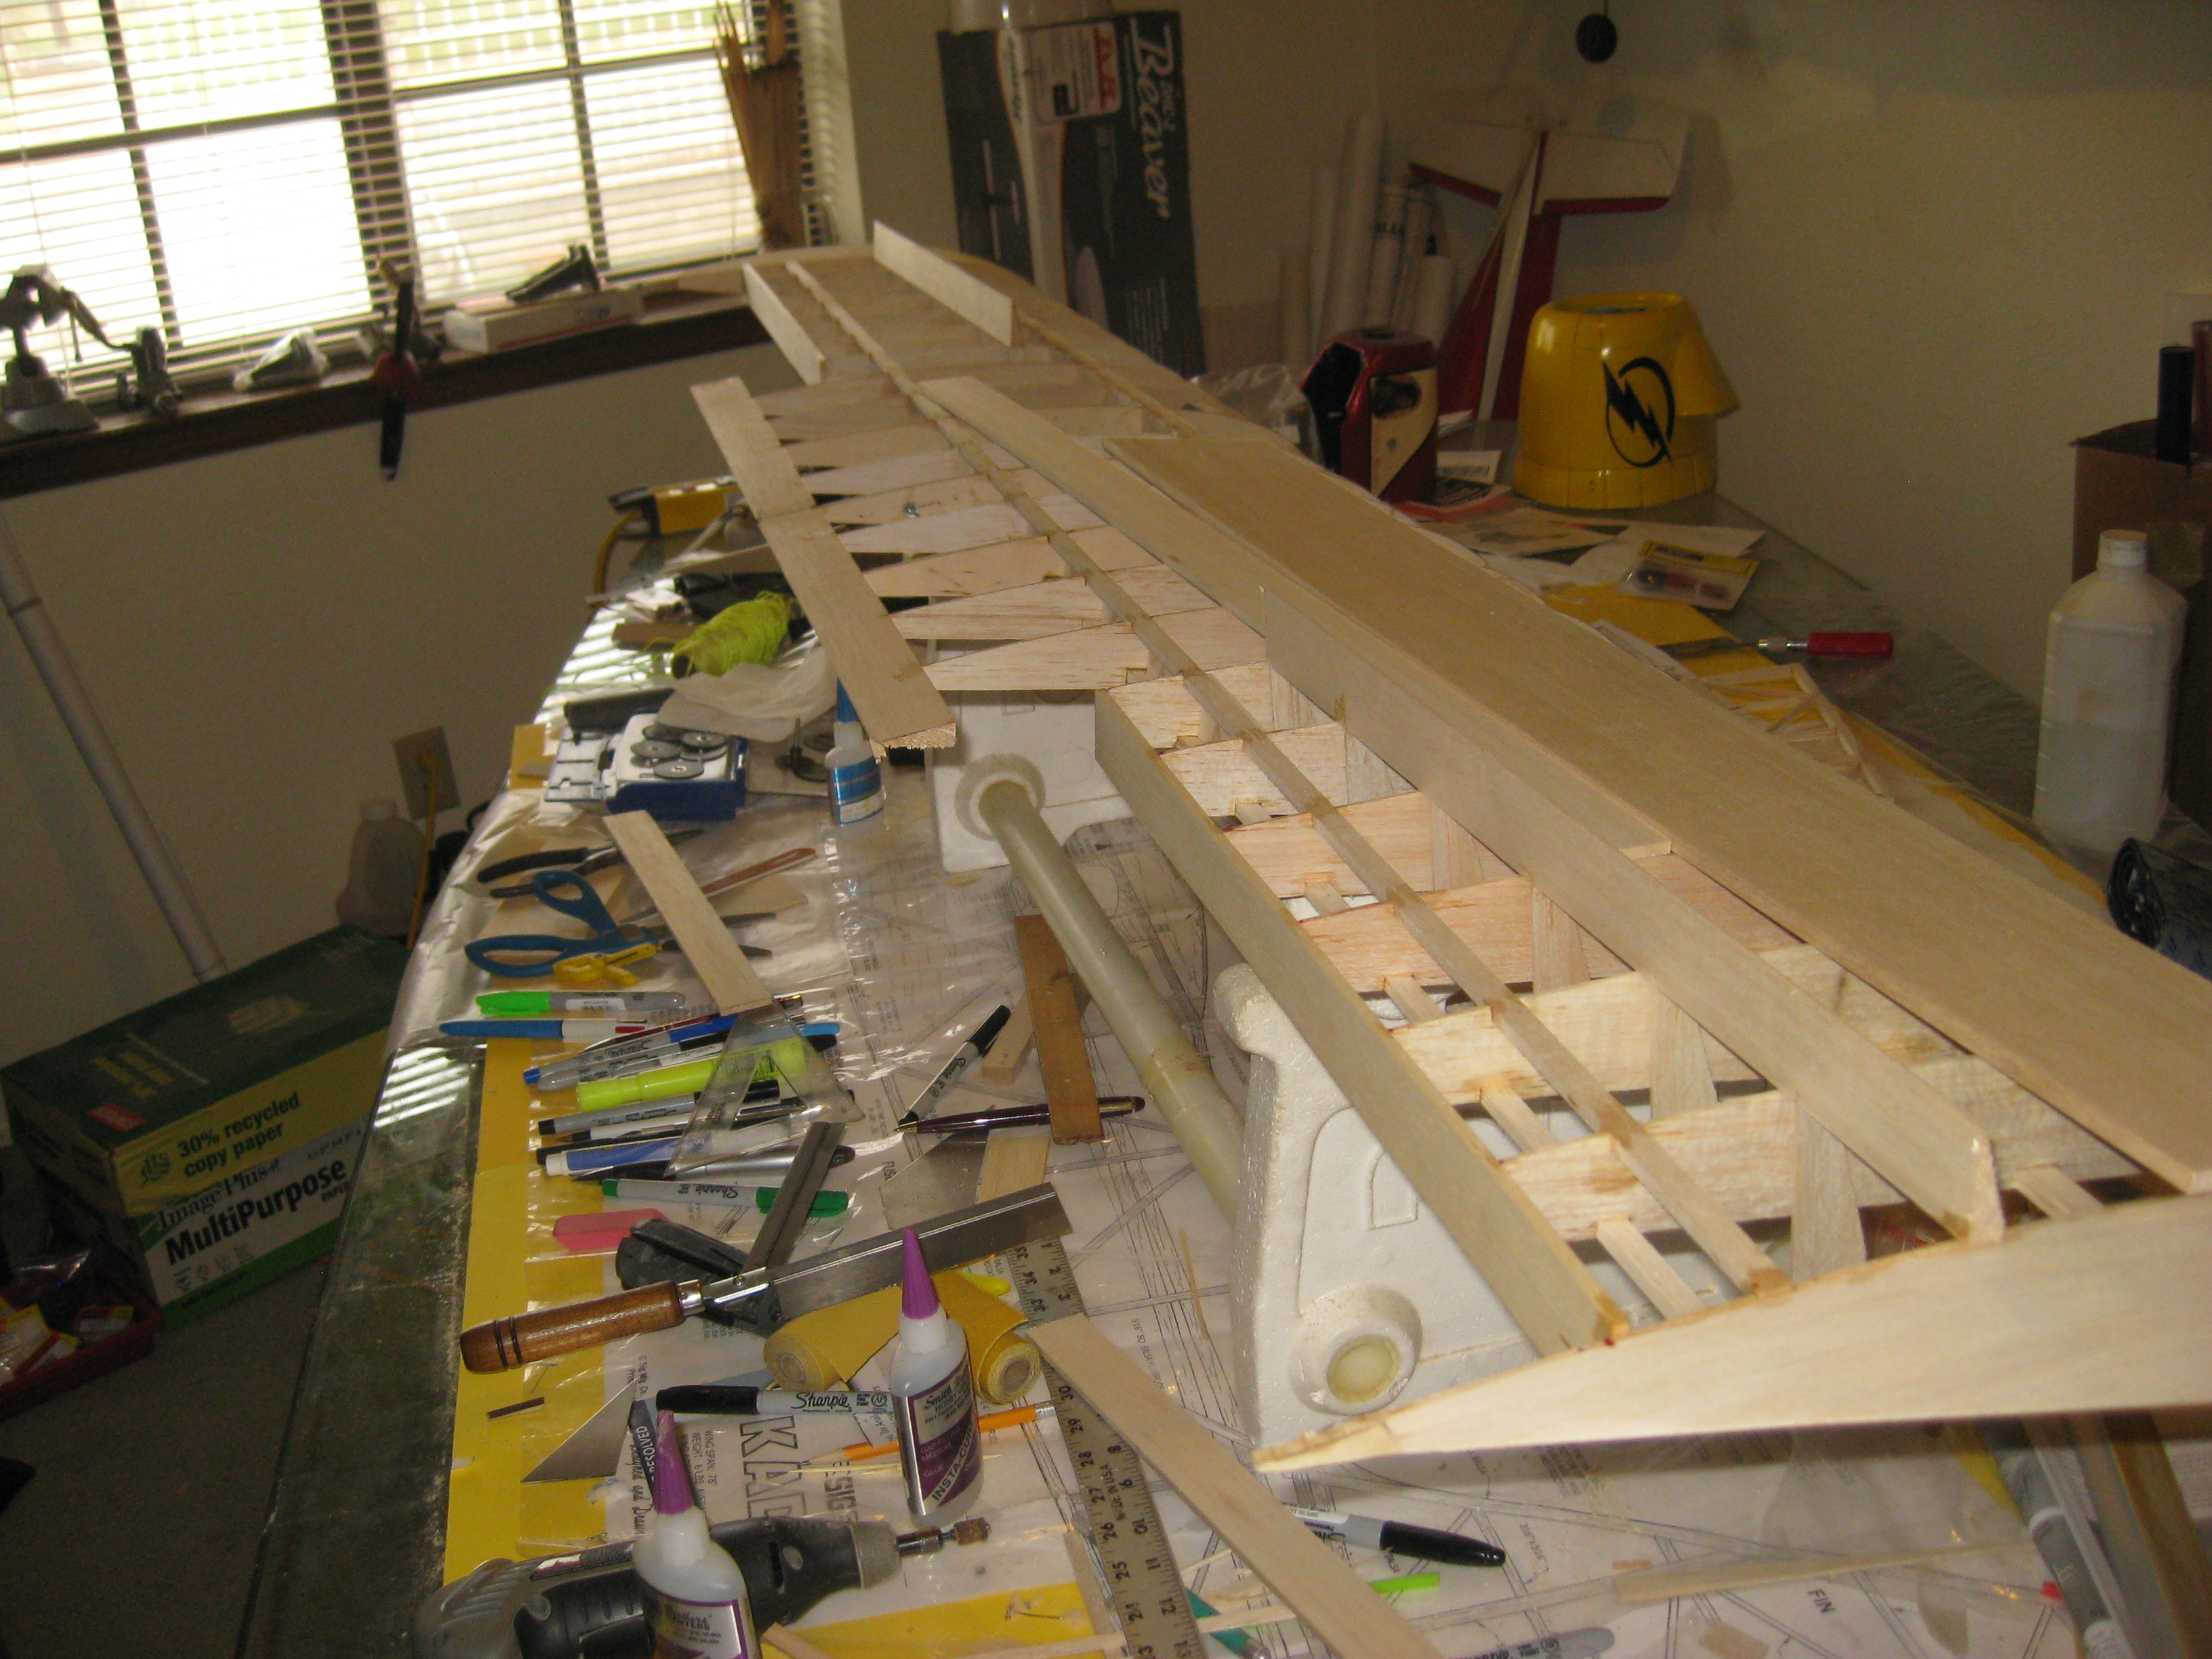
The attached pics should help to describe how I have tried to 'bash' this kit form to a two-piece flat (no dihedral) wing so that Earnie can haul it around in his car. You will note some rib doublers made out of 5/16 ply for strength to take the pressure from the removable aluminum 'spar' that will keep the wings together in flight. Also note the W1 ribs where the two wings join are ply and have a 'tab' nose that will fit into a slot in the front cabin former to hold the wing in place (same as came in the old ARF version). One problem I had with this is getting it to line up from the leading edge to the trailing edge. To accomplish this you should see that in the front and rear of the W1 ribs I installed blind nuts that will be accessible from the underside of the wing that fits over the cabin. Also included is the cut outs I made for the 'bashed' ailerons. Hope these pics take after all this typing. And yes I will have pics of the fuse to follow shortly.
03-15-2015 | 10:48 AM
#18
Thread Starter
My Feedback: (12)
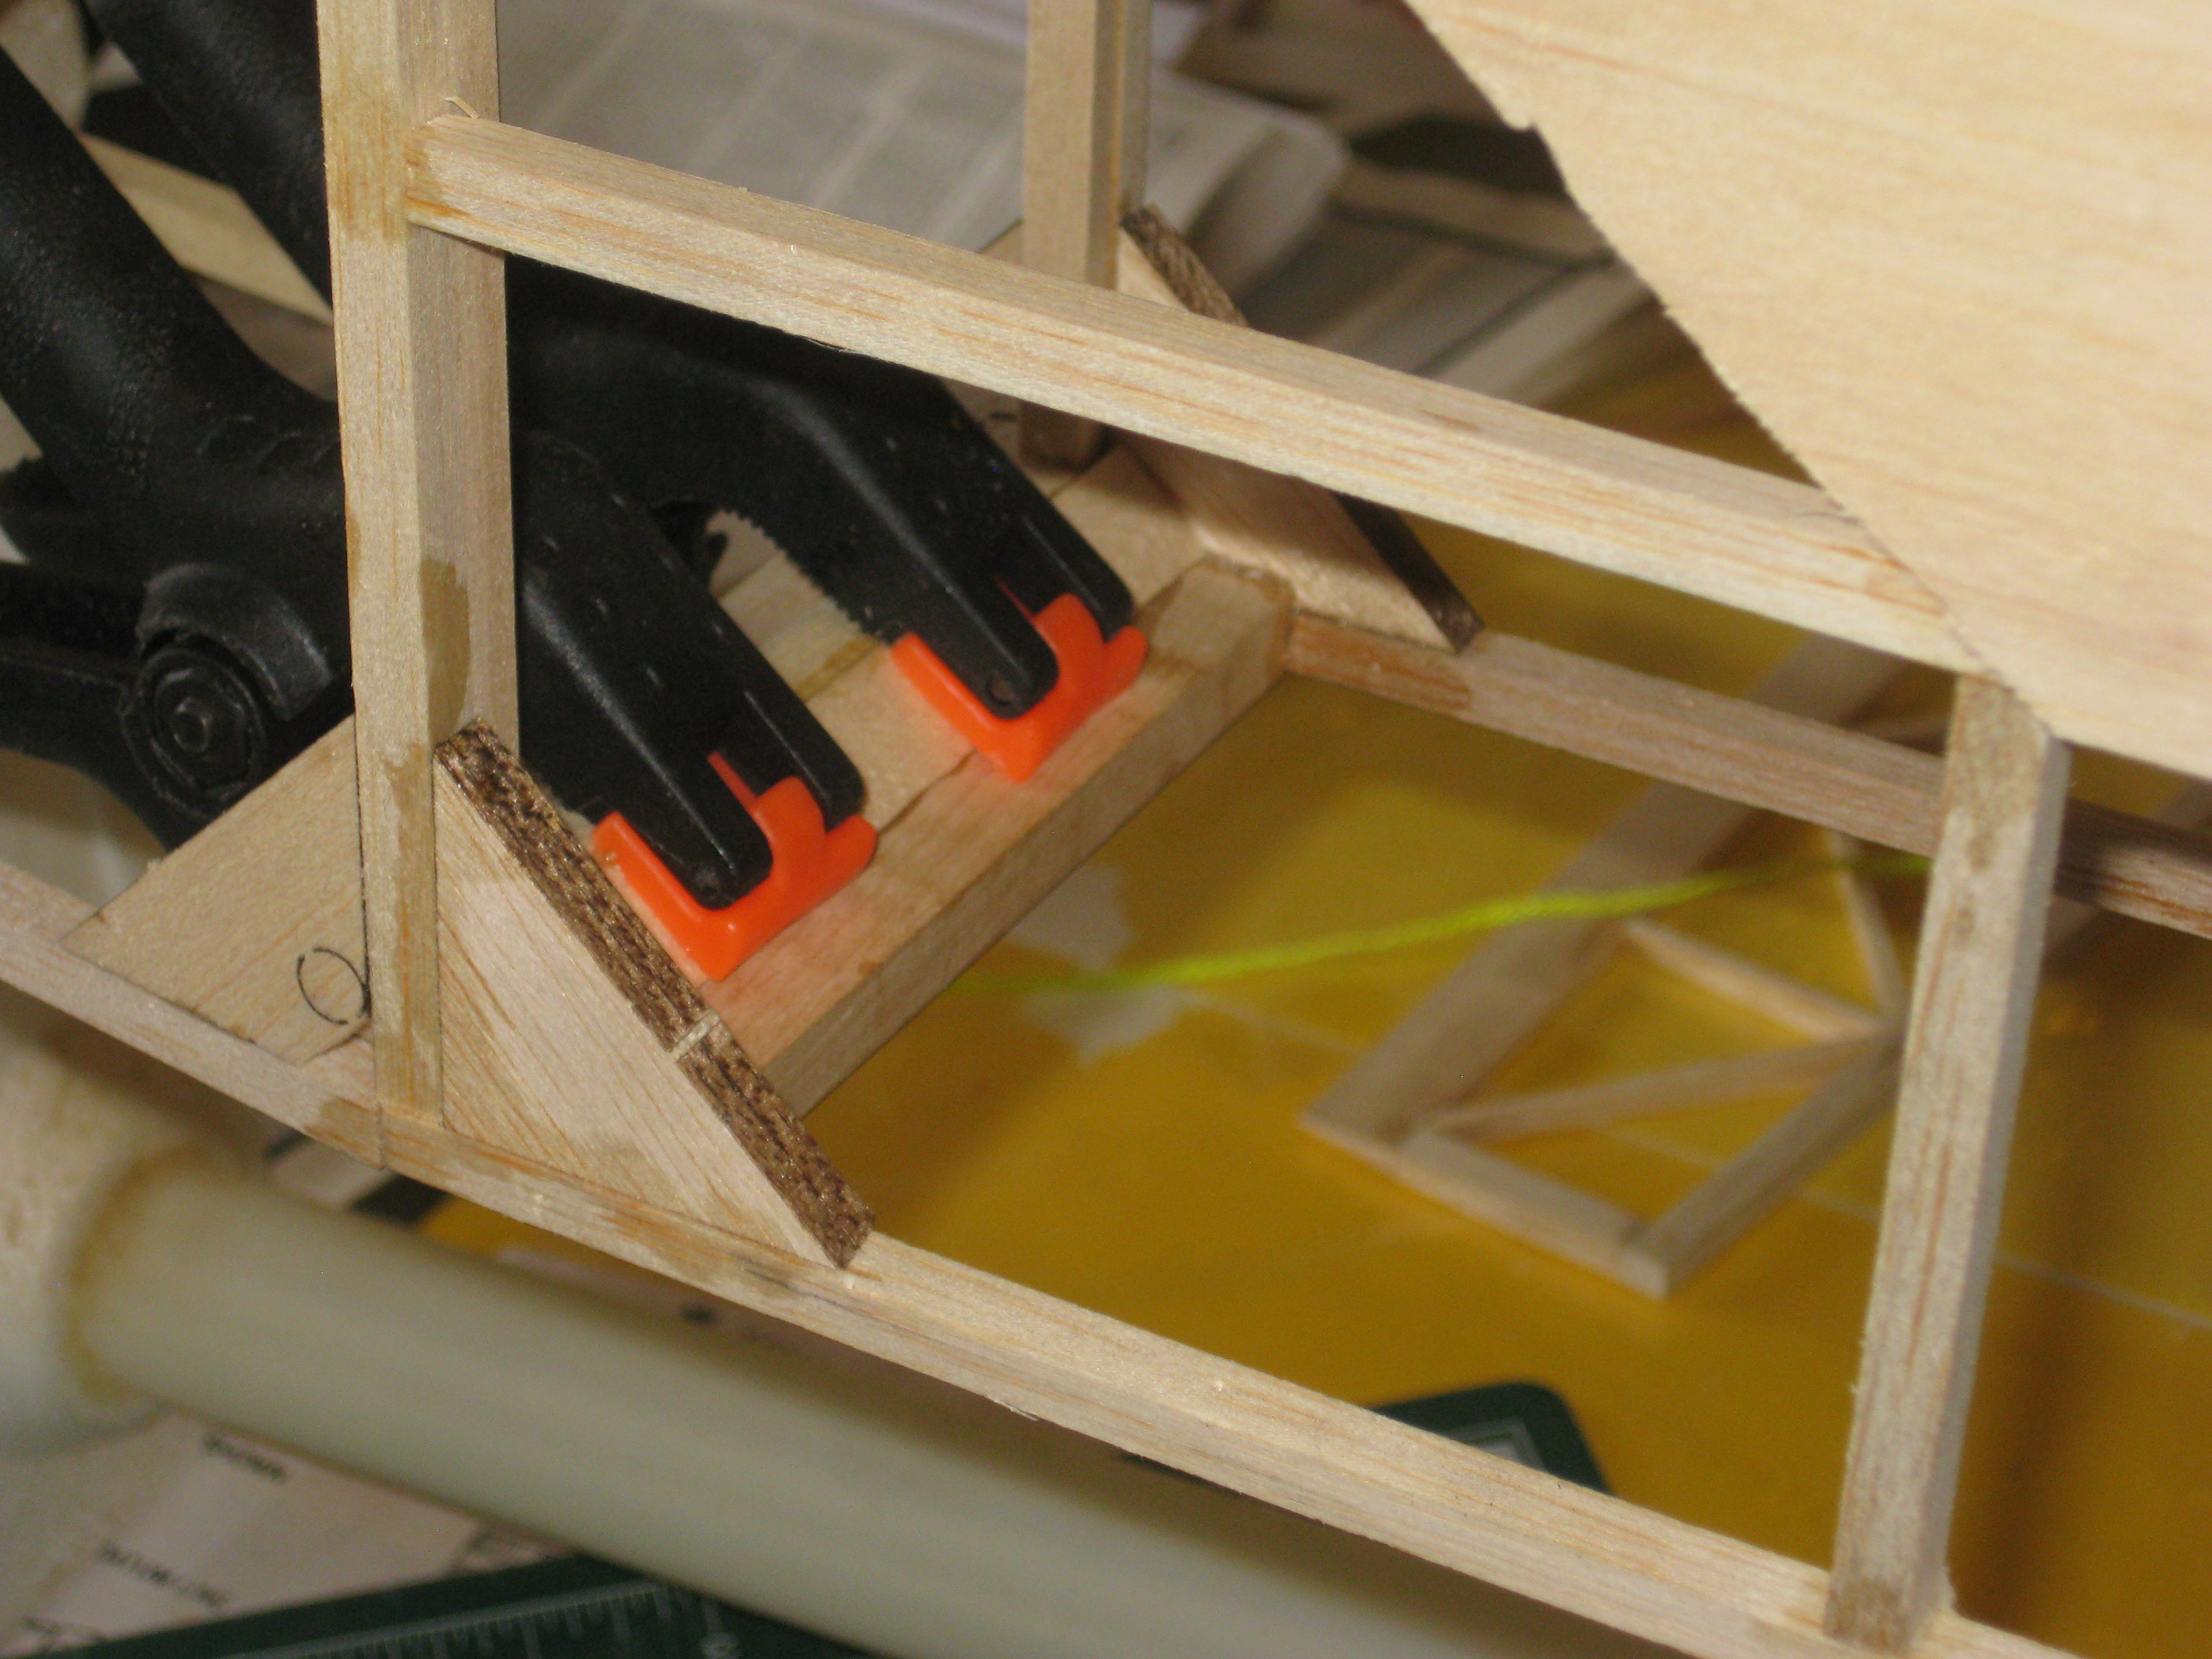
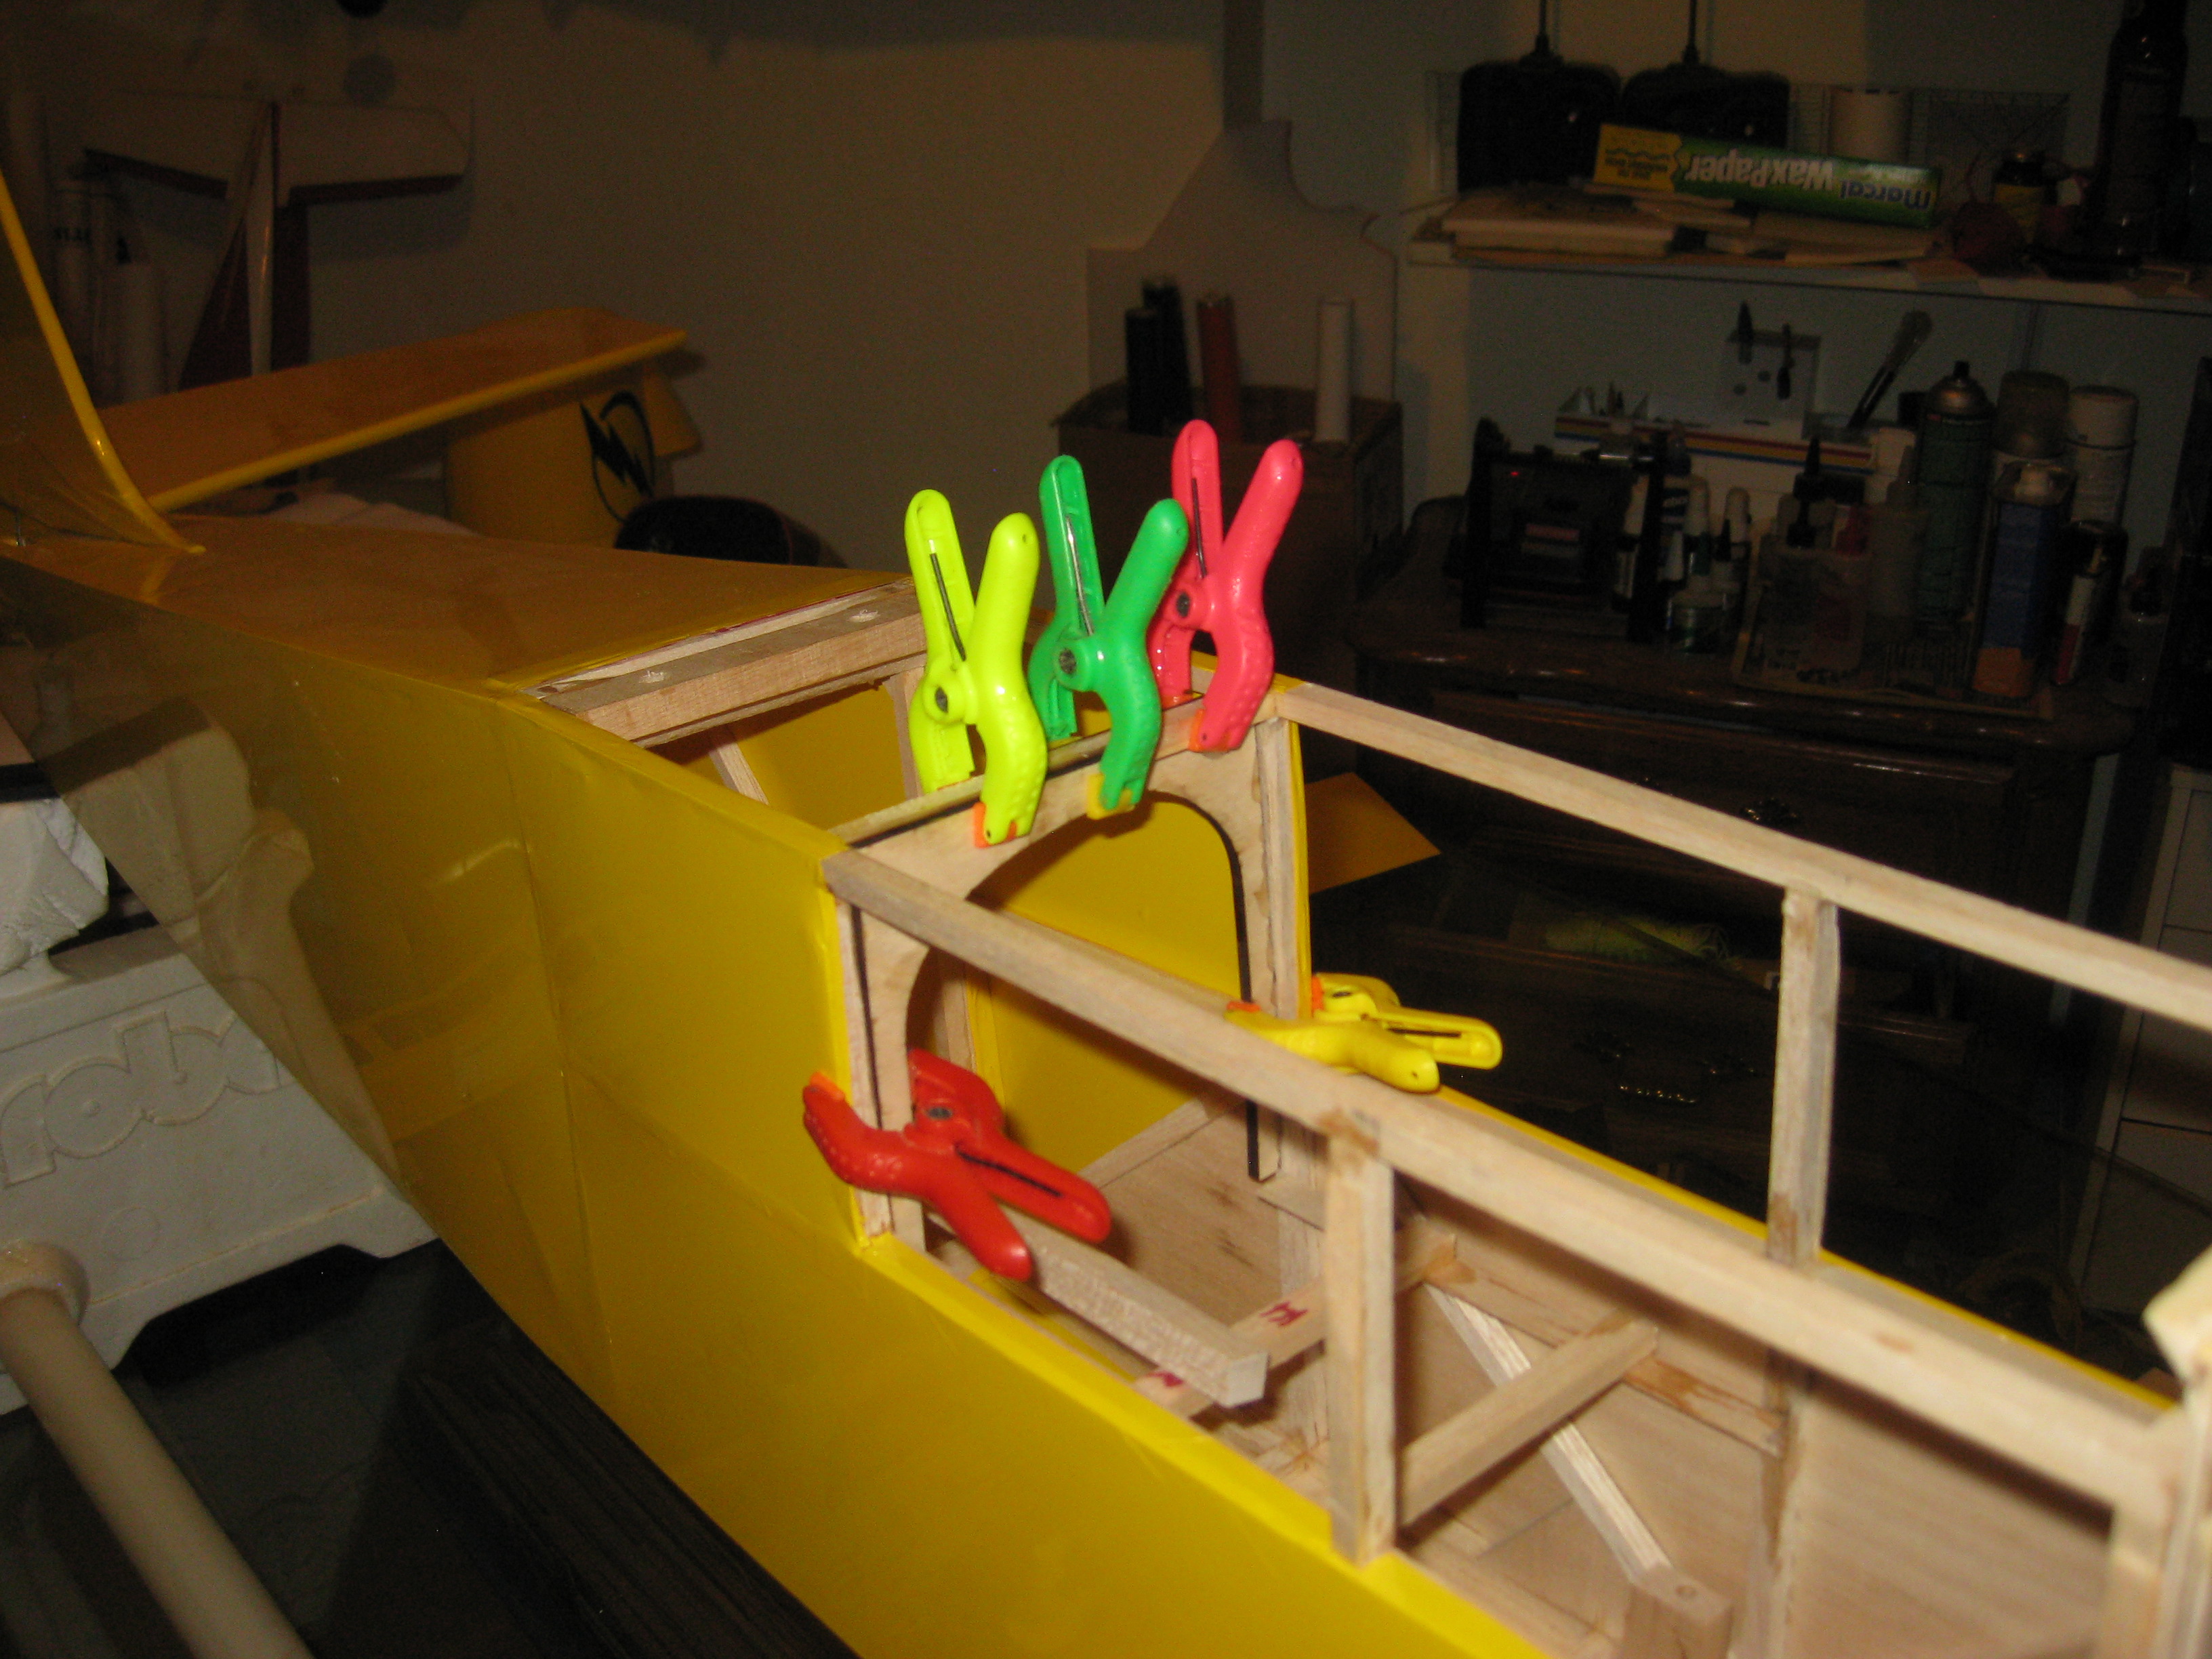
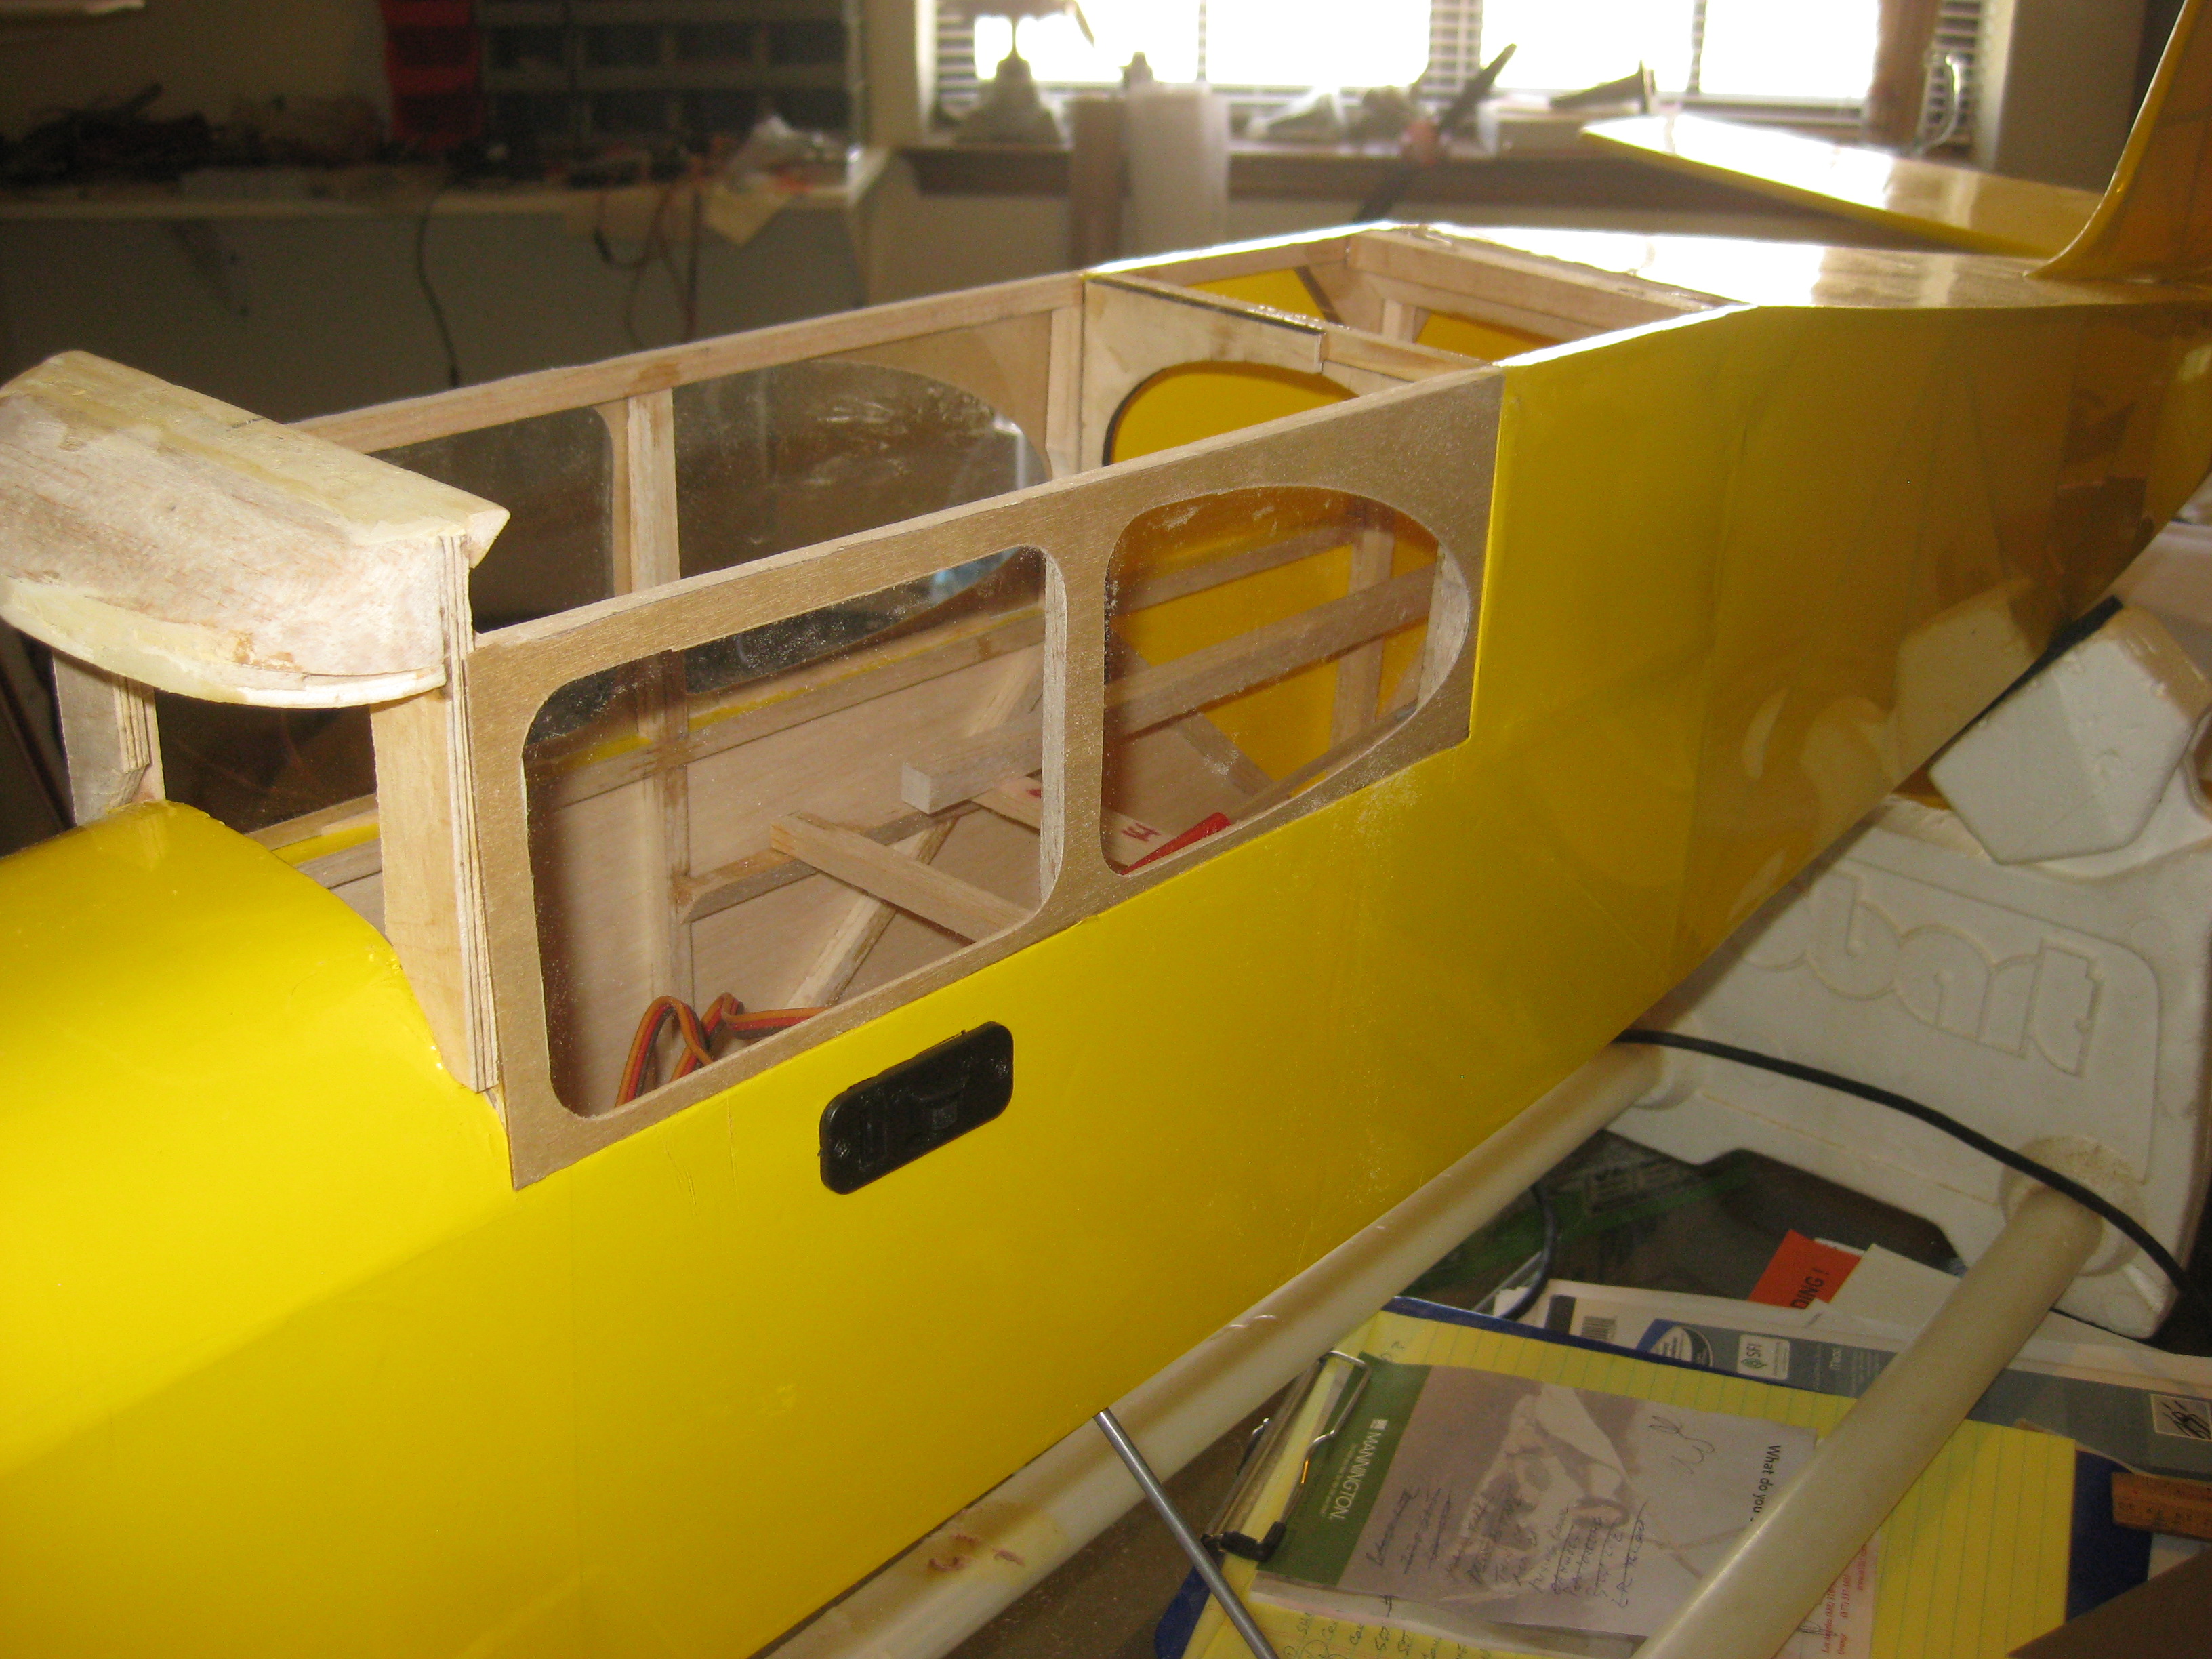
OK. As mentioned I have also started the fuse. About the only modification so far is the doubler to the front former to the cabin space for the wing to be able to attach, rather than rubber bands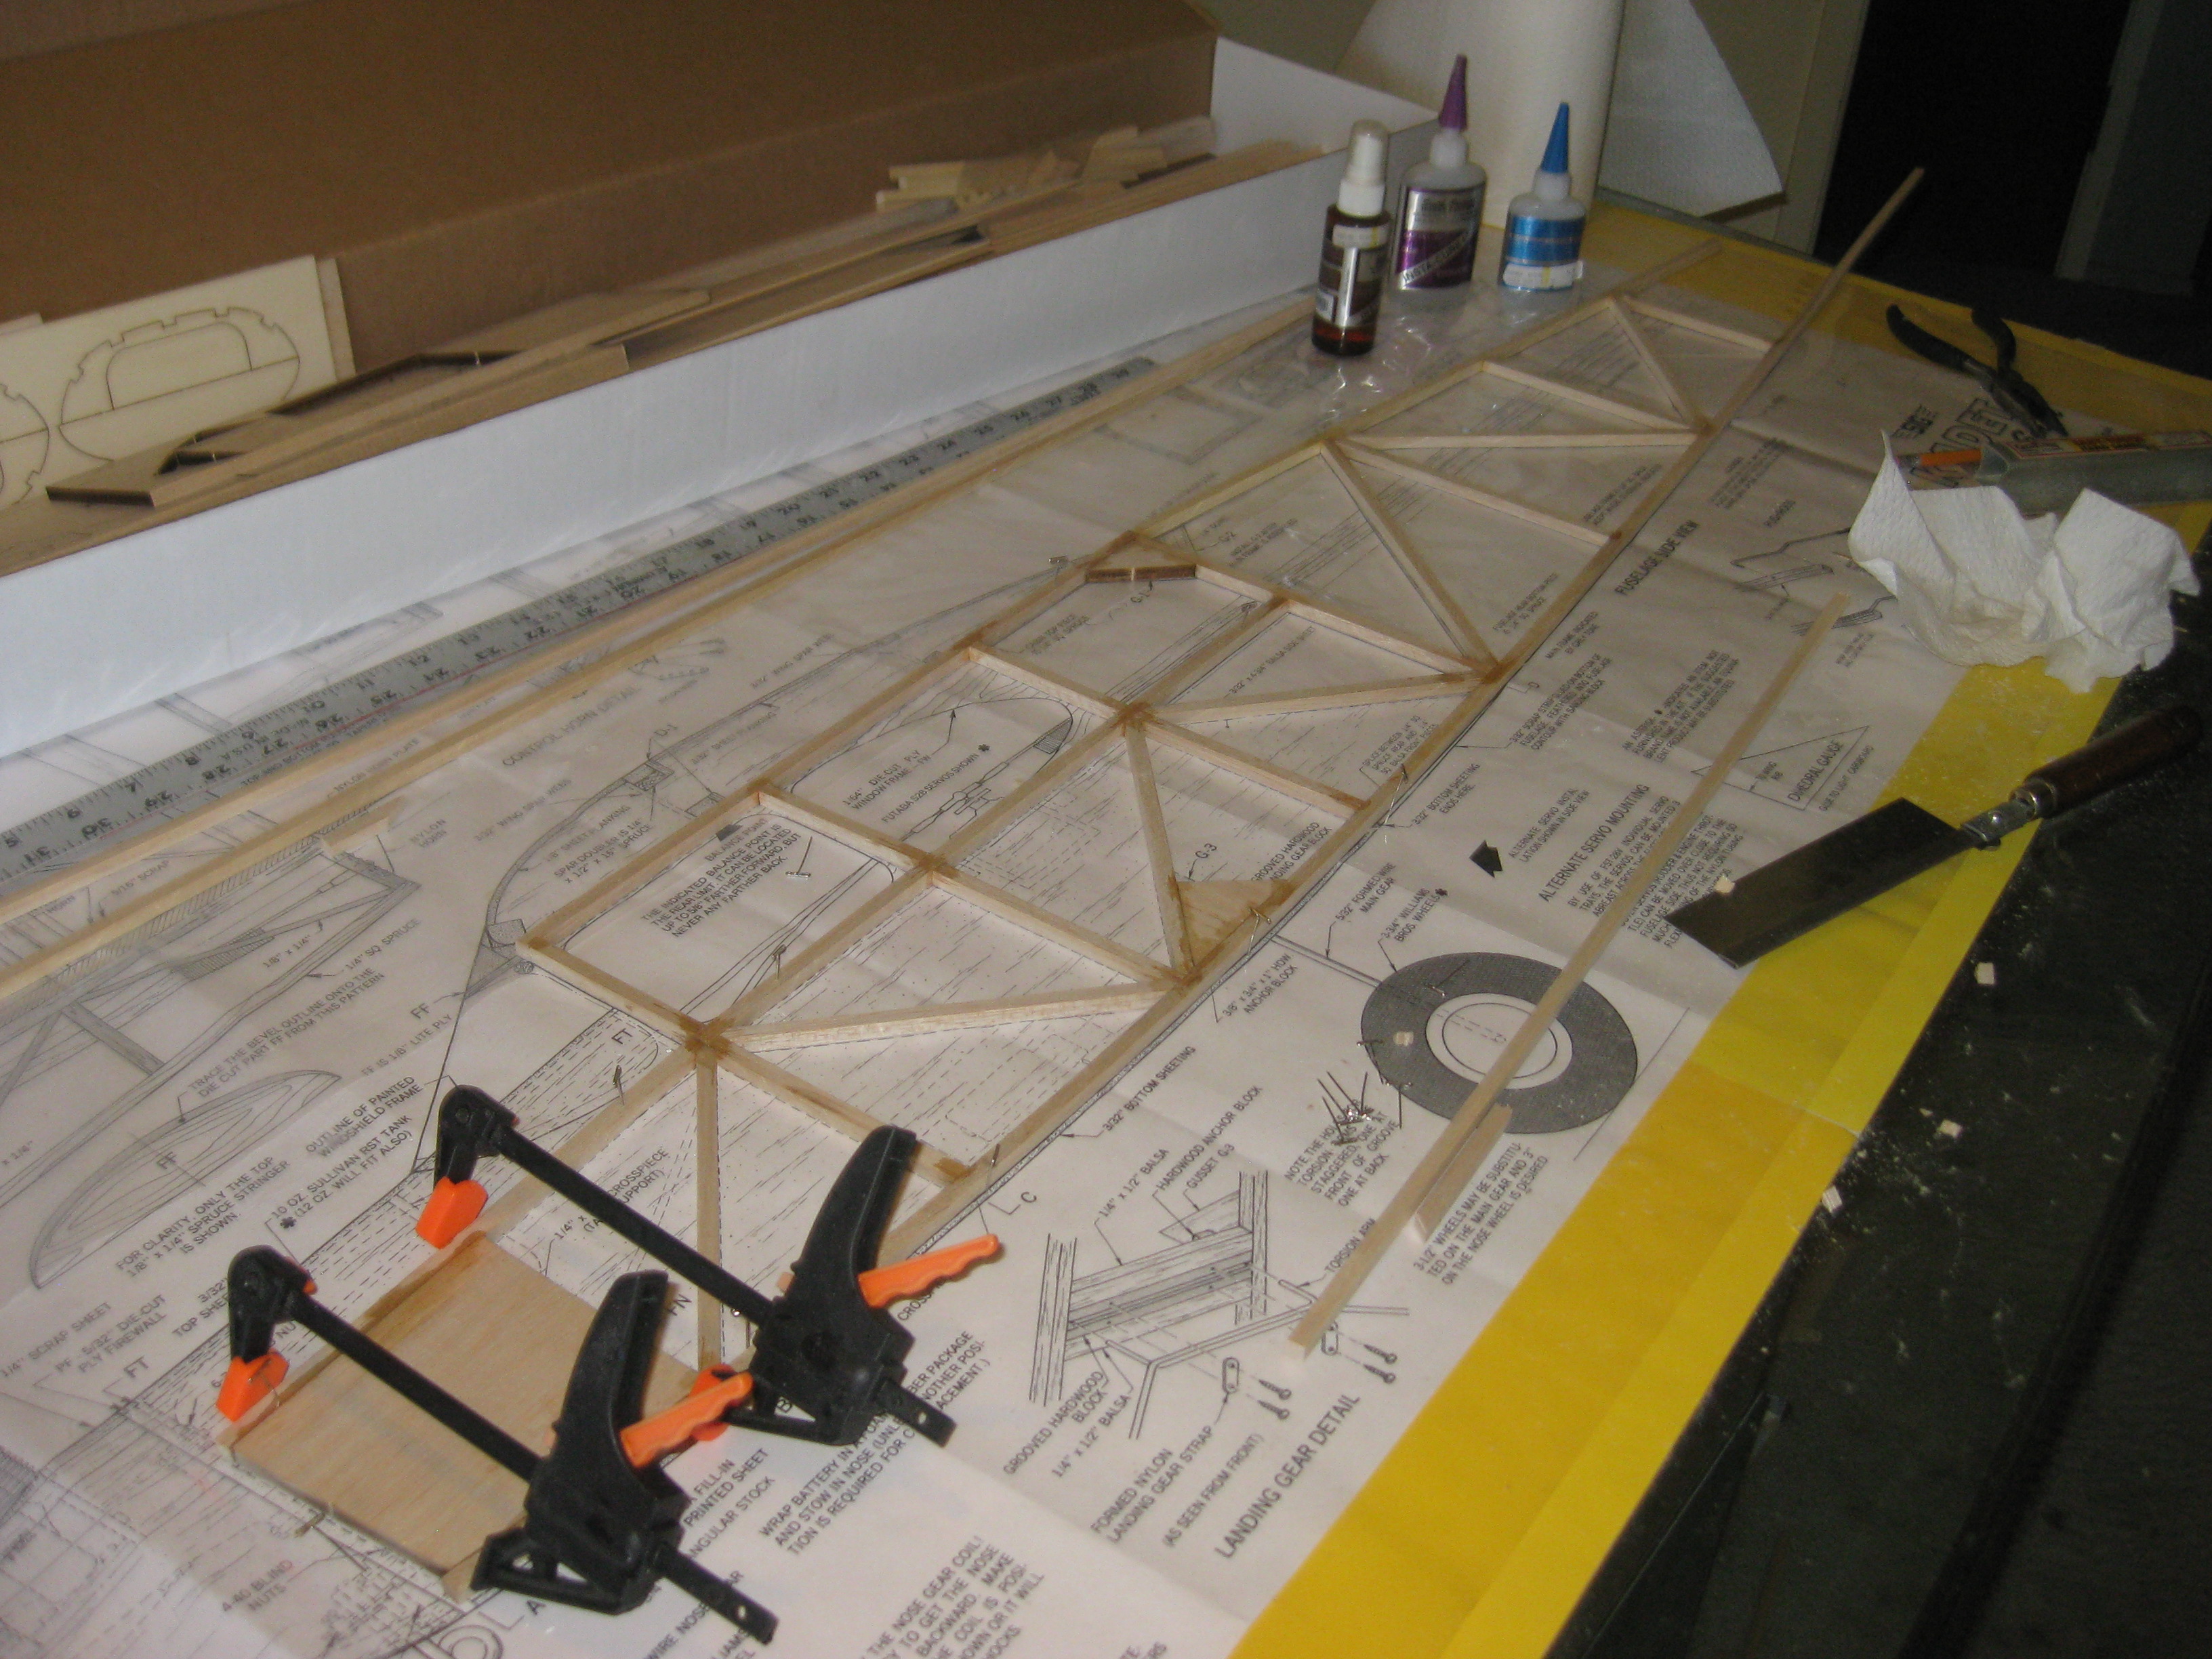
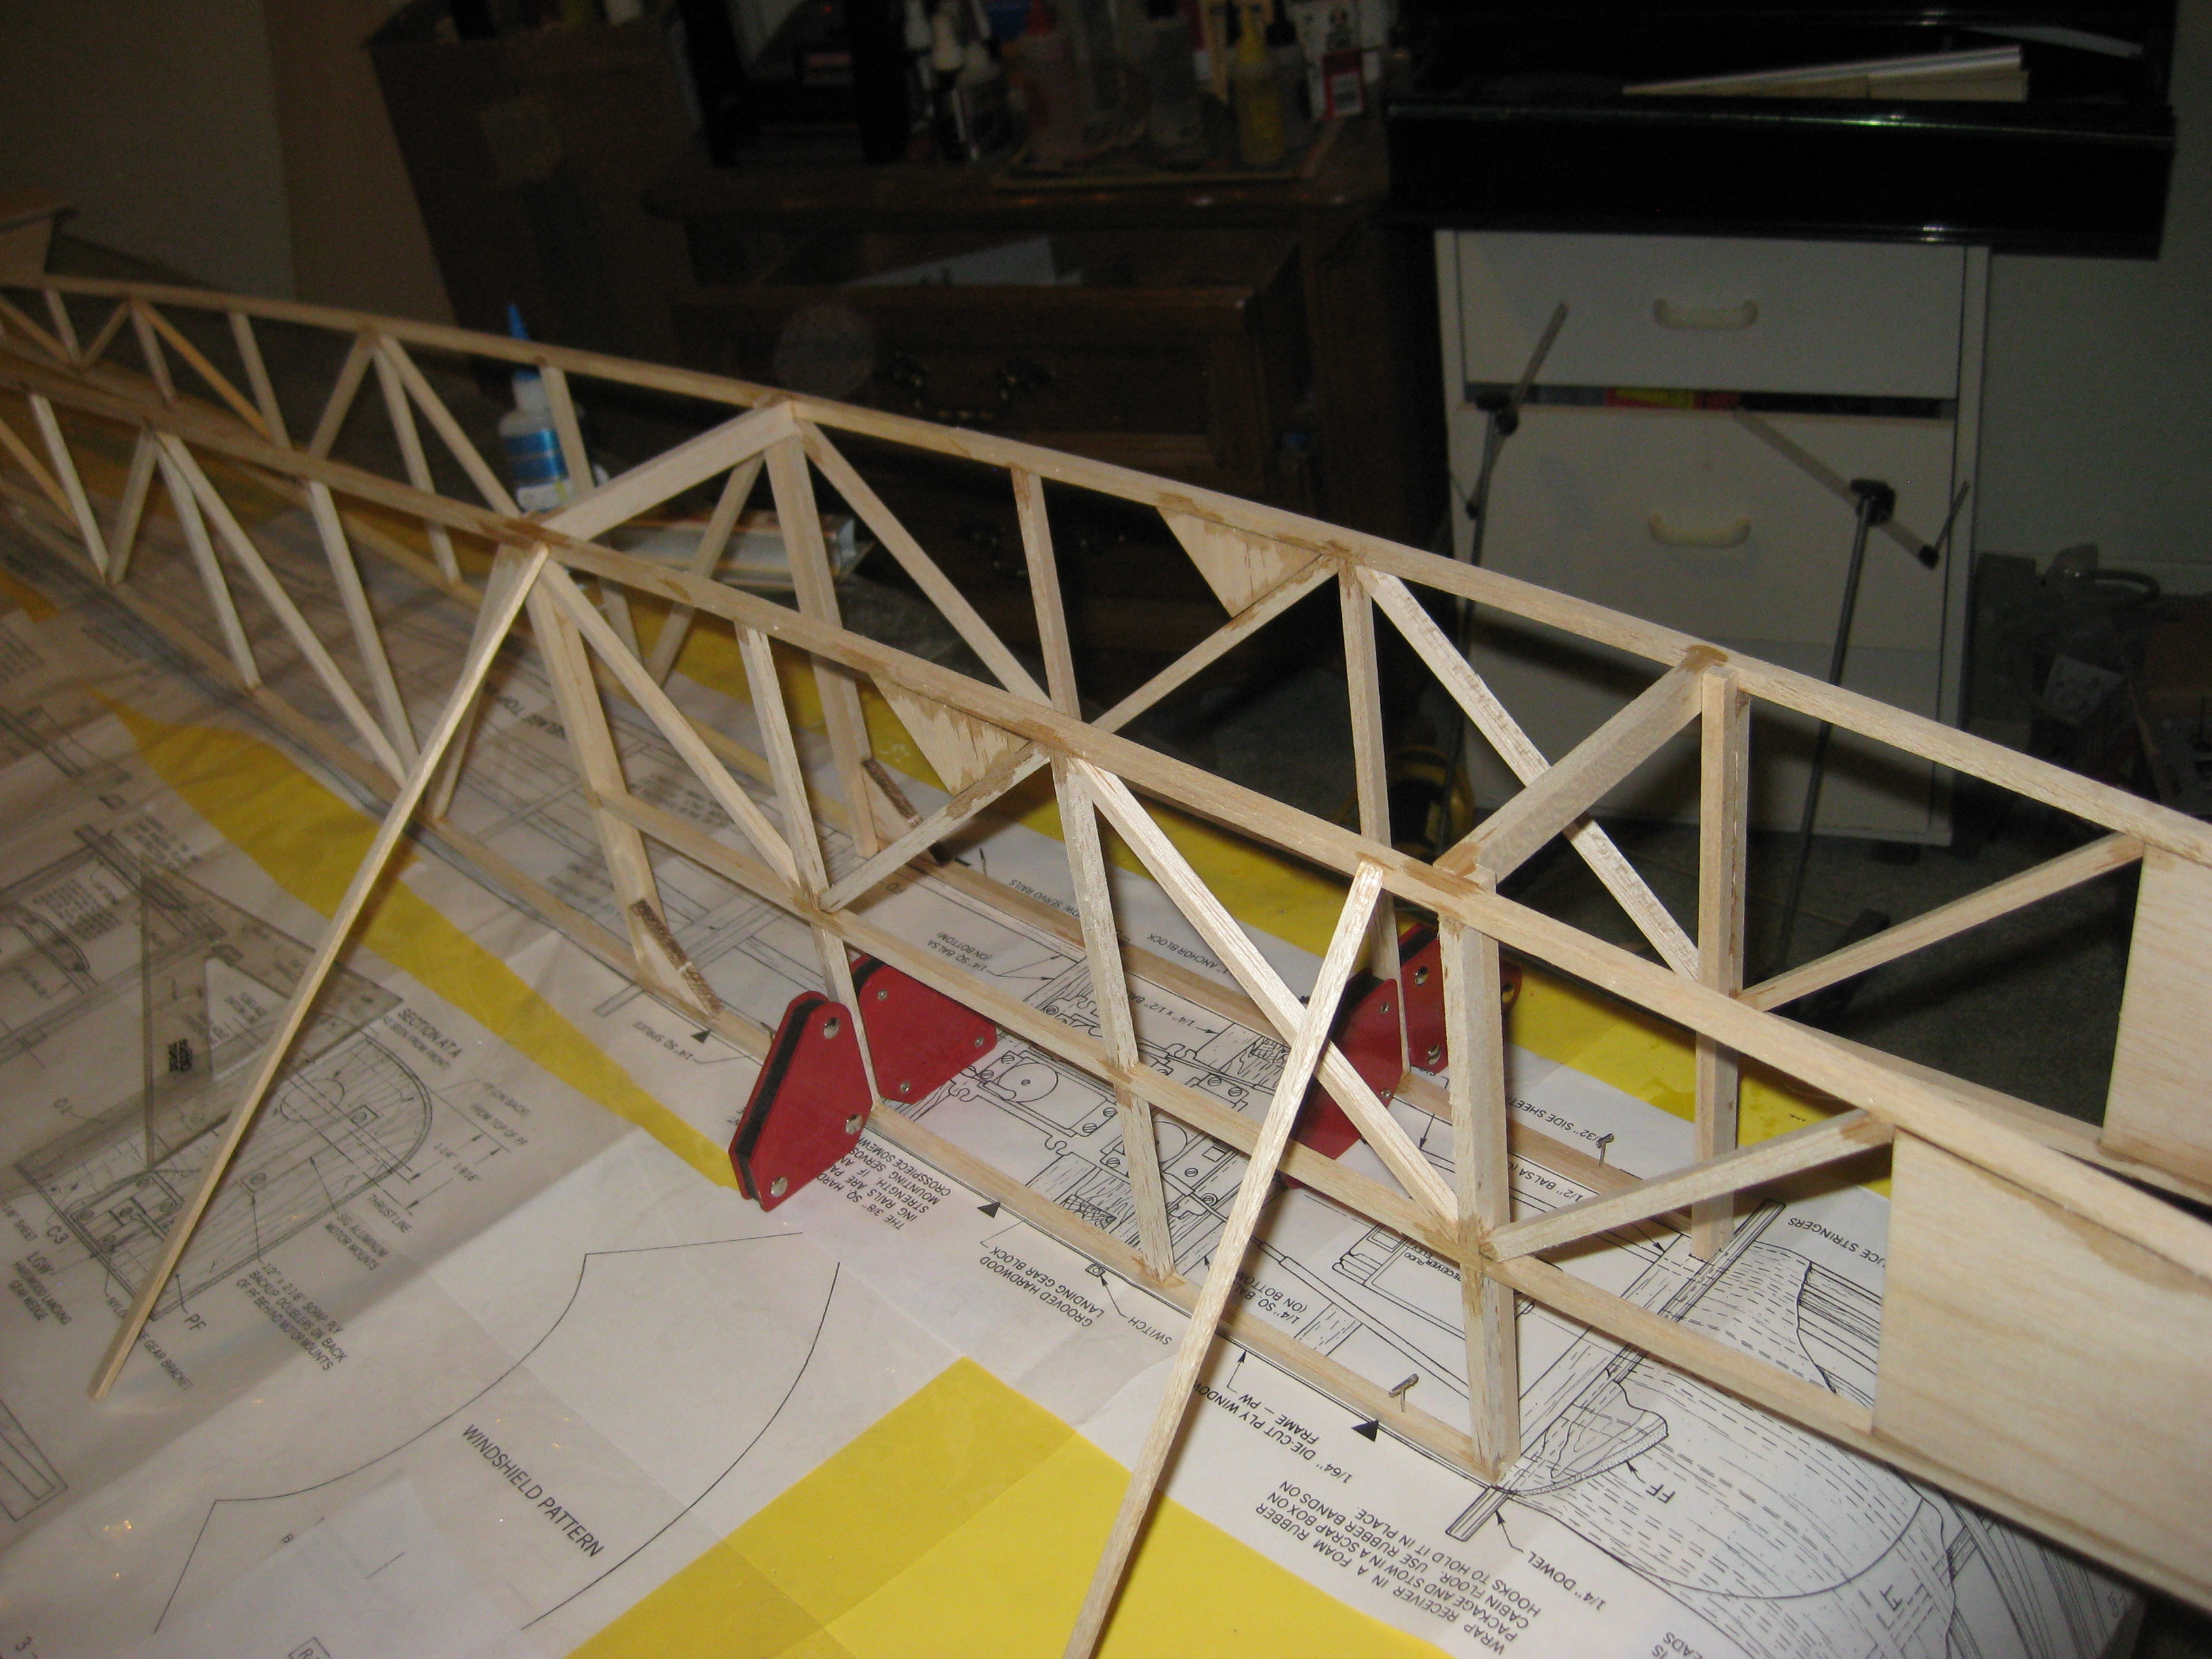
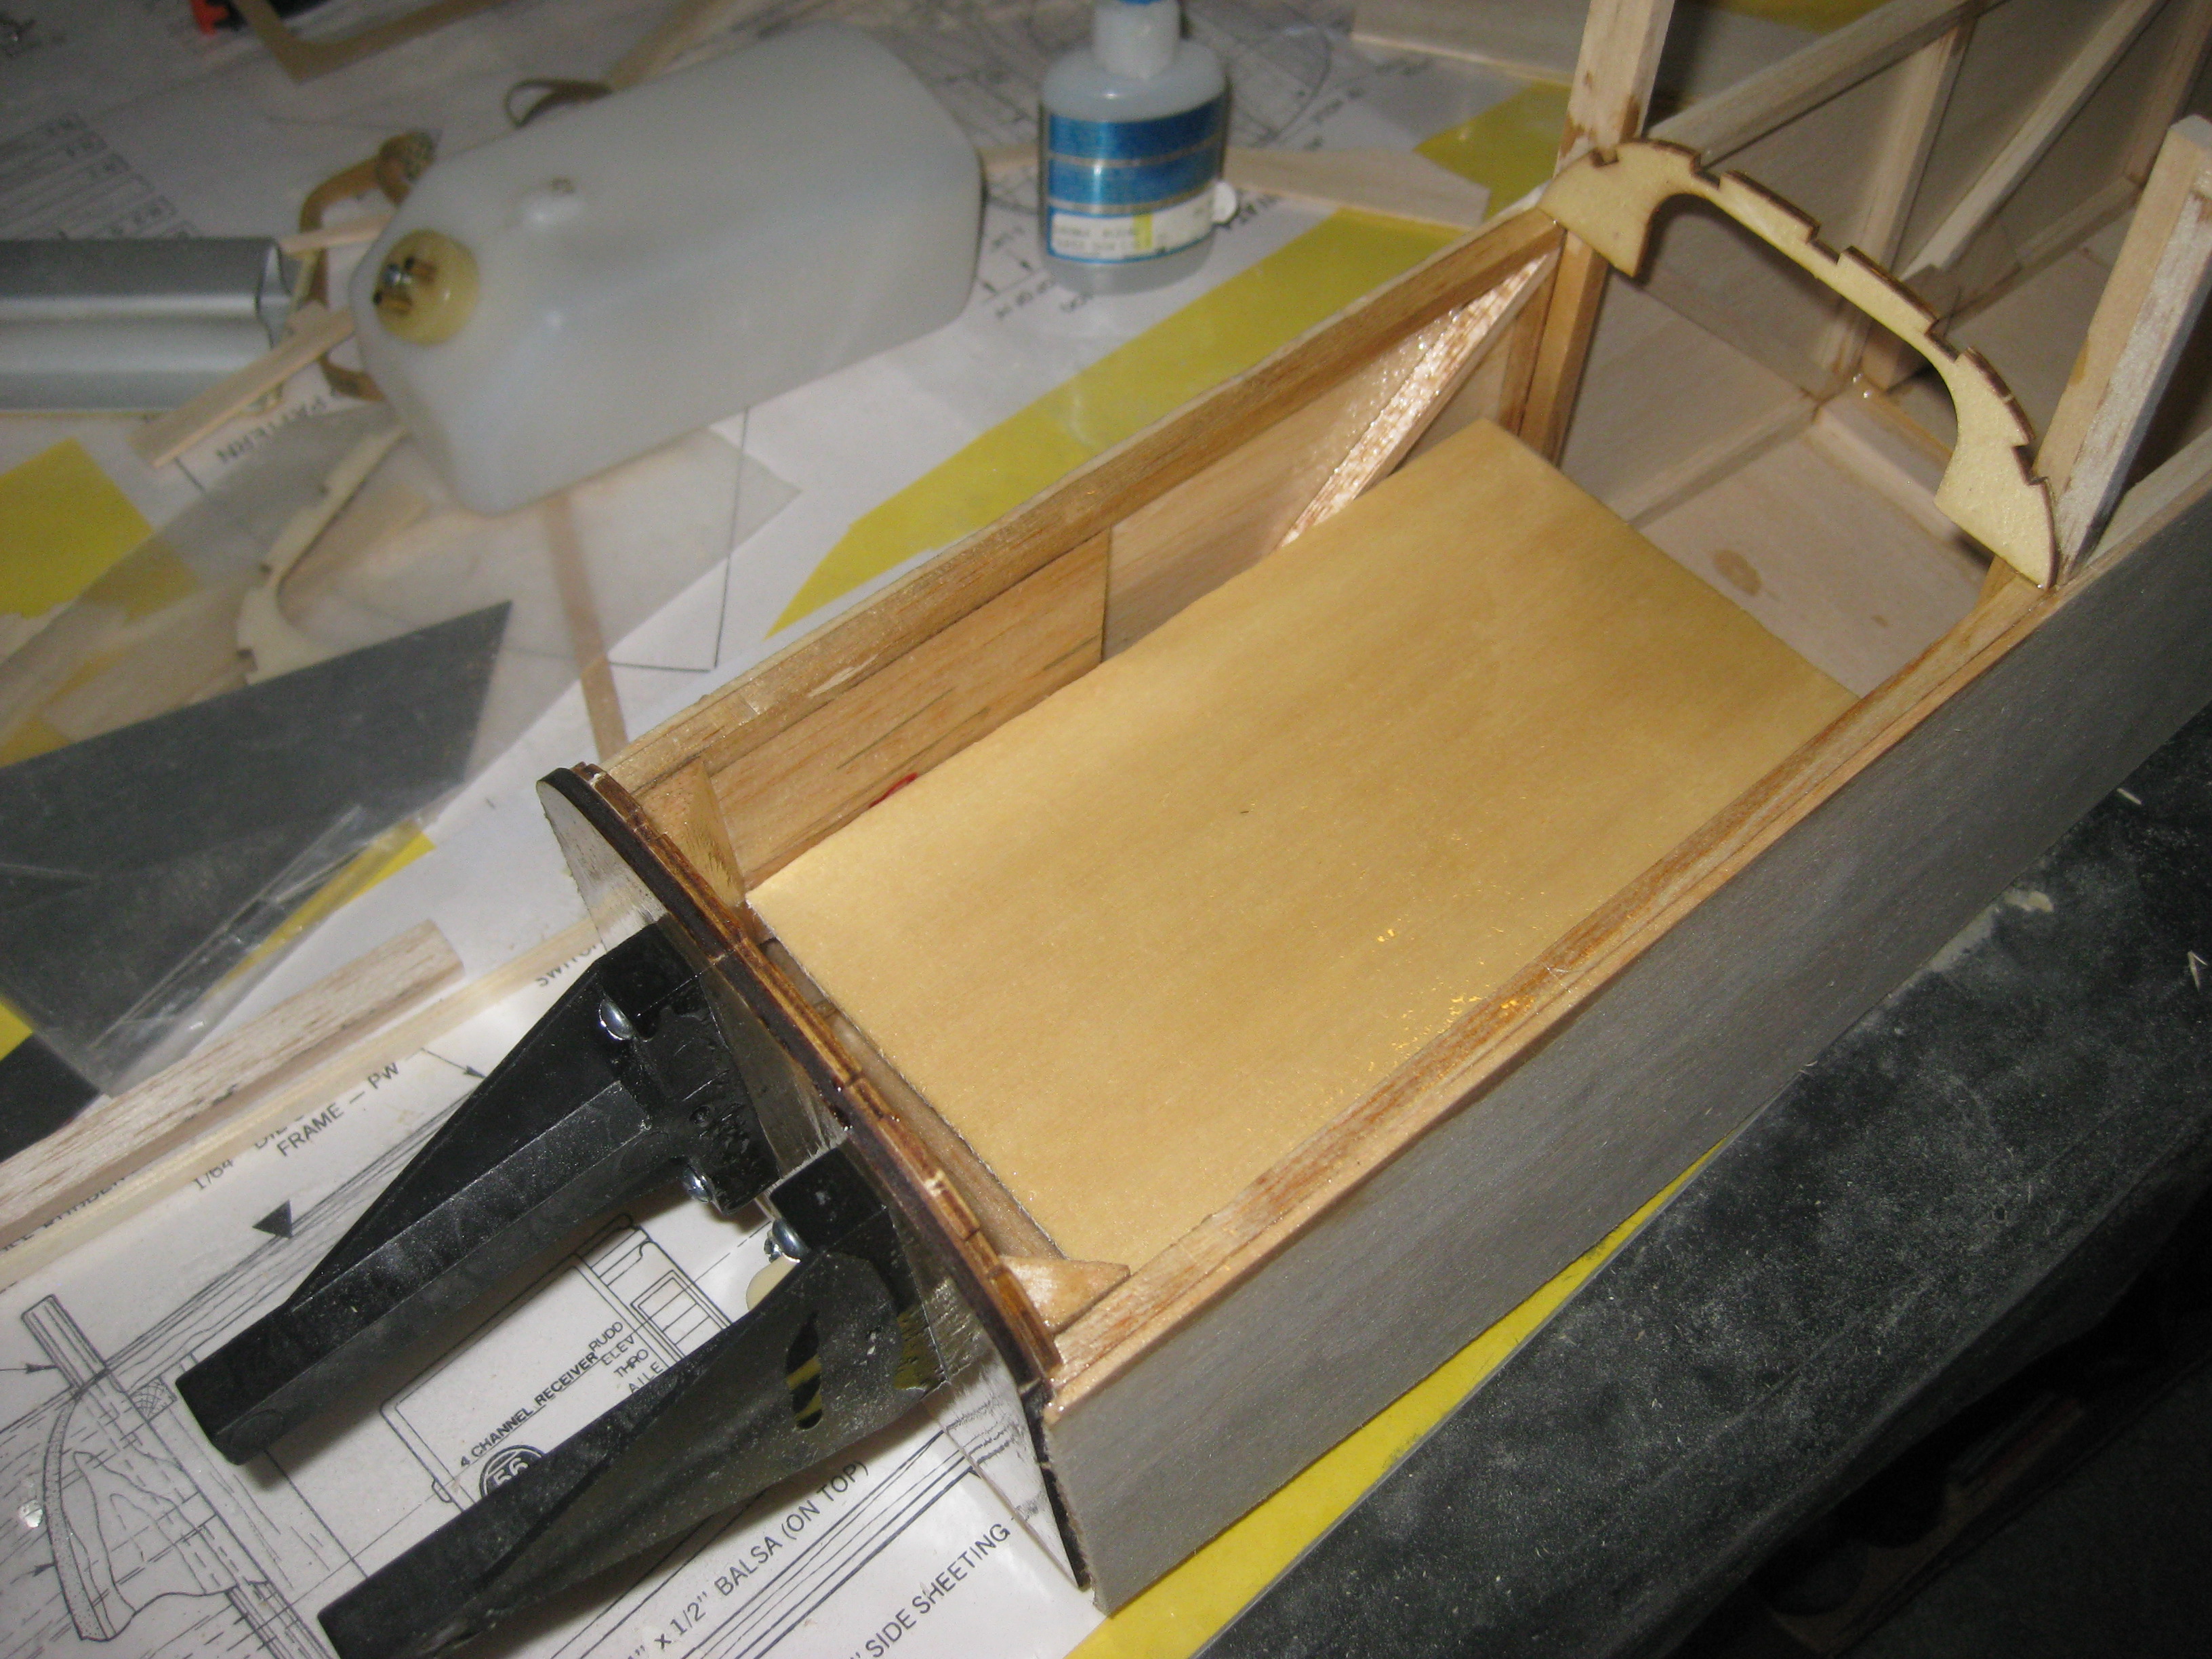
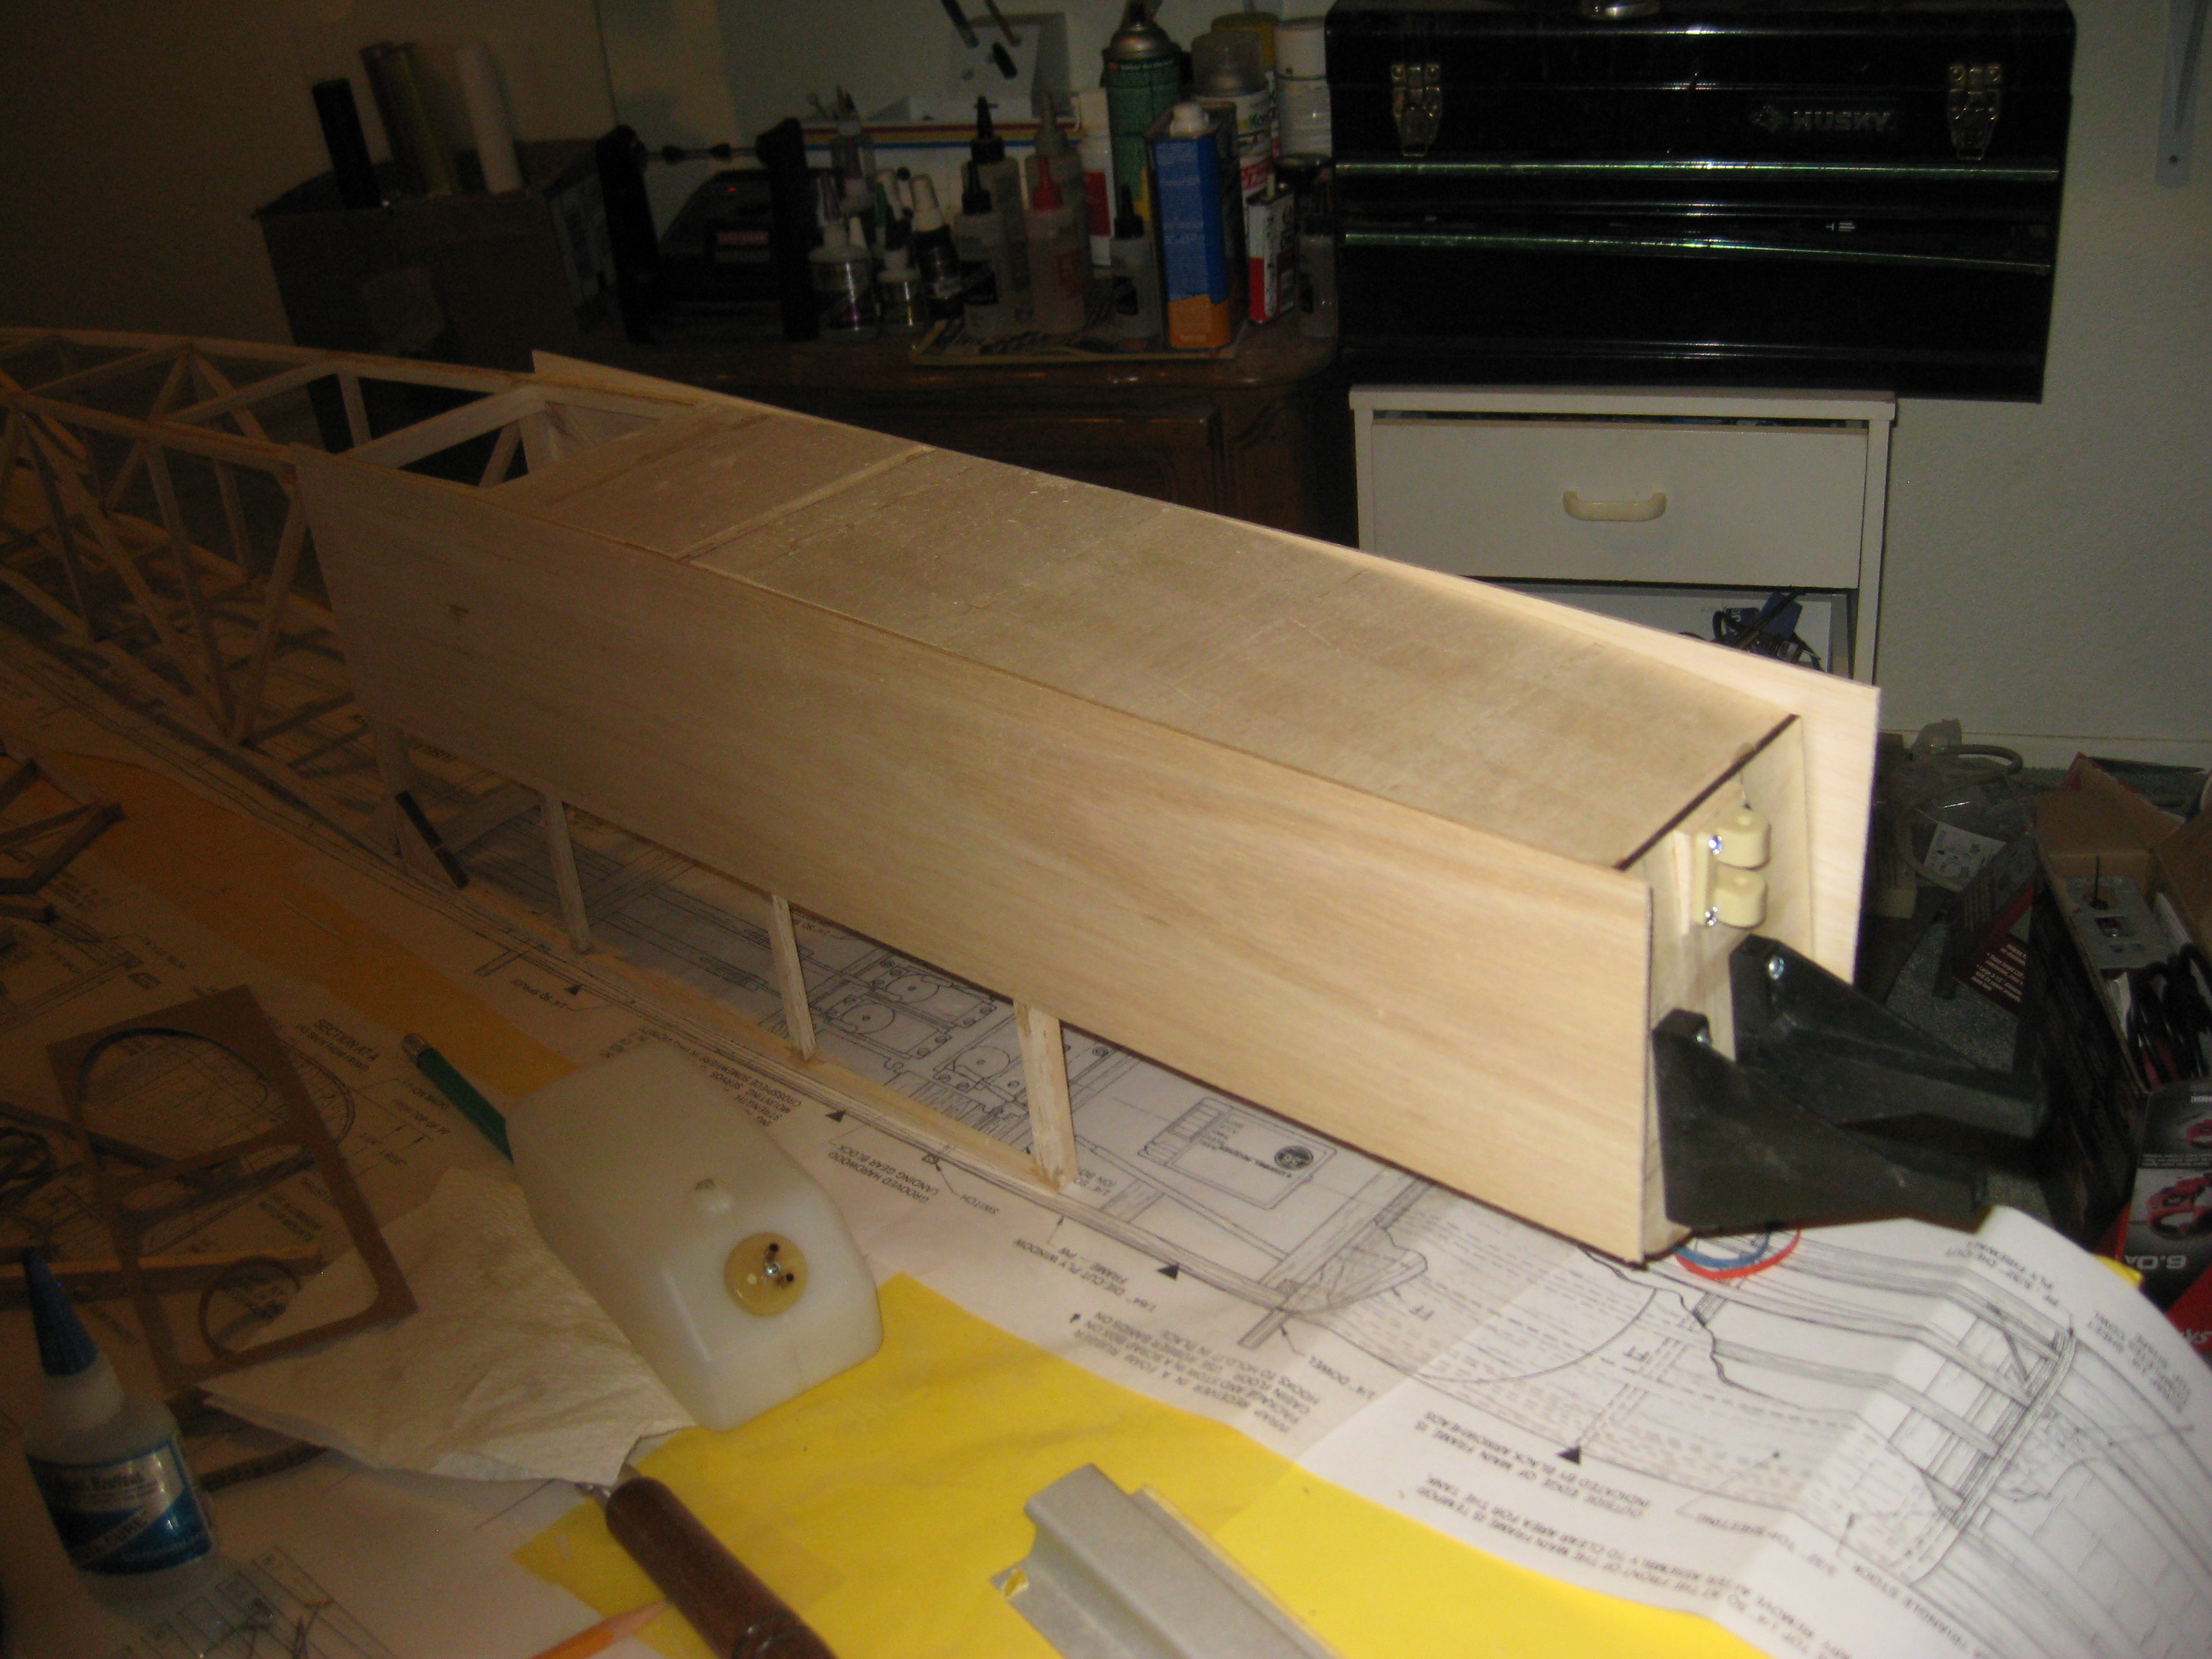

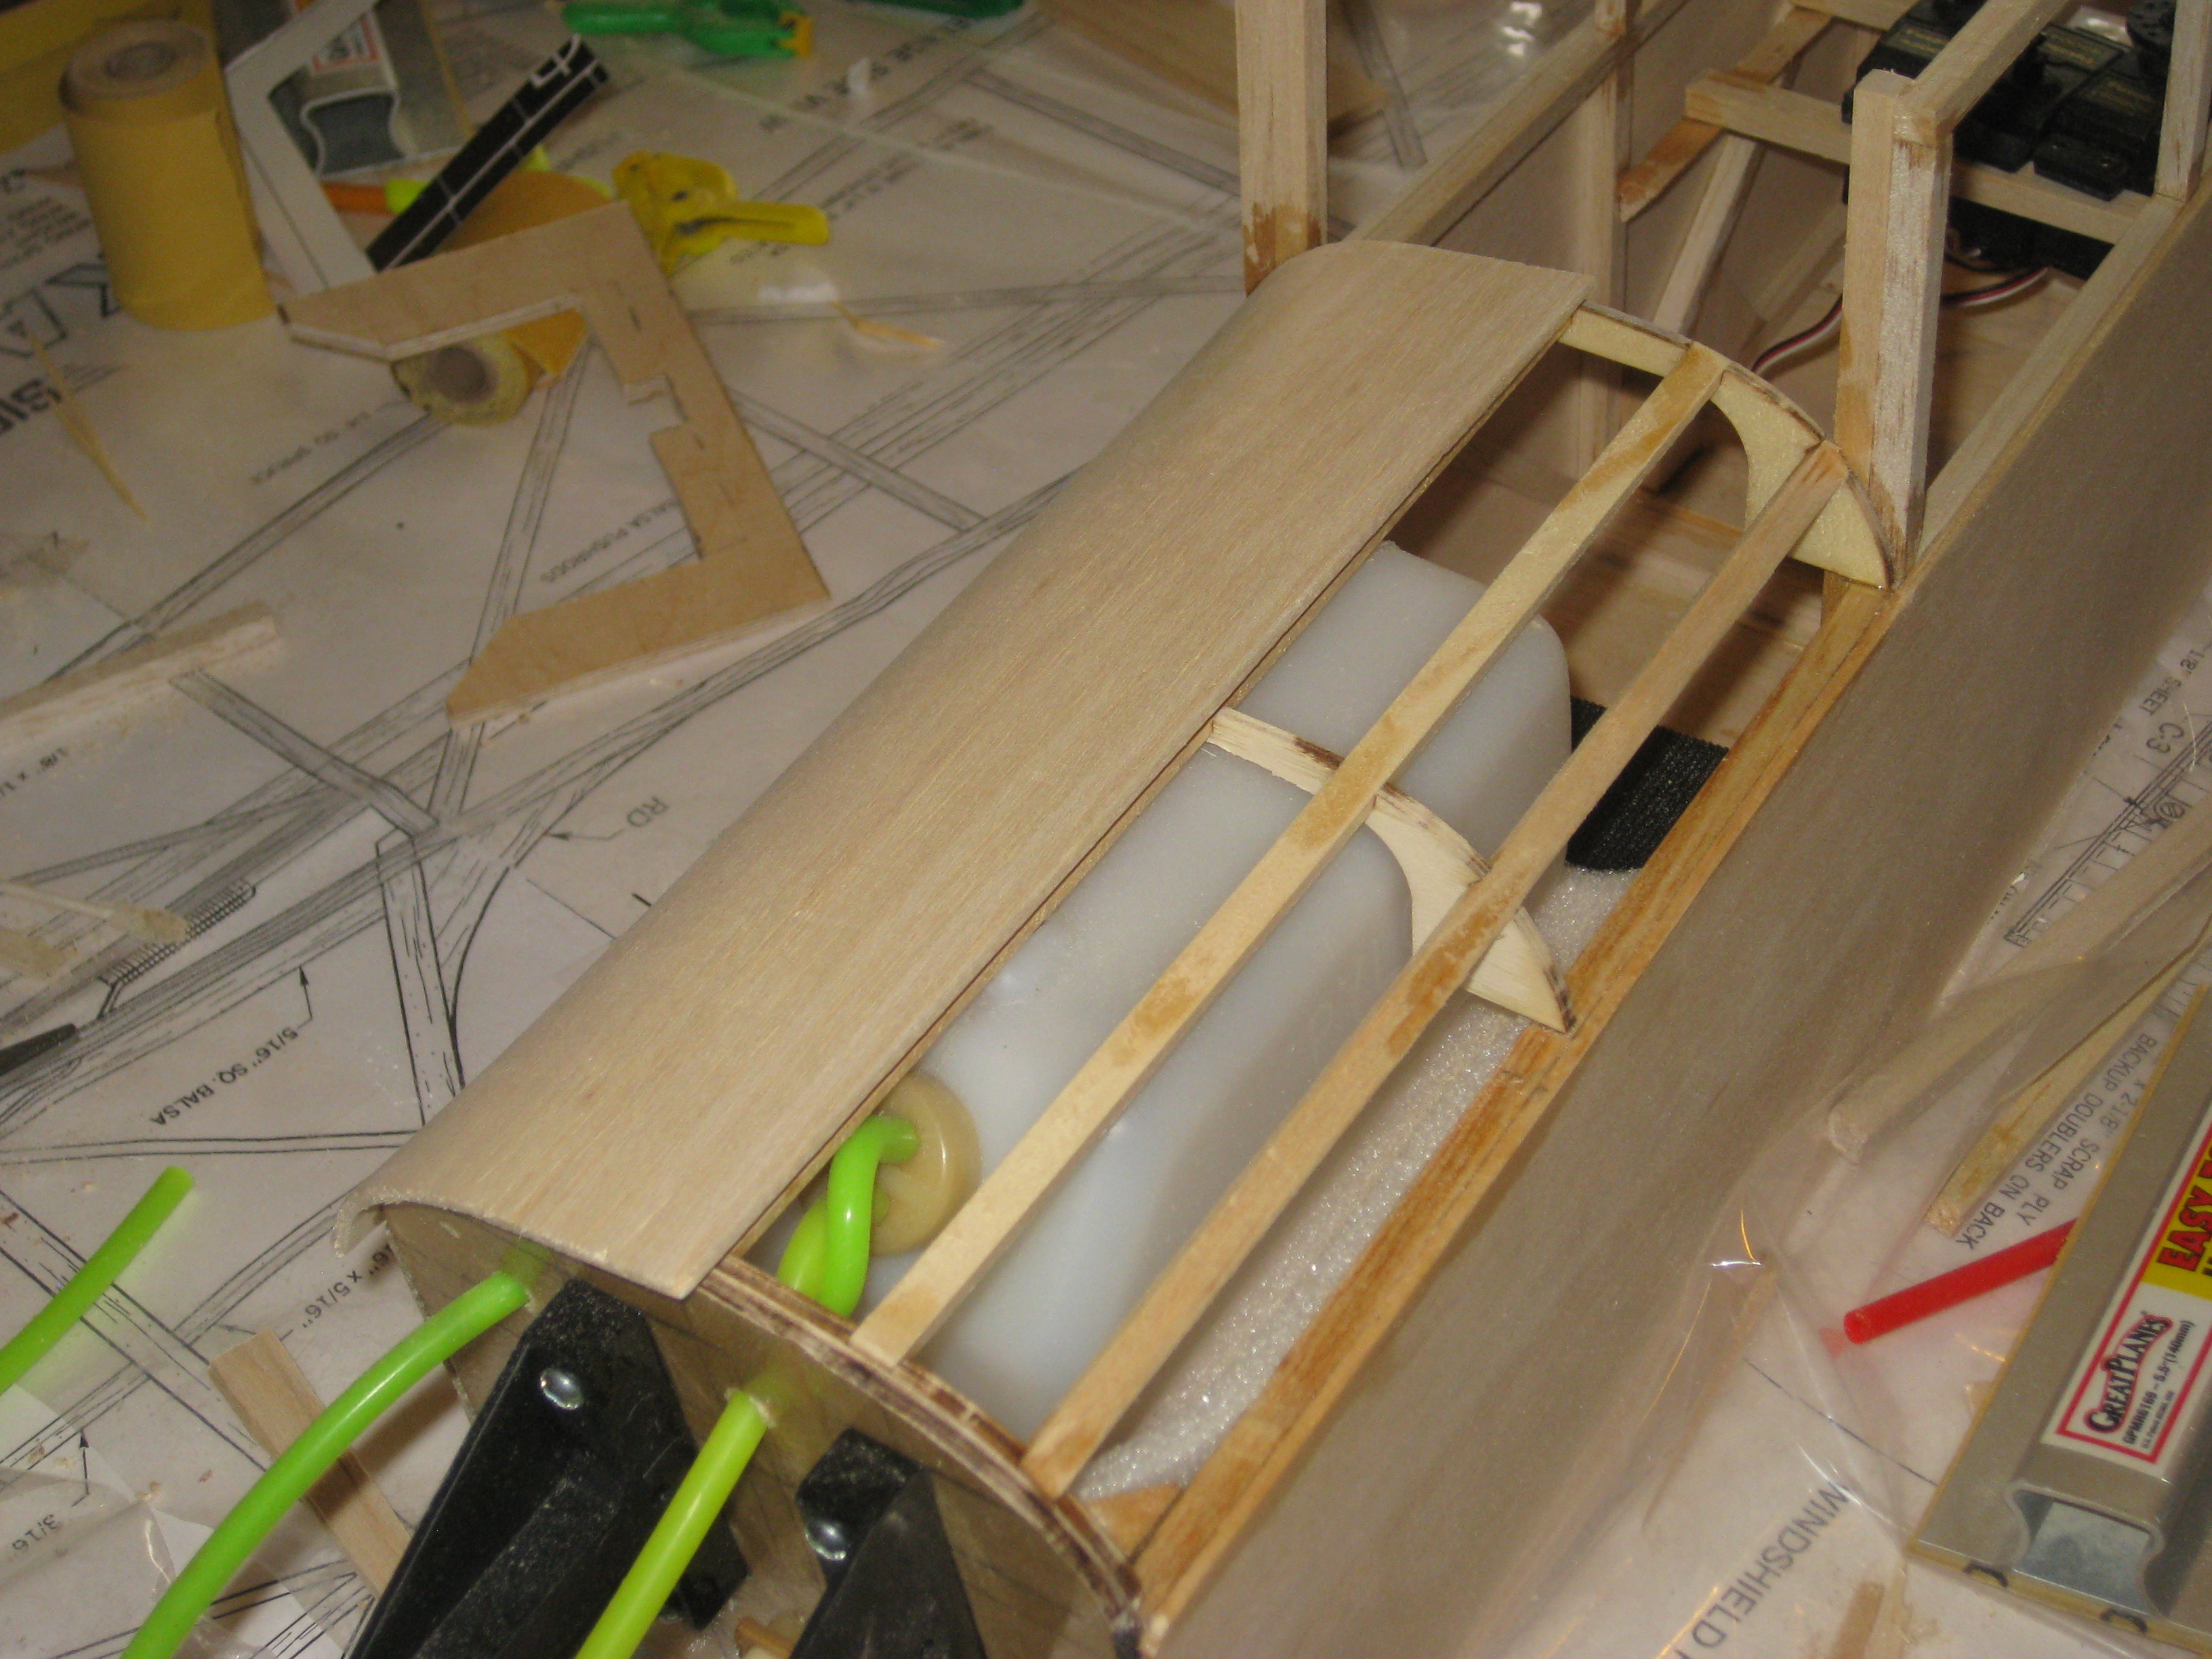
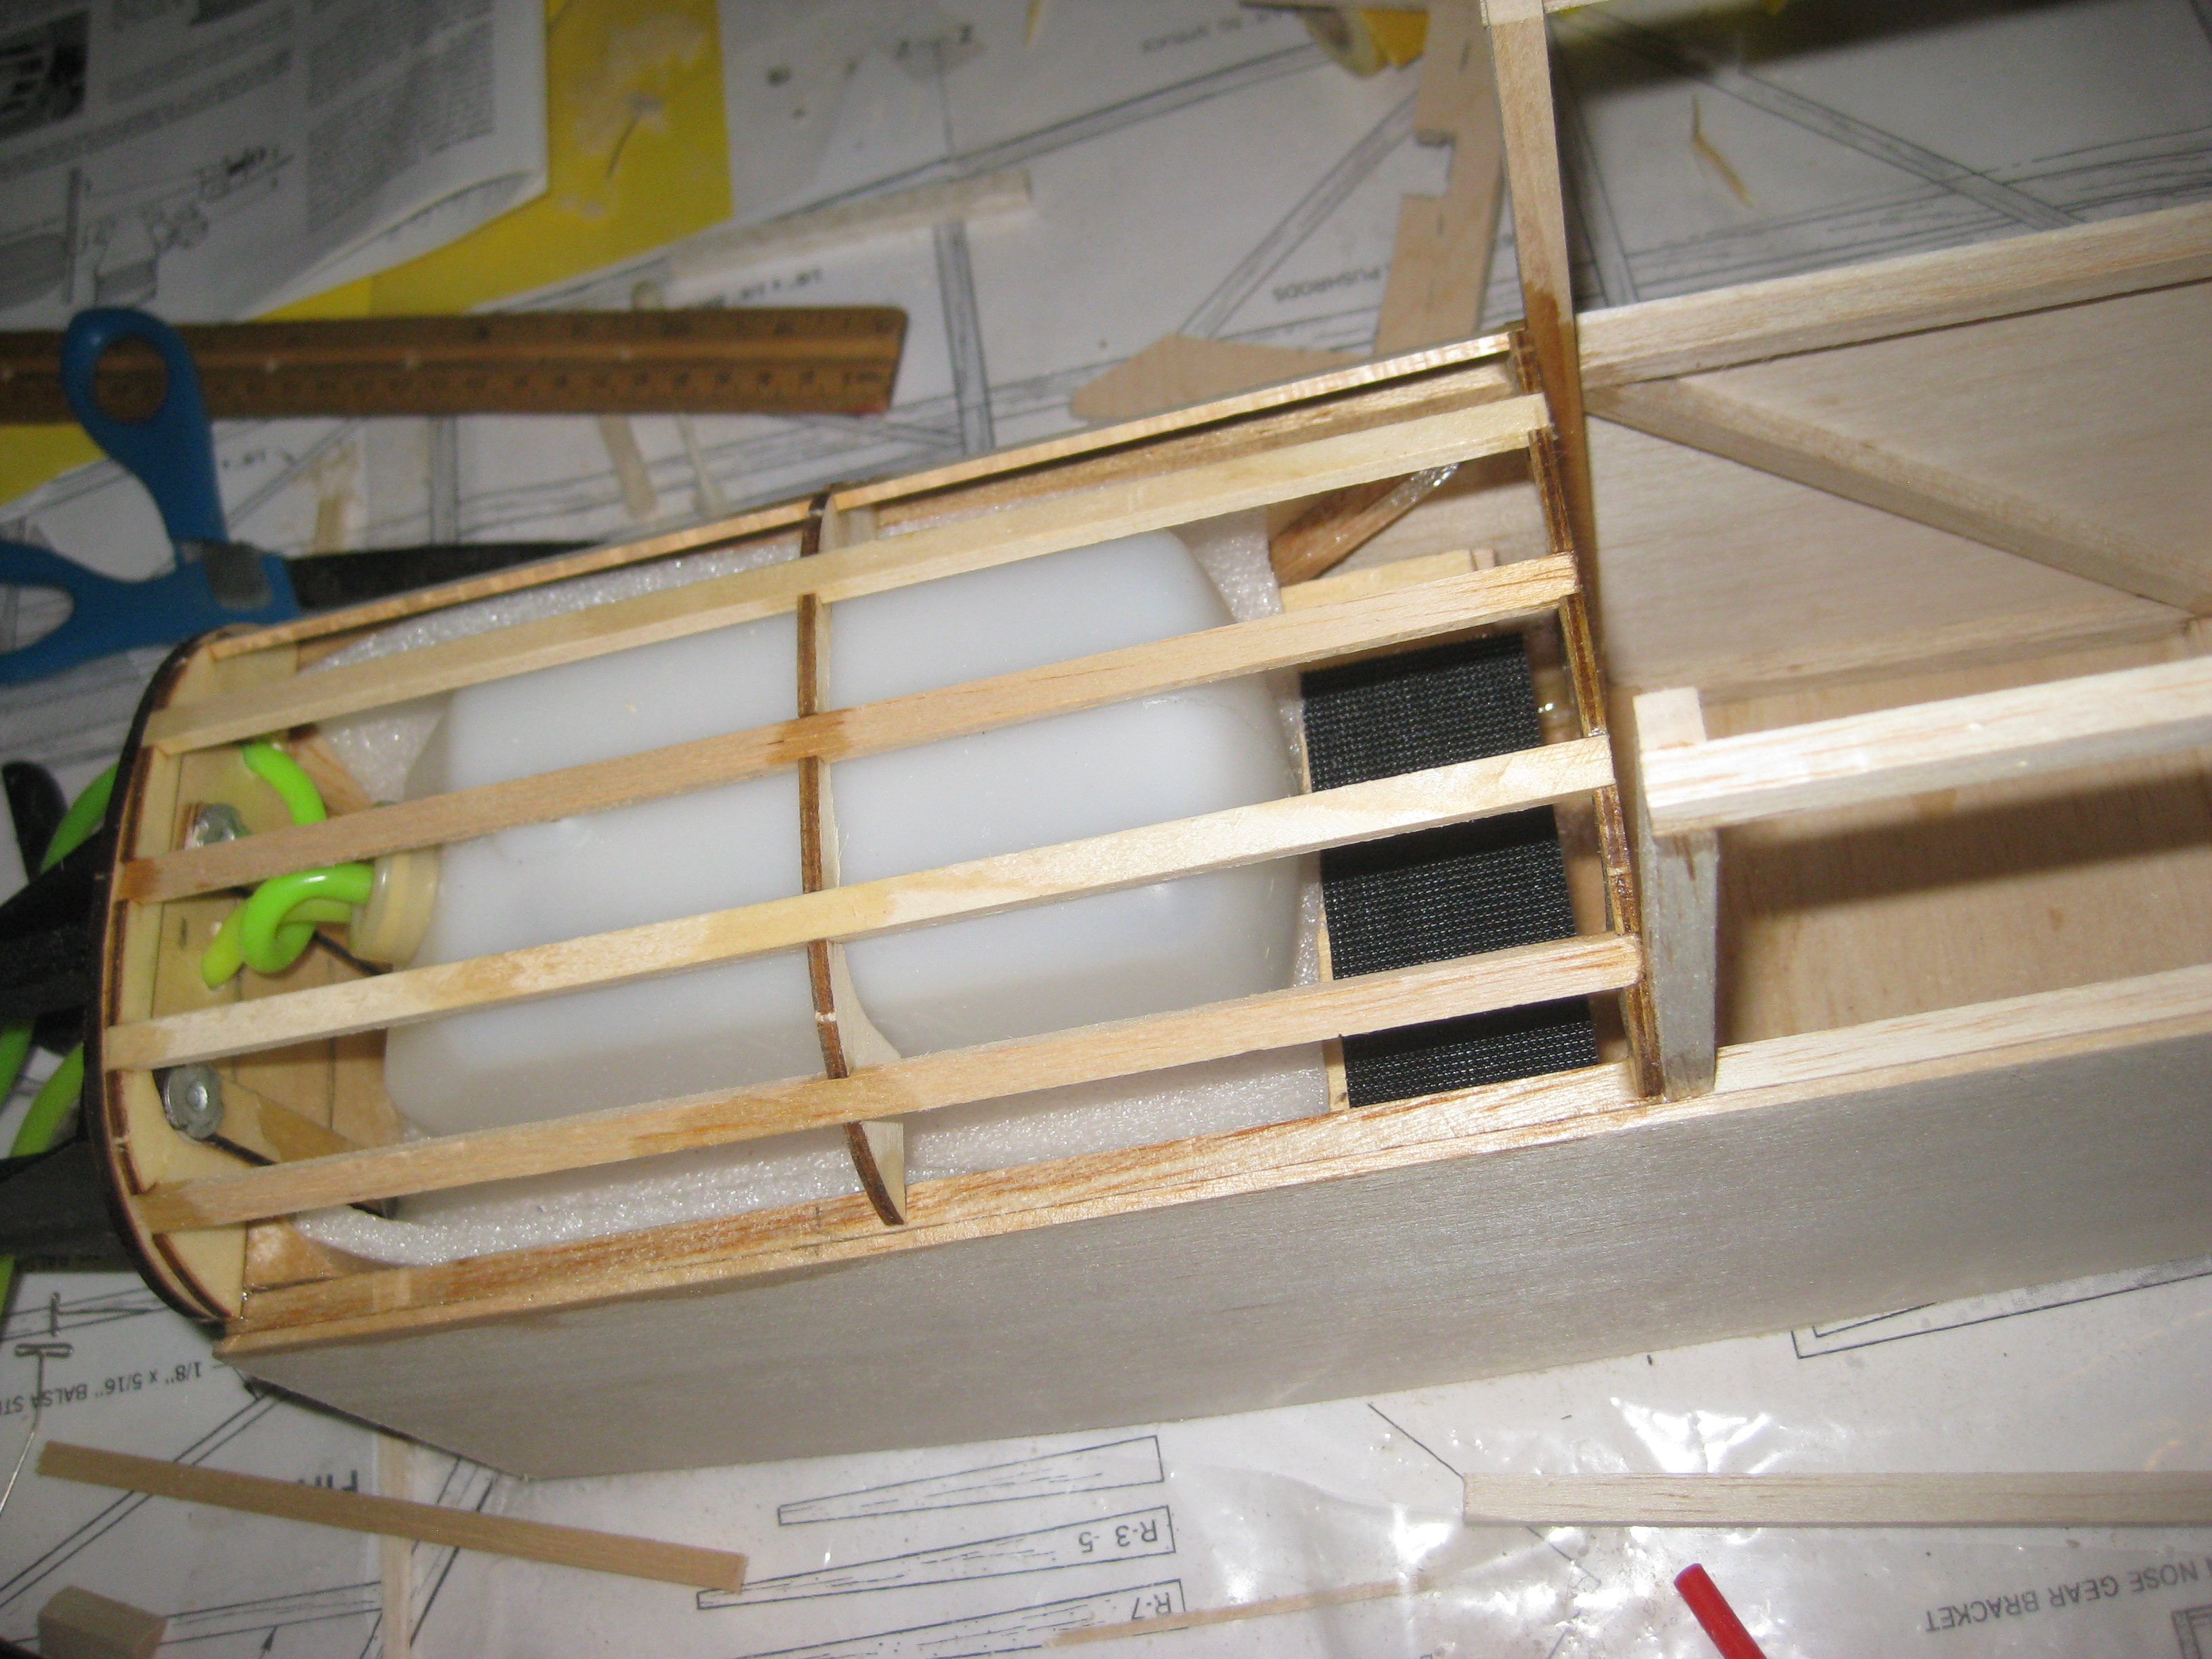
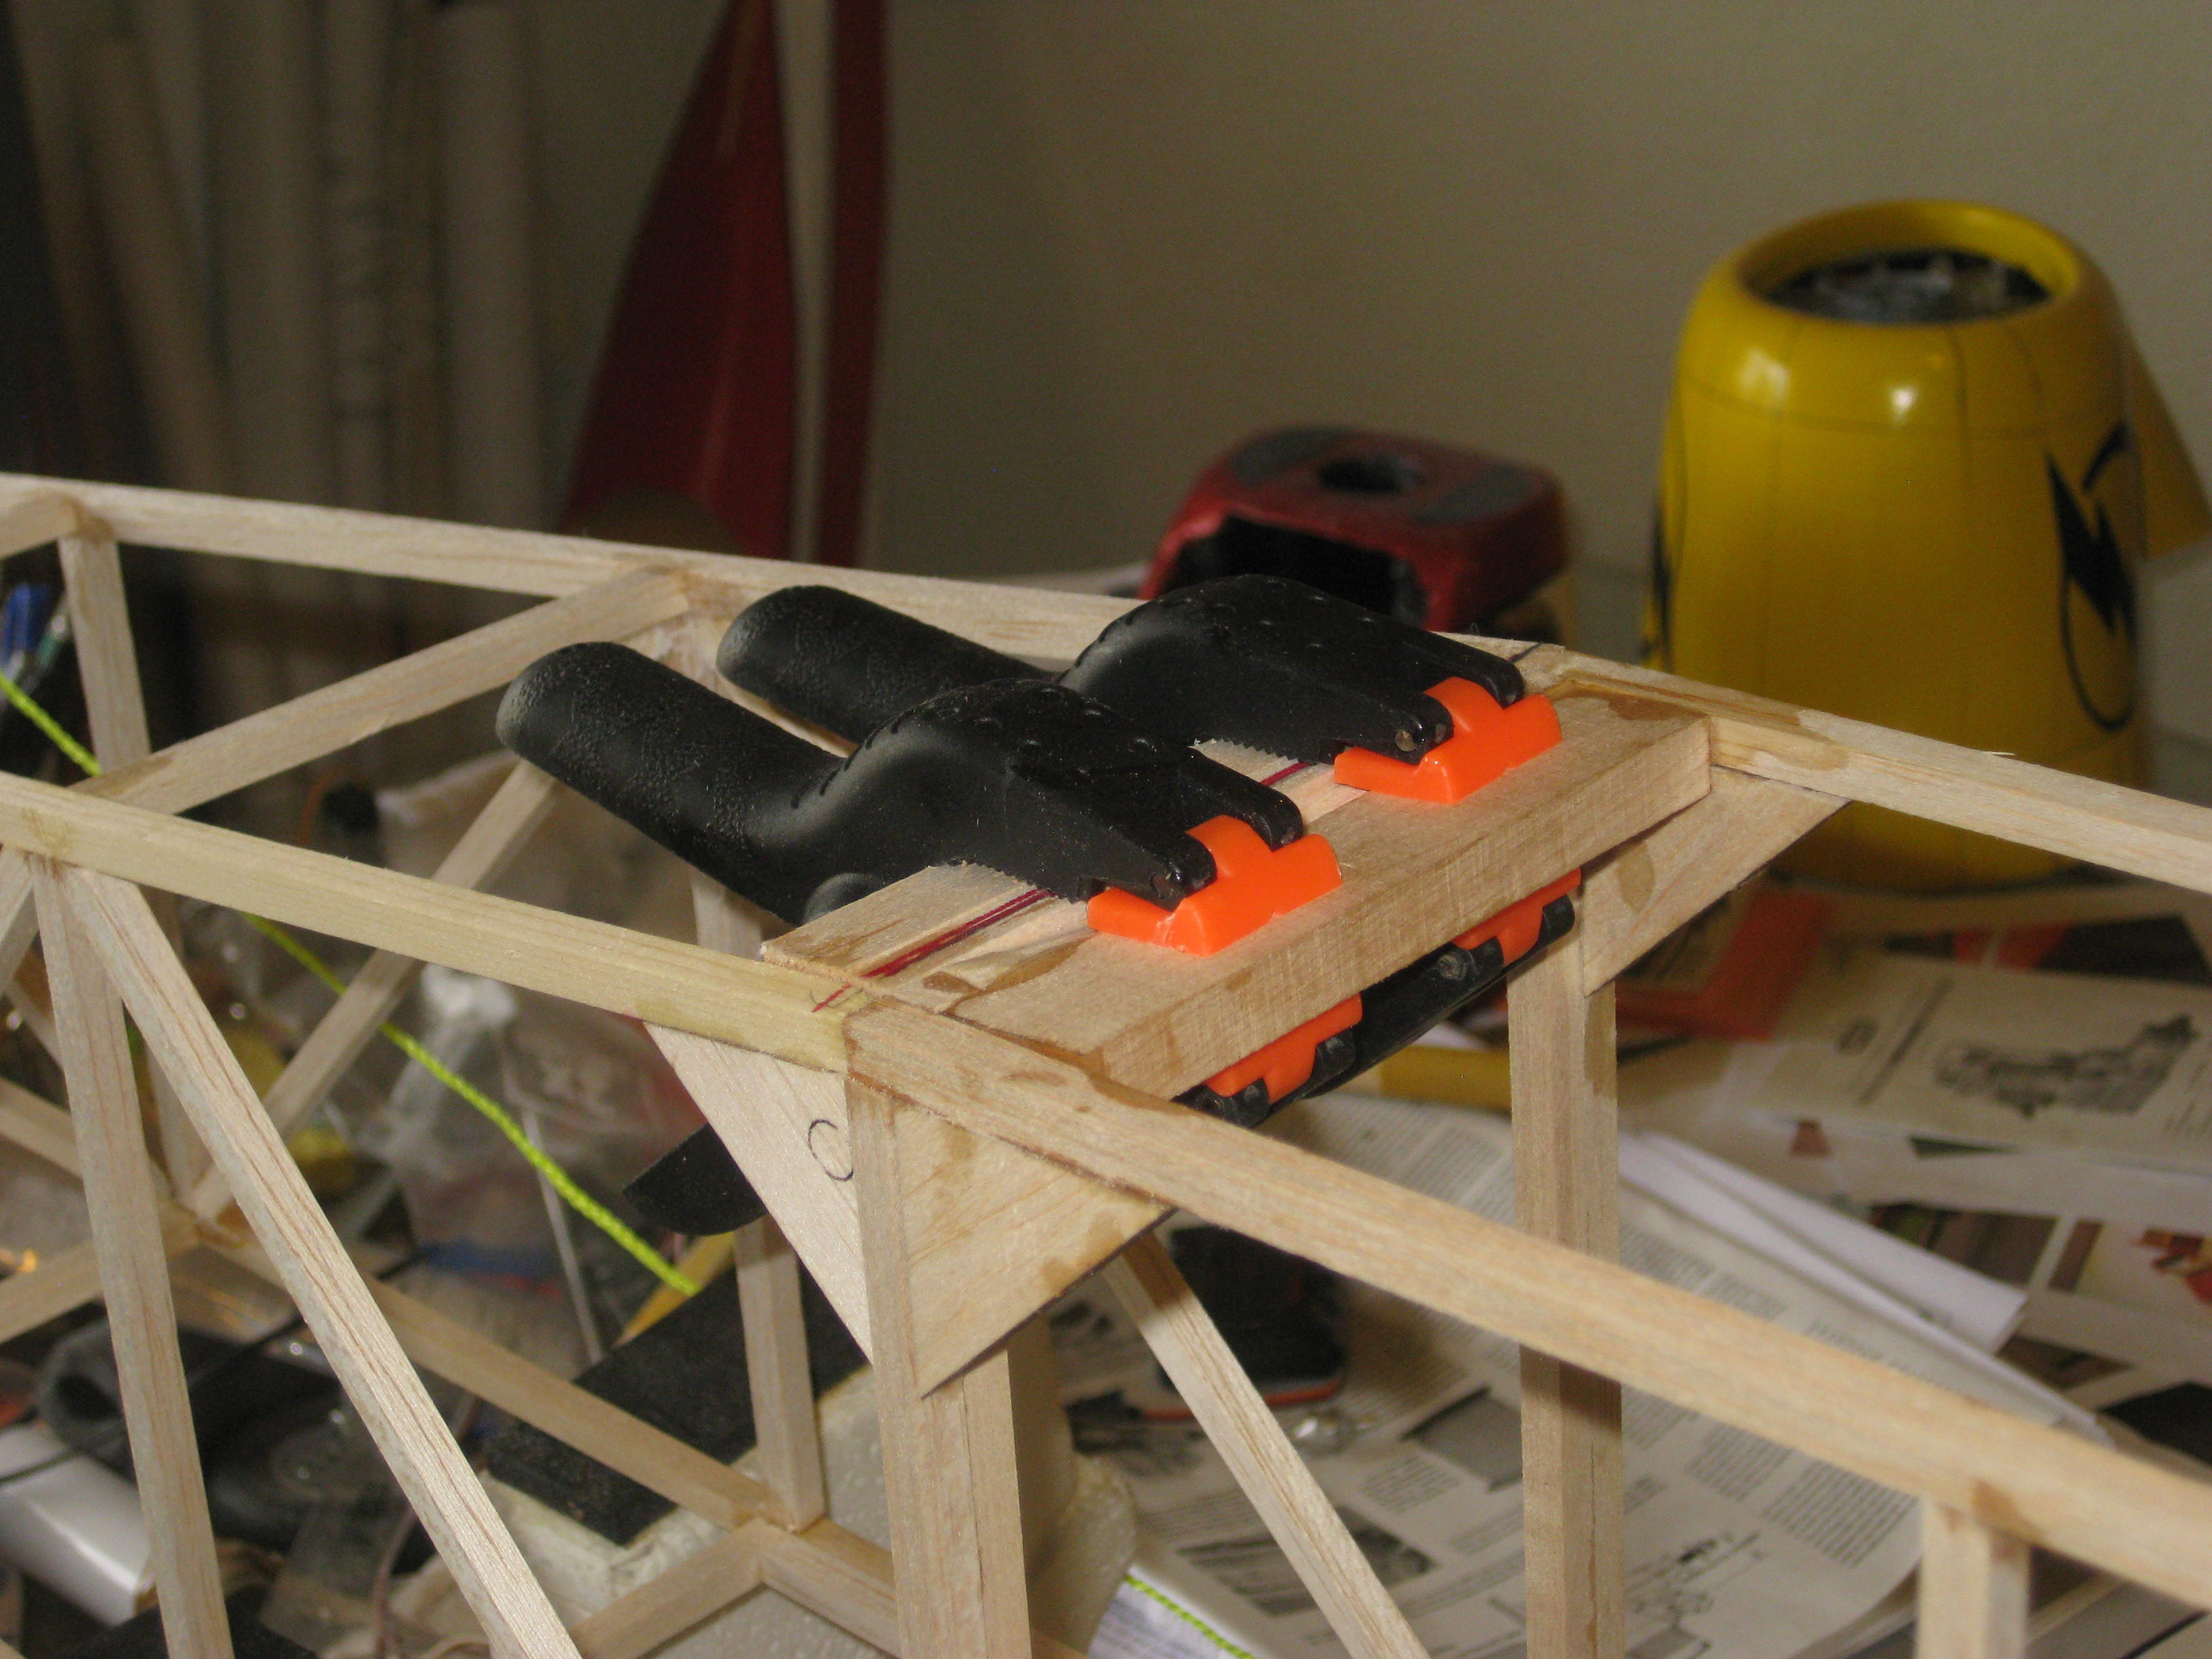
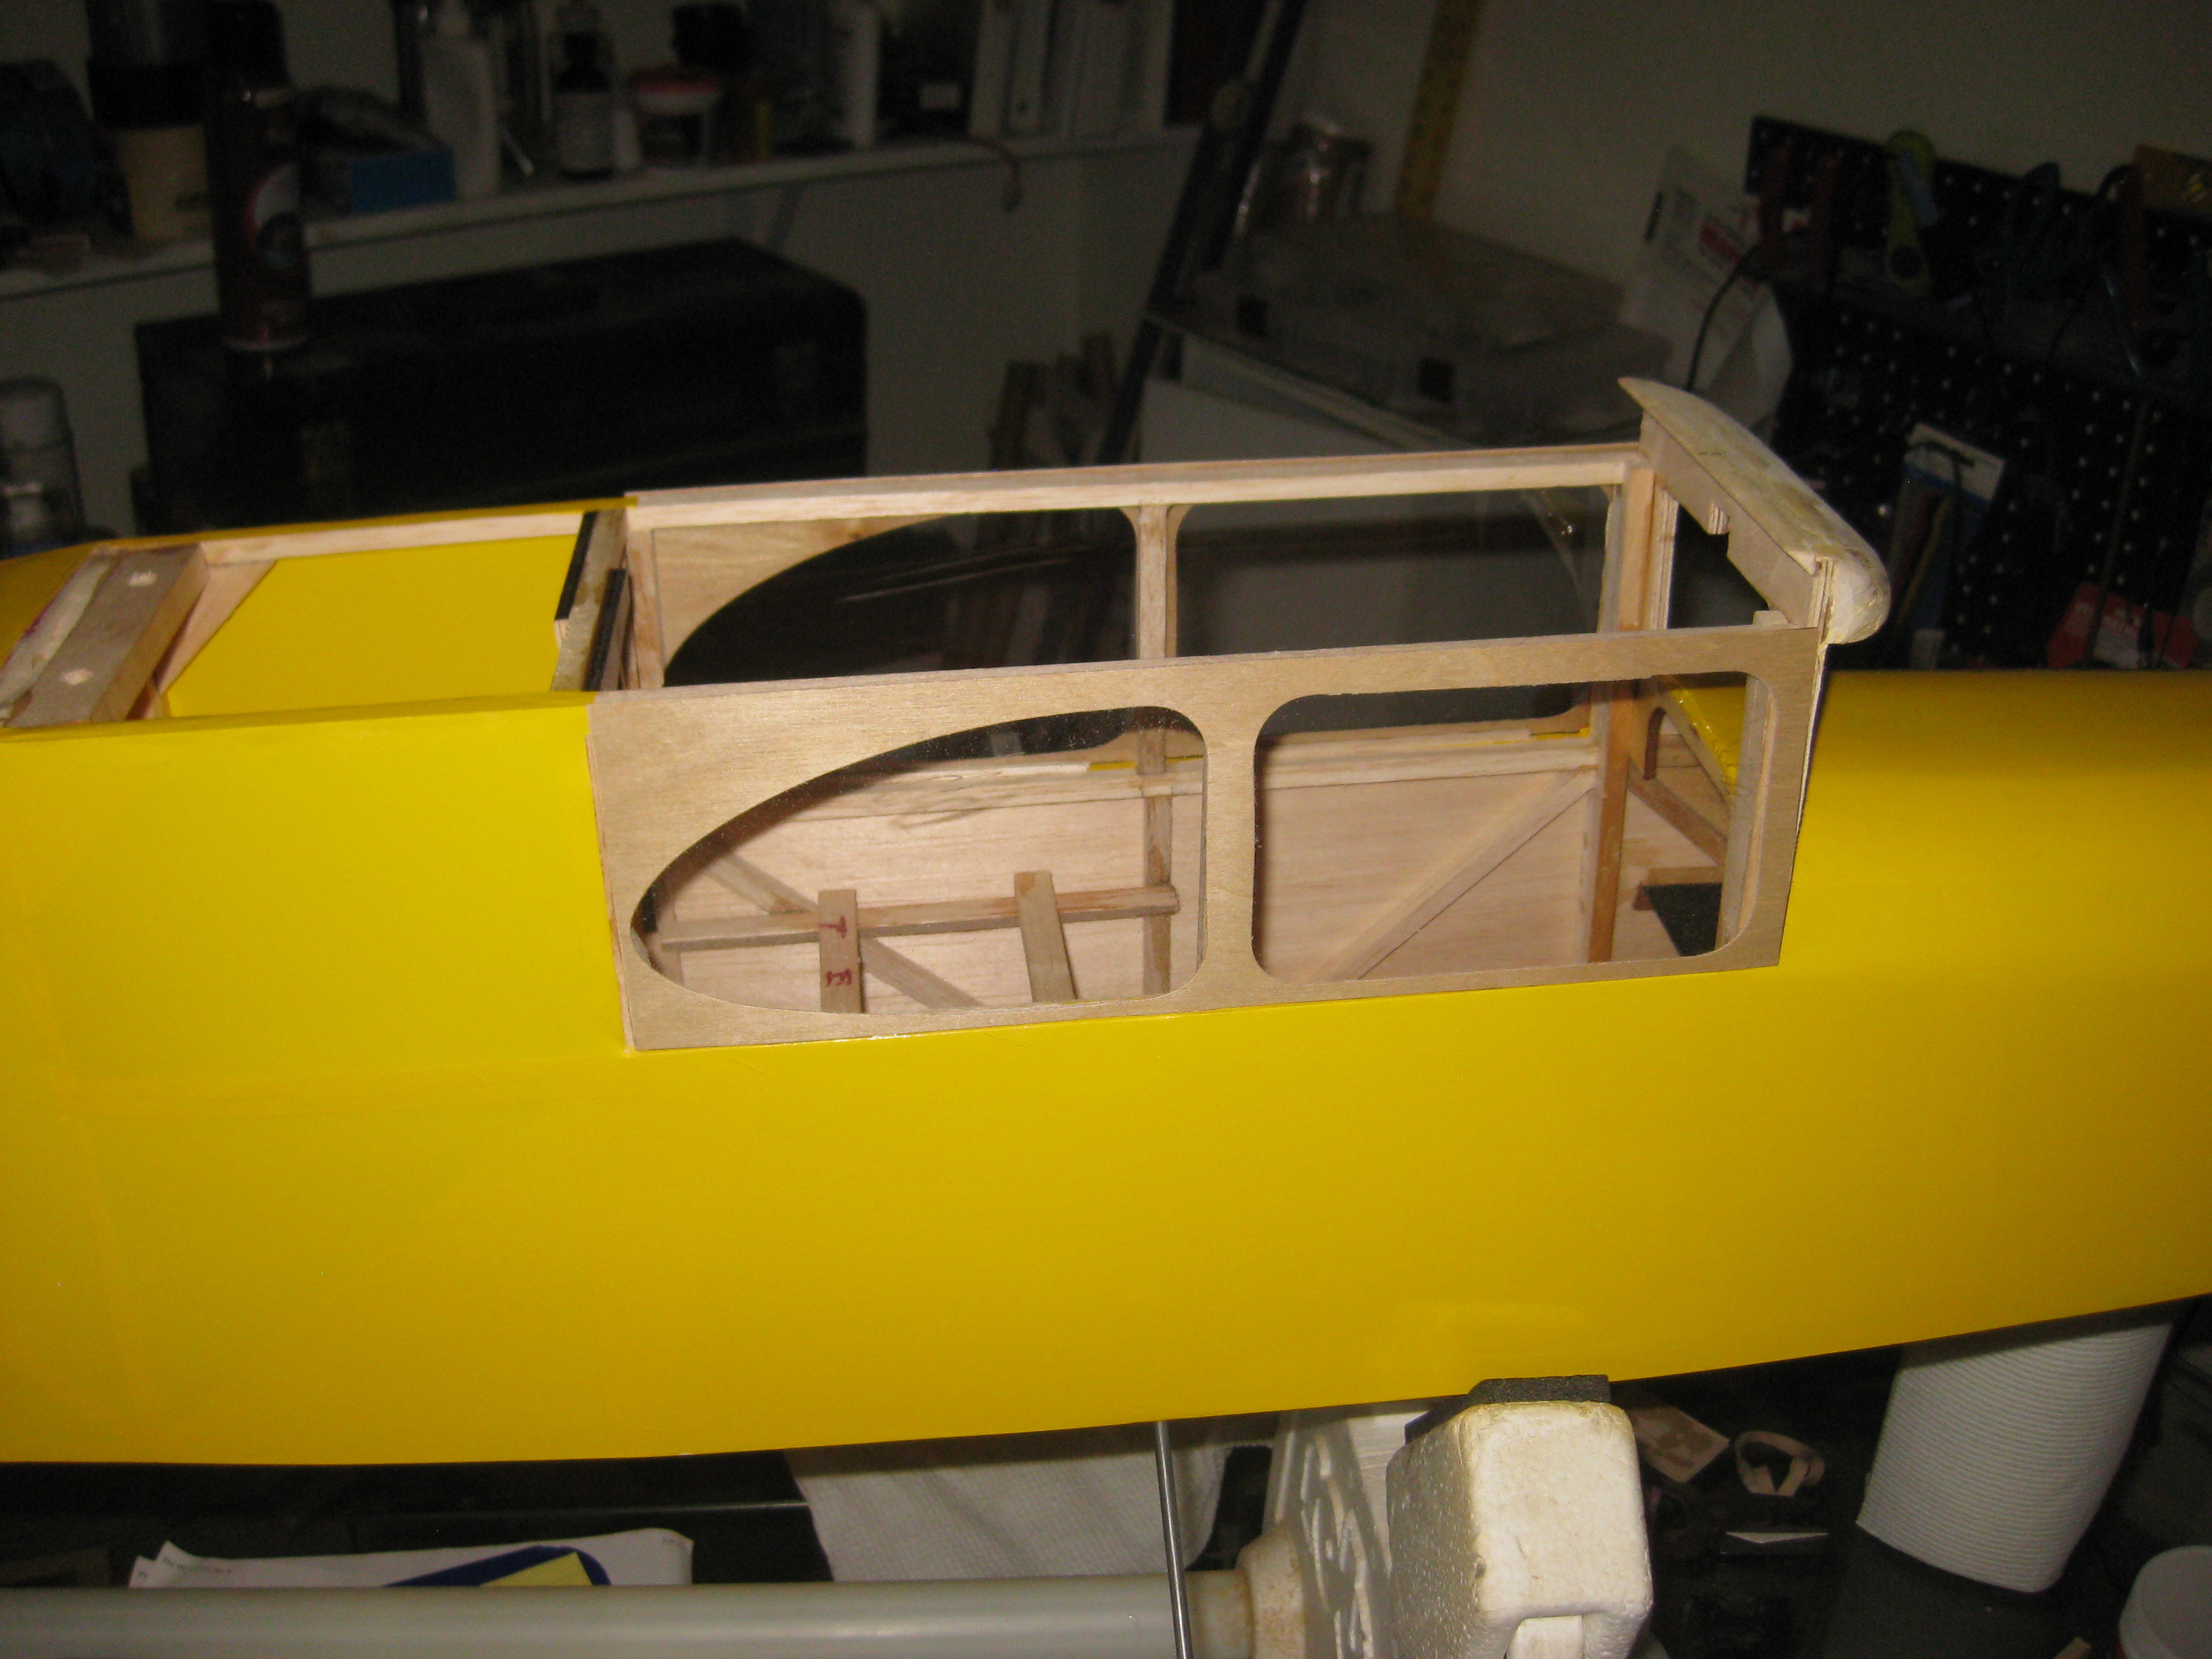
 I put a tray for the fuel tank wrapped in foam. fits very snug. I also put a piece of velcro immediately behind the tank where you can easily put the battery or if that is too much nose weight can attach a piece of balsa, either of which will keep the tank from moving aft. I also stuck a piece of velcro to the rear of the tank so that you can simply hood an opposing velcro to drag the tank rearwards in case of maintenance needs. My are did not have such and what a mess it is trying to get my thick hands into the tank area to remove.
Last edited by adreliable661; 03-15-2015 at 10:57 AM.
03-29-2015 | 07:15 PM
#20
Thread Starter
My Feedback: (12)
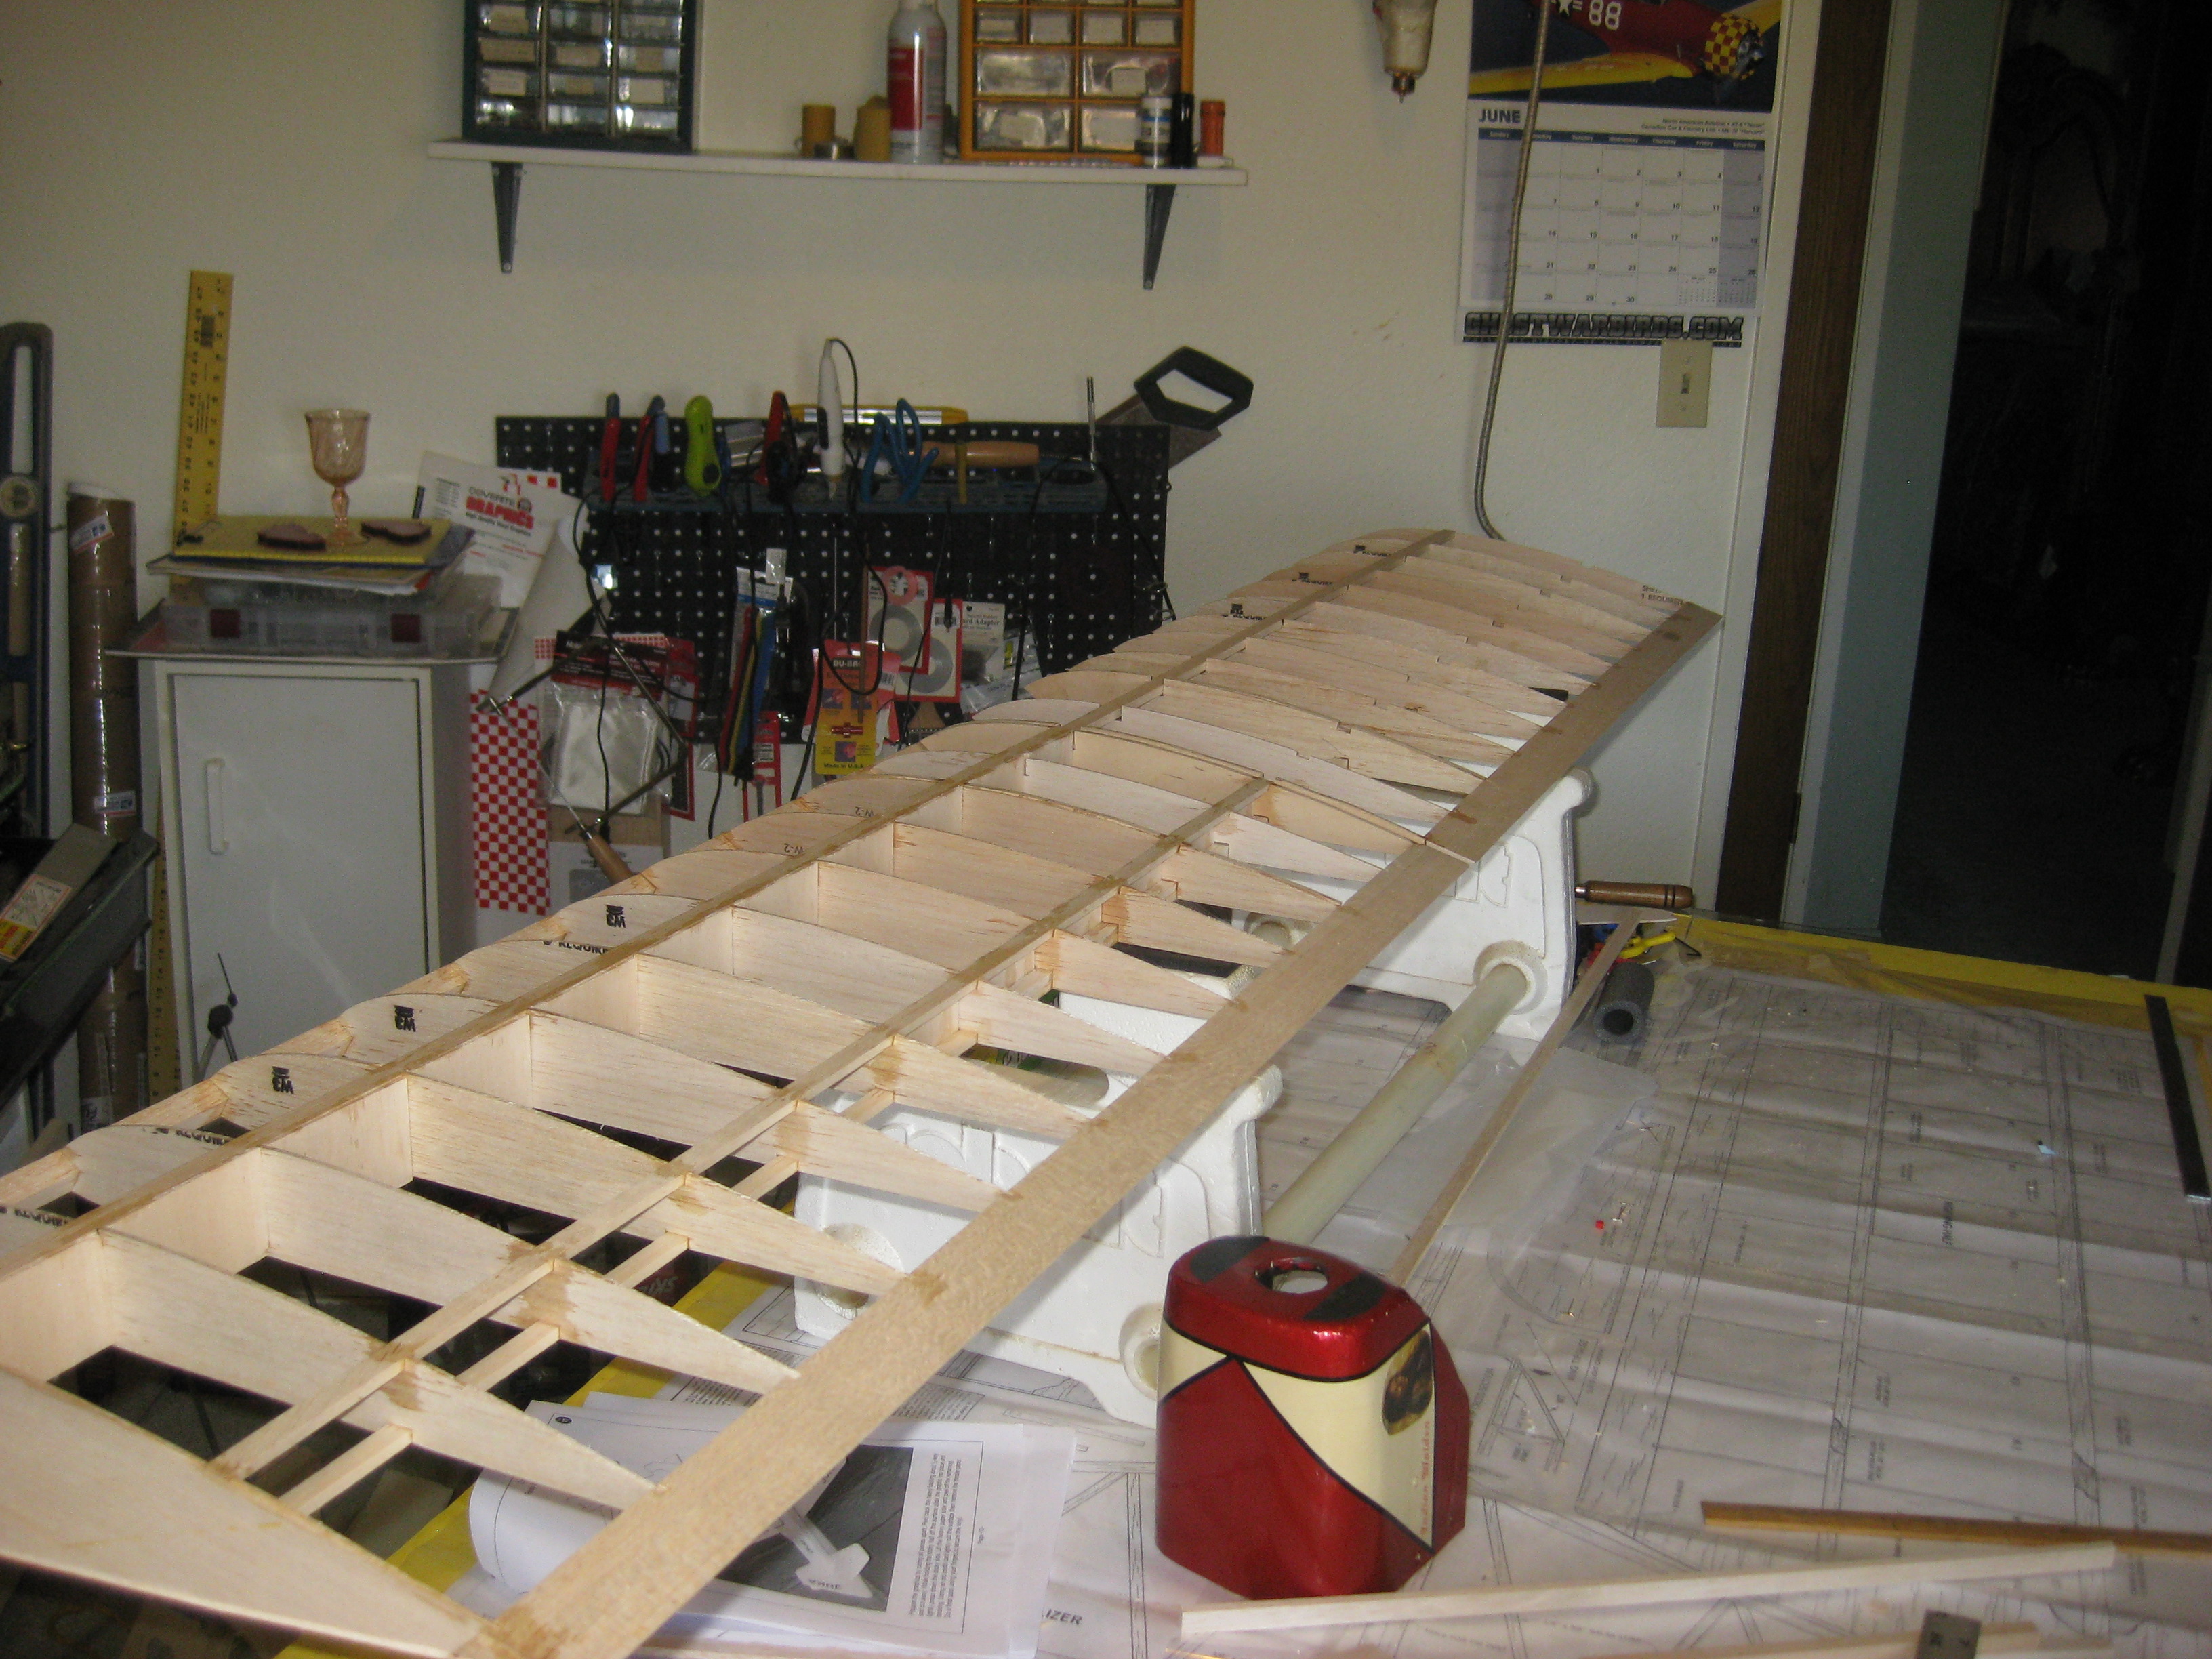
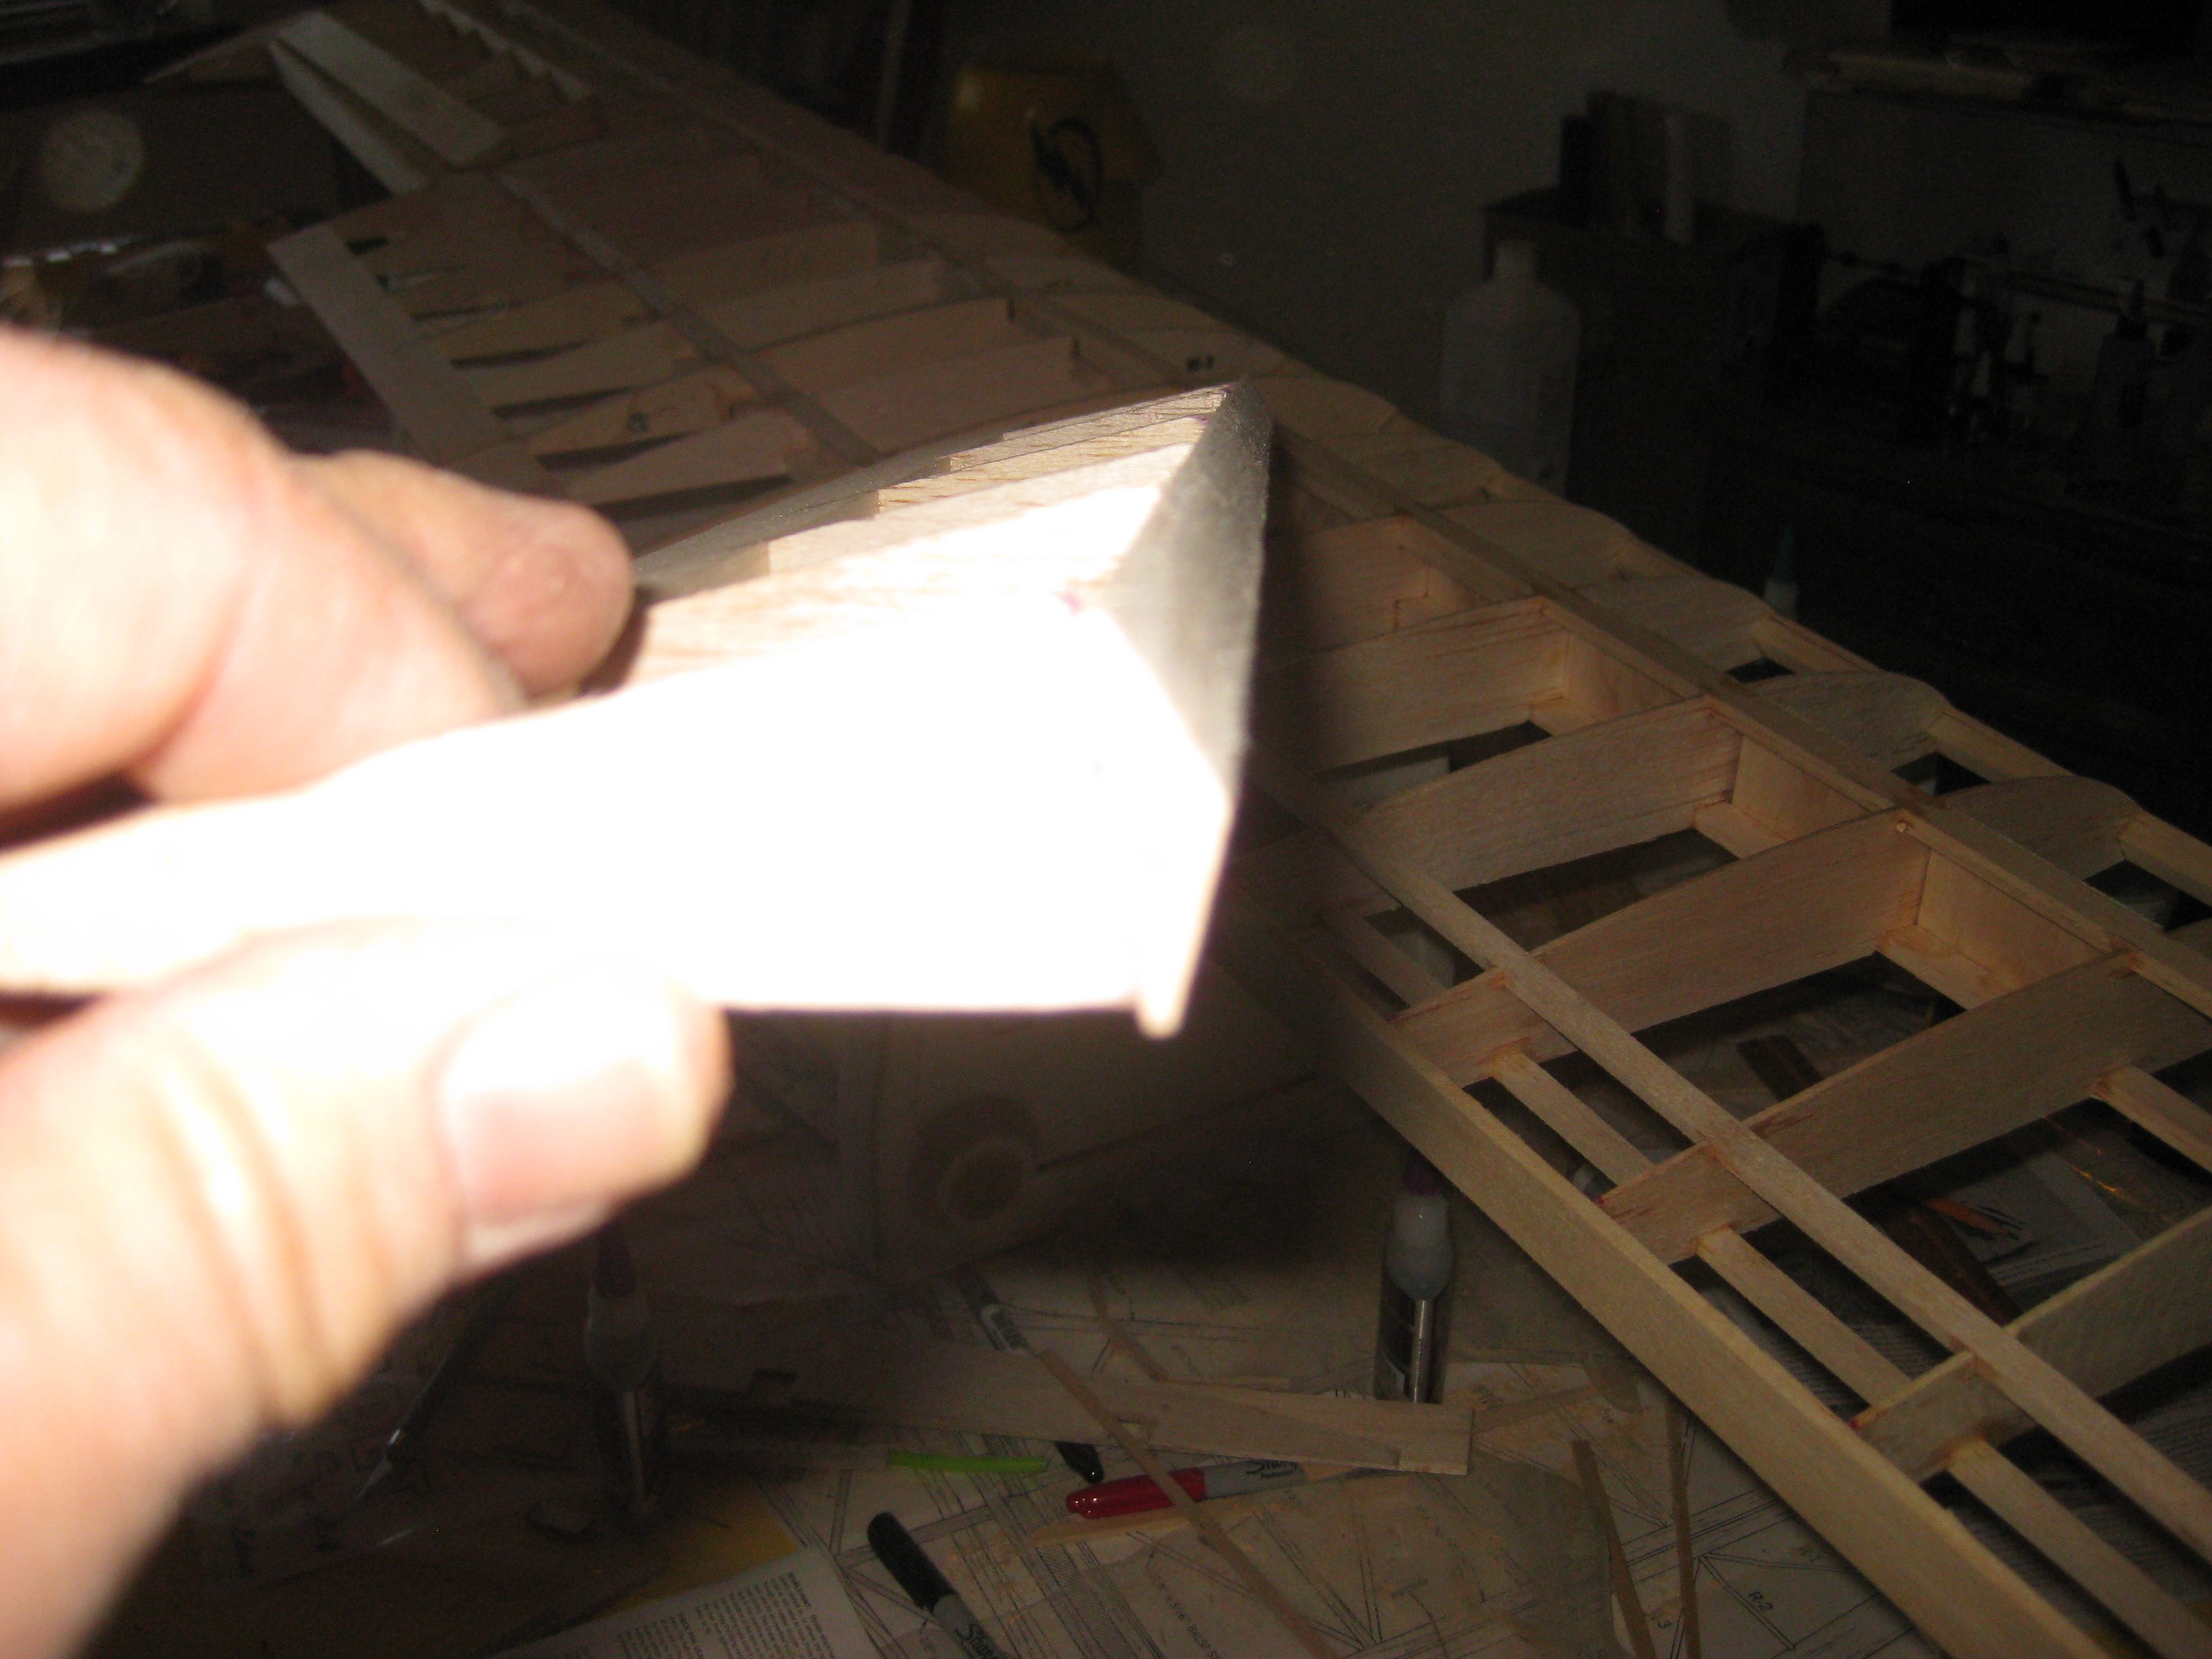
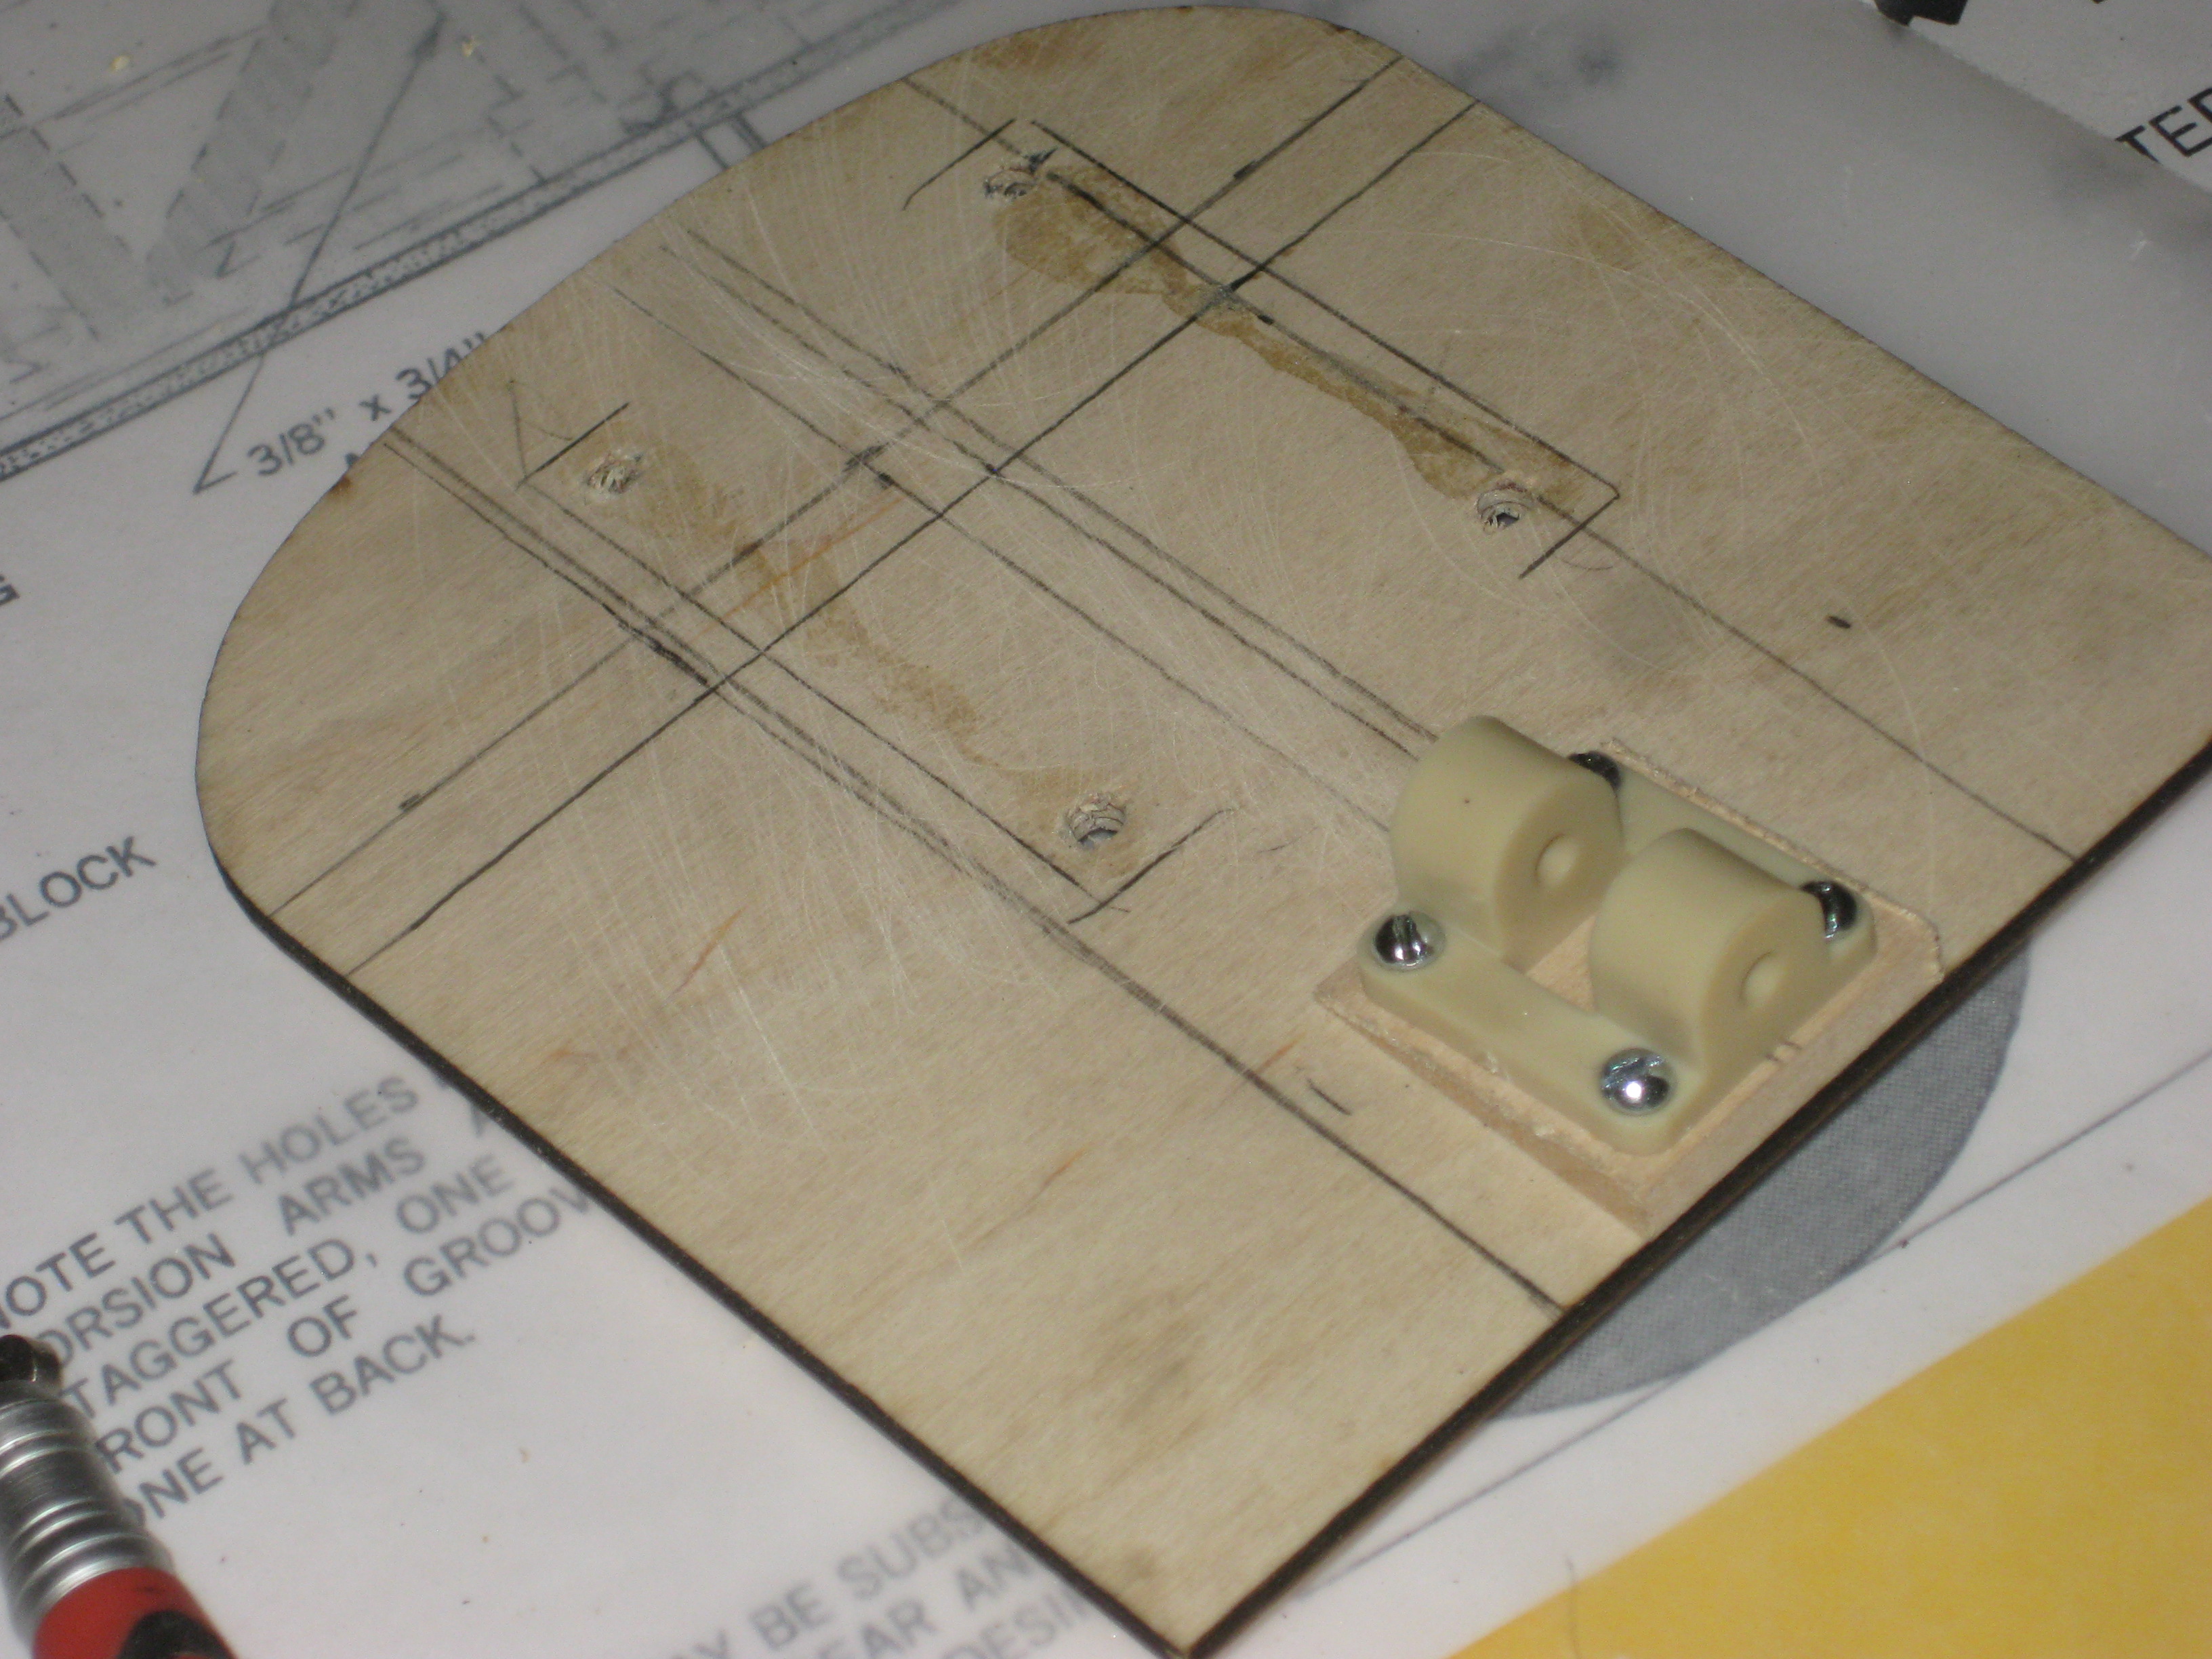
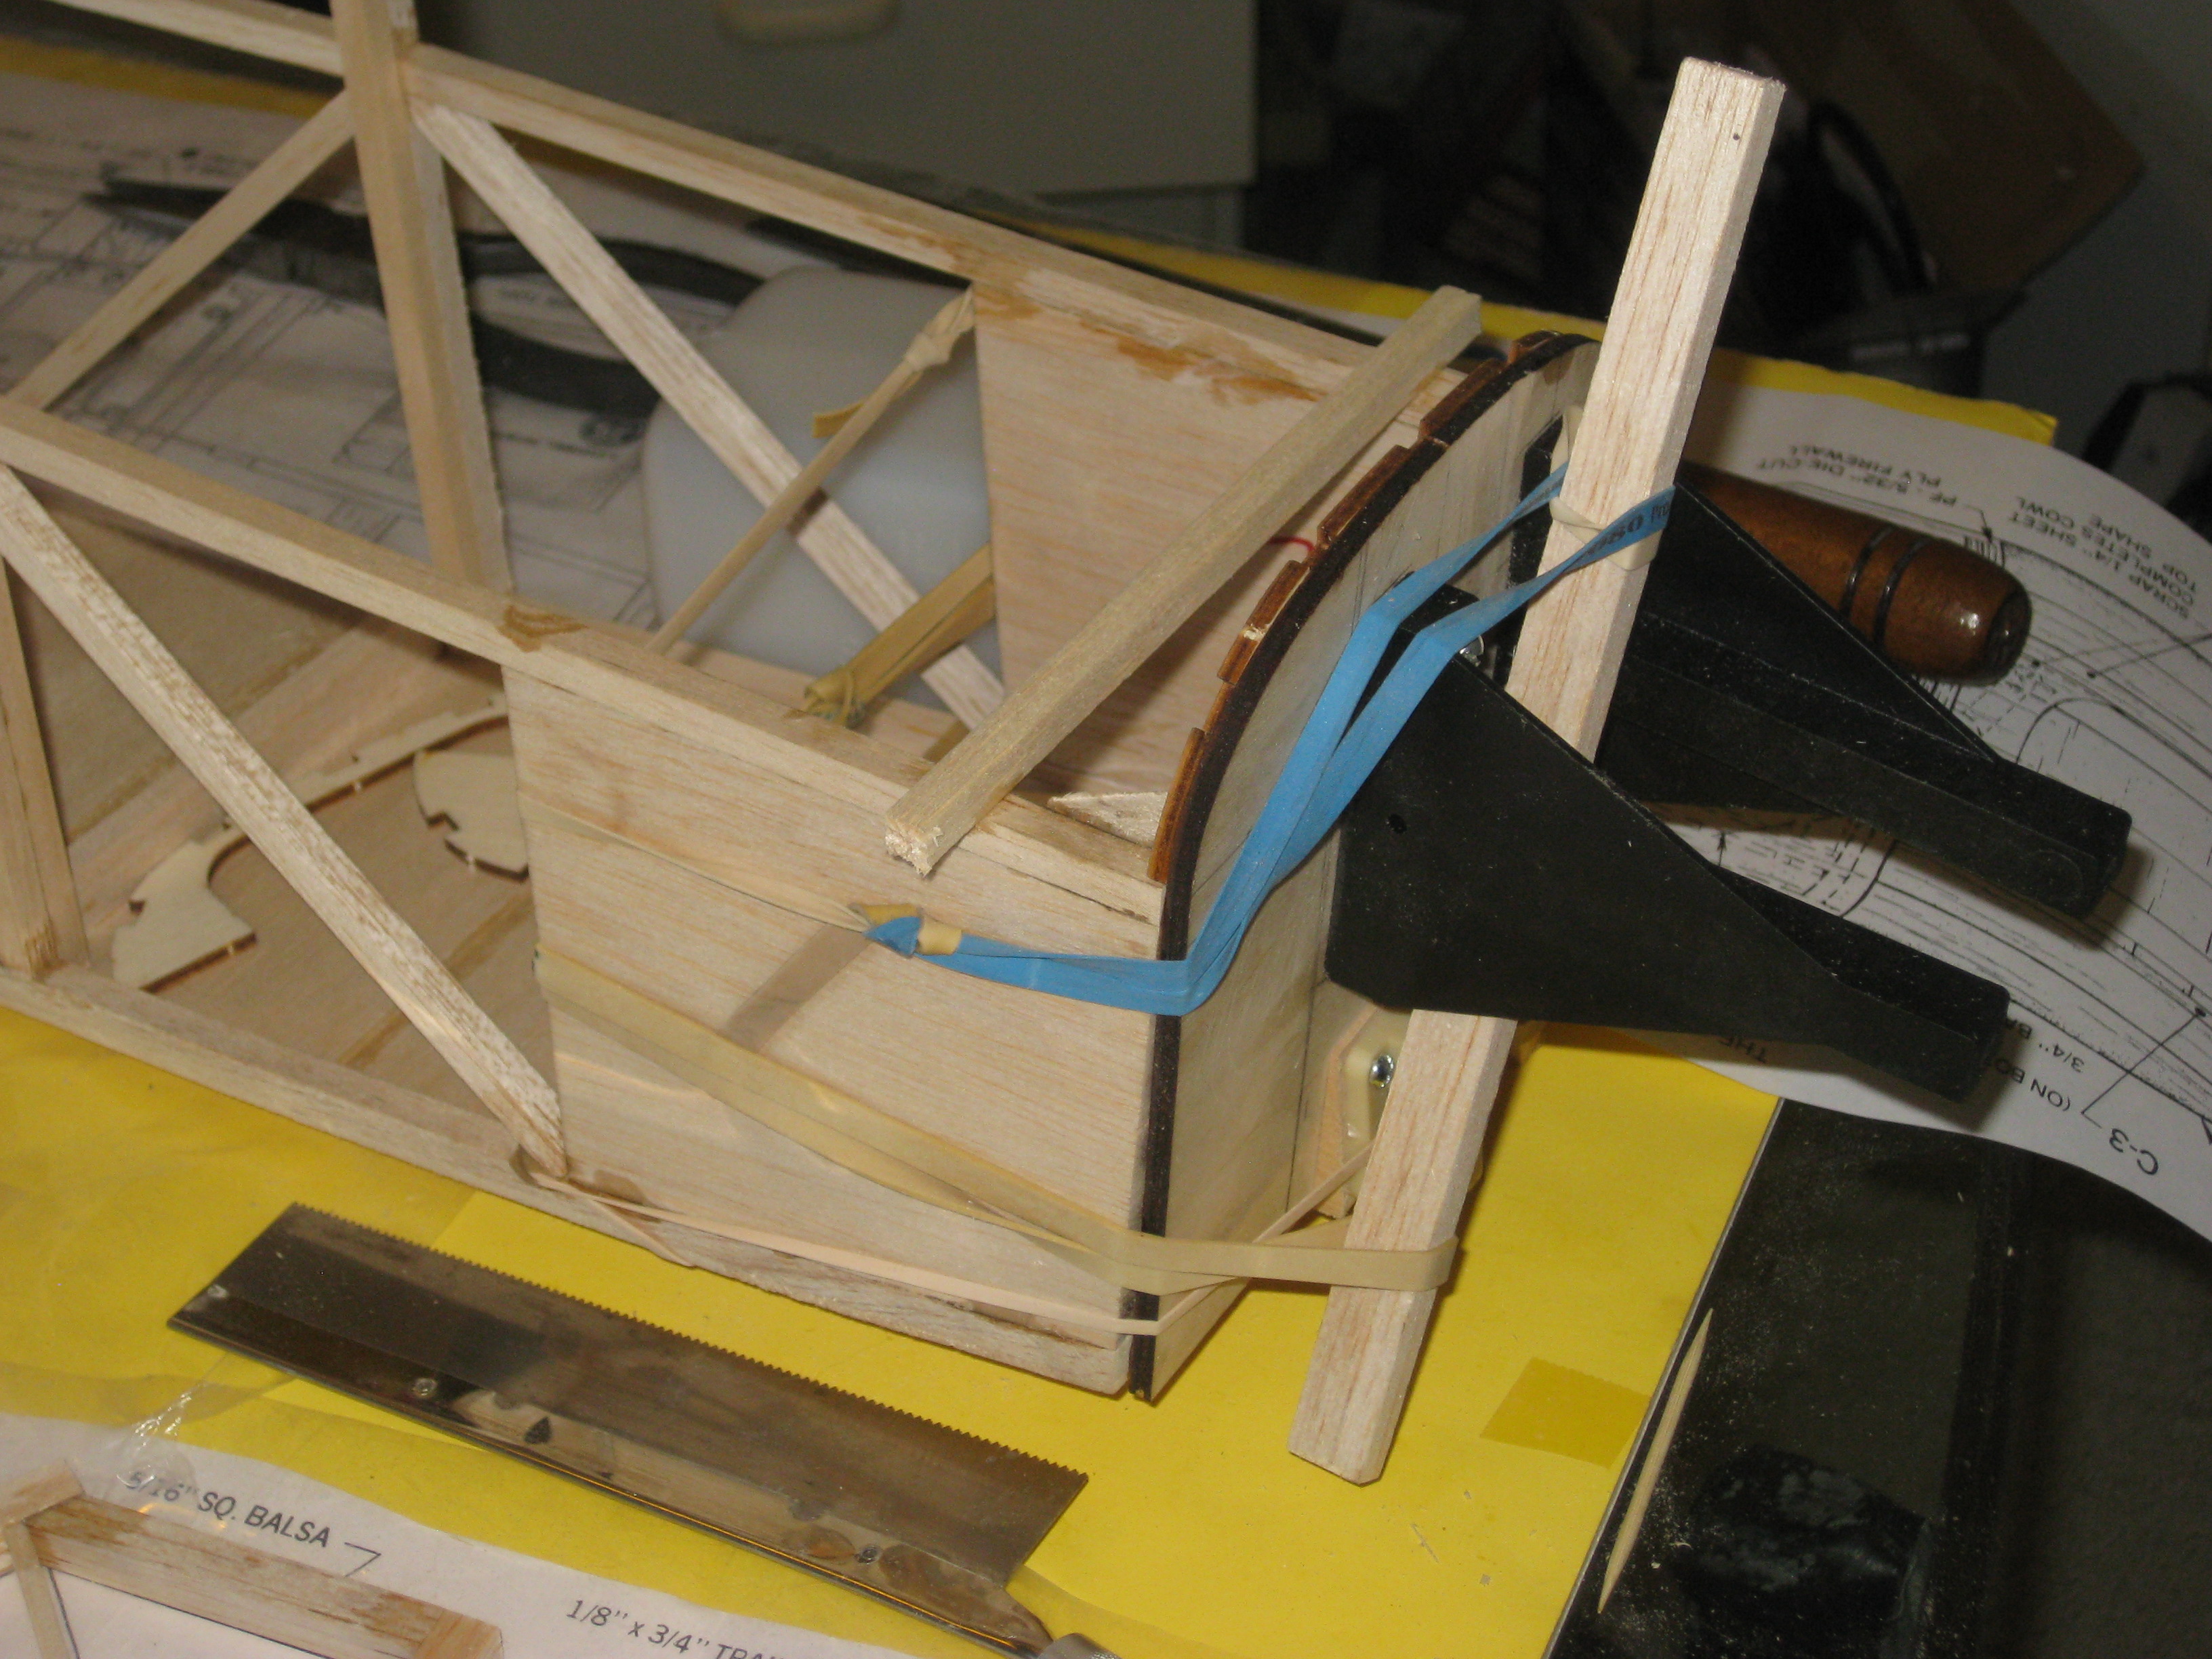
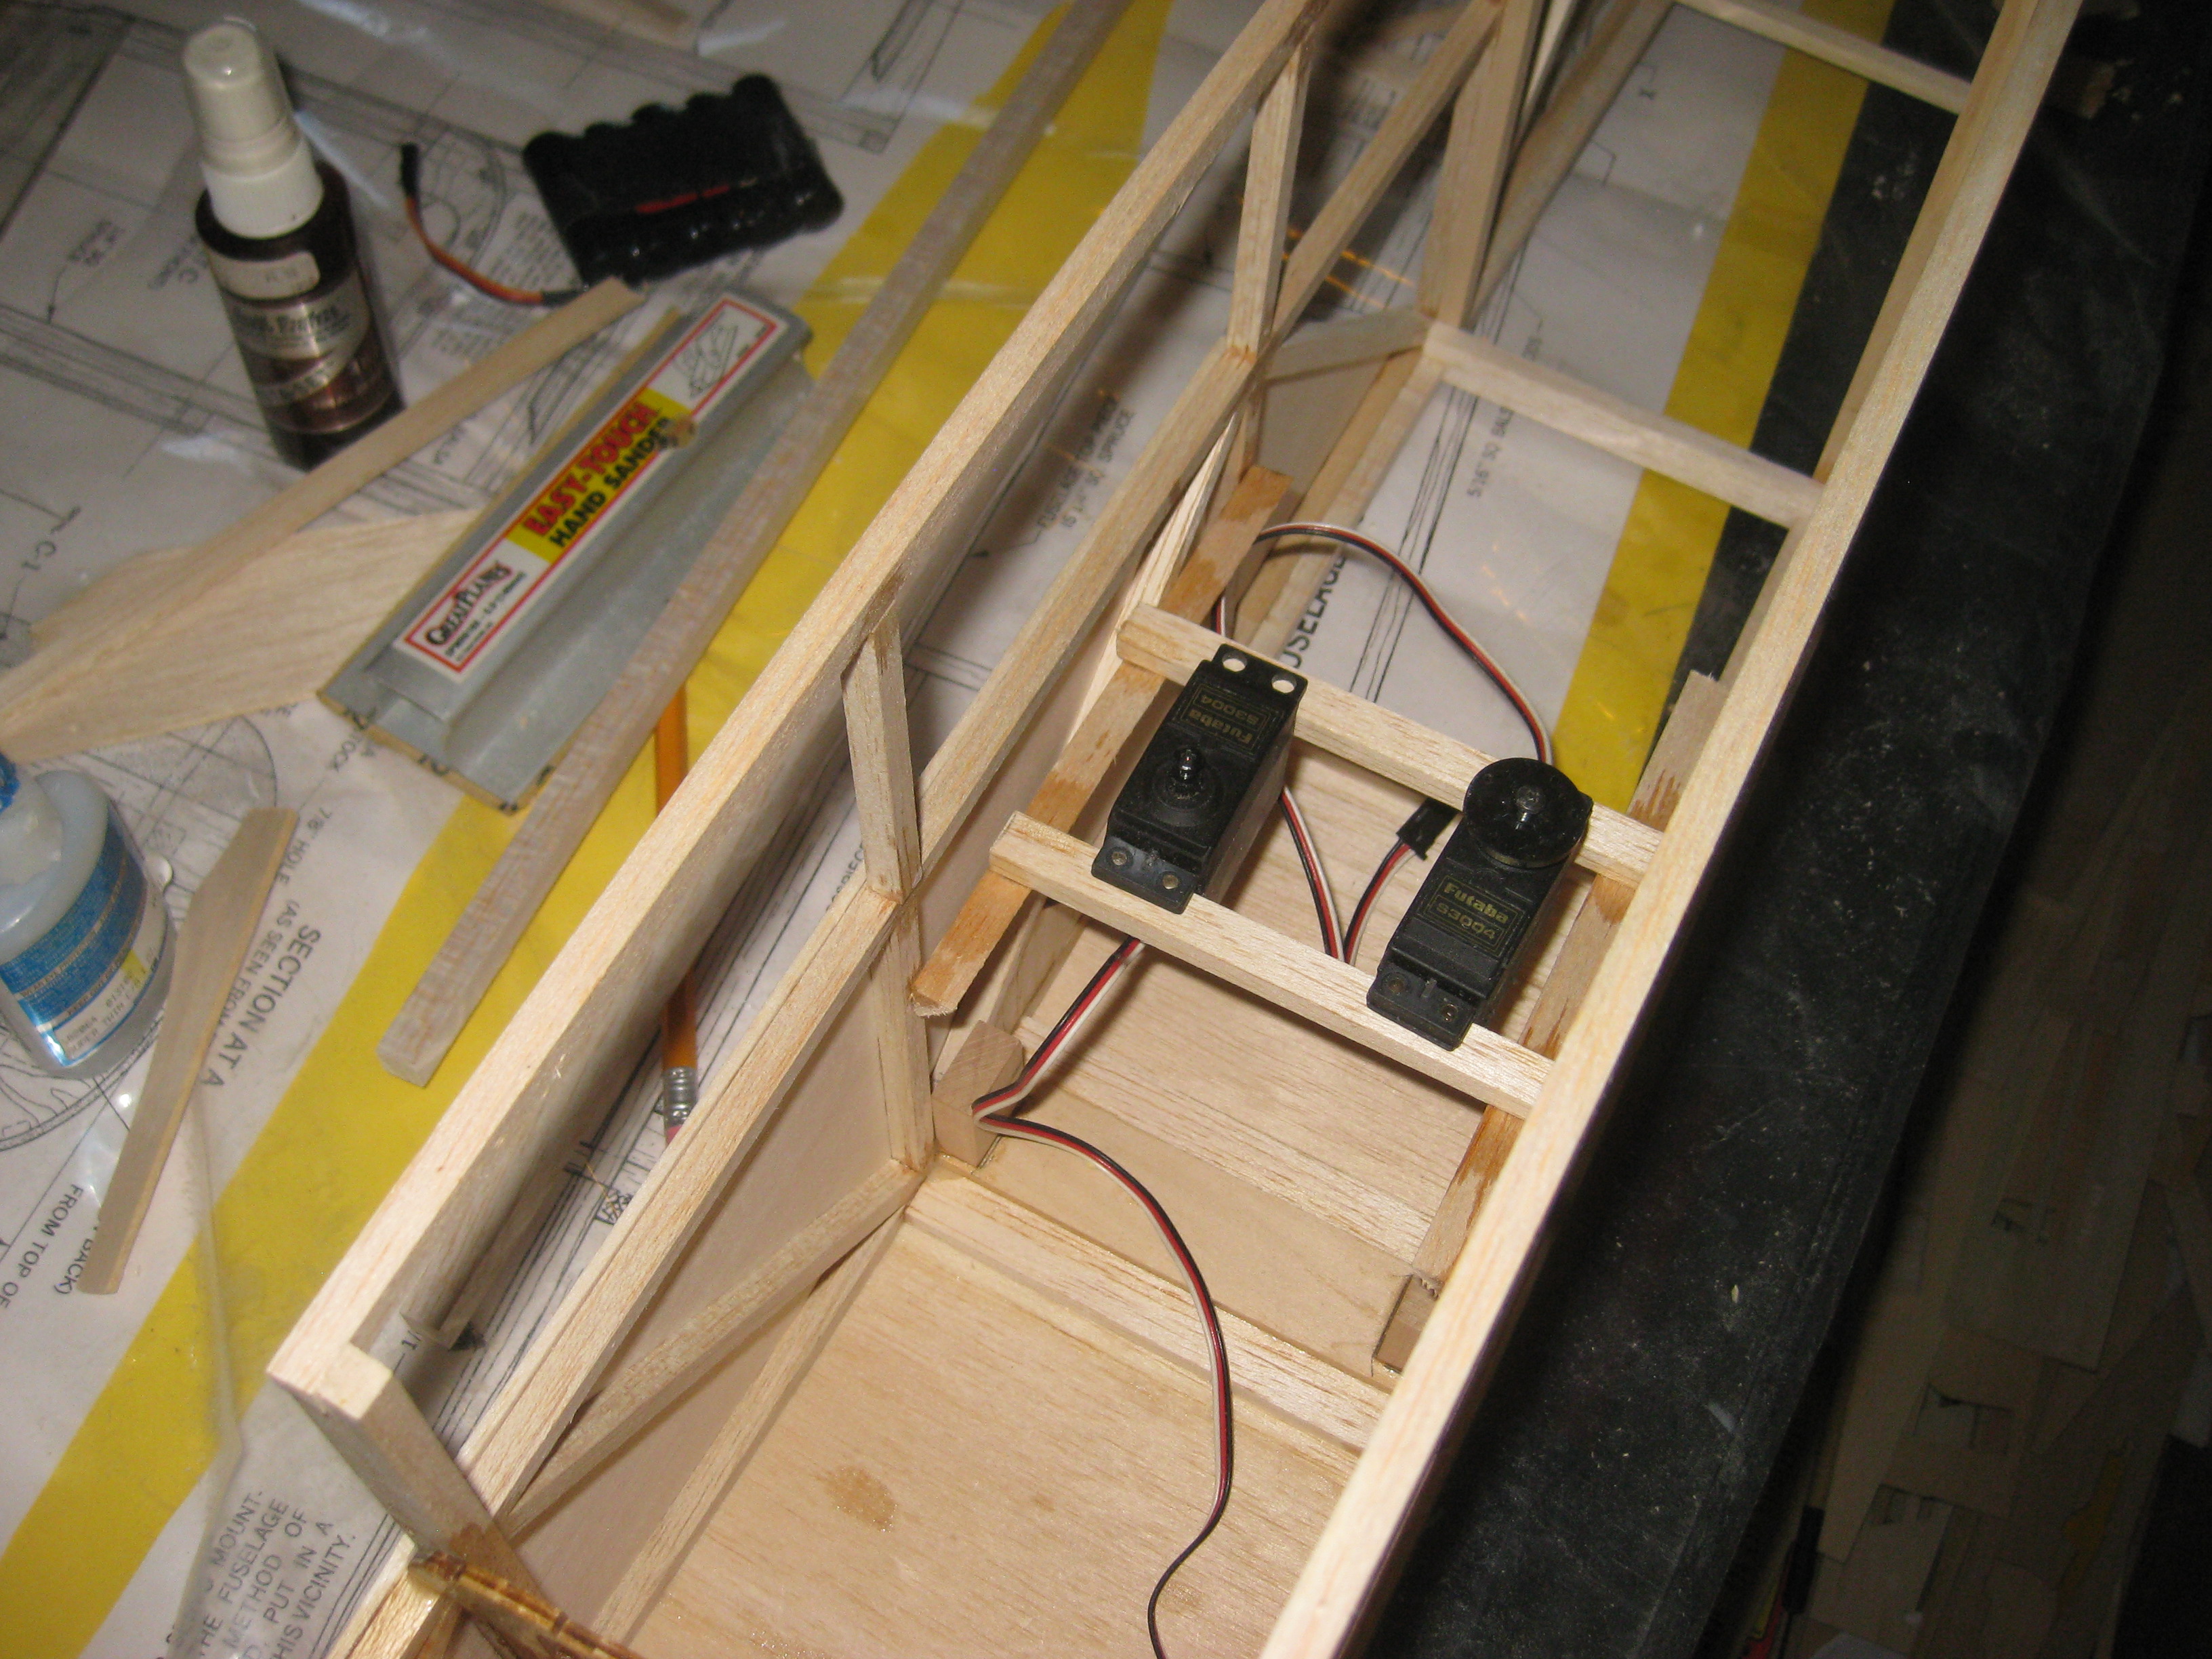
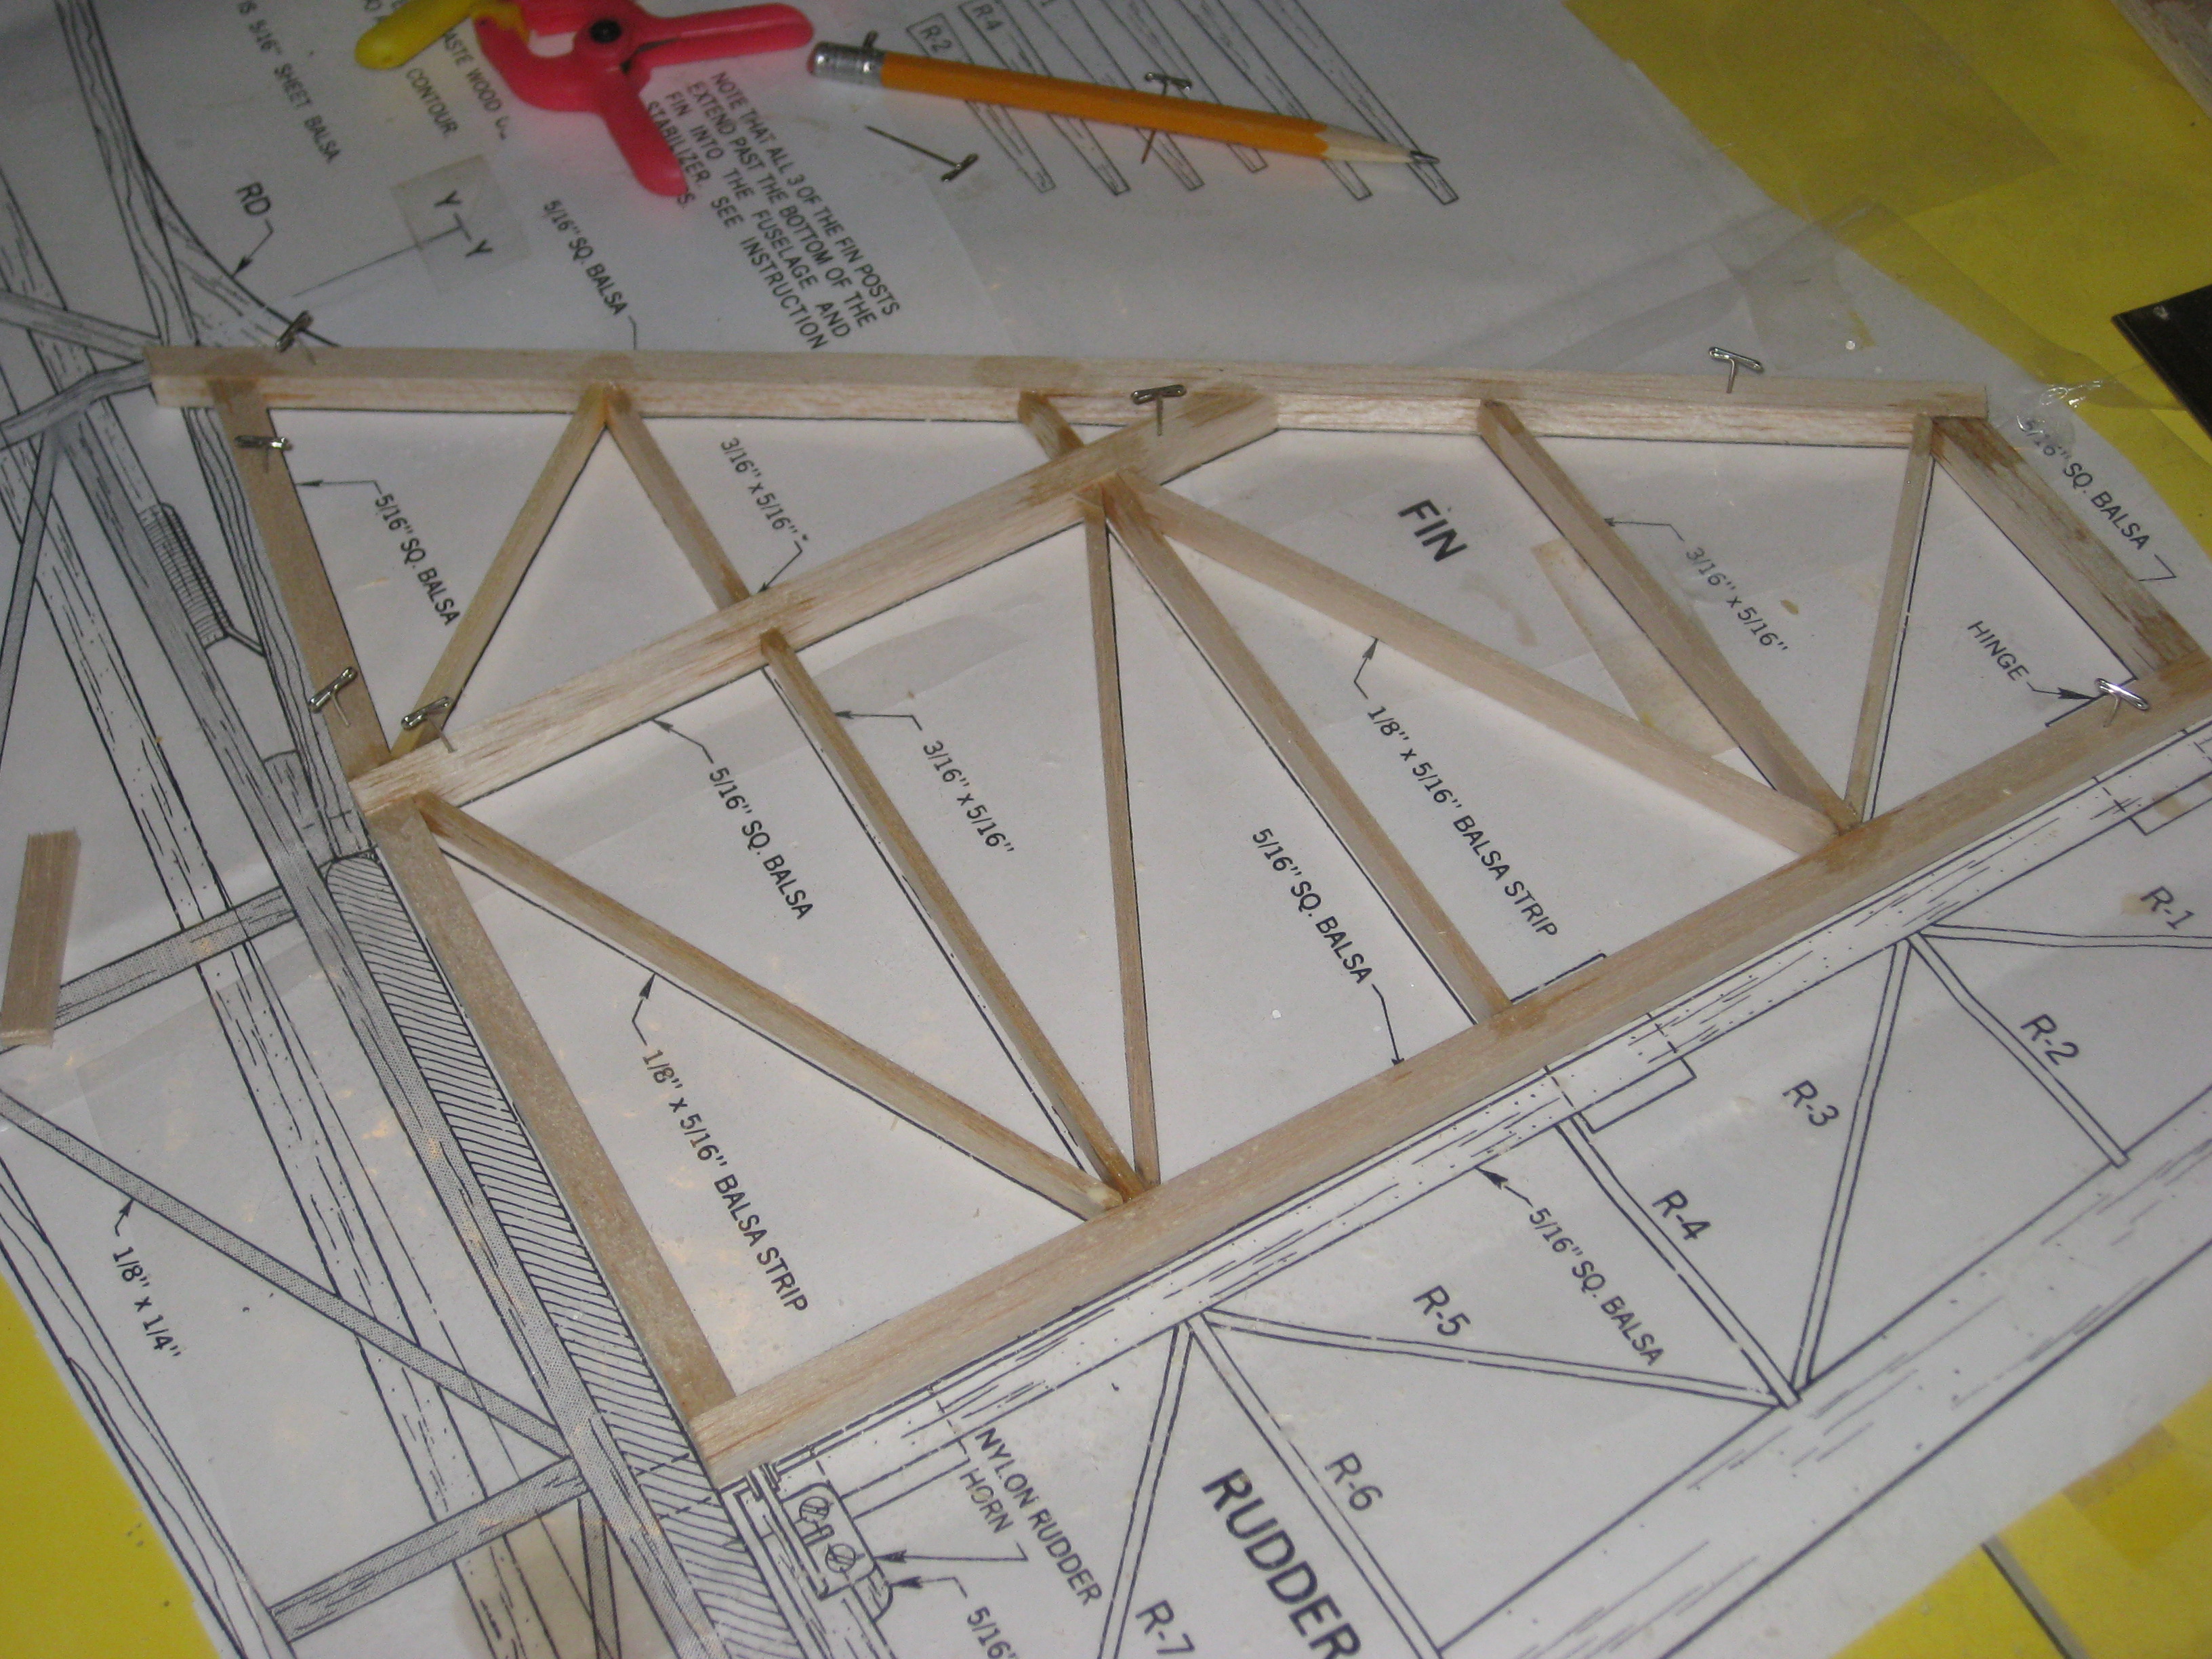
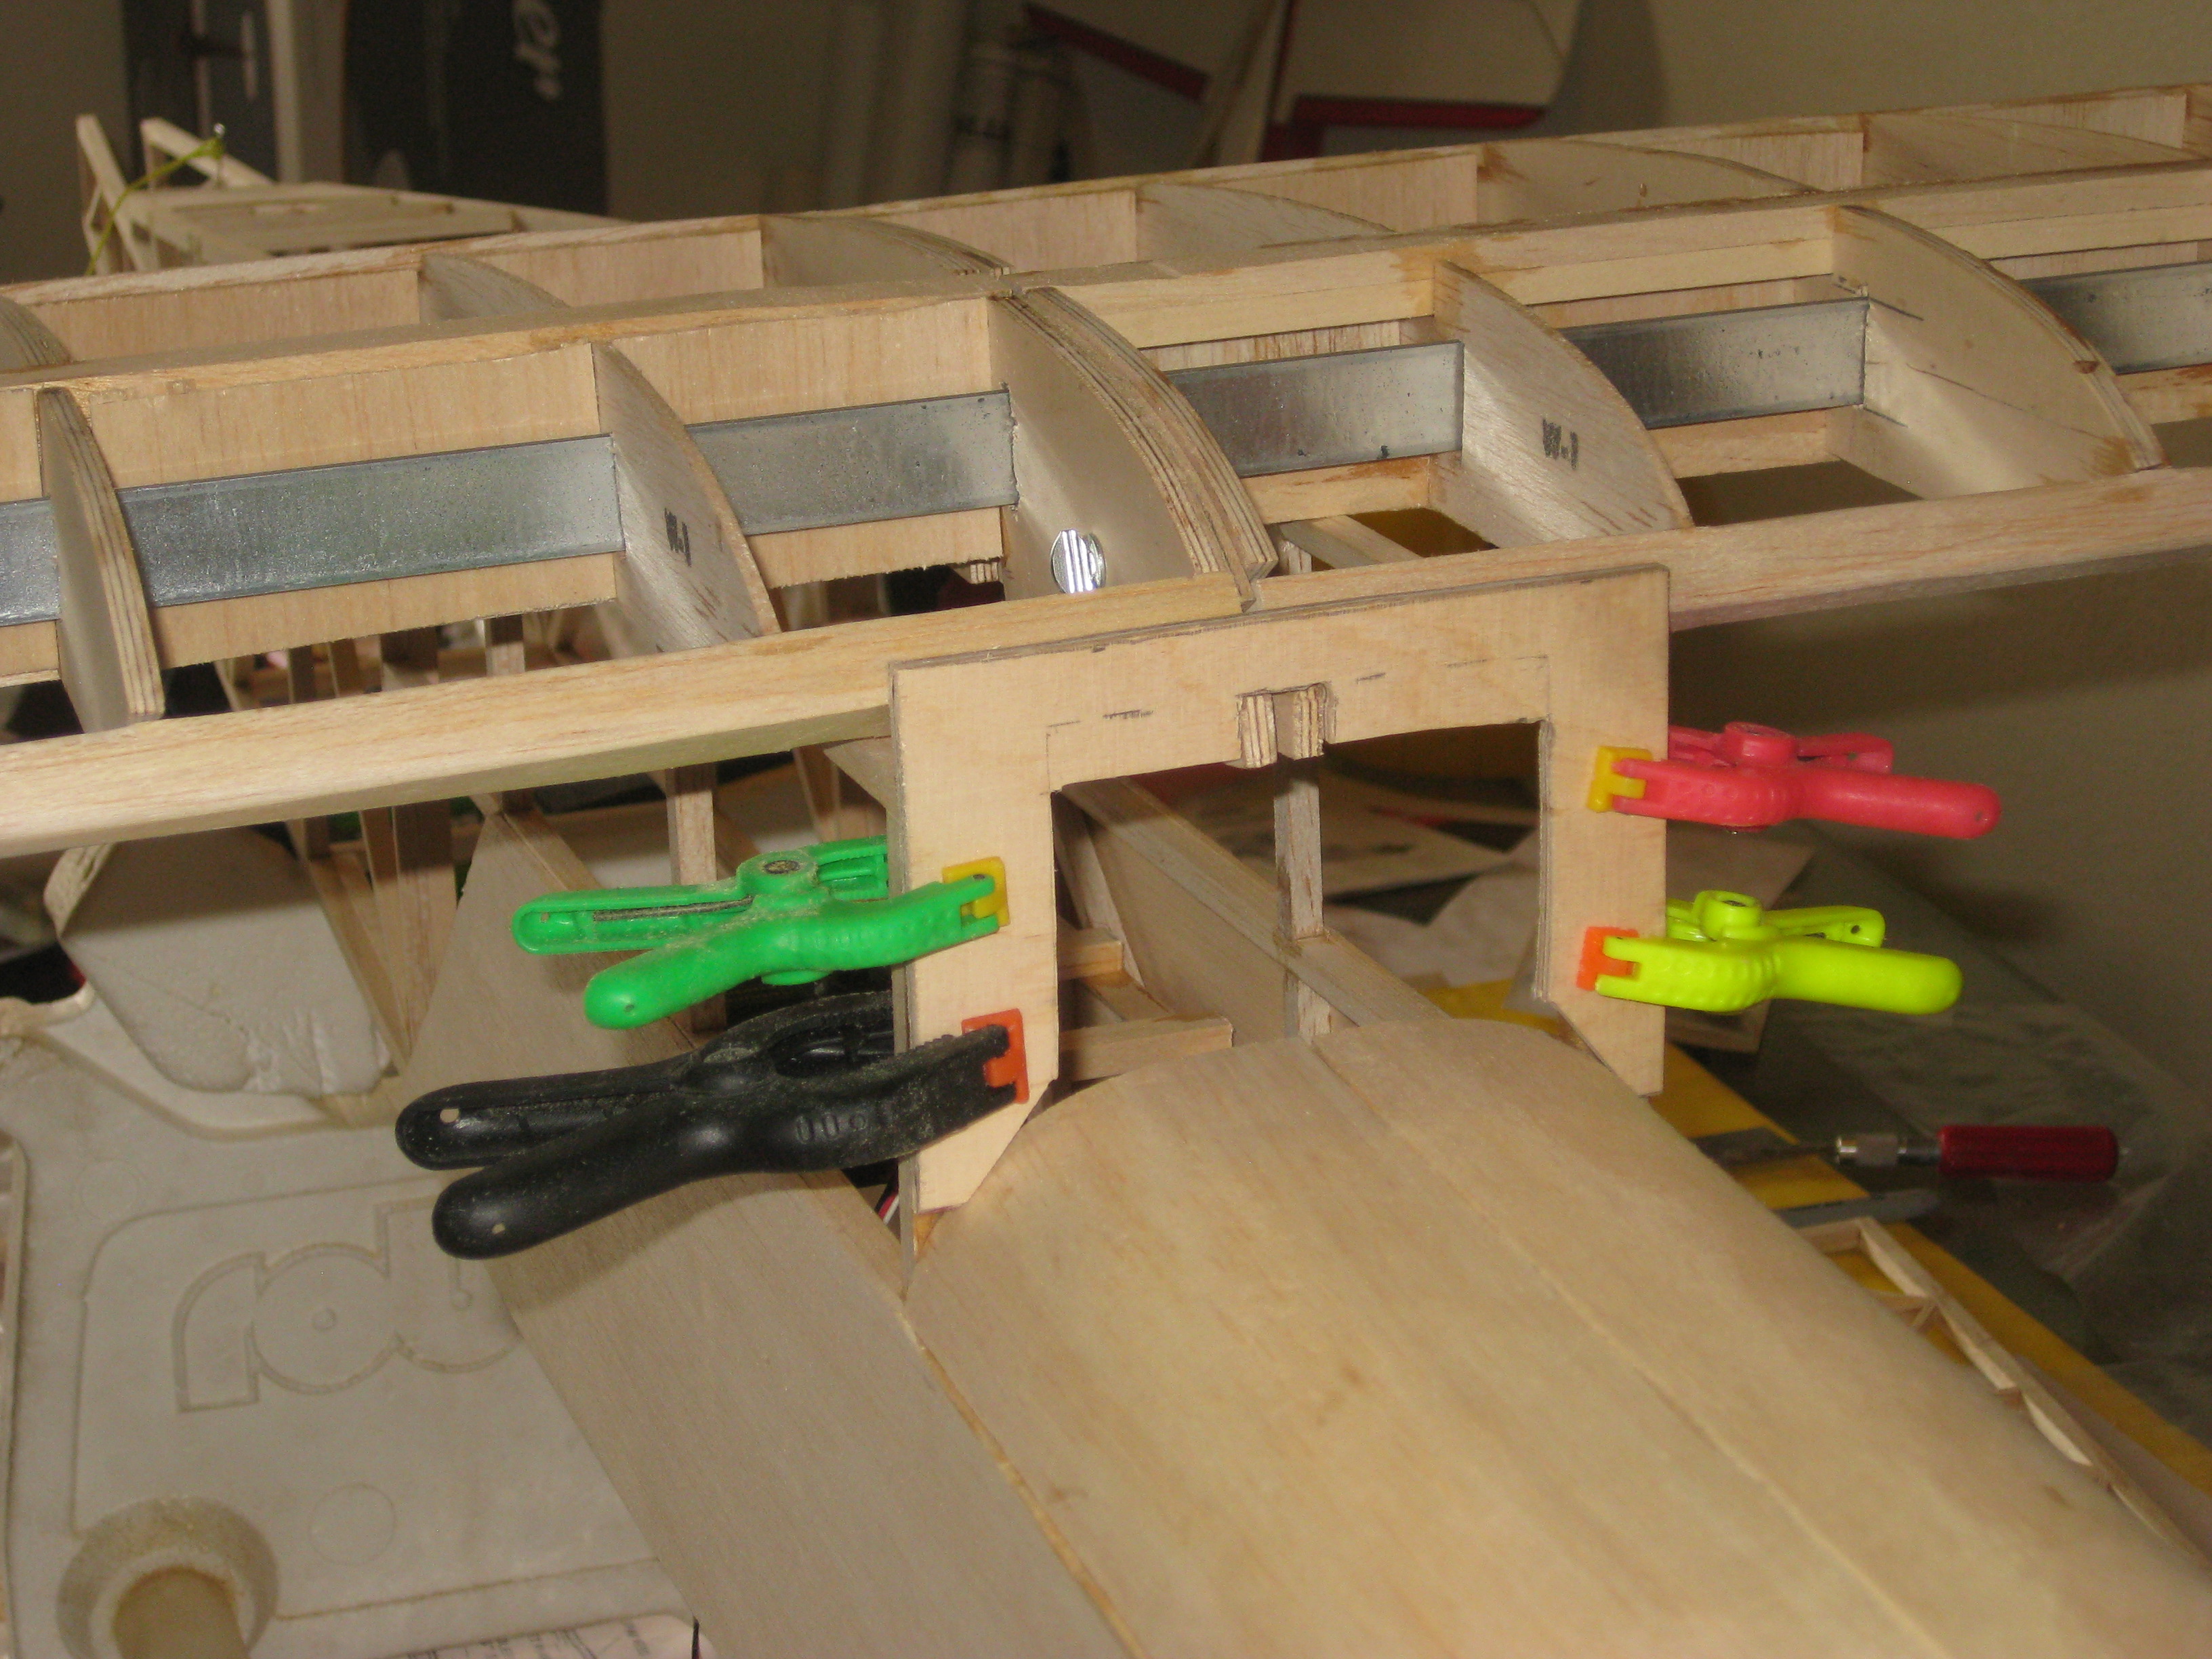
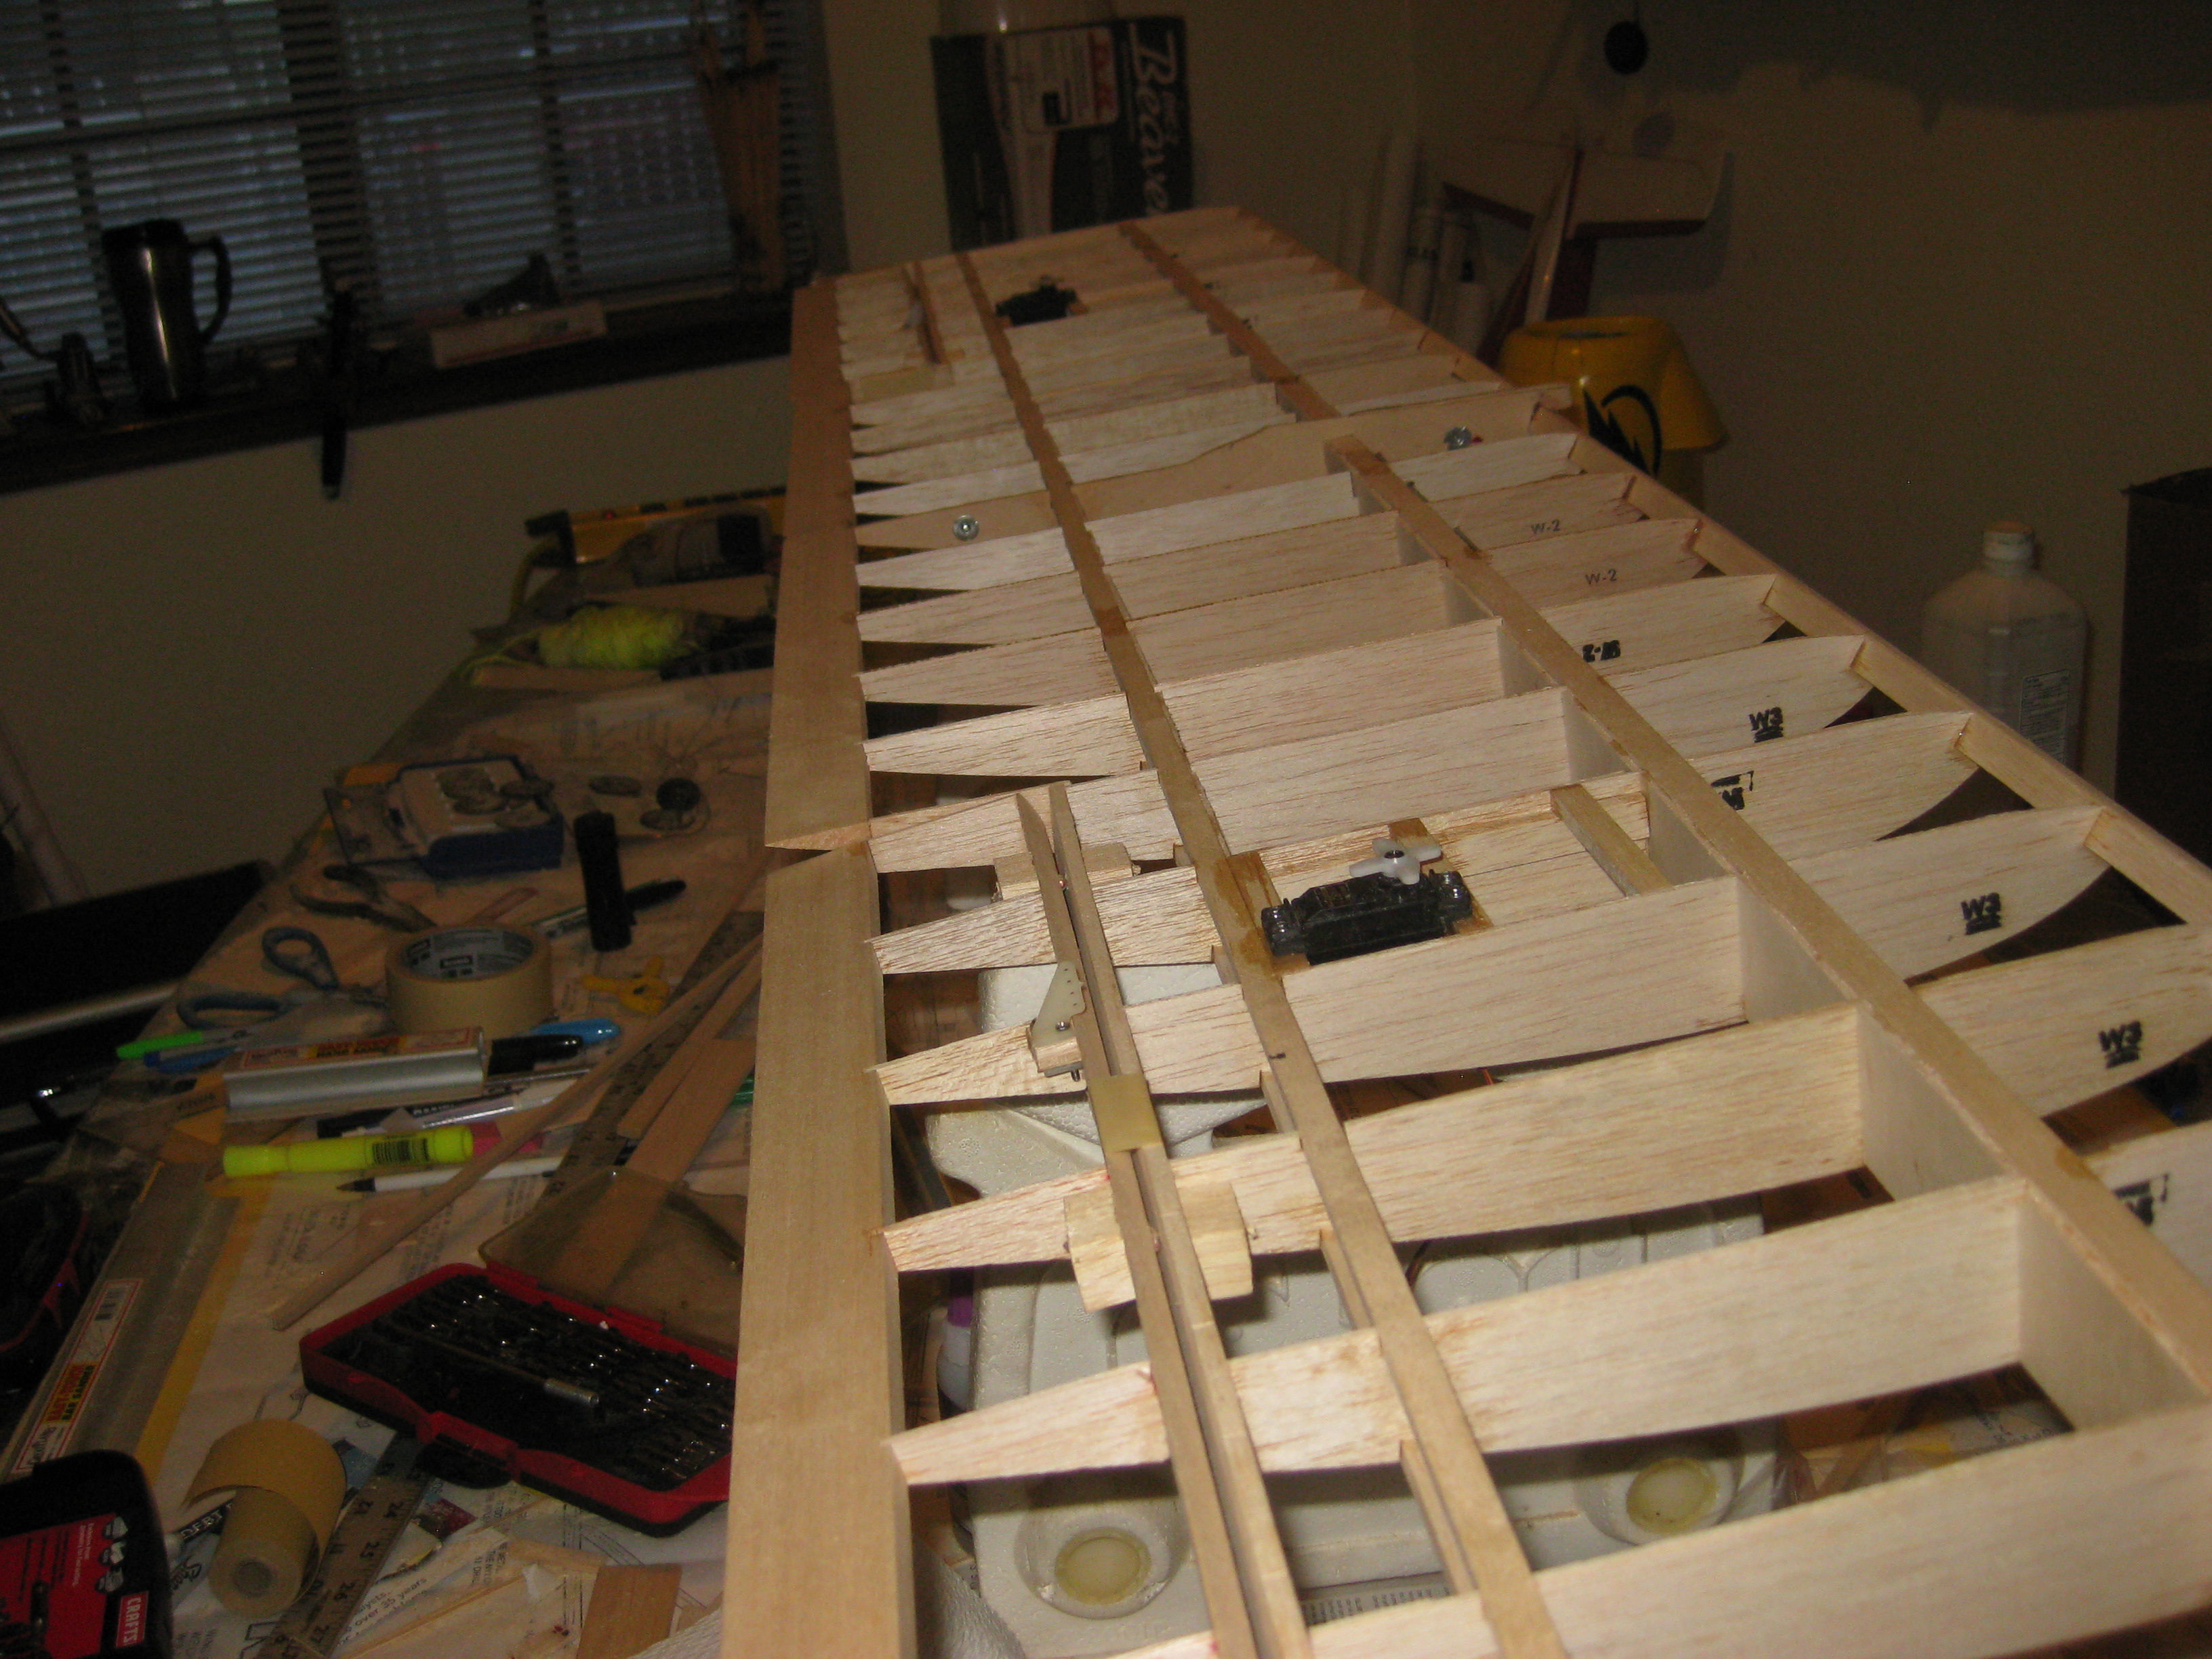
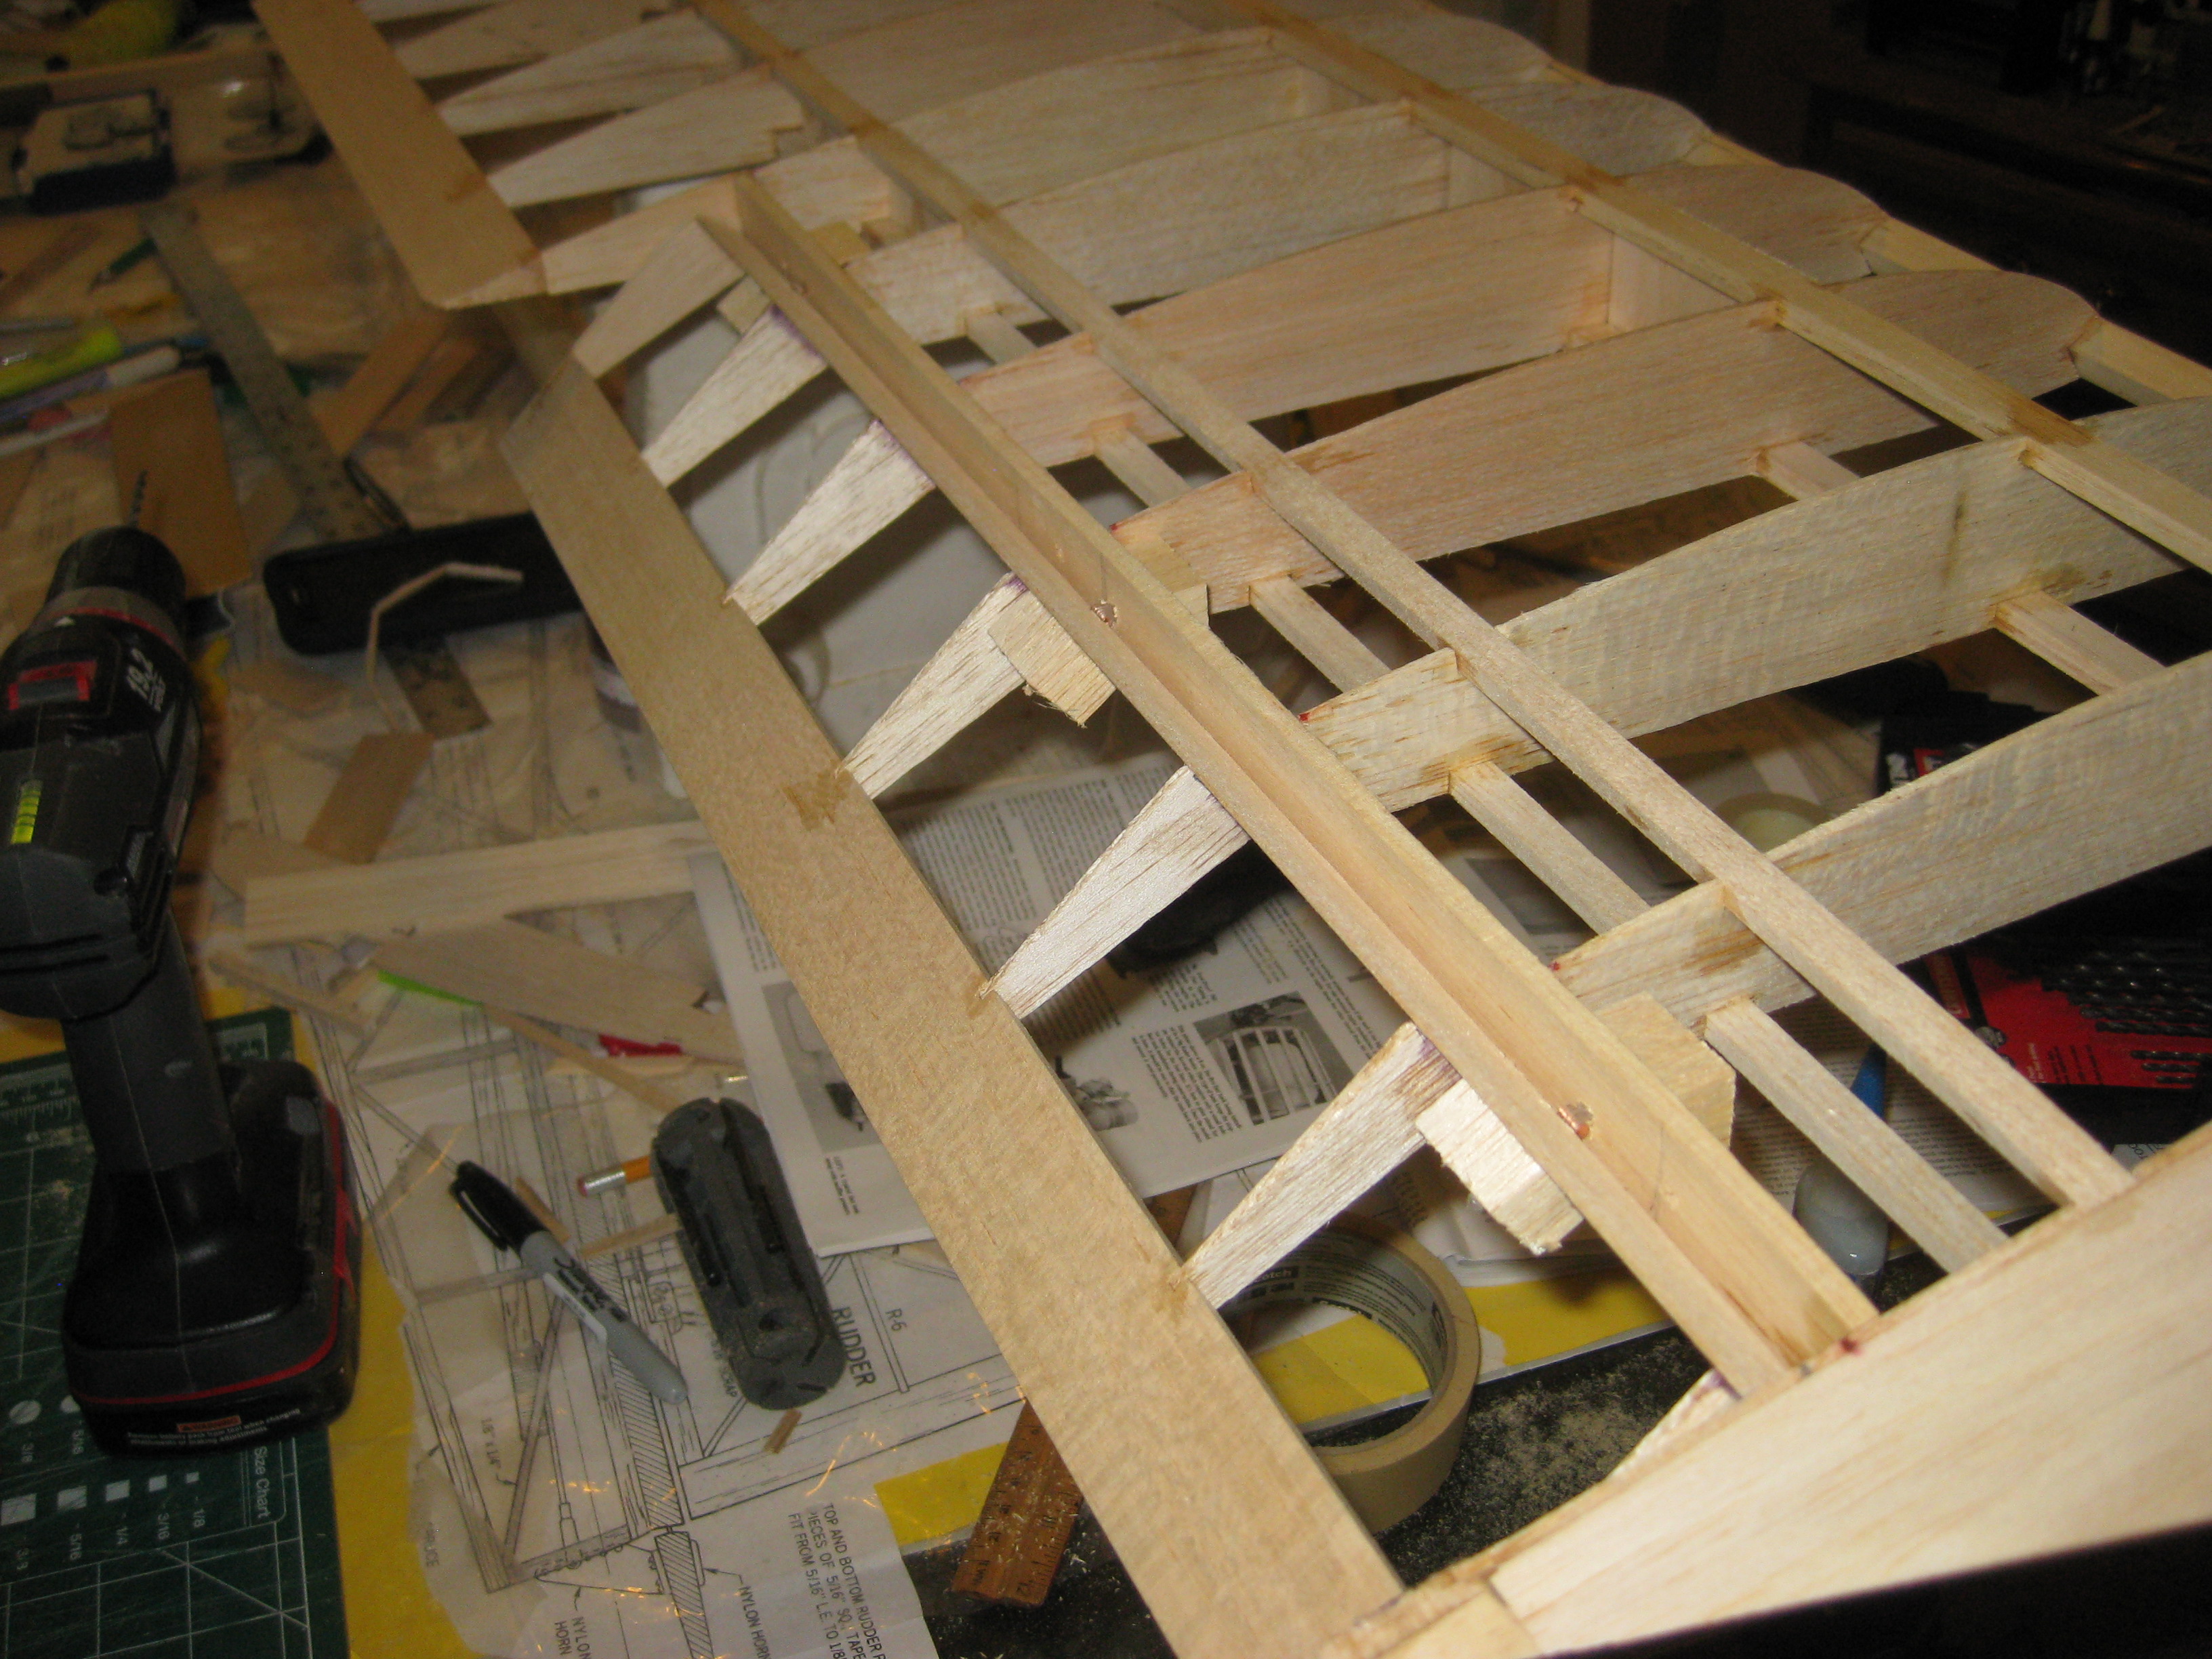
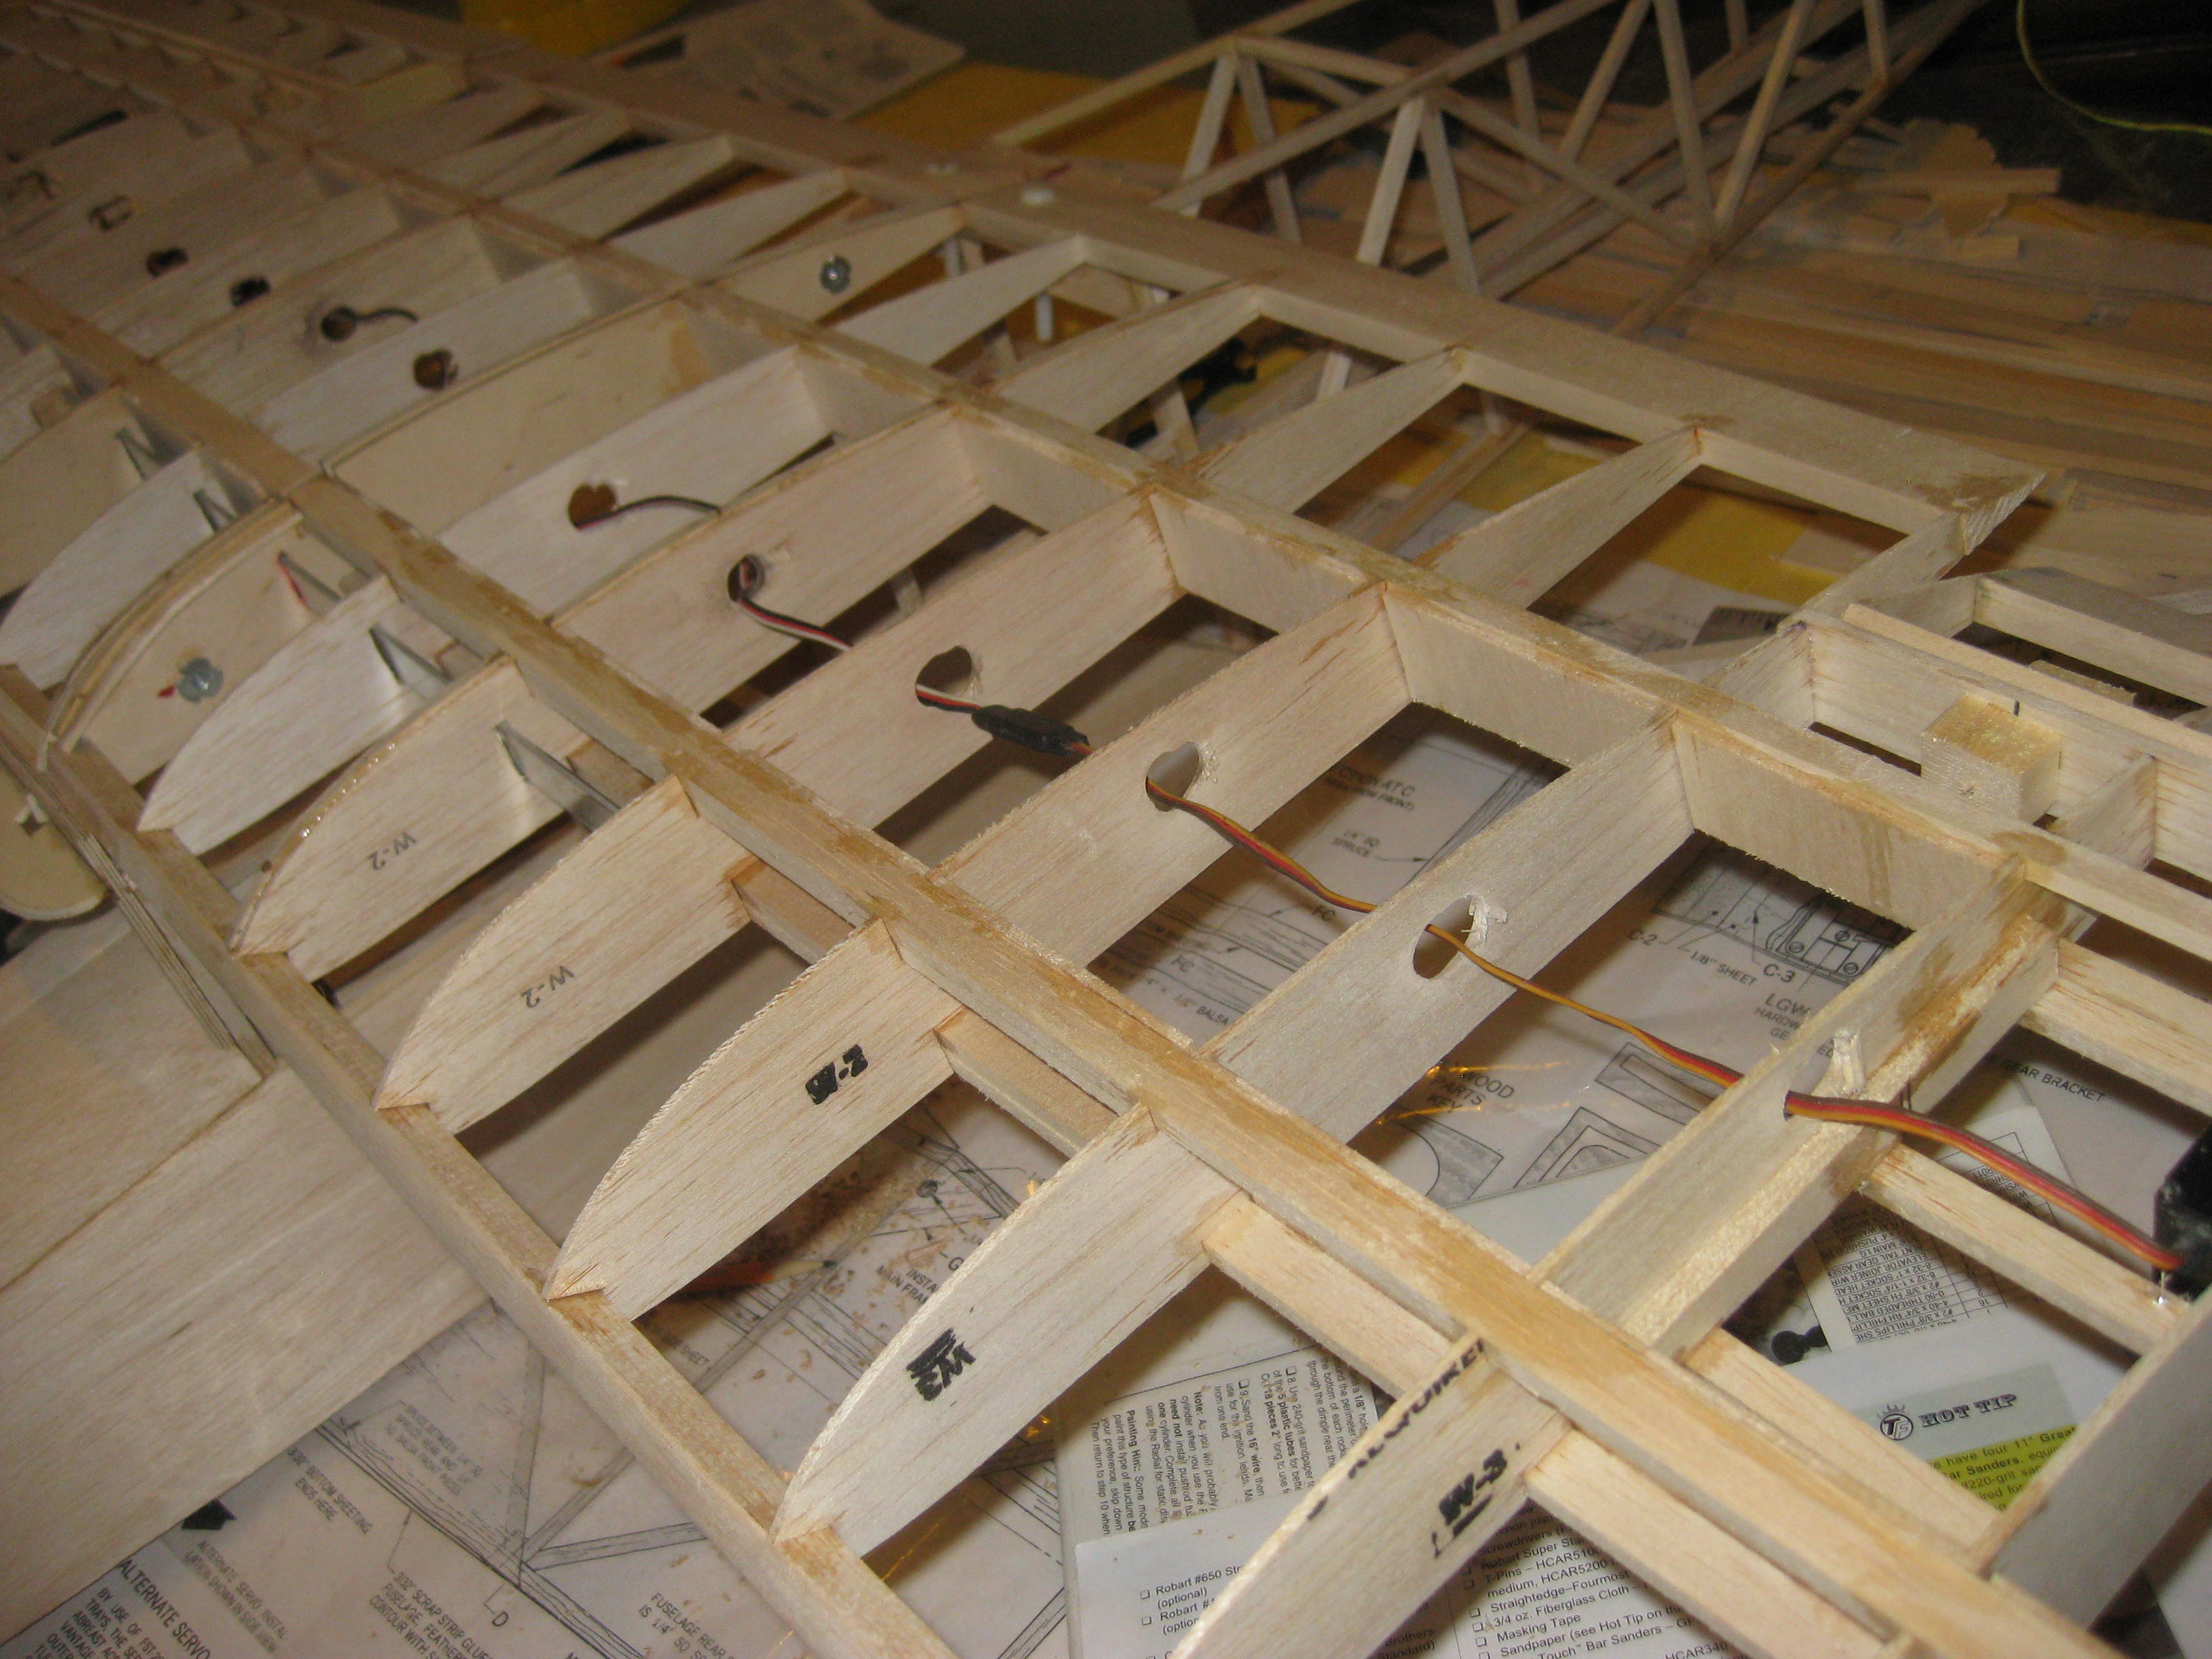
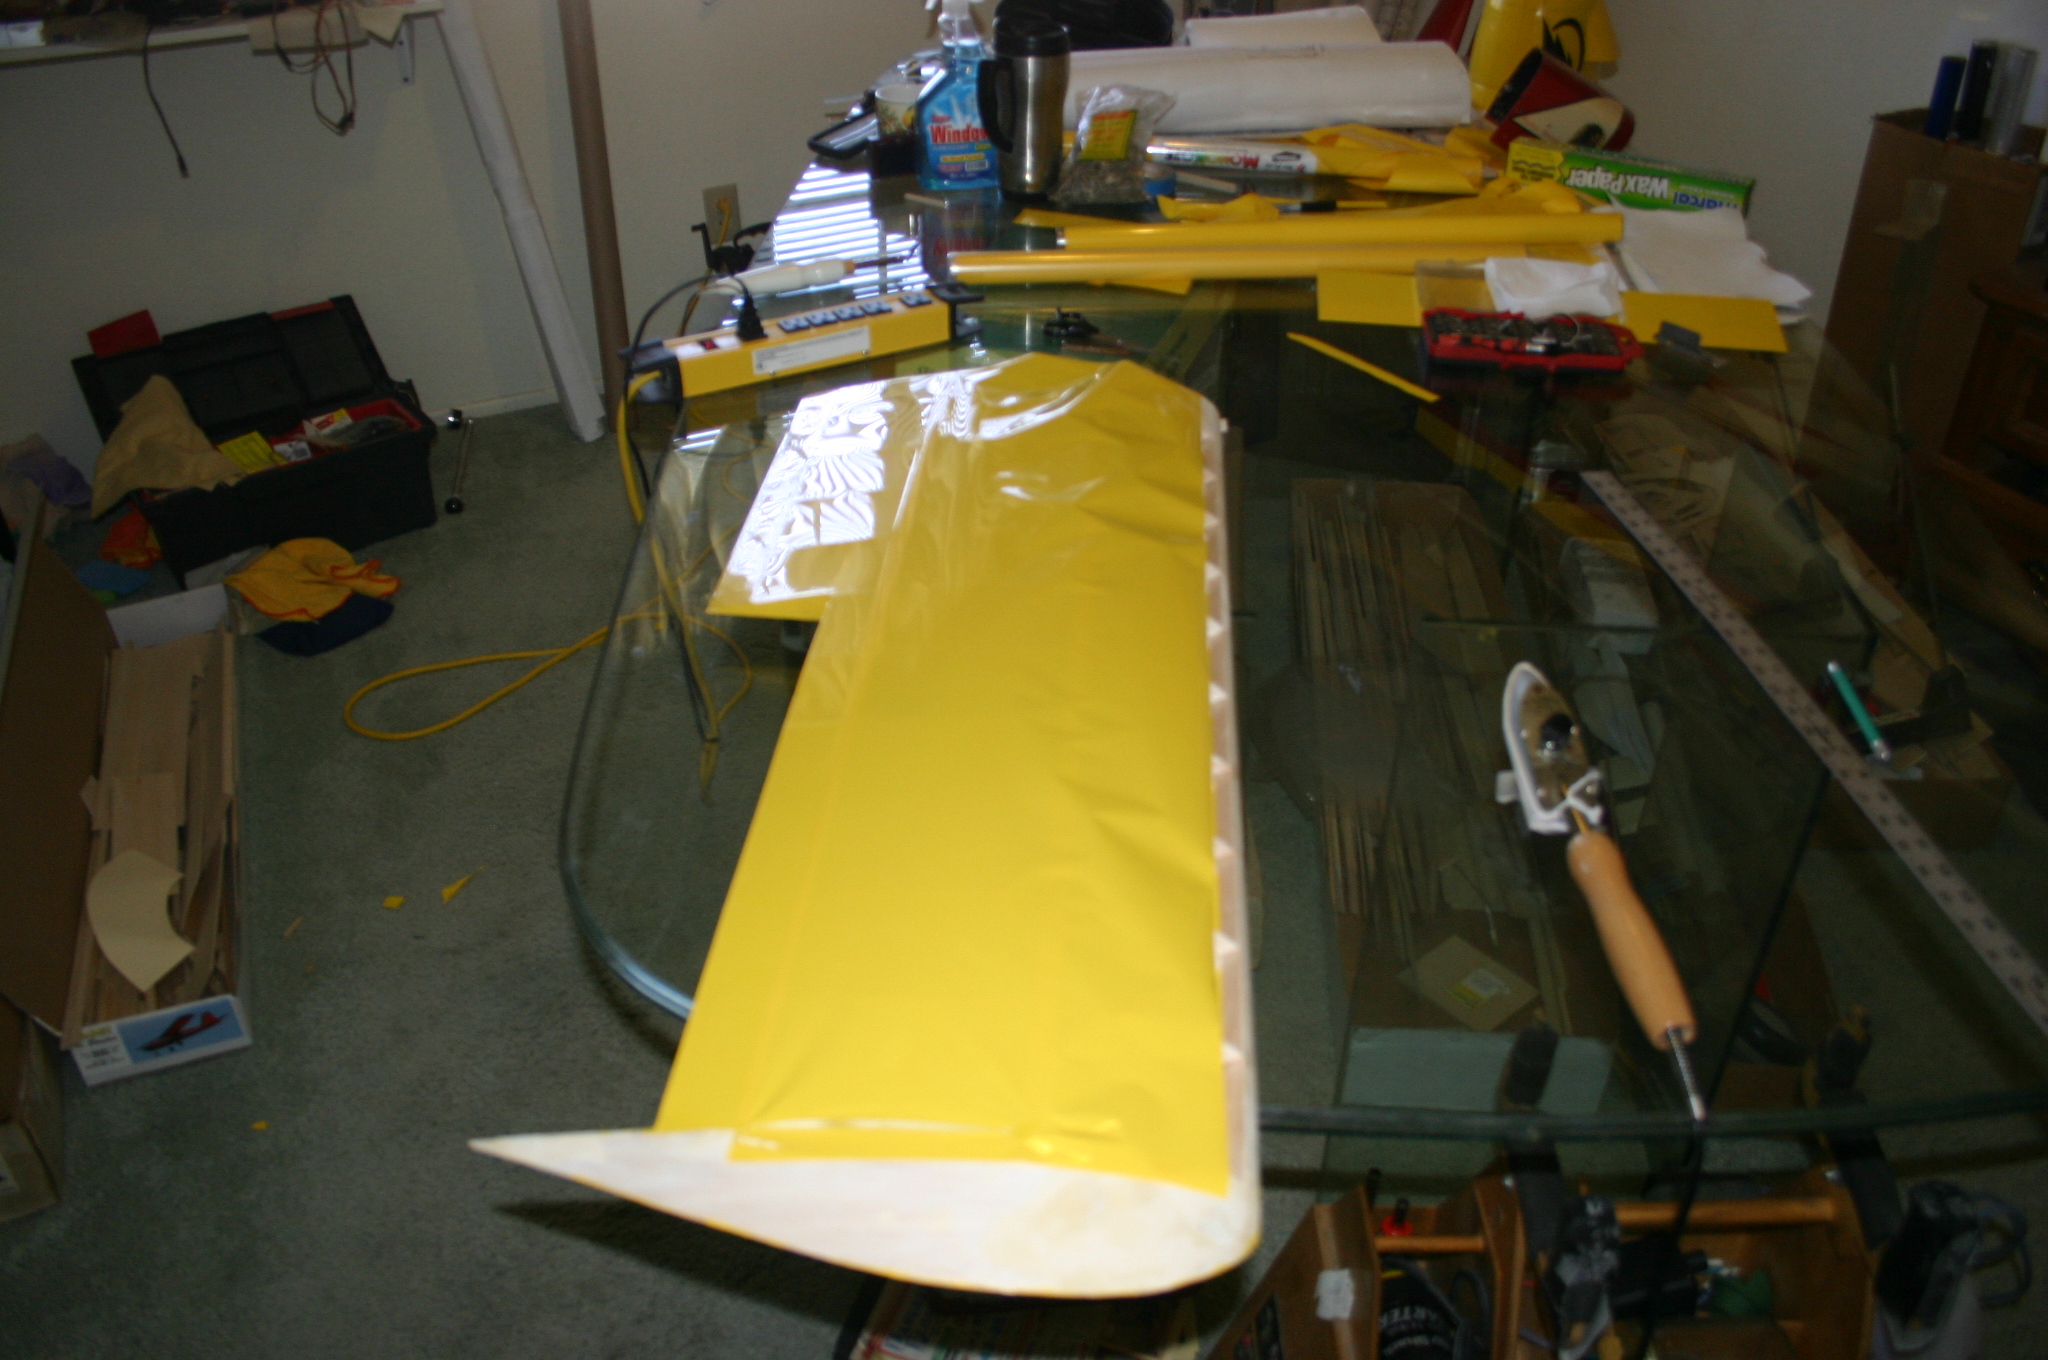
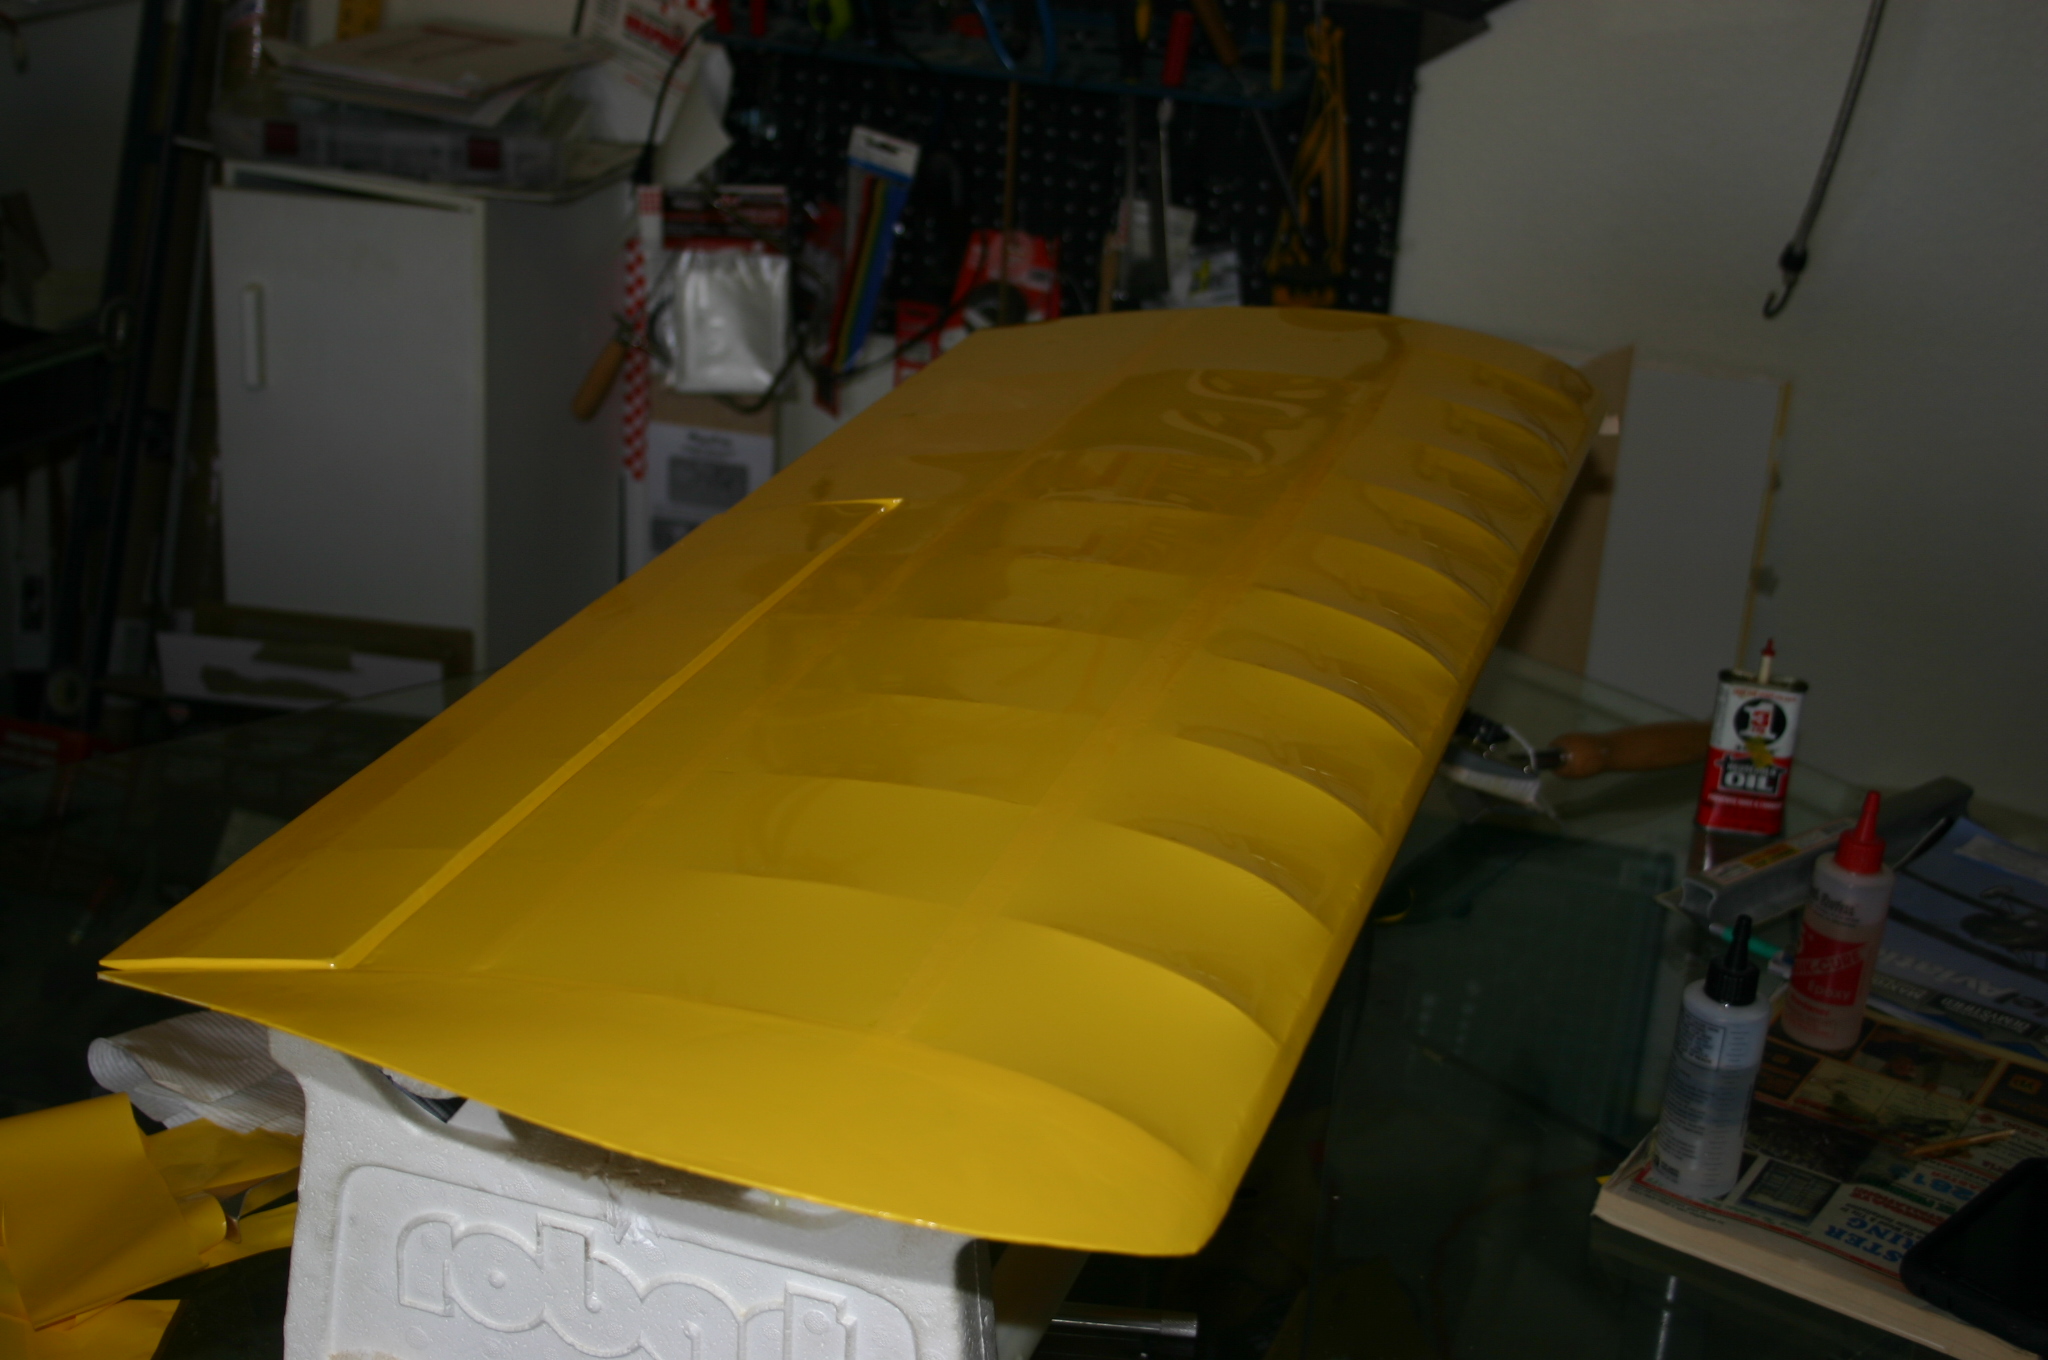
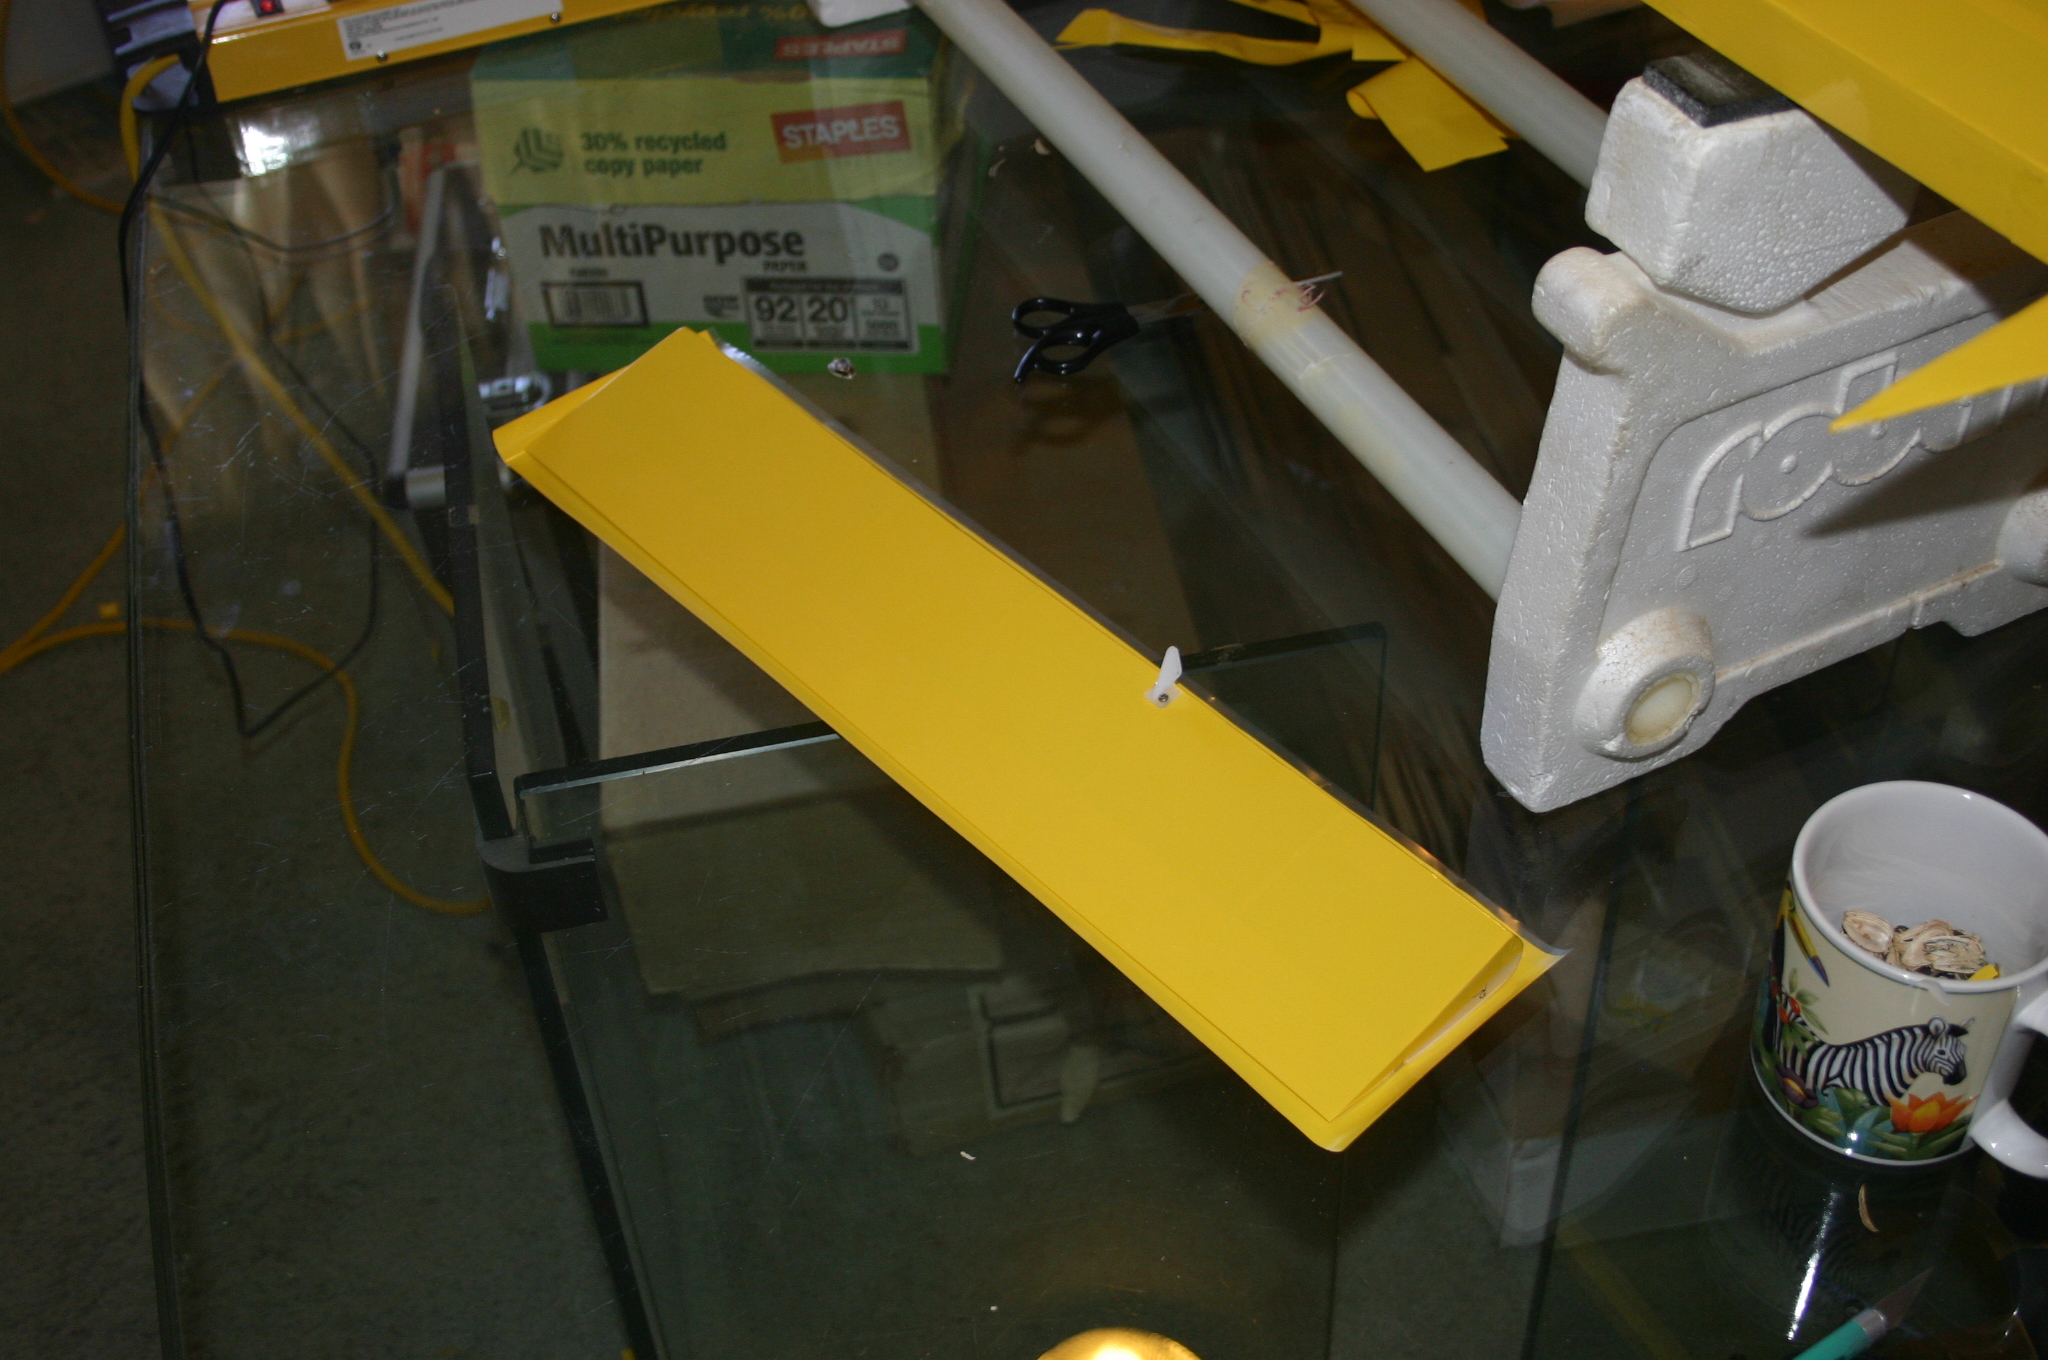
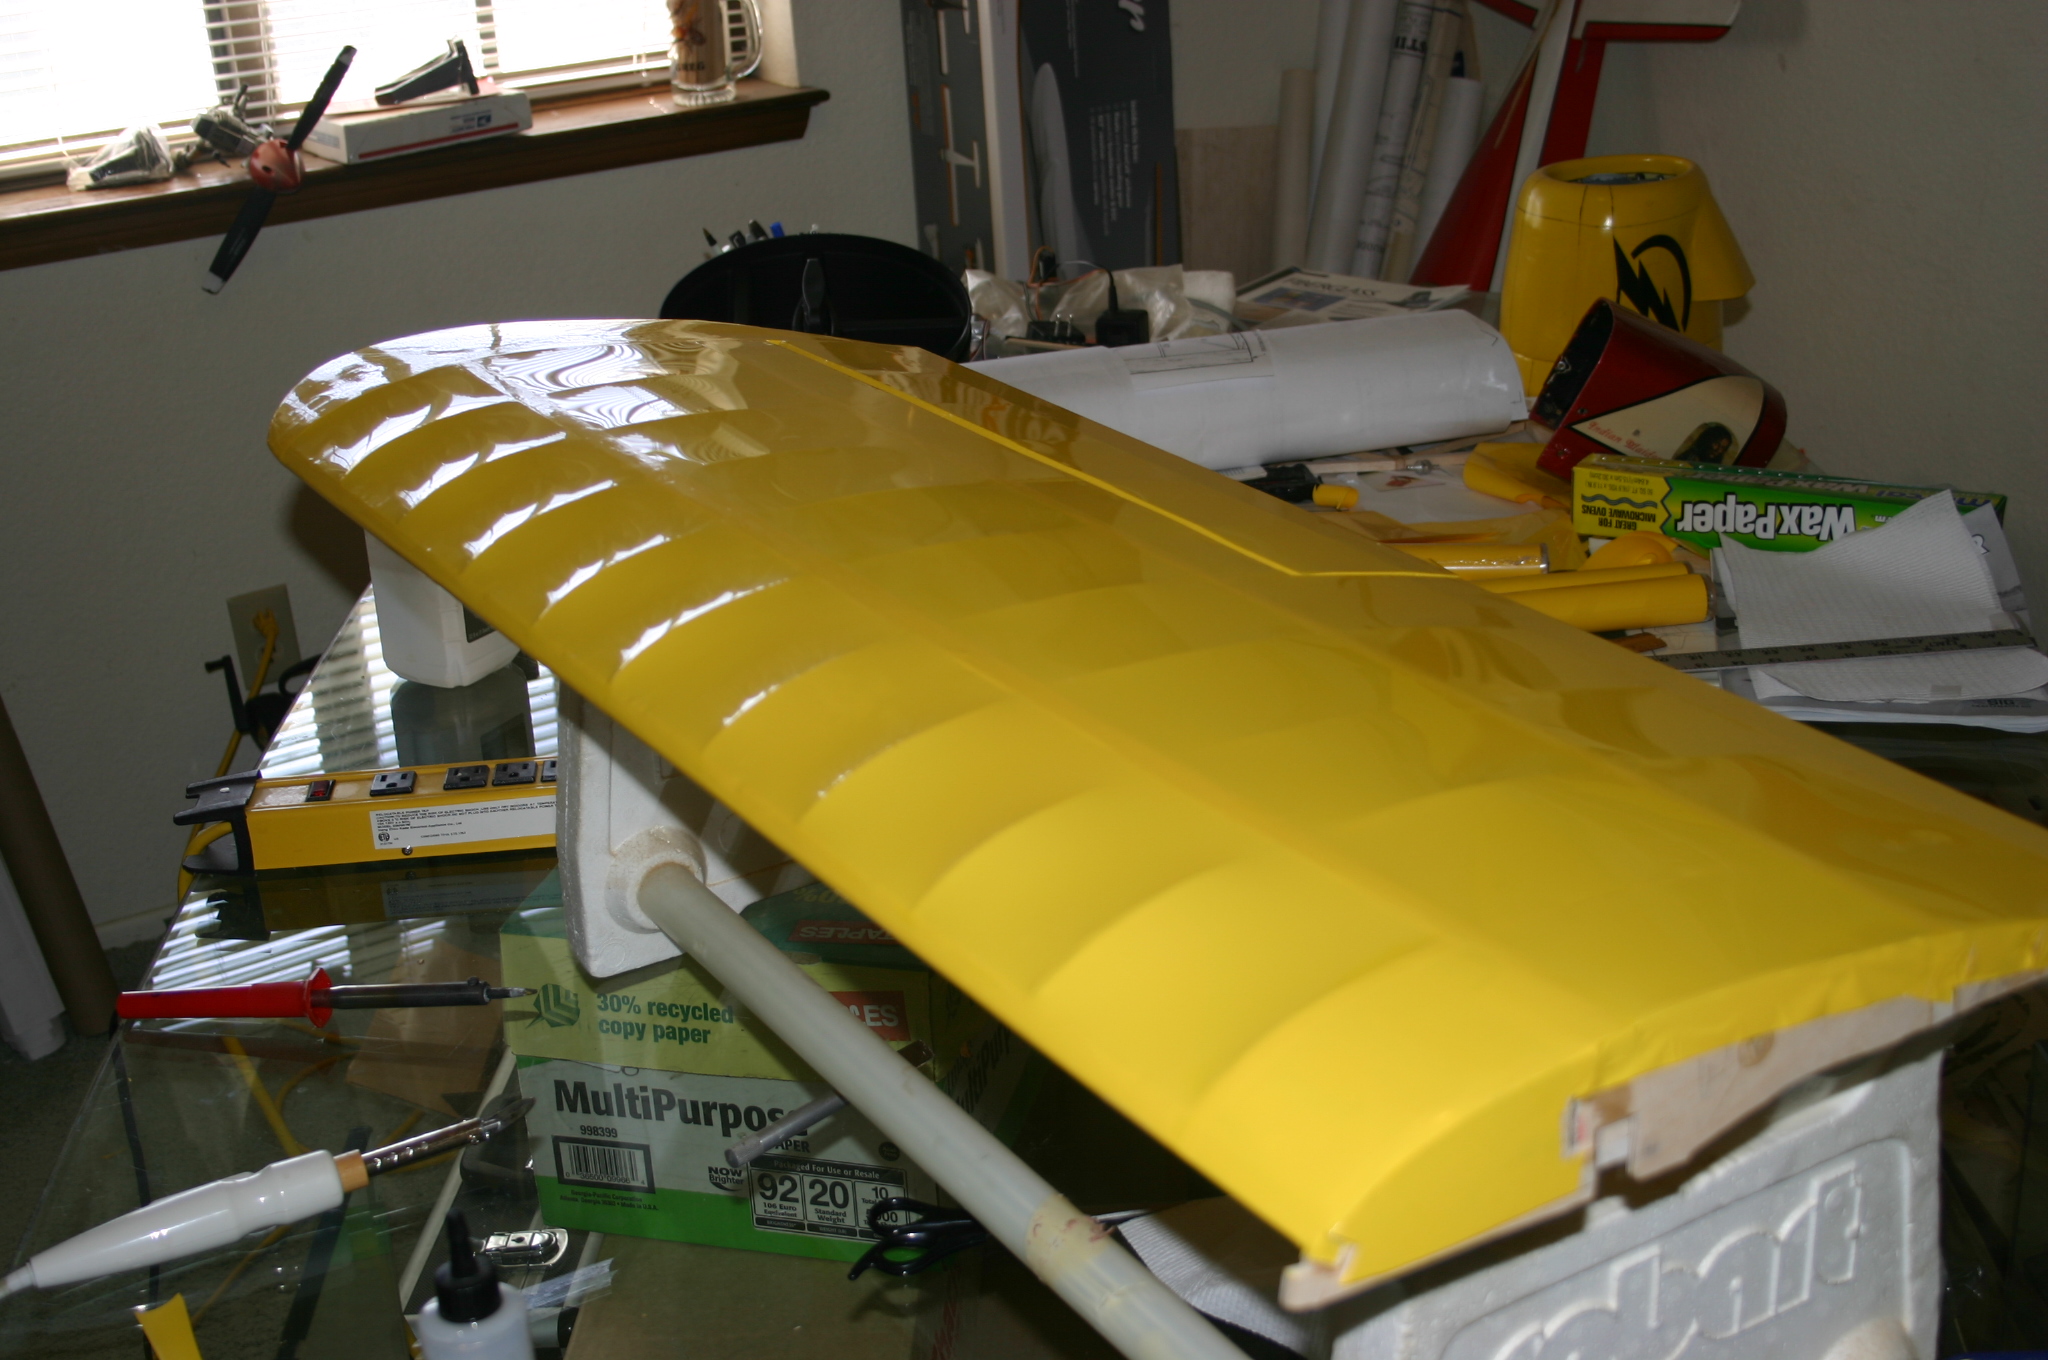
Ok. Making some progress. Here is more on the fuse and wings. Lining up ailerons for hinging, installing hinge blocks for pin hinges, aileron servo install along with control horns,filling wing tips, installing and supporting rear block for wing bolts and servo leads.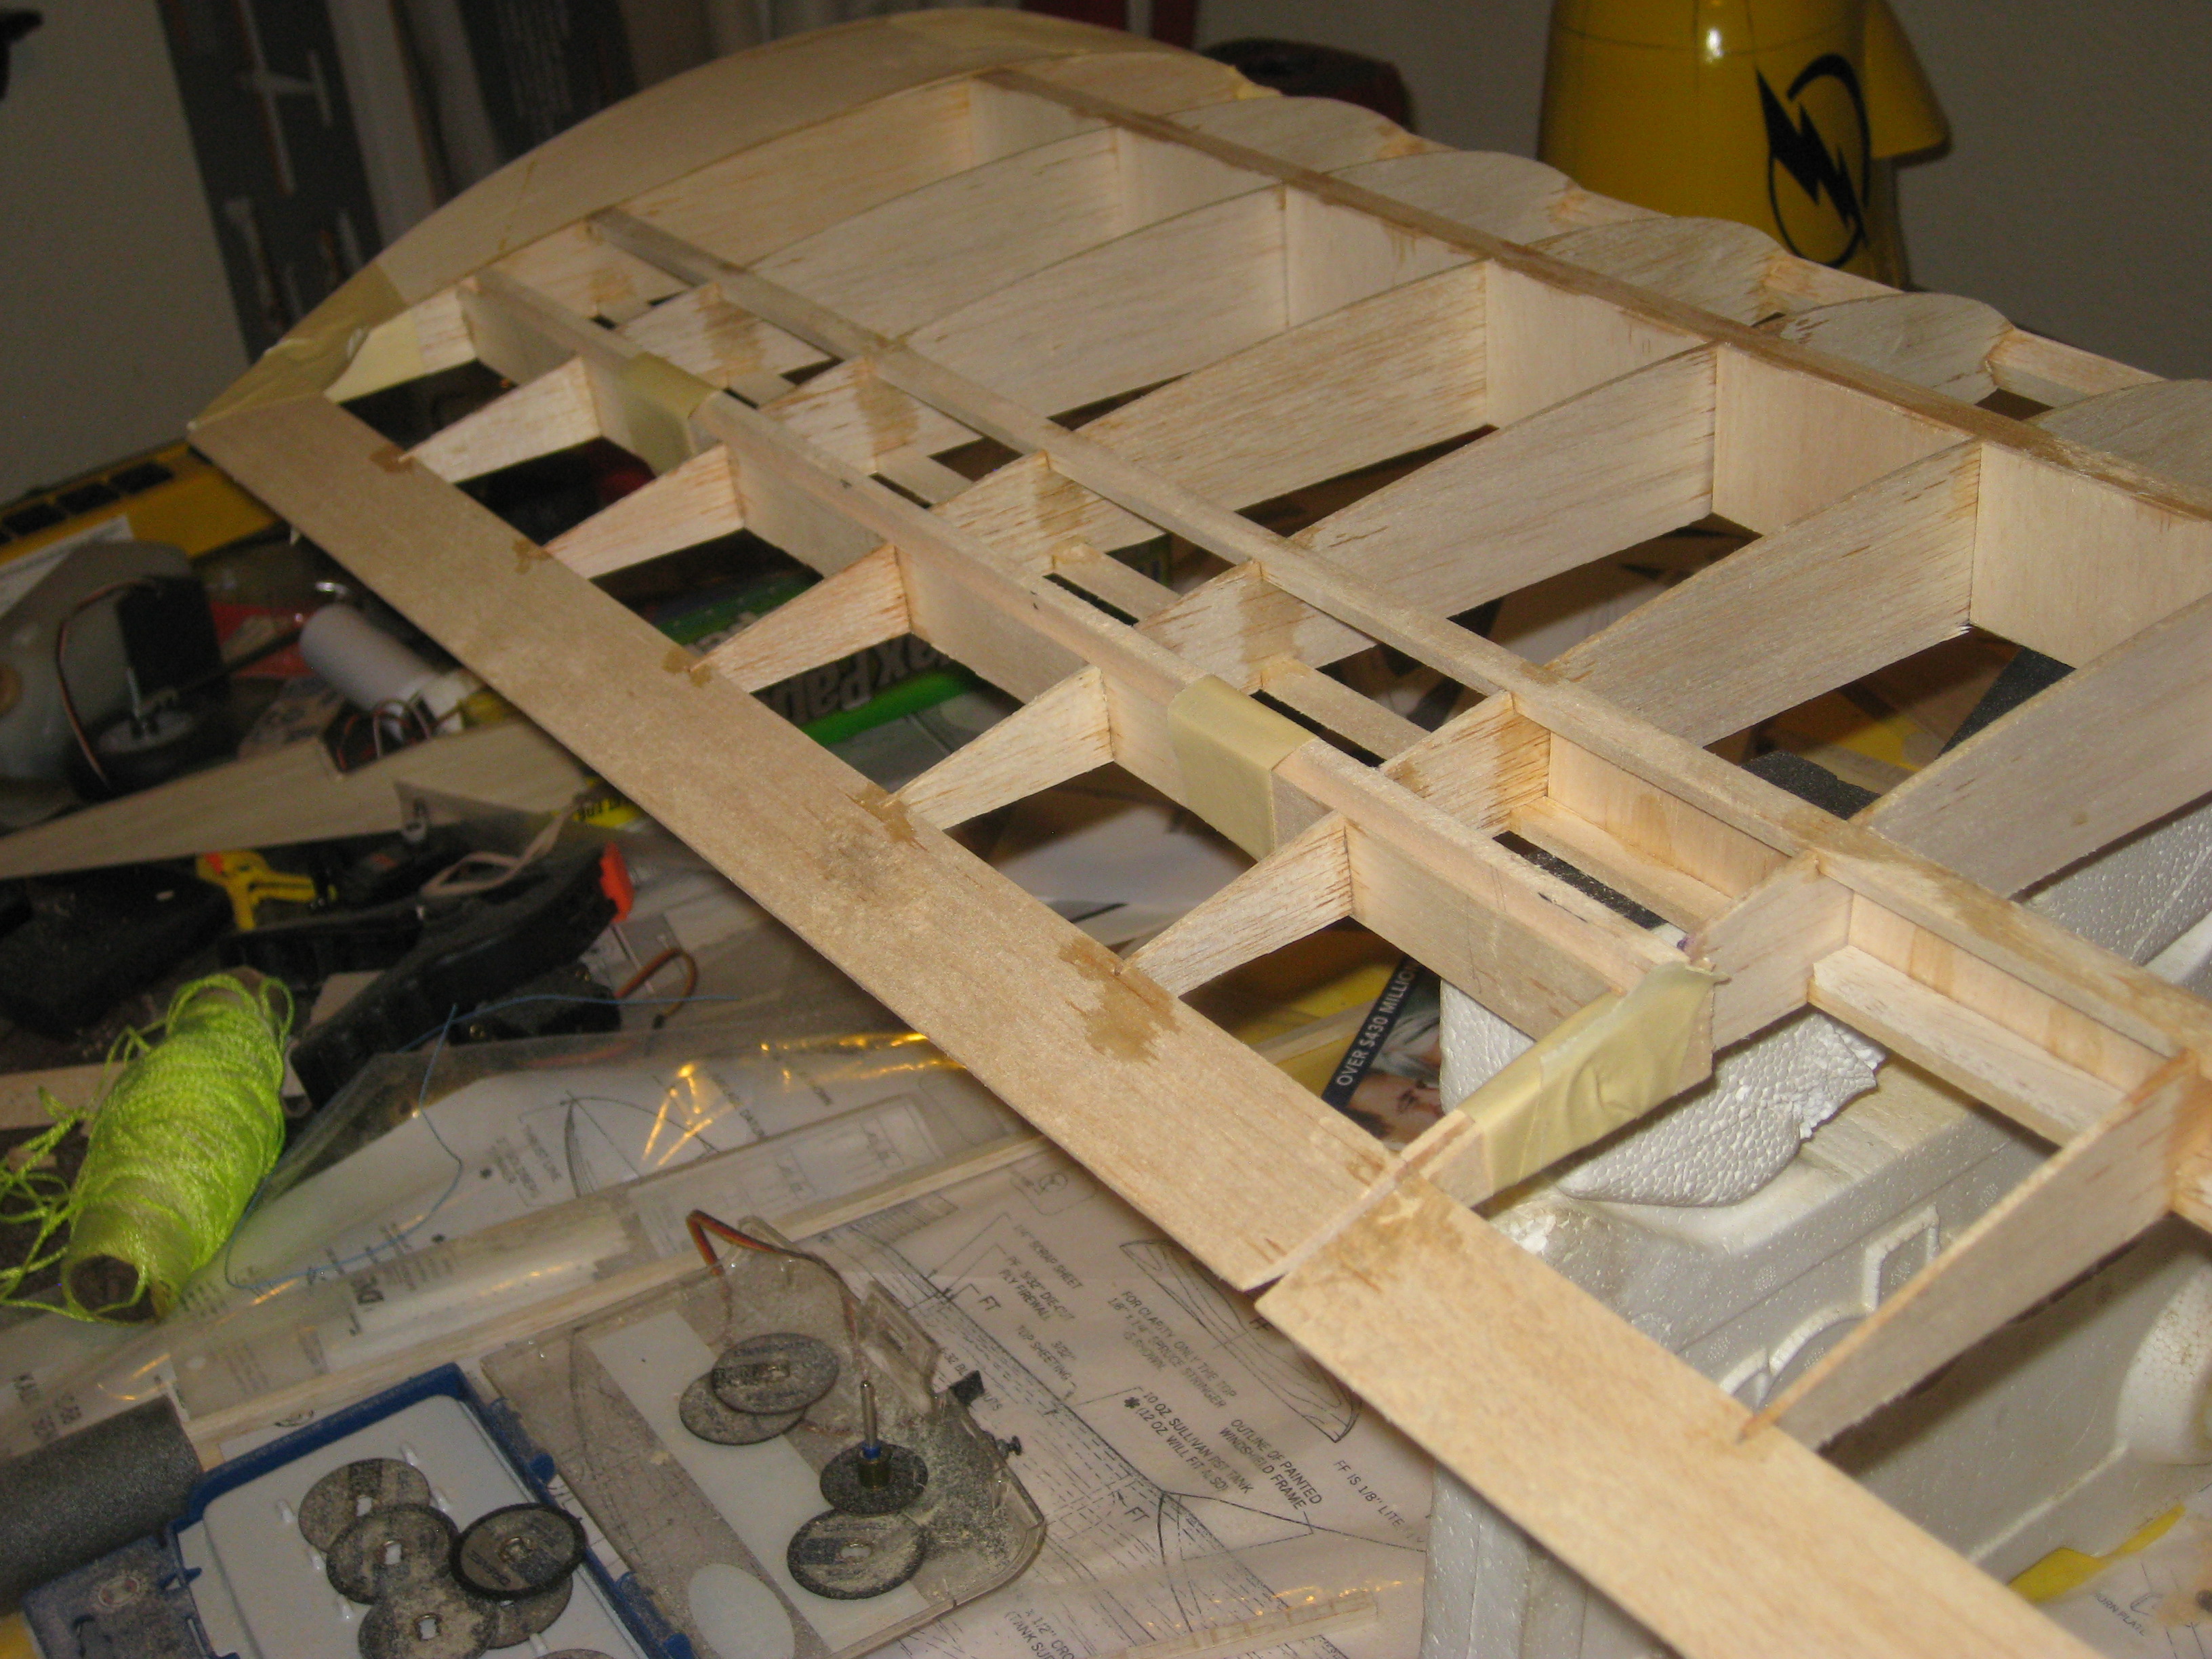

05-05-2015 | 02:01 PM
#25
Thread Starter
My Feedback: (12)
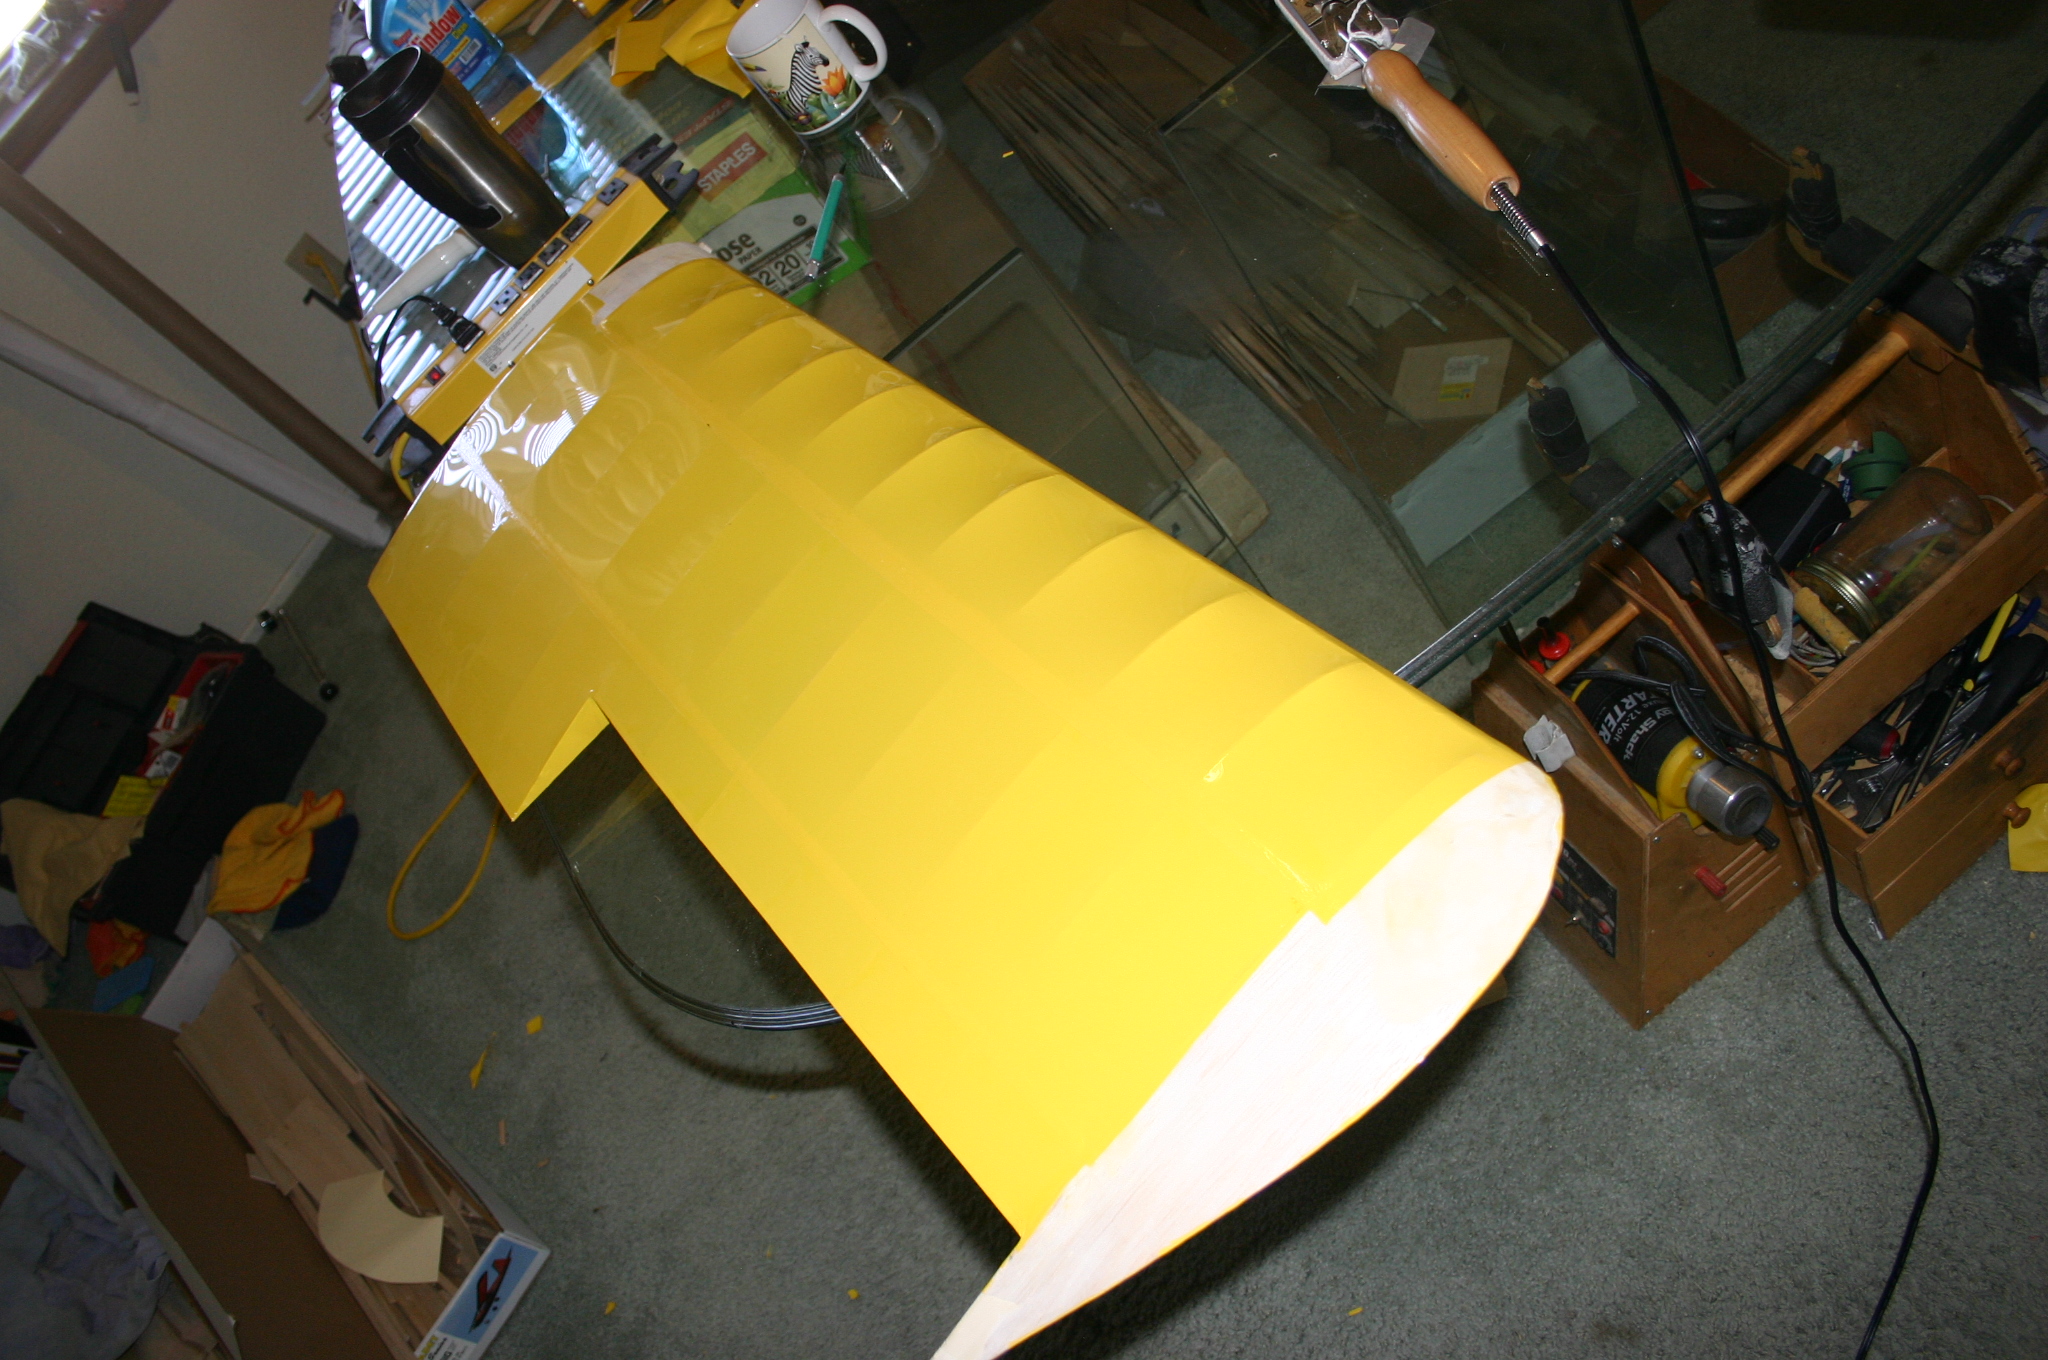
Finally able to deliver "almost ready to fly" to Ernie. He just has to mount the wheels, motor and internal servo's, receiver etc. and maiden. Here are the pics of the finishing progression. Hopefully I will be able to be at the field when Ernie maidens it and get some final pics.
Here is some pics of finishing the fuse:

Some wing covering:


Here is some pics of finishing the fuse:
Some wing covering:

