


G&L Hobbies Chipmunk Build
 04-09-2015 | 03:02 PM
#1
Thread Starter

My Feedback: (2)
Joined: Jun 2009
Posts: 18
Likes: 0
Received 0 Likes
on
0 Posts
From: TX
Hi,
I started to build the G&L Hobbies Chipmunk. A friend of mine recommended this kit to me and I got it in a heartbeat.
My plans are to fiberglass the wings, rudder, stab and elevators. I bought Robart ˝" struts for the fixed landing gear. I also bought a DLE 55RA.
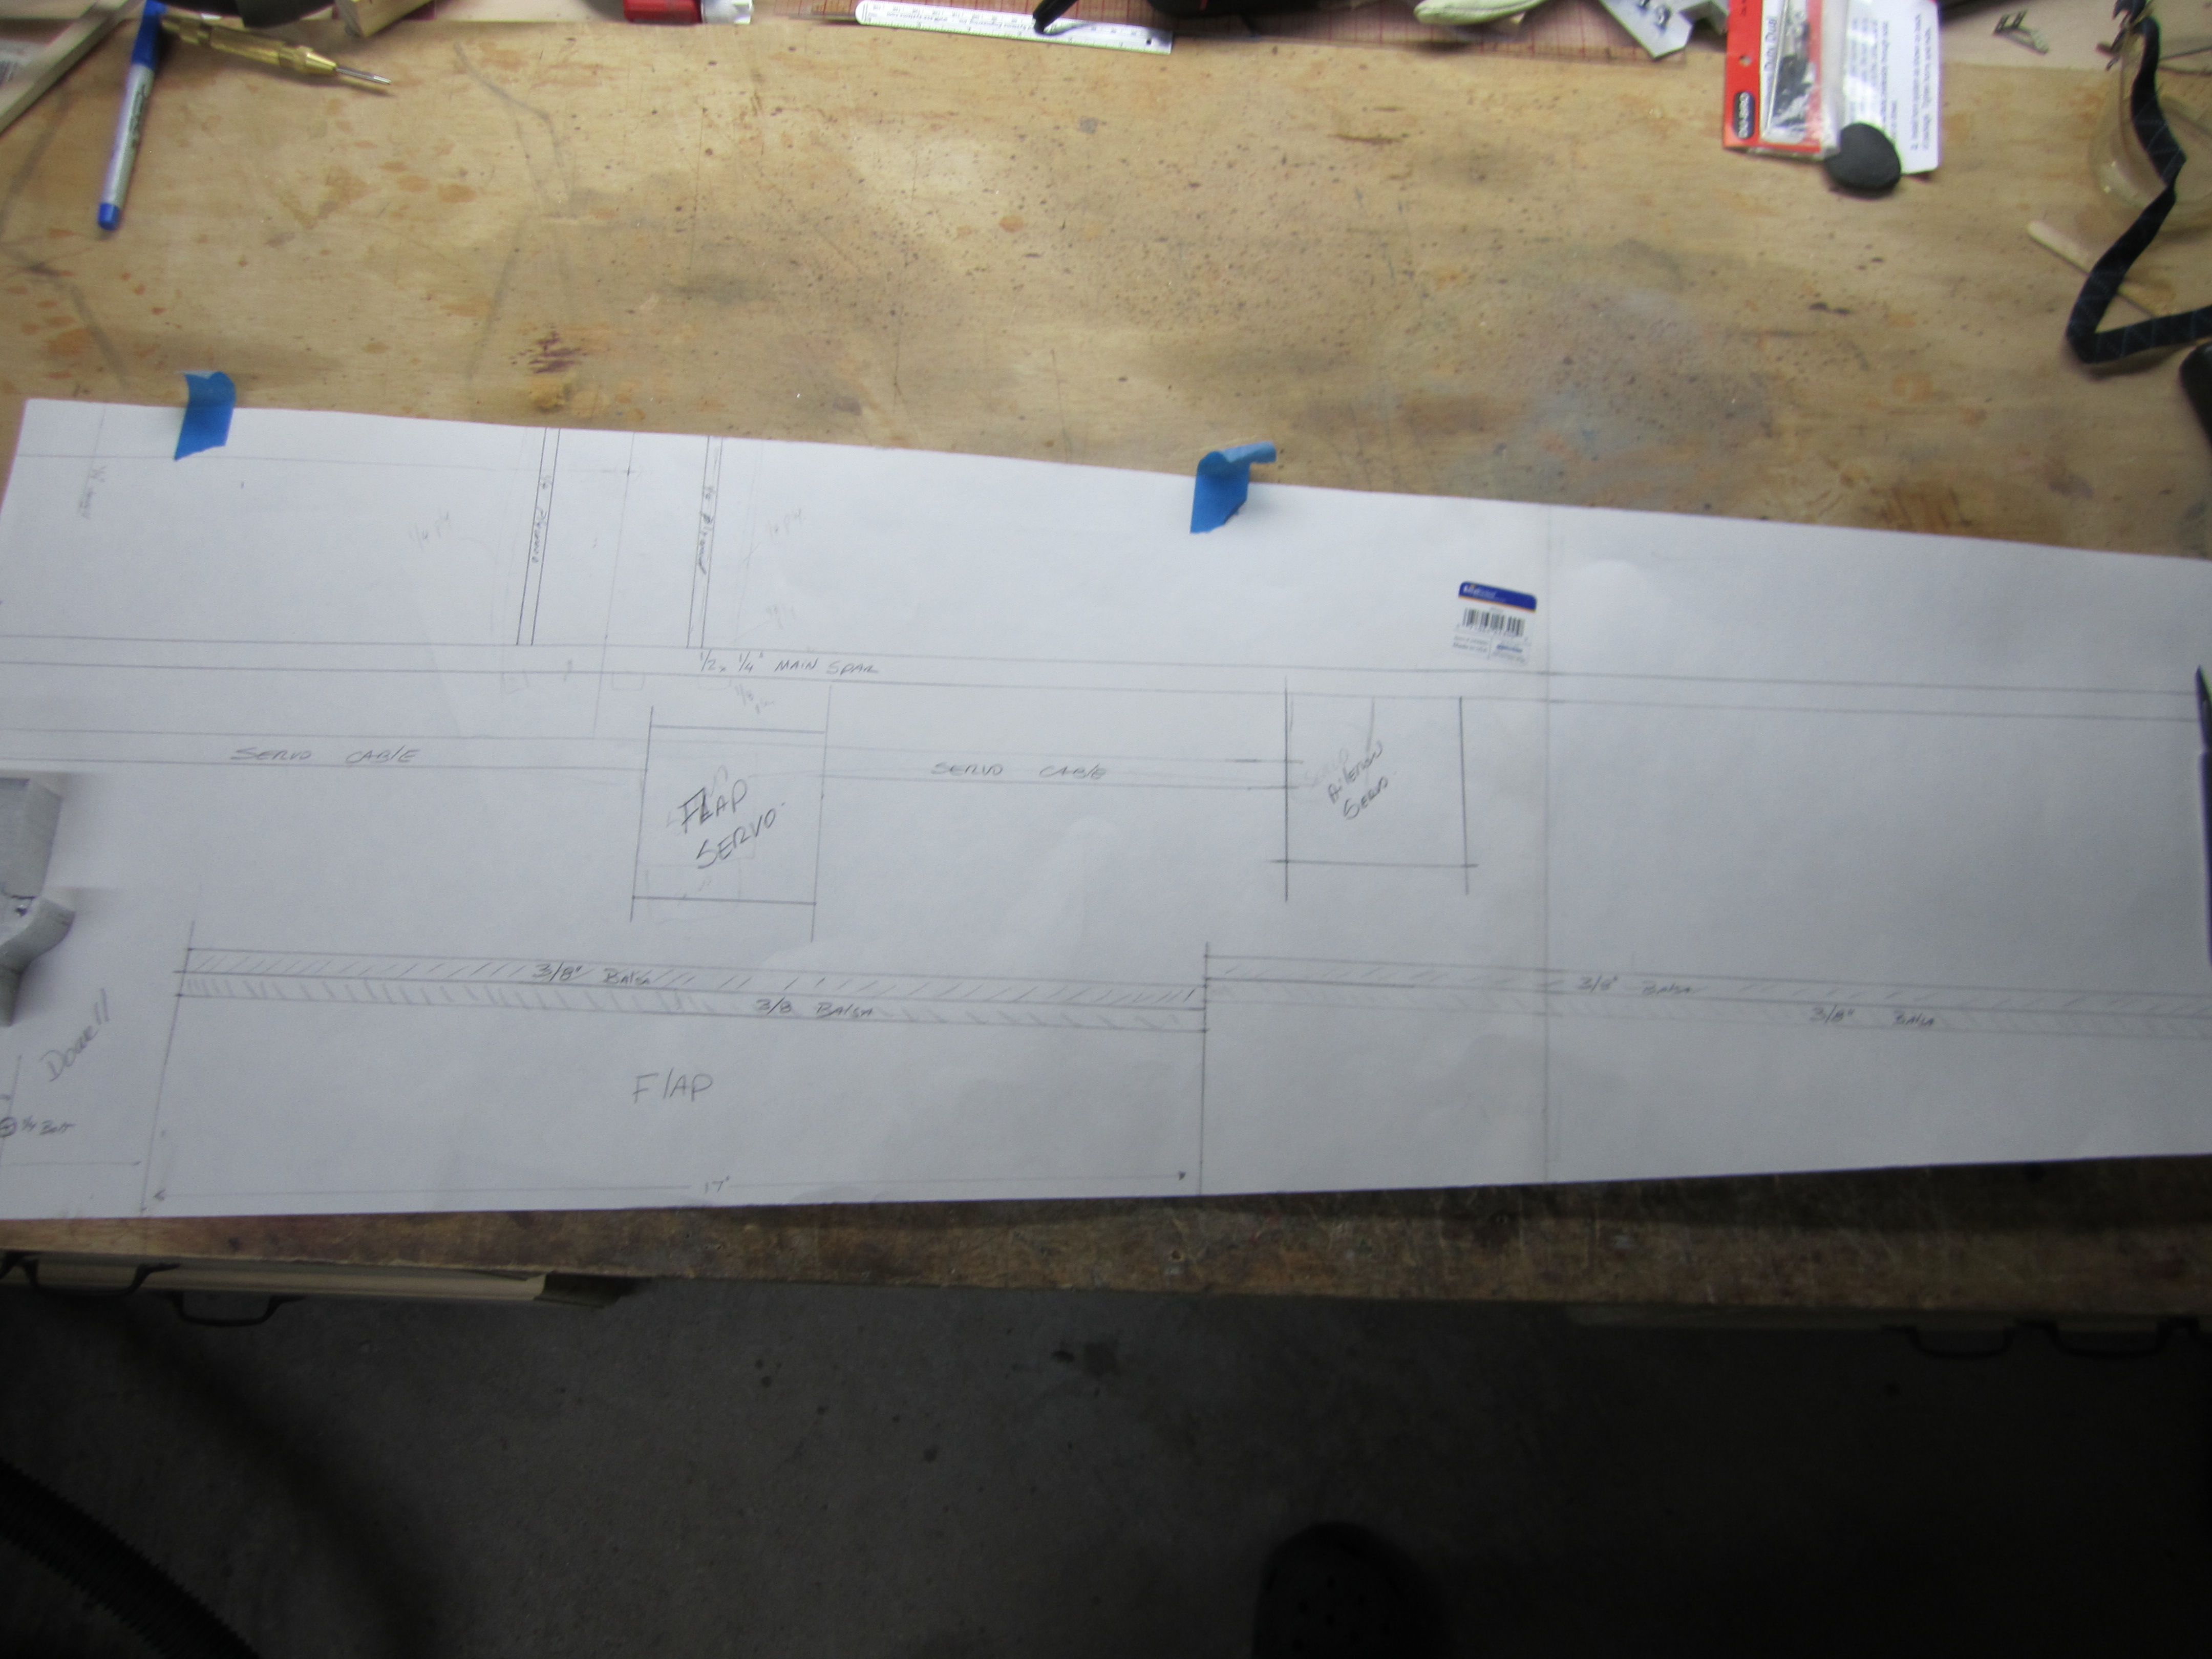
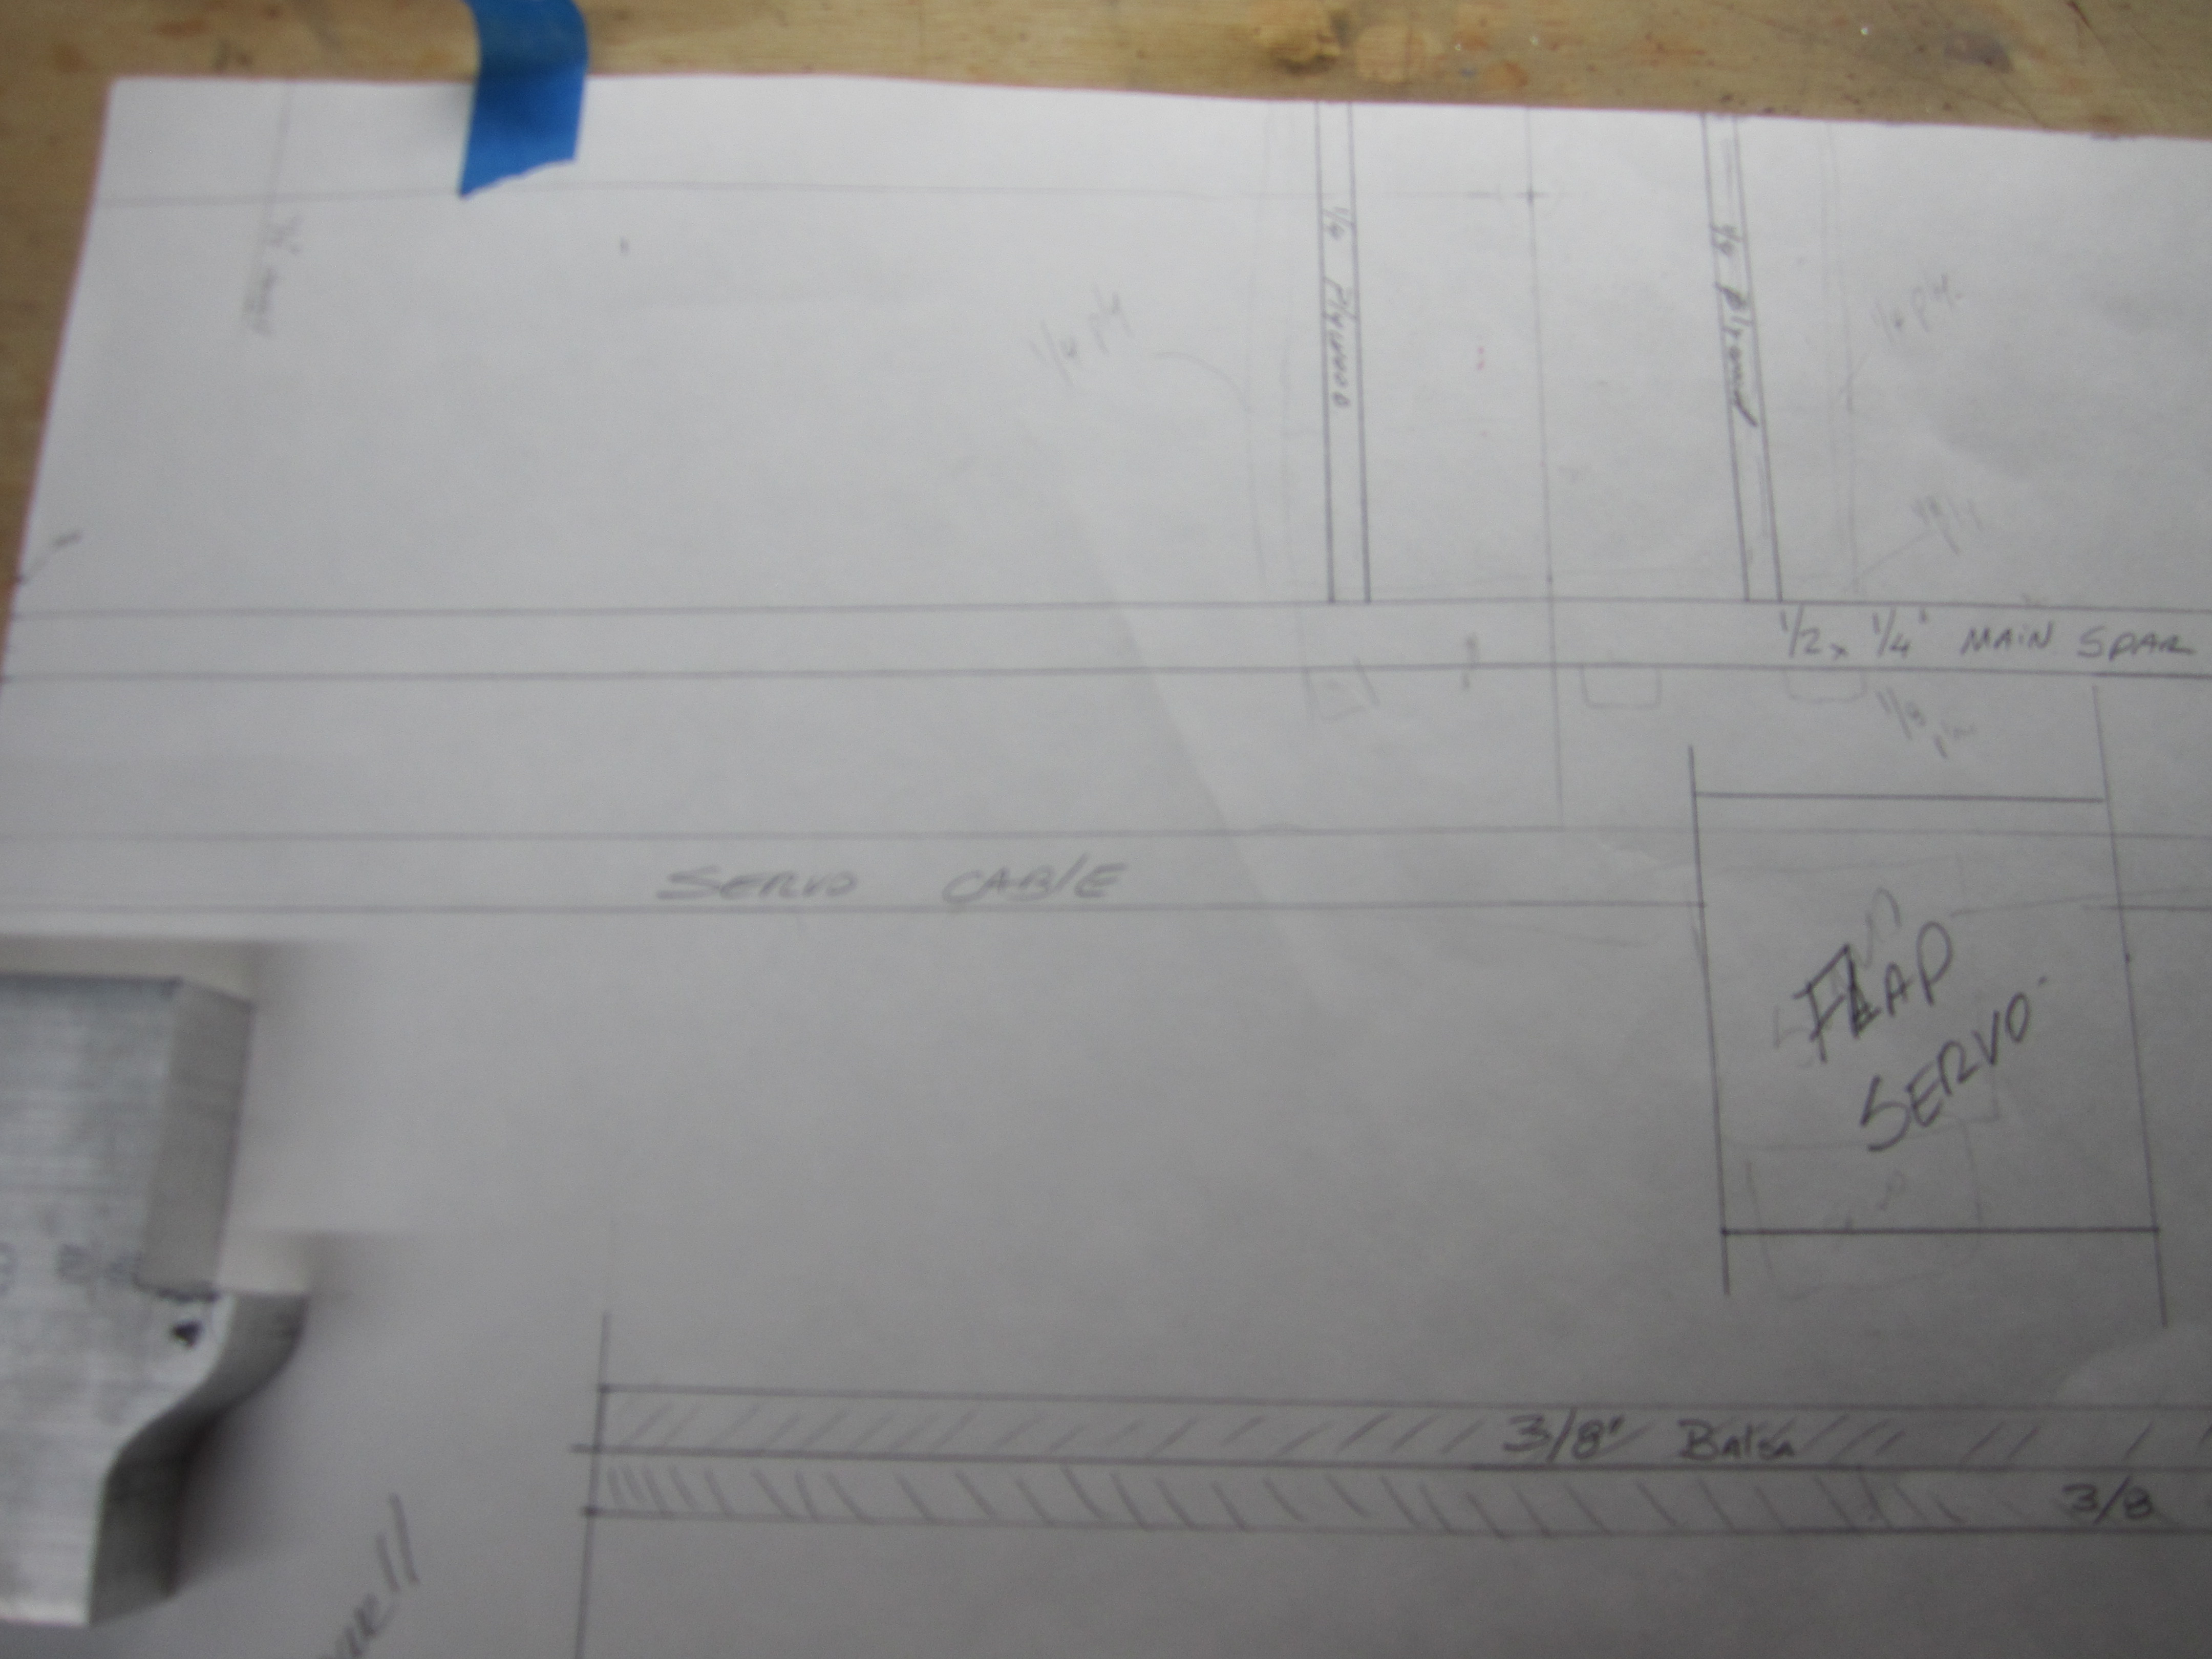
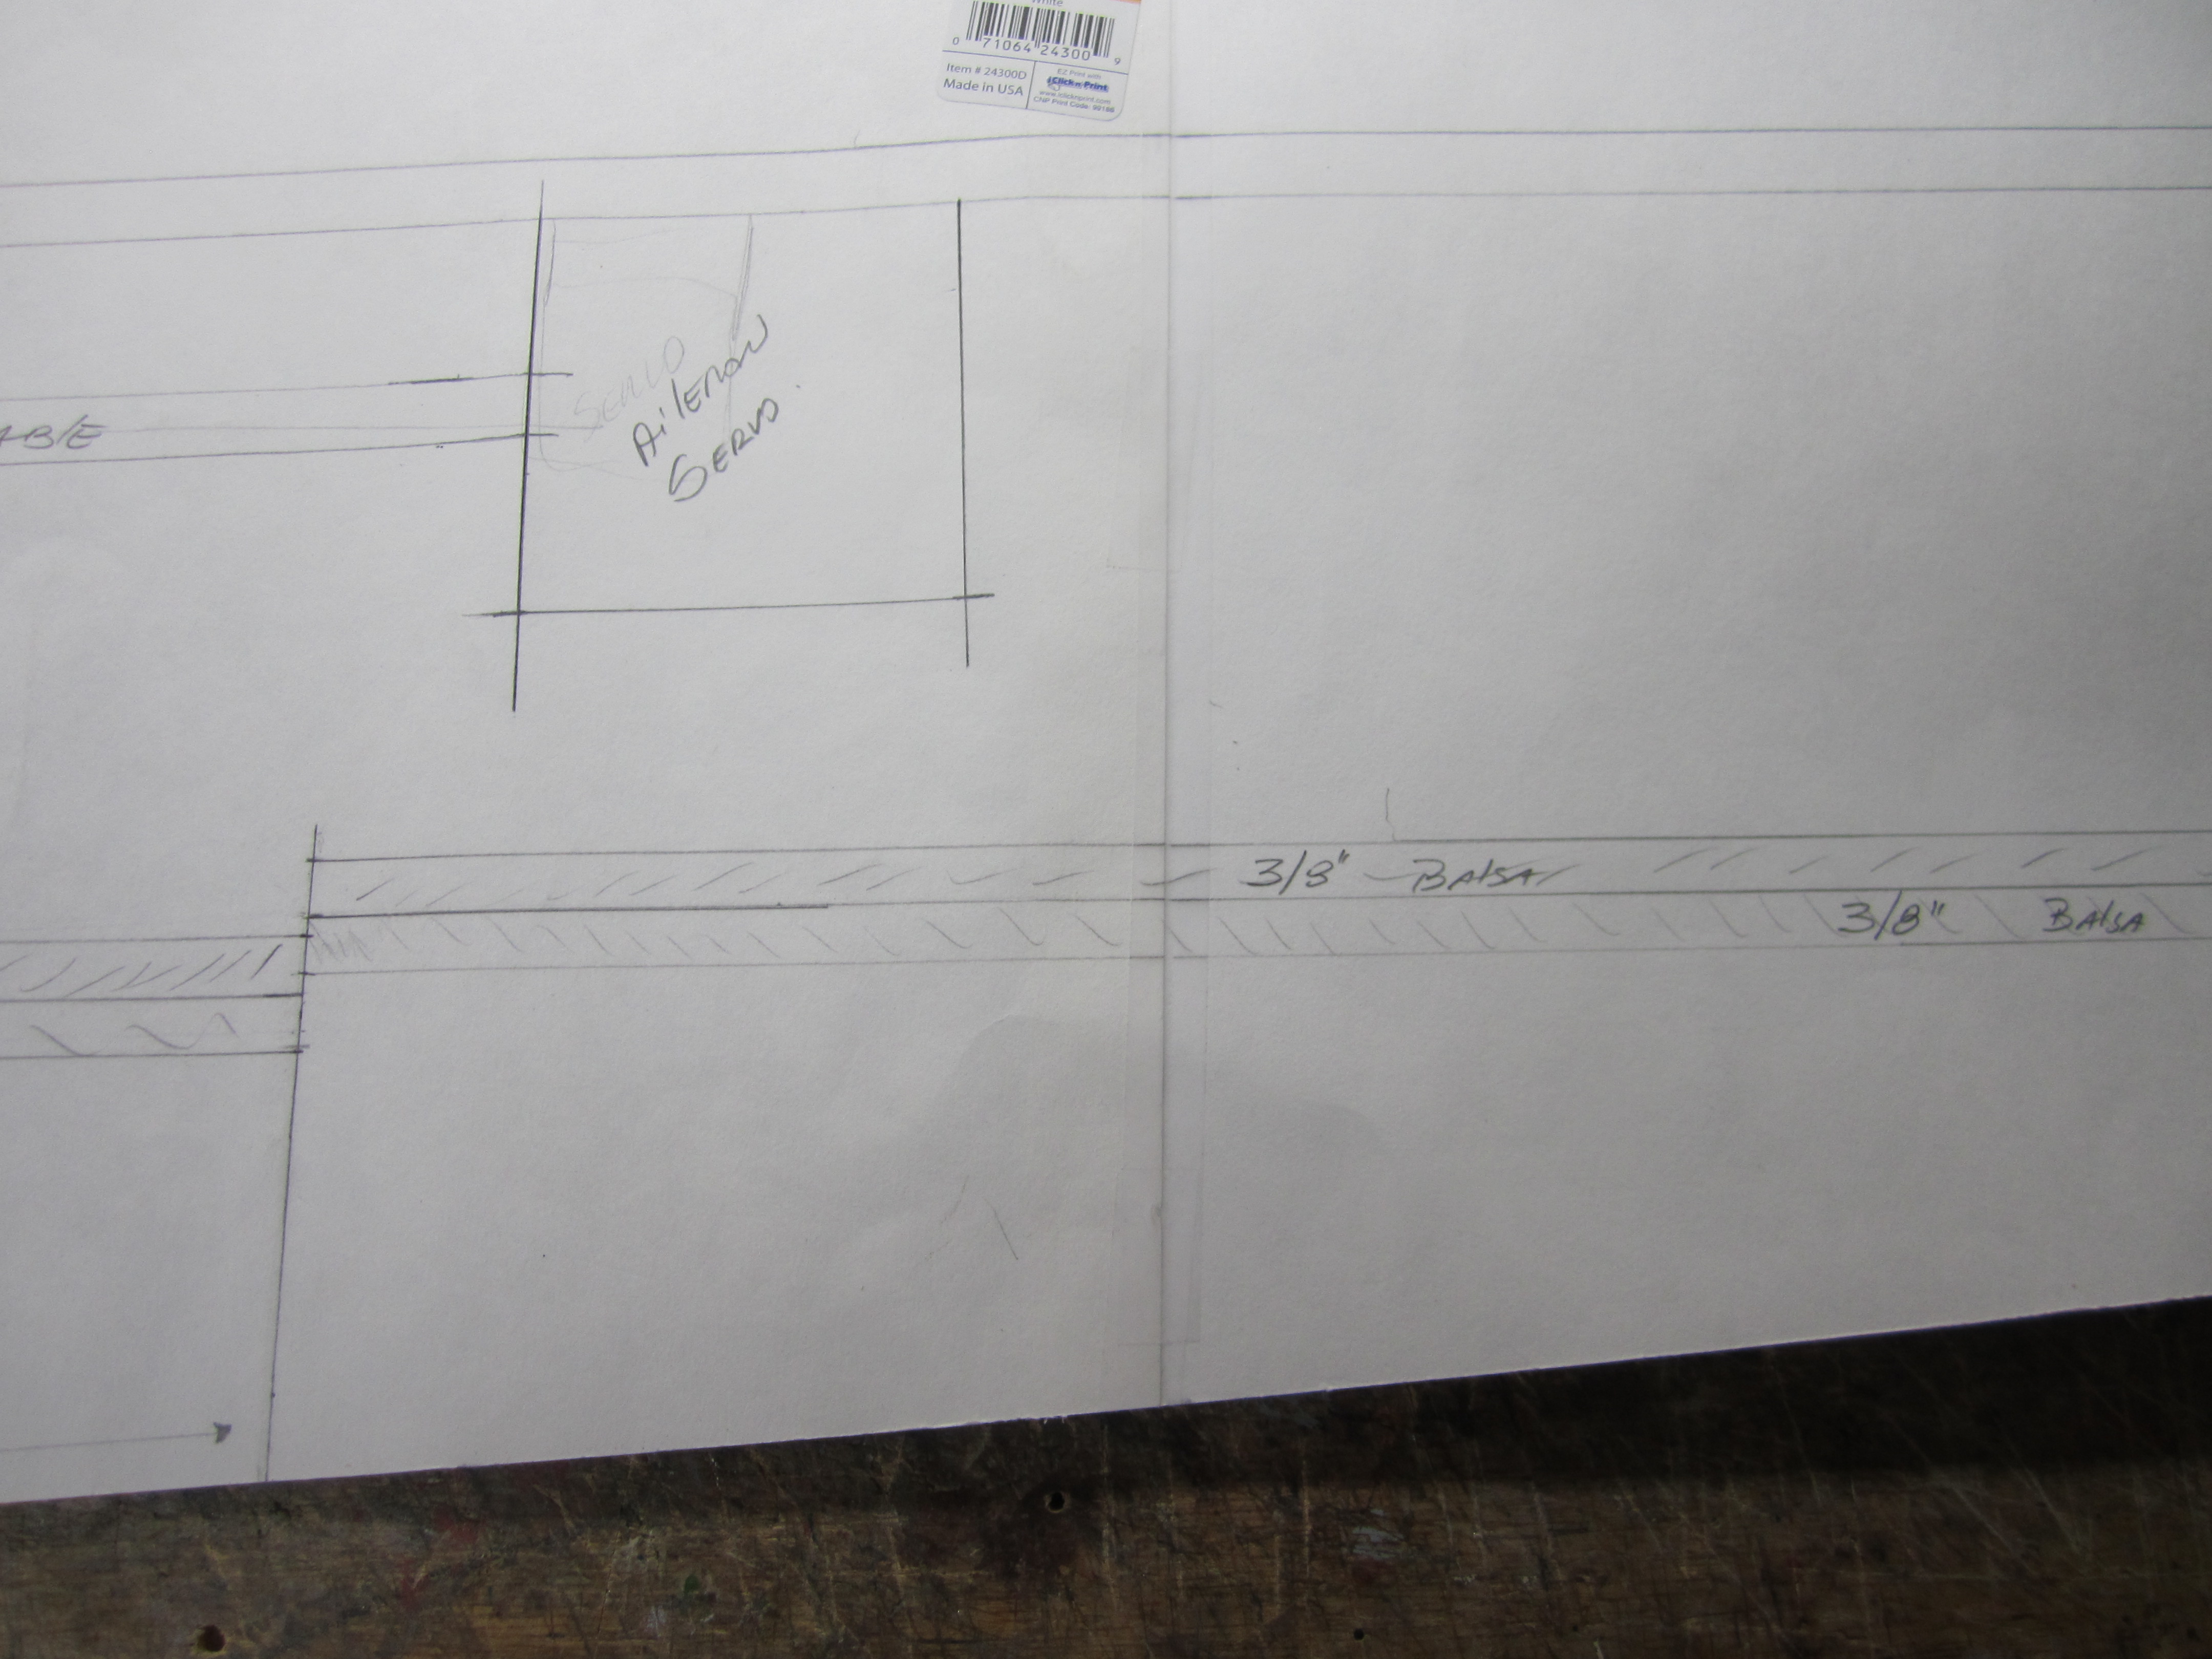
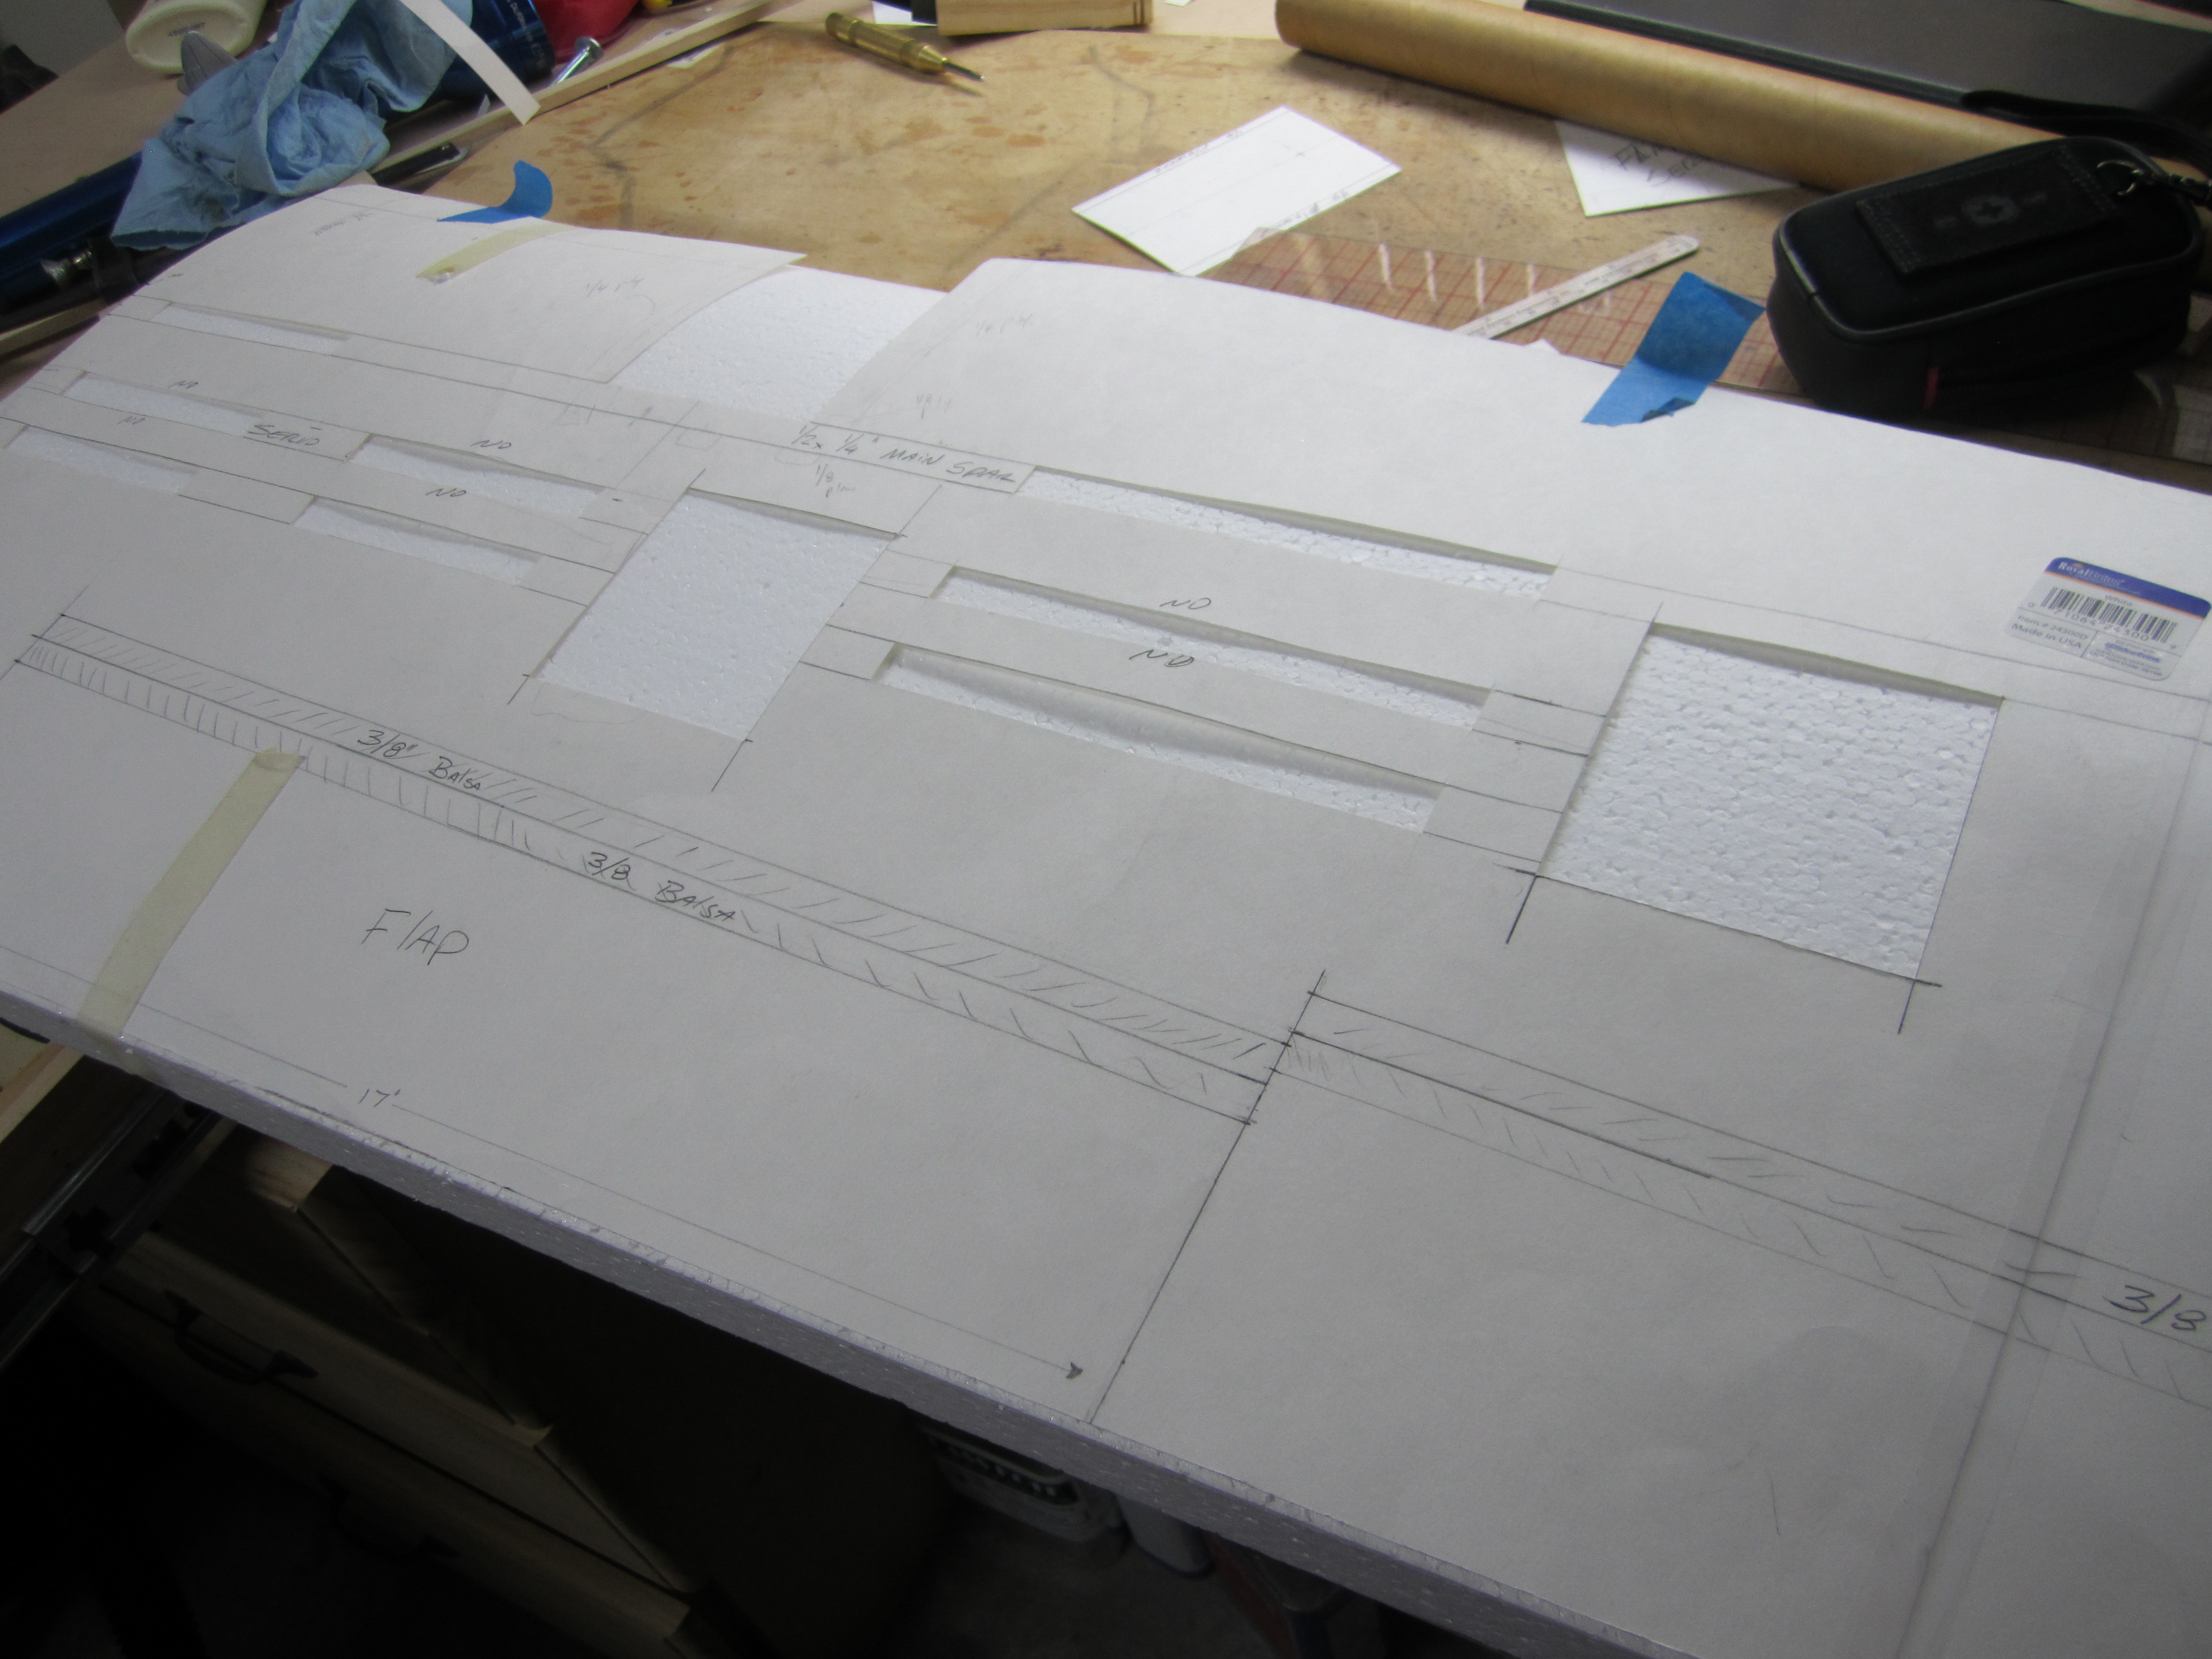
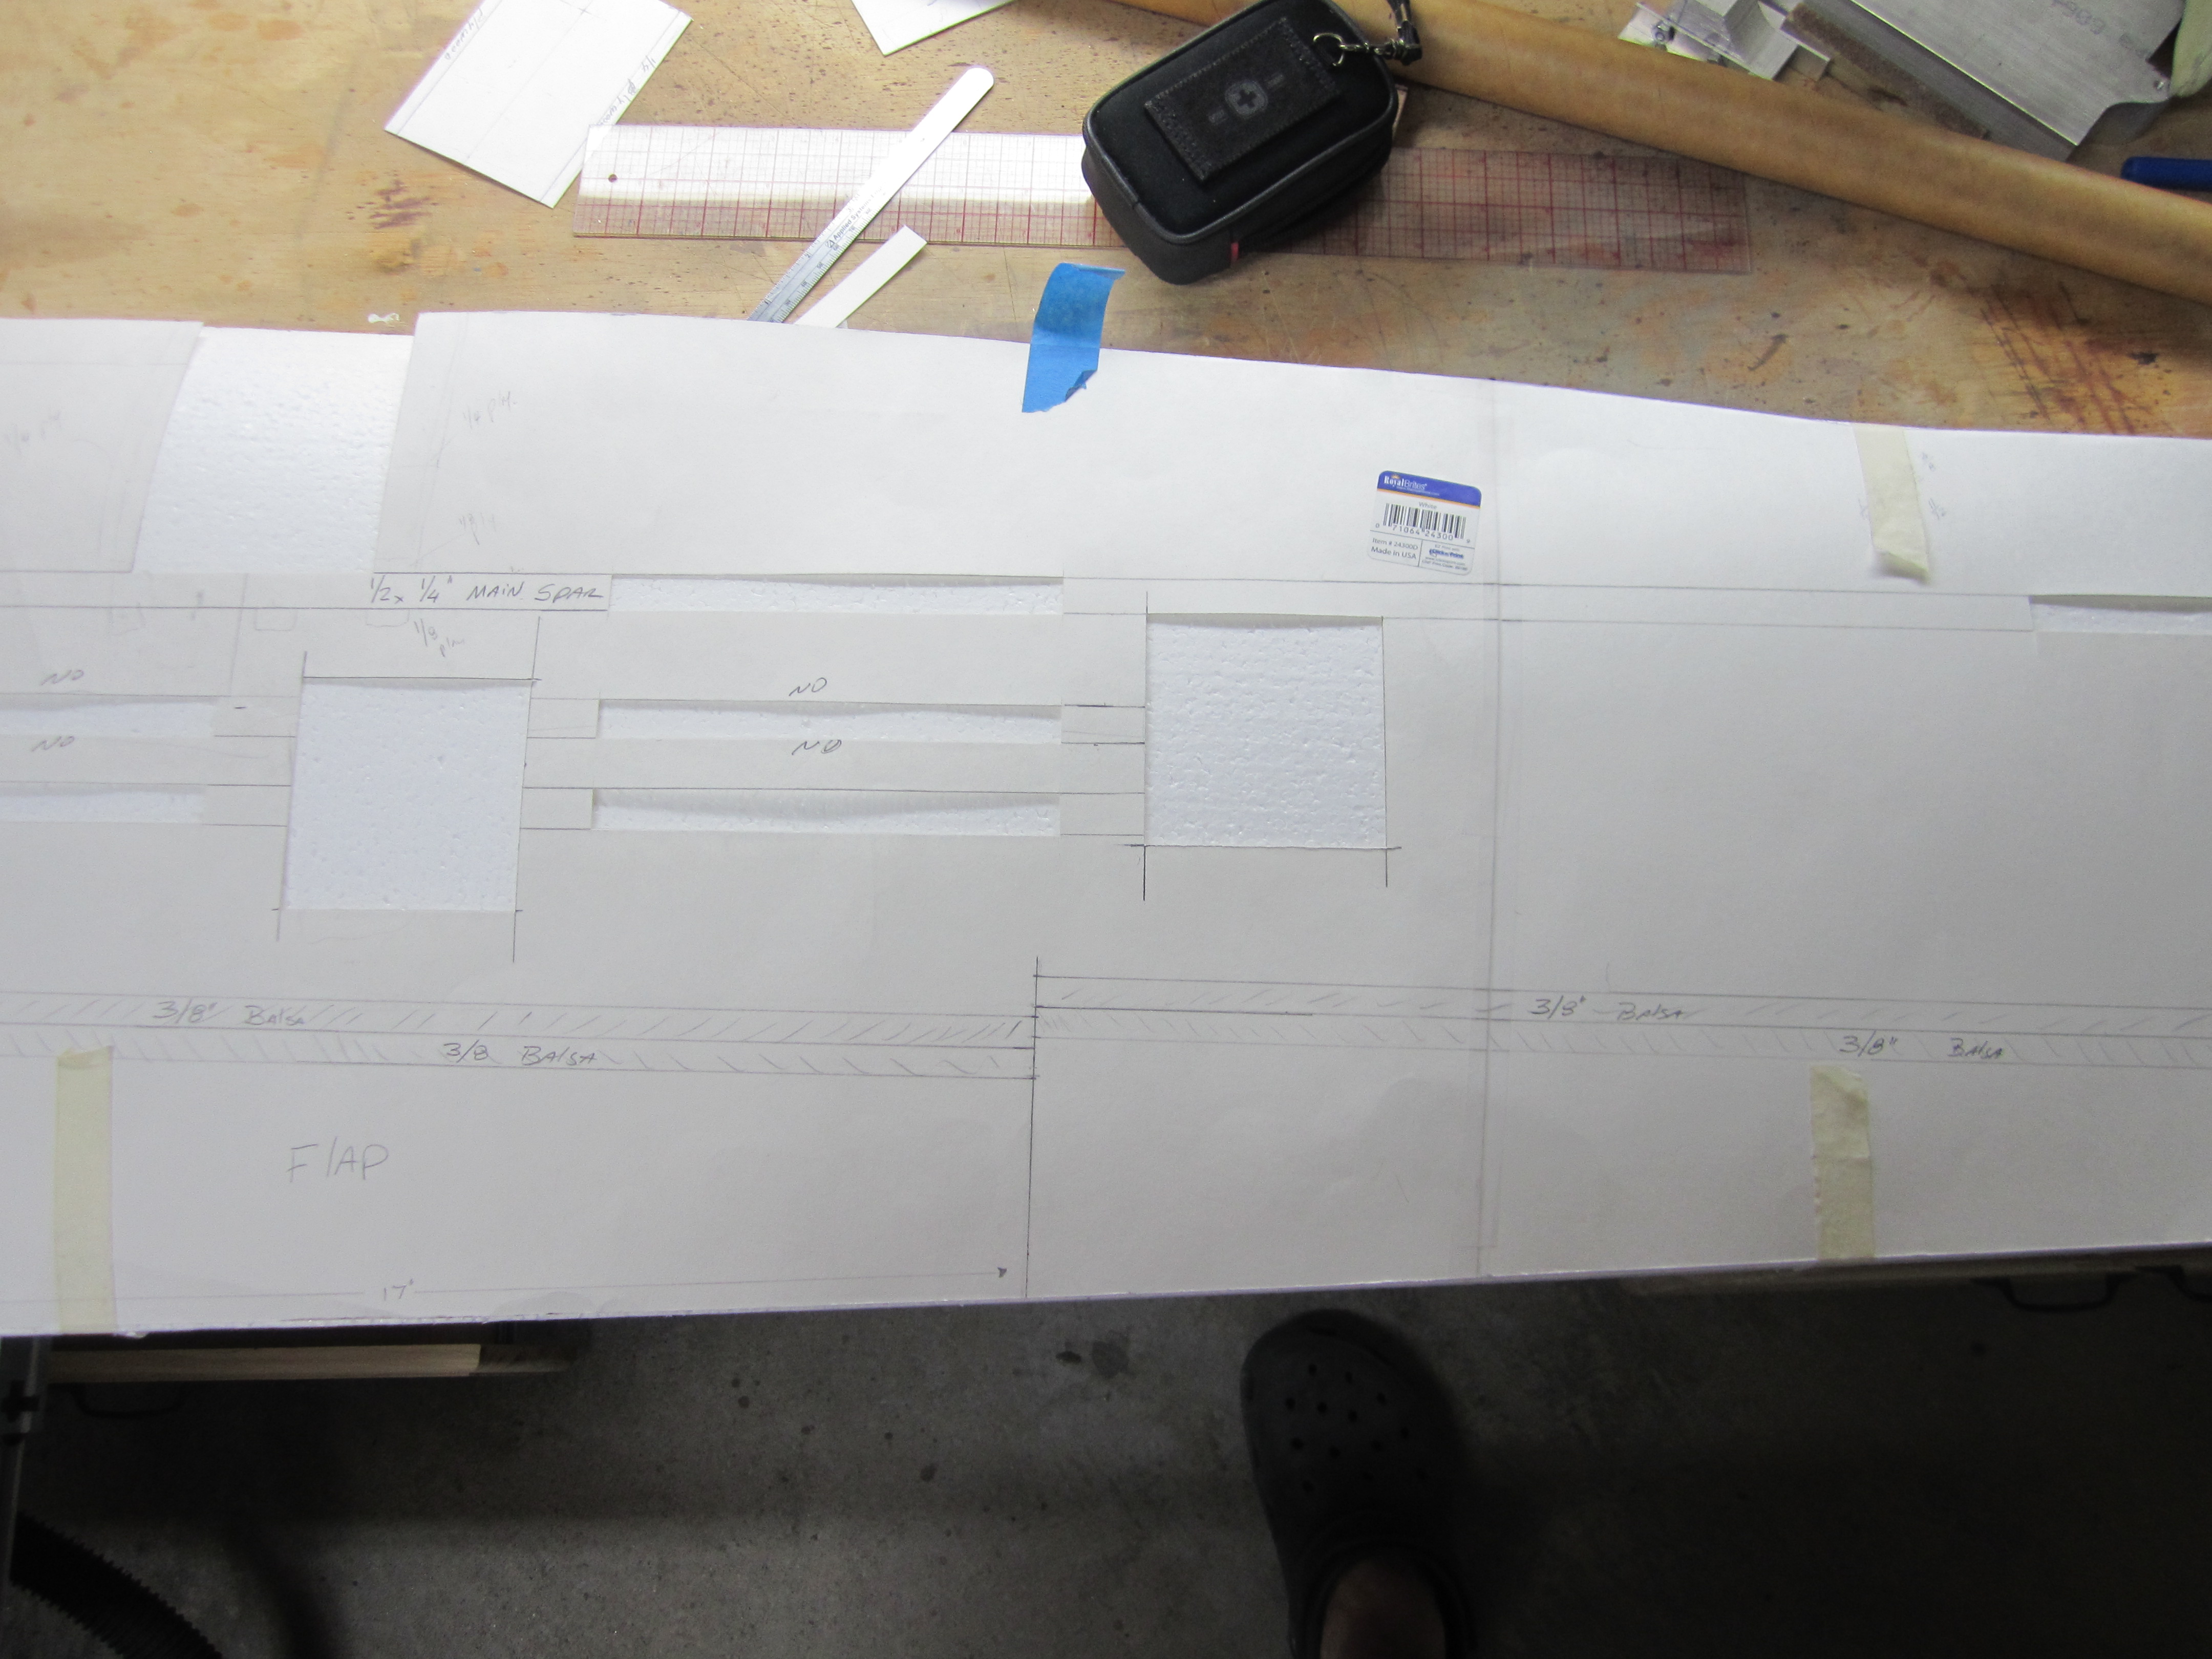
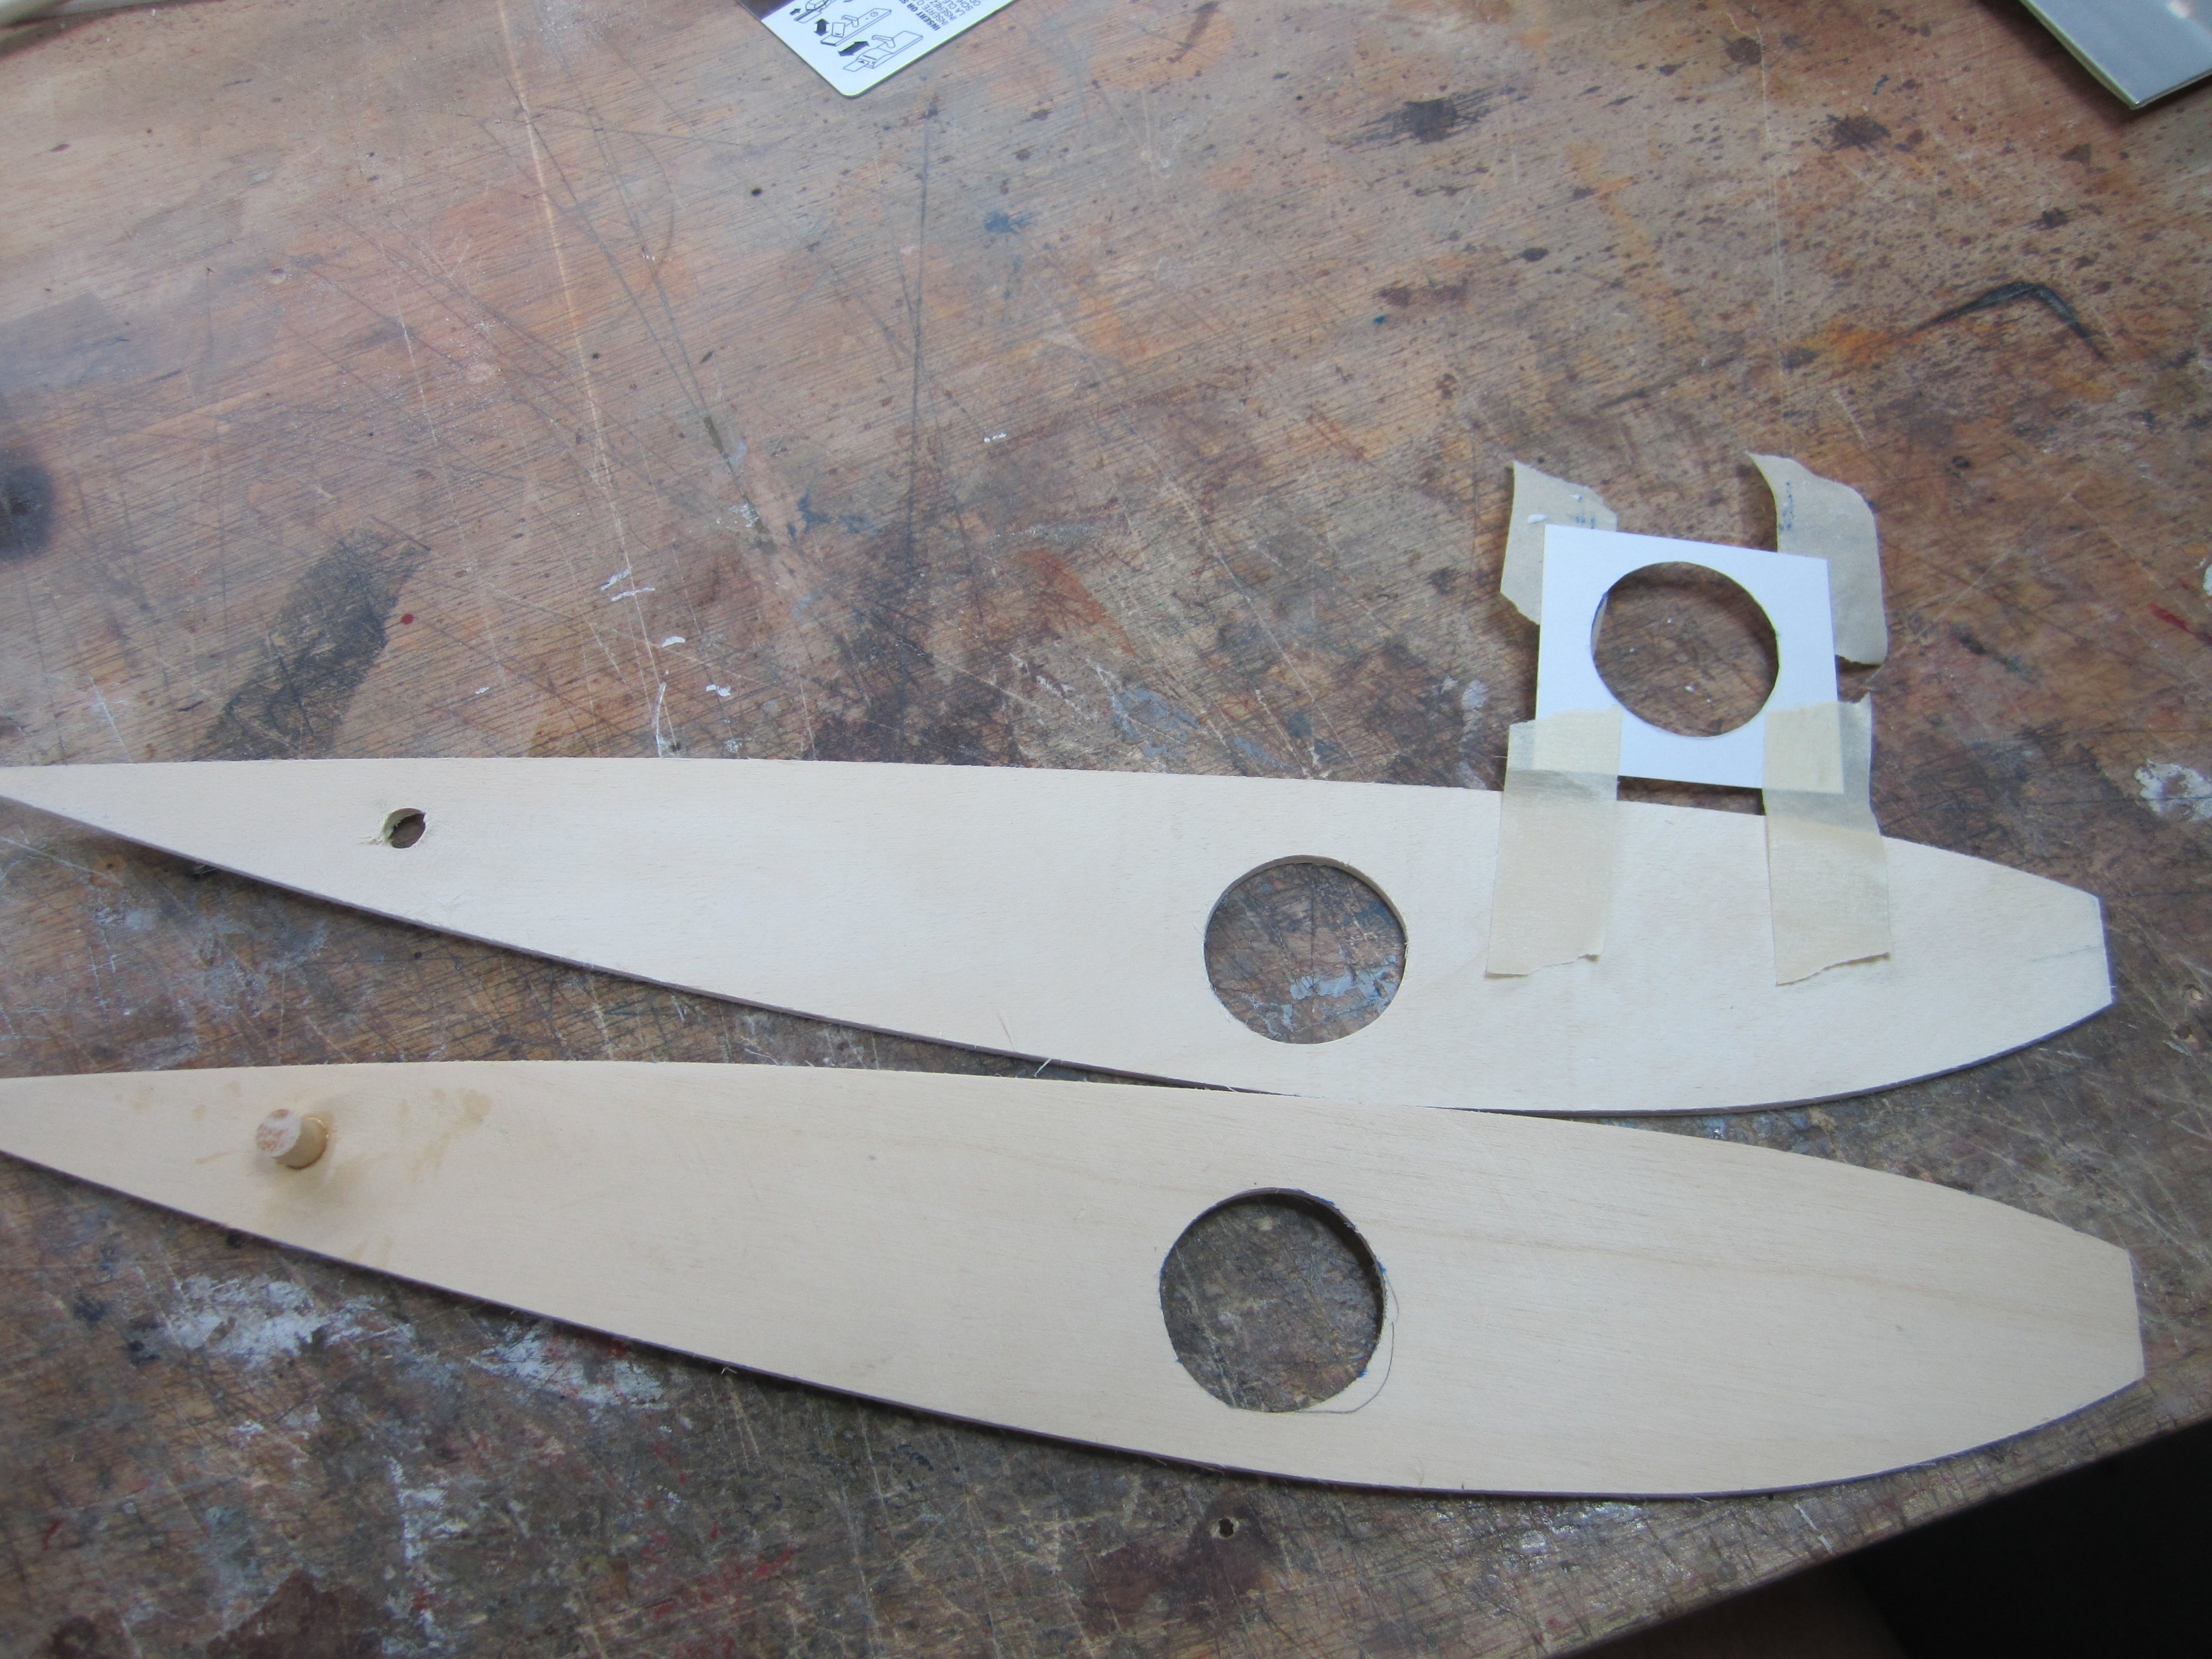
I started by making a template of the wing flaps and ailerons. I also added to the template the servos pockets, the landing gear cuts and the spars.
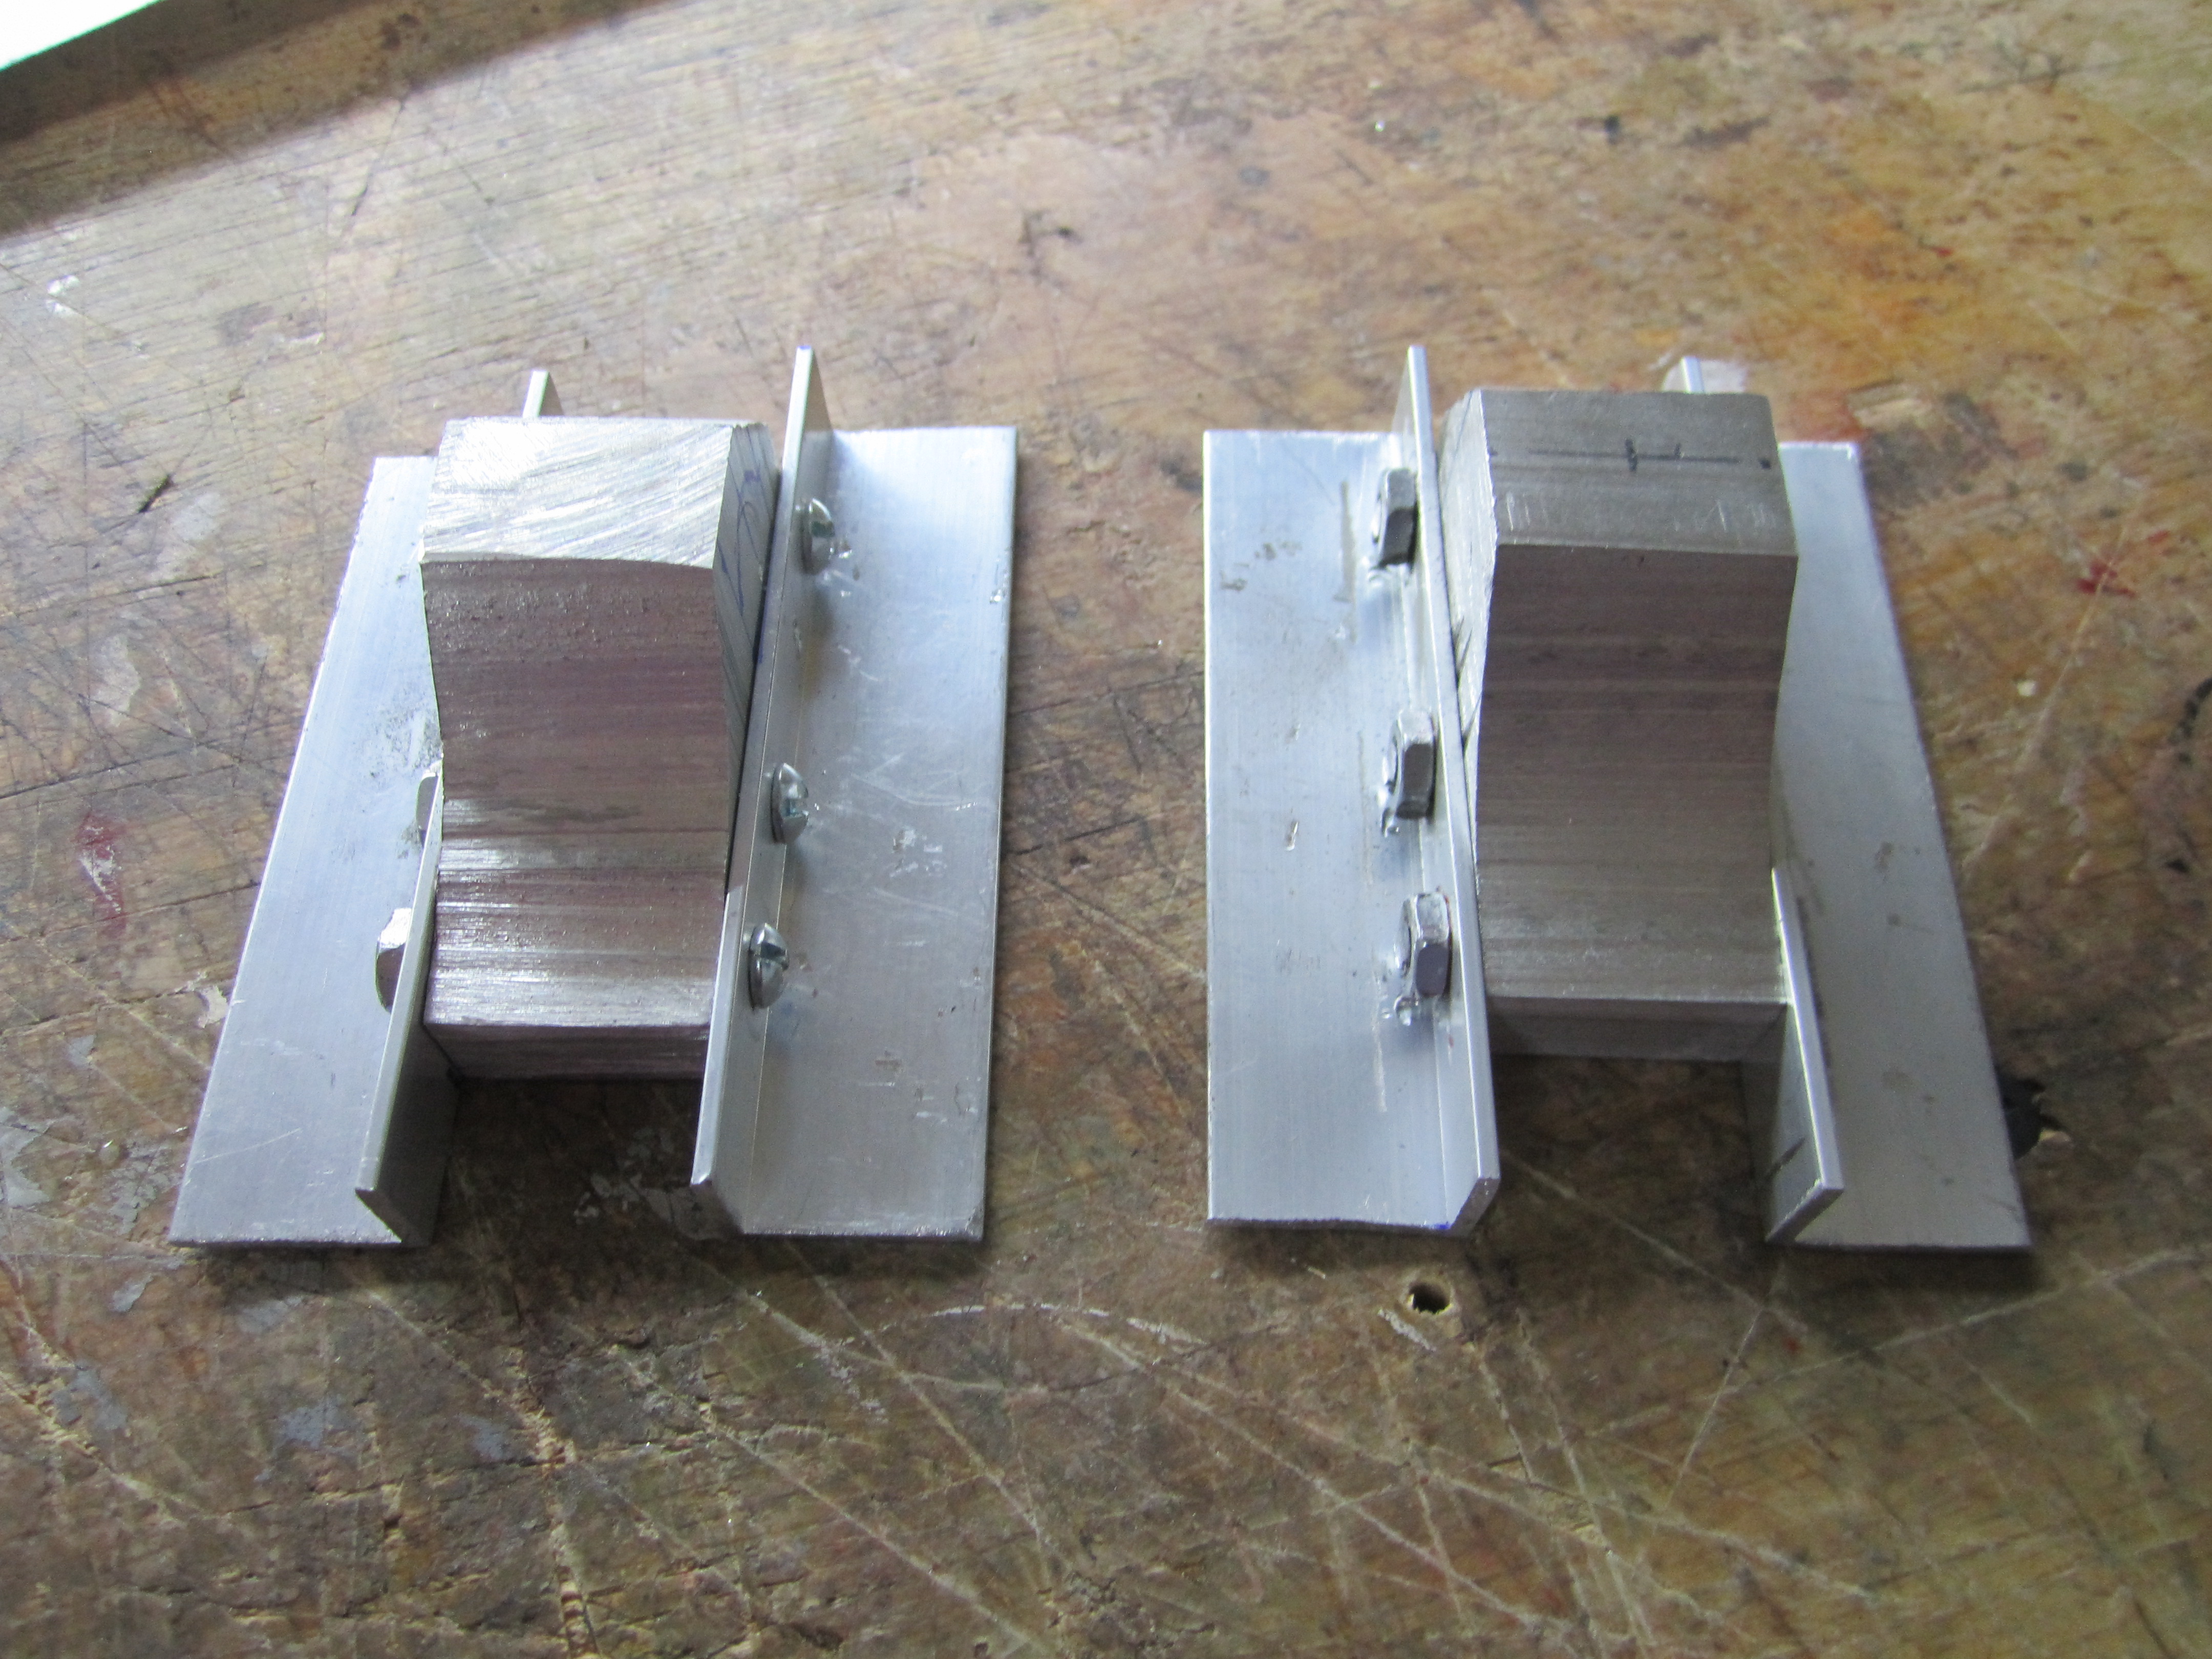
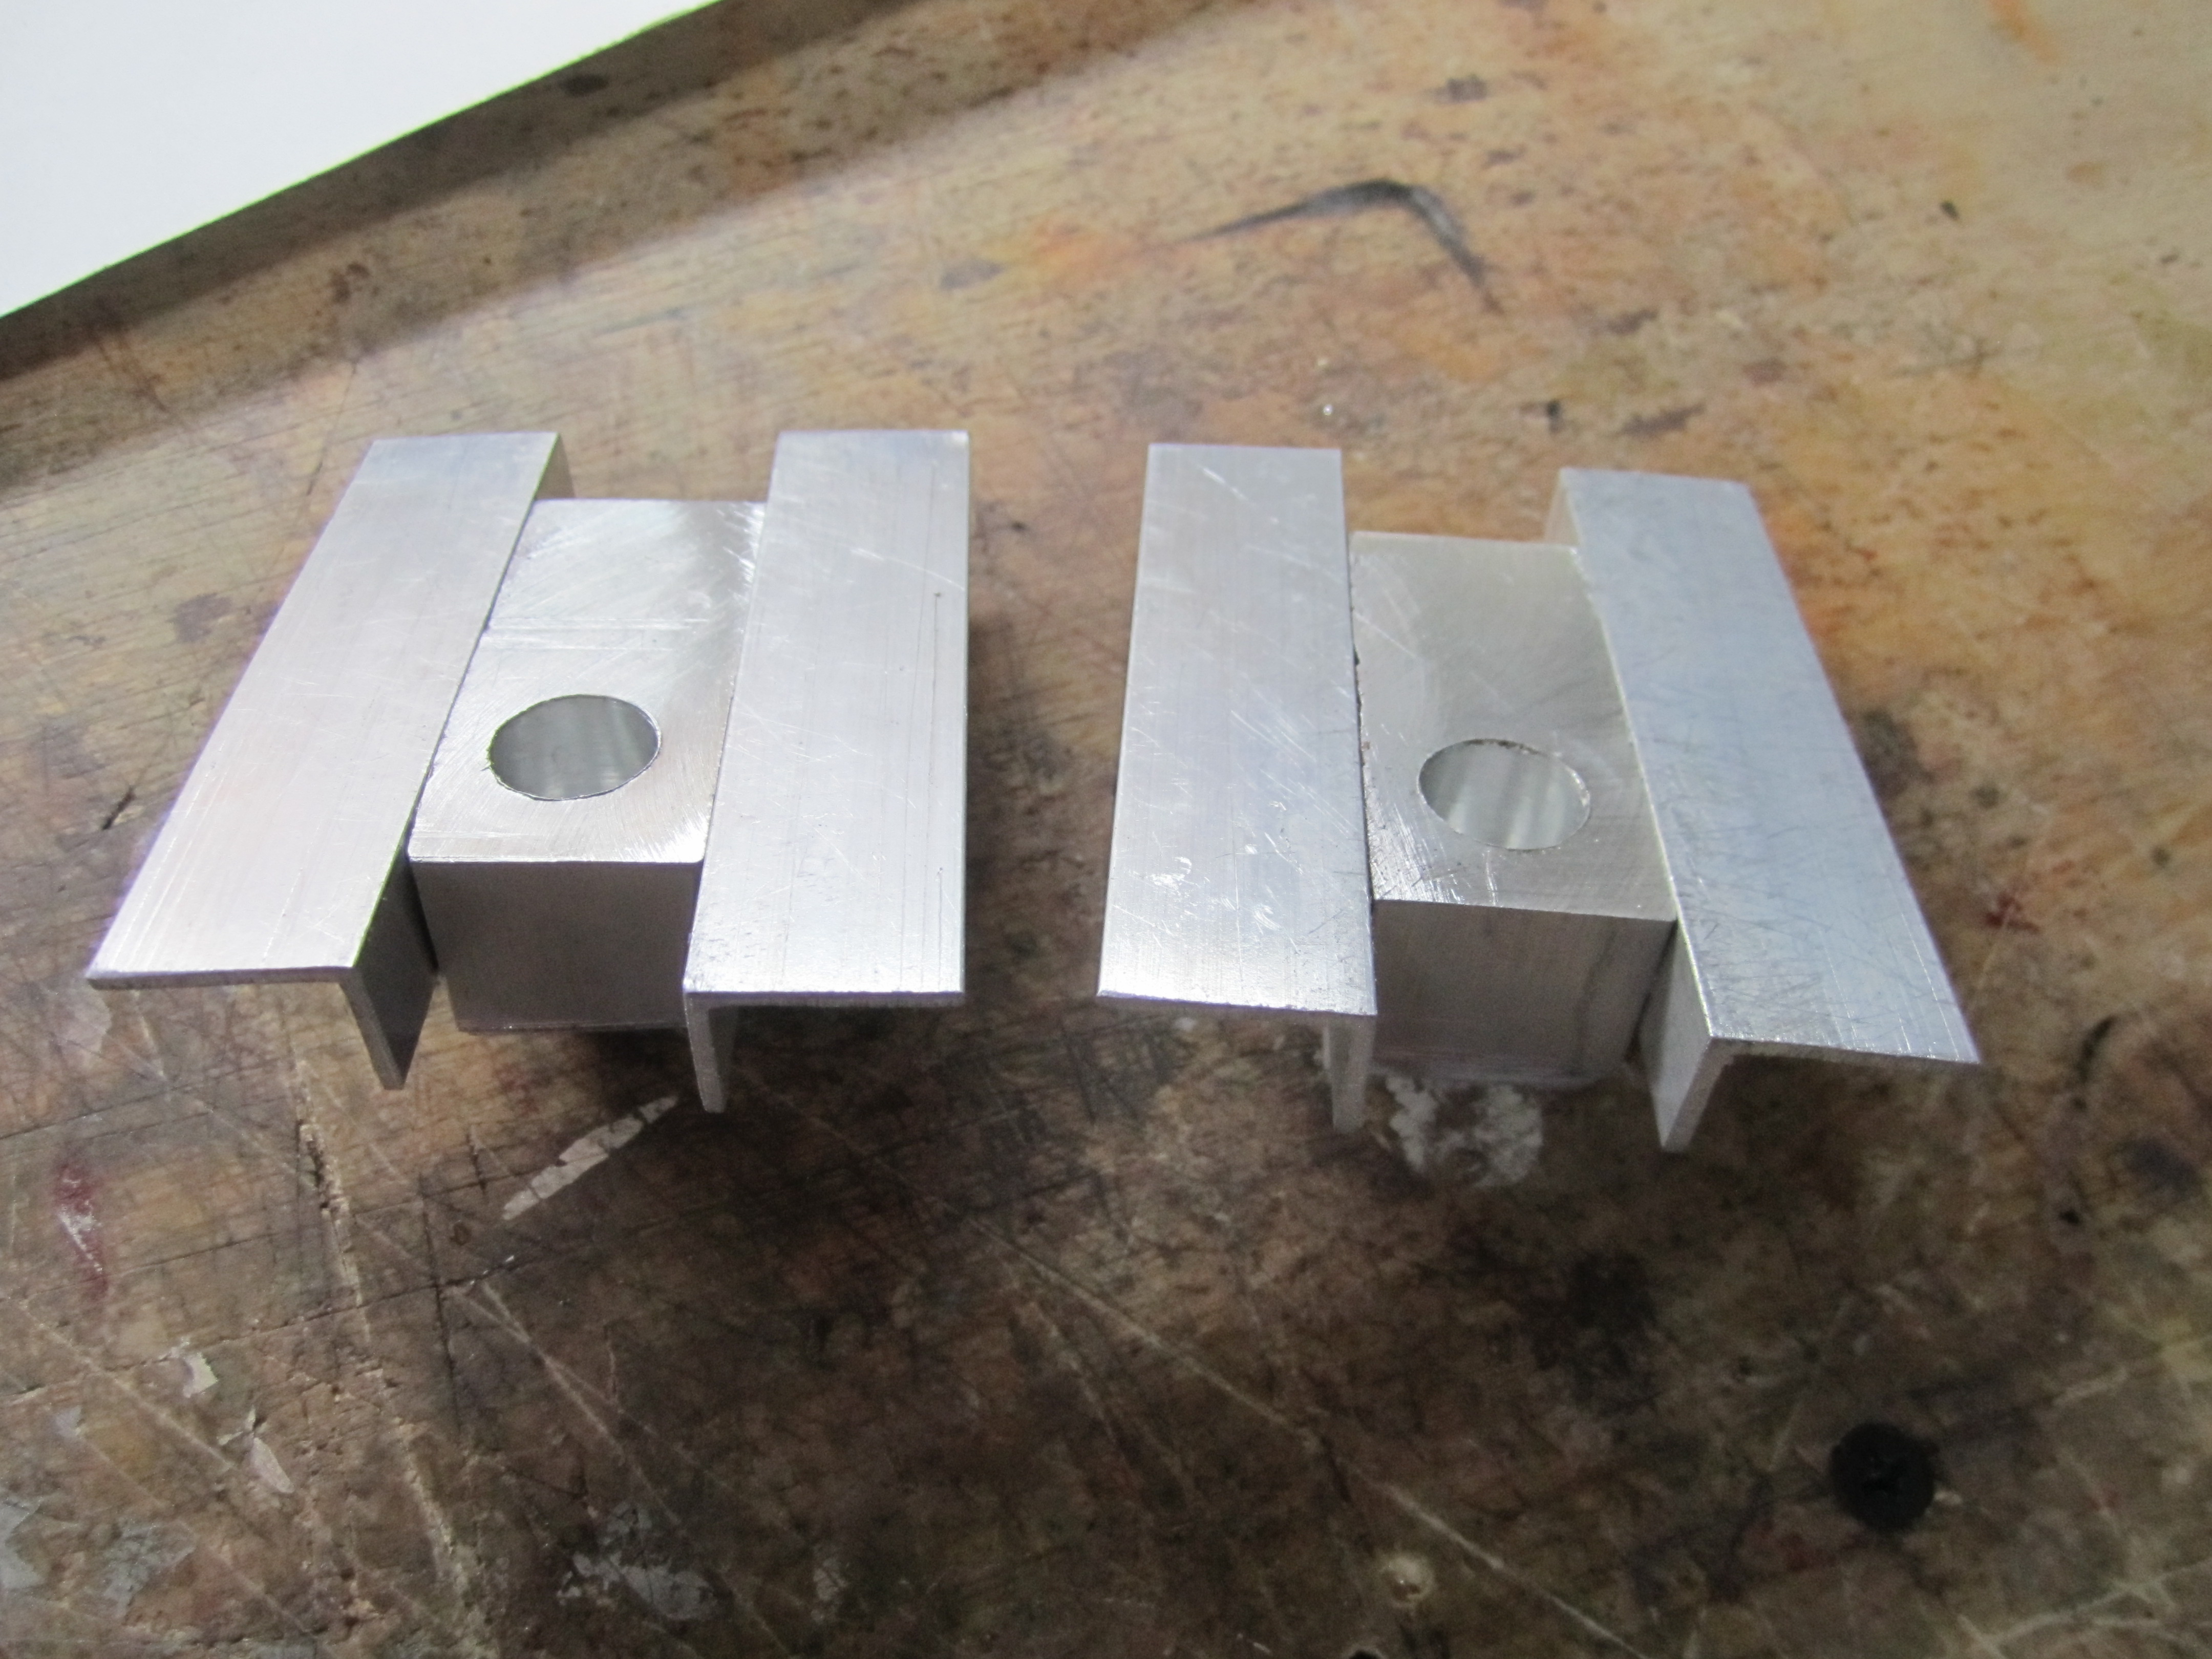
I bought a block of aluminum on ebay to make the landing gear blocks.

I started to build the G&L Hobbies Chipmunk. A friend of mine recommended this kit to me and I got it in a heartbeat.
My plans are to fiberglass the wings, rudder, stab and elevators. I bought Robart ˝" struts for the fixed landing gear. I also bought a DLE 55RA.
I started by making a template of the wing flaps and ailerons. I also added to the template the servos pockets, the landing gear cuts and the spars.
I bought a block of aluminum on ebay to make the landing gear blocks.
 04-09-2015 | 03:14 PM
#2
Thread Starter
My Feedback: (2)
Joined: Jun 2009
Posts: 18
Likes: 0
Received 0 Likes
on
0 Posts
From: TX
Working on the wings
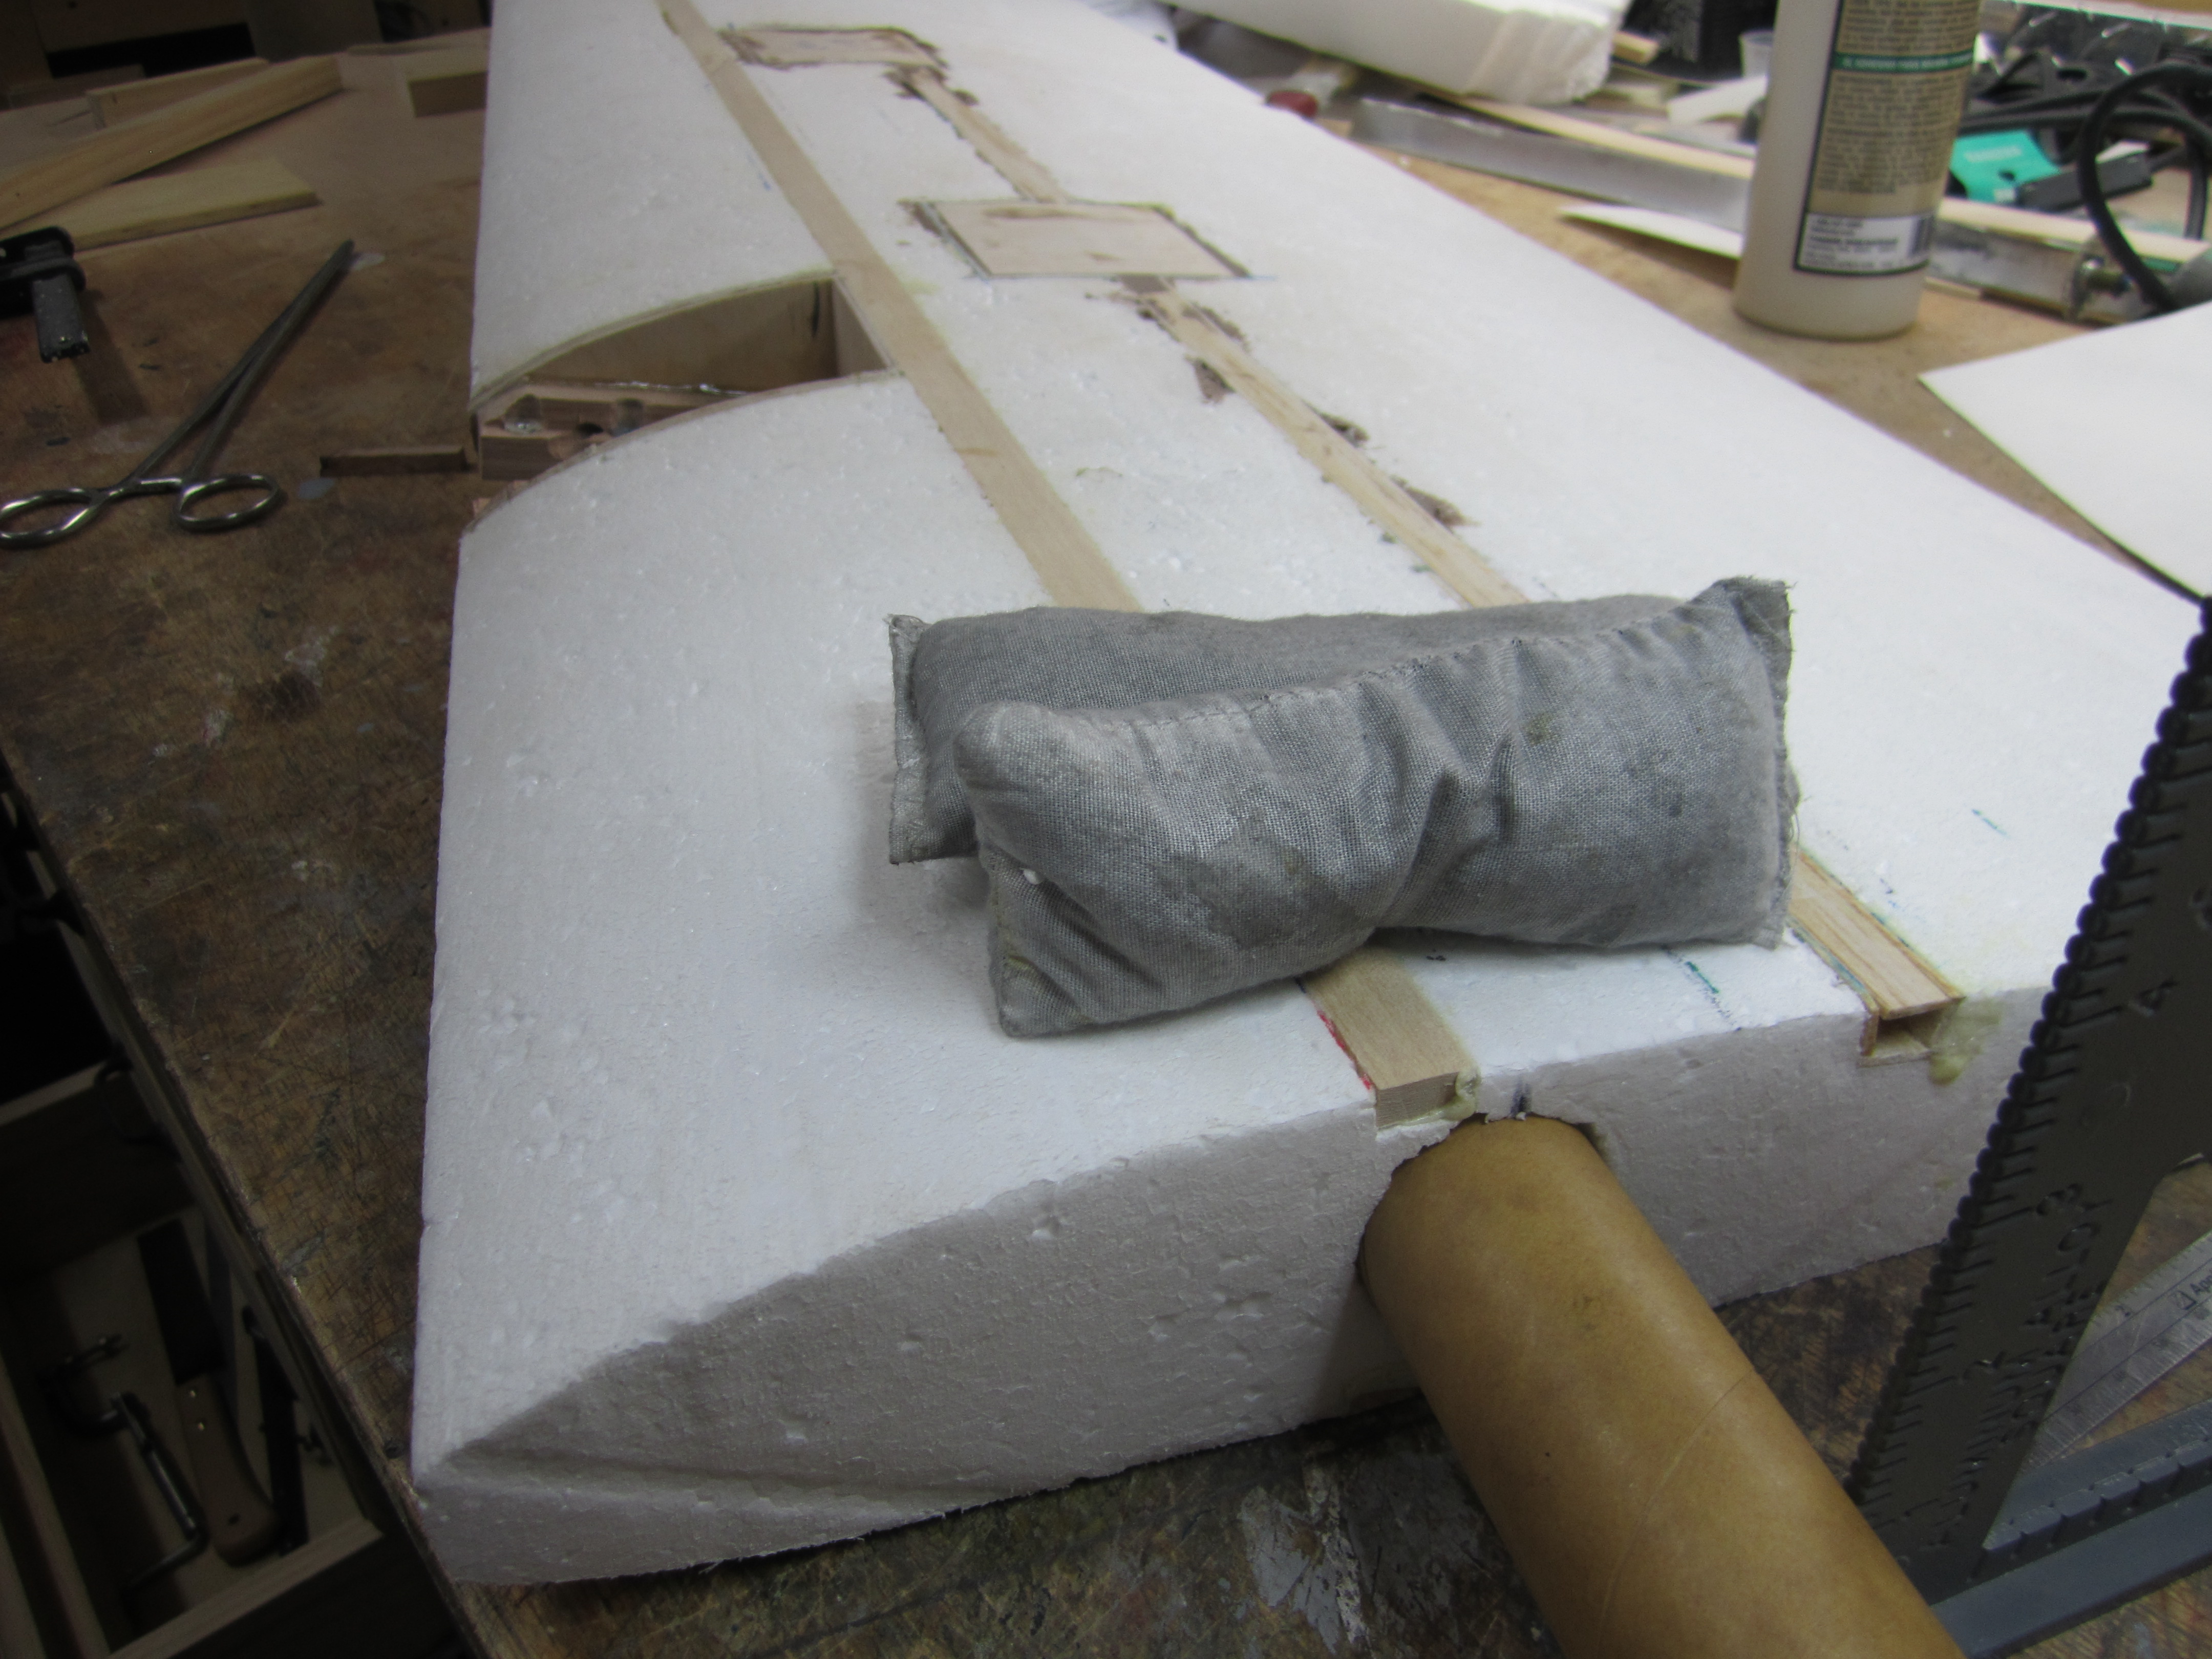
After I marked the wings with the templates, I cut the spars slots (Ľ x ˝" top and bottom) and the servo wires slot with a router. The holes were cut with a hot wire.
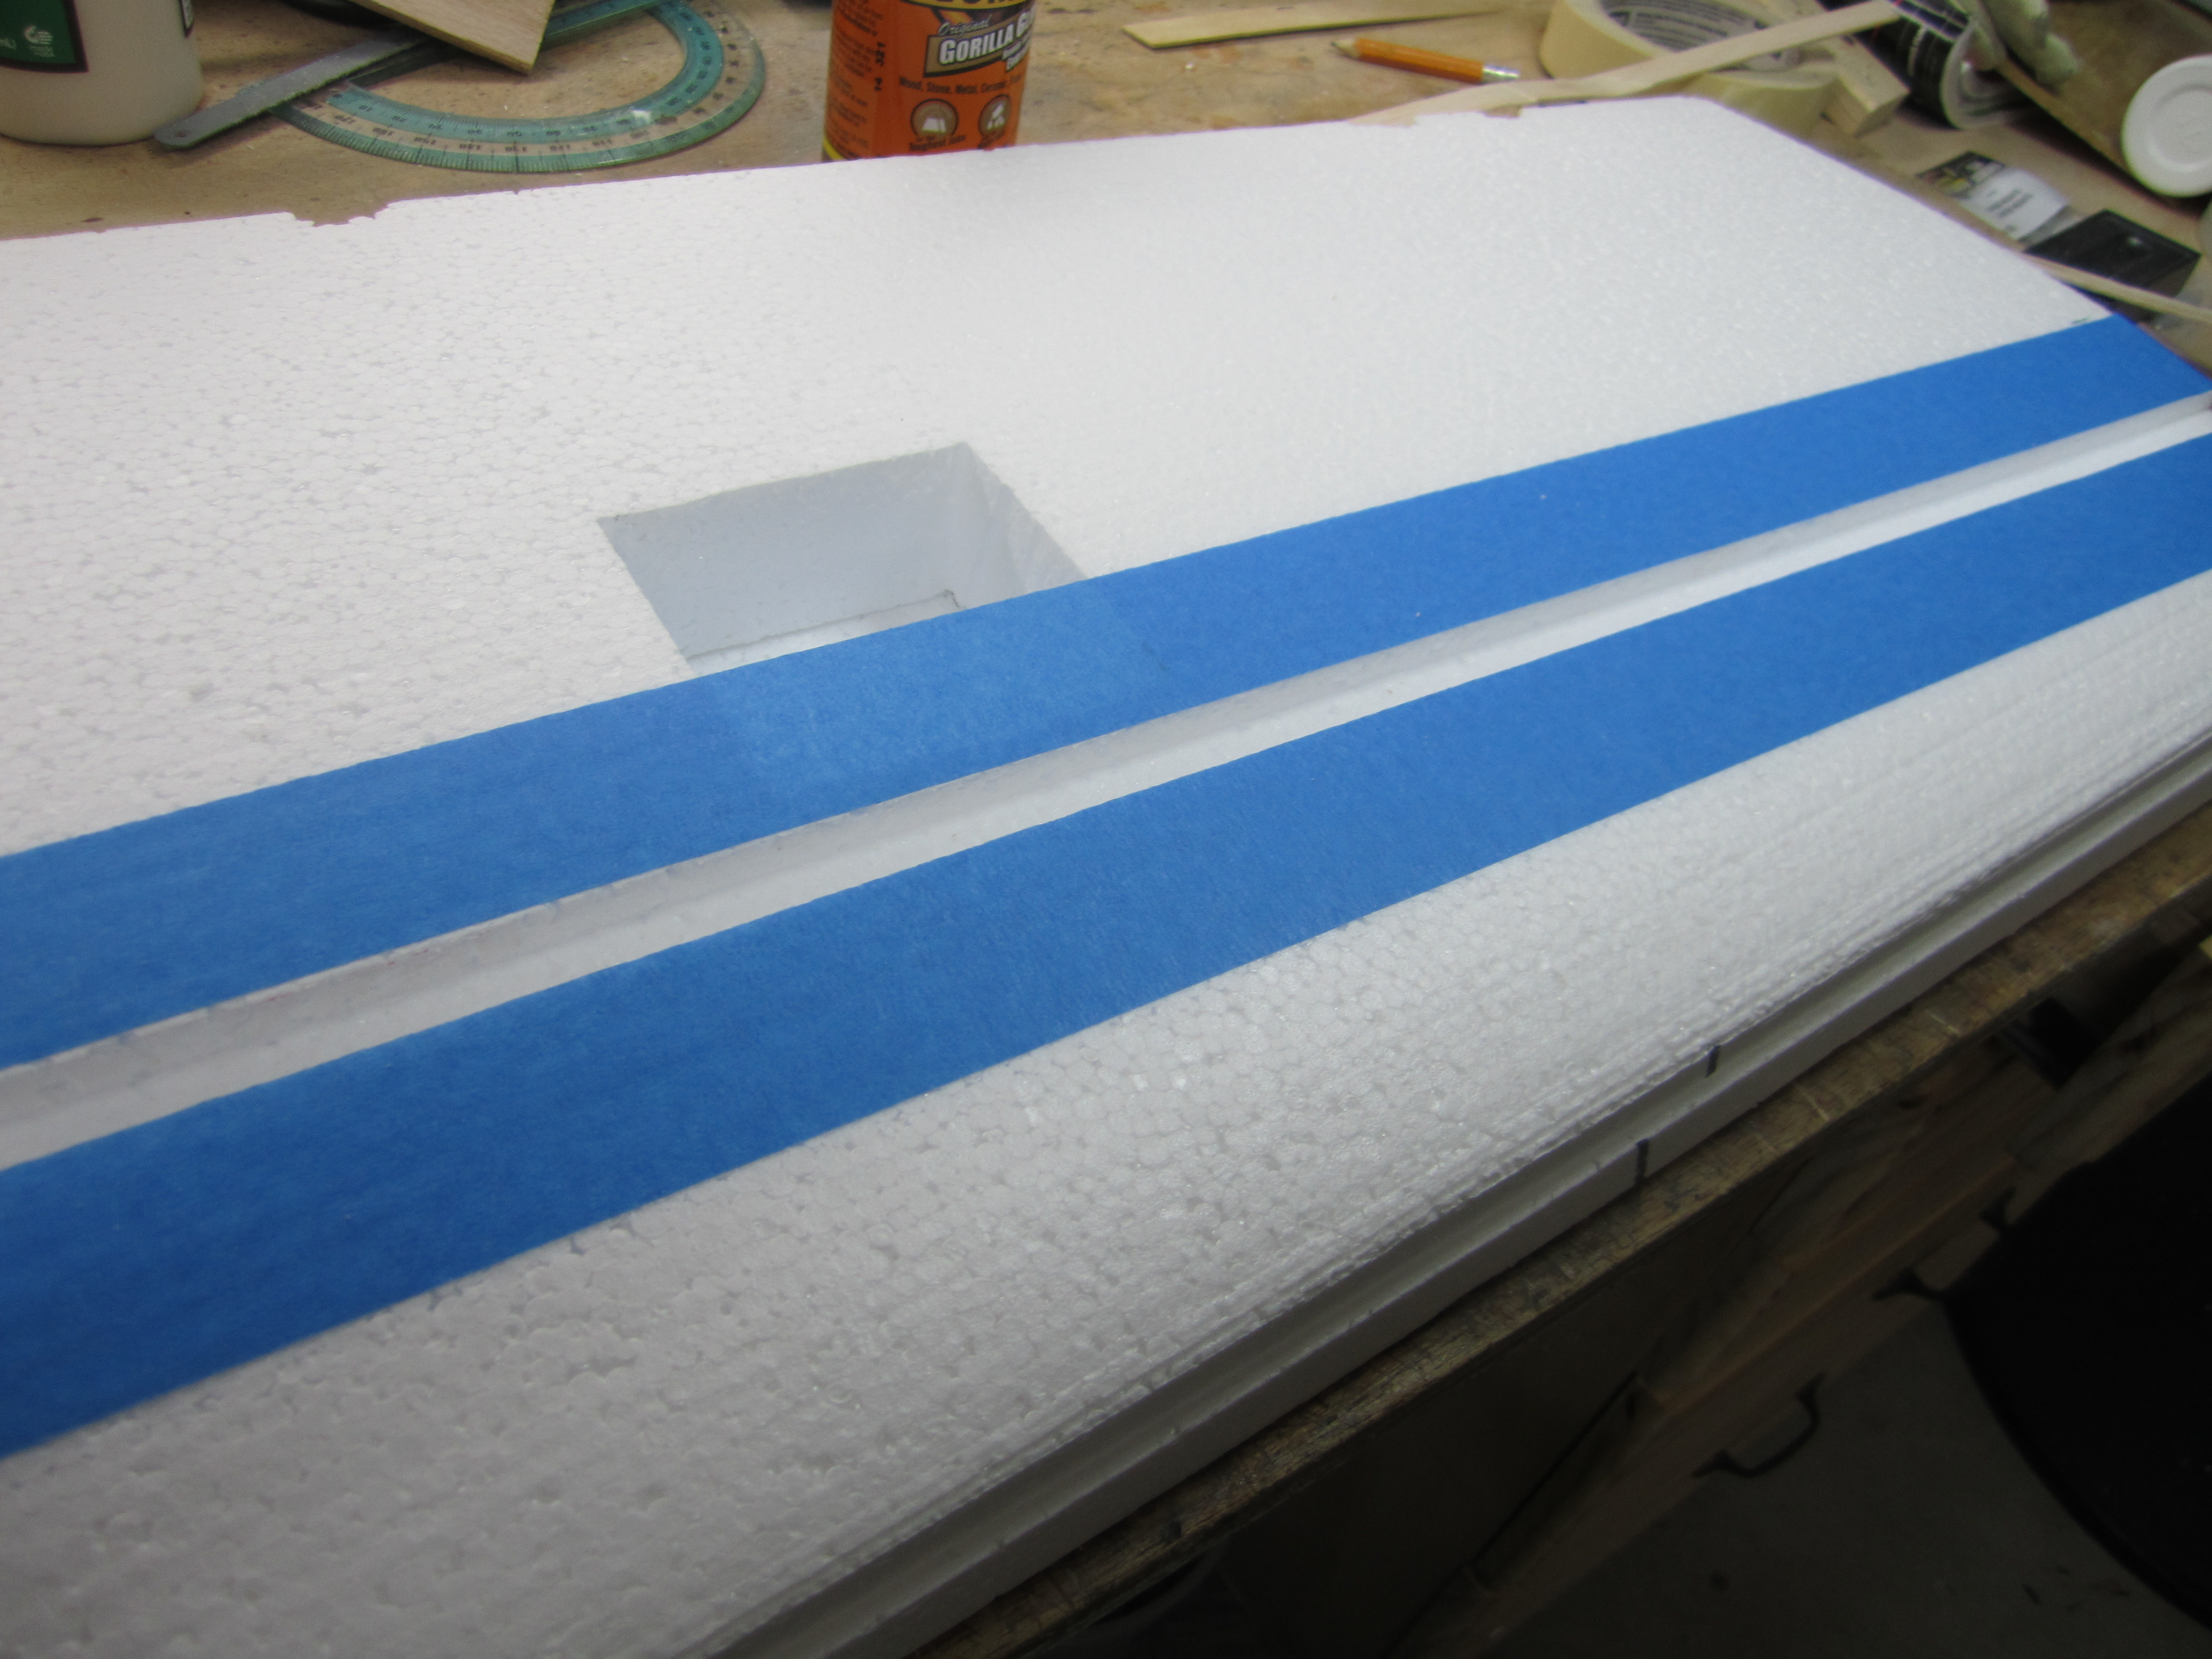
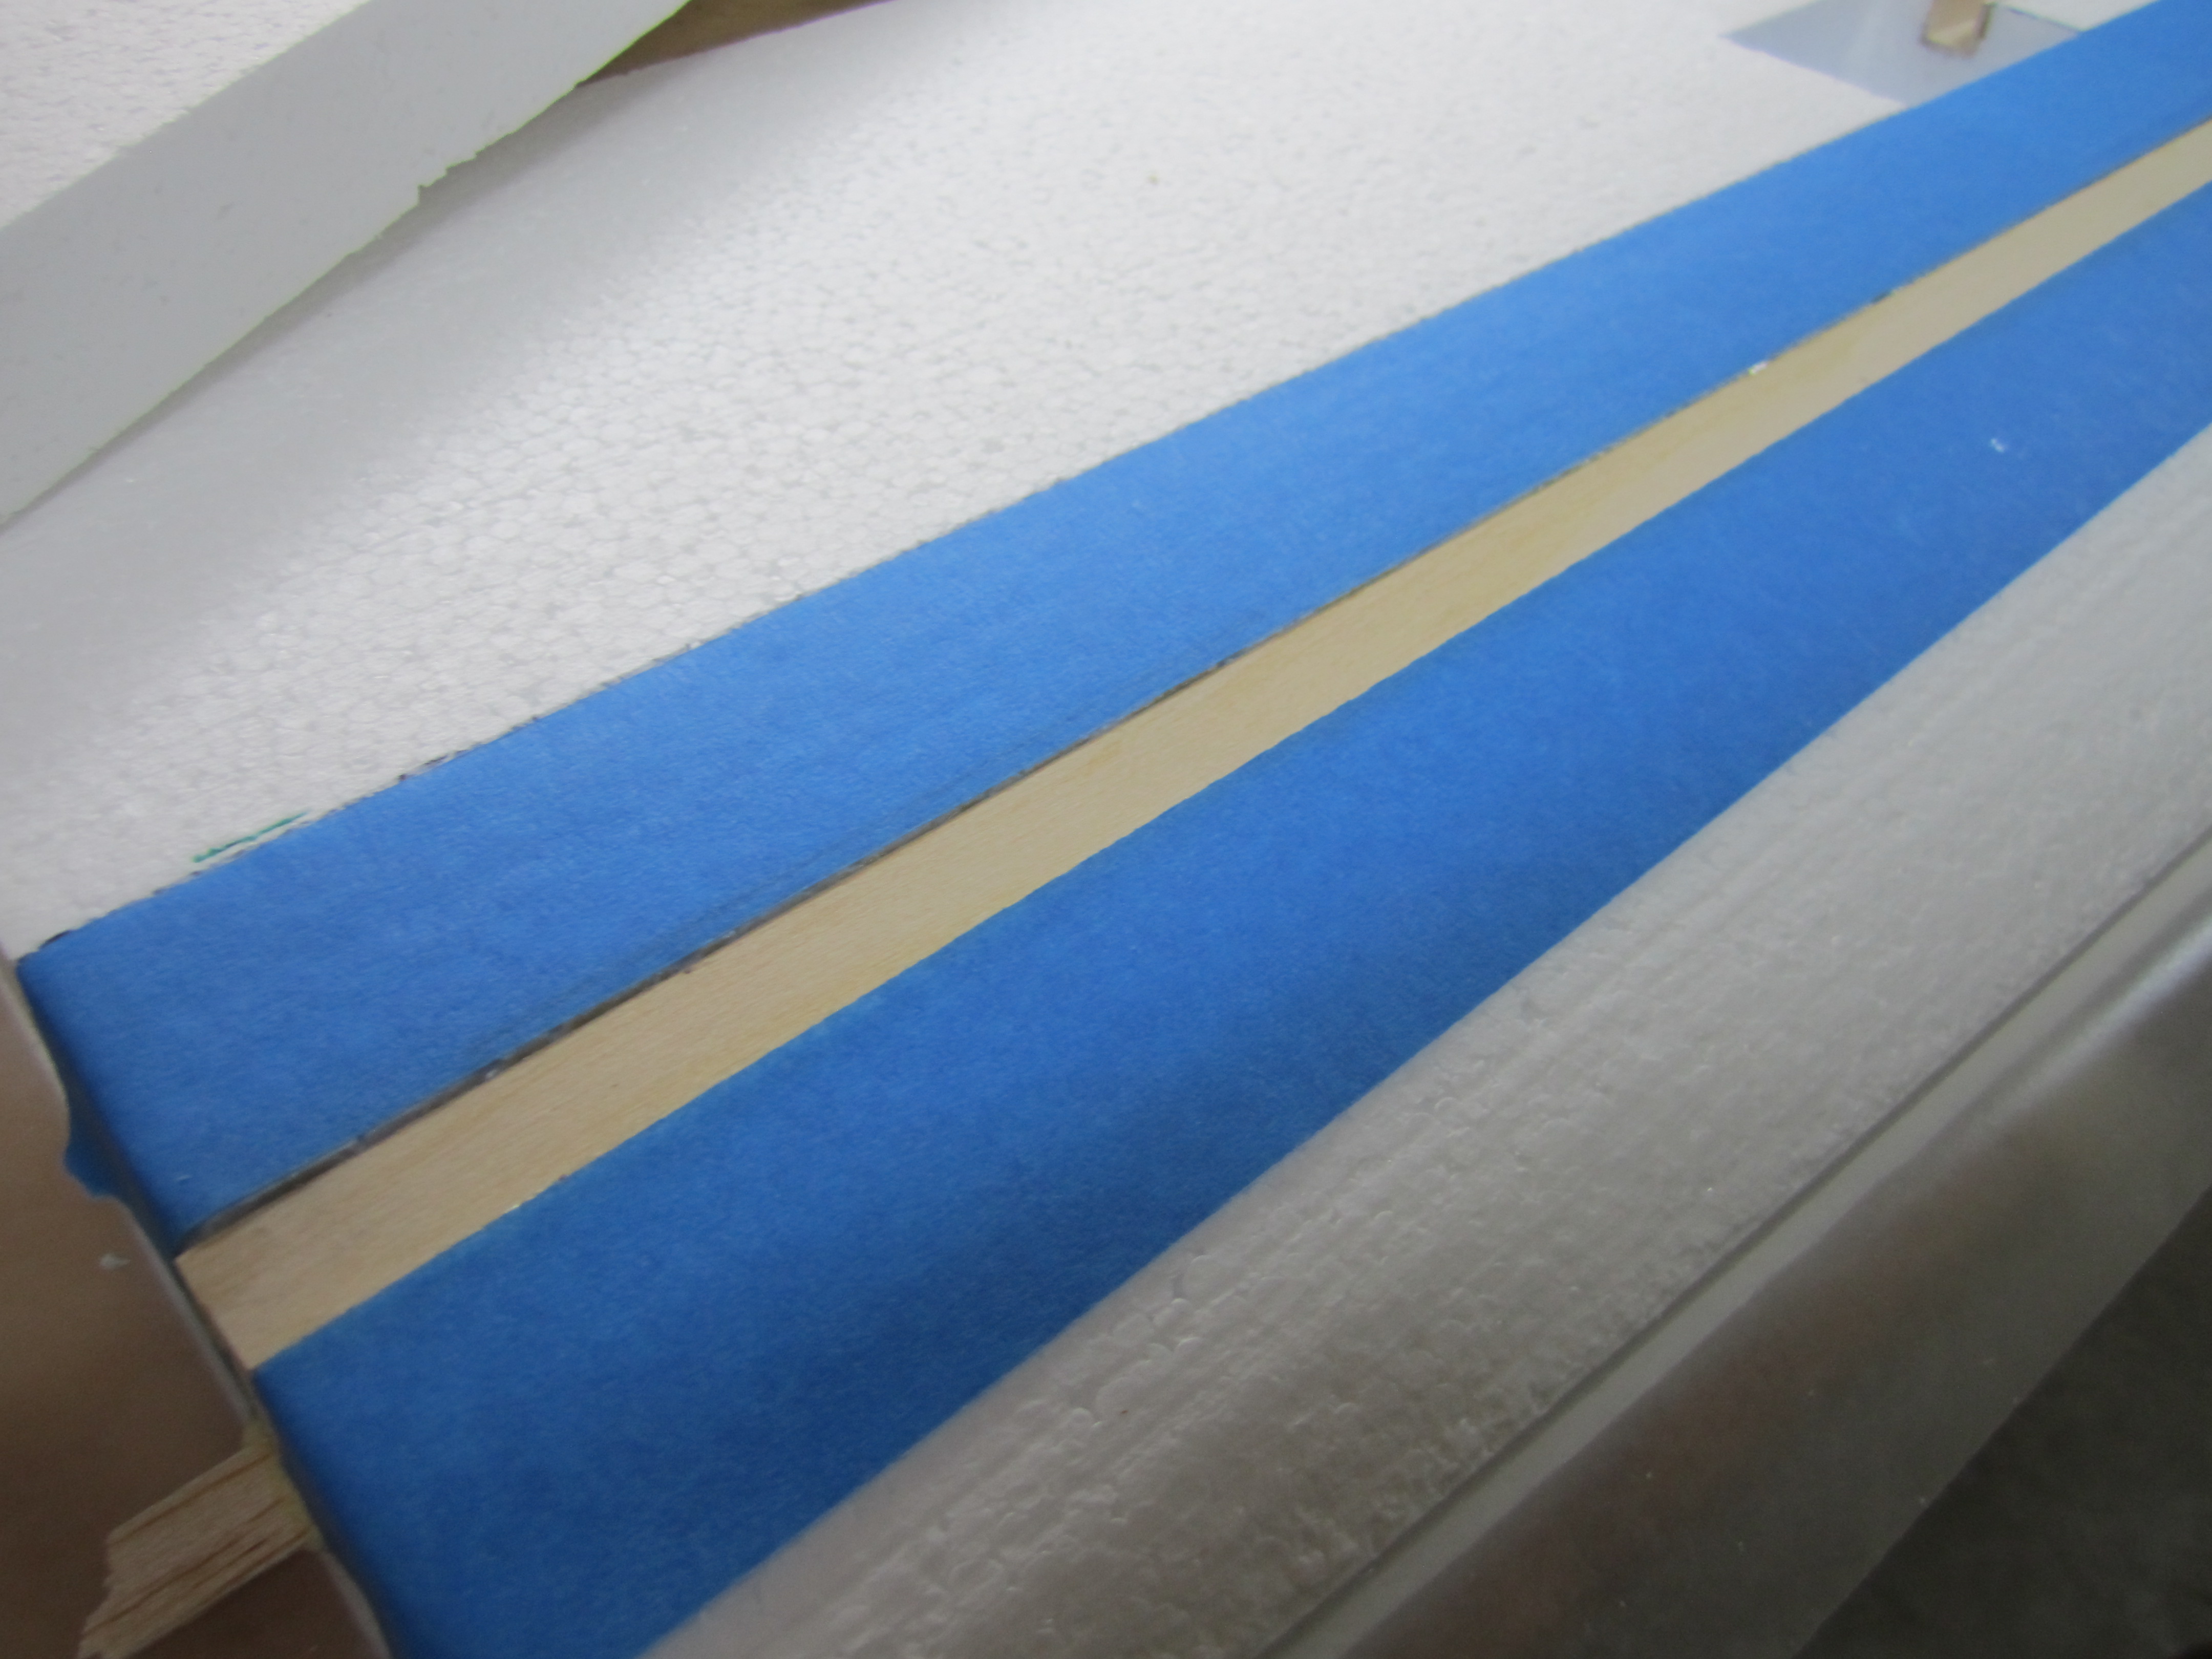
I masked the cuts before gluing the spars, servos canal and landing gear Ľ" plywood mountings because I am using Gorilla glue for this and I don't want to clean the mess when it expands.
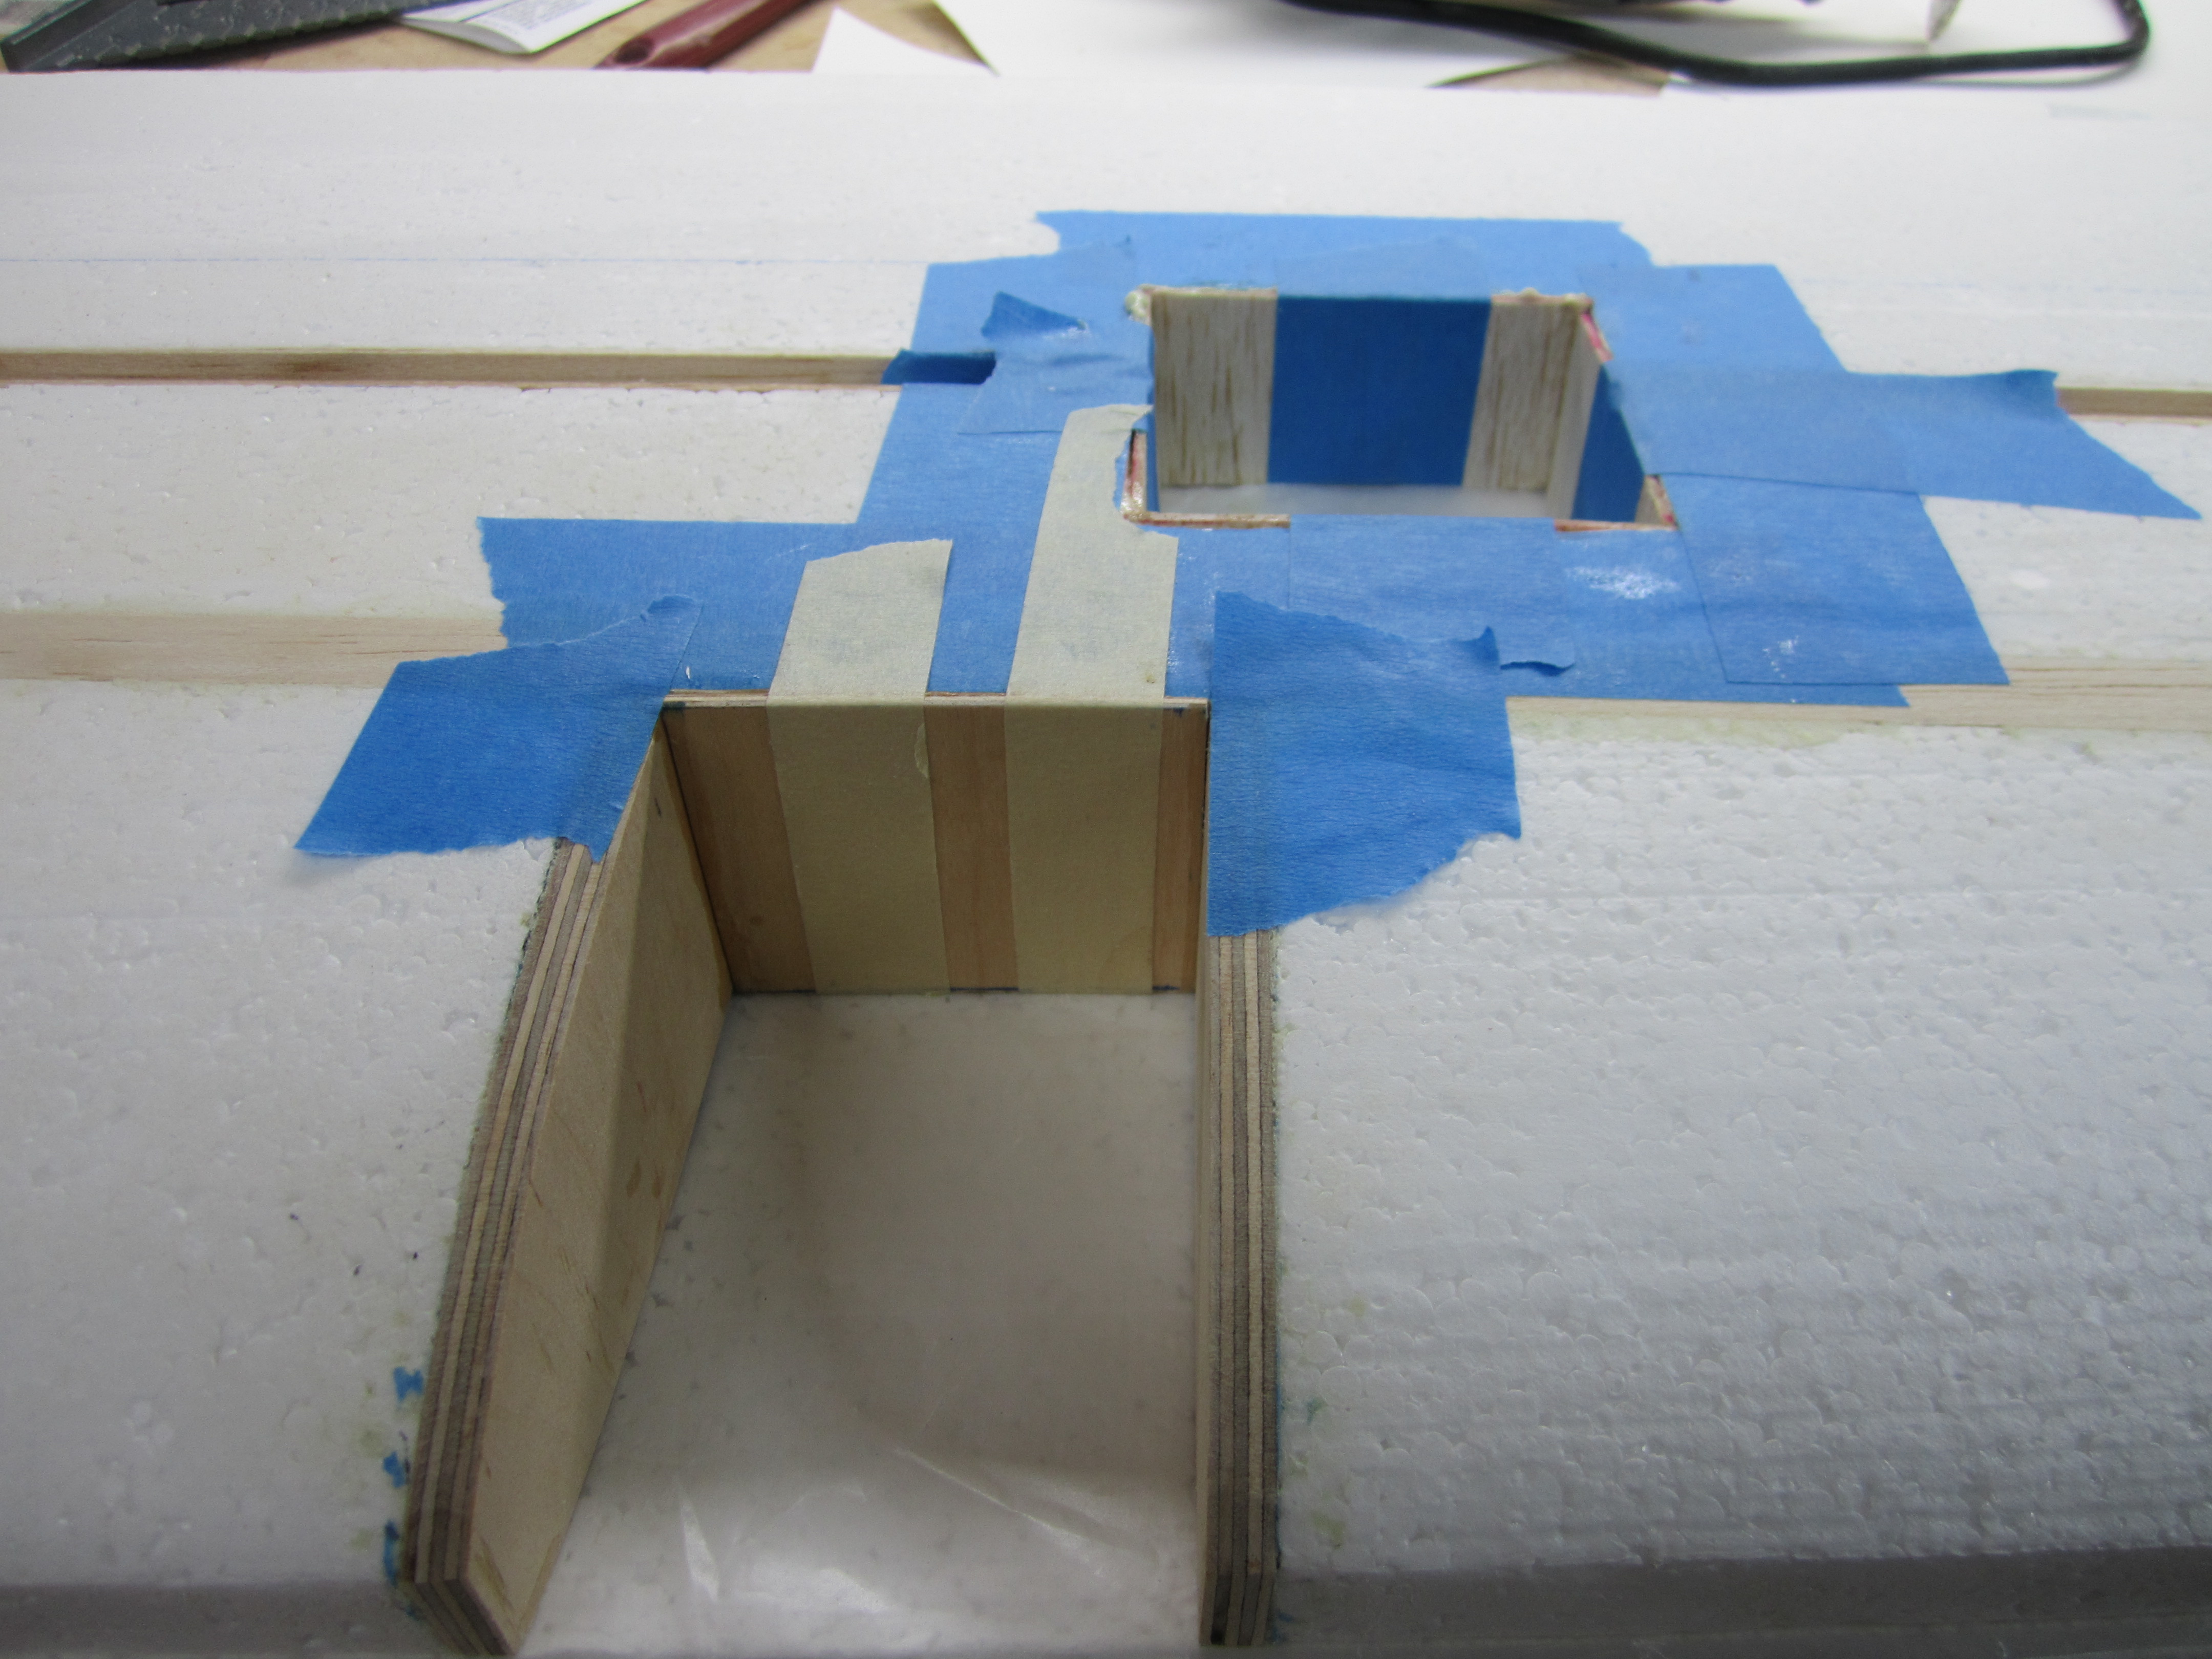
After I marked the wings with the templates, I cut the spars slots (Ľ x ˝" top and bottom) and the servo wires slot with a router. The holes were cut with a hot wire.
I masked the cuts before gluing the spars, servos canal and landing gear Ľ" plywood mountings because I am using Gorilla glue for this and I don't want to clean the mess when it expands.
04-09-2015 | 03:37 PM
#3
Thread Starter
My Feedback: (2)
Joined: Jun 2009
Posts: 18
Likes: 0
Received 0 Likes
on
0 Posts
From: TX
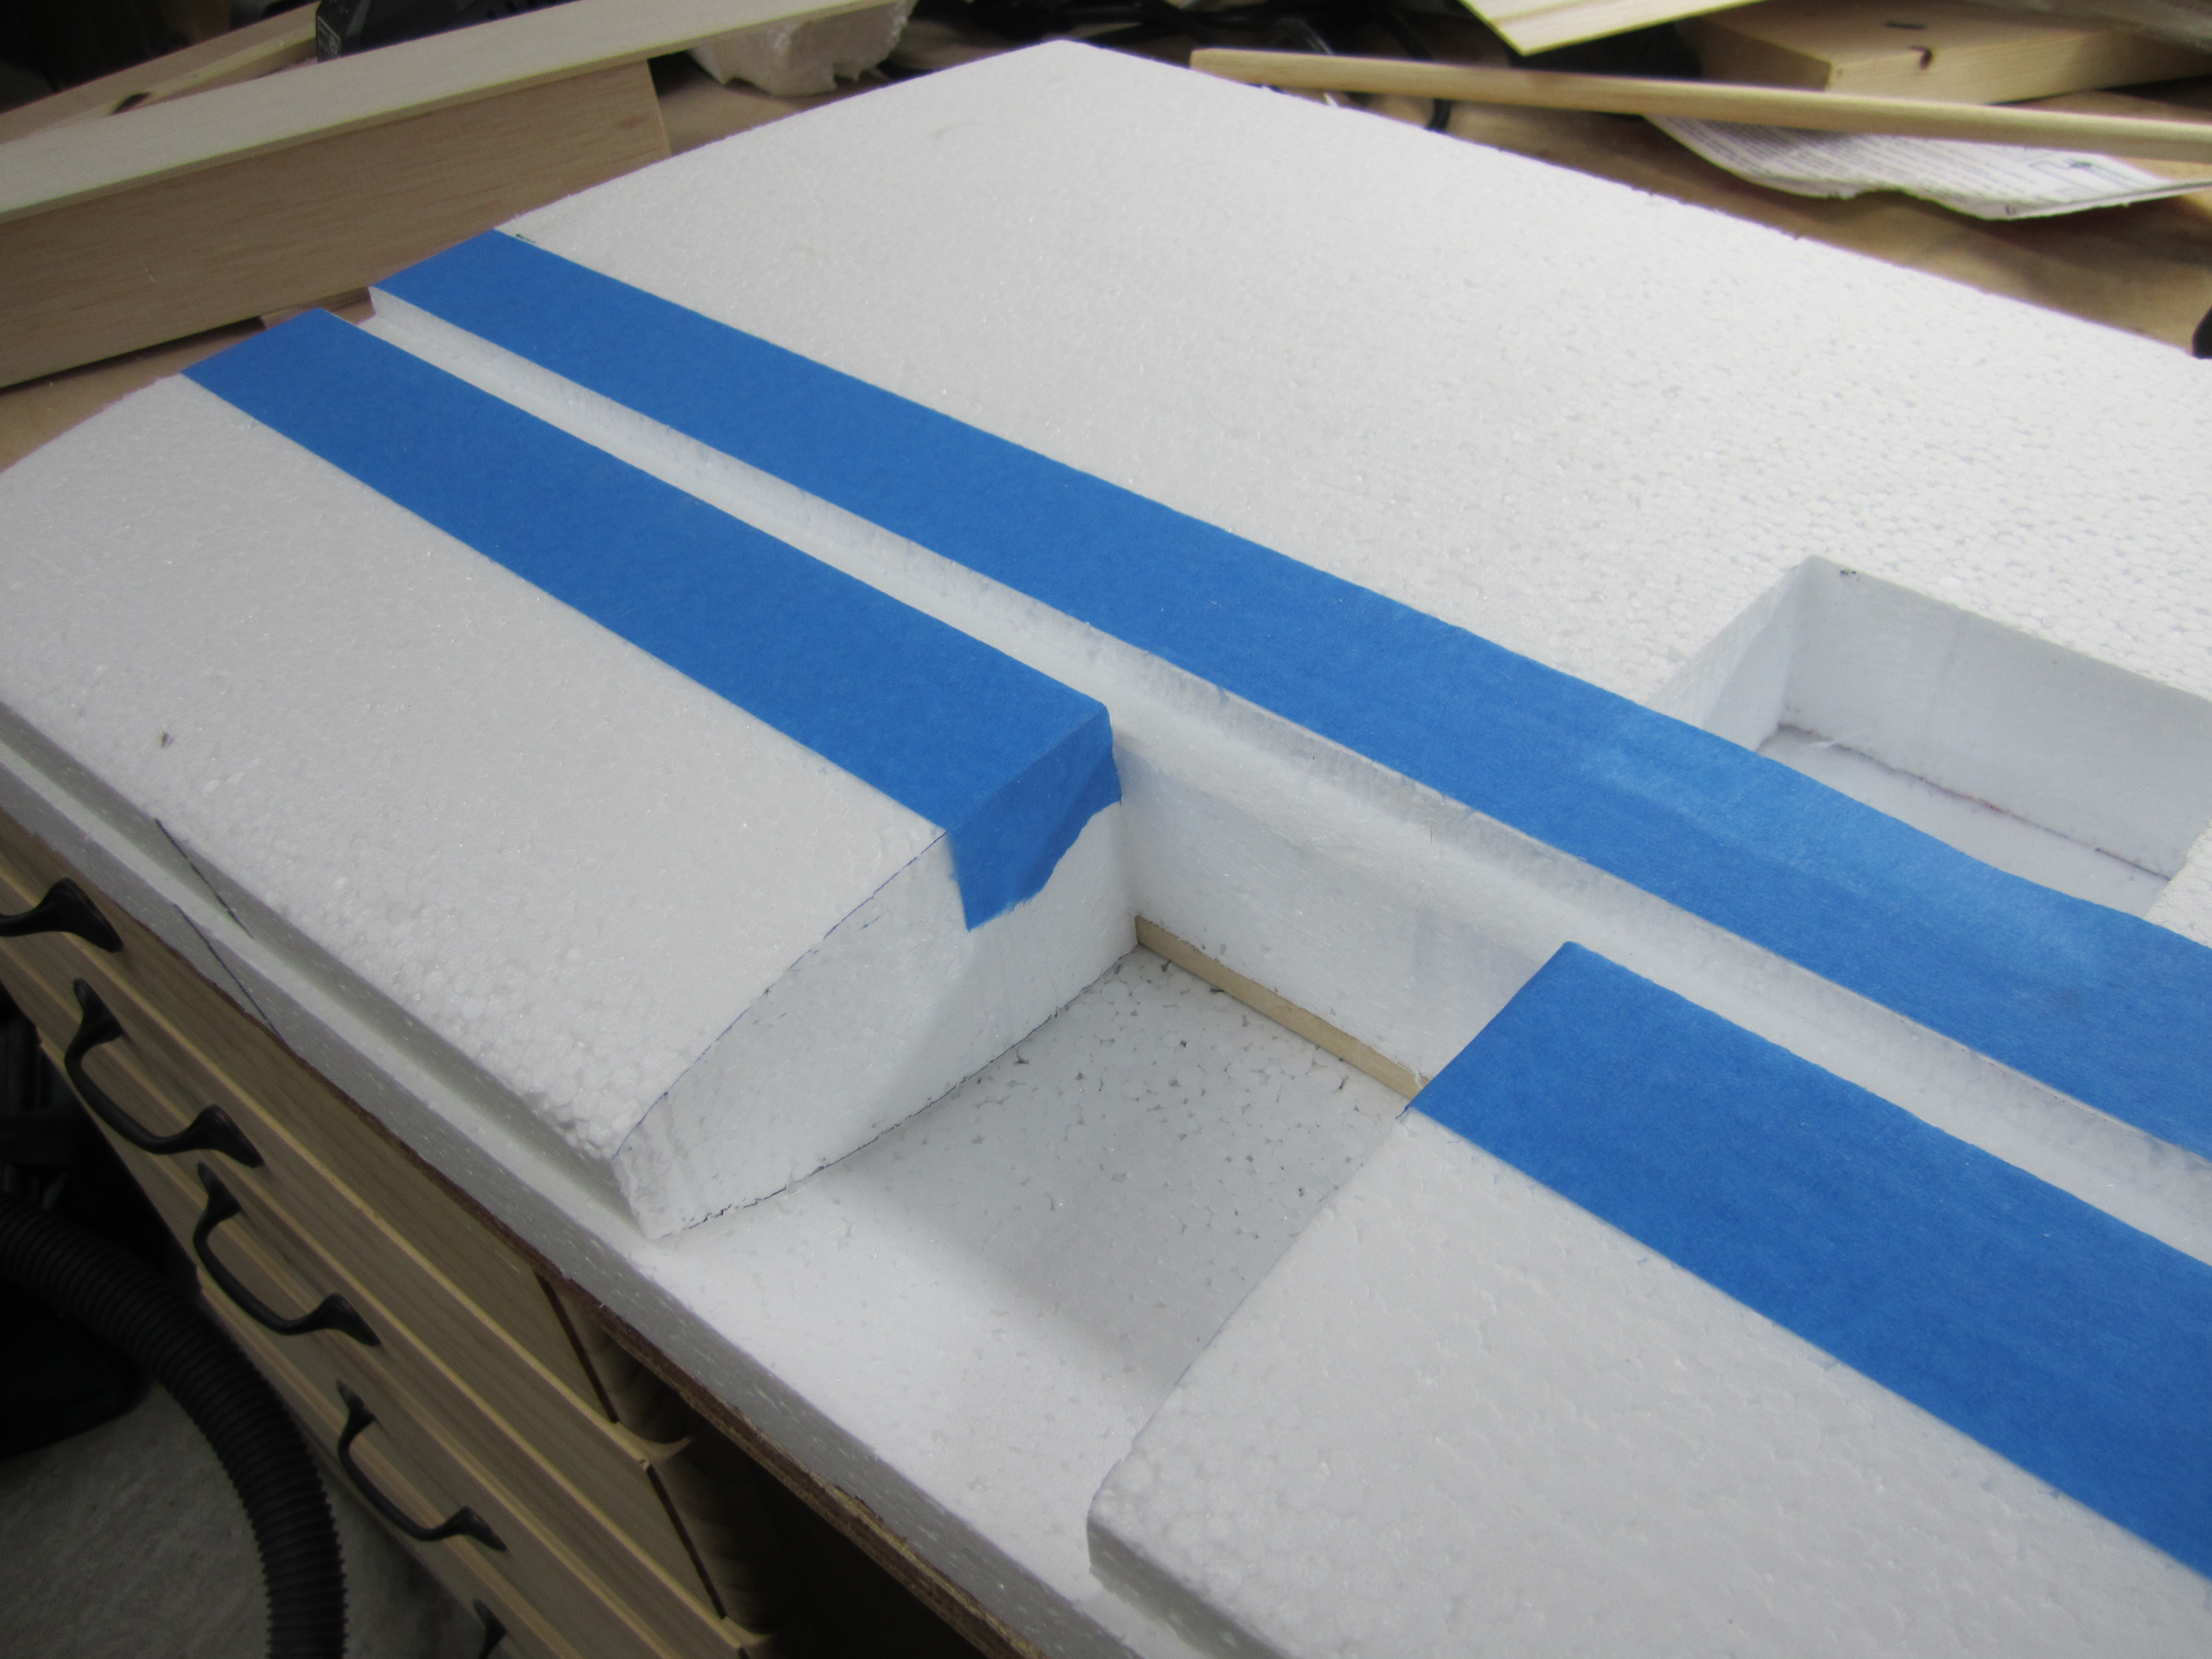
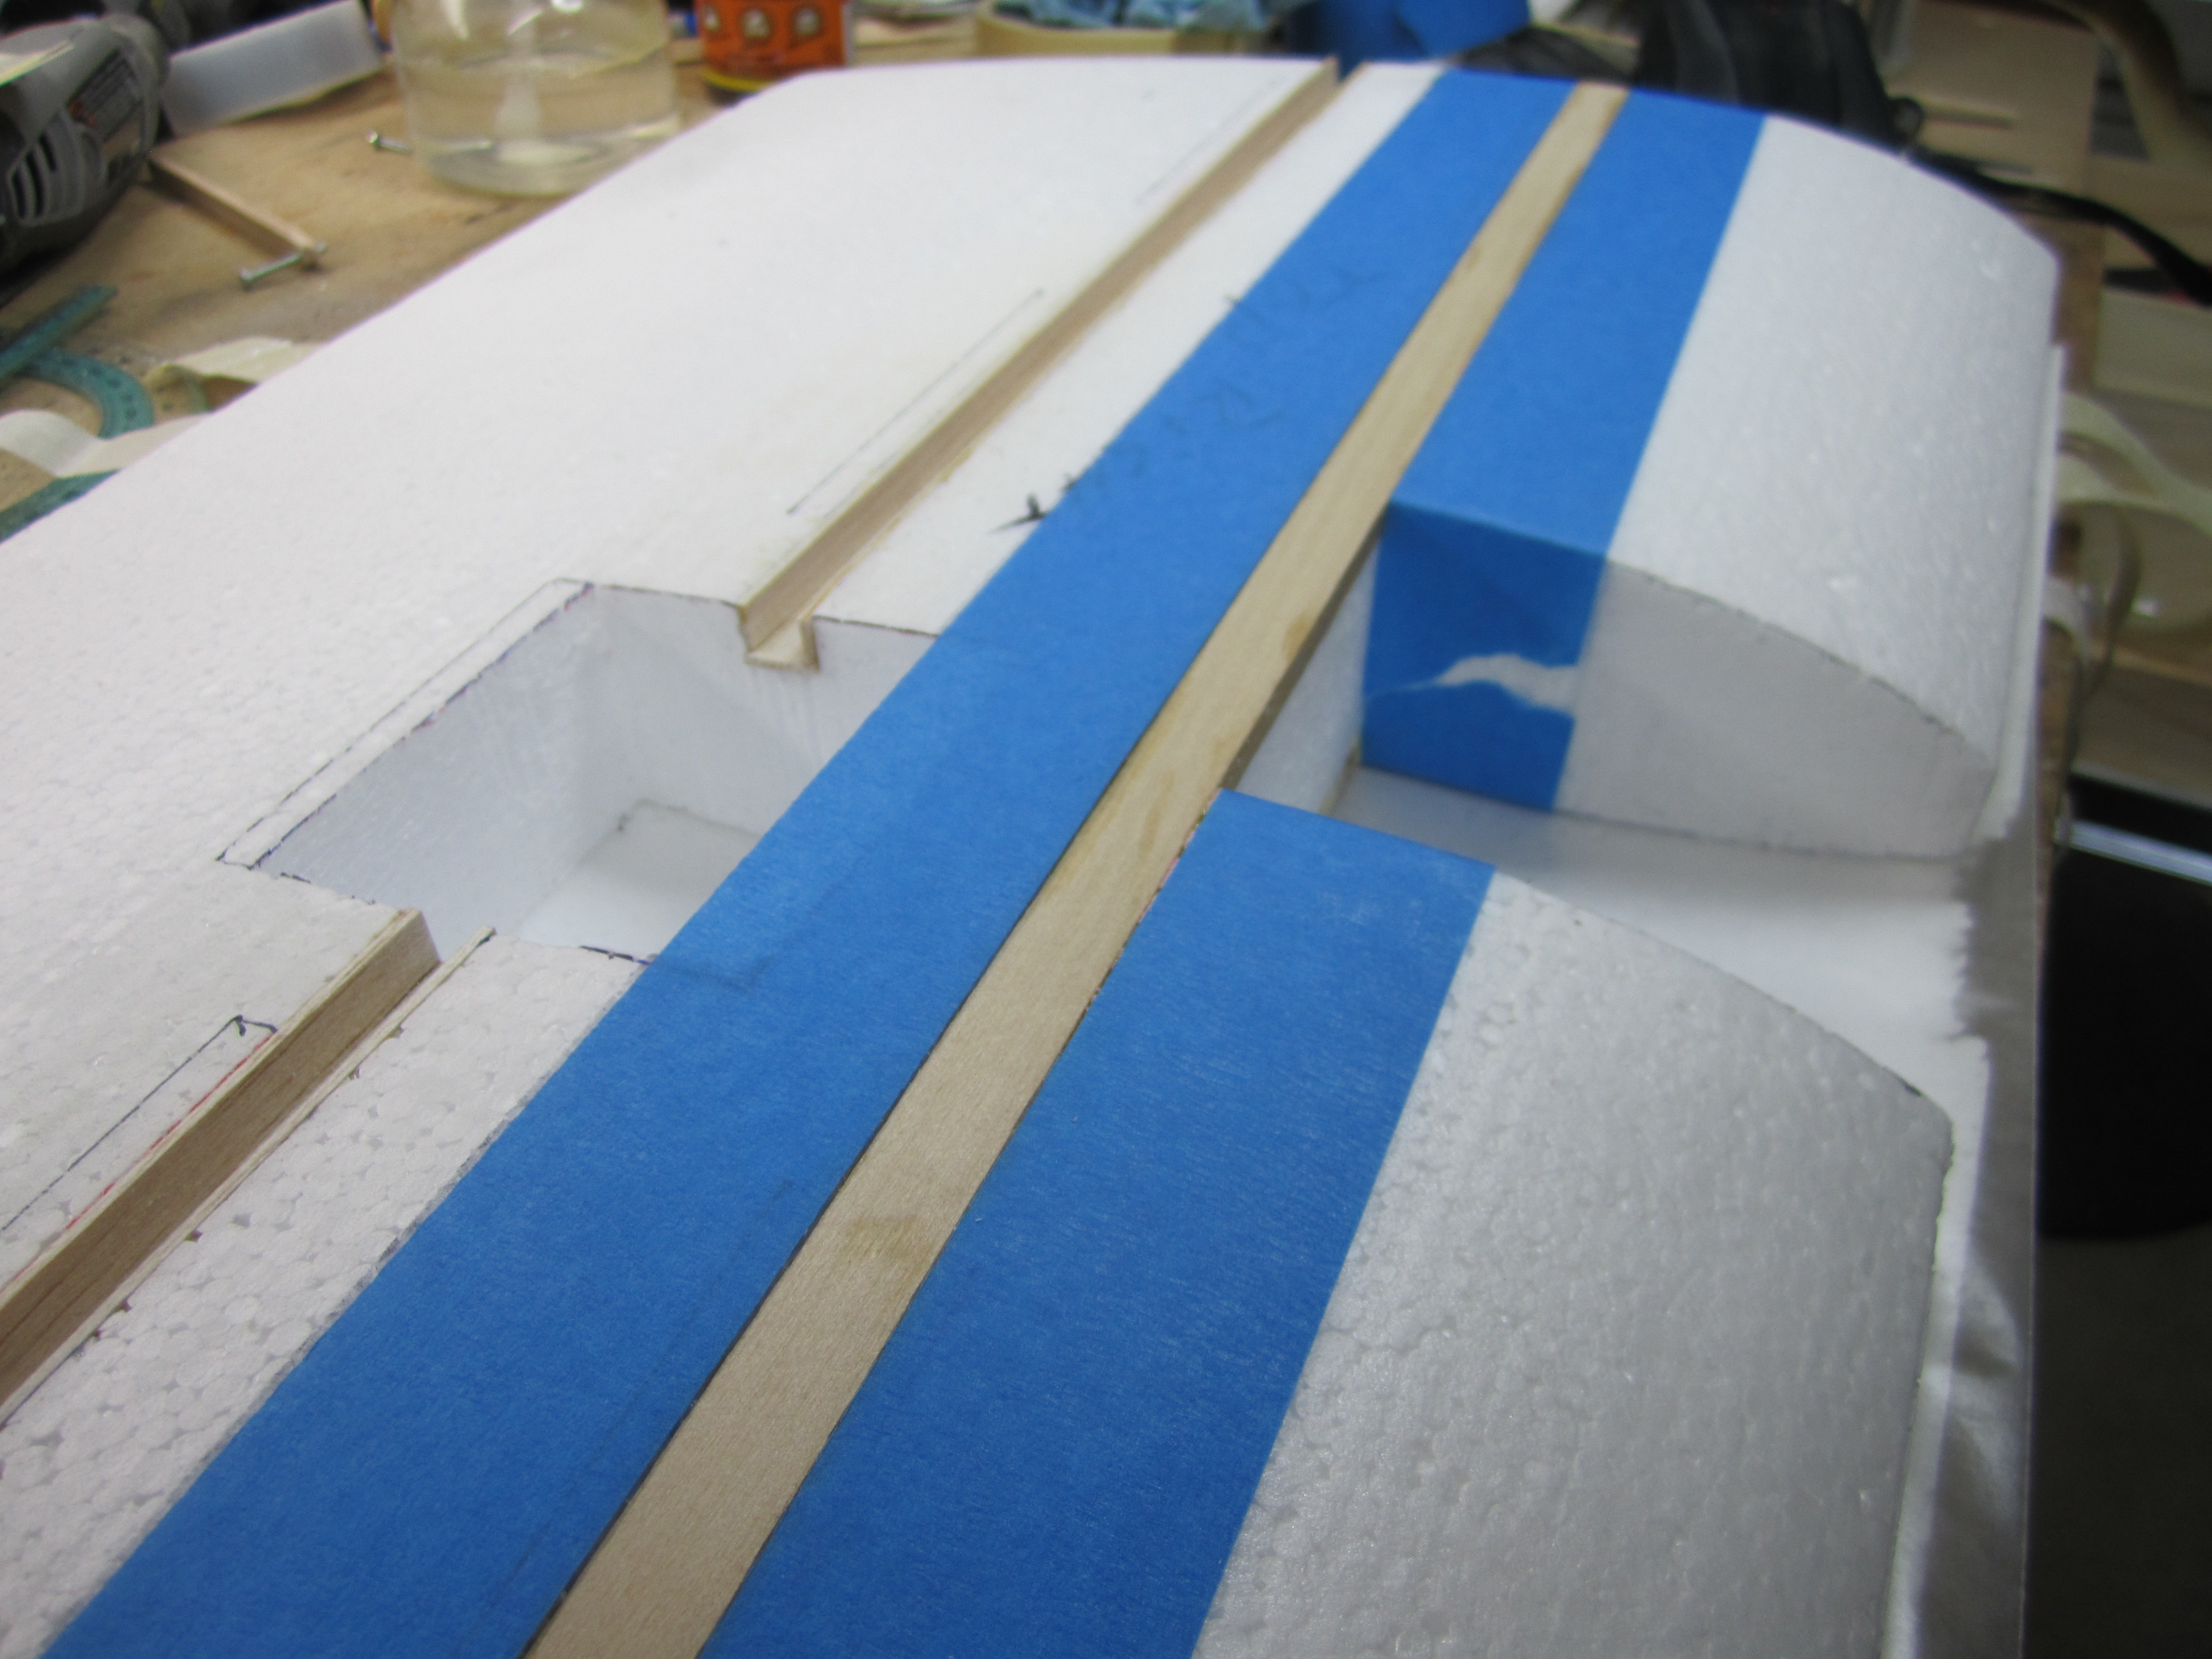
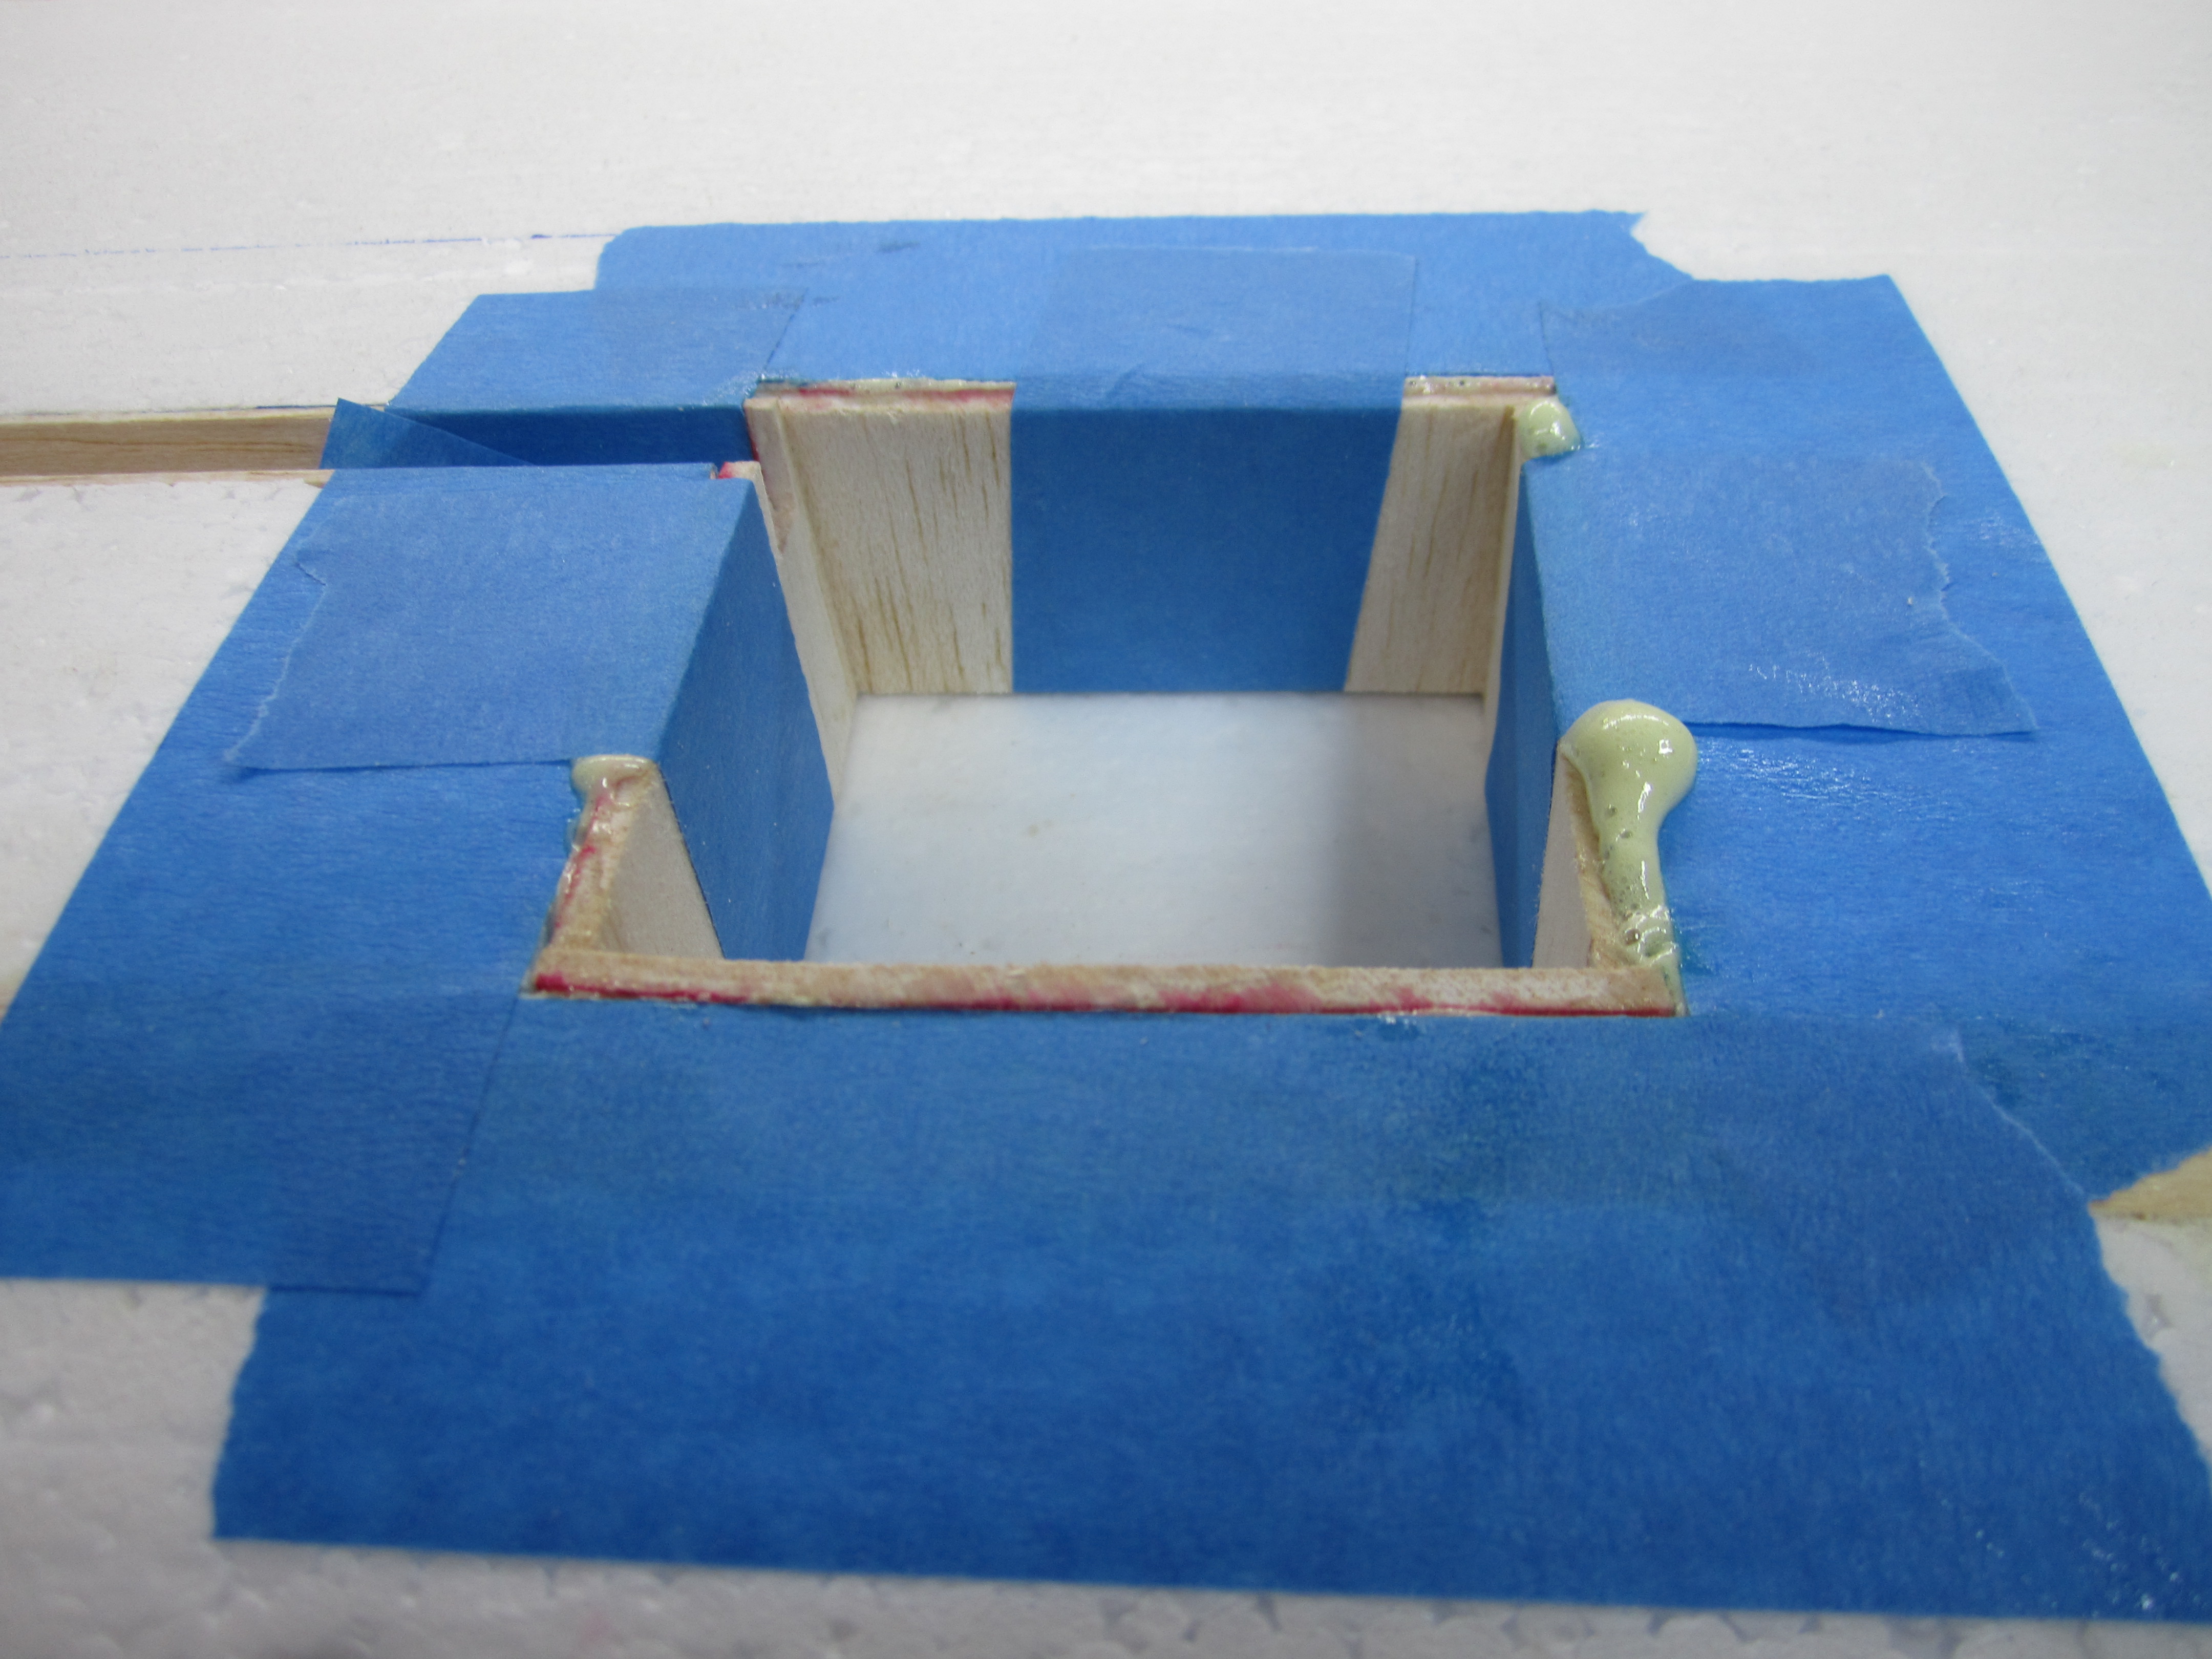
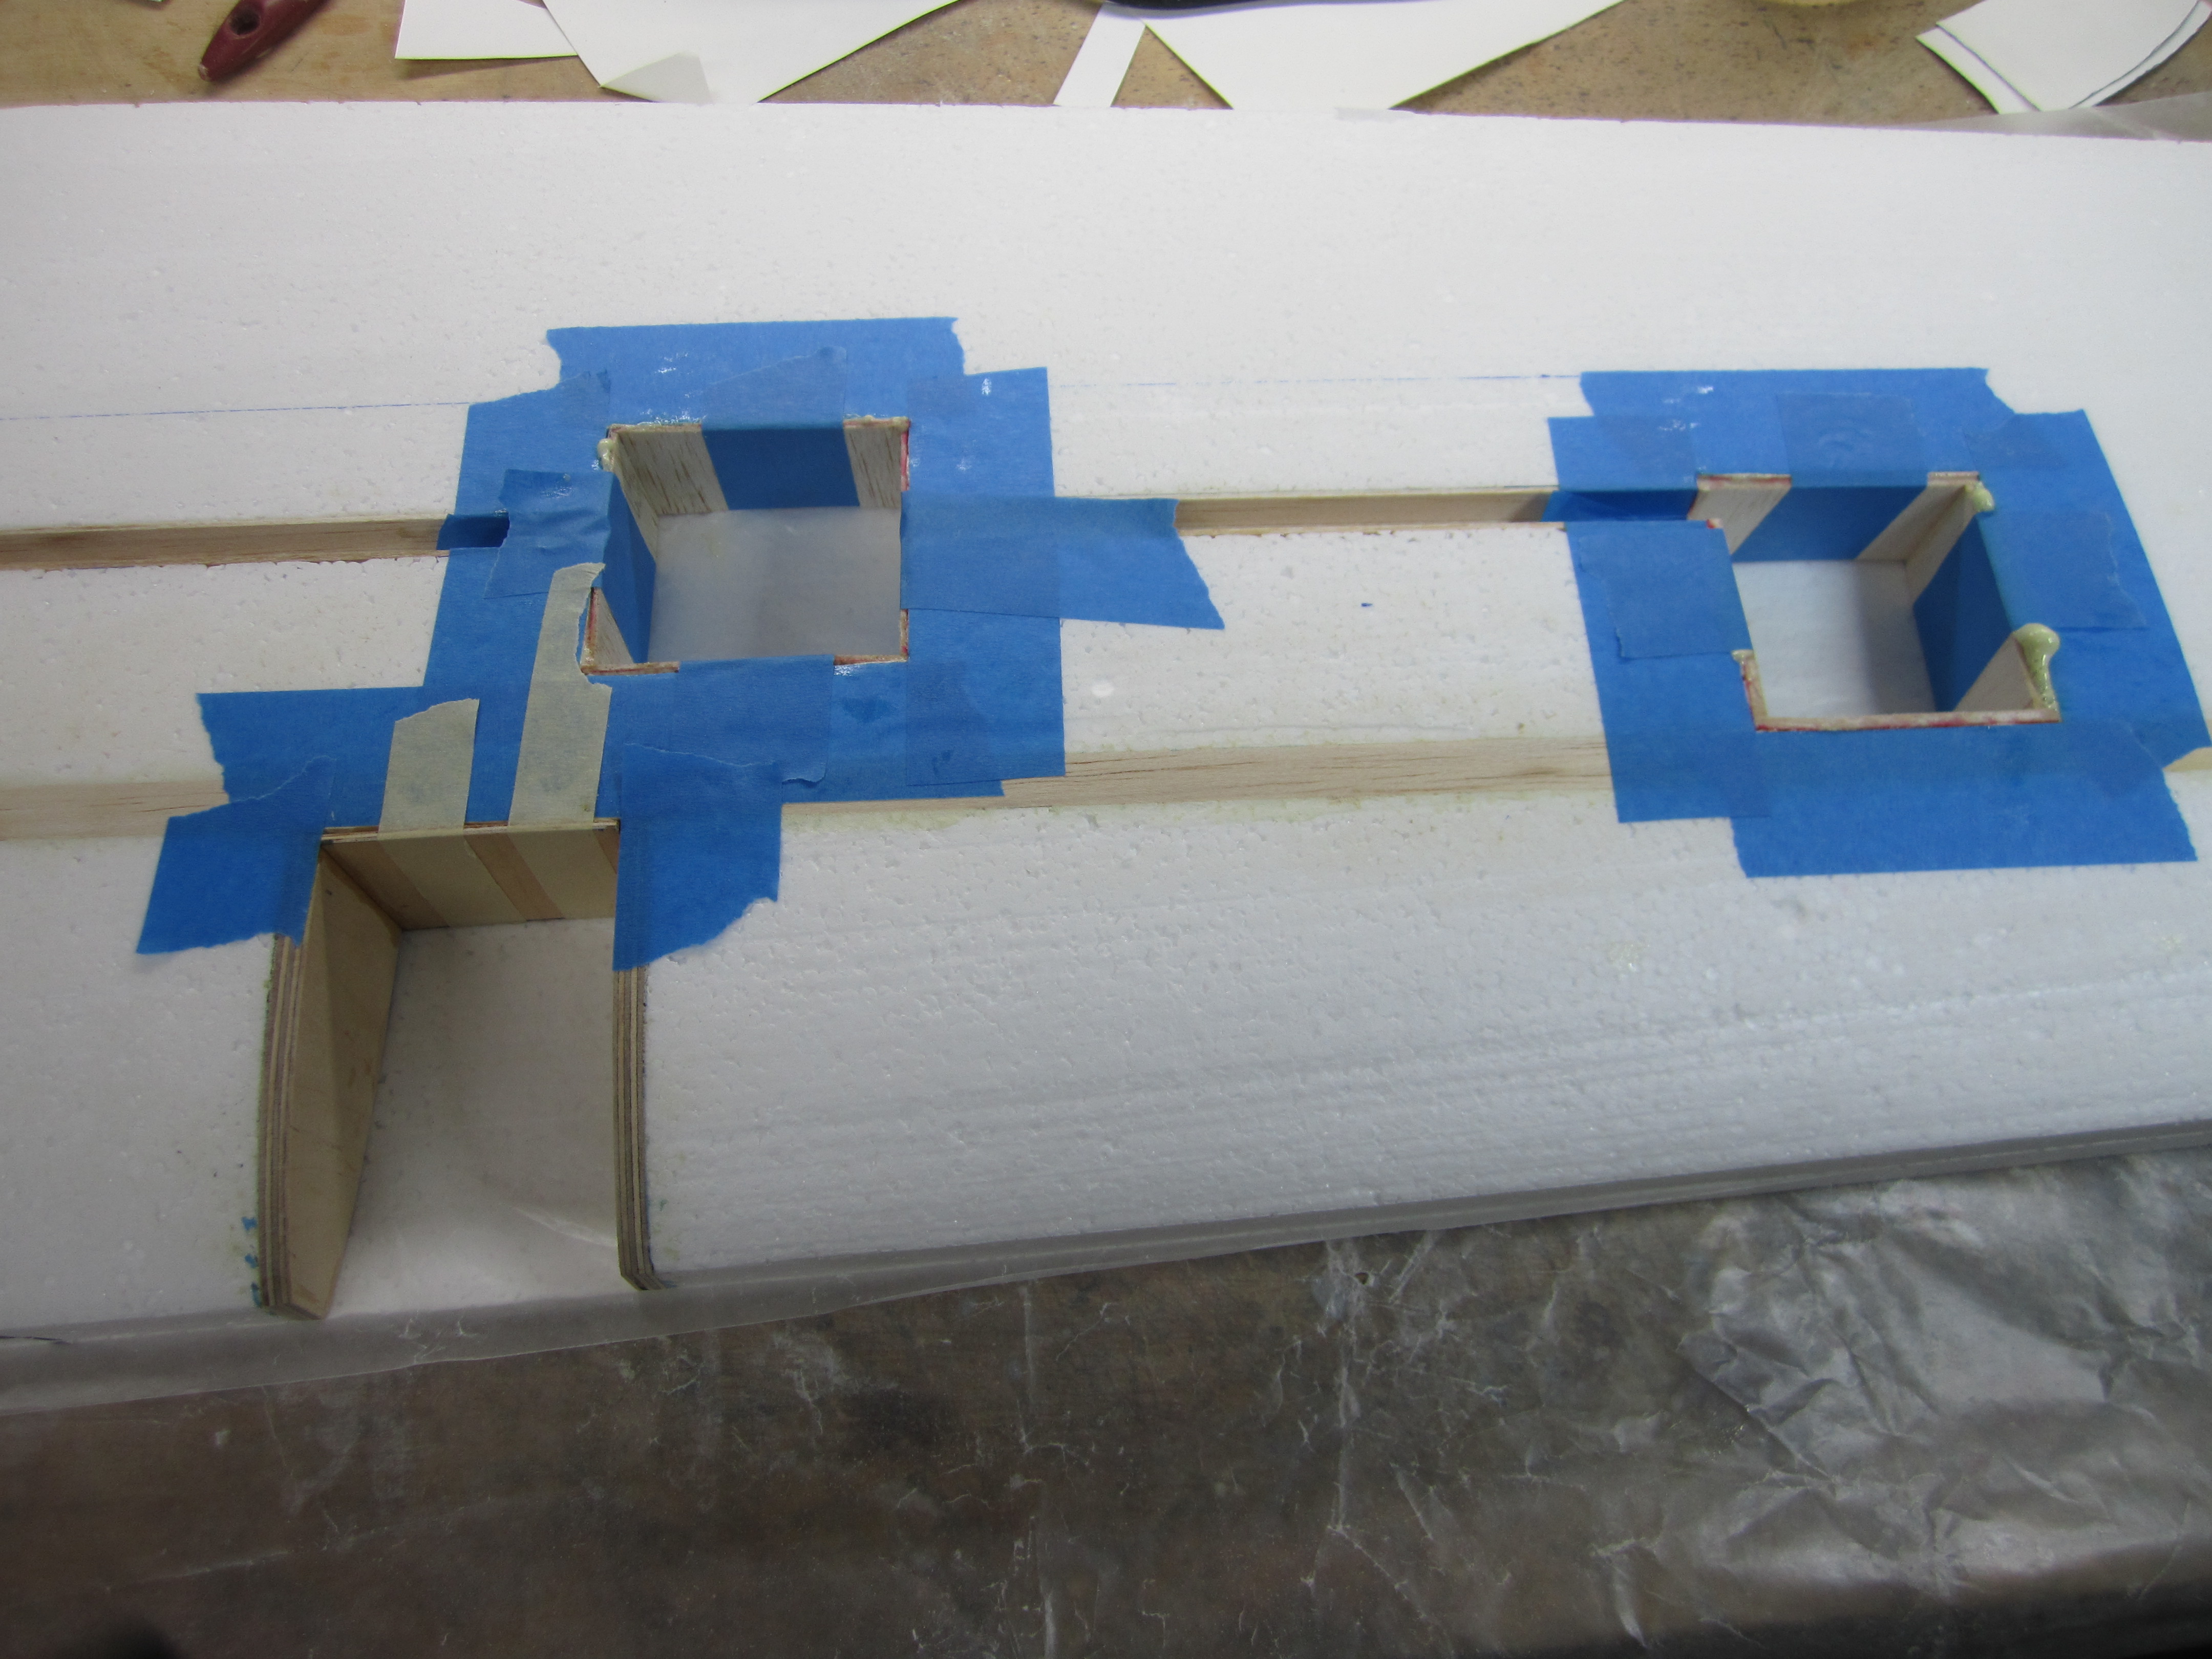
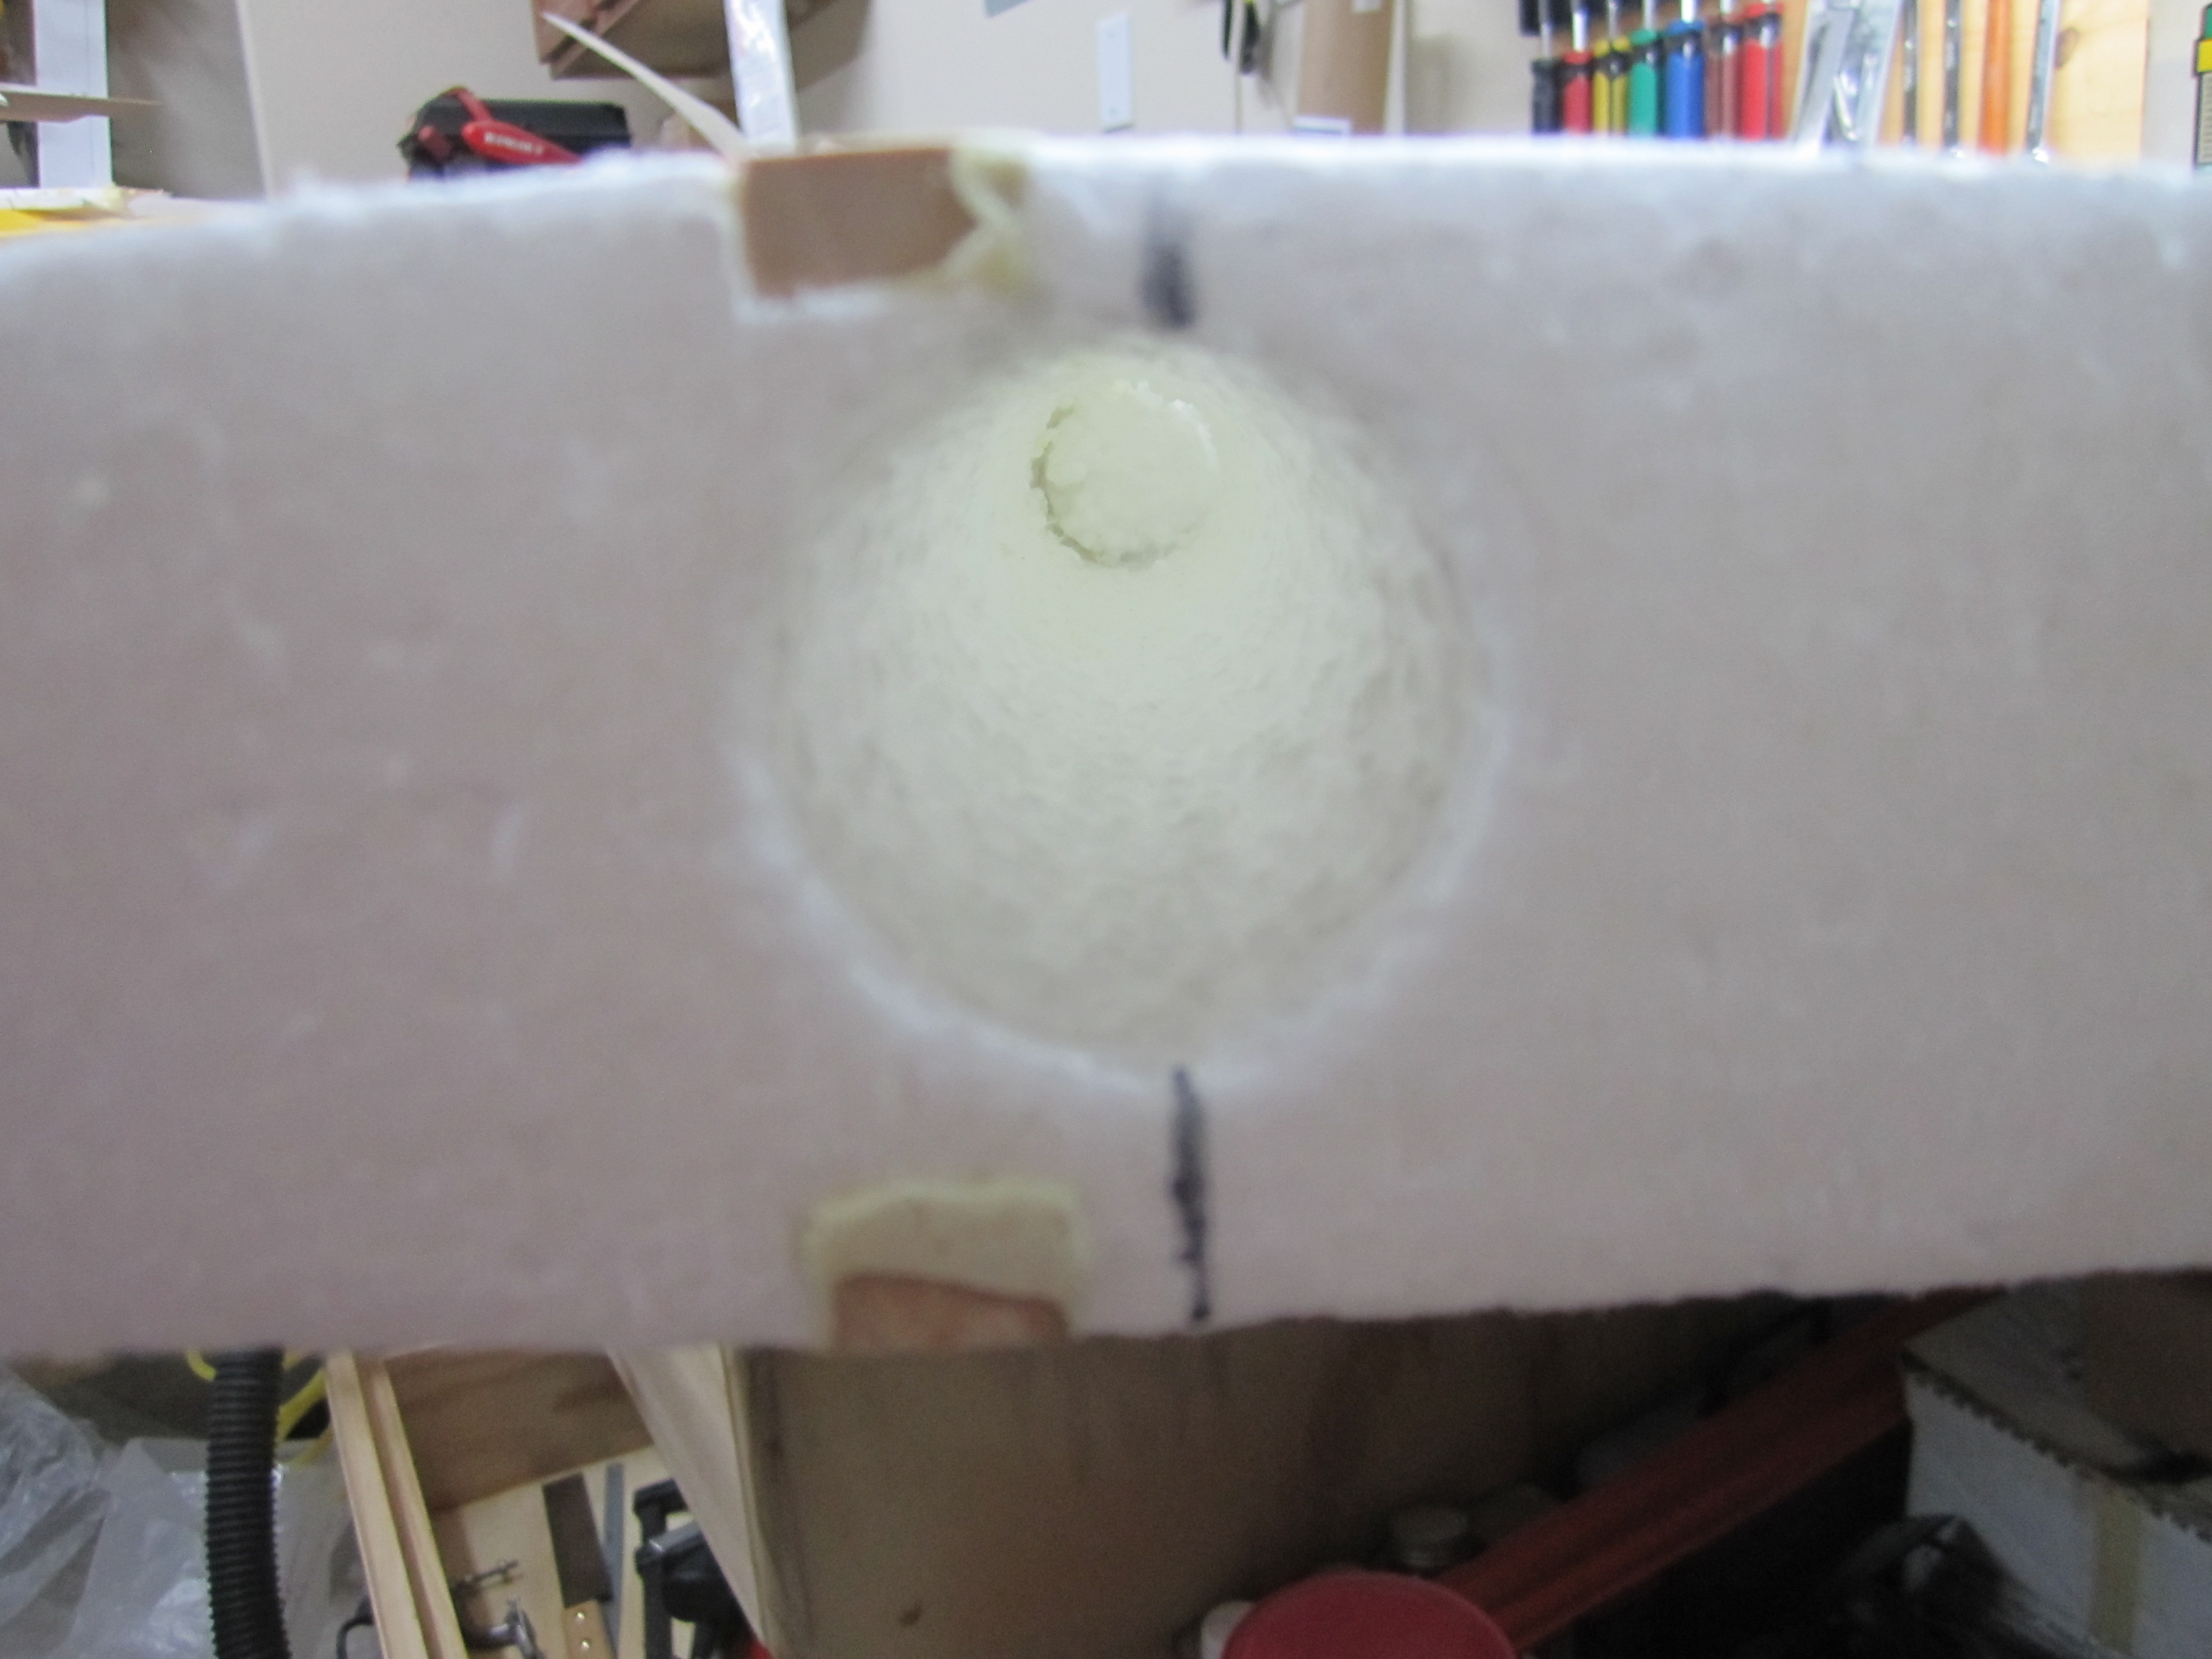
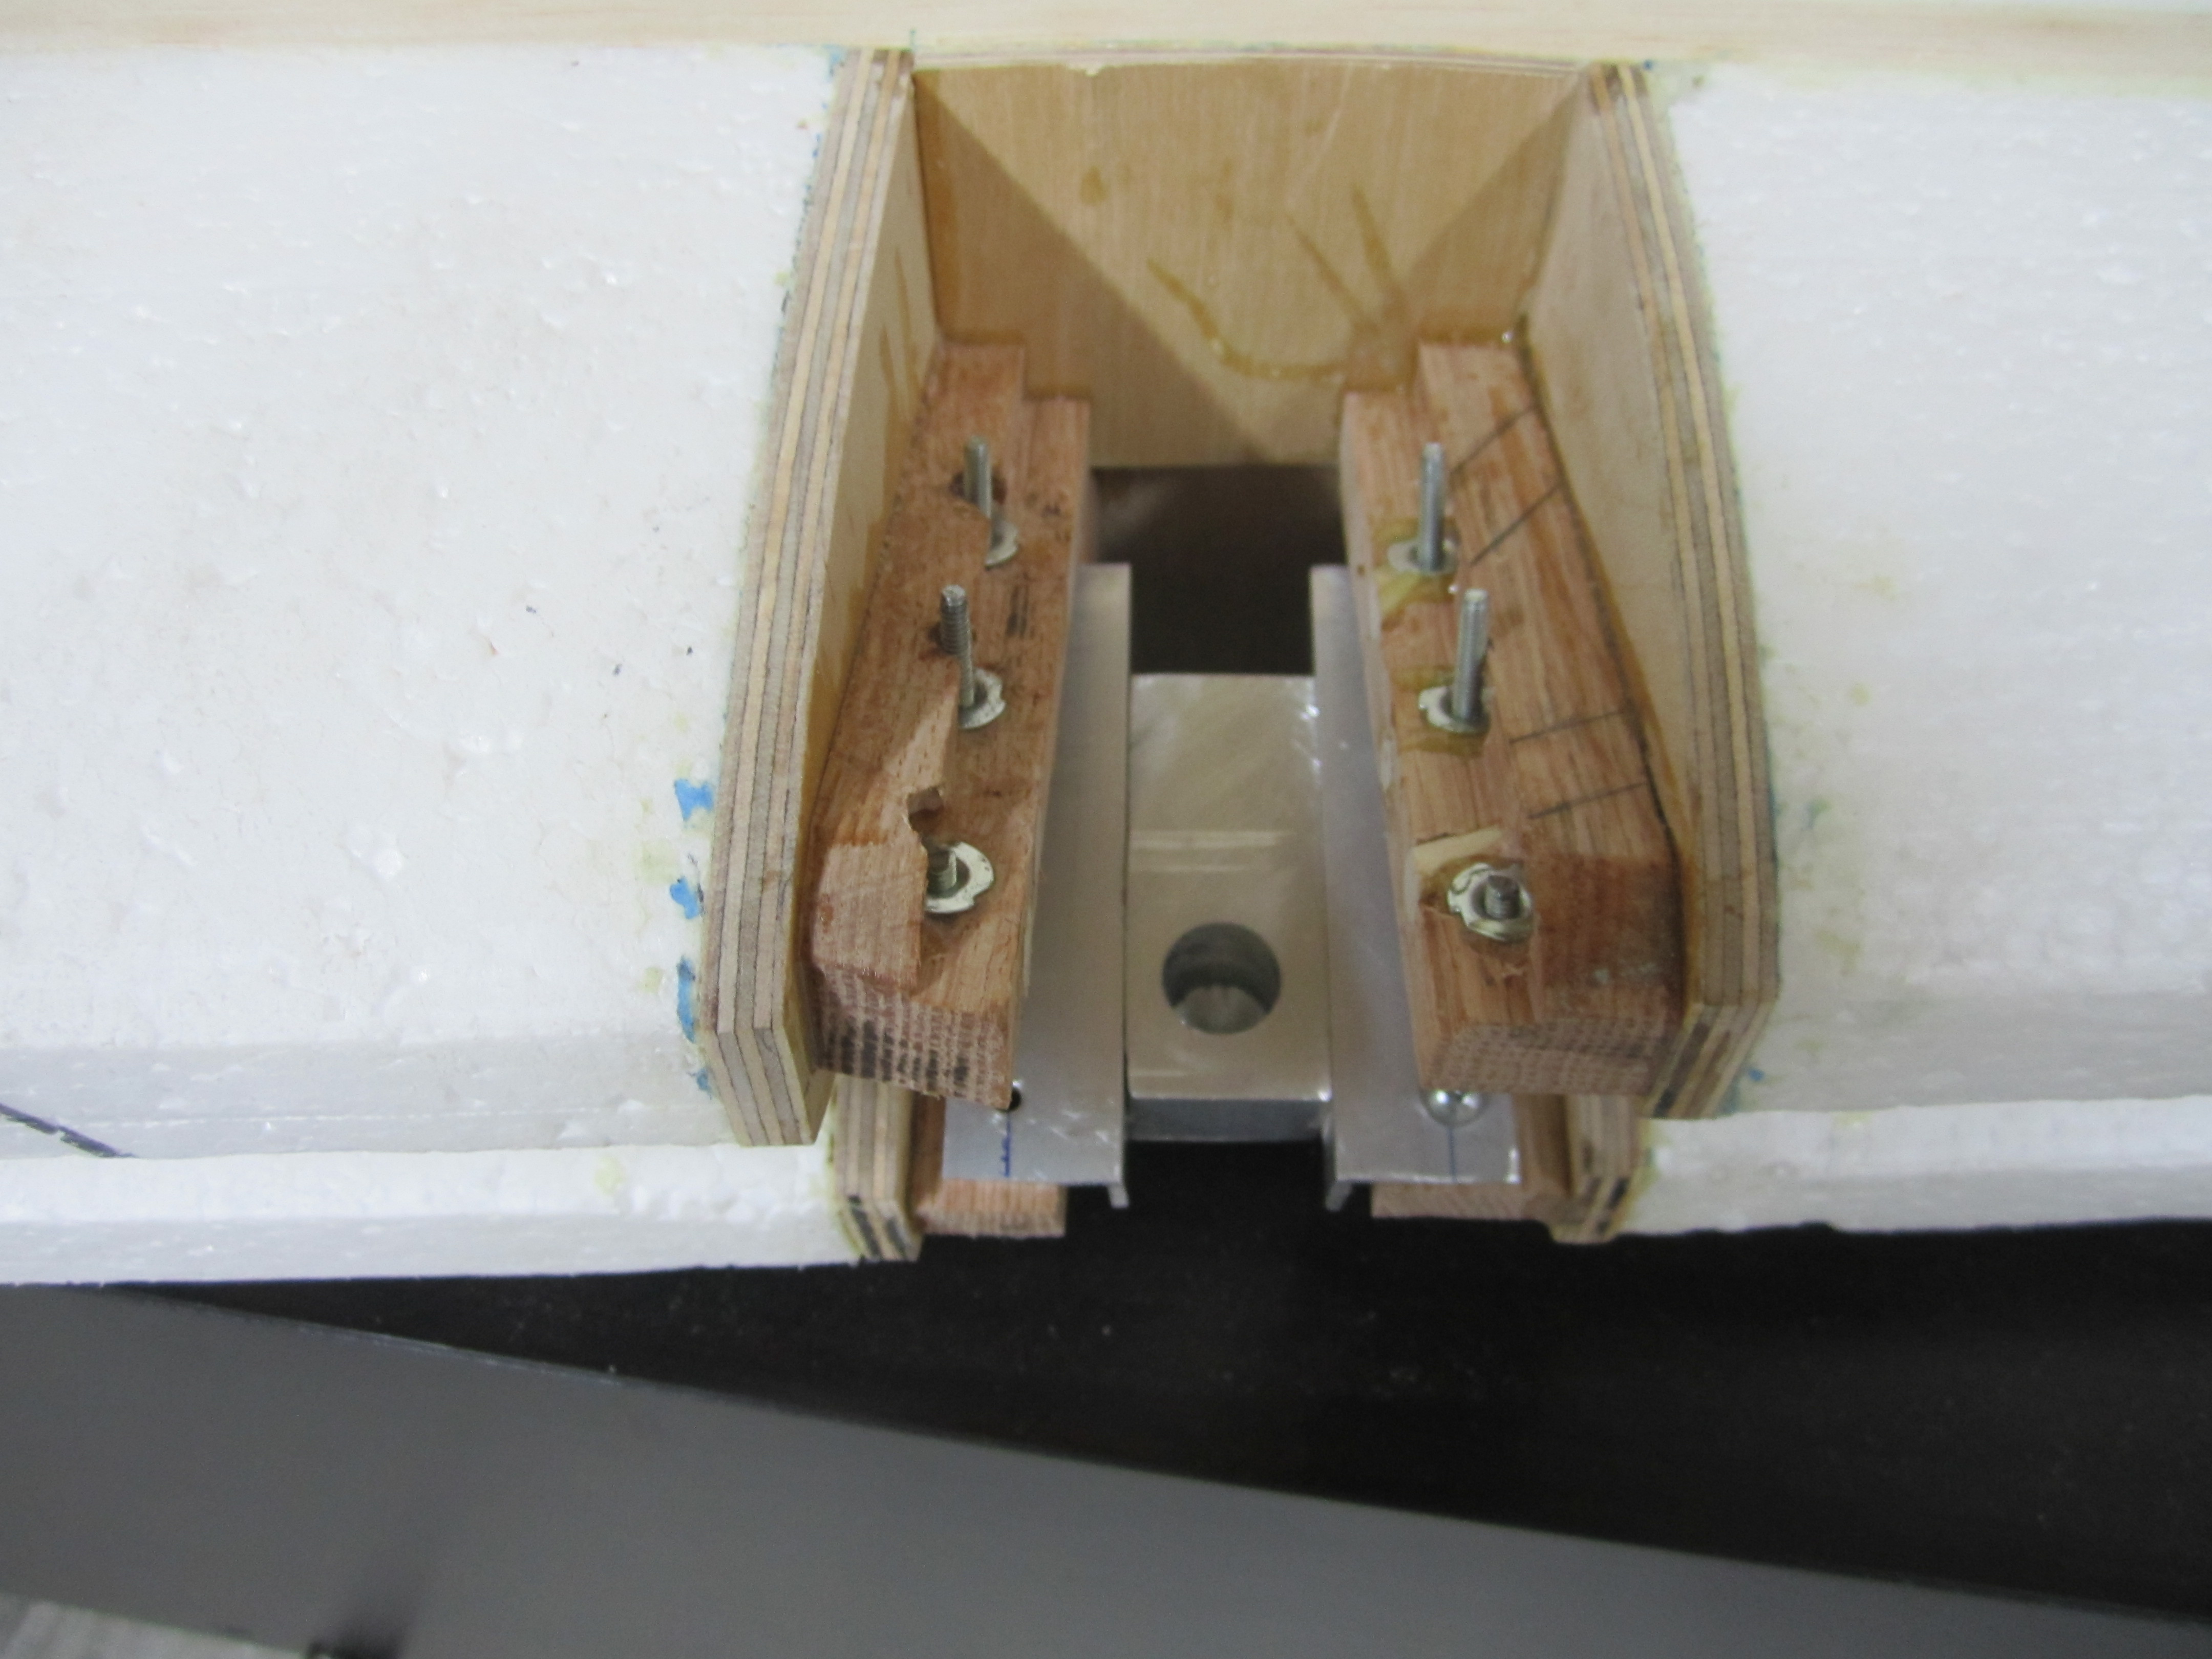
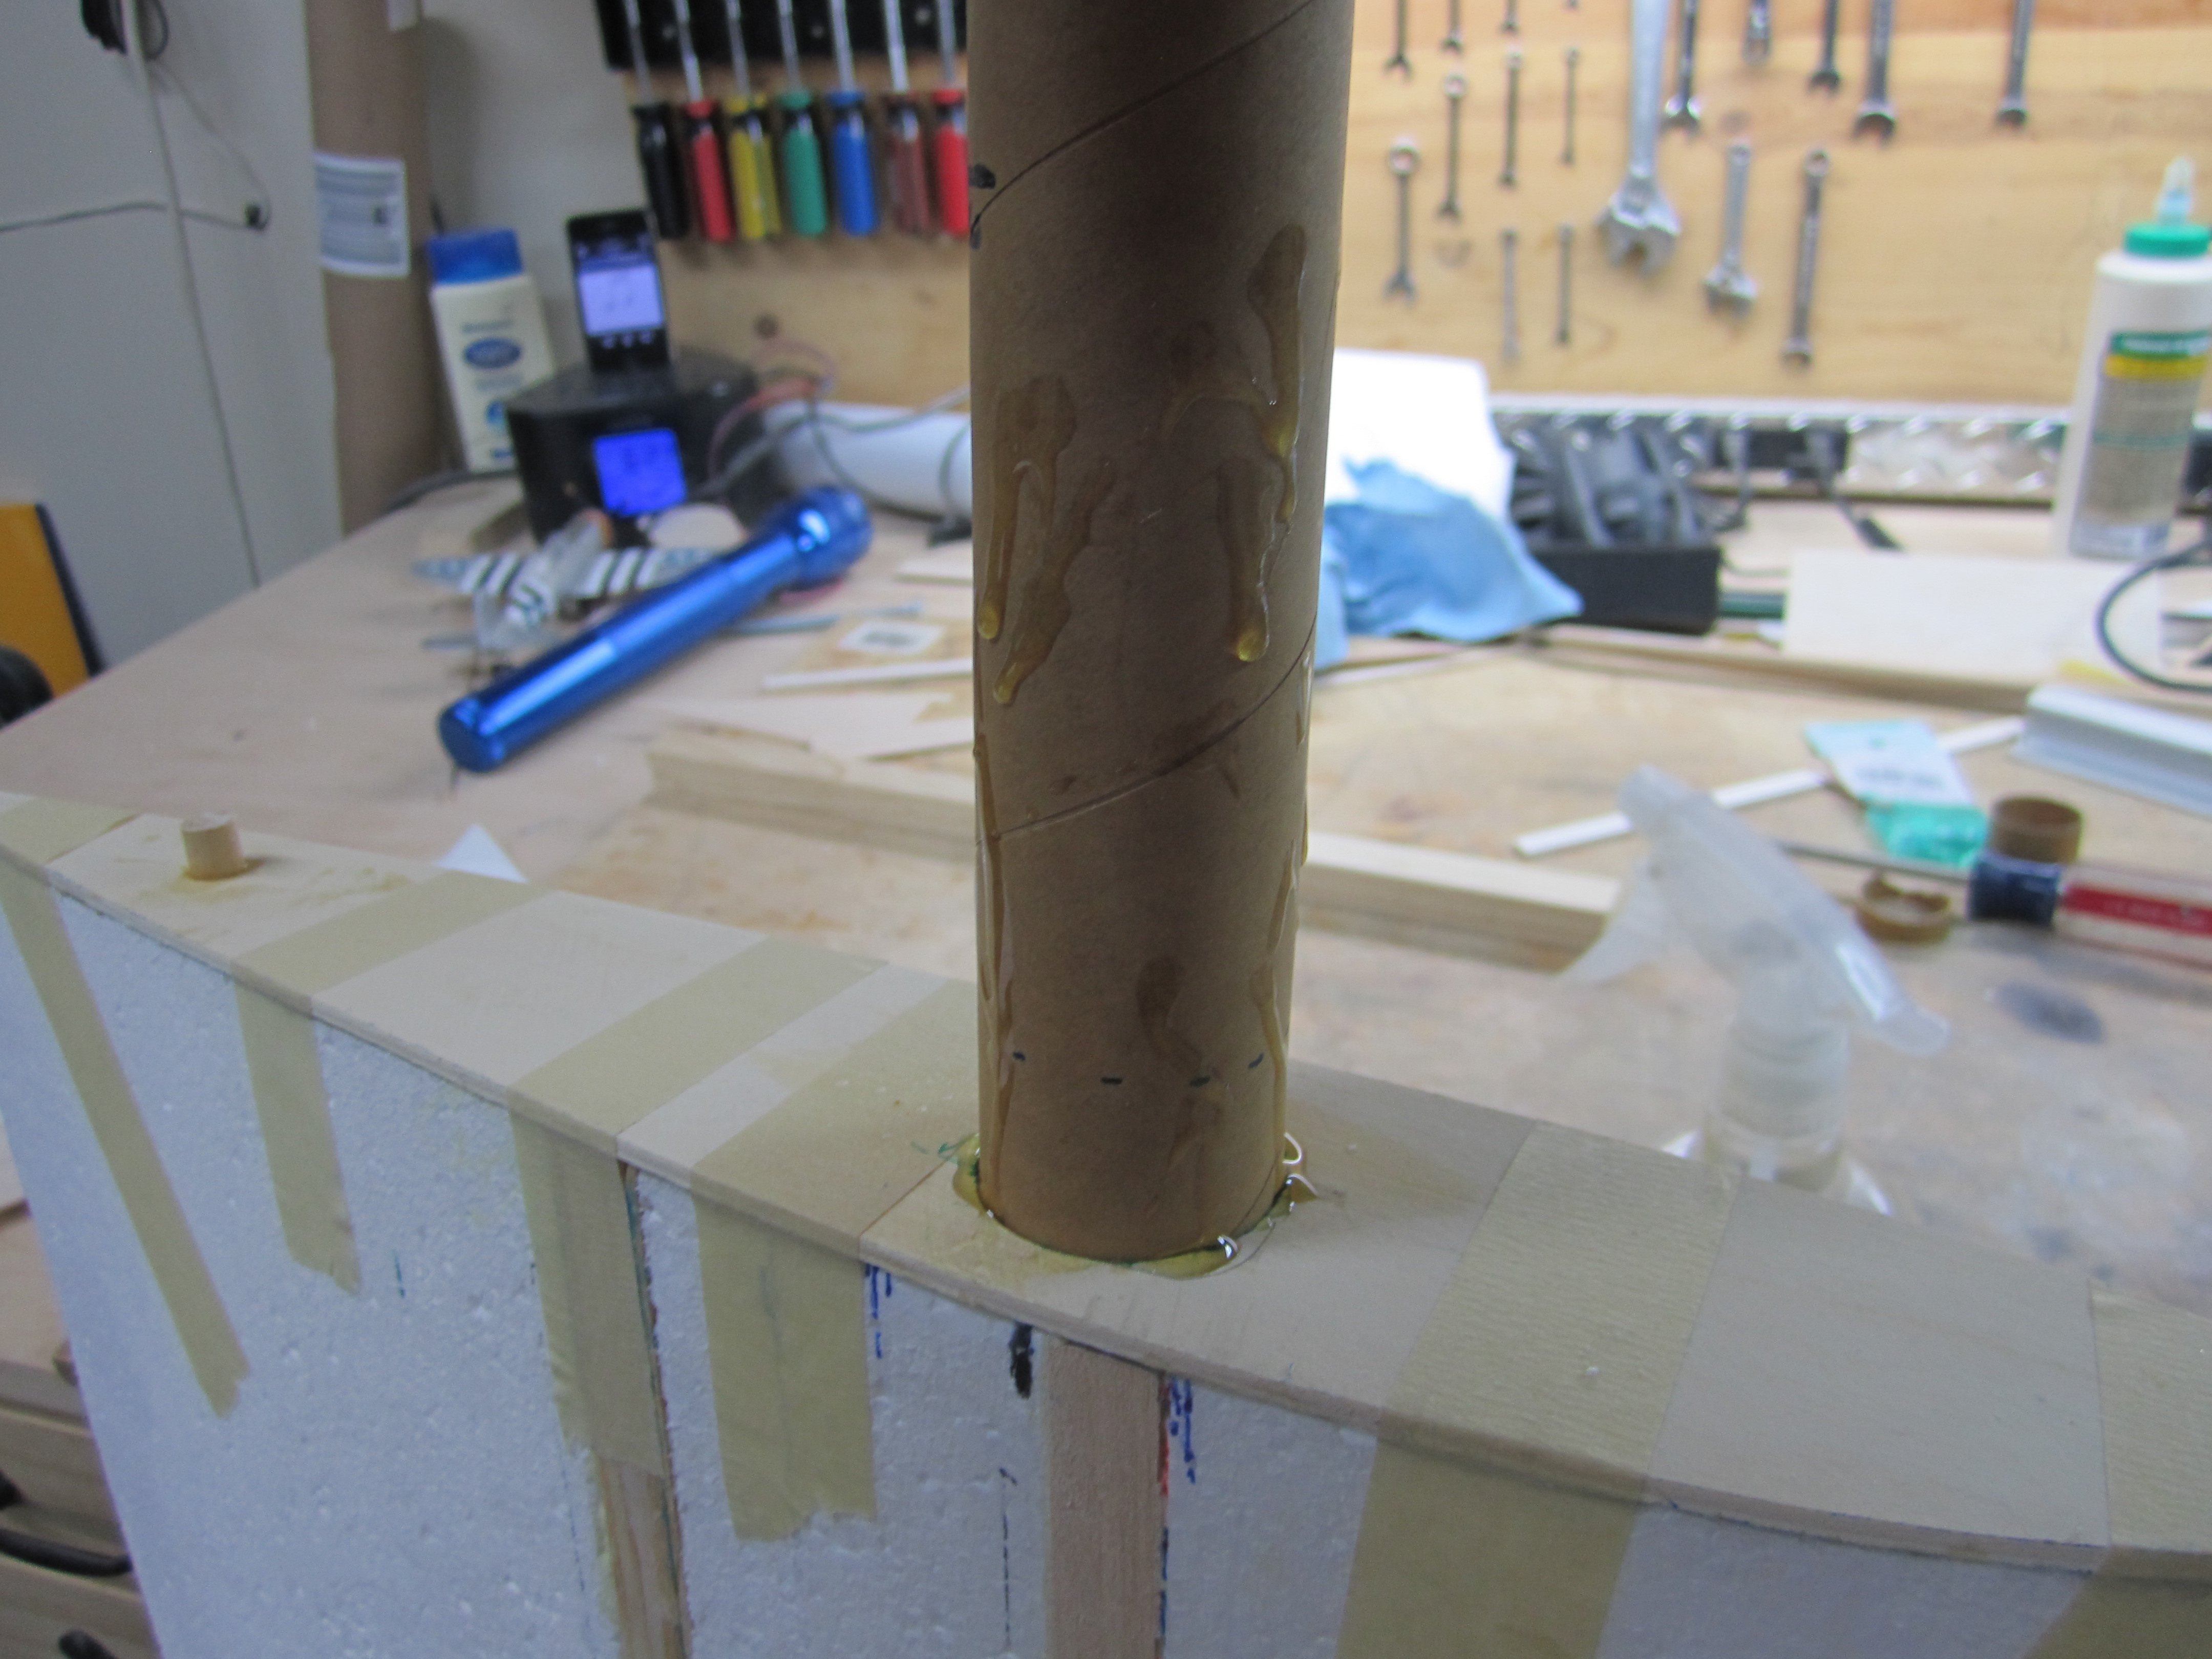
Since I am not going to joint the two wings, I will use an aluminum tube that I ordered from Nick Ziroli. I had to make a jig to get a straight line when cutting the holes.
I drilled the holes with the tube itself. I took into account the dihedral, so I put a piece of wood at the wing tip to elevate it 1 ˝" (plans says 2 ⅛ but is too much for me) before cutting it. Then I aligned very carefully the tube and by hand I opened the wing holes.


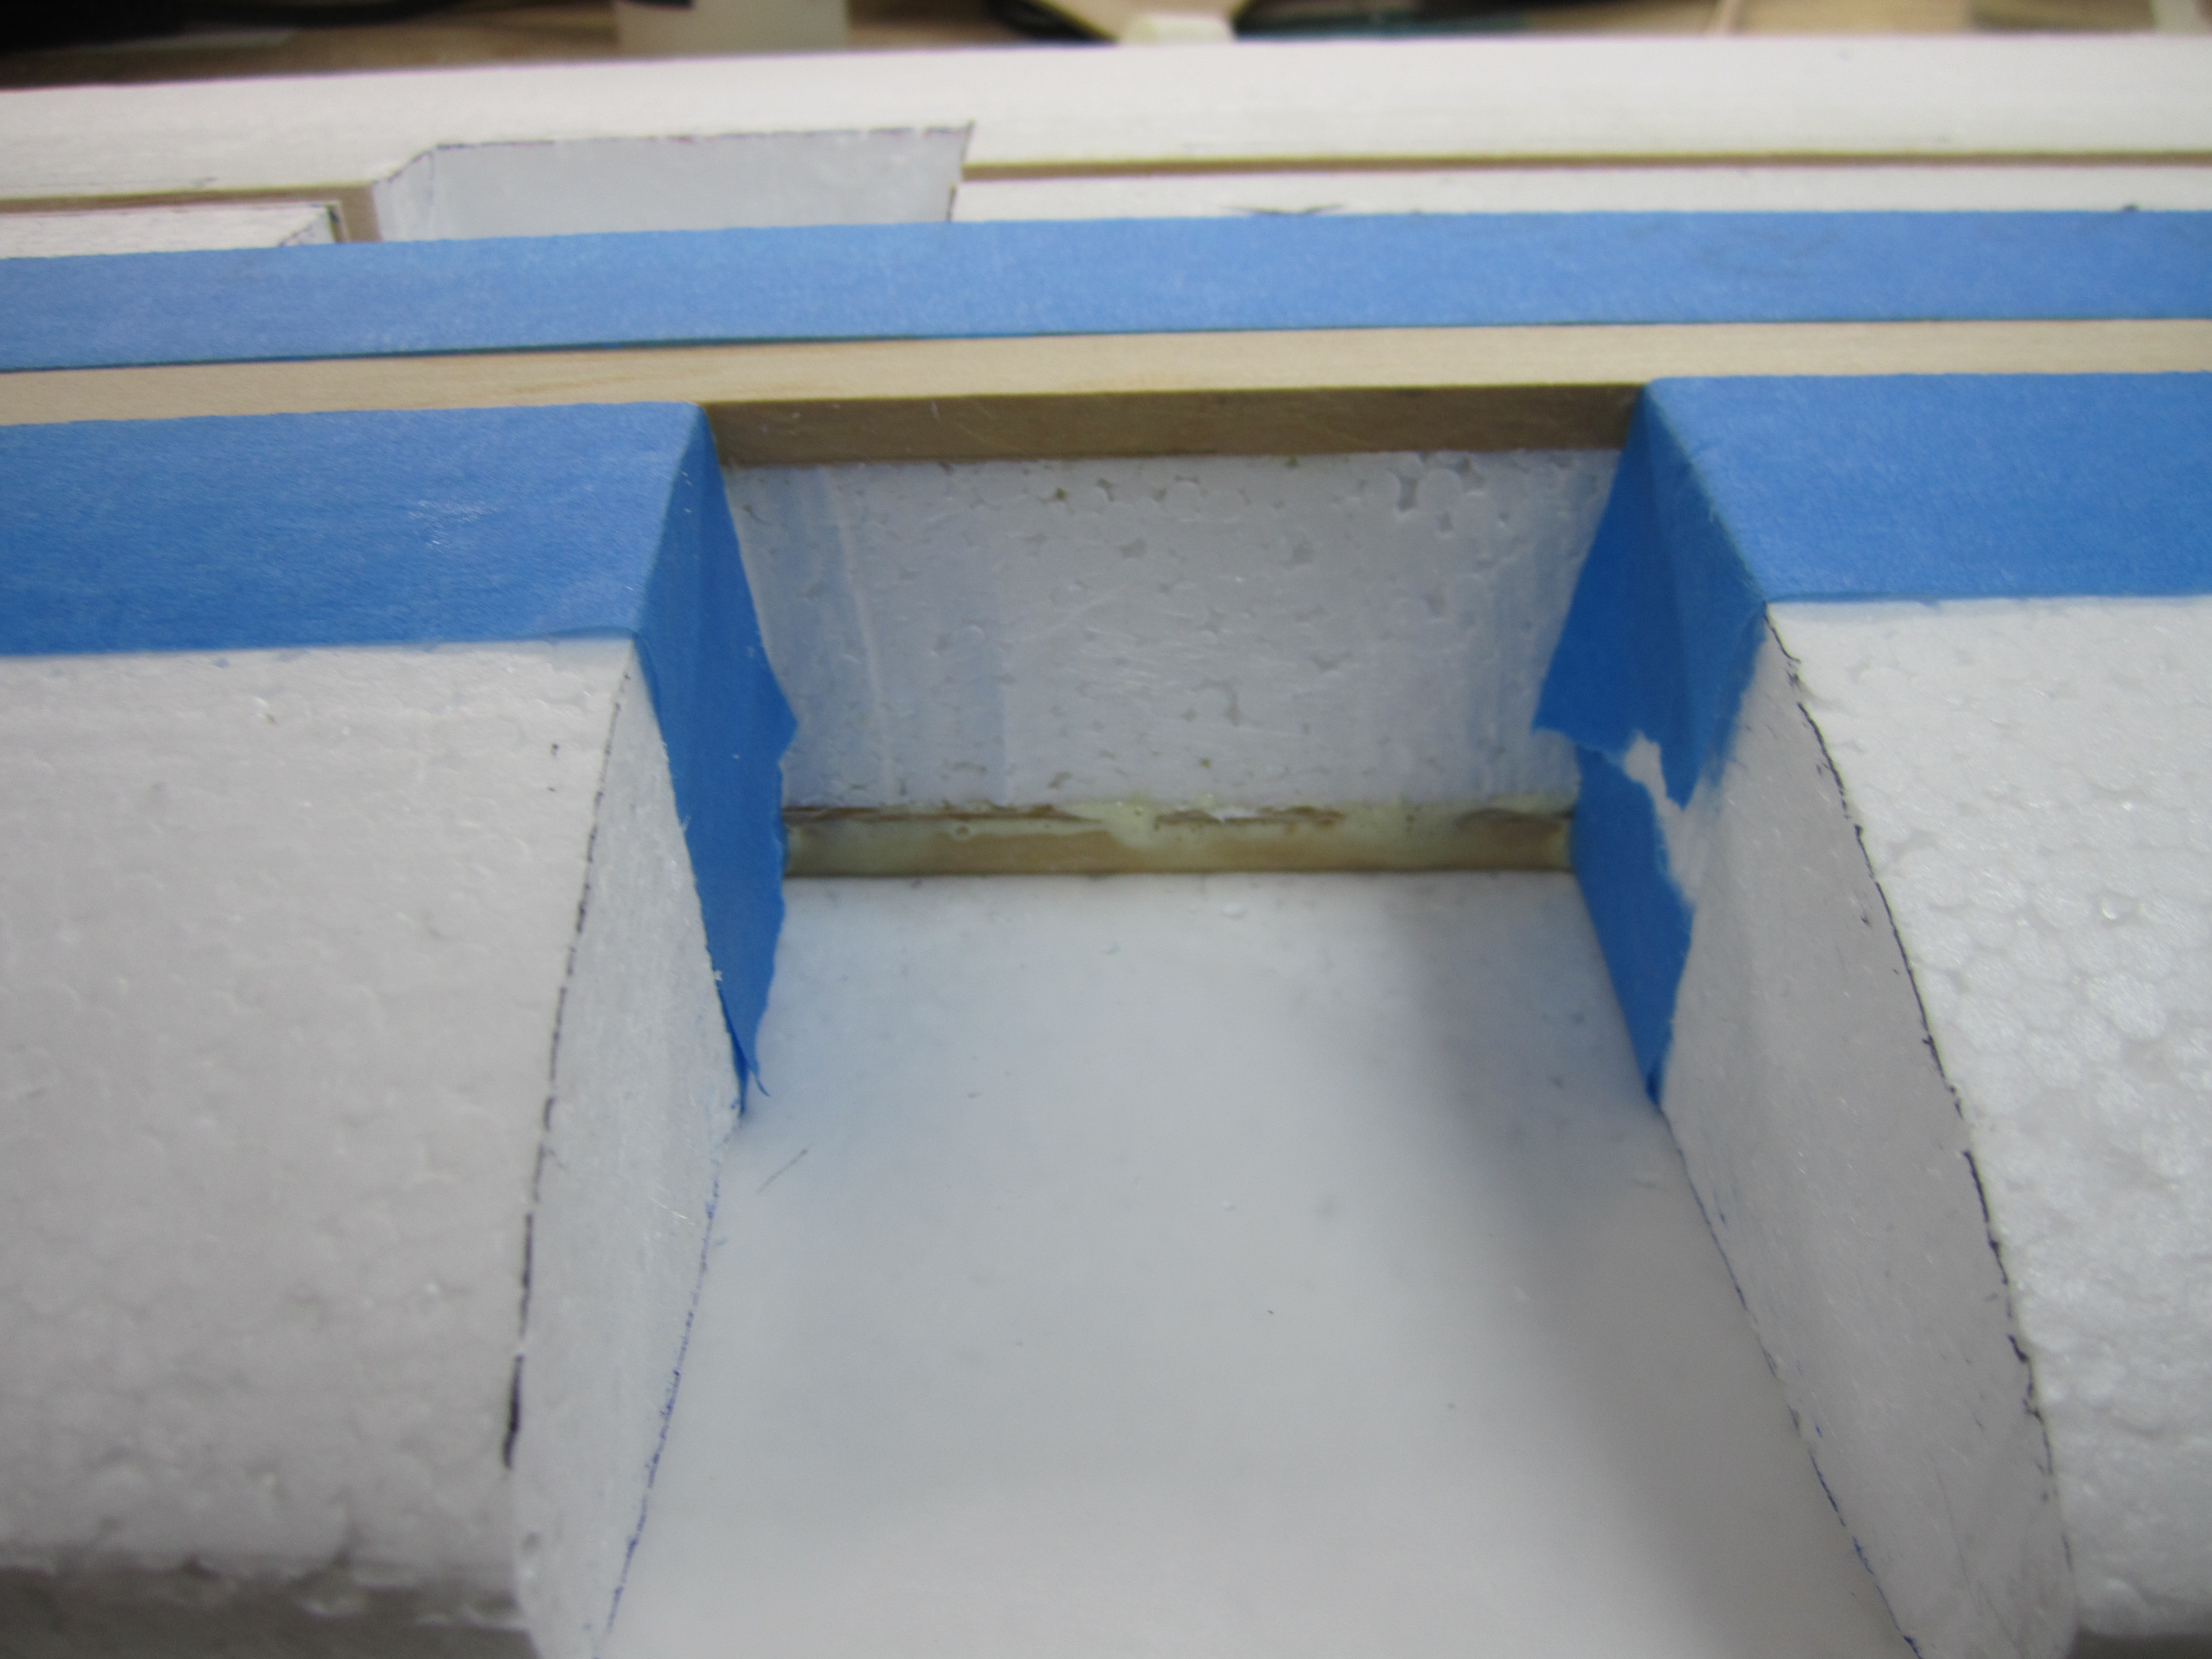
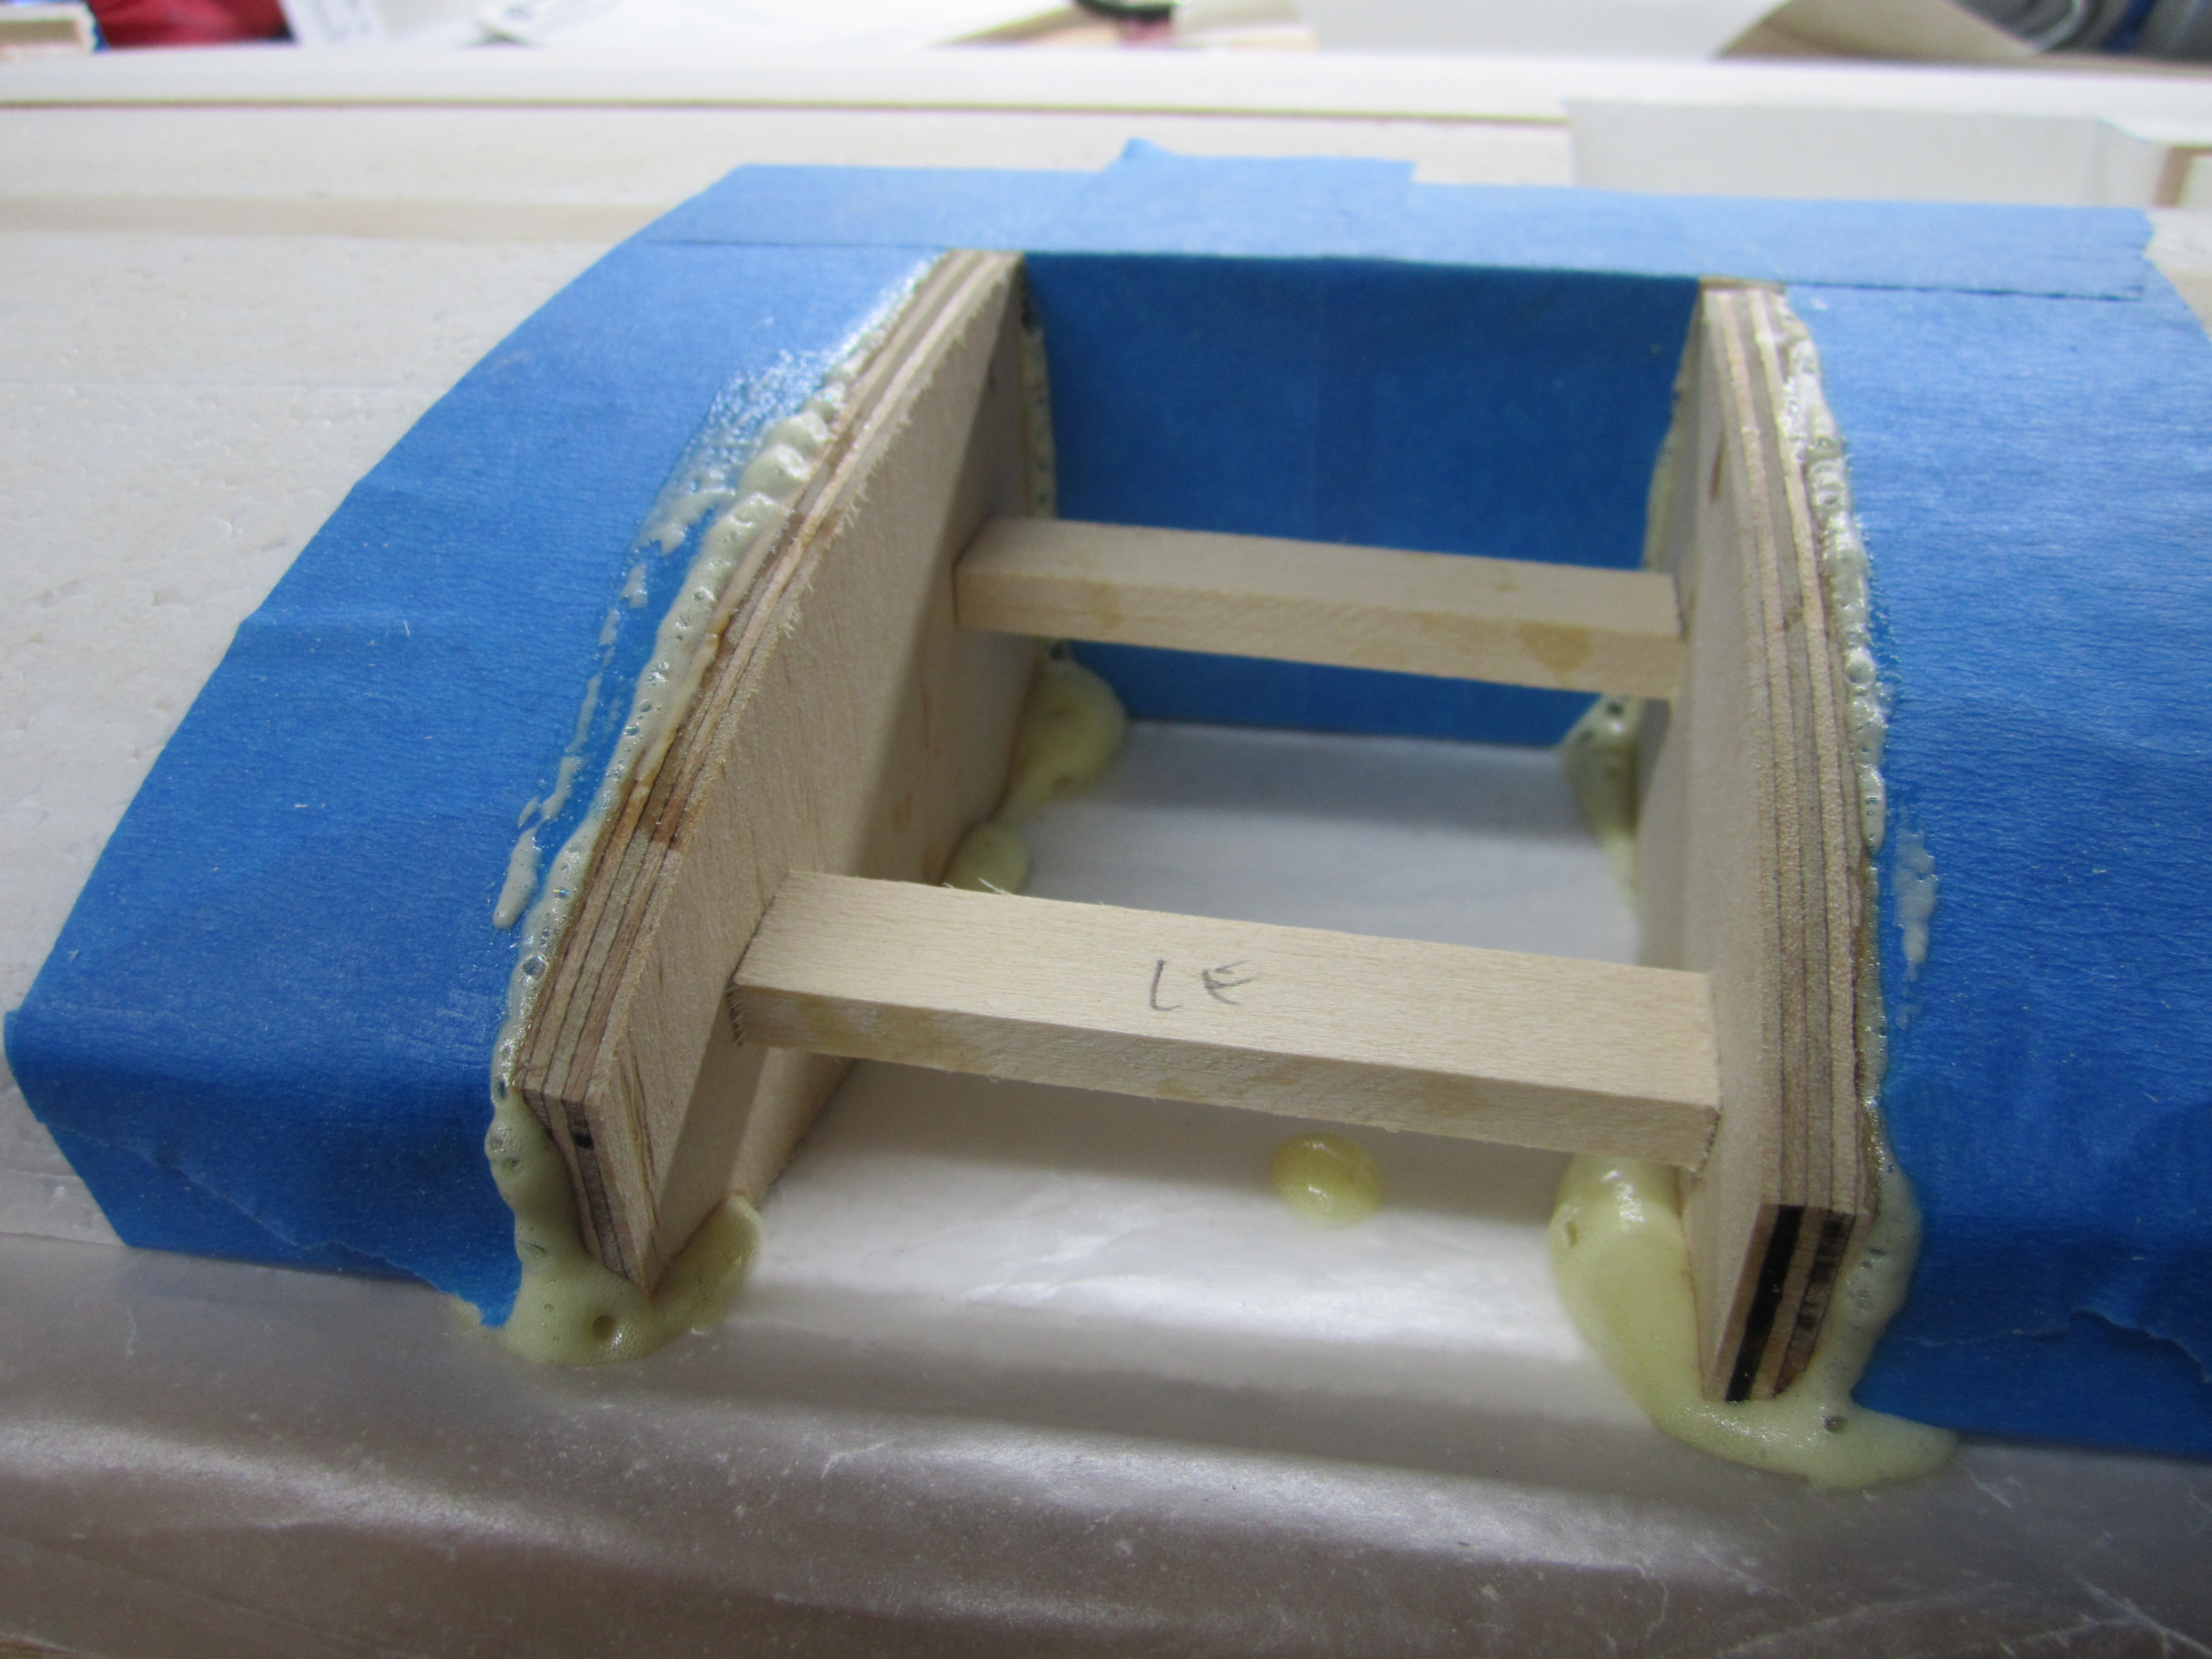
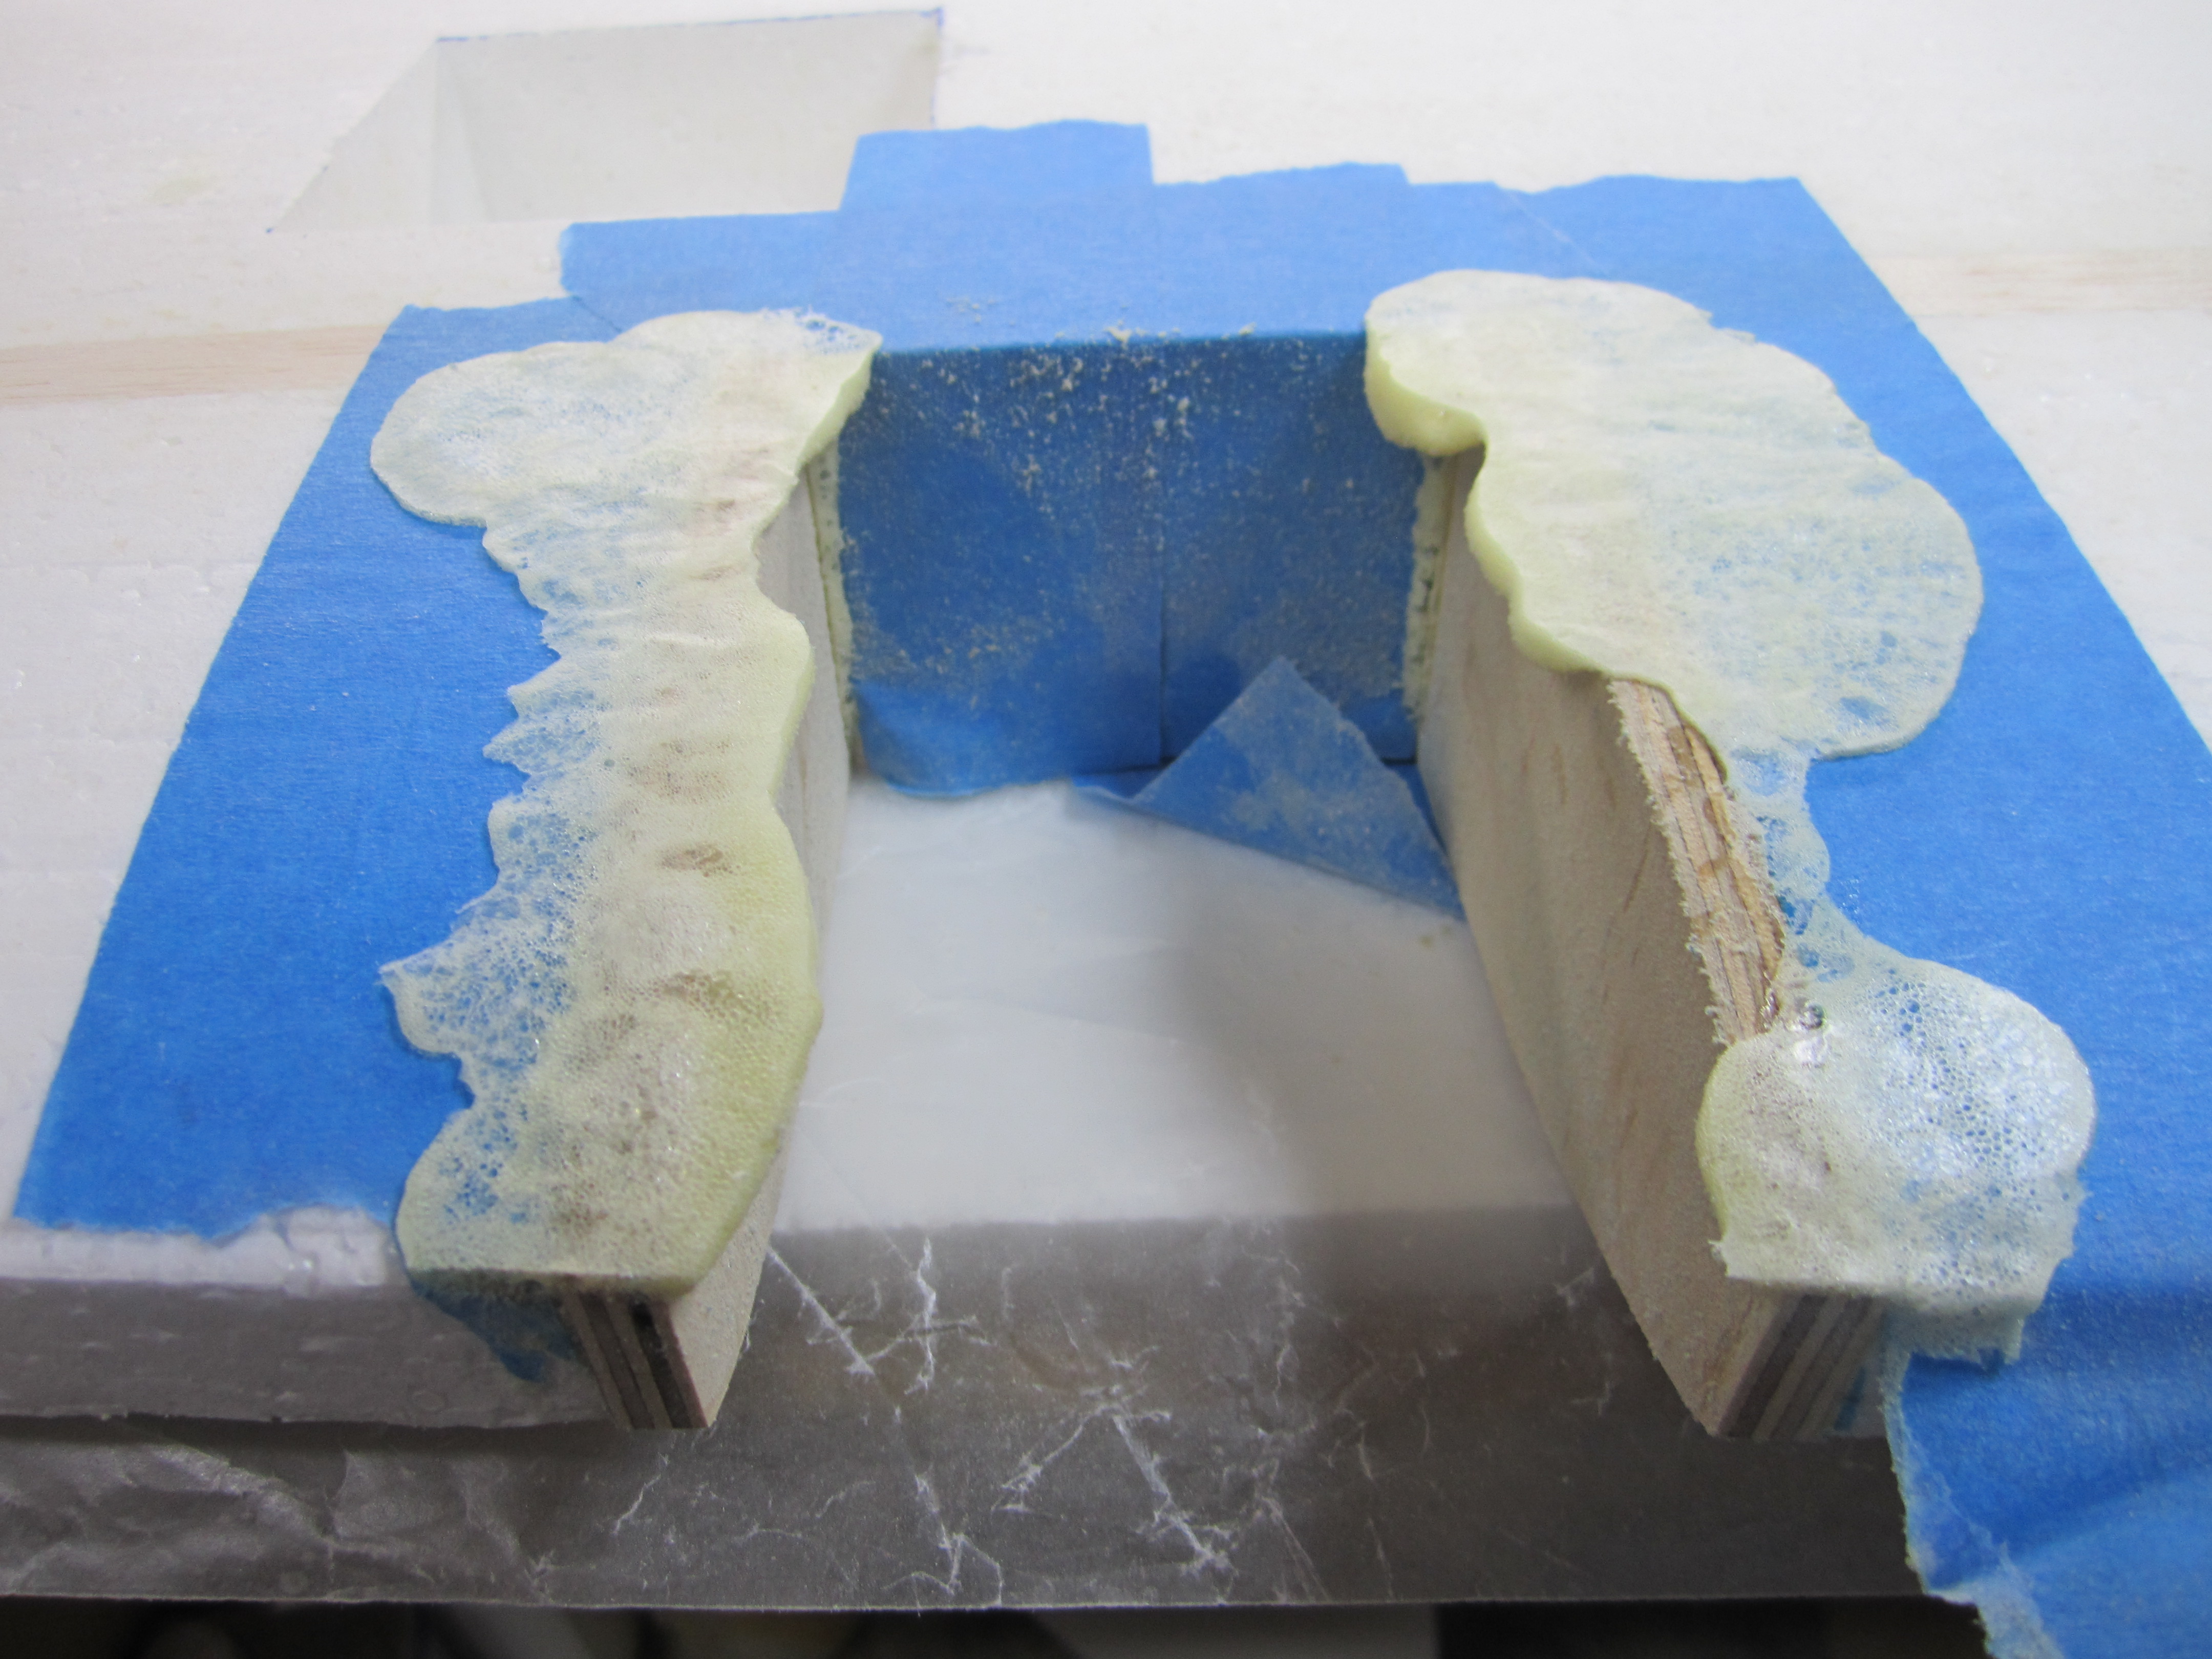
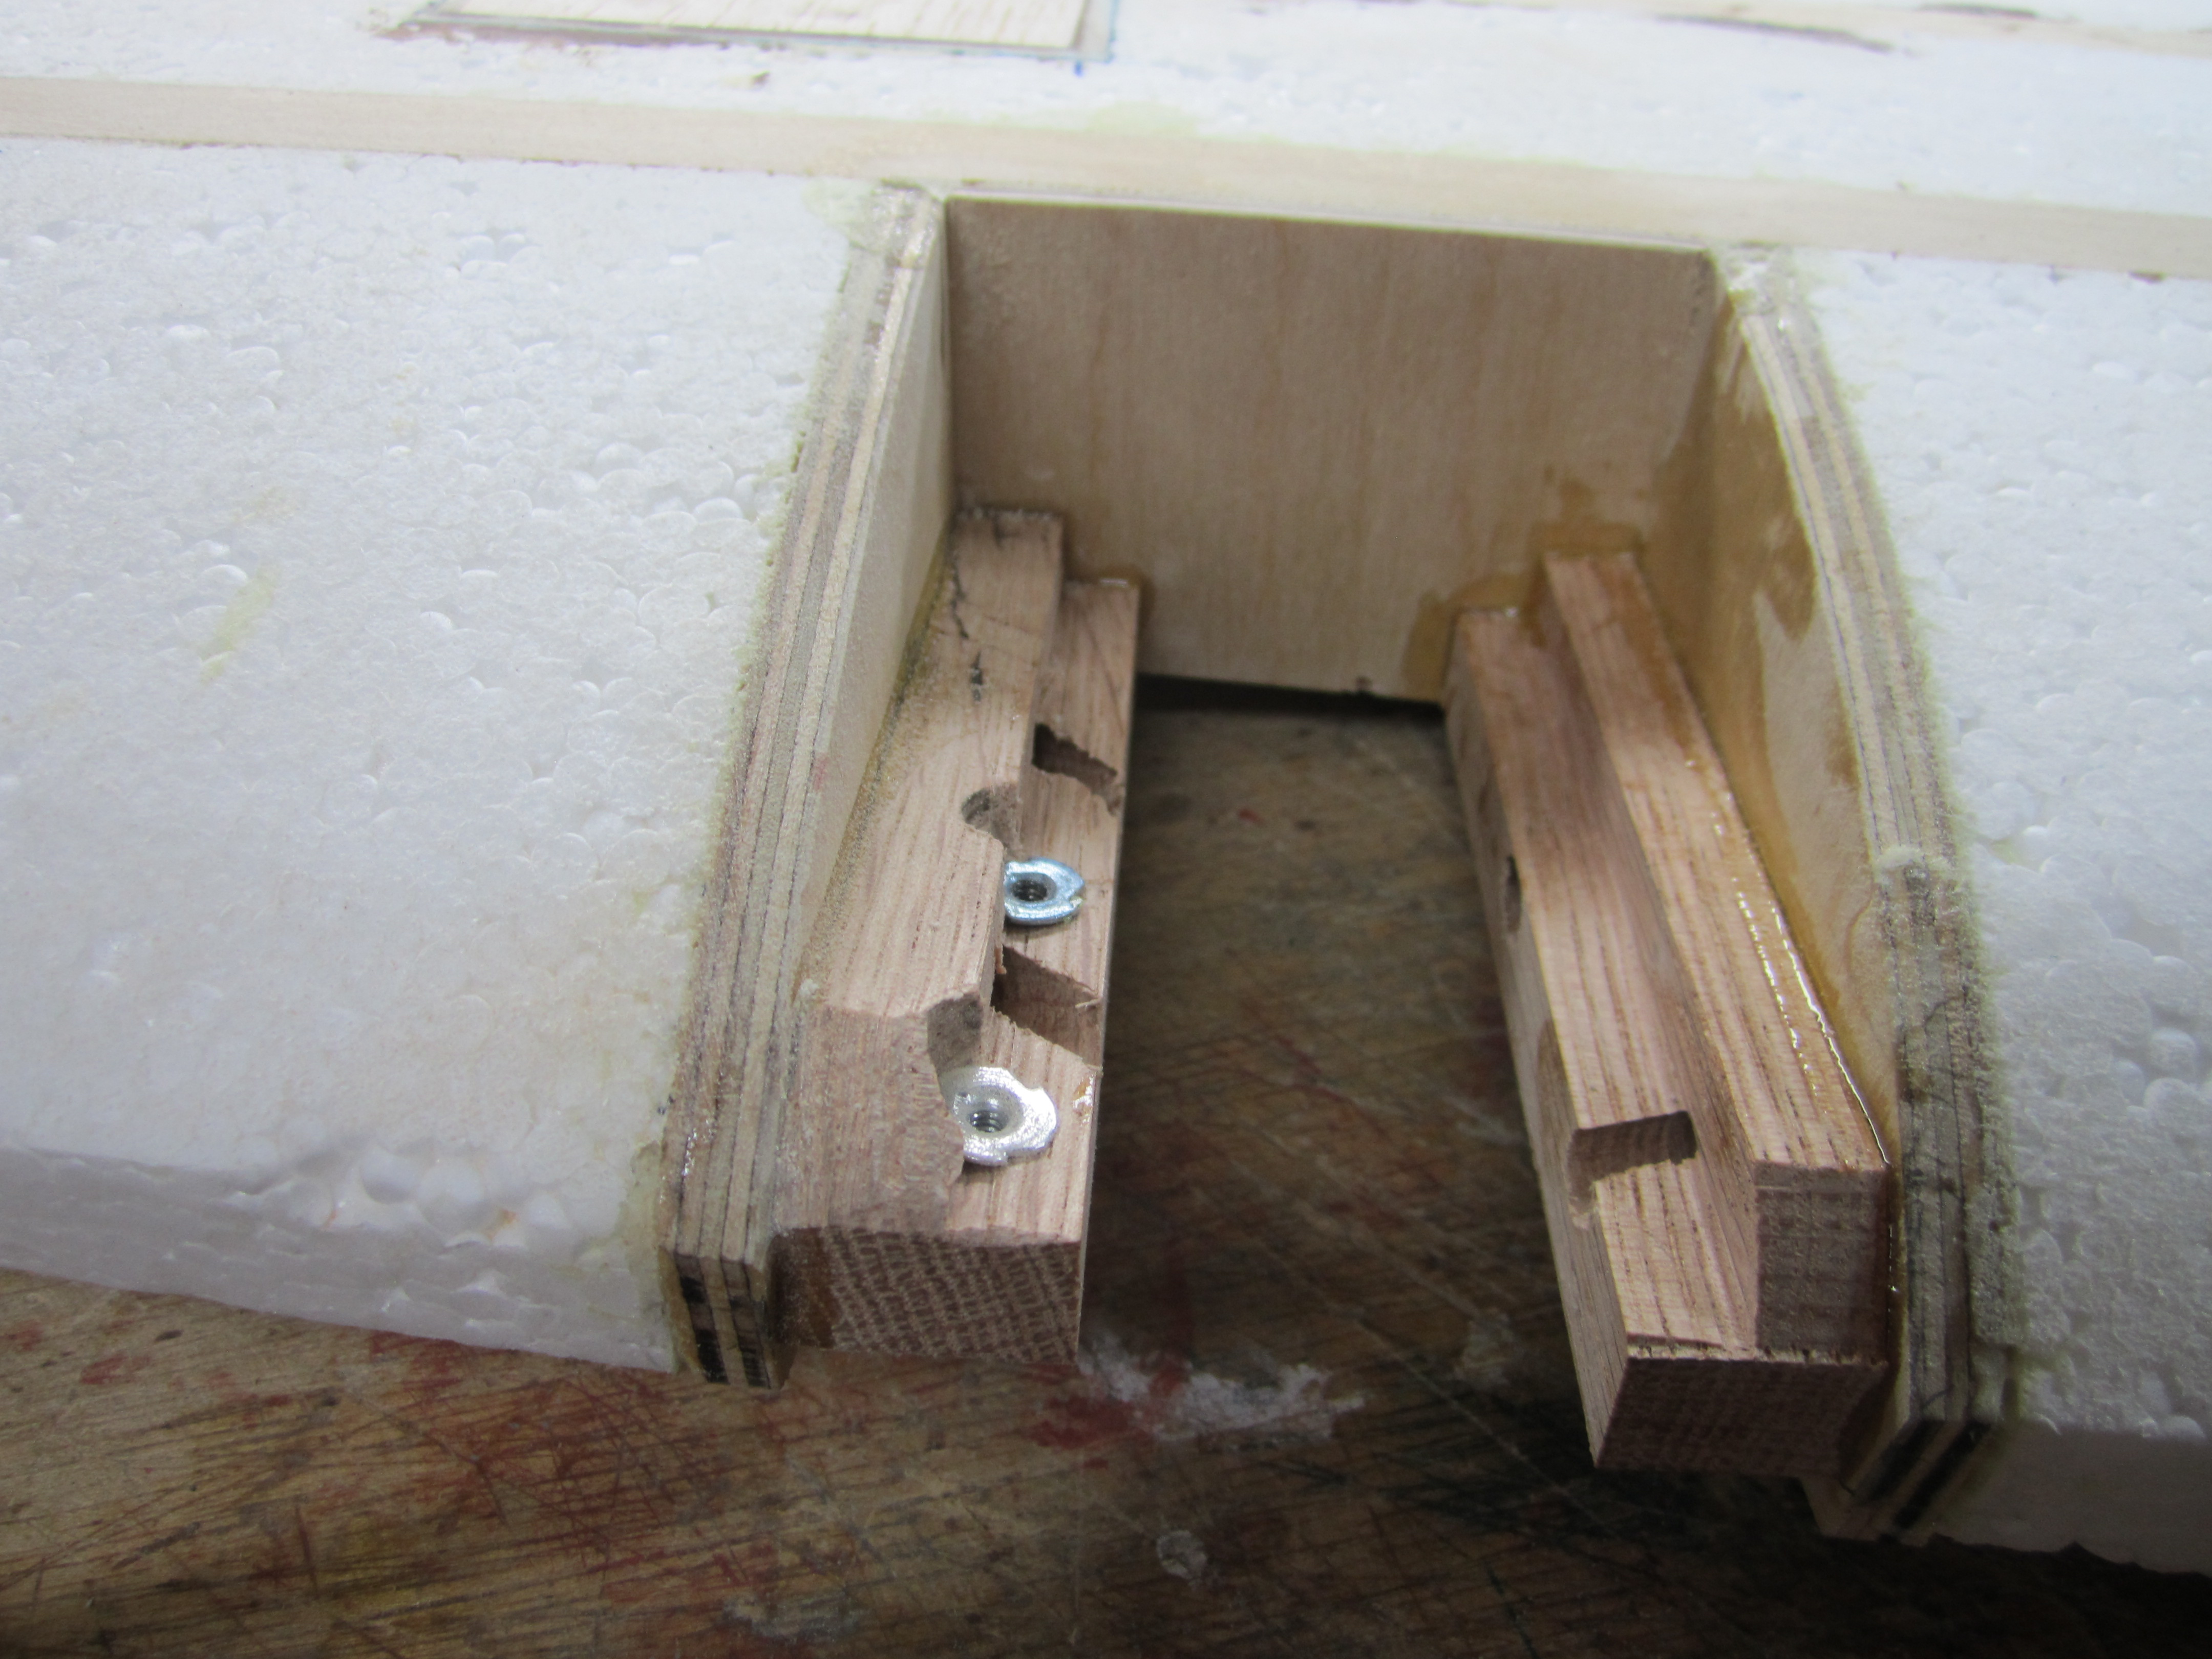
After that, I mounted the landing gear supports (red oak) and installed blind nuts. I also drilled Ľ" hole in those wood blocks al the way through the plywood and into the foam and inserted Ľ" wood dwell with gorilla glue. I was looking to have some extra support to this blocks. I don't want my landing gears to fail.
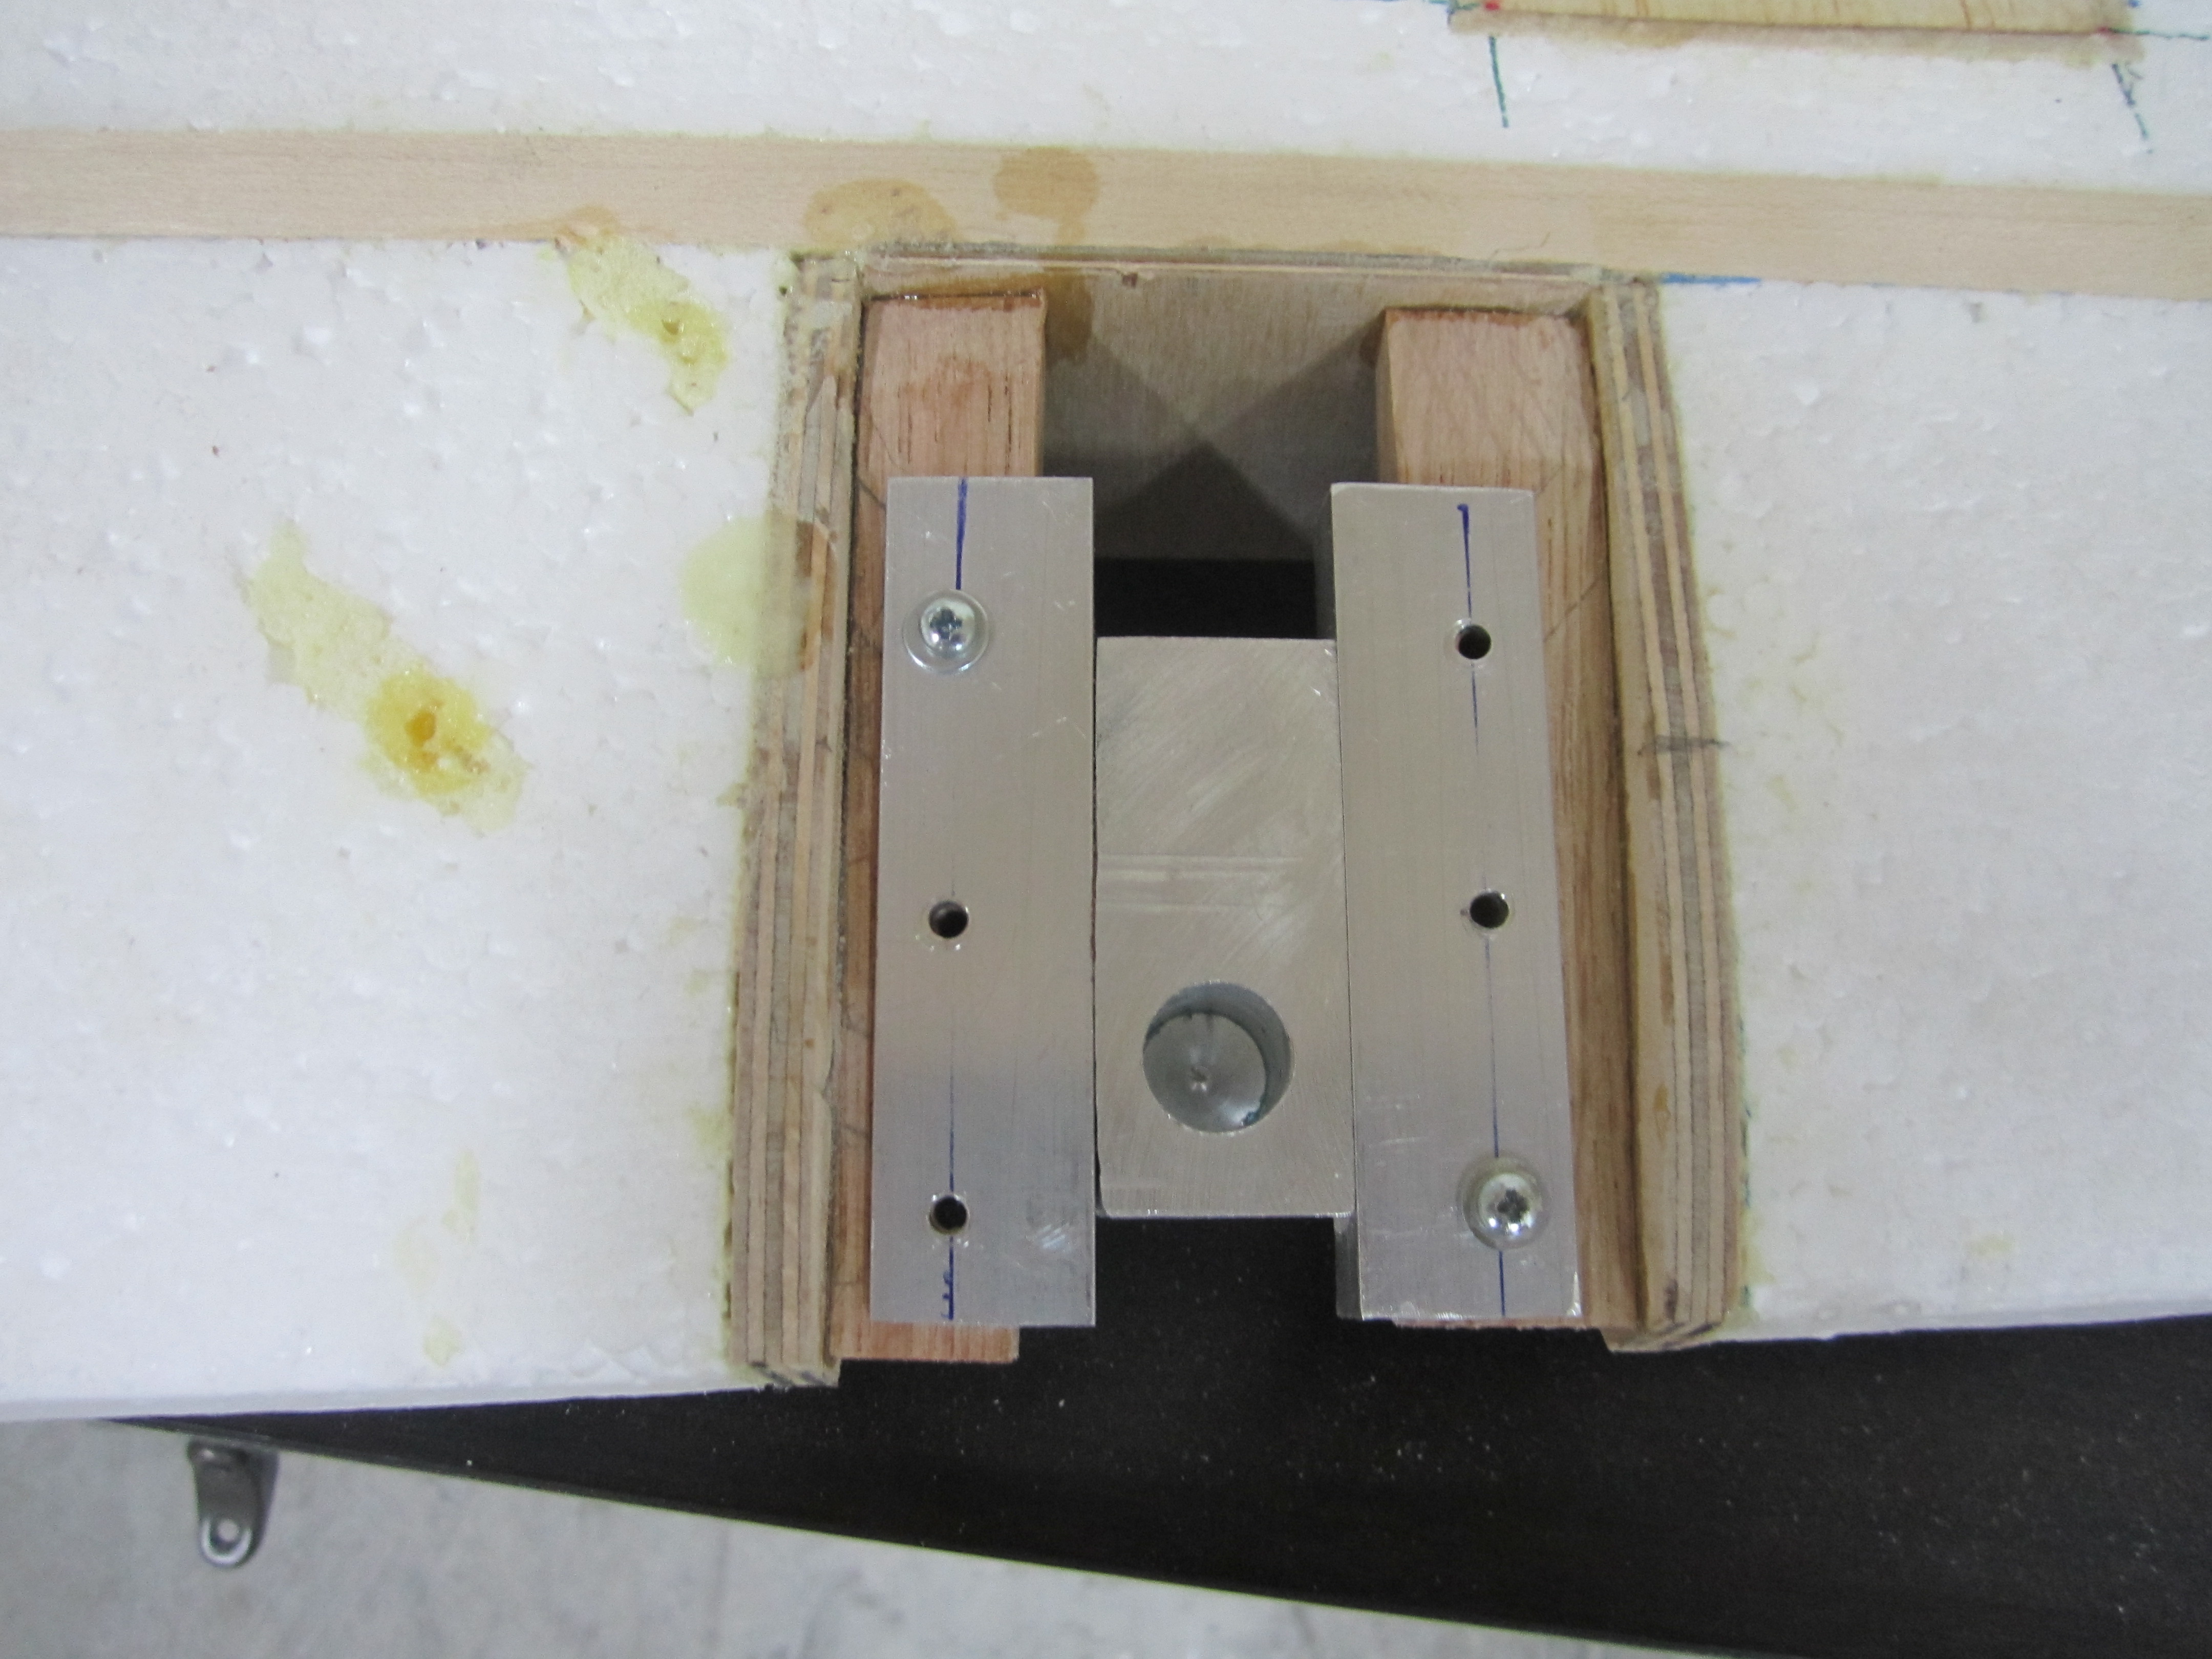
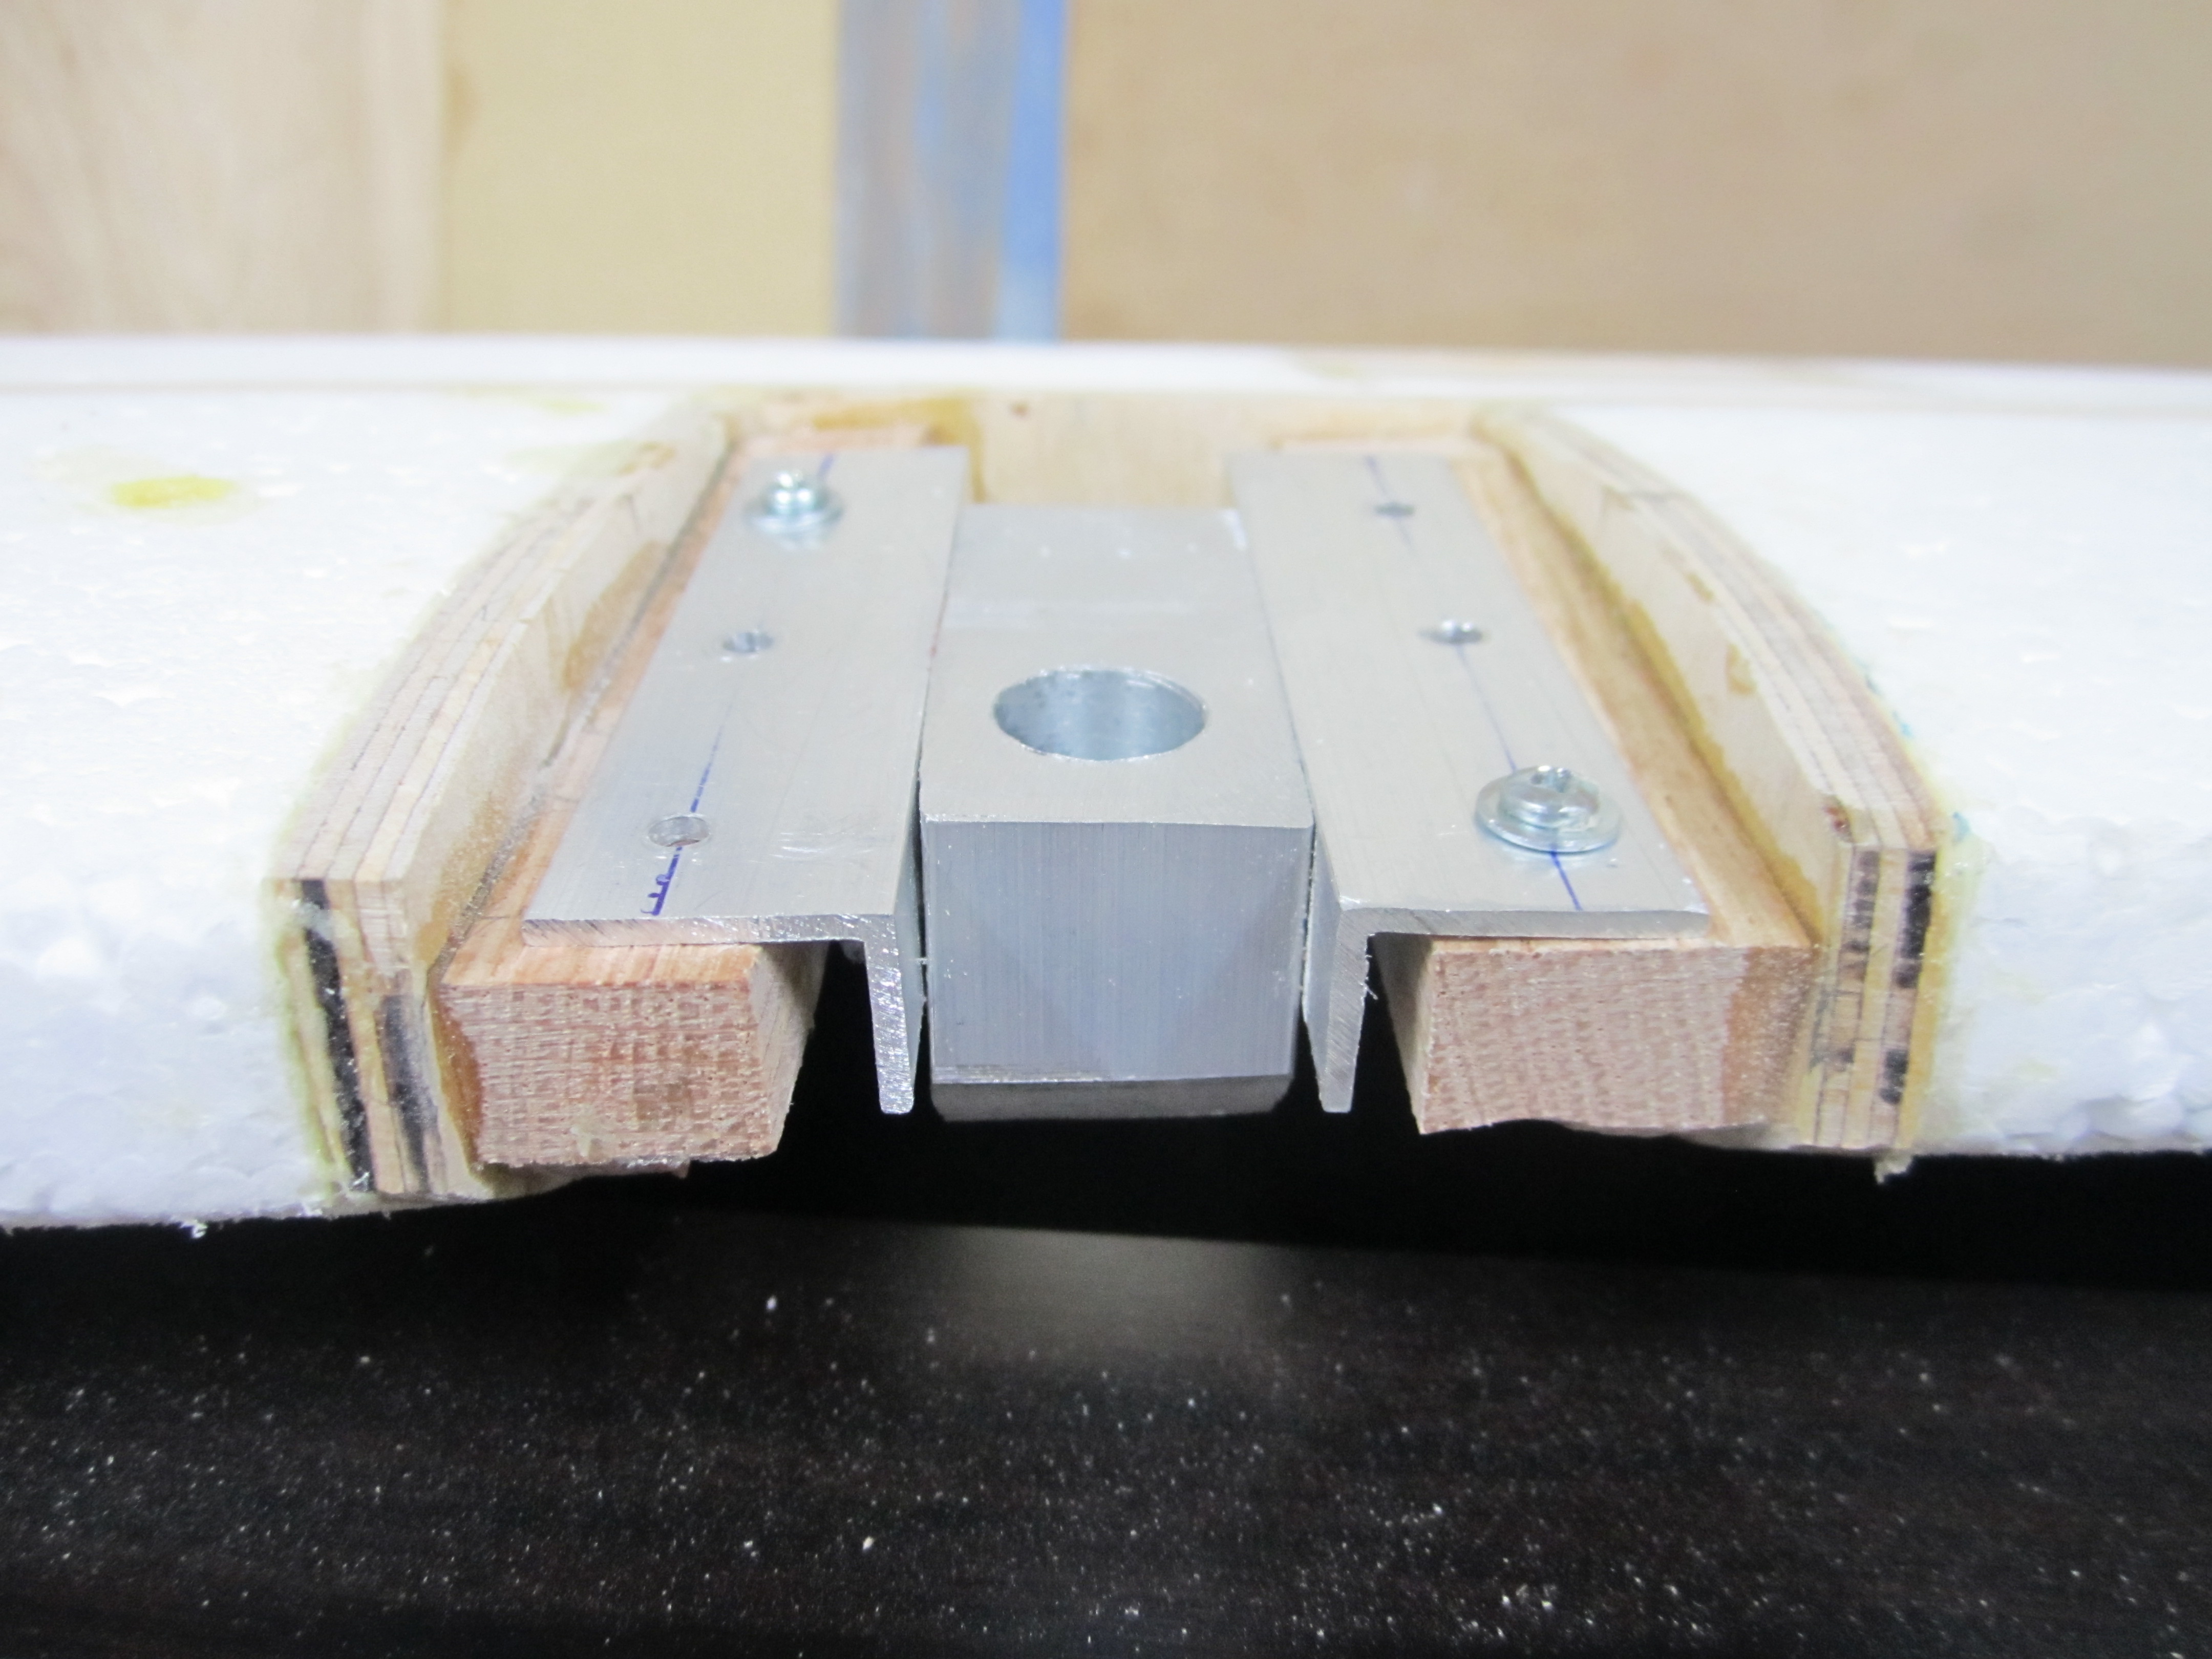
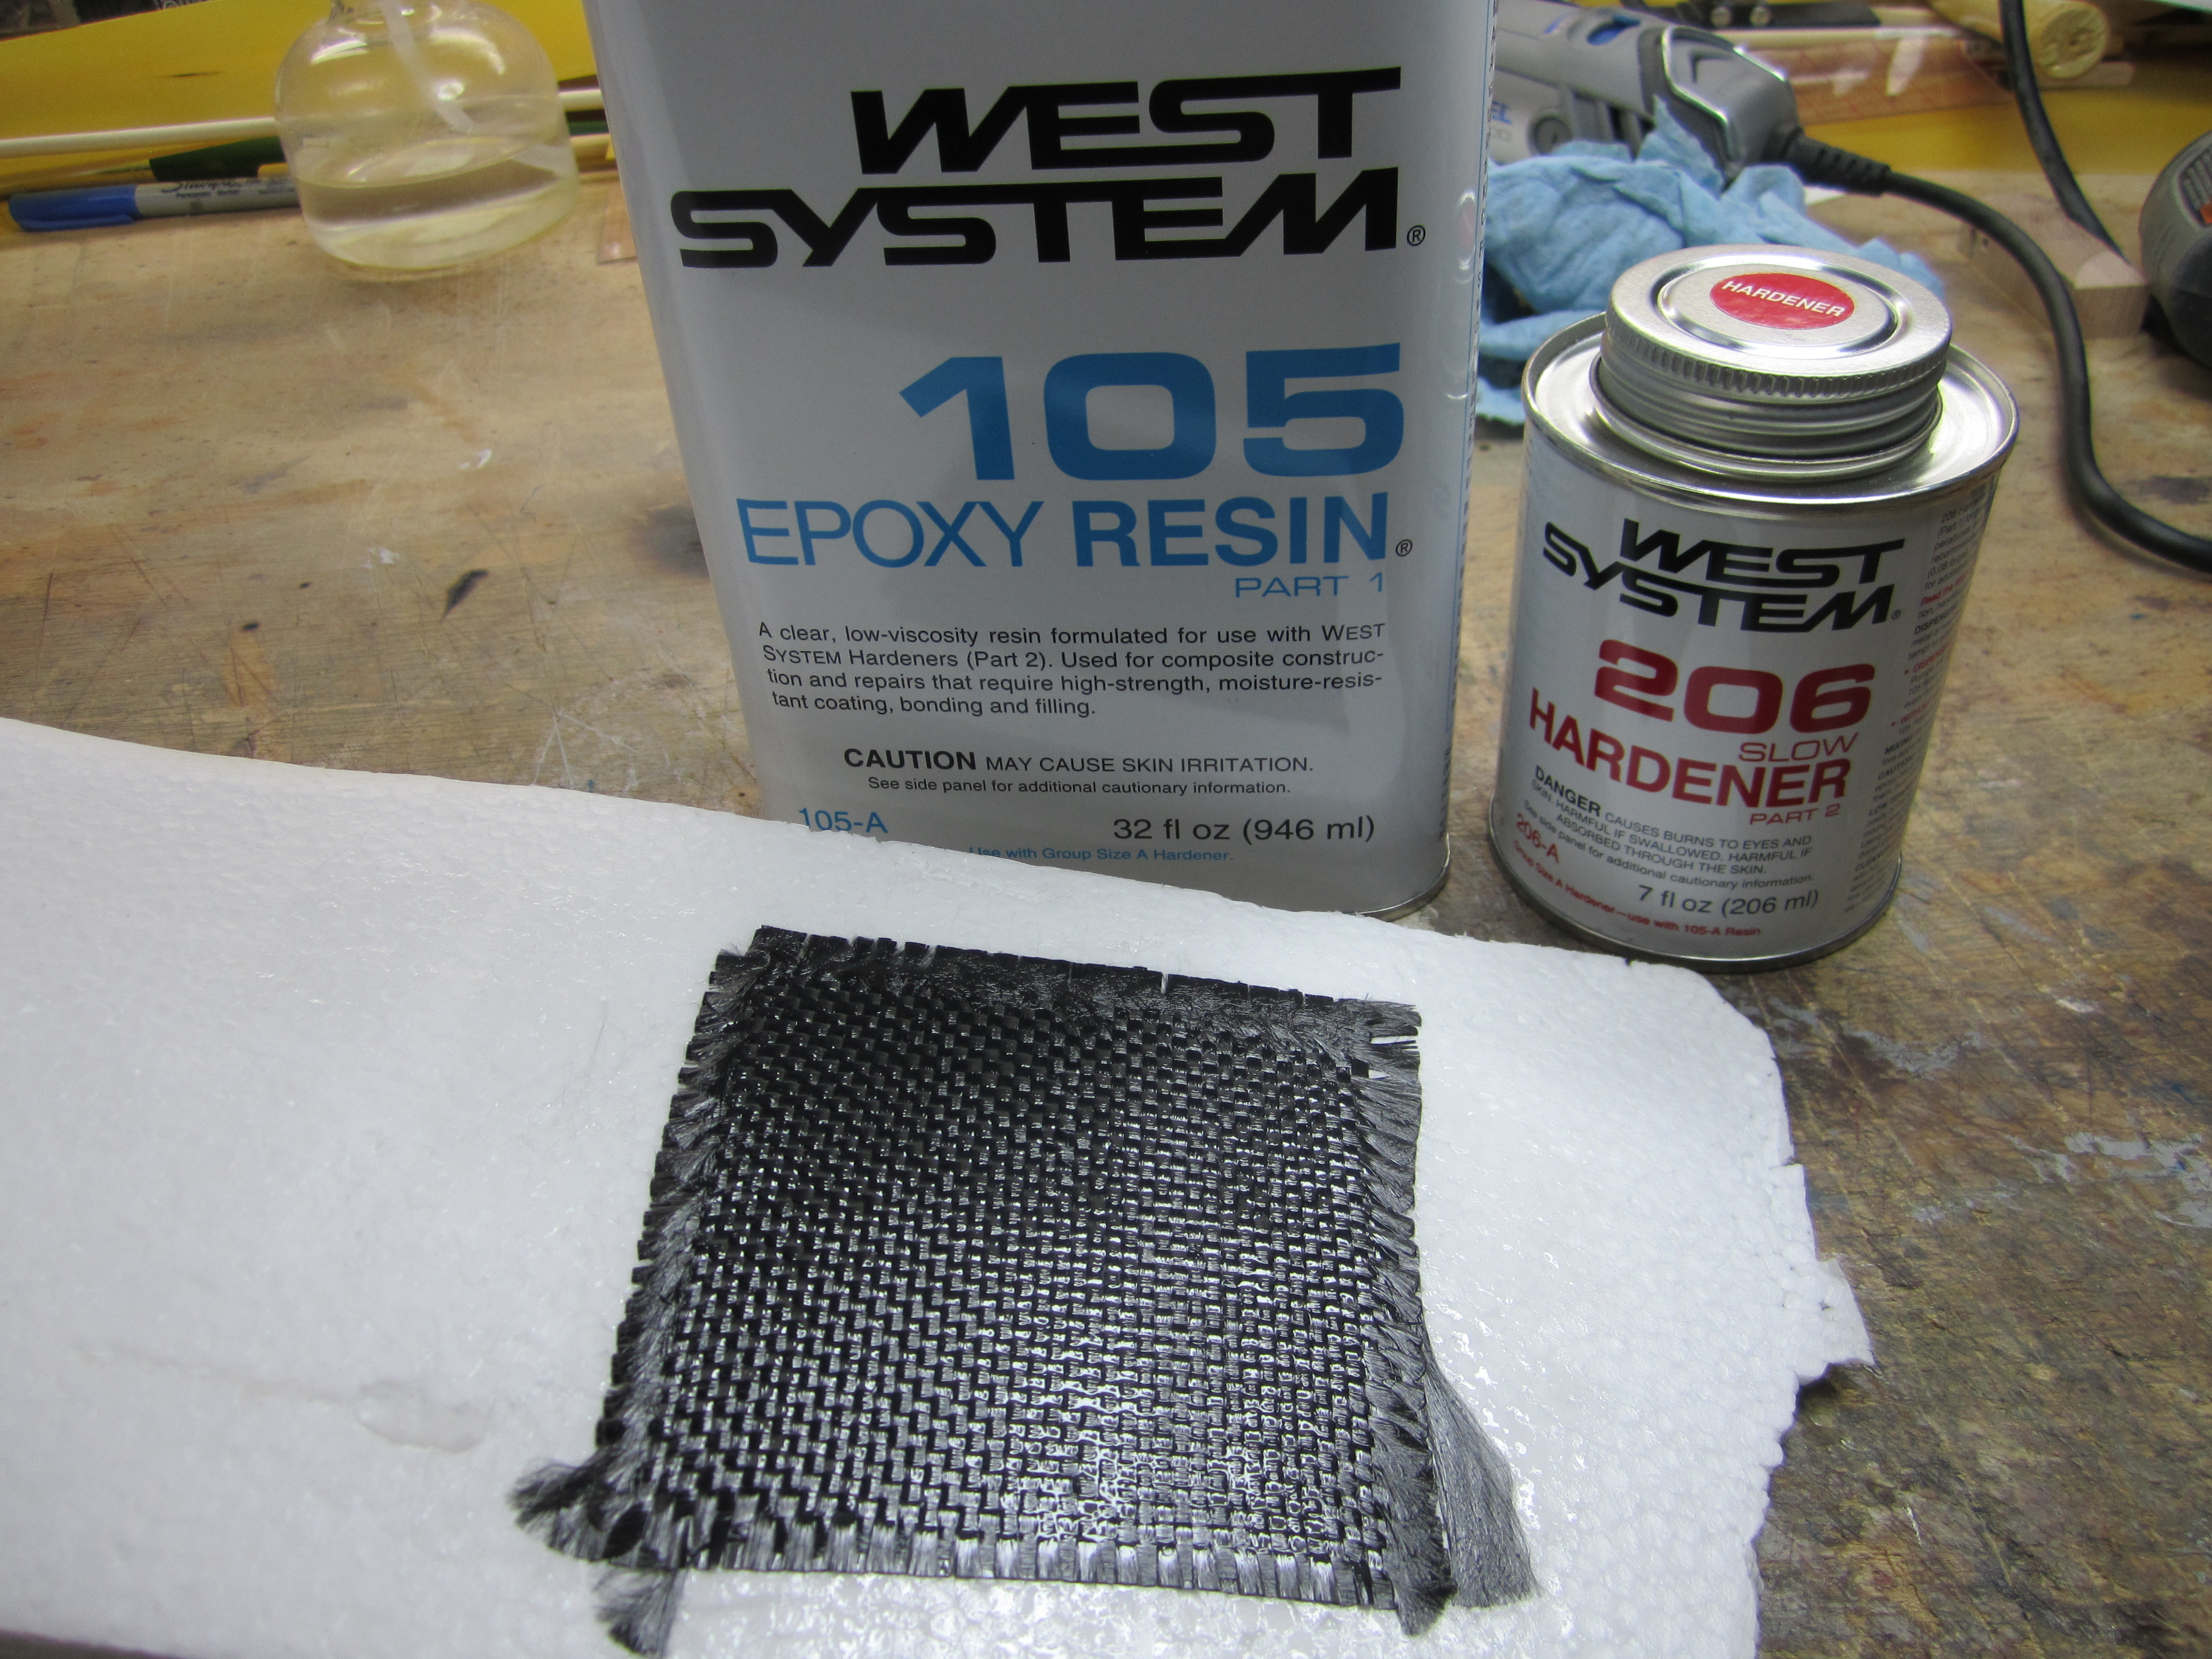
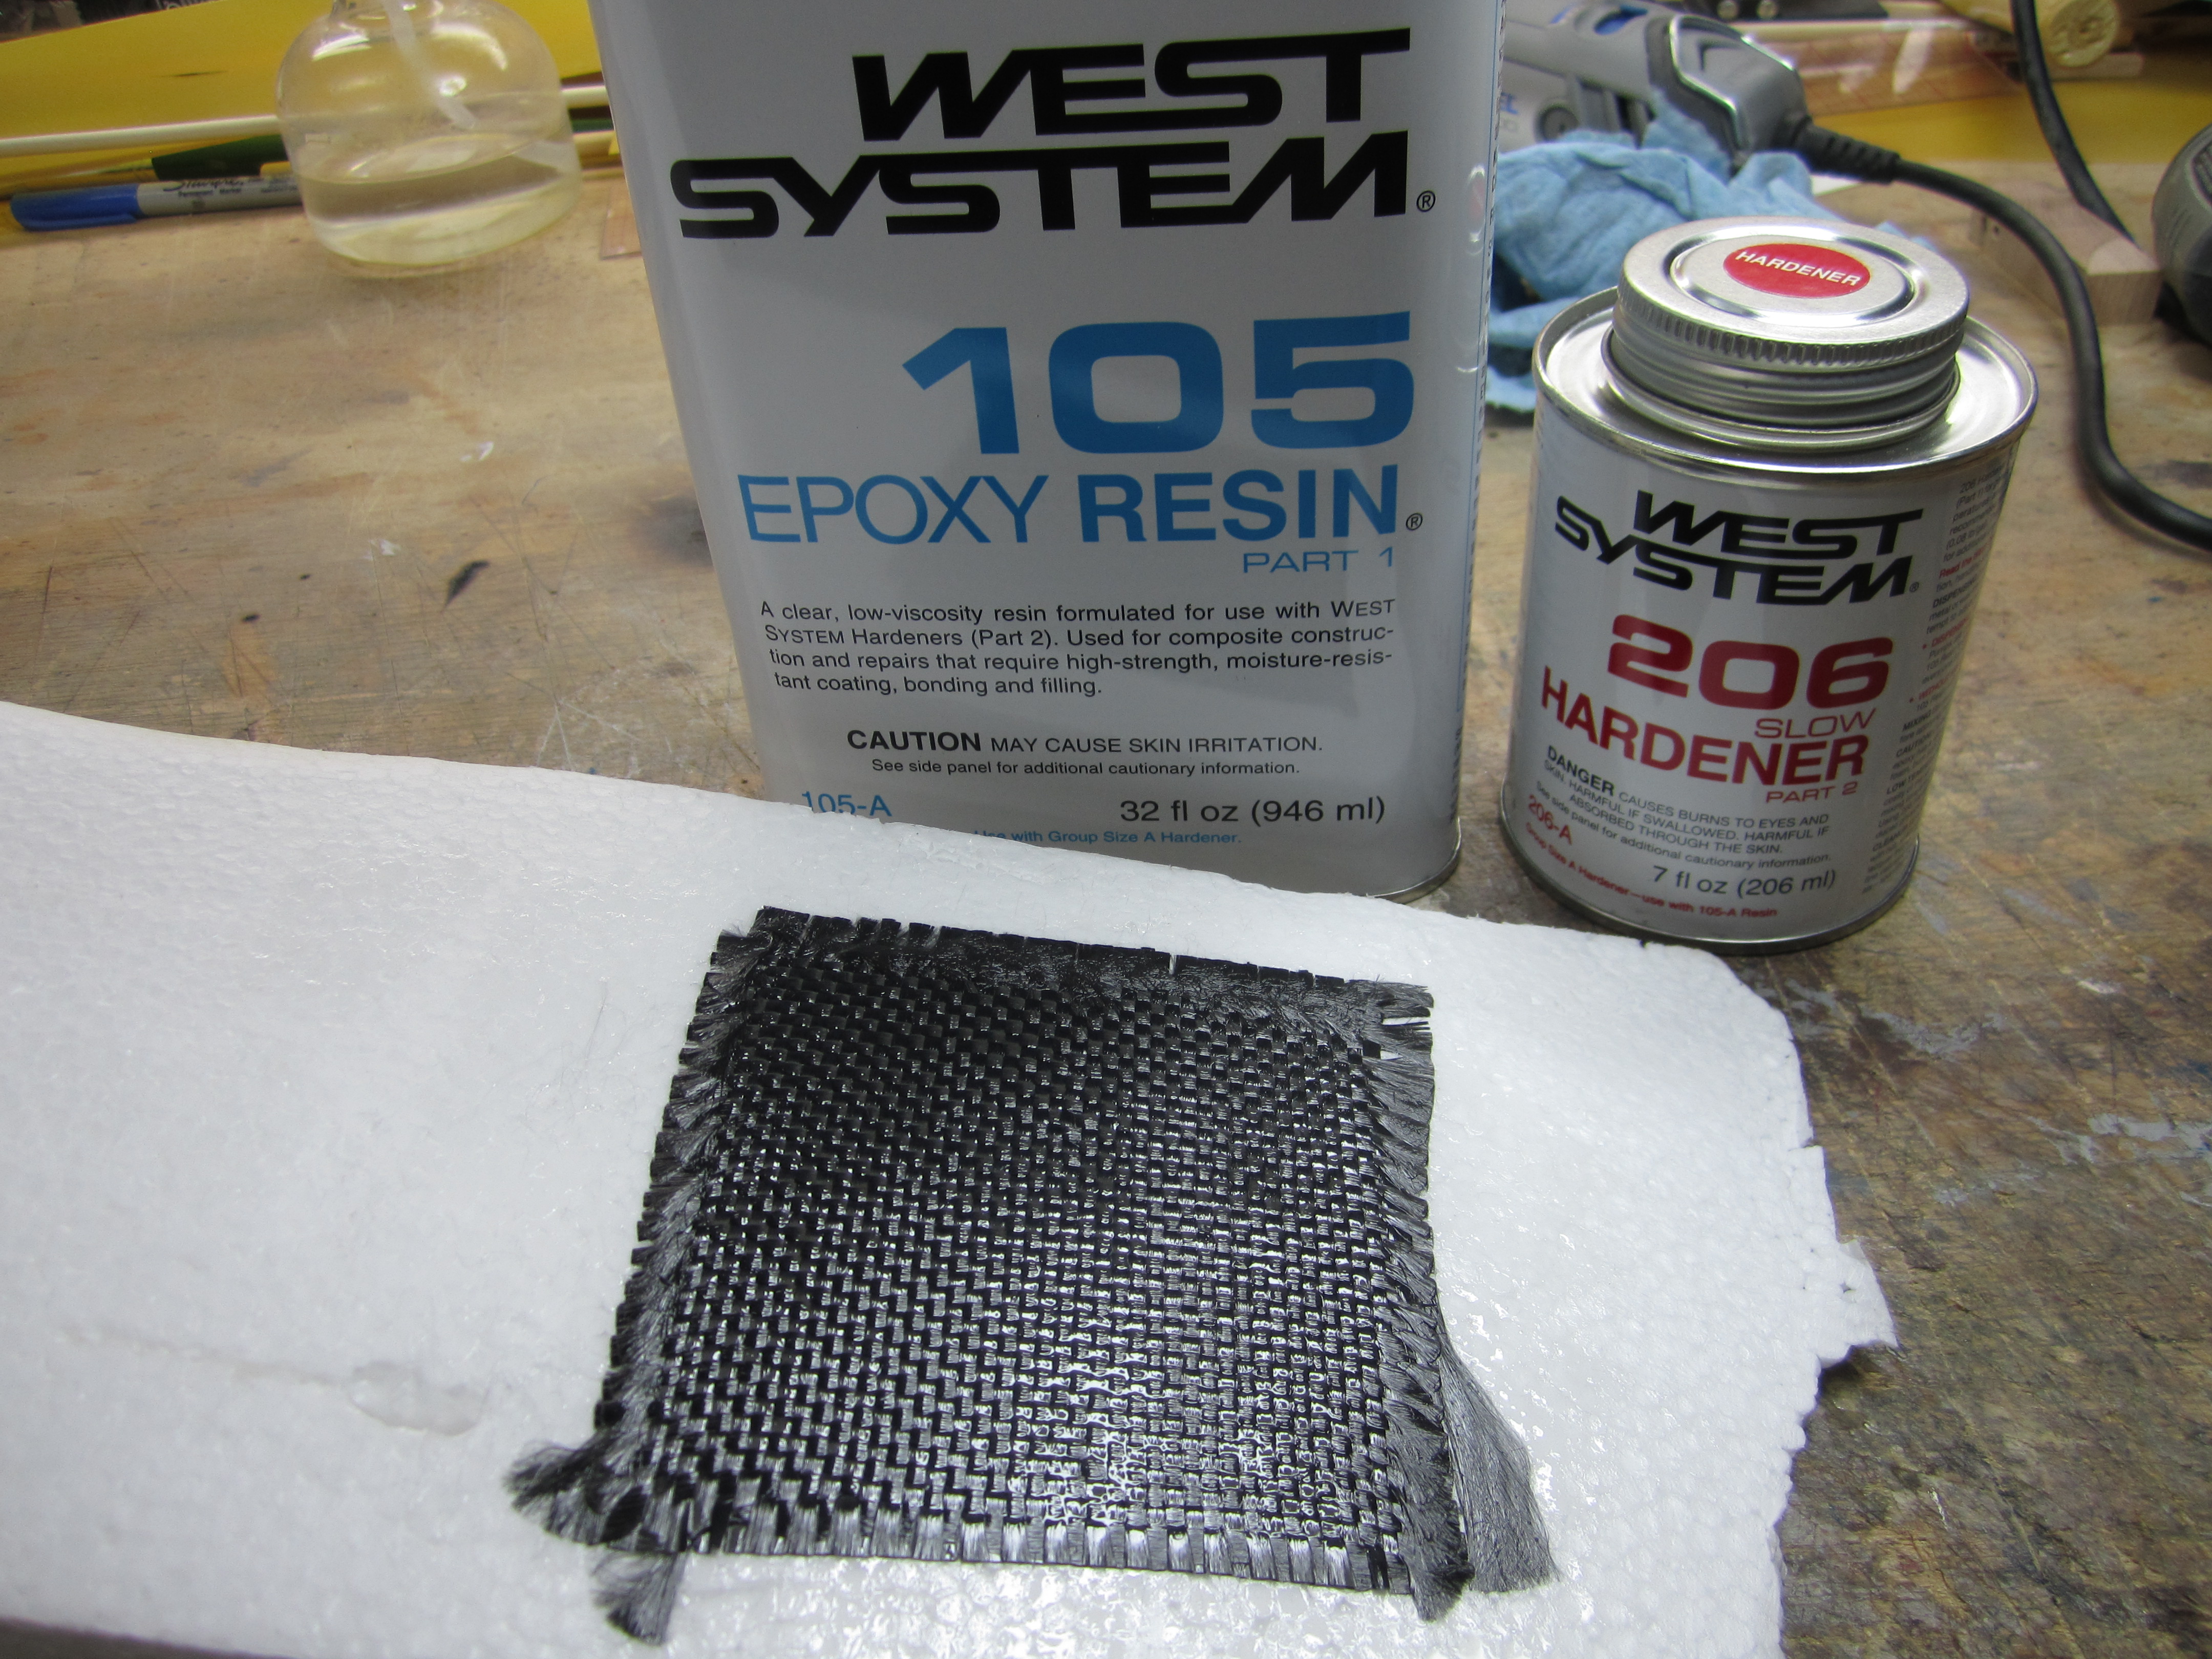
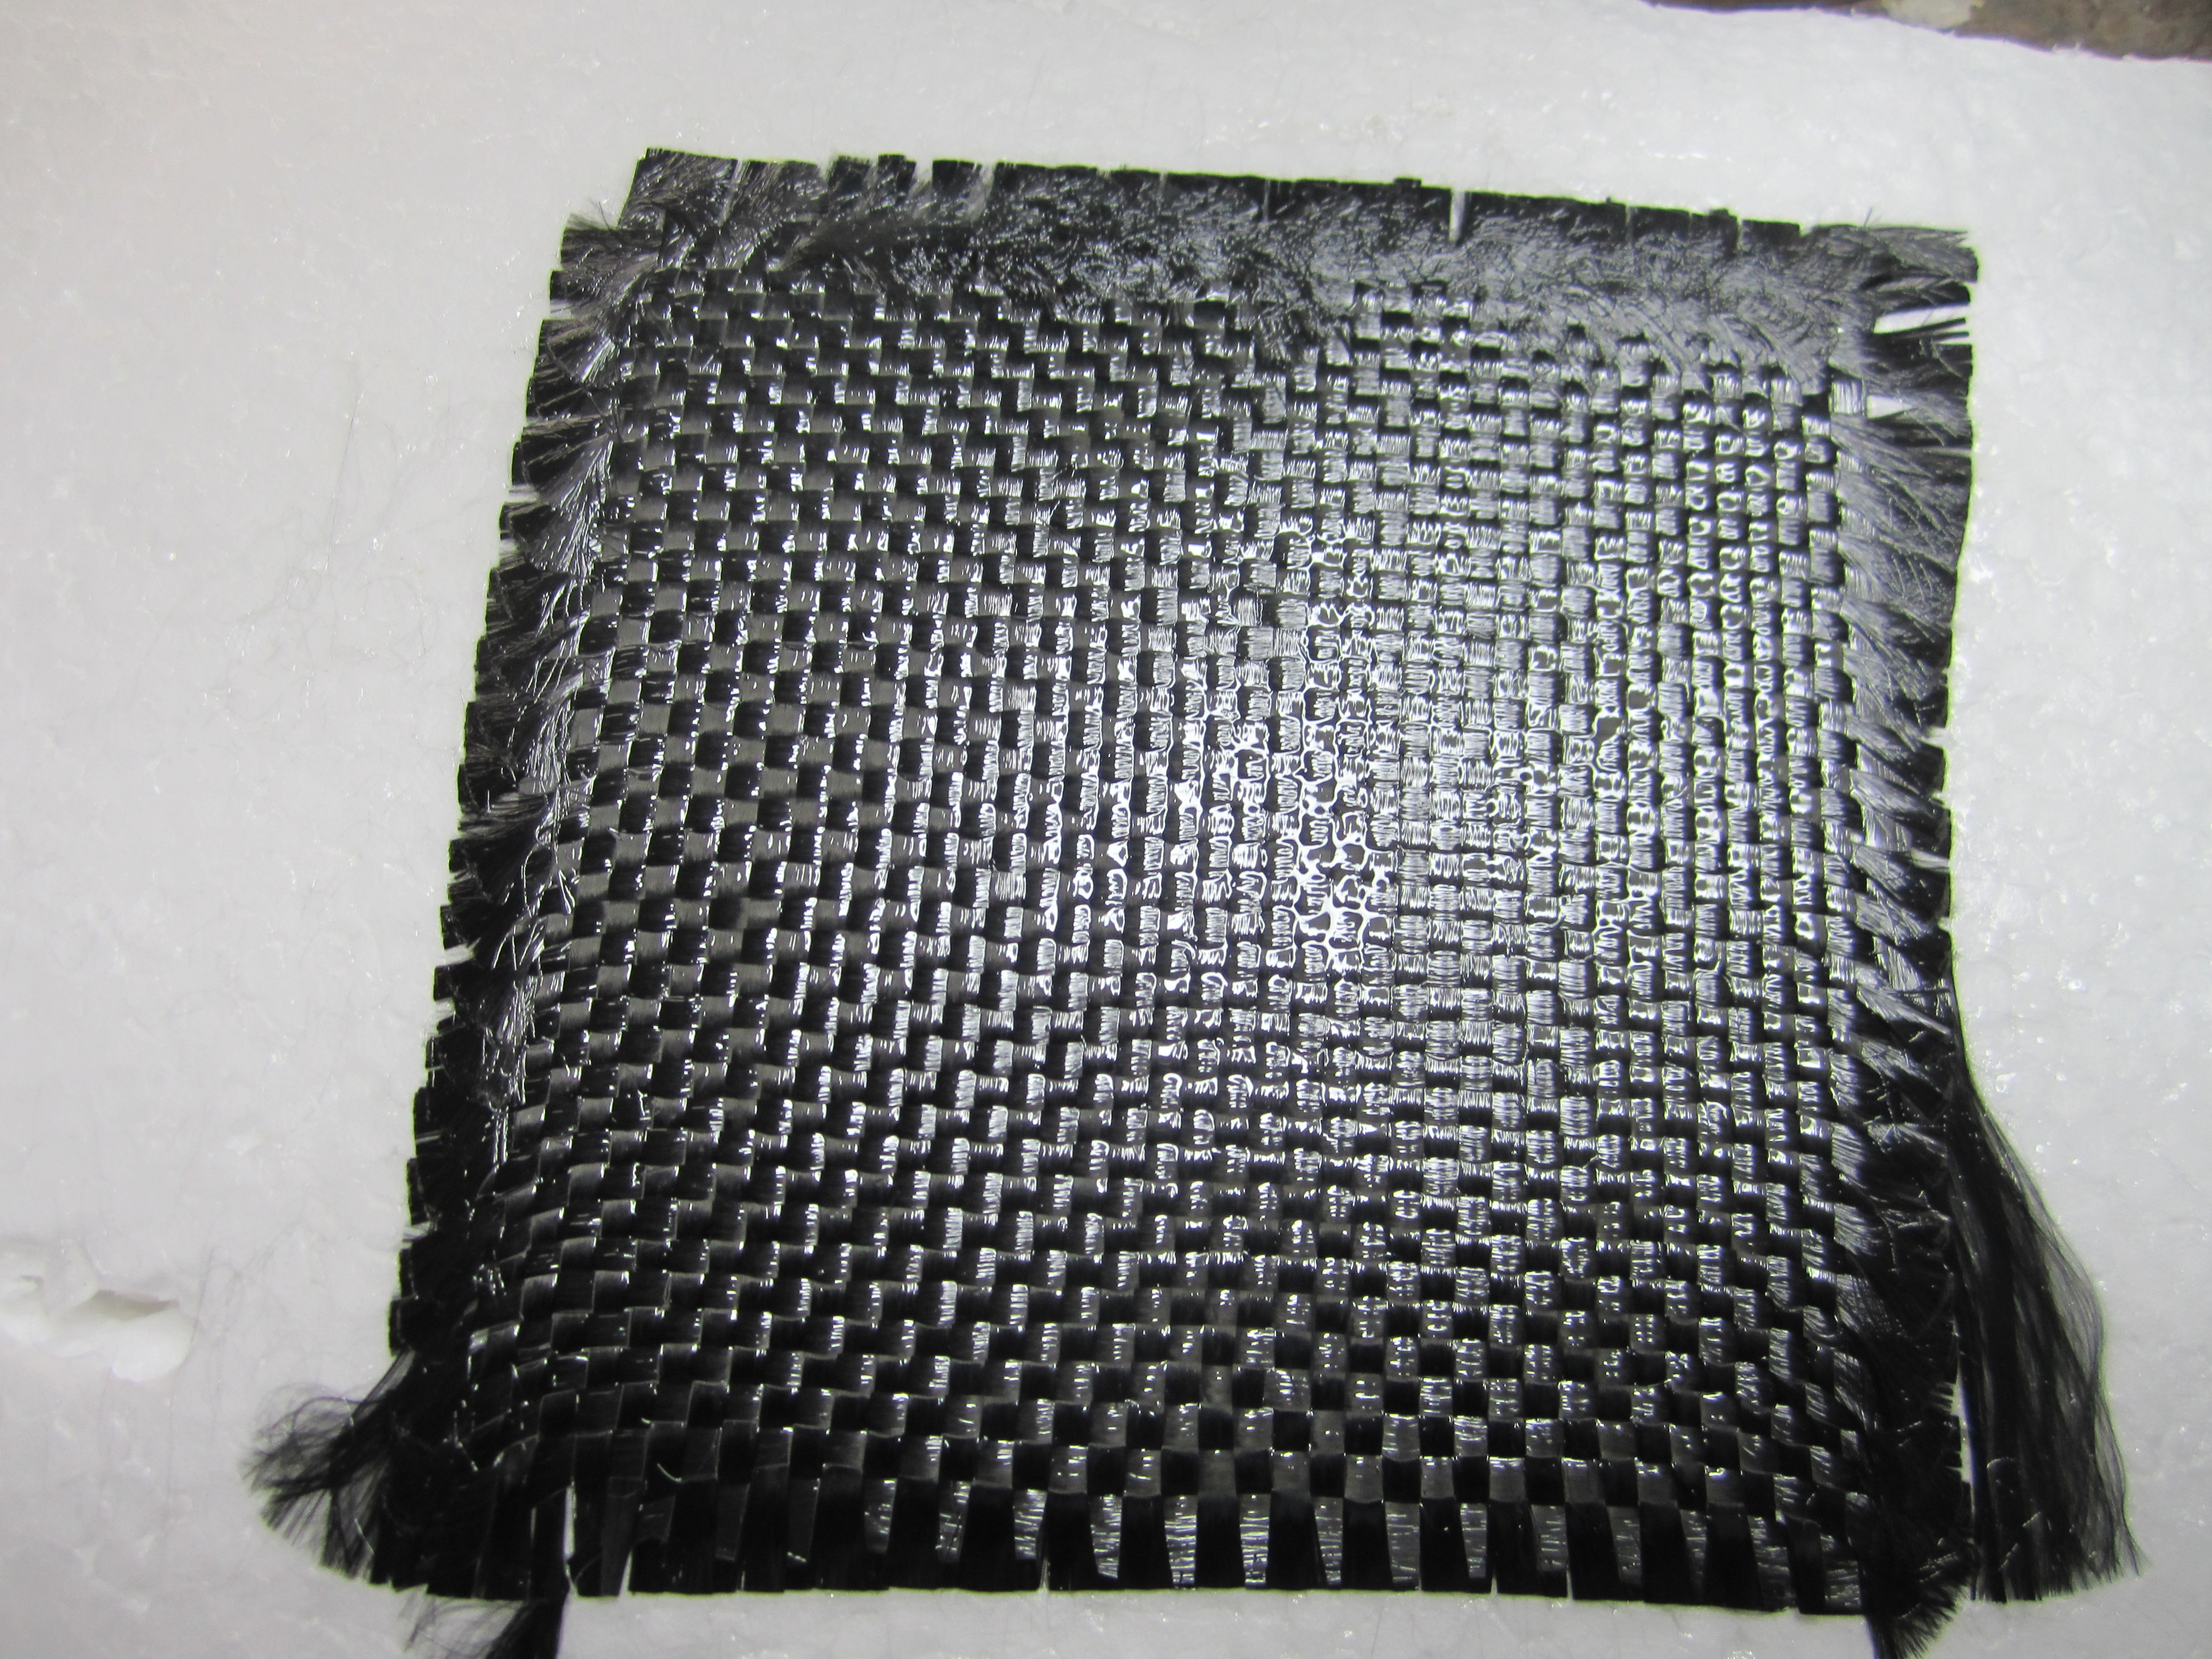
Since I will cover all the holes, with 1/16" balsa to avoid the gorilla glue going into them, I am concern with the top part of the landing gear holes, since we use that area of the wing when handling it. I am running a test with carbon fiber cloth in a piece of foam that I am planning to glue in the top part (for the bottom part I will make it with fiber glass or carbon fiber) to see how it looks once it dries and I apply a 1/16" piece of balsa. Not sure if the CF will raise the balsa in the wing that you will notice when I glue the sheeting.
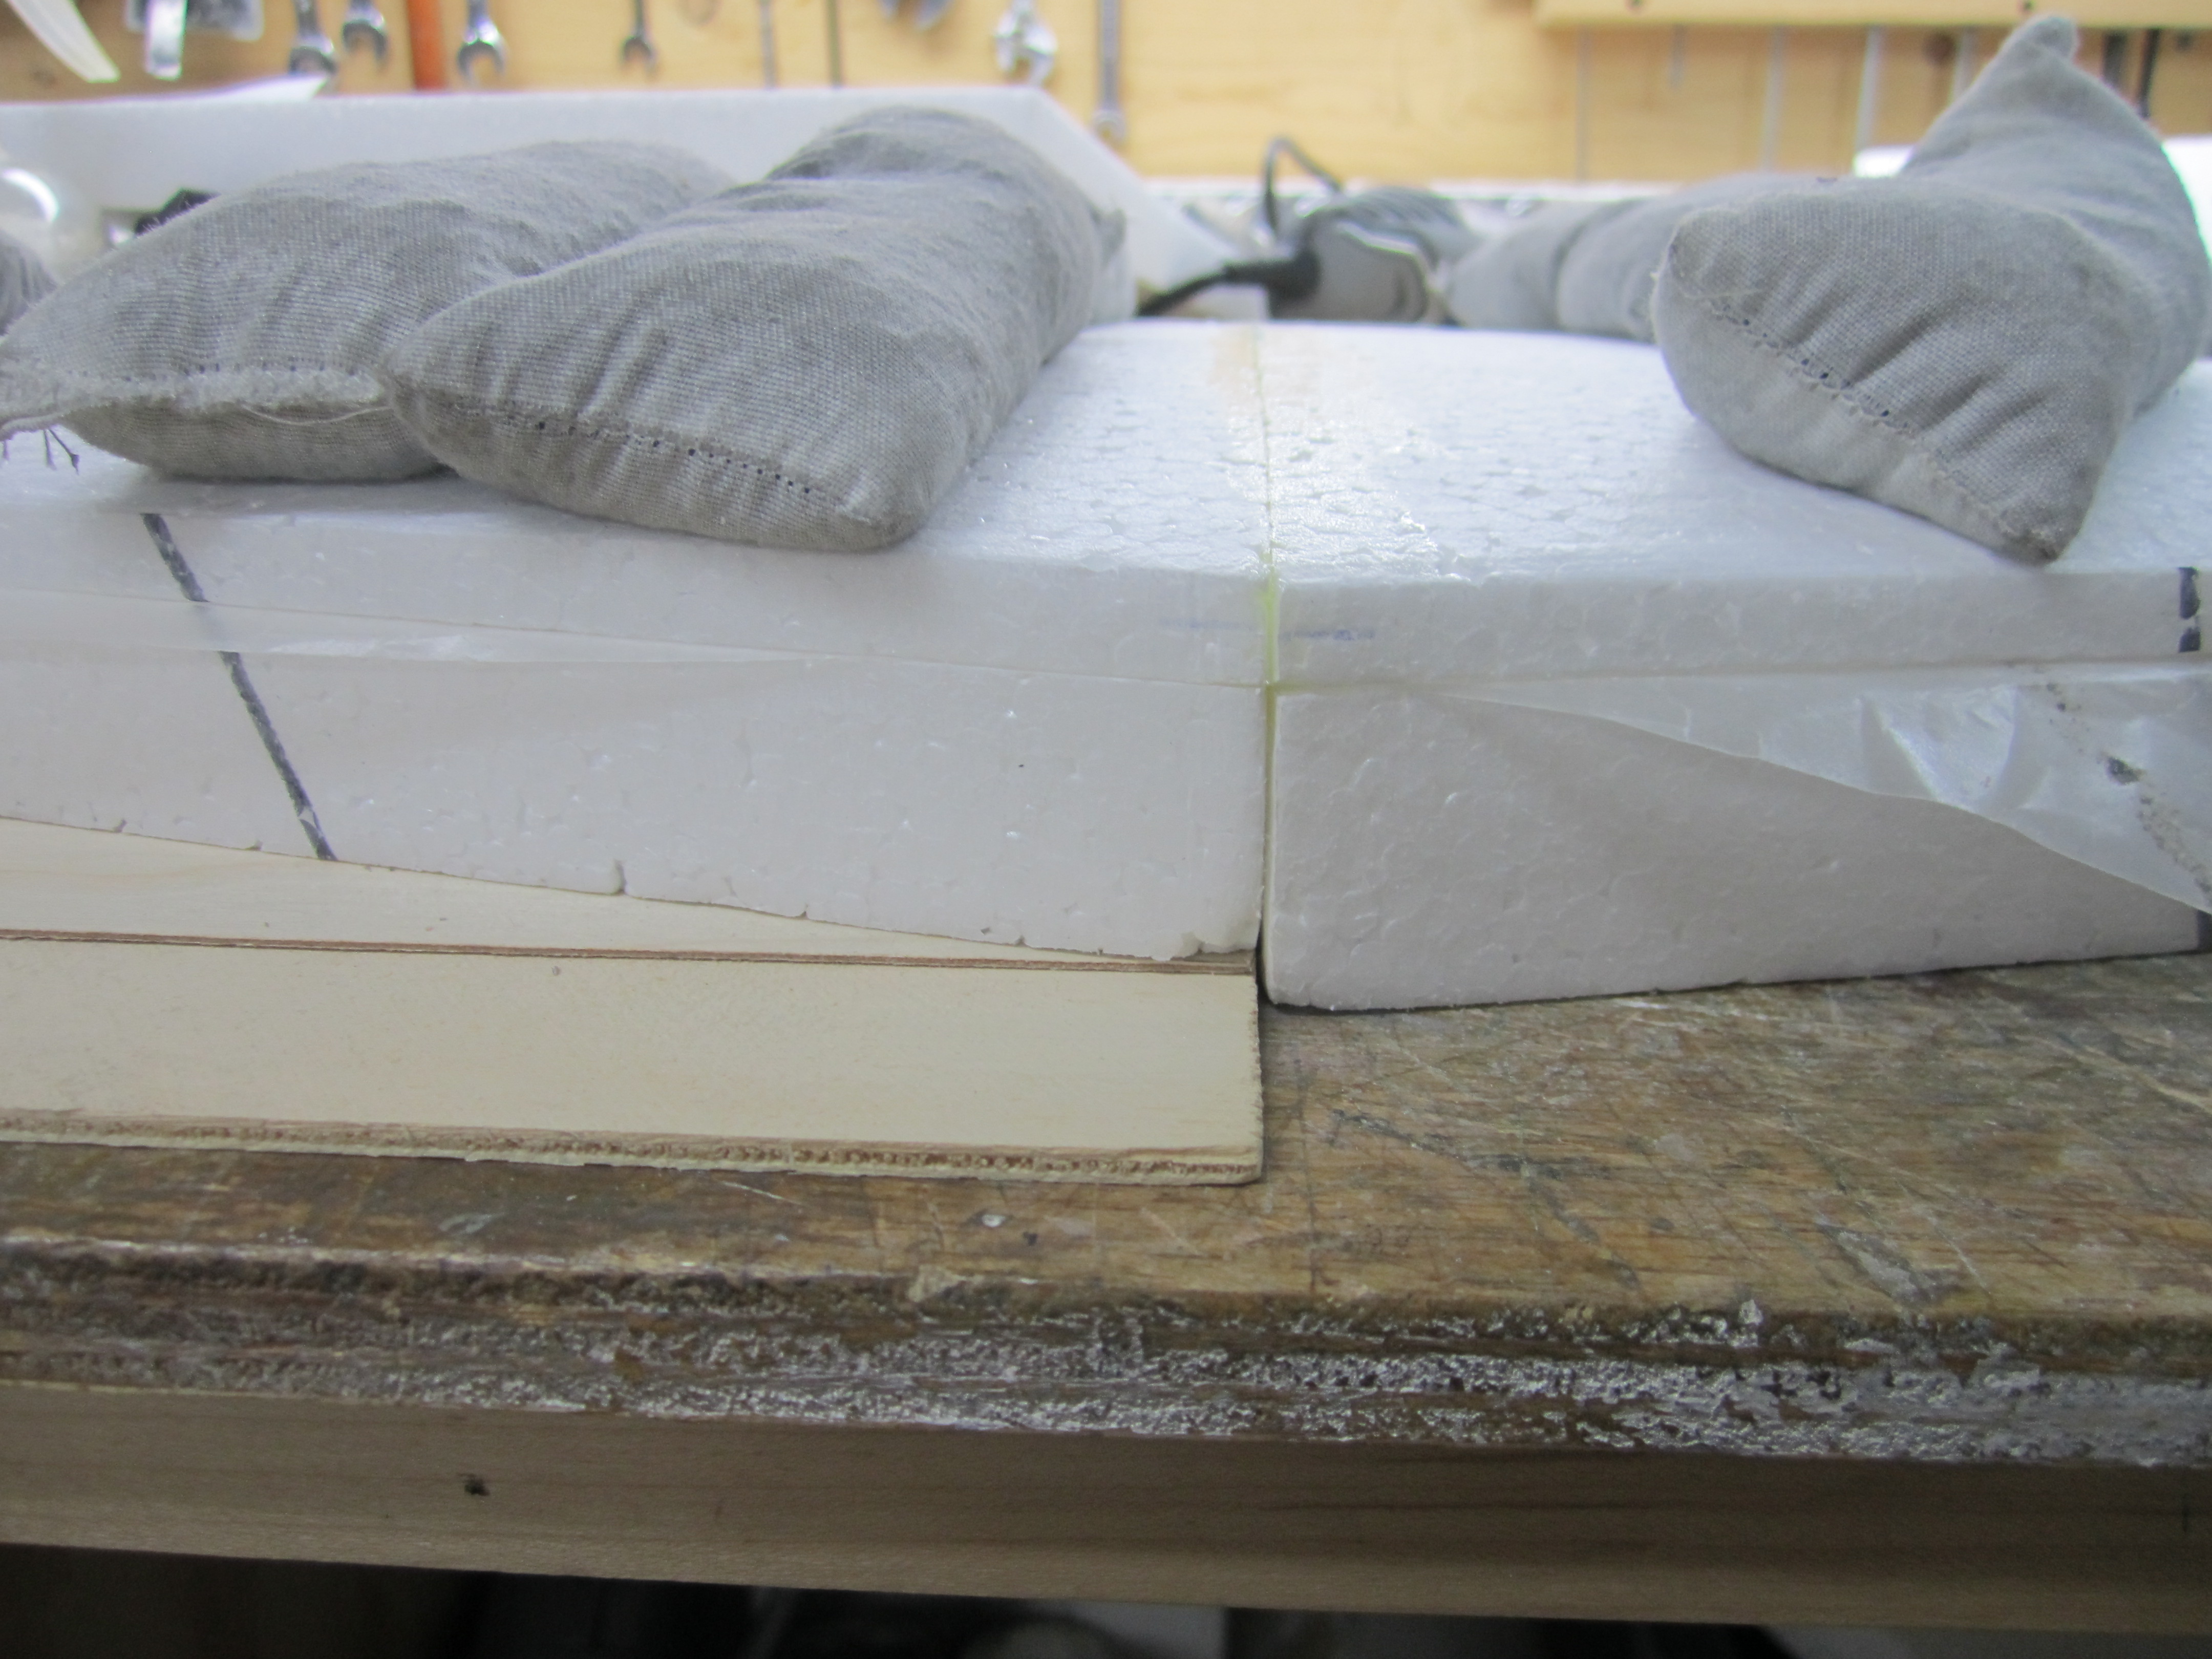
In the mean time, I glued the stab with 30 min epoxy. I had to install "shims" in one of the half since they were not level.

I drilled the holes with the tube itself. I took into account the dihedral, so I put a piece of wood at the wing tip to elevate it 1 ˝" (plans says 2 ⅛ but is too much for me) before cutting it. Then I aligned very carefully the tube and by hand I opened the wing holes.
After that, I mounted the landing gear supports (red oak) and installed blind nuts. I also drilled Ľ" hole in those wood blocks al the way through the plywood and into the foam and inserted Ľ" wood dwell with gorilla glue. I was looking to have some extra support to this blocks. I don't want my landing gears to fail.
Since I will cover all the holes, with 1/16" balsa to avoid the gorilla glue going into them, I am concern with the top part of the landing gear holes, since we use that area of the wing when handling it. I am running a test with carbon fiber cloth in a piece of foam that I am planning to glue in the top part (for the bottom part I will make it with fiber glass or carbon fiber) to see how it looks once it dries and I apply a 1/16" piece of balsa. Not sure if the CF will raise the balsa in the wing that you will notice when I glue the sheeting.
In the mean time, I glued the stab with 30 min epoxy. I had to install "shims" in one of the half since they were not level.
04-10-2015 | 07:38 AM
#4

My Feedback: (11)
Good to see another G&L being built. I have built two of them, looks like your on your way, like the wing tube.
Here is a link to my last build
http://www.rcuniverse.com/forum/kit-...ary-build.html

Will be falowing.
TB
Here is a link to my last build
http://www.rcuniverse.com/forum/kit-...ary-build.html
Will be falowing.
TB
04-11-2015 | 05:41 AM
#6
My Feedback: (11)
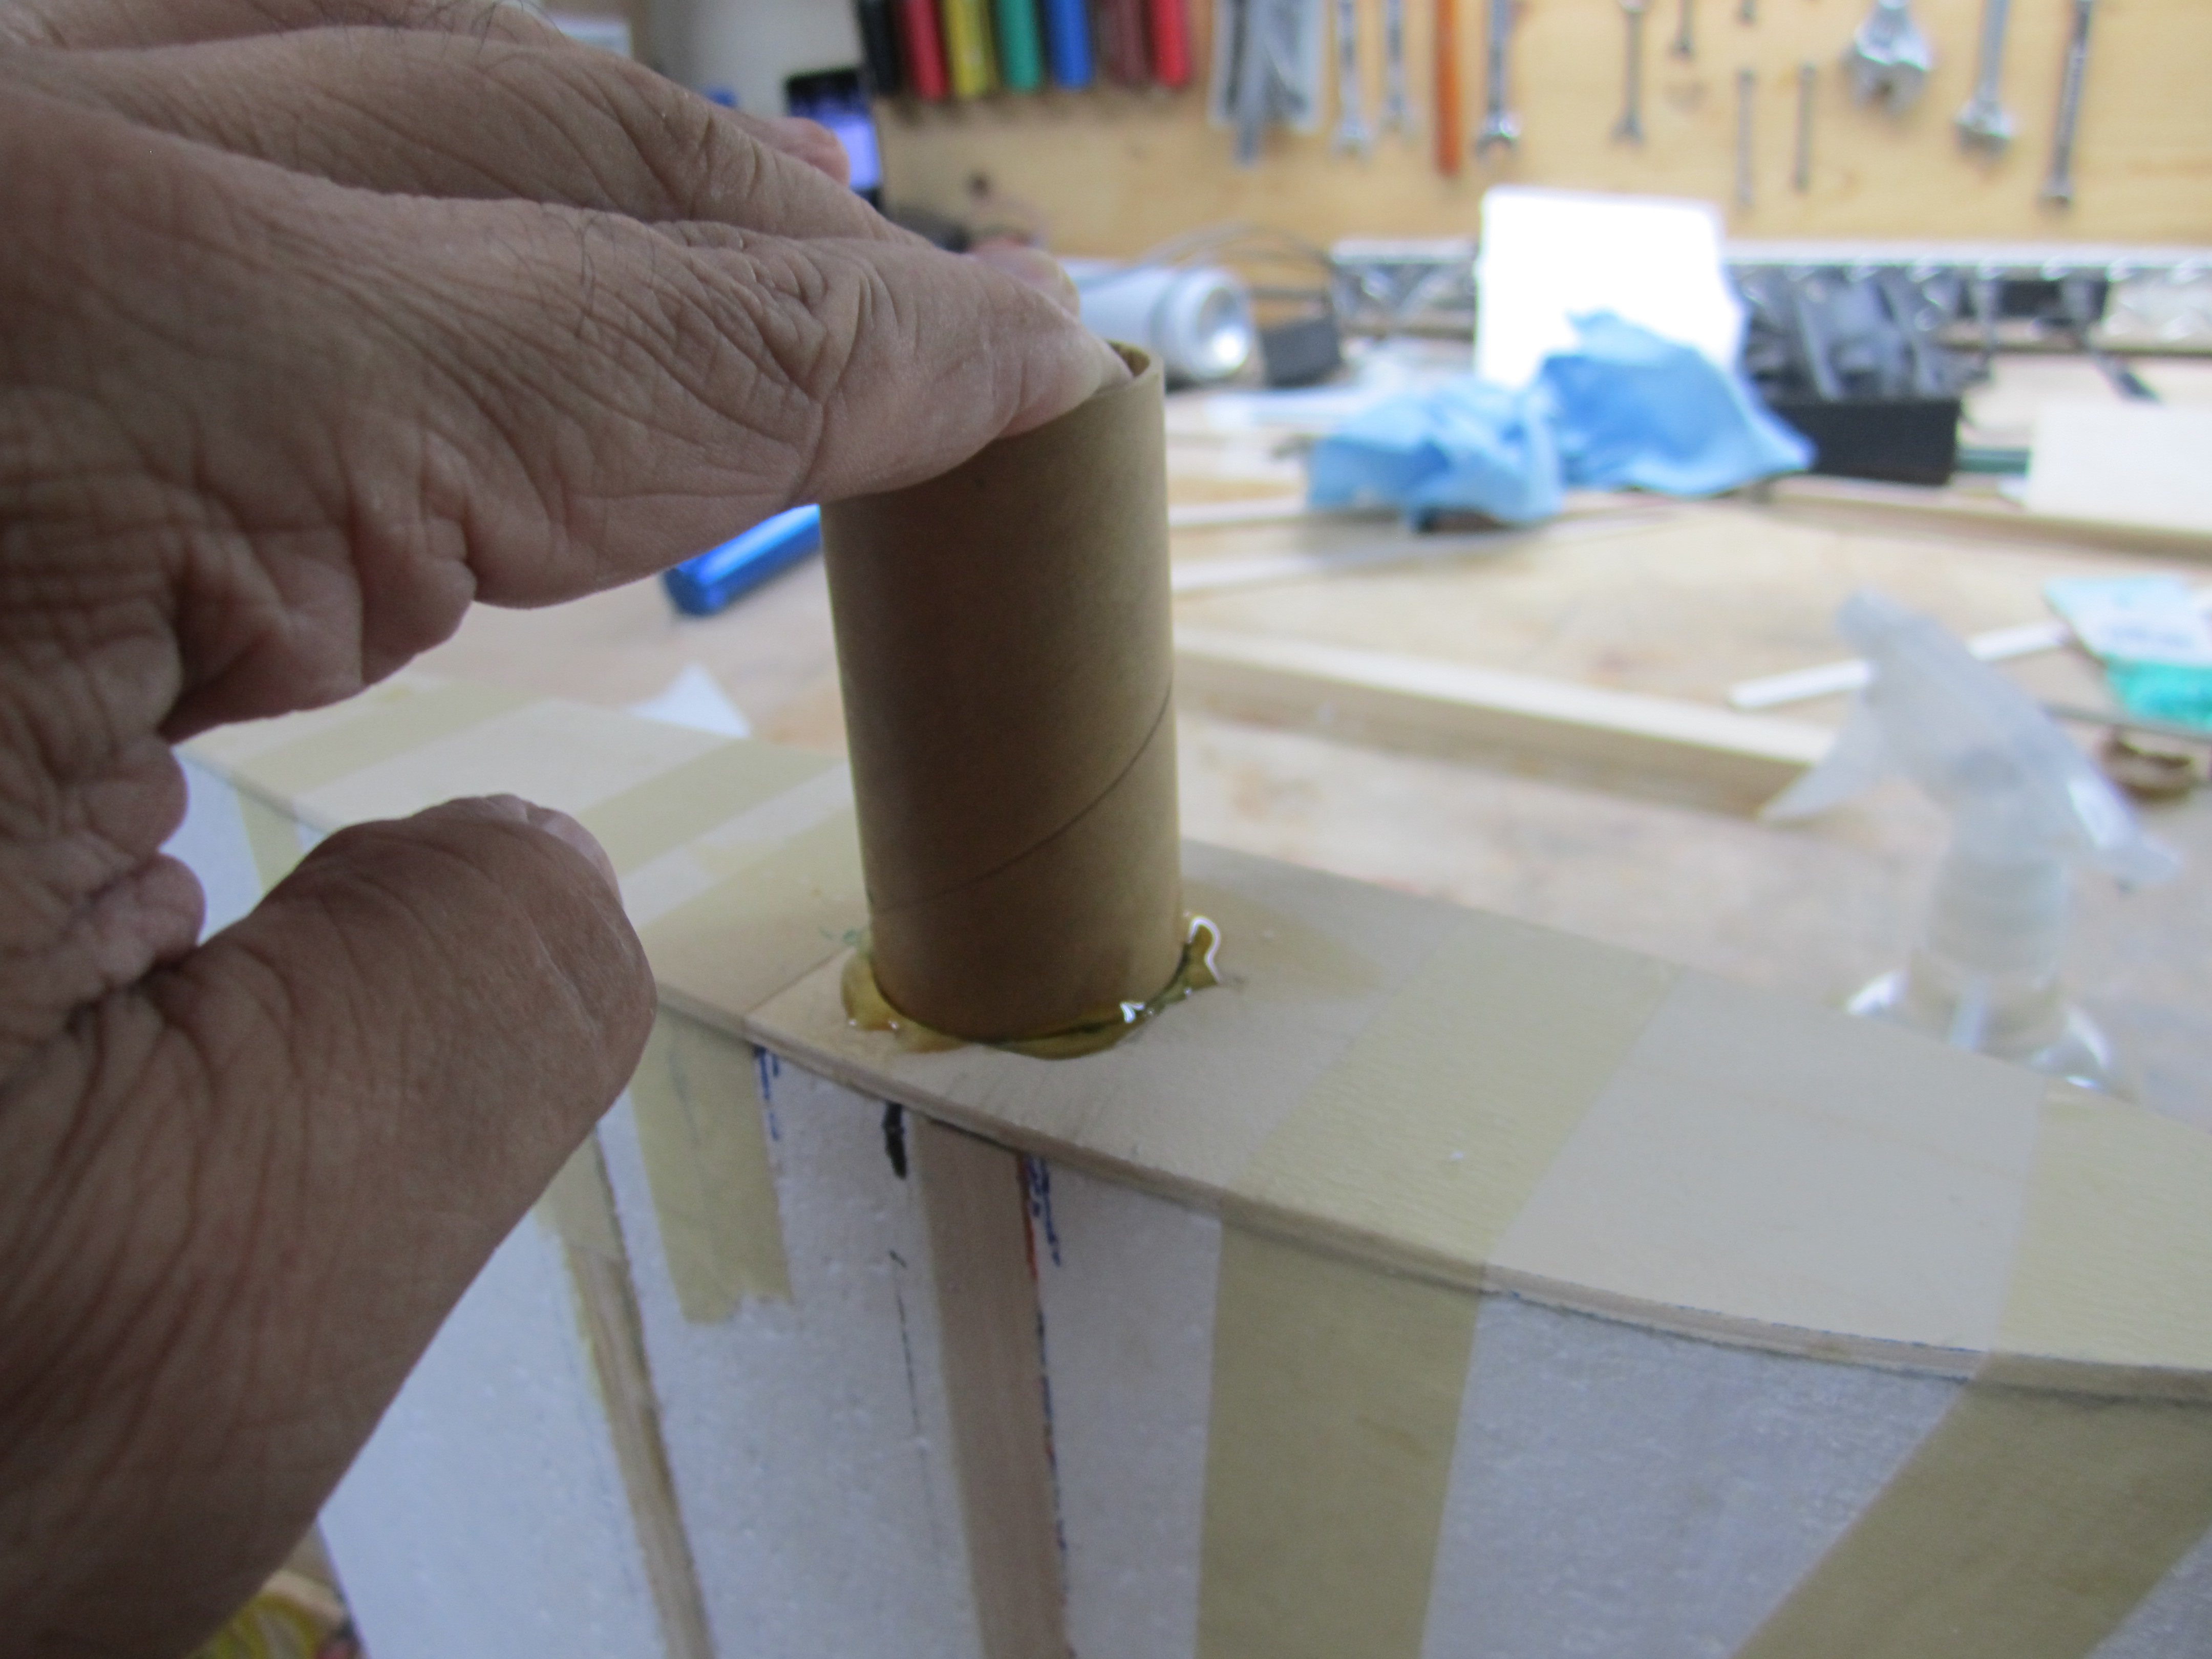
I also would recommend a paper tube for wires if you haven't already done this. The DLE55 is perfect for this and when I build my third as a super chipmunk I may squeeze a 61 in it. I would pin the side ply on your gear bays with dowels into the foam, otherwise your doing good.
TB
04-17-2015 | 05:29 AM
#7
Thread Starter
My Feedback: (2)
Joined: Jun 2009
Posts: 18
Likes: 0
Received 0 Likes
on
0 Posts
From: TX
Thank you TB, your Chipmunk job was just impressive, and I will "borrow" with your permission some of your ideas.")
My progress this week have been slow due to some commitments, but here we go.
I did put some dowels into the ply on the side and into the foam. I think I went around an inch into the foam... do you think that I should go more?
My progress this week have been slow due to some commitments, but here we go.
I did put some dowels into the ply on the side and into the foam. I think I went around an inch into the foam... do you think that I should go more?
04-17-2015 | 05:41 AM
#8
Thread Starter
My Feedback: (2)
Joined: Jun 2009
Posts: 18
Likes: 0
Received 0 Likes
on
0 Posts
From: TX
TB, I am using 1/16 x 4" balsa for the sheeting and gorilla glue on everything. I sanded very smooth on the bench and then I applied the gorilla glue on the rudder and the stab. I haven't sheeted the wings yet, but I am planning to do it this weekend, so please I will appreciate your opinion on how deeps do you think the dowels should go into the wing, because this is the perfect time to do it before I sheet the wings.
Thanks
Thanks
04-17-2015 | 05:53 AM
#9
Thread Starter
My Feedback: (2)
Joined: Jun 2009
Posts: 18
Likes: 0
Received 0 Likes
on
0 Posts
From: TX
Progress on the wing.
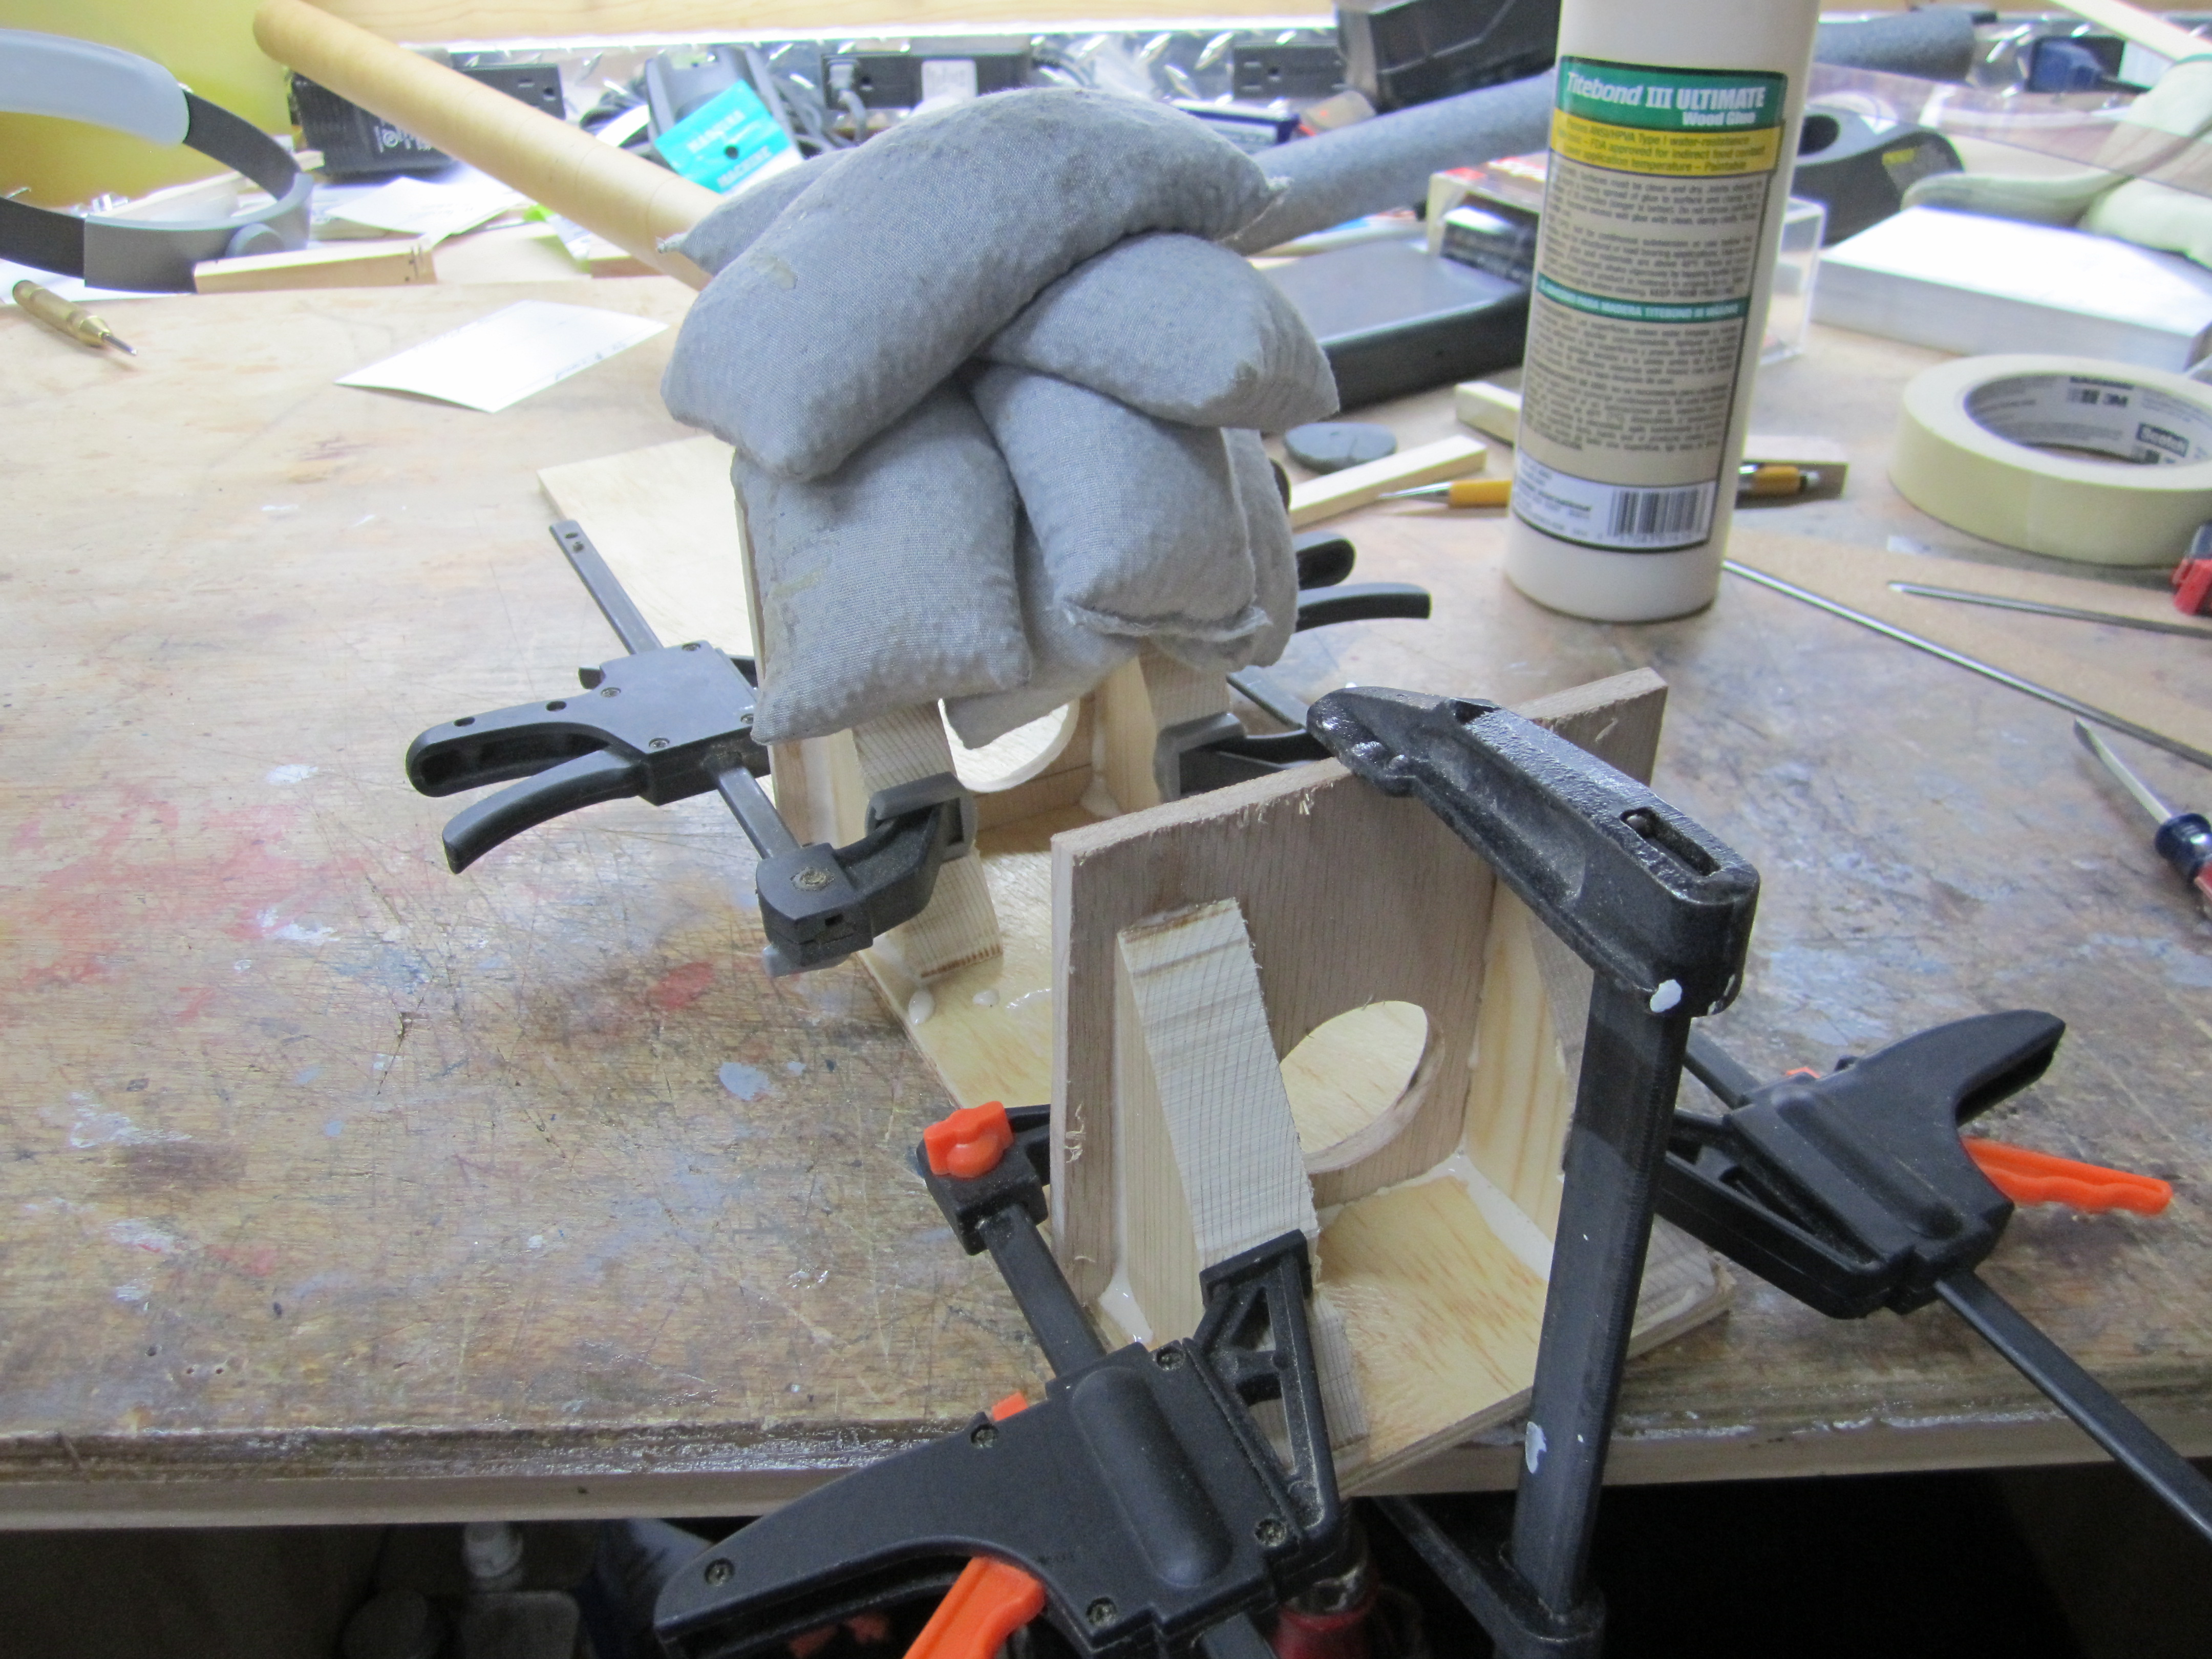
I installed the tube, sanded the dihedral, cut the rib # 1, opened the wings tube, added an alignment dowel and the glued the ribs using the tube as a guide.
I did a mistake with the photos... I saved from my camera SD into the computer as the original file, and now those are too big. I had to create a copy of a few of them with a lower resolution to upload those to this site.... lesson learned...
04-17-2015 | 06:14 AM
#10
Thread Starter
My Feedback: (2)
Joined: Jun 2009
Posts: 18
Likes: 0
Received 0 Likes
on
0 Posts
From: TX
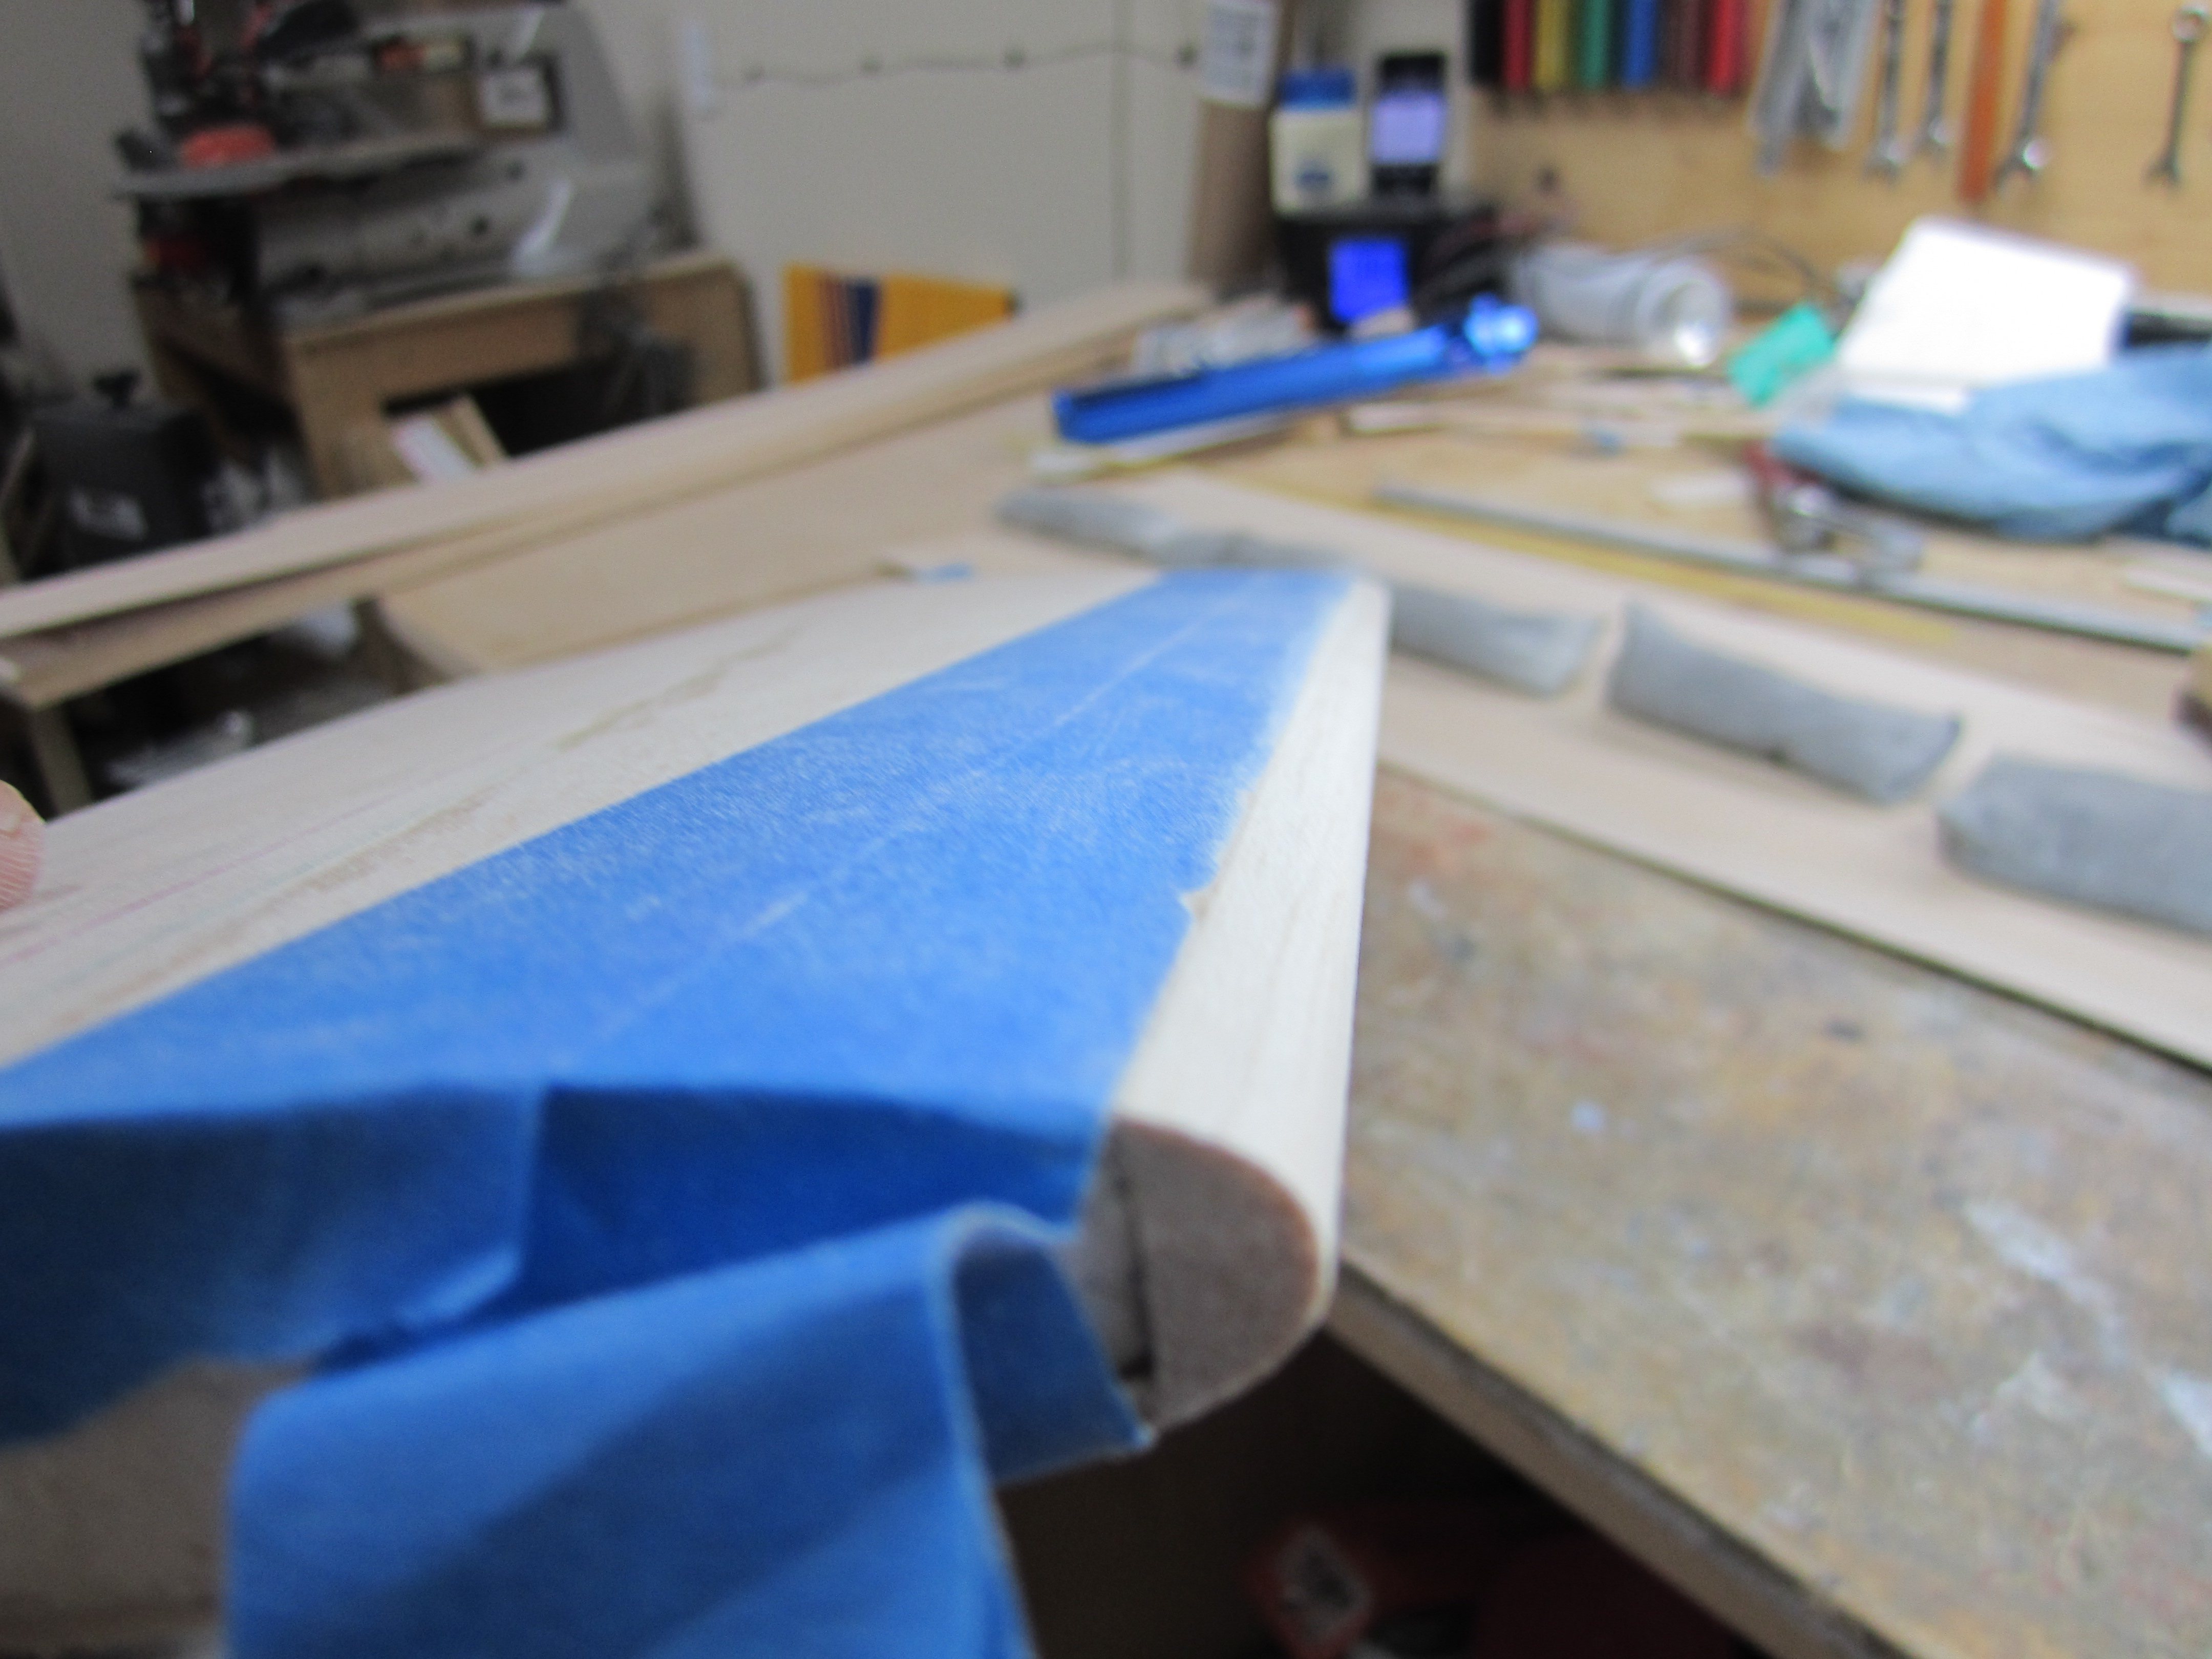
STAB
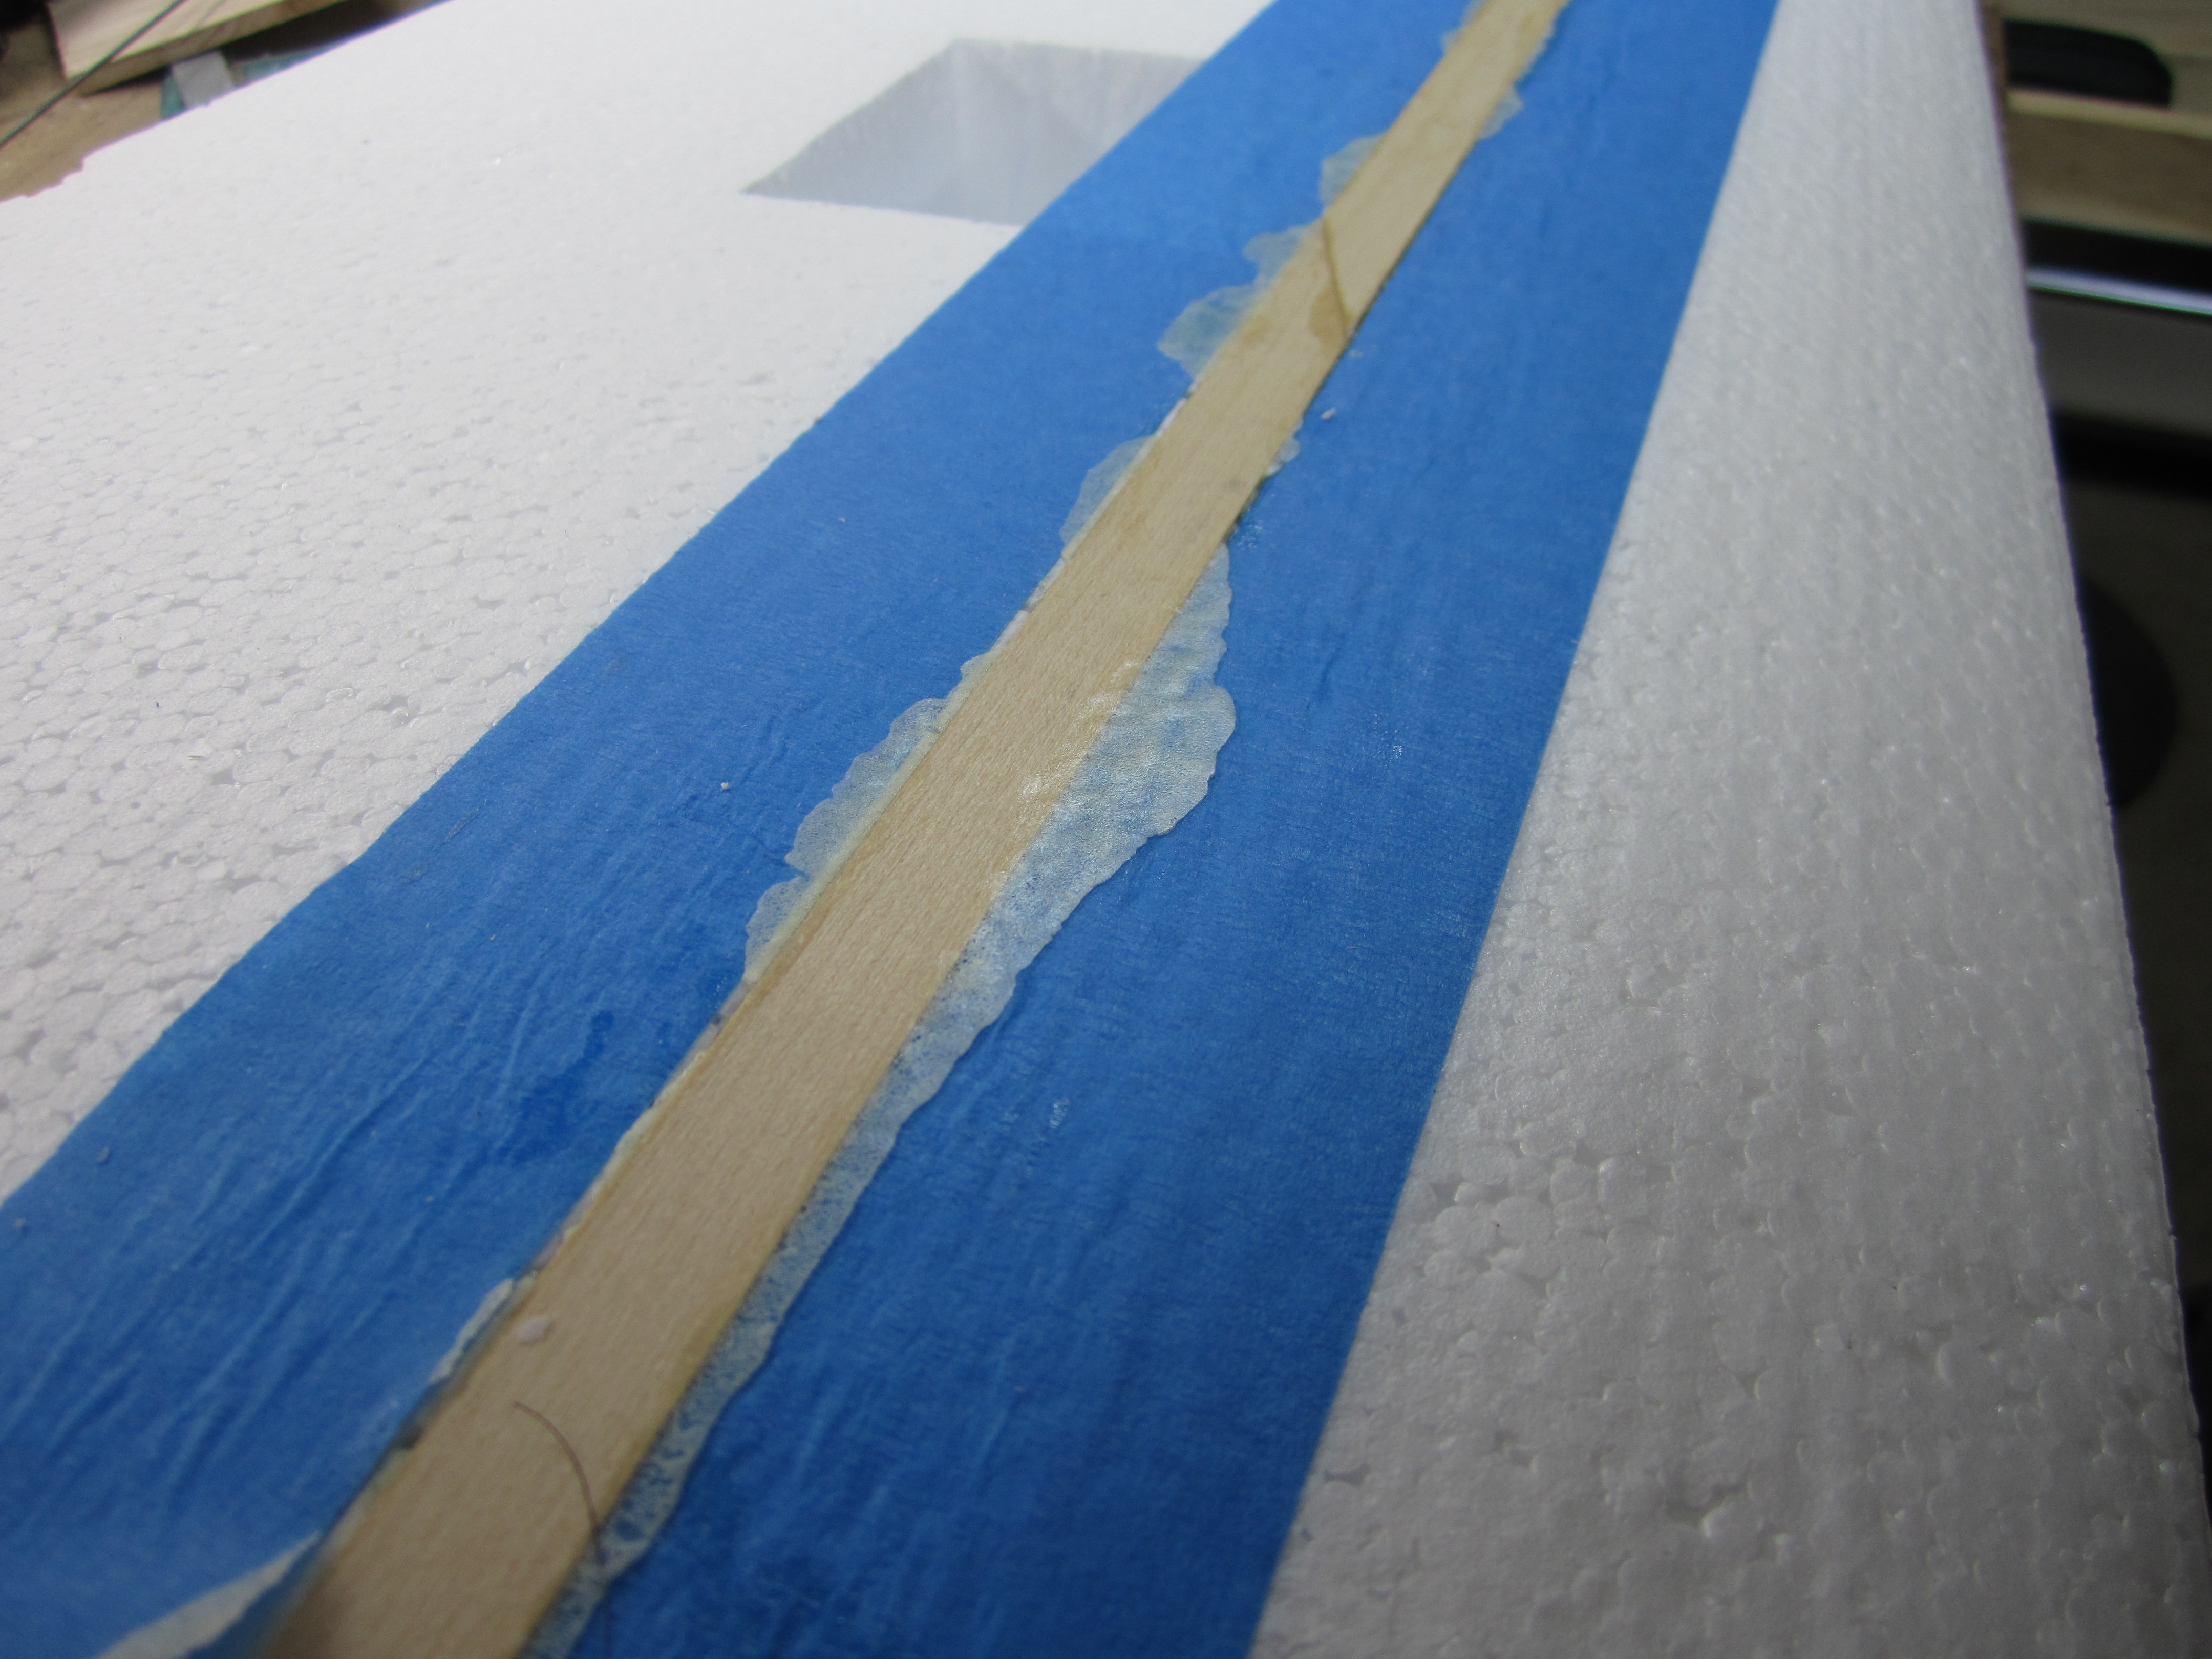
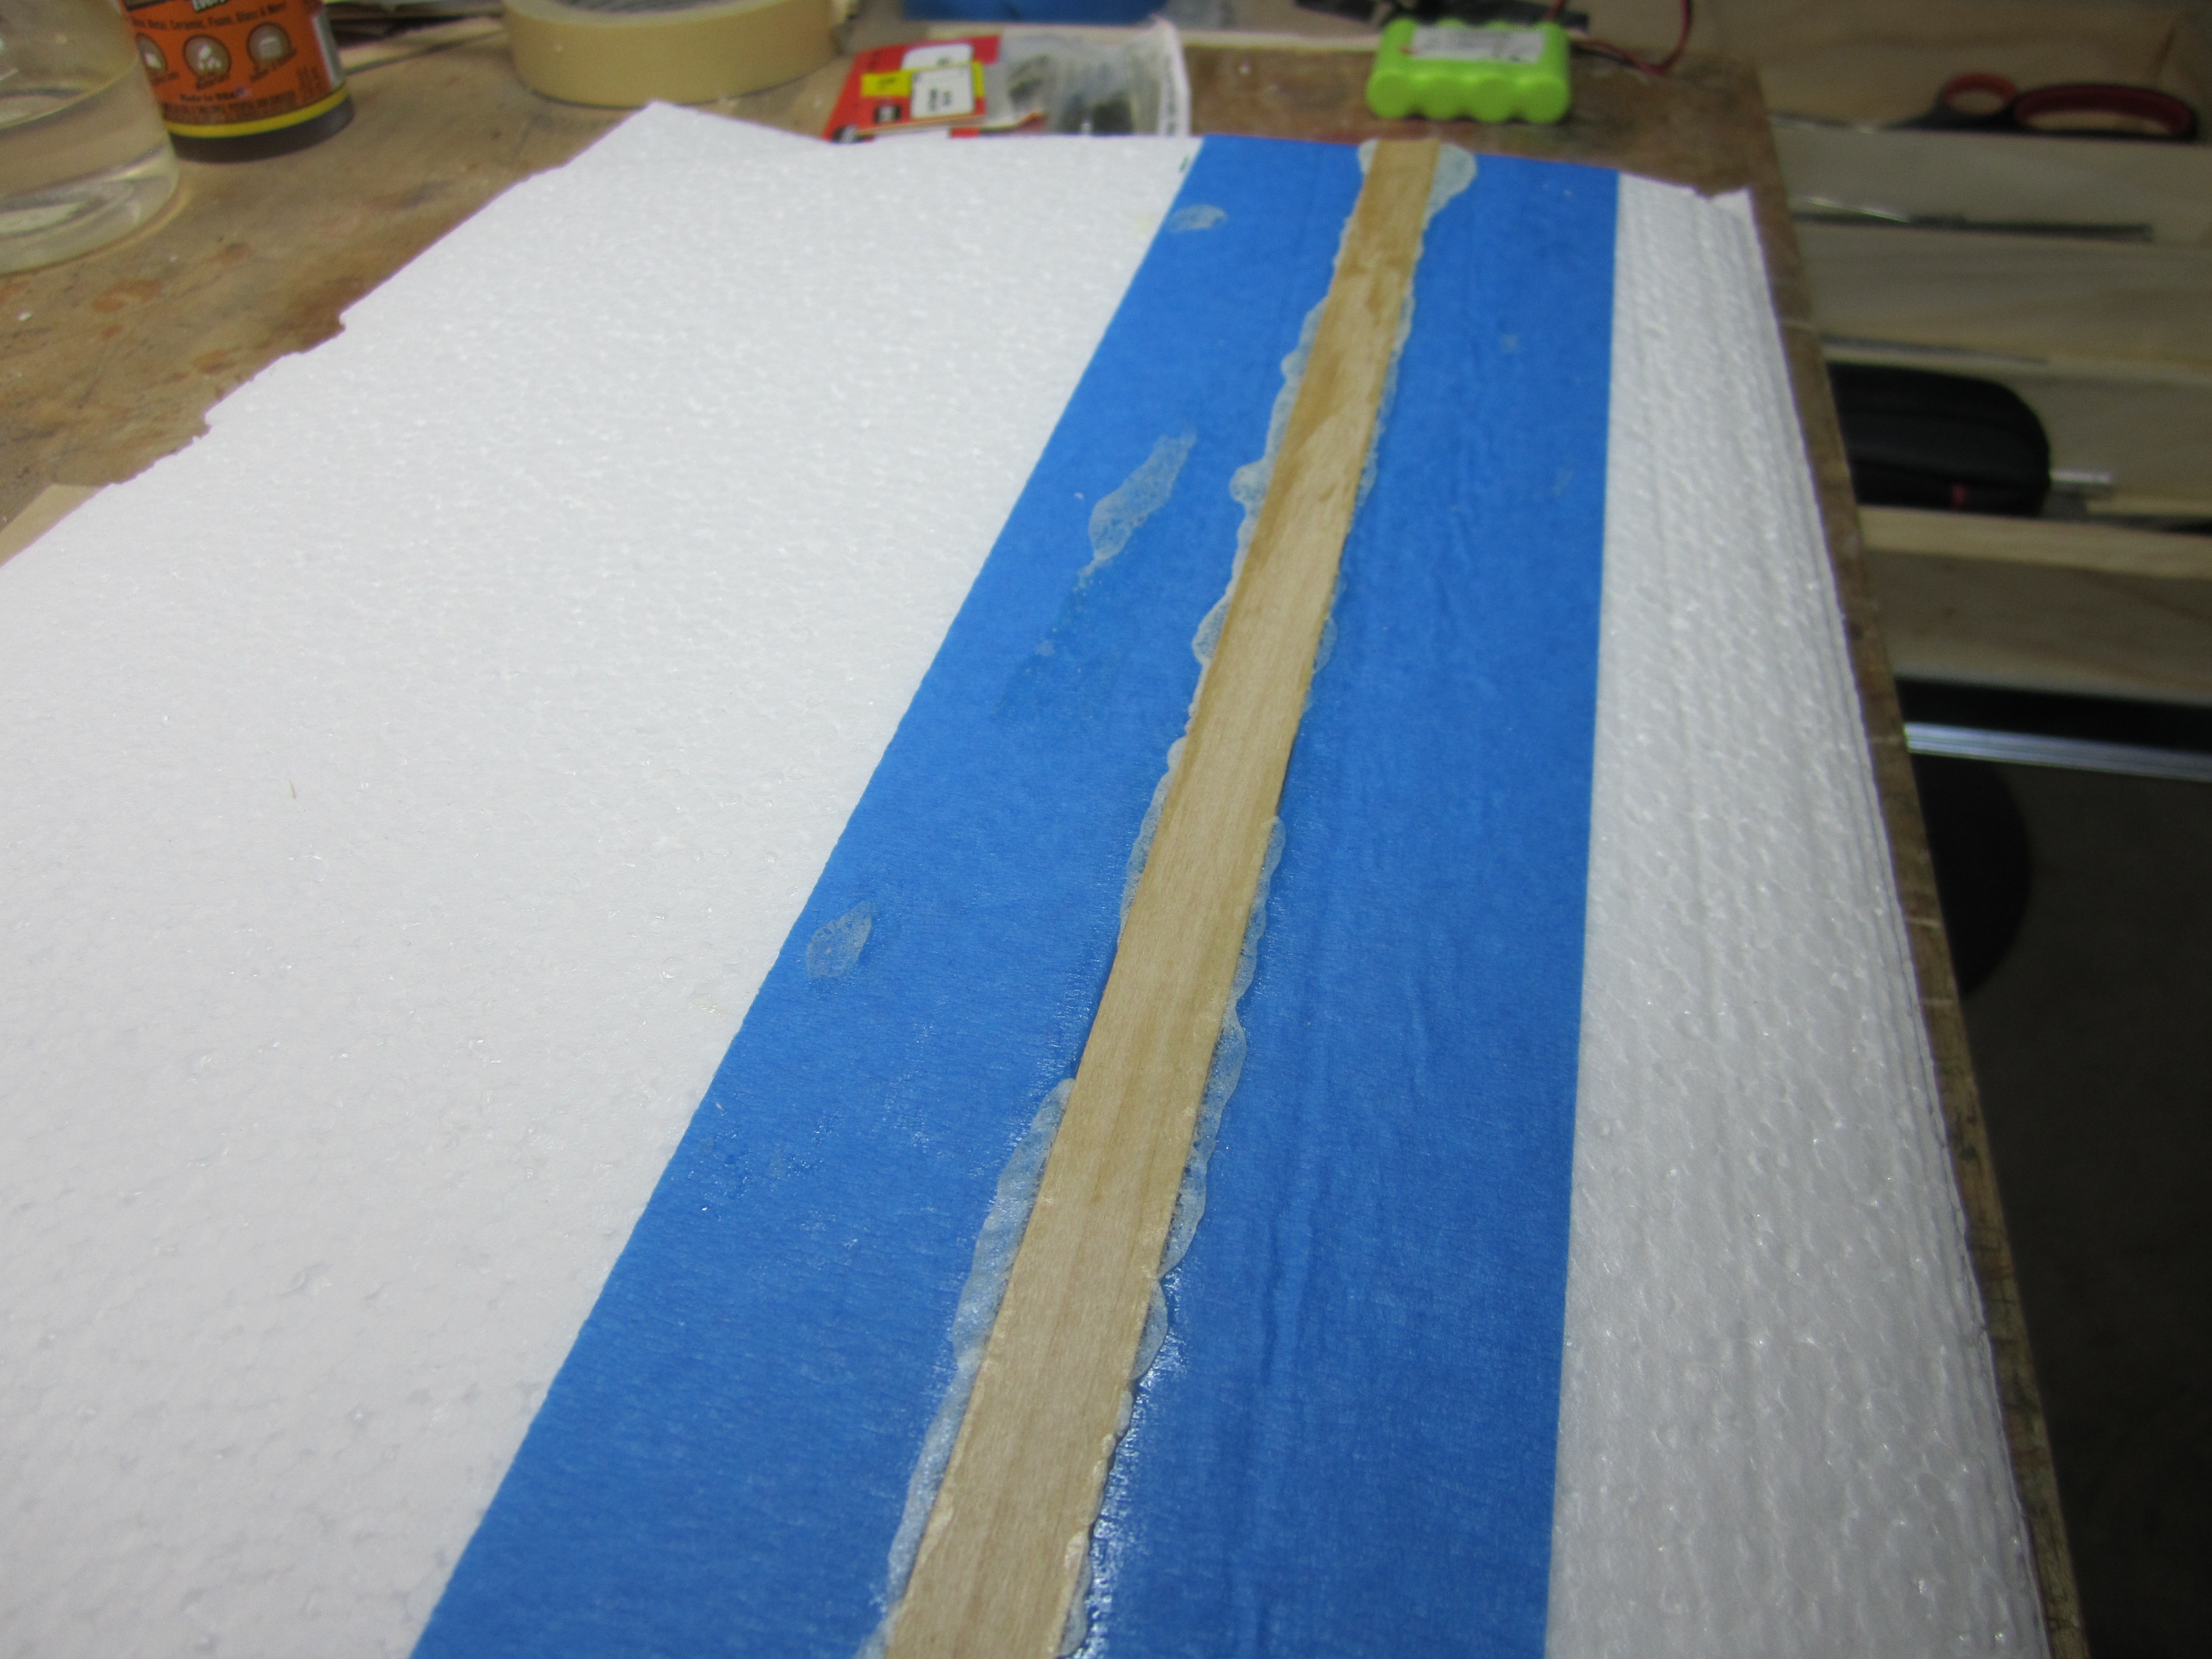
I sheeted the stab with 1/16" balsa and gorilla glue activated with water (applied water in spray).
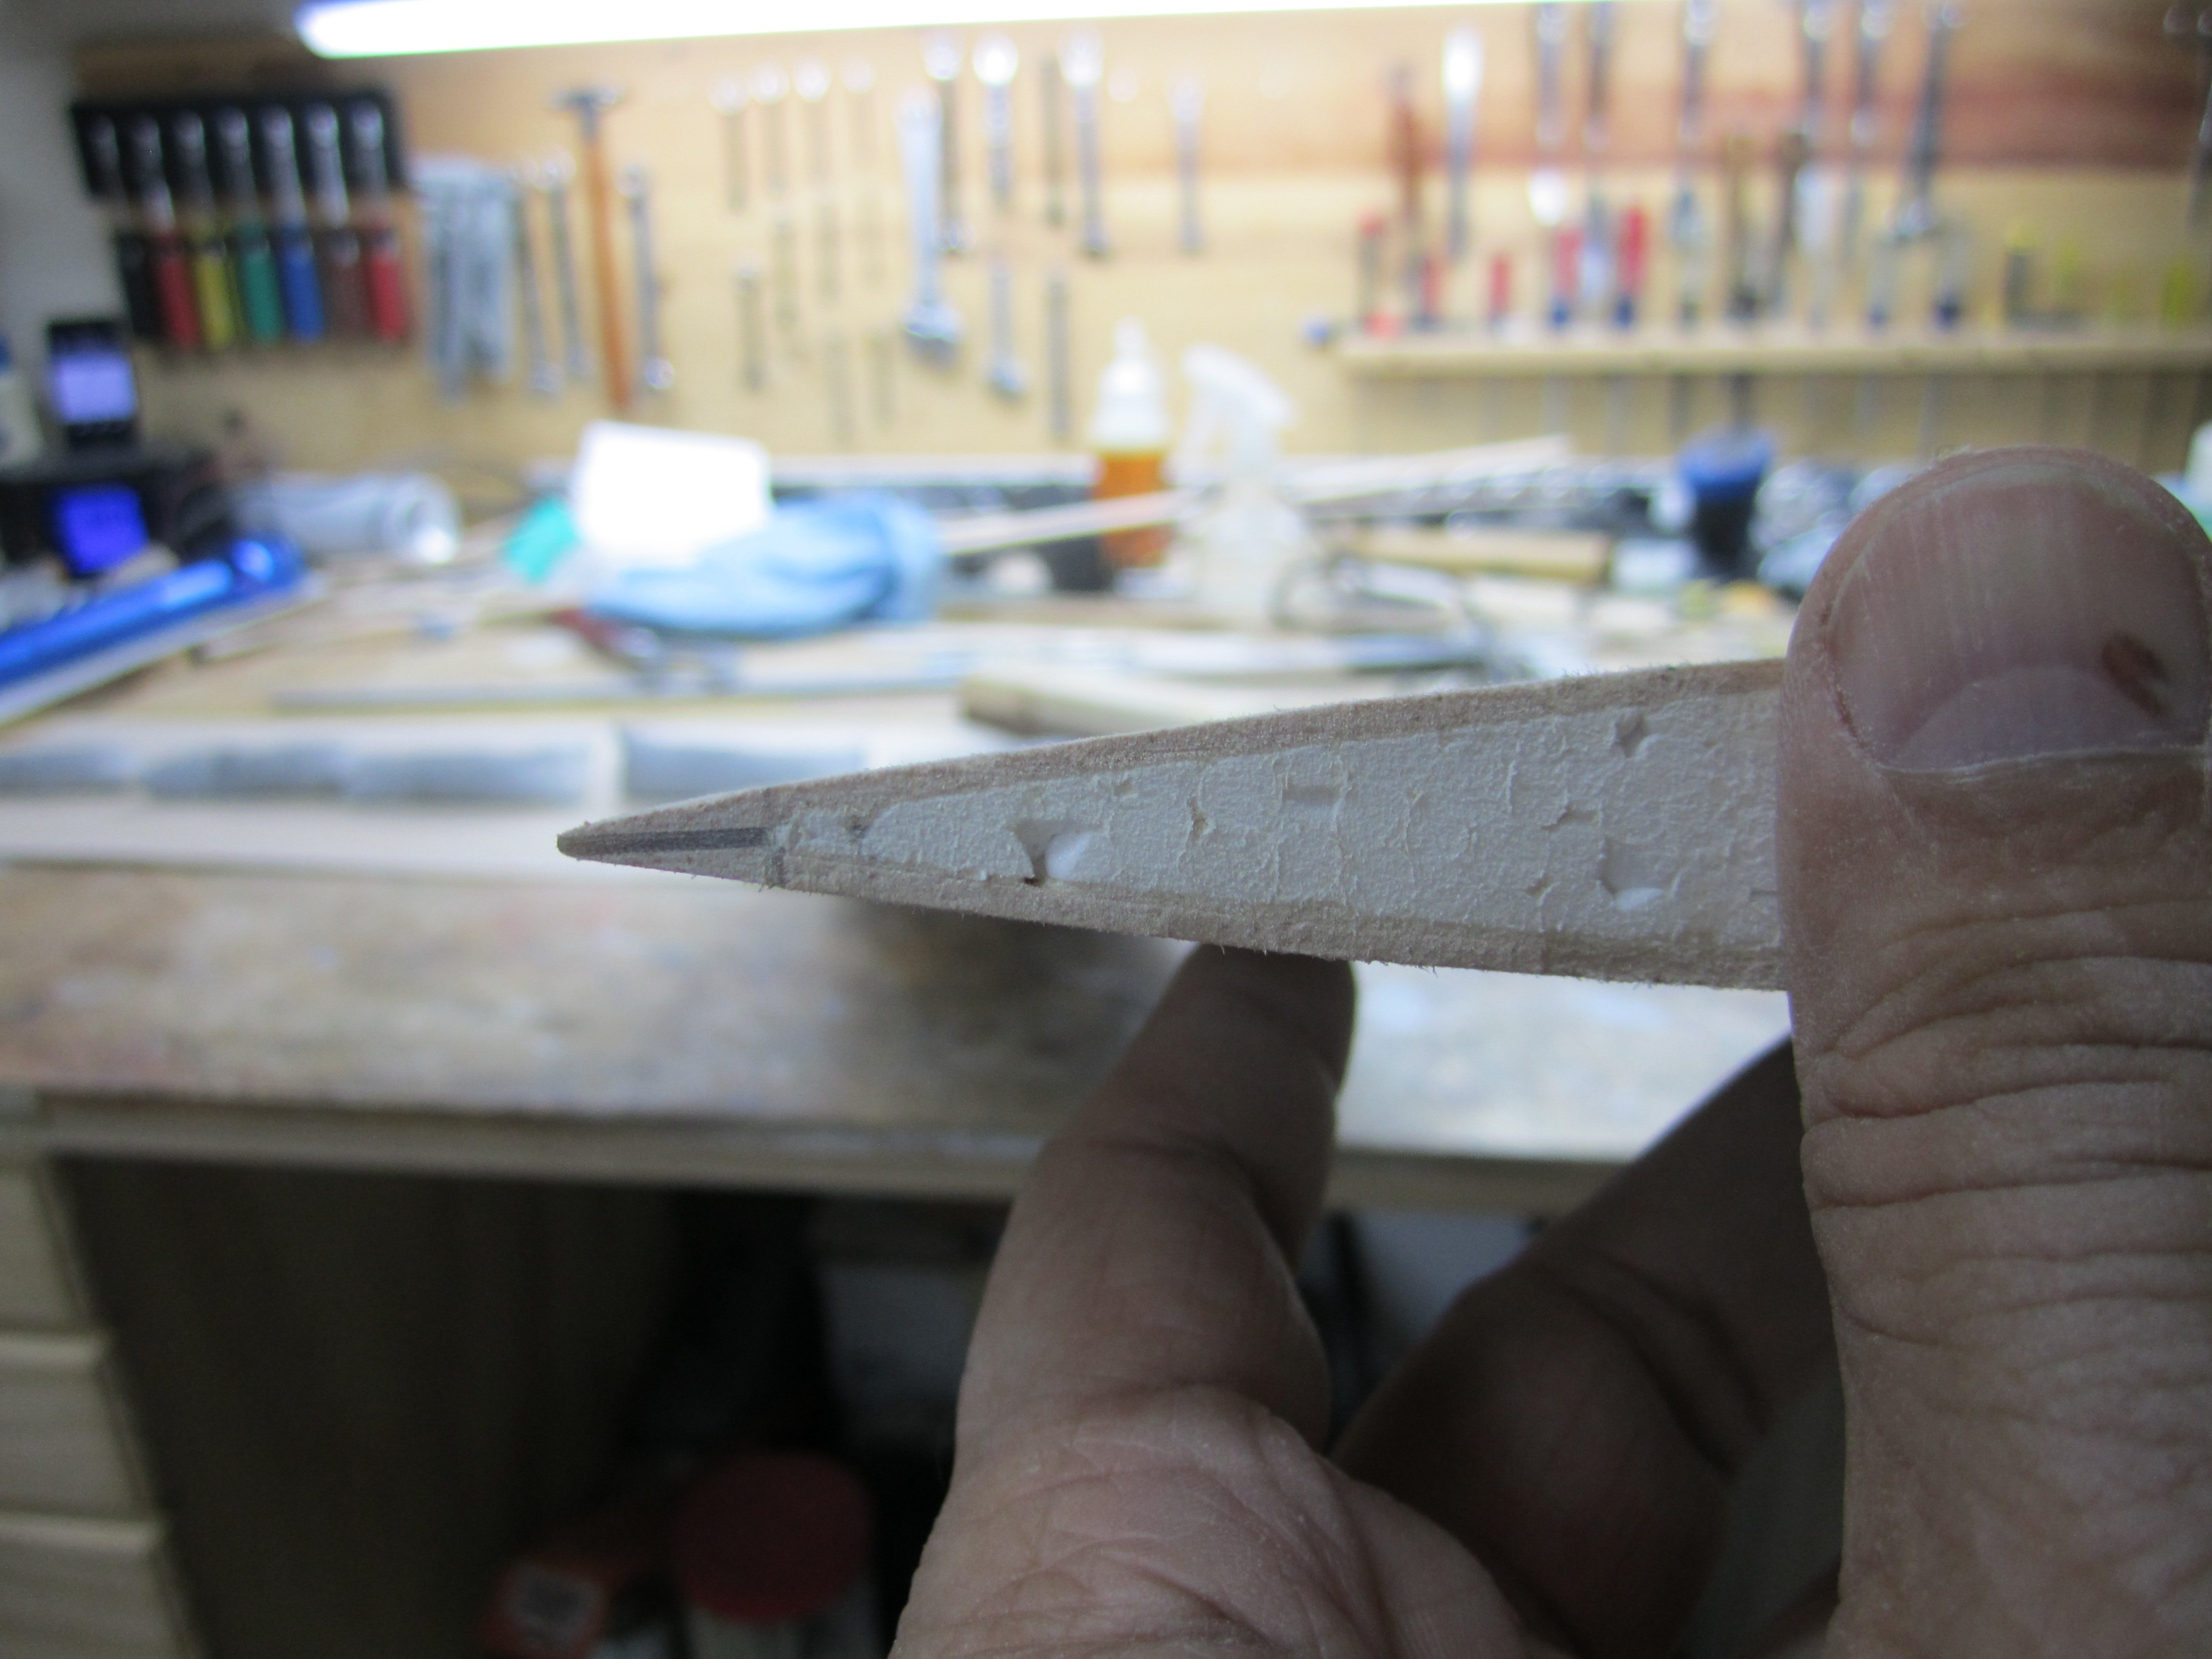
I like a very thin trailing edge on my control surfaces (1/32"), but you cannot do that with balsa because you'll ruin it just on transportation. So I use G10. I make a "g10 sandwich" with 1/32" g10 an ⅛" of balsa. I cut an strip of ⅜" of g10 to make the sandwich. I use carpenter glue for this.
Then I cut the trailing edge (around ⅜") -the elevators in this case- and glue the g10 sandwich. The next day I sand the sandwich until I get to the g10. With this you can get a very thin trailing edge and not a fatty one like ⅛" or Ľ".
Now you can hit the trailing edge with pliers and you will not damage it.... Just a preference.


I sheeted the stab with 1/16" balsa and gorilla glue activated with water (applied water in spray).
I like a very thin trailing edge on my control surfaces (1/32"), but you cannot do that with balsa because you'll ruin it just on transportation. So I use G10. I make a "g10 sandwich" with 1/32" g10 an ⅛" of balsa. I cut an strip of ⅜" of g10 to make the sandwich. I use carpenter glue for this.
Then I cut the trailing edge (around ⅜") -the elevators in this case- and glue the g10 sandwich. The next day I sand the sandwich until I get to the g10. With this you can get a very thin trailing edge and not a fatty one like ⅛" or Ľ".
Now you can hit the trailing edge with pliers and you will not damage it.... Just a preference.
04-17-2015 | 12:43 PM
#11
My Feedback: (11)
TB, I am using 1/16 x 4" balsa for the sheeting and gorilla glue on everything. I sanded very smooth on the bench and then I applied the gorilla glue on the rudder and the stab. I haven't sheeted the wings yet, but I am planning to do it this weekend, so please I will appreciate your opinion on how deeps do you think the dowels should go into the wing, because this is the perfect time to do it before I sheet the wings.
Thanks
Thanks
1/16 sheeting should be ok, I like to use 3/32 as I like to sand and don't want to burn threw and end up with 1/16" anyways. If you pre sand you should be good.
TB
04-17-2015 | 12:47 PM
#12
My Feedback: (11)
STAB
I sheeted the stab with 1/16" balsa and gorilla glue activated with water (applied water in spray).
I like a very thin trailing edge on my control surfaces (1/32"), but you cannot do that with balsa because you'll ruin it just on transportation. So I use G10. I make a "g10 sandwich" with 1/32" g10 an ⅛" of balsa. I cut an strip of ⅜" of g10 to make the sandwich. I use carpenter glue for this.
Then I cut the trailing edge (around ⅜") -the elevators in this case- and glue the g10 sandwich. The next day I sand the sandwich until I get to the g10. With this you can get a very thin trailing edge and not a fatty one like ⅛" or Ľ".
Now you can hit the trailing edge with pliers and you will not damage it.... Just a preference.

TB
03-18-2016 | 09:22 AM
#13
My Feedback: (11)
Resurrecting my chippy, I gave it to a friend and he started stripping it, but now he is giving it back to me so I can redo it and have a new chippy to fly. I will glass the wing and paint it white with similar starburst, and put a DLER 55 in it.
I will redo the flap hinges and the ailerons, but otherwise not going to change anything els...for now!
TB
I will redo the flap hinges and the ailerons, but otherwise not going to change anything els...for now!
TB


