


Top Flite 1/7 P-51 Build


 06-14-2020, 03:41 AM
#3630

Join Date: Nov 2017
Posts: 3
Likes: 0
Received 0 Likes
on
0 Posts
Guys,
I just bought a Top Flite P51D Mustang Gold Edition with Saito 20cc 4 stroke.
This kit was build by the previous owner. Not ARF.
The manual from the kit mentions a CG of 3-7/8" (99mm), manual P516P03
The manual of the ARF mentions a CG of 5-5/8" (143mm), manual TOPA0950 V1.1
Is there such a big difference in the 'to build version' and the ARF?
Which CG should it be?
Last edited by GVT; 06-14-2020 at 03:44 AM.
06-14-2020, 03:57 AM
#3631
The CG for the kit has the measurement from the LE break. The ARF is measured from the leading edge of the wing at the wing root. It is very clear in the manuals.so as yours is the kit version then measure from the LE break back 3 7/8" as shown in the manual. That will give a safe position for the maiden flight. After that you can decide whether to move the CG further aft or stay with the 3 7/8" CG.
Do you know what to look for in deciding whether your CG is in the optimal position for the way you fly?
Do you know what to look for in deciding whether your CG is in the optimal position for the way you fly?
06-14-2020, 07:02 AM
#3632
Join Date: Nov 2017
Posts: 3
Likes: 0
Received 0 Likes
on
0 Posts
Thanks for the correction about the proper CG.
I normally fly them inverted and check how much down elevator is needed to keep it horizontal.
I'd like to check the angle difference between stab and wing. What should it be?
I normally fly them inverted and check how much down elevator is needed to keep it horizontal.
I'd like to check the angle difference between stab and wing. What should it be?
06-14-2020, 07:20 AM
#3633
Hi GVT
The plan gives the wing at +1/2 deg to the fuselage datum with the stab at 0 deg. I used the top of the crutch onto which you build the fuselage as the datum. The die cutting is pretty accurate for the stab location. As you have a fully built aircraft, finding the datum will not be easy but if you set the wing at +1/2 deg the stab should then be at 0 deg. If it isn't, it's a bit of a palaver to get the wing to the new incidence as you either have to pack the wing at the front to increase incidence or sand away the wing seat to decrease incidence. My advice would be to fly it and see if it flies OK after you have trimmed it out. Then leave it alone as it's not worth the hassle of getting it to the correct setting. All that you will achieve is to alter the sit of the aircraft in the air by a very small amount and it may fly a different vertical down line but as it isn't meant to be a pattern ship it won't matter as much as jiggering up the scale look!
As regards checking CG position, in the pattern world we usually pull to 45 deg up and then roll inverted and relax on the sticks. If the nose pitches down quickly, move the CG aft a bit. If the nose falls slowly, that's about right. If the nose remains in the same position or pitches up slightly, move the CG forward. Good luck.
11-09-2021, 07:26 AM
#3634
Join Date: Oct 2009
Location: Saskatoon,
SK, CANADA
Posts: 15
Likes: 0
Received 0 Likes
on
0 Posts
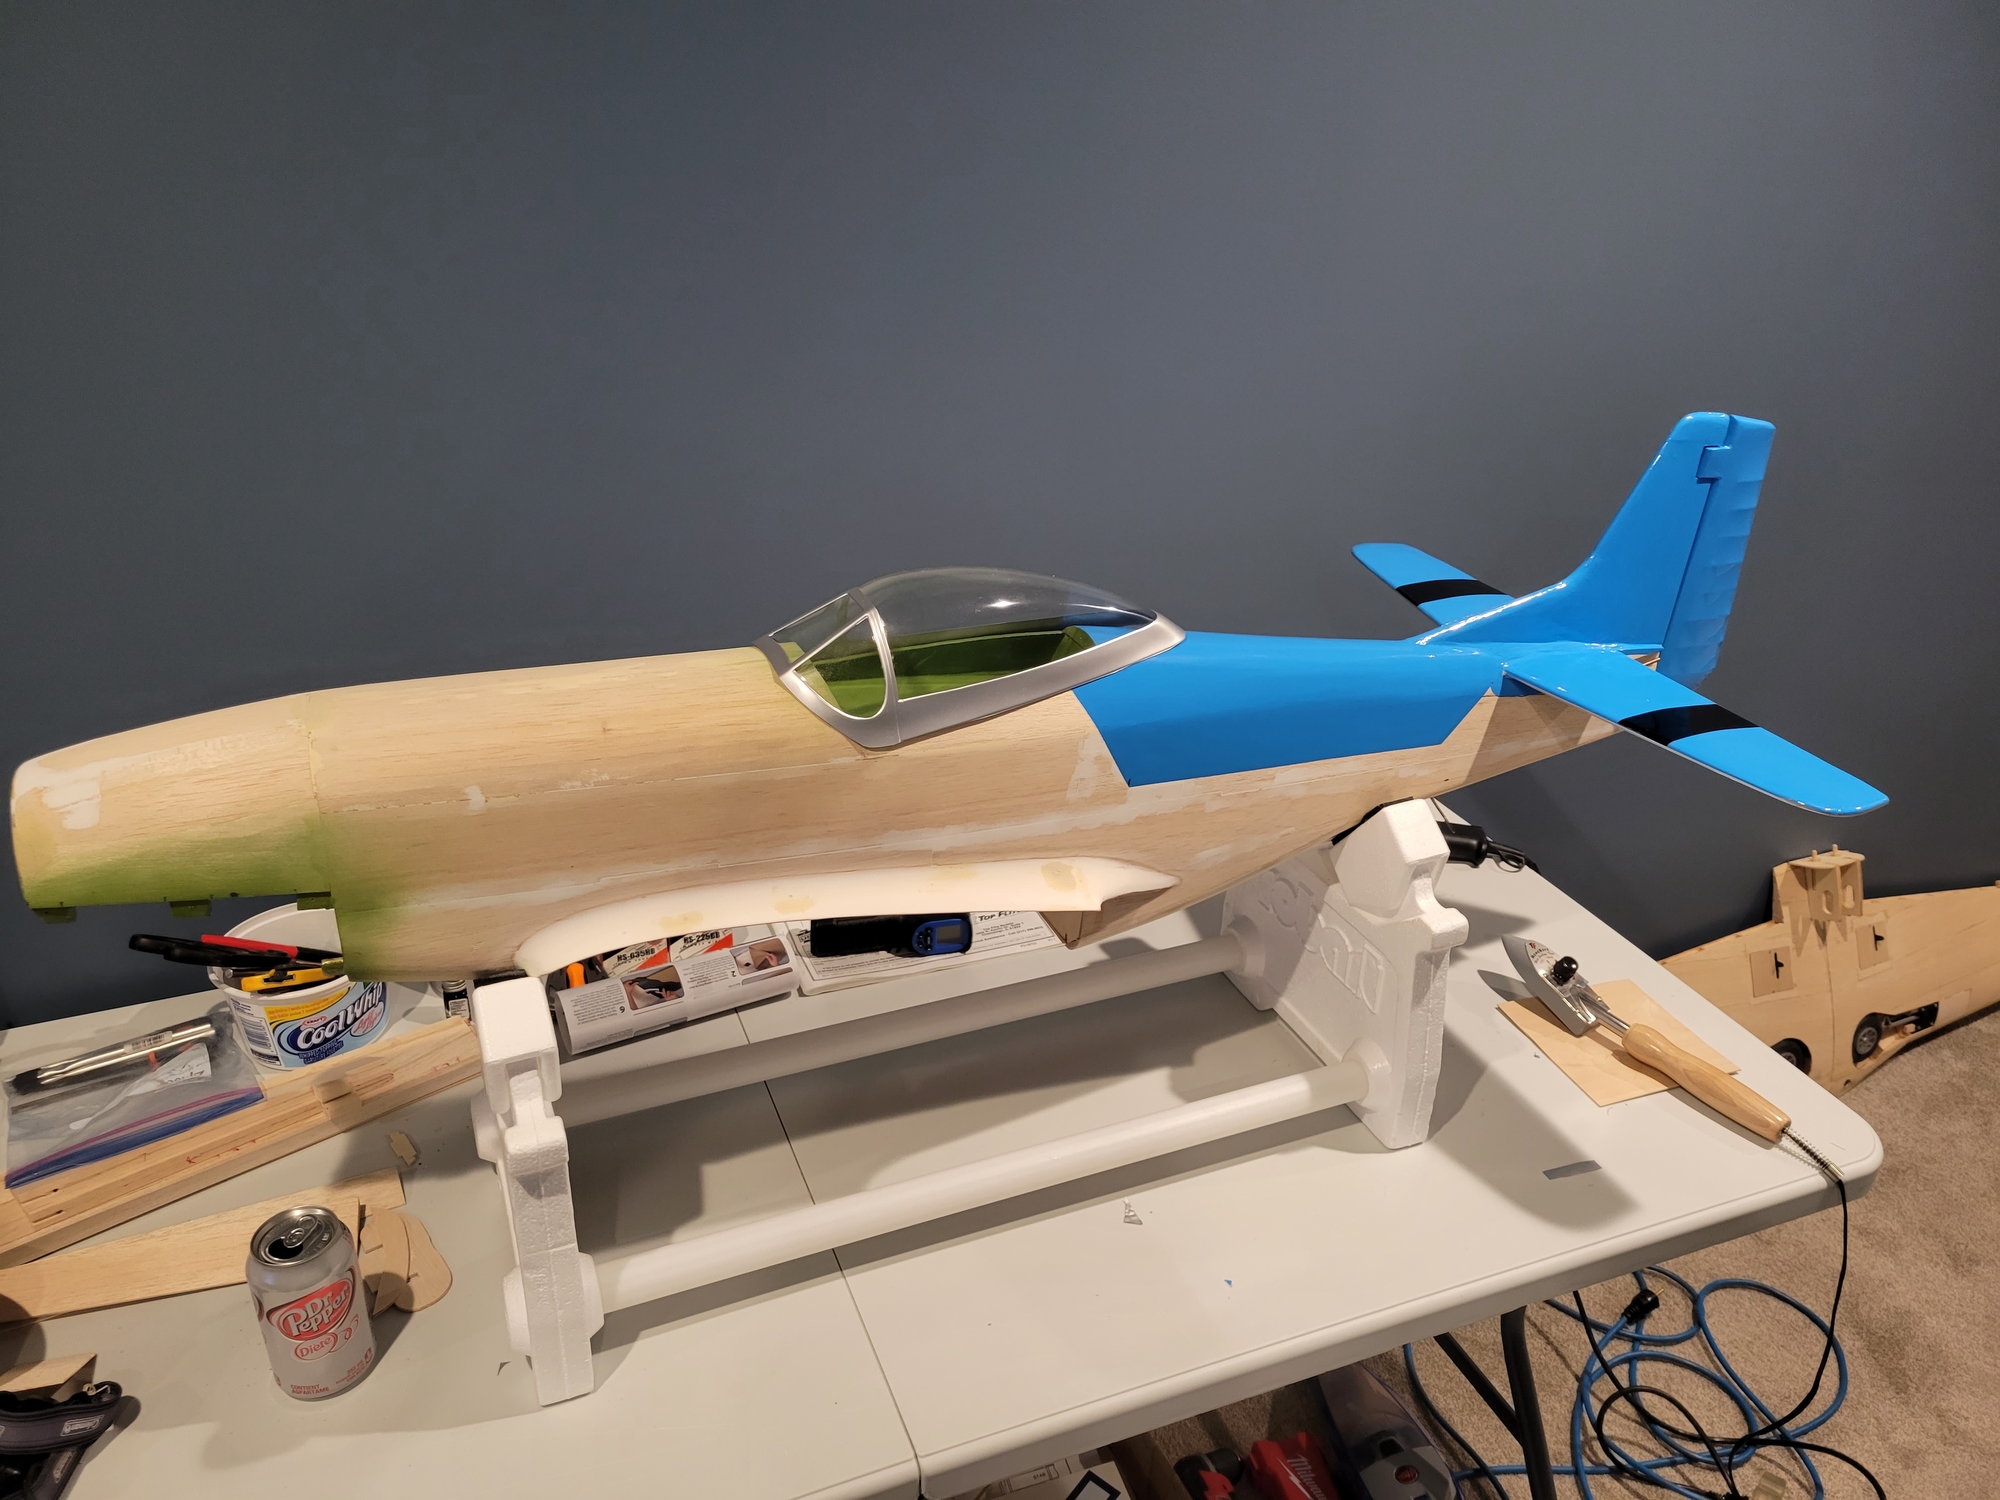
Hello, is there anyone still out there building these P-51's? I know there are less and less people building wooden kits now with the instant gratification of electric foam planes mostly taking over, but I still really enjoy building a plane from a box of wood. I am what you might call a long hauler P-51 builder  . I just looked waaaaay back in this forum to find my original posts when I started building this plane and it was December 2009. Believe it or not, I still have not finished building it but I am motivated to get it done this winter and fly it in the spring. I have made some progress on the build over the past few years, but life always seems to get in the way. Since 2009 I have completely renovated one house, finished two yards, two basements and built three sheds. Now that we are very happily settled in to our third and hopefully our "forever home" I finally have time to finish my P-51. So, my status update....My wing is complete, other than some final sanding and covering. I just finished sanding the fuselage and shaping the wing fillets on the weekend and last night started covering. I have said it many times over the past several years, but I'm really going to finish it this winter
. I just looked waaaaay back in this forum to find my original posts when I started building this plane and it was December 2009. Believe it or not, I still have not finished building it but I am motivated to get it done this winter and fly it in the spring. I have made some progress on the build over the past few years, but life always seems to get in the way. Since 2009 I have completely renovated one house, finished two yards, two basements and built three sheds. Now that we are very happily settled in to our third and hopefully our "forever home" I finally have time to finish my P-51. So, my status update....My wing is complete, other than some final sanding and covering. I just finished sanding the fuselage and shaping the wing fillets on the weekend and last night started covering. I have said it many times over the past several years, but I'm really going to finish it this winter
11-09-2021, 07:28 AM
#3635
Join Date: Oct 2009
Location: Saskatoon,
SK, CANADA
Posts: 15
Likes: 0
Received 0 Likes
on
0 Posts
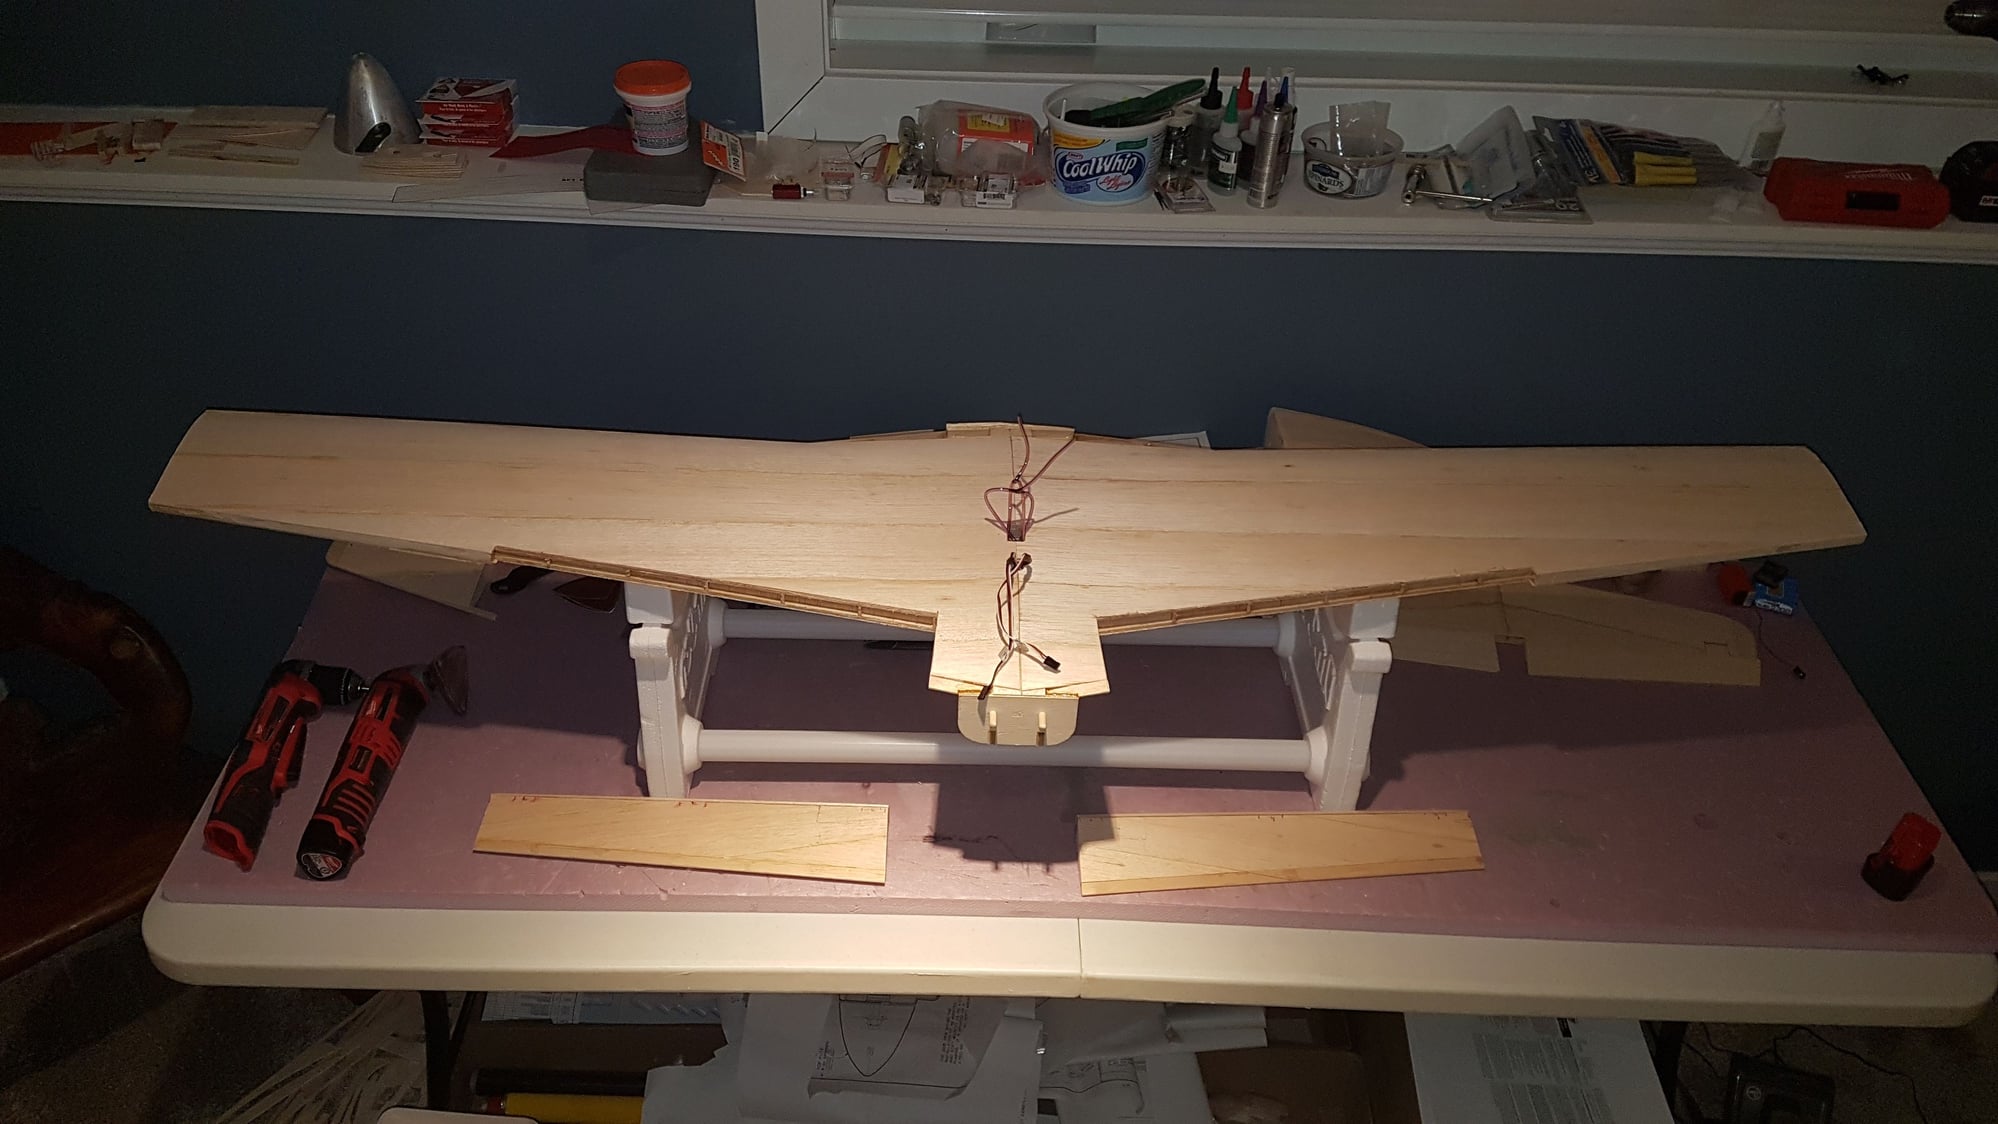
Here are a couple photos of my progress. The wing photo is a bit old. It is further along than what is shown. I actually have the wingtips on and shaped. All that is left is final sanding, shaping the LE of the flaps and then covering.
Last edited by bravosierra; 11-09-2021 at 07:31 AM.
11-09-2021, 07:42 AM
#3636

I have the kit but I'm no closer to starting it. I have a scratch built project and a TF 182 needing completion. My problem is a lack of time. Your Mustang looks close, what power plant re you using? I'm pretty much using Saitos on everything except on planes calling for a .25 or smaller.
11-09-2021, 07:55 AM
#3637
Join Date: Oct 2009
Location: Saskatoon,
SK, CANADA
Posts: 15
Likes: 0
Received 0 Likes
on
0 Posts
Glad I'm not the only one who struggles to find time to work on airplane builds. For my engine, I have a brand new Saito 1.20 in the box waiting to be broken in. I bought it, all the servos and old school Robart air retracts (electric ones weren't even a thing back then) back in 2009. I'm hoping to run the Saito on the bench in the next month or so.
11-09-2021, 09:25 AM
#3639
Join Date: Oct 2009
Location: Saskatoon,
SK, CANADA
Posts: 15
Likes: 0
Received 0 Likes
on
0 Posts
I think I would have preferred having electric retracts, but I have the Robarts and they're installed so I'll go with them. I have tested them a few times and they function well.
11-09-2021, 01:55 PM
#3640
Last edited by SIX GUNS; 11-09-2021 at 03:13 PM.
11-09-2021, 04:04 PM
#3643
Hi bravo sierra
I'm still going on my TF P51 build. I also read through this thread before starting my build. I've documented my build on another forum (https://www.modelflying.co.uk/forums...span/#comments). I got as far as doing the wing fillets and then other things got in the way and the build stopped. As the flying season is winding down, I intend to get the build going again with a view to getting it finished in Q1 of 2022.
I will be finishing mine as the aircraft of the Squadron Commander of 303 Squadron, RAF. This was actually a Polish Air Force Squadron that became operational during the Battle of Britain but were only allowed into the Battle in Aug 1940. As most couldn't speak English when they arrived and none had experience of operating in the RAF's Air Defence Environment (radar and sector controllers) this was felt to be essential for them to crack before going operational. Nevertheless, they became the top scoring squadron in the B of B and had the lowest loss rate. This was due to the pilots being experienced in combat in Poland and then France before coming to the UK to fly with the RAF. Hence, being experienced combat pilots they were better placed than many young pilots in the RAF, some of whom had around 15 hours on Spits/Hurricanes when they went into battle. Today this "blooding" of pilots is taken seriously by events such as the Red Flag exercises, the aim being to teach combat tactics that you would learn, or not, in the first 10 hours of combat flying.
I am using the Robart electric retracts and will be building operating main gear doors - that includes the inboard ones that open and then shut after each operation of the gear. I'm using a Hobby King door sequencer to get this function. I've also included a retractable tailwheel and doors. The big advantage of modelling the Spitfire is that it didn't have inner doors nor a retracting tailwheel!
Last edited by barnowljenx; 11-09-2021 at 04:08 PM.
11-10-2021, 05:43 AM
#3644
Join Date: Oct 2009
Location: Saskatoon,
SK, CANADA
Posts: 15
Likes: 0
Received 0 Likes
on
0 Posts
Hi barnowljenx,
I checked out your build on the Modelflying forum. It is looking very nice. You have put a lot more thought and planning into your build than I have put into mine. I look forward to following the rest of your P-51 build. My P-51 will have outer doors but I decided to forgo the inner doors and retractable tail wheel. I'm not shooting for a highly detailed scale bird. My airplane markings, identification numbers and pilot are going to be unique and personalized.
I checked out your build on the Modelflying forum. It is looking very nice. You have put a lot more thought and planning into your build than I have put into mine
. I look forward to following the rest of your P-51 build. My P-51 will have outer doors but I decided to forgo the inner doors and retractable tail wheel. I'm not shooting for a highly detailed scale bird. My airplane markings, identification numbers and pilot are going to be unique and personalized.
11-10-2021, 03:49 PM
#3646
Hi barnowljenx,
I checked out your build on the Modelflying forum. It is looking very nice. You have put a lot more thought and planning into your build than I have put into mine. I look forward to following the rest of your P-51 build. My P-51 will have outer doors but I decided to forgo the inner doors and retractable tail wheel. I'm not shooting for a highly detailed scale bird. My airplane markings, identification numbers and pilot are going to be unique and personalized.
I checked out your build on the Modelflying forum. It is looking very nice. You have put a lot more thought and planning into your build than I have put into mine
. I look forward to following the rest of your P-51 build. My P-51 will have outer doors but I decided to forgo the inner doors and retractable tail wheel. I'm not shooting for a highly detailed scale bird. My airplane markings, identification numbers and pilot are going to be unique and personalized.