


SIG Ryan STA special kit by Maxy Hester


 10-22-2014, 11:01 AM
#77
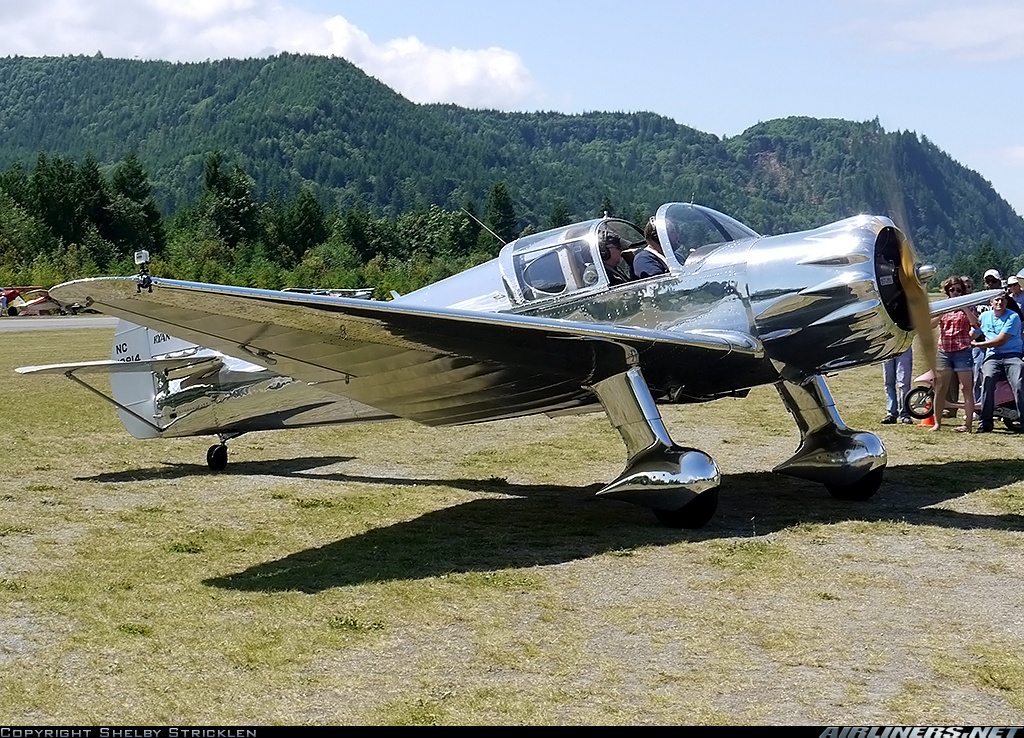
If you really like Ryan aircraft here is my next project. The first picture is the 1938 production aircraft, the second picture is the 1937 prototype (later converted and sold), and the last picture shows my favorite detail I will be replicating, the airbrake.


10-22-2014, 11:16 AM
#78
I am planning on covering my airplanes with this stuff. Its available by the foot in two widths and it is a thinner gauge material so I'm hoping it will be easier to install.
http://www.aero-accessories.com/Builders.html
http://www.aero-accessories.com/Builders.html
10-25-2014, 05:52 AM
#79

Thread Starter

Join Date: Nov 2006
Location: Santa Teresa, N.M.
Posts: 168
Likes: 0
Received 0 Likes
on
0 Posts
I wish this was all Flitemetal on here. I tried with some sample material and was not skilled enough to work it through the complex curves on the small plastic pieces. So what I used is the adhesive backed monokote. The hull is also covered in monokote as well. I have been working with monokote for over 20 years and went with the chrome for easy results. Besides, the very first time I bought chrome many years ago I swore "..to cover an airplane in this ****." And so here I am covering an airplane in chrome. I am planning to purchase some flitemetal to cover the cowl, wheel pants, and tail cone if I can. I want to learn how so I can apply it to my next project.
10-25-2014, 06:11 AM
#80
Thread Starter
Join Date: Nov 2006
Location: Santa Teresa, N.M.
Posts: 168
Likes: 0
Received 0 Likes
on
0 Posts
Something I went through a lot of thought over and still wonder if I'm doing the right thing. After trying many methods of rivet options I chose to go pin heads. There are several reasons for it. One was that It fit the style I wanted, Obvious as hell!
Anyway, what I've done on the hull is to pierce the monokote with a stipple tool made from scrap balsa and pin tips. I made sure not to go thru the wood but to indent it enough to apple my 20min finishing epoxy and have the pin head metal left from snipping the shaft off, set into the divot. Then I applied enough pressure to "dent the wood" and set the rivet. I then let the epoxy setup enough so that when it's wiped with an alcohol soaked rag in a front to back direction I created some age and weathering effects around the pin heads. This is some thing I discovered accidentally a wile back with monokote and epoxy.
I really tried to be very careful and not tear the wood fiber and create a whole bunch of zippers on my plane. There is a picture to show that I never pierced the wood. The balsa was prepared for covering by thinning my wood filler and gently skinning the whole fuse before final sanding. Because monkote loves to adhere to this setup! The wood also has a crisp smooth feel to it, just be sure not to work with to much heat, the wood filler can melt! This is probably why the bond to the monokote is so good.
Last edited by jwharkinz; 10-25-2014 at 06:15 AM.
10-25-2014, 06:38 AM
#81
Thread Starter
Join Date: Nov 2006
Location: Santa Teresa, N.M.
Posts: 168
Likes: 0
Received 0 Likes
on
0 Posts
Here are some photos of my progress.
In a couple of pictures you can see that I made a spring mechanism to absorb shock from the tail wheel. The rudder is setup with pull-pull and then the elevator uses the supplied connecting rod/horn. Its all good and tucked in under the seat as well. I am putting a lot of pieces into a small area and of course there is conflict. The port side rudder cable is covered in plastic control rod to prevent it from catching on the rudder servo control horn. Other than that minor issue it all fit!
Work on the cockpit detail is being finished and then I'll need to begin work on the wing to get it covered and painted.
10-25-2014, 08:13 AM
#82
Thread Starter
Join Date: Nov 2006
Location: Santa Teresa, N.M.
Posts: 168
Likes: 0
Received 0 Likes
on
0 Posts
 10-27-2014, 07:06 AM
#86
Thread Starter
Join Date: Nov 2006
Location: Santa Teresa, N.M.
Posts: 168
Likes: 0
Received 0 Likes
on
0 Posts
10-27-2014, 07:25 AM
#87
Thread Starter
Join Date: Nov 2006
Location: Santa Teresa, N.M.
Posts: 168
Likes: 0
Received 0 Likes
on
0 Posts
Thanks, I think I'll give em a try. This is thinner than Flitemetal?
Nice place to shop....
Nice place to shop....
I am planning on covering my airplanes with this stuff. Its available by the foot in two widths and it is a thinner gauge material so I'm hoping it will be easier to install.
http://www.aero-accessories.com/Builders.html
http://www.aero-accessories.com/Builders.html
10-27-2014, 11:26 AM
#88
Yes it is thinner than Flite Metal and the fact I could buy it by the foot and in more than one width got me interested. I was thinking a thinner product would make it easier to work around compound curves and complex shapes.
On the picture I was more interested in showing the tail art then the hinge gap. That said, if one of our airplanes had that kind of gap we would probably have a stroke! It's amazing it didn't affect the STA to the point they needed to fix it.
On the picture I was more interested in showing the tail art then the hinge gap. That said, if one of our airplanes had that kind of gap we would probably have a stroke! It's amazing it didn't affect the STA to the point they needed to fix it.
11-02-2014, 06:05 AM
#89
Thread Starter
Join Date: Nov 2006
Location: Santa Teresa, N.M.
Posts: 168
Likes: 0
Received 0 Likes
on
0 Posts
Progress is continuing and In these set of pictures you'll see I've switched gears and started to work with the wing, finally!
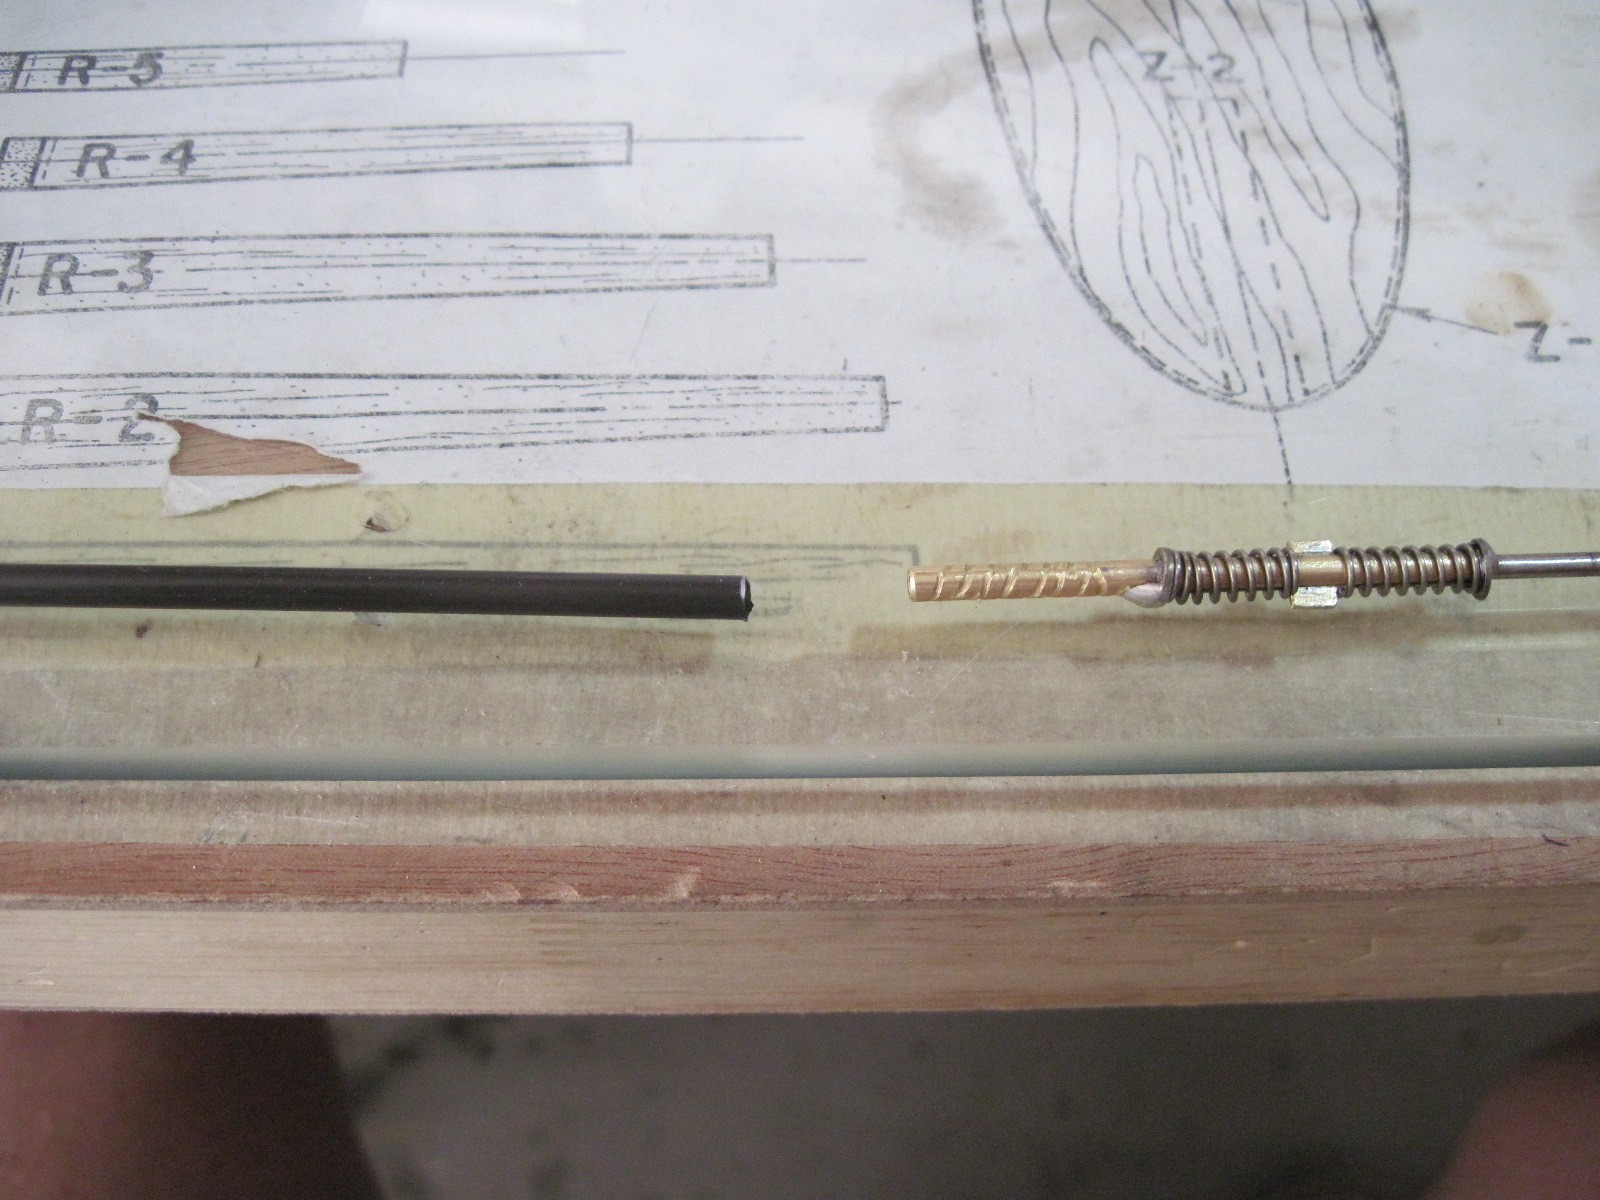
I am hoping to add some type of braking system to my project, the prototype setup is pictured below. It works well enough to add significant resistance without locking up the wheel. I hope to avoid nosing over if i apply too much brake. I thought about making a rotating assembly with a strap for the brake mechanism, but went for the simpler setup. I want to mix it with my elevator and use a mix toggle so I can activate the servo only when I need. We'll see if this works out, I may just buy some and install them, who knows?


I am hoping to add some type of braking system to my project, the prototype setup is pictured below. It works well enough to add significant resistance without locking up the wheel. I hope to avoid nosing over if i apply too much brake. I thought about making a rotating assembly with a strap for the brake mechanism, but went for the simpler setup. I want to mix it with my elevator and use a mix toggle so I can activate the servo only when I need. We'll see if this works out, I may just buy some and install them, who knows?
Last edited by jwharkinz; 11-02-2014 at 07:25 AM.
11-05-2014, 05:26 AM
#91
Thread Starter
Join Date: Nov 2006
Location: Santa Teresa, N.M.
Posts: 168
Likes: 0
Received 0 Likes
on
0 Posts
Kinda nostalgic aint it?
I am using a single servo on the flaps and dual for the ailerons. Im hoping to have brakes installed and needed to solve that issue as well. So far there are to be 8 servos in this plane as configured. Looks like I may need to cut back on some of the things Im planning.
I am using a single servo on the flaps and dual for the ailerons. Im hoping to have brakes installed and needed to solve that issue as well. So far there are to be 8 servos in this plane as configured. Looks like I may need to cut back on some of the things Im planning.
11-05-2014, 09:43 AM
#92
Kinda nostalgic aint it?
I am using a single servo on the flaps and dual for the ailerons. Im hoping to have brakes installed and needed to solve that issue as well. So far there are to be 8 servos in this plane as configured. Looks like I may need to cut back on some of the things Im planning.
I am using a single servo on the flaps and dual for the ailerons. Im hoping to have brakes installed and needed to solve that issue as well. So far there are to be 8 servos in this plane as configured. Looks like I may need to cut back on some of the things Im planning.
11-22-2014, 11:53 AM
#93
Thread Starter
Join Date: Nov 2006
Location: Santa Teresa, N.M.
Posts: 168
Likes: 0
Received 0 Likes
on
0 Posts
So I've been doing some catching up on other things and working toward completion with this Ryan. I might forgo the brake idea for now. My 7ch. radio is not gonna do all the things I want. Maybe Santa will have enough left over for a little sumthin' for himself after xmas. Anyway, my old 7ch radio will have Thr, Ail, Rud, Elv, Flaps, Glow Ignition, Exhaust Baffle, to deal with. Thats 7 if my math is correct, and so far it includes 8 servos. The exhaust is standby for smoke later on. My homemade header failed beautifully! As I throttled up and held it there the first thing to go was the solder, I suck at making this stuff for now. Waiting now for an aftermarket part to arrive, then I can start testing the exhaust again. Hopefully the rest of my masterpiece is downrange enough to get cooler temps that wont melt the JBWeld holding it together, the rating is around 500deg. I didnt have alot of faith in the header attempt, but it was worth a try, now I now.
The wing is covered and ready for detail, Some of the landing gear struts may need to be modified to get the plastic covers on with the least resistance. I hope to have this setup where I can access the undercarriage.
Some pics...


The wing is covered and ready for detail, Some of the landing gear struts may need to be modified to get the plastic covers on with the least resistance. I hope to have this setup where I can access the undercarriage.
Some pics...
01-17-2015, 07:18 AM
#95
Thread Starter
Join Date: Nov 2006
Location: Santa Teresa, N.M.
Posts: 168
Likes: 0
Received 0 Likes
on
0 Posts
I made it thru the family holiday season, hooray, now back to completing some new stuff for spring flying season...
Now I am completing my re-build on a Sig Somethin Extra which I love to fly and learn new maneuvers with. I finally bounced it off the ground showing-off a low flyby with snap-rolls and an attempted but failed inverted roll-out 5ft off the deck. Once this is done and my mule is back I will return to the Ryan. I am within completion range of my project build.
I have to decide on a method for finishing some of the chrome work on the cowl and wheel pants. Having it look like the chrome from those old plastic car models would be ideal, anyone have suggestions for some low cost methods?, there's lots of things out there on the inter-web.
01-31-2015, 11:24 PM
#96

I think there are places that do chrome vacuum plating of plastic parts. Plastic car modelers would be the ones to ask. Beautiful model, I've not seen the thread in years so the progress is amazing, as well as your craftsmanship.
Chris...
Chris...
02-03-2015, 06:30 PM
#97
Thread Starter
Join Date: Nov 2006
Location: Santa Teresa, N.M.
Posts: 168
Likes: 0
Received 0 Likes
on
0 Posts
Thanks stuntflyr, an idea well worth the look. All the major components needing finish are the cowl and wheel pants, I may add other items to that list. While that's apparently on hold, I'm adding another plane to the world and as soon as the thread I'm part of starts I'll post a shortcut here.
The plan is to have several planes ready to fly as the weather warms up and flying season starts here in the desert southwest.
John
The plan is to have several planes ready to fly as the weather warms up and flying season starts here in the desert southwest.
John
02-04-2015, 08:39 AM
#98
Thread Starter
Join Date: Nov 2006
Location: Santa Teresa, N.M.
Posts: 168
Likes: 0
Received 0 Likes
on
0 Posts
This is whats going on in the spare time we have in the build studio.
Adding to the fleet, the more the merrier!
The Ryan will be flying this season as well.
Enjoy...
http://www.rcuniverse.com/forum/scratch-building-aircraft-design-3d-cad-174/11612899-scratch-build-super-sportster-120-a.html
John
Adding to the fleet, the more the merrier!
The Ryan will be flying this season as well.
Enjoy...
http://www.rcuniverse.com/forum/scratch-building-aircraft-design-3d-cad-174/11612899-scratch-build-super-sportster-120-a.html
John
02-08-2015, 08:17 AM
#100
Superb!