Meister Scale P 47 - step by step
 03-04-2012 | 09:17 AM
#351
Thread Starter

Thank you GT and John...
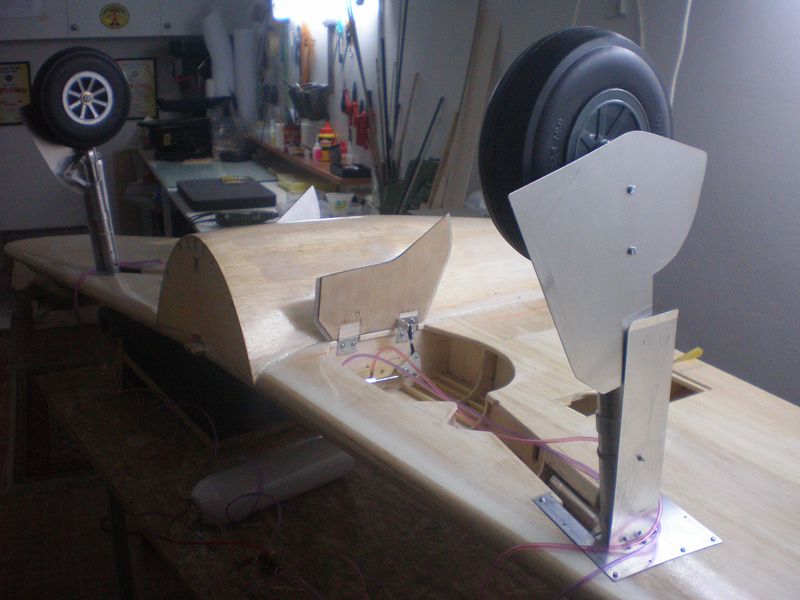
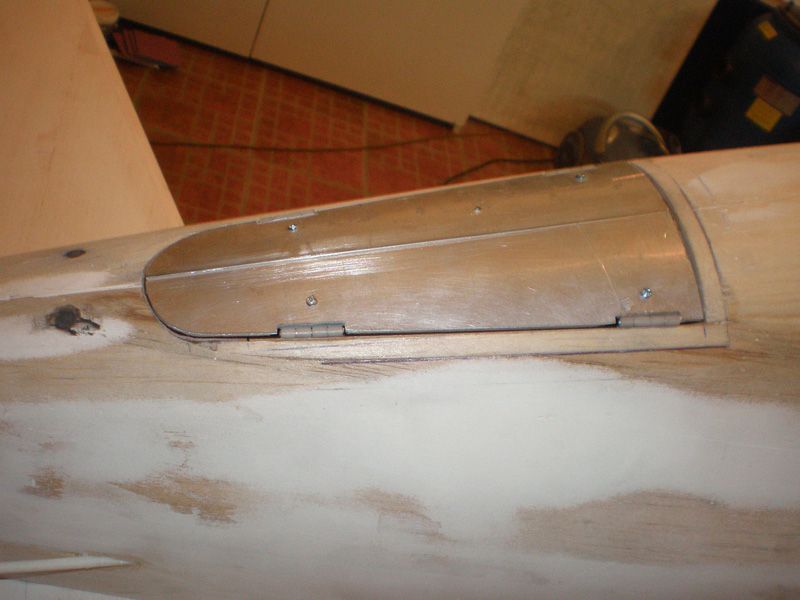
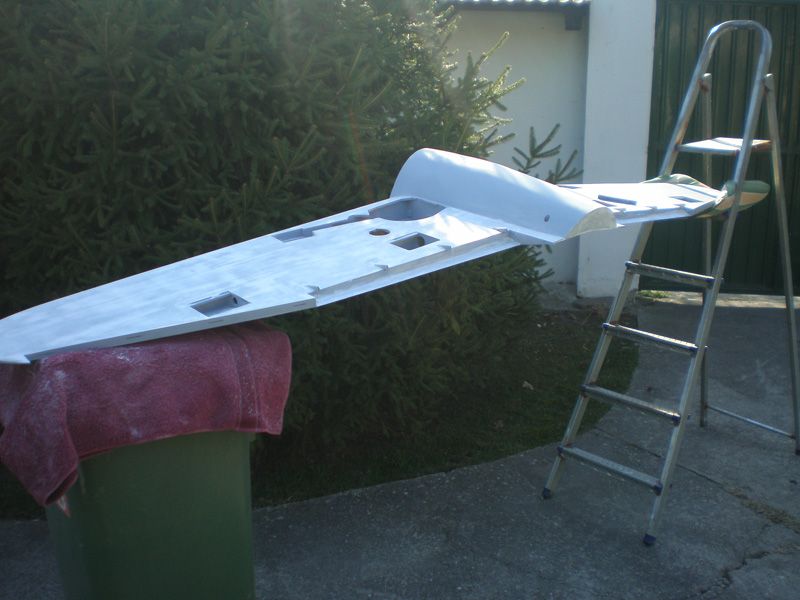
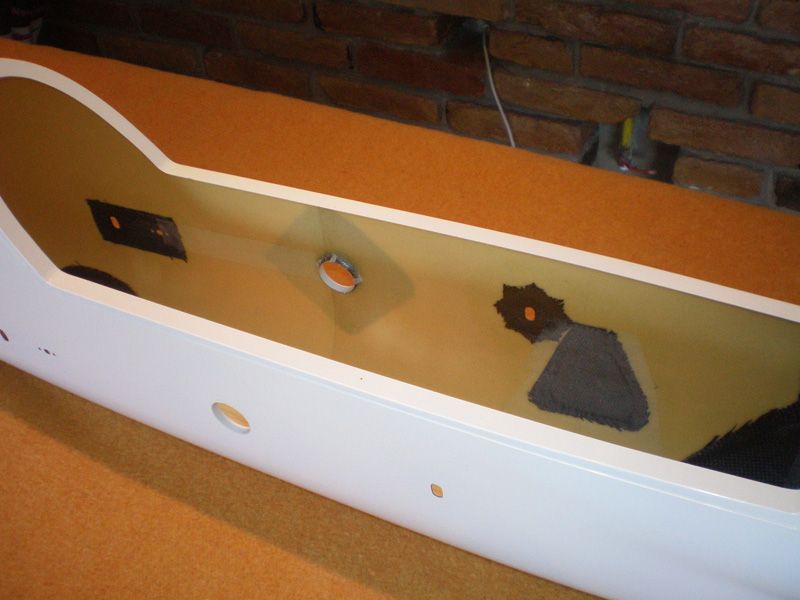
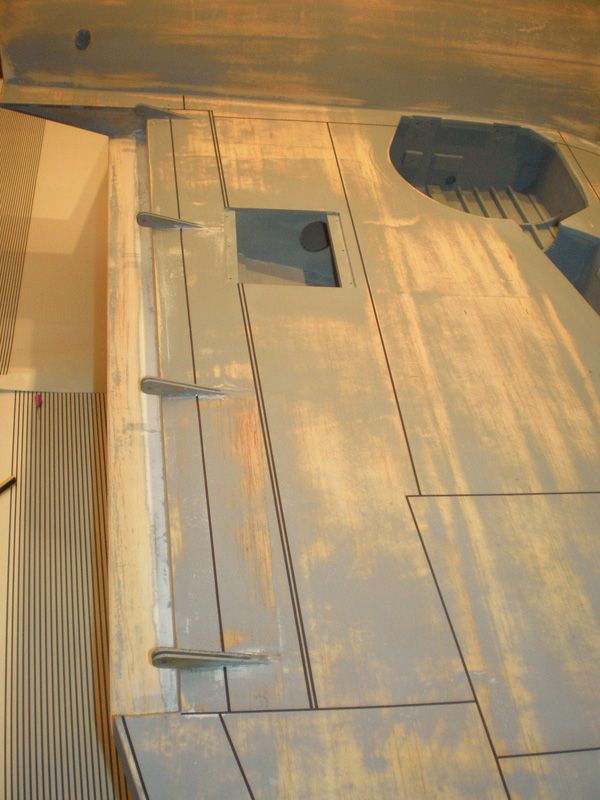
Today I finally finished work on gear doors...

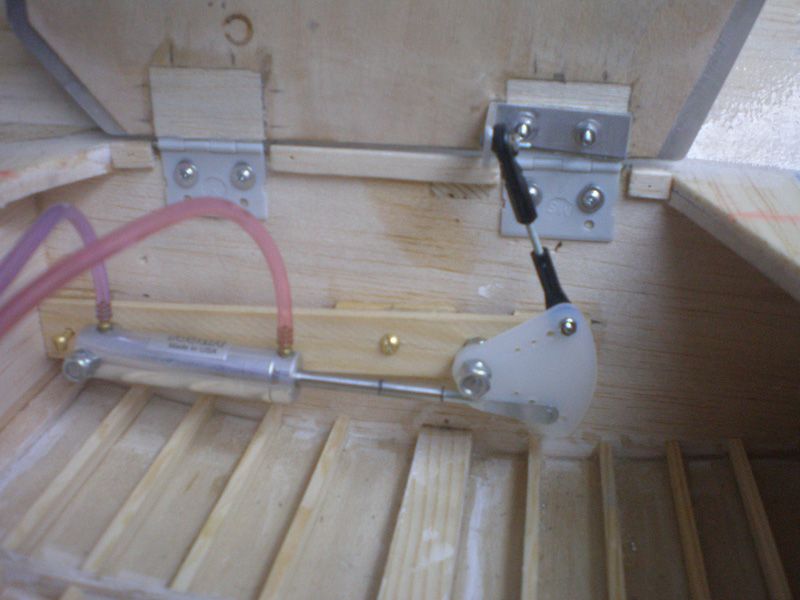
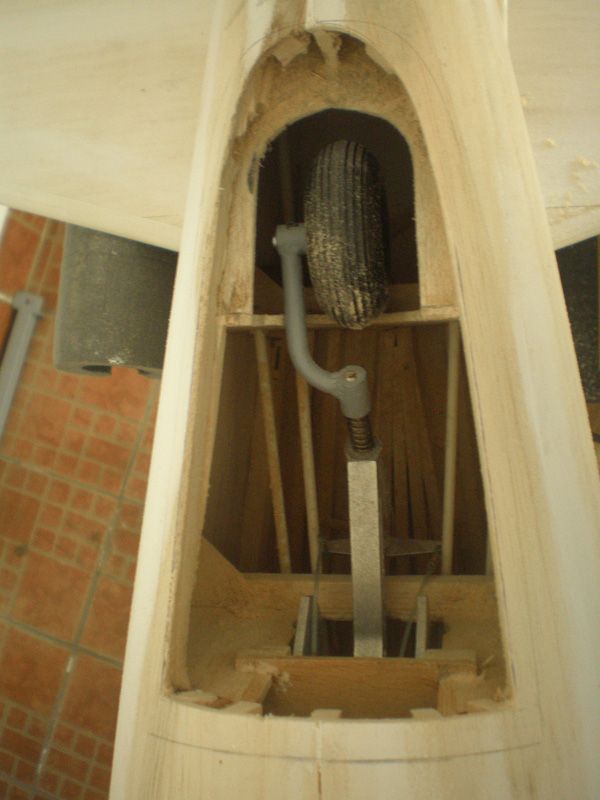
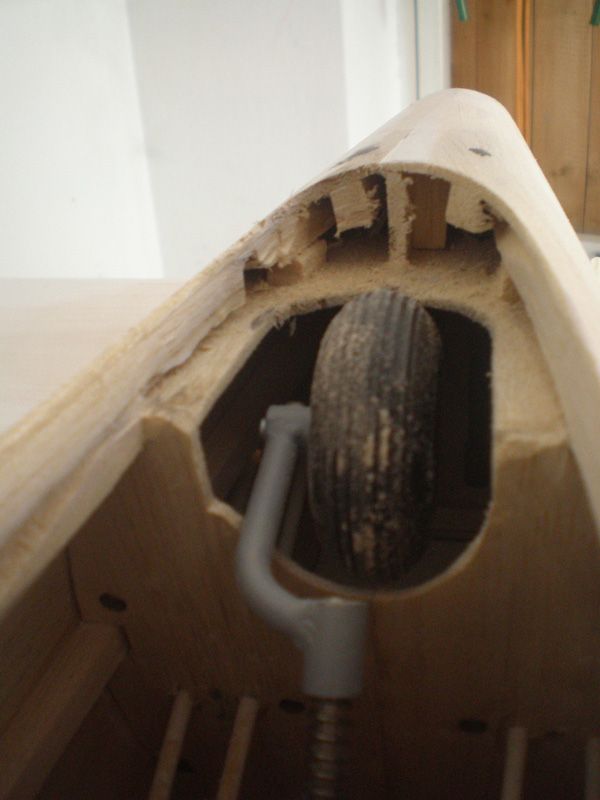
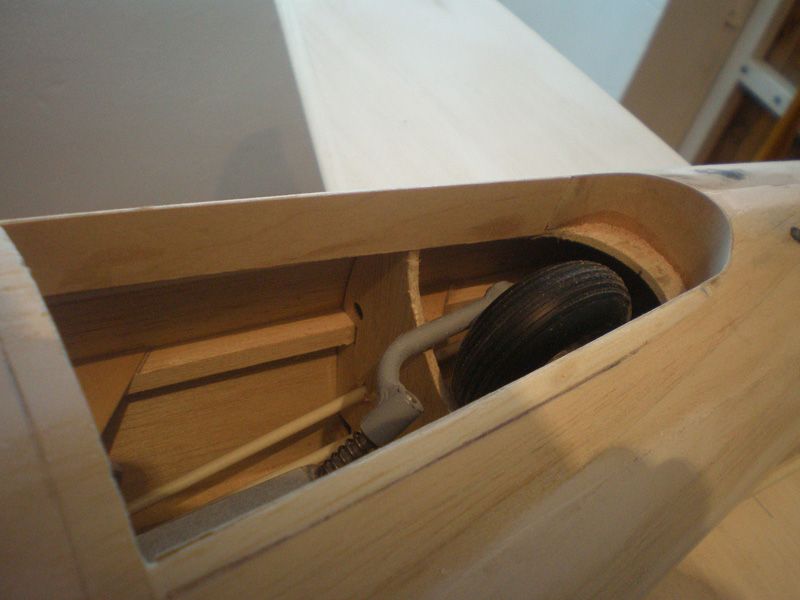
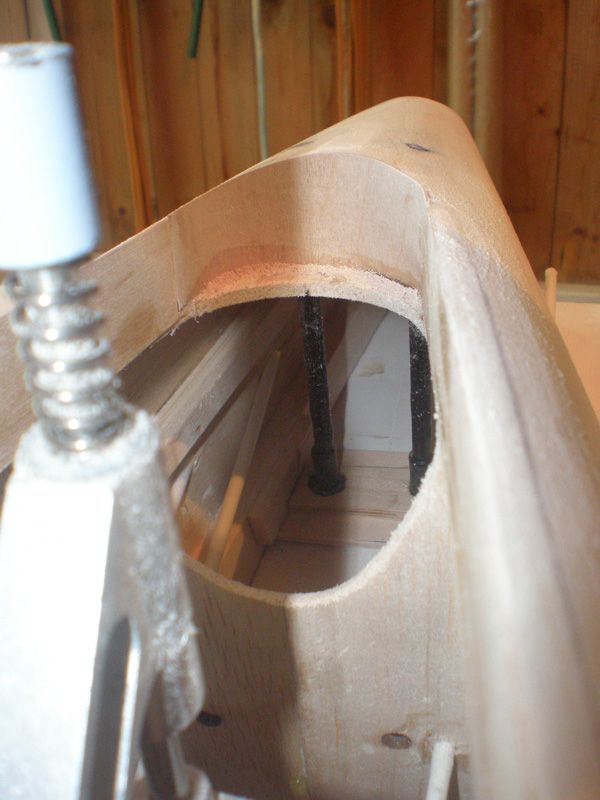
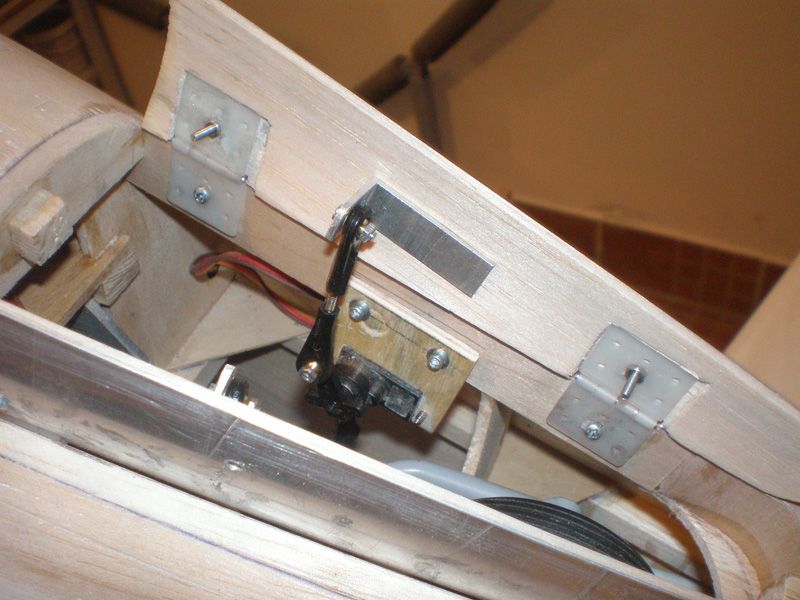
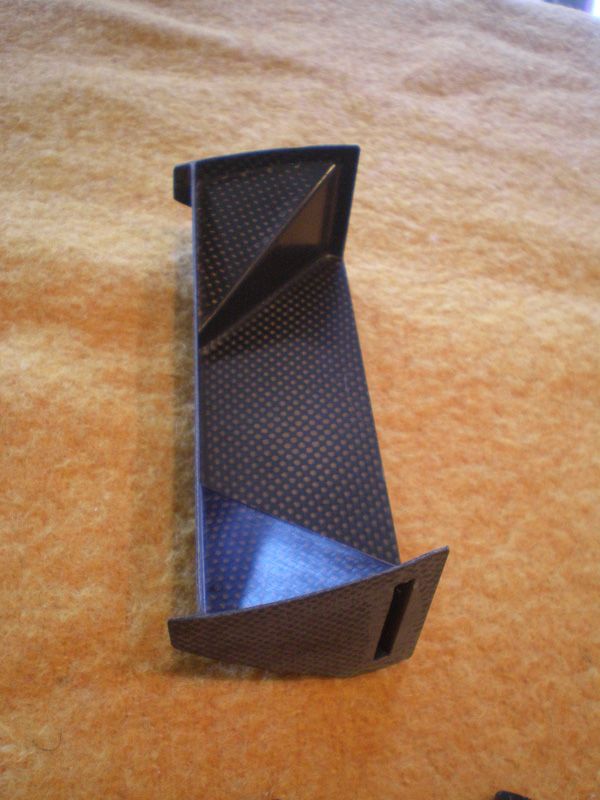
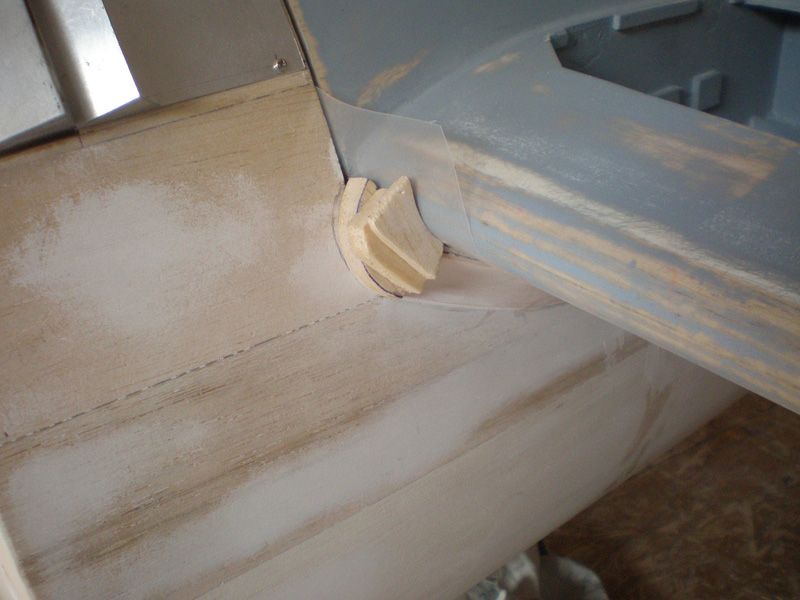
Last job was to made system for opening inner gear door. I was looking how other modelers doing that and finally copy Dino's system. Only different is I made all on one plate which is removable.

On back side I made three little plates and with double self adhesive tape fix it to main plate. Than with few drop of ZAP glue I glued it on wing.
After ZAP was dry, I separated main plate from wing...
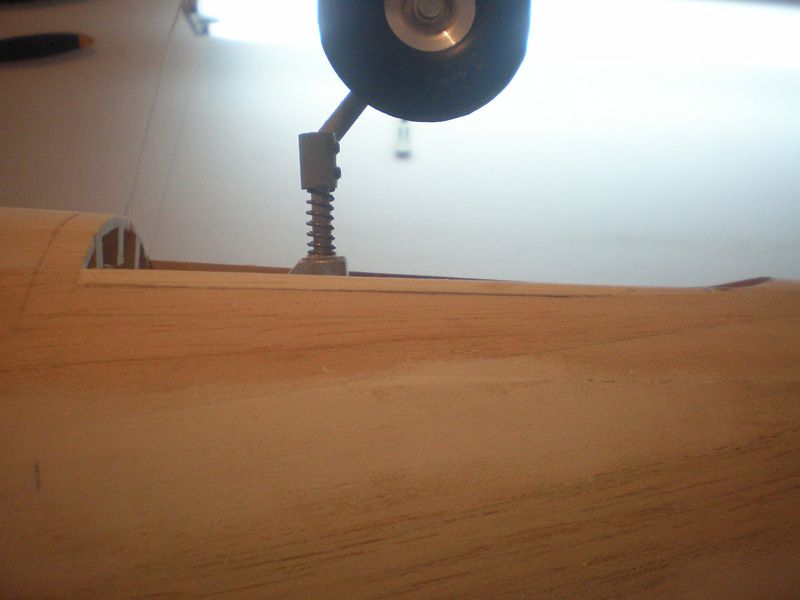
When start working on door geometry I saw that lever is no good, so I change it. With new lever I can made right movements...
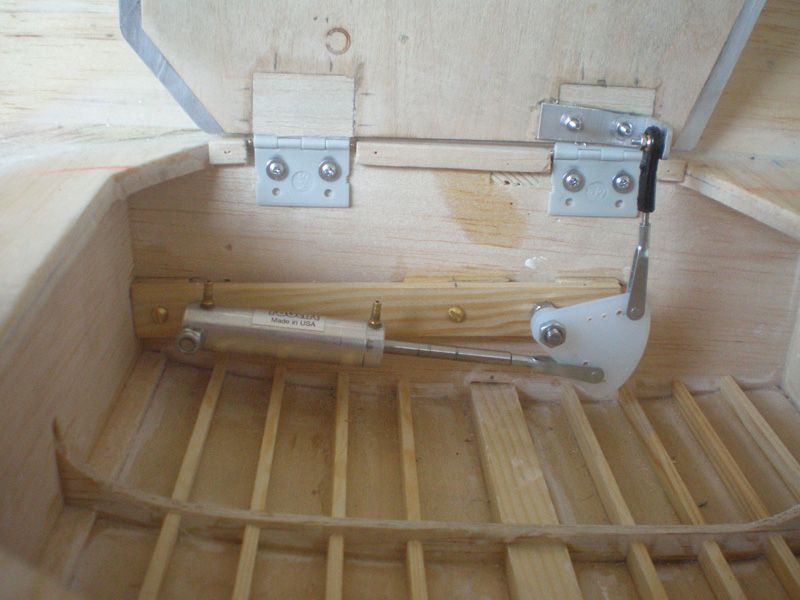
Without air it work fine, but we will see when come preasur will it work well. I hope so...
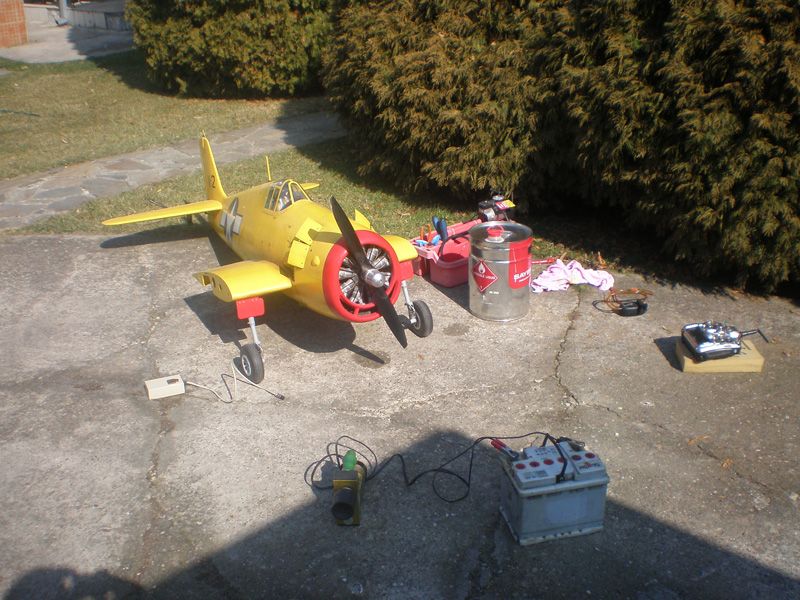
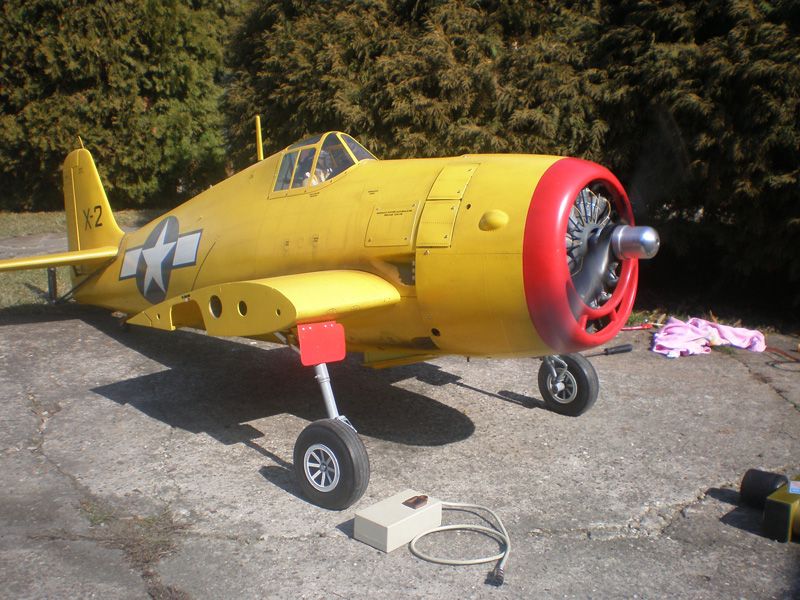
Today I start preparations for new season. Weather was nice, and after two days checking batteries, I start engine on my Hellcat. Zenoah GT 80 work fine, as always...
All the best from Serbia
Mirce
Today I finally finished work on gear doors...
Last job was to made system for opening inner gear door. I was looking how other modelers doing that and finally copy Dino's system. Only different is I made all on one plate which is removable.
On back side I made three little plates and with double self adhesive tape fix it to main plate. Than with few drop of ZAP glue I glued it on wing.
After ZAP was dry, I separated main plate from wing...
When start working on door geometry I saw that lever is no good, so I change it. With new lever I can made right movements...
Without air it work fine, but we will see when come preasur will it work well. I hope so...
Today I start preparations for new season. Weather was nice, and after two days checking batteries, I start engine on my Hellcat. Zenoah GT 80 work fine, as always...
All the best from Serbia
Mirce
 03-05-2012 | 06:12 PM
#352
Thread Starter
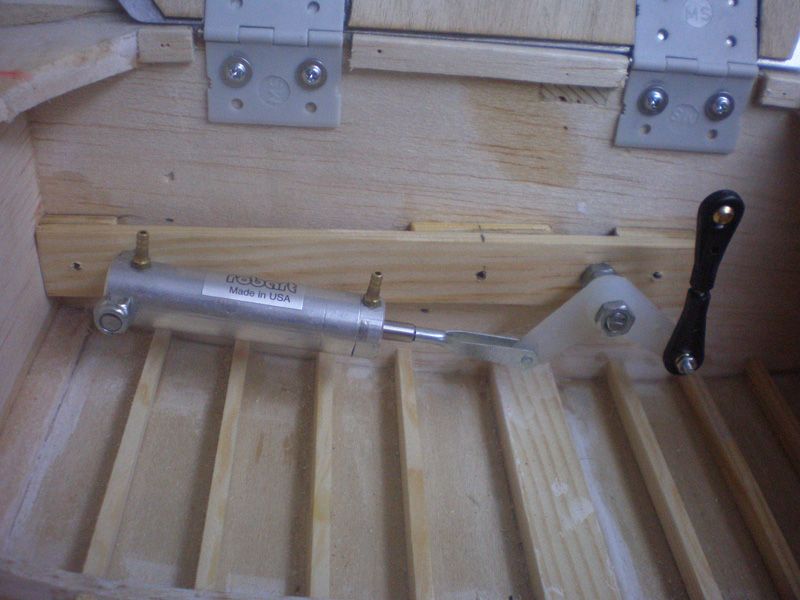
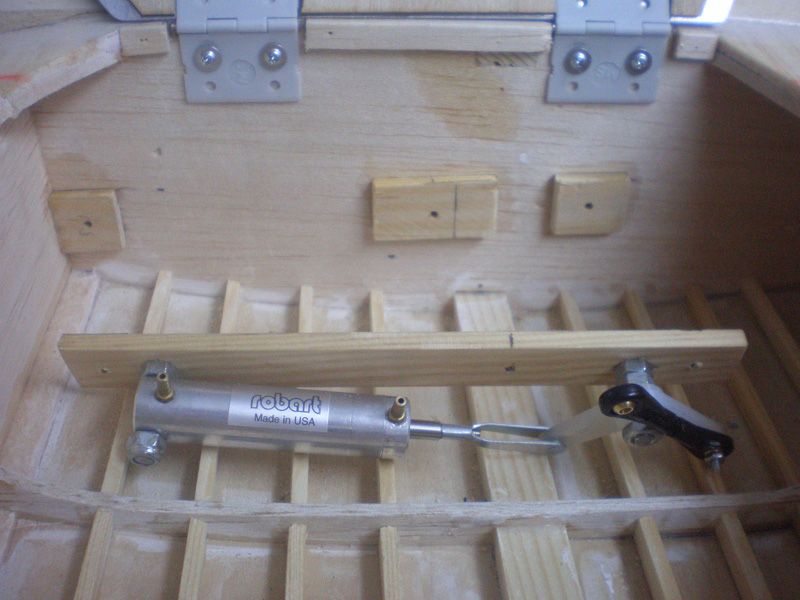
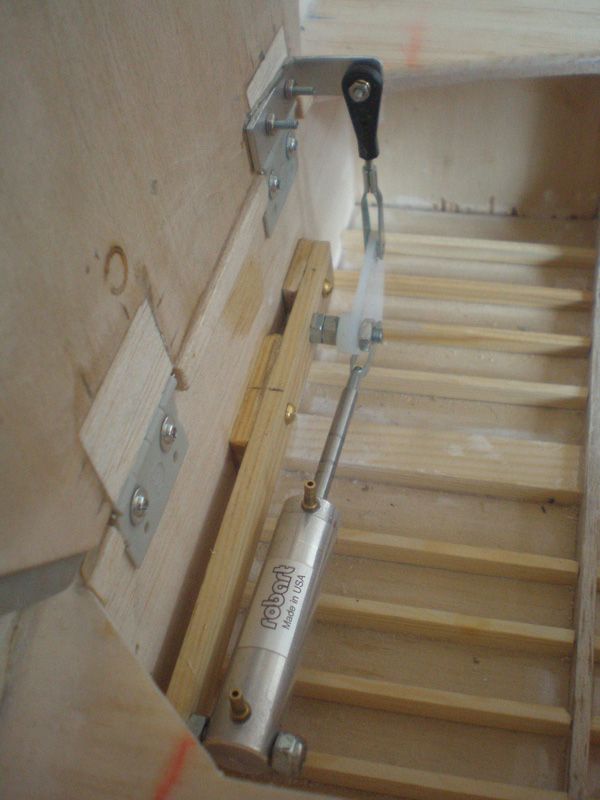
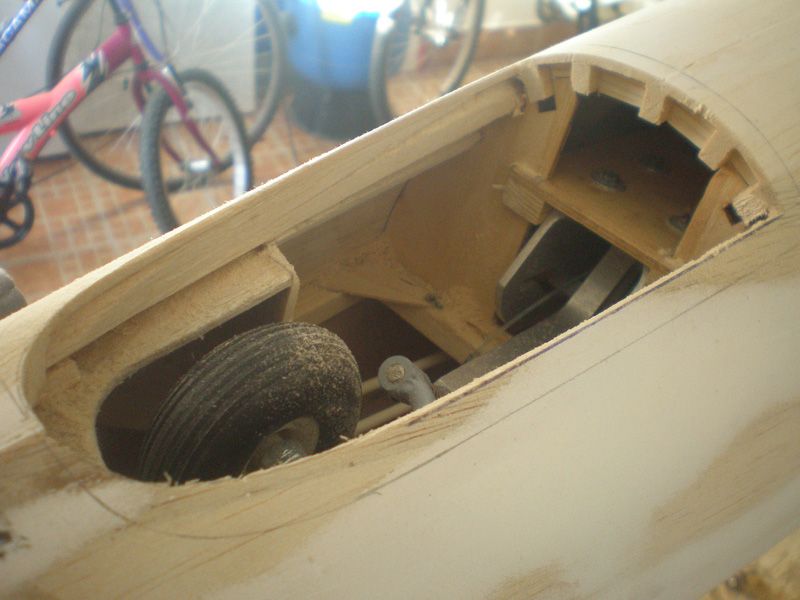
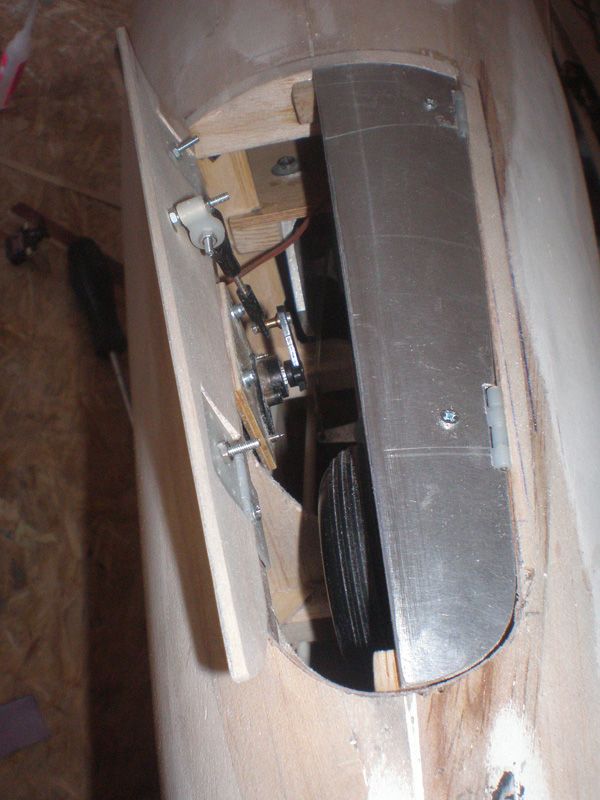
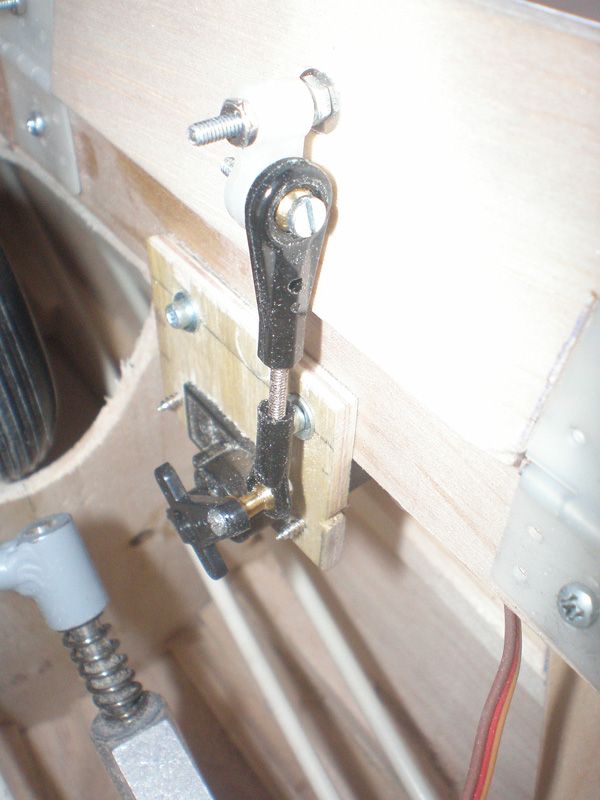
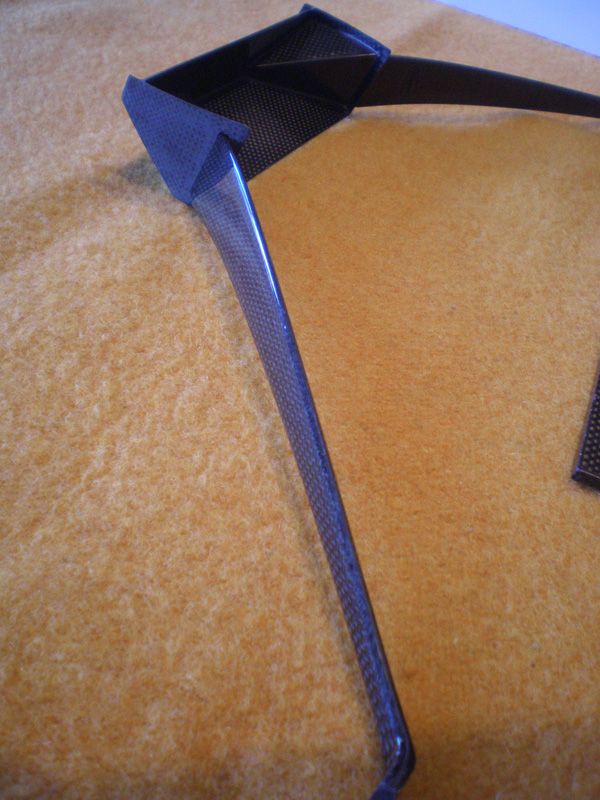
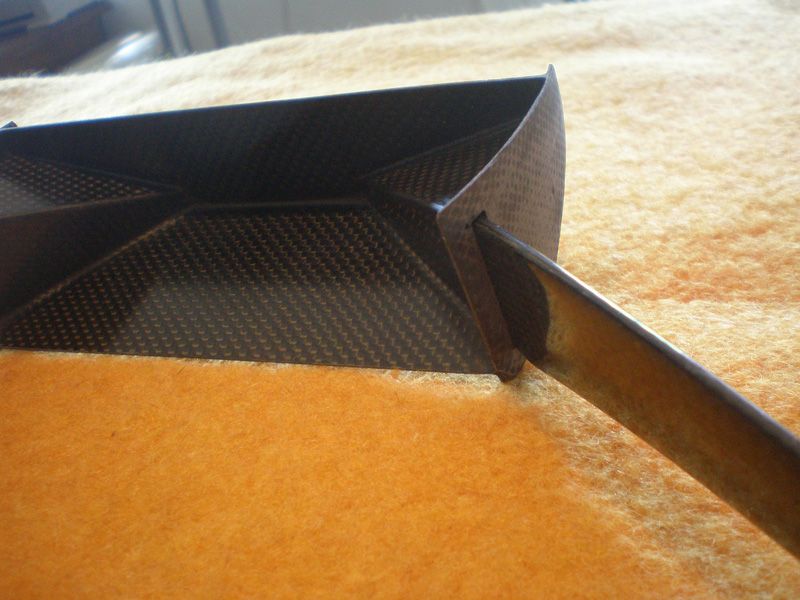
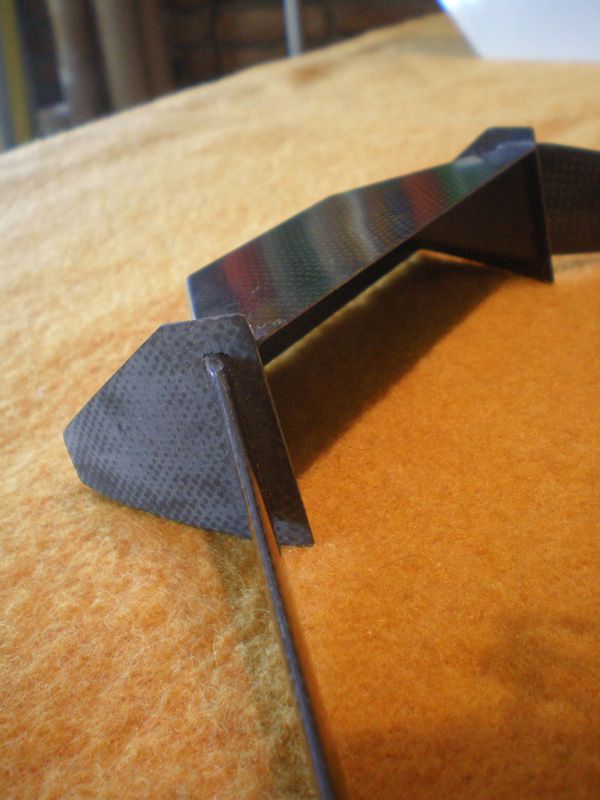
Yesterday I try system with air pressure.
It work very good. OK, I need to made some minor adjustments, but at the end result is great.
Most important, inner gear doors, when are on close position, stands very hard, and force from air cylinder is big. I think, no theoretical chance to open, even a little bit, during flight.
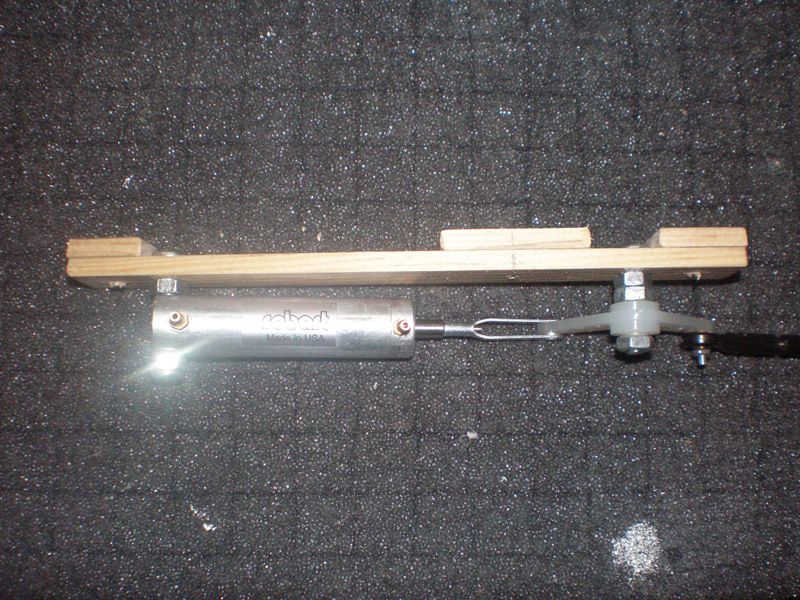
As you can see, I use Robart's stuffs...
Regards
Mirce
It work very good. OK, I need to made some minor adjustments, but at the end result is great.
Most important, inner gear doors, when are on close position, stands very hard, and force from air cylinder is big. I think, no theoretical chance to open, even a little bit, during flight.
As you can see, I use Robart's stuffs...
Regards
Mirce
03-11-2012 | 10:11 AM
#353
Thread Starter
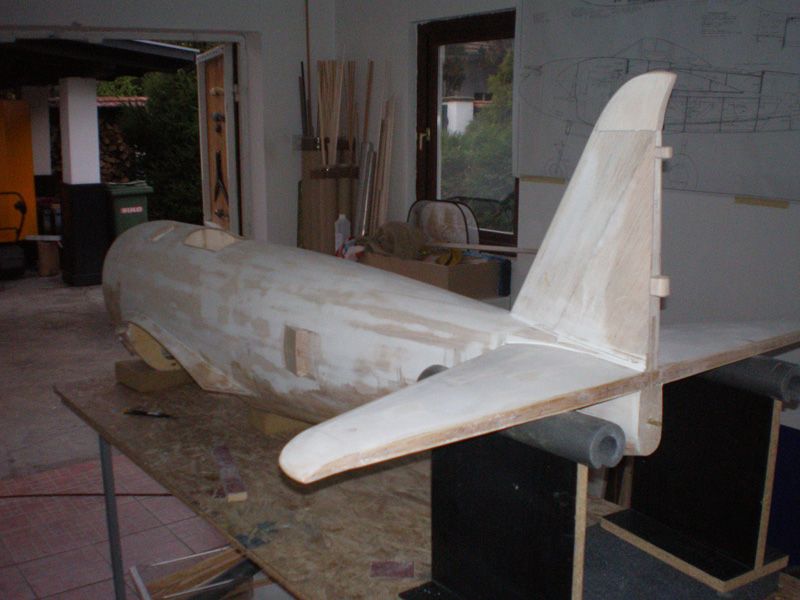
I must admit that I am a sinner, in last two week I was working more on my new jet project Galeb G2 than on P 47.
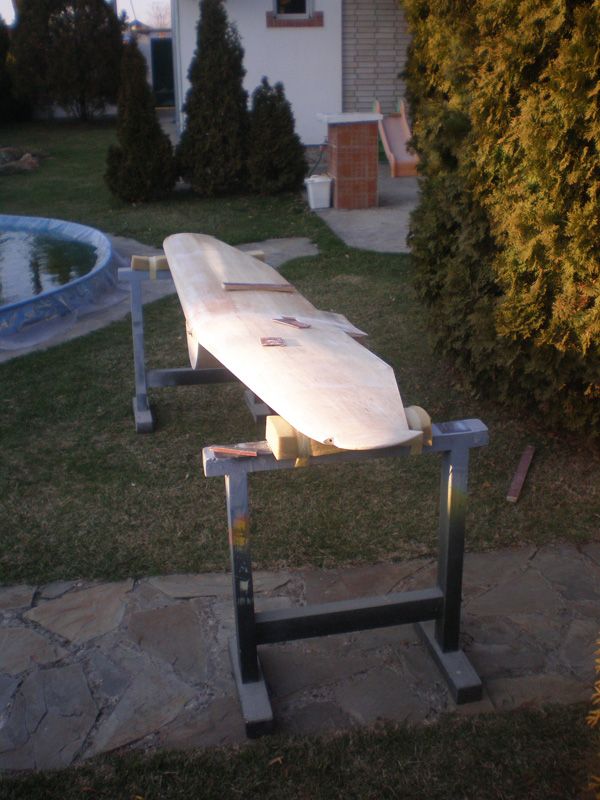
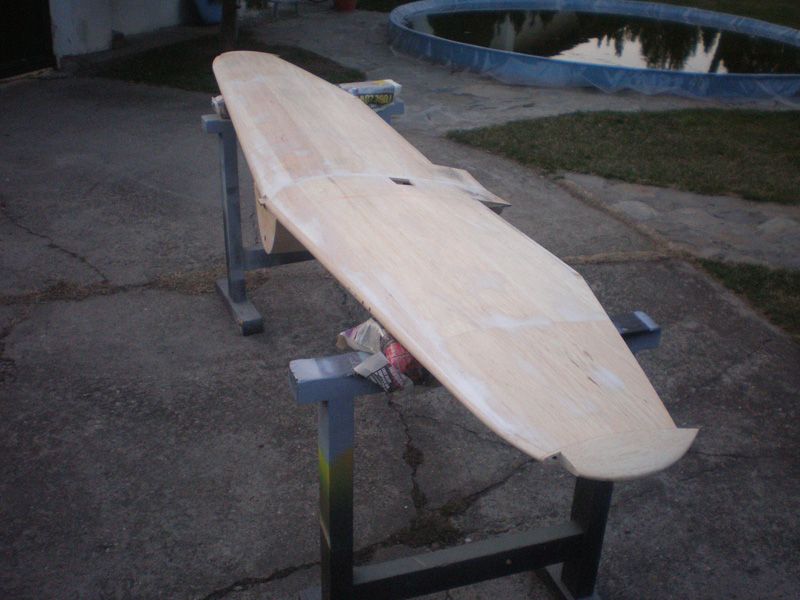
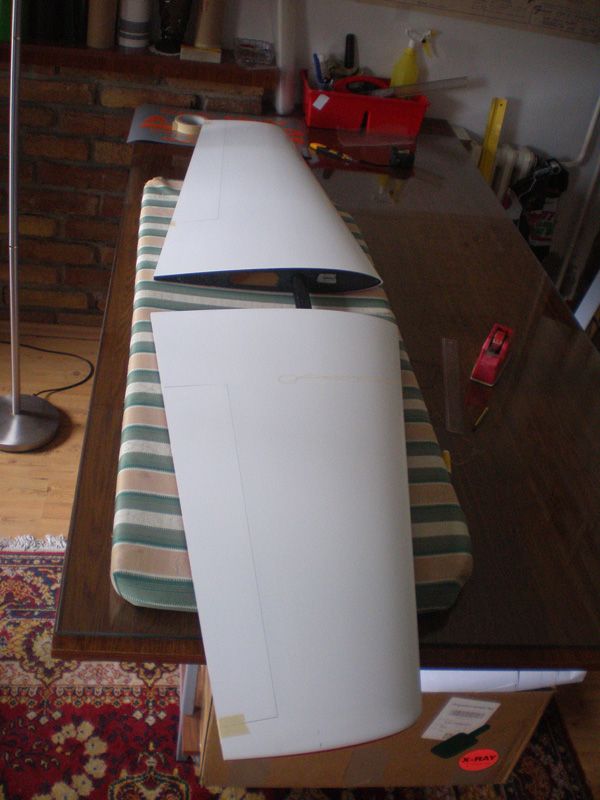
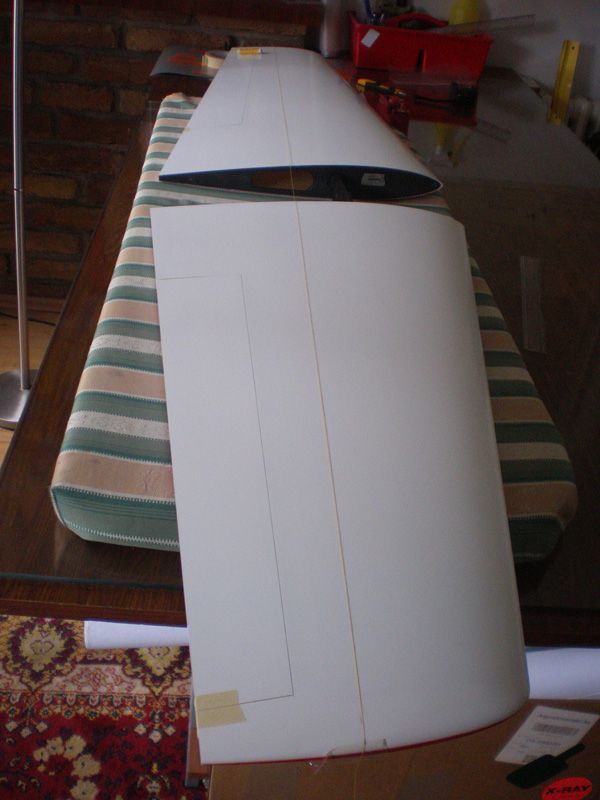
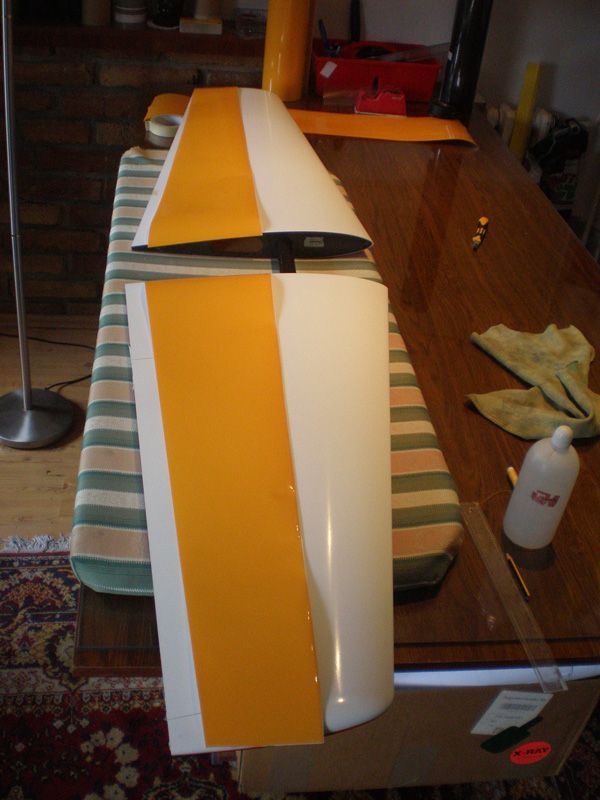
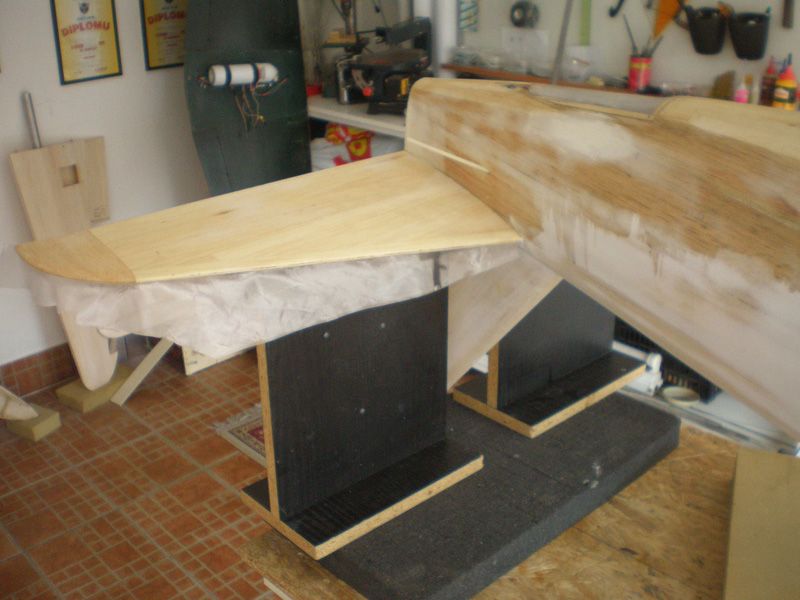
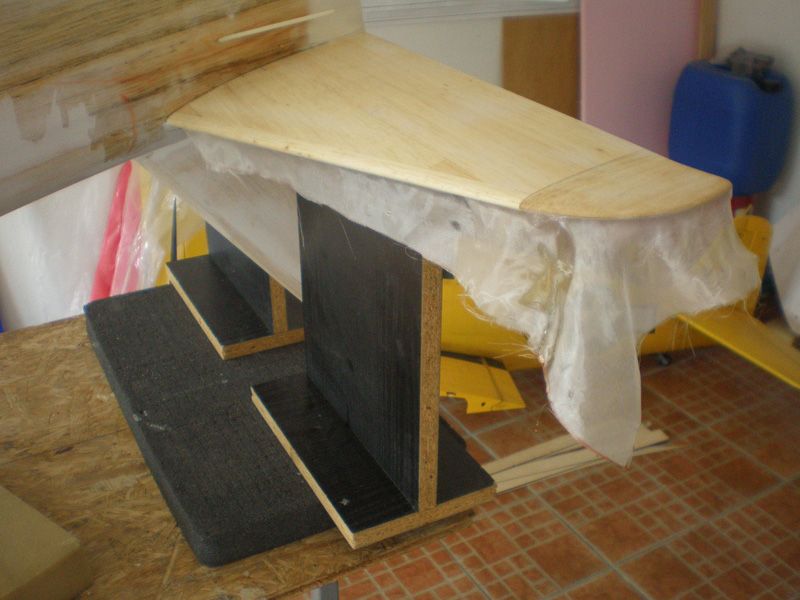
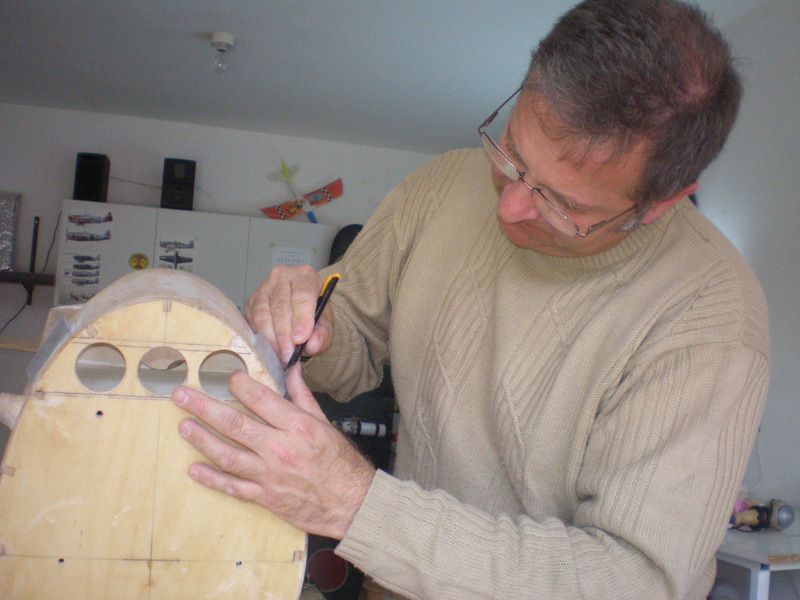
Thunderbolt wing are ready for sanding. I removed all from them, cut front corners for position lights, and in next few day it will start sanding...
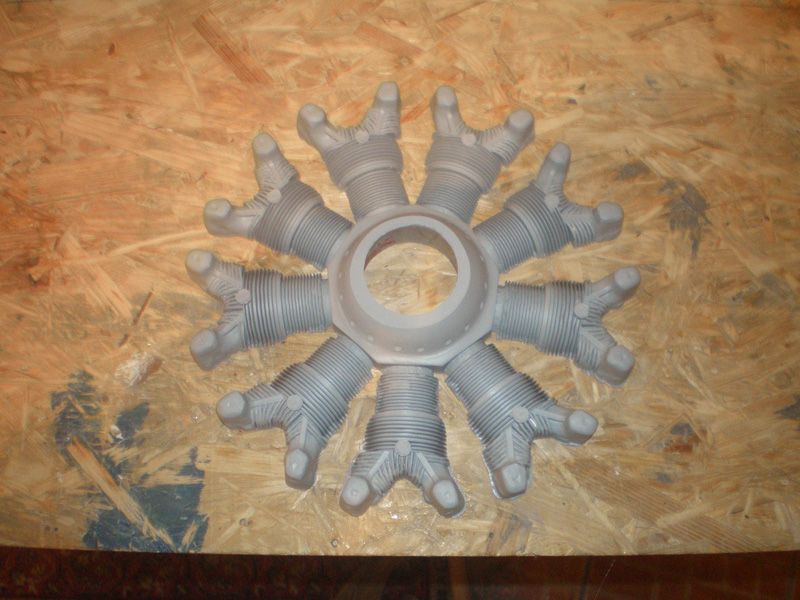
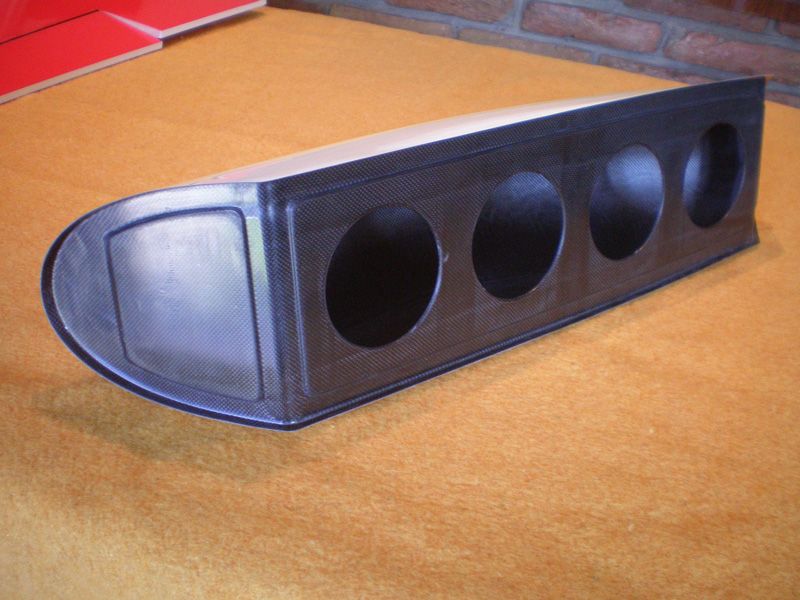
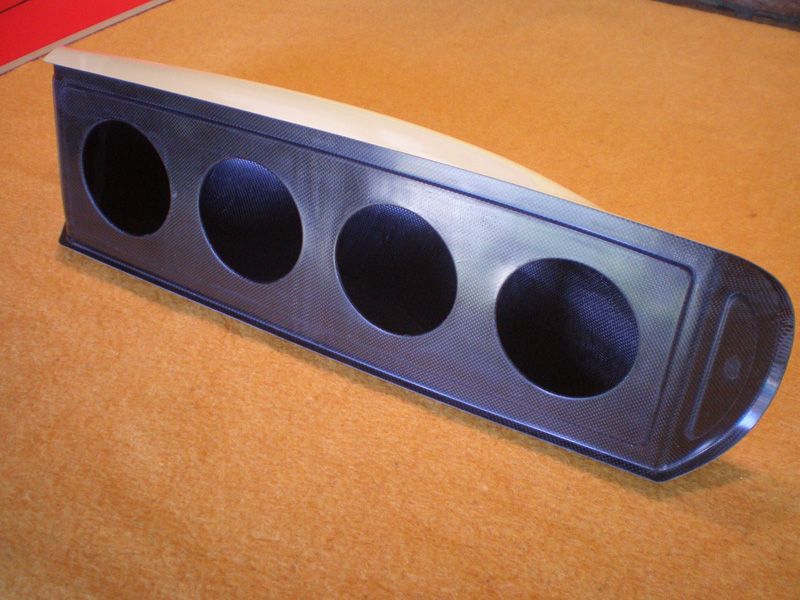
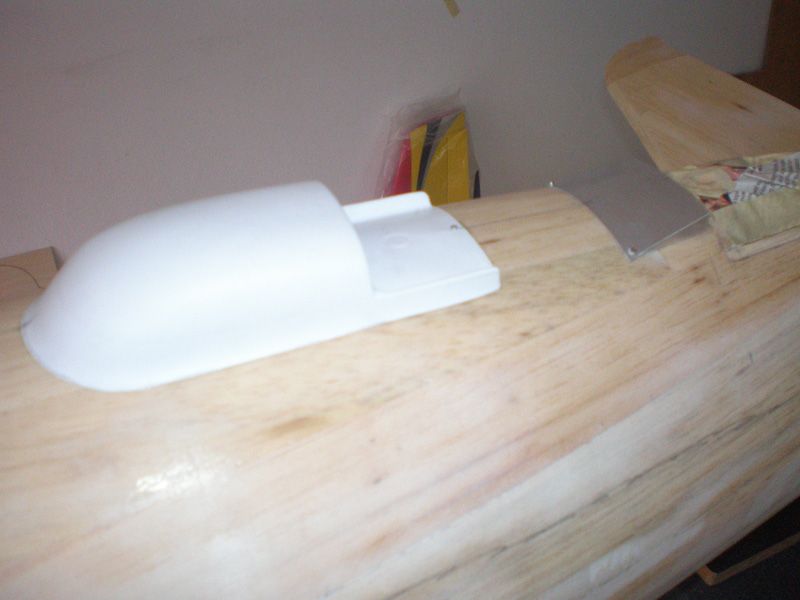
Few days ago I get package from FTE, with dummy engine...
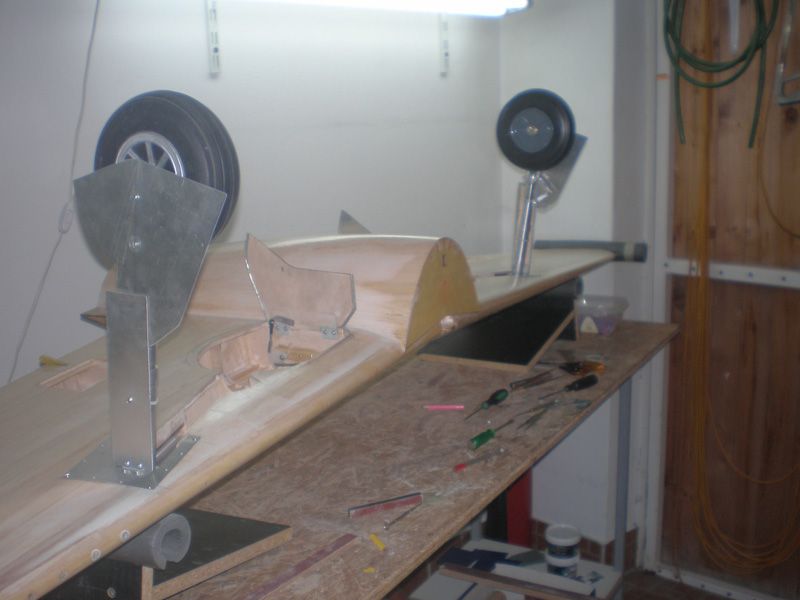
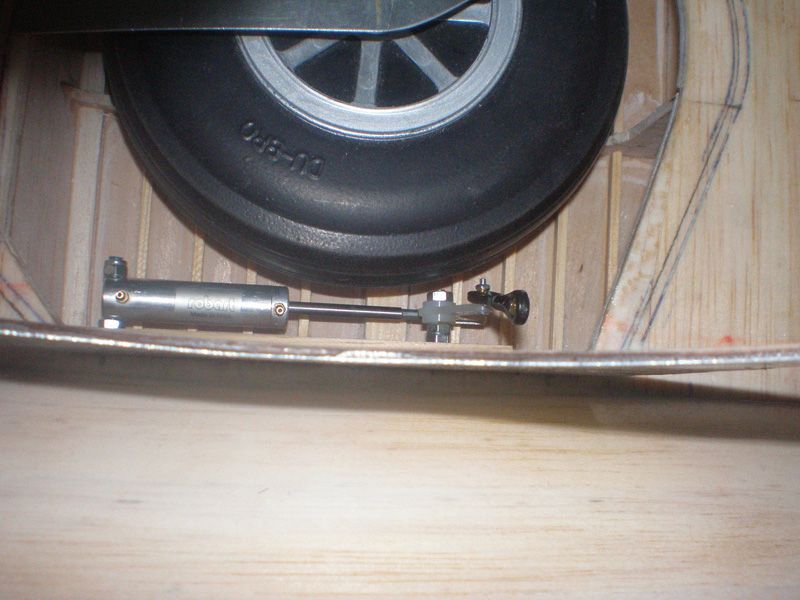
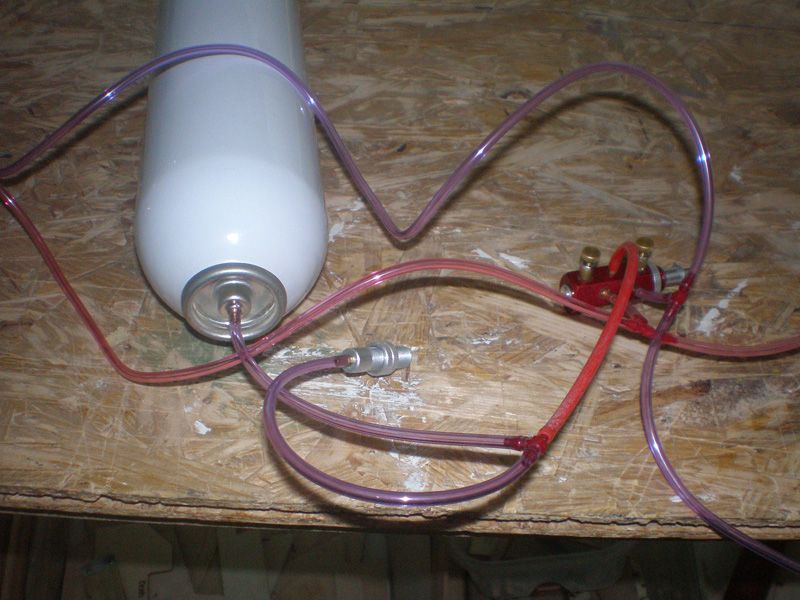
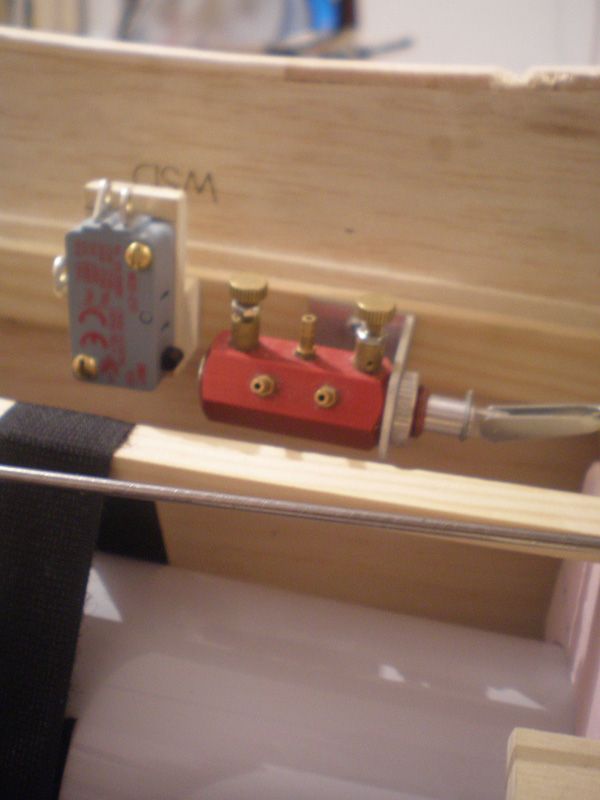
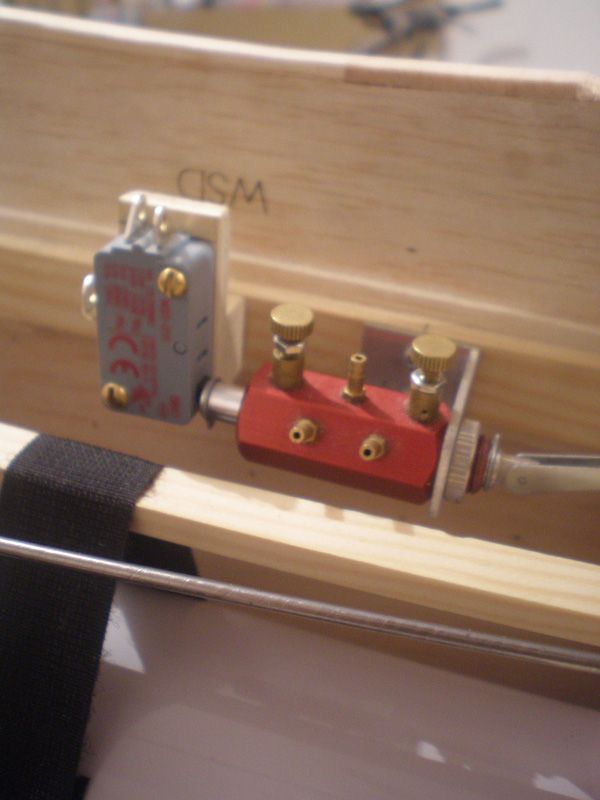
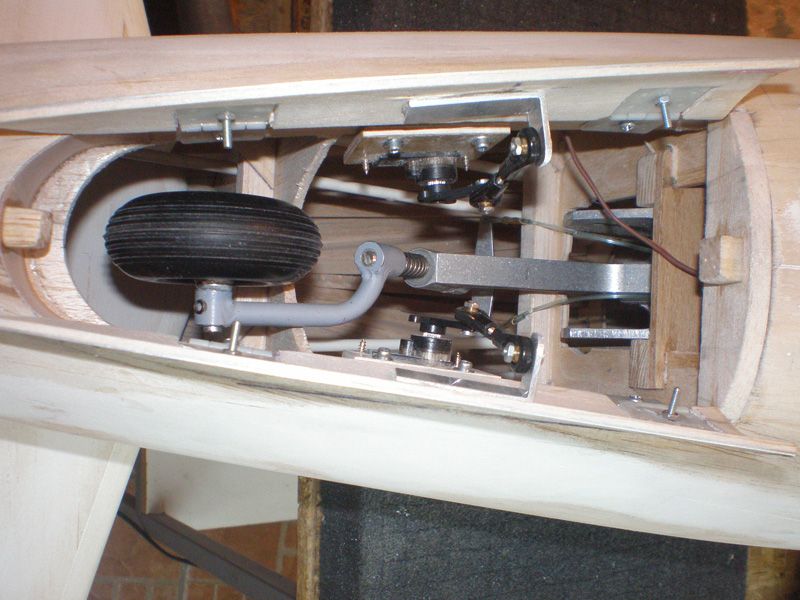
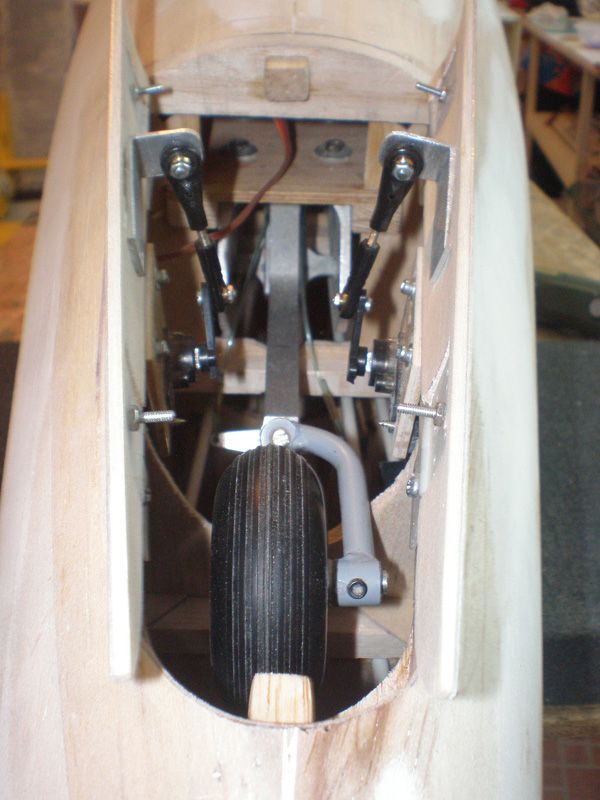
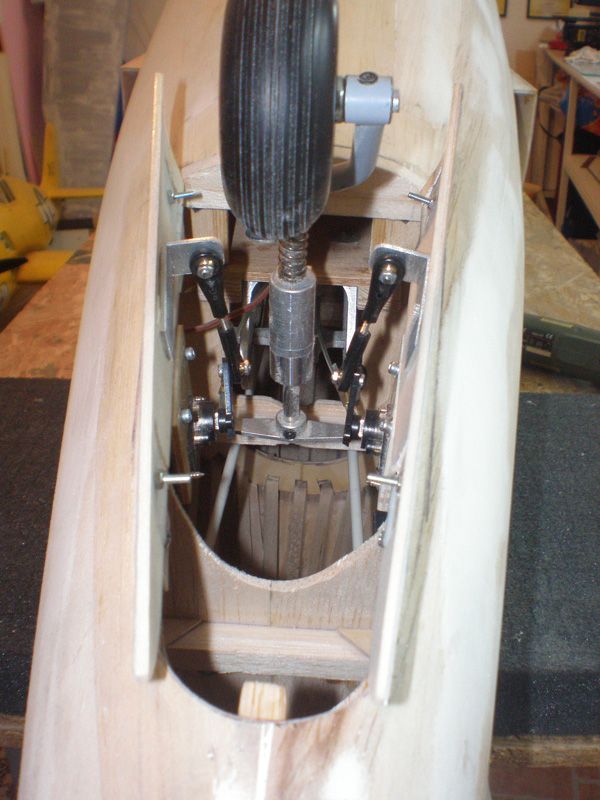
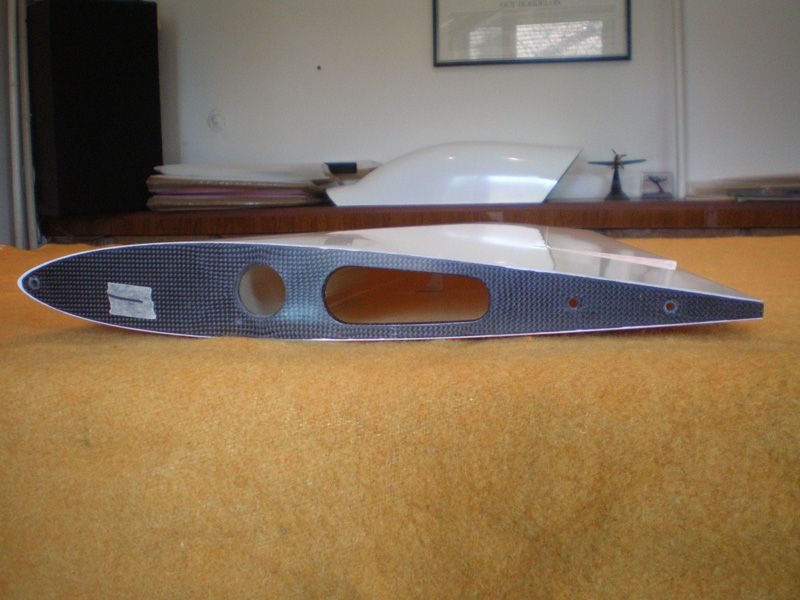
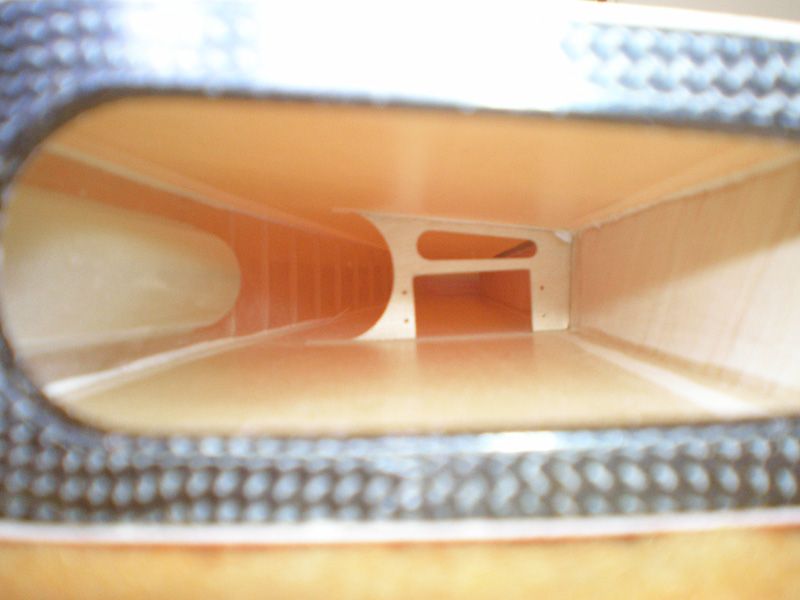
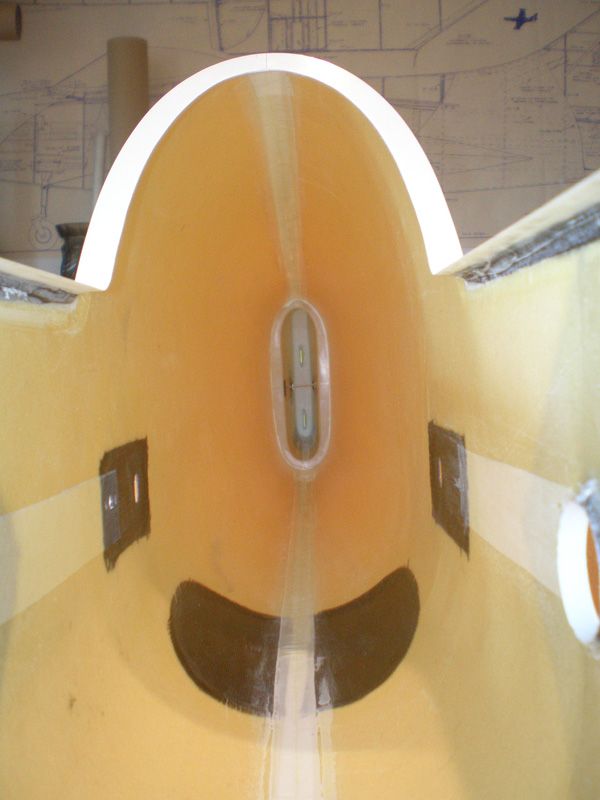
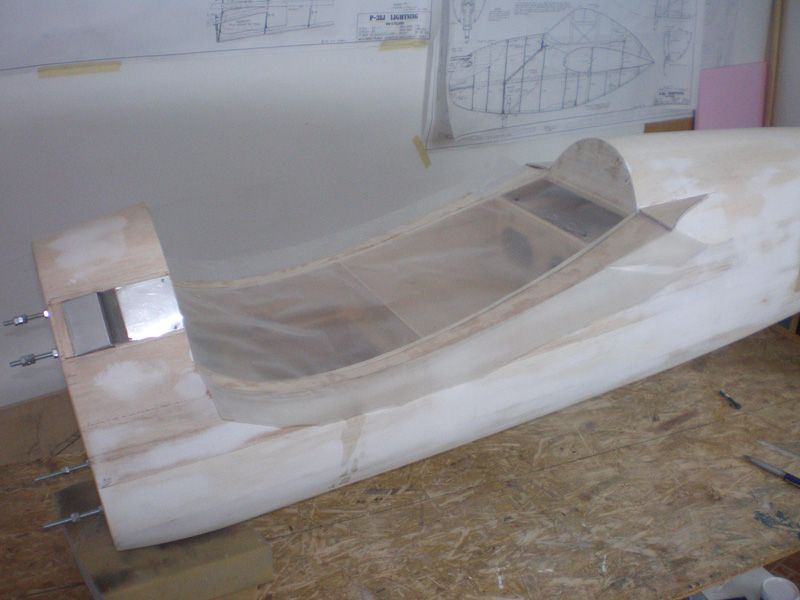
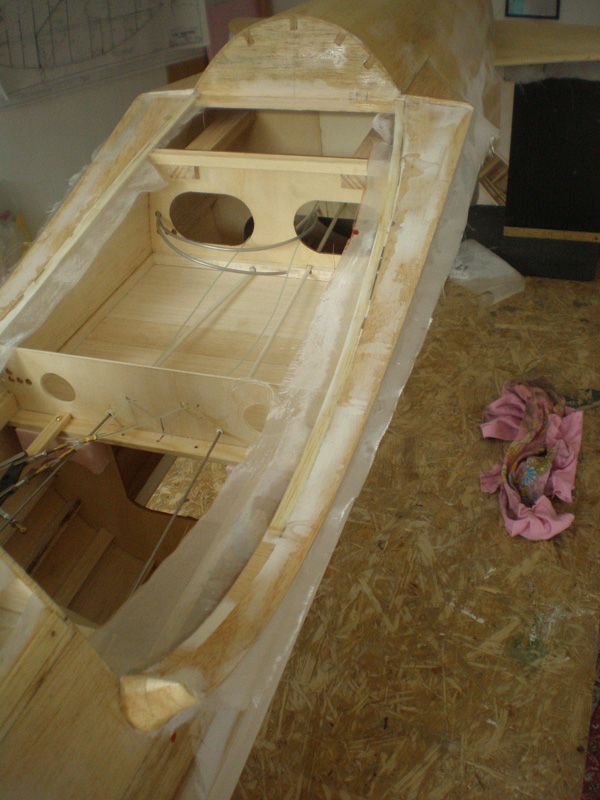
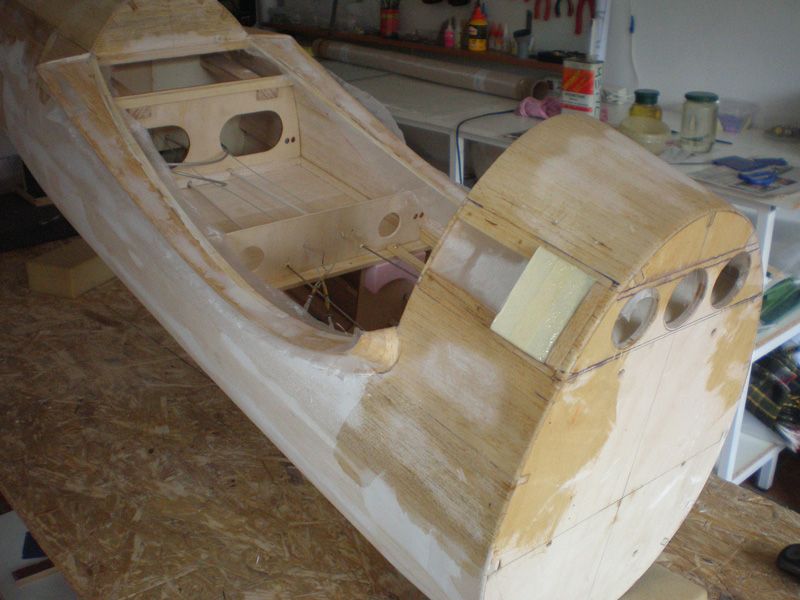
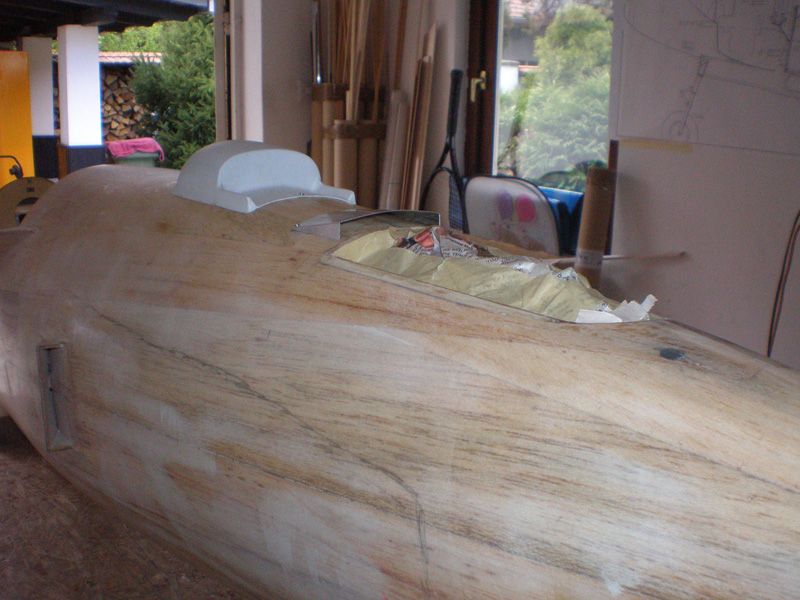
Most work this days was in fuselage. I install servos for elevators (two Hitec HS 645 MG, one for every half), and next to them standard Futaba servos for Robart air control valve. There are two valves, one for doors, and another for retract.
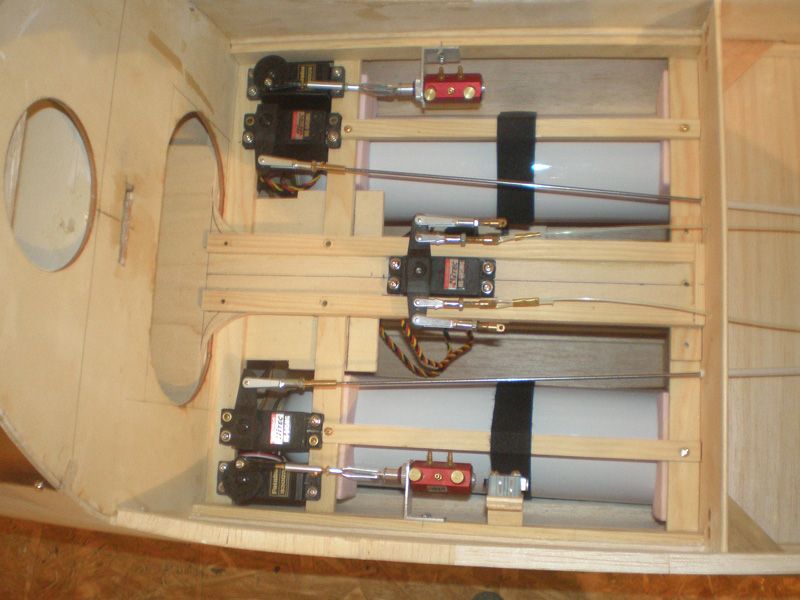

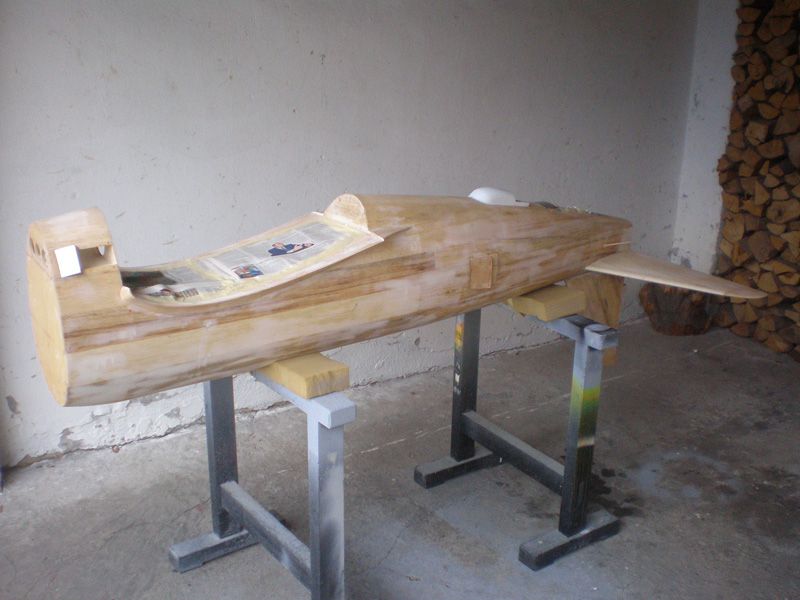
I was always trying to put all stuff as front as possible...
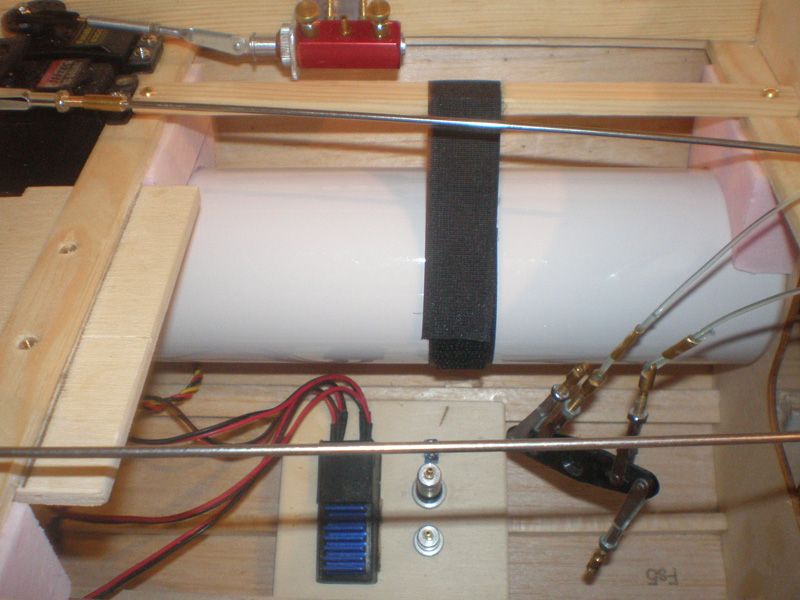
Big air tanks are installed also. They are on the styroform carriers and are clamped with Velcro...
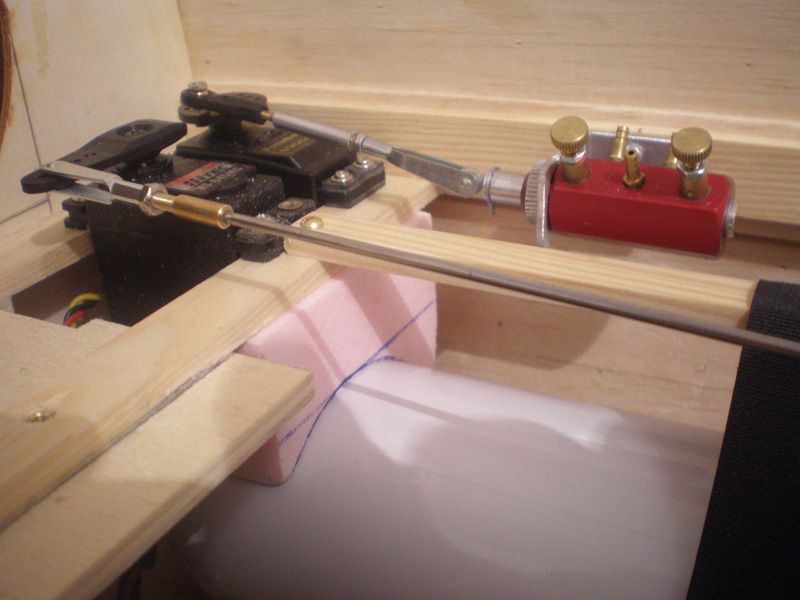
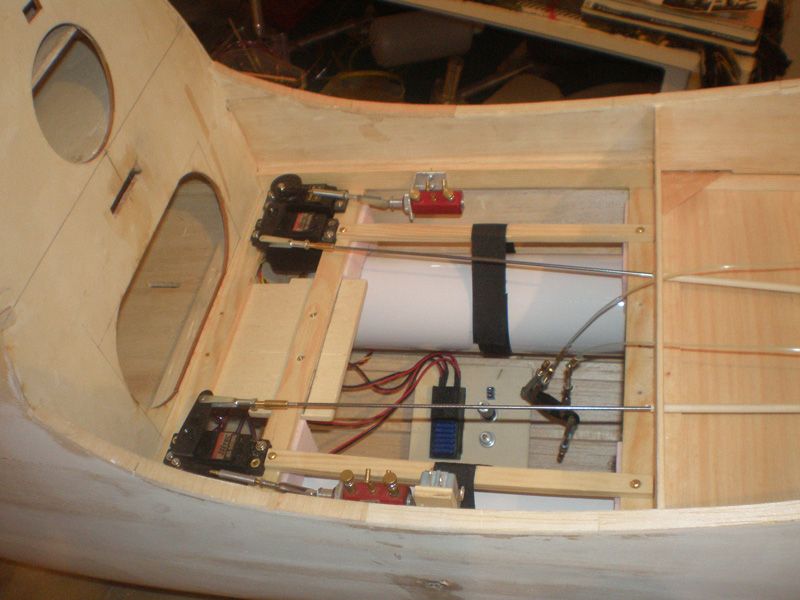
Air valve on right side activated switch for light system...
Wider, front end of this part will carry all batteries. All batteries will be fix with Velcro. Servo in the middle is for rudder...
Regards
Mirce
Thunderbolt wing are ready for sanding. I removed all from them, cut front corners for position lights, and in next few day it will start sanding...
Few days ago I get package from FTE, with dummy engine...
Most work this days was in fuselage. I install servos for elevators (two Hitec HS 645 MG, one for every half), and next to them standard Futaba servos for Robart air control valve. There are two valves, one for doors, and another for retract.
I was always trying to put all stuff as front as possible...
Big air tanks are installed also. They are on the styroform carriers and are clamped with Velcro...
Air valve on right side activated switch for light system...
Wider, front end of this part will carry all batteries. All batteries will be fix with Velcro. Servo in the middle is for rudder...
Regards
Mirce
03-15-2012 | 11:22 AM
#354
Thread Starter
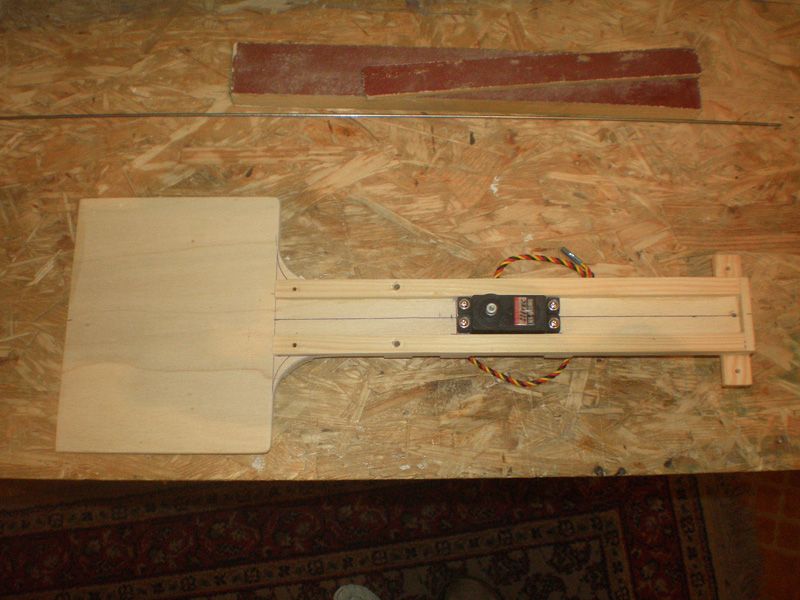
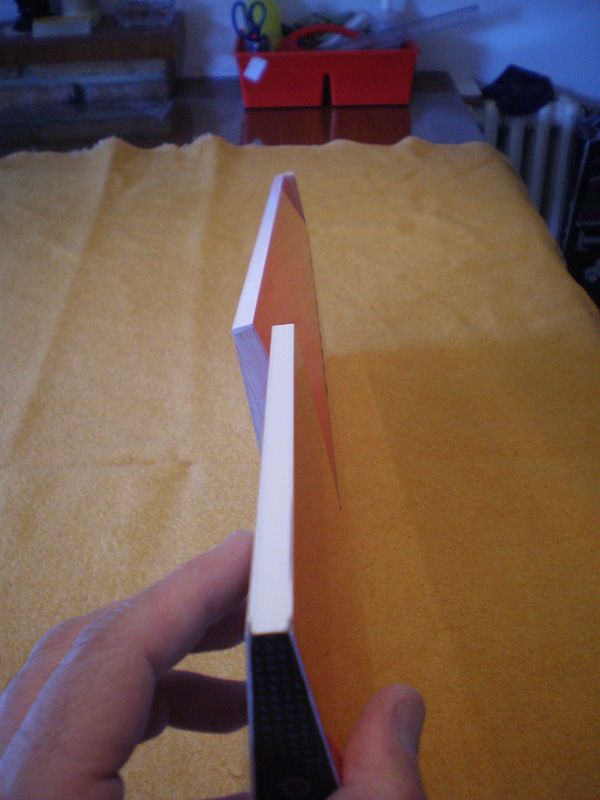
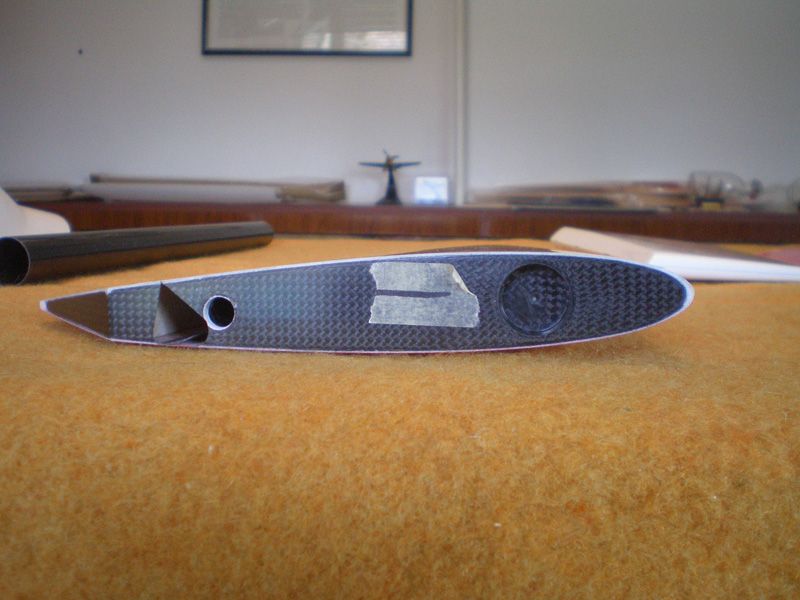
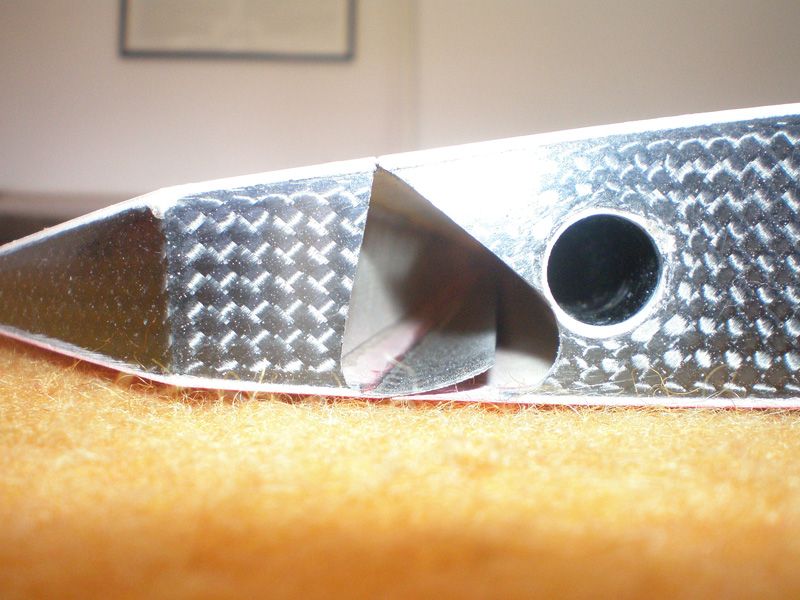
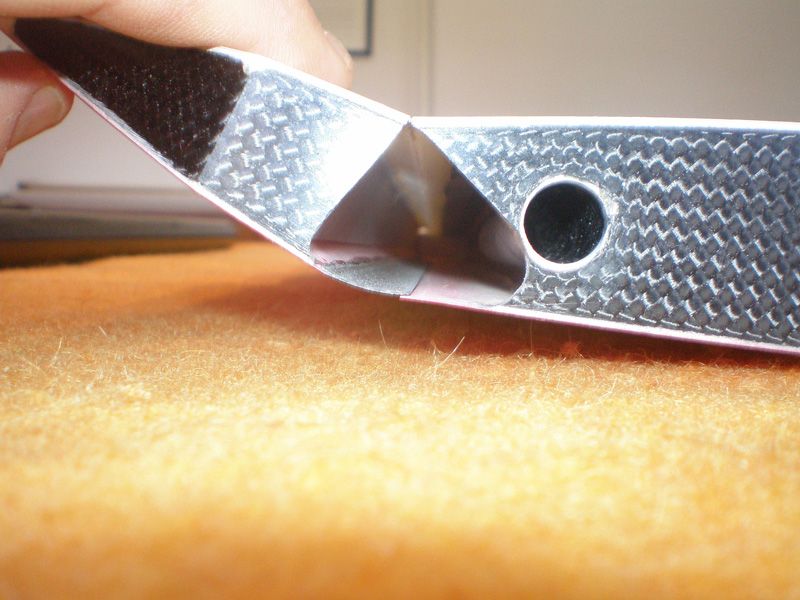
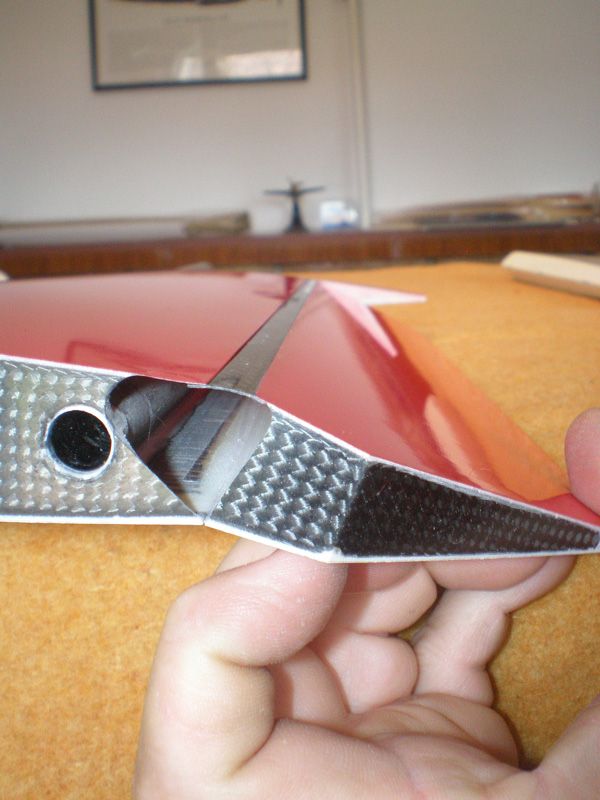
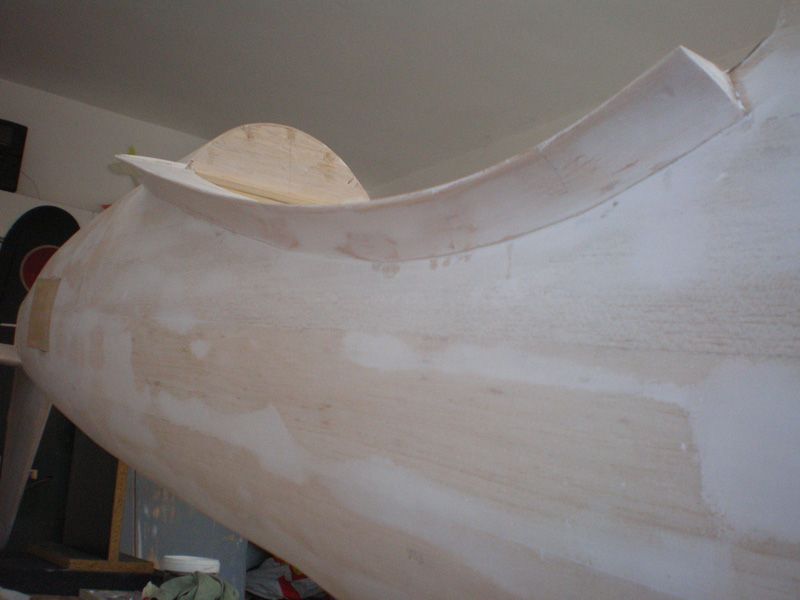
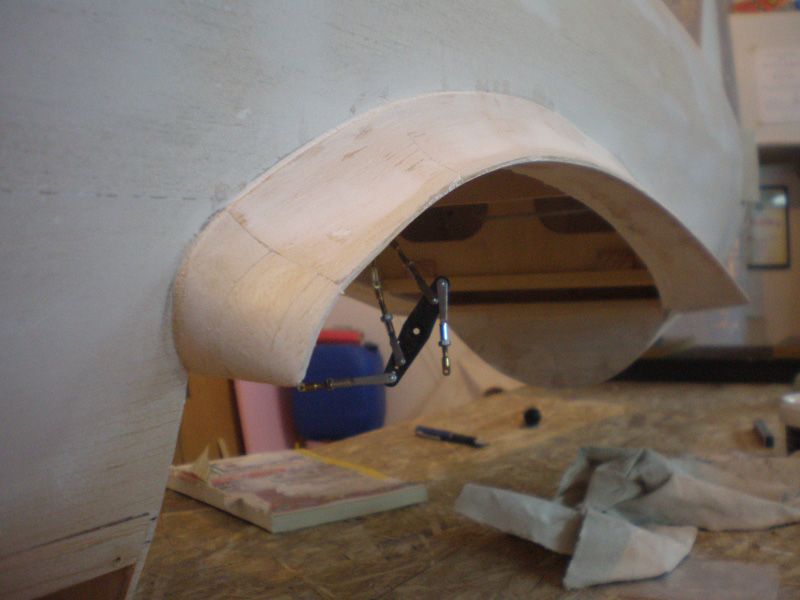
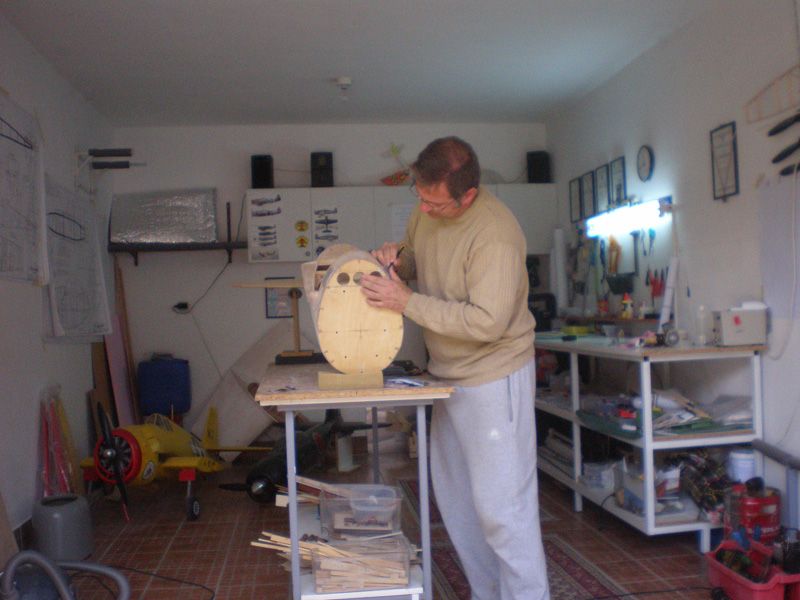
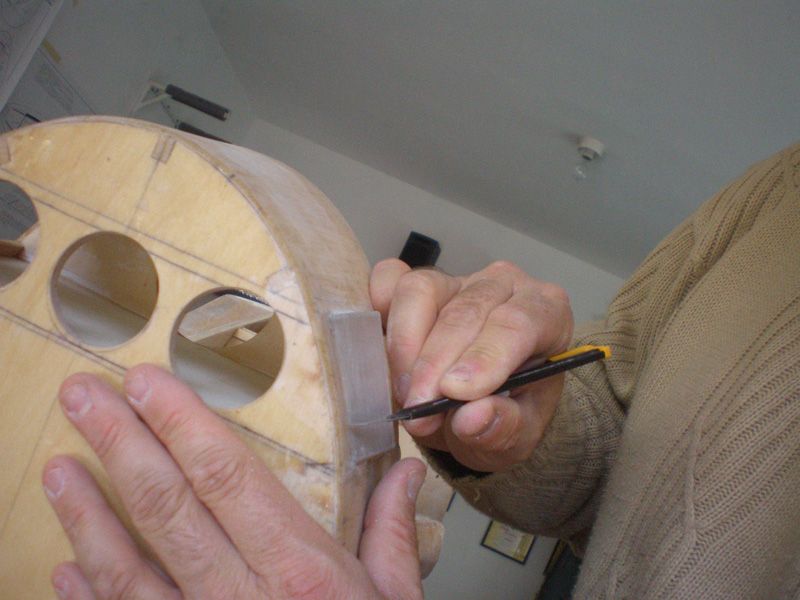
I made tail wheel doors...
First I made opening. I used Meister tail wheel door template, but opening is little smaller.
On the edge I glued hard wood plate 15x4 mm, and on that plate thin ply.

Edge...
Door was made from 0,5 mm thin aluminum plate. Inside I glued 2,5 mm balsa. which give aluminum strength.
I was looking how to made mechanism for opening, and finally made it with two small 9 gr servos, one for each door.

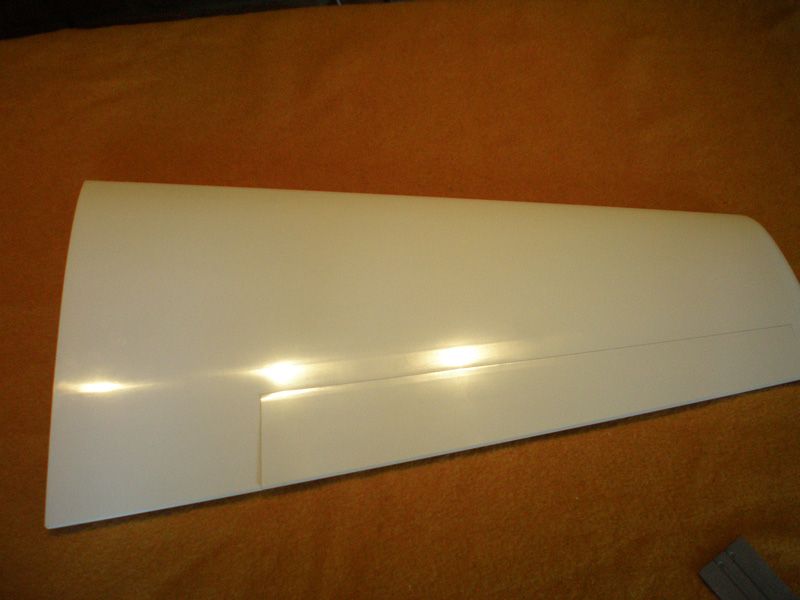
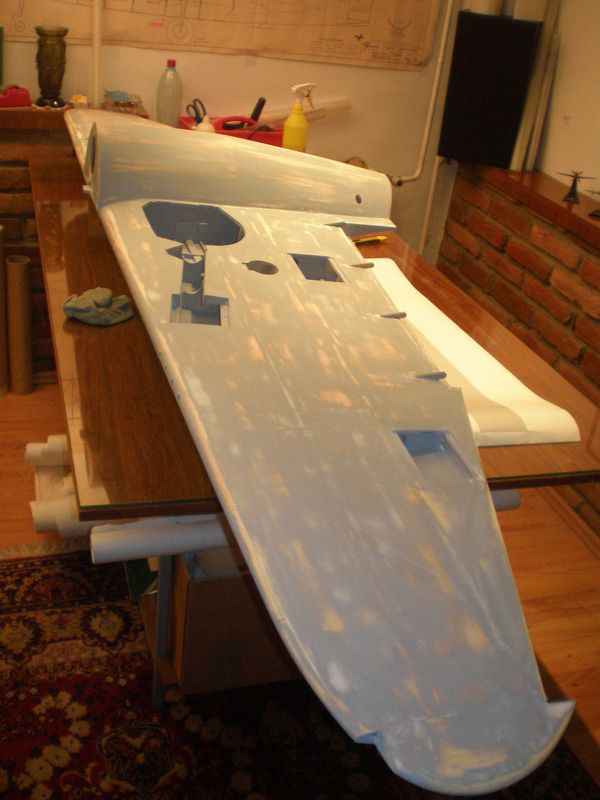
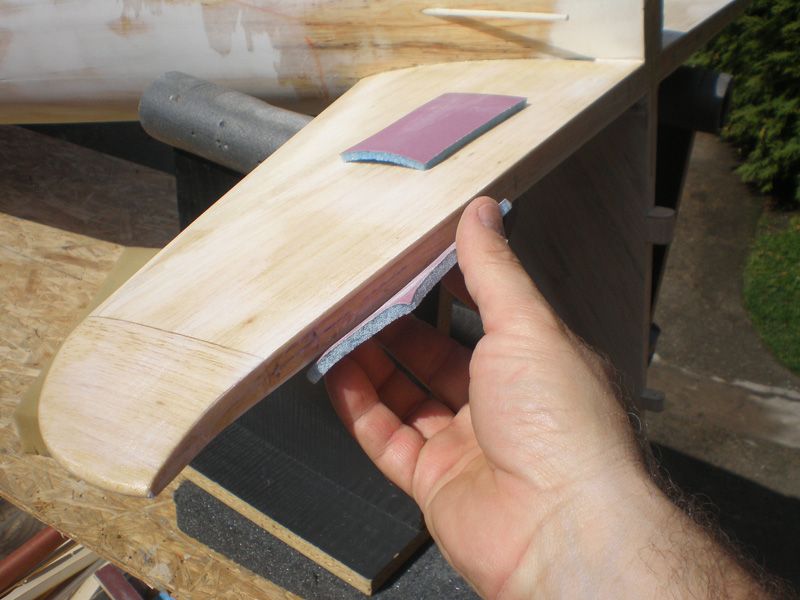
Today, with last sunlight, I finished wing sanding. I spent more than three hour to sand it, but result is great.
After cleaning, first layer of filer was added on the wing. Tonight it will dry, and tomorrow filer will be add on other side...

Regards from Serbia
Mirce
First I made opening. I used Meister tail wheel door template, but opening is little smaller.
On the edge I glued hard wood plate 15x4 mm, and on that plate thin ply.
Edge...
Door was made from 0,5 mm thin aluminum plate. Inside I glued 2,5 mm balsa. which give aluminum strength.
I was looking how to made mechanism for opening, and finally made it with two small 9 gr servos, one for each door.
Today, with last sunlight, I finished wing sanding. I spent more than three hour to sand it, but result is great.
After cleaning, first layer of filer was added on the wing. Tonight it will dry, and tomorrow filer will be add on other side...
Regards from Serbia
Mirce
 03-16-2012 | 02:45 PM
#356
Thread Starter
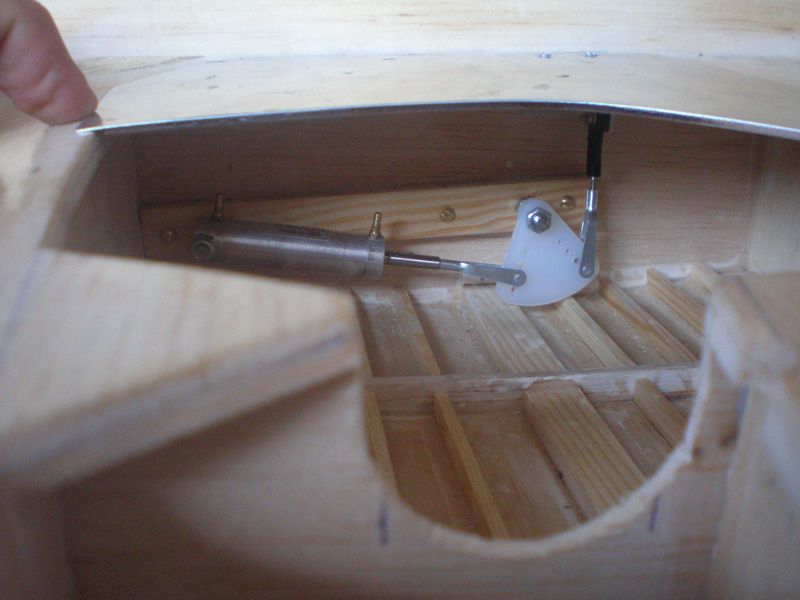
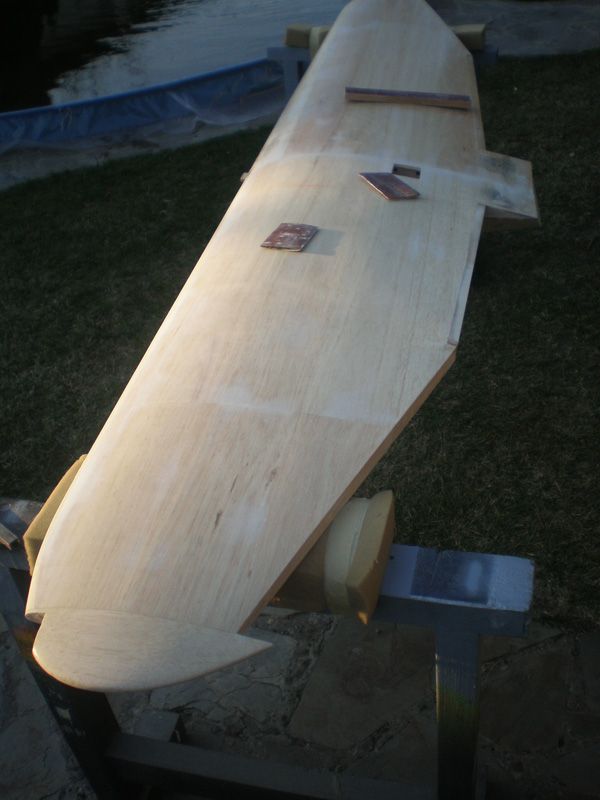
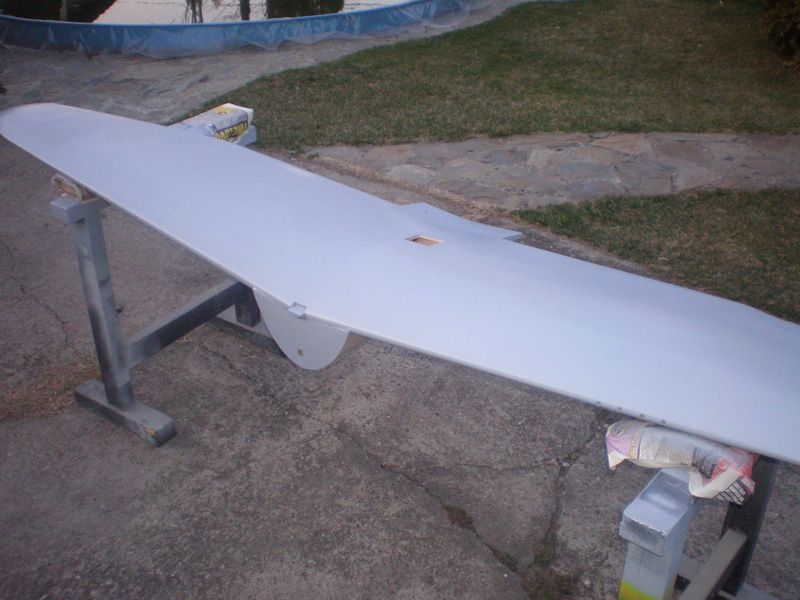
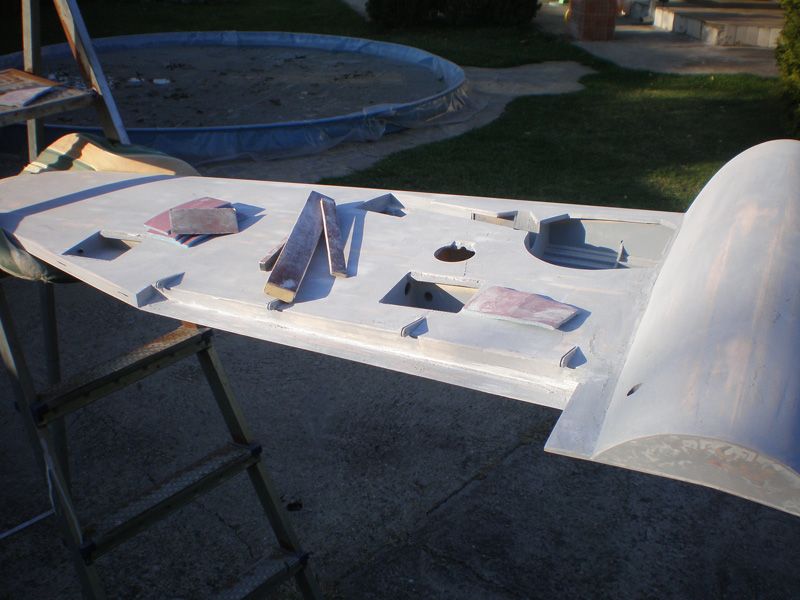
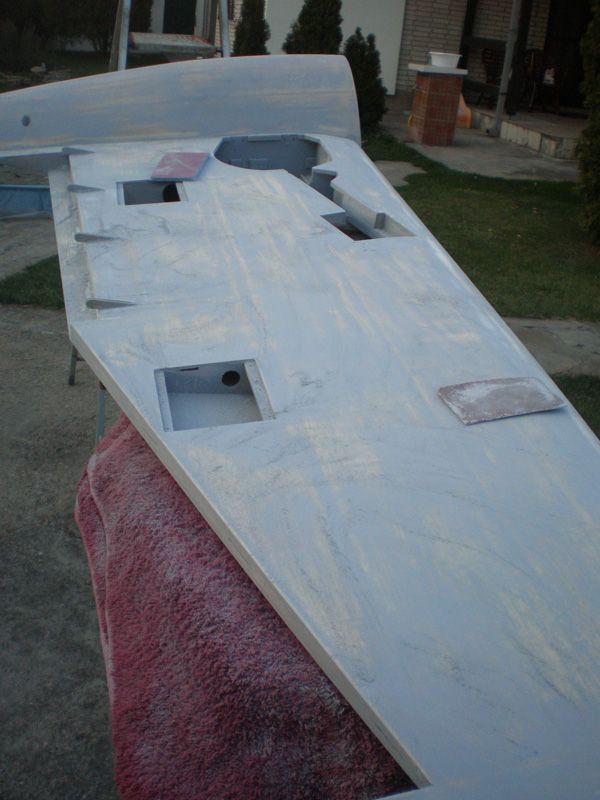
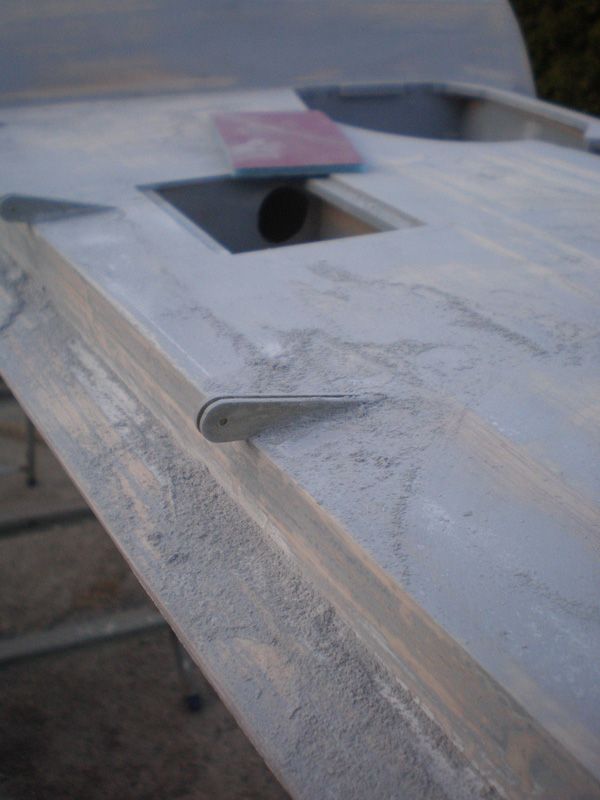
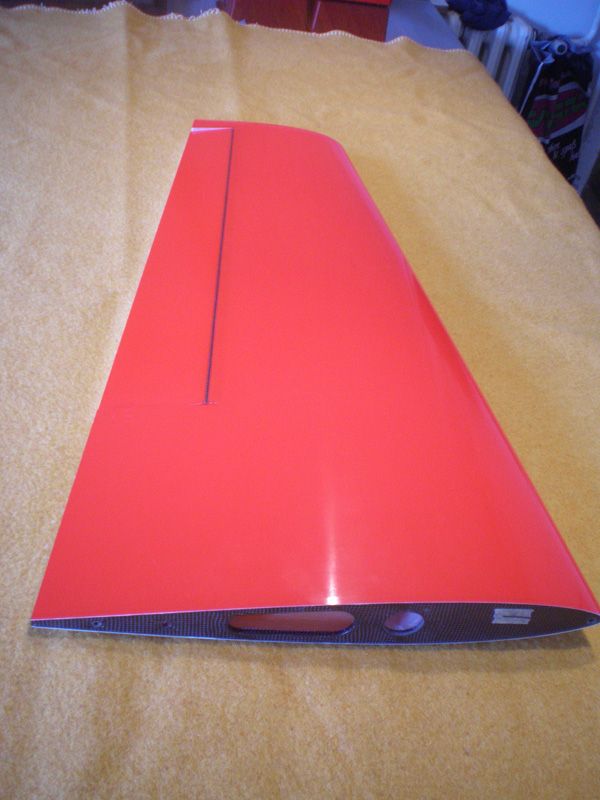
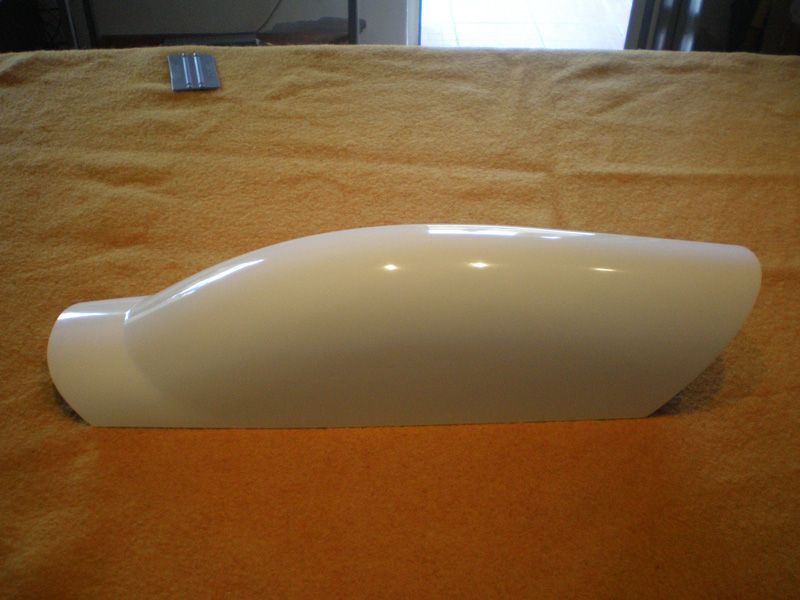
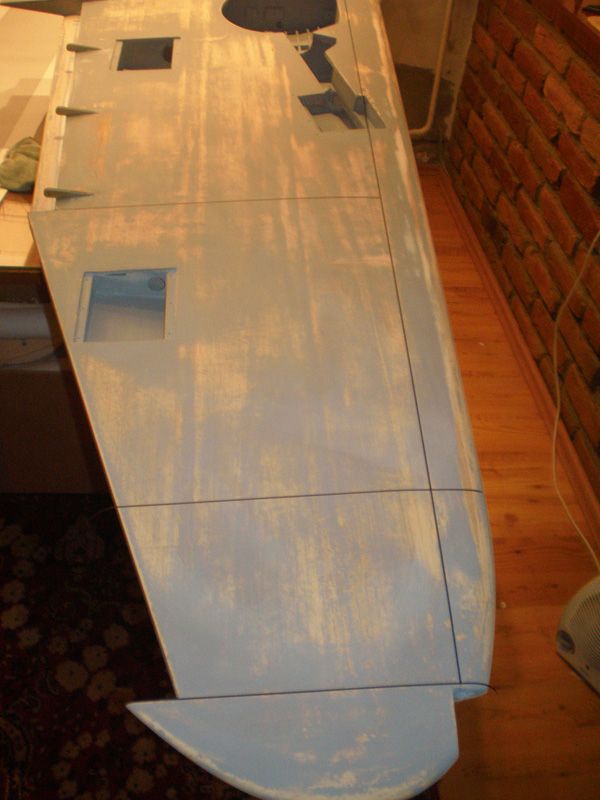
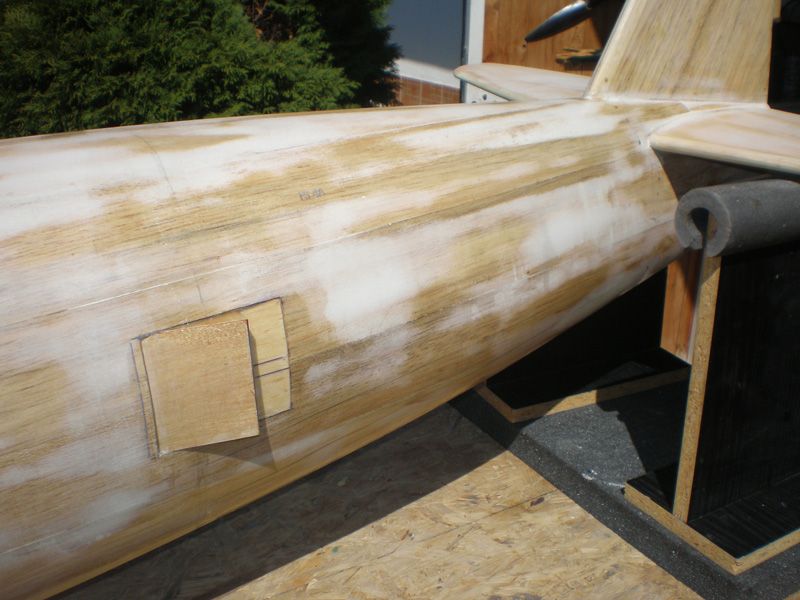
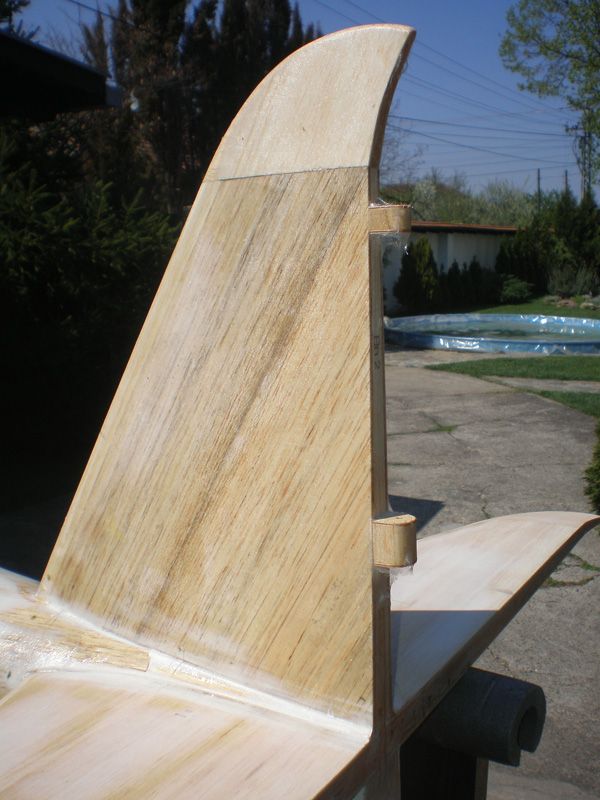
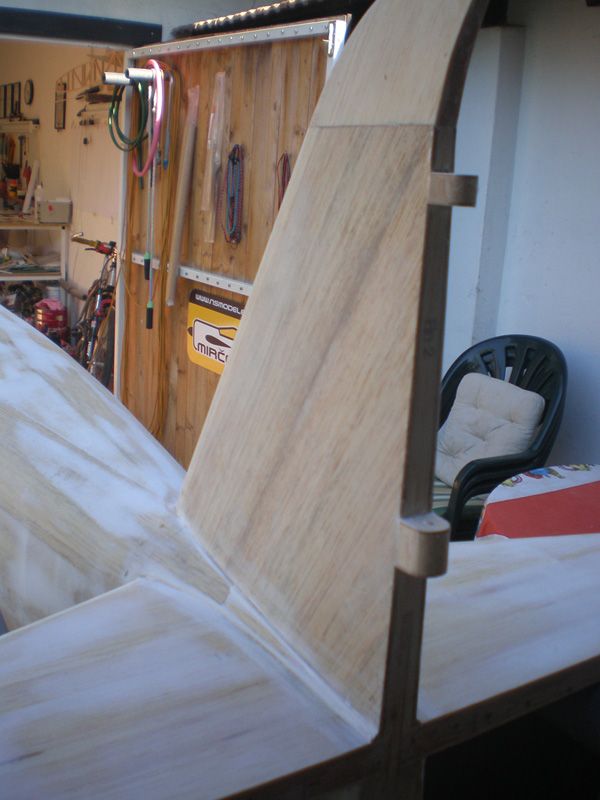
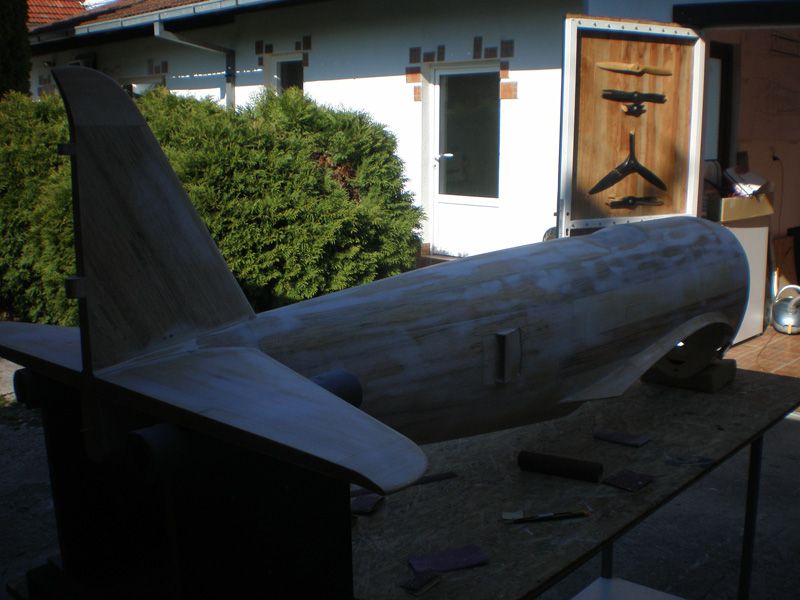
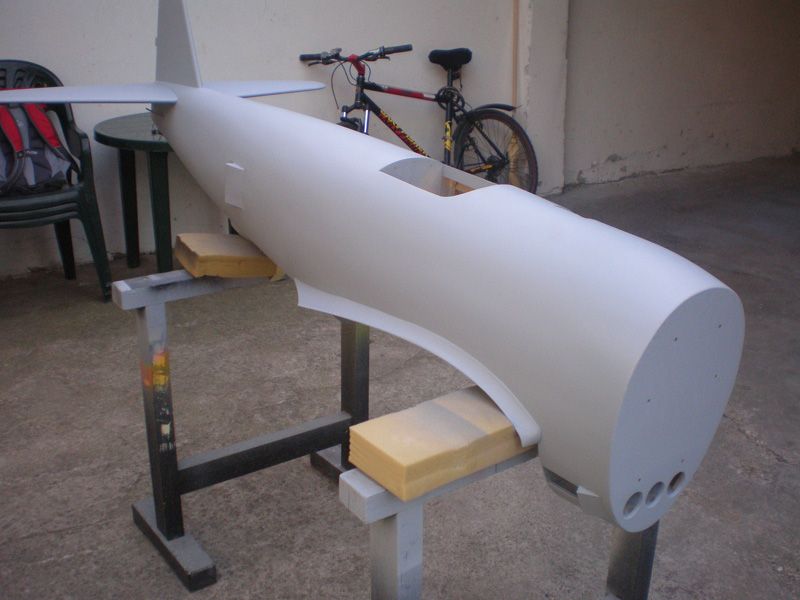
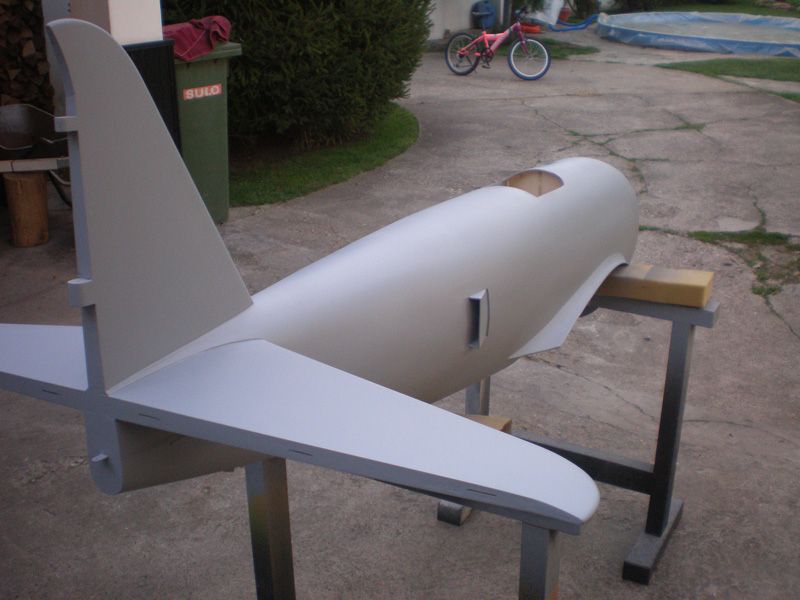
Gear doors are finished... From last time I made some little changes...
On wing and other parts I add acrylic filler...

Than...
...but result is great...
Of course, I have to do a lot of sanding.
Finished parts are ready for panel lines, but I will add them when everything be prepared for those phase...
Regards
Mirce
On wing and other parts I add acrylic filler...
Than...
...but result is great...
Of course, I have to do a lot of sanding.
Finished parts are ready for panel lines, but I will add them when everything be prepared for those phase...
Regards
Mirce
 03-17-2012 | 10:41 AM
#358
Thread Starter
Thanks Shiftyeddie...
First breath of spring is felt in the air...
P 47 will fly in this season, I thing at August - September.
Regards
Mirce
First breath of spring is felt in the air...
P 47 will fly in this season, I thing at August - September.
Regards
Mirce
 03-31-2012 | 05:46 AM
#362
Thread Starter
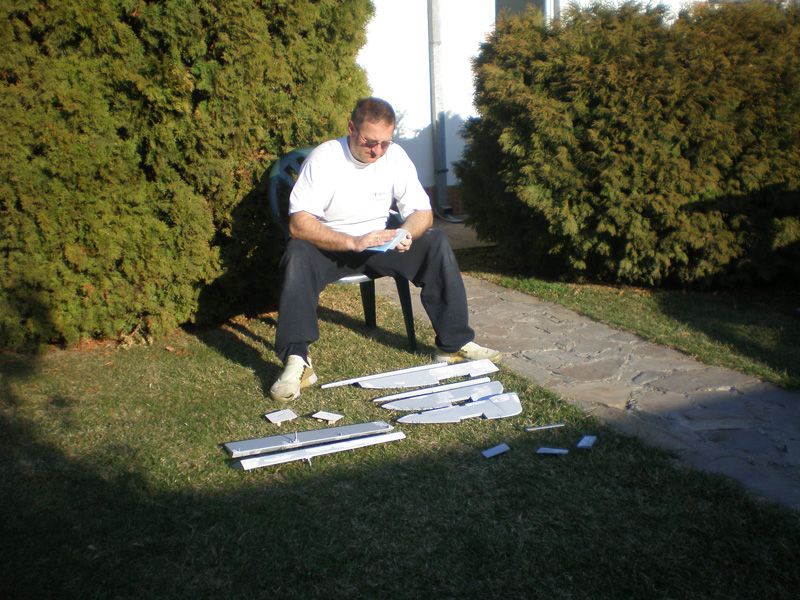
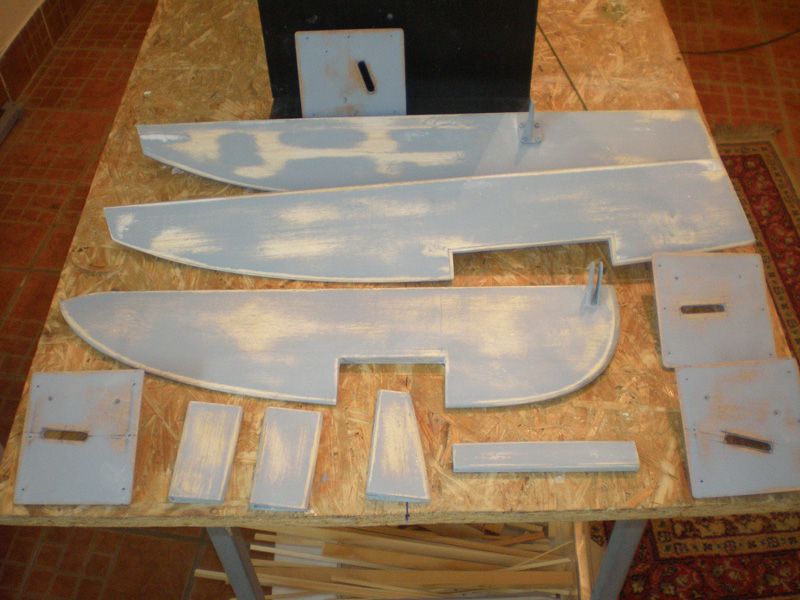
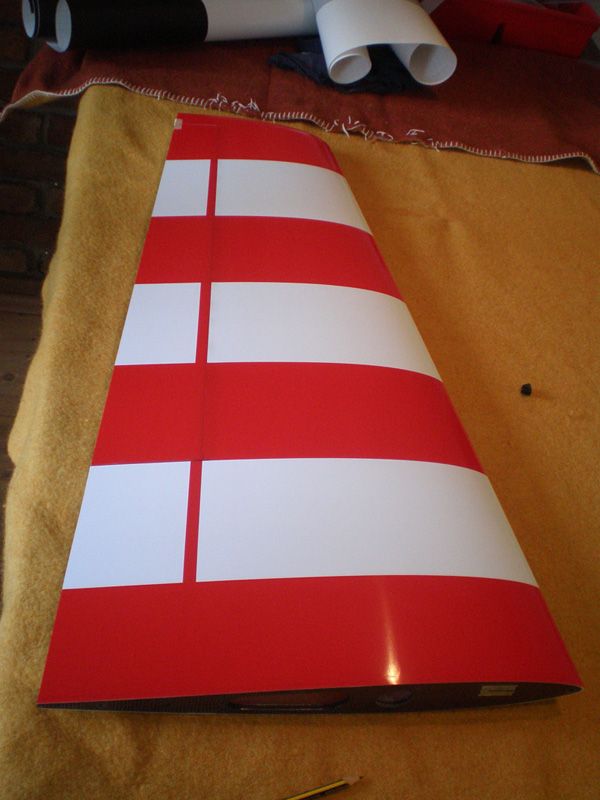
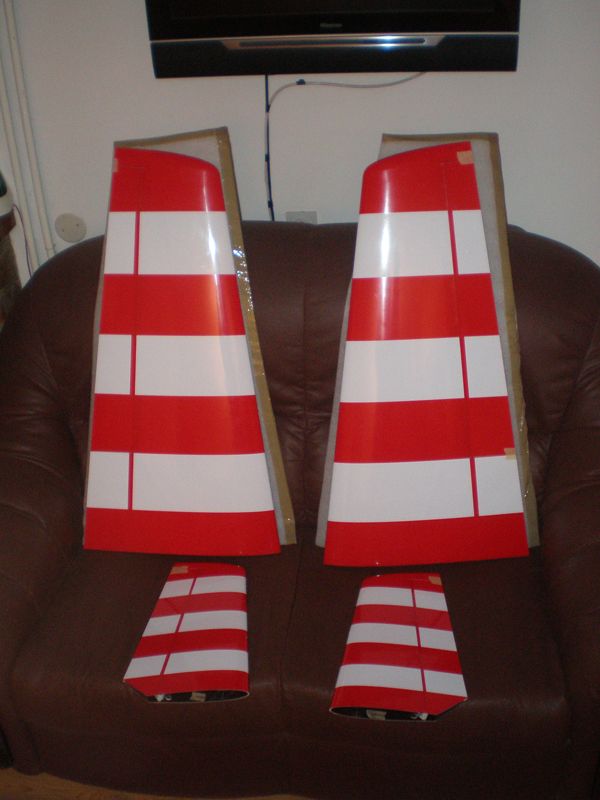
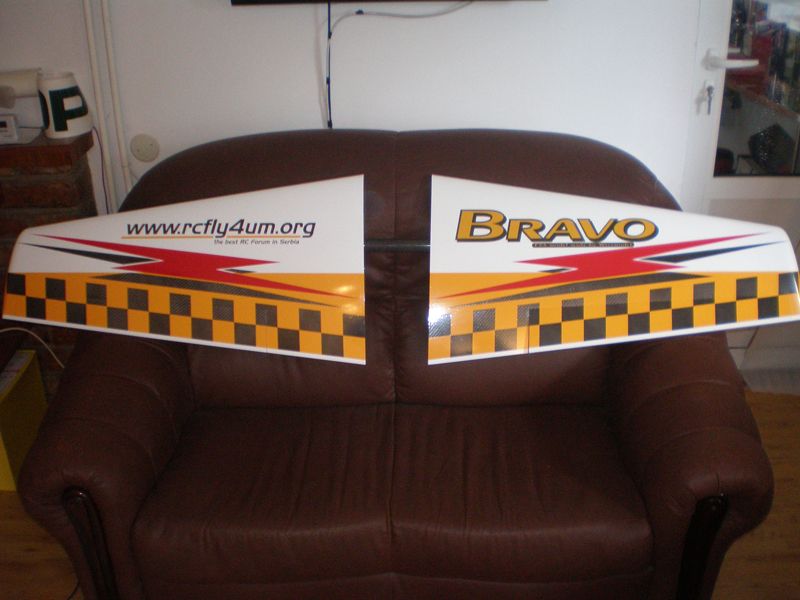
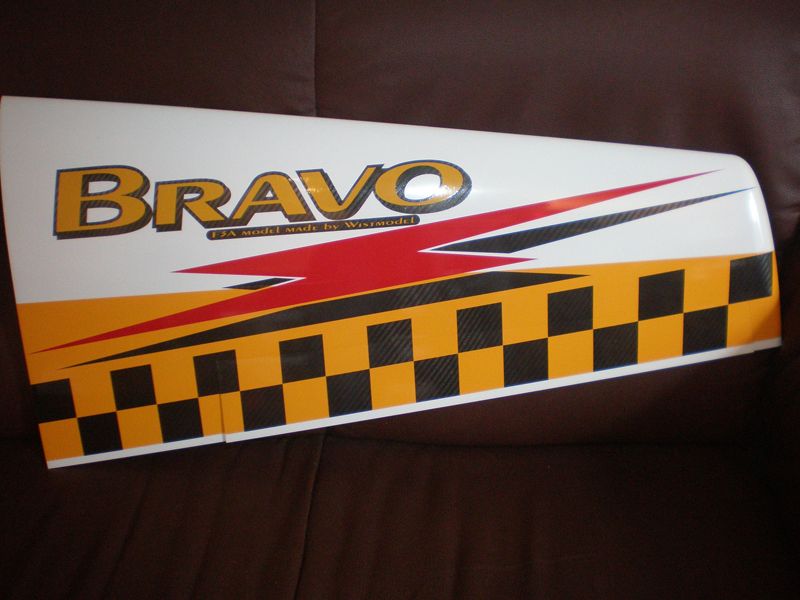
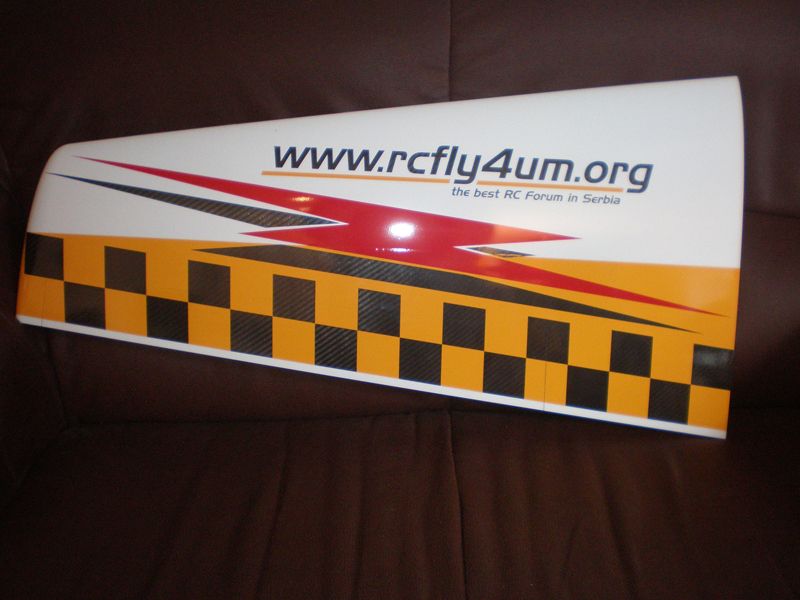
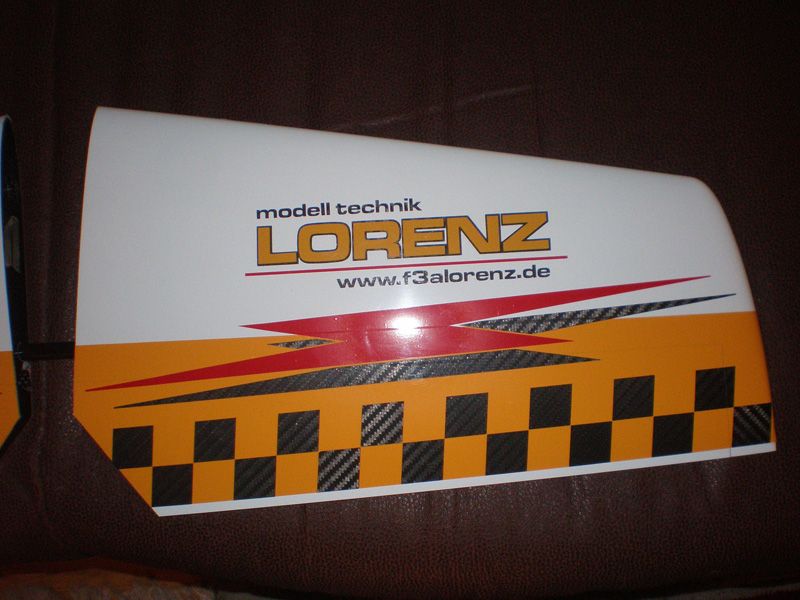
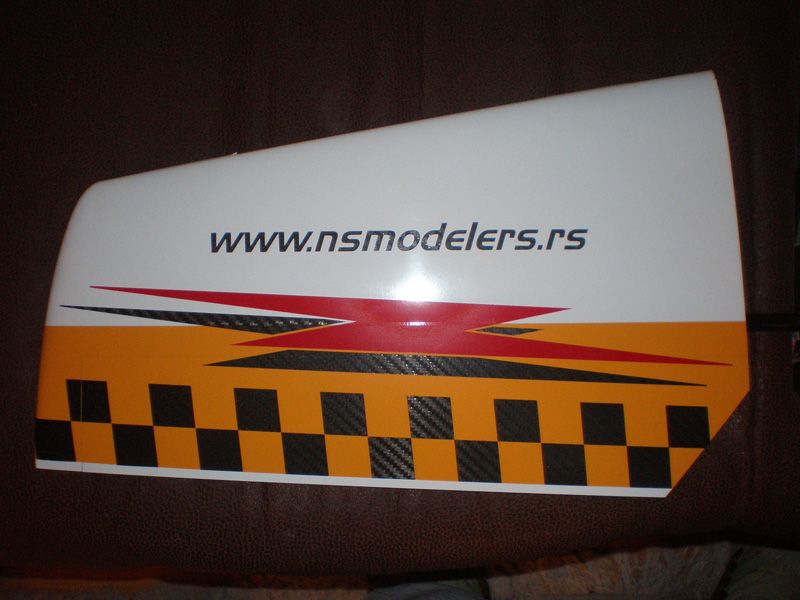
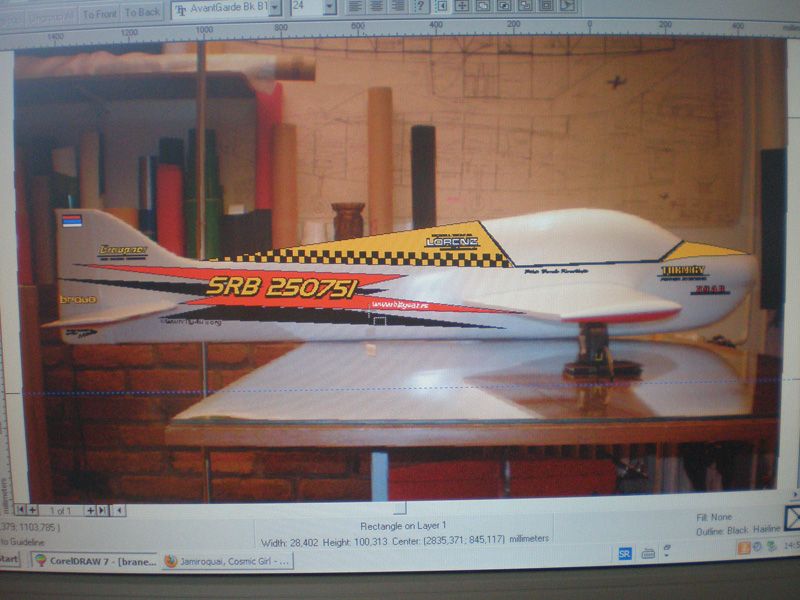
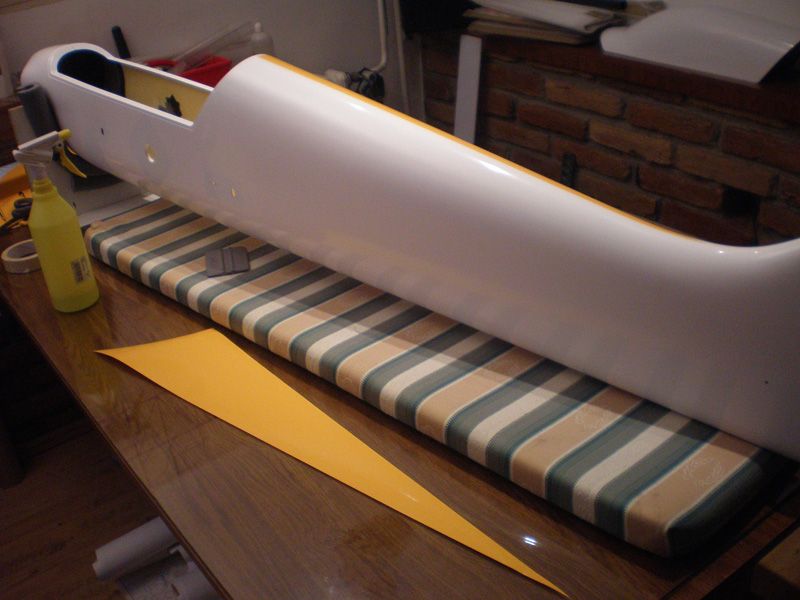
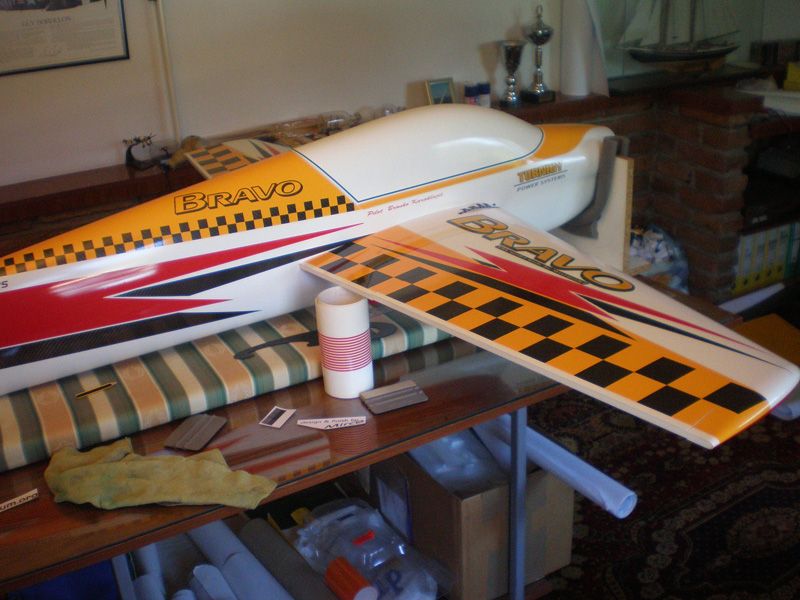
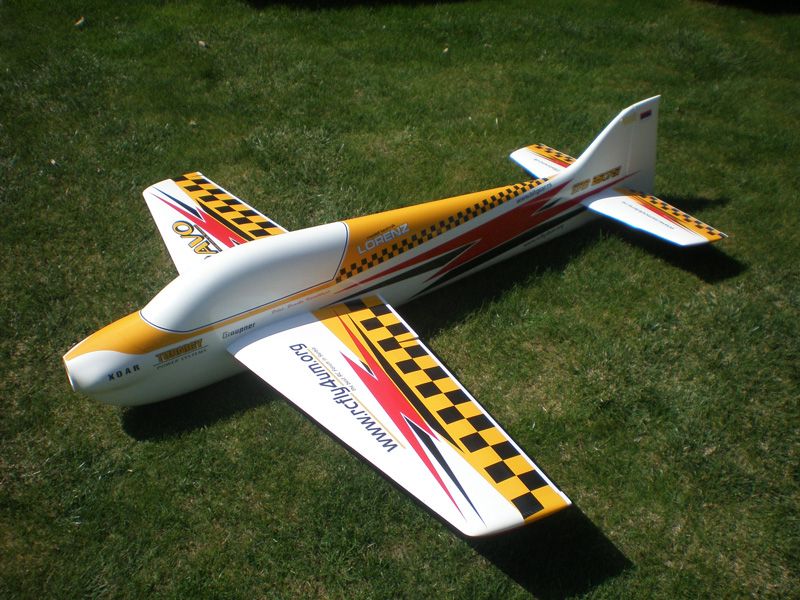
Little off topic, but look what I was doing in last week...
Last few days I spent working on color scheme on my friends F3A model Bravo.
He bought it from Lorenz Modell from Germany. Model was white, and I have job to design and made finish on this model.
Model are extremely easy, so painting it wasn't option, because first must add primer, than color, and everything must be paint with clear cote. So many layers will add to much weight, so we decided to made finish with self adhesive foils.
Self adhesive foils are grate on flat surfaces but it can't be apply on rounded shapes. So, I must create design which will match with model...
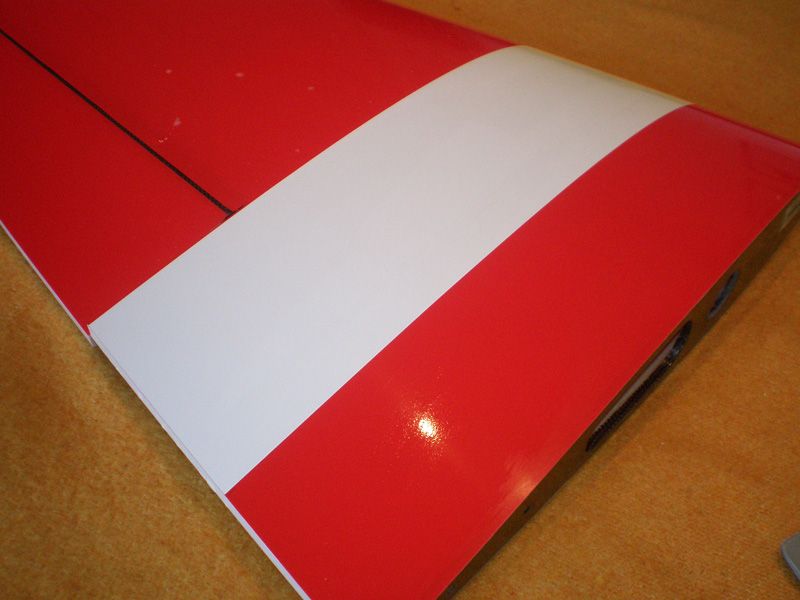
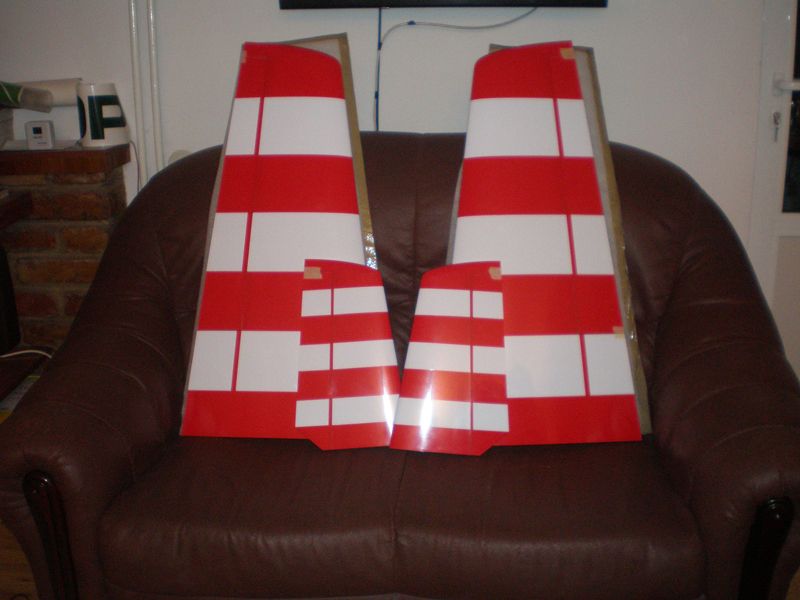
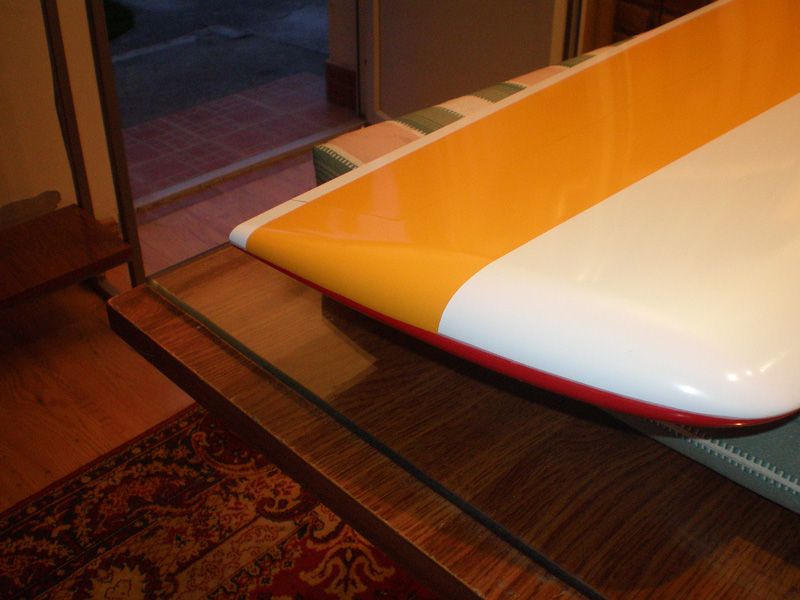
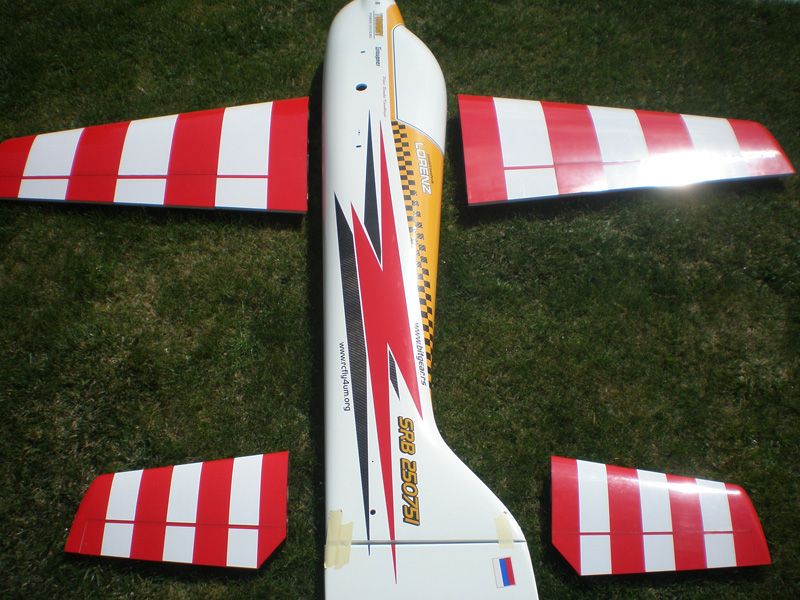
On Bravo upper surface and complete fuselage are white, and botom side of wings and elevators are red.
My friend have wish to color scheme be totally different on upper and lower side.
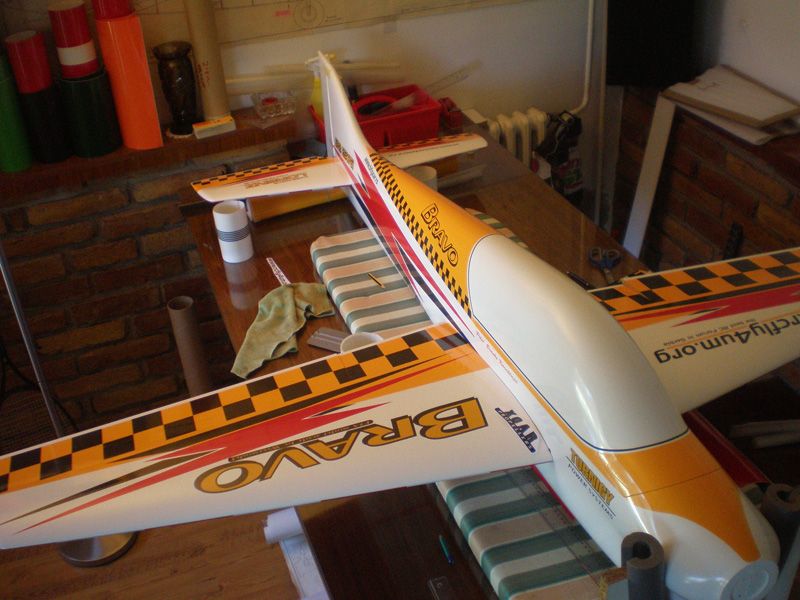
But before story about color scheme, look few pictures about model...
Bravo is last generation in full composite F3A model...
Bottom wing side...

Trailing edge...
Cabin is made from thin carbon...
Elevators was made with same technology as wings...
Few details about landing gear...

And finally fuselage...
OK, now when we know how model look, lets start with work.
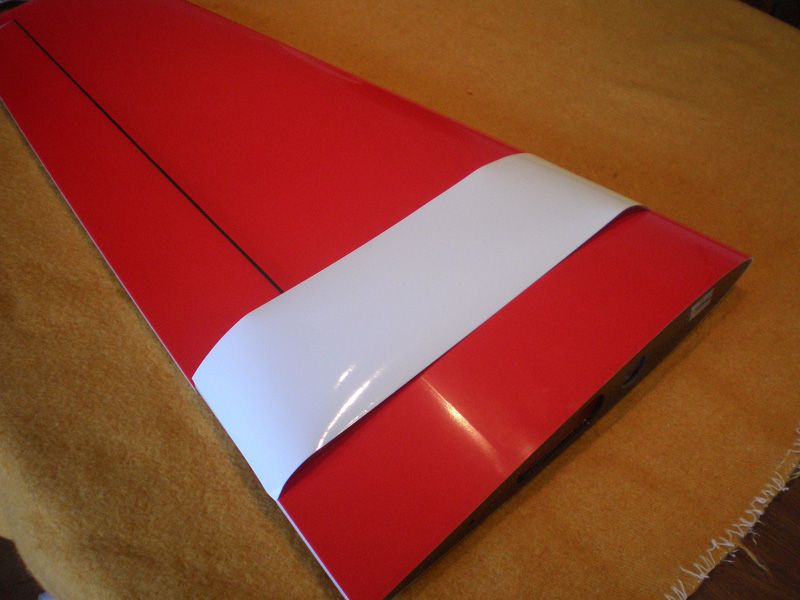
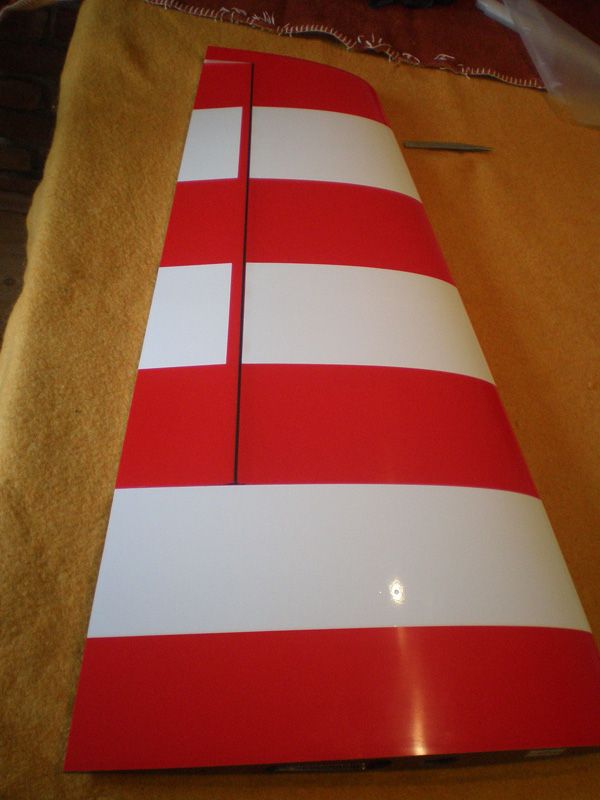
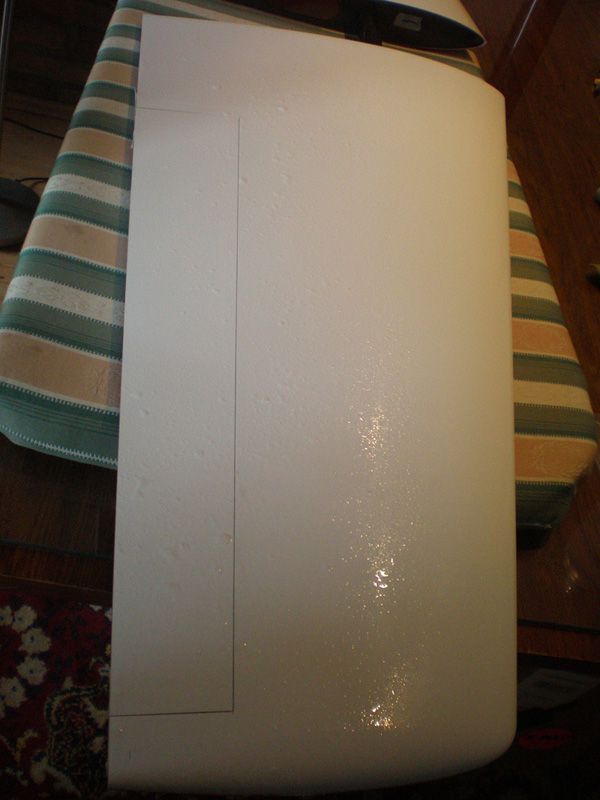
I start working on lower wing side, and apply three white stripes...
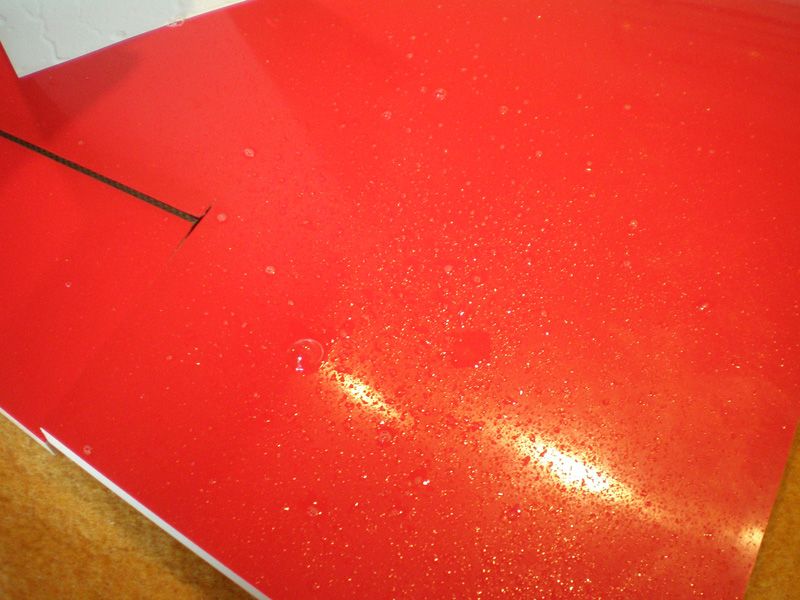
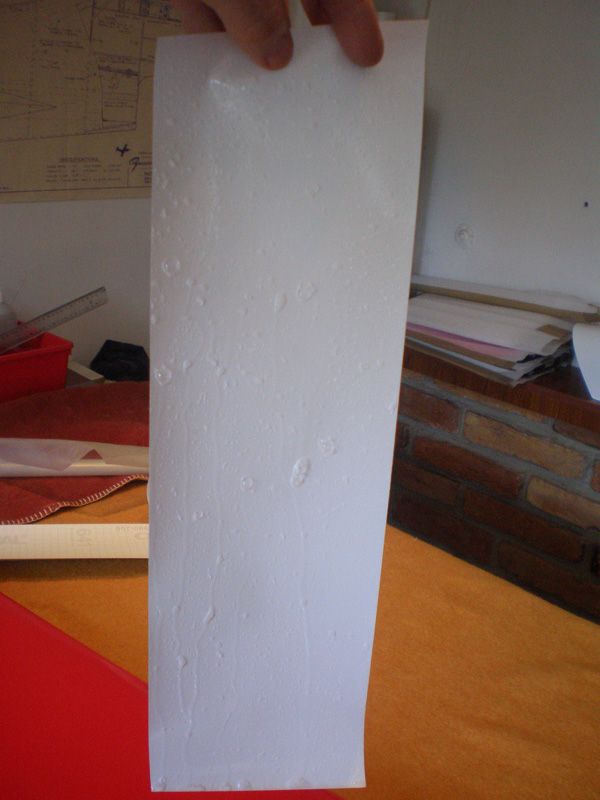
I use Oracal 641 self adhesive foils. Because wing surface are plastic, very thin and gentle, I use water for applying foil. System is simple, add water on surface, add water on sticky foil side, and aplly foil on surface. Bacause foil is wet, I could position white line very precise on wing...
Than I used this little tool, and squeeze out water...
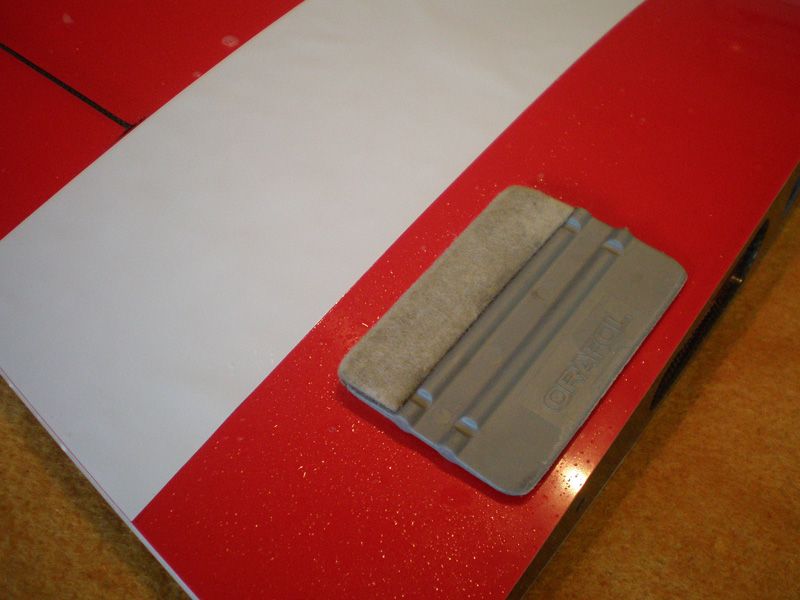
Surface are without any bubble...
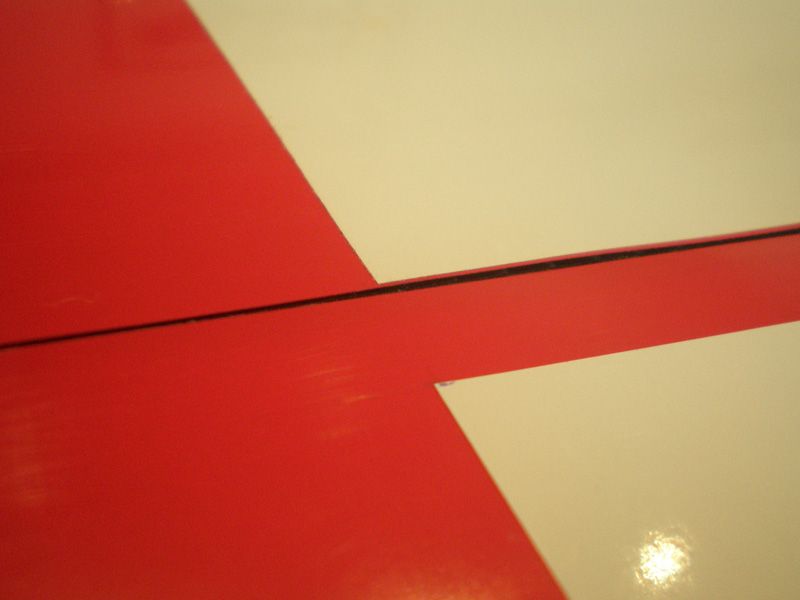
When water dryed I add masking foil in edges which I want cut...
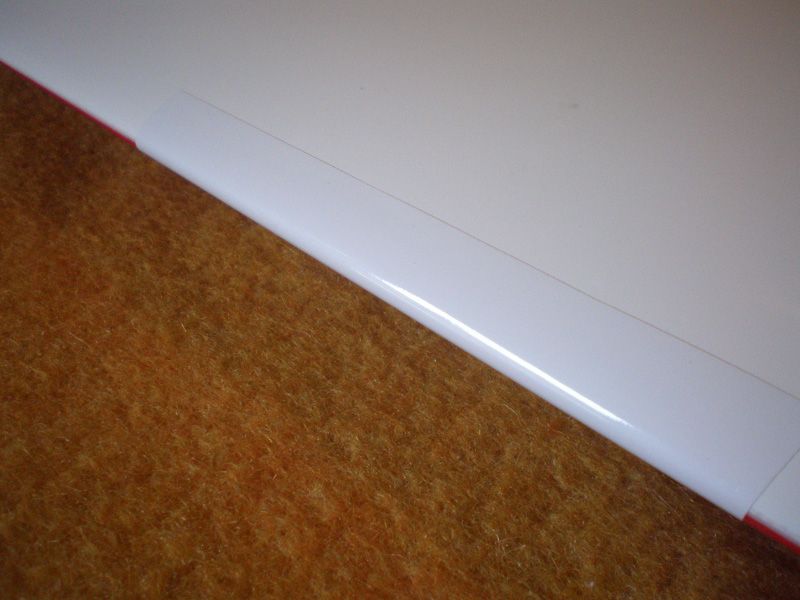
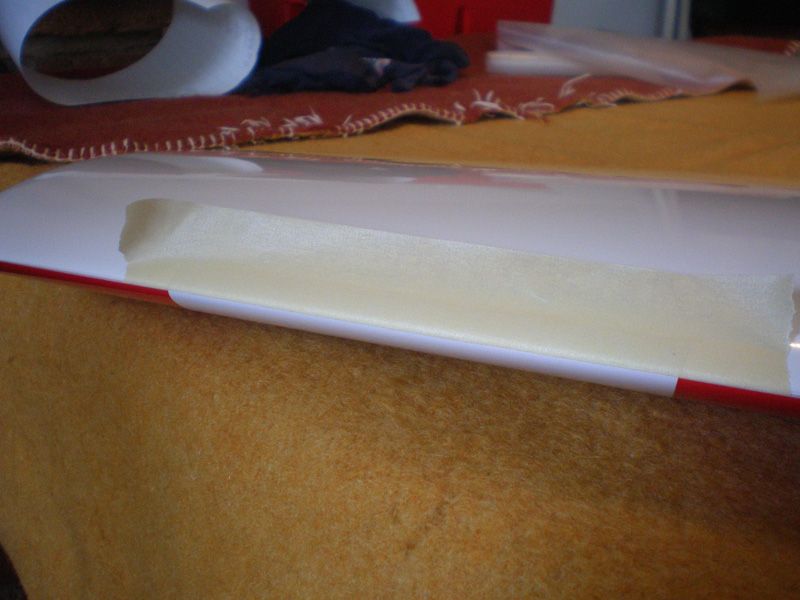
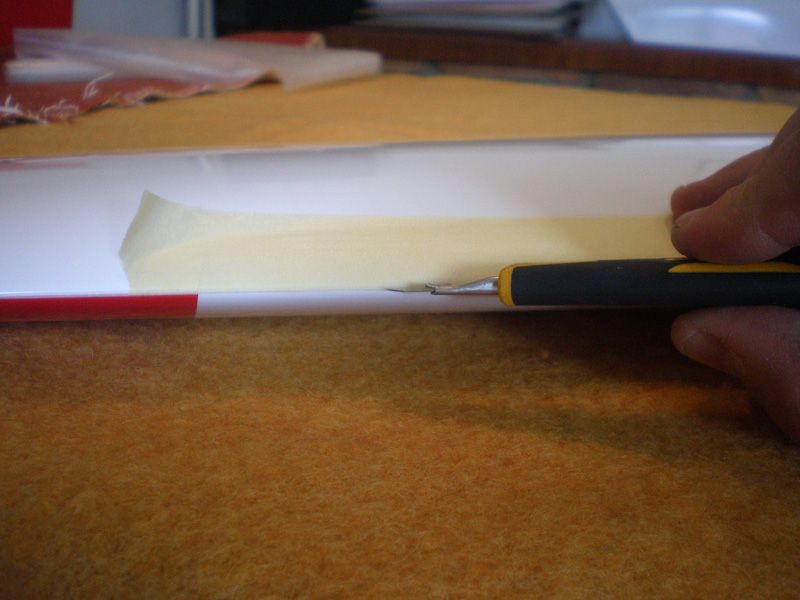
On ailerons I must move white line from edge where aileron come inside in the wing. Gap is so small that foil will stuck on the edge...
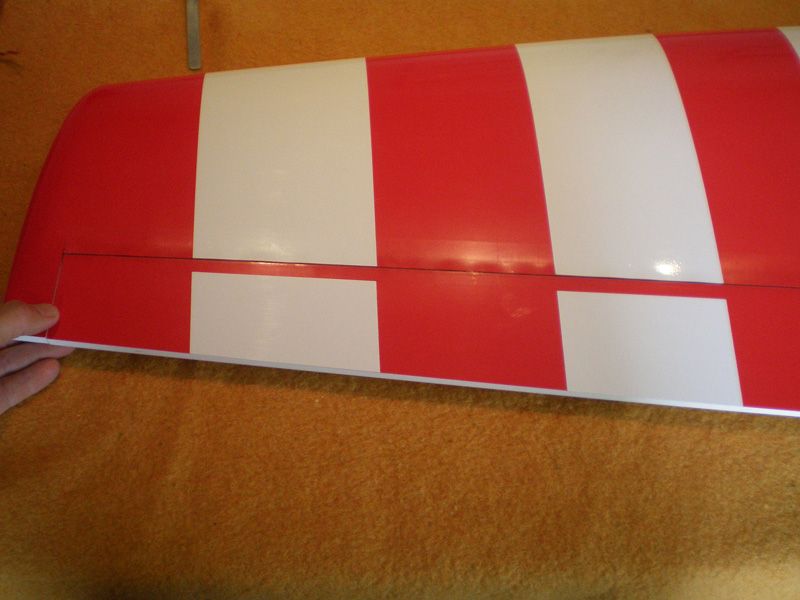
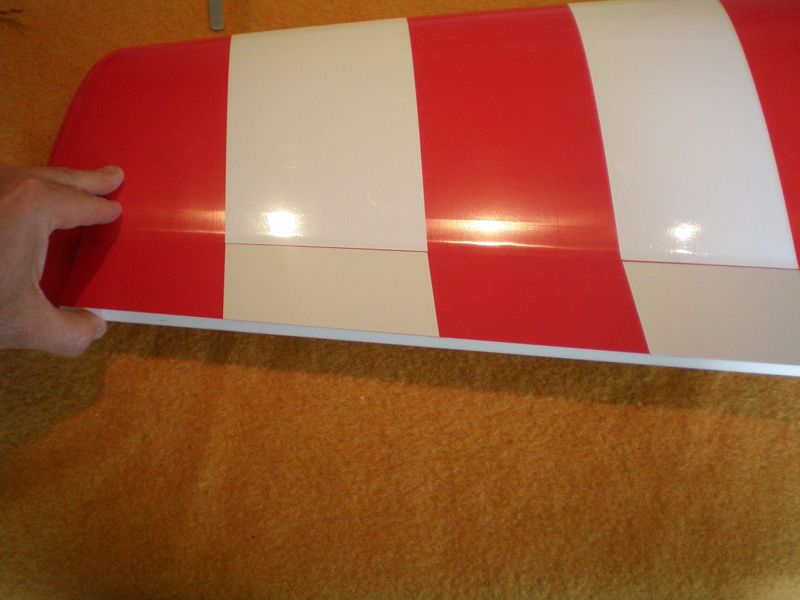
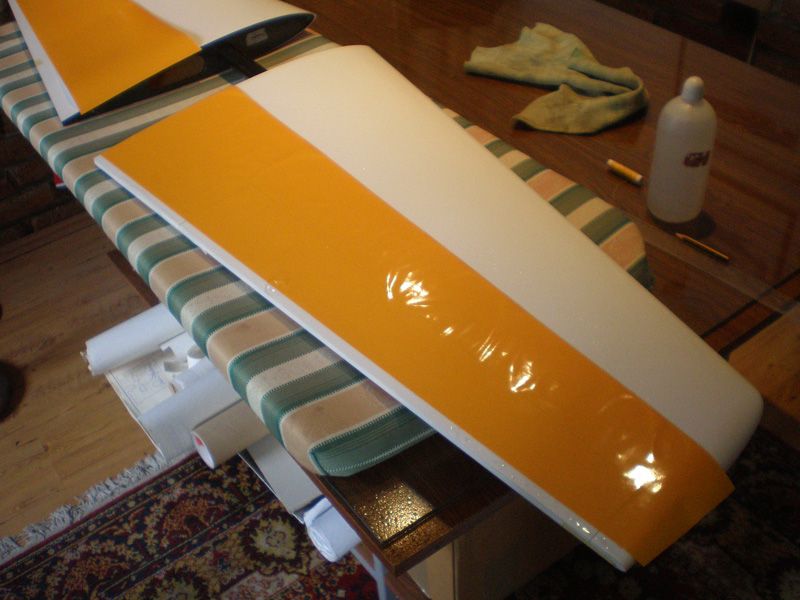
Finally, I add one red stripe on first white line to made all lines same...
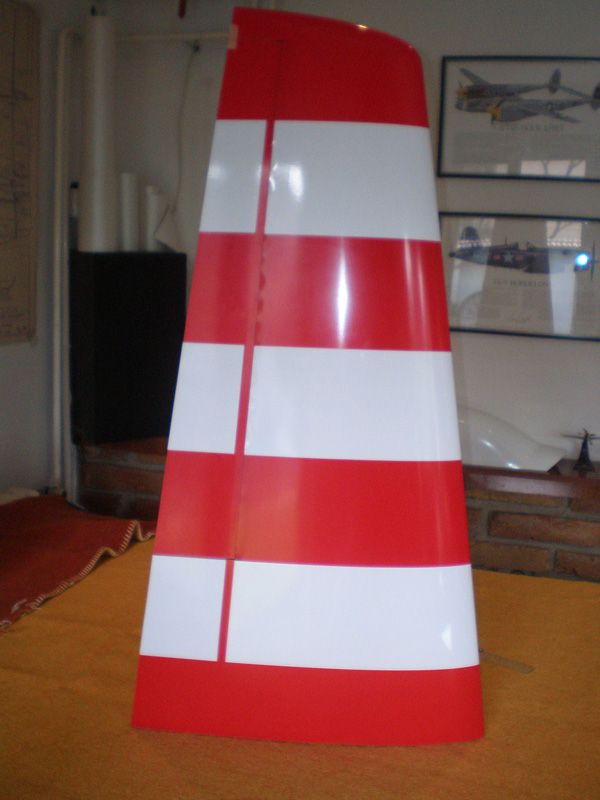
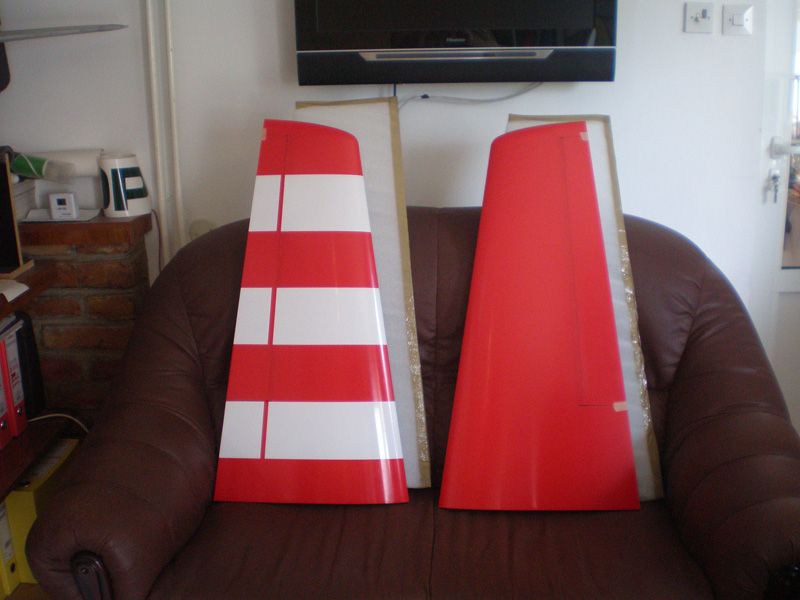
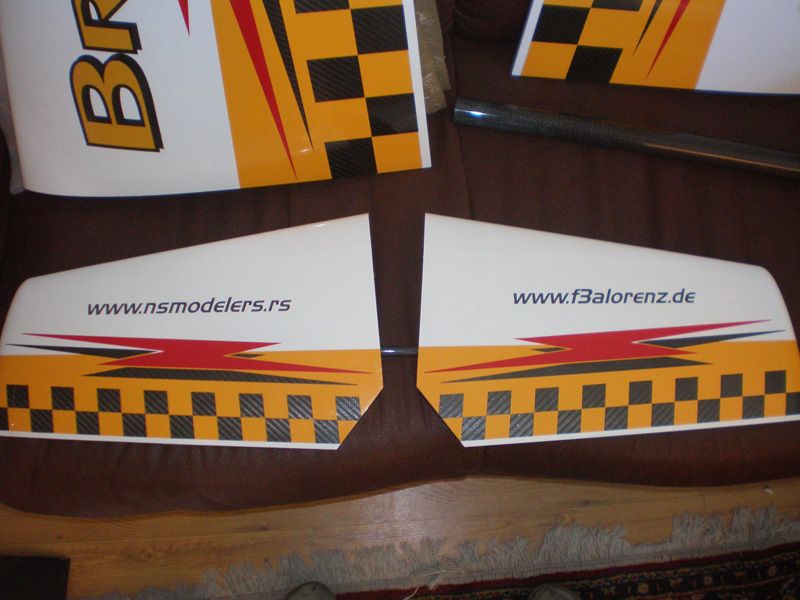
Than I made this process few more times, and get white lines on bottom sides... Same procedure was for elevators, but for applying white stripes I was not using water...
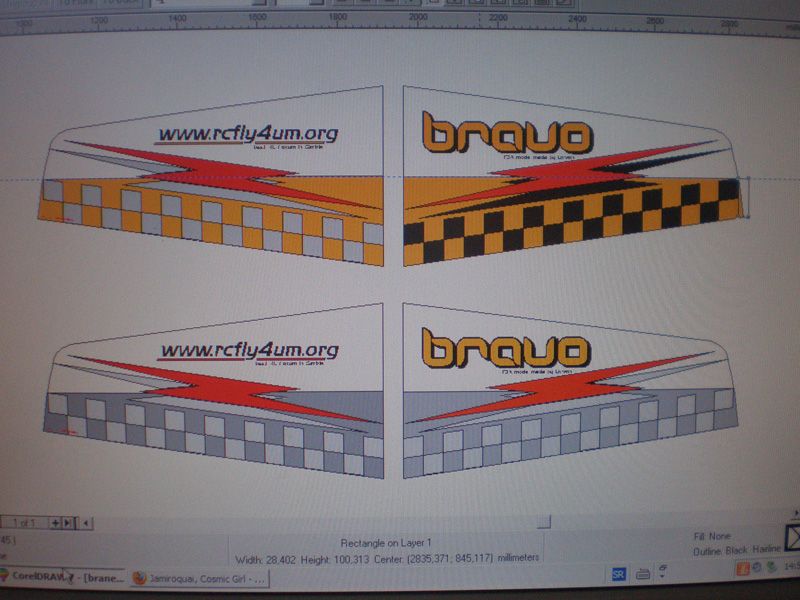
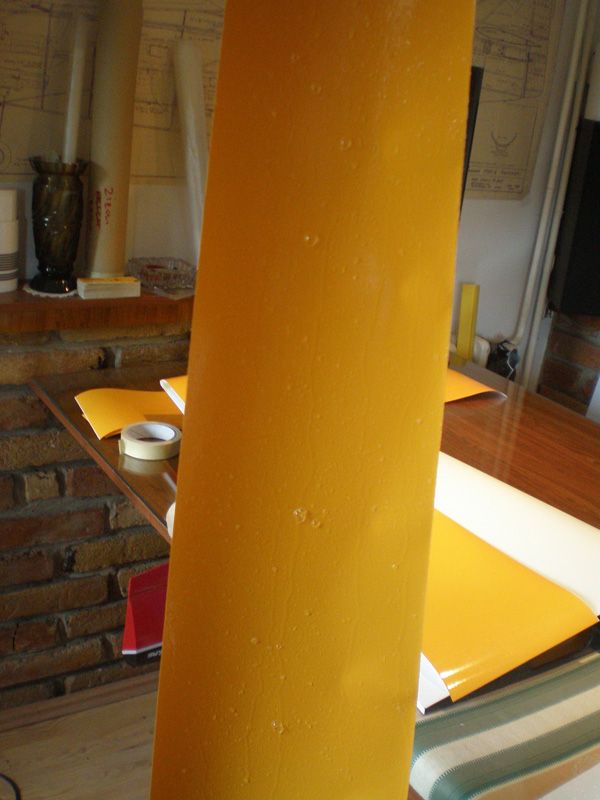
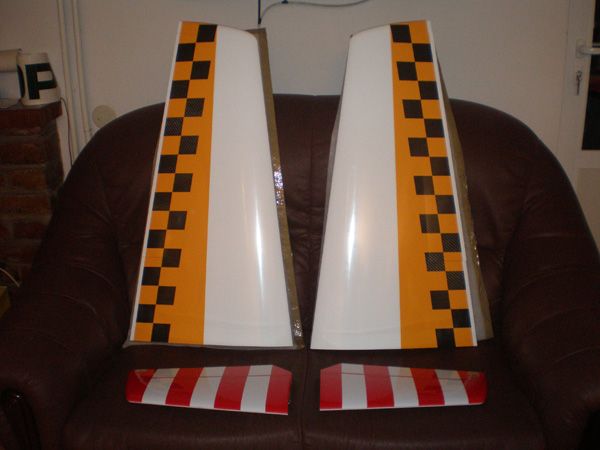
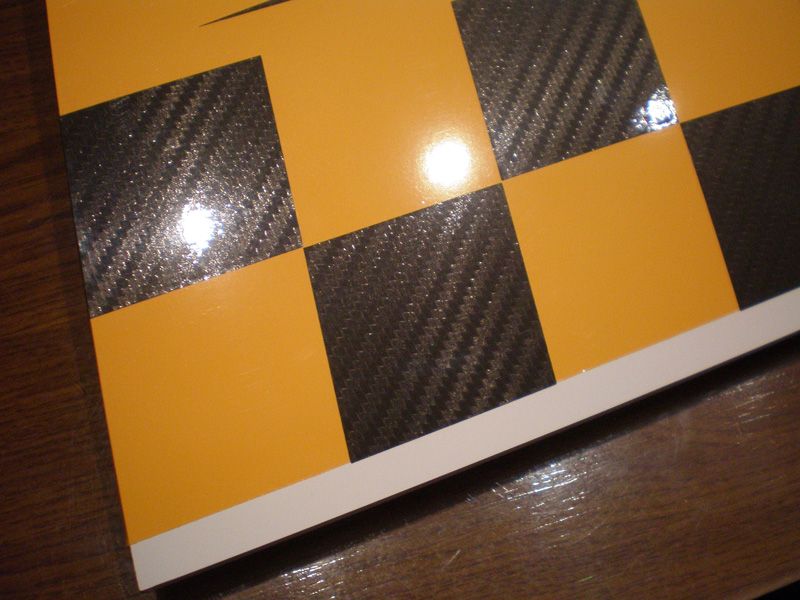
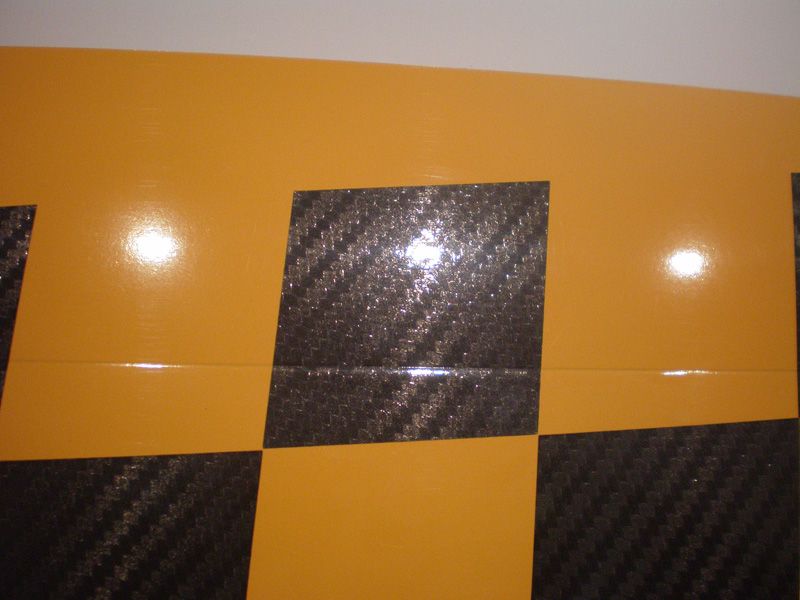
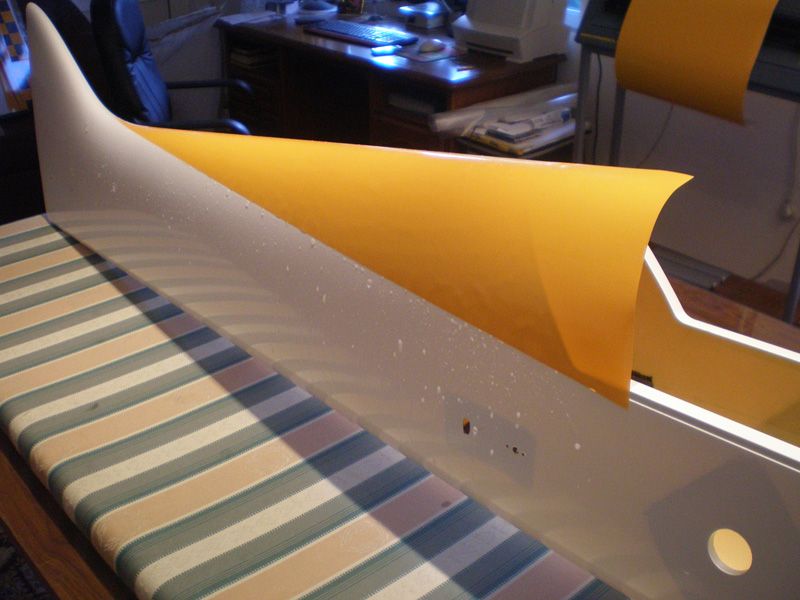
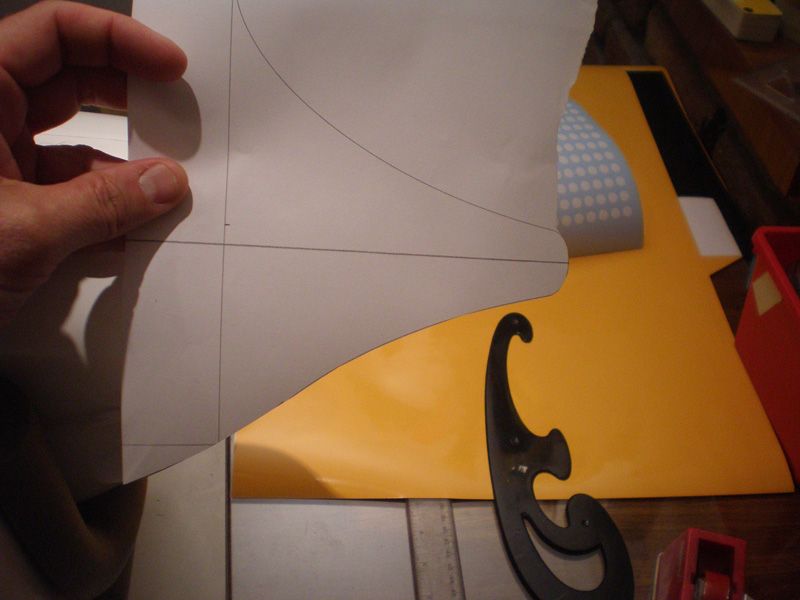
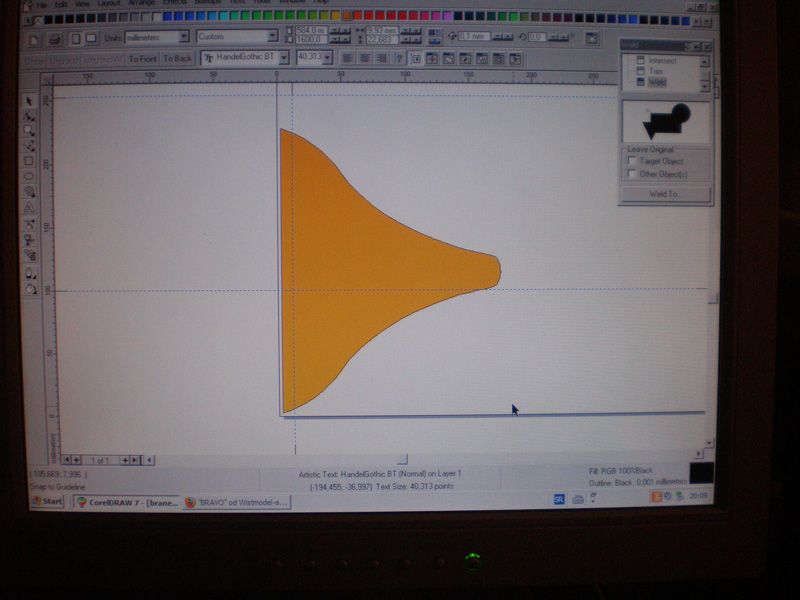
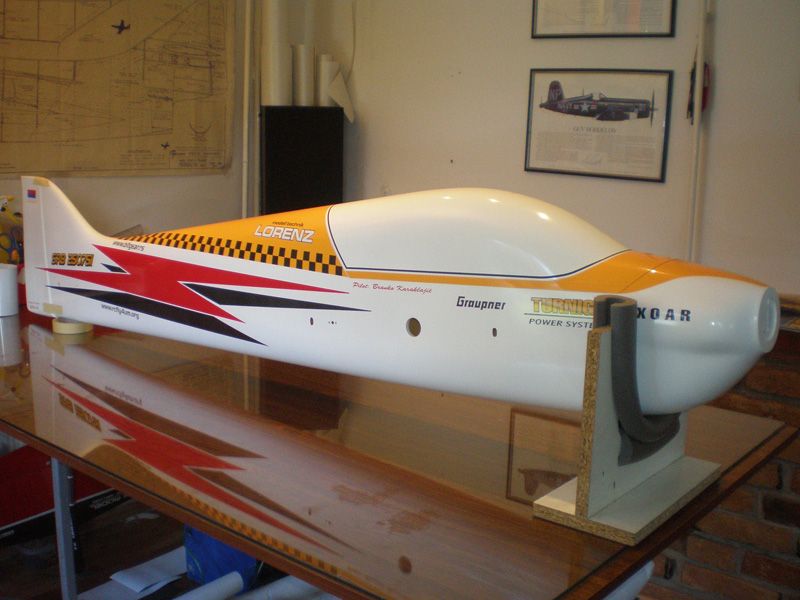
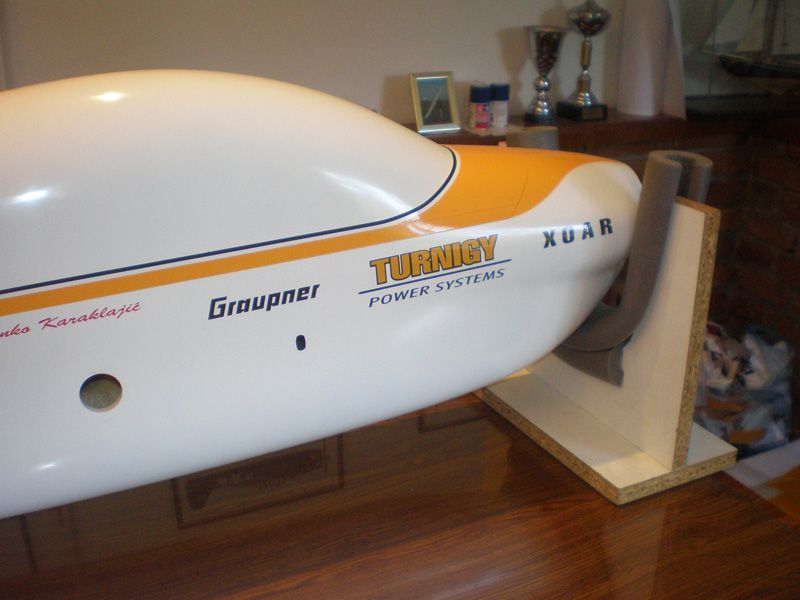
For upper surface I made totally different color scheme. First I draw everything in computer in Corel... I made few proposals, to enable my friend to choose colors, but for me, and for him also, yellow and black was the best combination...
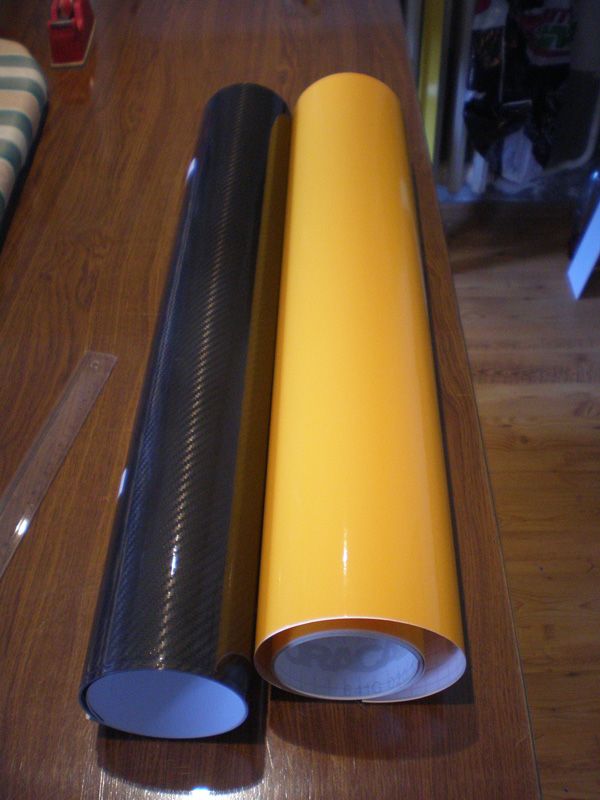
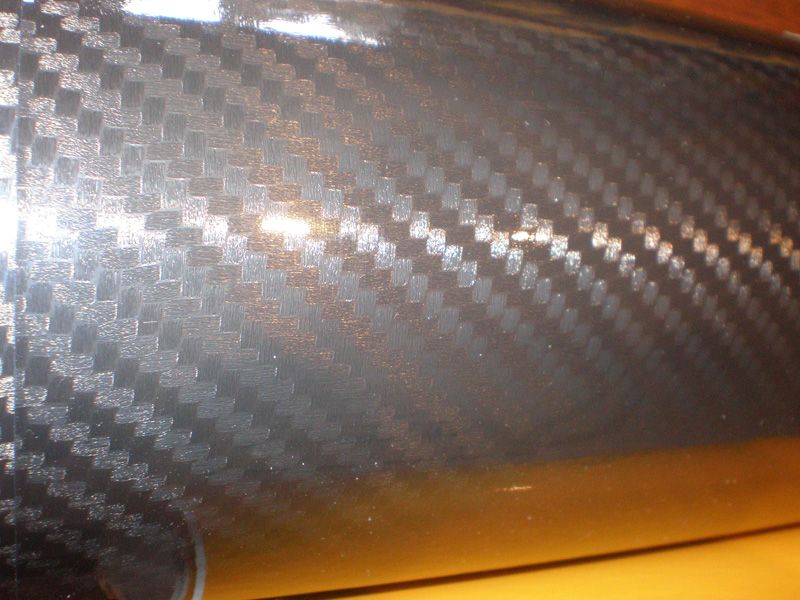
I bought yellow foil, and instead off black I take foil like carbon...
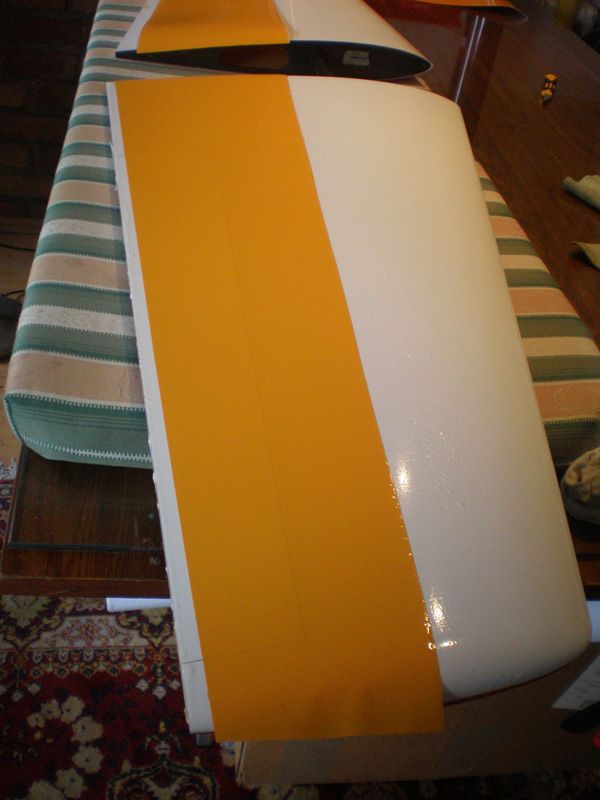
On white wing side, first I add yellow areas, but before that I put together wings to draw a straight line. For that operation I use very "high tech" tool...
Gluing was again with water...
Technique was same like on bottom side...

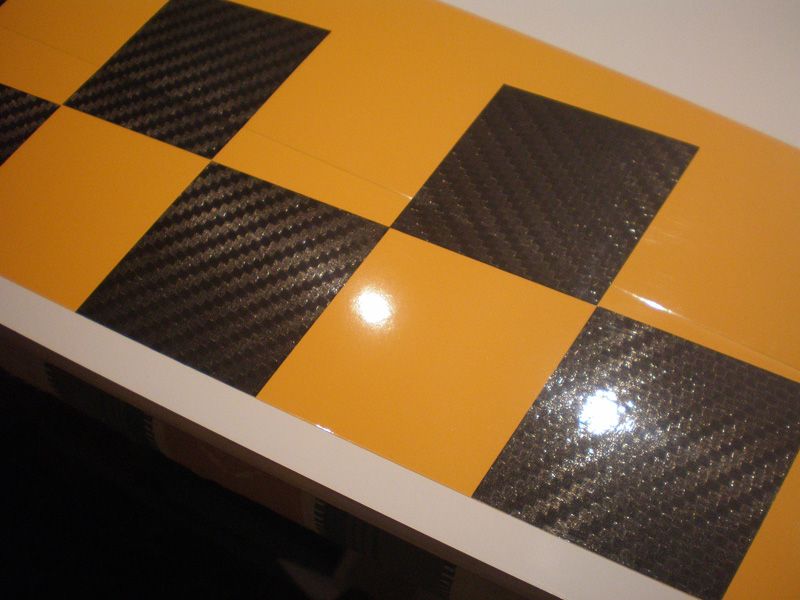
Than I apply cubes made from carbon foil...
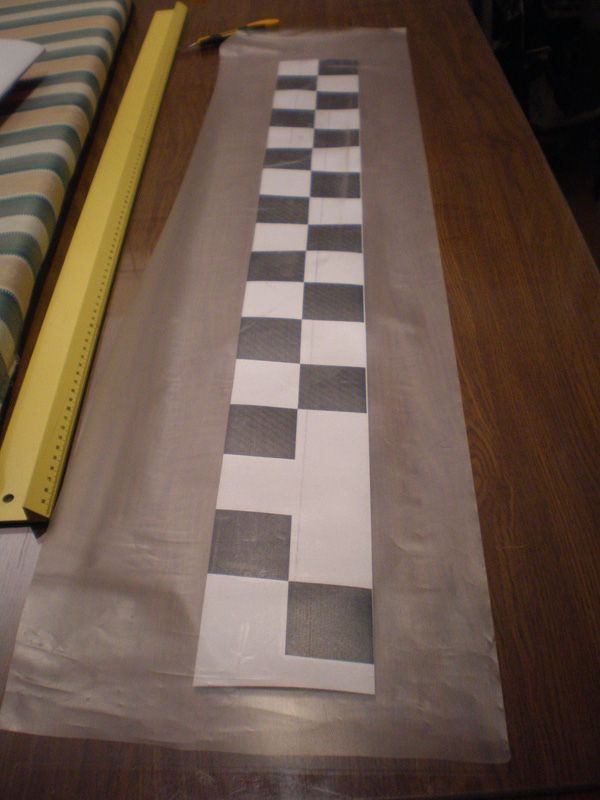
I used transfer foil for this...

Than I made and apply lightning shadow, which was again from carbon foil...
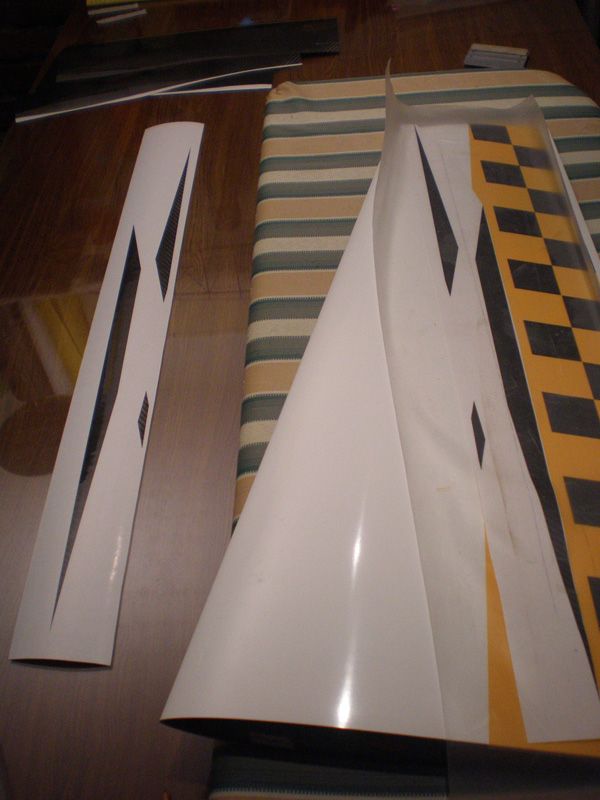
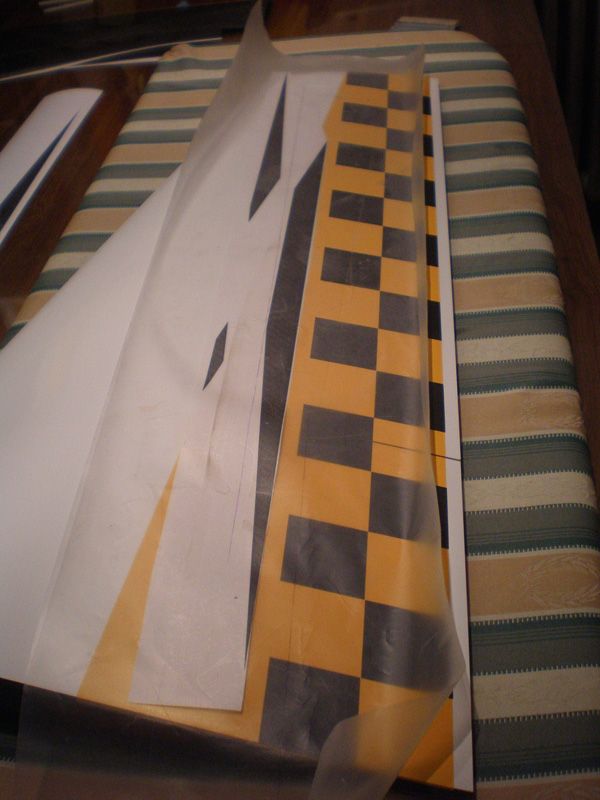

After that letters and finally red lightning...

Same procedures was on elevators...

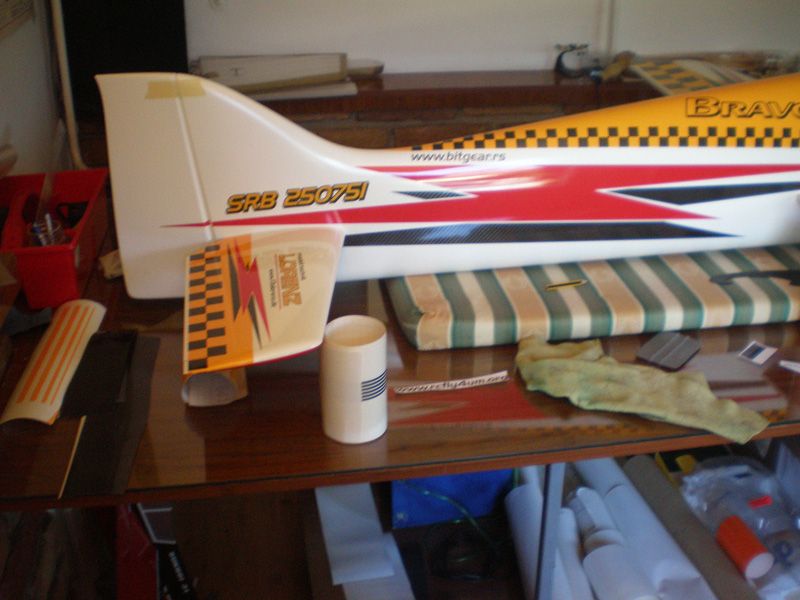
Next was fuselage...
First yellow areas...

I add black stripe for easier cutting...
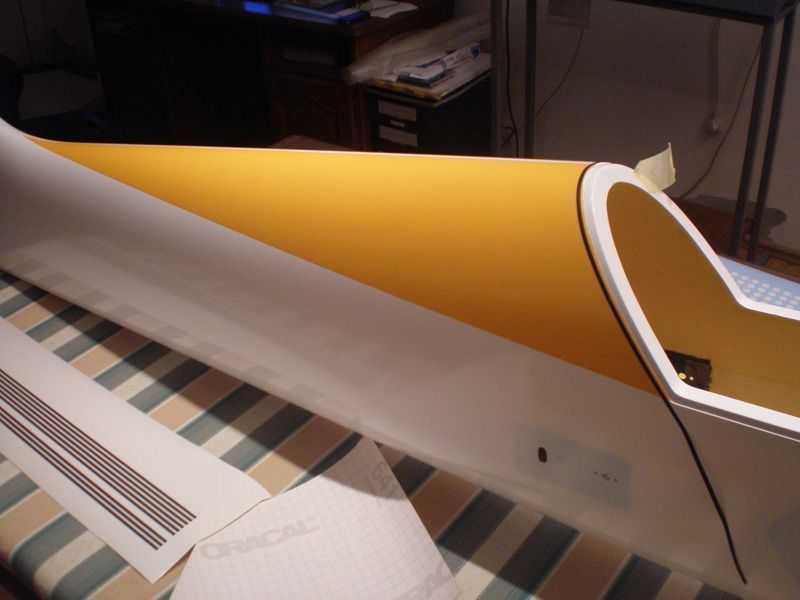
Than copy - paste everything on other side...
Next was front end of the fuselage...
I must made paper template...
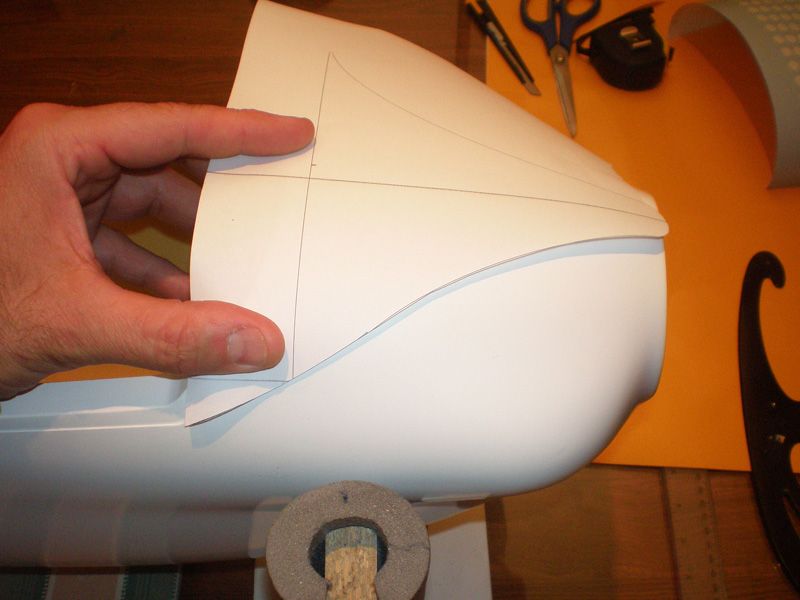
Than I scan it in computer and finally cut on my Roland cutter......
Next step was easy...
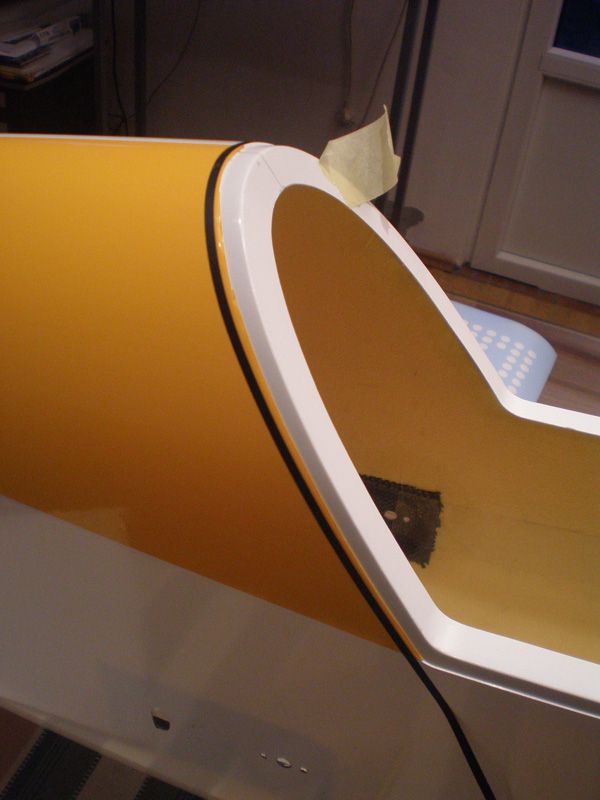
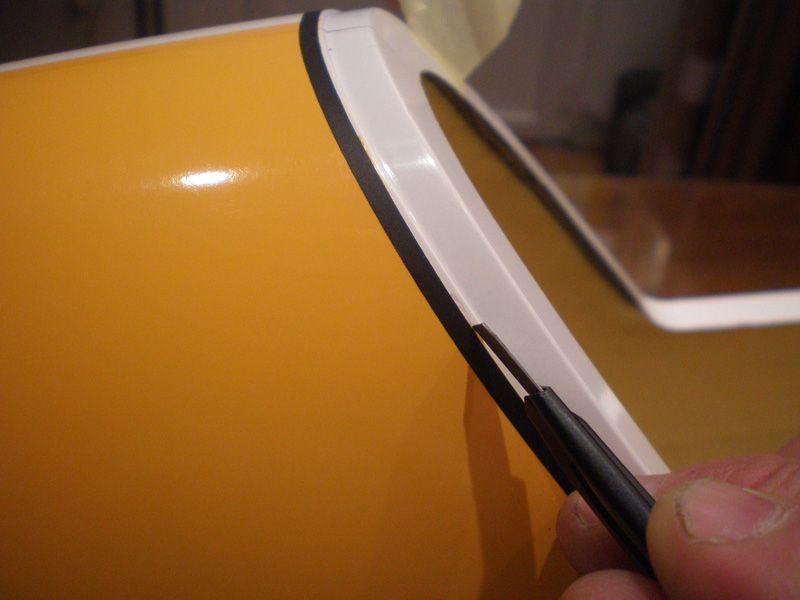
Than I add yellow and black line on cabine. Yellow line connect front and rear yellow fuselage areas...
But, when I add cabin on fuselage I saw that in fron was big white area...
Paper templates again...
...little cutting, little trimming and...

On the foil lap I add "warbird" details - screws...
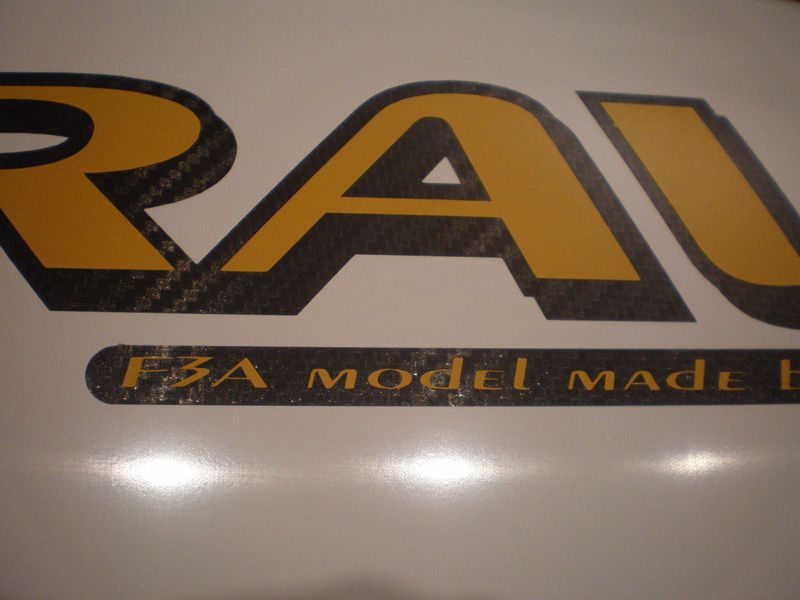
Next steps was to add letters, lightning with shadow, and all other details...
I always made letters first on paper...
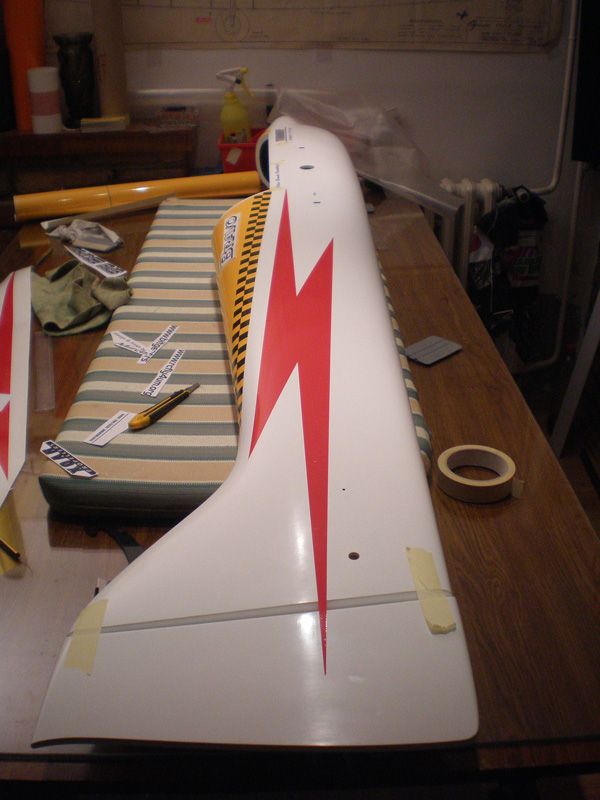

But, when I put wings on, I saw that right elevator is to much color full for my taste, so I change design...
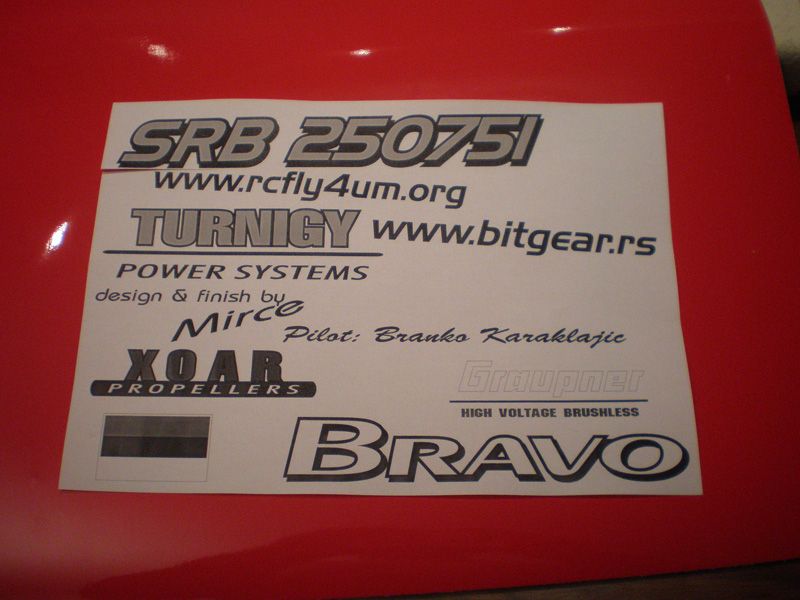
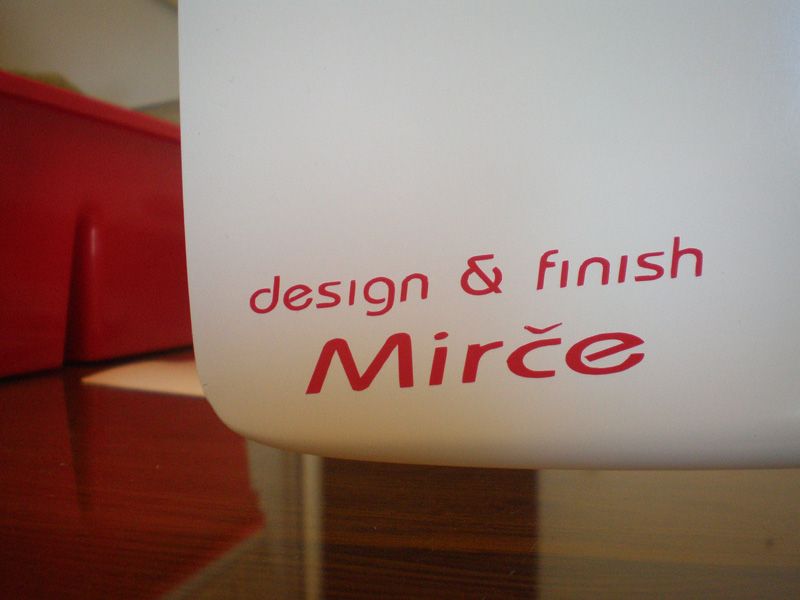
Last touch was adding authors logo...
And finally Bravo in full shine...
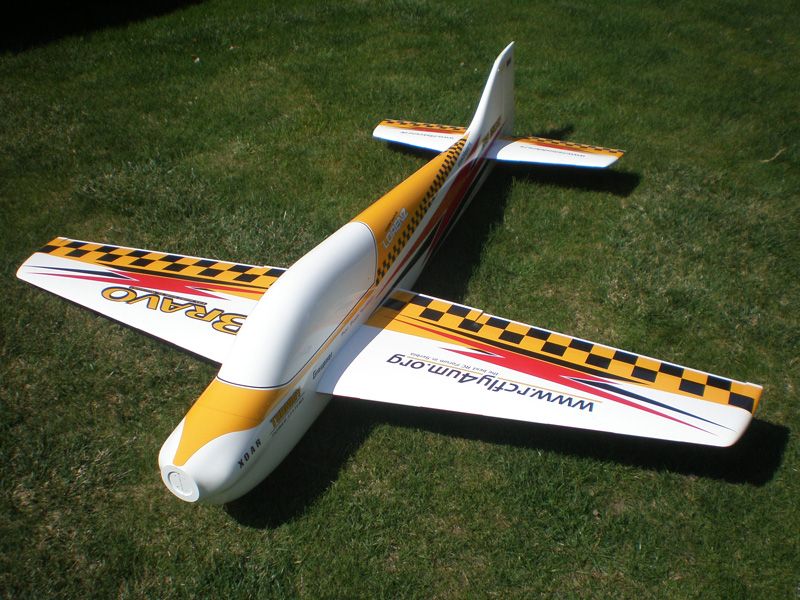
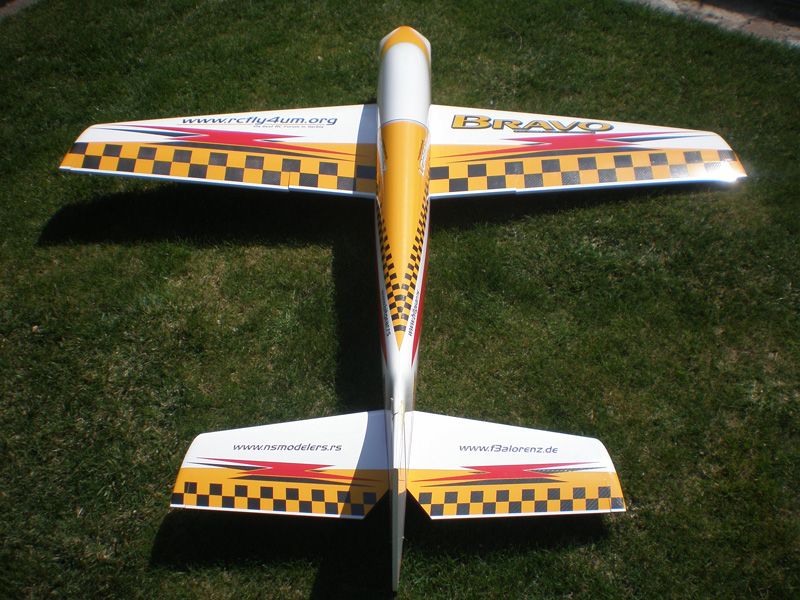
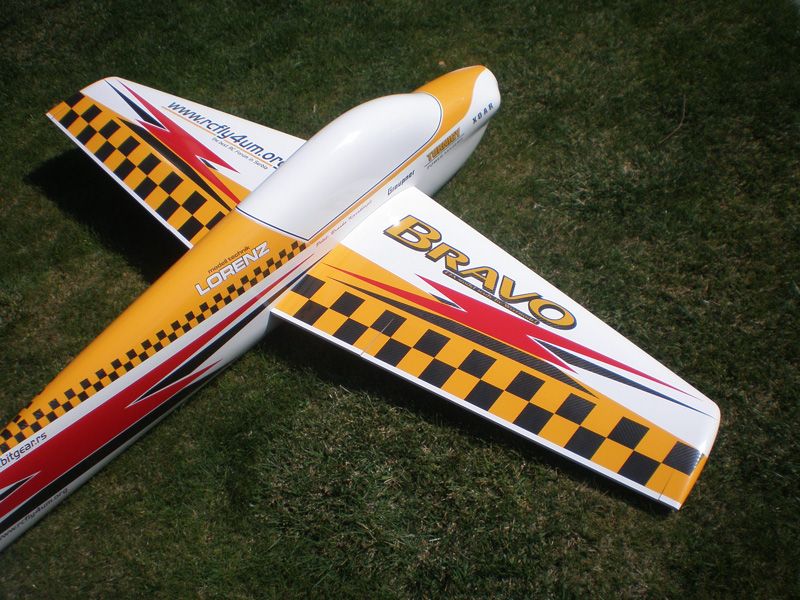
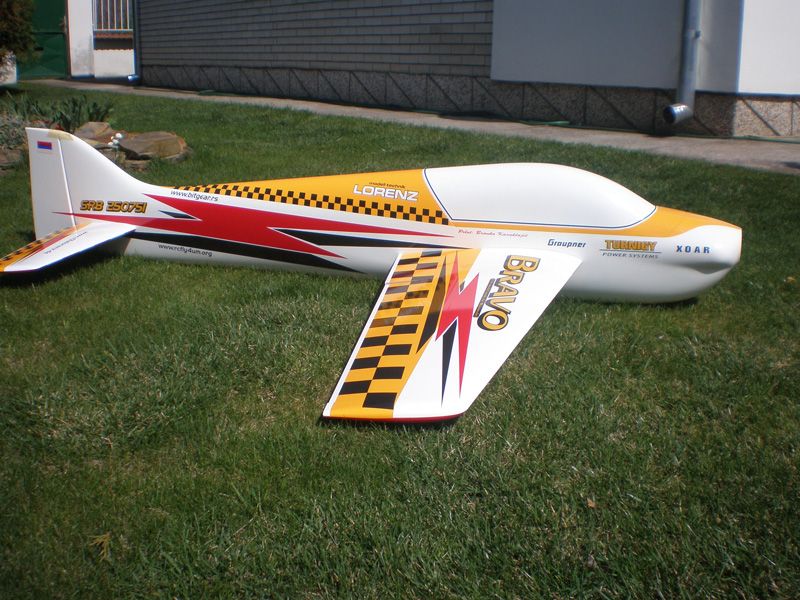
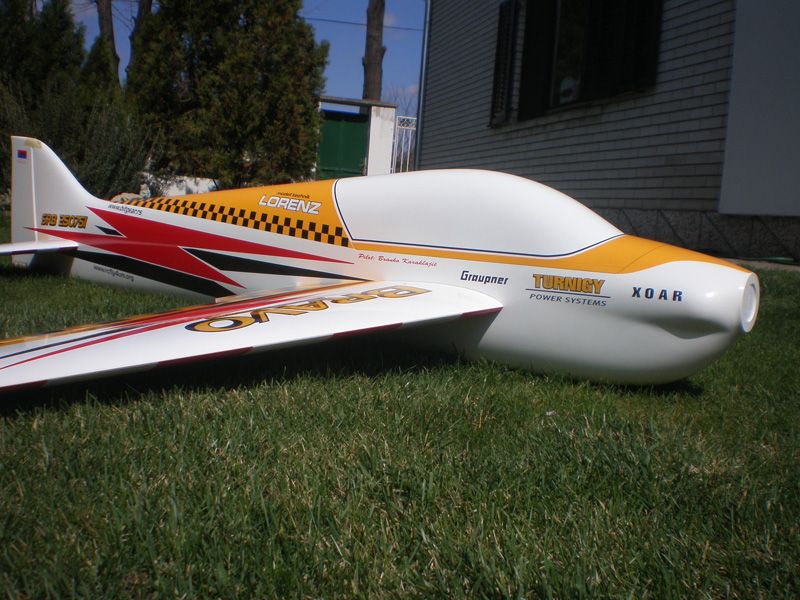
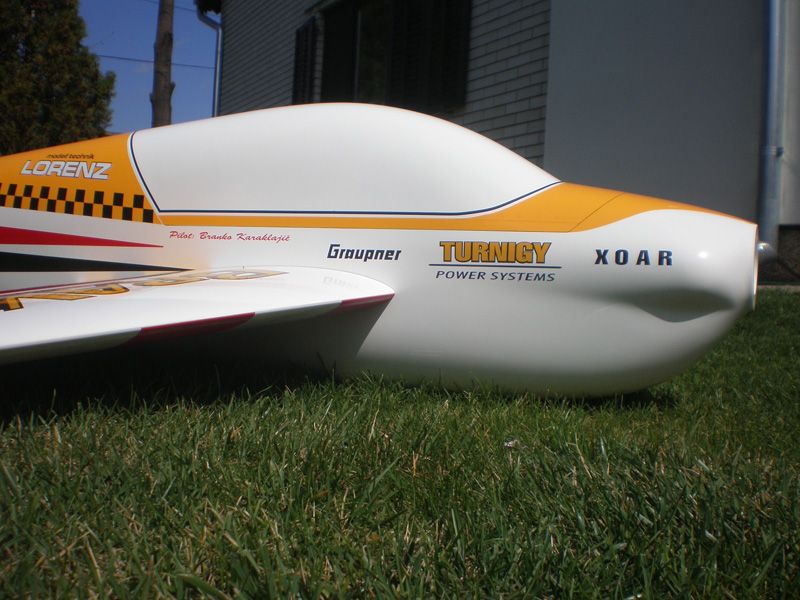
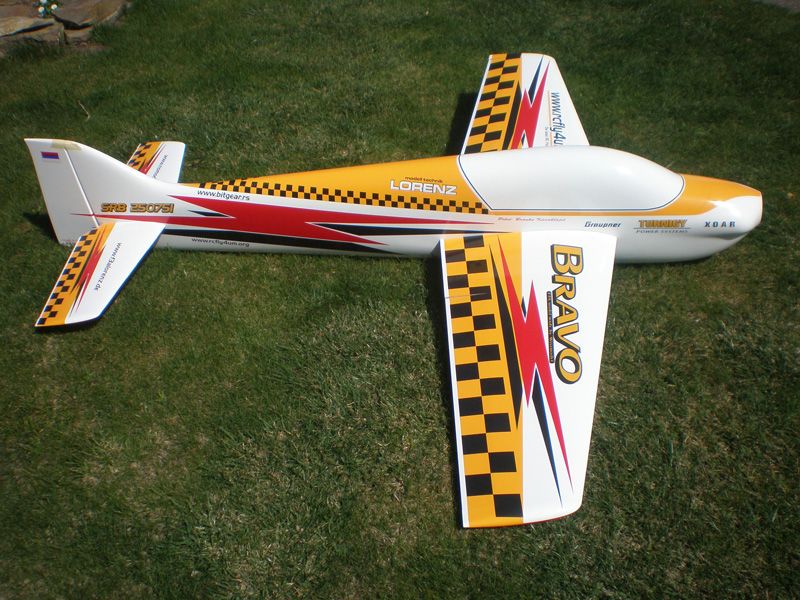
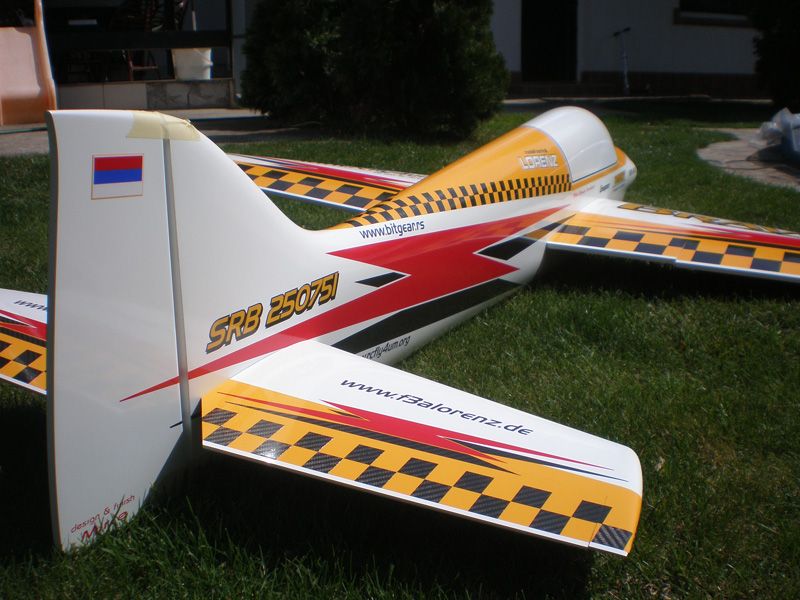
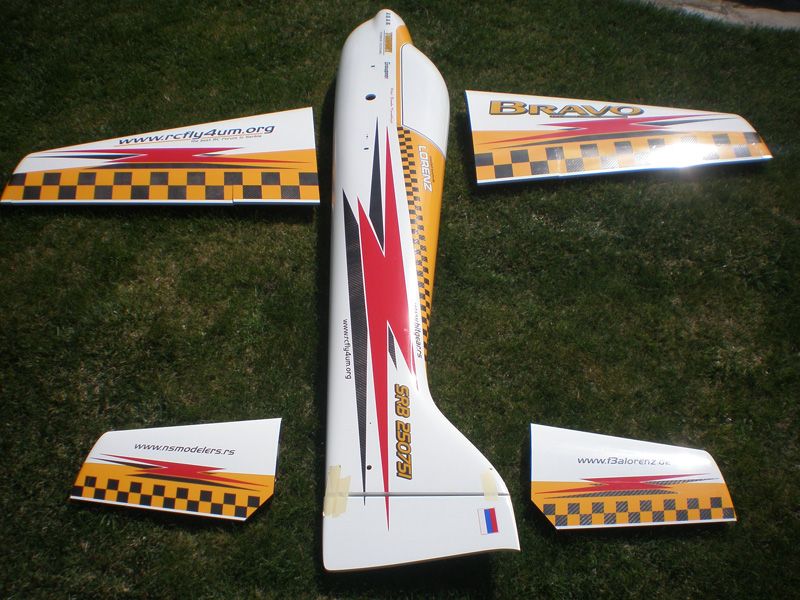
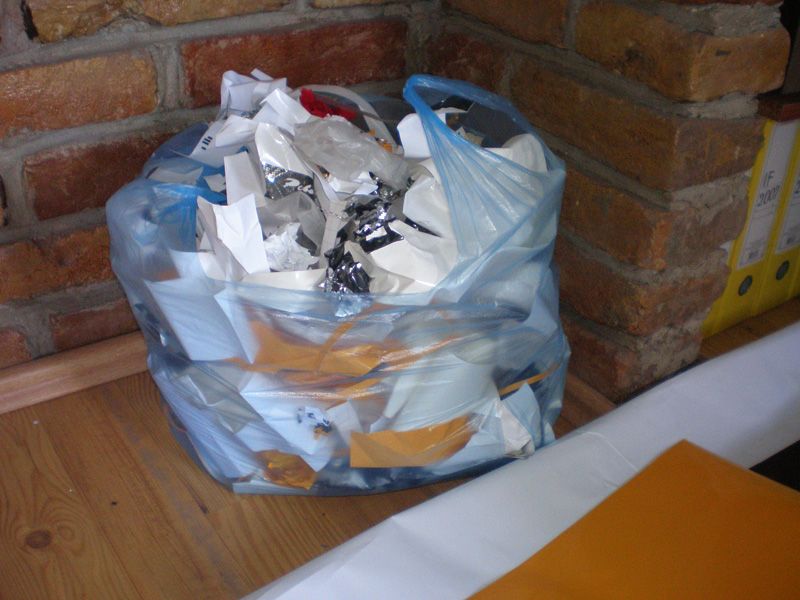
30 hours of work, and full bag of excess foils...
Best regards from Serbia
Mirce
Last few days I spent working on color scheme on my friends F3A model Bravo.
He bought it from Lorenz Modell from Germany. Model was white, and I have job to design and made finish on this model.
Model are extremely easy, so painting it wasn't option, because first must add primer, than color, and everything must be paint with clear cote. So many layers will add to much weight, so we decided to made finish with self adhesive foils.
Self adhesive foils are grate on flat surfaces but it can't be apply on rounded shapes. So, I must create design which will match with model...
On Bravo upper surface and complete fuselage are white, and botom side of wings and elevators are red.
My friend have wish to color scheme be totally different on upper and lower side.
But before story about color scheme, look few pictures about model...
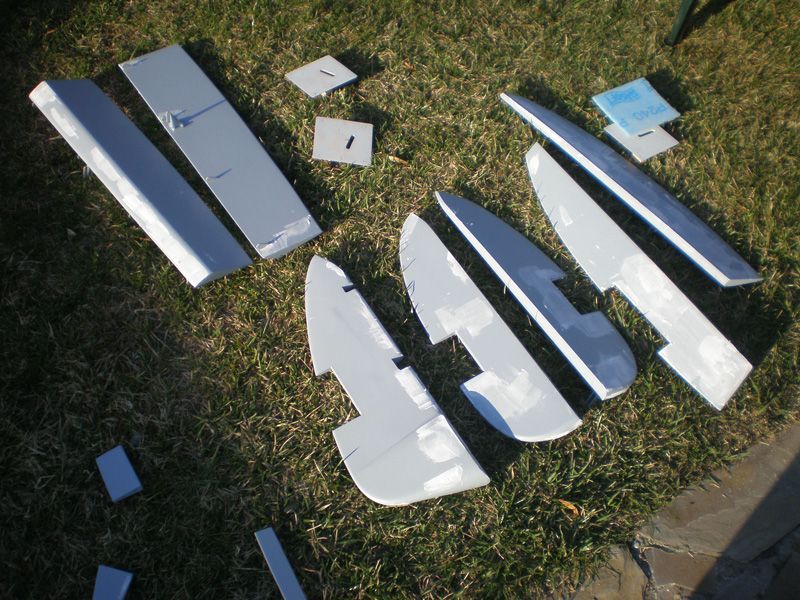
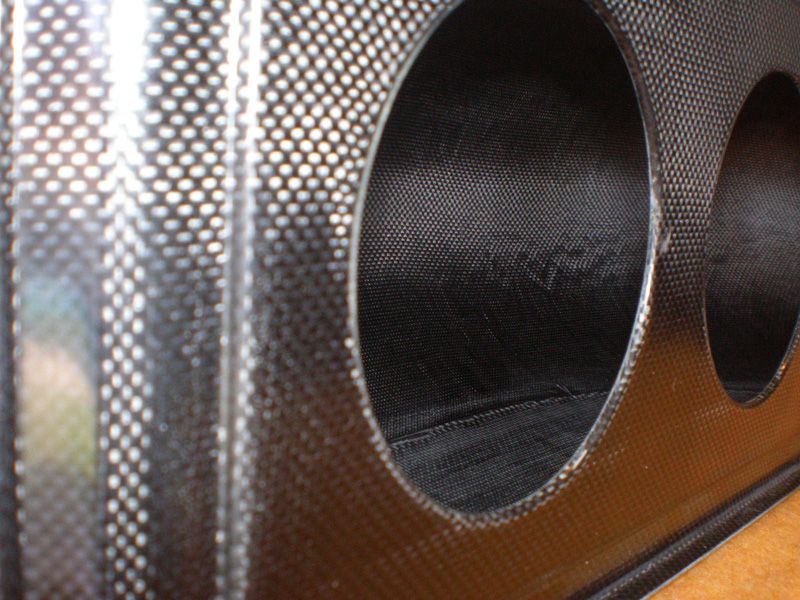
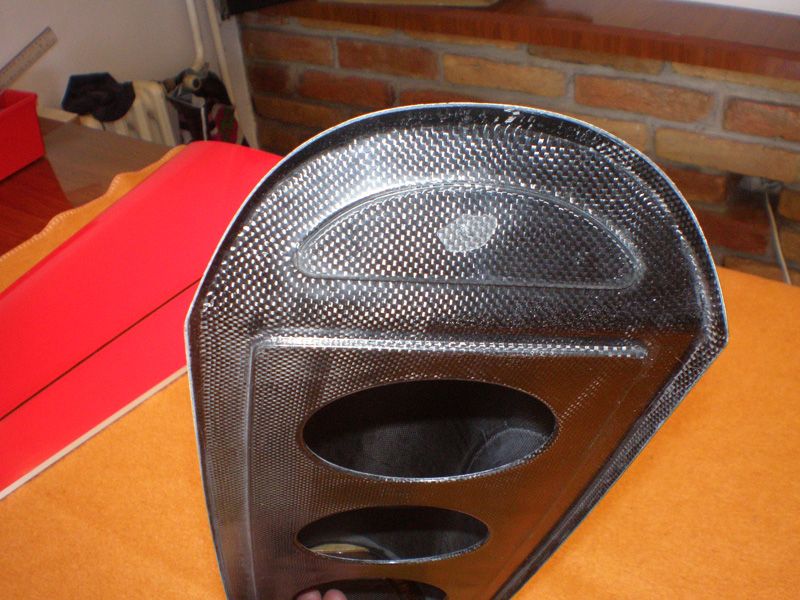
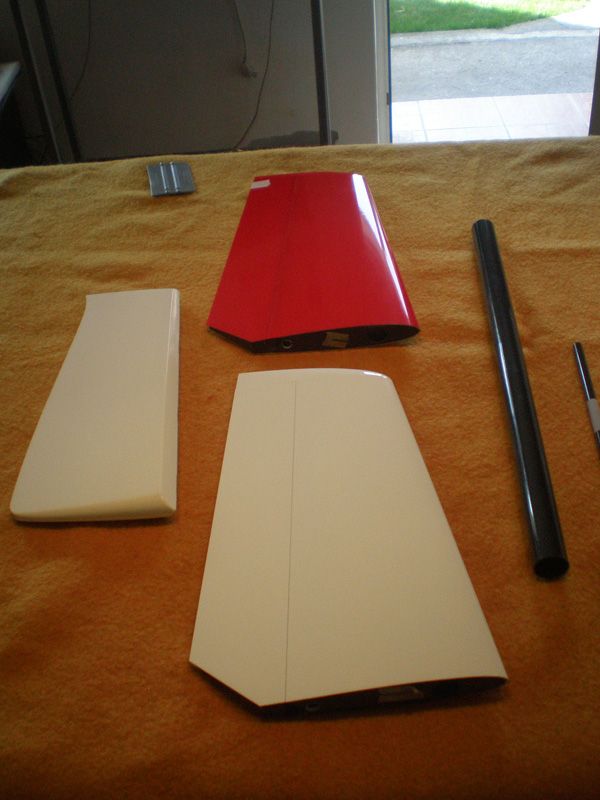
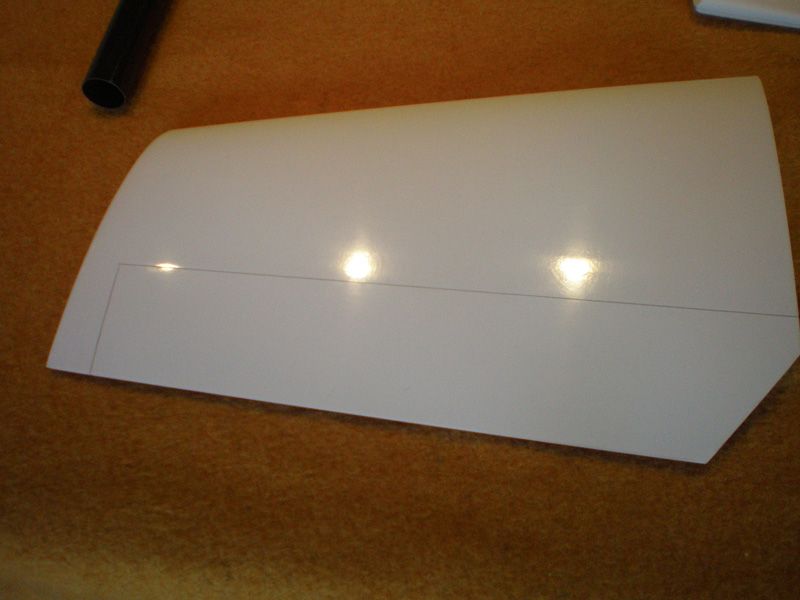
Bravo is last generation in full composite F3A model...
Bottom wing side...
Trailing edge...
Cabin is made from thin carbon...
Elevators was made with same technology as wings...
Few details about landing gear...
And finally fuselage...
OK, now when we know how model look, lets start with work.
I start working on lower wing side, and apply three white stripes...
I use Oracal 641 self adhesive foils. Because wing surface are plastic, very thin and gentle, I use water for applying foil. System is simple, add water on surface, add water on sticky foil side, and aplly foil on surface. Bacause foil is wet, I could position white line very precise on wing...
Than I used this little tool, and squeeze out water...
Surface are without any bubble...
When water dryed I add masking foil in edges which I want cut...
On ailerons I must move white line from edge where aileron come inside in the wing. Gap is so small that foil will stuck on the edge...
Finally, I add one red stripe on first white line to made all lines same...
Than I made this process few more times, and get white lines on bottom sides... Same procedure was for elevators, but for applying white stripes I was not using water...
For upper surface I made totally different color scheme. First I draw everything in computer in Corel... I made few proposals, to enable my friend to choose colors, but for me, and for him also, yellow and black was the best combination...
I bought yellow foil, and instead off black I take foil like carbon...
On white wing side, first I add yellow areas, but before that I put together wings to draw a straight line. For that operation I use very "high tech" tool...
Gluing was again with water...
Technique was same like on bottom side...
Than I apply cubes made from carbon foil...
I used transfer foil for this...
Than I made and apply lightning shadow, which was again from carbon foil...
After that letters and finally red lightning...
Same procedures was on elevators...
Next was fuselage...
First yellow areas...
I add black stripe for easier cutting...
Than copy - paste everything on other side...
Next was front end of the fuselage...
I must made paper template...
Than I scan it in computer and finally cut on my Roland cutter......
Next step was easy...
Than I add yellow and black line on cabine. Yellow line connect front and rear yellow fuselage areas...
But, when I add cabin on fuselage I saw that in fron was big white area...
Paper templates again...
...little cutting, little trimming and...
On the foil lap I add "warbird" details - screws...
Next steps was to add letters, lightning with shadow, and all other details...
I always made letters first on paper...
But, when I put wings on, I saw that right elevator is to much color full for my taste, so I change design...
Last touch was adding authors logo...
And finally Bravo in full shine...
30 hours of work, and full bag of excess foils...
Best regards from Serbia
Mirce
03-31-2012 | 06:21 AM
#363
Mirce,
You did a great job with that model. Kudos!
Takes a bit of time to do it right, but the results.
Just take a look.
Congrats!!
Charles
You did a great job with that model. Kudos!
Takes a bit of time to do it right, but the results.
Just take a look.
Congrats!!
Charles
 04-05-2012 | 02:27 PM
#366
Thread Starter
Thank you guys...
OK, now back to P 47...
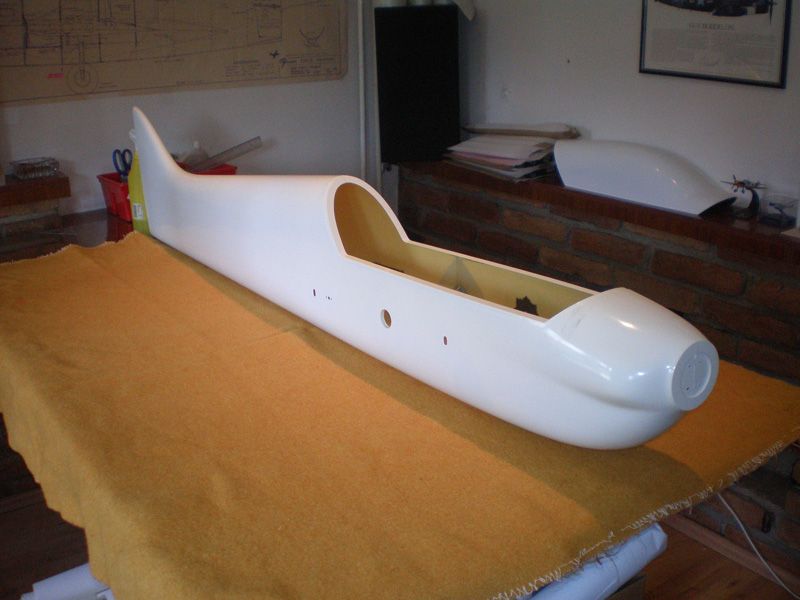
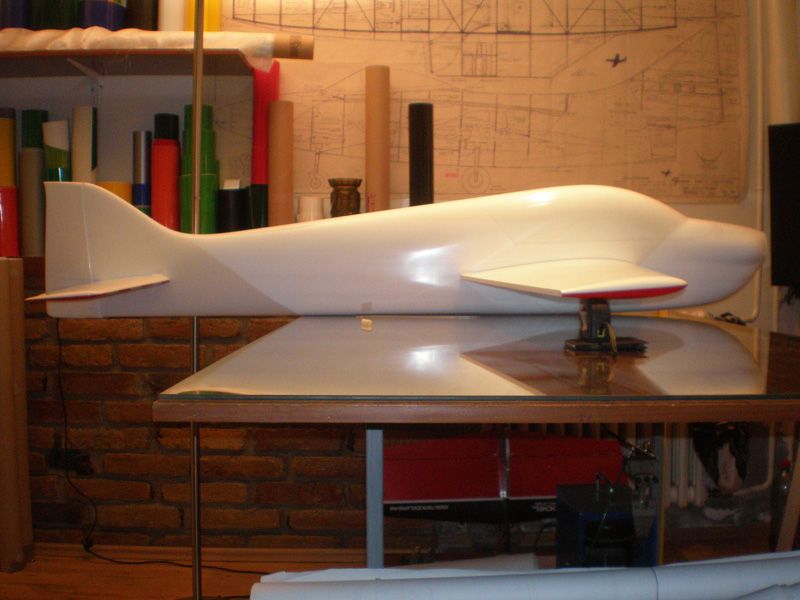
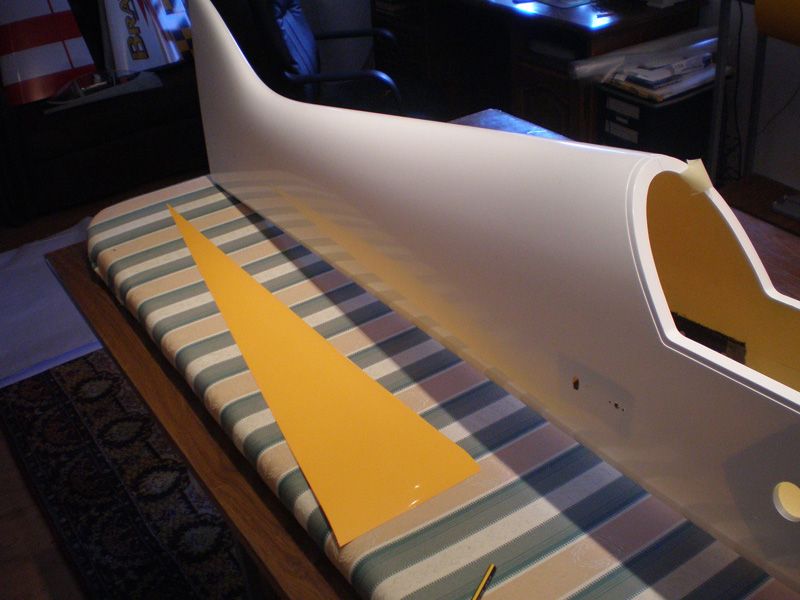
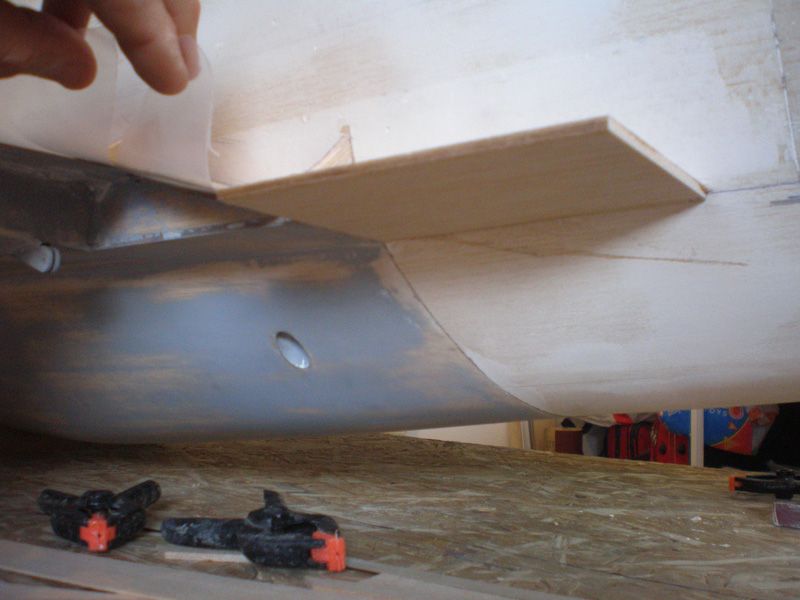
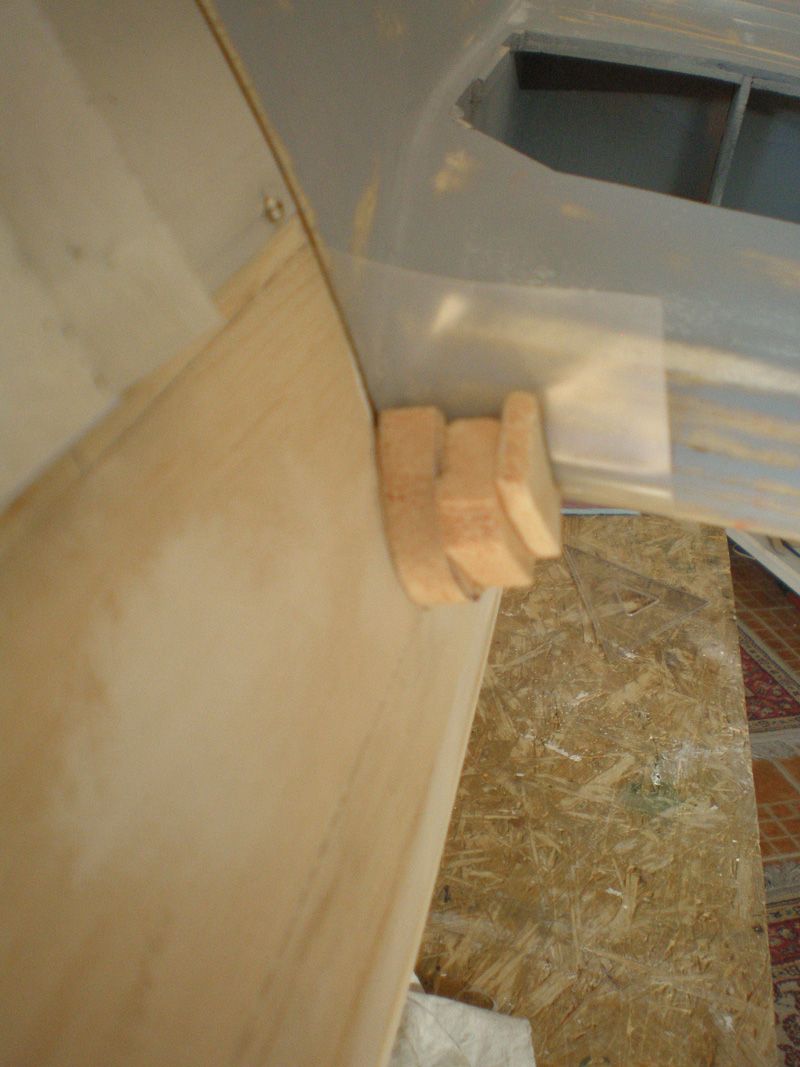
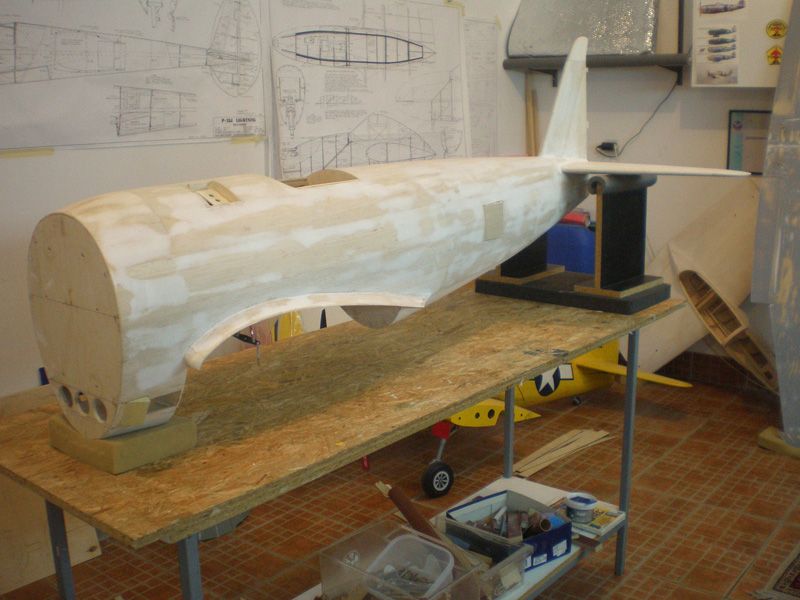
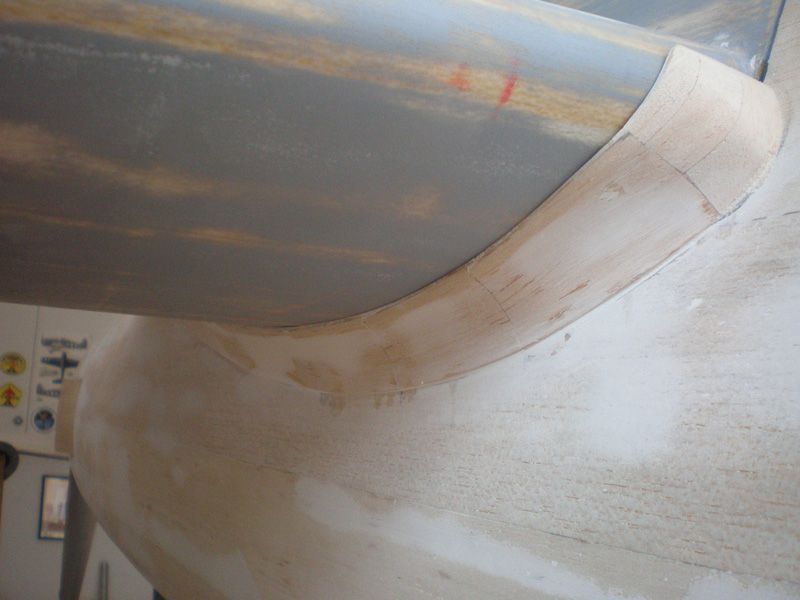
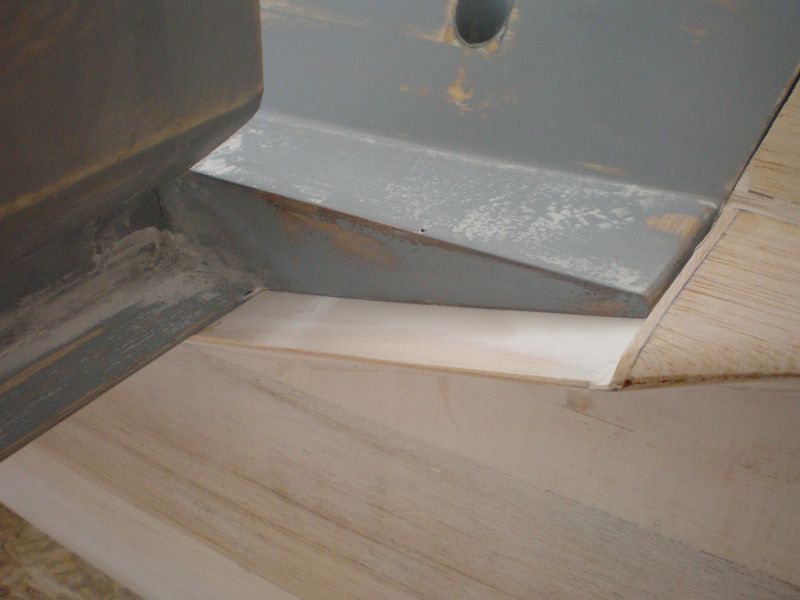
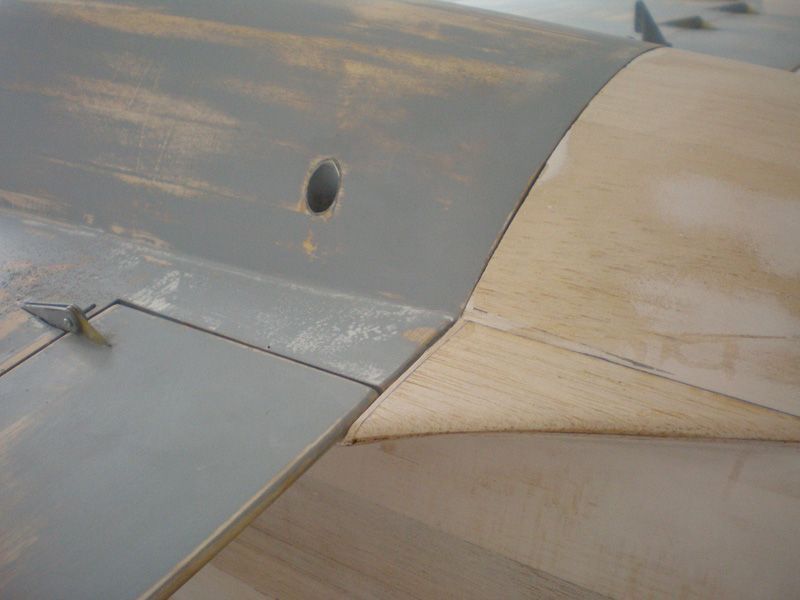
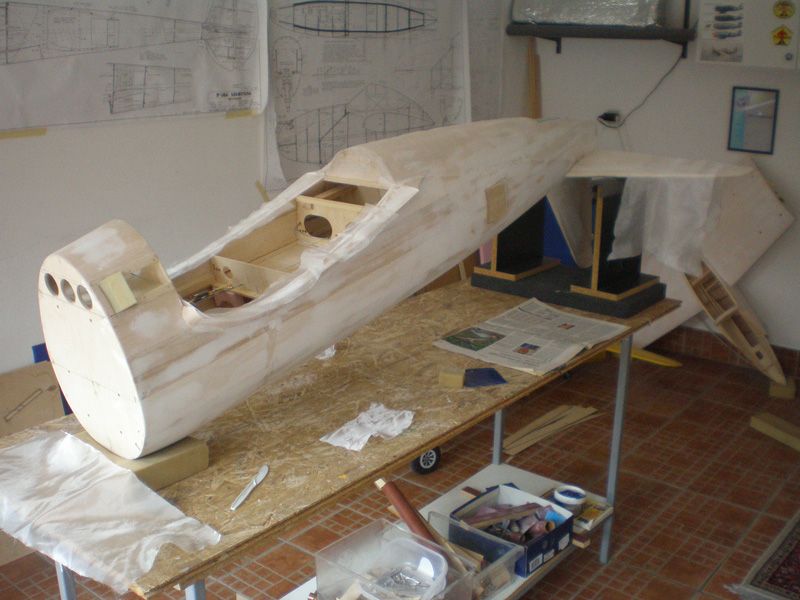
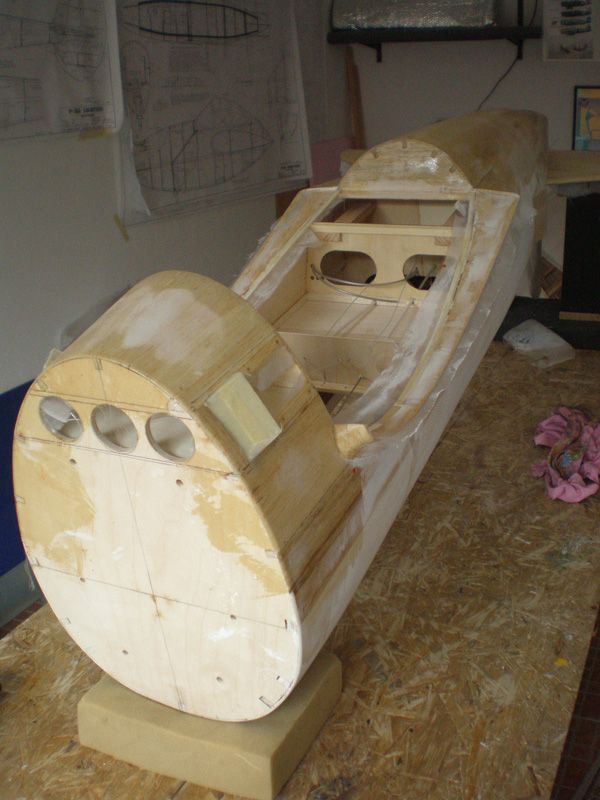
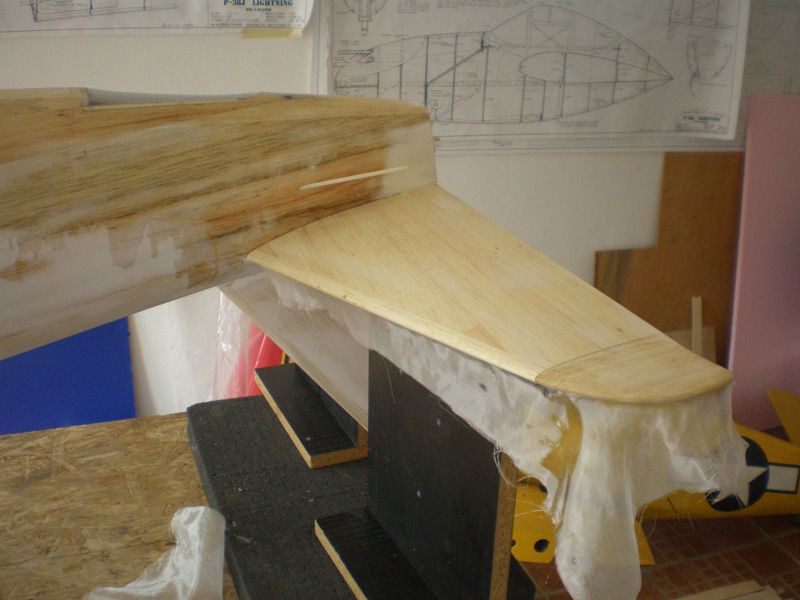
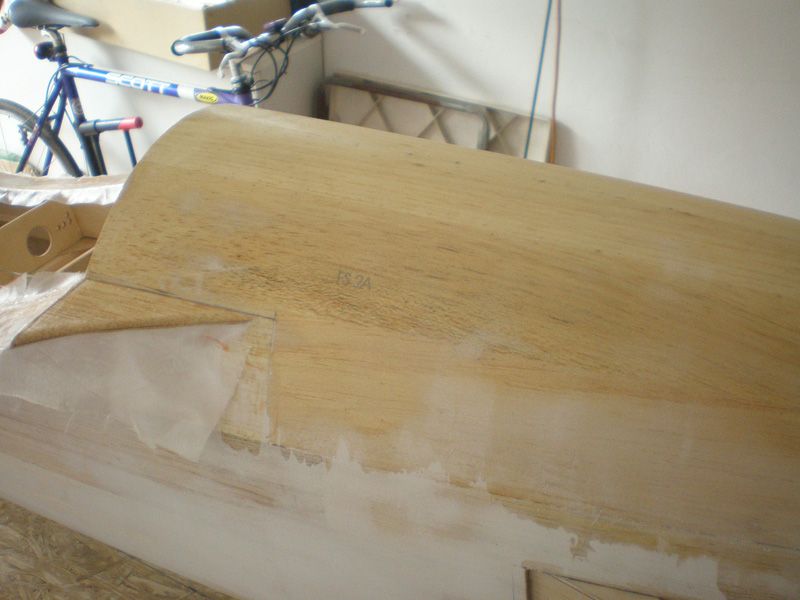
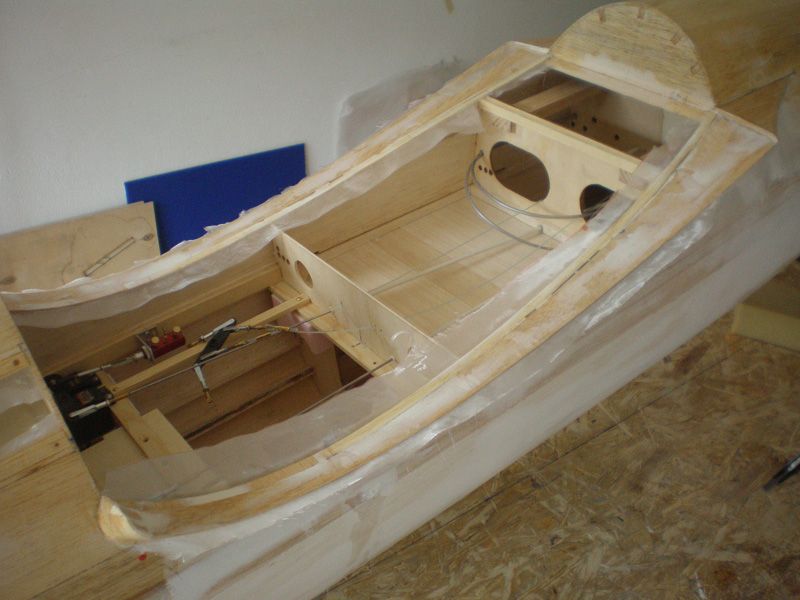
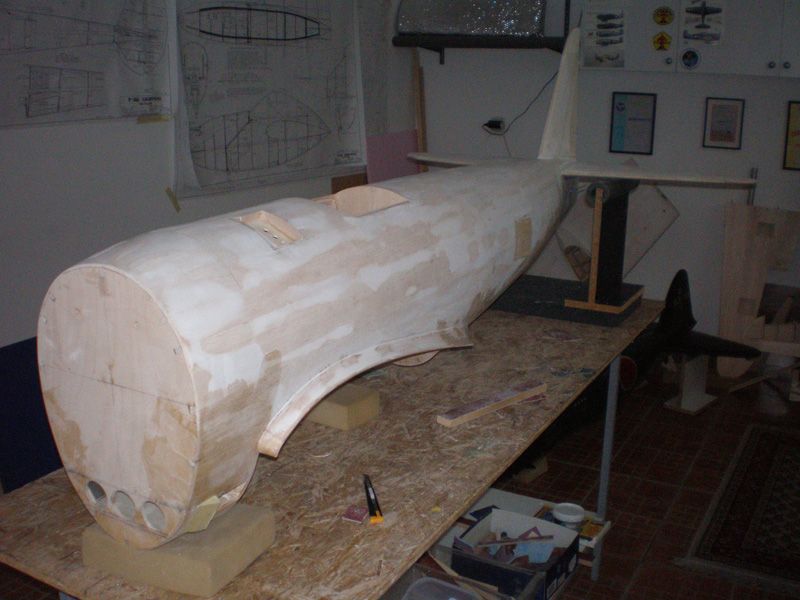
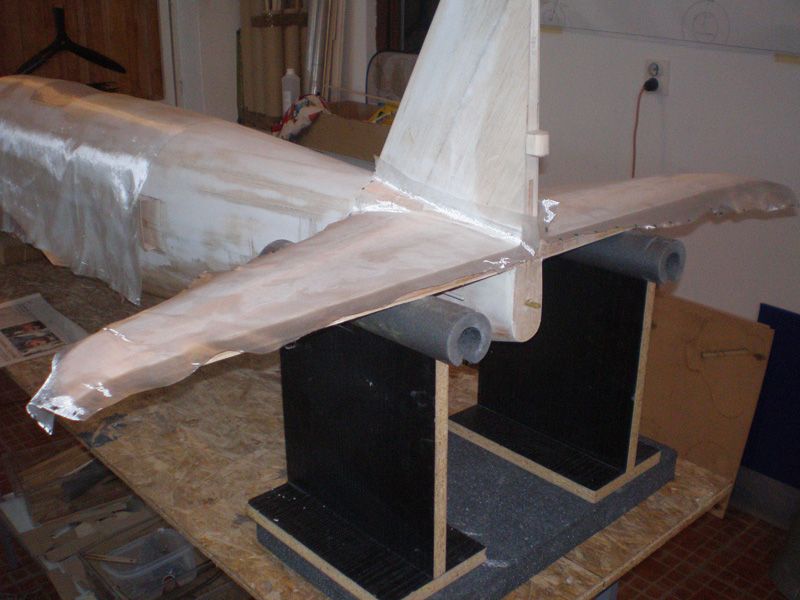
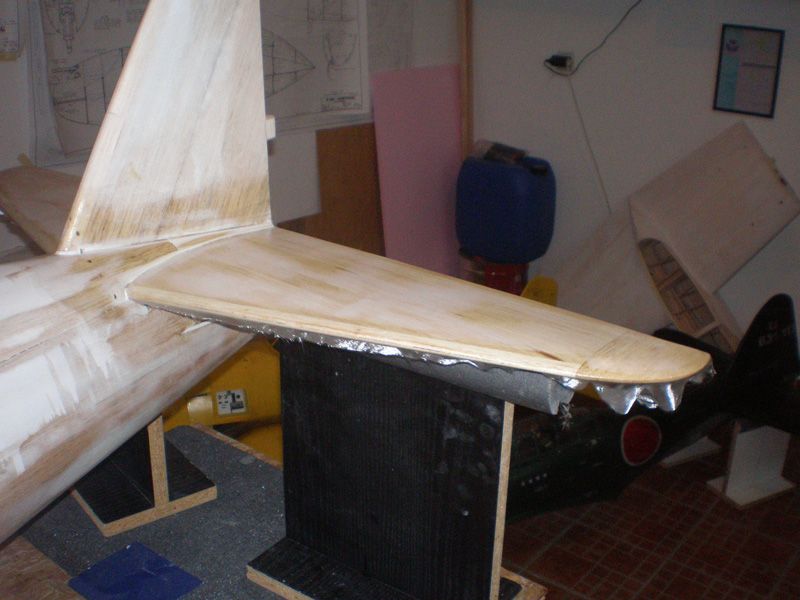
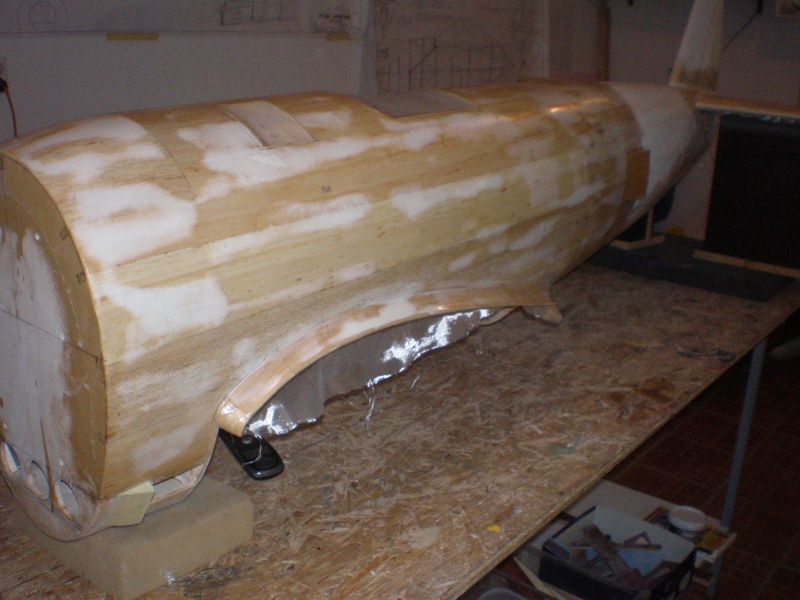
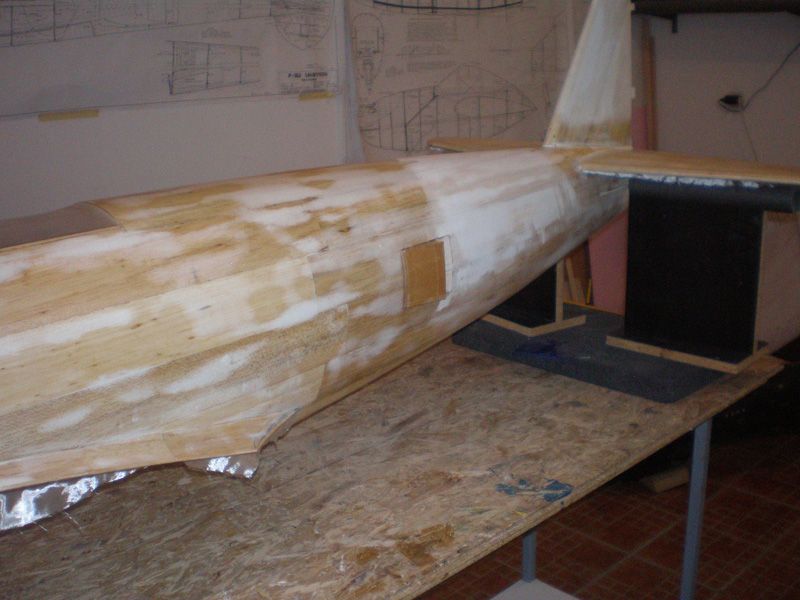
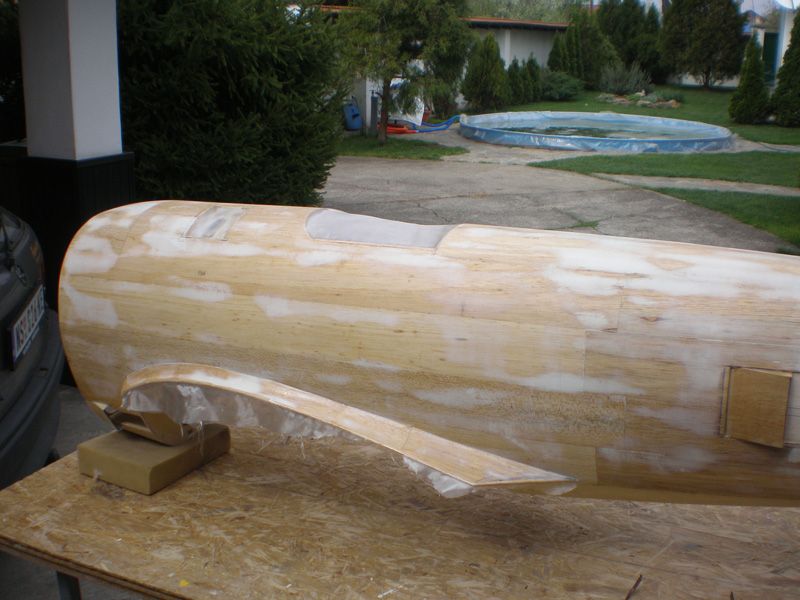
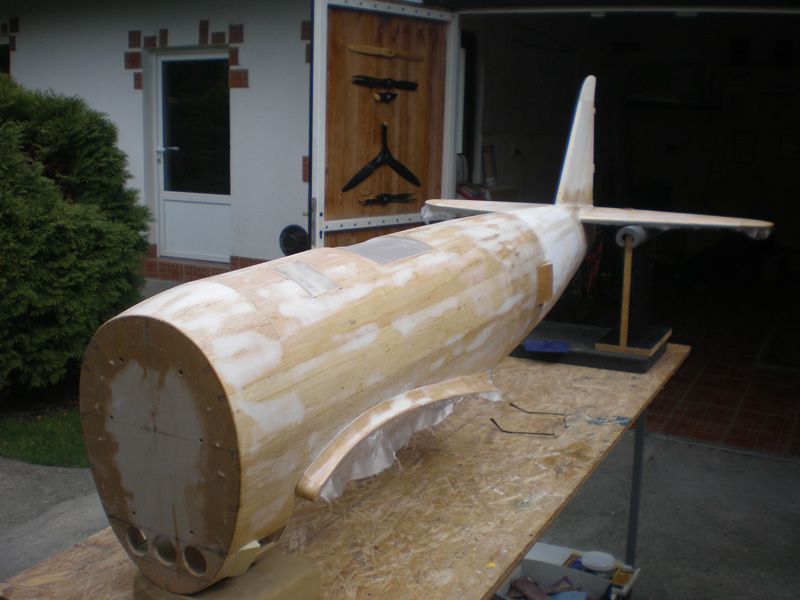
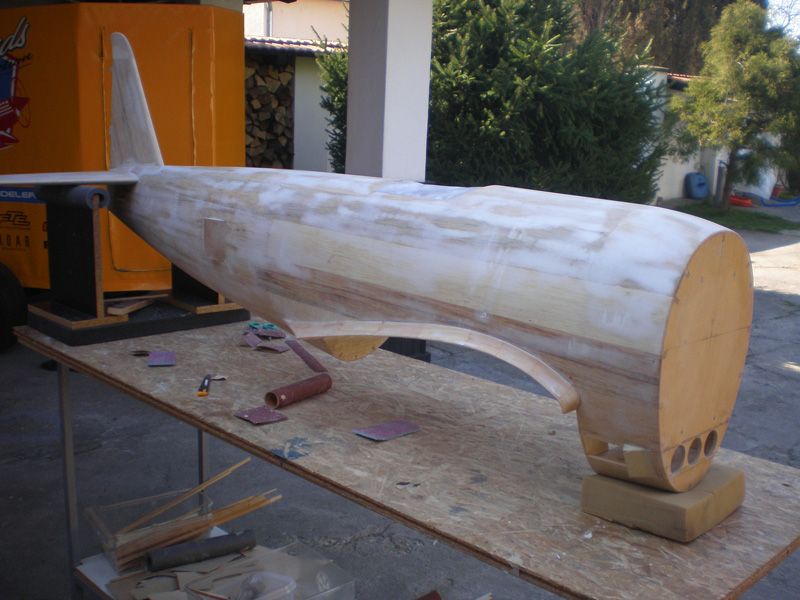
In last few days I was working on transition from the fuselage on the wing. Thin ply I get from Meister was not lean nice on fuselage, so I decided to made all from the beginning.
First I made template from paper to get right shape...

Than I made bottom side from 1,5 mm balsa...
Rear part follow down wing side...

I made first few 3 mm balsa triangles...
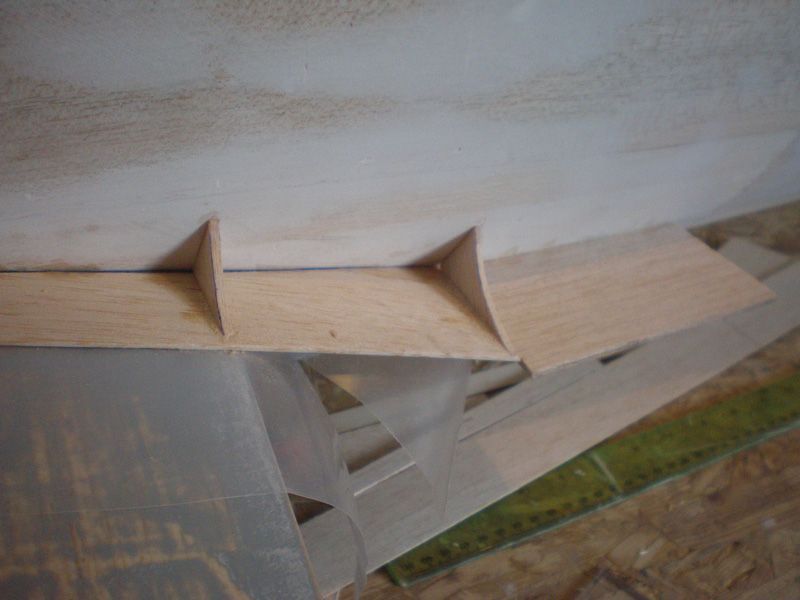
Than rear part of the upper side...


I glued it with Zap thin glue...

After that rest of the triangles...
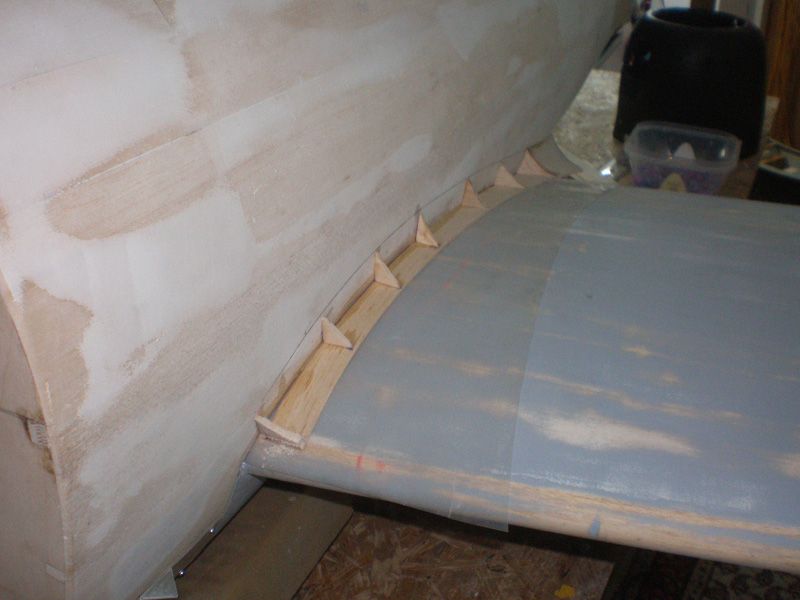
Than I was making every part between balsa triangles. It was making from 1,5 mm balsa...
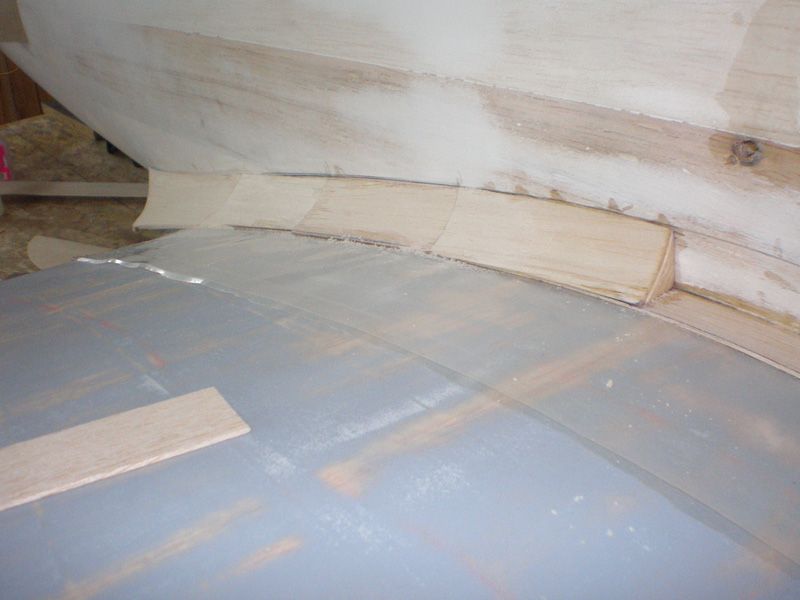
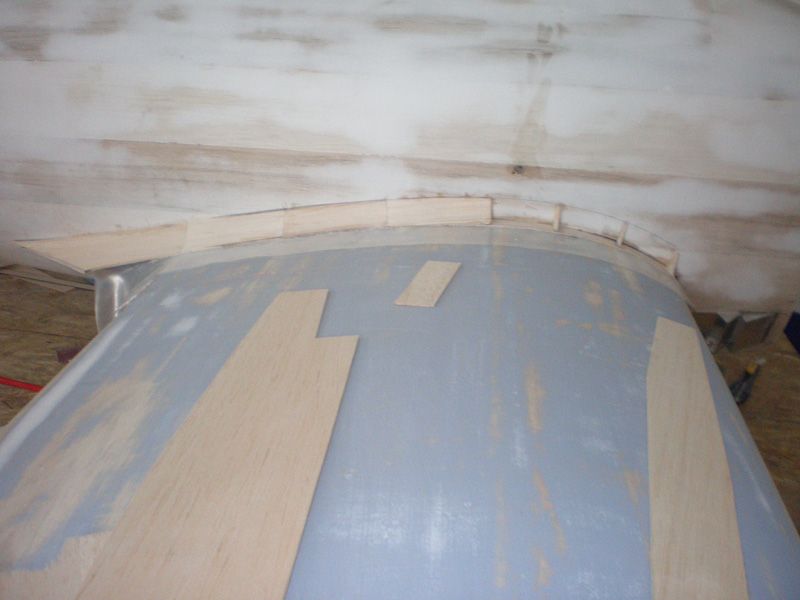
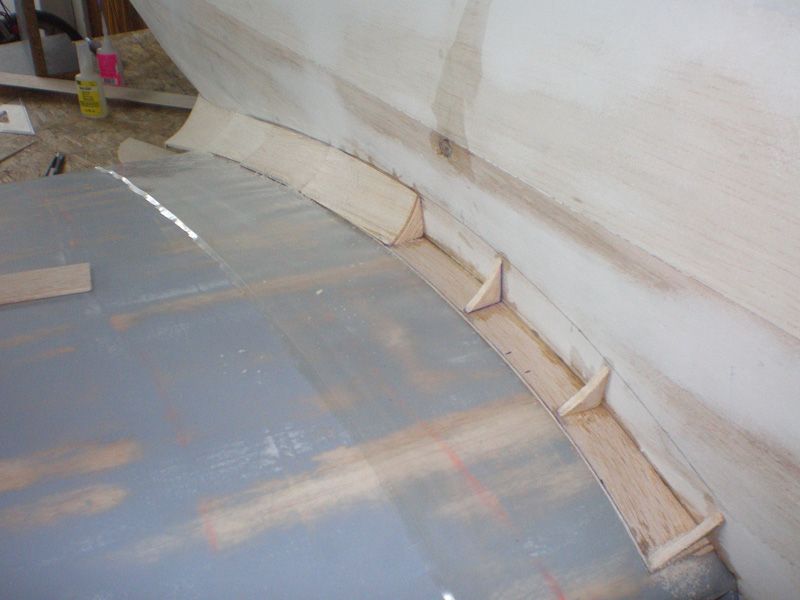
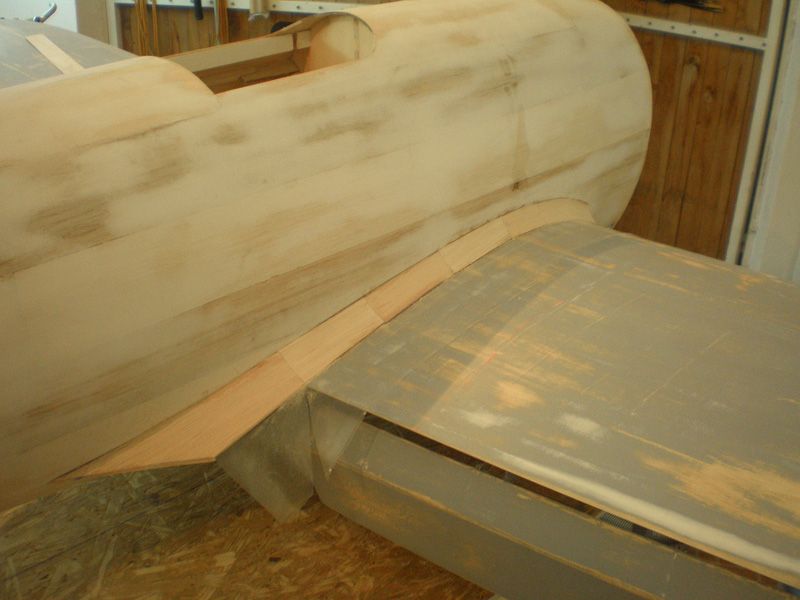
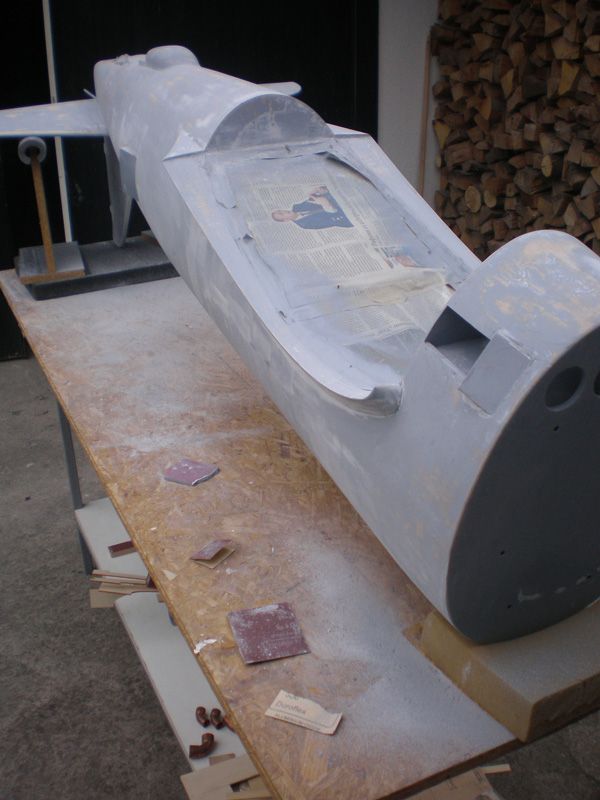
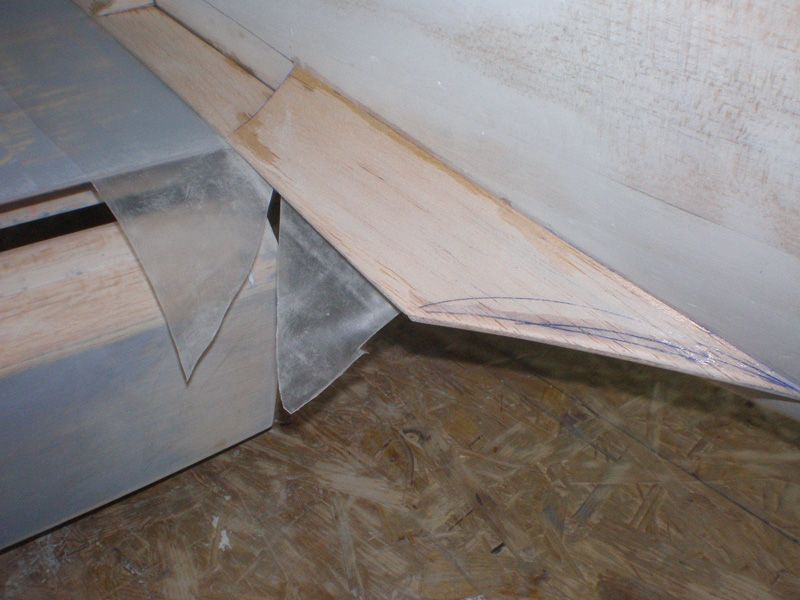
When I finished that stage, wing was take off the fuselage...

Because everything was working on the wing directly, no gap between transition part and wing. But, front end was not be done on this way, so I made it from few 10 and 5 mm thick balsa pieces...
Little sanding, and...
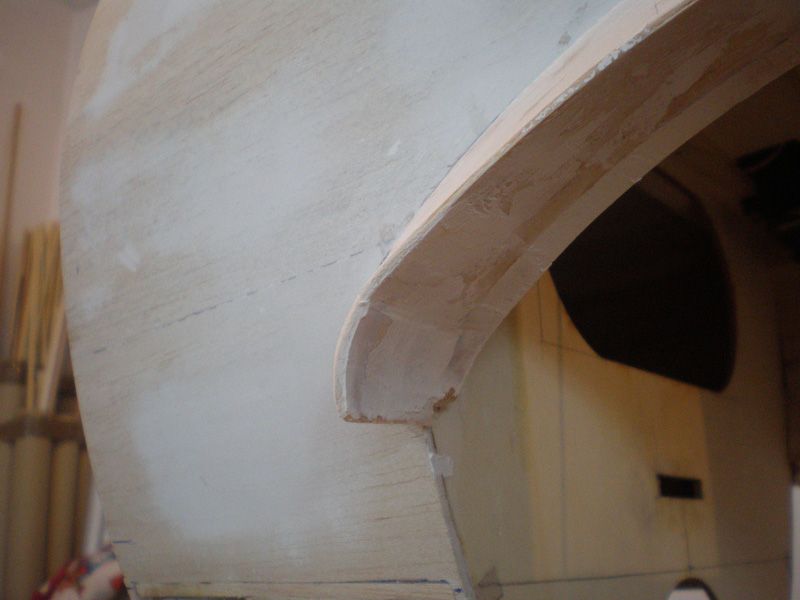
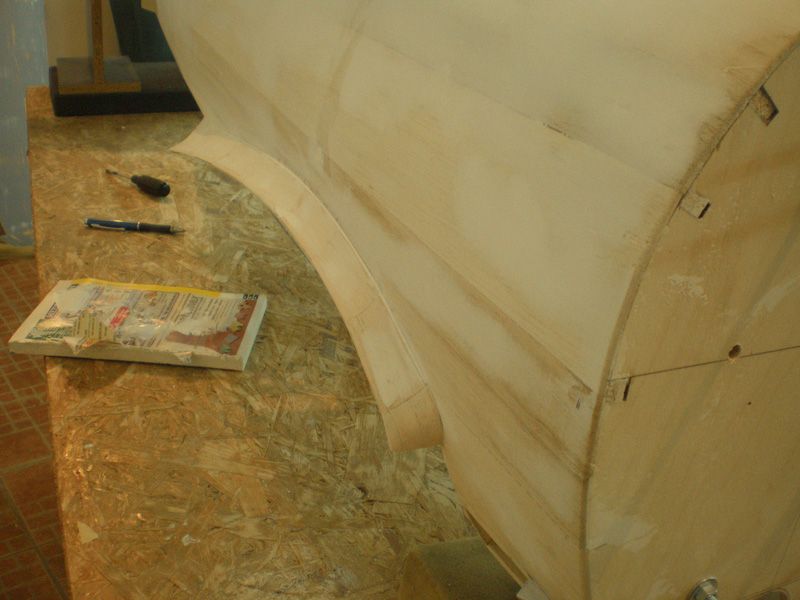
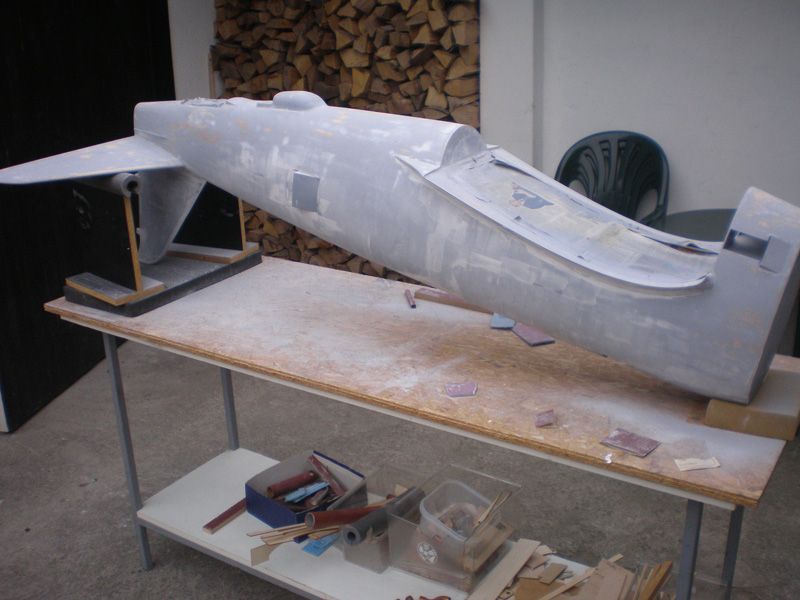
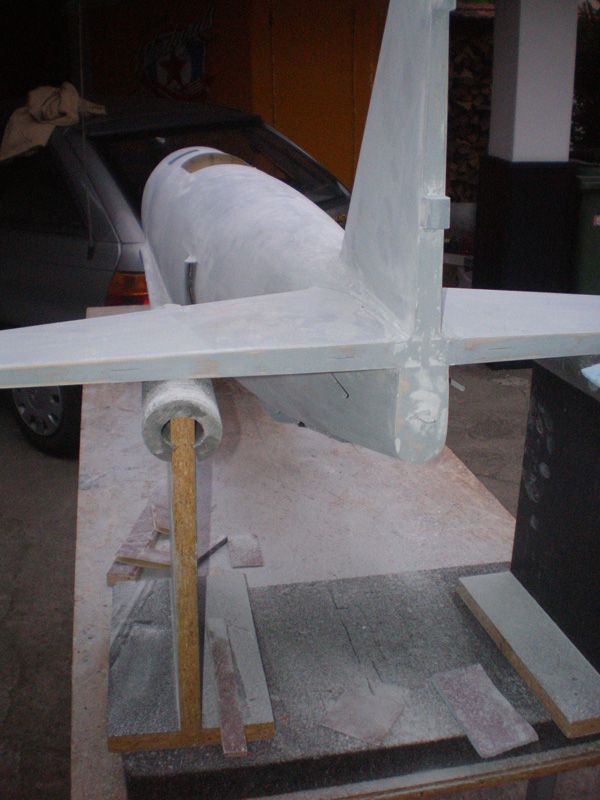
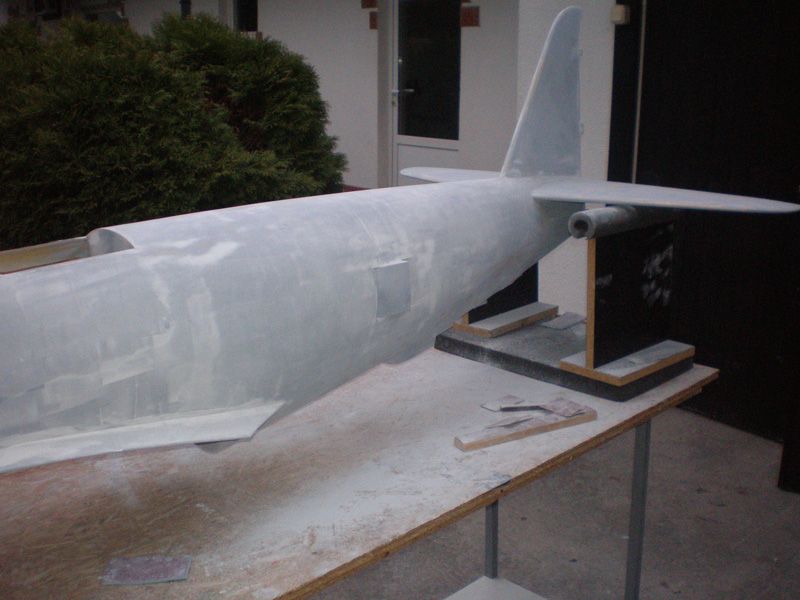
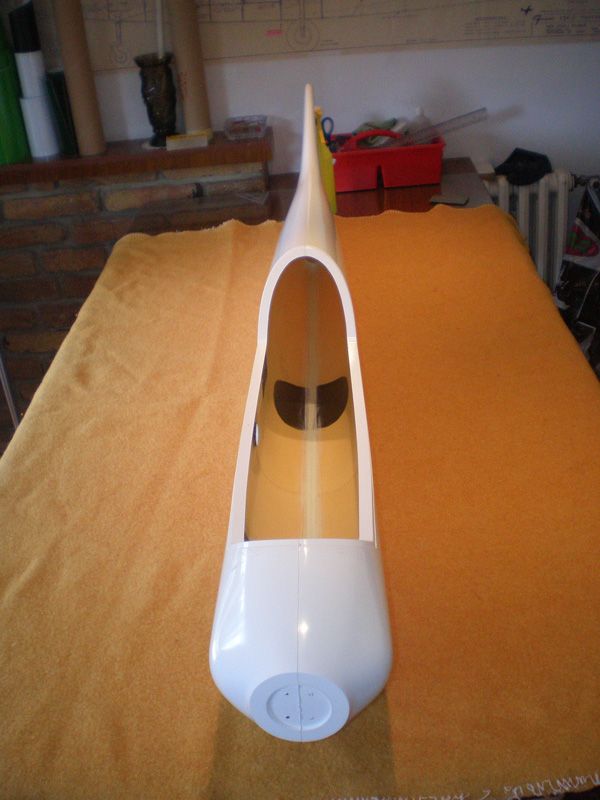
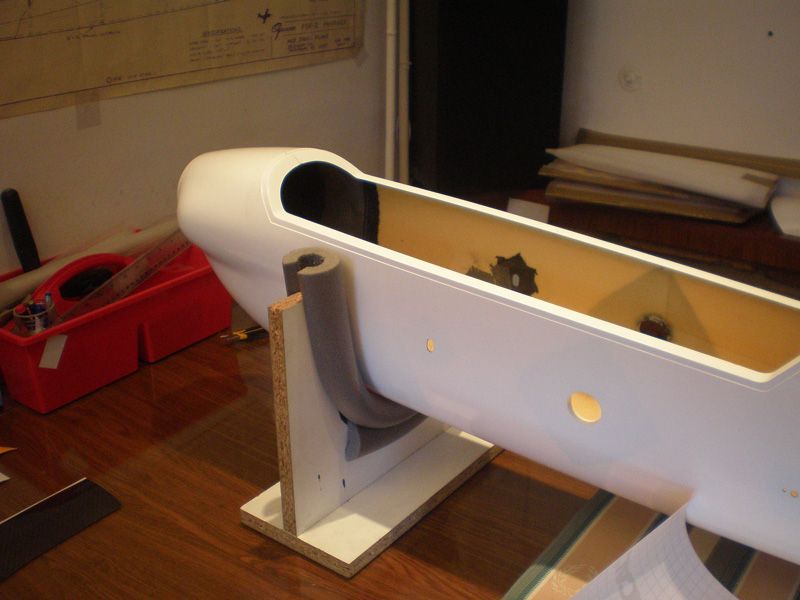
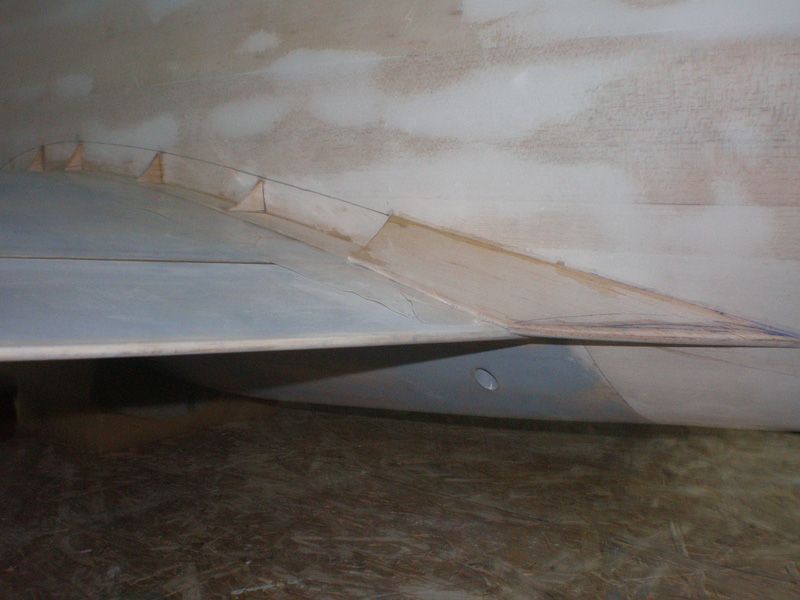
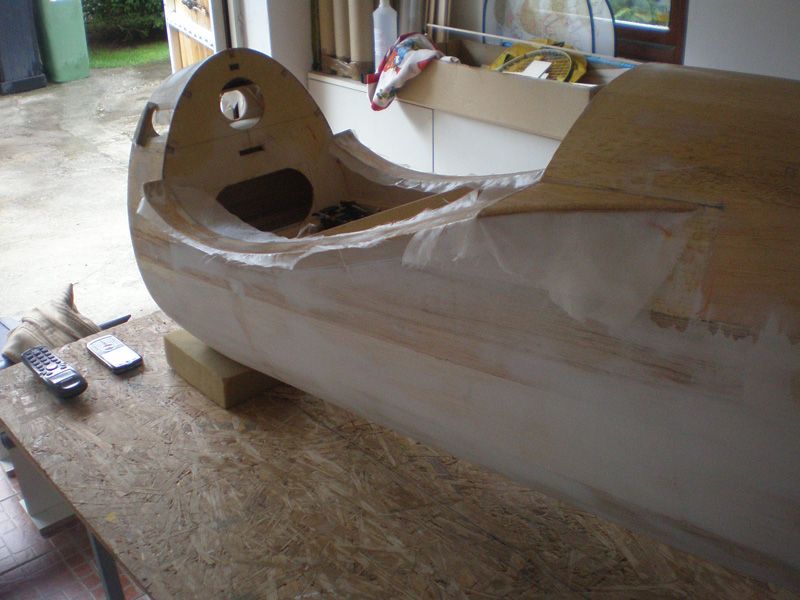
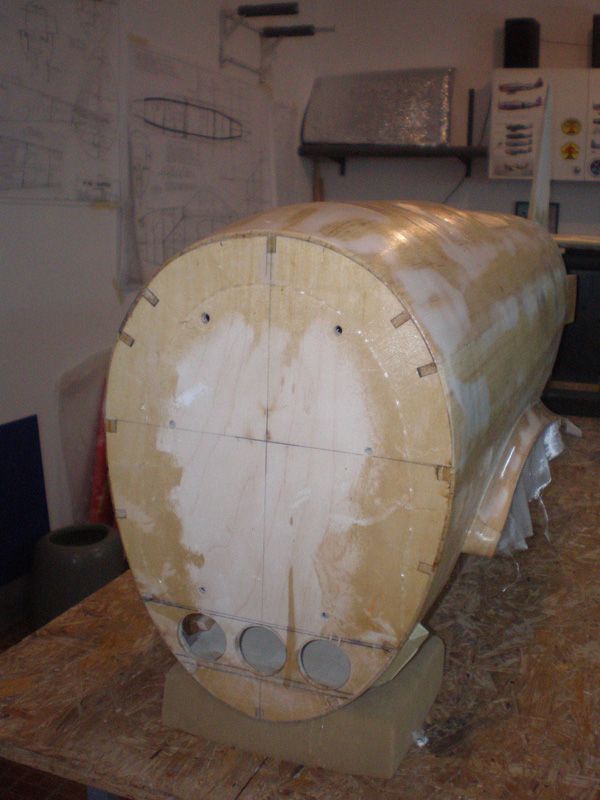
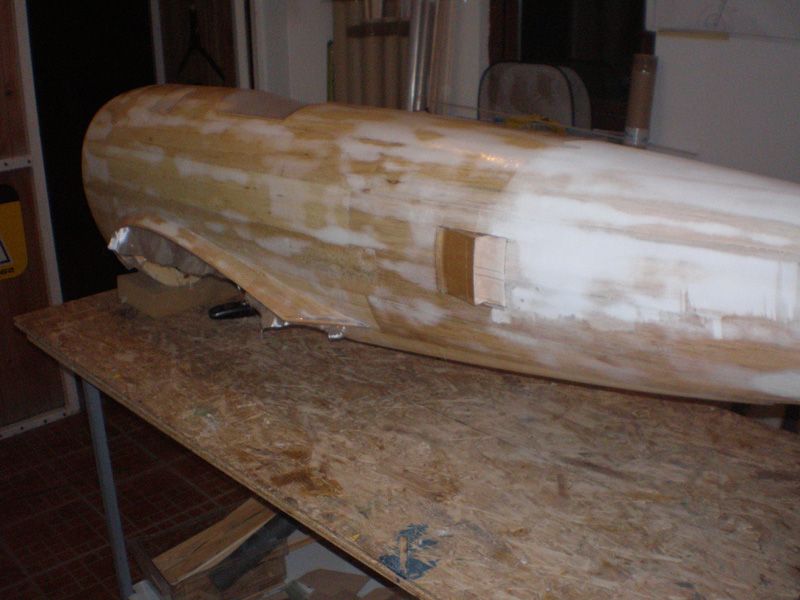
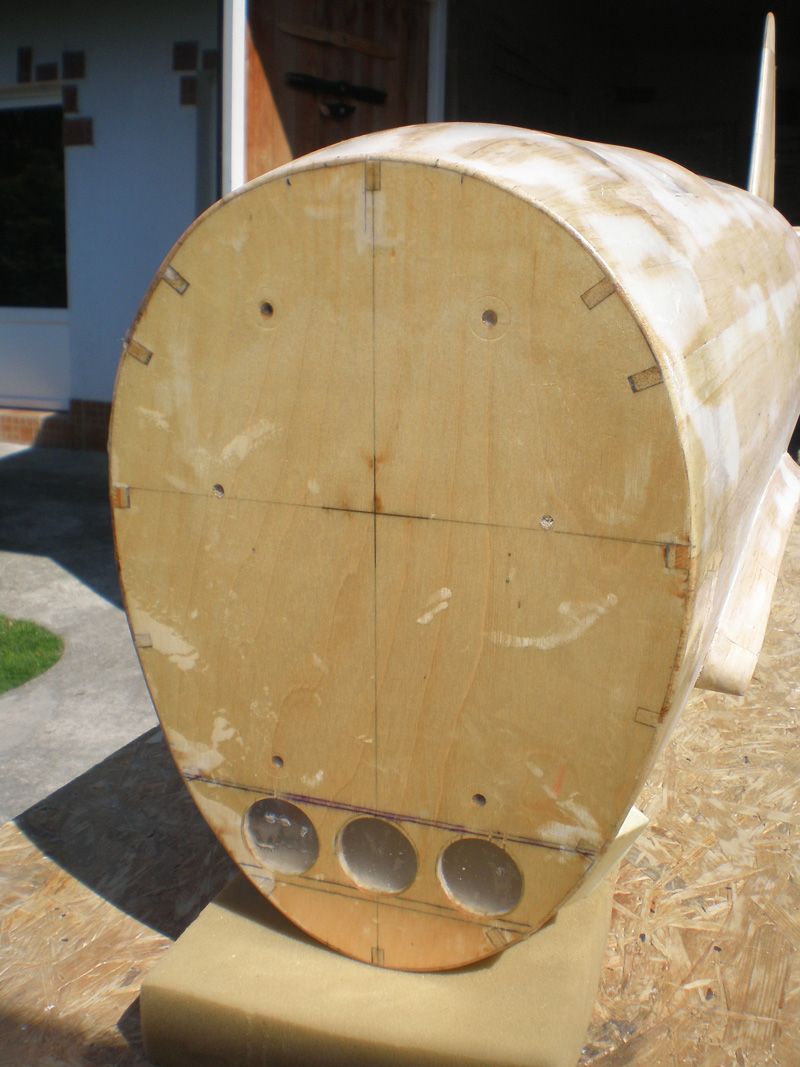
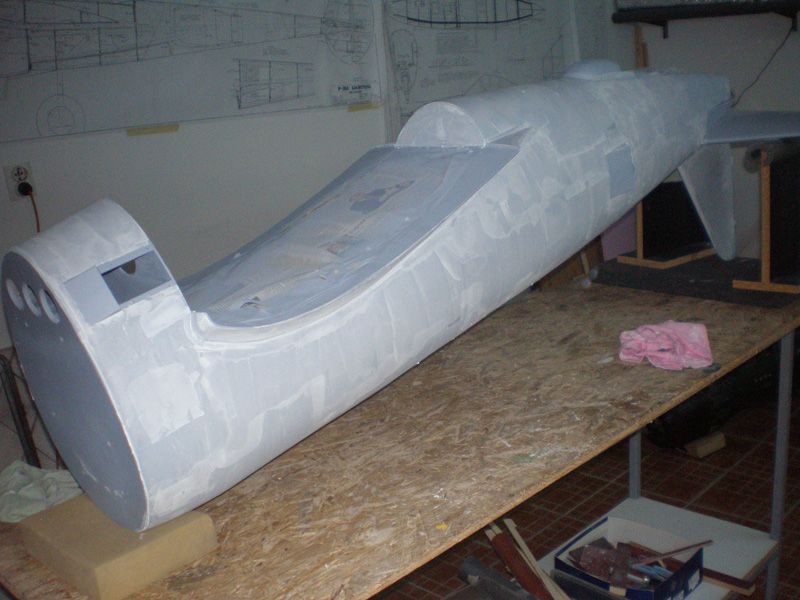
Now fuselage is ready for glassing...
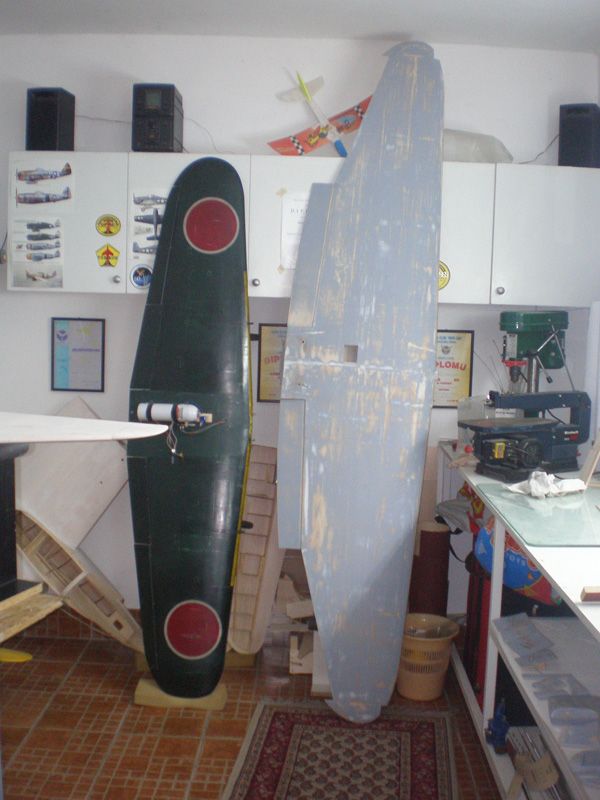
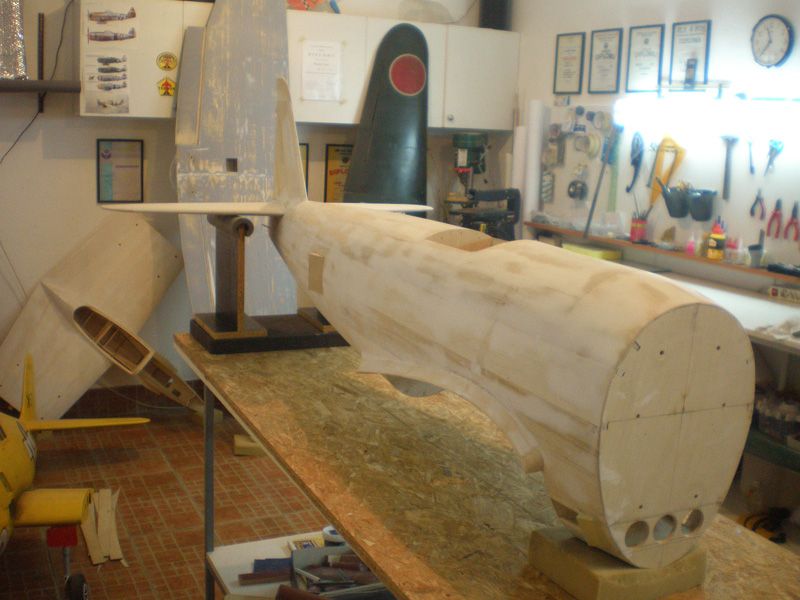
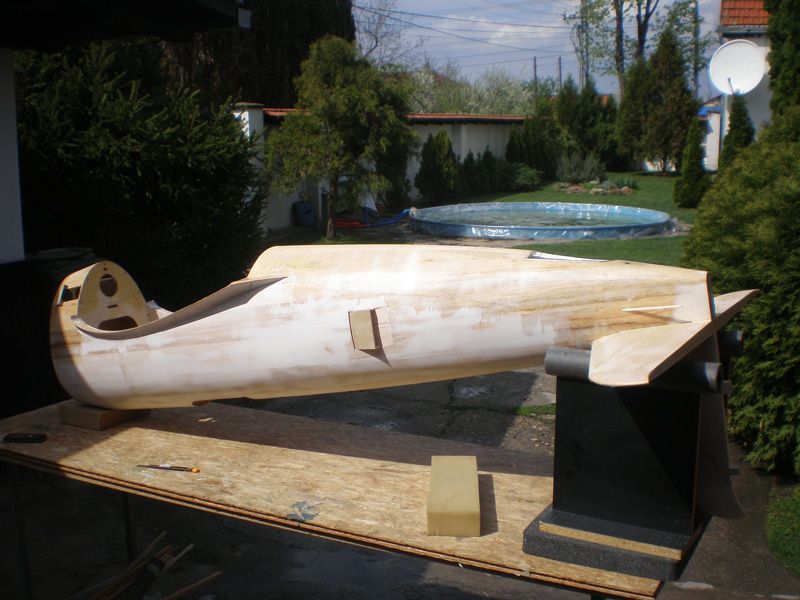
And one more picture, look difference between Zero 2,1 meter wing, and Meisters P 47...
No more other projects, from tomorrow I start with glassing...

Regards from Serbia...
Mirce
P.S. - 023 - like in army, 23 more days to go to Top Gun...
OK, now back to P 47...
In last few days I was working on transition from the fuselage on the wing. Thin ply I get from Meister was not lean nice on fuselage, so I decided to made all from the beginning.
First I made template from paper to get right shape...
Than I made bottom side from 1,5 mm balsa...
Rear part follow down wing side...
I made first few 3 mm balsa triangles...
Than rear part of the upper side...
I glued it with Zap thin glue...
After that rest of the triangles...
Than I was making every part between balsa triangles. It was making from 1,5 mm balsa...
When I finished that stage, wing was take off the fuselage...
Because everything was working on the wing directly, no gap between transition part and wing. But, front end was not be done on this way, so I made it from few 10 and 5 mm thick balsa pieces...
Little sanding, and...
Now fuselage is ready for glassing...
And one more picture, look difference between Zero 2,1 meter wing, and Meisters P 47...
No more other projects, from tomorrow I start with glassing...
Regards from Serbia...
Mirce
P.S. - 023 - like in army, 23 more days to go to Top Gun...
04-07-2012 | 01:23 PM
#367
Thread Starter
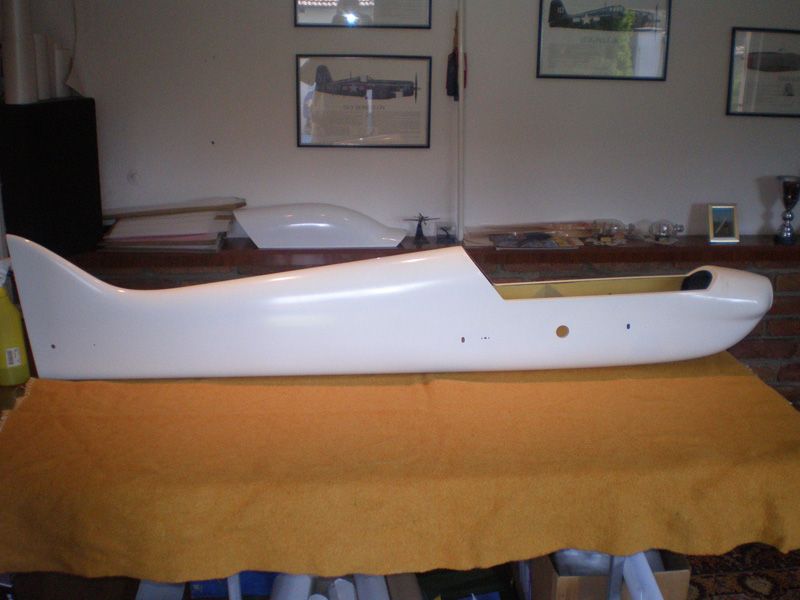
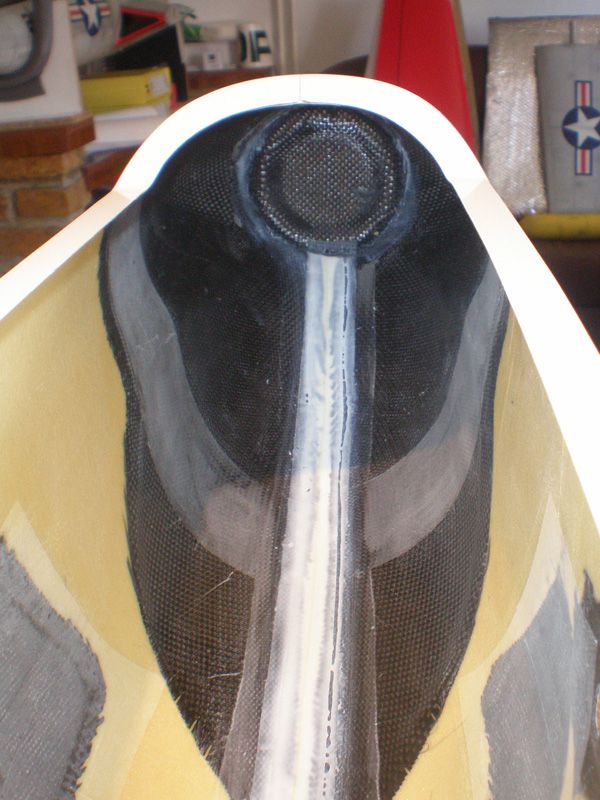
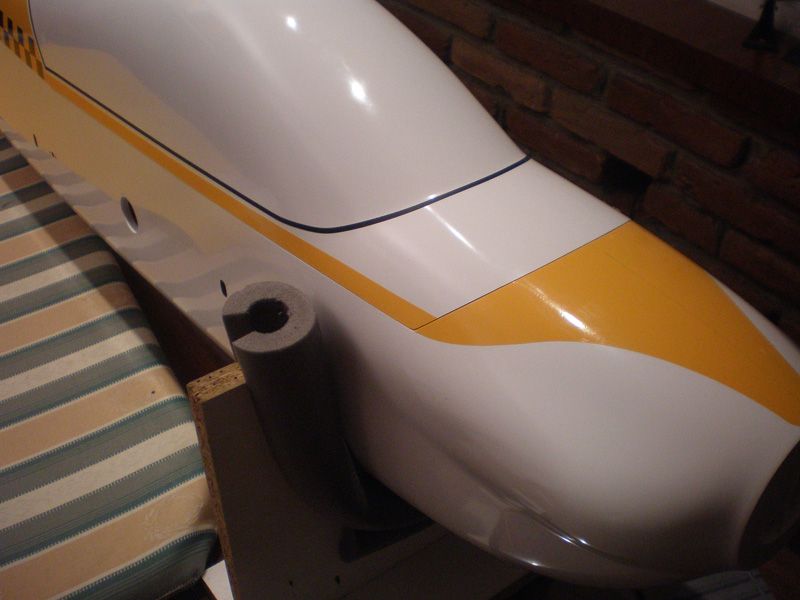
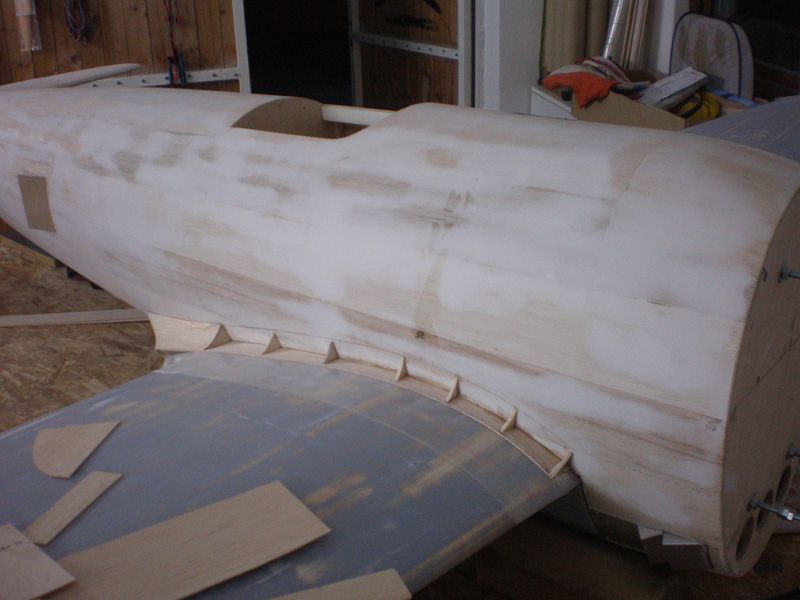
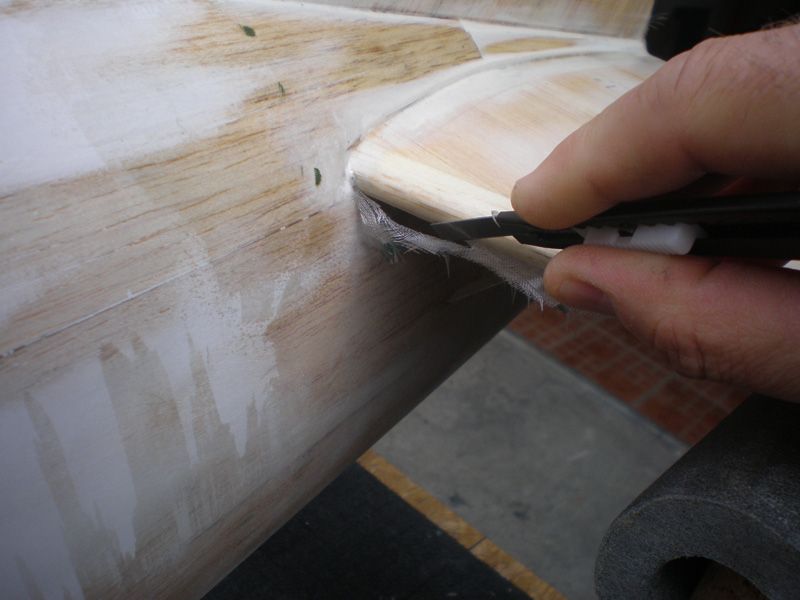
Yesterday I start working on two fronts. One is glassing fuselage, and other is adding panel lines on wing.
But before glassing I want to check one more time how wing sits on the fuselage...
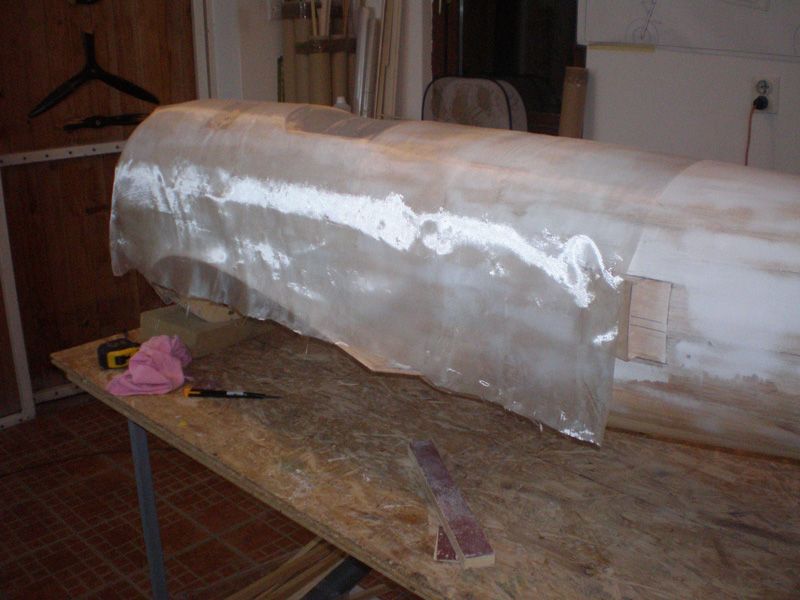
On fuselage I put 25 gr glass fabric from German firm R&G. Epoxy resin is from same firm also...

Putting glass on fuselage must be in few stages, so I will need 3 - 4 days to do this.
First I add glass on bottom side of the fuselage and elevators. I prepare all glass fabric parts first...

Piece by piece I made all from the bottom side...

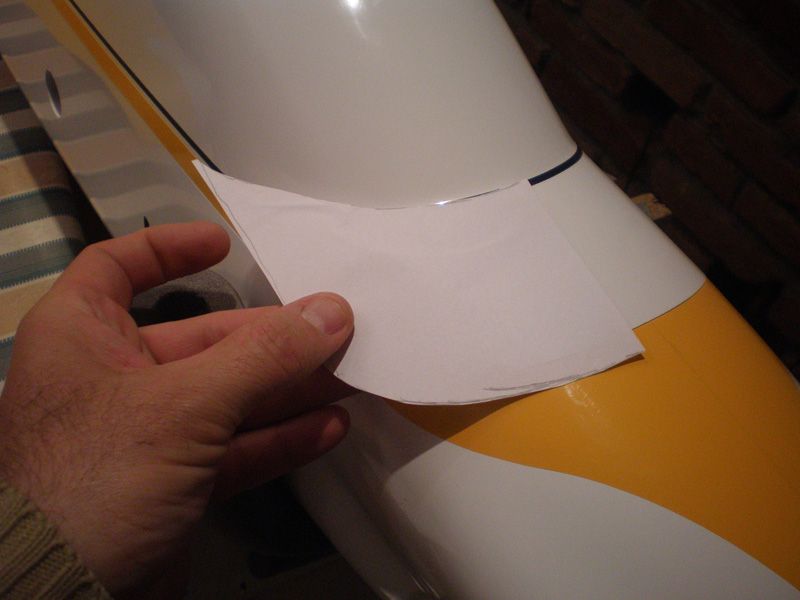
While the epoxy resin dryers, I start working on the panel lines on the wing.
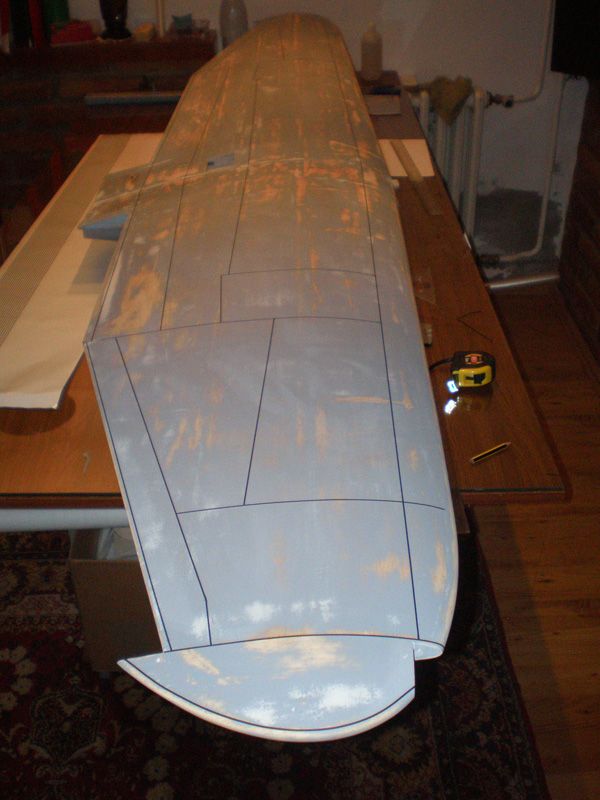
First step was to wipe all wing with alcohol.
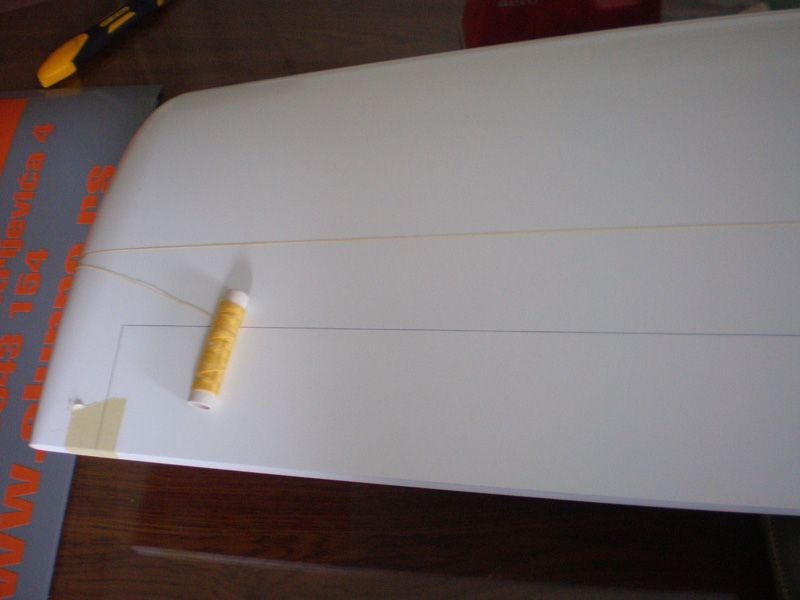
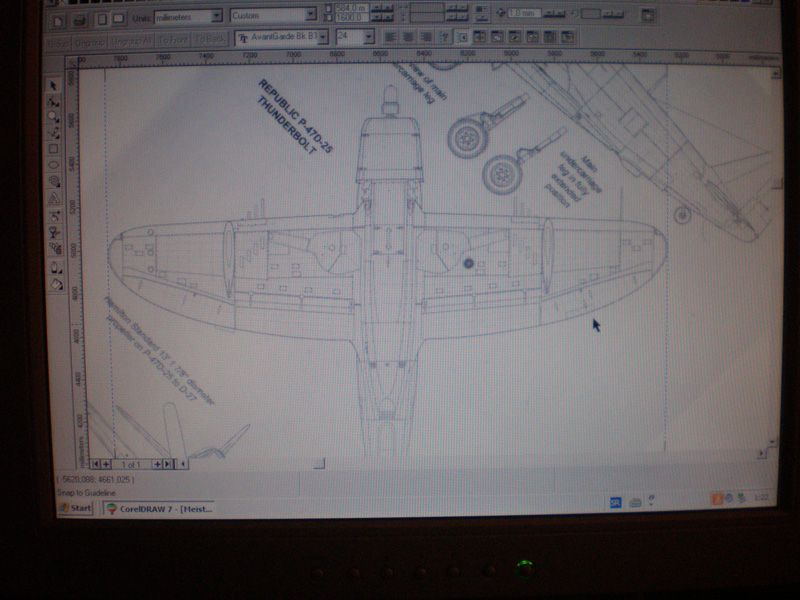
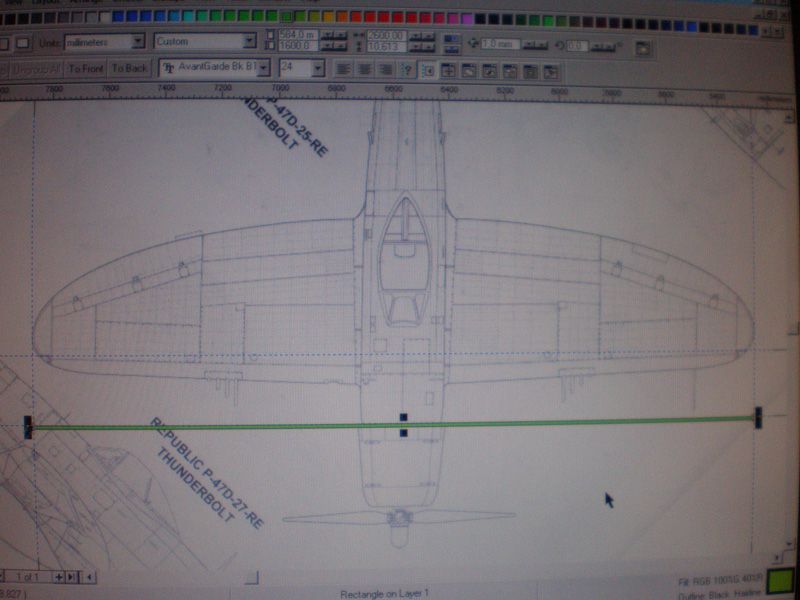
Than, from the P 47 book, I scan upper and lower side of the Thunderbolt. On that draws I have all what I need for adding panel lines. That scan I open in Corel draw program, and made it 2,6 meter wide, same like Meister scale wing. Now I have all measures...

Than I cut 1,2 mm wide lines from Oracal self adhesive foil...
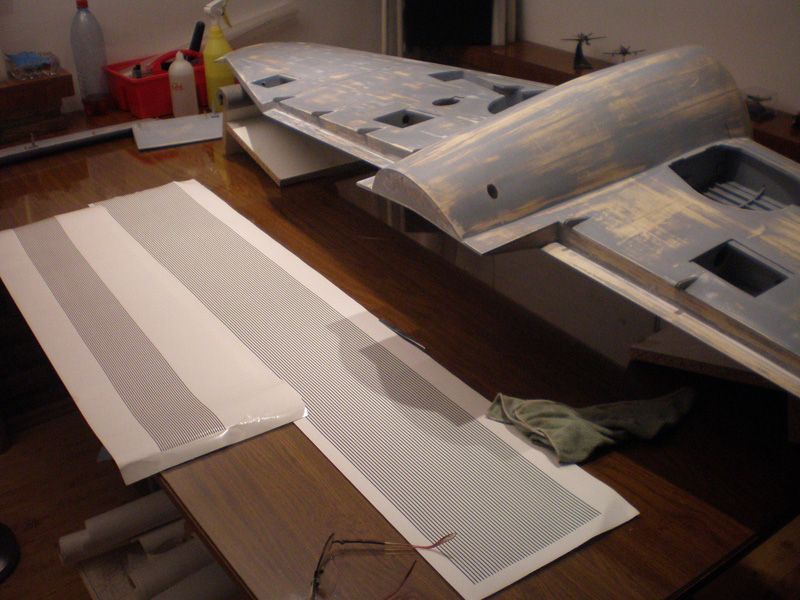
Then began measuring and gluing lines...

At same evening all lines on the bottom side was applyed...
Today, I was check all surfaces, and epoxy on the glassed surfaced was dry...
I pushed my working table in front of my work shop, and start fine sandind glassing surfaces and edges...
Glass is so fine that it is almost impossible to see where are edges...
At afternoon fuselage was ready for adding next glass fabric parts...
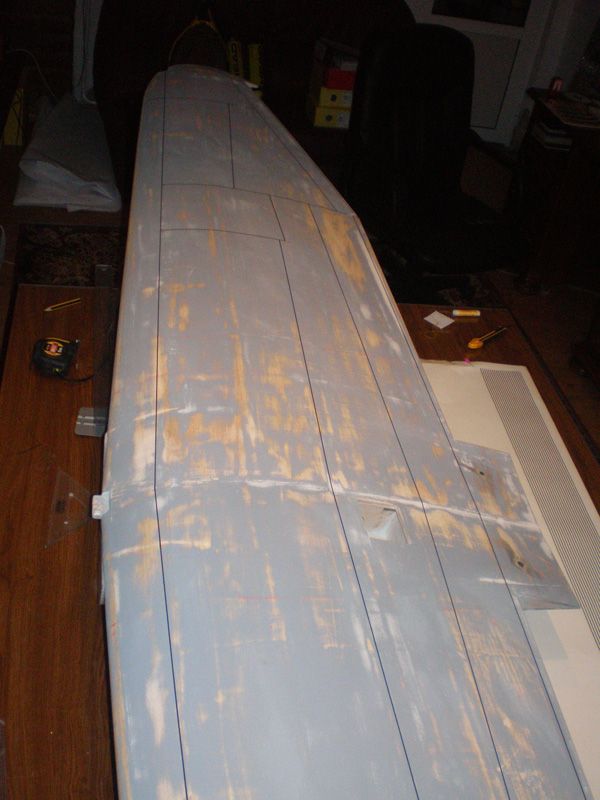
Same like yesterday, I first cut few pieces. Today I was working on upper side of the fuselage, and elevators...

I connect todays and yesterdays pieces of the glass cloth. I also bent glass on the fire wall...
Tomorrow I will finish work on panel lines on upper wing side.
Regards
Mirce
But before glassing I want to check one more time how wing sits on the fuselage...
On fuselage I put 25 gr glass fabric from German firm R&G. Epoxy resin is from same firm also...
Putting glass on fuselage must be in few stages, so I will need 3 - 4 days to do this.
First I add glass on bottom side of the fuselage and elevators. I prepare all glass fabric parts first...
Piece by piece I made all from the bottom side...
While the epoxy resin dryers, I start working on the panel lines on the wing.
First step was to wipe all wing with alcohol.
Than, from the P 47 book, I scan upper and lower side of the Thunderbolt. On that draws I have all what I need for adding panel lines. That scan I open in Corel draw program, and made it 2,6 meter wide, same like Meister scale wing. Now I have all measures...
Than I cut 1,2 mm wide lines from Oracal self adhesive foil...
Then began measuring and gluing lines...
At same evening all lines on the bottom side was applyed...
Today, I was check all surfaces, and epoxy on the glassed surfaced was dry...
I pushed my working table in front of my work shop, and start fine sandind glassing surfaces and edges...
Glass is so fine that it is almost impossible to see where are edges...
At afternoon fuselage was ready for adding next glass fabric parts...
Same like yesterday, I first cut few pieces. Today I was working on upper side of the fuselage, and elevators...
I connect todays and yesterdays pieces of the glass cloth. I also bent glass on the fire wall...
Tomorrow I will finish work on panel lines on upper wing side.
Regards
Mirce
04-07-2012 | 05:48 PM
#369
Junior Member
My Feedback: (9)
Joined: May 2011
Posts: 29
Likes: 0
Received 0 Likes
on
0 Posts
From: Grand Blanc,
MI
After following this build so closely, I hope you will have the opportunity
to let us in with a video of the maiden flight!
Wish I could be at the fly in event to meet ya.
Regards
Eddie
to let us in with a video of the maiden flight!
Wish I could be at the fly in event to meet ya.
Regards
Eddie
04-08-2012 | 04:24 AM
#371
Thread Starter
Thanks...
Of course that I will made video of maiden flight...
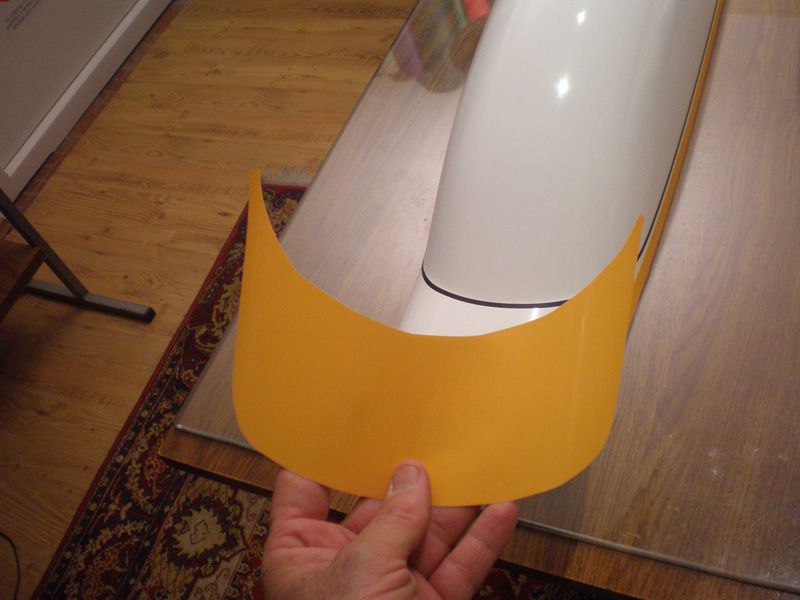
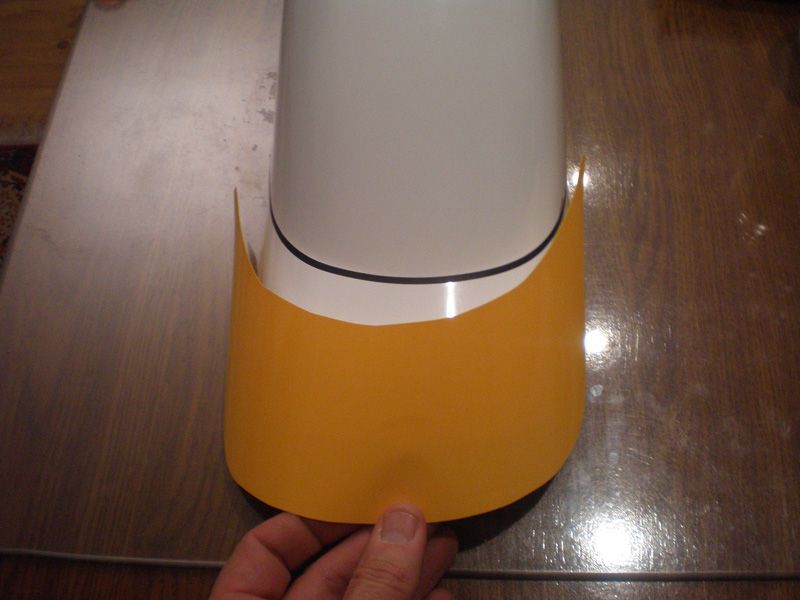
Few more picture of glassing...

Panel lines are finished on upper wing side also...

Regards
Mirce
Of course that I will made video of maiden flight...
Few more picture of glassing...
Panel lines are finished on upper wing side also...
Regards
Mirce

 04-10-2012 | 02:03 PM
#373
Thread Starter
Thanks Gary, I finally work every day on P 47.
Yesterday and today I was working with glass coat and epoxy resin, after that sanding...
Tonight I was adding second layer of epoxy resin...
Tomorrow, after final sanding, I hope that will add first coat of filler.
I have to say now few nice word about Dino...
Few days ago I got mail from him, in which he ask me what I need for my next Meister Scale project. He want to donate some parts to thanks me for this topic. So, my & Meister Scale next project will be Foke Wulf 190 A.
One more time Dino proved to be very kind and to appreciate the effort and work of other modelers... Dino, thank you my friend...
Best regards from Serbia
Mirce
04-12-2012 | 10:32 AM
#374
Thread Starter
After final sanding...

... I was working on the last details on fuselage...
Fuselage was ready for primer...
First on bottom side...
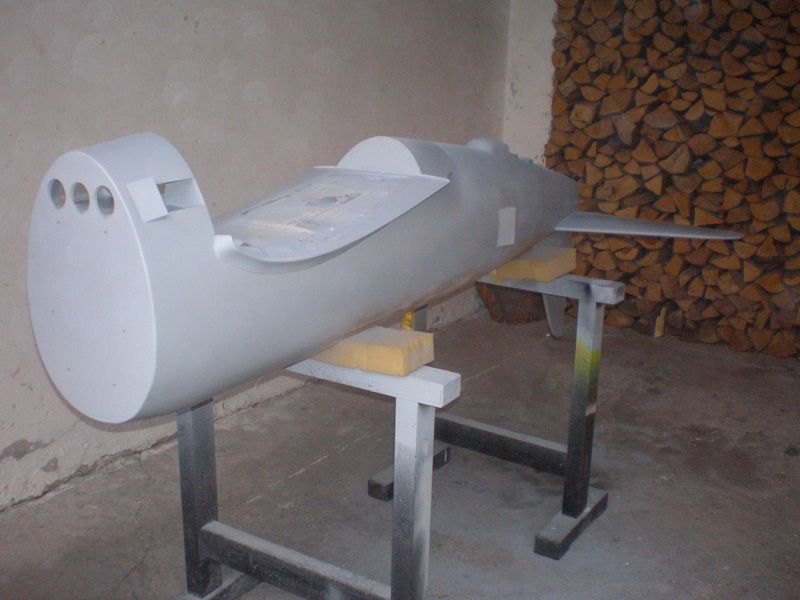
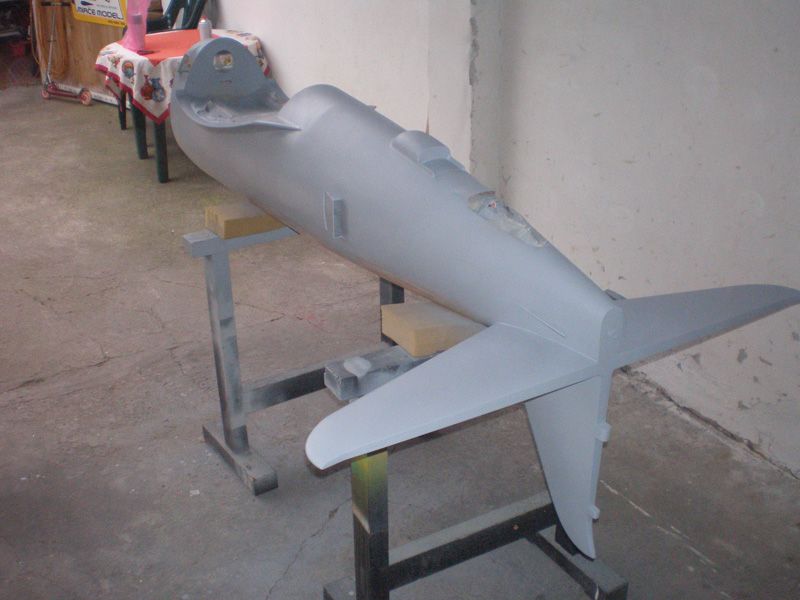
...than on upper side...
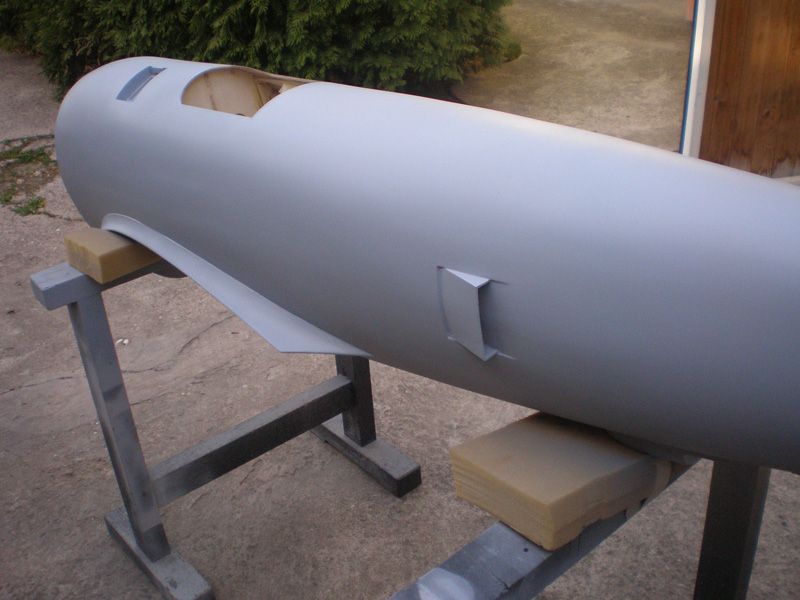
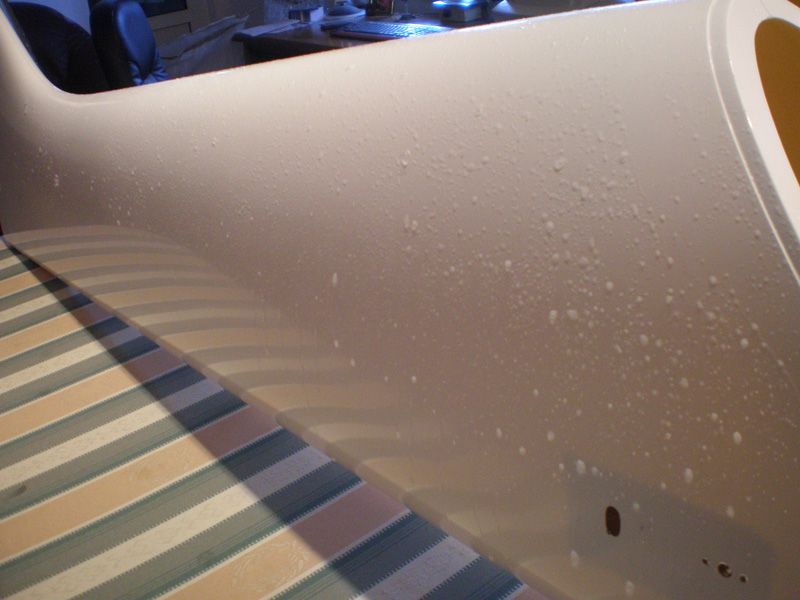
At late afternoon, I put one thin layer of acrylic filler...
Tonight and tomorrow sanding...
Regards from Novi Sad
Mirce
... I was working on the last details on fuselage...
Fuselage was ready for primer...
First on bottom side...
...than on upper side...
At late afternoon, I put one thin layer of acrylic filler...
Tonight and tomorrow sanding...
Regards from Novi Sad
Mirce