


Meister Scale P 47 - step by step
 05-31-2012 | 01:56 AM
#426

Senior Member
Very nice work you are doing with your pannel lines and rivets I'll continue to watch as you paint and weather this JUG.
Bruce<br type="_moz" />
Bruce<br type="_moz" />
 06-02-2012 | 04:04 PM
#427
Thread Starter

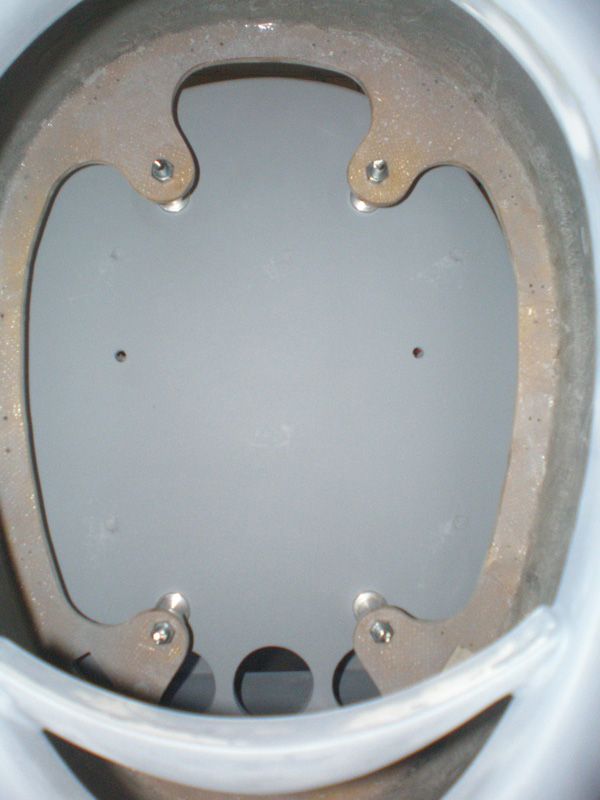
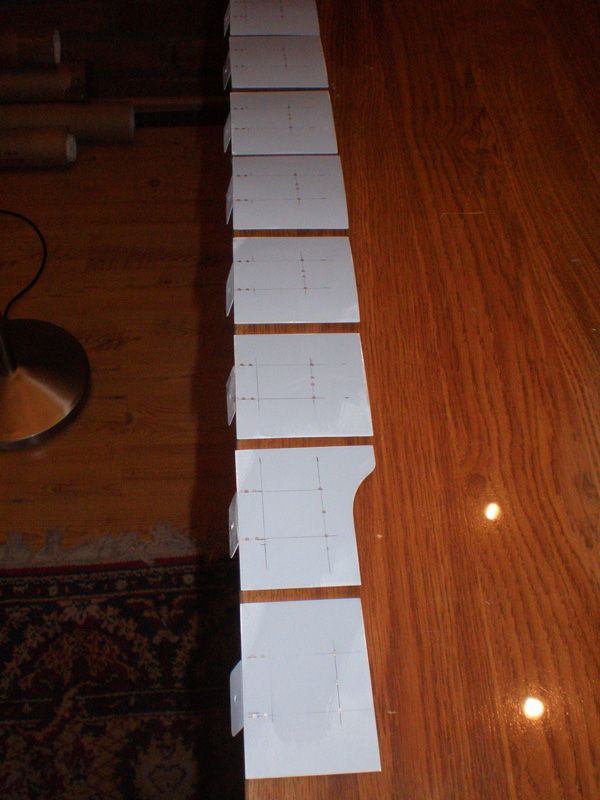
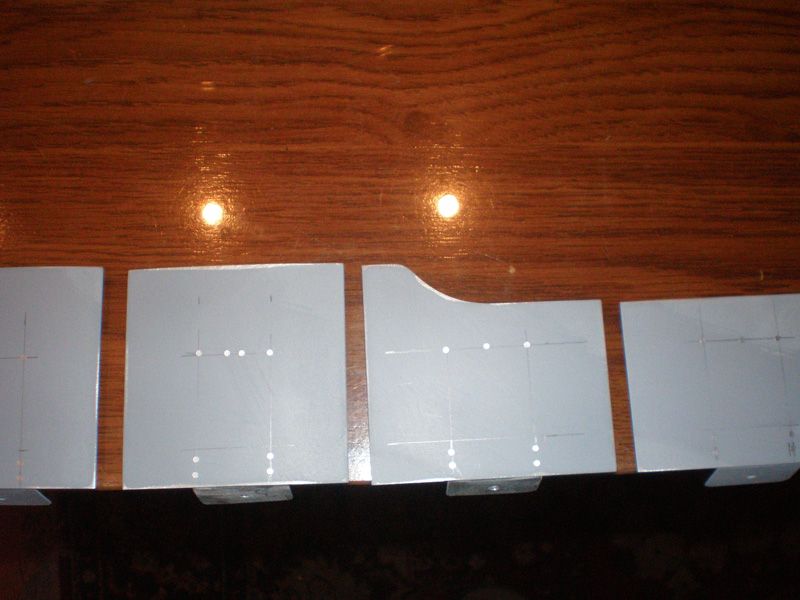
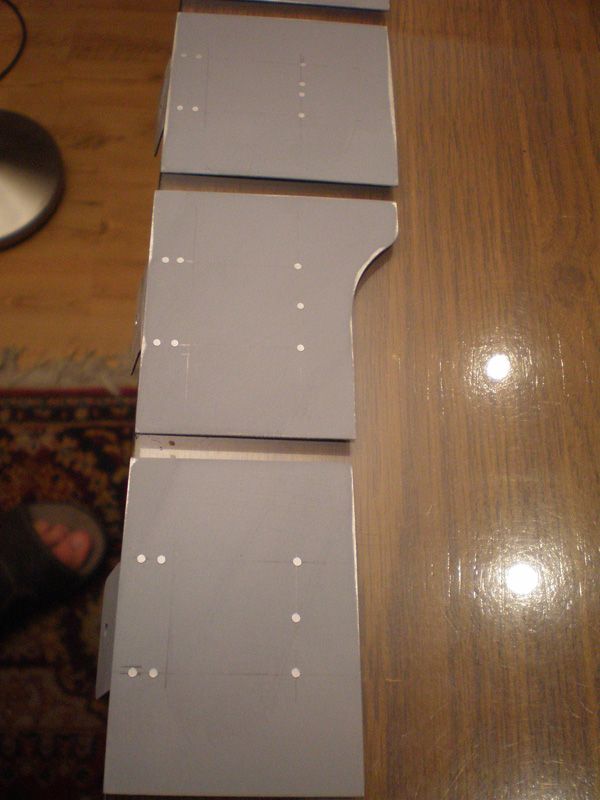
First step in engine carrier plate was to draw it. I made few shapes, cut it from vinyl foil, to see how it will fit on engine, and cowl...
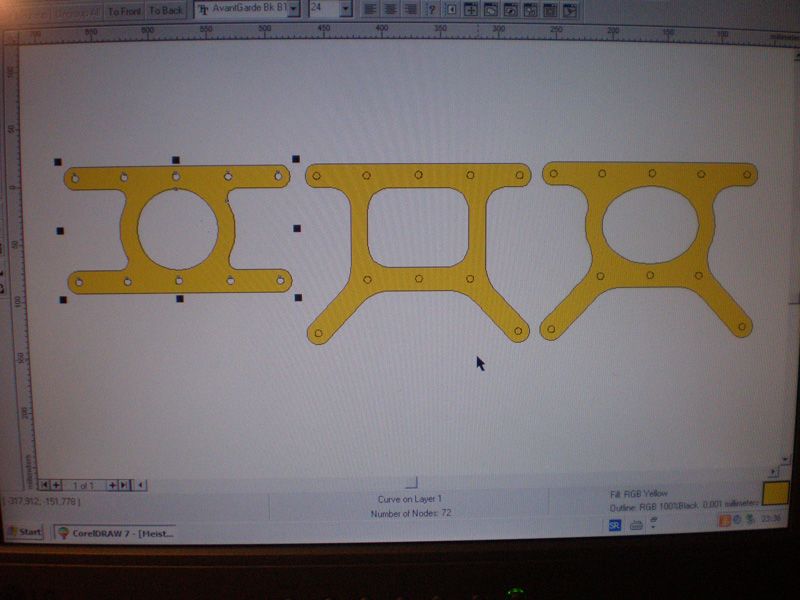
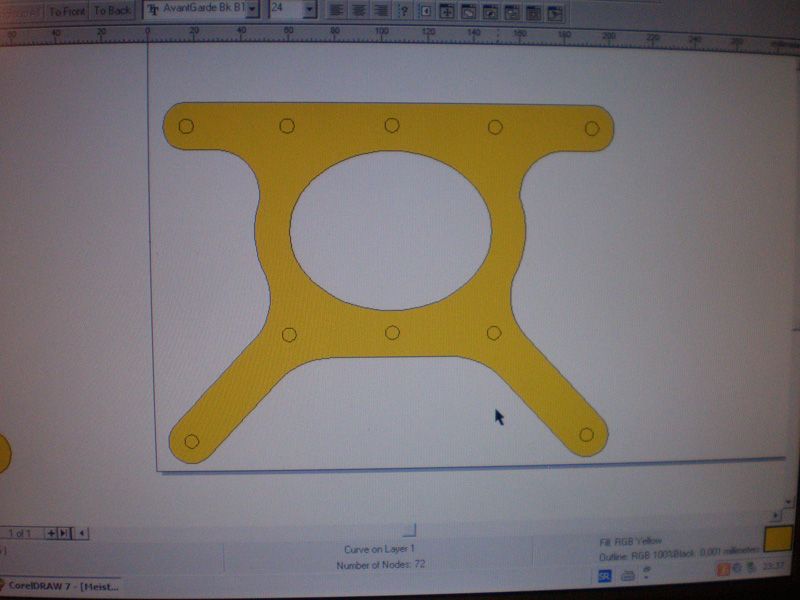

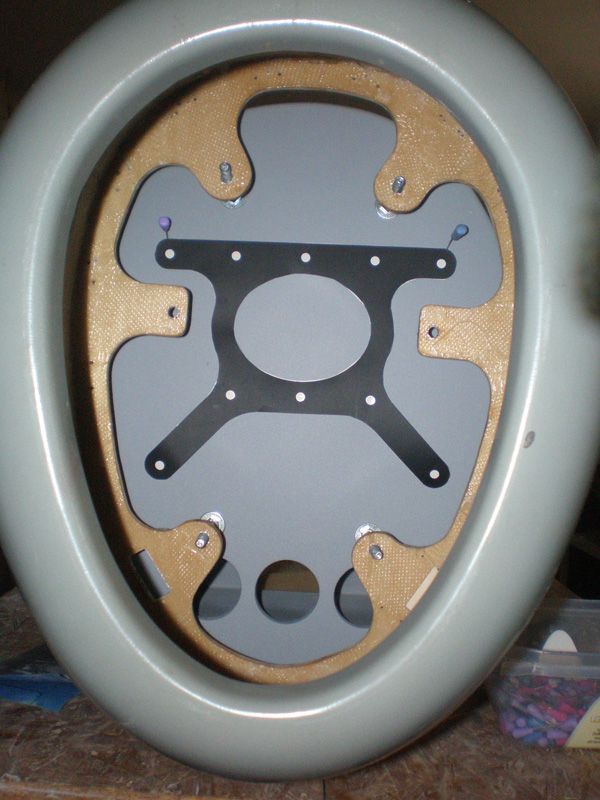
Than I made it from 4 mm ply...
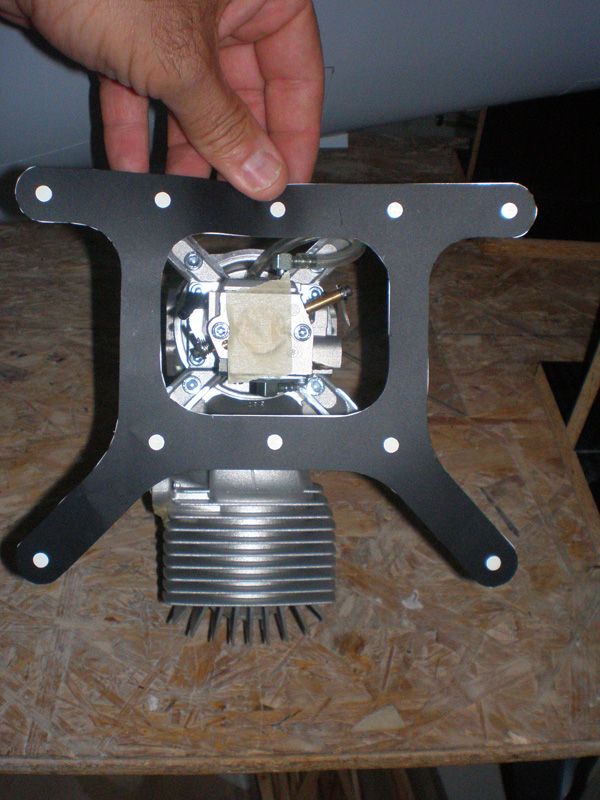
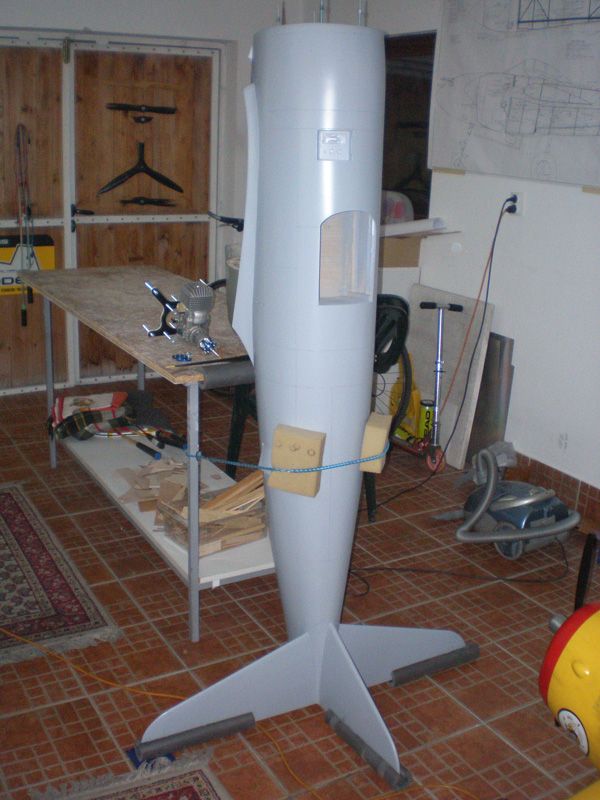
I have very simple system for finding good engine position on fire wall. First I set fuselage in vetrically...
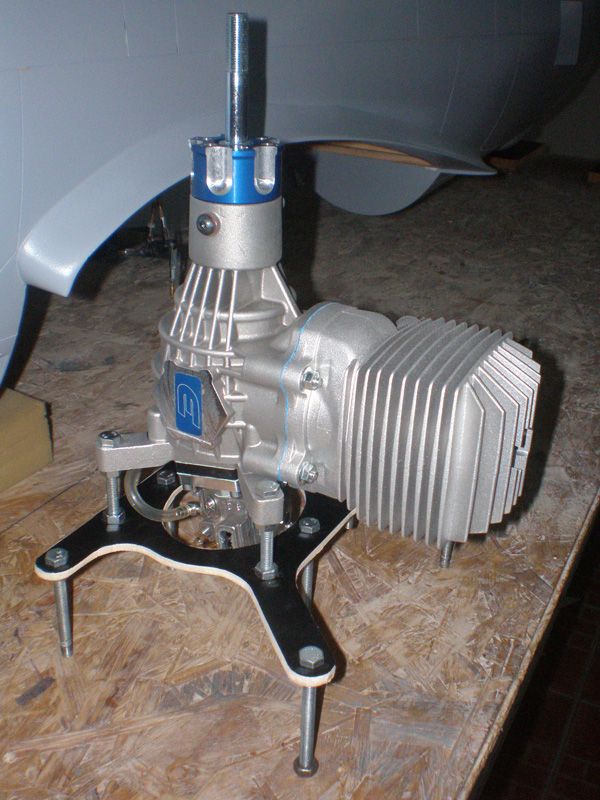
On the table I prepare all I will need...
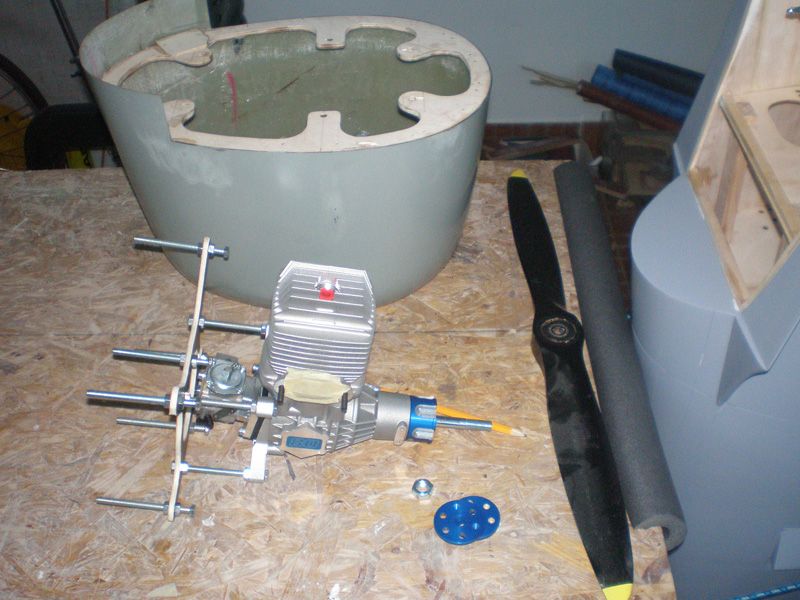
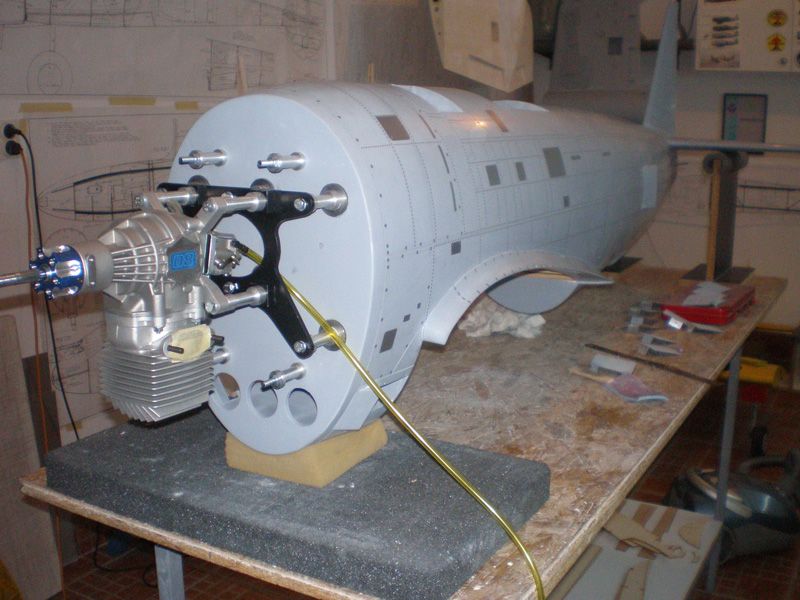
Than, I go up on the table, and put engine on fire wall.
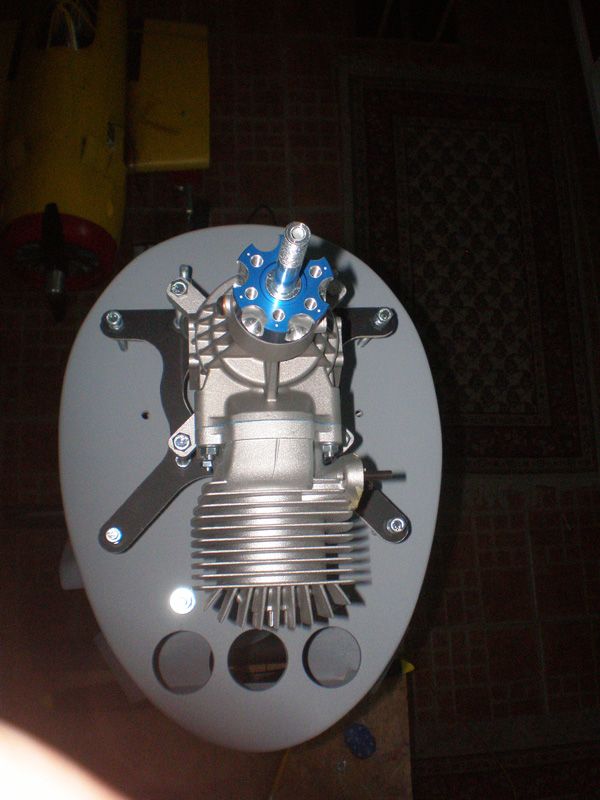
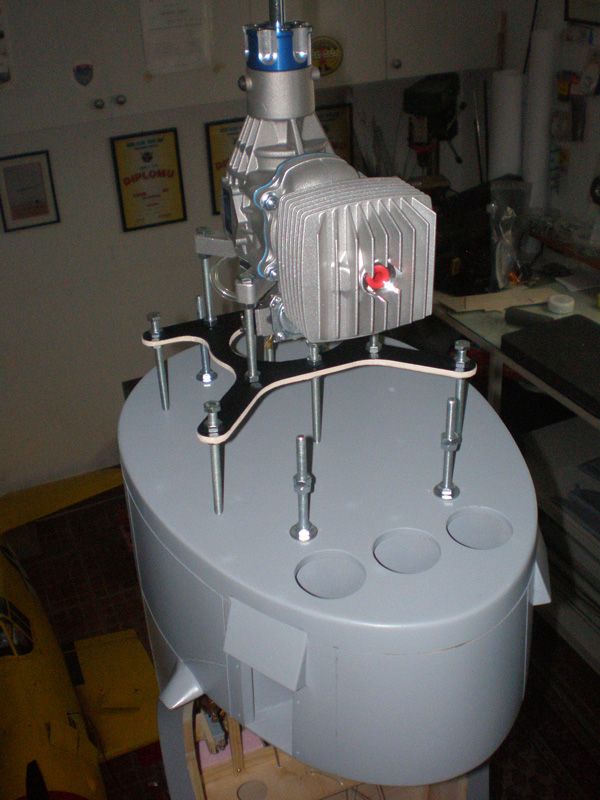
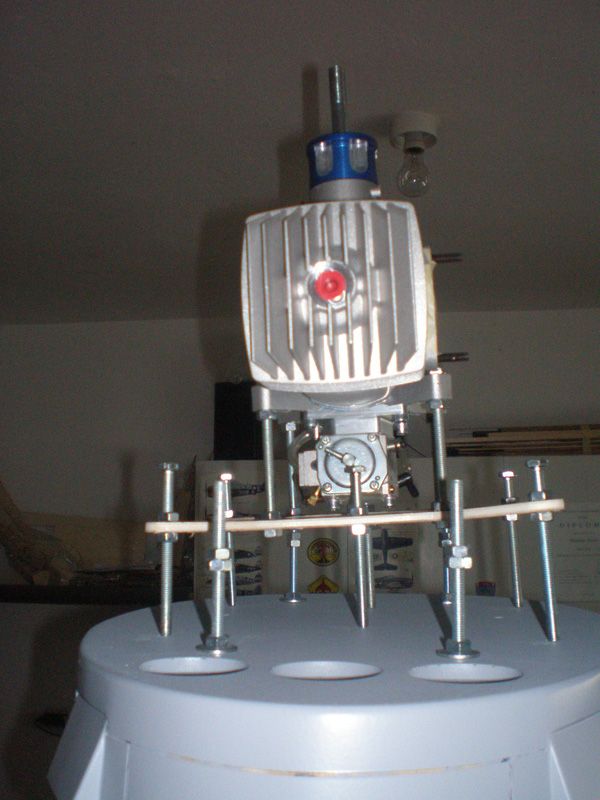
Screws allow me to made right angle (2 degrees right) and right distance from fire wall. Than I put cowl on the engine...

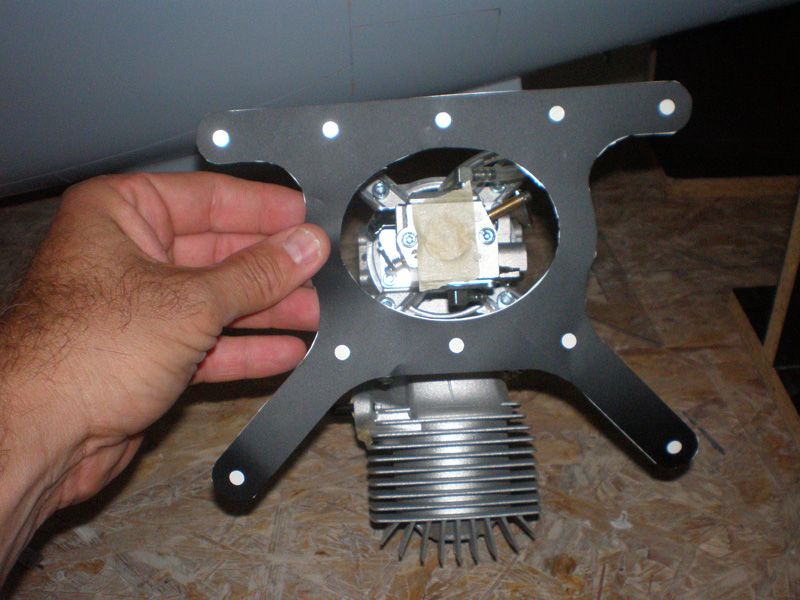
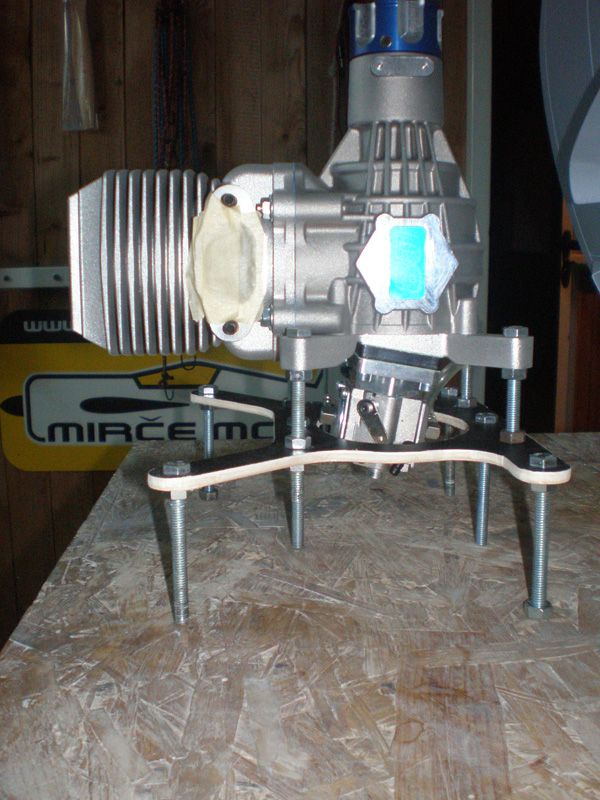
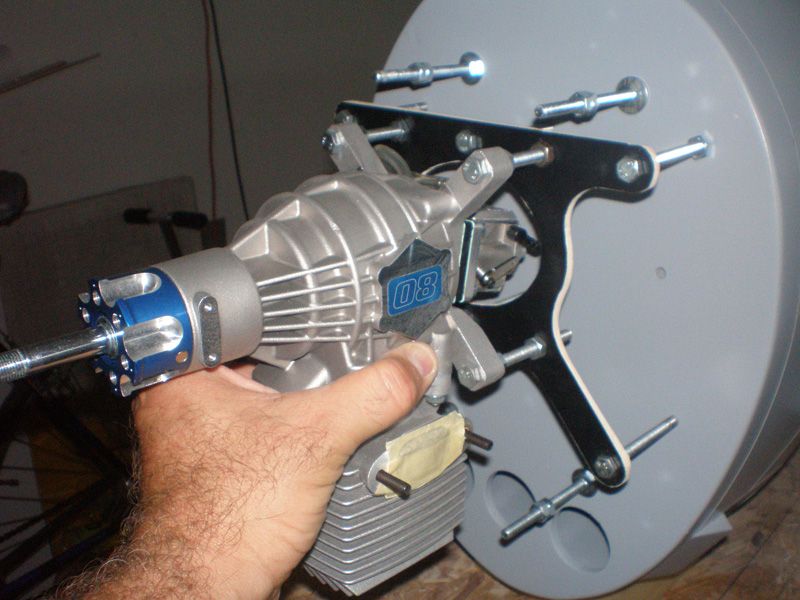
Now, I can move engine with carrier little left right until I find perfect position for shaft in the middle of the dummy engine...
Than I pick up cowl, very carefully, mark positions of the screws on fire wall, and that's it...
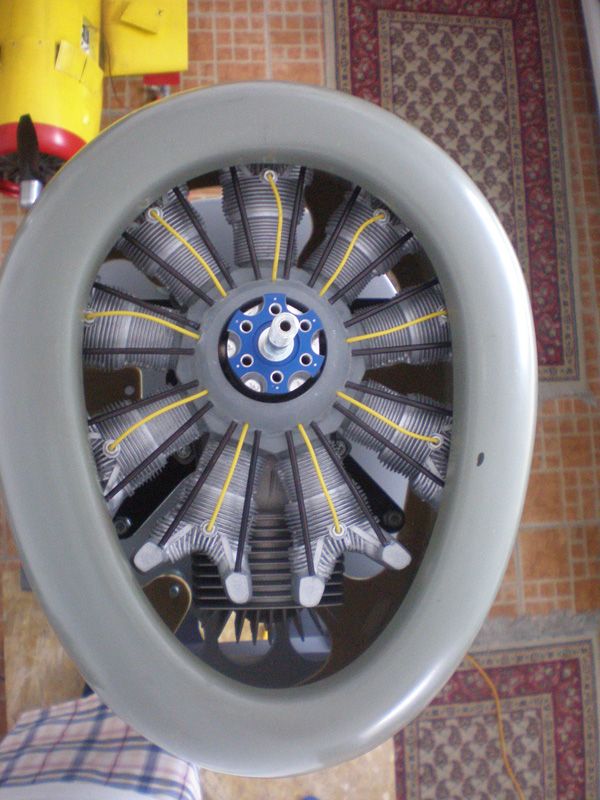
Here is propeller angle than cowl...

Cylinder will have enough air flow for cooling...
Now I will sent drawing to my friend and he will made me engine plate from 5 mm stainless steal plate. He will made aluminum spacers for distance between engine and plate, and engine and fire wall...
I will need few days to get it. In mean time, I will start sanding fuselage, to prepare it for rivets, and other details...
Regards
Mirce
Than I made it from 4 mm ply...
I have very simple system for finding good engine position on fire wall. First I set fuselage in vetrically...
On the table I prepare all I will need...
Than, I go up on the table, and put engine on fire wall.
Screws allow me to made right angle (2 degrees right) and right distance from fire wall. Than I put cowl on the engine...
Now, I can move engine with carrier little left right until I find perfect position for shaft in the middle of the dummy engine...
Than I pick up cowl, very carefully, mark positions of the screws on fire wall, and that's it...
Here is propeller angle than cowl...
Cylinder will have enough air flow for cooling...
Now I will sent drawing to my friend and he will made me engine plate from 5 mm stainless steal plate. He will made aluminum spacers for distance between engine and plate, and engine and fire wall...
I will need few days to get it. In mean time, I will start sanding fuselage, to prepare it for rivets, and other details...
Regards
Mirce
06-07-2012 | 06:41 PM
#428
Senior Member
Joined: Nov 2005
Posts: 485
Likes: 0
Received 0 Likes
on
0 Posts
From: Frisco,
TX
Mirce,
I should have paid closer attention. I remembered that you had a problem with the gear plate early on, that the gear would not retact all the way into the wing. Since Wayne didn't mention anything about that, I just built it to plan. A little "dremel" later, all is well. Gear is almost completely in the wing. I'll make some templates for the ribs and doublers for the other wing. If anyone is just starting out, let me know and I'd be glad to provide them. Much easier to cut before they are glued in.
Thanks,

 06-08-2012 | 01:15 AM
#430
Thread Starter
Frisconick, topics like this serve to exchange experiences. Btw, you have nice workshop...
Yes, I must do extra work with gear plate, but nothing seriously. Even now all gear are not completed in the wing (maybe 2-3 mm is out), but looking photos of some other Meister P 47 i saw that there is same situation.
I must told I use Siera retracts. I was using Dubro wheels, but maybe some thinner wheels will solve the problem...
With gear doors, made from thin aluminum, which is slightly curved, everything is just perfect.
Last two days I was sanding fuselage with 240 sand paper.
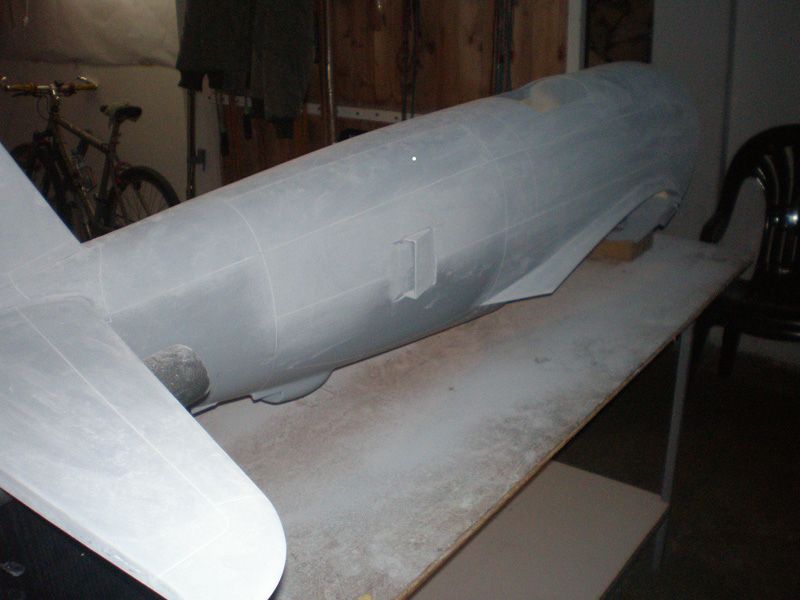
Today I will continue sanding with 800 grit sand paper, and after that - rivets and details...
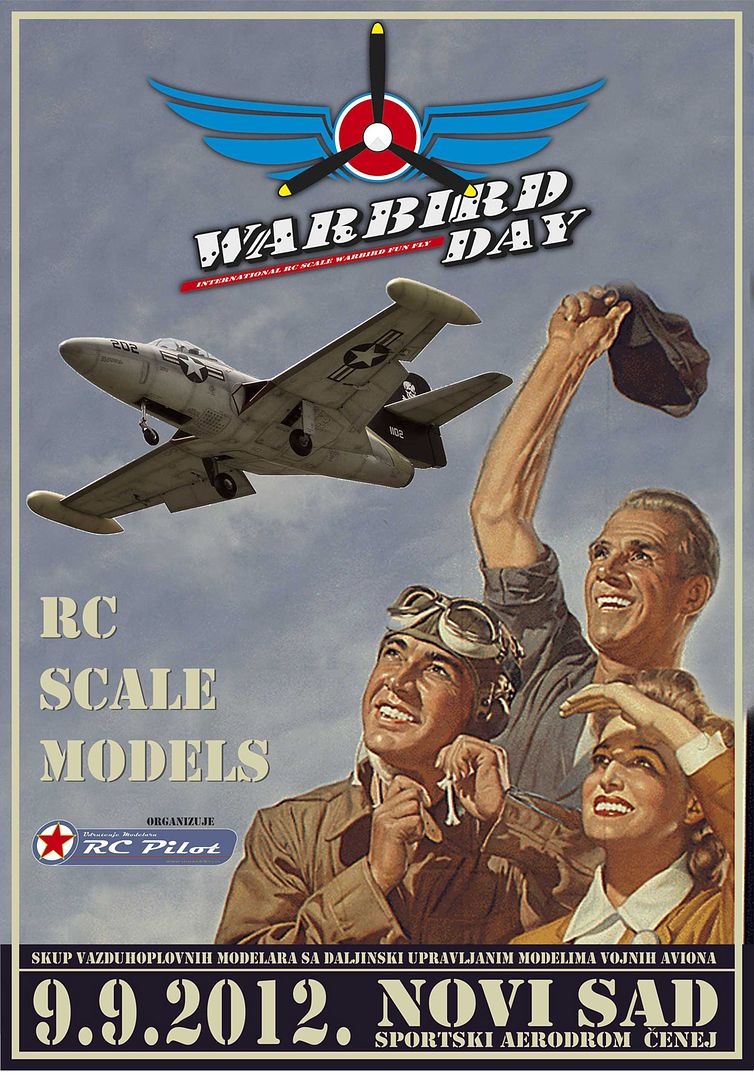
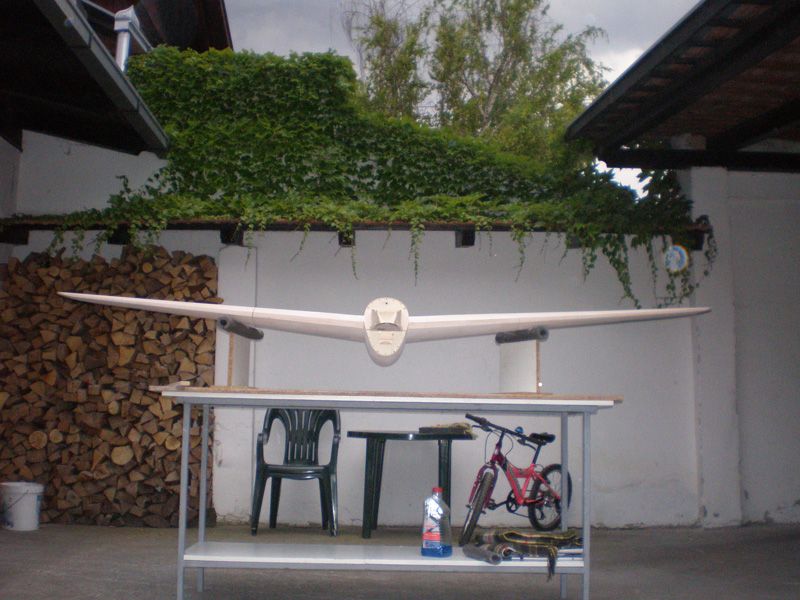
I was working little less on model in last few weeks. Reason is work on organization of first "Warbird Day" RC scale event at 09. September which will be held on our airfield...
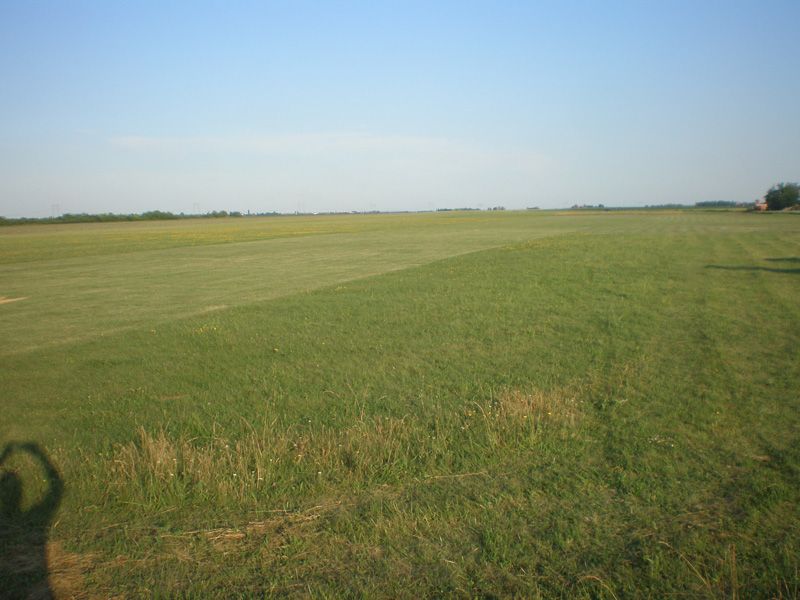
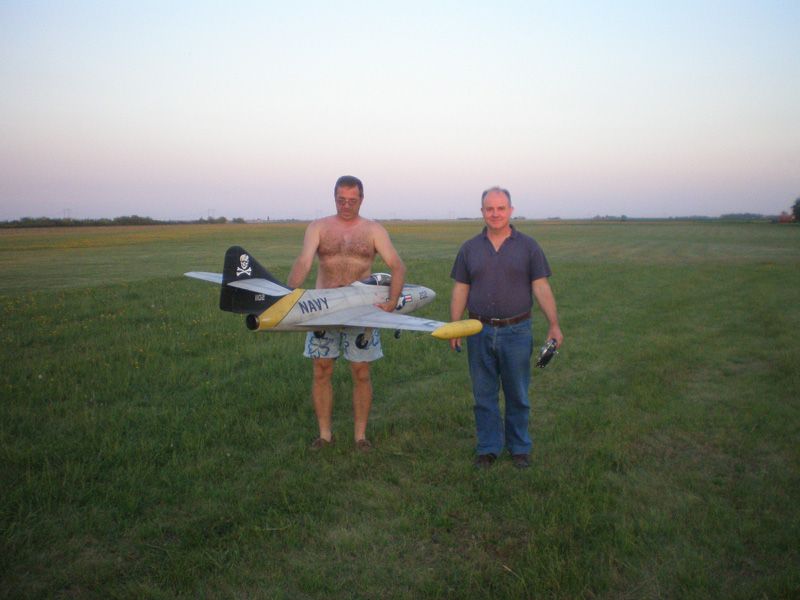
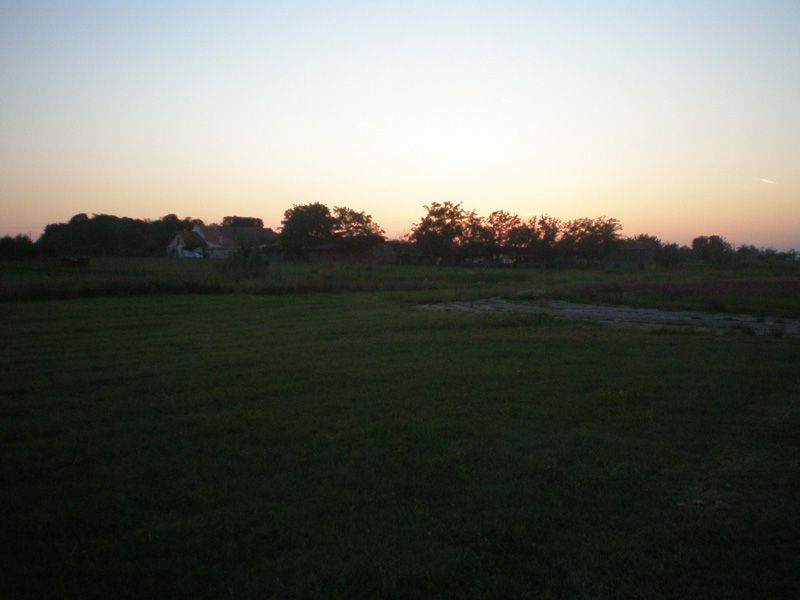
Few photos from our flying field from yesterday...

I hope today I will get parts for engine mount...
Regards
Mirce
Yes, I must do extra work with gear plate, but nothing seriously. Even now all gear are not completed in the wing (maybe 2-3 mm is out), but looking photos of some other Meister P 47 i saw that there is same situation.
I must told I use Siera retracts. I was using Dubro wheels, but maybe some thinner wheels will solve the problem...
With gear doors, made from thin aluminum, which is slightly curved, everything is just perfect.
Last two days I was sanding fuselage with 240 sand paper.
Today I will continue sanding with 800 grit sand paper, and after that - rivets and details...
I was working little less on model in last few weeks. Reason is work on organization of first "Warbird Day" RC scale event at 09. September which will be held on our airfield...
Few photos from our flying field from yesterday...
I hope today I will get parts for engine mount...
Regards
Mirce
06-10-2012 | 04:32 AM
#431
Thread Starter
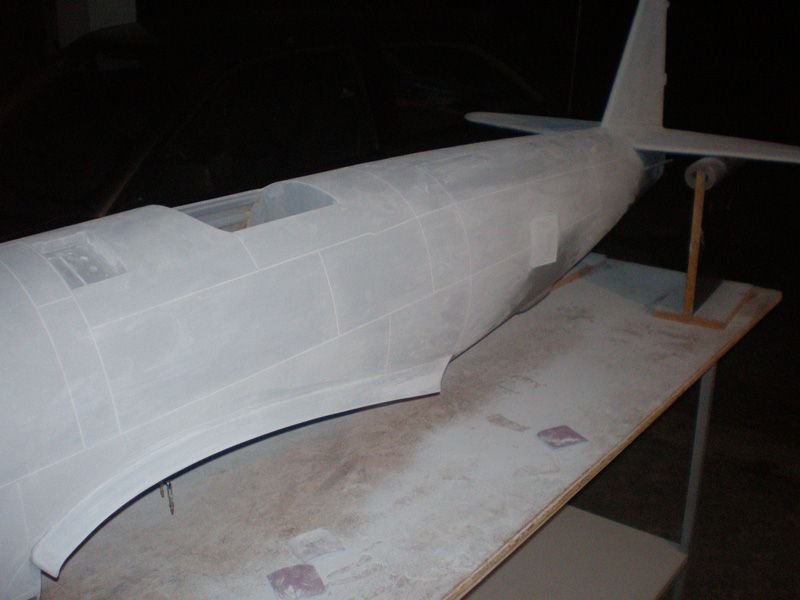
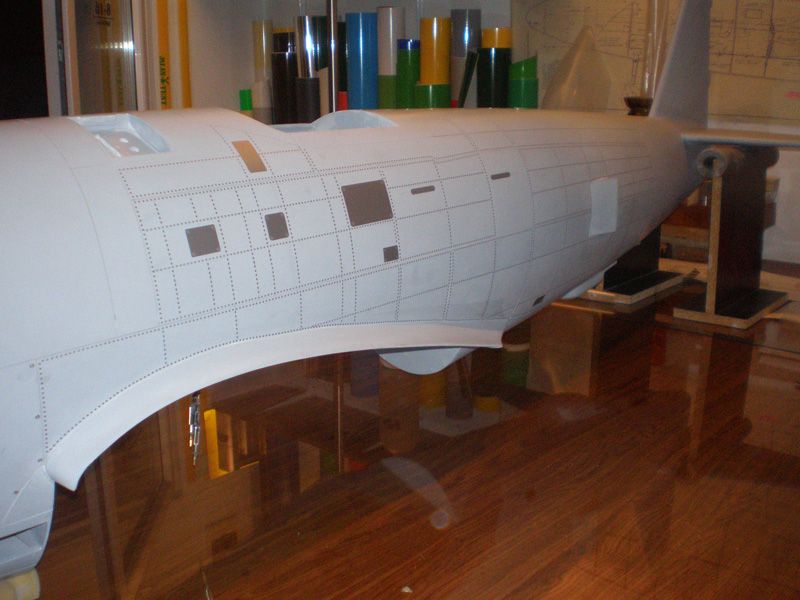
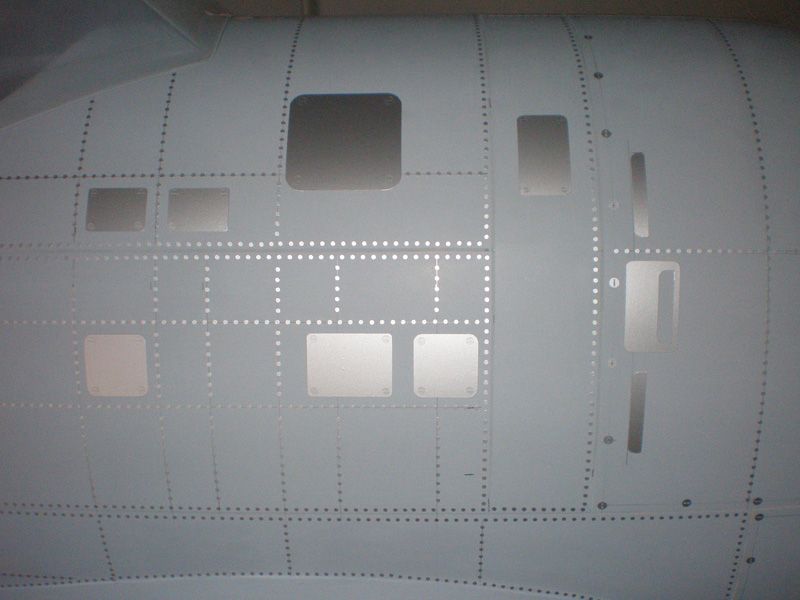
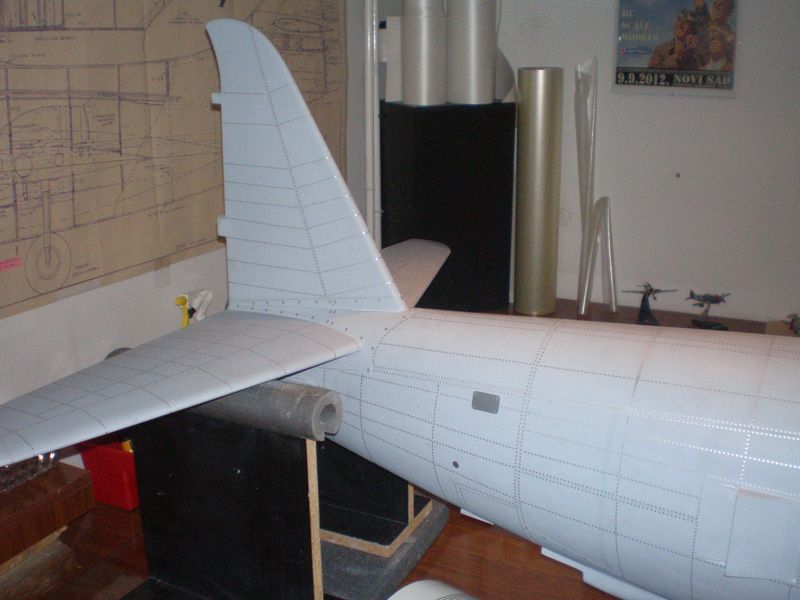
As I told earlier, after sanding with 240 grit sand paper, I polished fuselage with 800 water sand paper...

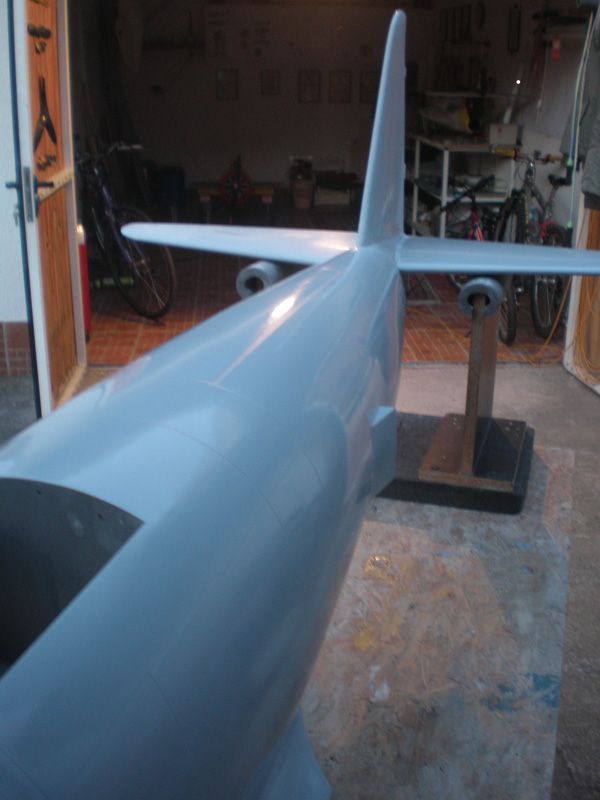
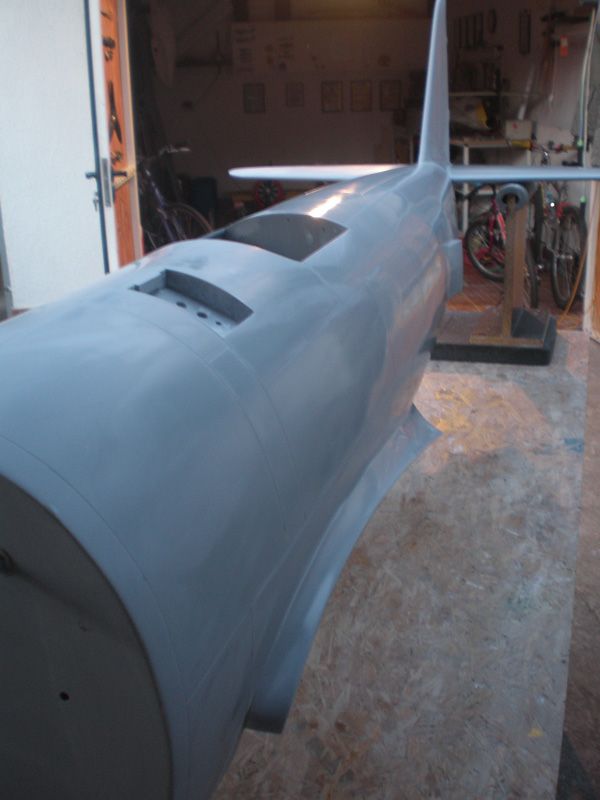
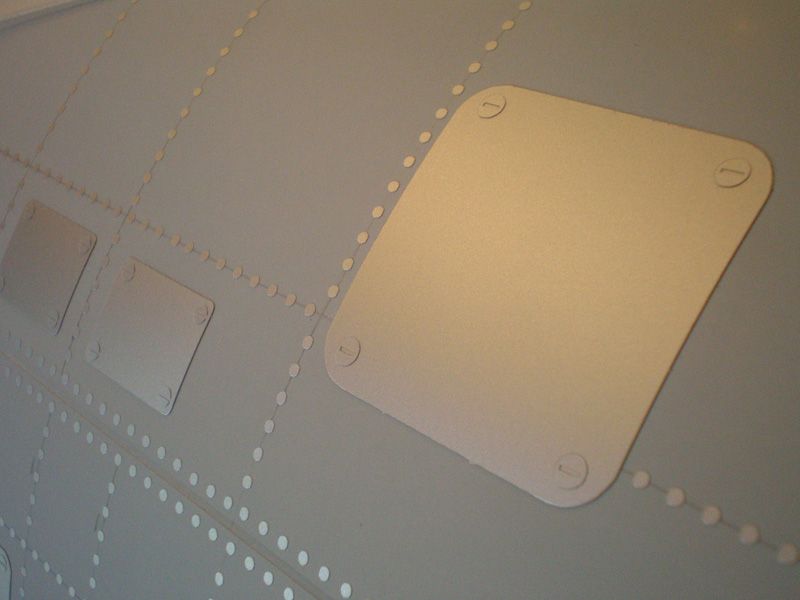
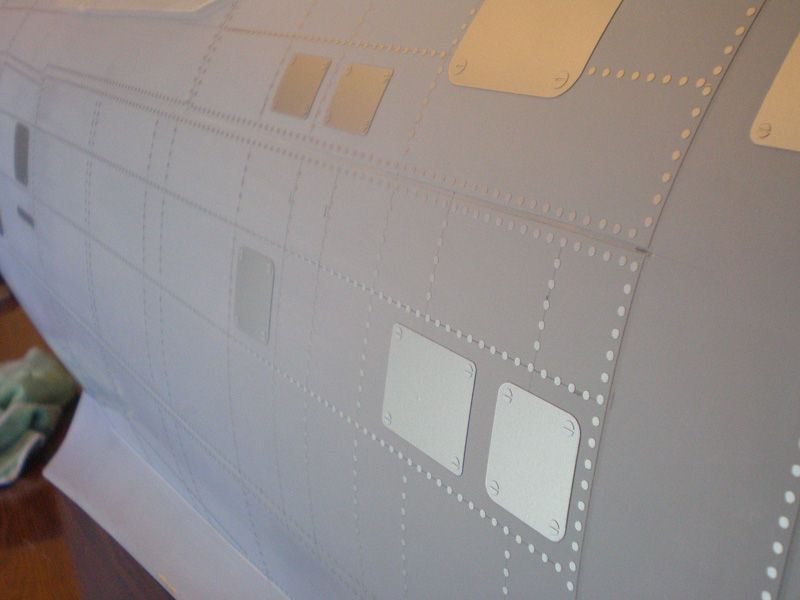
After cleaning I start putting rivets and details on fuselage...
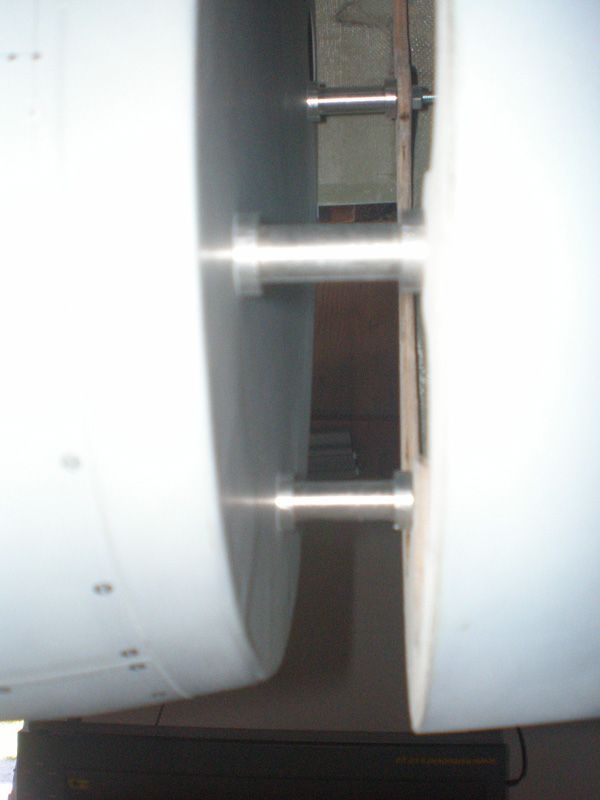
Engine mount and spacers are finish also...

For now I made it from 5mm steel plate, because my opinion is P 47 will need weight in front. If not need weight for CG, I will made that plate from aluminum...
Regards
Mirce
After cleaning I start putting rivets and details on fuselage...
Engine mount and spacers are finish also...
For now I made it from 5mm steel plate, because my opinion is P 47 will need weight in front. If not need weight for CG, I will made that plate from aluminum...
Regards
Mirce
06-10-2012 | 07:10 PM
#432
ORIGINAL: frisconick
Mirce,
I should have paid closer attention. I remembered that you had a problem with the gear plate early on, that the gear would not retact all the way into the wing. Since Wayne didn't mention anything about that, I just built it to plan. A little ''dremel'' later, all is well. Gear is almost completely in the wing. I'll make some templates for the ribs and doublers for the other wing. If anyone is just starting out, let me know and I'd be glad to provide them. Much easier to cut before they are glued in.
Thanks,
06-10-2012 | 07:13 PM
#433
ORIGINAL: frisconick
Mirce,
I should have paid closer attention. I remembered that you had a problem with the gear plate early on, that the gear would not retact all the way into the wing. Since Wayne didn't mention anything about that, I just built it to plan. A little ''dremel'' later, all is well. Gear is almost completely in the wing. I'll make some templates for the ribs and doublers for the other wing. If anyone is just starting out, let me know and I'd be glad to provide them. Much easier to cut before they are glued in.
Thanks,
Mirce,
I should have paid closer attention. I remembered that you had a problem with the gear plate early on, that the gear would not retact all the way into the wing. Since Wayne didn't mention anything about that, I just built it to plan. A little ''dremel'' later, all is well. Gear is almost completely in the wing. I'll make some templates for the ribs and doublers for the other wing. If anyone is just starting out, let me know and I'd be glad to provide them. Much easier to cut before they are glued in.
Thanks,
06-10-2012 | 07:20 PM
#434
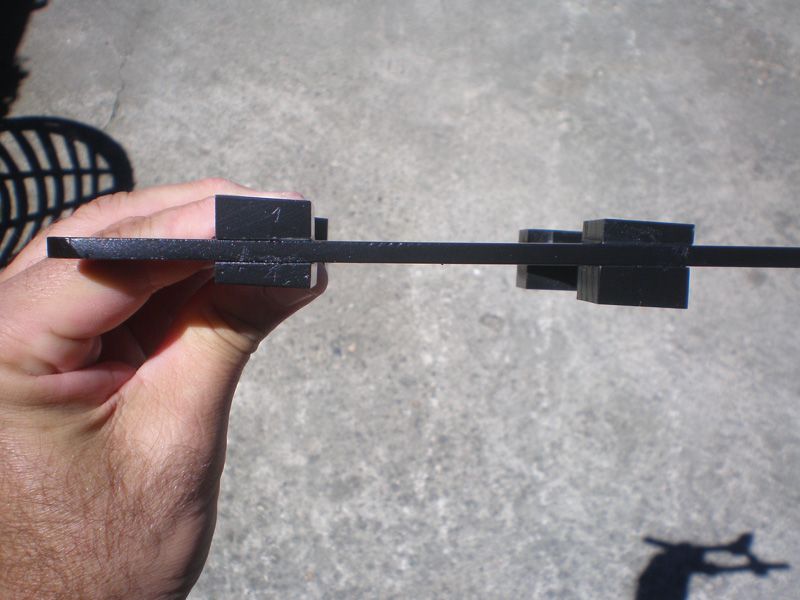
first picture are the 85 degree and the second are the 87 degree. Darrell's response to this was that he never made a 85 degree p-47 gear and that I must have gotten them somewhere else.
06-10-2012 | 10:17 PM
#435
Thread Starter
Jeff, that gear is quite out side of the wing. I don't remember which angle is on my Siera gear (I think 85) but they don't was so much out from the surface.
In post 62 on page 3, and post 347 on page 14, are few photos from my P 47 wing and gears.
Regards
Mirce
In post 62 on page 3, and post 347 on page 14, are few photos from my P 47 wing and gears.
Regards
Mirce
06-11-2012 | 04:26 AM
#436
Senior Member
Joined: Nov 2005
Posts: 485
Likes: 0
Received 0 Likes
on
0 Posts
From: Frisco,
TX
Jeff,
Yep. Mine looked like the picture on the right. It stood out about an inch. After some dremel work, it looks like the picture on the left.
Hope to see you this weekend at our field.
Thanks,
Yep. Mine looked like the picture on the right. It stood out about an inch. After some dremel work, it looks like the picture on the left.
Hope to see you this weekend at our field.
Thanks,
06-11-2012 | 01:20 PM
#437
Thread Starter
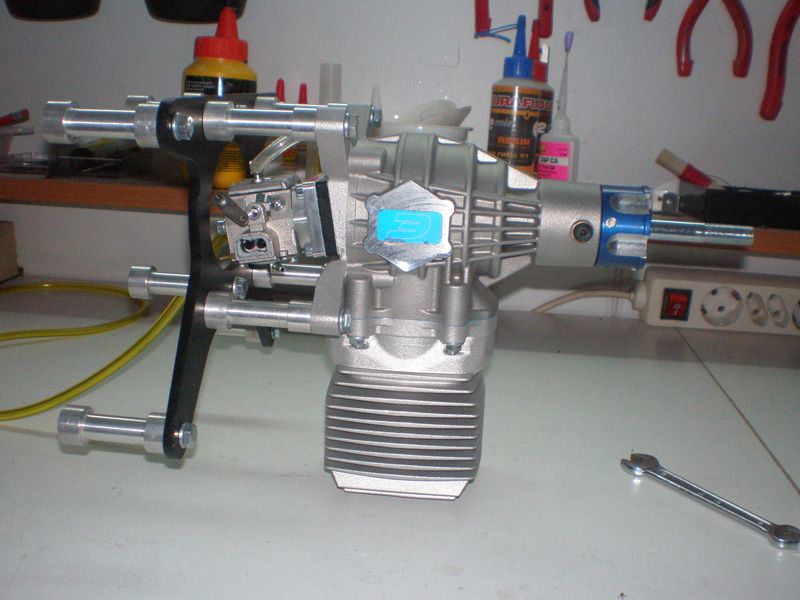
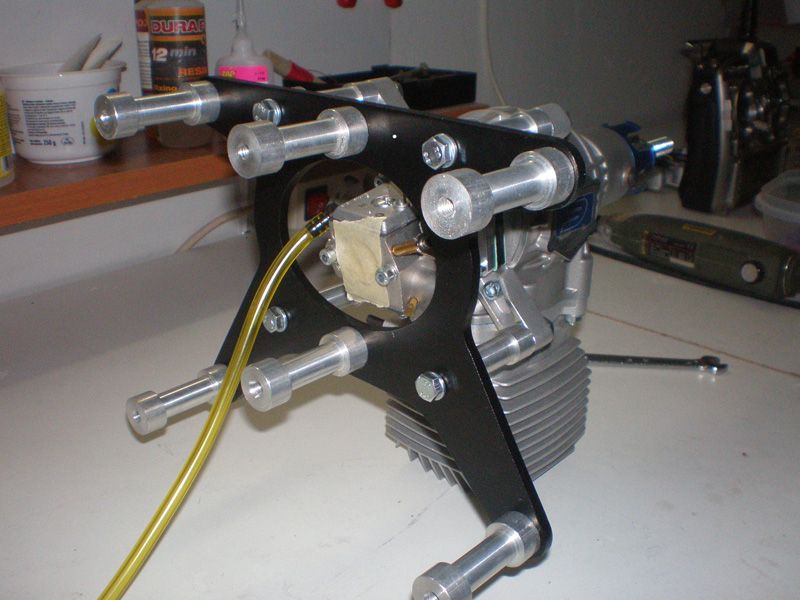
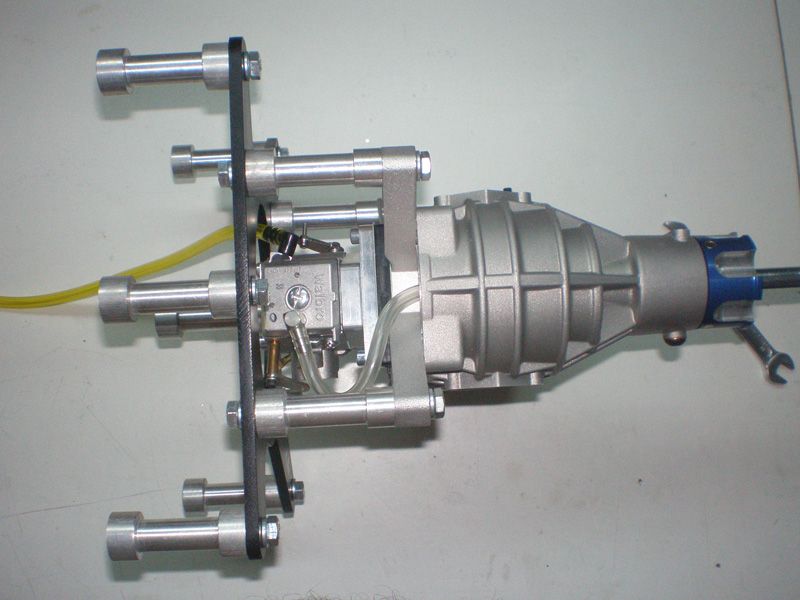
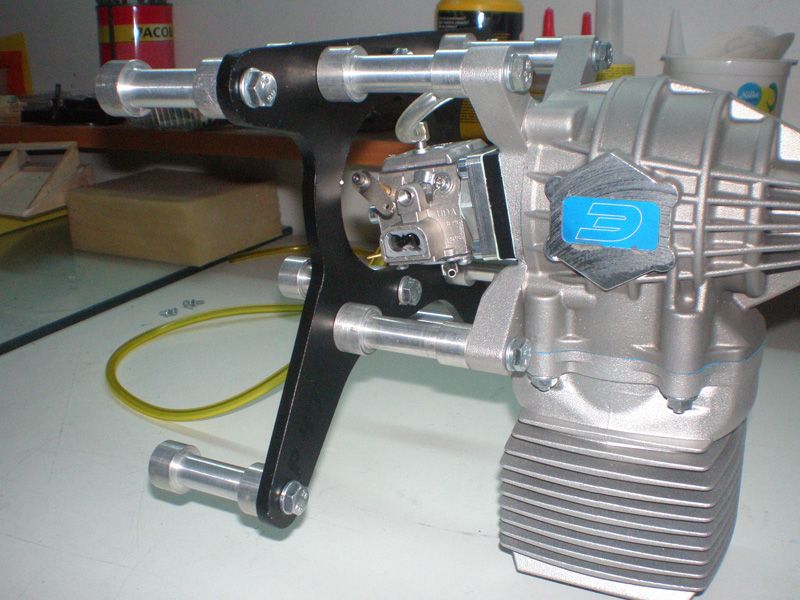
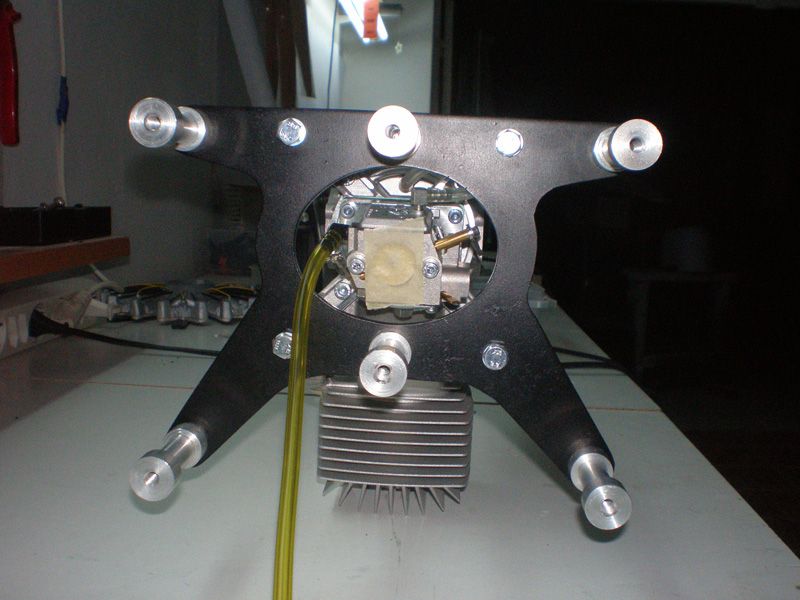
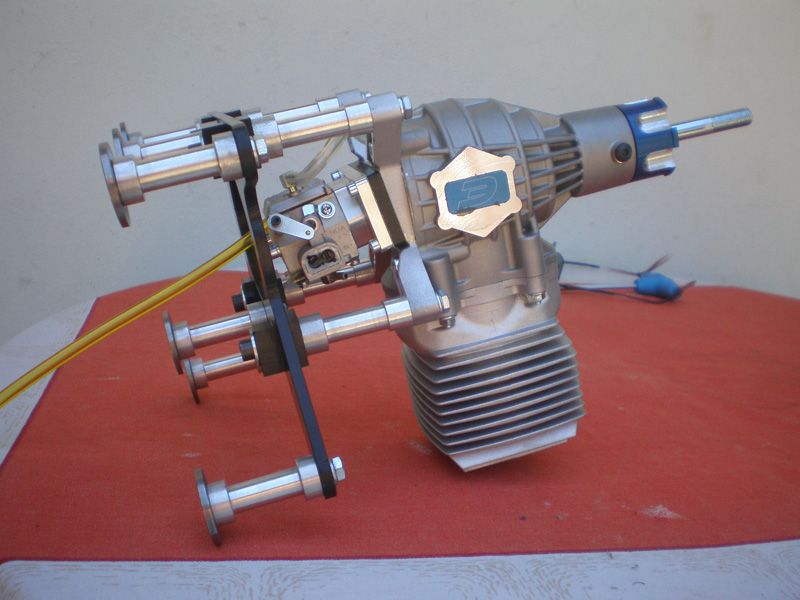
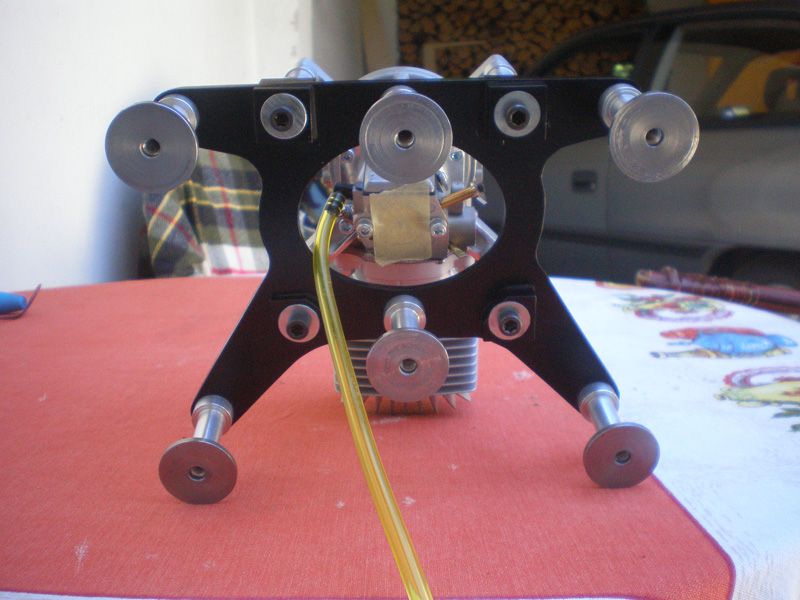
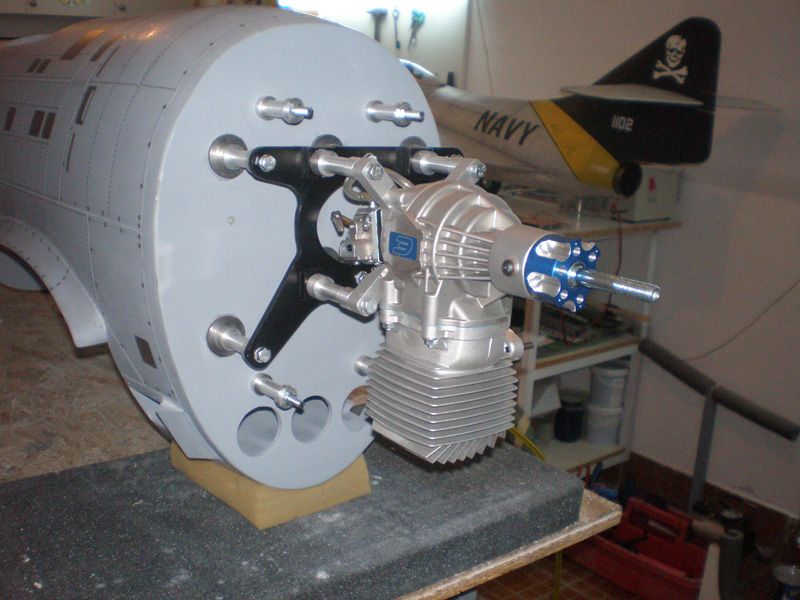
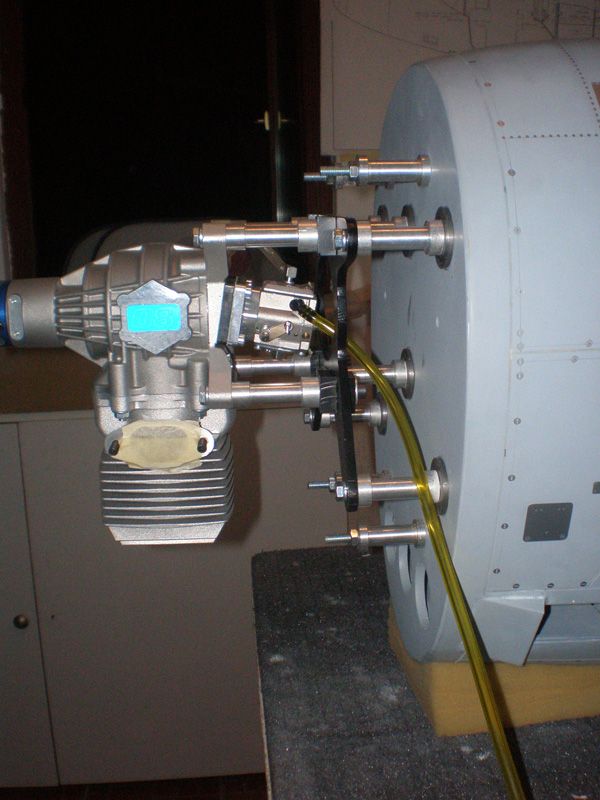
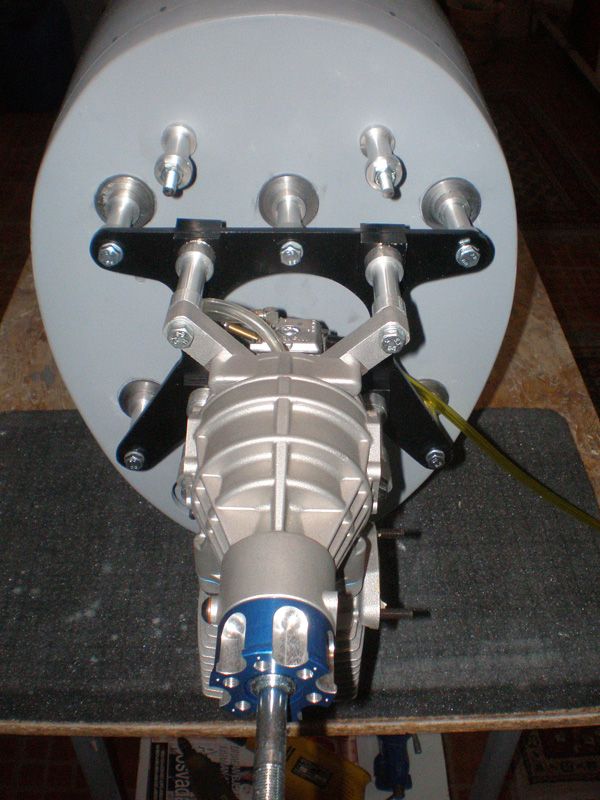
Today I get engine plate and spacers. For now I made plate from 5 mm steel plate. I'll see if I need to add weight for CG steel will be OK. If not I'll made plate from aluminum...
I want to thanks to my friend Dragan, who made all this parts.
Engine plate have 6 spacers...
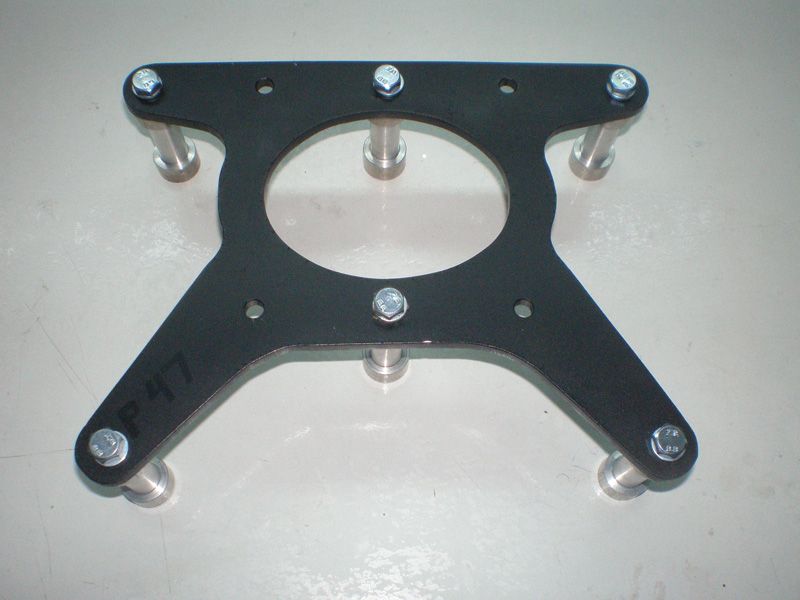
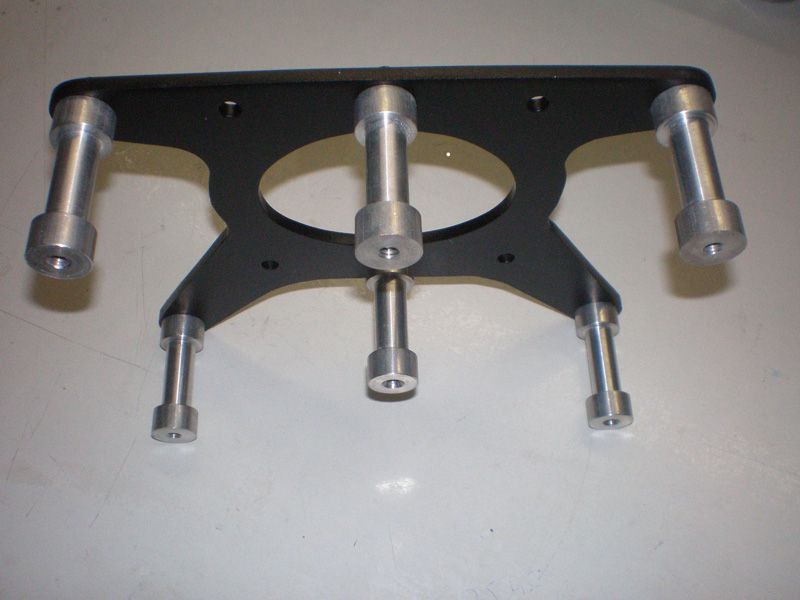
Four spacers are made for engine...
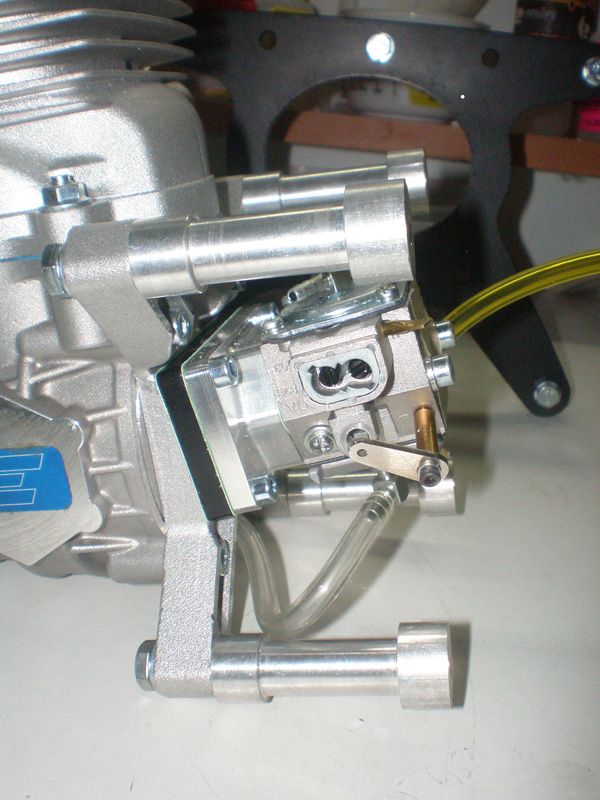
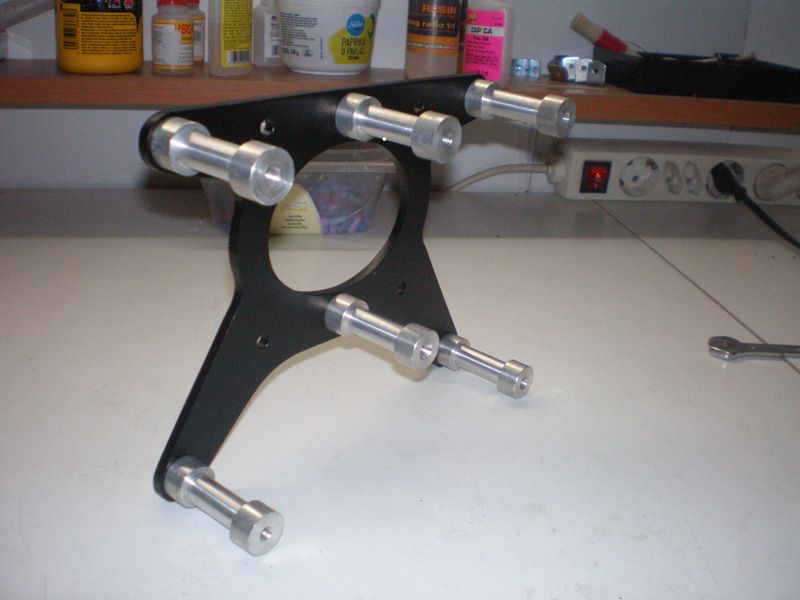
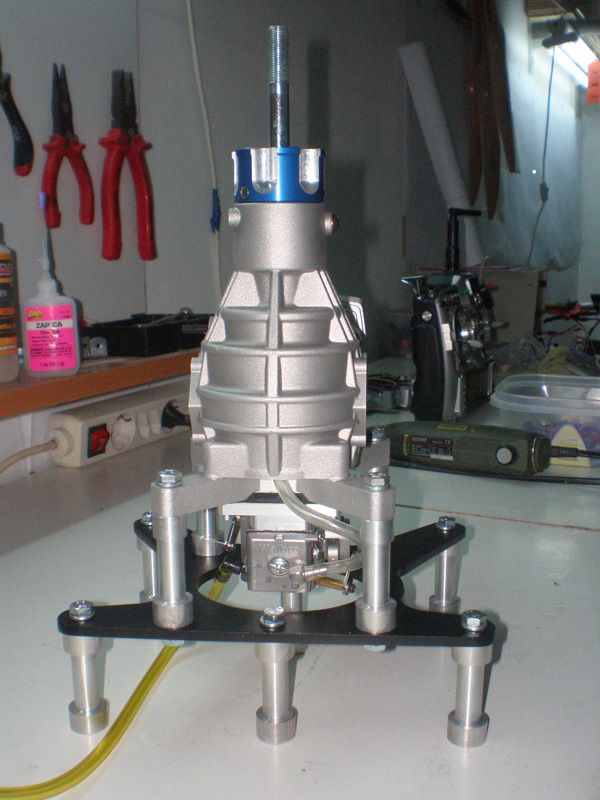
All together it look like this...
I'm inpatient to fix engine on fuselage, but on my working table is Ziroli P 38.
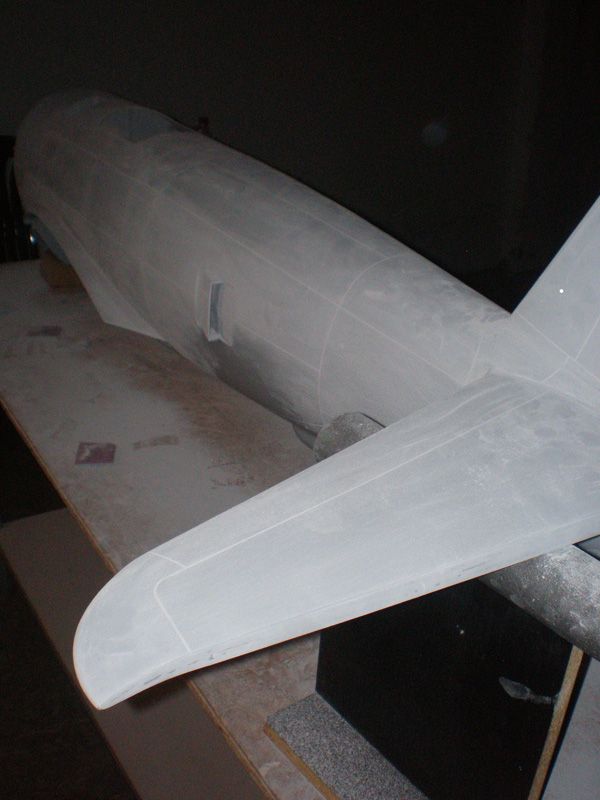
Today I was sanding leading edges, and tomorrow, when finish that job, I will put engine on P 47...
Can't wait to see how it will look...
Now I have question for you guys, when you put engine on fuselage on Meister P 47, are you made angle to right and down?
On Top Gun some told me that they wasn't do that.
I always put those angles, but I want to ask...
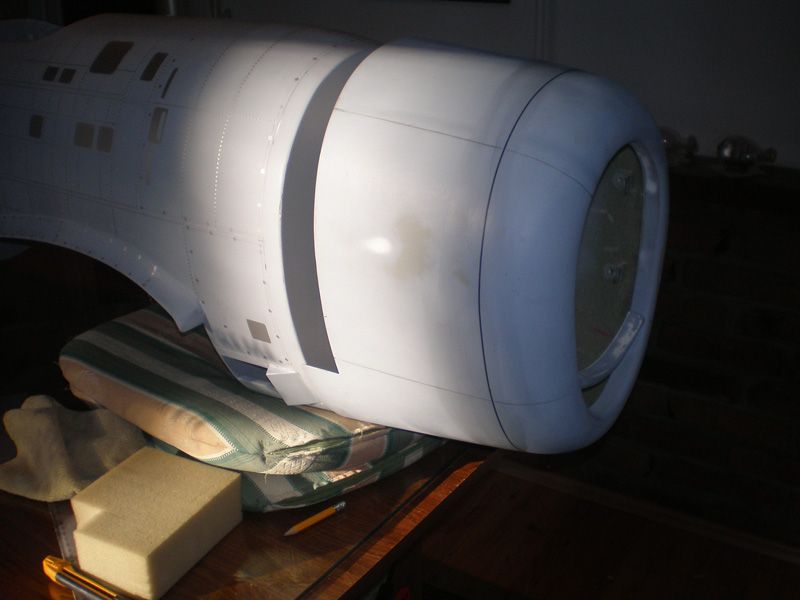
And finally, some small work on cowl...
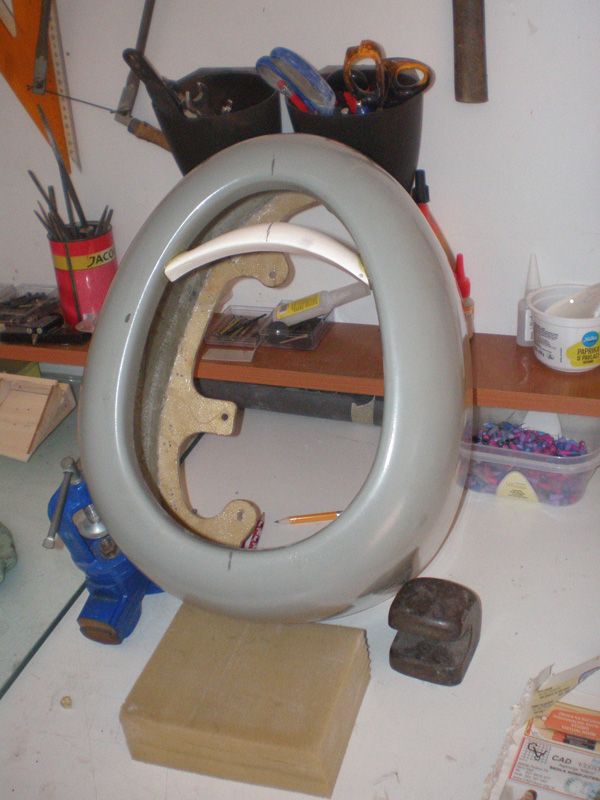
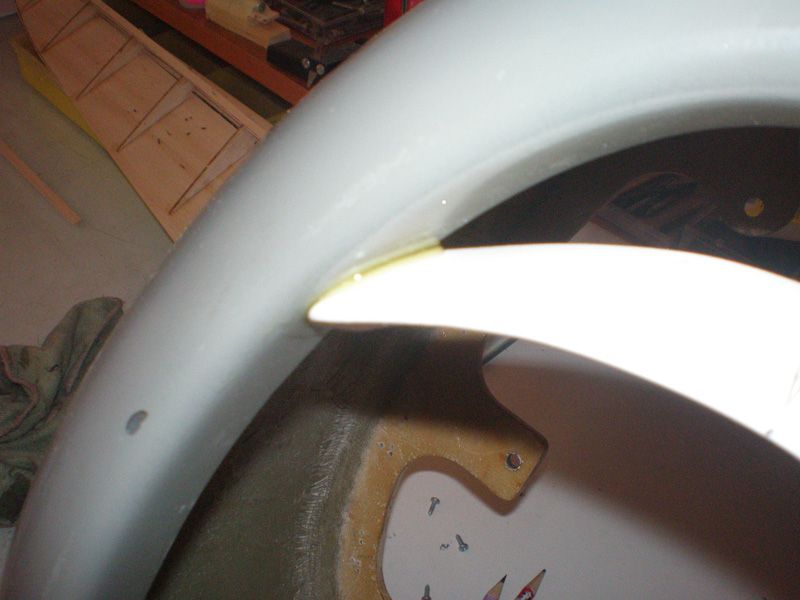
Cowl was sand with 800 grit water sand paper, and primed...

Regards
Mirce
I want to thanks to my friend Dragan, who made all this parts.
Engine plate have 6 spacers...
Four spacers are made for engine...
All together it look like this...
I'm inpatient to fix engine on fuselage, but on my working table is Ziroli P 38.
Today I was sanding leading edges, and tomorrow, when finish that job, I will put engine on P 47...
Can't wait to see how it will look...
Now I have question for you guys, when you put engine on fuselage on Meister P 47, are you made angle to right and down?
On Top Gun some told me that they wasn't do that.
I always put those angles, but I want to ask...
And finally, some small work on cowl...
Cowl was sand with 800 grit water sand paper, and primed...
Regards
Mirce


 06-13-2012 | 04:00 PM
#443

Joined: Apr 2006
Posts: 1,698
Likes: 0
Received 0 Likes
on
0 Posts
From: Carrollton
Hello Mirce,
Your Jug is looking AWESOME ! ! ! I realize you cannot rush a project like this, but I was just wondering how much longer do you think it will be before it will be ready for it's maiden. I don't know about you, but I cannot wait..............
Keep up the great work and I'll keep watching and drooling all over my keyboard.
David
06-13-2012 | 11:03 PM
#444
Junior Member
Joined: Mar 2012
Posts: 3
Likes: 0
Received 0 Likes
on
0 Posts
From: Socal, CA
Hello Mirce,
I'm just wondering if you still have the kit for the rivets like the ones you are using in the P47? If so I'm more than happy to buy them from you just let me know the total shipped to 91730 in USA.
Thanks
I'm just wondering if you still have the kit for the rivets like the ones you are using in the P47? If so I'm more than happy to buy them from you just let me know the total shipped to 91730 in USA.
Thanks
06-14-2012 | 03:22 AM
#445
Thread Starter
Thank you guys for king words...
I really enjoining in this build, and want to made everything best I can do. So, my opinion is that maiden flight will be in August or September...
I hope that in next few days I will finish work on rivets and details on fuselage, than same same story on cowl (OK that is small part)...
I must install engine, and servos for throttle and choke, and prepare many small parts for painting...
Color scheme I choose have, I think, 7 or 8 colors, so for that I will need 2-3 weeks for that phase...
Finally weathering, clear cote, compilation... Yes, September...
Lpjamb, yes I have Kit or Mirce Finish Set. When I finish rivet and details, on my P 47 I will have new Set which will include all details same like on my P 47.
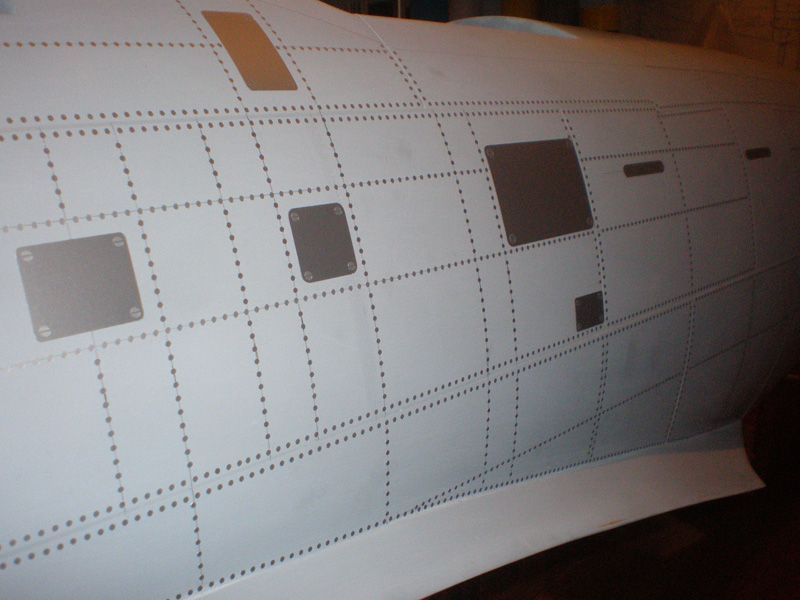
On my model I applied more than 40000 rivets. But, I made every row like on real Thunderbolt.
Price depend of how many rivets you want to add on your model. Check my web site...
Best way is to send me e mail, so we can all agree on...
Regards
Mirce
I really enjoining in this build, and want to made everything best I can do. So, my opinion is that maiden flight will be in August or September...
I hope that in next few days I will finish work on rivets and details on fuselage, than same same story on cowl (OK that is small part)...
I must install engine, and servos for throttle and choke, and prepare many small parts for painting...
Color scheme I choose have, I think, 7 or 8 colors, so for that I will need 2-3 weeks for that phase...
Finally weathering, clear cote, compilation... Yes, September...
Lpjamb, yes I have Kit or Mirce Finish Set. When I finish rivet and details, on my P 47 I will have new Set which will include all details same like on my P 47.
On my model I applied more than 40000 rivets. But, I made every row like on real Thunderbolt.
Price depend of how many rivets you want to add on your model. Check my web site...
Best way is to send me e mail, so we can all agree on...
Regards
Mirce
06-17-2012 | 01:52 AM
#446
Thread Starter
Here is little up date...
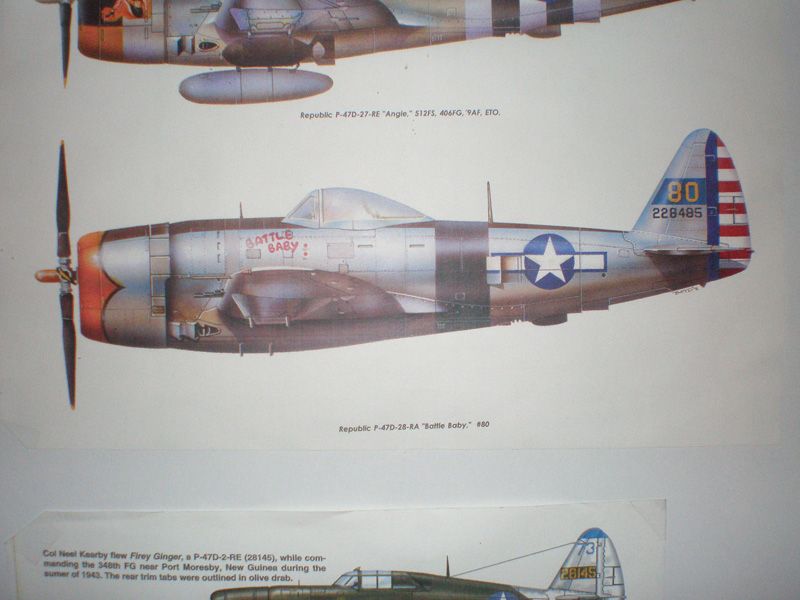
This will be color scheme...
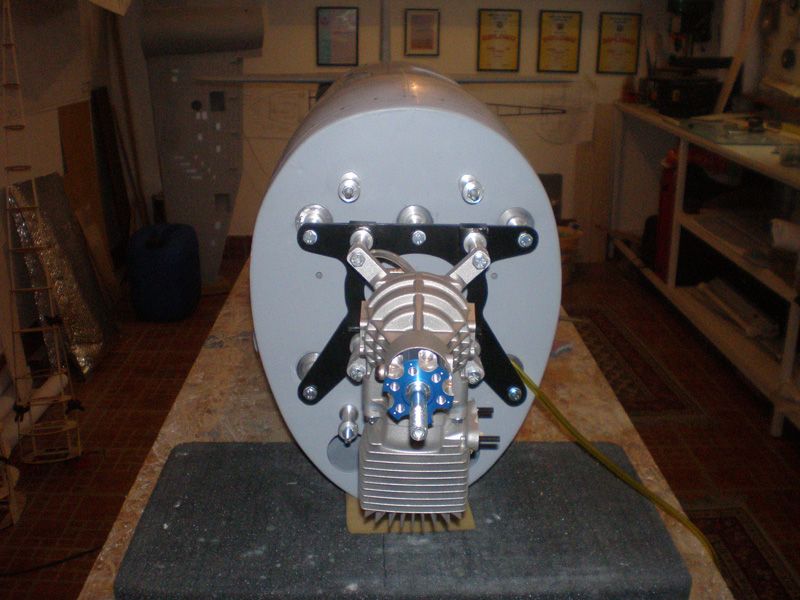
Engine mount is finish. I made washers with 2 degree angle on left side. I made also bigger washers which will come on fire wall...
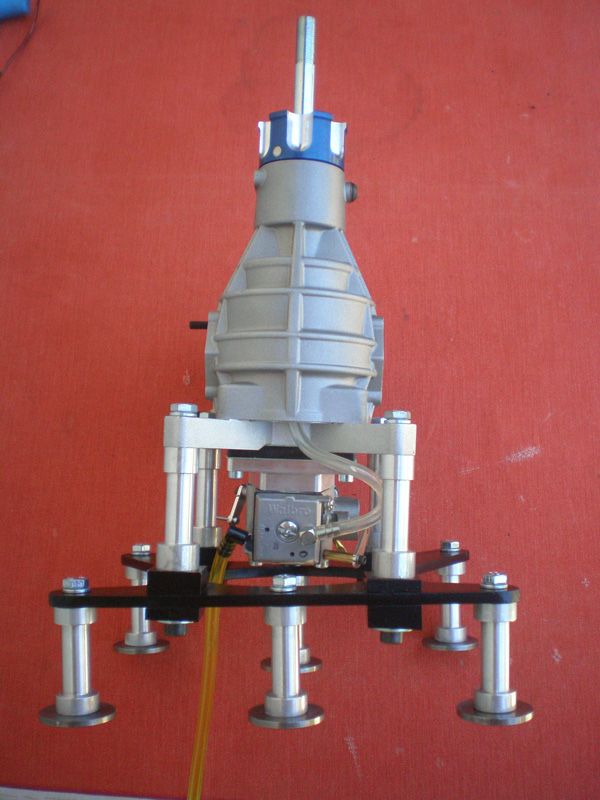
If someone want, I can made engine mount like this for MVVS 80, with all washers, spacer, screews + 4 spacers for cowl...
Price - 149,00$
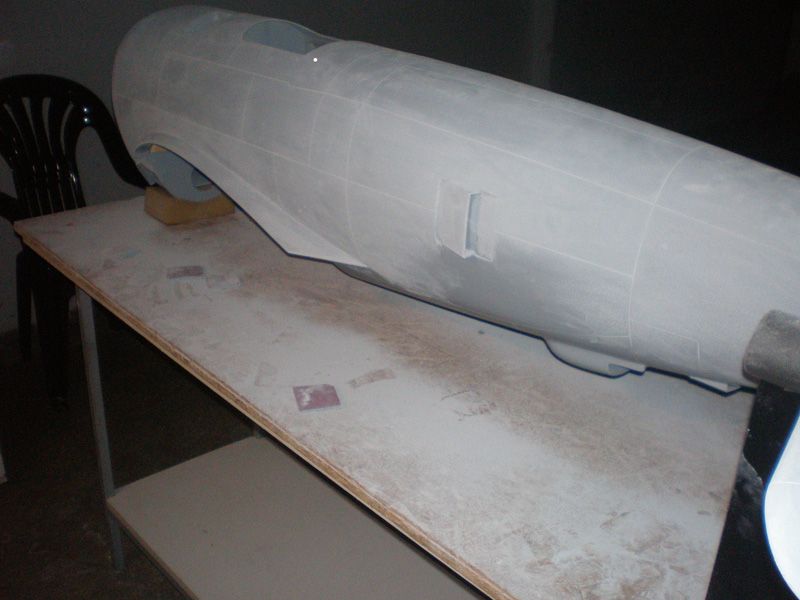
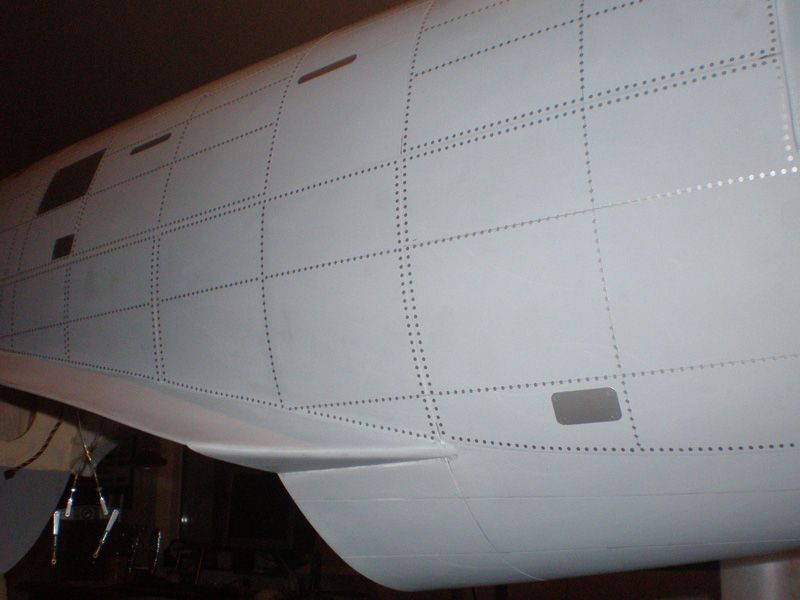
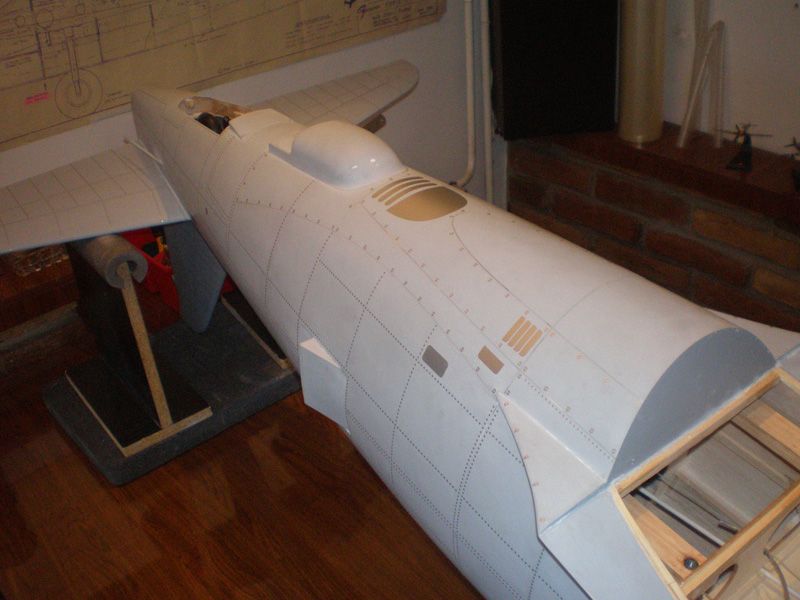
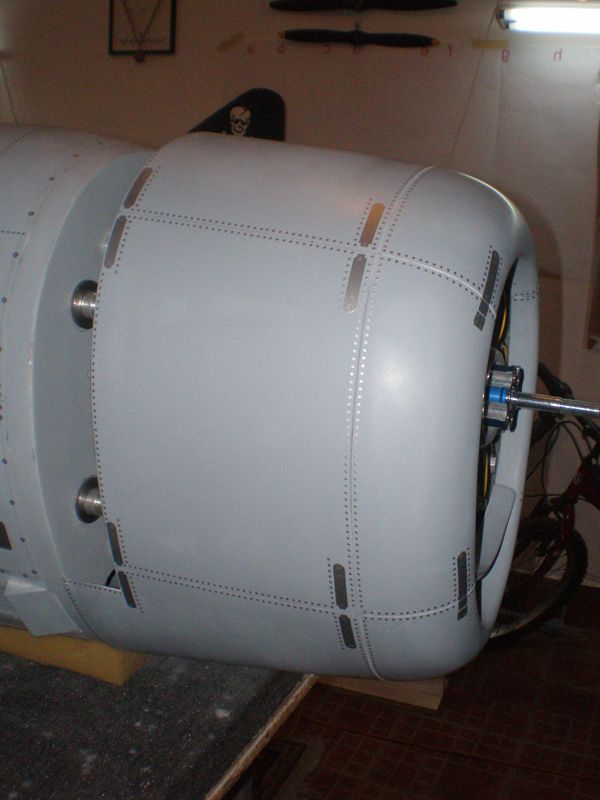
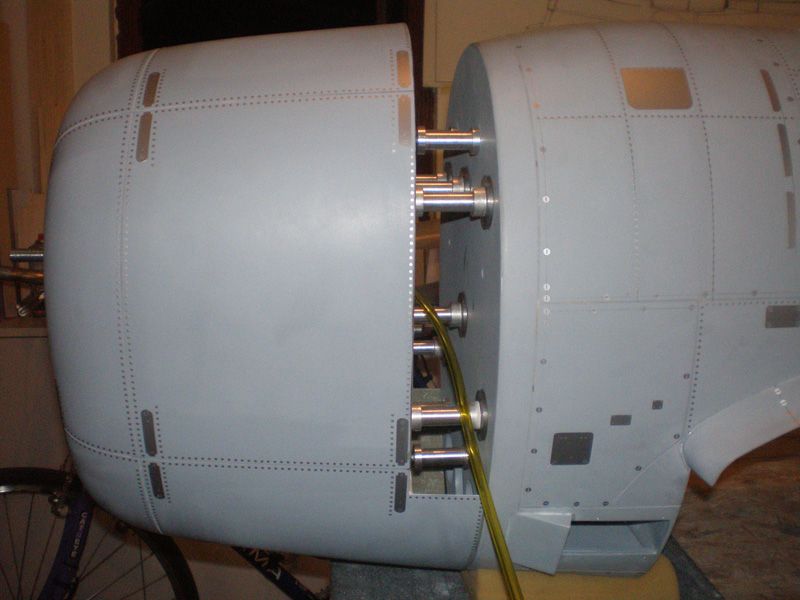
Front part of the fuselage almost finished...


For cowl I made 4 aluminum spacers...

Regards
Mirce
This will be color scheme...
Engine mount is finish. I made washers with 2 degree angle on left side. I made also bigger washers which will come on fire wall...
If someone want, I can made engine mount like this for MVVS 80, with all washers, spacer, screews + 4 spacers for cowl...
Price - 149,00$
Front part of the fuselage almost finished...
For cowl I made 4 aluminum spacers...
Regards
Mirce
06-17-2012 | 02:21 AM
#447
Thread Starter
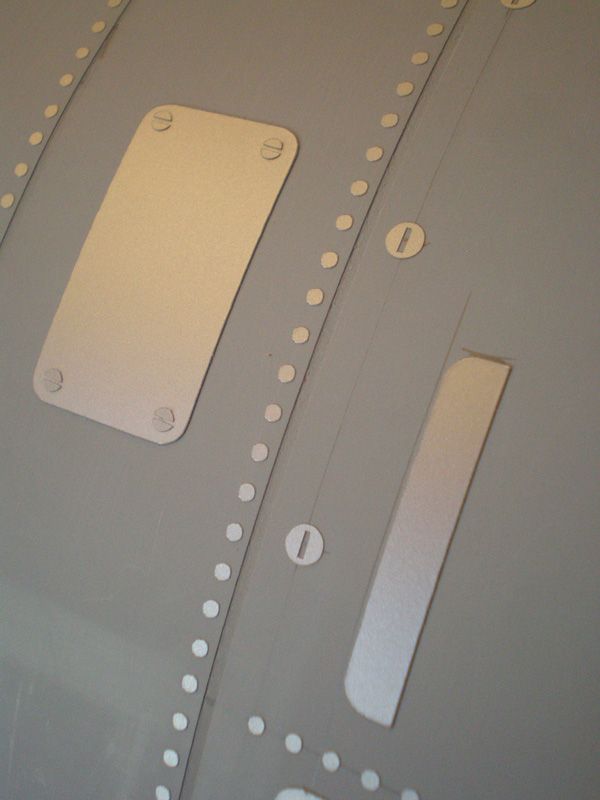
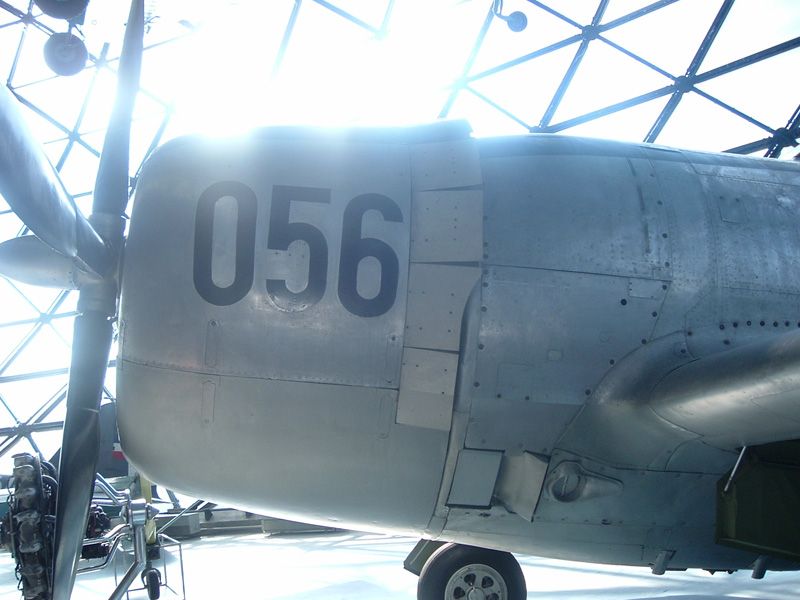
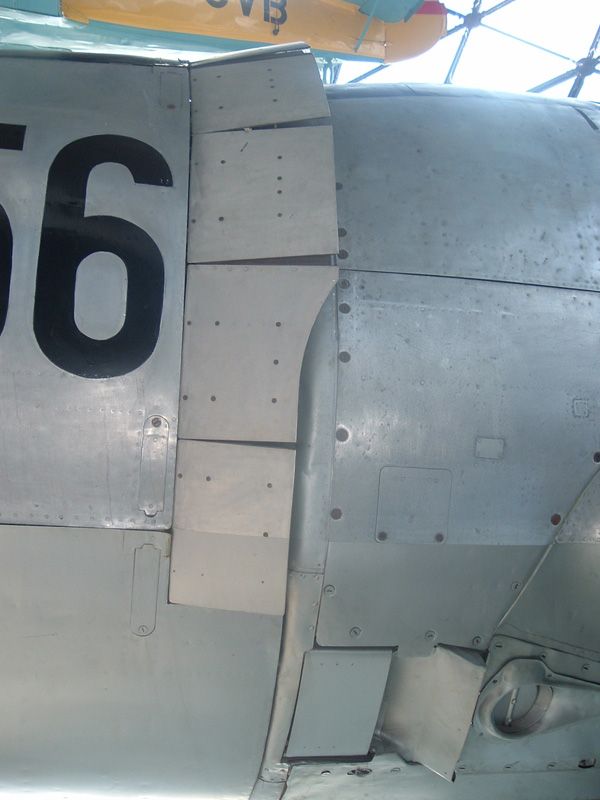
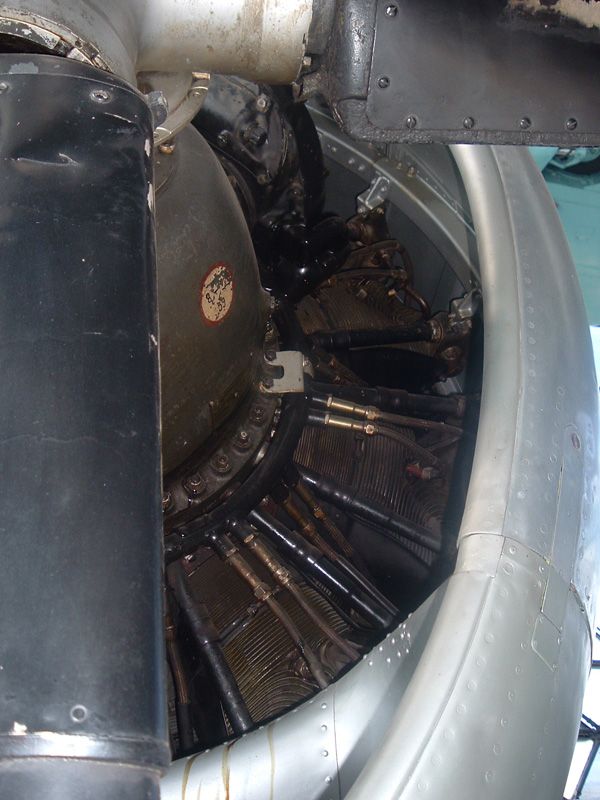
I forget to add this few pictures...
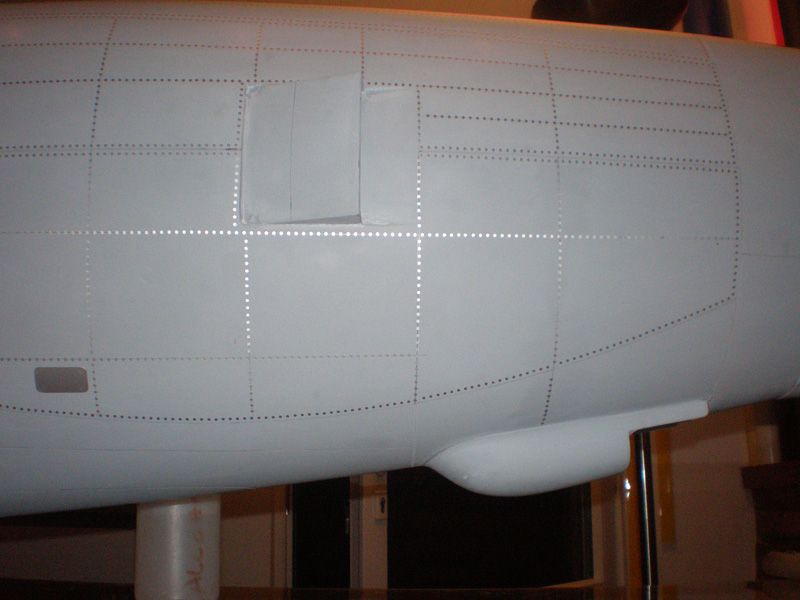
In Air Museum in Belgrad we have one P 47...
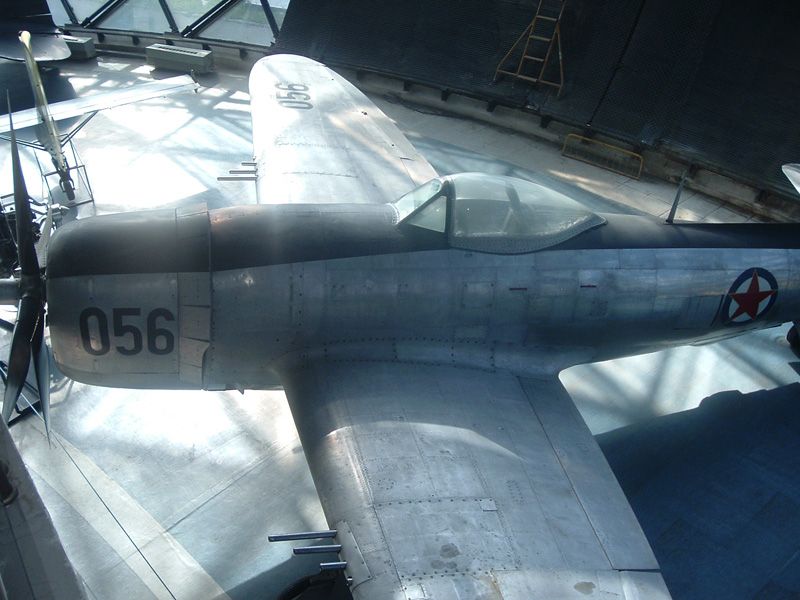
I use some photos for my work...

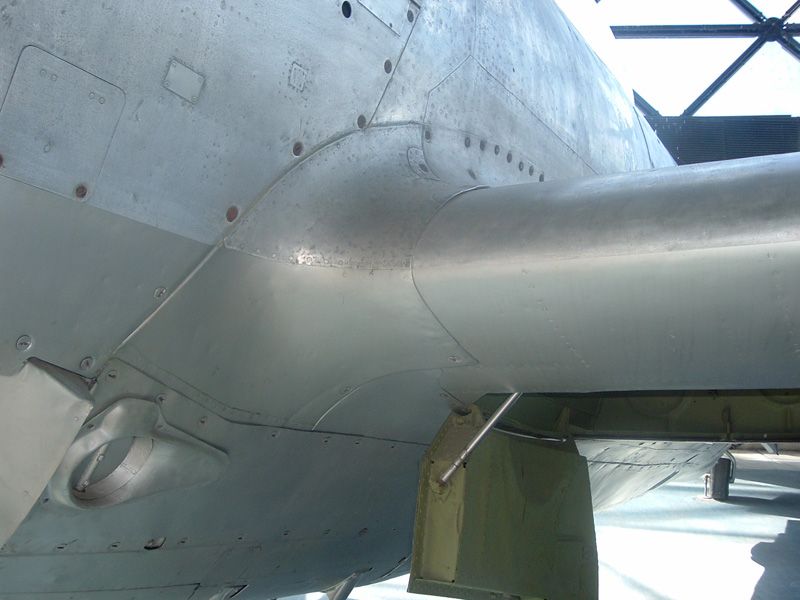
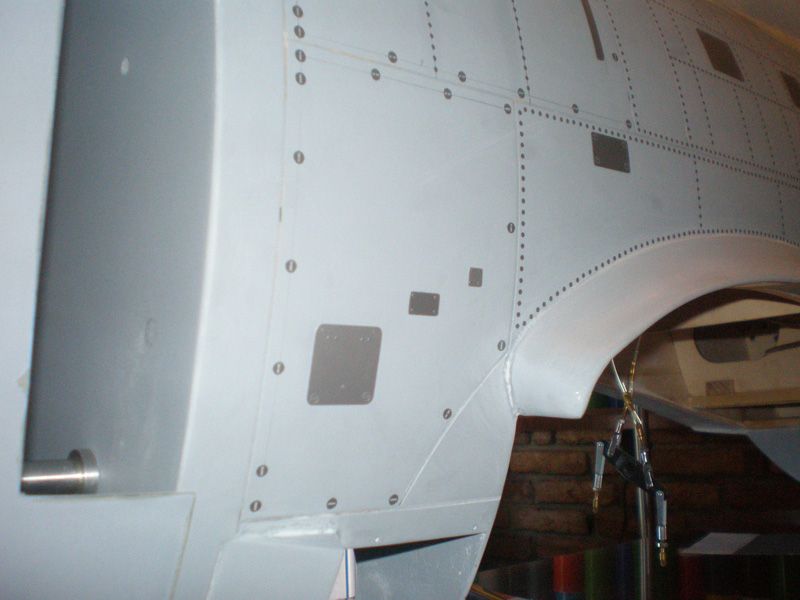
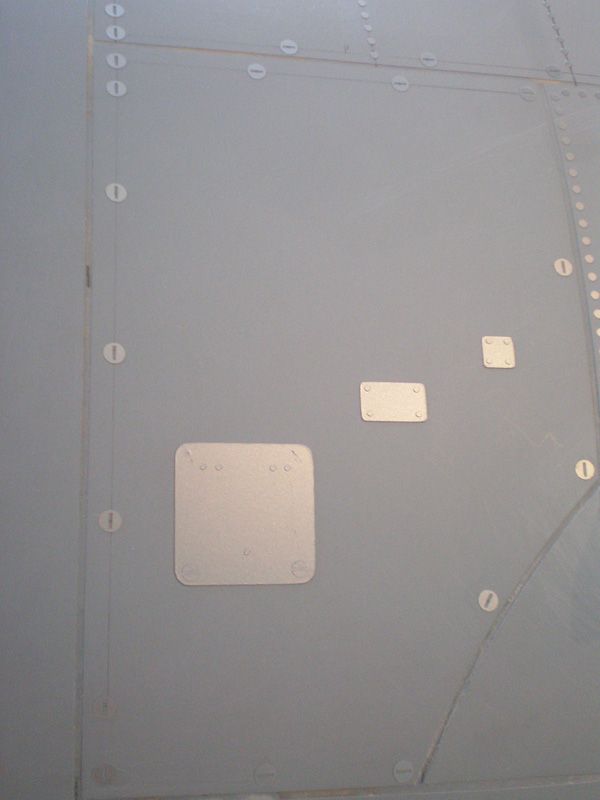
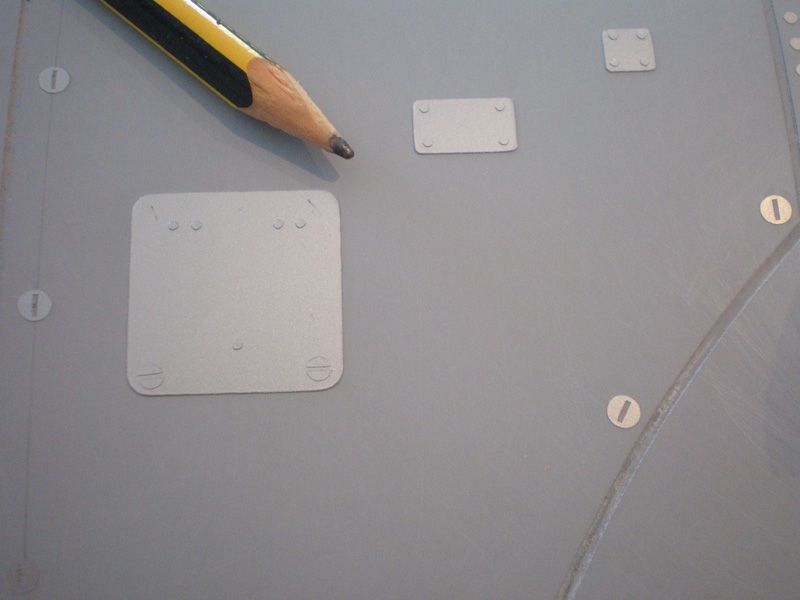
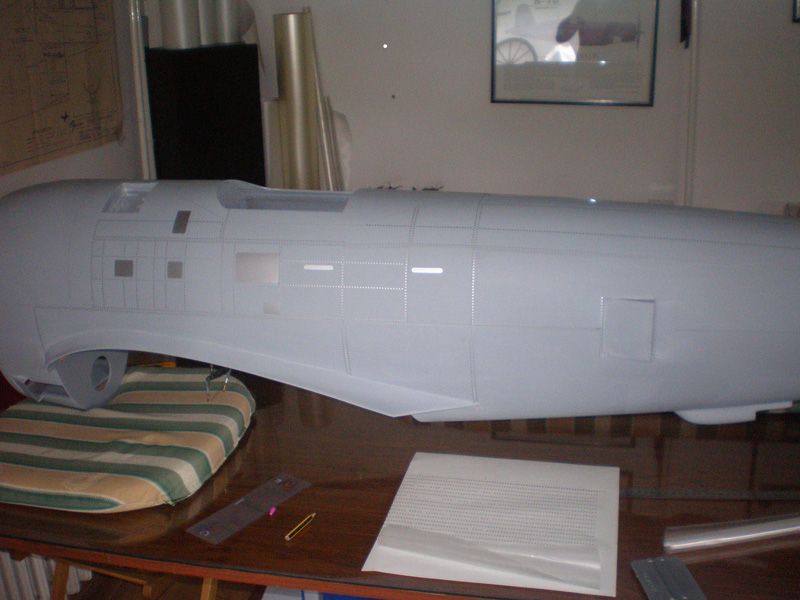
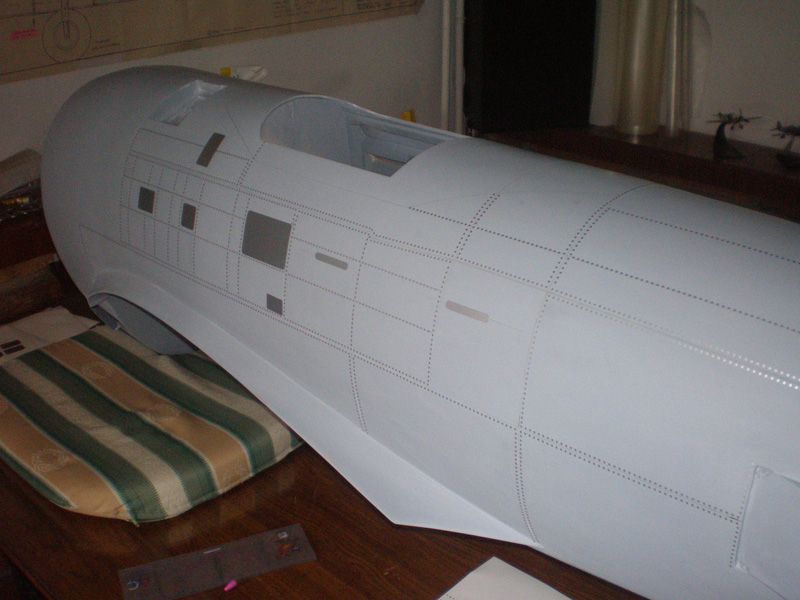
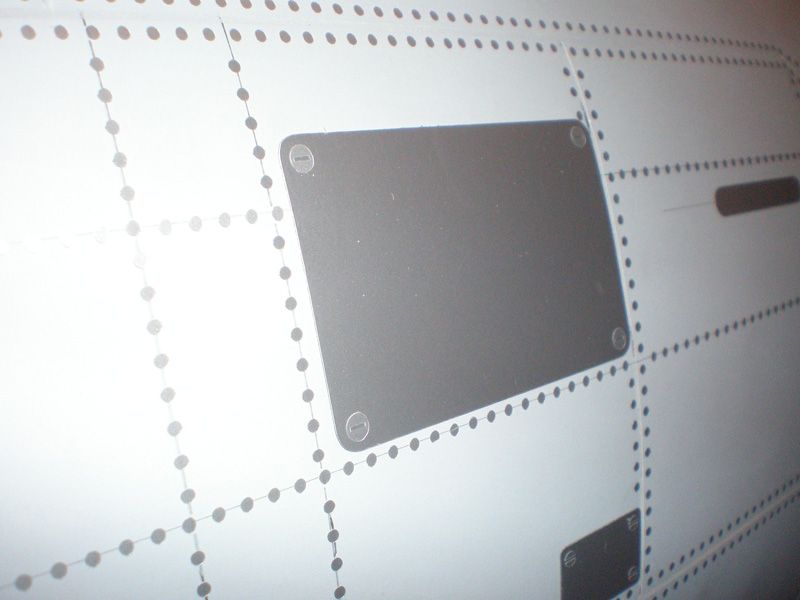
Circles (rivets) are 1,4 mm diameter!!!
That's all for today
Bye
Mirce
In Air Museum in Belgrad we have one P 47...
I use some photos for my work...
Circles (rivets) are 1,4 mm diameter!!!
That's all for today
Bye
Mirce
06-19-2012 | 04:09 PM
#448
Thread Starter
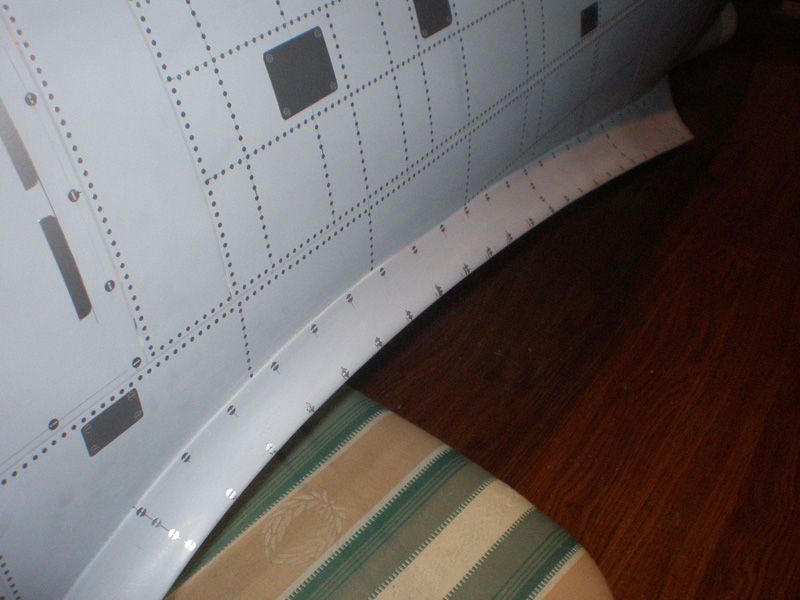
Today I was finally finished work on rivet and details on fuselage.


Tomorrow I will finish cowl and install engine.
I measured everything to see what is P 47 weight.
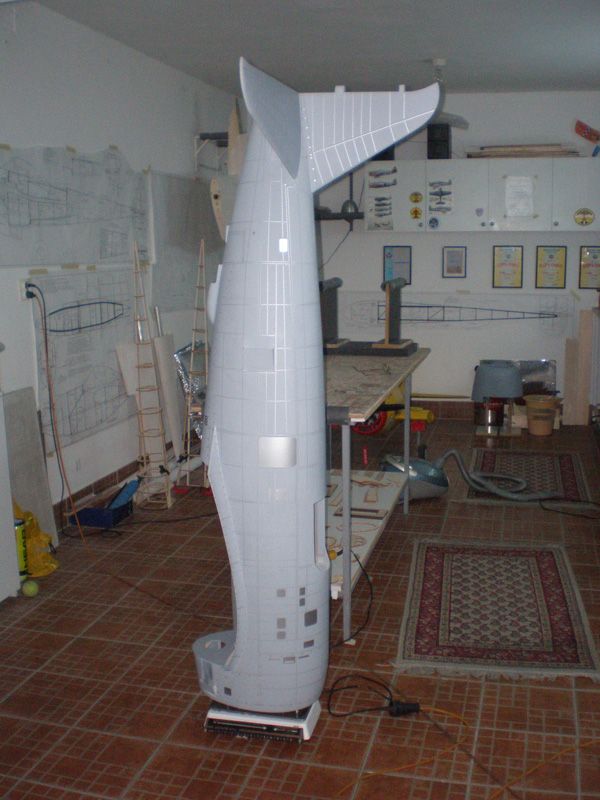
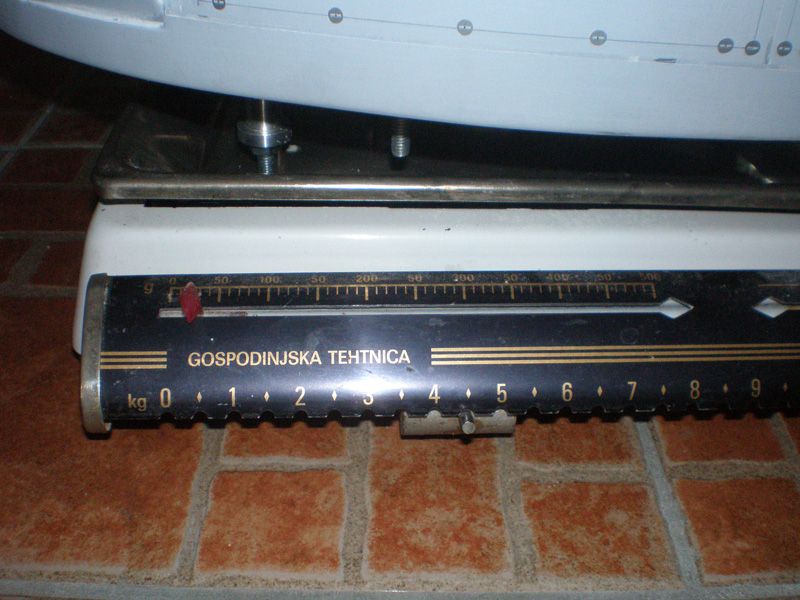
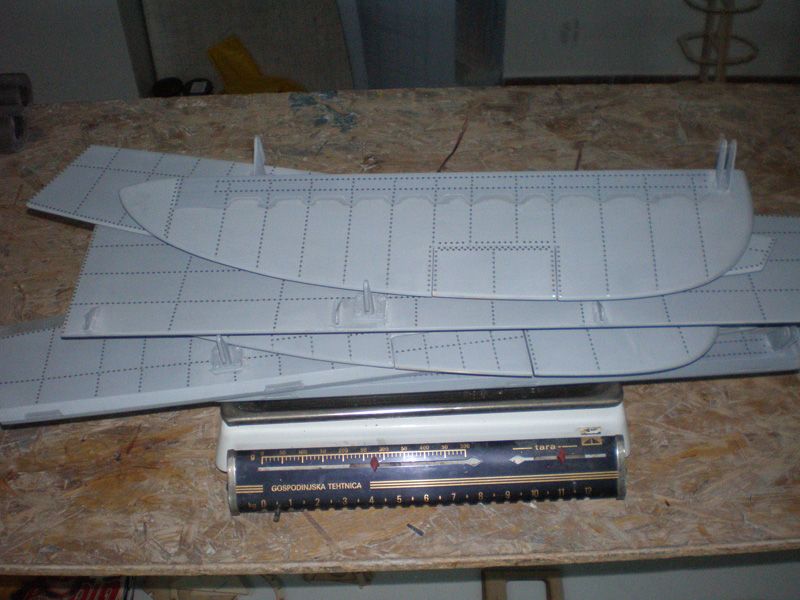
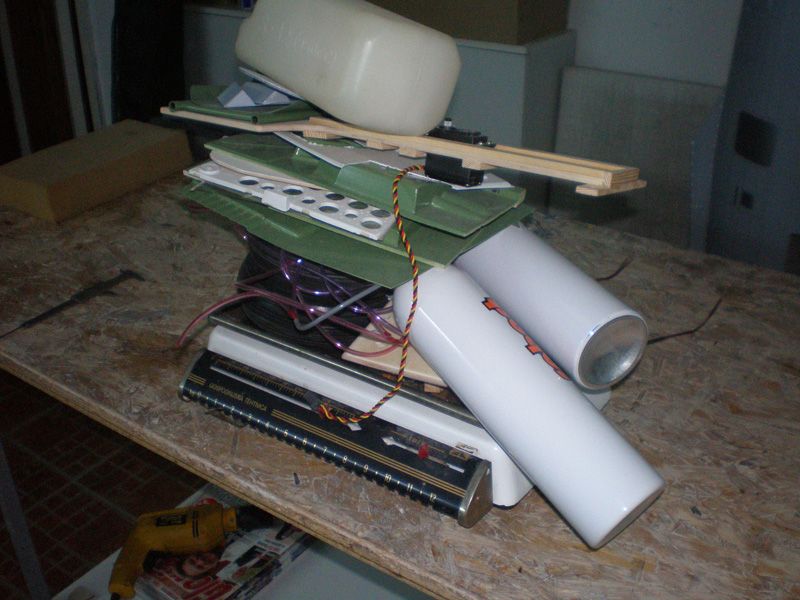
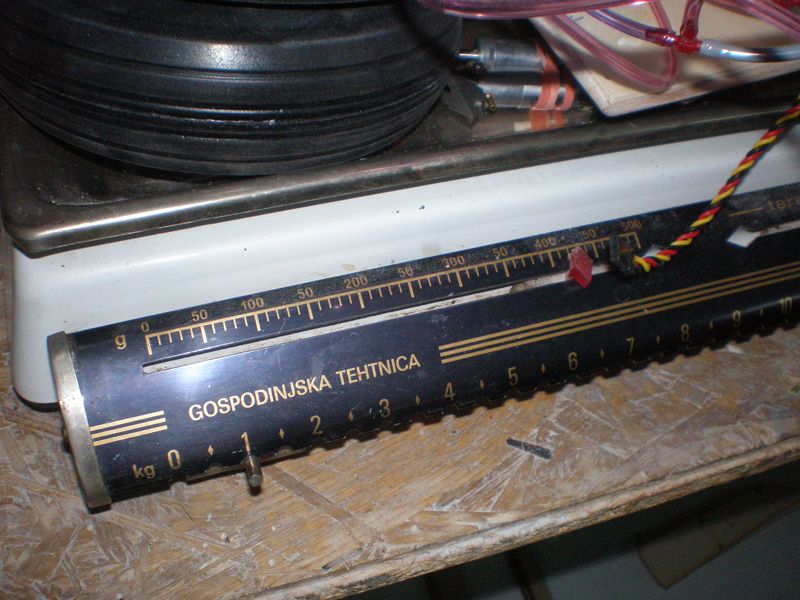

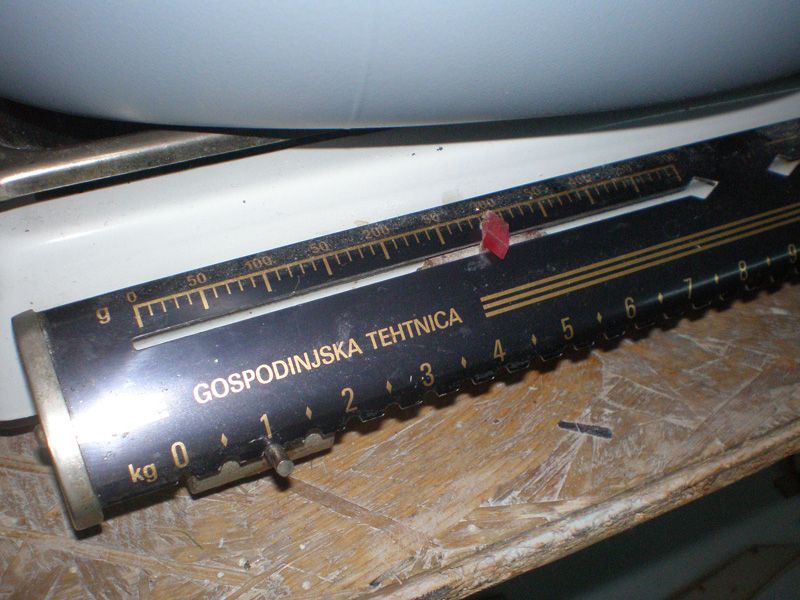
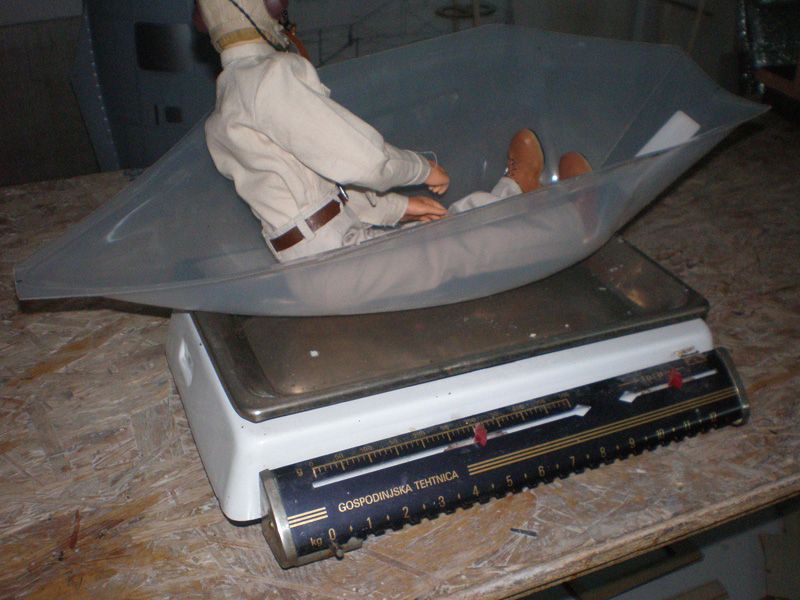
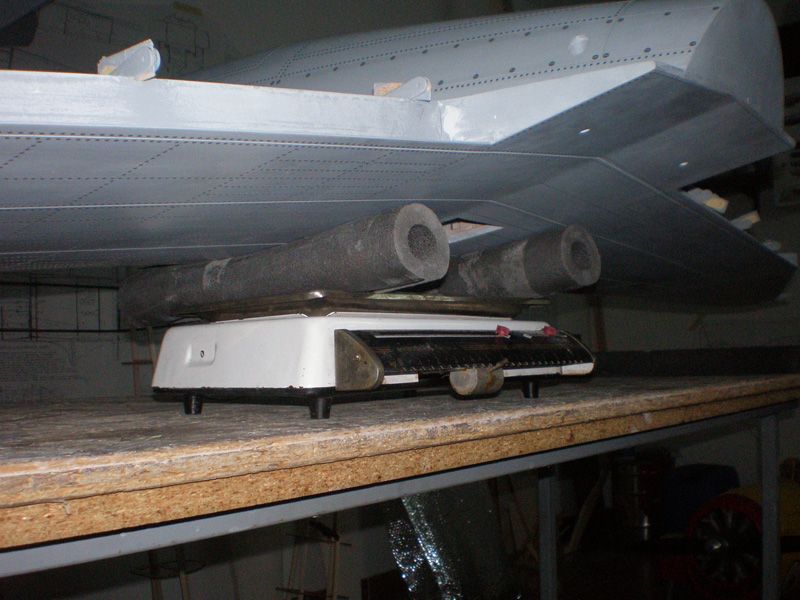
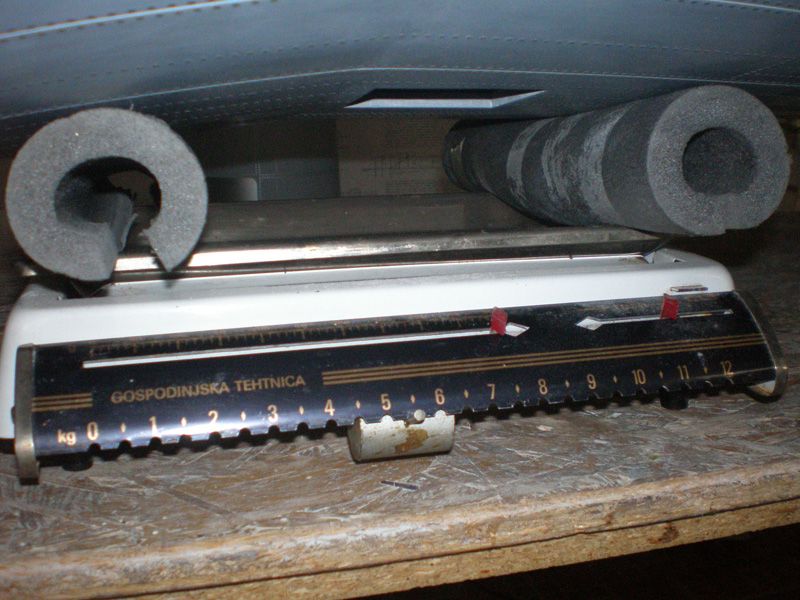
Here is a results:
- fuselage with tail servos. servos for pneumatic, pneumatic valves and tail wheel with mechanic - 4530 gr
- ailerons, flaps, and all other control surfaces - 780 gr
- engine with bracket - 3850 gr
- other parts - 1350 gr
- cowl with dummy engine - 1290 gr
- pilot and canopy - 300 gr
- wing with retracts - 5900 gr
Total exactly 18000 gr - 18 kg or 39,7 pounds...
I think that batteries, wing servos, receiver, switch... will be around 1 - 1,5 kg - 2,2 - 3,3 pounds, paint about 1,5 kg - 3.3 pounds, propeller and spinner - 0,5 kg - 1.1 pound...
Hope that not need to add ballast in front., engine mount is heavy and everything is in front....
I will be quite happy with 22 kg - 48 pounds
We'll see...
Regards
Mirče
Tomorrow I will finish cowl and install engine.
I measured everything to see what is P 47 weight.
Here is a results:
- fuselage with tail servos. servos for pneumatic, pneumatic valves and tail wheel with mechanic - 4530 gr
- ailerons, flaps, and all other control surfaces - 780 gr
- engine with bracket - 3850 gr
- other parts - 1350 gr
- cowl with dummy engine - 1290 gr
- pilot and canopy - 300 gr
- wing with retracts - 5900 gr
Total exactly 18000 gr - 18 kg or 39,7 pounds...
I think that batteries, wing servos, receiver, switch... will be around 1 - 1,5 kg - 2,2 - 3,3 pounds, paint about 1,5 kg - 3.3 pounds, propeller and spinner - 0,5 kg - 1.1 pound...
Hope that not need to add ballast in front., engine mount is heavy and everything is in front....
I will be quite happy with 22 kg - 48 pounds
We'll see...
Regards
Mirče
06-21-2012 | 02:27 AM
#449
Thread Starter
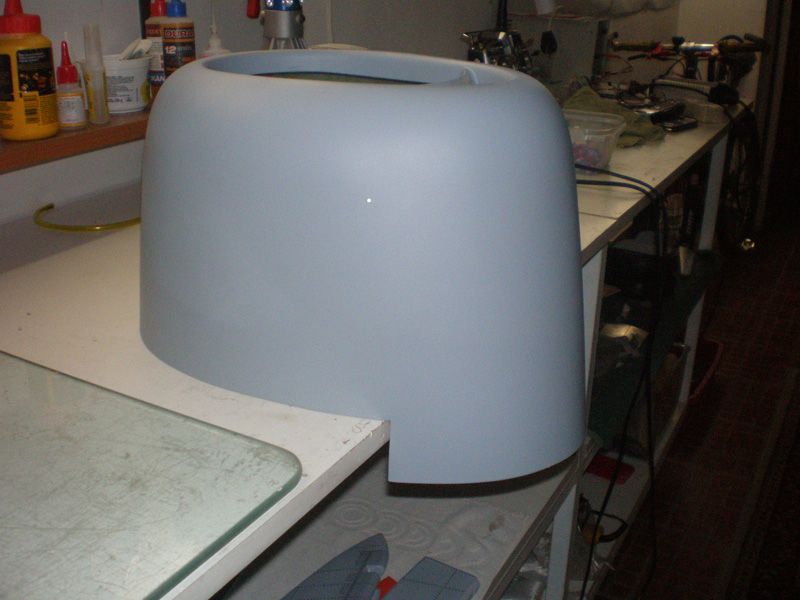
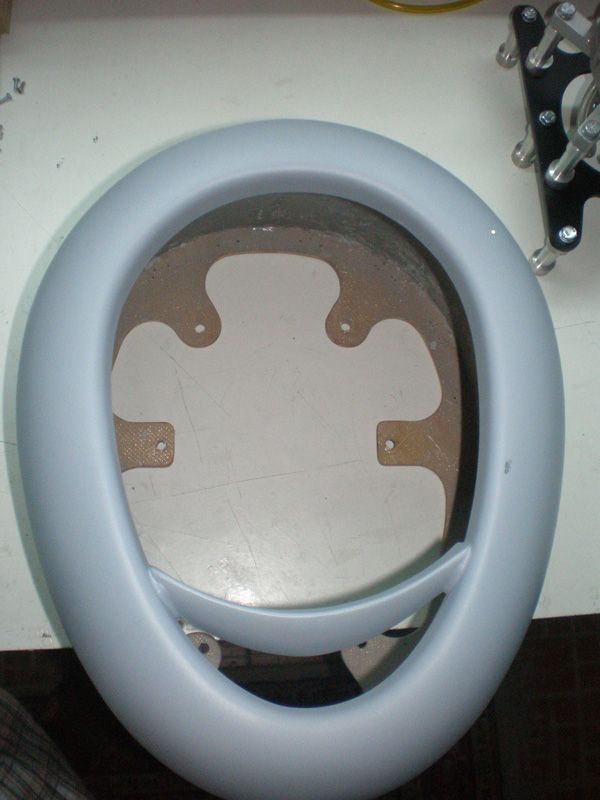
For cowl finally sanding I used special method...
You must understand, living in Serbia is not easy... After sanding I went to airfield, made few starts with my jet... At evening, work on P 47...
Man, and today all again... As I told, hard life, should have face it out...
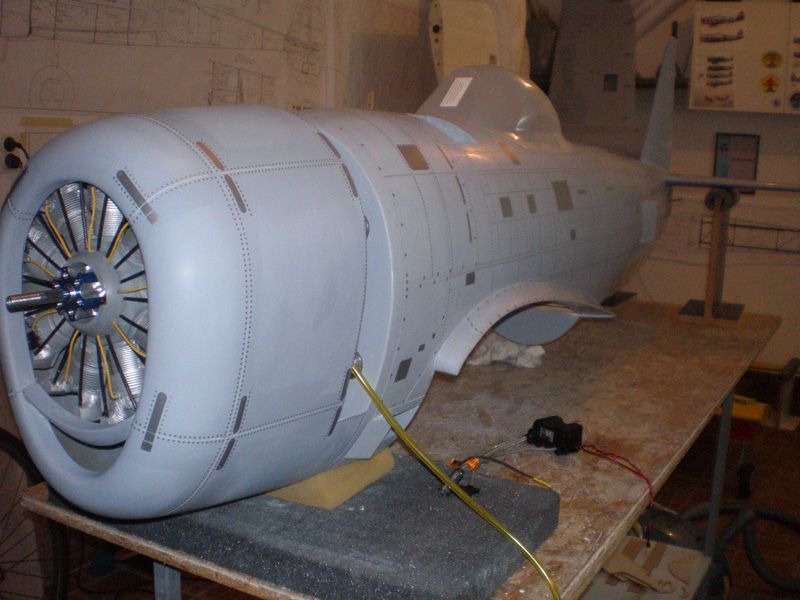
OK... Yesterday I was finally finish all job on model surface.
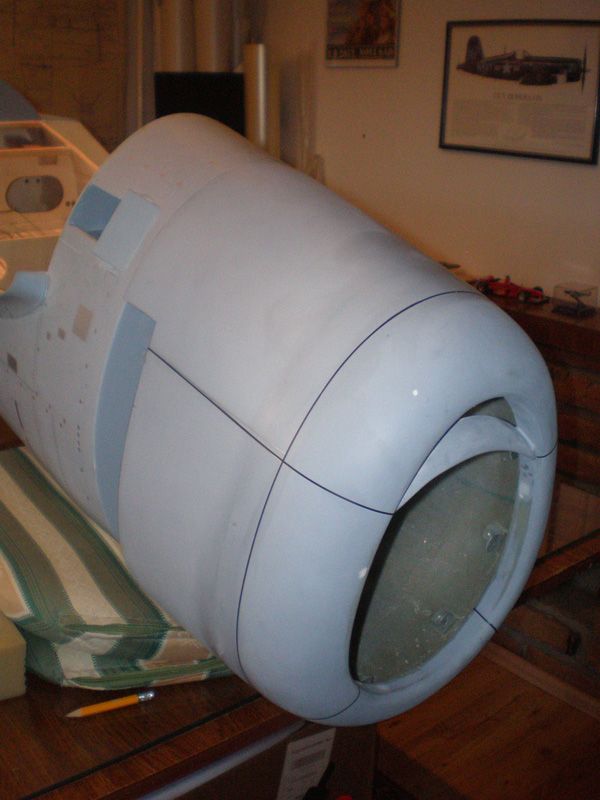
For details on cowl I used again photos of P 47 from Belgrade Museum...
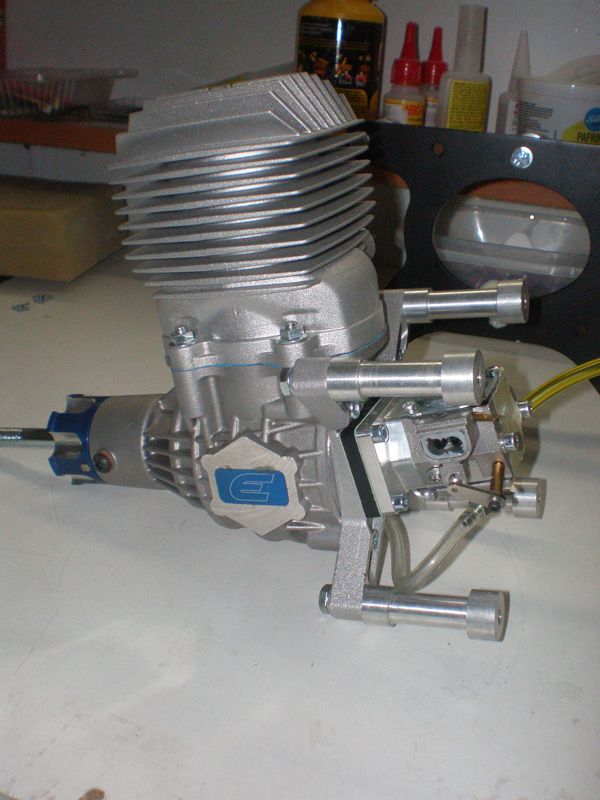
Engine is on model...
After I finish details on cowl, I put it on fuselage...

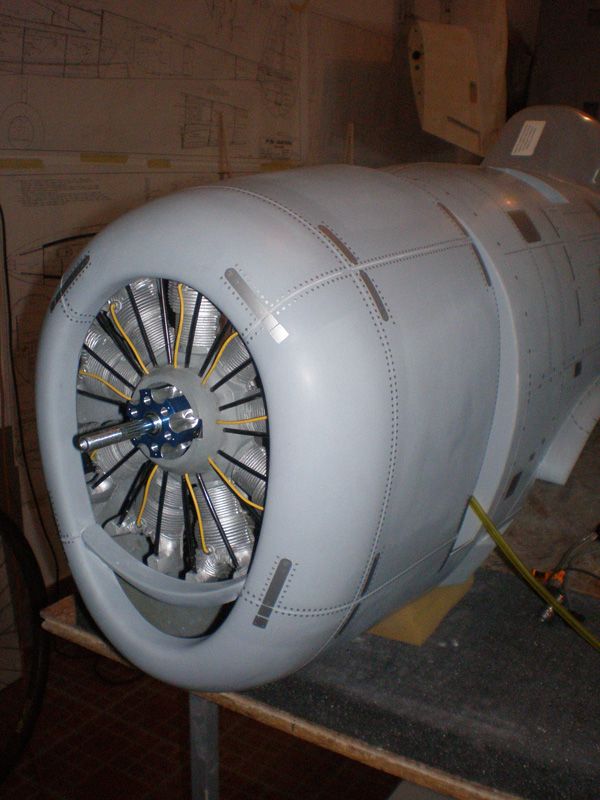
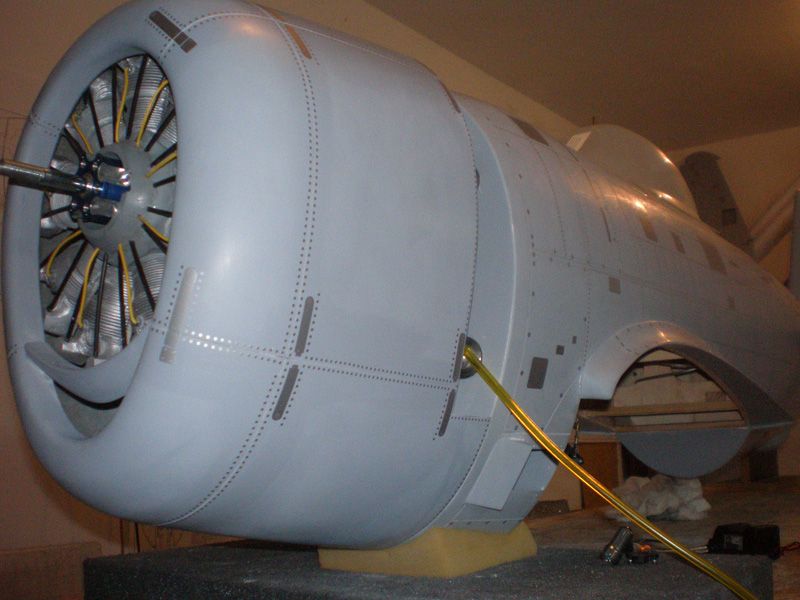
All the best from Serbia
Mirce
You must understand, living in Serbia is not easy... After sanding I went to airfield, made few starts with my jet... At evening, work on P 47...
Man, and today all again... As I told, hard life, should have face it out...
OK... Yesterday I was finally finish all job on model surface.
For details on cowl I used again photos of P 47 from Belgrade Museum...
Engine is on model...
After I finish details on cowl, I put it on fuselage...
All the best from Serbia
Mirce

