


GR130
 12-19-2018, 09:33 AM
#101

My Feedback: (5)
Join Date: Jan 2004
Location: Algard, NORWAY
Posts: 111
Likes: 0
Received 0 Likes
on
0 Posts
Hehe Lukacs - we'll see 
Had a couple of days where I could spend a couple of hrs on it and visually I managed to make good progress. I am outsourcing the shaft tunnel so I can continue with some of the detail work (spacing, final distances etc)
So it may go "fast" now but I will have some slow periods ahead of me aswell
A mock-up of the NGV is planned so I can finalise as much as possible until I have the funds for NGV/wheel purchase.
 12-21-2018, 01:10 AM
#102
My Feedback: (5)
Join Date: Jan 2004
Location: Algard, NORWAY
Posts: 111
Likes: 0
Received 0 Likes
on
0 Posts
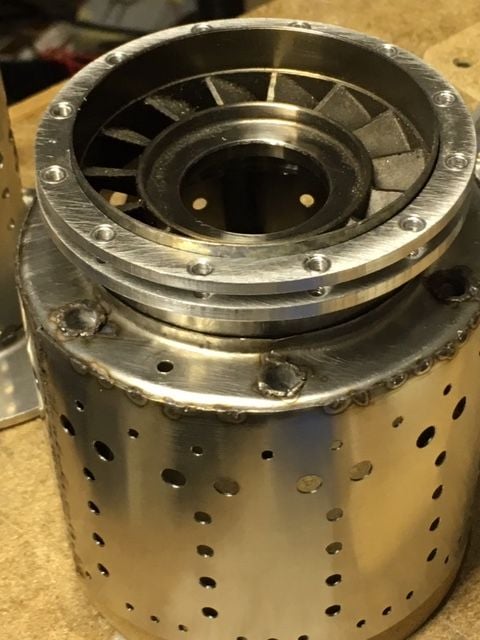
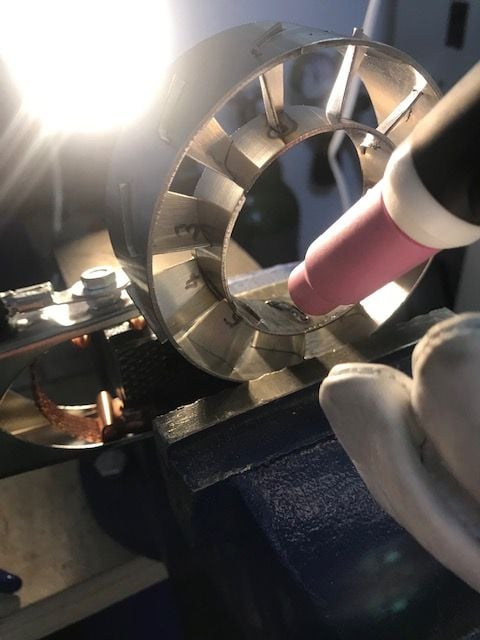
Got my hands on a older crash'n'burn Simjet3000 for �150 with the hopes that some of its components could be salvaged for my GR130. Partial tear-down show promise for the axle, bearings and turbine wheel 
Need to completely disassemble the engine before I can measure the NGV.
But this look very promising!
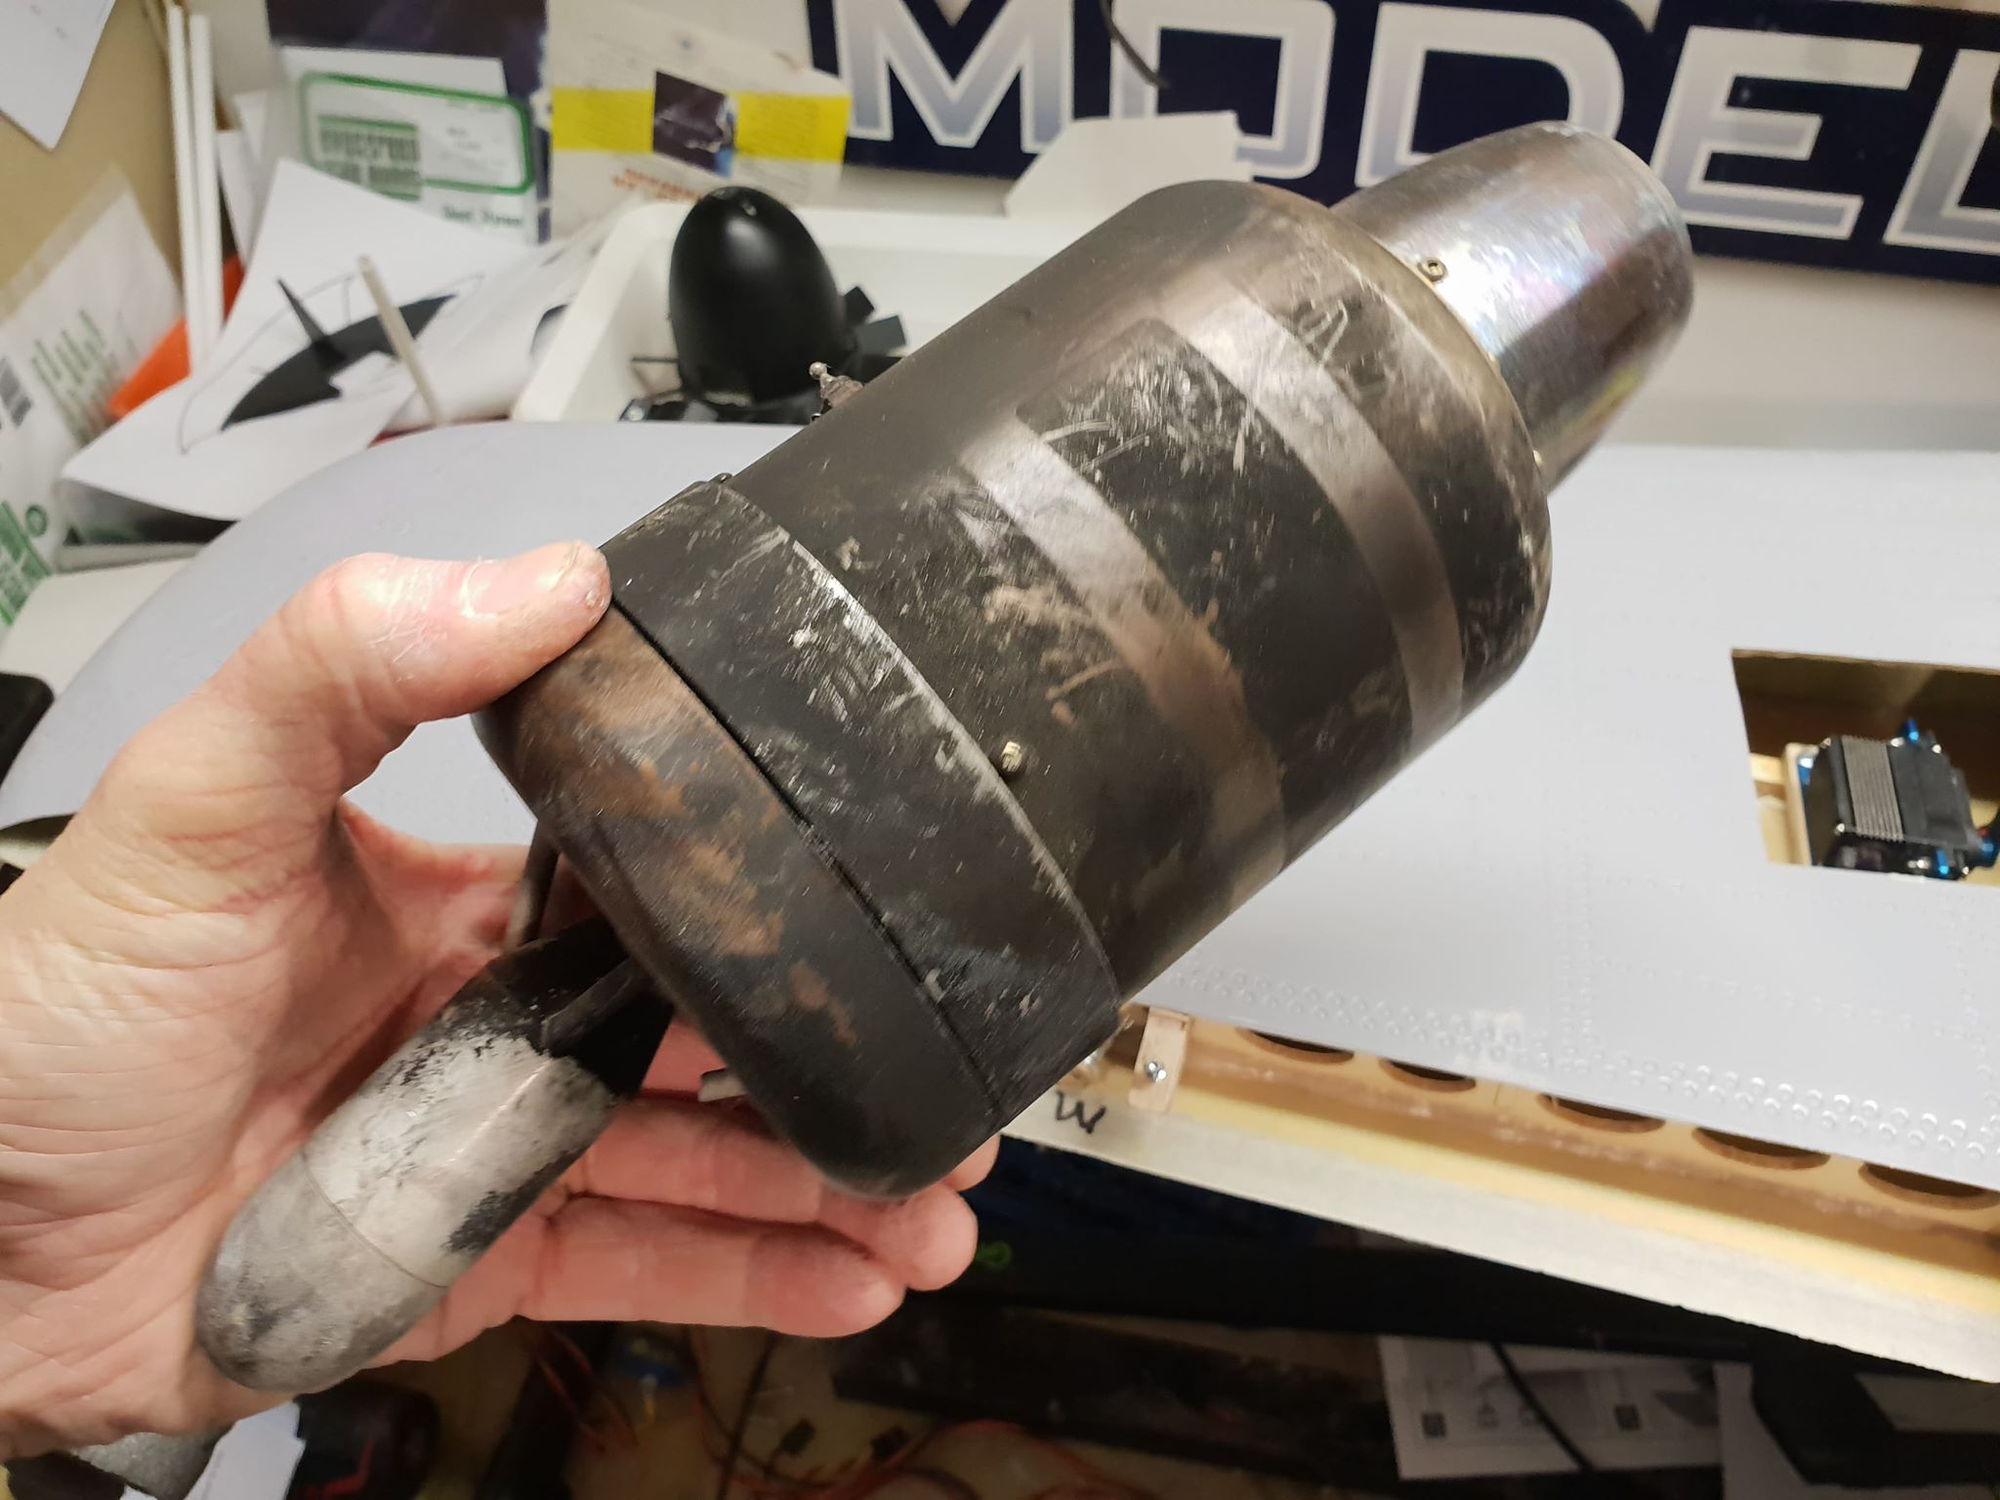
Simjet 3000 after flame-out on base turn and post crash fire. Electronics are toast, rest seem to be light surface scuffs and sooth. A dent in the casing but I believe the internals may have survived.
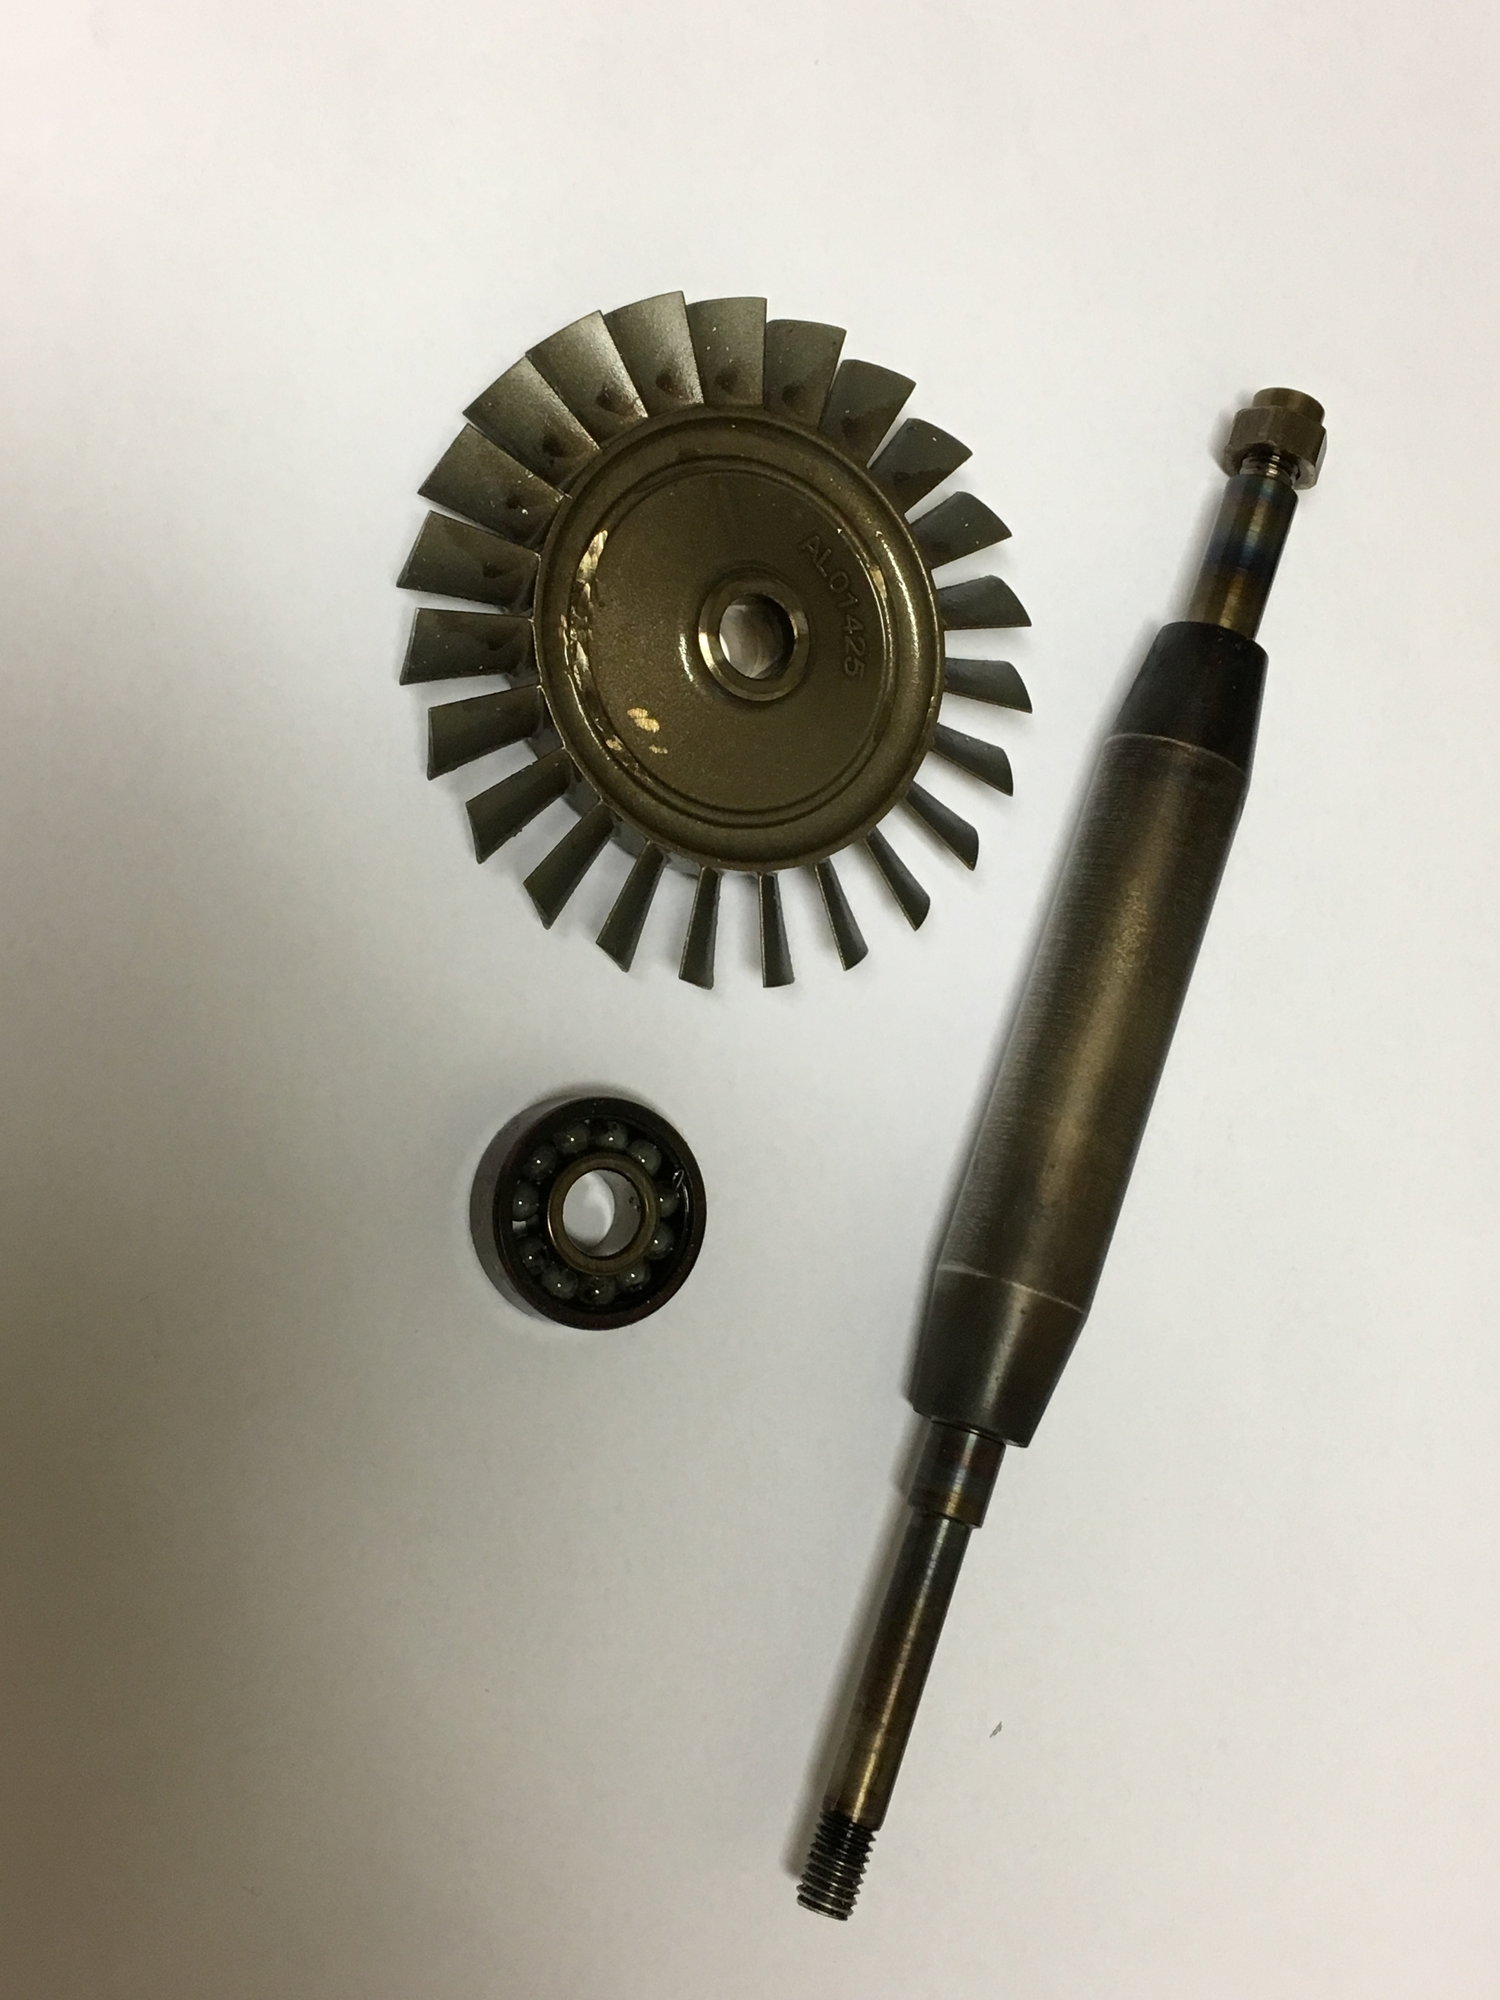
SJ3000 bearings / axle / turbine whee after being extracted from the turbine. The wheel is a match for the GR130, bearings also. The vital parameters for the axle indicate good fit as well. Promising!
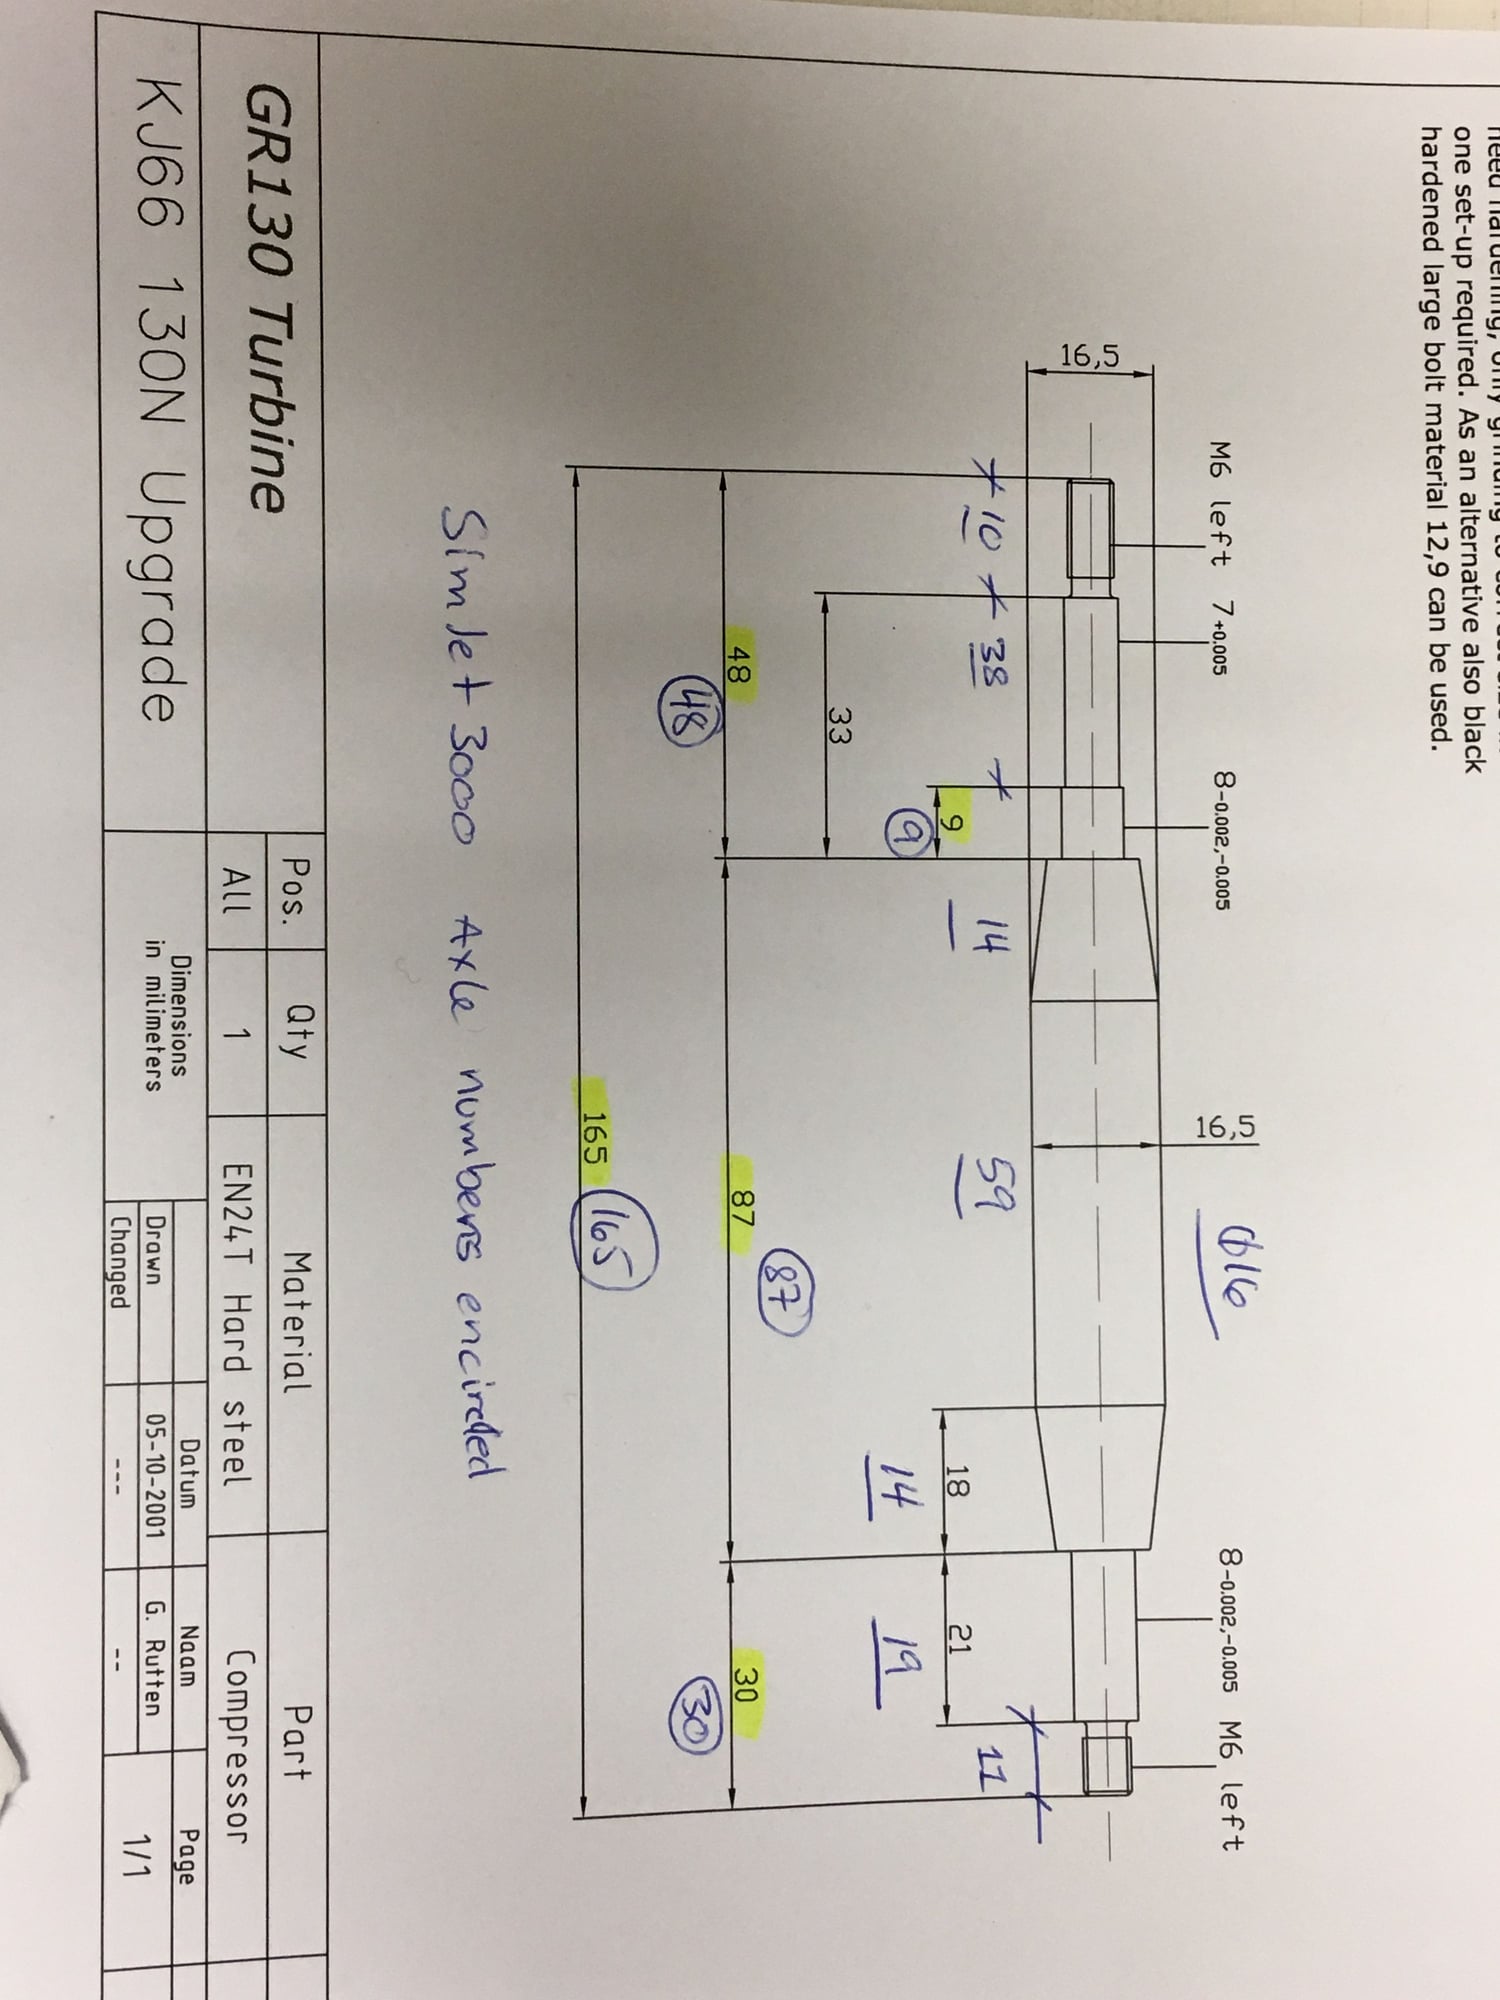
SJ3000 measurements in pen writing, matching parameters highlighted in yellow.
Need to completely disassemble the engine before I can measure the NGV.
But this look very promising!
Simjet 3000 after flame-out on base turn and post crash fire. Electronics are toast, rest seem to be light surface scuffs and sooth. A dent in the casing but I believe the internals may have survived.
SJ3000 bearings / axle / turbine whee after being extracted from the turbine. The wheel is a match for the GR130, bearings also. The vital parameters for the axle indicate good fit as well. Promising!
SJ3000 measurements in pen writing, matching parameters highlighted in yellow.
01-07-2019, 05:33 AM
#103
My Feedback: (5)
Join Date: Jan 2004
Location: Algard, NORWAY
Posts: 111
Likes: 0
Received 0 Likes
on
0 Posts
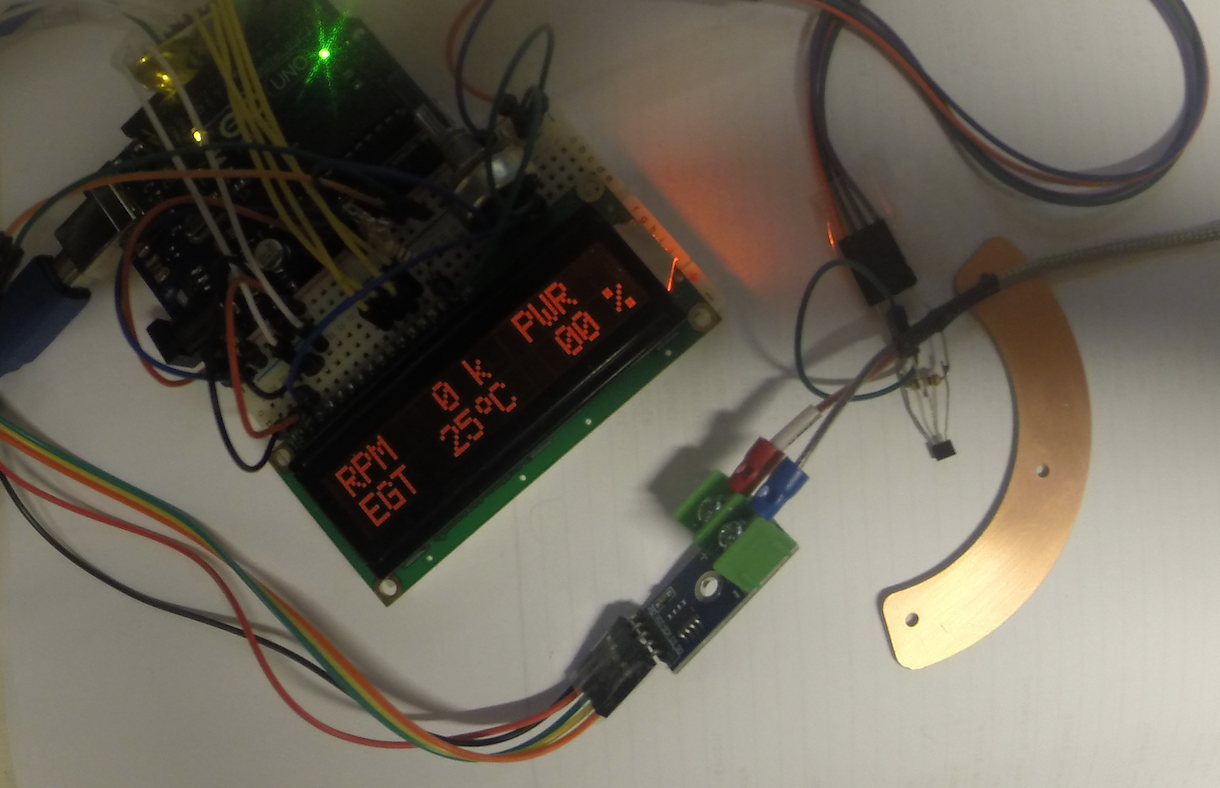
I am trying to make a ECU for ground operations and here is a short video showing initial progress.
EGT and RPM display in real-time, a Graupner Speed280 DC motor provide RPM data and a thermocouple provide temperature.
Code need to be optimized but is currently fully functional regarding its primary intention
https://www.youtube.com/watch?v=mfhCjIX6s7E
EGT and RPM display in real-time, a Graupner Speed280 DC motor provide RPM data and a thermocouple provide temperature.
Code need to be optimized but is currently fully functional regarding its primary intention
https://www.youtube.com/watch?v=mfhCjIX6s7E
01-09-2019, 11:23 PM
#104
My Feedback: (5)
Join Date: Jan 2004
Location: Algard, NORWAY
Posts: 111
Likes: 0
Received 0 Likes
on
0 Posts
My Ground Monitor is now configured correctly, reading EGT and RPM real-time with good refresh rate
Next up is to add throttle control that will govern fuel pump voltage.
Basic read functions for the ground monitor done, EGT and RPM now being displayed/refreshed correctly.
Next up is to add throttle control that will govern fuel pump voltage.
Basic read functions for the ground monitor done, EGT and RPM now being displayed/refreshed correctly.
01-10-2019, 03:13 AM
#106
My Feedback: (5)
Join Date: Jan 2004
Location: Algard, NORWAY
Posts: 111
Likes: 0
Received 0 Likes
on
0 Posts
No, the prototype is based on the Ardunio UNO, breadboard and individual sensorboard for the temp.sensor. The key component there is the Atmel chip (Processor), MAX6675 chip (temp) and hall sensor (RPM). Space/component wise a really condensed version can be made, and certainly lightweight (<50g)
For monitor purposes only only the sensors are needed to be installed on the turbine, with external connection to LCD for displaying the data.
This excersise isnt costwise worth it, a ready2go commercial ECU can be had for aaround $120 and up. Like building the turbine, I am in it for the challenge
For monitor purposes only only the sensors are needed to be installed on the turbine, with external connection to LCD for displaying the data.
This excersise isnt costwise worth it, a ready2go commercial ECU can be had for aaround $120 and up. Like building the turbine, I am in it for the challenge
01-12-2019, 12:05 AM
#108
Thread Starter
 01-12-2019, 04:18 AM
#109
Thread Starter
I have also done a start controller and a logger for my ecu and I�m building right now an extension for my ecu for the powerstage!
Here the Video of the start controller:
Regards Lukacs
Here the Video of the start controller:
Regards Lukacs
01-14-2019, 12:17 AM
#110
My Feedback: (5)
Join Date: Jan 2004
Location: Algard, NORWAY
Posts: 111
Likes: 0
Received 0 Likes
on
0 Posts
Looks great I want to add functionality as I go, considering I havent played with Arduinos prior to hooking up the LCD I am happy with my progress
Now I need to read myself up on LCD menus and select options
Waiting for a I2C LCD display so I can free up some ports allowing me further options like solenoids and ESC for the fuel pump etc
I want to add functionality as I go, considering I havent played with Arduinos prior to hooking up the LCD I am happy with my progress Now I need to read myself up on LCD menus and select options
Waiting for a I2C LCD display so I can free up some ports allowing me further options like solenoids and ESC for the fuel pump etc
01-28-2019, 12:55 AM
#111
My Feedback: (5)
Join Date: Jan 2004
Location: Algard, NORWAY
Posts: 111
Likes: 0
Received 0 Likes
on
0 Posts
New update - while progress have been slow, progress have been made 
I needed to revise my spot welding technique and I feel the result is good, good heating of the spot and good bond.
Still manual work though..
What is done since last update is:
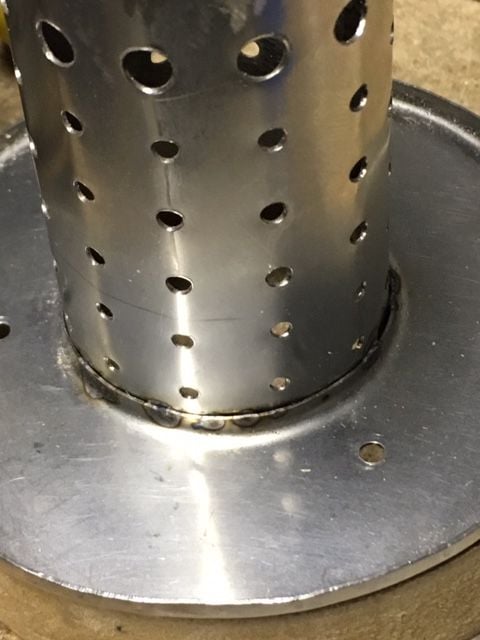
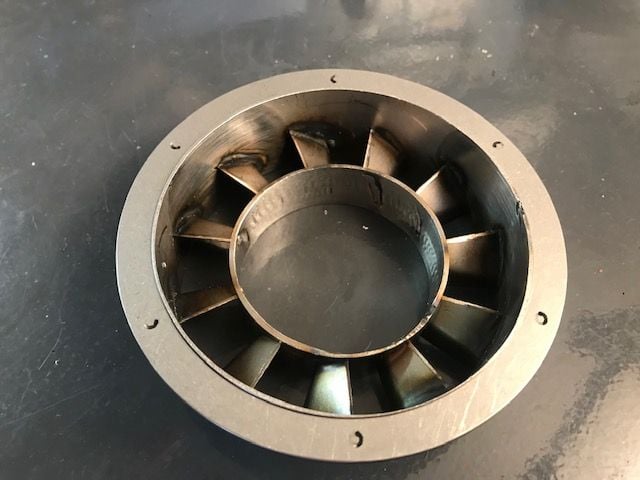
Make the NGV fit the rear fuel stick ring
Spot weld inner CC to front CC ring
Spot welded evaporator sticks to the rear ring
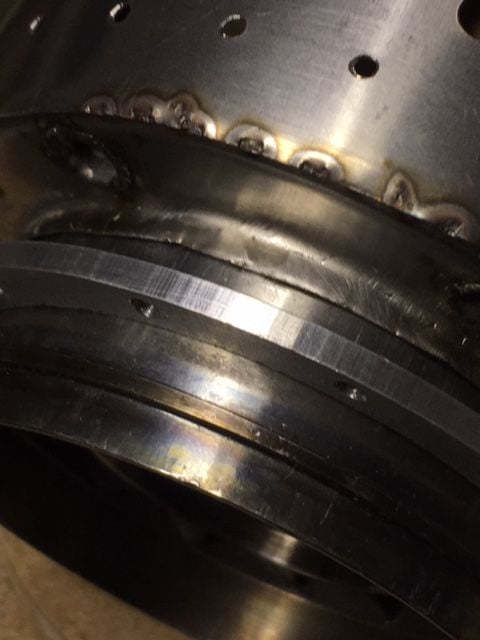
Spot welded the rear ring to the outer CC, if sequence is different one wont be able to get spot weld access for all parts.
Next on my list:
Make a spot weld arrangement for easy welding the front CC ring to the outer CC
Spot weld the CC making it complete
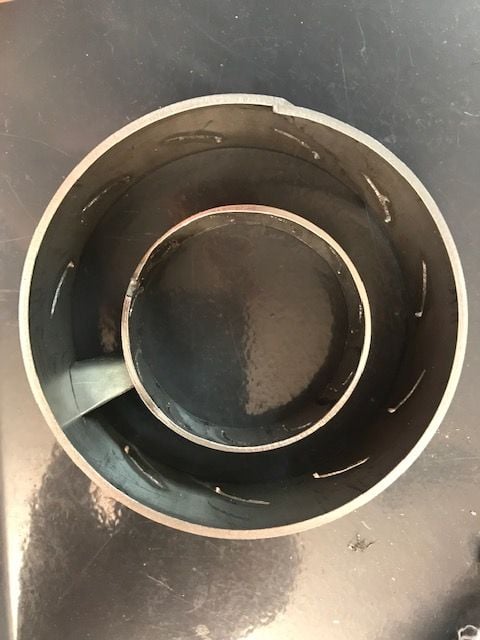
Adapt the diffusor so the Simjet3000 axle tunnel will fit.
The rest after that is starting to tie in all parts and make it a full system Piece of cake lol!
I needed to revise my spot welding technique and I feel the result is good, good heating of the spot and good bond.
Still manual work though..
What is done since last update is:
Make the NGV fit the rear fuel stick ring
Spot weld inner CC to front CC ring
Spot welded evaporator sticks to the rear ring
Spot welded the rear ring to the outer CC, if sequence is different one wont be able to get spot weld access for all parts.
Next on my list:
Make a spot weld arrangement for easy welding the front CC ring to the outer CC
Spot weld the CC making it complete
Adapt the diffusor so the Simjet3000 axle tunnel will fit.
The rest after that is starting to tie in all parts and make it a full system
02-04-2019, 12:41 AM
#113
My Feedback: (5)
Join Date: Jan 2004
Location: Algard, NORWAY
Posts: 111
Likes: 0
Received 0 Likes
on
0 Posts
Yeah, I didnt check all sticks for centricity when I welded it in place - wont change it now but will rather build a new CC should initial testing give reason for optimism 
The inner CC isnt welded yet.
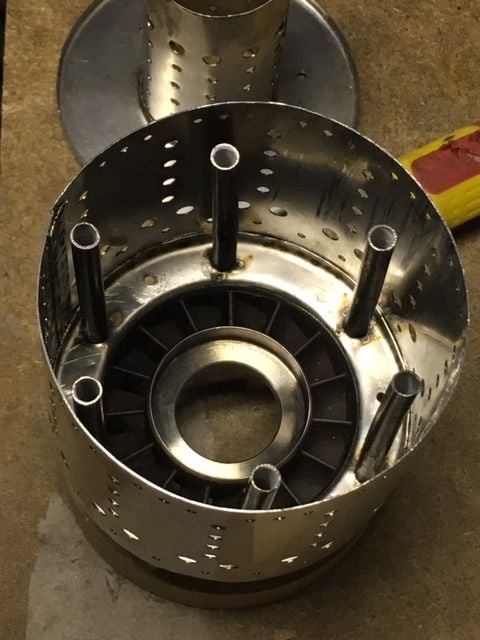
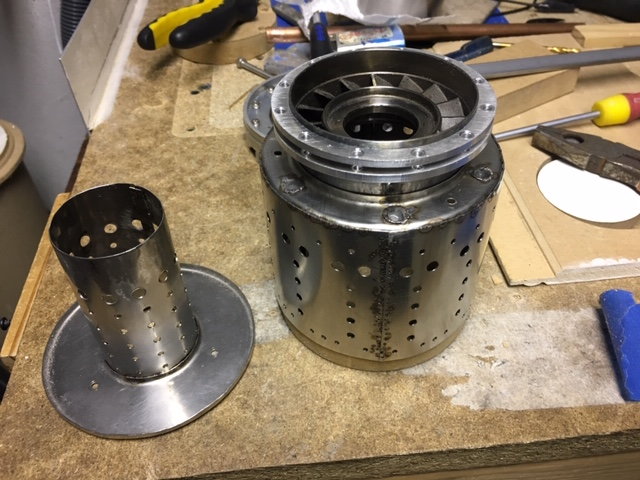
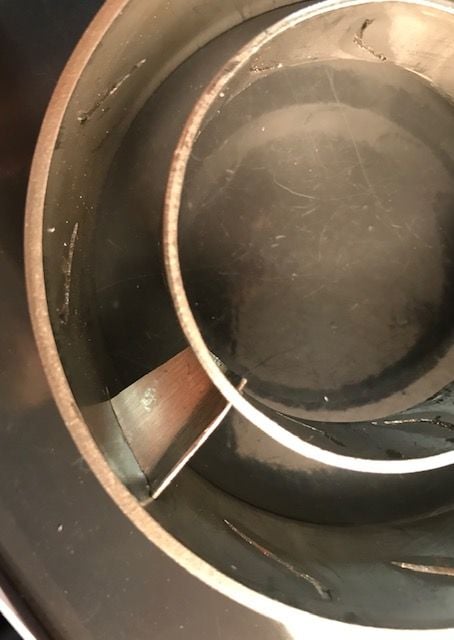
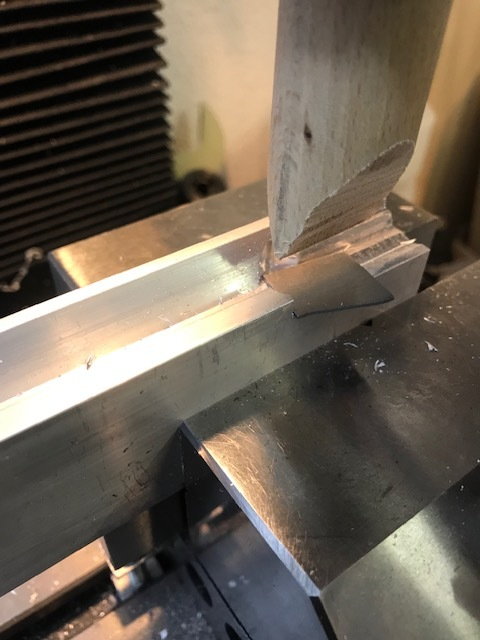
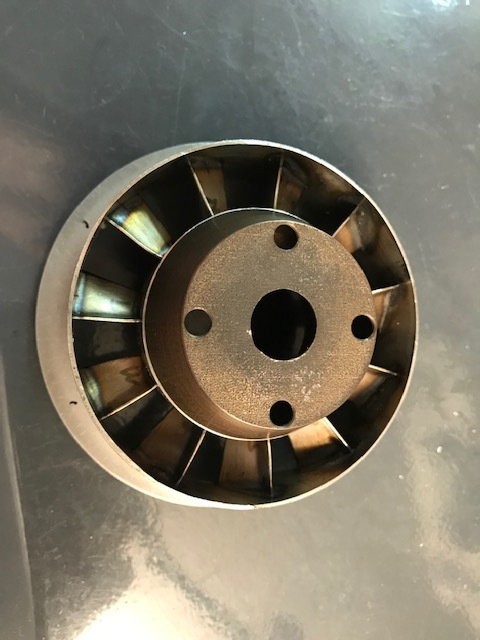
Work over the past week have been slim but mainly directed towards getting the canister/NGV/axle tunnel to all fit as one unit.
I need to fabricate the diffusor intake cover before I have the minimum parts required on hand.
The inner CC isnt welded yet.
Work over the past week have been slim but mainly directed towards getting the canister/NGV/axle tunnel to all fit as one unit.
I need to fabricate the diffusor intake cover before I have the minimum parts required on hand.
02-04-2019, 02:01 AM
#114
Hi Haldor,
By any chance, have you explored the benefits (if any) of twisting the outer sticks? I believe Frank Turbines used to have twisted outer sticks. I do not know if they still make them like that.
Reuben
By any chance, have you explored the benefits (if any) of twisting the outer sticks? I believe Frank Turbines used to have twisted outer sticks. I do not know if they still make them like that.
Reuben
02-05-2019, 12:54 AM
#115
My Feedback: (5)
Join Date: Jan 2004
Location: Algard, NORWAY
Posts: 111
Likes: 0
Received 0 Likes
on
0 Posts
I havent considered twisting them, I have seen it done during my research but keeping it simple. If I make a new CC I'll go with 12sticks vs 6 as this seem to be an upgrade aswell, especially for higher pressure engines.
07-26-2019, 10:56 PM
#116
Thread Starter
Hey Haldor
any news?
It looks that you slowed down
I just updated my Homepage www.turbinenheli.ch
regards Lukacs
any news?
It looks that you slowed down
I just updated my Homepage www.turbinenheli.ch
regards Lukacs
Last edited by athome; 07-26-2019 at 10:59 PM.
07-30-2019, 03:29 AM
#117

Nice site Lukacs! Also good temperatures seen on your movie. Looks like acceleration / ramp-up might be adjusted just a bit faster but still very good looking!
Rgds,
Gerald
Rgds,
Gerald
07-30-2019, 01:45 PM
#118
Thread Starter
Hi Gerald
What a nice surprise and honor to hear from you! Thank you for your compliment, but still fighting with hot temperature on the second stage, when I connect the NGV. Right now, I'm building a new NGV with less vanes
Regards Lukacs
What a nice surprise and honor to hear from you! Thank you for your compliment, but still fighting with hot temperature on the second stage, when I connect the NGV. Right now, I'm building a new NGV with less vanes
Regards Lukacs
 01-14-2020, 12:52 AM
#120
Junior Member
Hi Guys,
I'm looking to built a jet, looked at the MW64 and the KJ66, then someone suggested the GR180
I've just purchased Kurt Schreckling's book and Thomas Kamps
Just a quick question, are all these jets more or less the same design?
This will be my first build so looking for something suitable to learn on.
Outsourcing will be my friend for anything I can't do, but I will try to do most of it.
I have a 3axis CNC with max travel of 40mm
The plan is to get a small lathe also
Anyway it's nice to meet you all, all the projects above look really neat!!!
And if you're in the neighborhood, any suggestions are warmly welcome...?!
01-14-2020, 01:01 AM
#121
The basic principle of Operations is same for all jet engines available. KJ66 has been the pioneer of all from where many design were developed and successfully tested. I would suggest you to go for GR130 or GR 180. Both are well known and proven design by Gerald. I am currently making one 130 model. Welcome to the world of thrill.
03-15-2020, 05:19 AM
#122
Junior Member
Join Date: Mar 2020
Posts: 3
Likes: 0
Received 0 Likes
on
0 Posts
The basic principle of Operations is same for all jet engines available. KJ66 has been the pioneer of all from where many design were developed and successfully tested. I would suggest you to go for GR130 or GR 180. Both are well known and proven design by Gerald. I am currently making one 130 model. Welcome to the world of thrill.
Last edited by Raptor4; 03-15-2020 at 05:23 AM.
03-15-2020, 05:24 AM
#125
Gerald's website is down for a while. I think the subscription might have expired. PM me your email.. I will send the files. @gerald I hope you approve this.