


Ripmax Xcalibur Sports jet

 05-19-2014, 12:38 AM
#655

Thread Starter
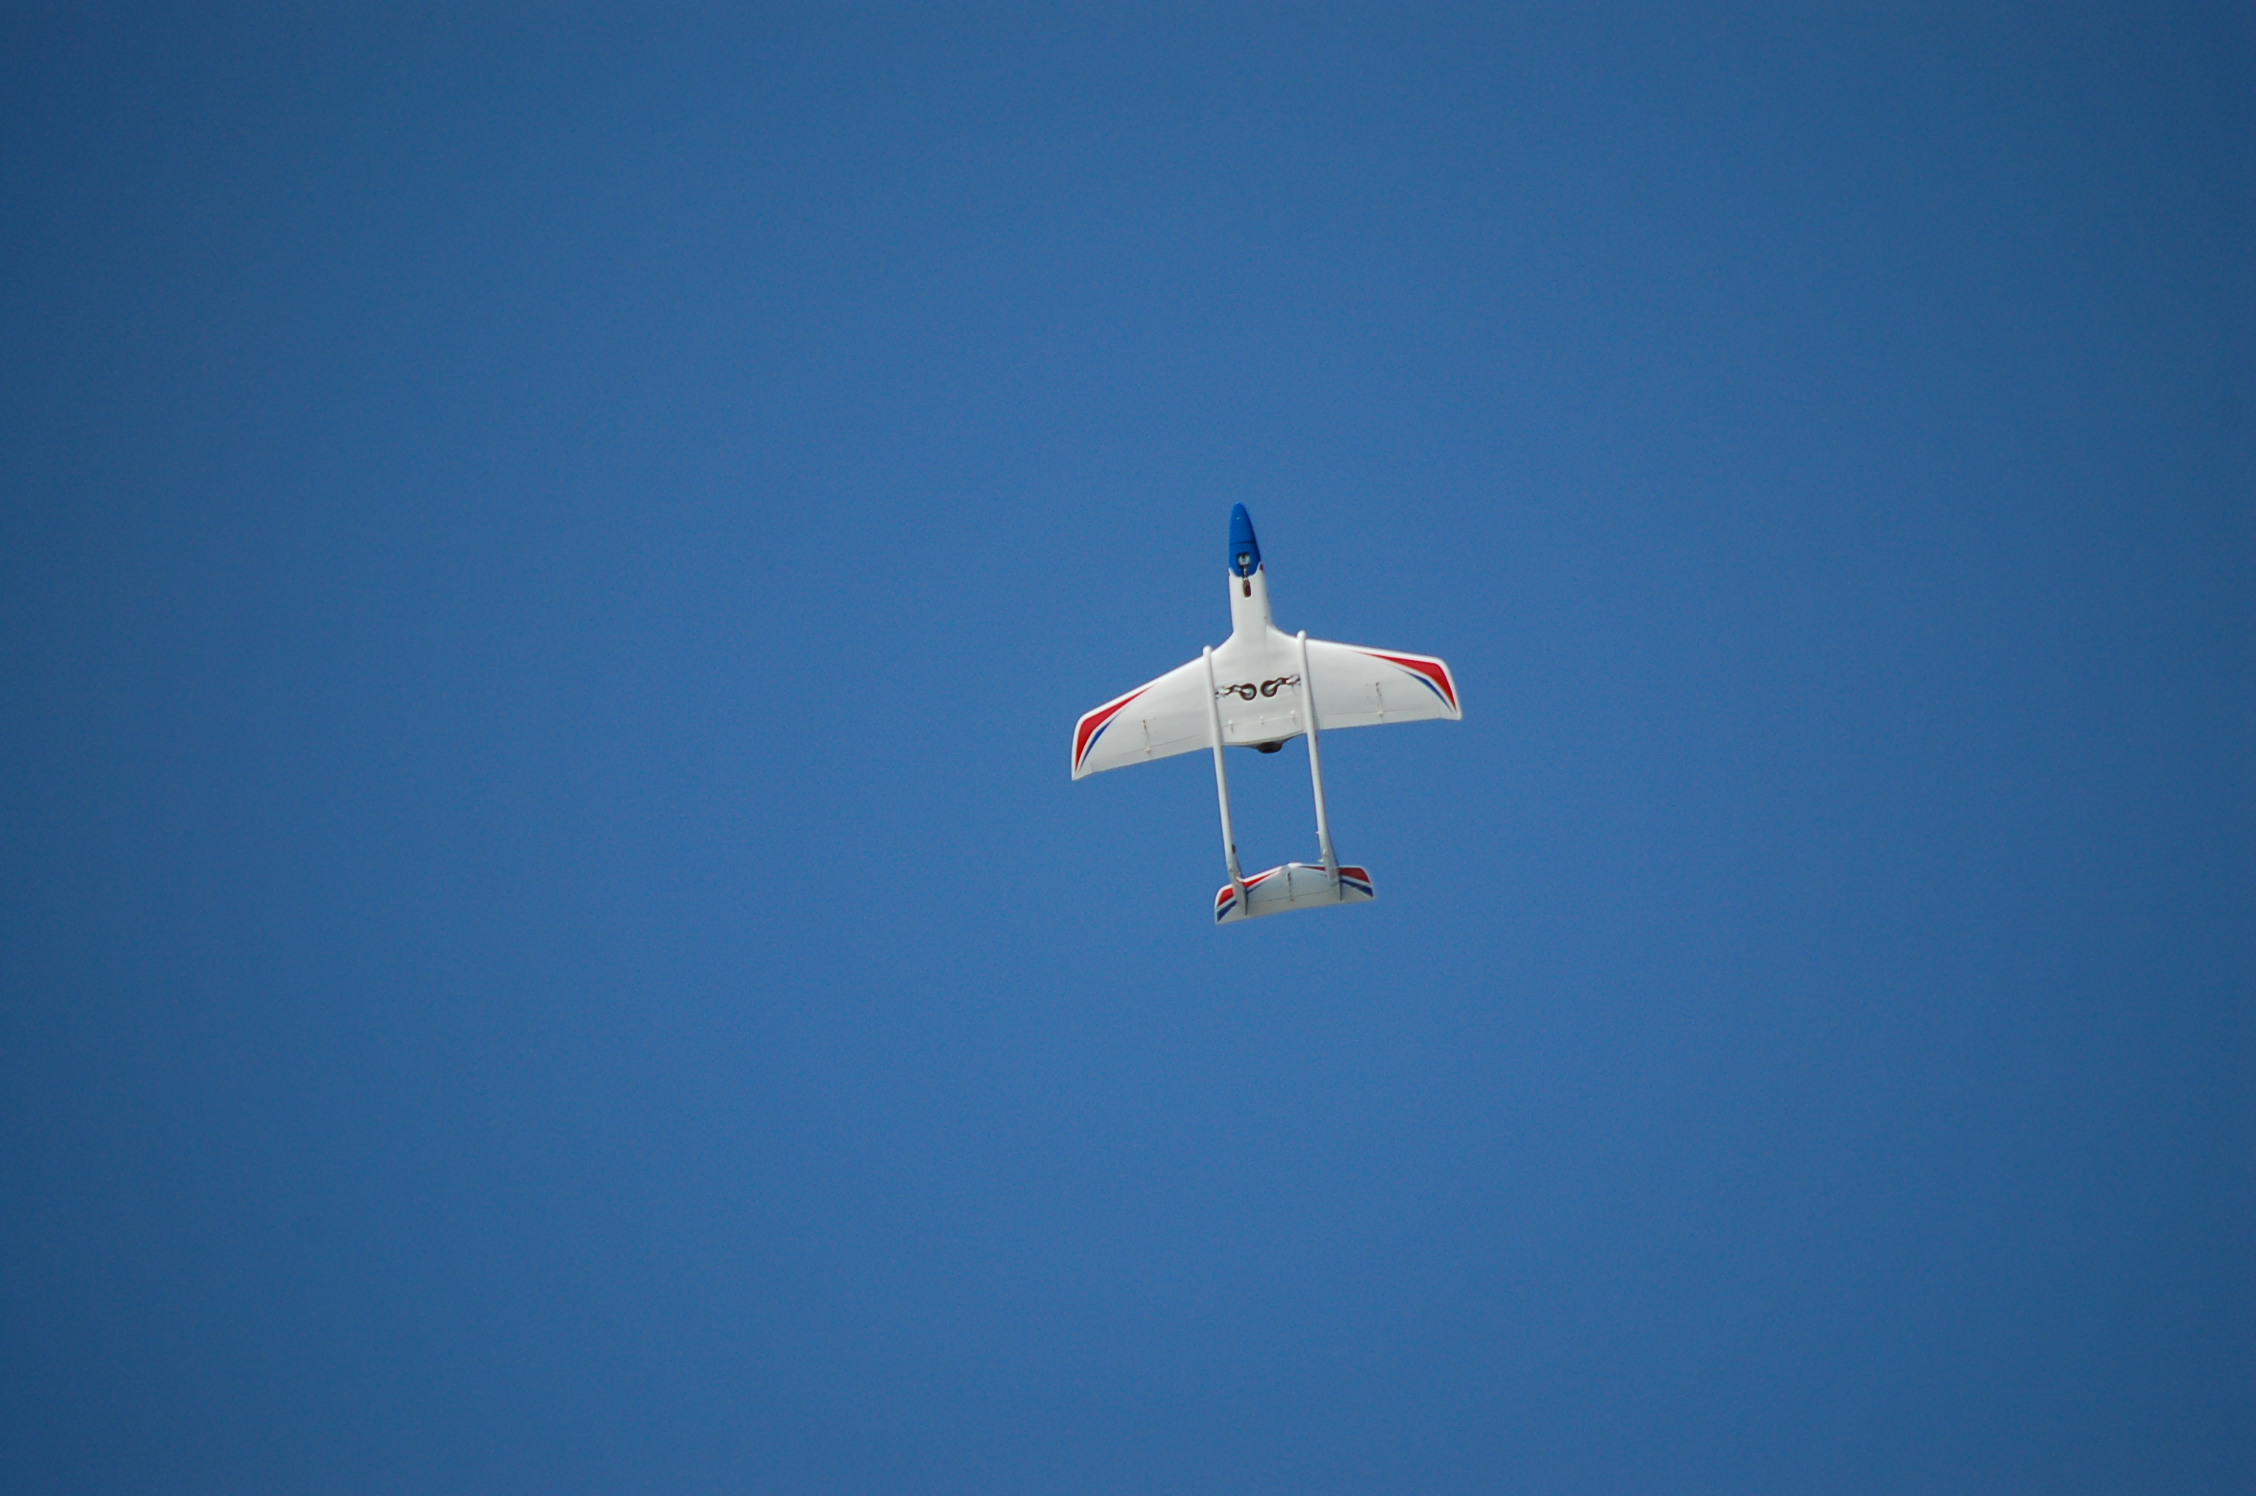
Great weekend with my Xcalibur, flew it at a show on Saturday and then again yesterday at our JMA Top Gun event.
Fabulous airframe, drew lots of interest from seasoned flyers.


Fabulous airframe, drew lots of interest from seasoned flyers.
05-24-2014, 03:13 AM
#656

can anyone give me the length from the bottom of fuse ( pls don't include length until trunion- only from bottom of fuse) till where the wheel touches the ground
I am using Paul's photo (from his build here) for reference
thx
I am using Paul's photo (from his build here) for reference
thx
05-24-2014, 12:07 PM
#657
Gentlemen
I am in the process of buttoning everything up.
Got all the airlines nice and tidy and to the stage of pumping up the retracts.
Air good, Jettronics valve happily buzzing away - hit the retract switch and the nose nicely comes up, the mains don't move...***!!
Huh....never had that one before...time to trouble shoot.
Checked valve, O.K.
Checked air out and in from valve OK
Checked pressure of gear down...all O.K.
This is getting weird....
Checked gear air up and low and behold no pressure to the mains....
Checked all the connections to discover that the T from the valve that splits the nose from the mains was the problem.
Pulled out the metal T fitting supplied with the gear and found it to be plugged on one nipple!!
Replaced the T and the world is good again.
So...moral of the story check those Chinese made Tfittings before placing them in an area that is hard to get at.
P.S. This is not a dig at the Xcalibur airframe.
Dean W.
Last edited by Helijet; 05-24-2014 at 12:10 PM.
06-01-2014, 01:20 PM
#659
Member

Join Date: Sep 2013
Location: Dunfermline, Scotland
Posts: 40
Likes: 0
Received 0 Likes
on
0 Posts
At last i finally test flew my Xcalibur today. First ever turbine jet i have flown. All i can say is what a fantastic jet and looking forward to many more flights. The only issue that i had is that i lost some of the blue trim. Going to have to try and find a match for the blue trim.
06-01-2014, 01:27 PM
#660
Thread Starter
Great! Flew mine all weekend at the Long Marston show, lots of interest and another three possible orders for the new scheme version.
We can help you with a new section of trim. Let me know side and surface. I'm out of the office till late pm tomorrow, so email or leave info with Richard
Dave
We can help you with a new section of trim. Let me know side and surface. I'm out of the office till late pm tomorrow, so email or leave info with Richard
Dave
06-01-2014, 08:43 PM
#663
Well gentlemen
My bird also flew for the first time this weekend. She had another 5 put on before bringing it back to the workshop.
Everything stayed put BUT the blue trim on the upper surface of the right wing...which interestingly appeared to delaminate???
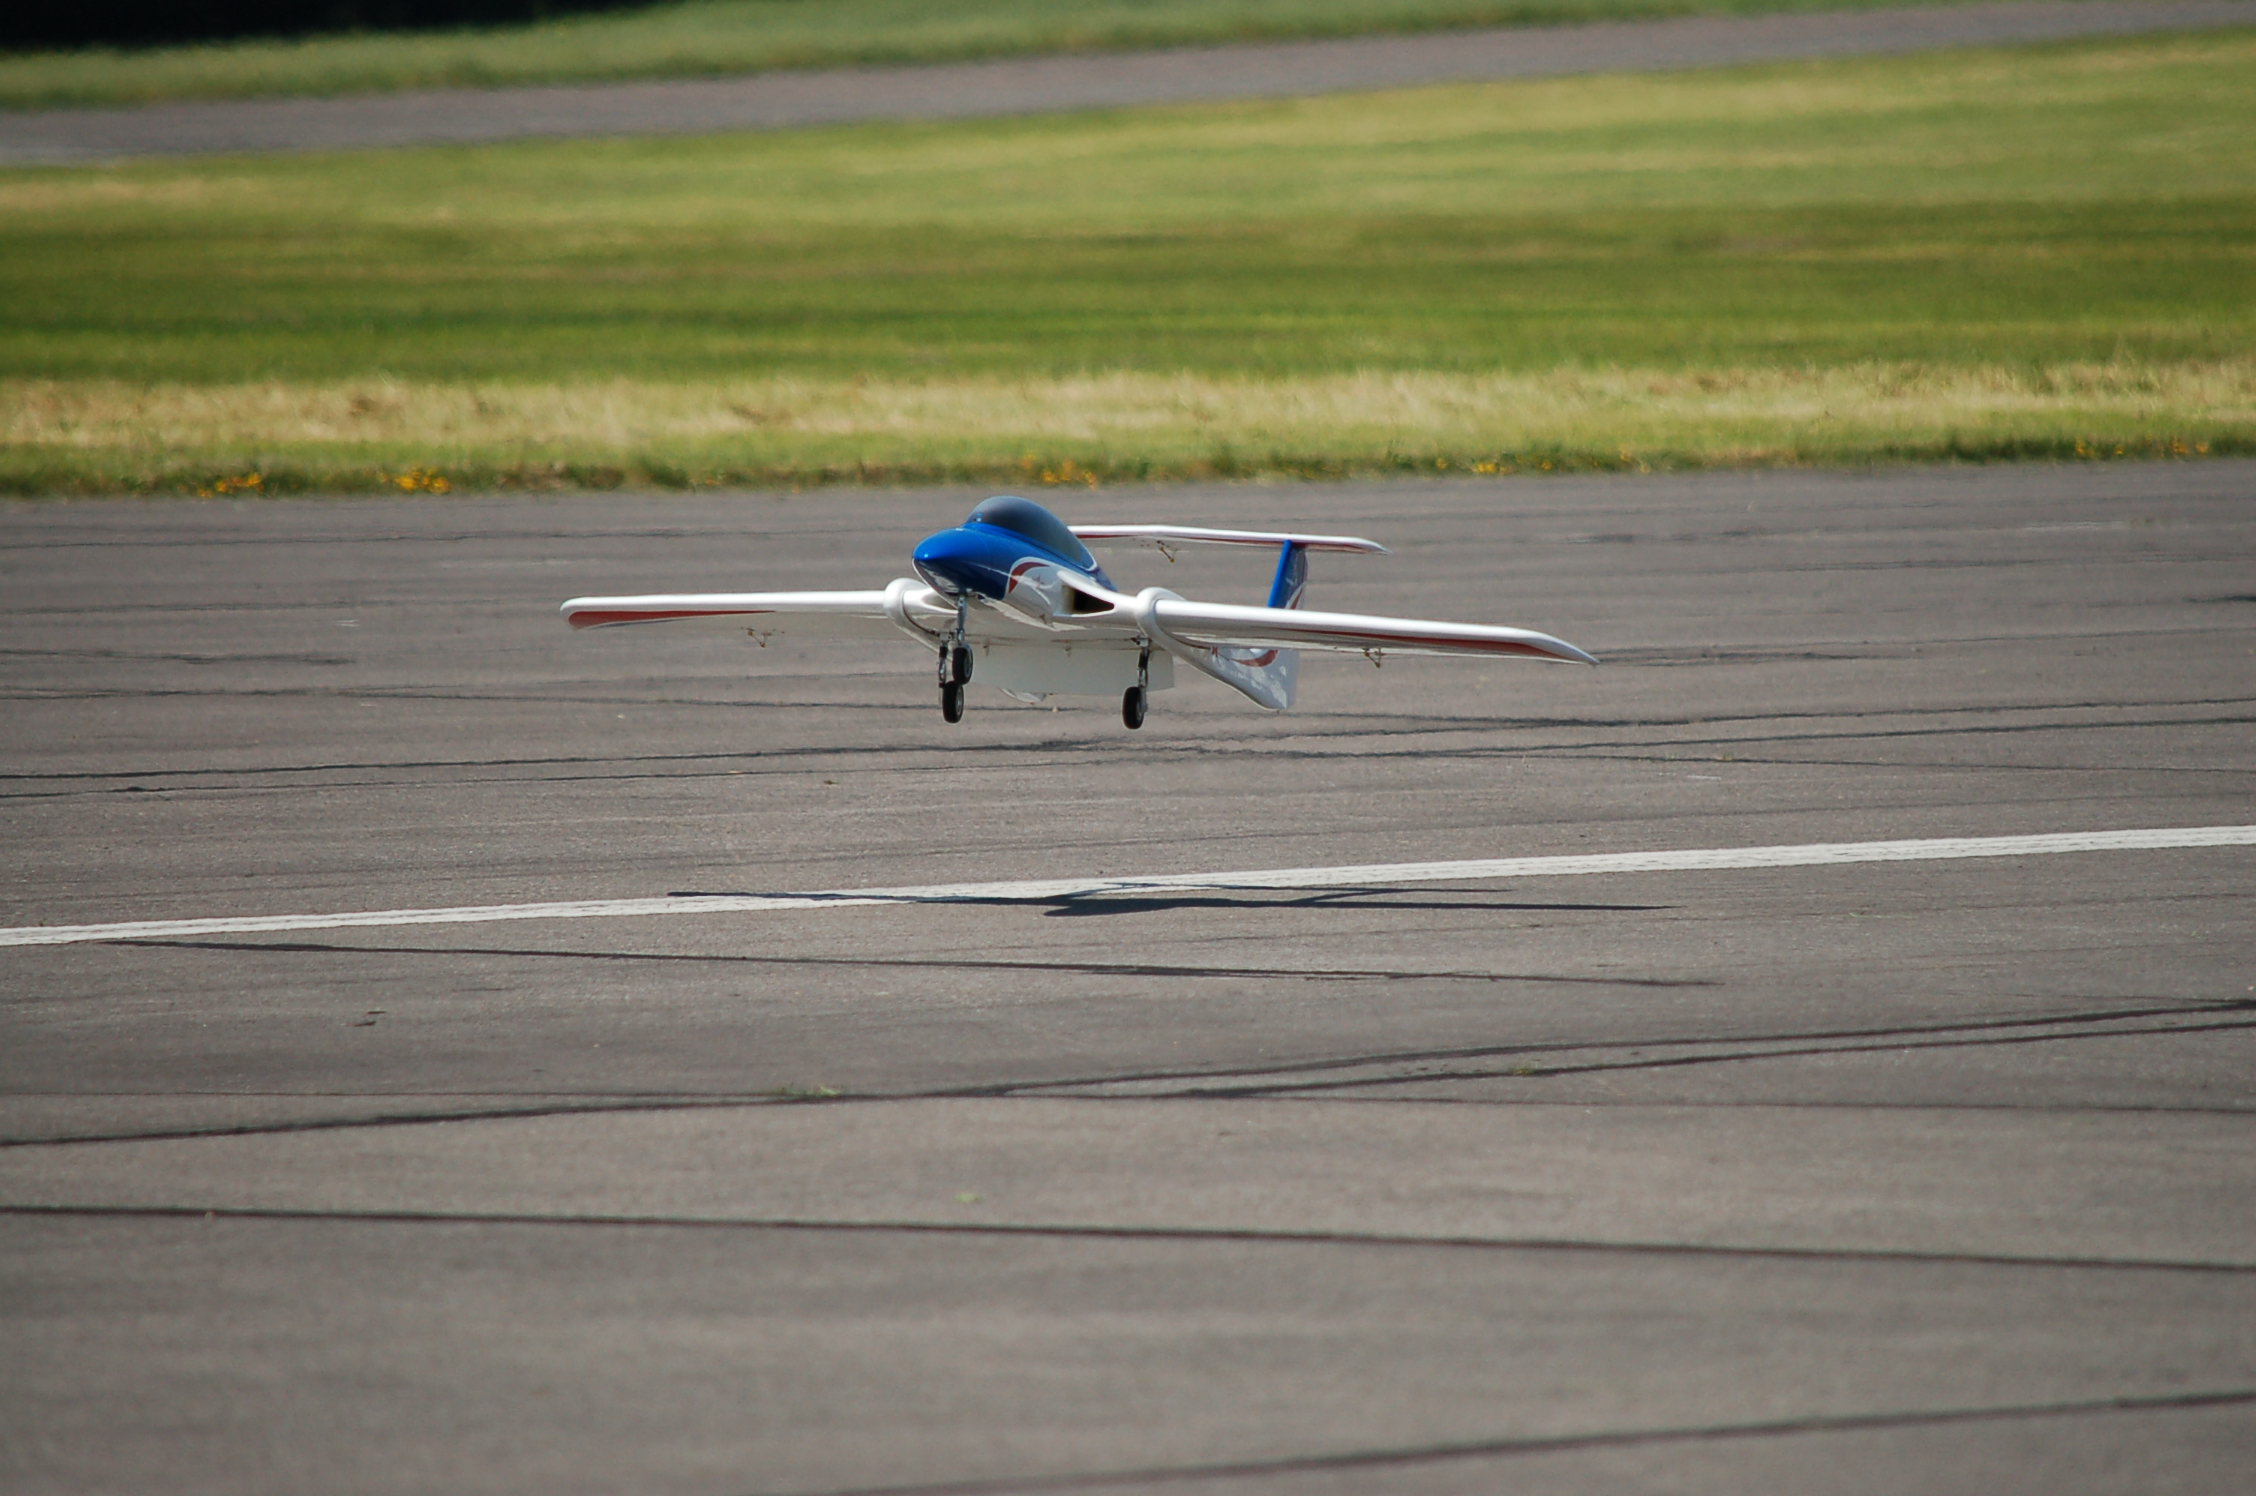
Here is a brief overview of my project. She is powered by a Kingtech 100g running on diesel. Flight time average around 11 minutes with the supplied tank. All components are moved as far forward as possible ( just looks like Dave's install ) but I have 2 X 2300 mah A123 packs and 1 X 3800 9.9 A123 ECU pack crammed as far forward as possible. It required an additional 4 oz of weight to bring the CG to 165 mm. It requires very little down elevator in inverted flight and is very well behaved with the throws as indicated in the manual. A word of caution - at this aft CG setting if you get aggressive with her in a stall she will snap quite violently and will require a turn or two to come out. However this is really cool and is easy to get of by simply releasing the sticks and allow her to drop the nose and fly away.
Landing: there is some residual thrust with the 100 which will make for unnecessarily long landings if you don't use proper flap and crow. On the maiden I chose not to use crow only the full flap measurement as indicated. I found I had to bring the throttle back to idle directly in front of me on the downwind leg in order to have the plane land within 50 ft of my position. On the second flight I put in 8 mm of crow and it made a significant difference in dragging up the bird. I could now carry a little throttle and pin point my landing spot much easier. The roll out is pretty stable but I would suggest putting on the wing tip skids as the gear is narrow and you are likely to scrape a tip in crosswinds.
Final thoughts, other than a few little things about the hardware and the known issue with the trim departing from maiden flights I like this bird. It is well engineered, has easy access to the components, flys straight, does really nice slow rolls, behaves well in slow flight with 1/2 flaps and is easy to spot land. As long as the price point and quality is maintained many of these will be seen at the local fields.
Dean W.
My bird also flew for the first time this weekend. She had another 5 put on before bringing it back to the workshop.
Everything stayed put BUT the blue trim on the upper surface of the right wing...which interestingly appeared to delaminate???
Here is a brief overview of my project. She is powered by a Kingtech 100g running on diesel. Flight time average around 11 minutes with the supplied tank. All components are moved as far forward as possible ( just looks like Dave's install ) but I have 2 X 2300 mah A123 packs and 1 X 3800 9.9 A123 ECU pack crammed as far forward as possible. It required an additional 4 oz of weight to bring the CG to 165 mm. It requires very little down elevator in inverted flight and is very well behaved with the throws as indicated in the manual. A word of caution - at this aft CG setting if you get aggressive with her in a stall she will snap quite violently and will require a turn or two to come out. However this is really cool and is easy to get of by simply releasing the sticks and allow her to drop the nose and fly away.
Landing: there is some residual thrust with the 100 which will make for unnecessarily long landings if you don't use proper flap and crow. On the maiden I chose not to use crow only the full flap measurement as indicated. I found I had to bring the throttle back to idle directly in front of me on the downwind leg in order to have the plane land within 50 ft of my position. On the second flight I put in 8 mm of crow and it made a significant difference in dragging up the bird. I could now carry a little throttle and pin point my landing spot much easier. The roll out is pretty stable but I would suggest putting on the wing tip skids as the gear is narrow and you are likely to scrape a tip in crosswinds.
Final thoughts, other than a few little things about the hardware and the known issue with the trim departing from maiden flights I like this bird. It is well engineered, has easy access to the components, flys straight, does really nice slow rolls, behaves well in slow flight with 1/2 flaps and is easy to spot land. As long as the price point and quality is maintained many of these will be seen at the local fields.
Dean W.
 06-01-2014, 11:58 PM
#666
Quick question
i am trying to fit the Kingtech 100G , do you need to remove the turbine mount to get the motor and then reattache the mount to the turbine
no matter how i try , cant get the motor in without removing the mount
thx
i am trying to fit the Kingtech 100G , do you need to remove the turbine mount to get the motor and then reattache the mount to the turbine
no matter how i try , cant get the motor in without removing the mount
thx
06-02-2014, 01:31 AM
#667
I Think the K100G is a marginal diameter to fit the Xcalibur. Some butchery may be required.
Last edited by Jim Cattanach; 06-02-2014 at 01:38 AM.
06-02-2014, 02:40 AM
#668
I'm sure that with some gentle trimming of the turbine mount formers with the Dremal tool and you will fit the K100 in. The gentleman a few posts back is flying his with a K100
06-02-2014, 02:43 AM
#669
In my case, the trim color coat appears to have separated from the film. It appears to a delaminating problem not a situation where the entire trim separated.
To fit the 100G, I glued two pieces of the supplied wood shims together.I then drilled the holes for the bottom brace and placed blind nuts on the back of the block. I then proceeded to glue a third shim over the blind nut after having drilled an oversized relief hole to accommodate the blind nut flange. So, I have three spacer shims to bring the engine up the from the mount. The bottom strap is put in place followed by the turbine. The top strap is then put over. You are correct, you can't place the turbine onto the mount with the straps in place. The blocks themselves are held on the mounting rails with wood screws. Nice clean install and no cutting of the mounting rail is required. I did drill a couple of small access holes through the fuse flange lip in order to line up the screw driver with the mounting screws.
Another note...I also glued a small 4" x 3" piece of BVM ceramic blanket just below the engine. I wanted to little heat protection because there is not more than 1/4 space between the engine and the glass. There have been no heat related issues around the engine bay.
If I have time...I'll post pics later.
Dean W.
06-02-2014, 02:45 AM
#670
Join Date: Dec 2010
Location: Victoria, AUSTRALIA
Posts: 105
Likes: 0
Received 0 Likes
on
0 Posts
Guys, the k80 and k100 are the same can size. I fit my 80 with a little fiddling and flexing the fuze without cracking anything. I would suggest using some thicker ply to make the turbine sit higher otherwise it will touch the bottom of the fuse. Also a set of allen keys on a bendy head makes life easier.
06-02-2014, 04:21 AM
#671
06-02-2014, 09:54 AM
#672
Hey guys...this especially for the North American crowd who have a hard time getting metric bolts.
It is really easy to loose the front canopy hold down bolt. What I did was to camfer the hole a little and place a 2 mm thick piece of medium fuel tubing
on the bolt capturing it. This way when you go to take off the canopy the bolt is retained and you won't have to go searching through the grass to find it.
Have fun!
Dean W.
06-02-2014, 11:29 AM
#673
Thread Starter
Dean I'm at 170mm and it behaves really well. Yes as you can see from the video Dominic posted it snaps and spins well, but always recovers quickly for me. Also my landing in very light winds is no CROW. I have it on a separate switch (with spit rudders) for really tight spaces.
factory are aware of trim issues, since running a hot iron around mine I have a lot of flights and no more film peeling.
Dave
06-02-2014, 11:47 AM
#674

Fairly sure was your first flight on Sunday Dave. You're welcome. - Dom
Just to add that I do have the full flight from Saturday but light wasn't as good. Shout if you want that and I'll get around to loading it.
Just to add that I do have the full flight from Saturday but light wasn't as good. Shout if you want that and I'll get around to loading it.
06-02-2014, 11:51 AM
#675
diameter of Jetcat P80se, P90RXi, P140RX, and P180RX all have a diameter of 112 mm
The P100 has a diameter of 97mm. The P60 has a diameter of 82.5mm
Kingtech turbines diameter K 60G is 82 mm. K80G and K100G are 95.25mm.
K140G, K170G and K180G are all 114.3mm
I think it's important that before you jump into purchasing this Jet you do your homework and be sure that the turbine you have or going to buy will fit and is suited for this jet. This rule obviously goes to any Jet or prop airplane you buy, weather it is turbine , turbo prop, electric, gas, nitro
, etc.
Hope this helps with your project.
Last edited by Justflying1; 06-02-2014 at 12:04 PM.