


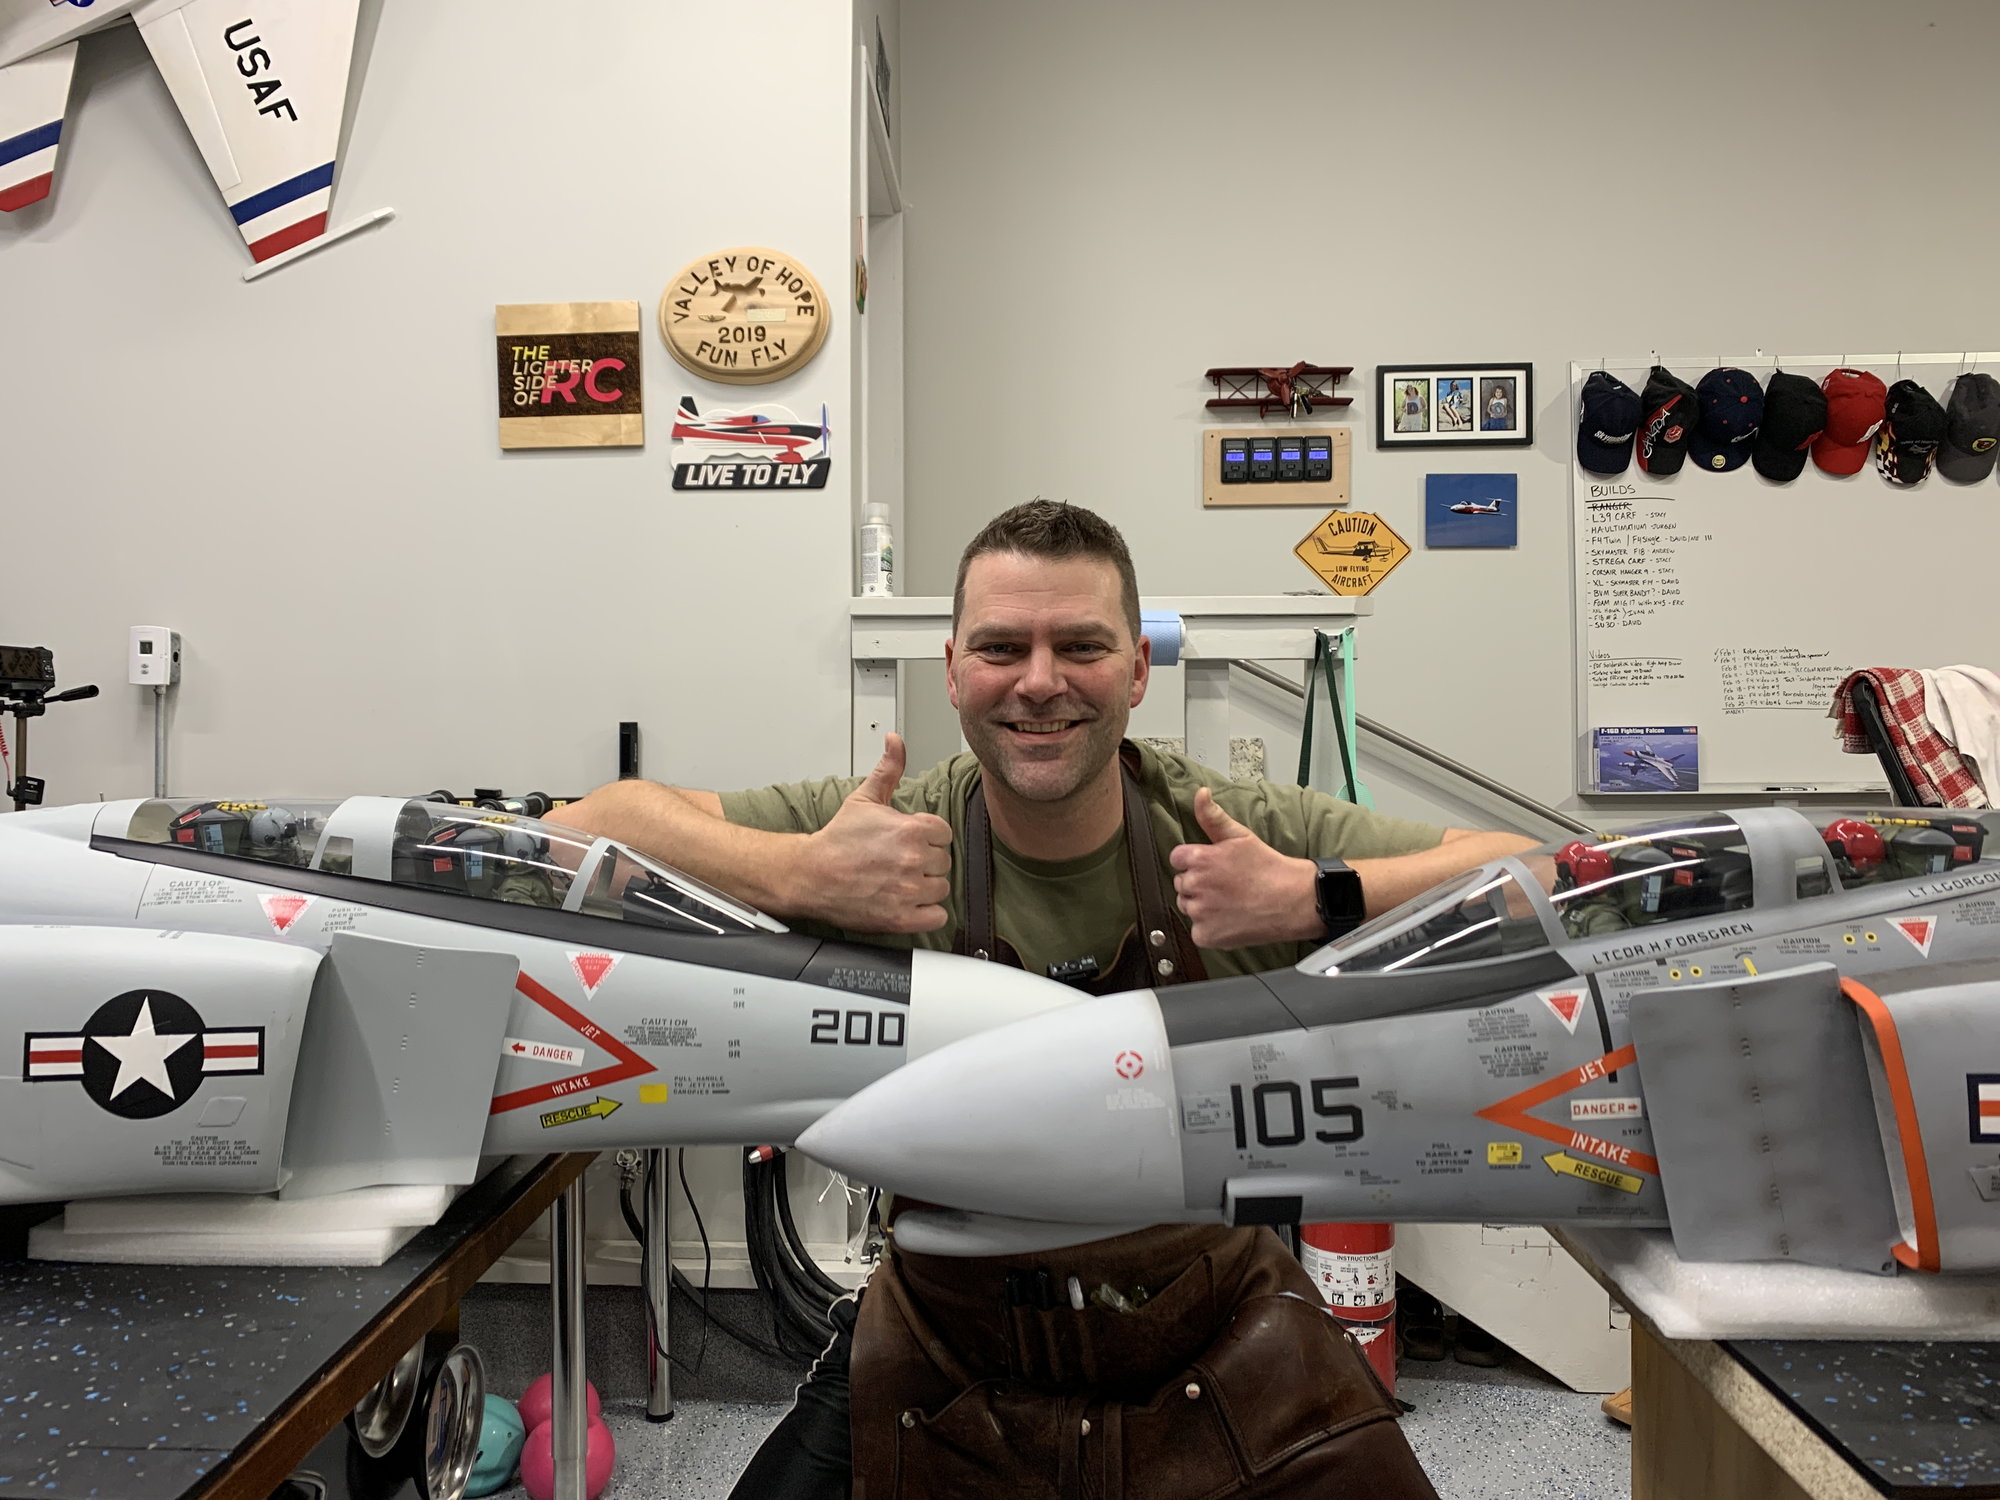
Skymaster 1:7.5 F-4 Phantom


The following users liked this post:
yeahbaby (02-25-2023)

The following users liked this post:
F16Jeff (02-25-2023)
The following users liked this post:
LA jetguy (02-26-2023)
 02-26-2023, 07:45 PM
#557

My Feedback: (1)

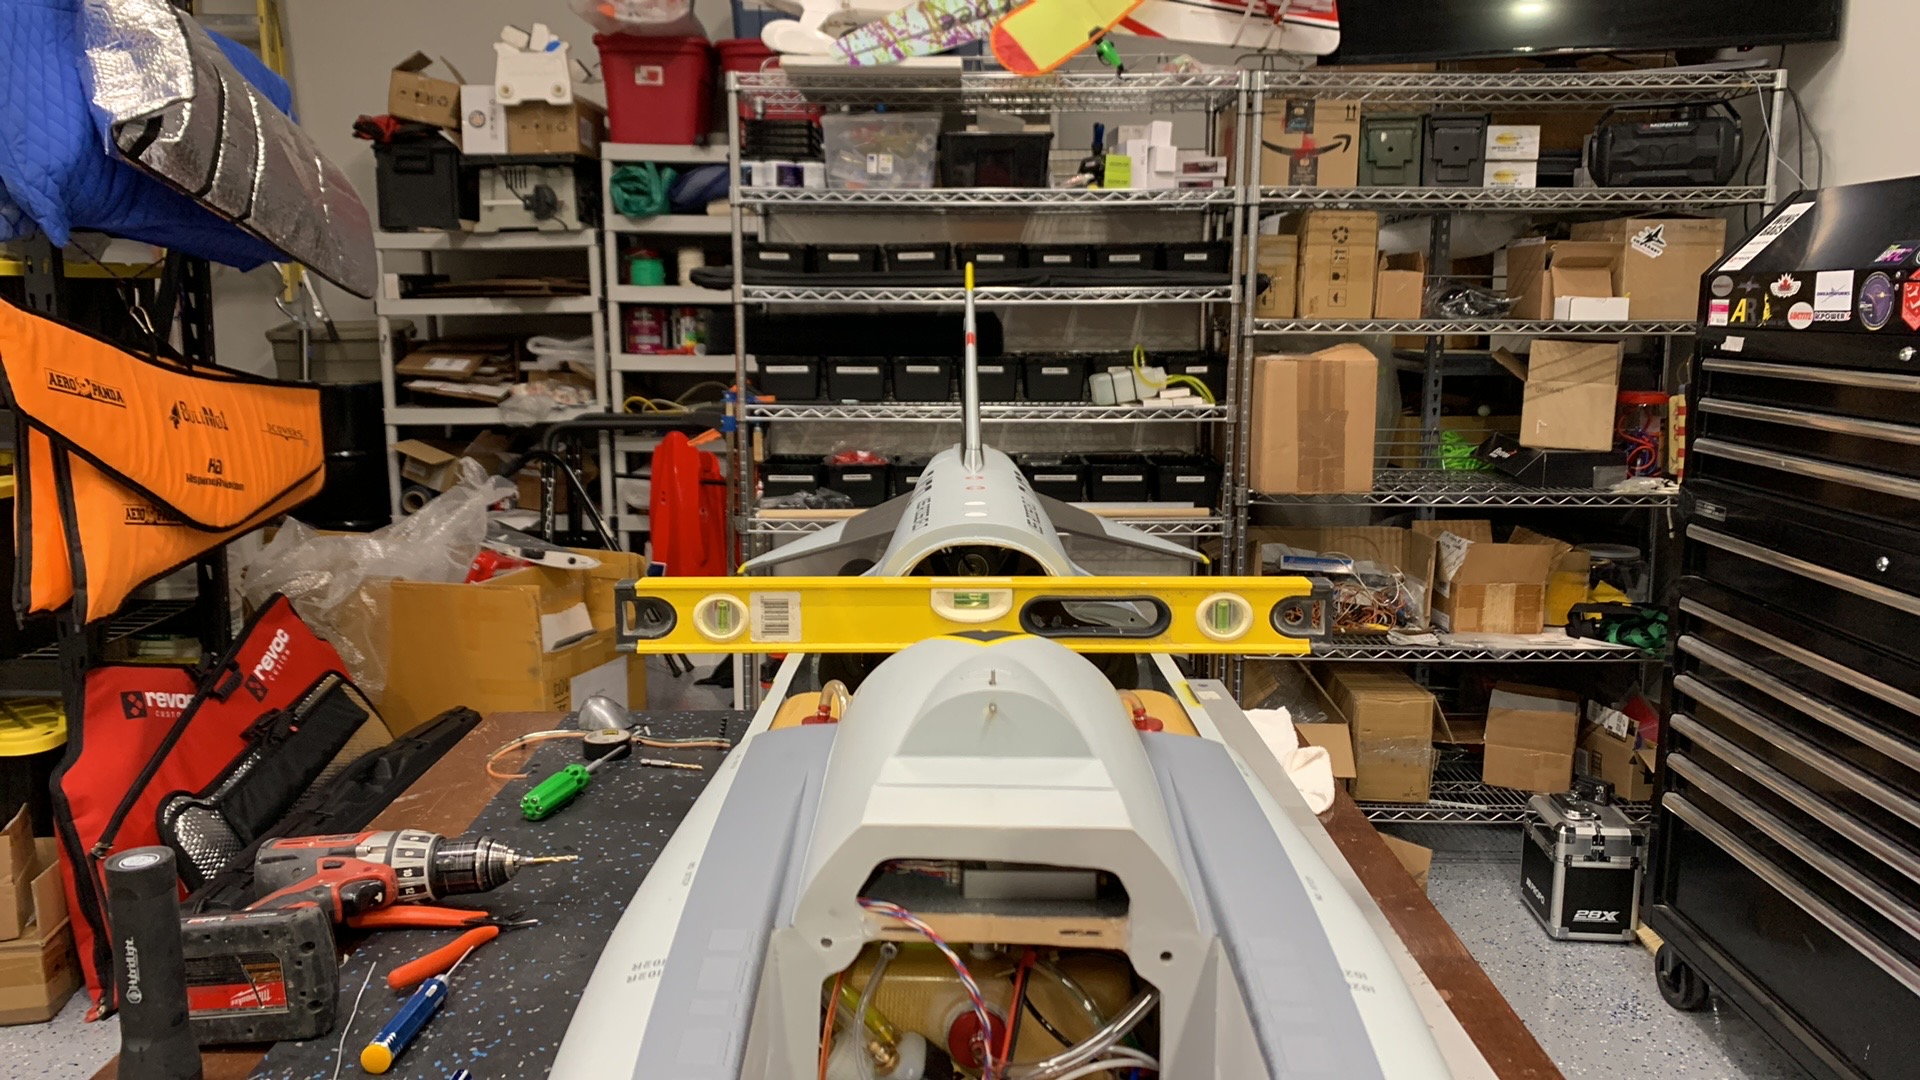
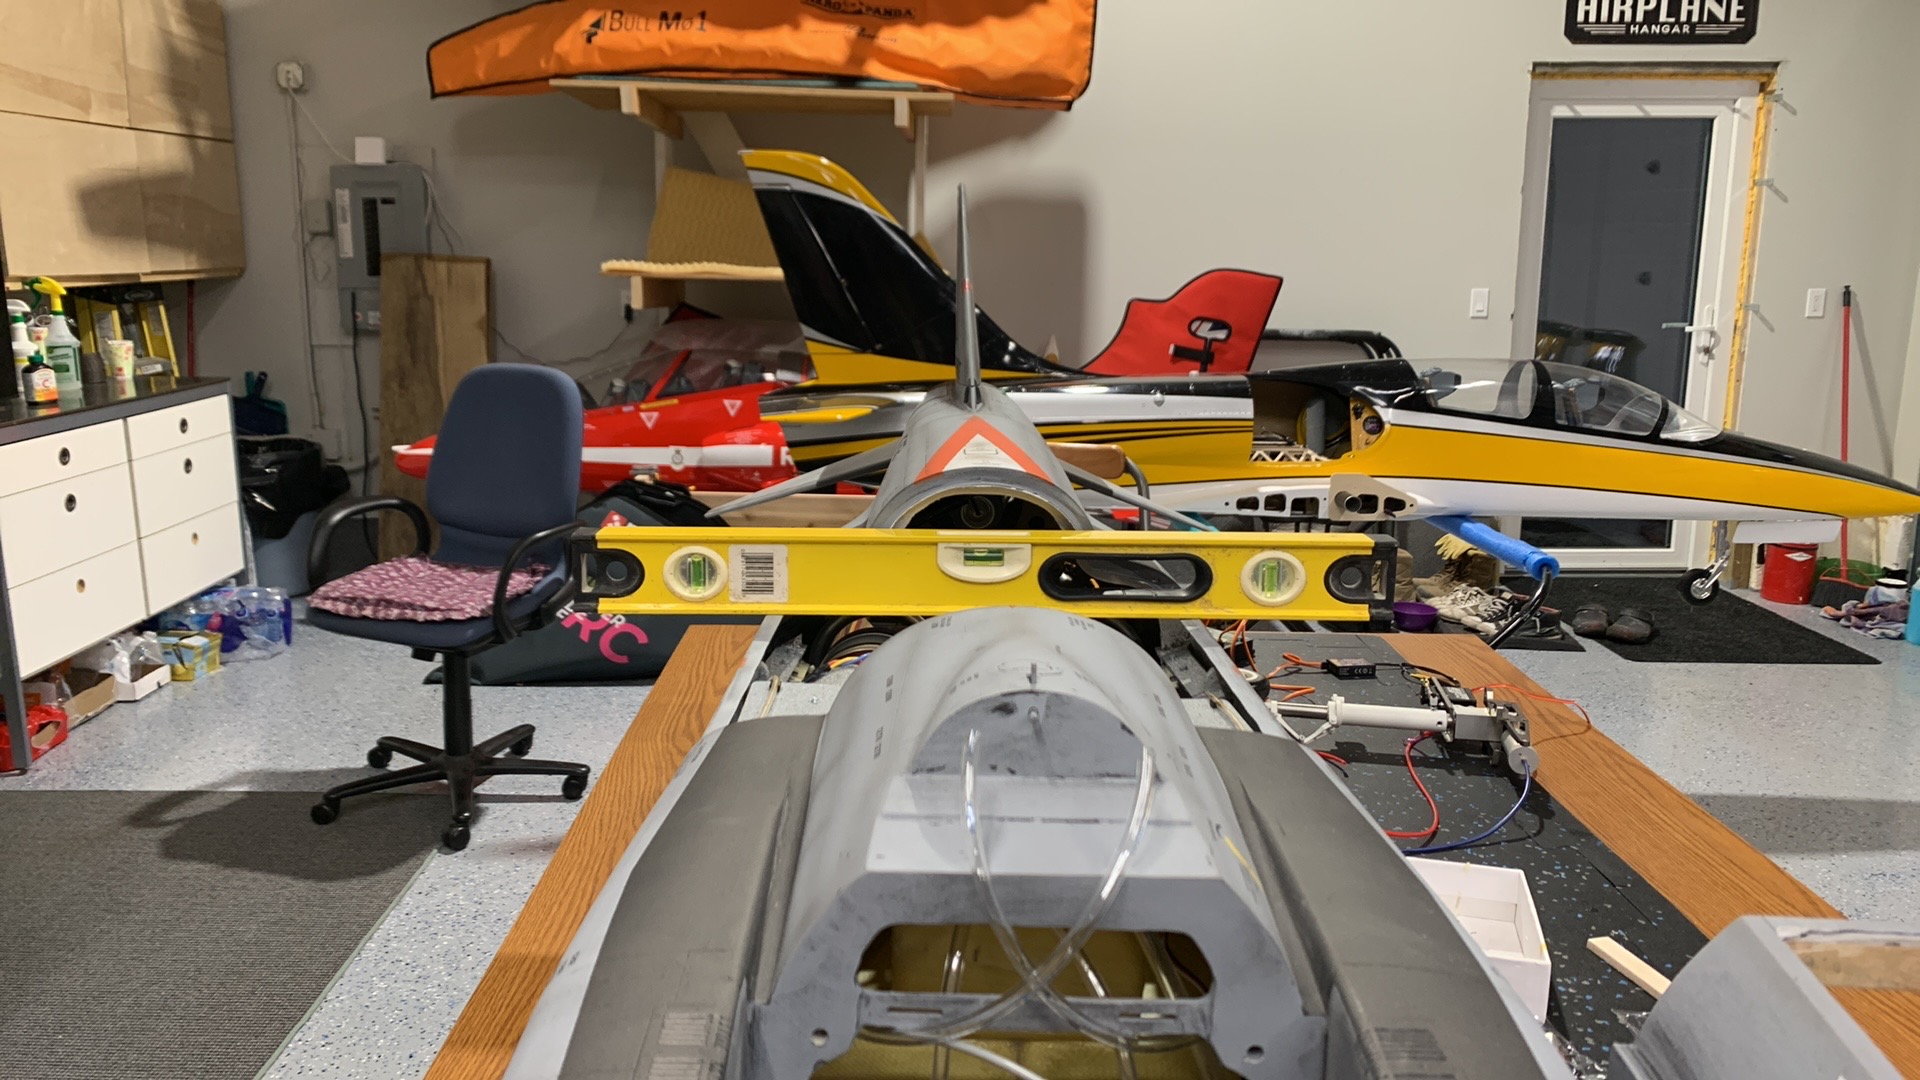
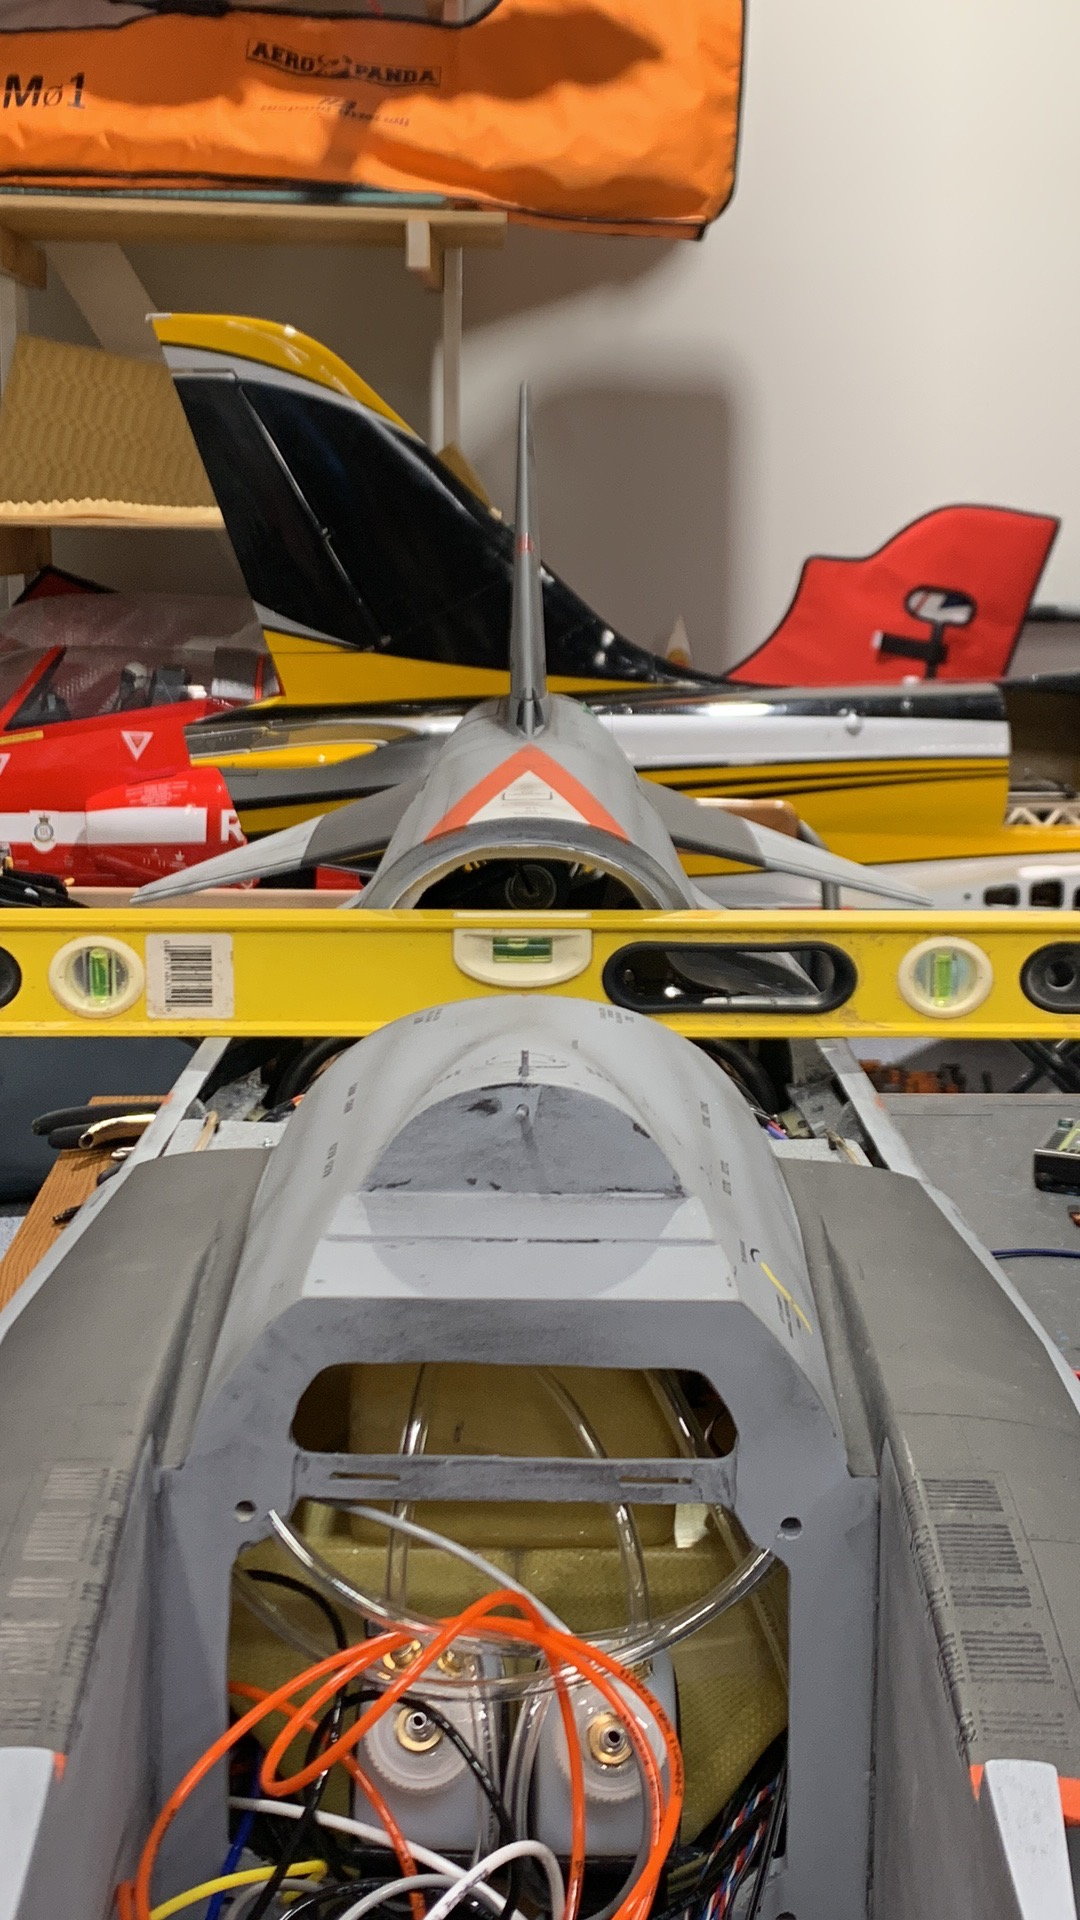
Don't assume the hatch opening is level as it may have come across in the video.
Checked table.
checked opening
Checked stab tip to tip with long level
Then final check relative to wings with wings on.
The following users liked this post:
LA jetguy (02-26-2023)
02-27-2023, 10:37 AM
#558
My Feedback: (1)
HAHA. Happy to create work for you! It crossed my mind when there were a few comments on excessive aileron trim on maidens.
Don't assume the hatch opening is level as it may have come across in the video.
Checked table.
checked opening
Checked stab tip to tip with long level
Then final check relative to wings with wings on.
Don't assume the hatch opening is level as it may have come across in the video.
Checked table.
checked opening
Checked stab tip to tip with long level
Then final check relative to wings with wings on.
The following users liked this post:
Canadian Man (02-27-2023)
The following users liked this post:
F16Jeff (03-01-2023)
03-02-2023, 08:40 AM
#560
My Feedback: (1)
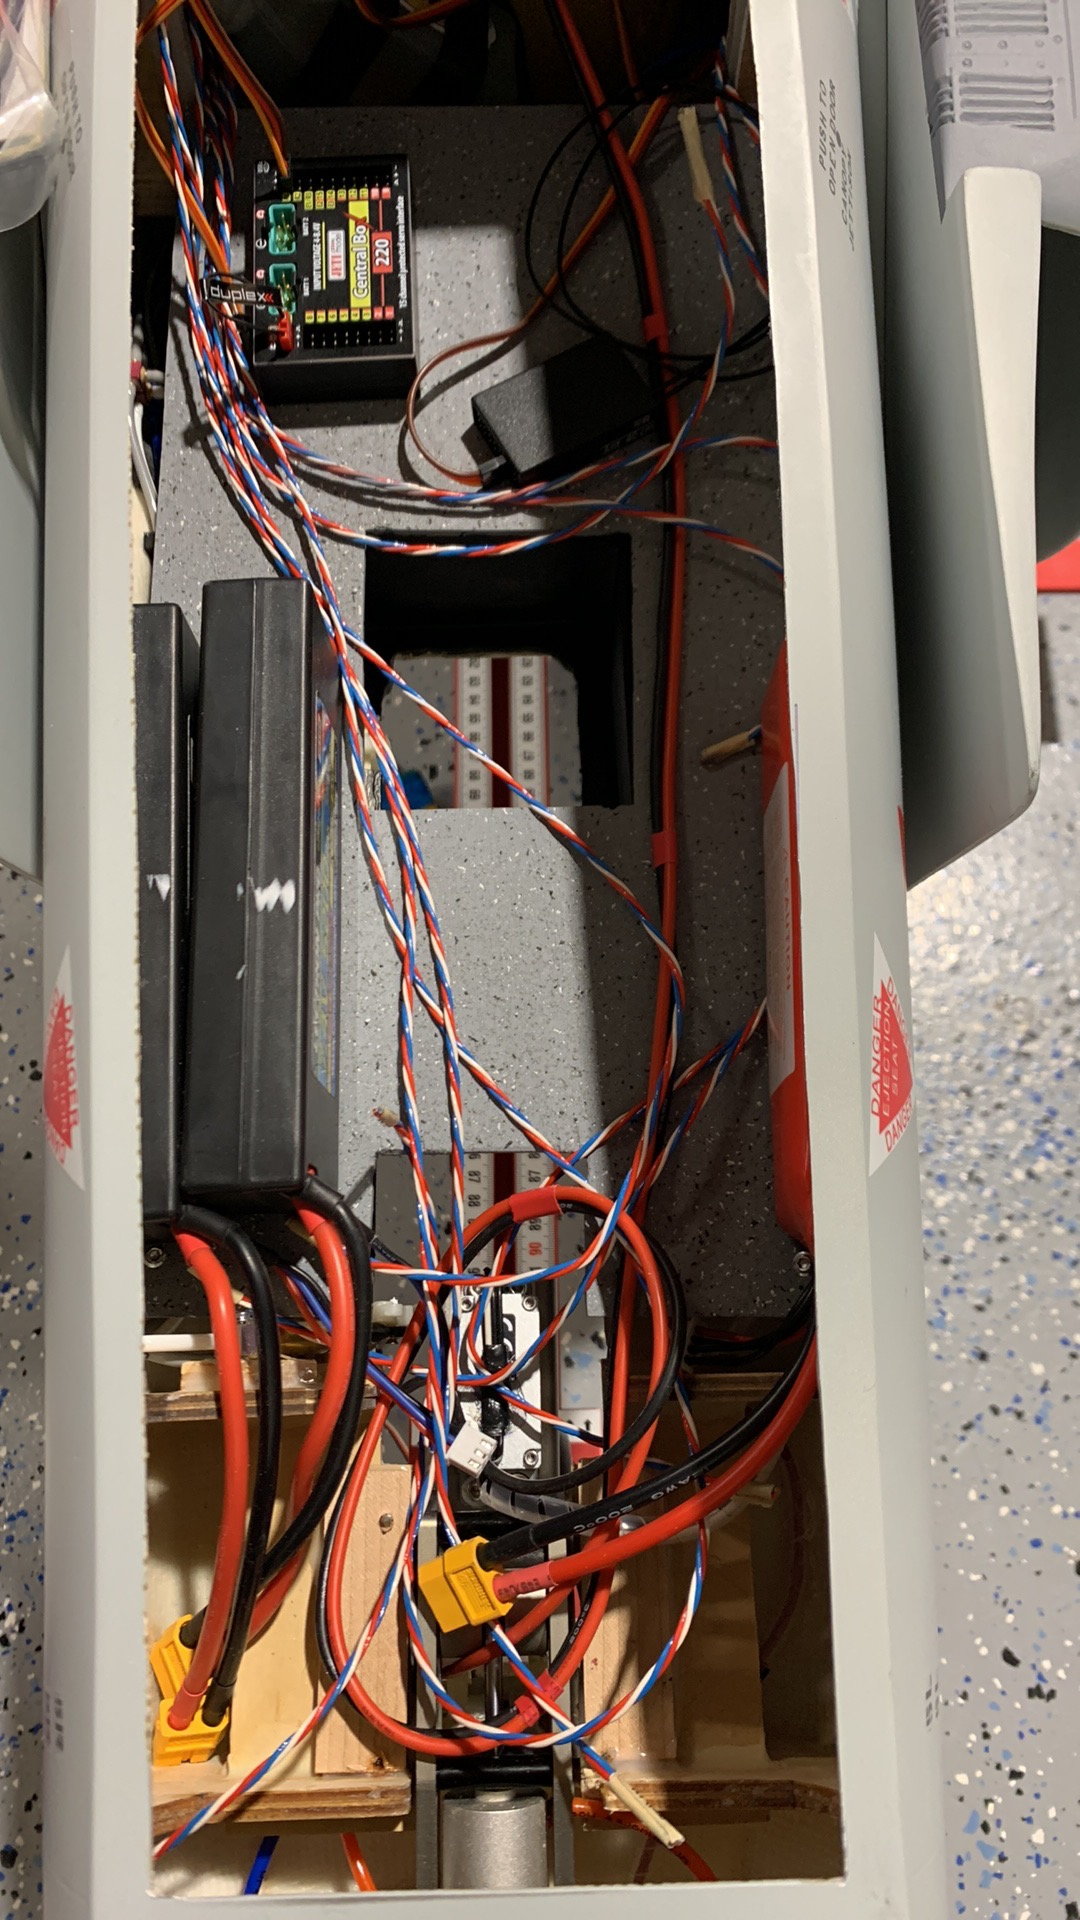
Picture catchup time.

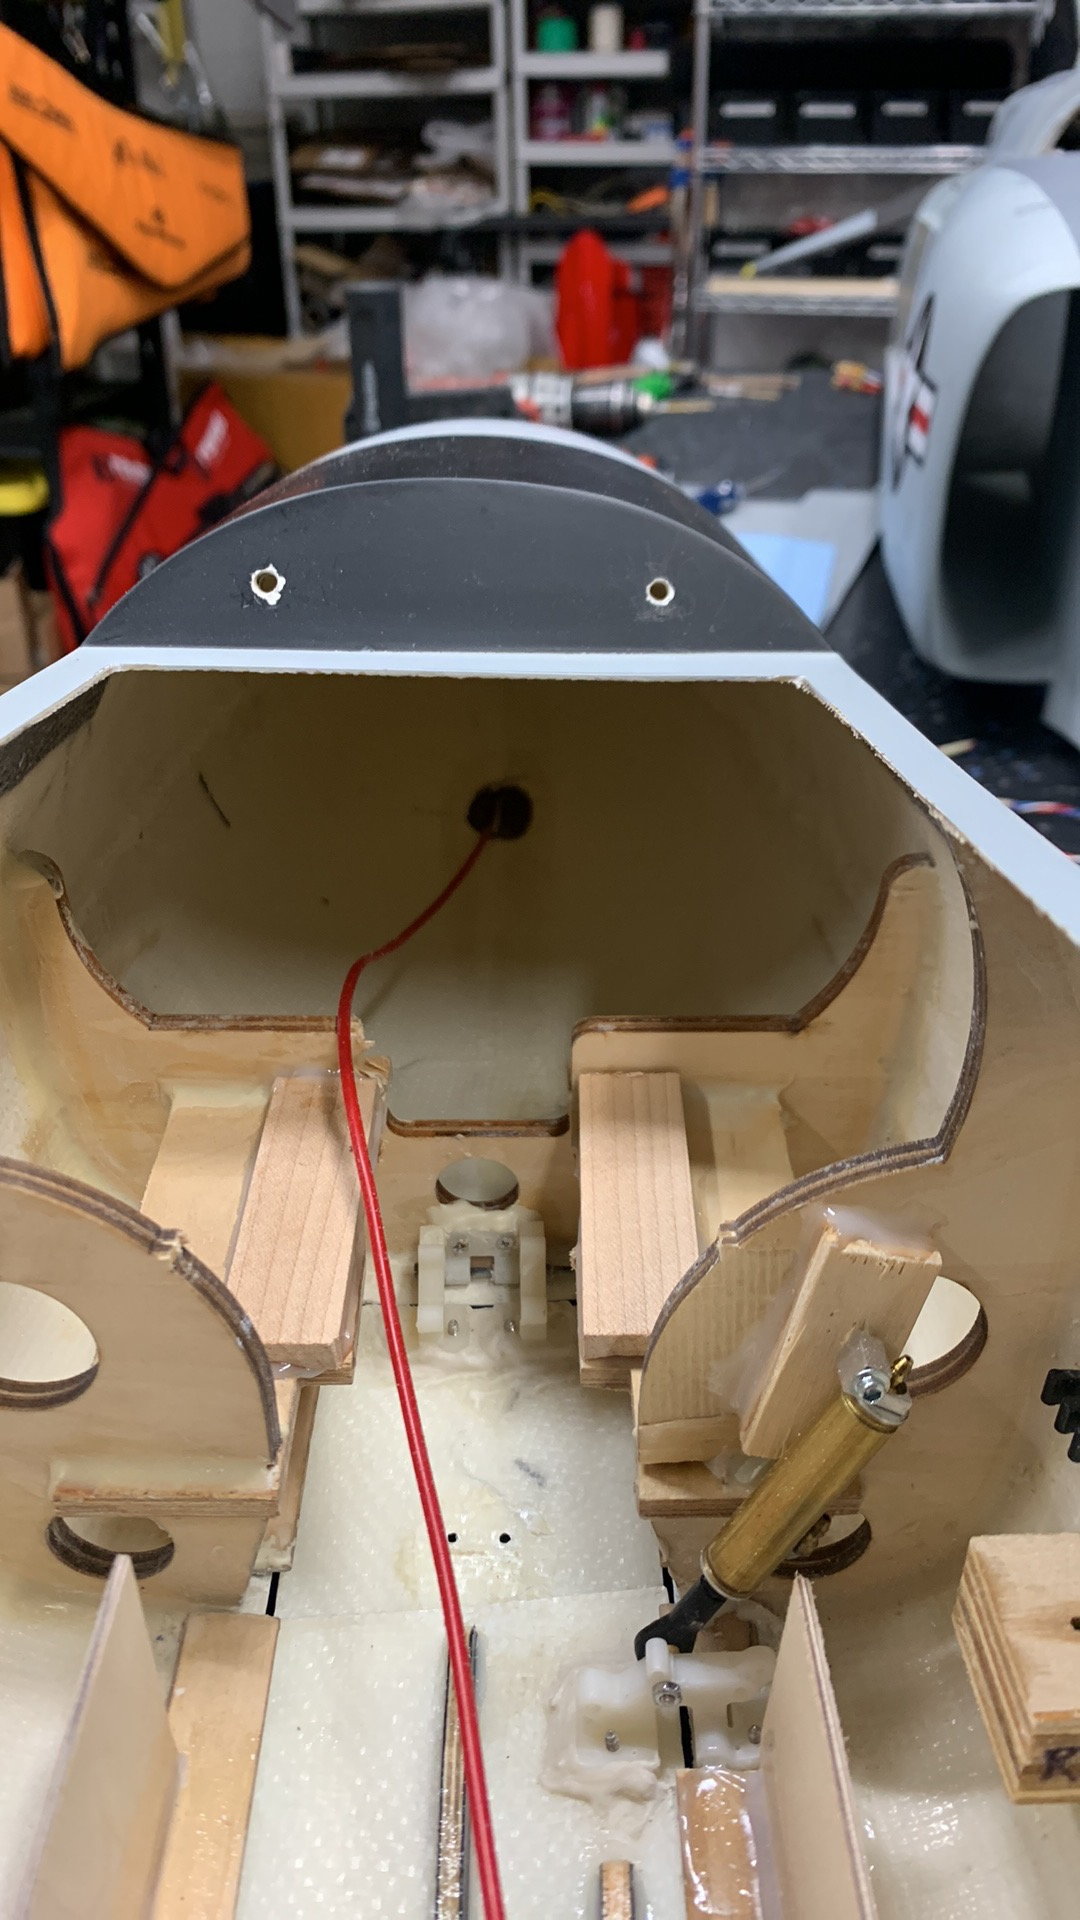
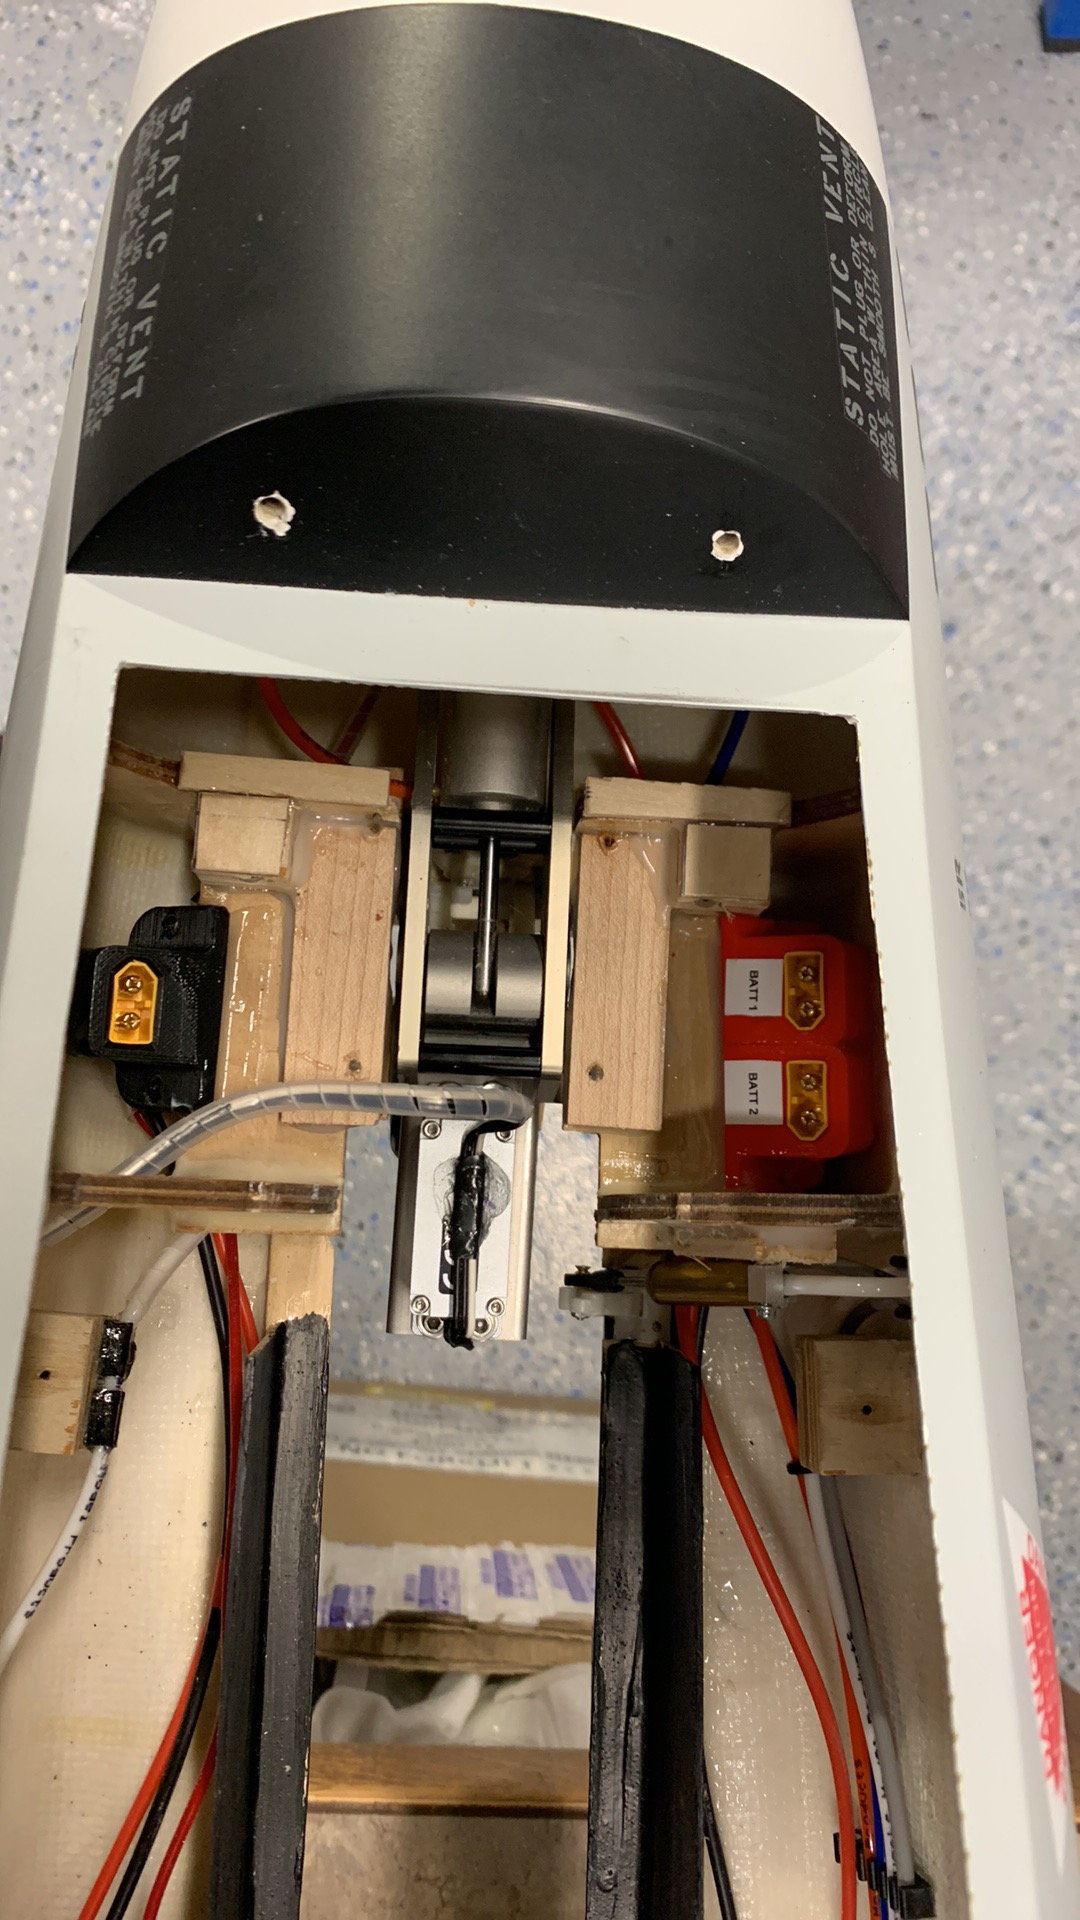
Nose gear walls built from 1/16" ply. Did this for a few reasons. 1. Keep wires, tubes and lines from interfering with the nose function. 2. If any moisture on field it prevents some of it from hitting electronics. 3. Grass fields minimizes grass intake. This is negated slightly with the openings needed for the wheel/tire relief.
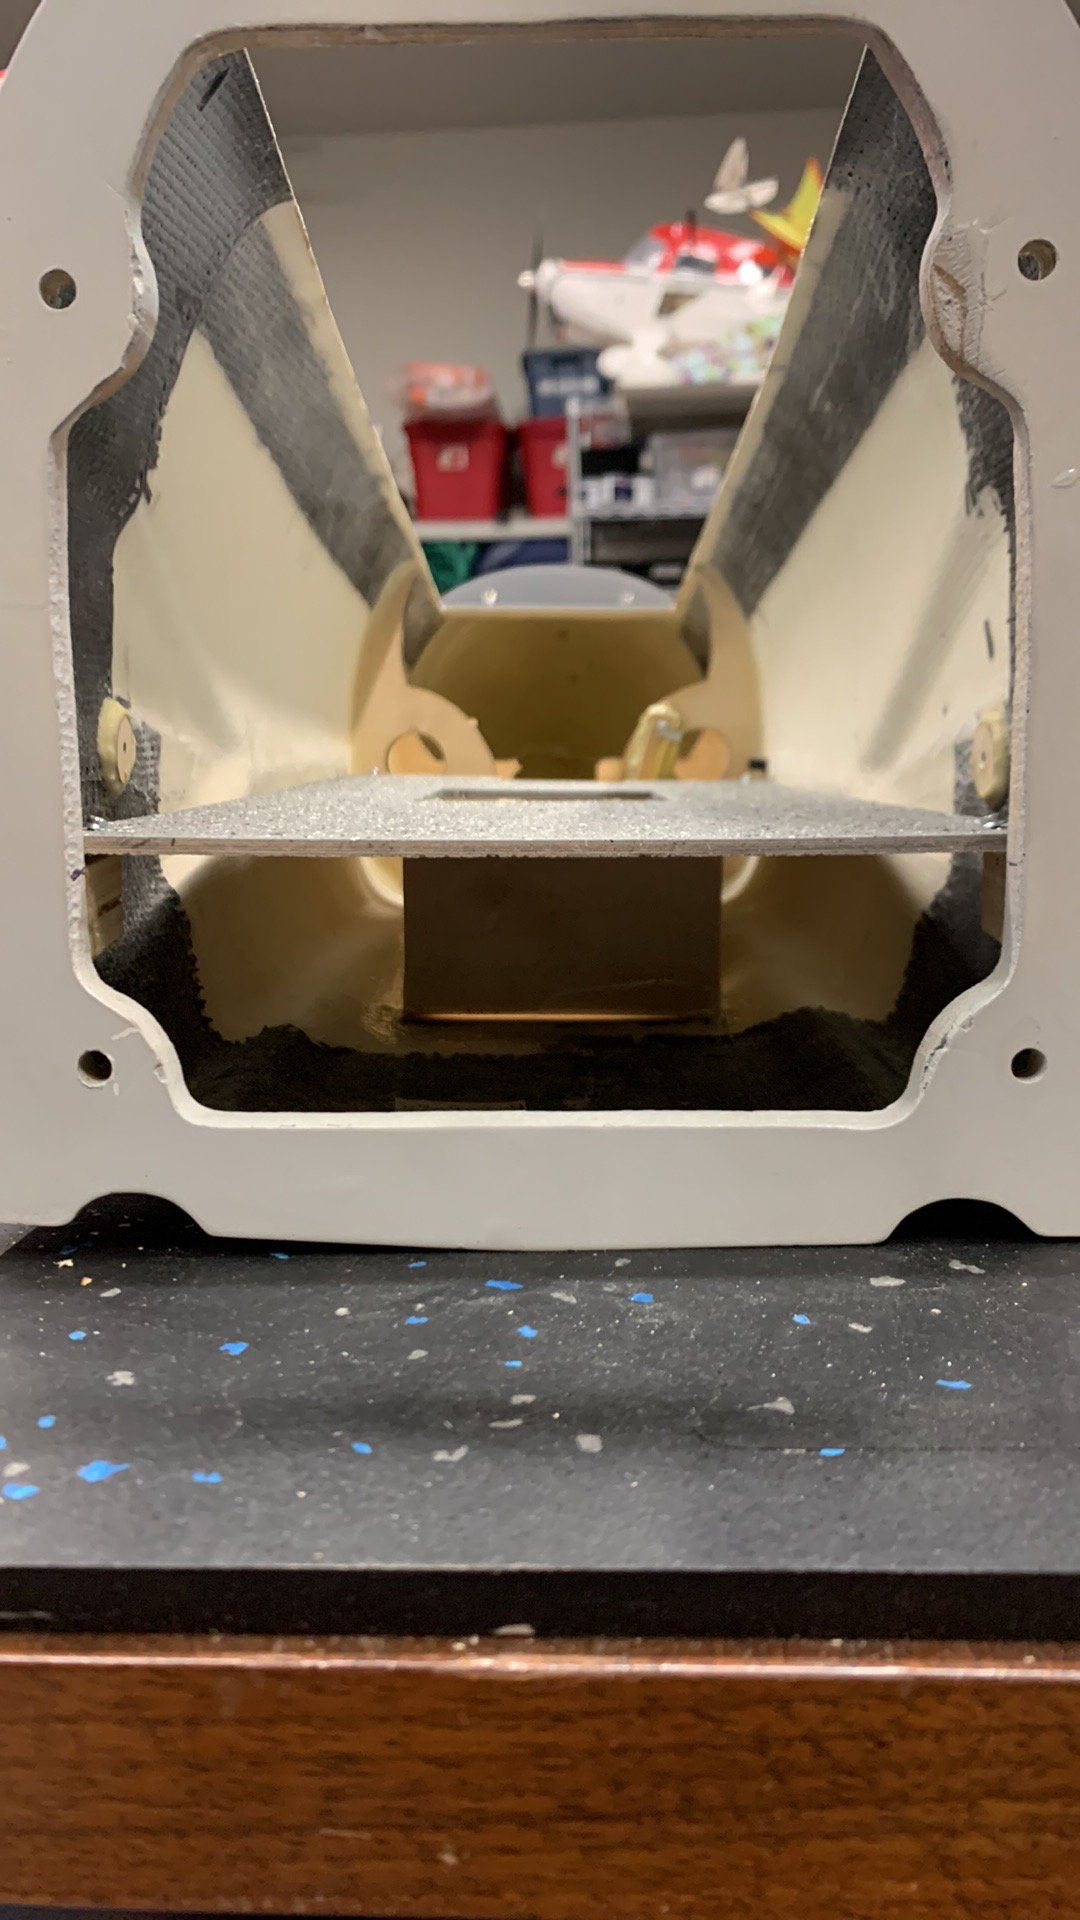
Front tray tight to nose walls
Nose door reinforcing added to old kit. Nose door is very flimsy.
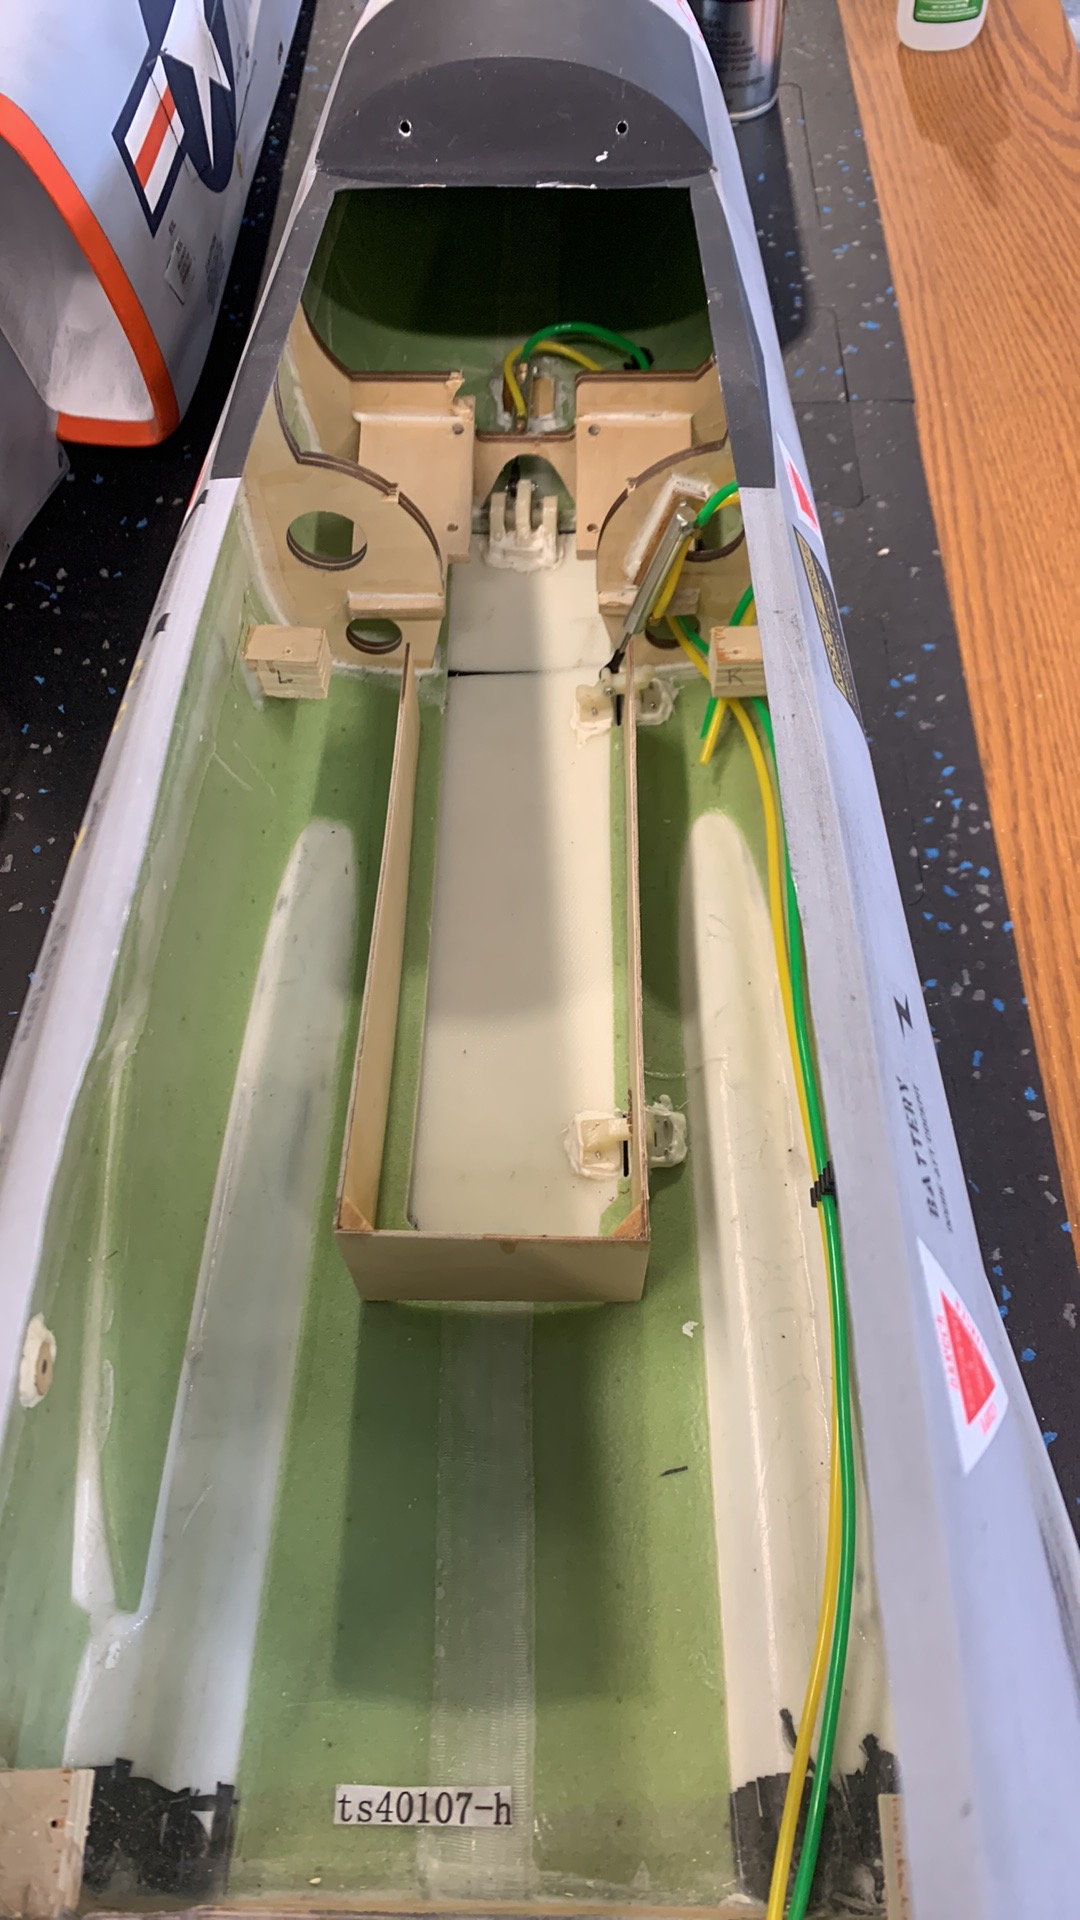
New kit nose door refinforcement.
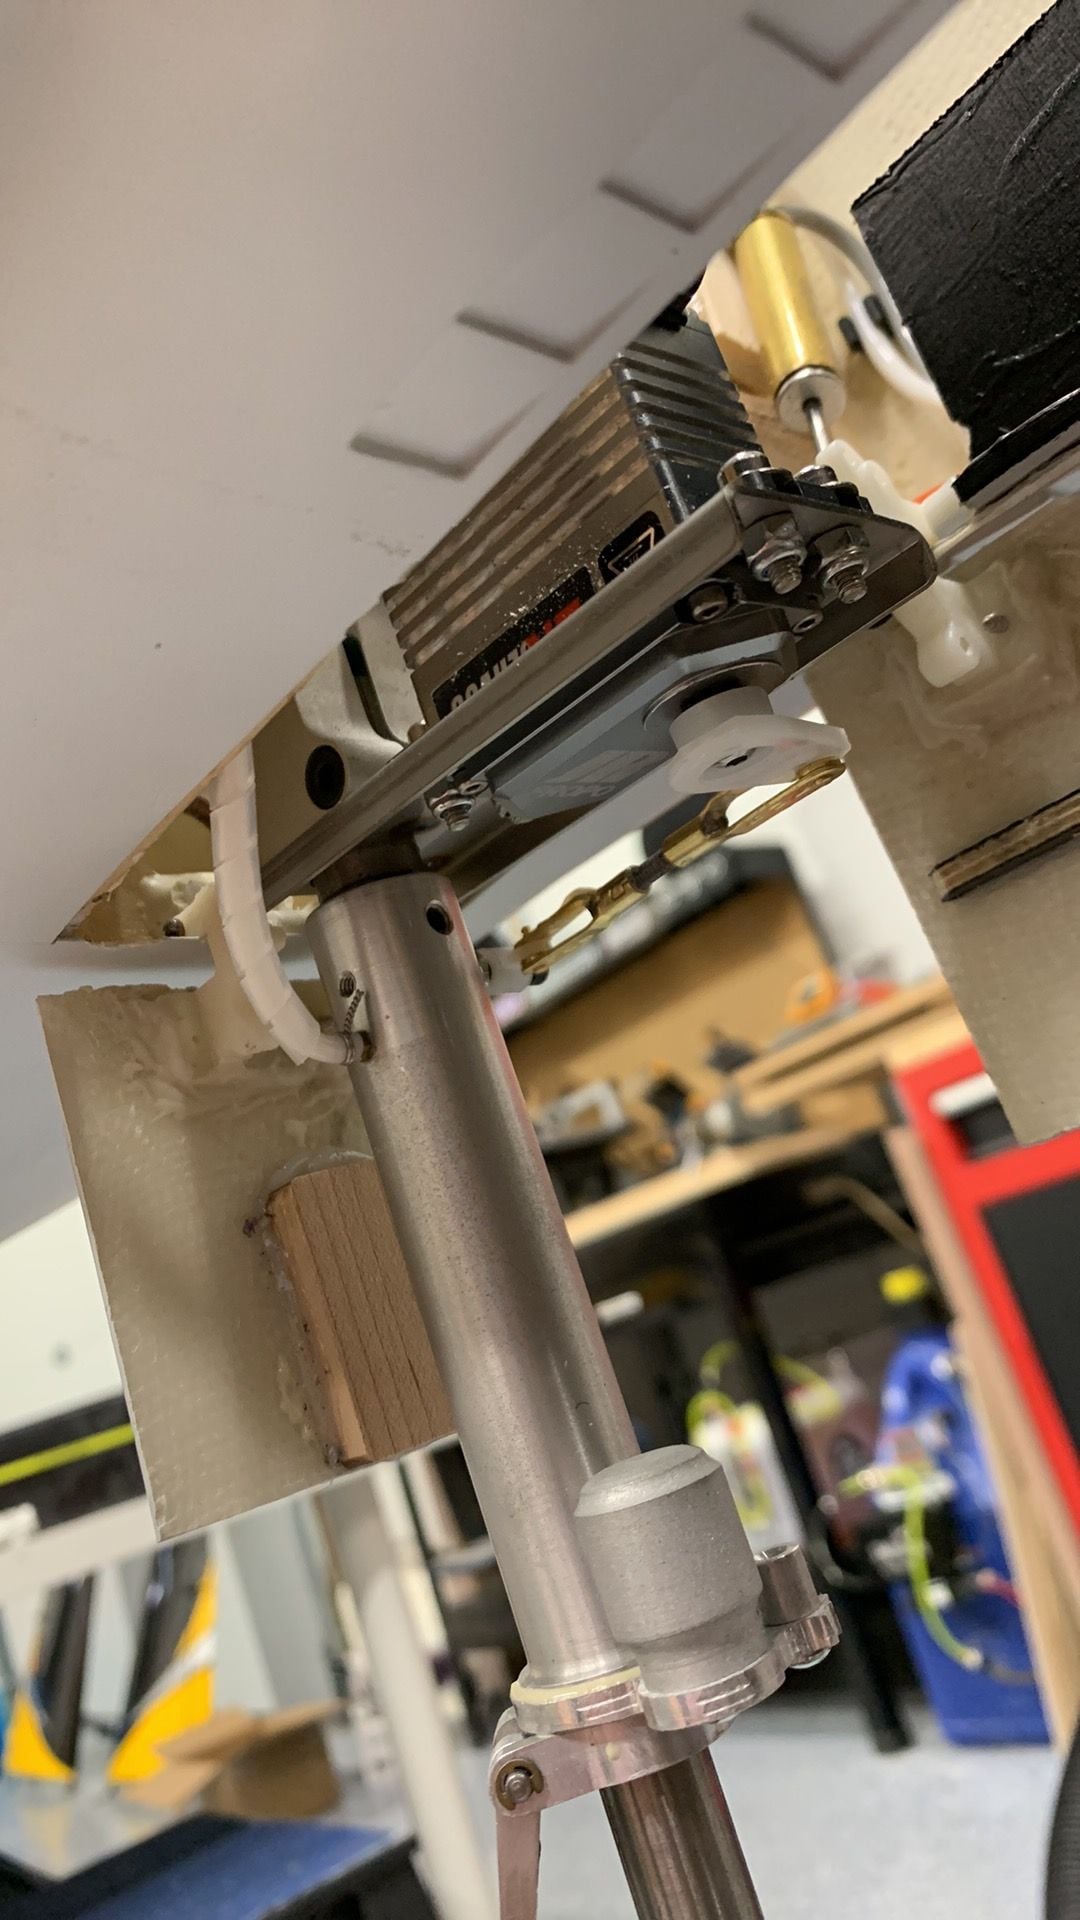
Servos added to both nose systems.
Nose gear walls built from 1/16" ply. Did this for a few reasons. 1. Keep wires, tubes and lines from interfering with the nose function. 2. If any moisture on field it prevents some of it from hitting electronics. 3. Grass fields minimizes grass intake. This is negated slightly with the openings needed for the wheel/tire relief.
Front tray tight to nose walls
Nose door reinforcing added to old kit. Nose door is very flimsy.
New kit nose door refinforcement.
Servos added to both nose systems.
03-02-2023, 08:43 AM
#561
My Feedback: (1)
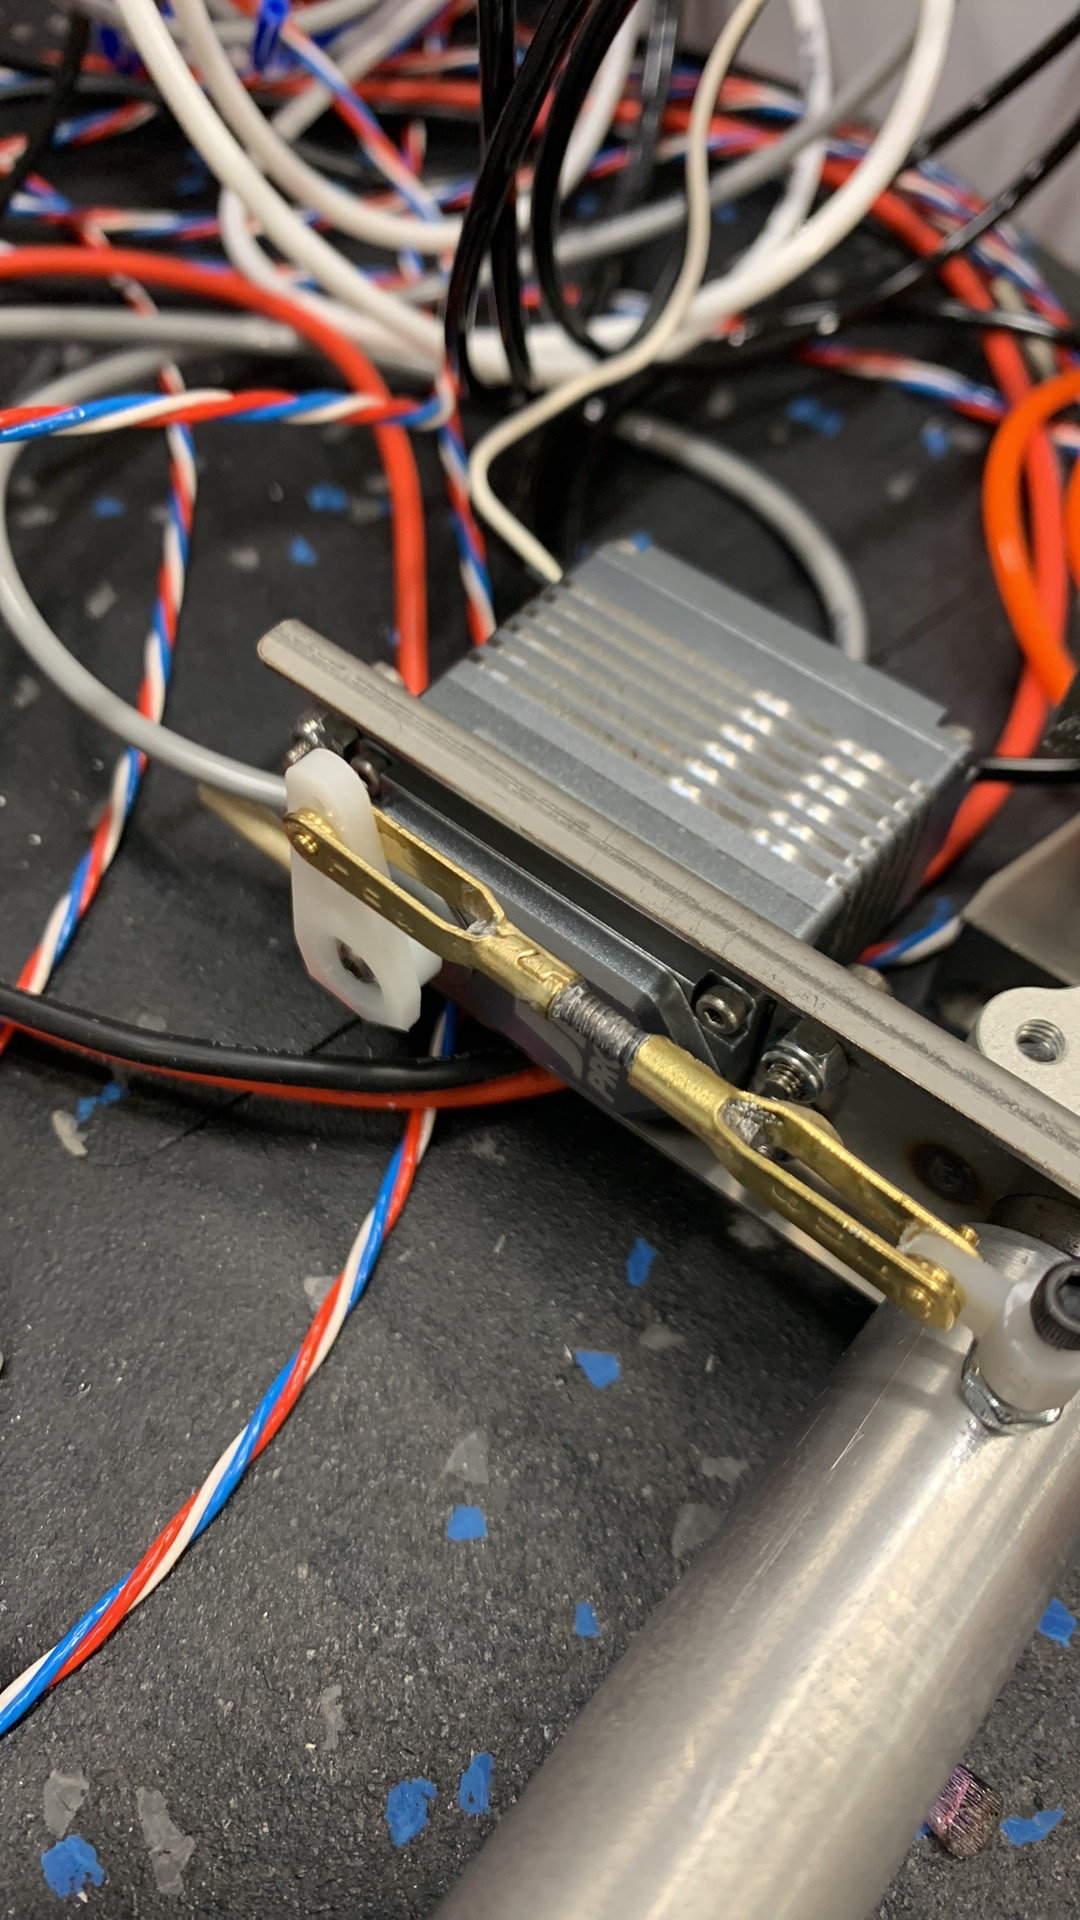
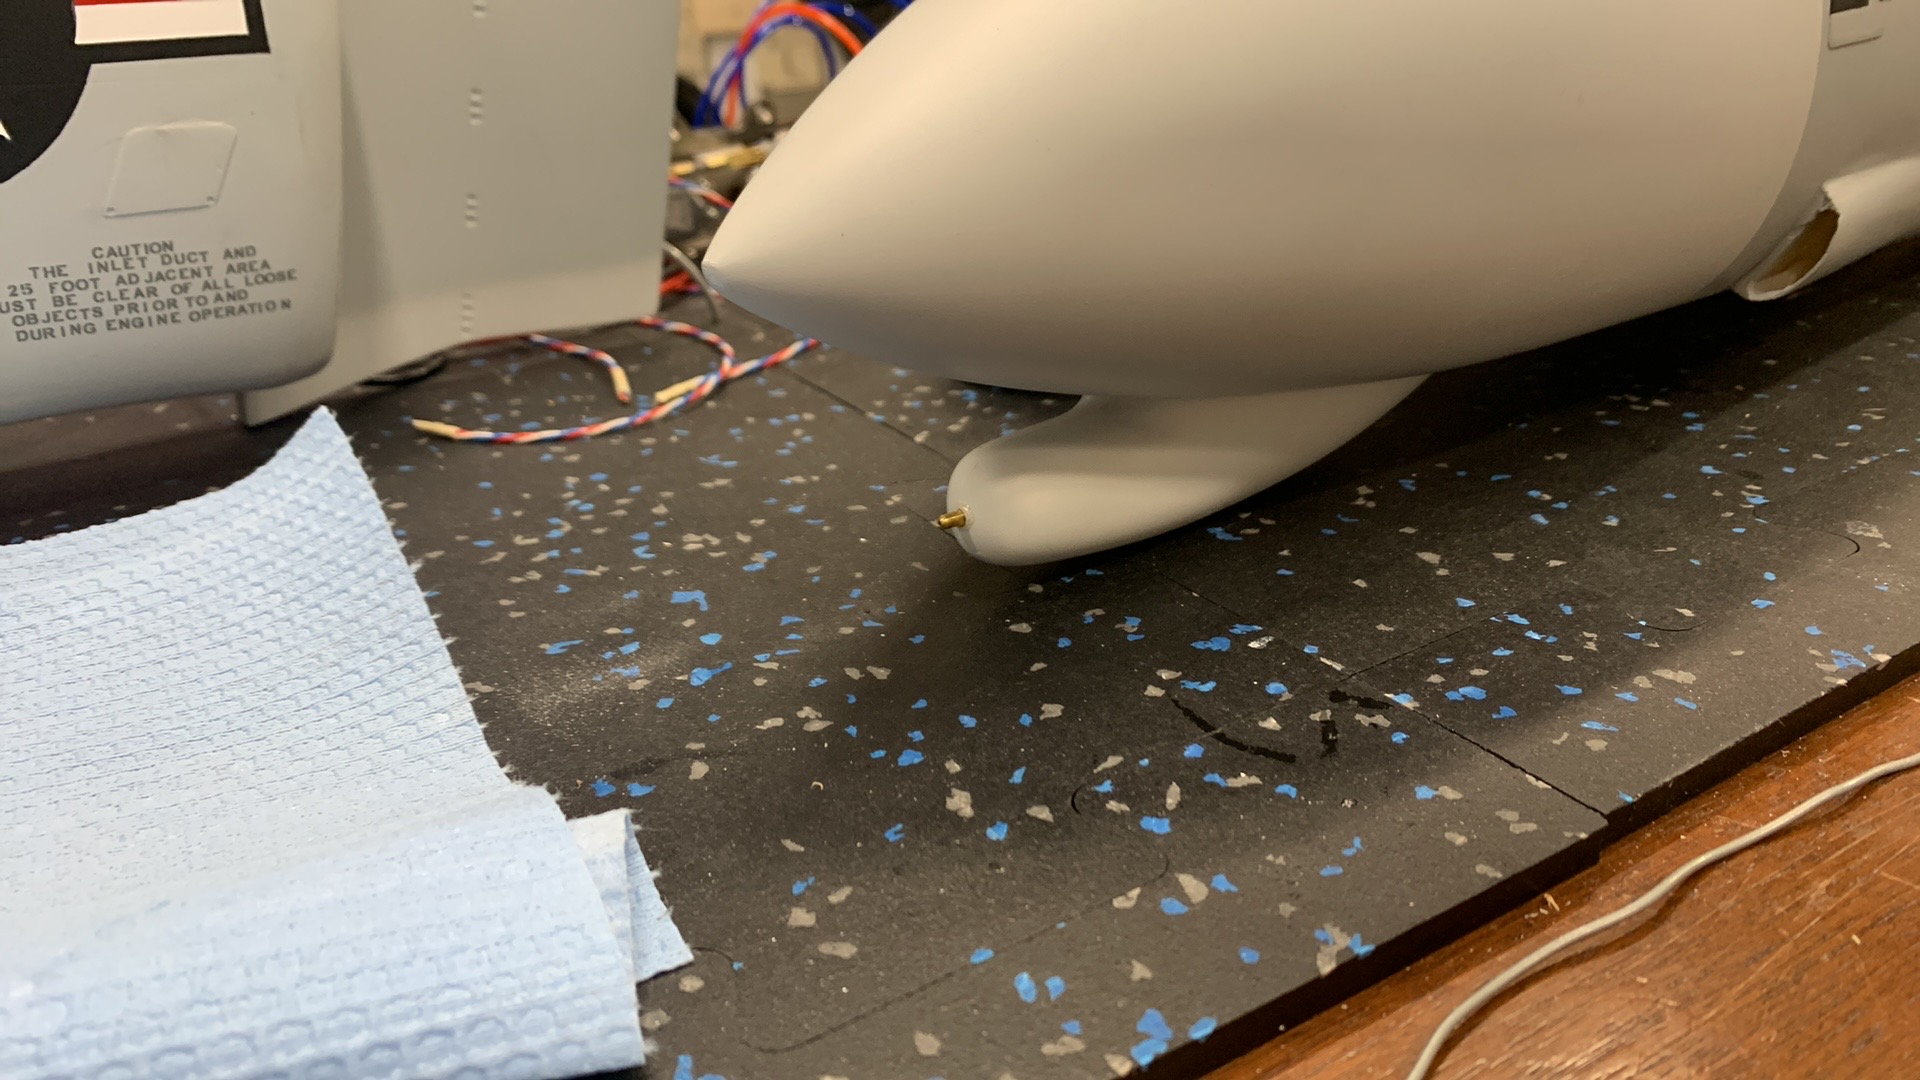
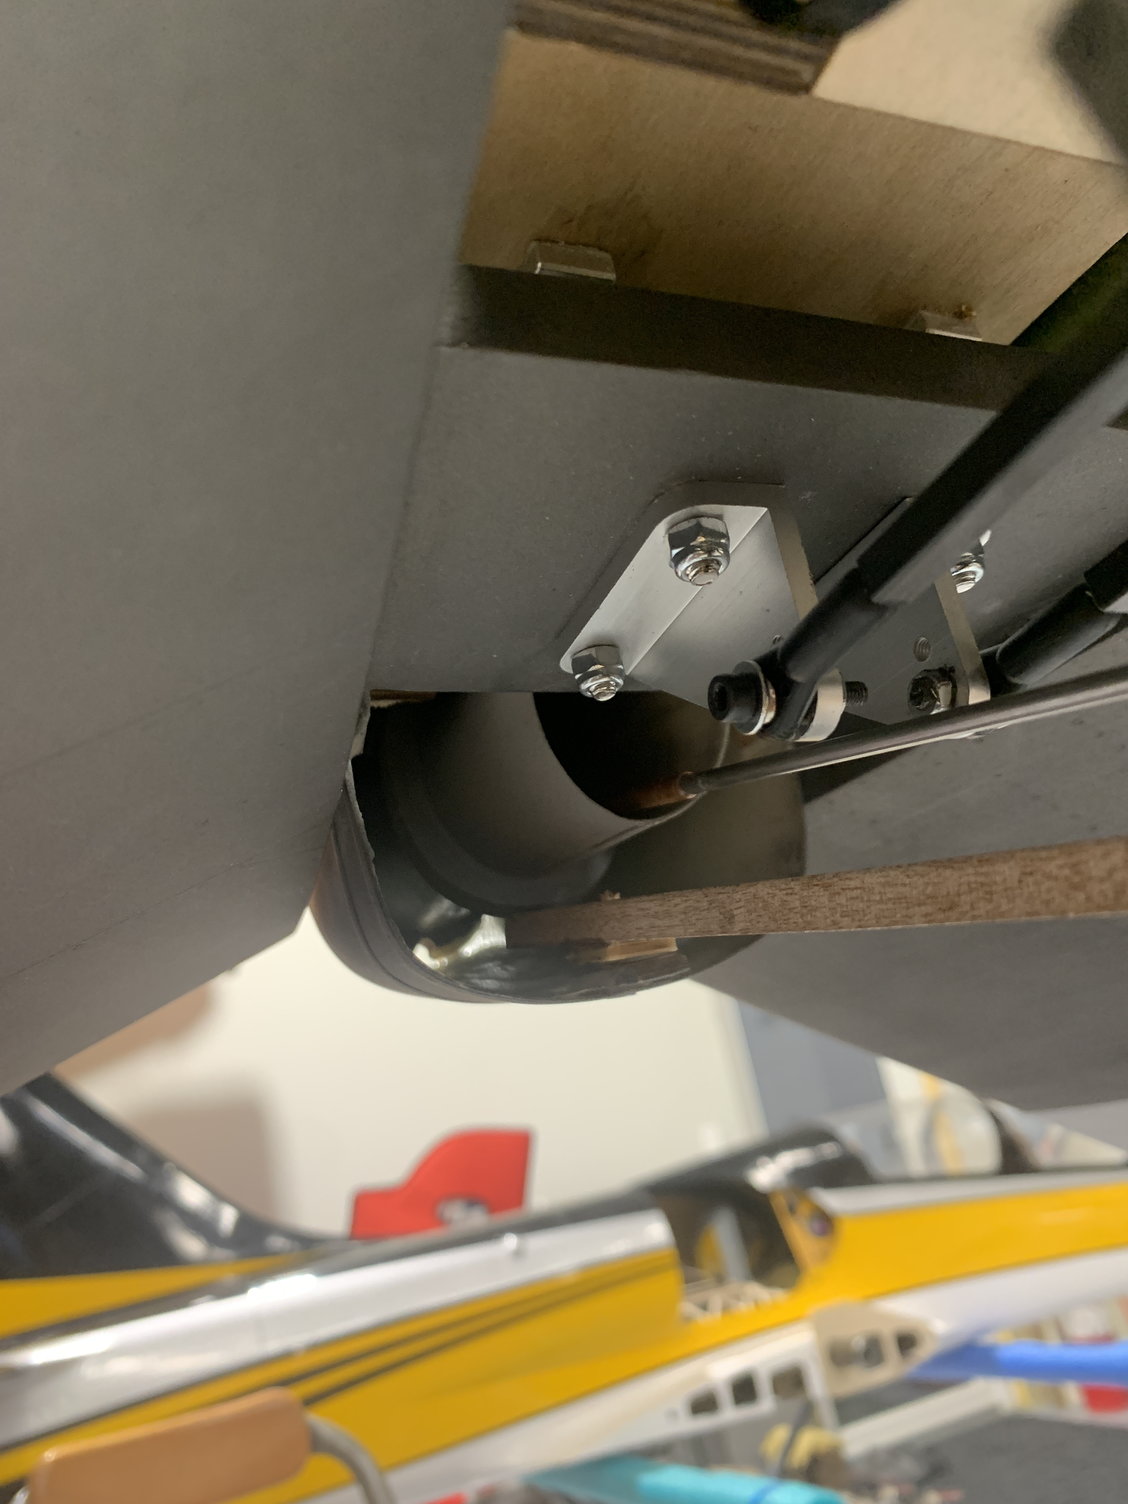
Mspeed pitot tube location same on both aircraft.
Both horizontal stabs out of alignment. Old kit left side high. New kit right side high.

Added G10 Shims under mounting hardware and perfect.
The following users liked this post:
Sparhawk (03-07-2023)
03-02-2023, 08:46 AM
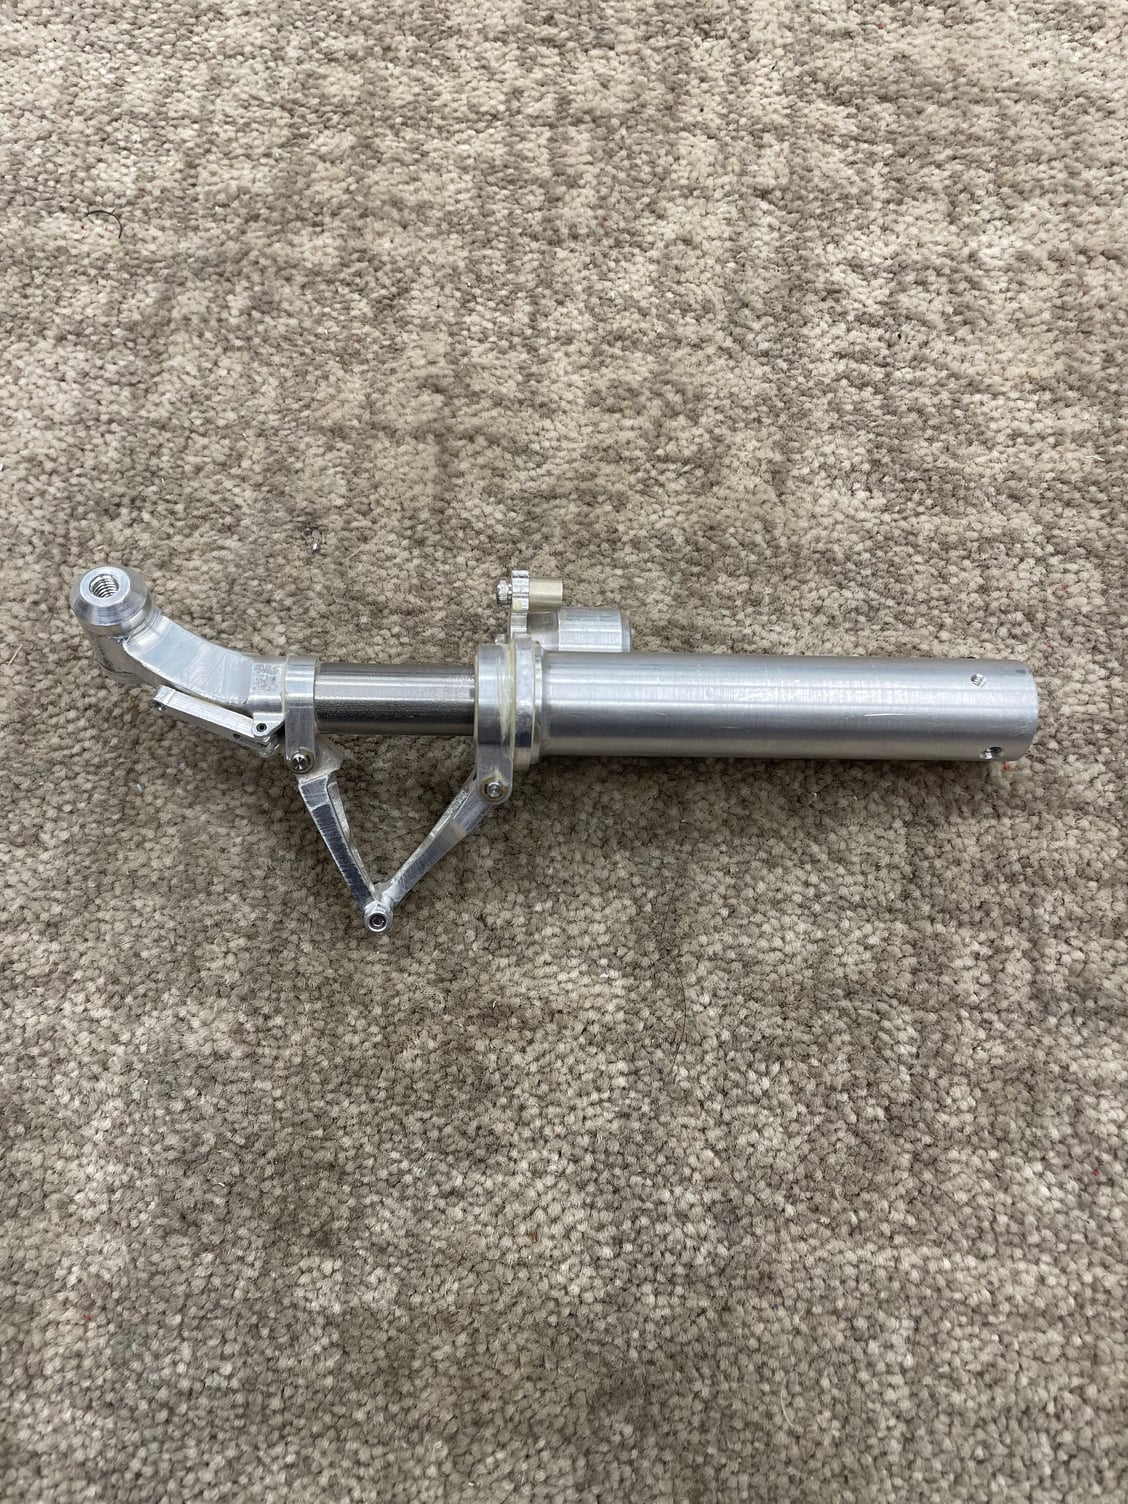
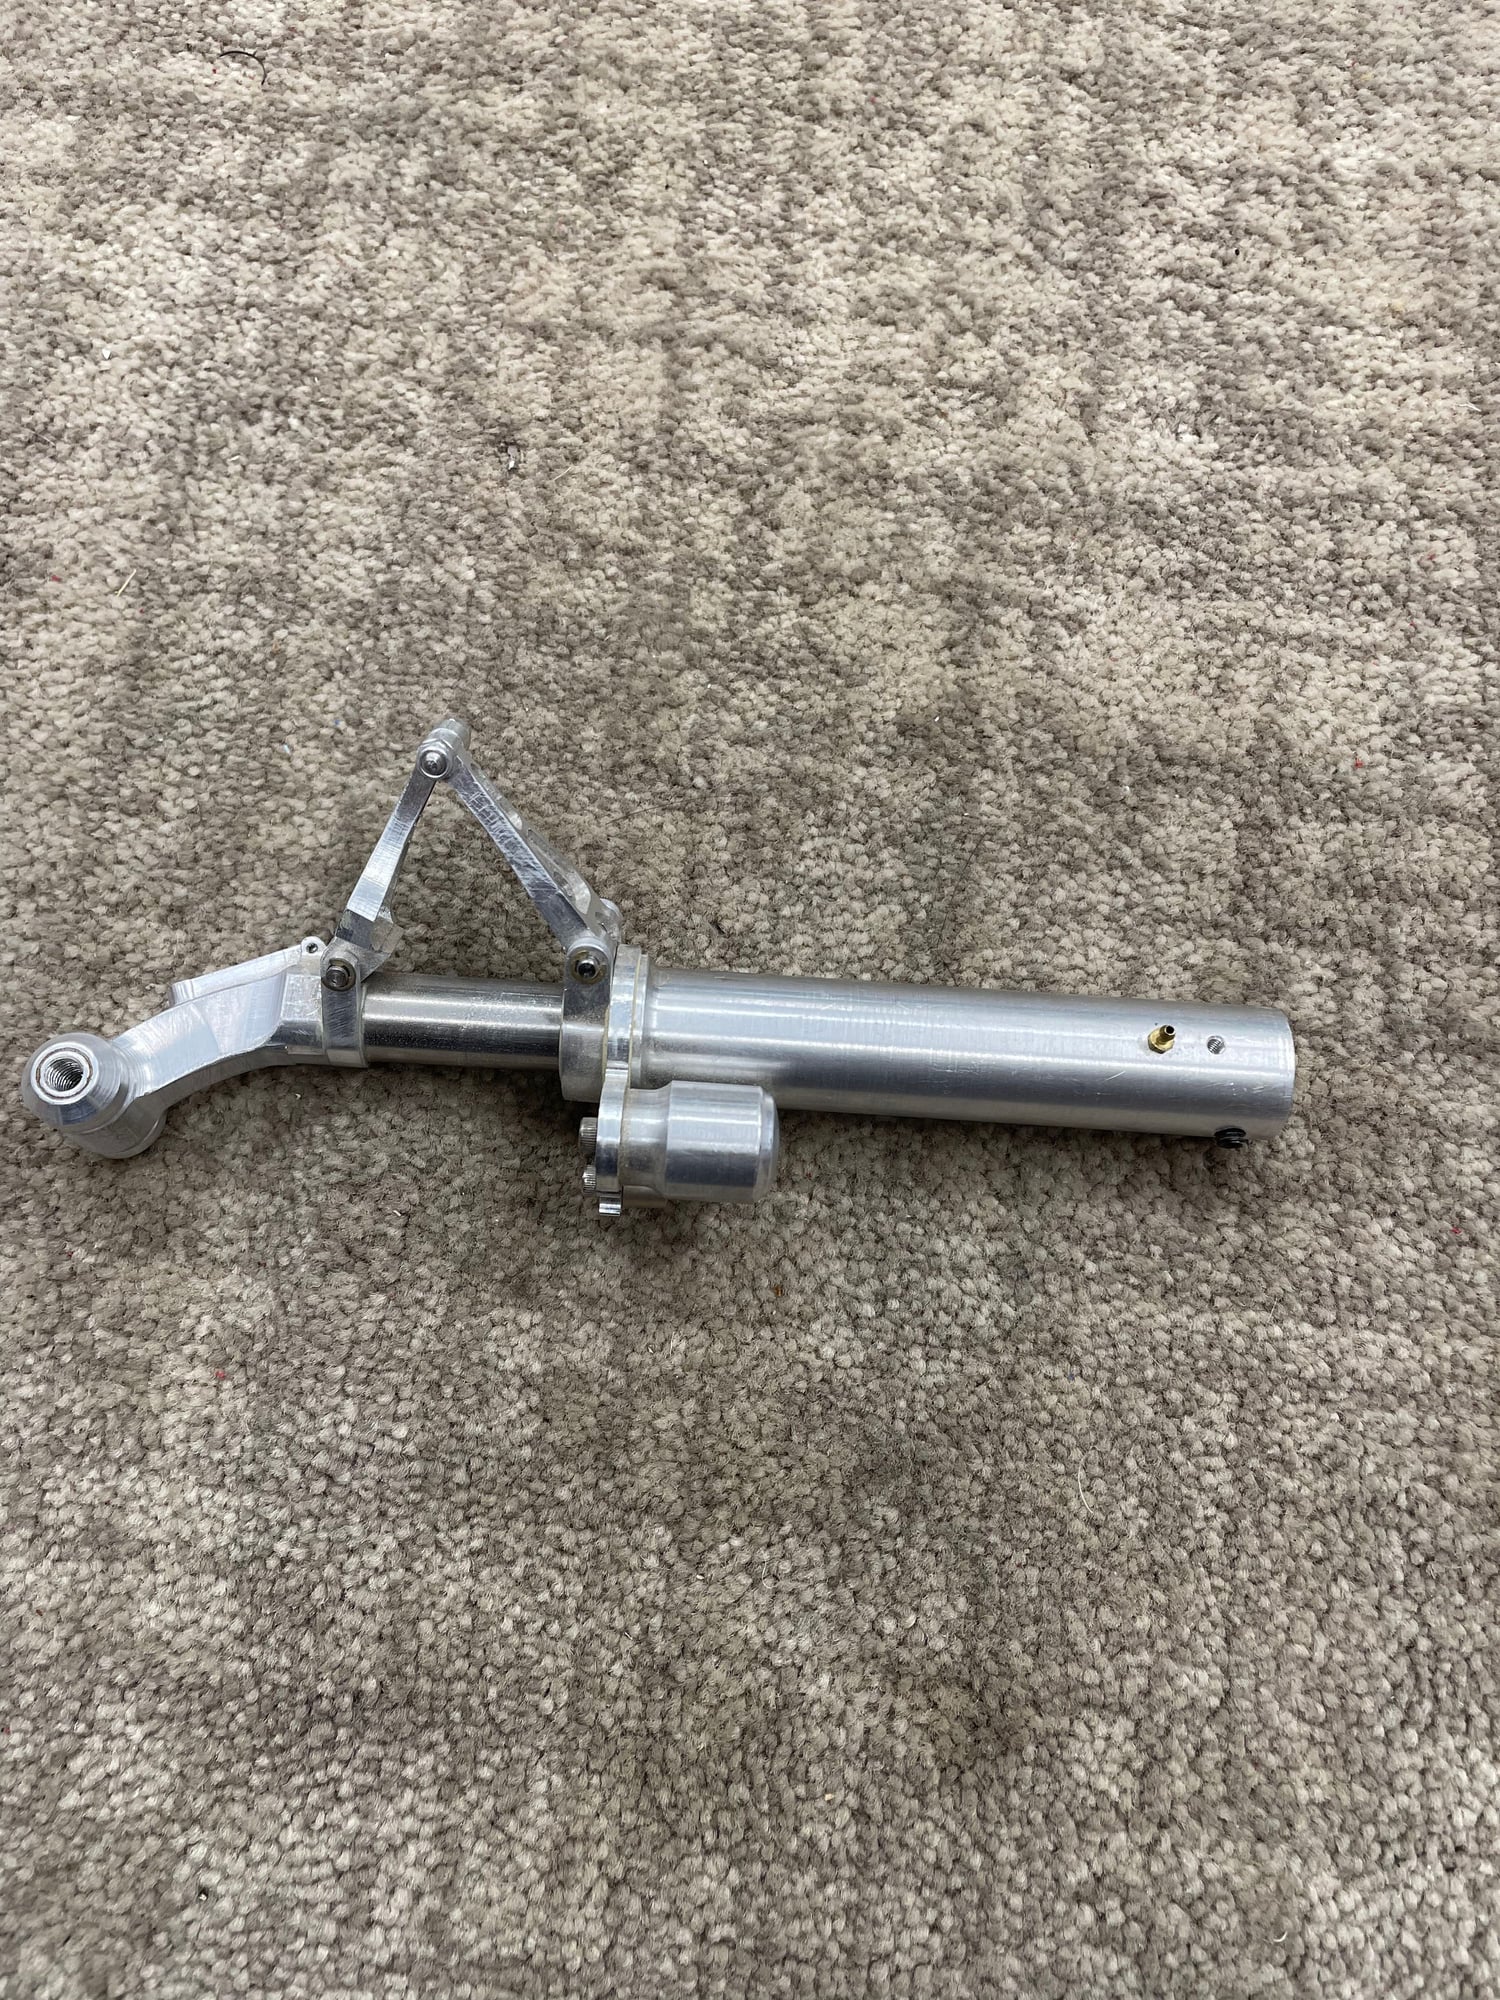
#562
My Feedback: (1)
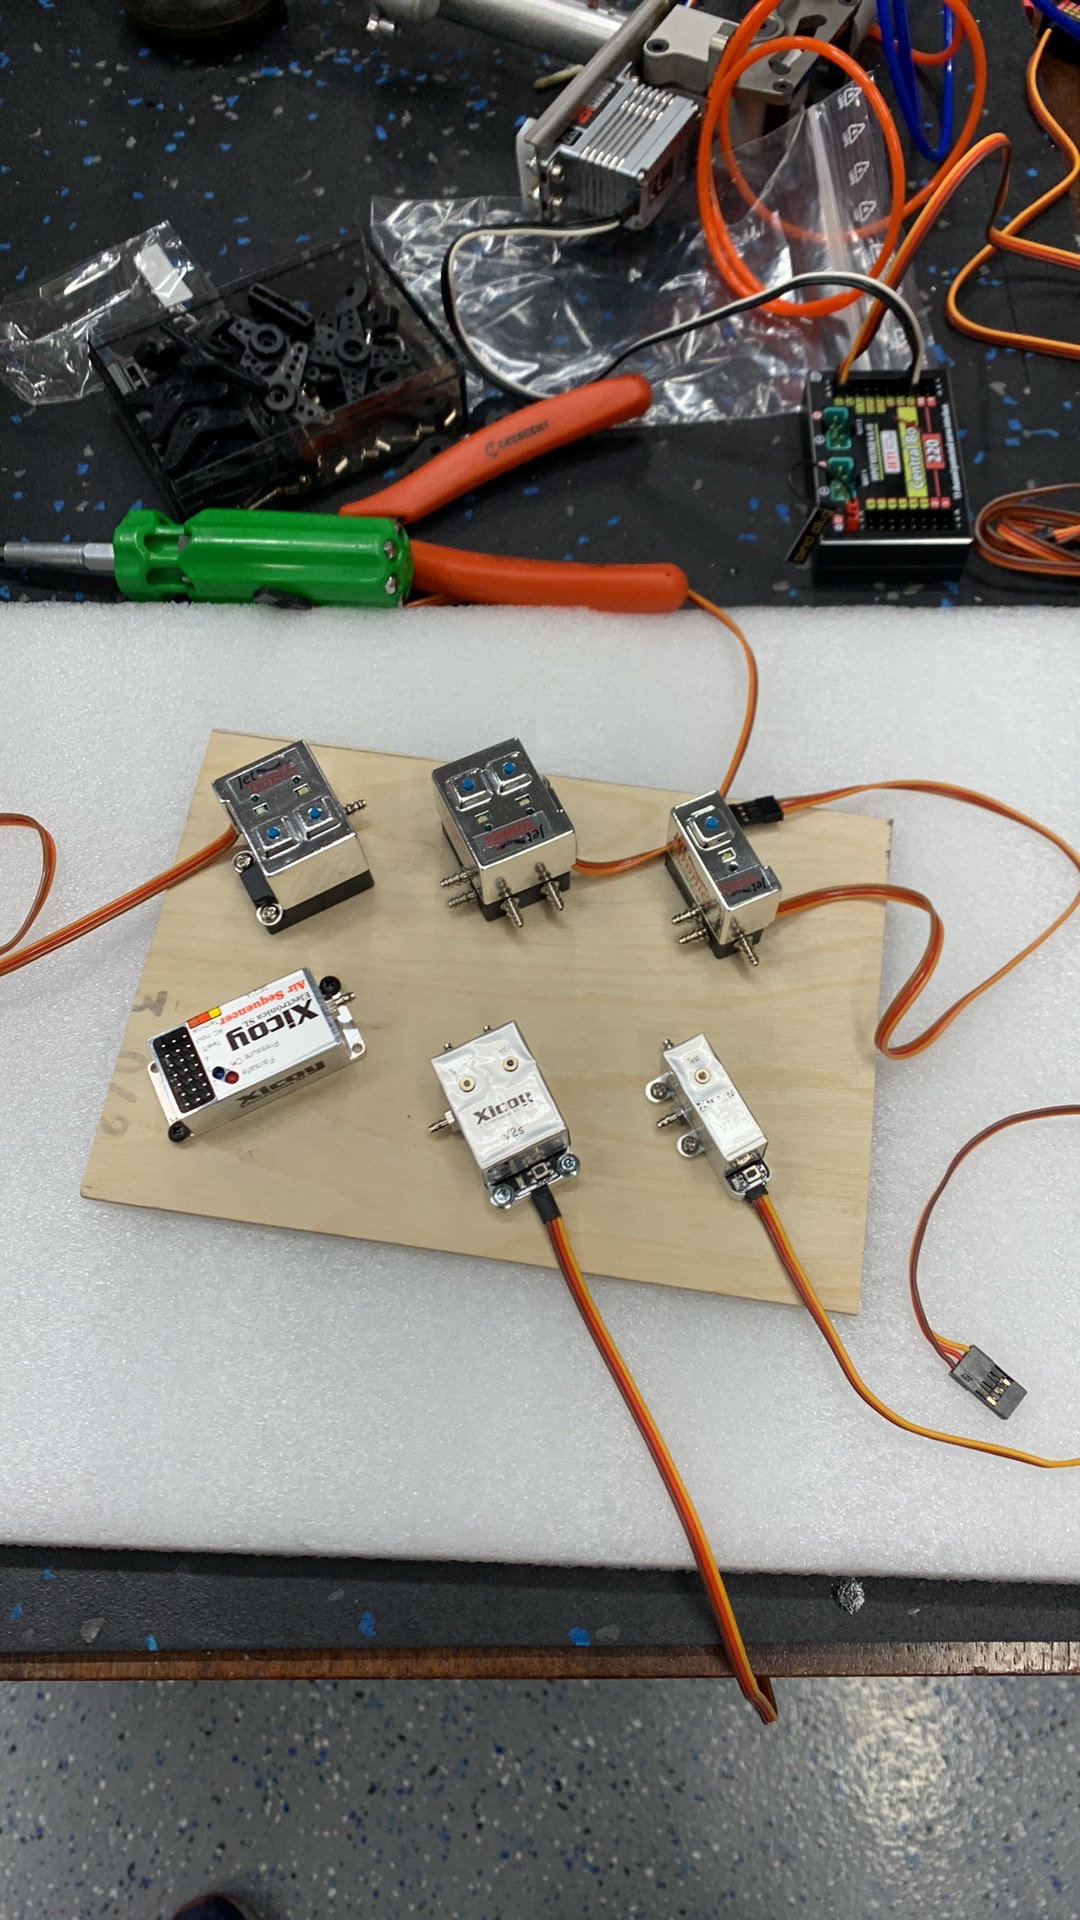
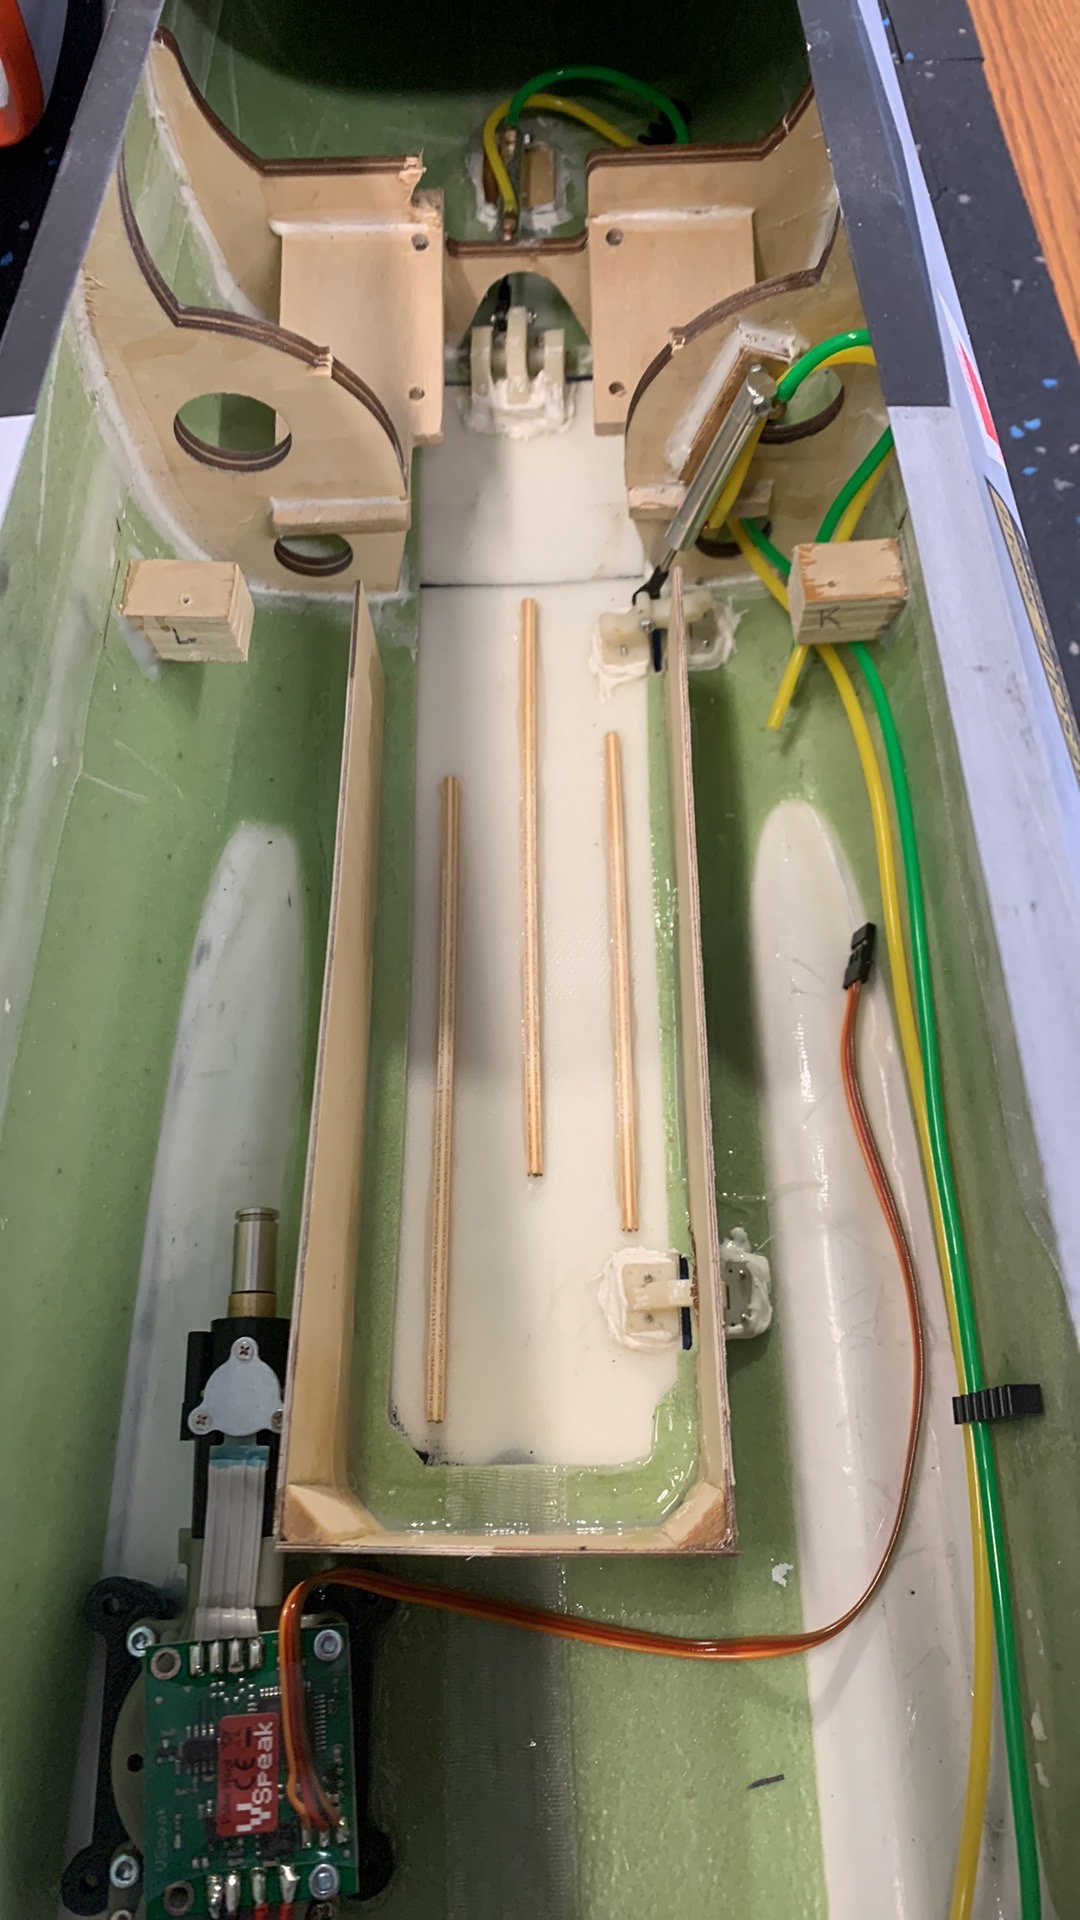
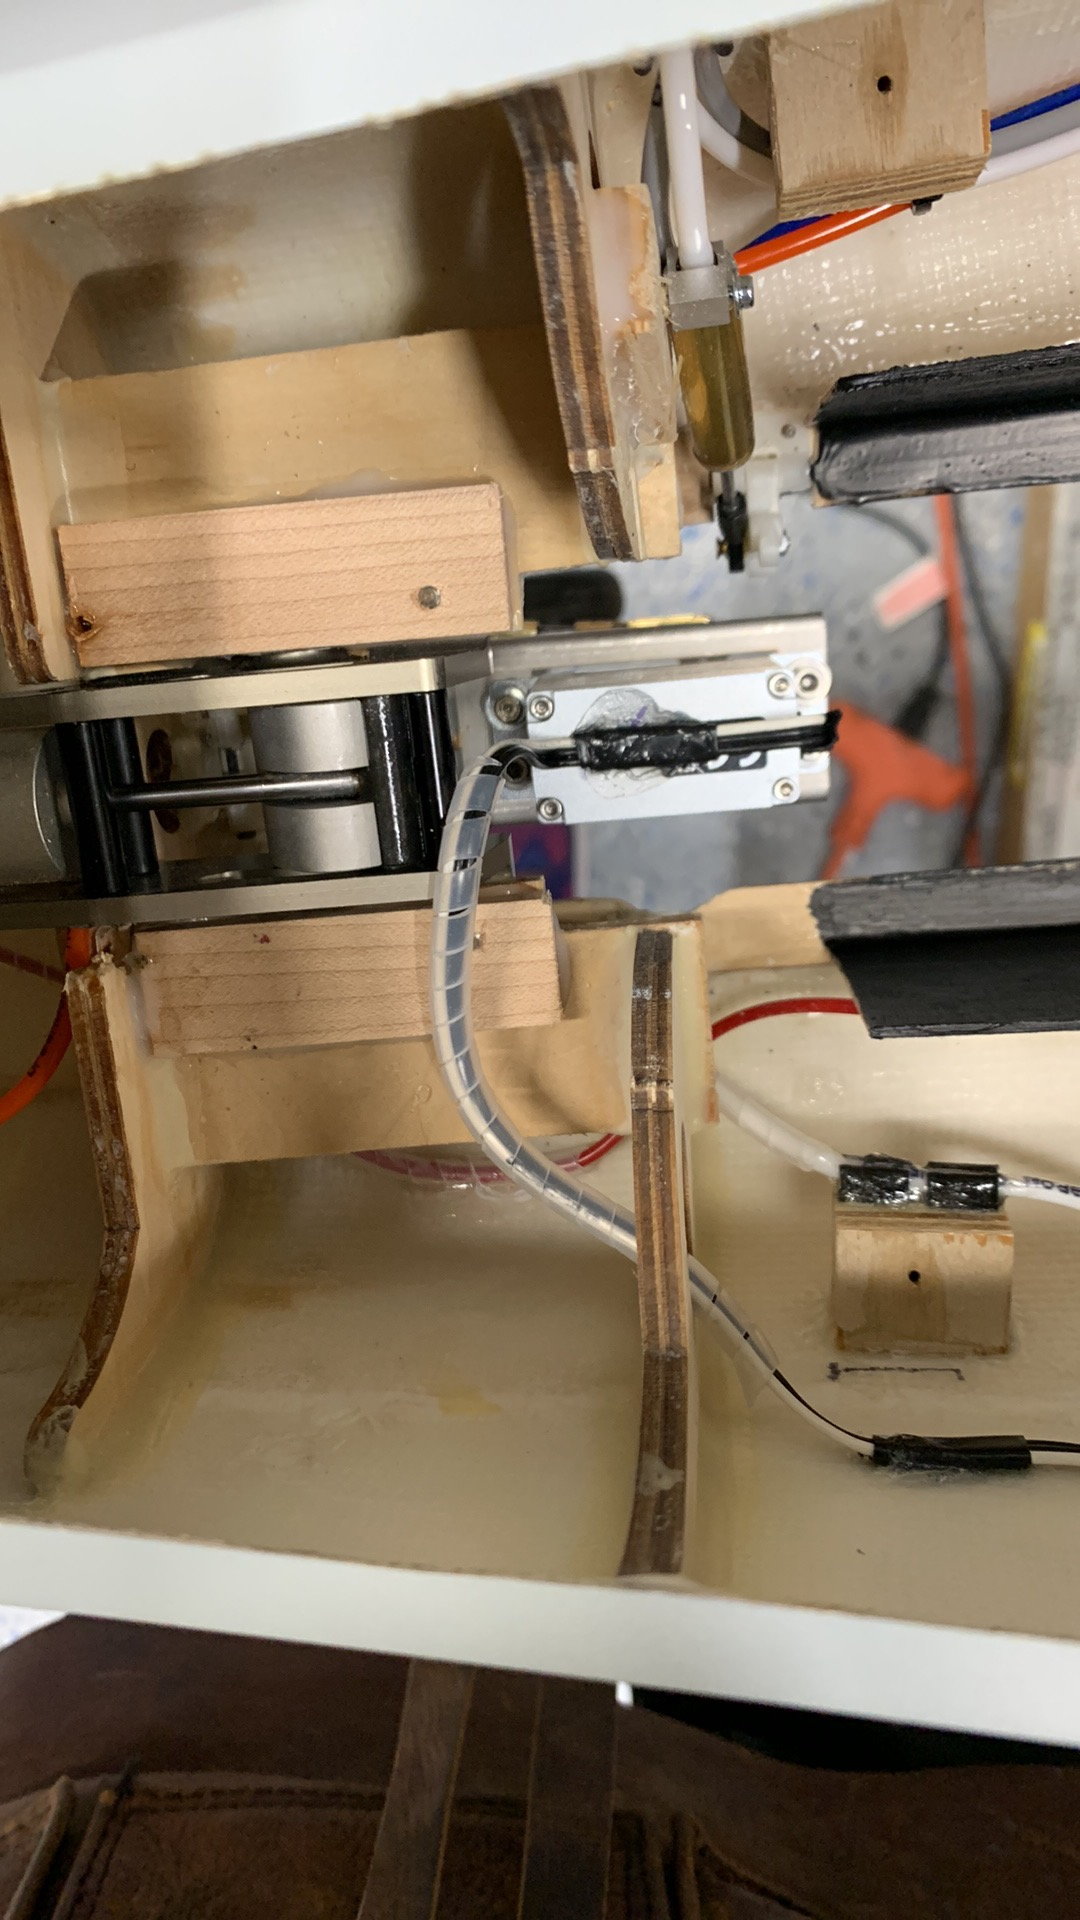
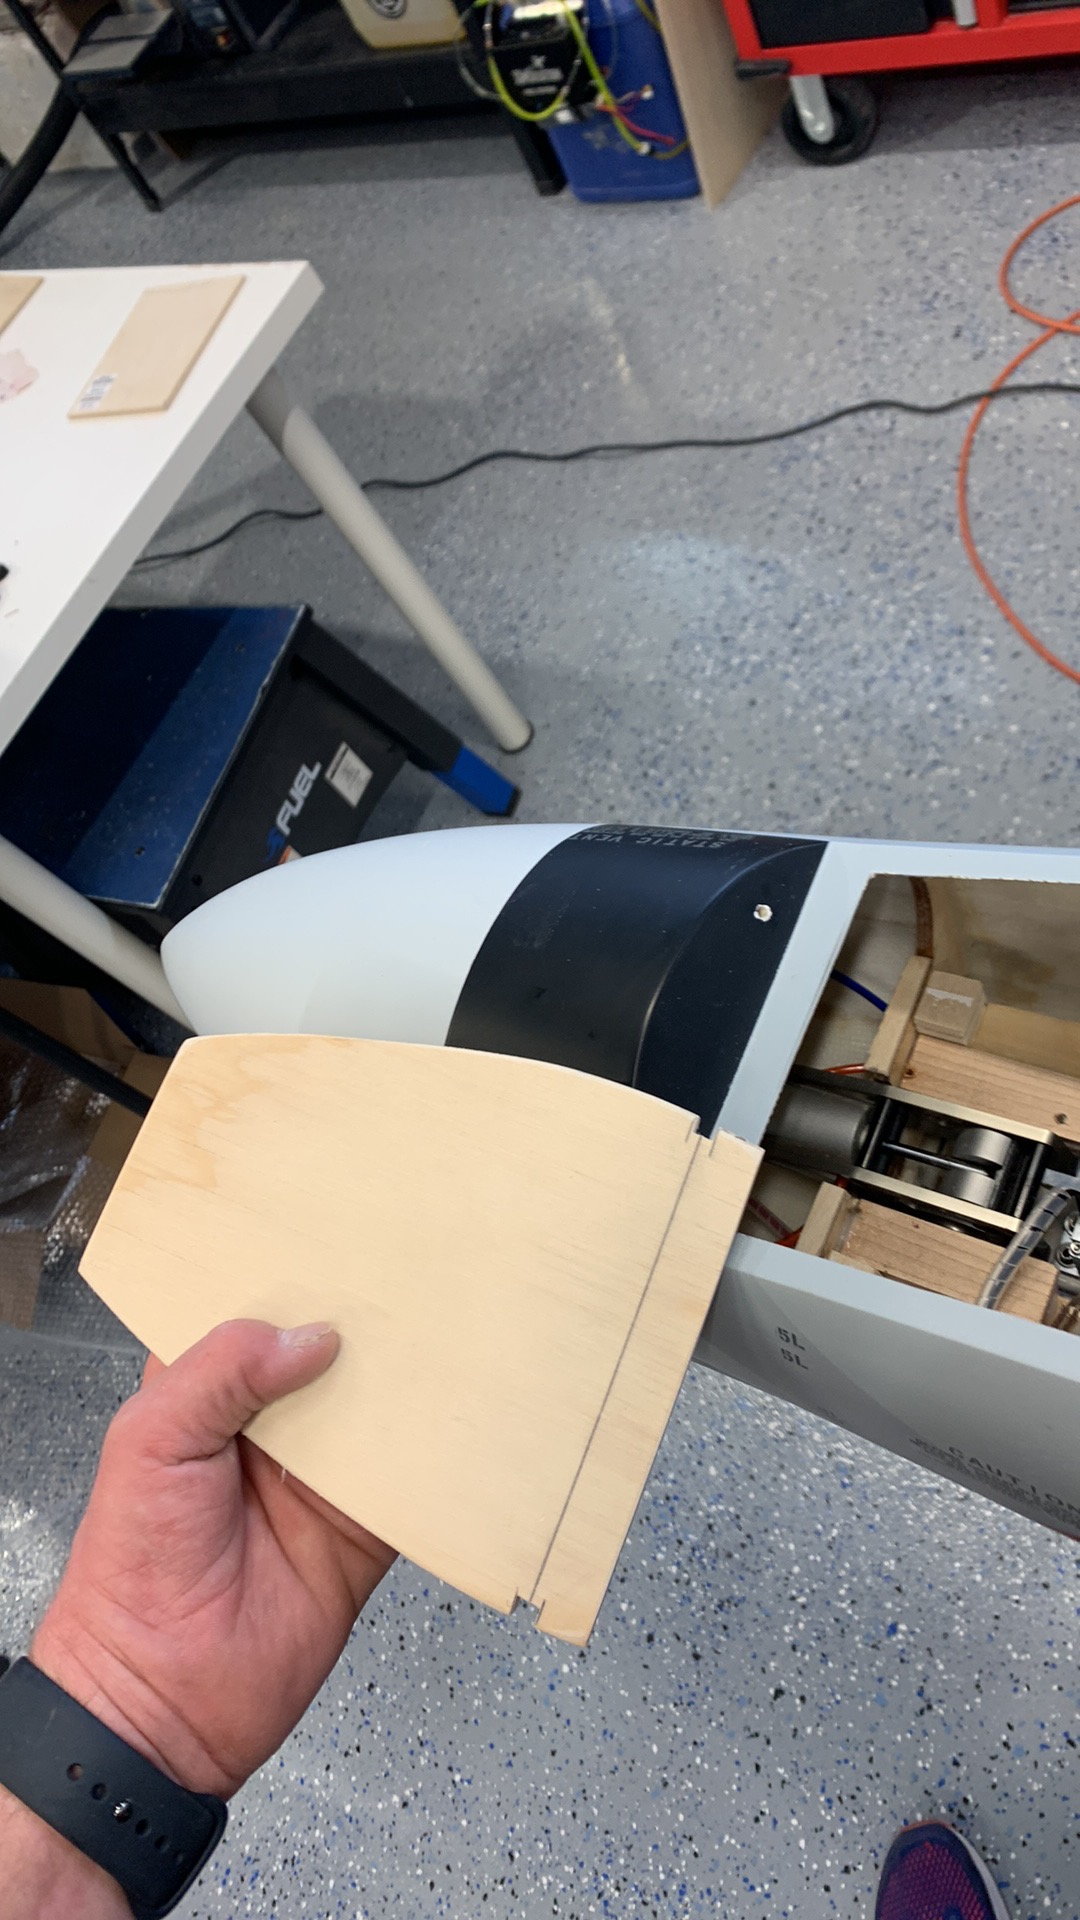
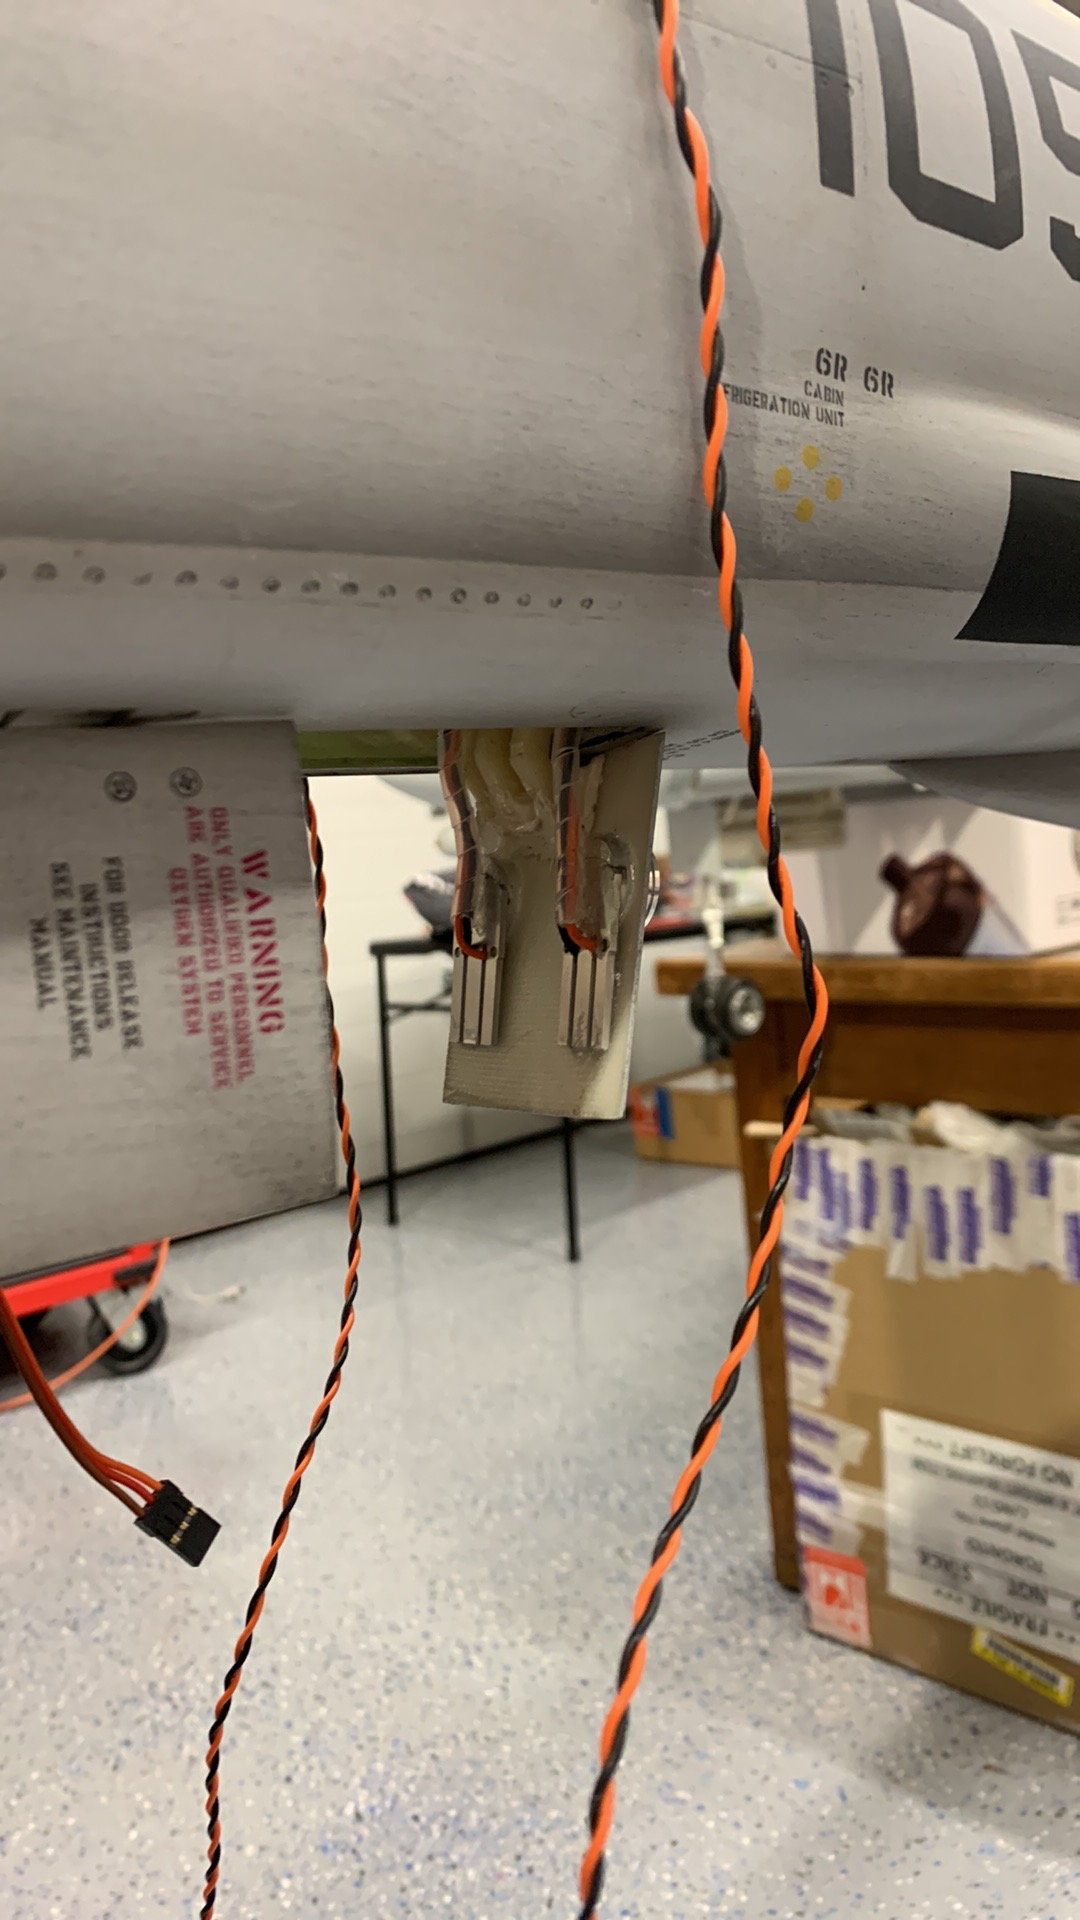
Front Air board on old F4.
Tubing complete
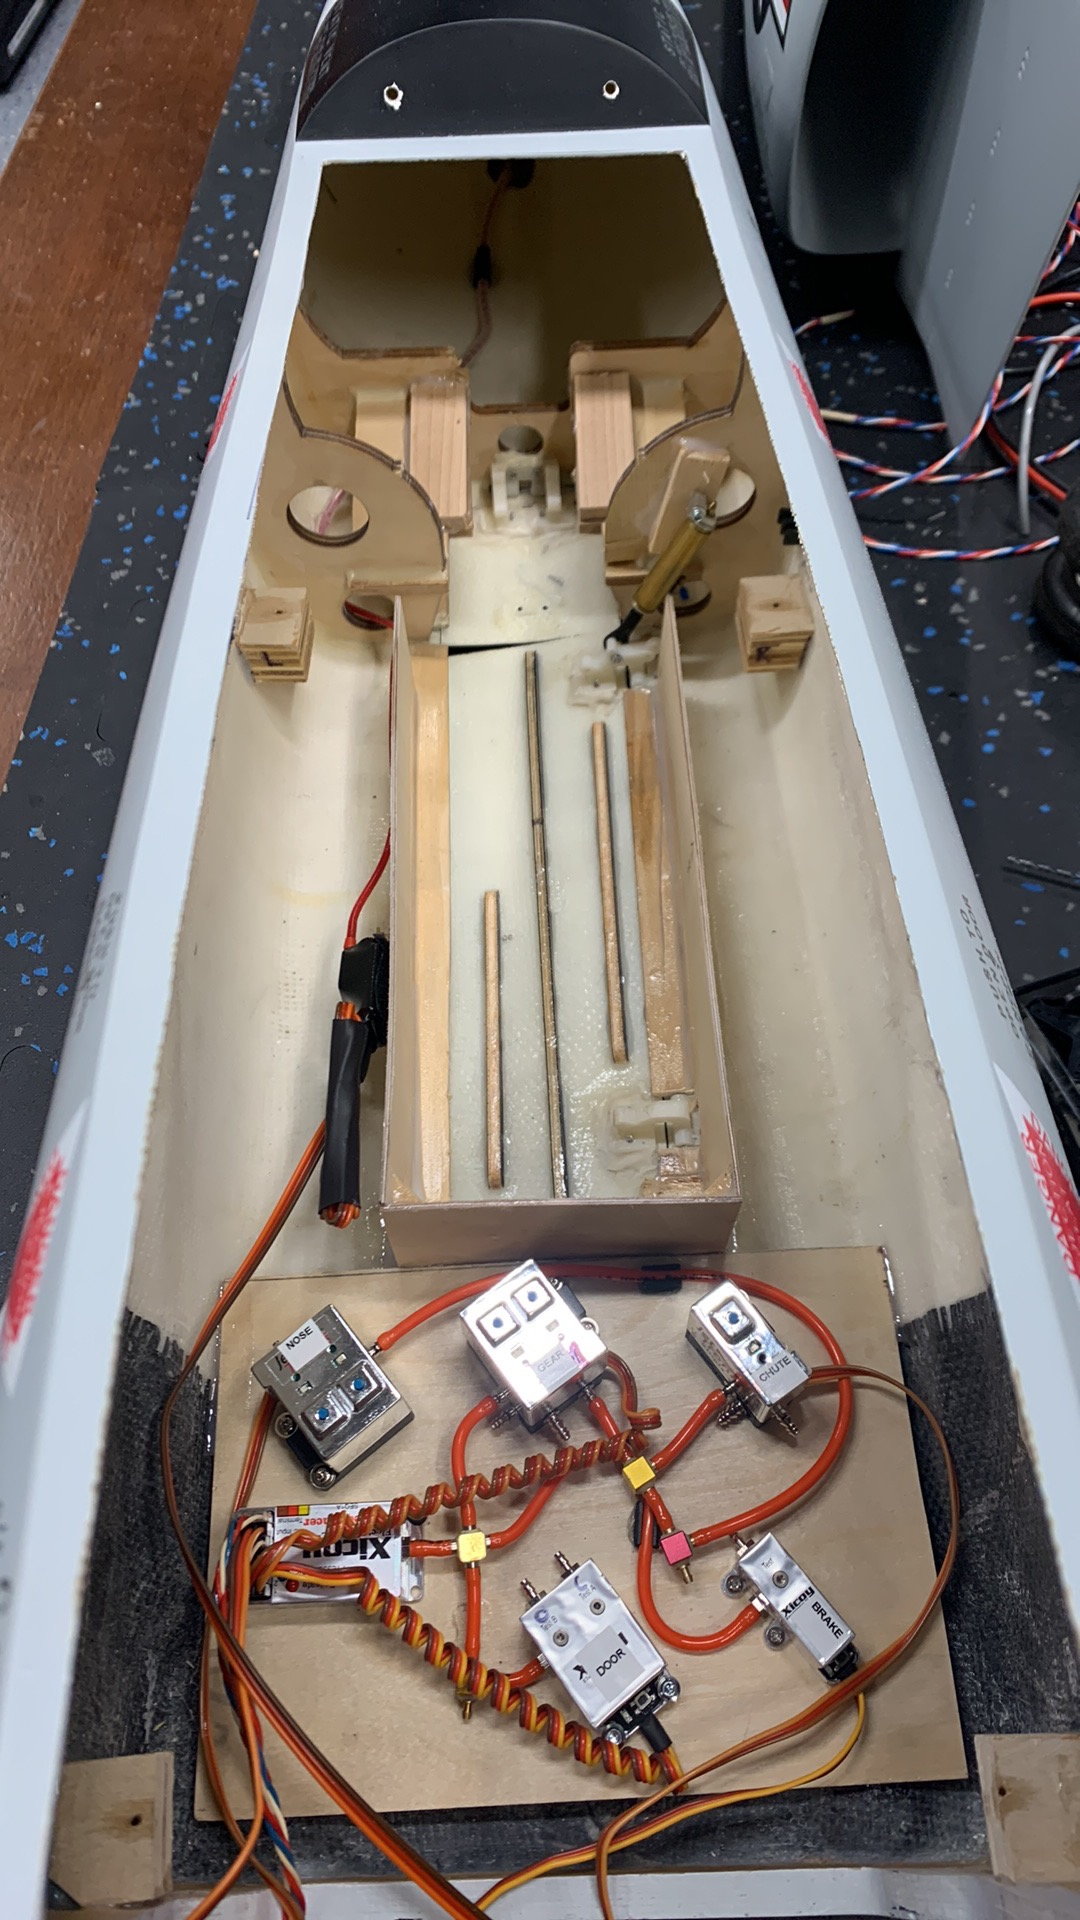
Installed.
New kit air board. Went with this shape as compressor is to the left side.
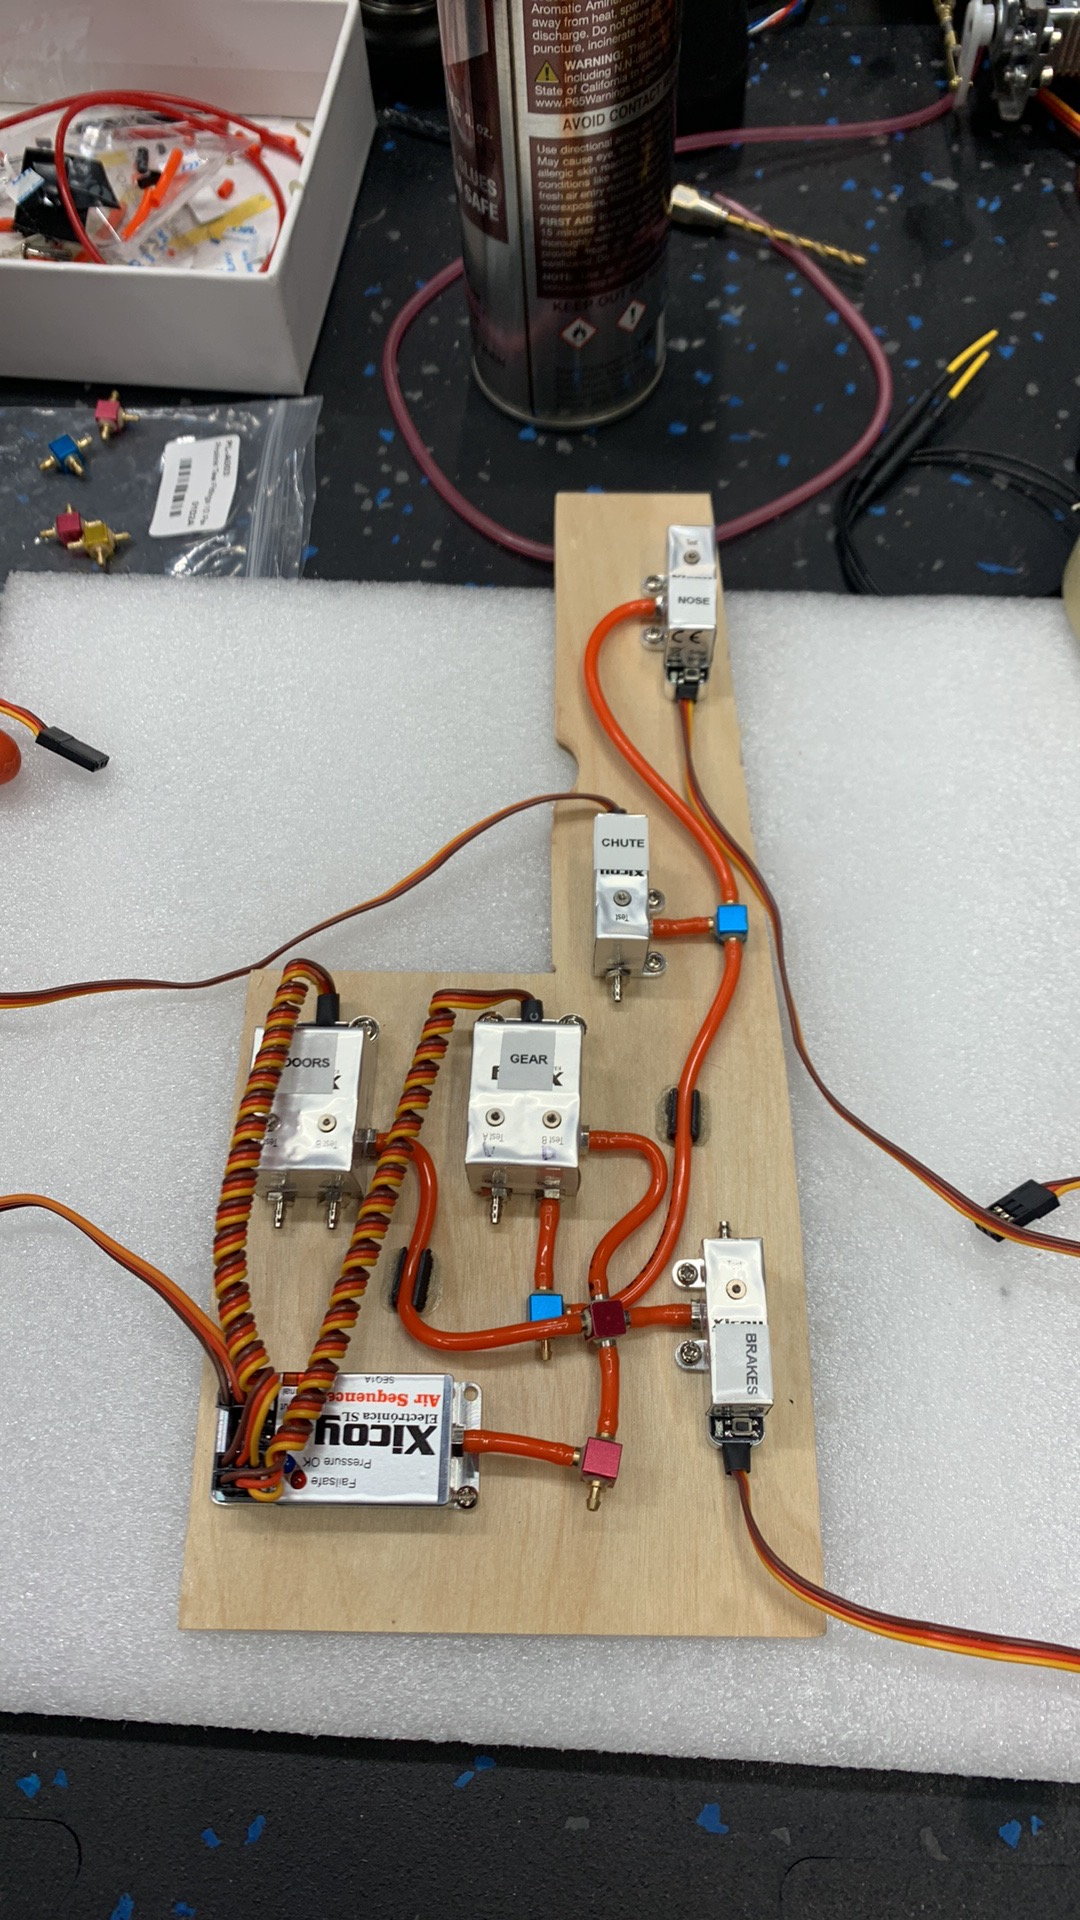
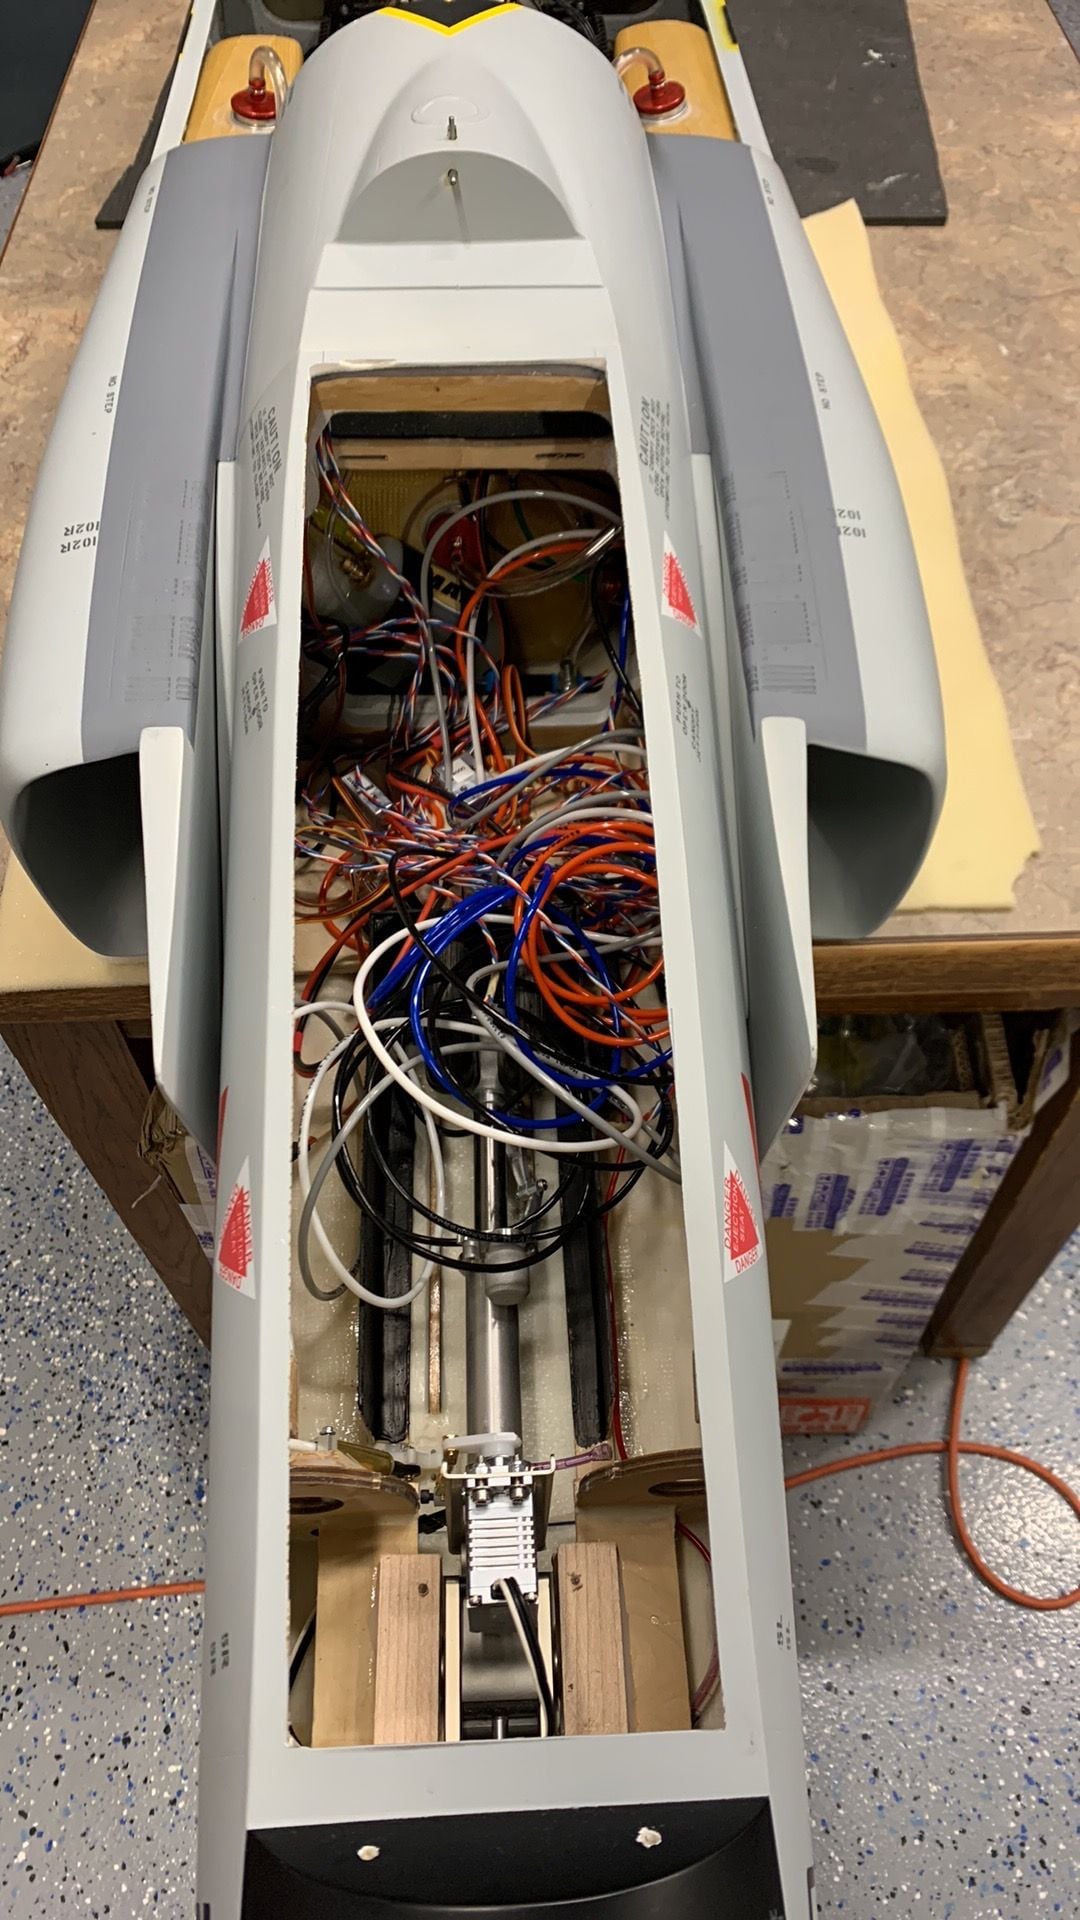
The Mess!
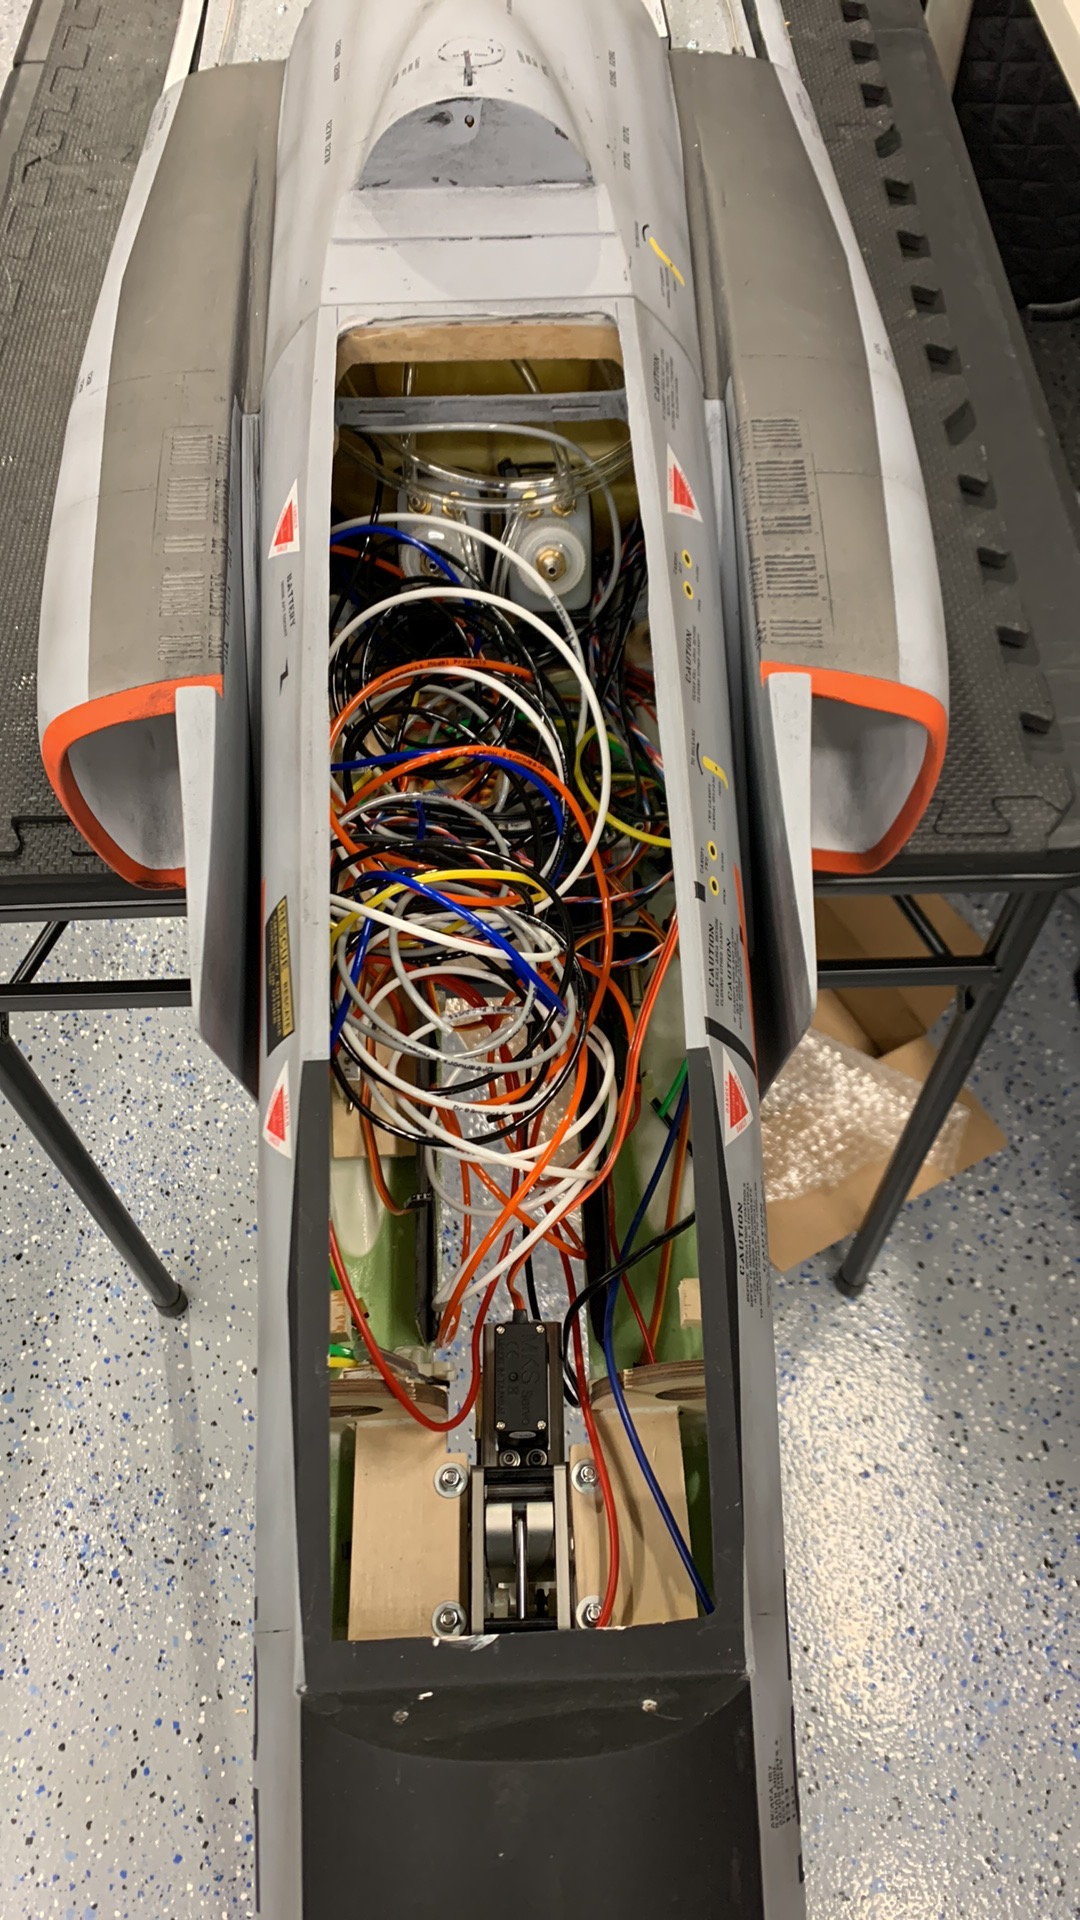
The Mess #2
Airline run to nose leg. spiral wrap installed around airline.
03-02-2023, 09:22 AM
#563
My Feedback: (1)
Servo line wrapped up with sprial wrap
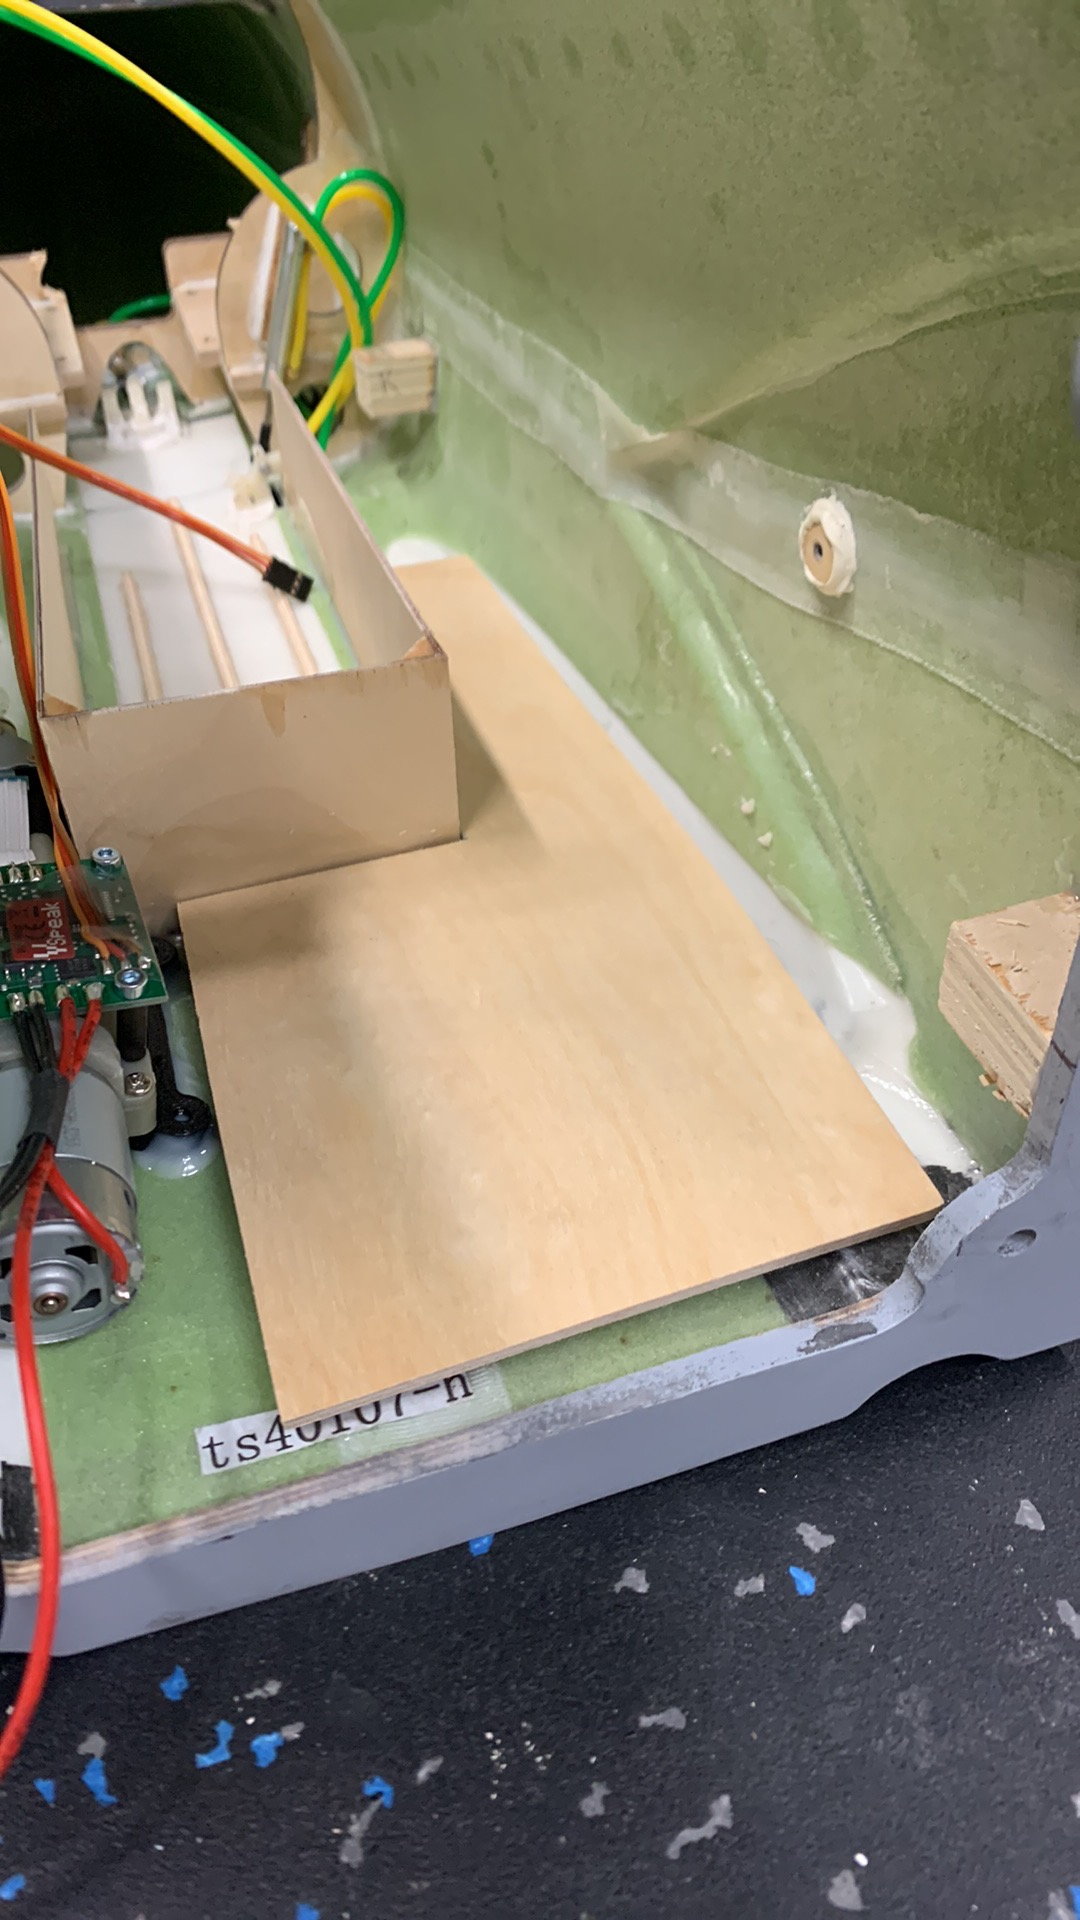
Nose Battery tray mockups
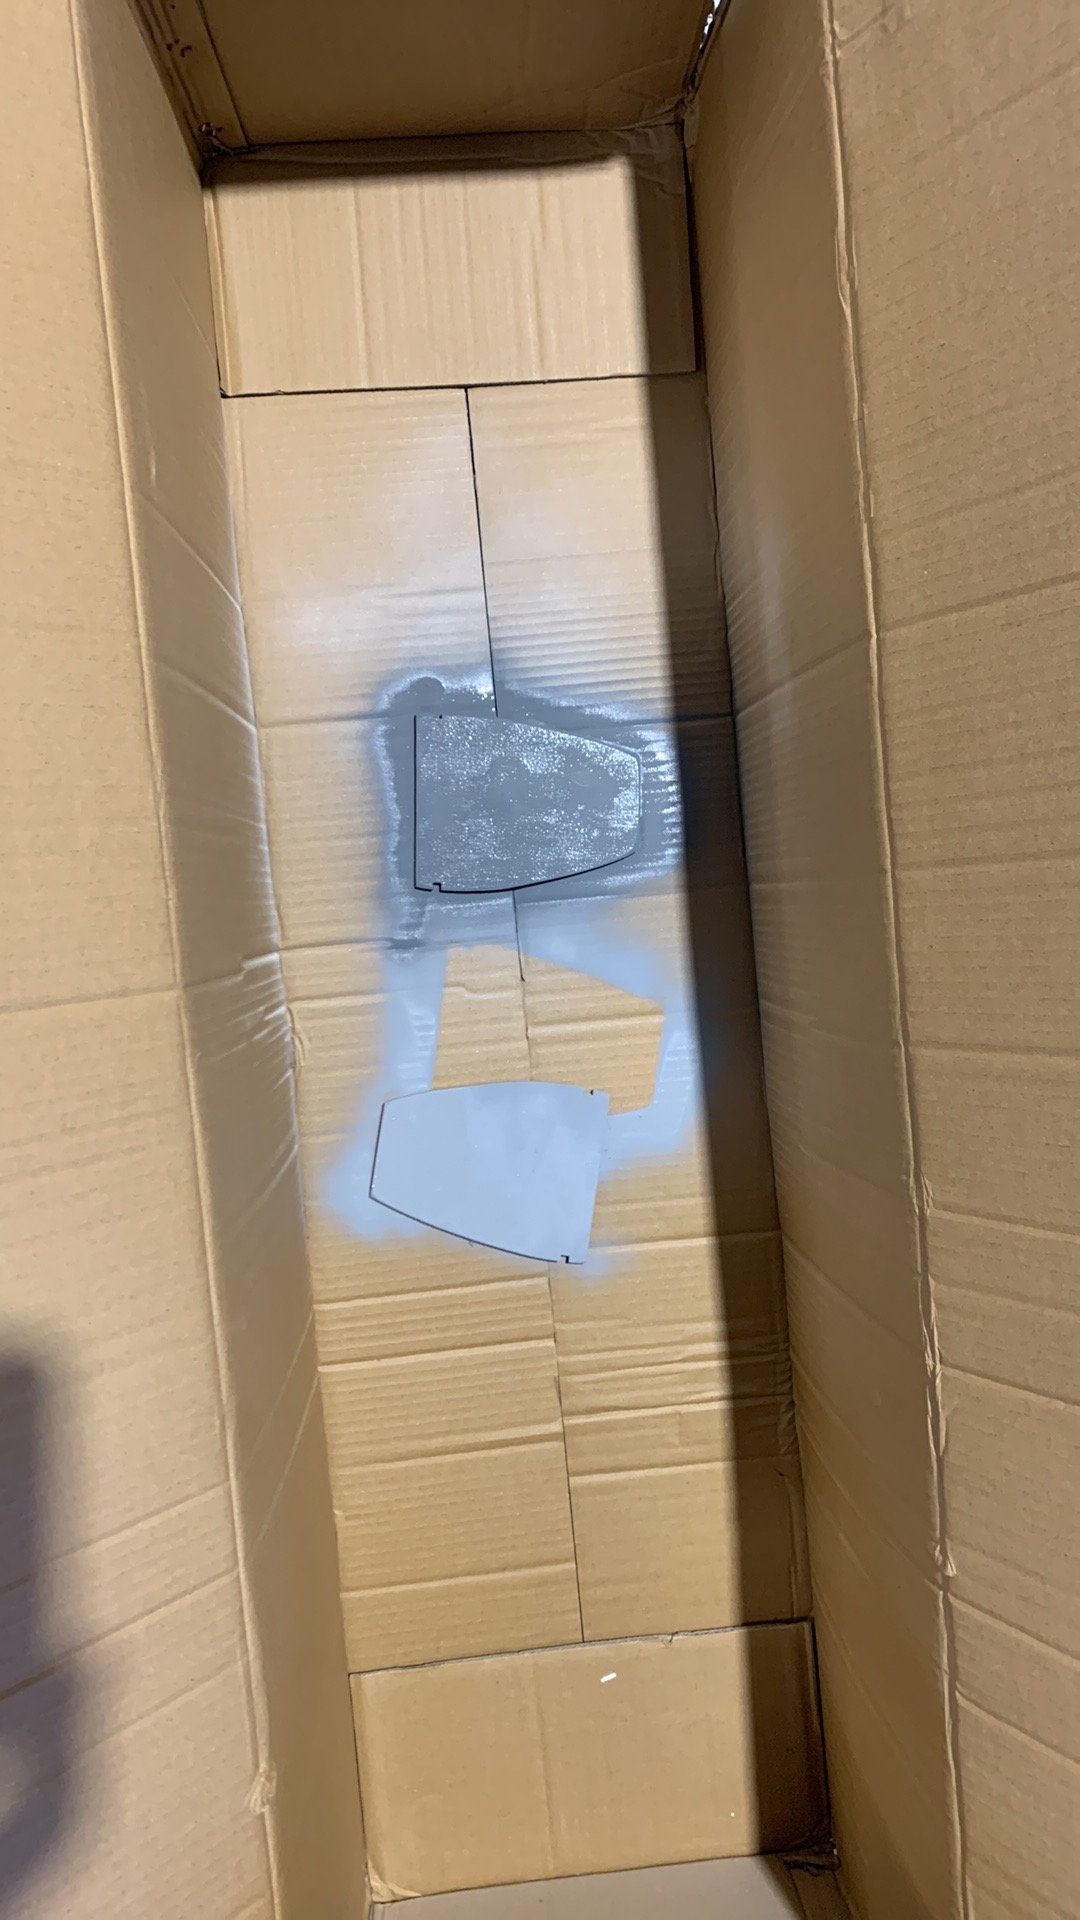
Painting front battery tray
Older F4 Front Equipment tray. Additional cutout for scale leg needed.
Battery plugs installed.
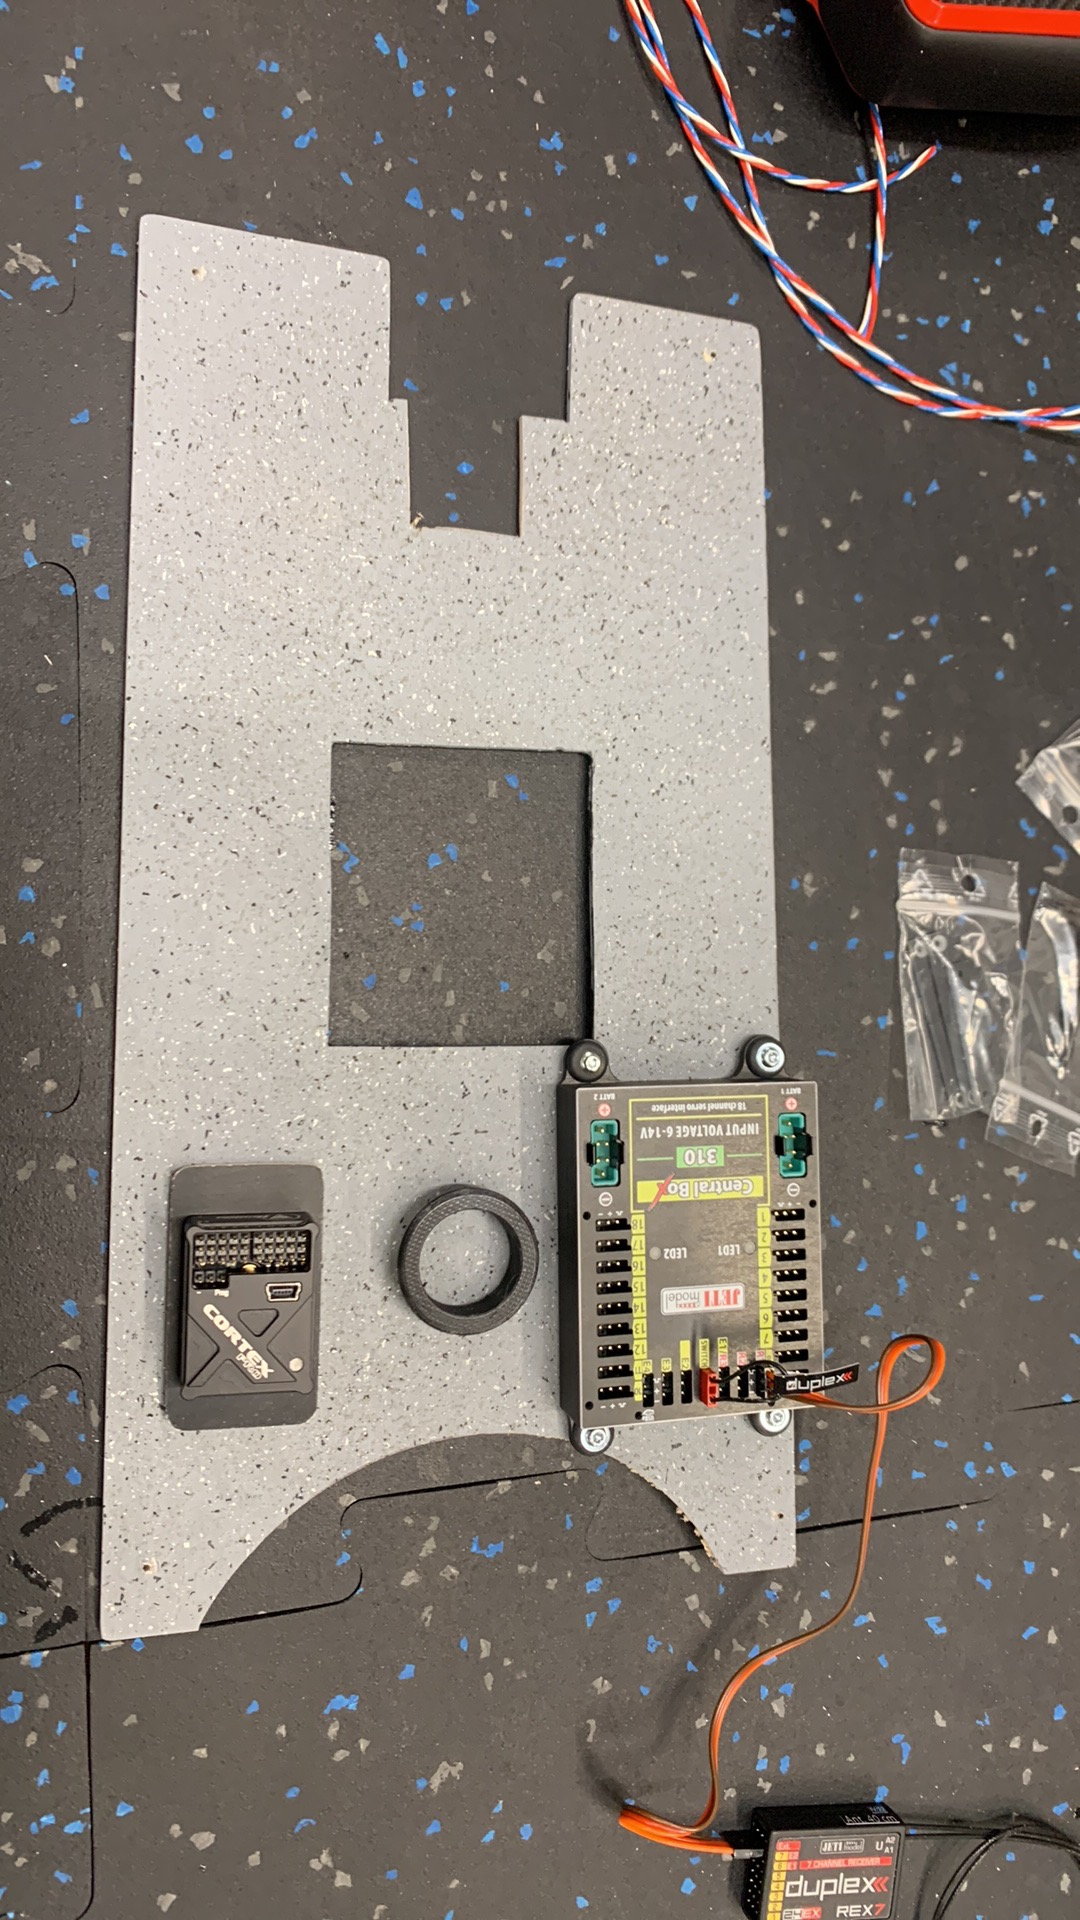
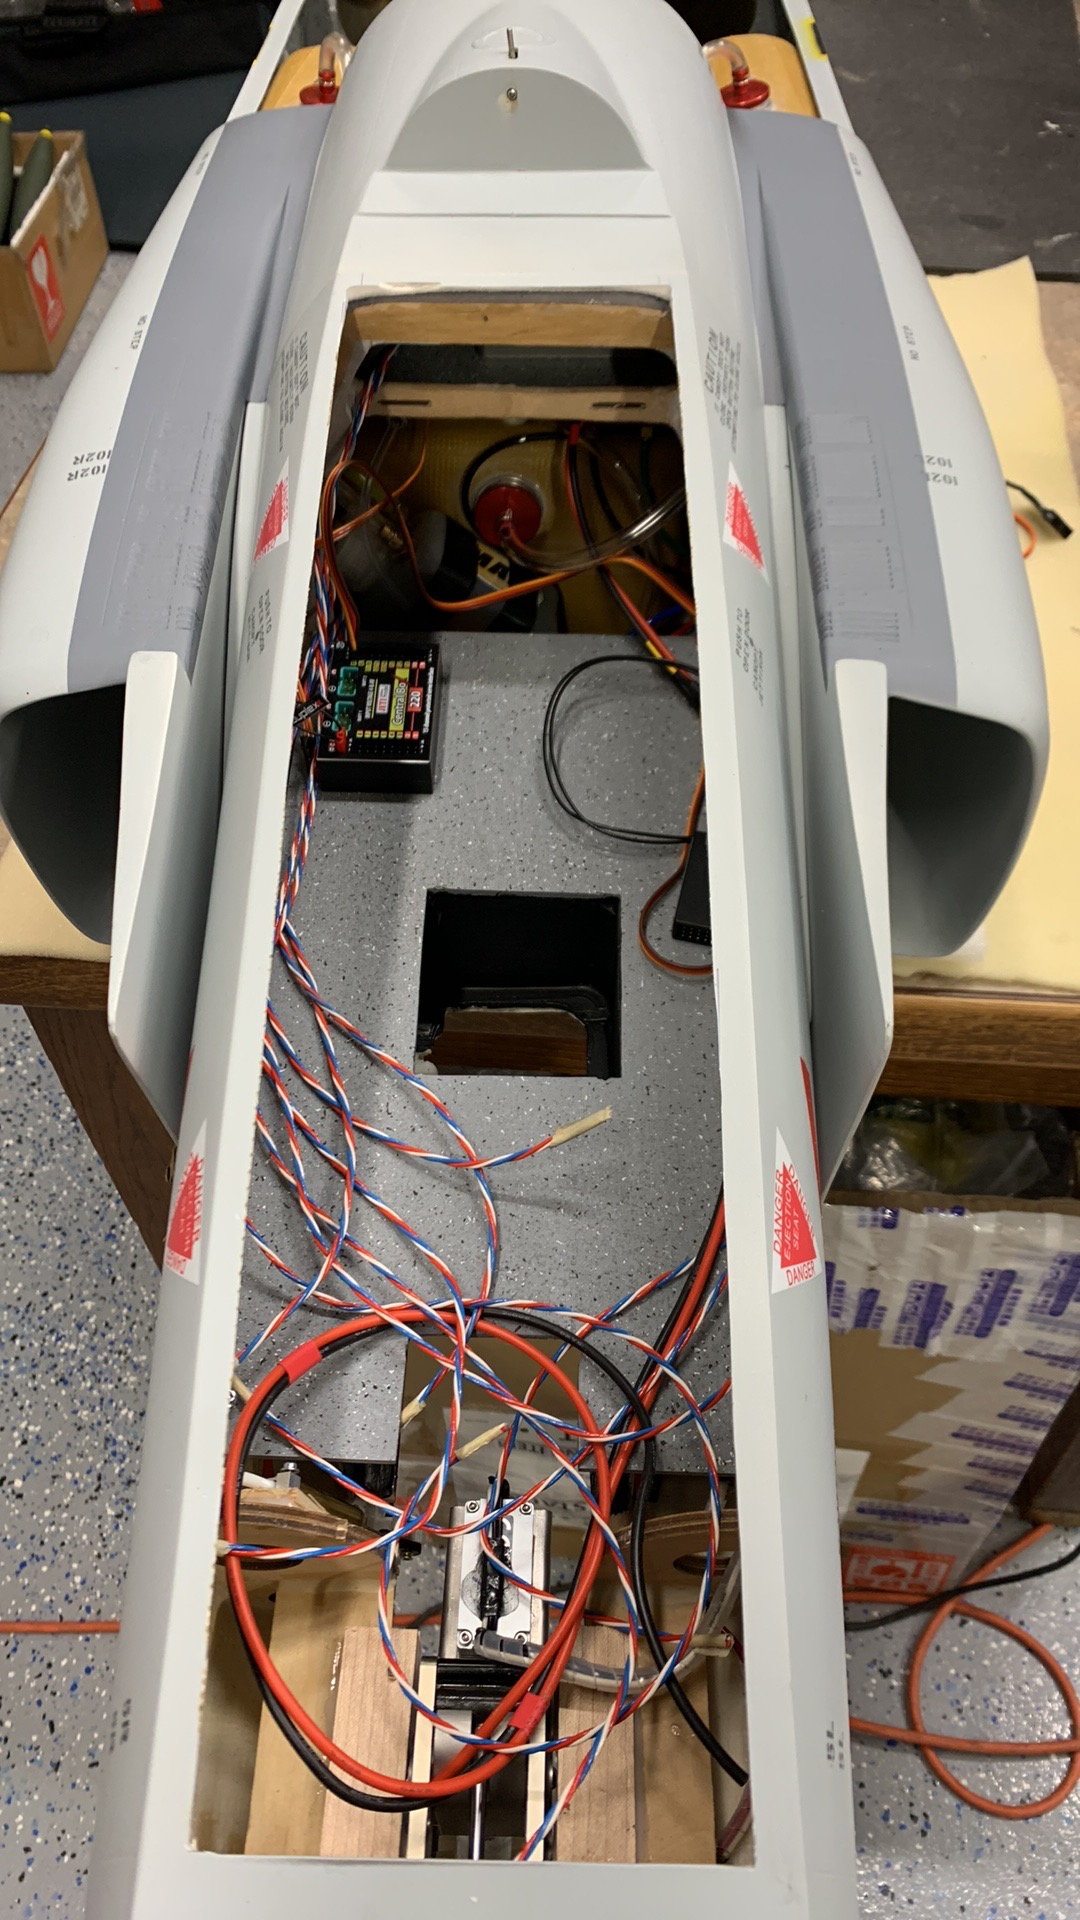
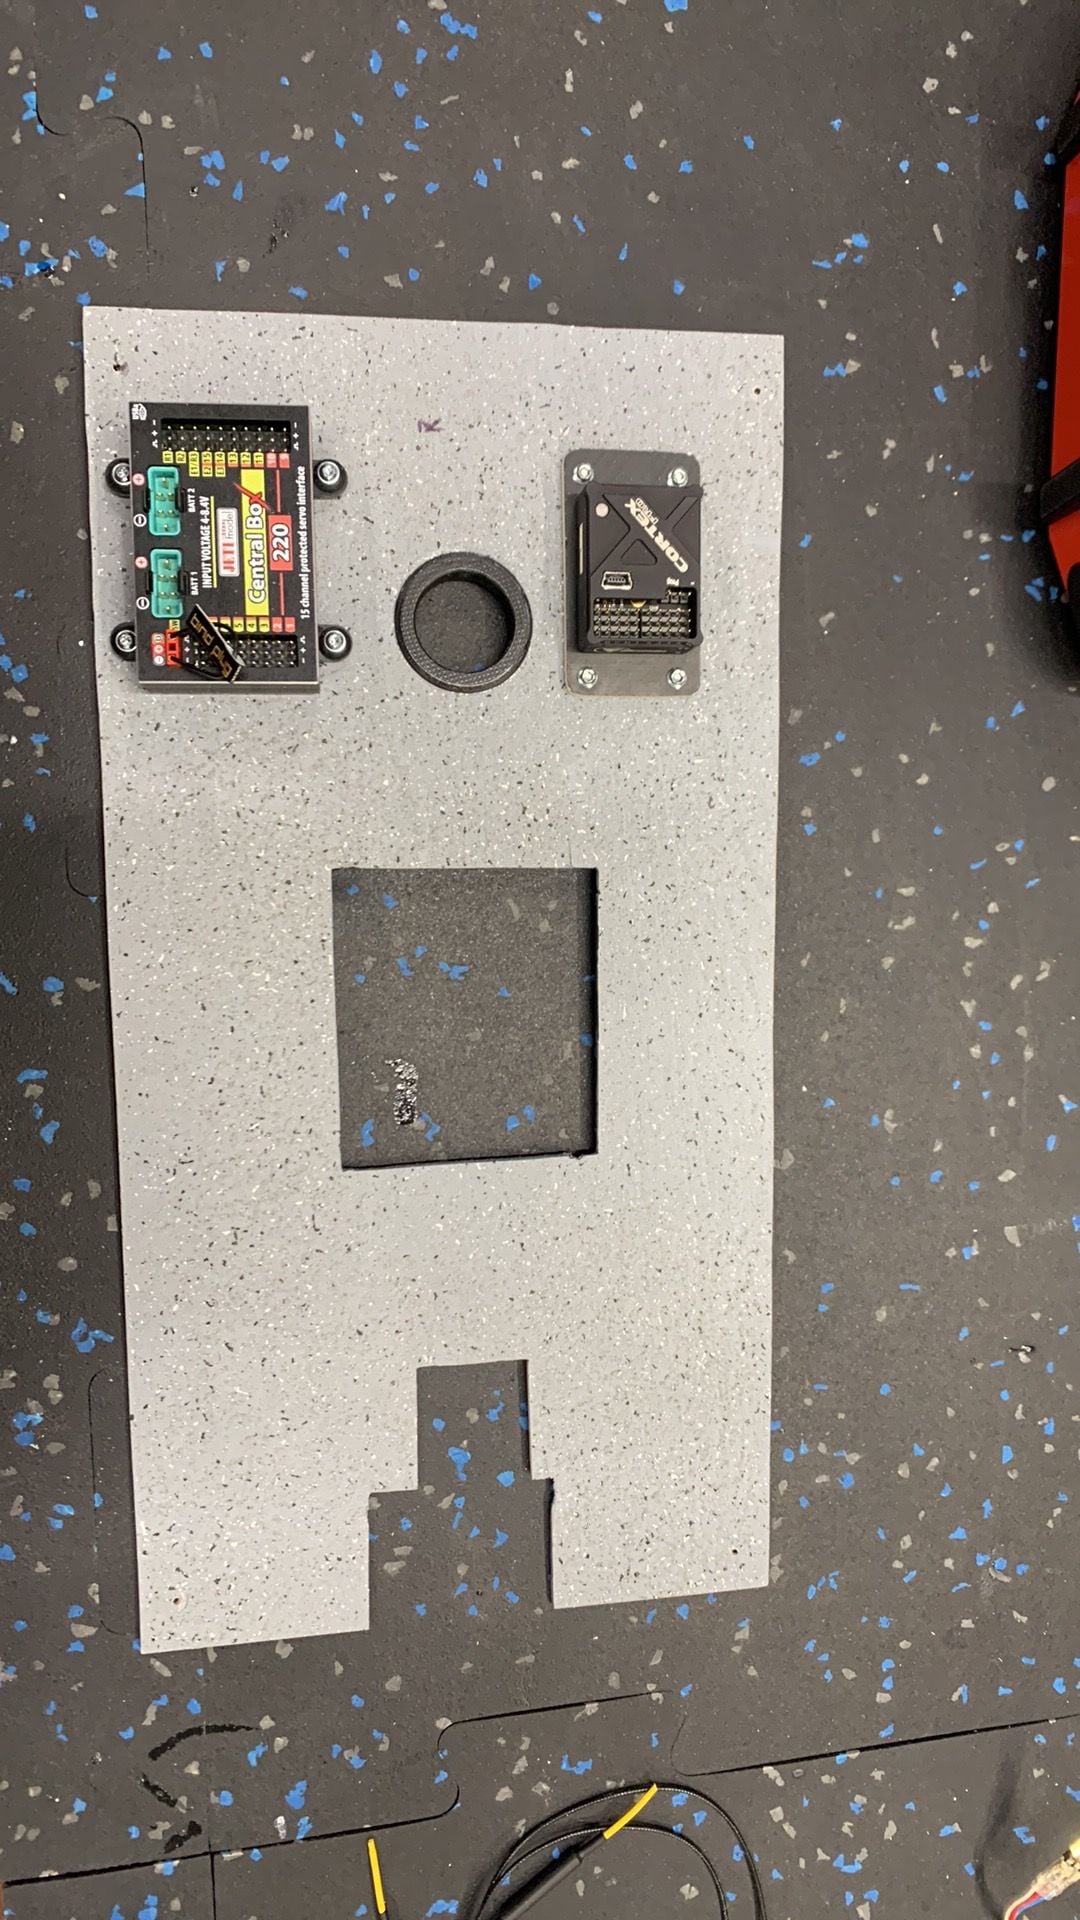
New F4 Front tray layout.
 03-02-2023, 09:29 AM
#565
My Feedback: (1)
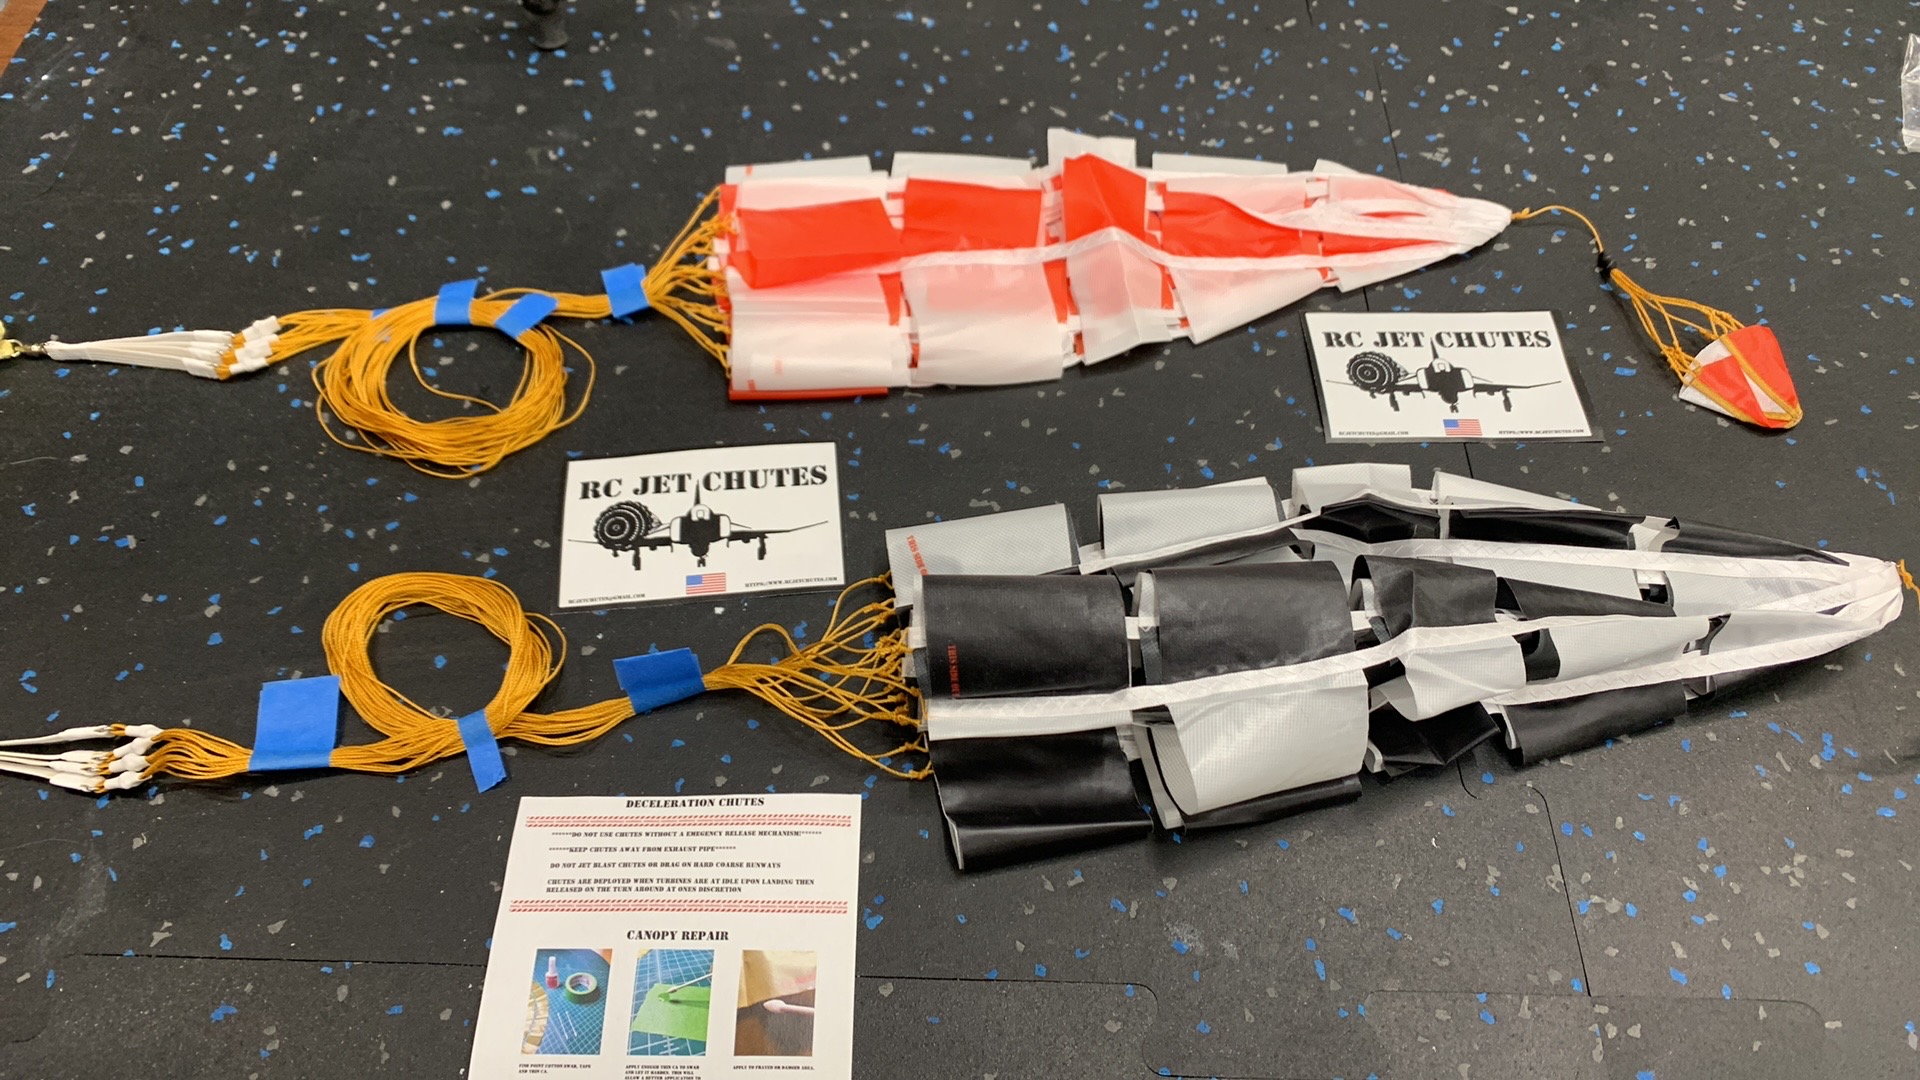
Beautiful Chutes from RC Jet Chutes!!!!
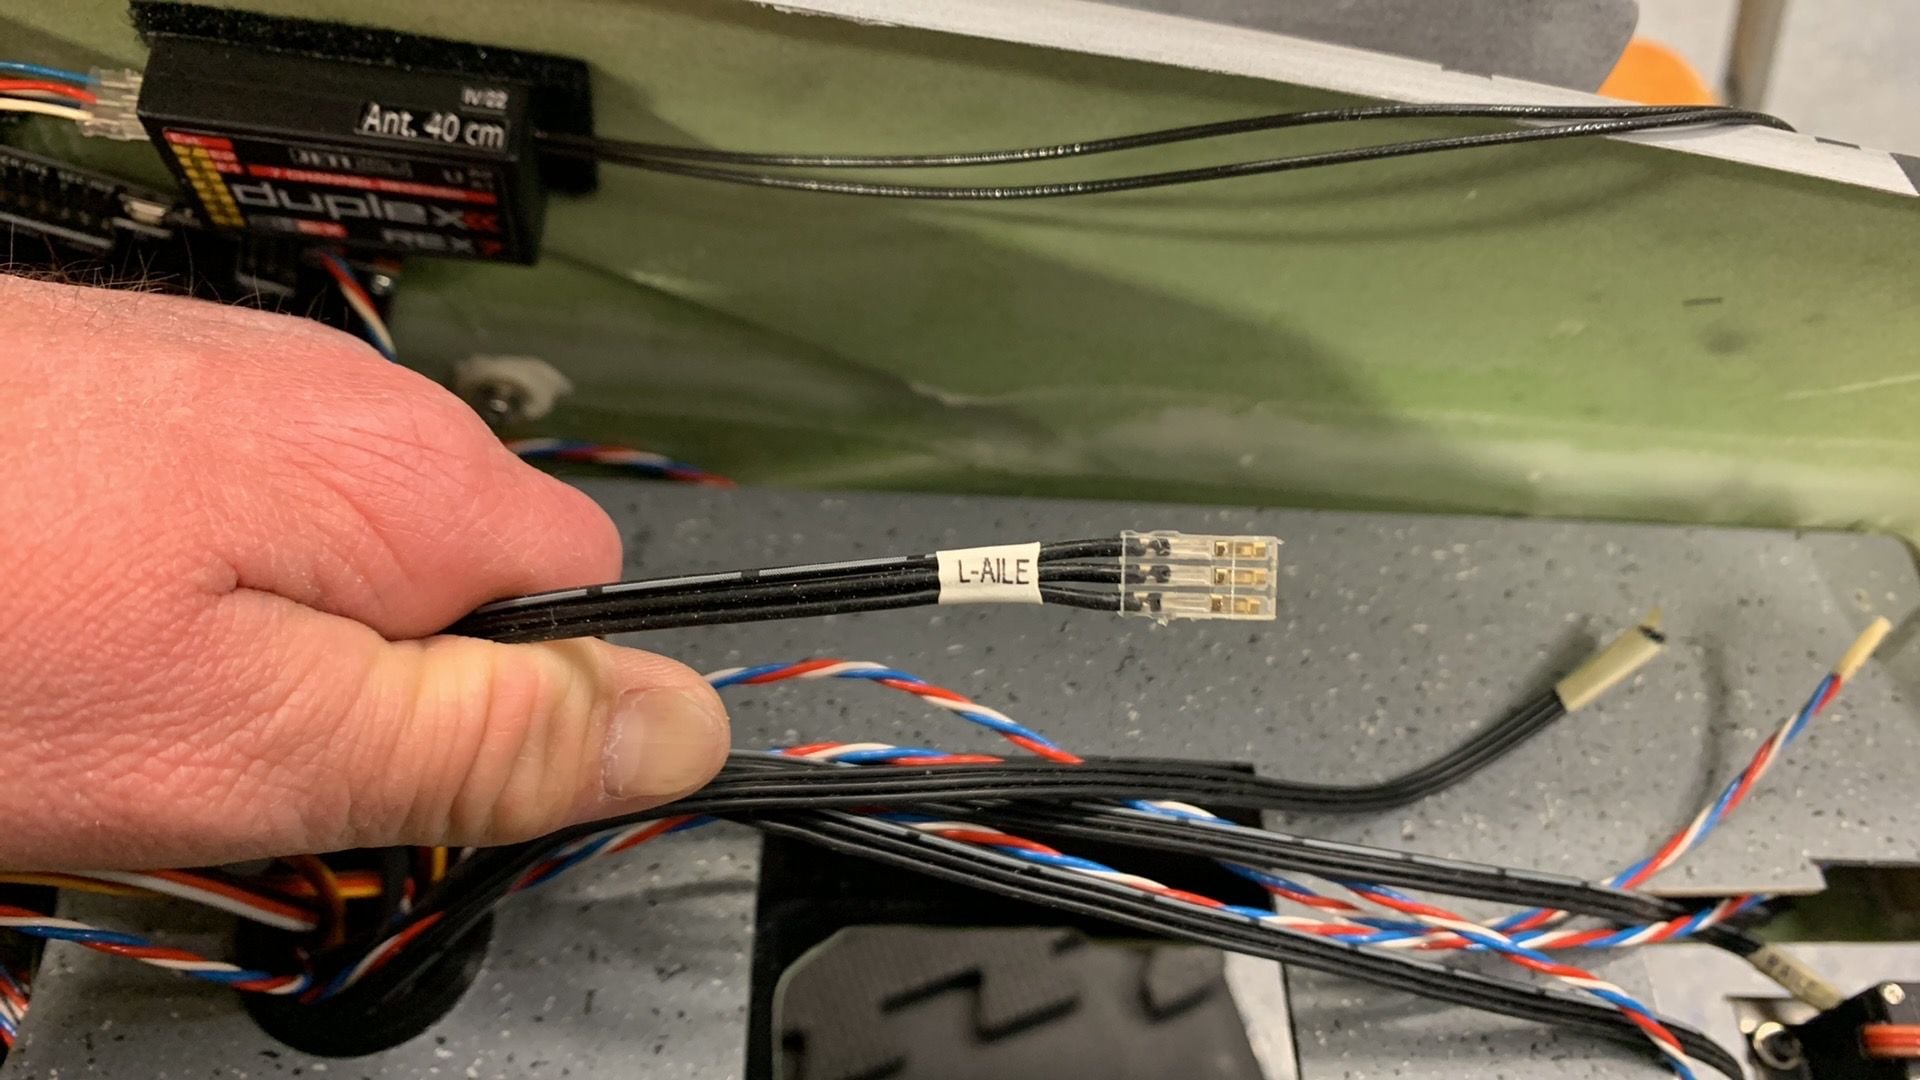
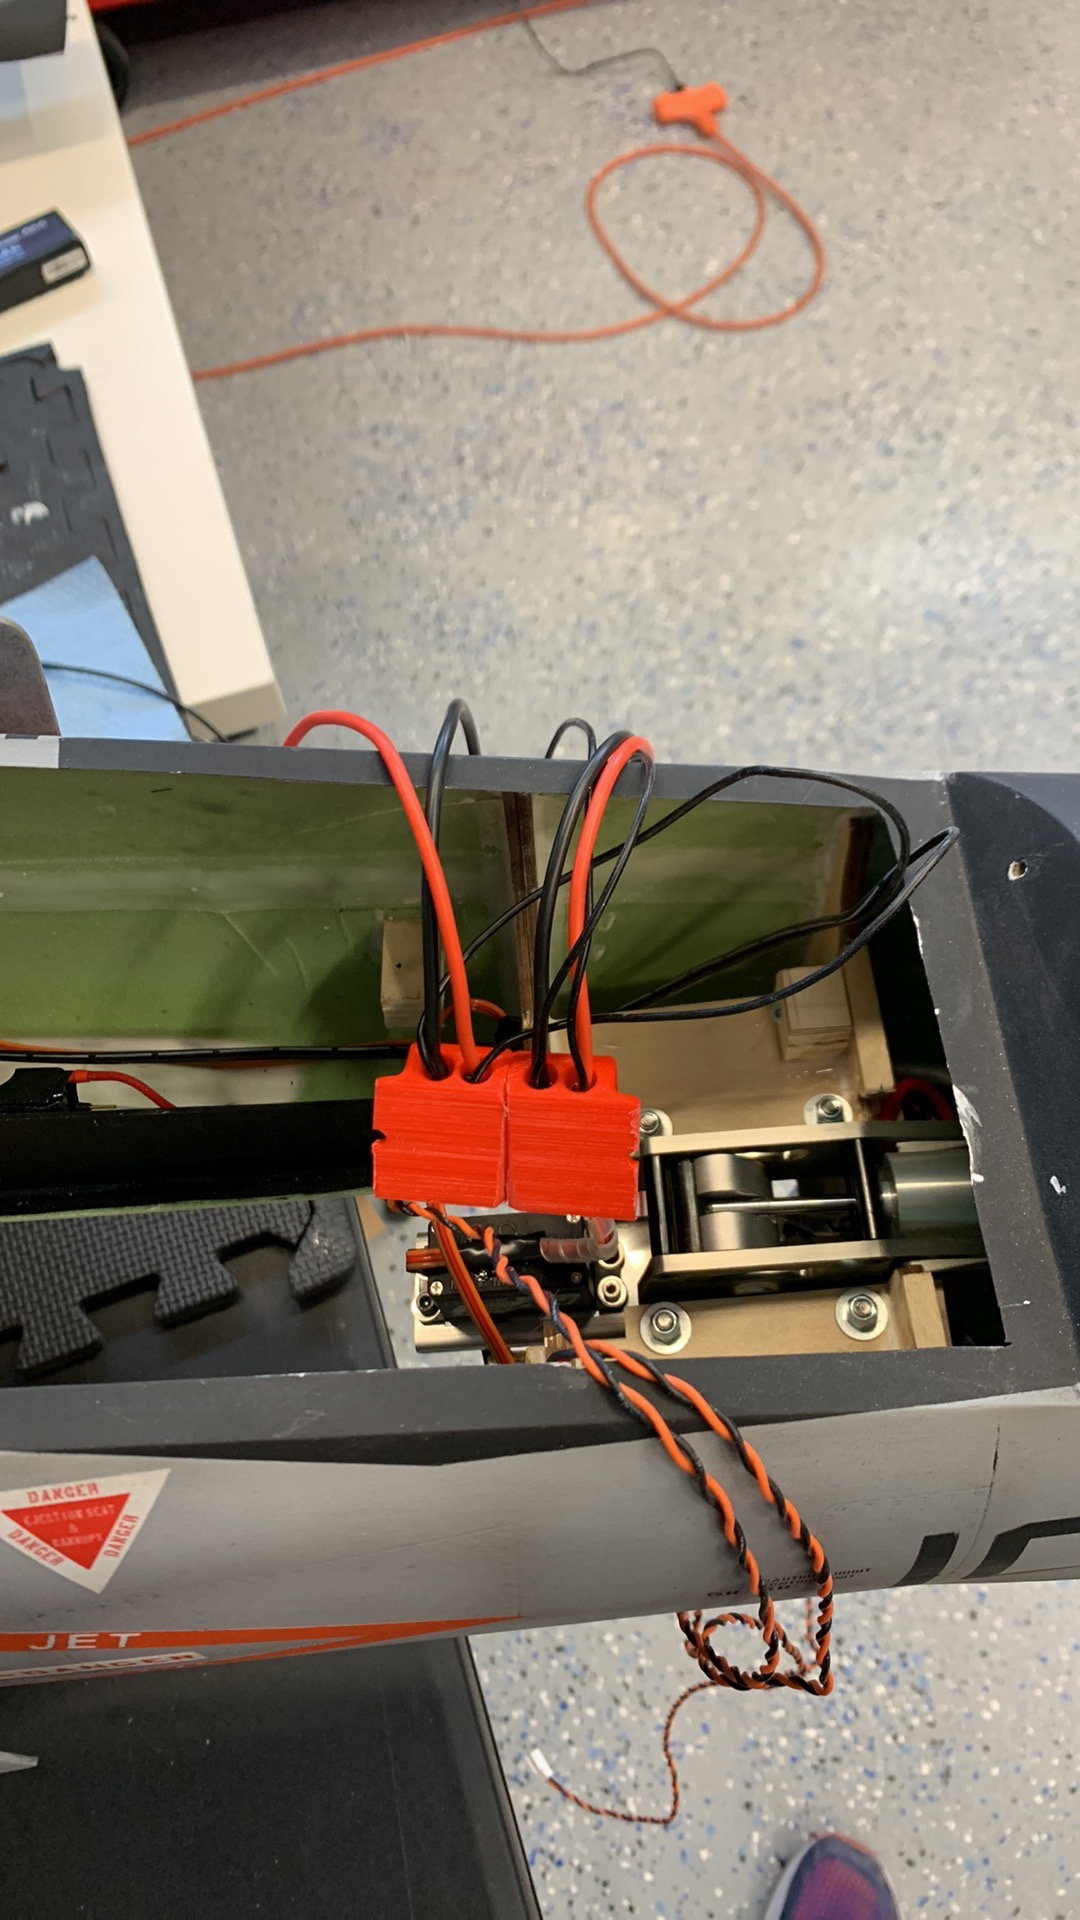
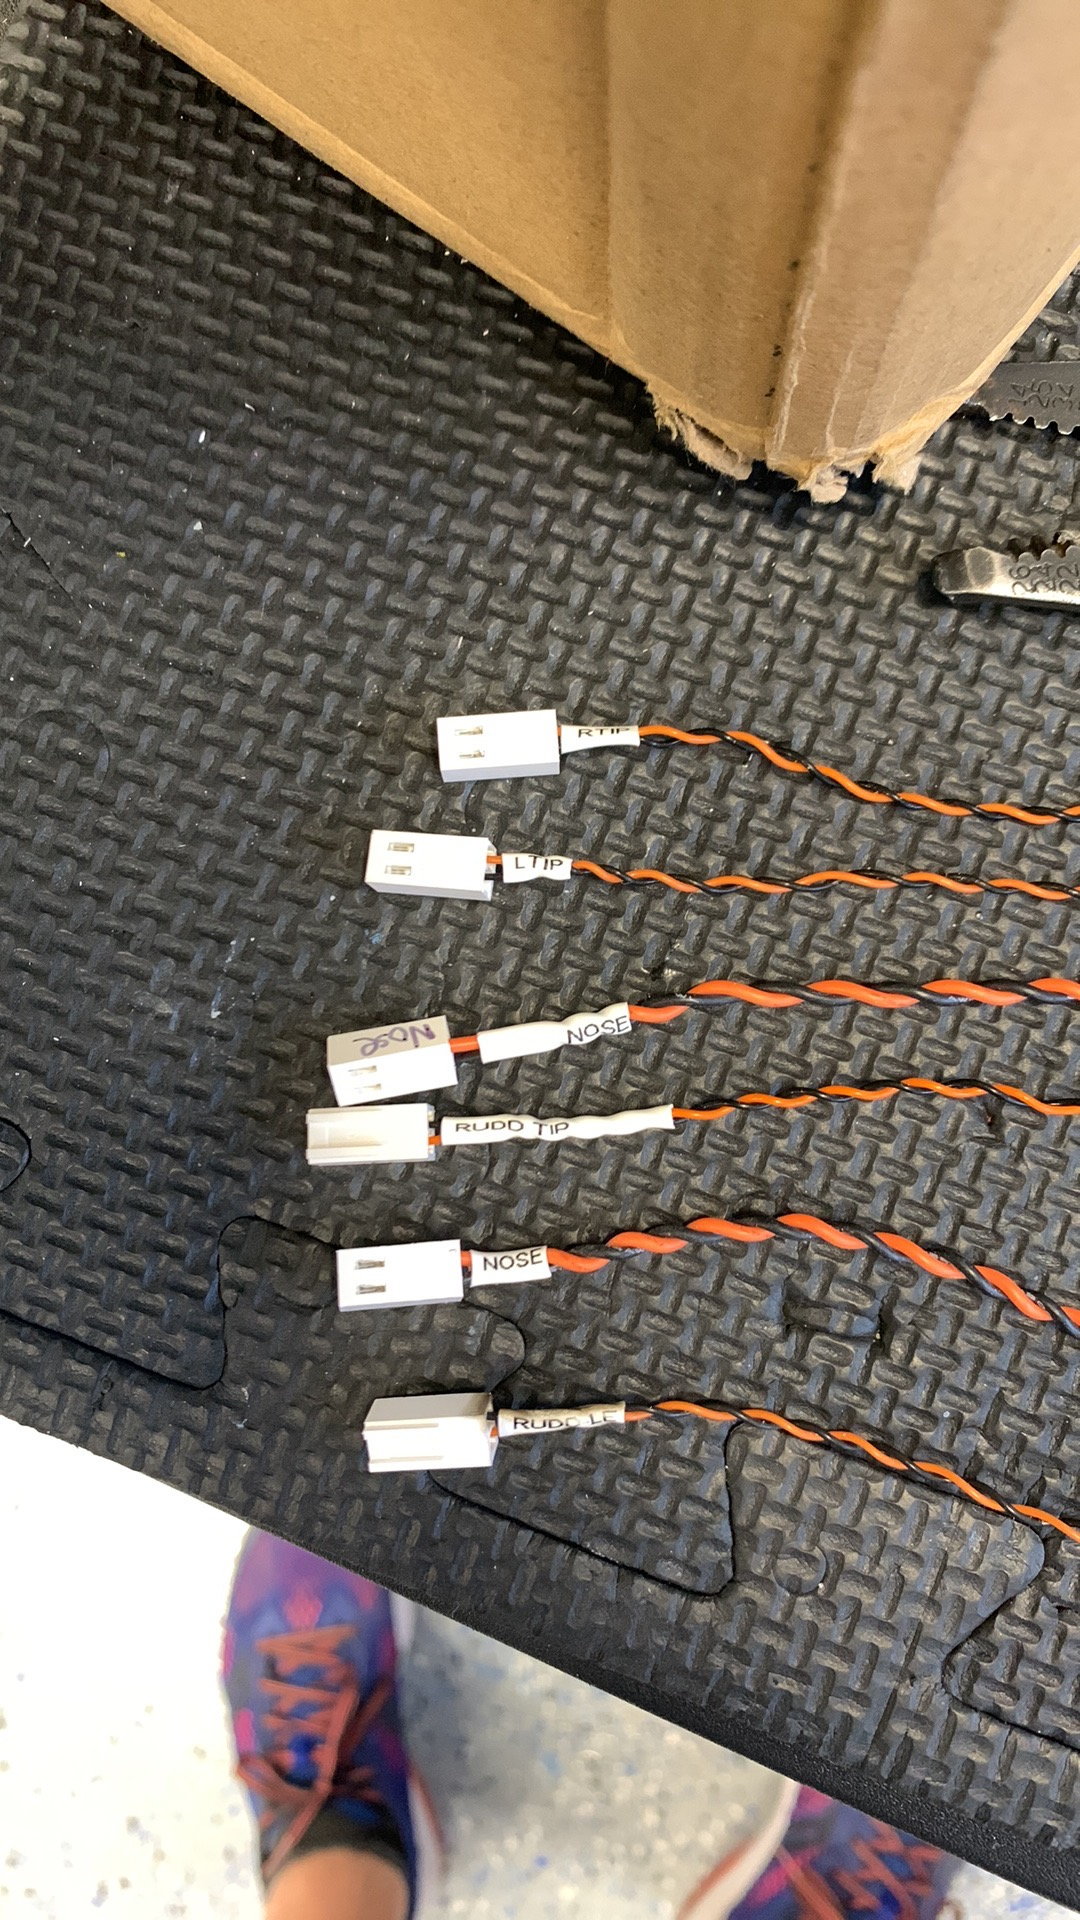
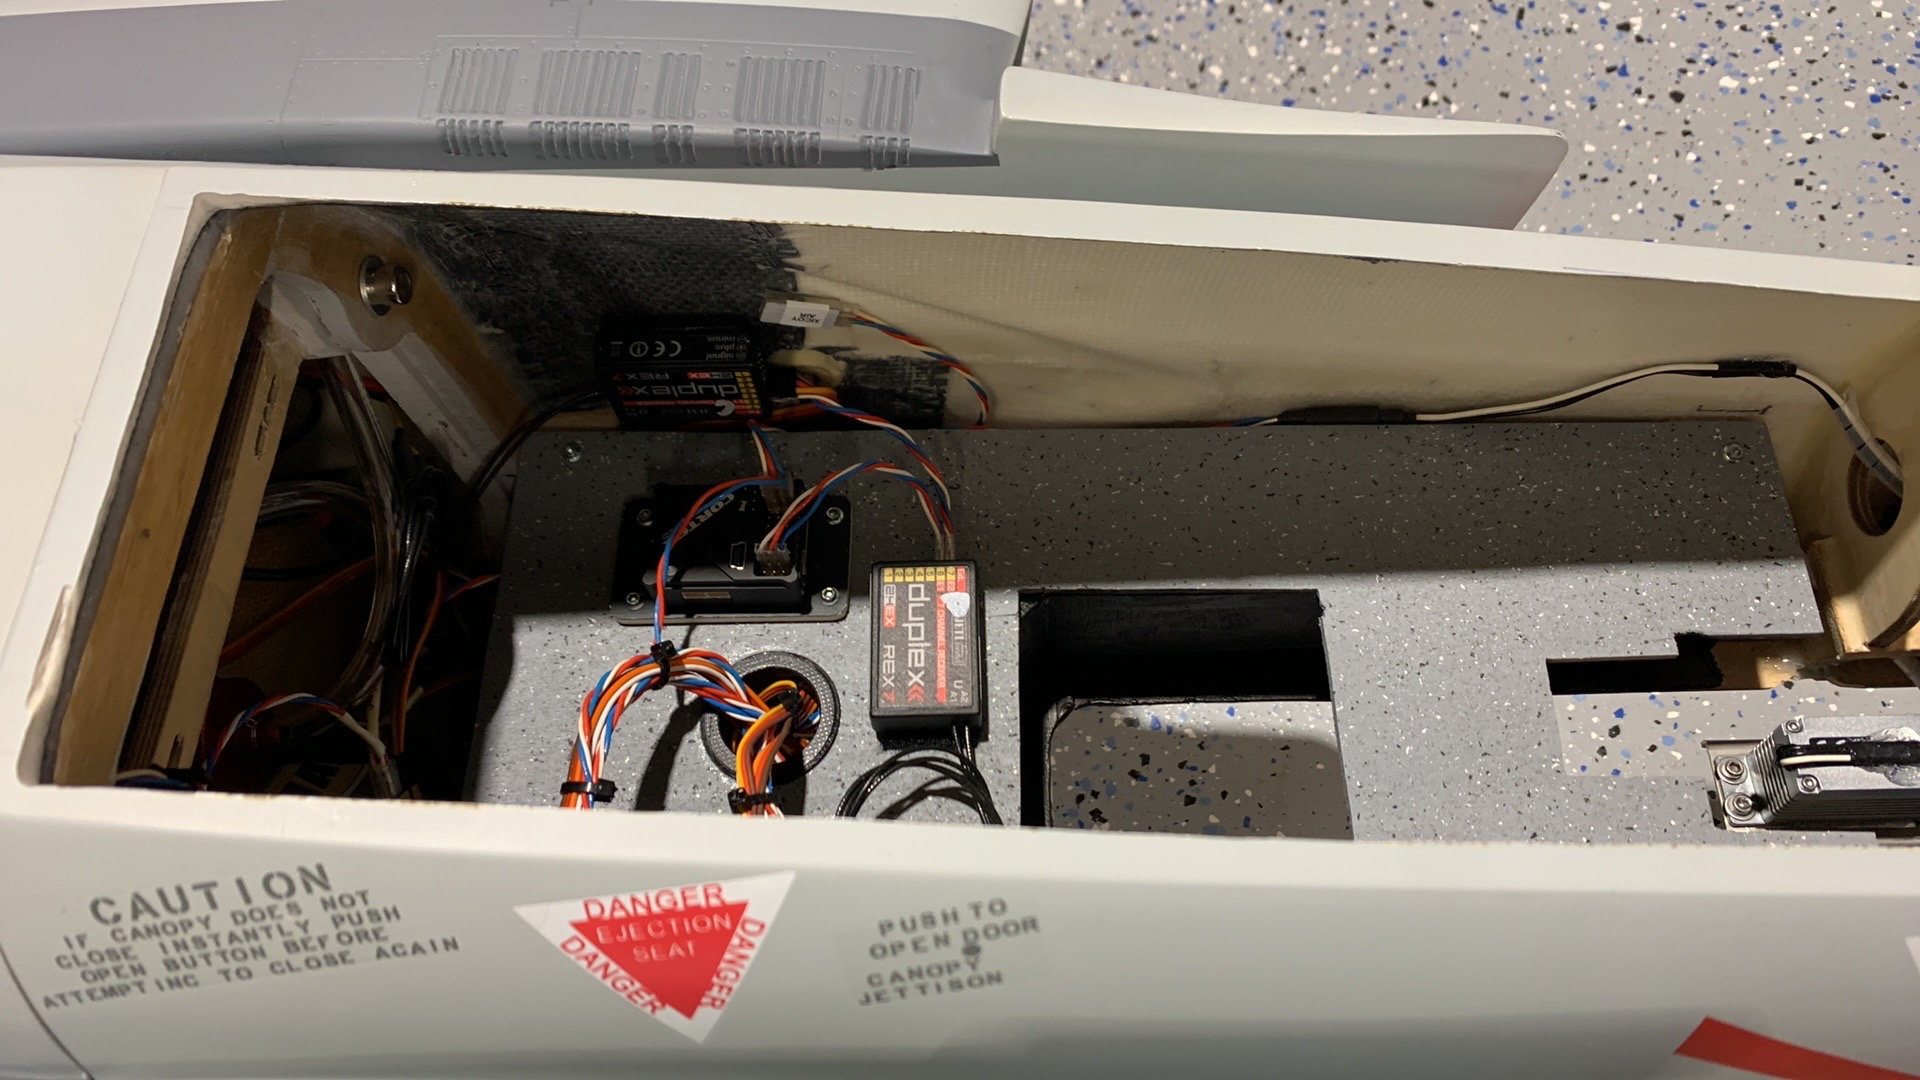
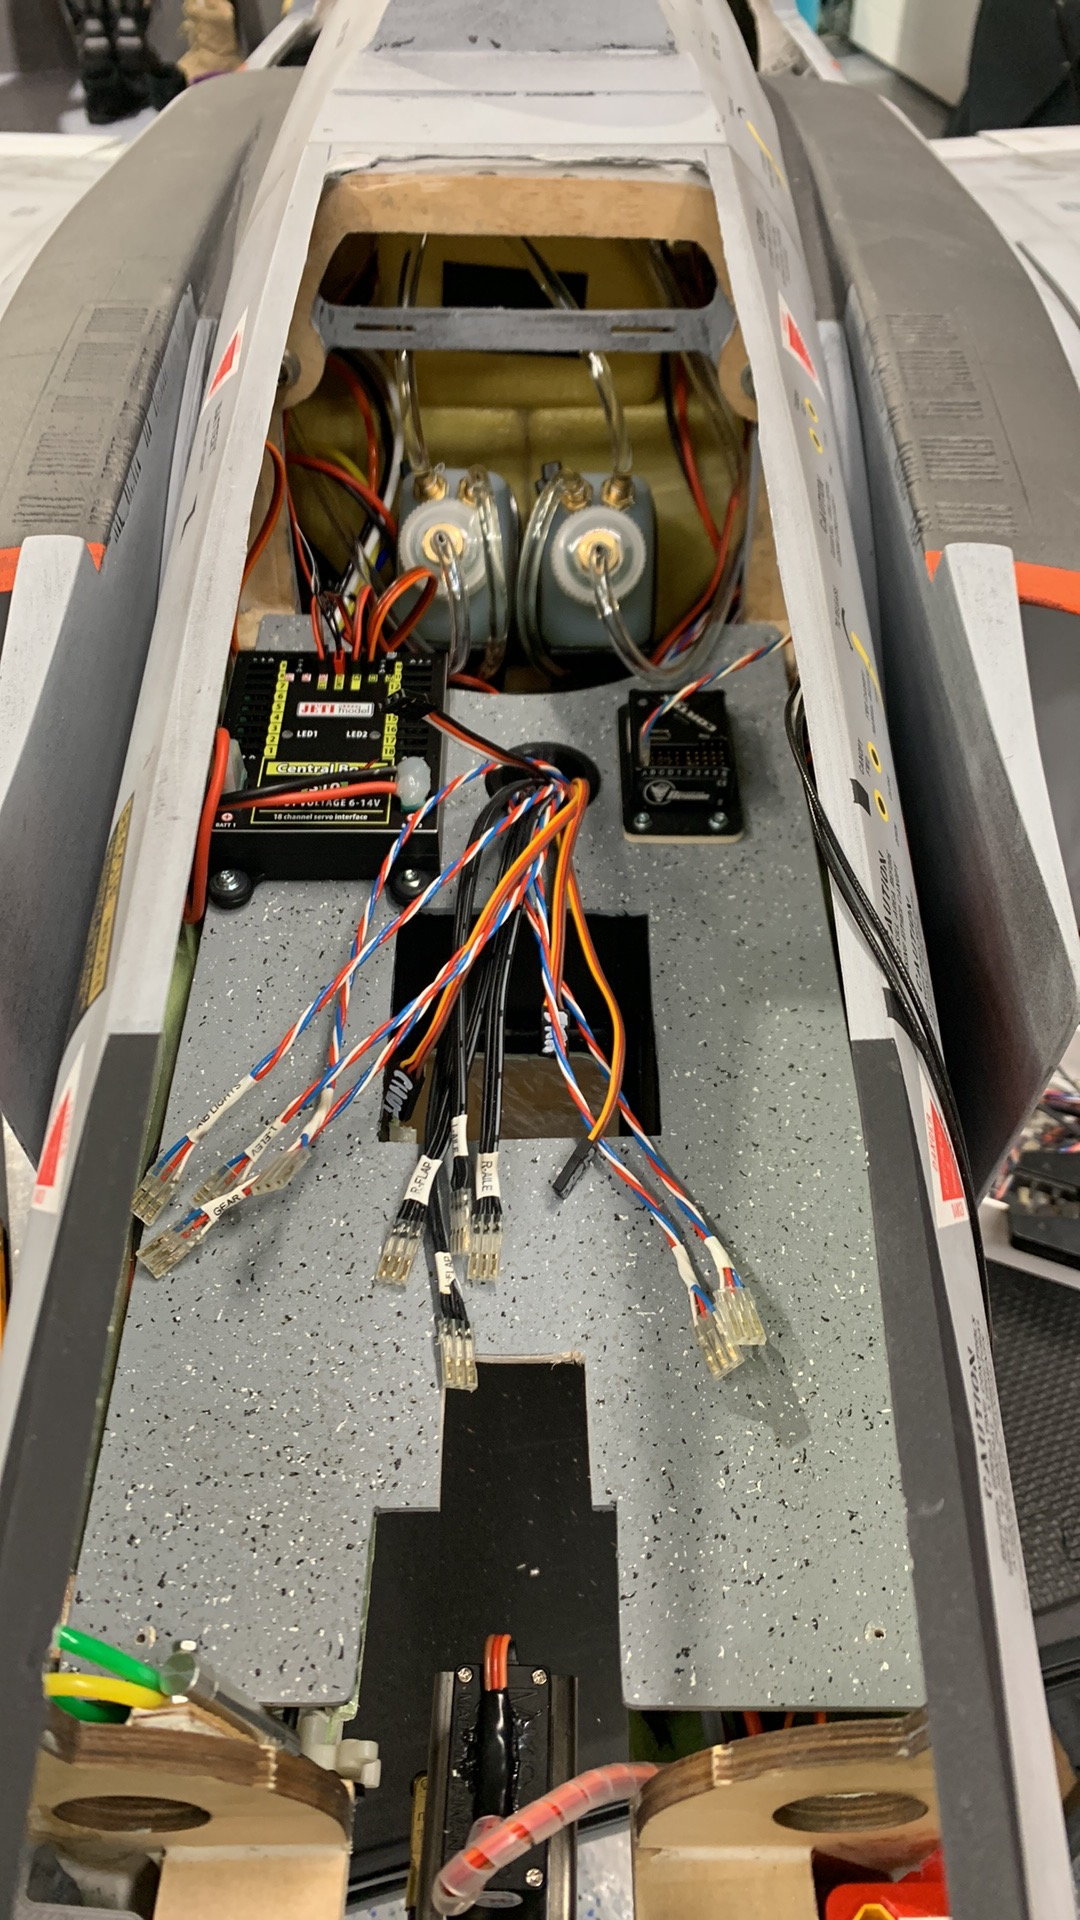
Labels added to all the control leads. This black wire is high temp silicone servo line used for wing wiring as it's close to the turbines.
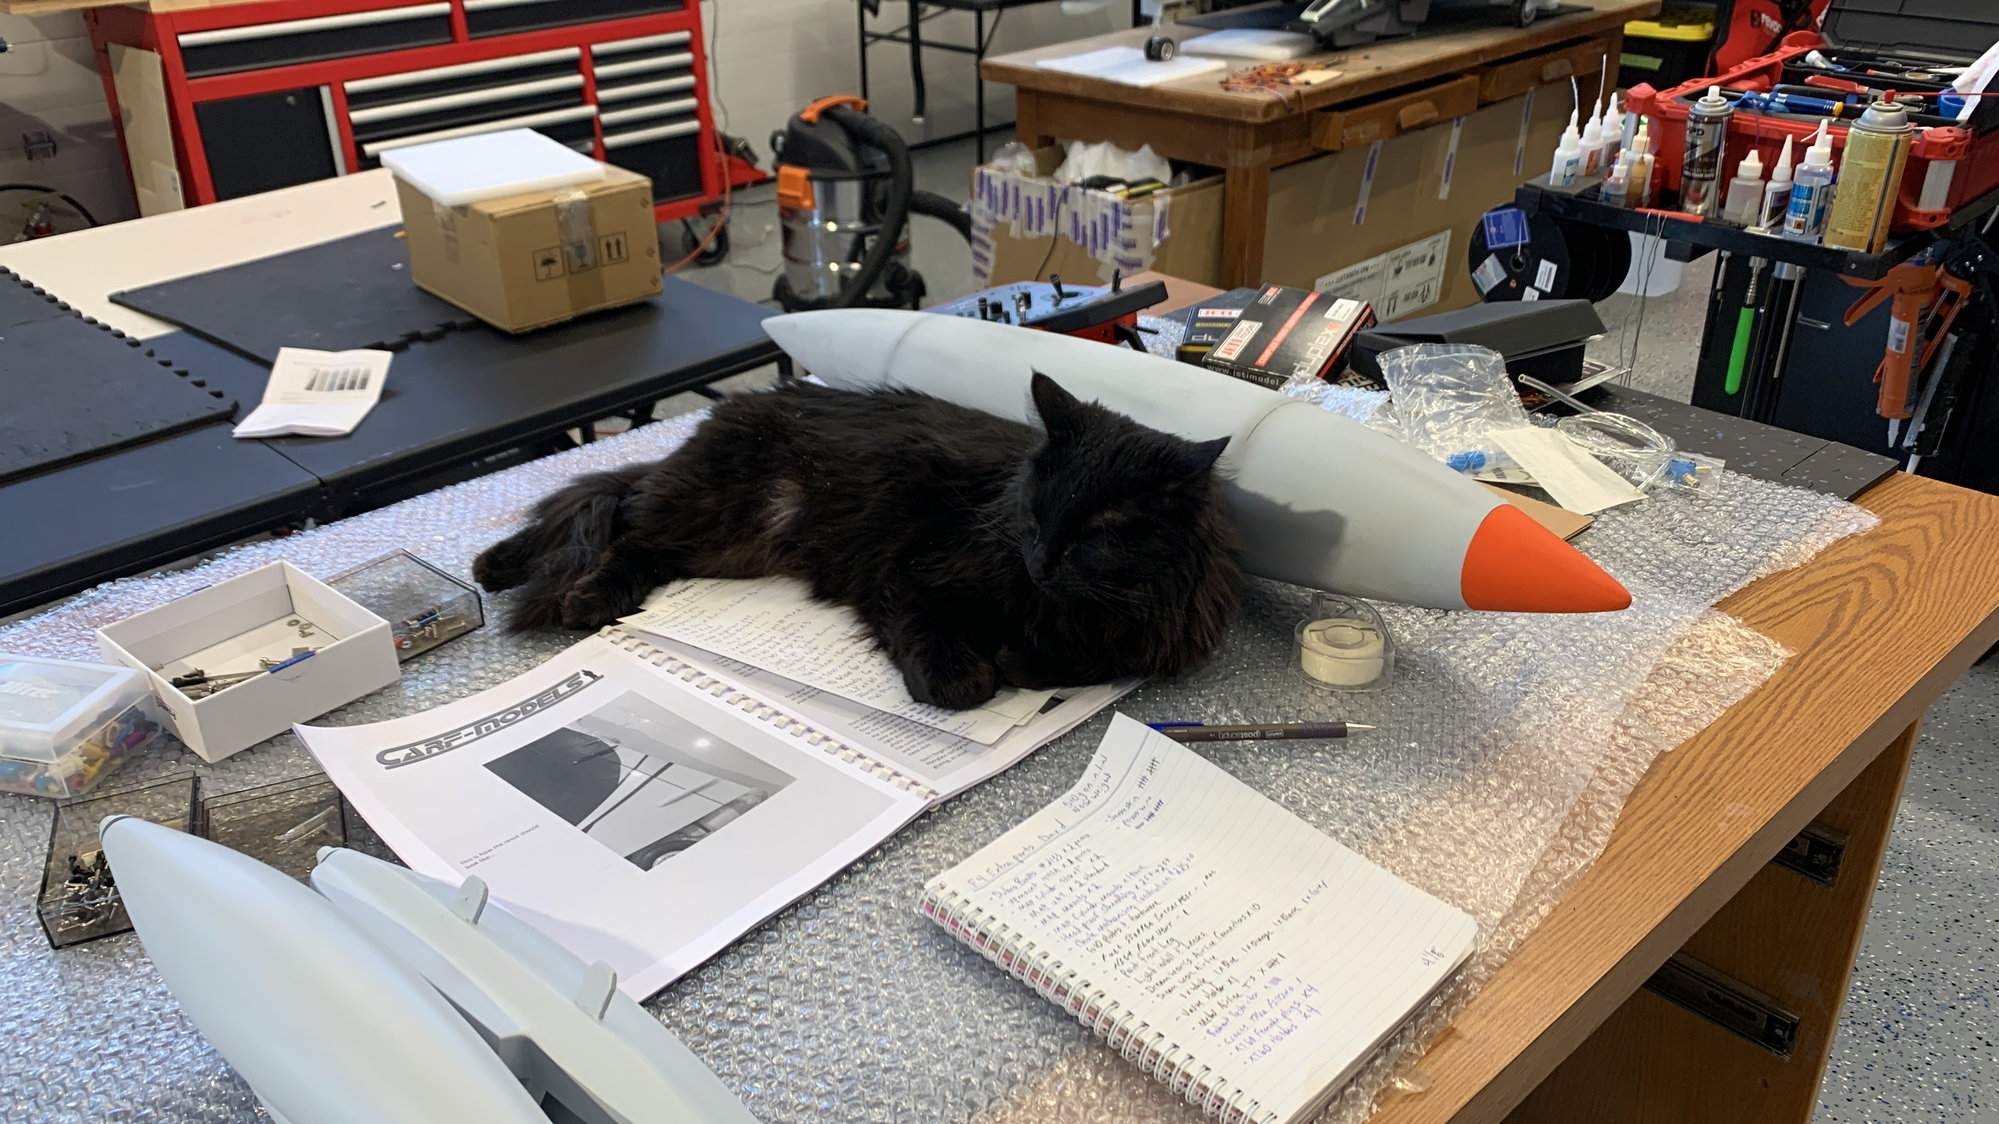
Nez Holding down the fort!
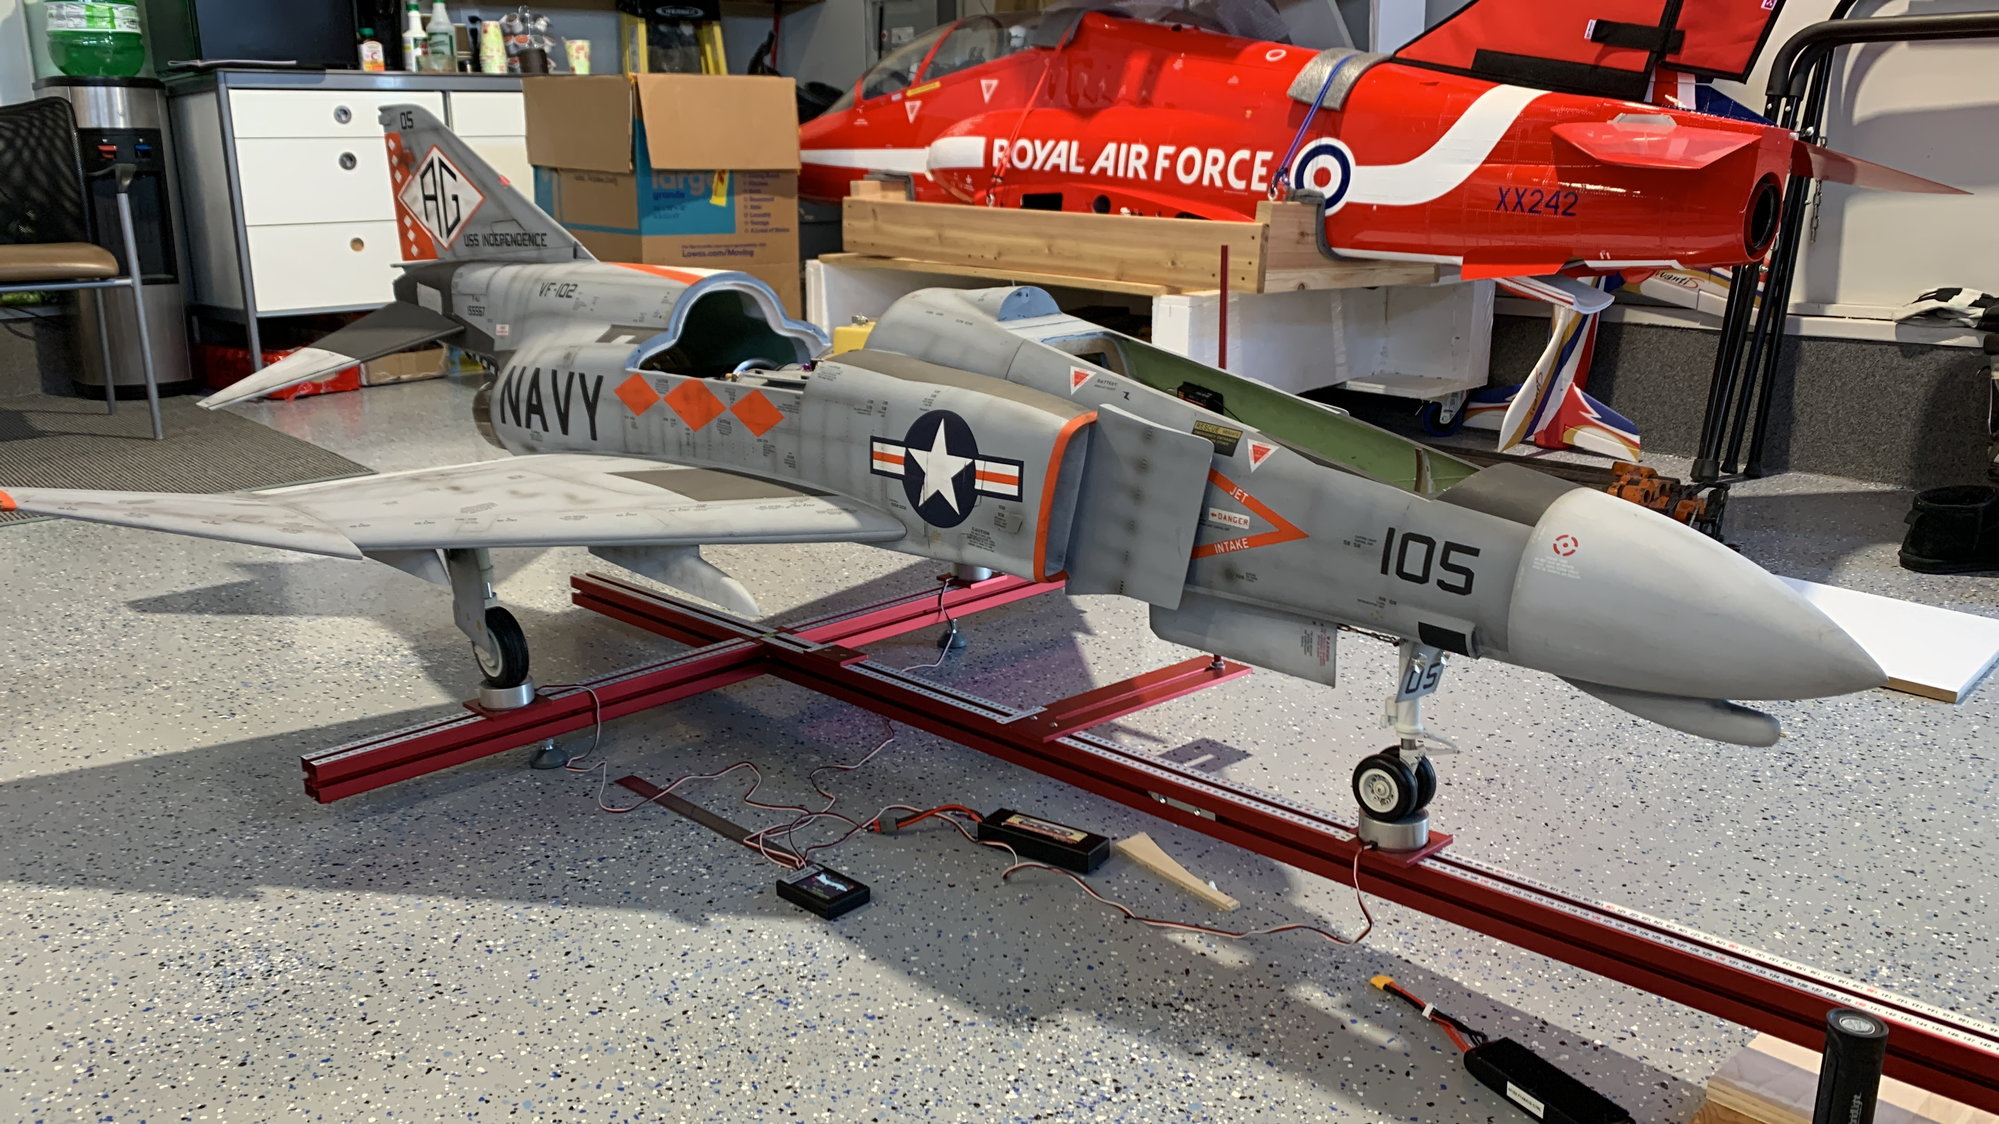
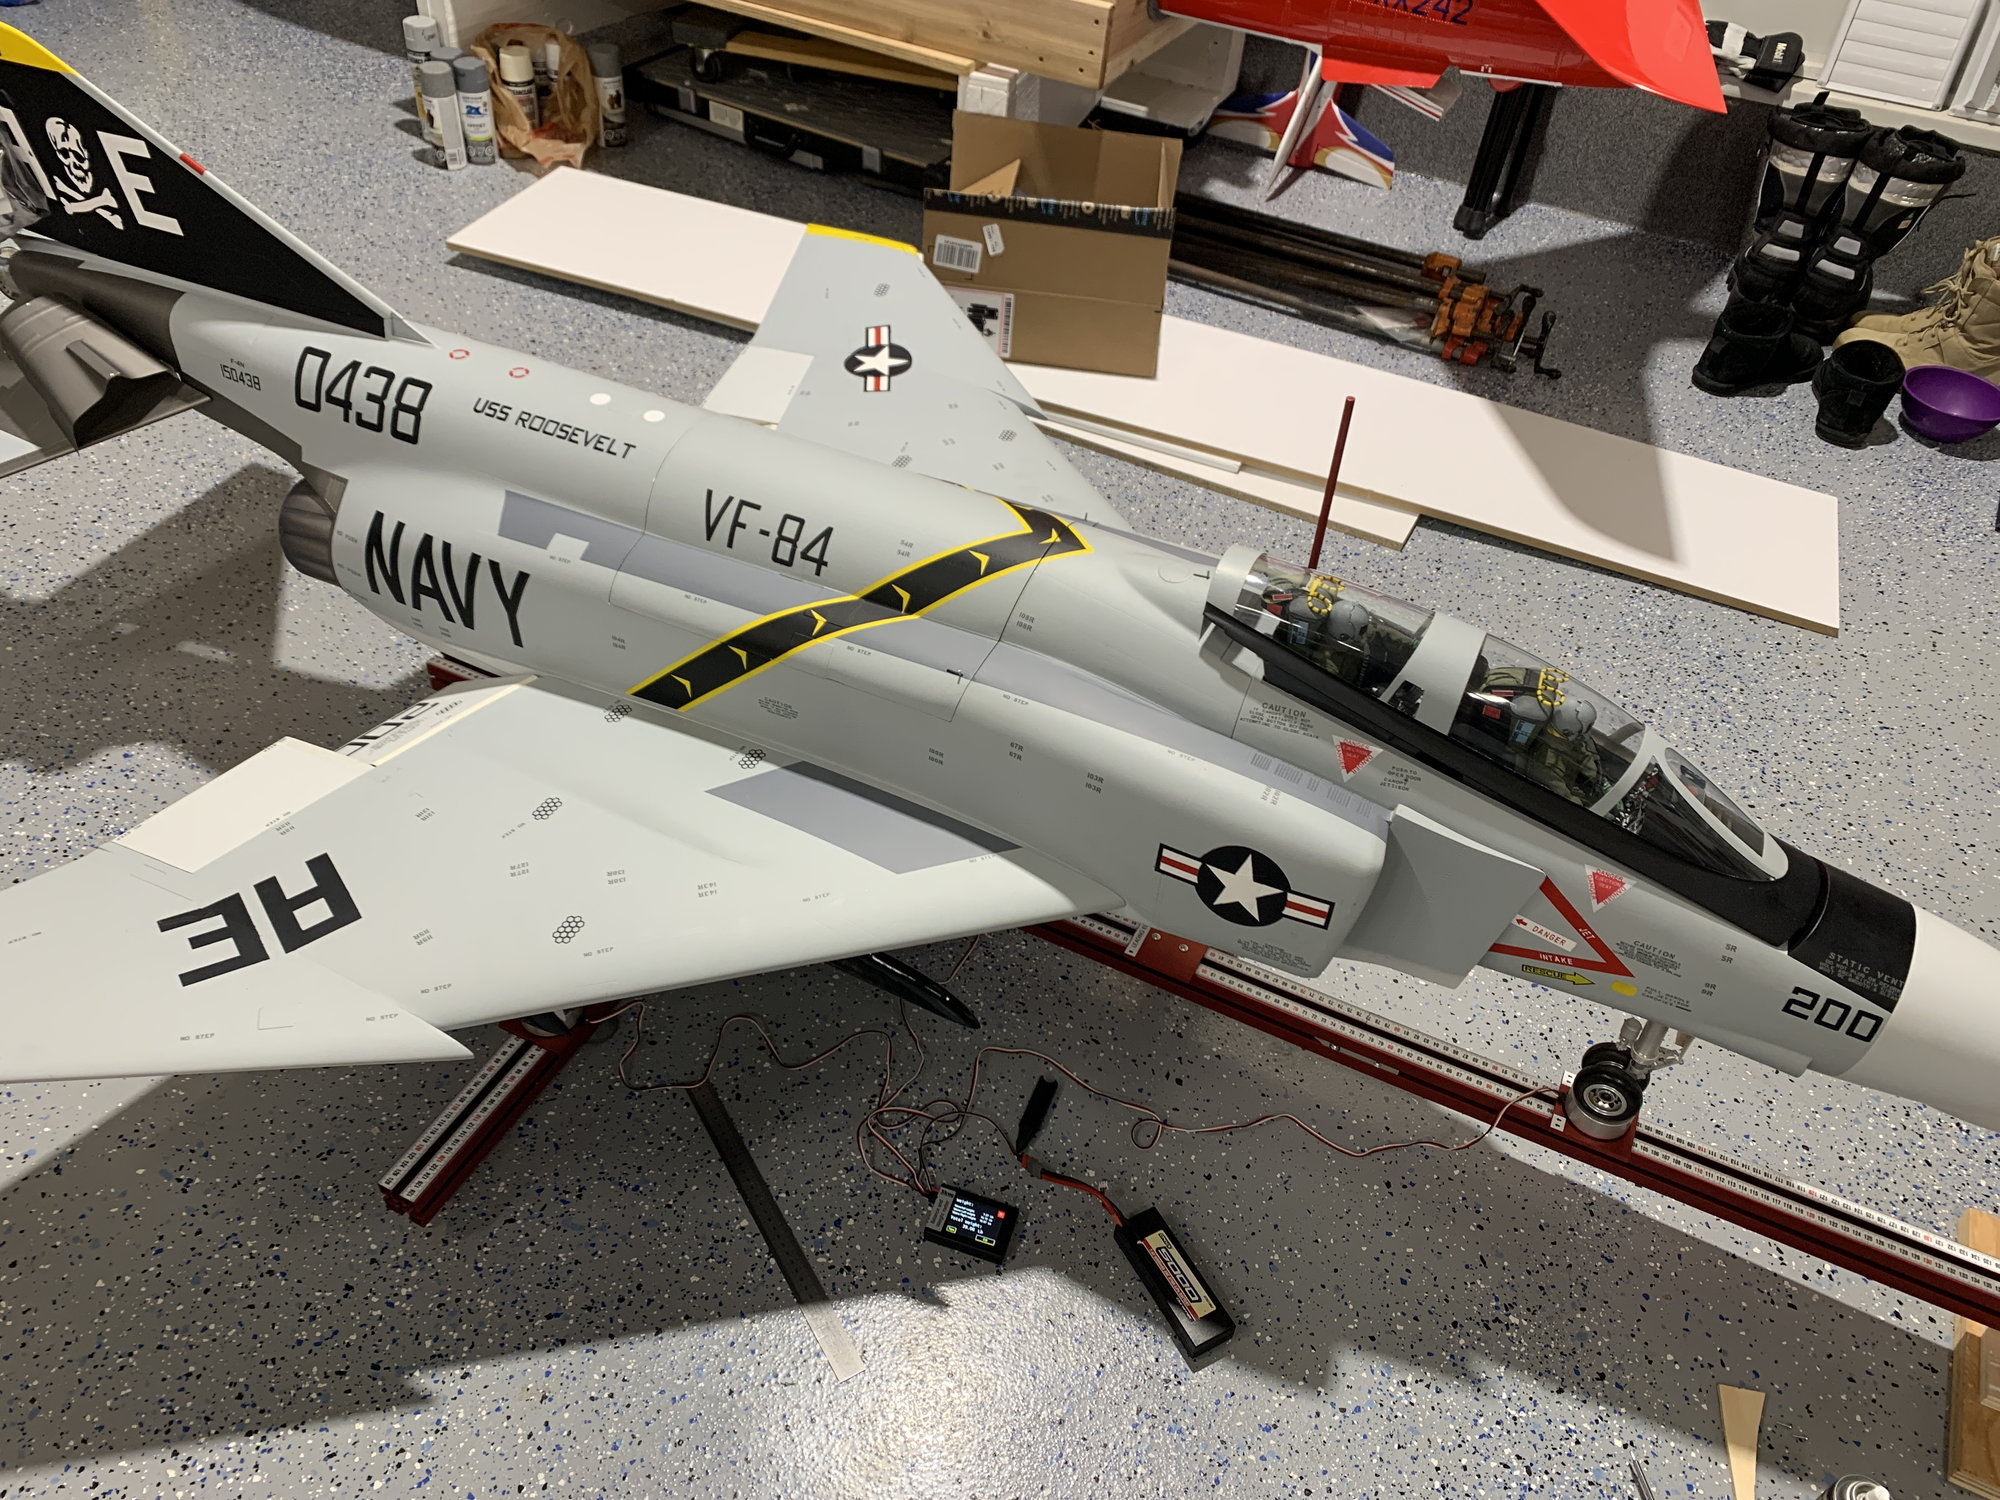
New F4 on the RCCGMACHINE to find out final balance point and battery location.
 03-02-2023, 09:34 AM
#566
My Feedback: (1)
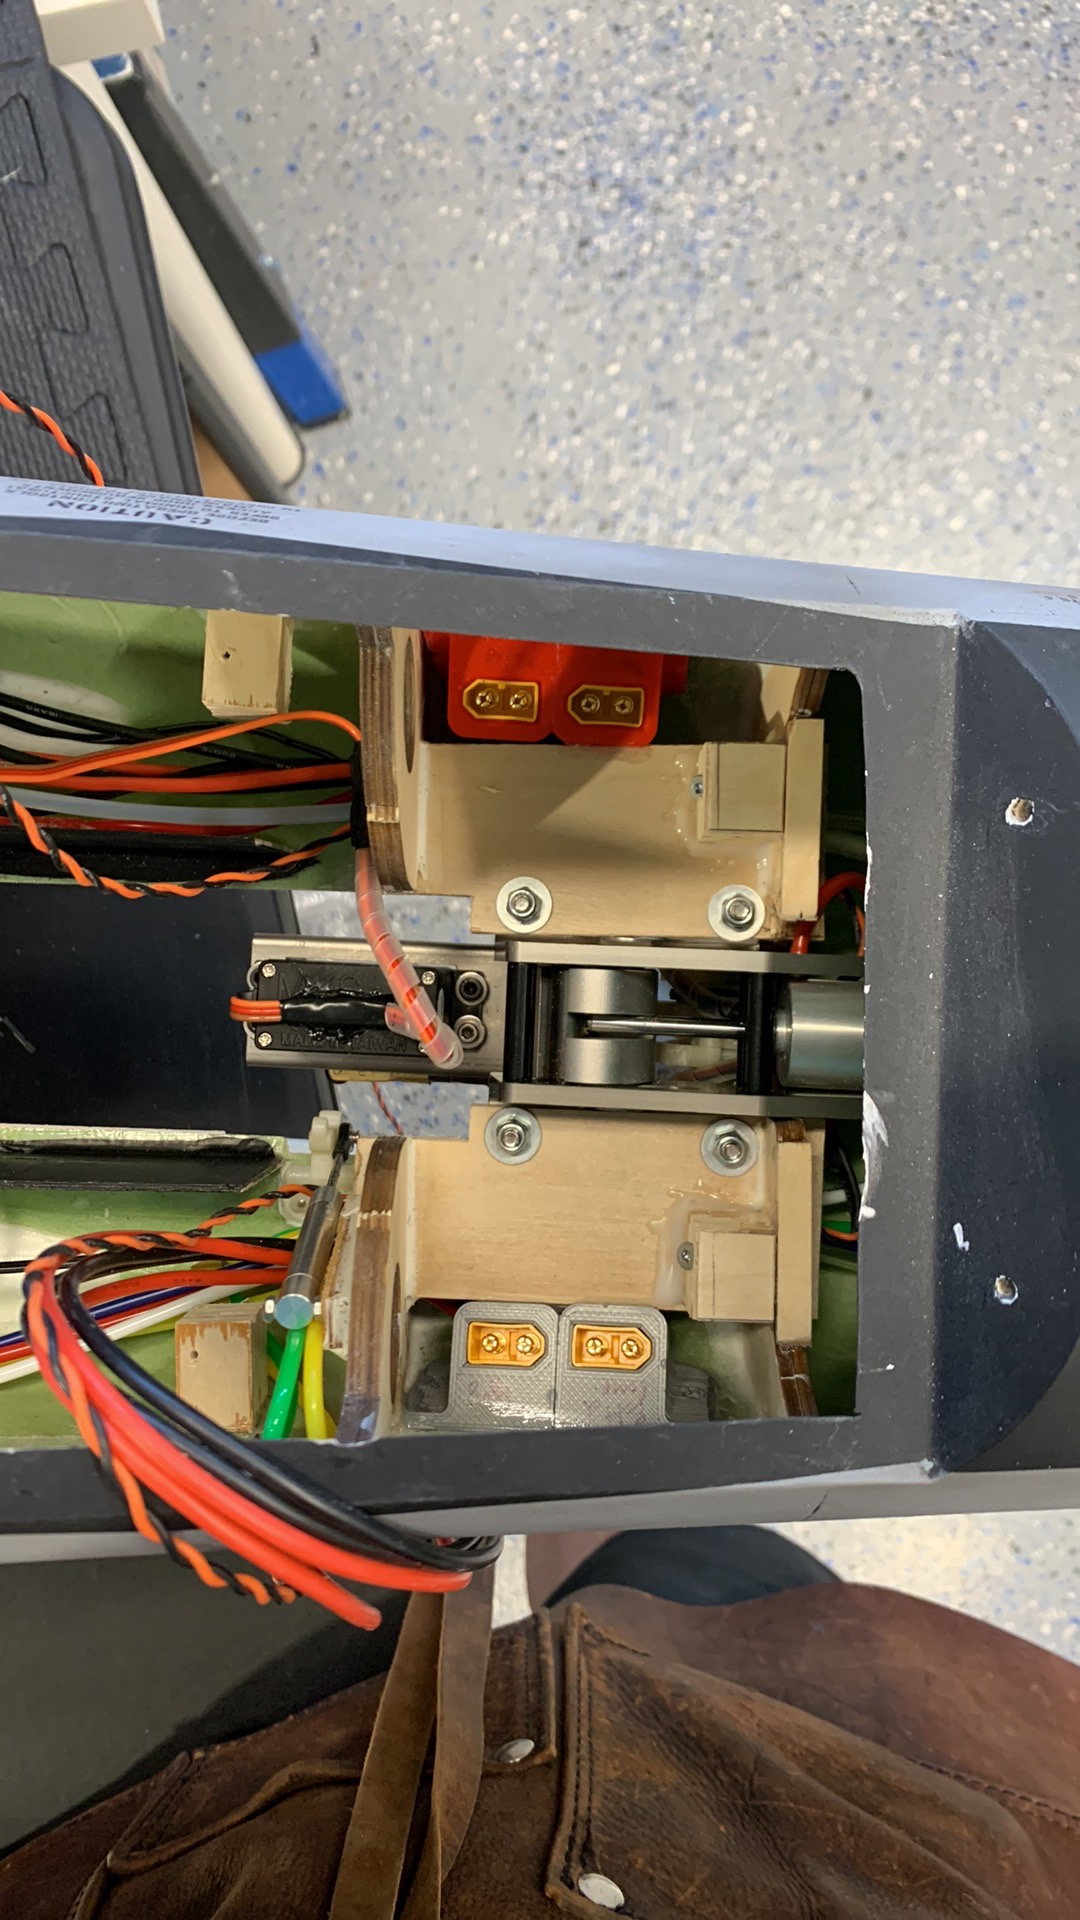
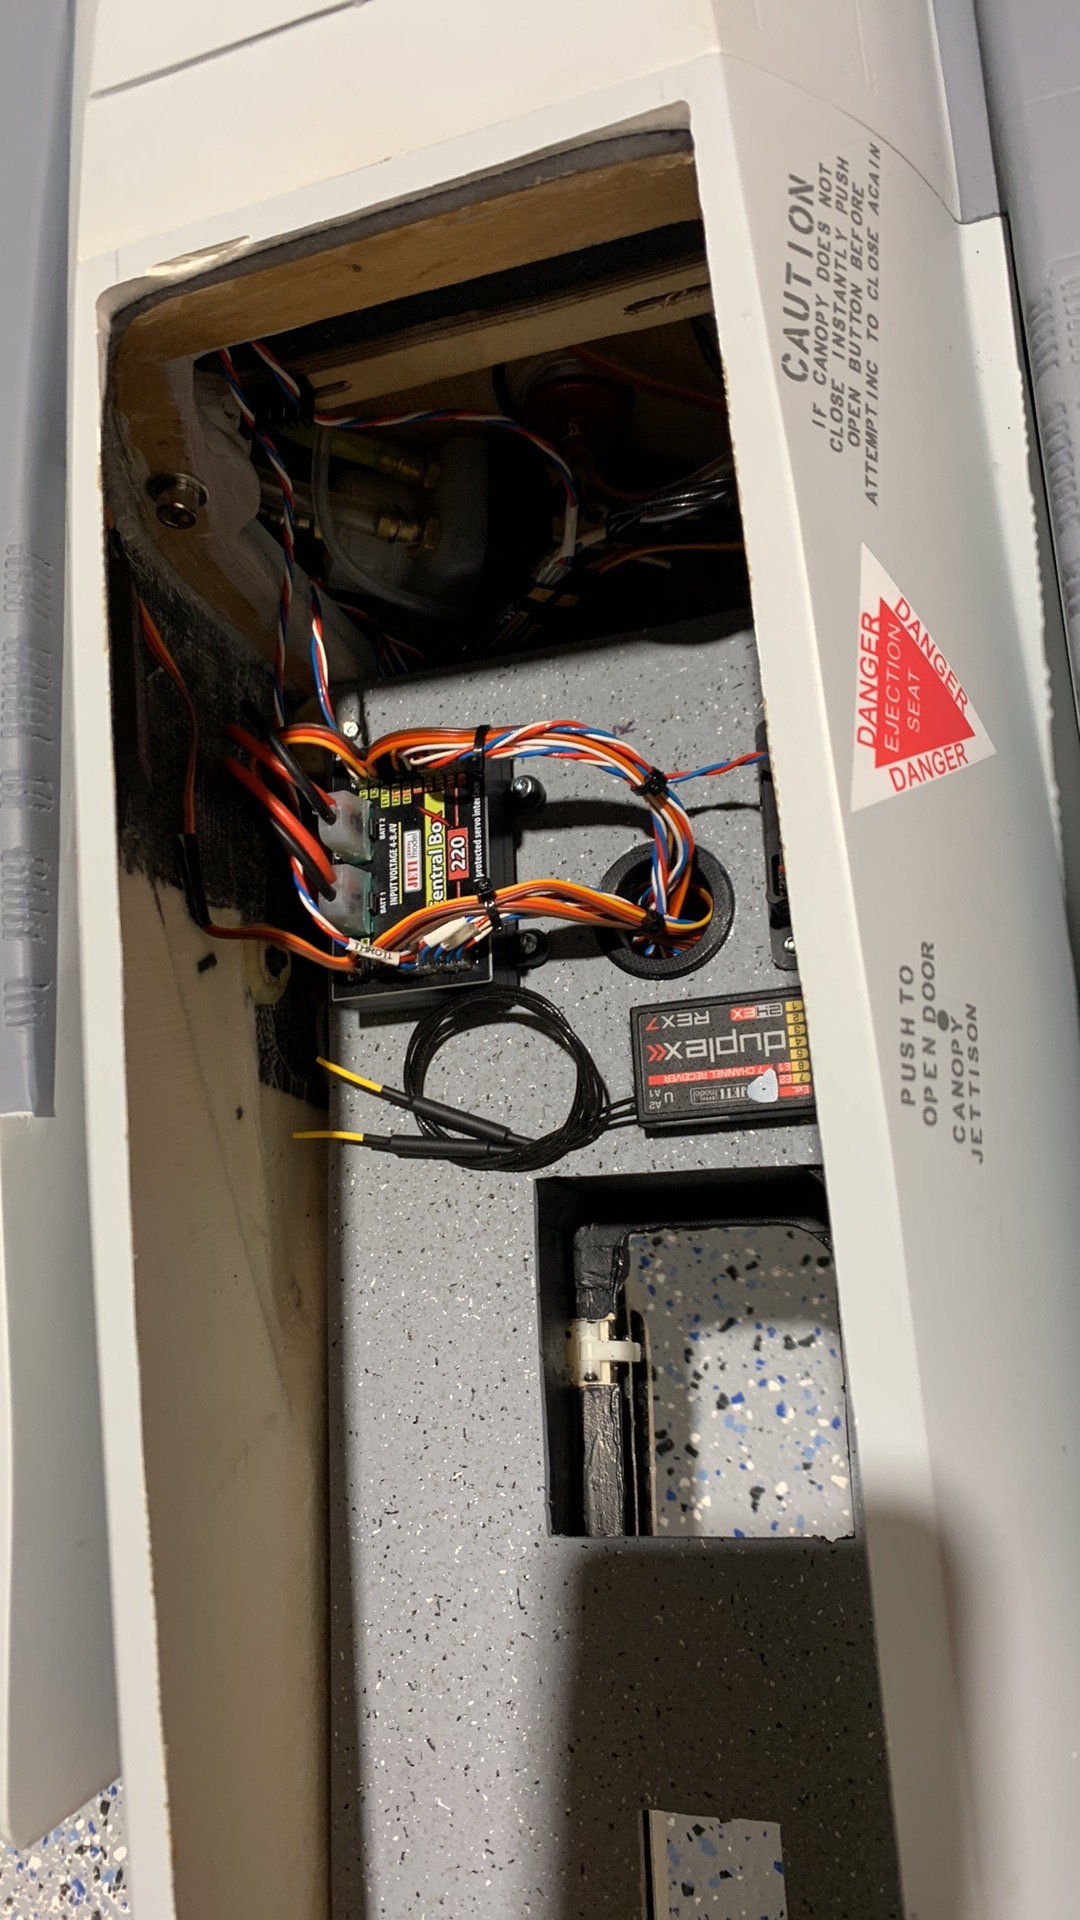
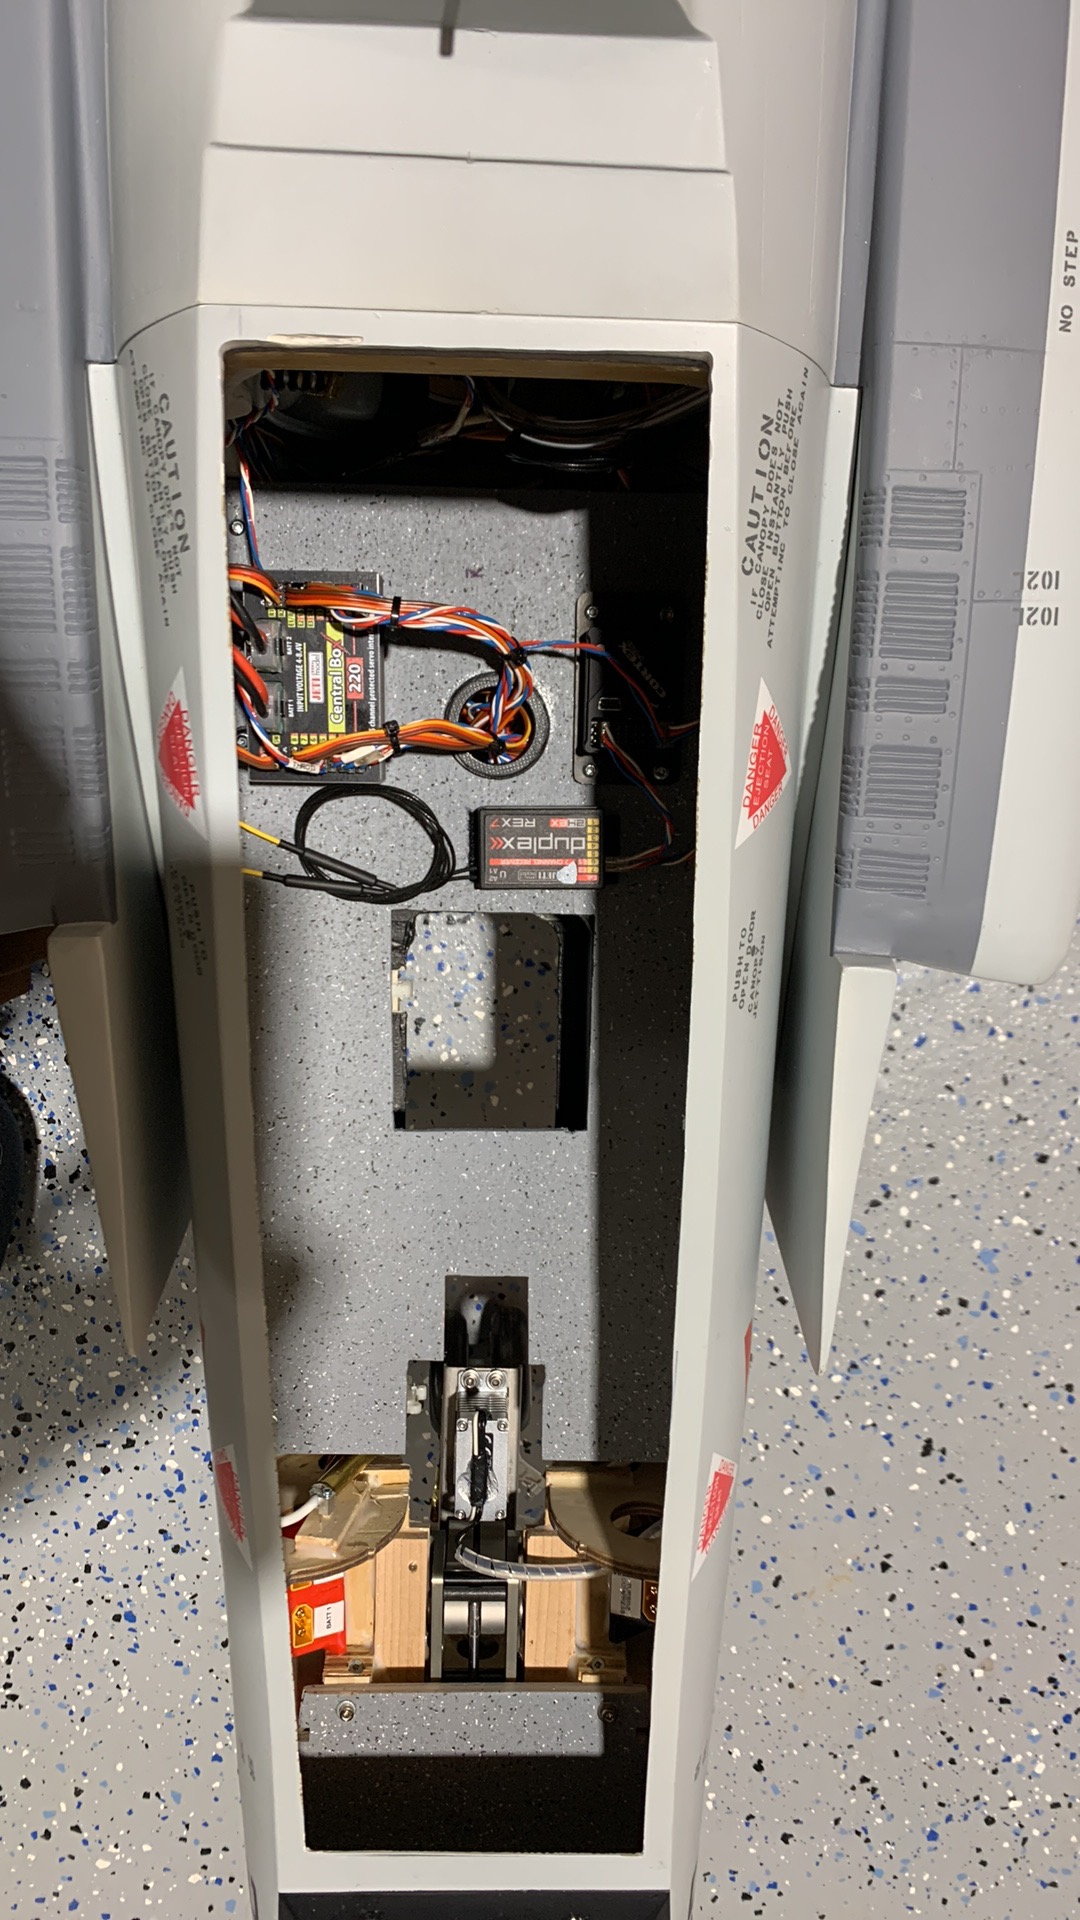
This last batch is a bit out of order. Chute mechanisim on New F4
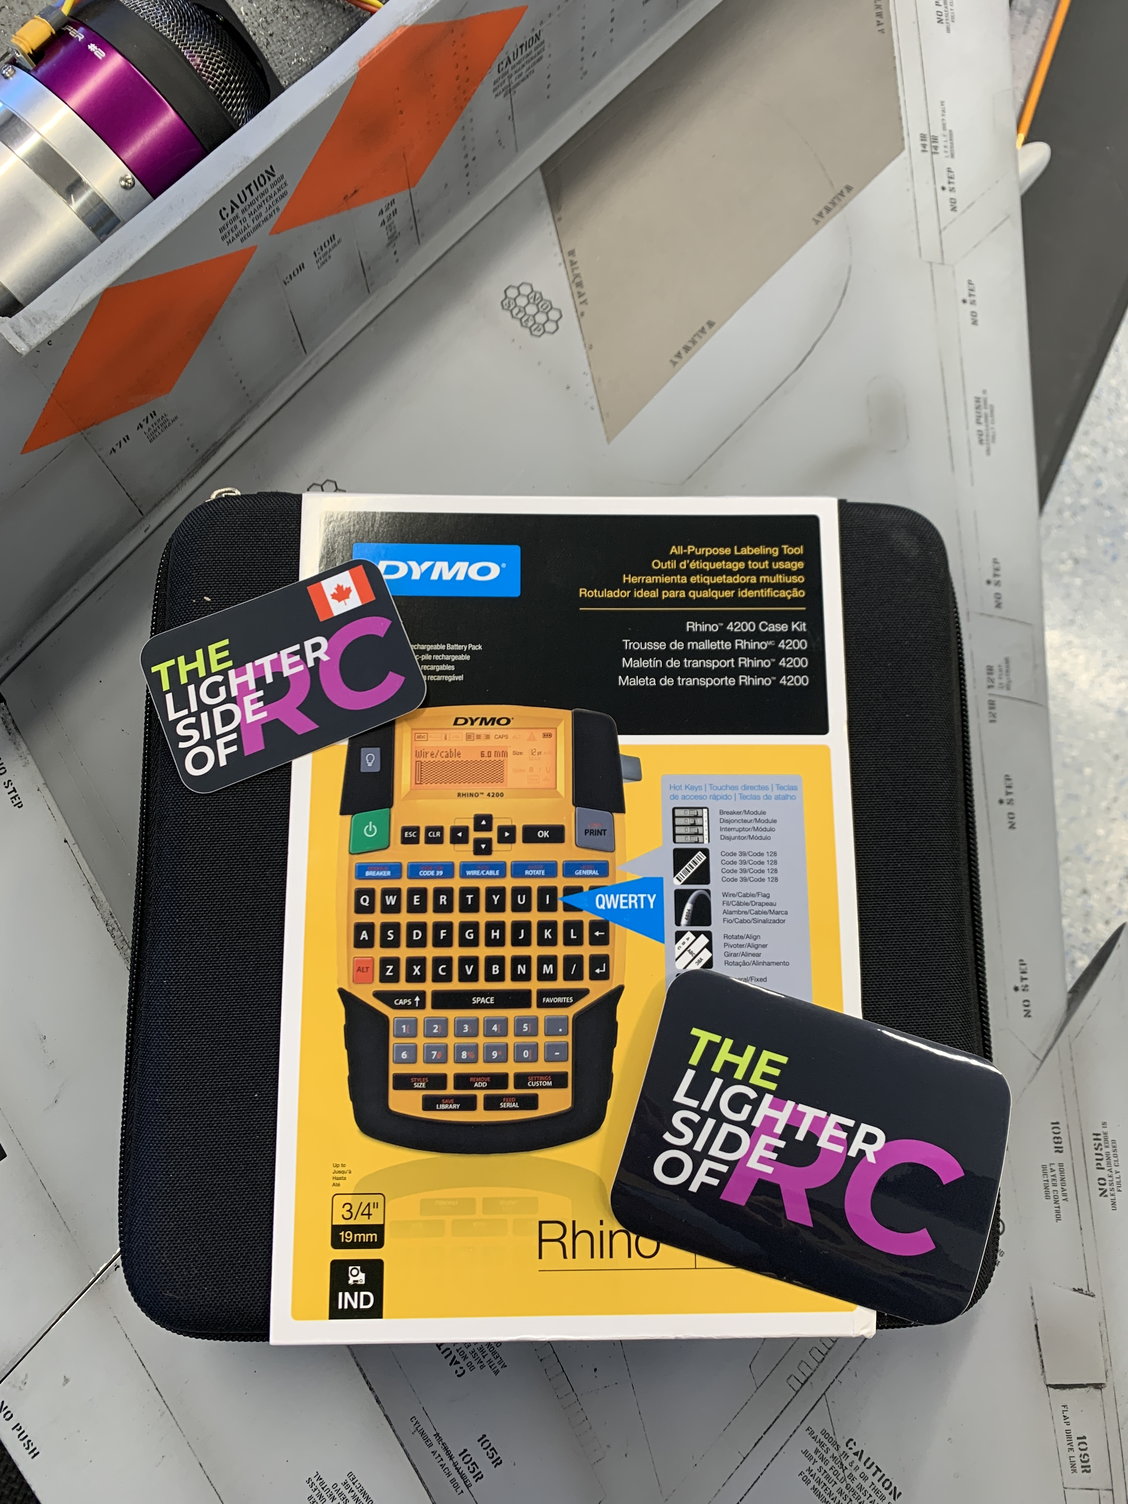
The New Tool in the shop! Shrink tube label makers.
Old F4 on the RCCGMACHINE to check balance and battery locations.
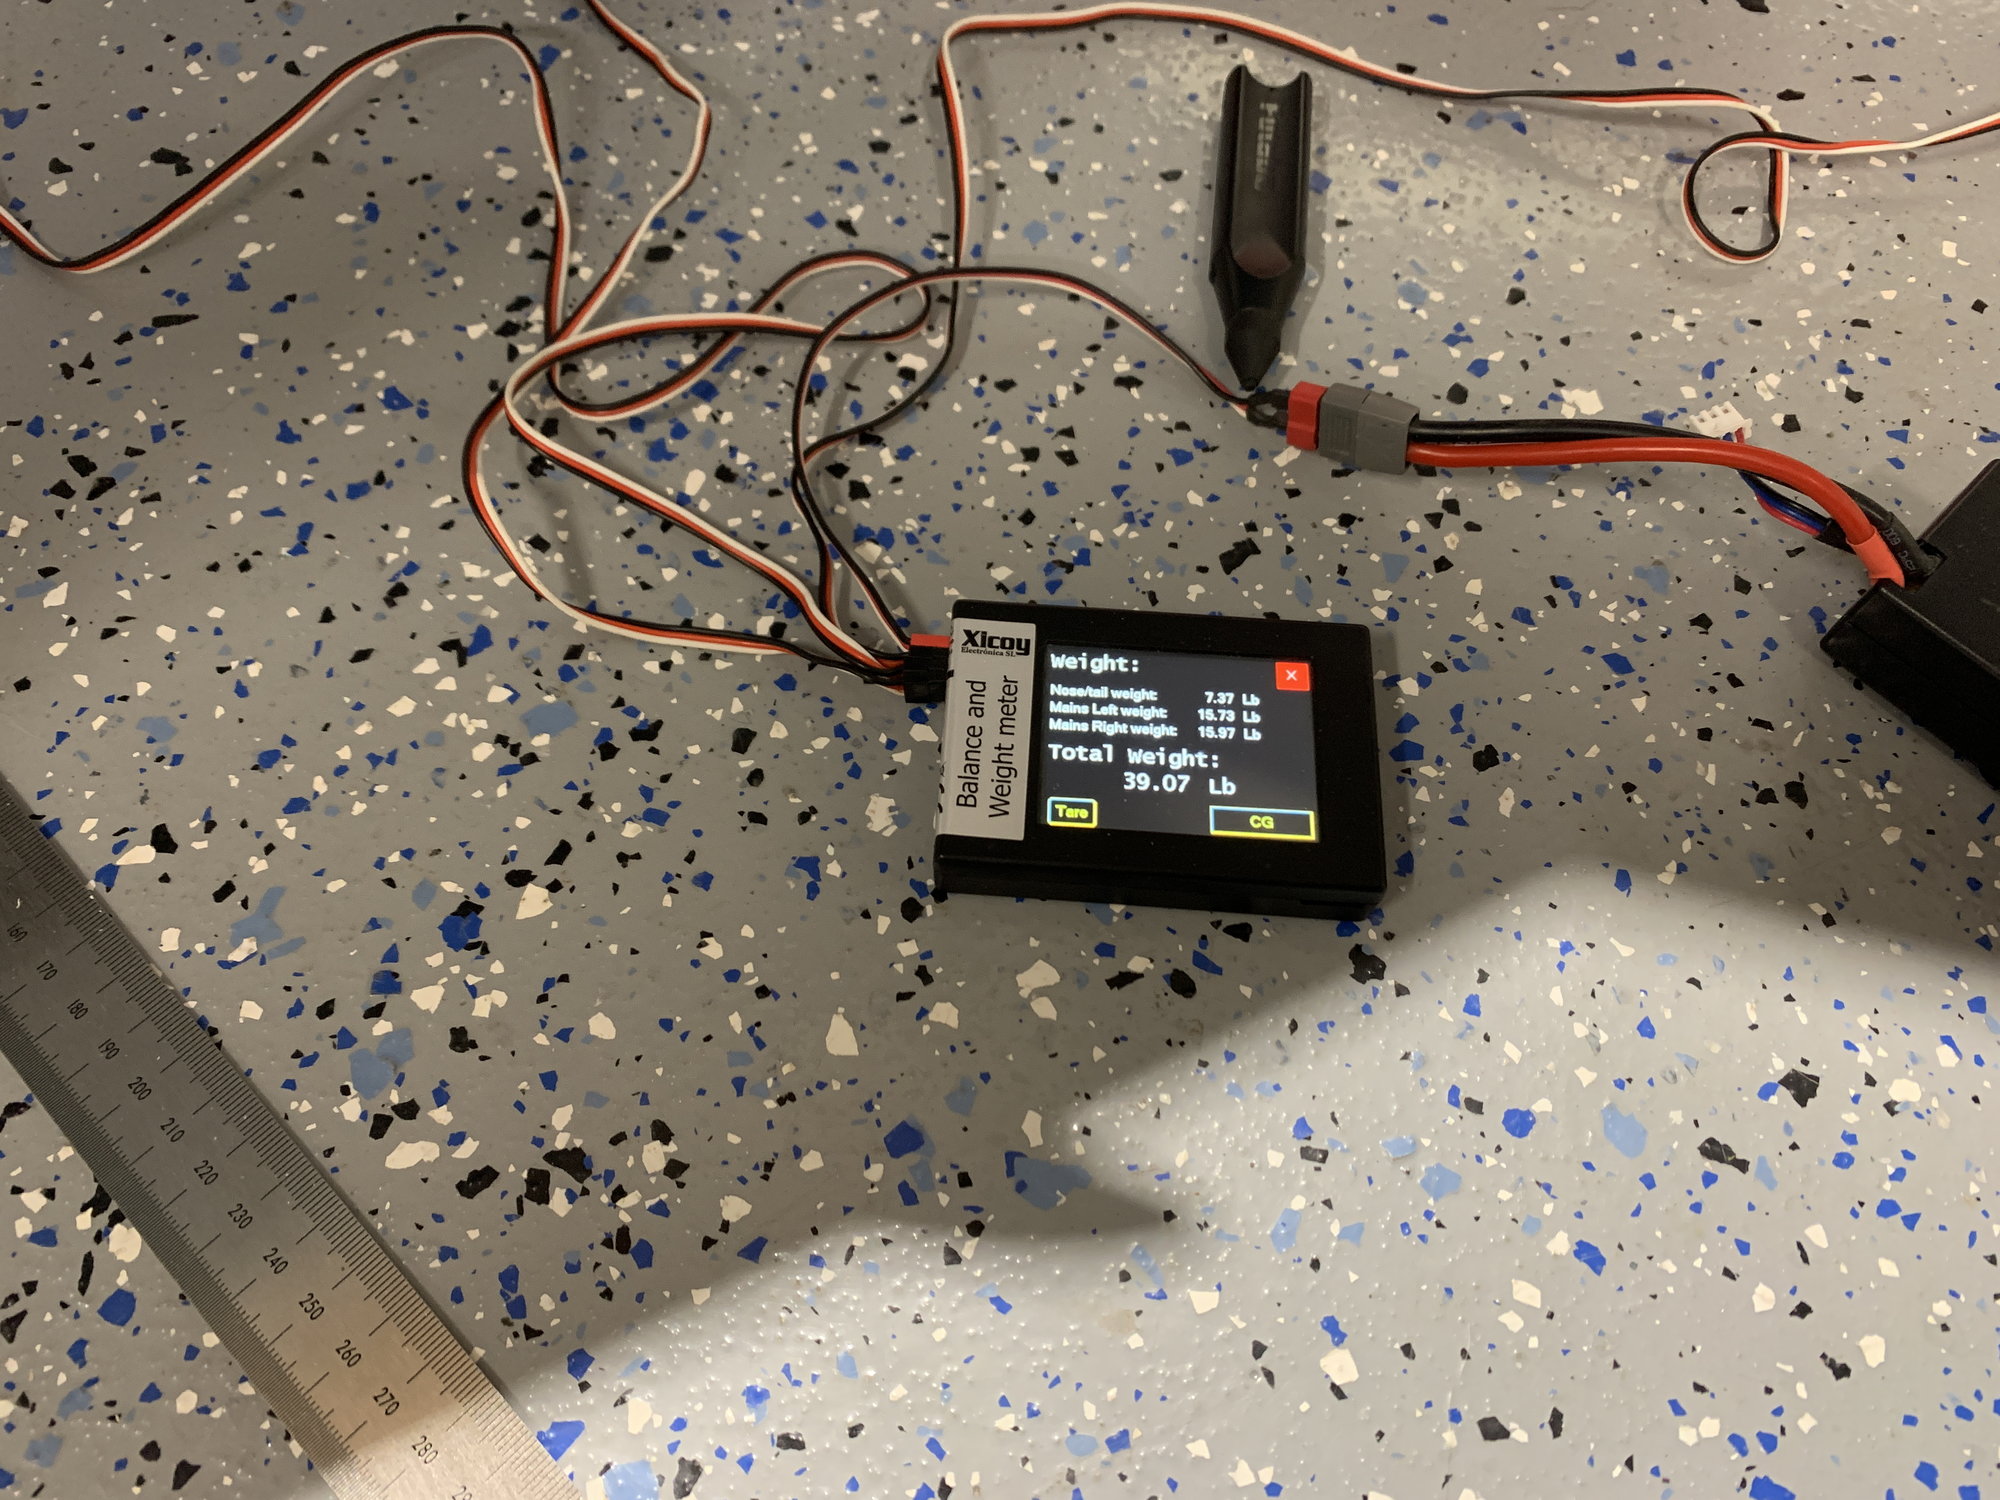
Final weight on the F4. UAT Full. Balanced both aircraft at 335. there is 2.5 strips of weight in the old f4 nose. removal of this weight allows CG to go back to 345.
The following 2 users liked this post by Canadian Man:
cptnassos (03-05-2023),
Shanehendo (02-26-2024)

The following 2 users liked this post by Erik R:
Canadian Man (03-05-2023),
SkyKnight (03-05-2023)

The following users liked this post:
Canadian Man (03-05-2023)
The following 2 users liked this post by Canadian Man:
LA jetguy (03-08-2023),
Shanehendo (02-26-2024)
02-22-2024, 02:37 PM
#574

My Feedback: (13)
Guys, I had mine at an event recently and a gentleman asked a bunch of questions for his that is on order. I typed the following up and sent it to him. If it helps someone here, excellent. If you have a better way, excellent. Take it for what it’s worth…Jim,
Here are the things I’ve found with the airplane. I’m thinking going nose to tail is the simplest way to go. Remember that I have a tendency to keep my planes forever and build them to go 1000 flights so some of this is probably overkill. My F-16 you saw has 300 flights and I’ve had it eight years. My BV F-4 first flew in 1998 on ducted fans…etc.
I cut the nosecone off mine to grant easy access to the batteries. I have four batts (radio, radio, turbine, and lights). For CG they all ended up way far forward. Remember though that I flute metaled my tail and put the drag chute in, so you might not end up needing that much in the nose. The other thought here is that my cockpit does not come out with the canopy because I intended to make opening canopies. With the ability to reach in through the cockpit section, you can probably get the batts far enough forward without the removable nose cone.
My buddy had a SM phantom previously and had a hard landing with it. When the nose slammed down it ripped some of the fiberglas forward of the intakes. To combat that I added another layer of glass in the forward nose. I’m not convinced this was necessary.
The cockpit tub is very brittle plastic. I knew that wouldn’t last, so I added a layer of fiberglas to that. This is necessary IMO…especially if you’re going to be removing the cockpit regularly. You’ll have to hog out a bunch of the forward cockpit to clear the NWS steering servo that lives the back of the nose gear leg
The nose gear: F-4s need to sit with a positive AOA on the ground or the takeoff is very abrupt. If you look at a BV phantom they look goofy on the ground because they taxi around nose up. That’s for a reason! When I first had the SM Phantom I deflated the nose strut to look more scale. It then JUMPED off the ground. Two fixes, one: just keep the nose strut inflated (it’s a pneumatic/hydraulic affair), two: buy the matrix nose strut (which is what’s on mine now). It sits very low/scale on the ground, and then you add air to it (I have it mixed to full throttle so on the takeoff roll my nose strut extends to provide the positive AOA for rotation). My opinion is save the cash (Matrix was $400 when I bought) and just keep the stock strut inflated and accept the looks on the ground
Gear valve. My buddy there at the event that had a big red SM F-4 used a UP-x valve. I do not recommend that. He struggled with gear/door issues all weekend. What I did, and would do again, is to use a BV high-flow servo-activated valve for the gear and a xicoy (or equivalent) single action electronic valve for the doors. Because the doors stay open when the gear is down on a phantom, I Tee the gear down line to the door open line. When you select gear down it opens the doors at the same time. Then I use the single action valve to close the doors. Works like a champ and is very simple while providing a good volume of air to the big gear.
Fuel system: There are three tanks. One in-between the intakes and one on either side of the motor. I think the forward tank accounts for 50ish% of the fuel and the two saddles are 25ish% each for the other 50. When you plumb the system, you determine how the fuel will feed. Most guys set this plane up to feed from the saddles to the forward tank and then the forward tank to the UAT. My issue with that was that depending on how long you flew you would have a varying amount of fuel in the forward tank on landing, and therefore a variable CG on landing. My technique was to feed from the forward tank to one saddle, from that saddle to the other, and then to the UAT. The forward tank empties completely every flight that way and I have a consistent CG on every landing. I used high-flow fuel fittings/lines throughout the system to minimized fuel system drag. This has been a great set up. When I land I usually have a full saddle and sometimes a bit of fuel in the other saddle (which sits very close to the CG so the effects are minimal). It also ensures full useage of the fuel whereas in a parallel fuel system if one of the saddles goes dry you cannot get fuel out of the other one. I used a BVM hi-flow UAT and would do that again. It fits nicely on equipment tray on top of the intakes. To mount the forward fuel tank I made wood mounts that screw together…I’d probably just stick it in with good velcro today if I had to do it again.
CG: LOTS of discussion on this on the web. I dug forever through it and got more and more confused. I think a lot of the confusion had to do with the way guys were feeding their fuel as discussed above. What I found/like us 330mm back from the leading edge of where the wing meets the fuse. If you have a xicoy balancer it equates to about 192mm forward of the main wheels. Different guys will argue all kinds of different stuff and I think a lot of those numbers were driven by the varying CG…Ie they balance with this much gas in forward tank etc…mine is done with fuel in UAT and that was it. When Phantoms are nose heavy they fly really poorly: they tuck their nose low into turns, they fly a million miles an hour on final, they struggle to settle into that comfortable squat attitude on final etc. When you get the CG right on a Phantom, once you’re in the correct attitude on final you feel like you can just glue the elevator stick in place and go get a cup of coffee…they’re that stable on final…BUT the CG has to be right.
Radio Placement: There is a tray on top of the intakes that sits in the spine aft of the aft cockpit. I thought I was going to be smart and run all my radio gear up there: gyro, retract valve/servo, xicoy valve for the doors, power distribution etc. I would not recommend doing that! The plate moves too much for it to be a good gyro platform. All the servo wires running up there makes it a huge pain in the ass to move the plate. The UAT has to come out of mount to move the platform etc. If I had to do it over, I would make the cockpit come out from the top of the plane so you just pull the canopy and the cockpit slides out. Mine goes in from the bottom because I intended to make the canopies open (but never did). If the cockpit came out easy, there would be plenty of room for radio gear in the nose (like my buddy with the red phantom that was in PHX). I would stick the UAT on that platform like I did and maybe a rx or something. I’d put the power distribution unit in the nose, gyro in the nose, etc.
Radio Gear/flight controls: I used MKS 1220 servos on all the flight controls except the stab. I used two MKS 777s for that. Some room for discussion here: when a servo fails, it often locks in place. IF a stab servo were to fail and lock in place, it would prevent the other servo from moving the stab and cause the loss of the plane. Therefore, putting two servos on the stab, in essence, doubles the chance of a stab servo crashing the plane. When Lindberg was asked why he didn’t fly a twin engine across the Atlantic his response was “because it doubles the chance of an engine failure”. Kind of the same thought here. With modern servos being as strong and precise as they are, a really high quality single might be a better answer. When I built my BVM F-100, it calls for two JR8411s on the stabs….I put a single MKS 777 on mine for the above logic. That said, my SM F-4 has been flying 7 years on two servos…do what makes sense to you here. Lately I have really come to love Pro-Modeler servos as well. They are very quick, precise, strong and reasonably priced. I installed the flap horns backwards. This allows me to get the flaps down very far for landing flap which the plane absolutely loves. When in that position, the servos are at a great geometric position and draw little amperage. The “bad” thing for that is that in the takeoff position, the flap servos aren’t in as good a position so they draw a bit more amperage but it isn’t excessive and landing is where I want all the drag I can get. For throws I used: ailerons: 27mm up, 23mm down, Elevator: 28mm up throw, 40mm down (gives a balanced feel when inverted), flaps: takeoff 40mm down from neutral, 115mm down for landing (full scale was 60 deg full flap if I recall correctly…this approximates that—full scale was ridiculously stable in the pattern FWIW), rudder 25mm L/R (that was all I could get based on how it was hinged). For the elevator neutral position I measured the LE at 50mm below the panel line in that area for flying and takeoff flap and 55mm bellow the panel line for landing flap (F-4 gets up elevator with more flap). Obviously these elevator neutral points coincide with the CG I gave above.
Intakes: my buddy that had the one where the nose ripped on a hard landing said that where the intakes were glued into the plane (where the interior intake met the extrerior part of the intake ) was weak and he could see the interior intake collapsing at high power settings. To counter this I poured an epoxy/microballoon slurry into that area. My intakes are now very very solid with zero propensity to collapse. Necessary? I don’t know. I did it but choose your own adventure here. Remember that mine is chubby (43# dry) so all of this stuff contributes to that.
Bypass: I installed both the lower and upper bypass in my plane. I filled/finished them on mine more as a place to put a squadron zap (sticker) and give the plane a very finished look. Probably not necessary but looks nice.
Air kit: I also had SM do the doors and install airlines etc. When it showed I was glad they had done that because it mapped out where/how to run air lines etc. That said I tore almost all of it out. I didn’t like the airline used and I wanted to paint my interior (for a finished look and also for fuel protection). Their air cylinders are marginal at best but more on that later.
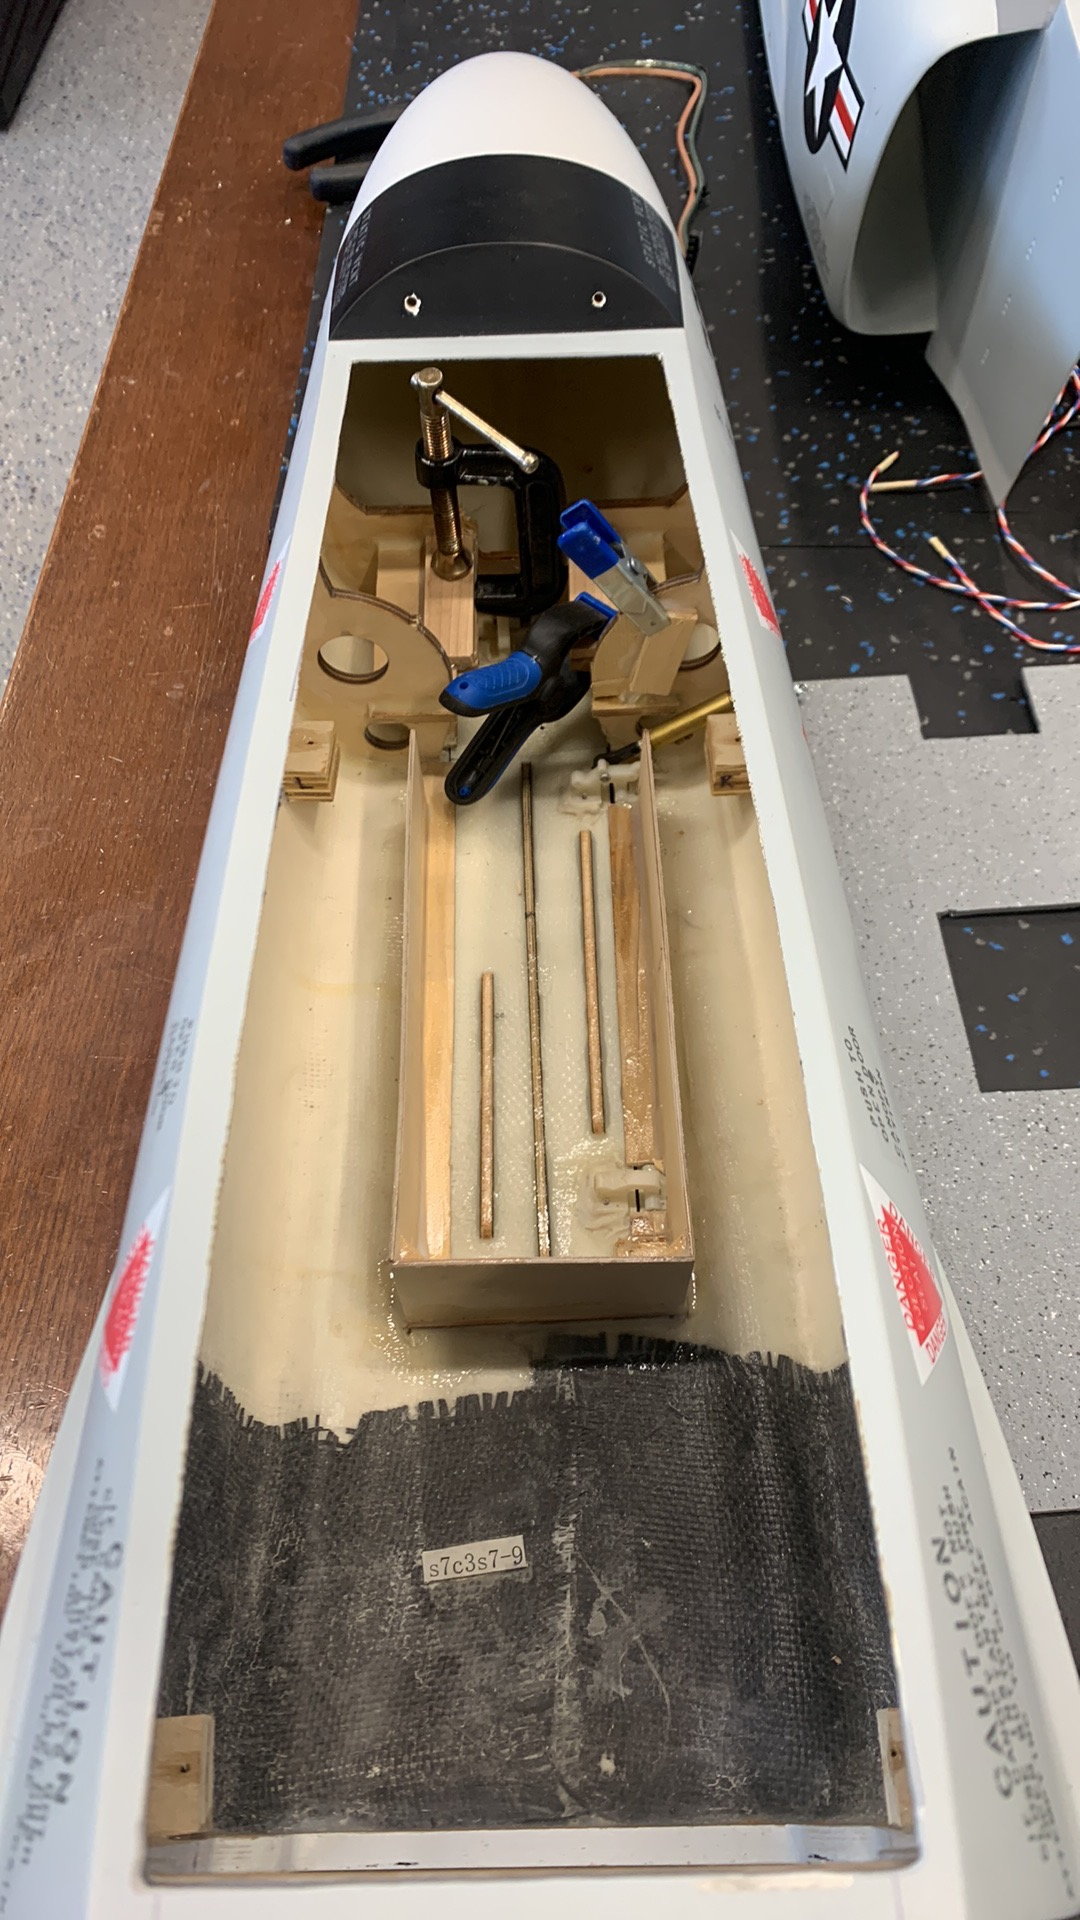
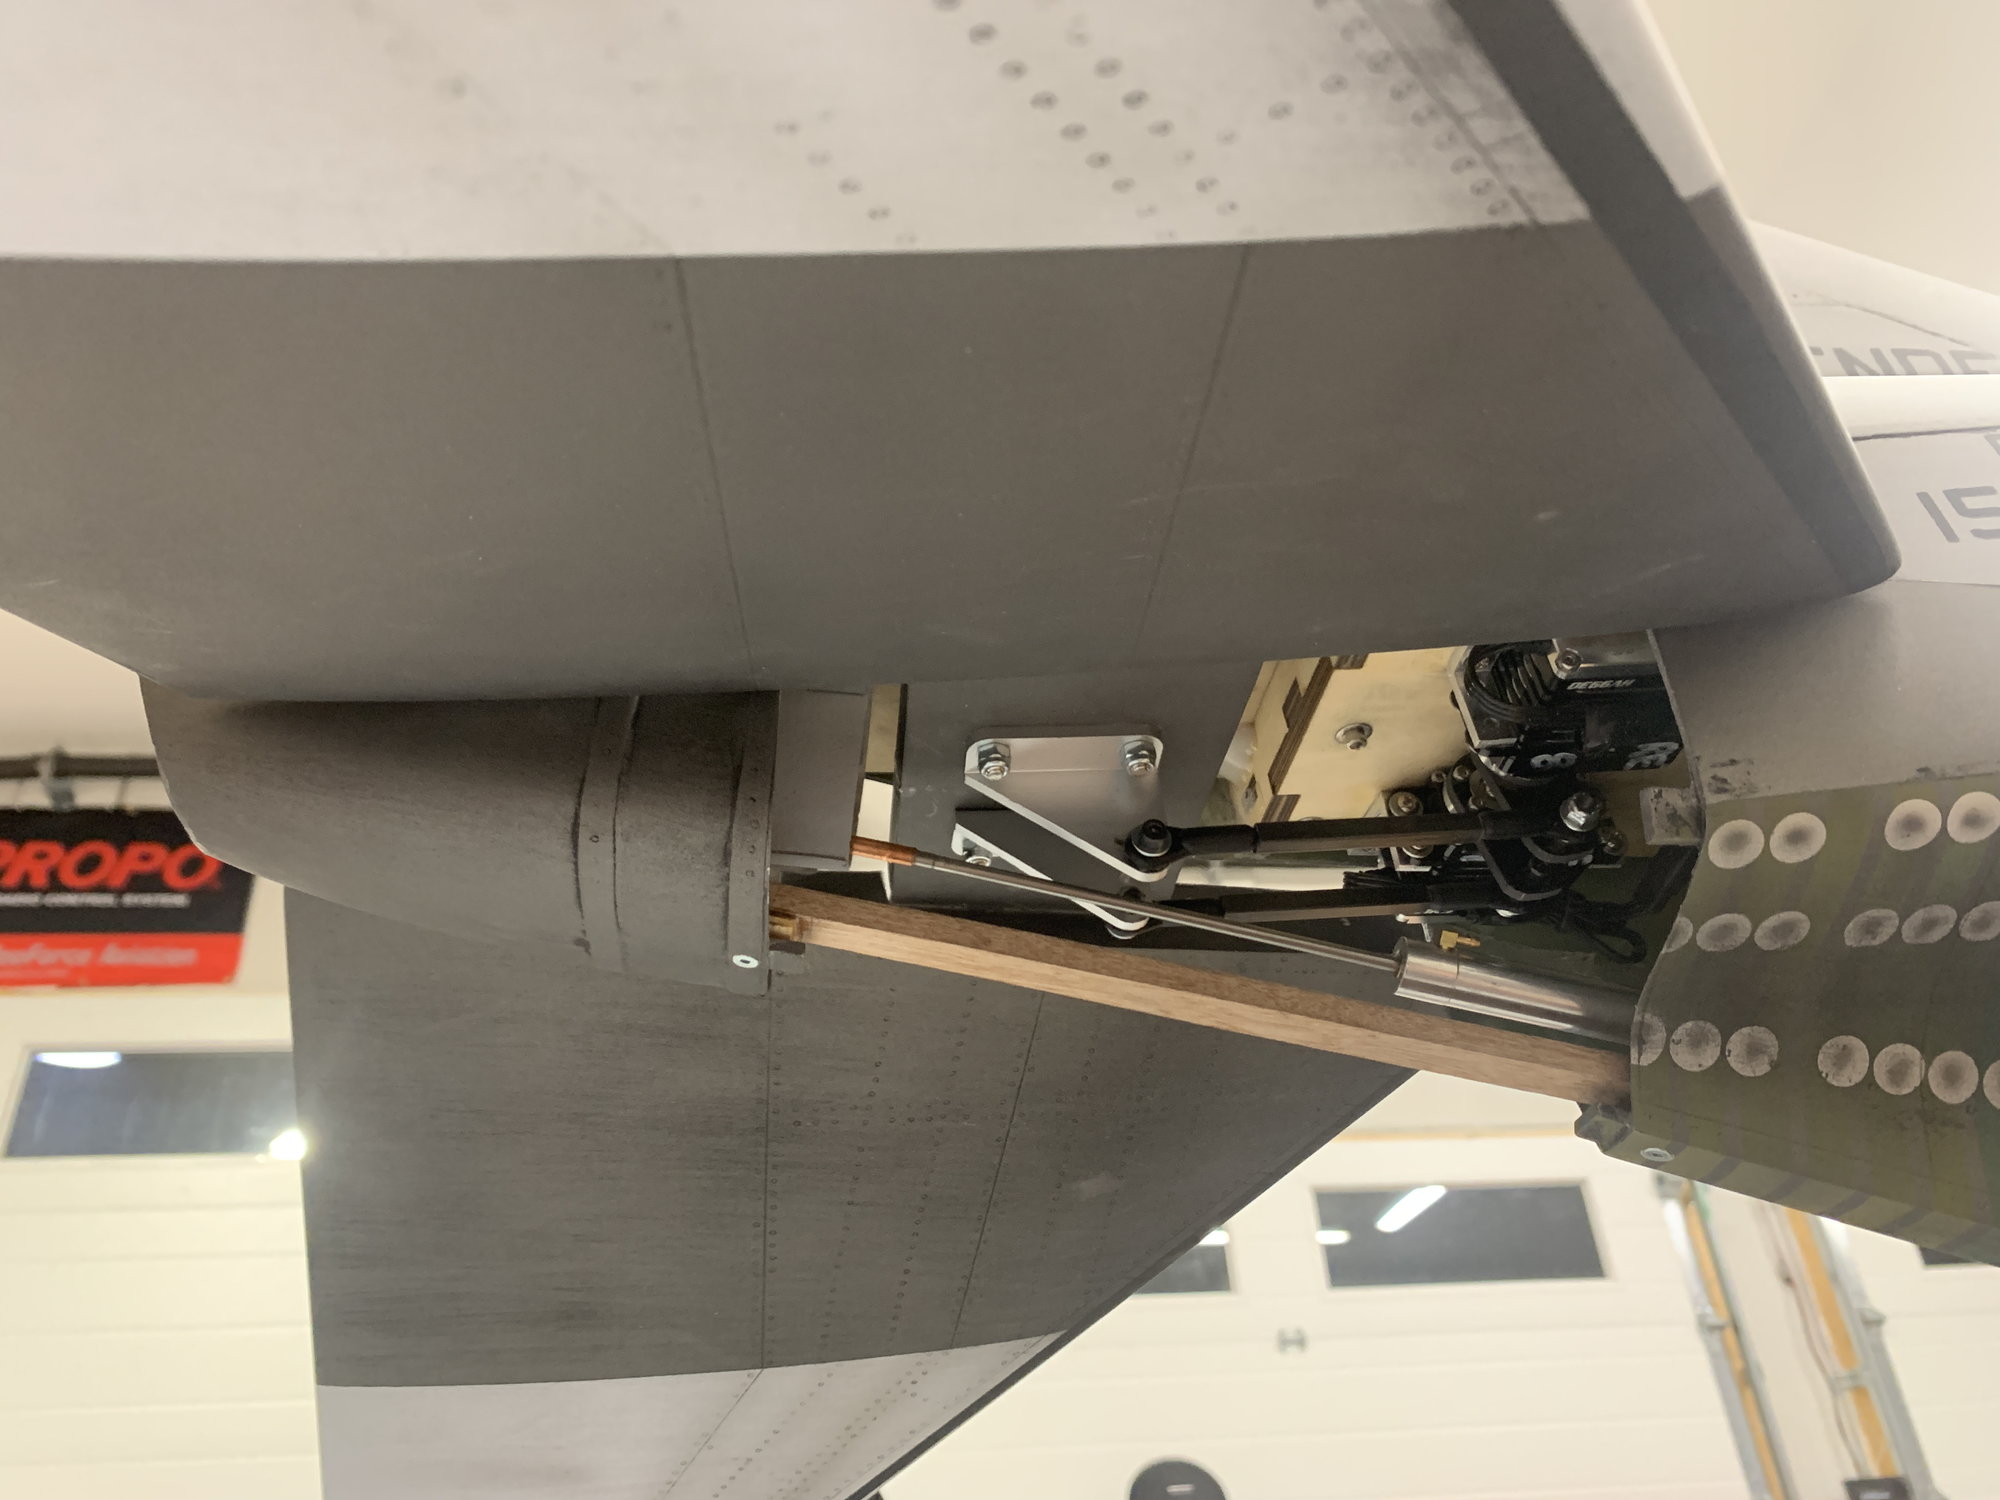
Air tanks/fill etc: I used the area aft of the aft edge of the main hatch and around the pipe to put in all my air tanks. I run three separate air systems in mine: Gear/doors/drag chute, brakes, and a blowdown system (this is another system that through the use of a single action valve I can open, run through a one way check valve into the main air supply for gear etc. If I bleed out the air system while flying I can select gear down and them open the blowdown valve and give the gear a chance to come down). Some people look at the blowdown as extraneous and it probably is, but with the inhospitability for gear up landings where we fly I thought it was good. If I lived somewhere with grass I’d just put it in the grass gear up worst case. For the half circle that is the spine aft of the main hatch I put a piece of wood there and put my air fill valves/guages for the three air systems.
Pipe: Lots of discussion online about this as well. The stock SM pipe has a little bend at the end. My understanding is the tif you install it as directed you get a big pitch up with power. It sounds like a lot of guys flipped that pipe upside down to mitigate the climb with power. As you know the FS had the engines pointed down at 12 deg I think to mitigate that issue. I used a TAM pipe which is straight. I get a tiny bit of climbing with power. To mitigate that I simply mixed in 5-10% down elevator with throttle and don’t notice it at all. TAM is no longer in business but I hear his pipe maker Hiep is still producing TAM’s stuff. If it were me, I would skip the SM pipe and order a Hiep pipe, but that’s technique.
Nozzles: I ordered the TAM stainless nozzles as well. It’s not exactly scale in that for the E model (which mine is) they had a different dash number J-79 so it had much longer nozzles than yours and they were black. These are SS so a silver-ish color. Very few people know that and I think they look cool as they are. I would bet Hiep has the templates for these nozzles as well. For me, I had to create standoffs for those nozzles to get them to stick out far enough to look scale. For you, with your short nozzles you could just screw them to that bulkhead back there and be good. You might have to creat standoffs to the top two screws to give the nozzles the down angle that’s so pronounced on a phantom (although with the short nozzles it’s probably less noticeable ).
Metal on the back end: as you know the whole ass end of a phantom is titanium (I think) and is unpainted. SM uses silver paint. I wasn’t in love with that so I took the time to put Flite Metal on all the “raw metal” portions of the aft fuse/stab. There are lots of places that describe how to FM something, but I think the result is stunning. It took some time and added weight but damn does it look good. Also, if you run diesel, when you shut down there is a lot of smoke. This gets all over the FM and really adds to the sooty/scale look!
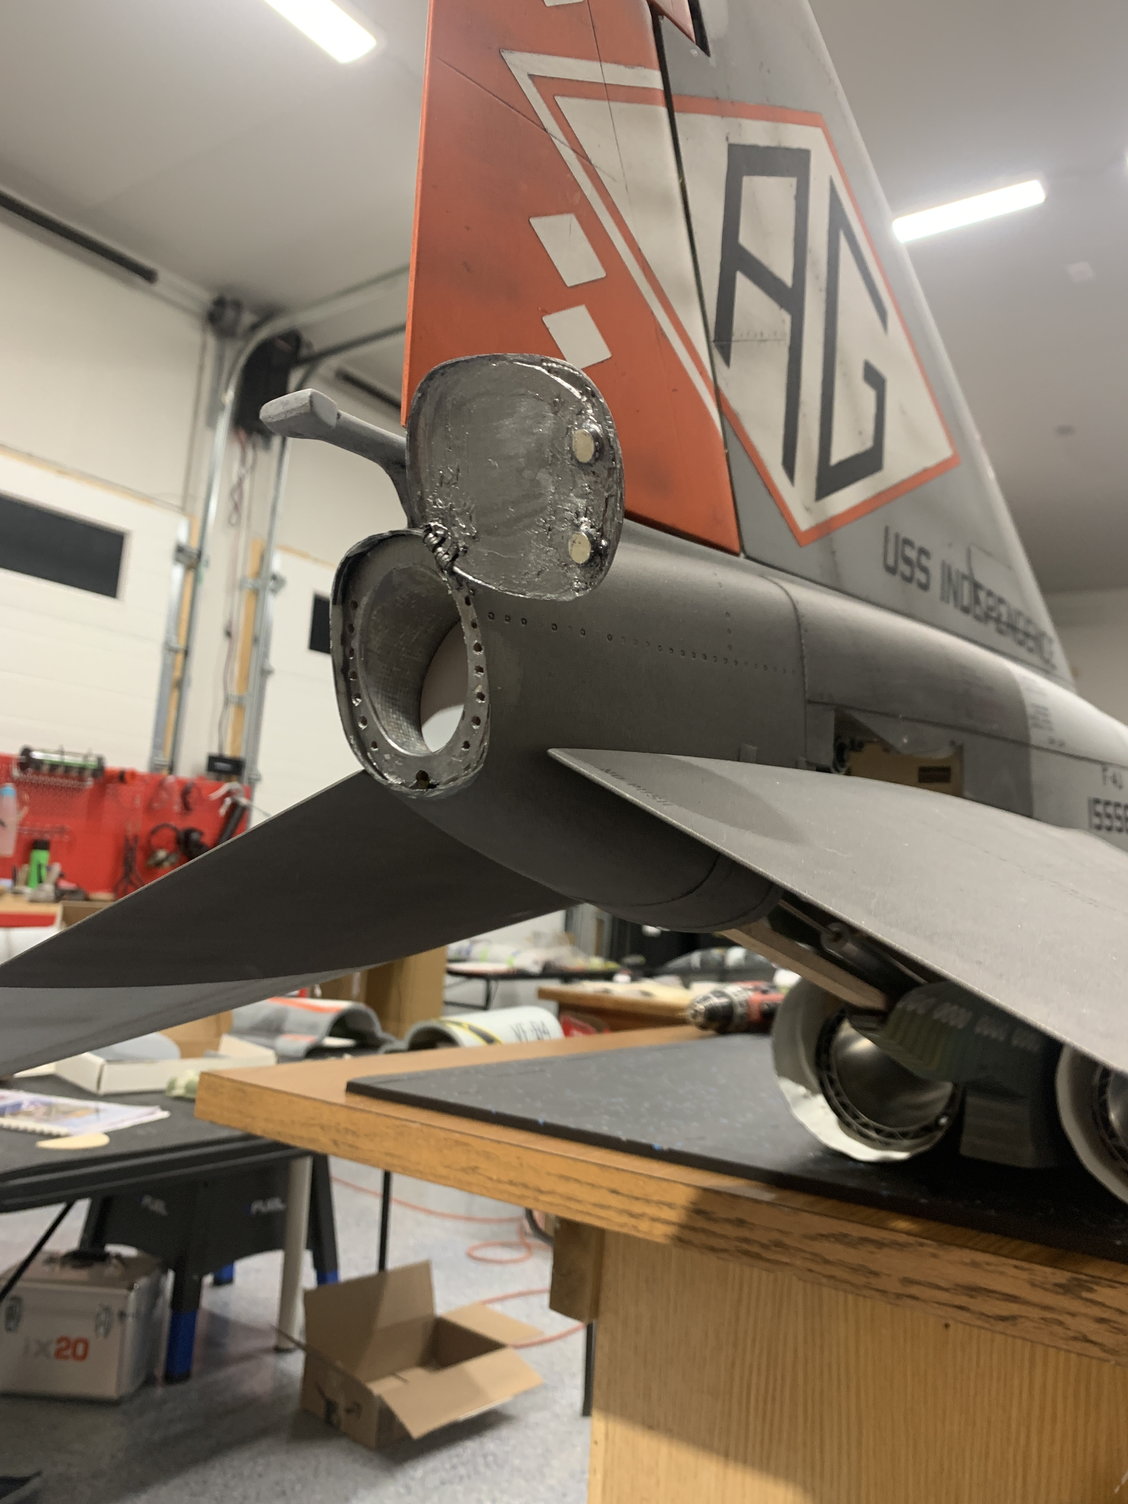
Stab opening covers: Because the stab is on a rocking platform below the hinge point you have to have a horizontal hour-glass shaped cutout to allow the stab to move. So, just like the FS you worked on, it gets a cover plate. SM gives you a brittle ****ty piece of plastic for this. Mine was curved very badly and would have been a major pain in the ass. I used their piece as a template to cut a new piece from .015-.020 G10. I also did this for the half moon tracks that the cover rides in. These were then covered in FM and the end result has been Maint free for the 80 some flights I have on mine. They look much better than SM std as well.
Drag Chute: Back when I built mine there was a company called Details for Scale that produced kits for a drag chute. I purchased that and installed it. D4S has had a bunch of issues, changed hands etc. I’m not sure of their current status. Making your own kit wouldn’t be too hard. You create a tube for the chute to go in. It will be a bit oblong from a cross-sectional view. In terms of length, the forward edge of that tube is screwed into the elevator stab plate just aft of the elevator hinge mechanism and extends to back end of the plane. You have to cut off what would be the chute door on the FS. The D4S kit had a molded tailcone that came with it but you could use the piece you cut off if you were careful. The chute is expelled by a long air ram with a plunger on the end that physically pushes the chute. The air ram could be made by ordering the ends from BVM, and then sourcing appropriate diameter aluminum tubing and cutting to length and using a piece of music wire for the “silver” part of the actuator if you follow. The forward end of the ram sits below and forward of the rocking portion of the stab (ie the middle of the stab that goes through the fuse). There is a cover plate that covers the whole stab mechanism. I put a piece of square stock wood that covers the lower “spine” of this area (ie the lateral area immediately above the hook). That square stock gave me a place to attach the forward portion of the ram to. When compressed the plunger for the ram sits in the front of the chute tube, and when extended the ram is flush with the aft portion of the fuse without the tailcone/chute door. To mount the chute door I used two robart pin hinges that, when the door is closed, are at approx a 60 deg angle. Then when the door is open the hinges are almost straight. Once I had the hinging all correct I created a “bulkhead” in the very forward portion of the tailcone. When you push the chute out, it pushes on that bulkhead and opens the door slick as snot. To secure the chute, I ran a piece of yellow nyrod from my chute release servo up to and along the upper spine of the jet. Just forward of the aft end of the fuse I created a little gap (~1/4”) in the yellow nyrod and then there is another piece of yellow nyrod that is approx 1/2-3/4 long that I hysoled all in. I then run braided brass cable from the servo, through the nyrod, across the 1/4” gap in nyrod into that 1/2-3/4” aft piece of nyrod. In the area where the cable goes across the gap I silver soldered it to make it stiff. There is a loop in the end of the chute line that I place in the gap, and then use the servo to push the cable across the gap and into the short piece of nyrod. To release the chute I simply use the servo to pull the braided cable back freeing the chute and I can drop it at the end of the runway when I want. I got my chute from D4S as well but there is a guy on FB that is making them now. They aren’t cheap but they sure are a crowd pleaser when they work and are very effective at slowing the plane.
Lights: I installed the D4S lighting system, I drive them with the Jet Cat lighting controller which also drives my AB lights. In hindisght I would probably skip all this. It was a ****-ton lot of work and the effects are cool but it adds weight. I did the position lights on the wings, white beacon on the aft end of the vertical, red beacon on the LE of the vertical, landing light on nose gear (for mine, I think NG door for yours) and under-intake lights. Cool yes but a TON of work and some weight. As far as AB lights are concerned: because they are buried up in there you rarely see them…only at specific aspects do they show…and then they are quite cool.
Gear doors: my nose gear doors have been fine. Nothing significant to report there. Main gear doors are a different issue however. The inner gear doors absolutely don’t work as they come from SM. They use too small a door cylinder and their geometry is TERRIBLE. I’ll skip all the steps I went through, and skip to how I solved the problem: I ordered BVM 1” stroke door cylinders. There is enough room to basically mount them forward of the retracted main wheels in an almost vertical position when the door is closed. This has been exceptionally consistent and awesome. The cylinders have significantly more power than SM actuators (larger diameter) and with them nearly vertical the geometry is excellent yielding closed doors even at 200 mph. As I mentioned before these are T’d to the gear down line to open, and are on a xicoy single action electronic valve with a 5ish second delay from gear retraction (ie, gear up, 5ish seconds later the valve activates and sends air to the close side of the door cylinder). The little outer doors (outboard of the main gear leg door) are spring closed from the factory. I have yet to have one flight where I get the left one to close. I have tightened the spring up significantly and it still hangs open (see Barry’s pics from PHX). The right one has been fine. I think my next step is to put a small piece of plastruct on the LE of that little door that has an L cross section. I think the door is acting like a little wing and its form of lift is to open itself. I’m thinking that Plastruct will act like a spoiler to prevent the lift from happening and the spring will hold the door shut.
Main gear mounts: I think these are weak at best from the factory. What you’ll see when you look in there is a rail the retract mounts to that is keyed into the ribs etc around it but not to the fore/aft spars. What I did is create hardwood blocks that filled the space from the aft spar forward to the forward edge of the gear rail and from rib to rib and bottom of the rail to the top skin of the wing. Essentially a rectangular piece that filled all “free” space that I hysoled in (and then the same for the forward gear mounts). I also added a CF strip to the top of the gear rails that I tapped for the gear screws. Before I glued those blocks in I marked where the machine screws for the gear would be and drilled relief holes in the blocks. Once this was all glued in, the structure becomes VERY solid. My buddy gave me crap when I told him to do that to his red Phantom…he said “why don’t you just learn to land the plane?” He’s right of course…with good landings it wouldn’t be a problem. Of course he blew one of his wings apart on his next landing. When a Phantom gets slow it doesn’t stall in a traditional sense…it just picks up a HUGE sink rate. That happened to him and he was unable to arrest it before touchdown and the gear/wing couldn’t take it. An ounce of prevention now may save a ton of work in the future. This I would highly recommend
Gyro: yes please. I don’t know how close you were watching my 6-9 flights in PHX but the first flight after I put the TERs with the six MK-82s on, the plane was just a *****. Not uncontrollable by any stretch but just pitchy and *****y. I kept thinking it was the bombs causing that. I finally figured out that I had the gyro off. I turned it on and she was a sweetheart again. Again, it can be flow without but the experience is better with. Mine has a Powerboat iGyro 3e. I usually use cortex but couldn’t get them to get along with my turbine noise. The iGyro did fine with it and has the added benefit of the “Attitude Assist” mode. That works well for Phantom finals if it’s windy.
Engine: Mine started life with a KT 210. That was sufficient power but if I wanted to do a loop on center I’d go full power on downwind before starting my base/final turn in. I finally stumbled on a good deal for a 260 and put that in. Now if I want to go up right this second I can . Of note I have an airspeed indicator in mine so I have a speed warning set up to keep it at/below 200 mph. I test flew the red one that you saw for my buddy and he had a KT210 G4 in his but his is much lighter without all the stuff (lights, chute, FM on the tail, bombs, etc etc etc) and that was a really sweet setup that I enjoyed a lot. Mine handles the extra weight no problem but the lighter one was very enjoyable to fly and the 210 was plenty of power. I think you said you’re doing a Swinin 190. I think that’ll be a nice setup if you can keep it light.
Prepping to fly it: I think two things are important: turbine time and delta wing time. If you are proficient in those and have someone next to you that knows what they’re doing you’ll be fine. For the turbine time I think 50 flights on something would be good…your cougar for instance. For the delta wing time I would suggest buying a FW F-4. Yes it’s a foamy but it can be a good training aid if you let it. If you force yourself to fly it slow, get used to that nose up attitude…drive it down final where the elevator stick is stuck in place and you control descent with power (F-4s need power on approaches-hence the drag from the flaps all the way down being good). If, however, you allow yourself to roll out on final, pull it to idle and push the nose down, flare and land, that foamy will be a terrible training aid. The big one will NOT like that and it doesn’t look scale. Spend a TON of time flying the plane slow. It’s not scary, it’s totally predictable. Most guys fly their jets fast and then try to land at that same speed (or close to it because they’re afraid “jets have to fly fast”…not necessarily). If you want, take a couple days and come to vegas, I’ll pull mine out, show you the picture as many times as you want. We can maiden yours together and I’ll talk you through it. It’s not hard, but it is different. When the Air Force developed Red Flag they found that if a guy survived his first ten combat missions, he was likely to survive the war. Red Flag was to get you your first ten “combat” missions in a semi-controlled environment. Flying a Phantom is similar…if you can get through the first ten flights you’ll never want to be without a Phantom!
Hope all this helps. I know it was a long email but I wanted to get all the data out while I was thinking about it. Let me know what you need and we’ll get it for you.
Here are the things I’ve found with the airplane. I’m thinking going nose to tail is the simplest way to go. Remember that I have a tendency to keep my planes forever and build them to go 1000 flights so some of this is probably overkill. My F-16 you saw has 300 flights and I’ve had it eight years. My BV F-4 first flew in 1998 on ducted fans…etc.
I cut the nosecone off mine to grant easy access to the batteries. I have four batts (radio, radio, turbine, and lights). For CG they all ended up way far forward. Remember though that I flute metaled my tail and put the drag chute in, so you might not end up needing that much in the nose. The other thought here is that my cockpit does not come out with the canopy because I intended to make opening canopies. With the ability to reach in through the cockpit section, you can probably get the batts far enough forward without the removable nose cone.
My buddy had a SM phantom previously and had a hard landing with it. When the nose slammed down it ripped some of the fiberglas forward of the intakes. To combat that I added another layer of glass in the forward nose. I’m not convinced this was necessary.
The cockpit tub is very brittle plastic. I knew that wouldn’t last, so I added a layer of fiberglas to that. This is necessary IMO…especially if you’re going to be removing the cockpit regularly. You’ll have to hog out a bunch of the forward cockpit to clear the NWS steering servo that lives the back of the nose gear leg
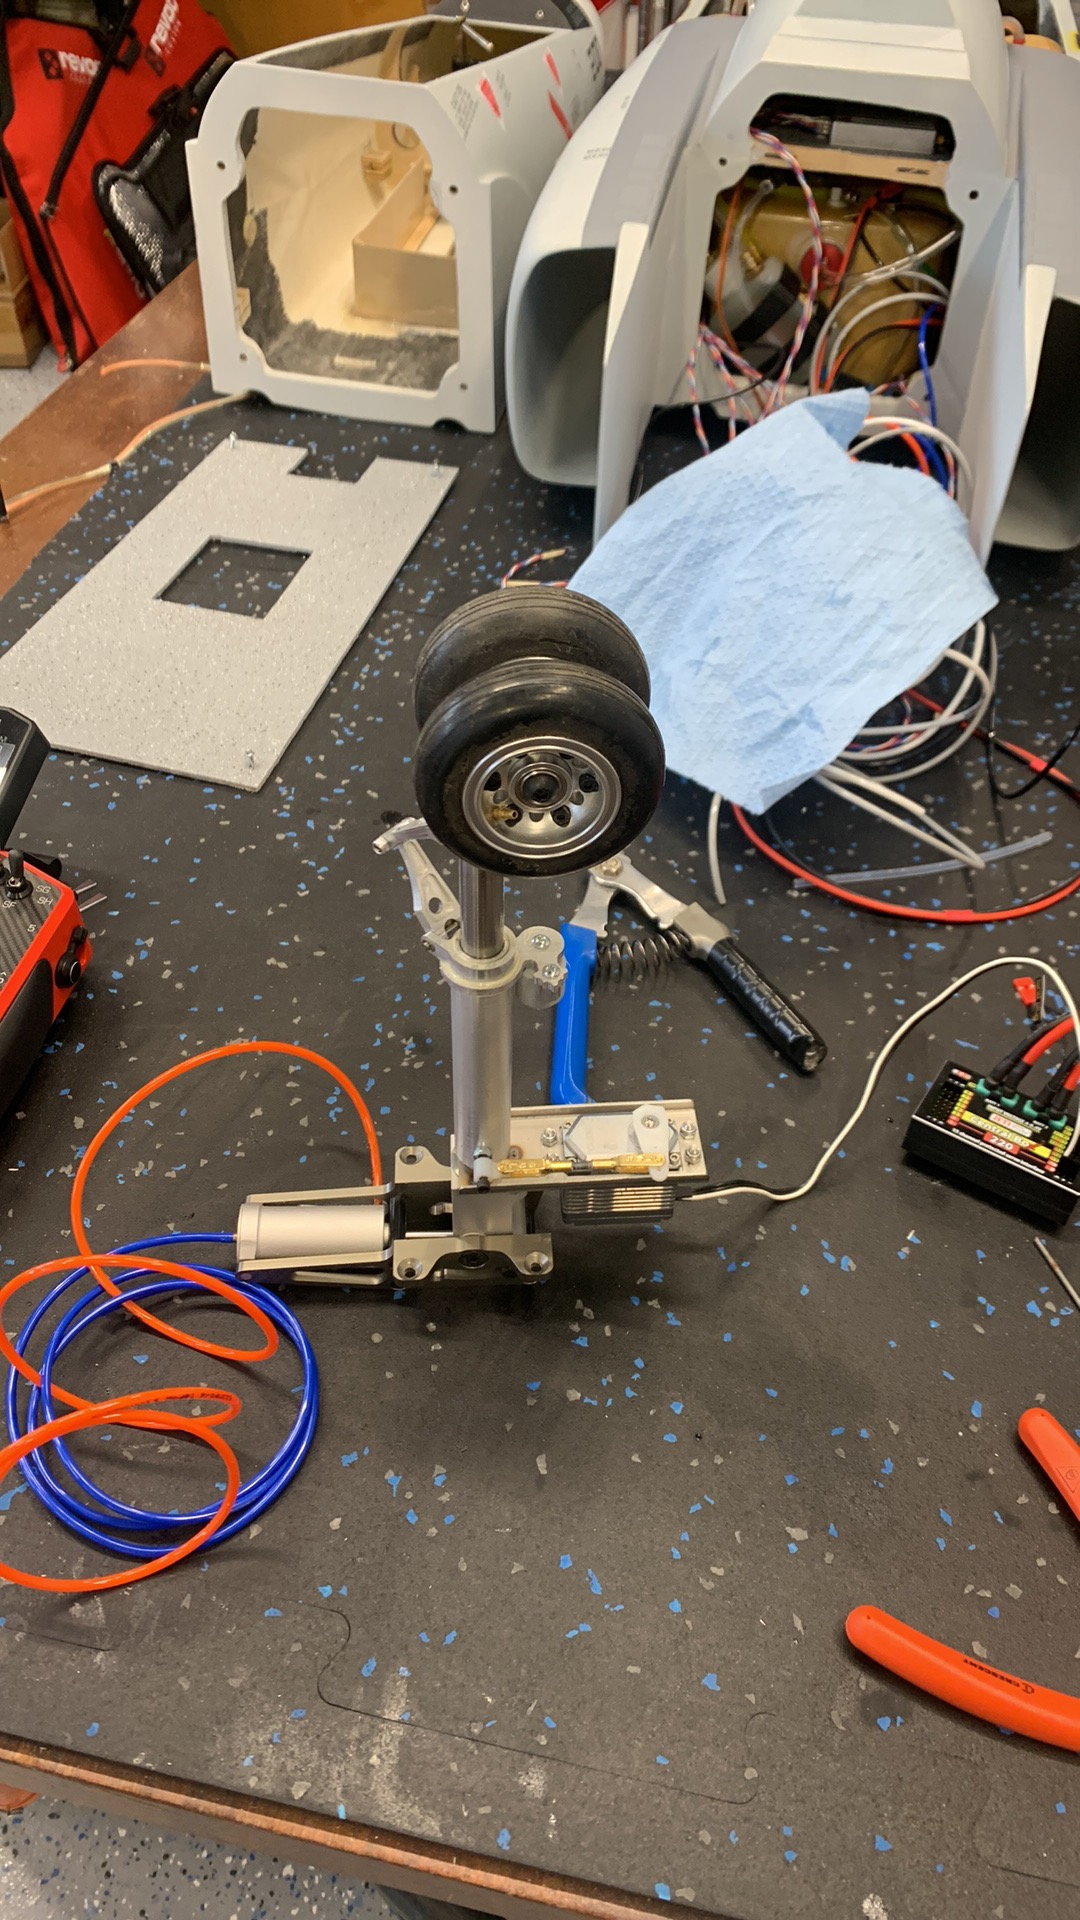
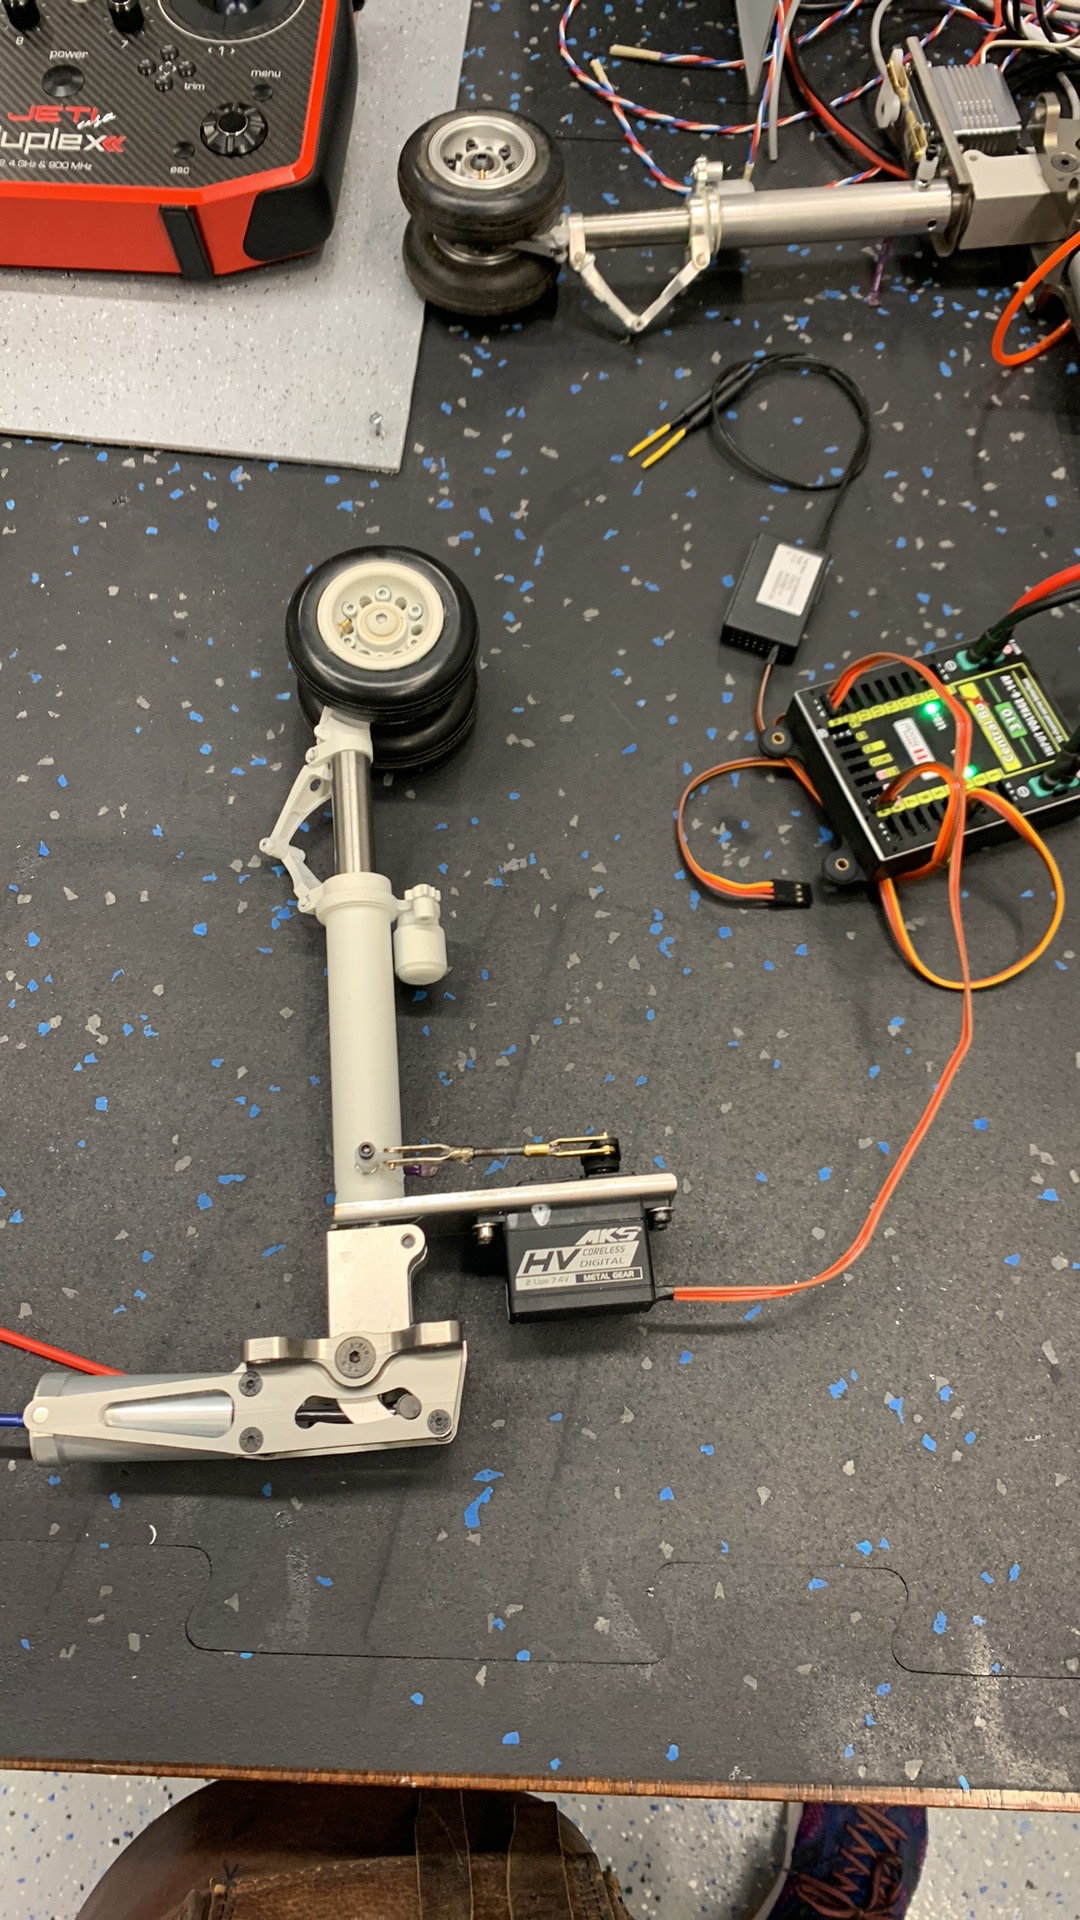
The nose gear: F-4s need to sit with a positive AOA on the ground or the takeoff is very abrupt. If you look at a BV phantom they look goofy on the ground because they taxi around nose up. That’s for a reason! When I first had the SM Phantom I deflated the nose strut to look more scale. It then JUMPED off the ground. Two fixes, one: just keep the nose strut inflated (it’s a pneumatic/hydraulic affair), two: buy the matrix nose strut (which is what’s on mine now). It sits very low/scale on the ground, and then you add air to it (I have it mixed to full throttle so on the takeoff roll my nose strut extends to provide the positive AOA for rotation). My opinion is save the cash (Matrix was $400 when I bought) and just keep the stock strut inflated and accept the looks on the ground
Gear valve. My buddy there at the event that had a big red SM F-4 used a UP-x valve. I do not recommend that. He struggled with gear/door issues all weekend. What I did, and would do again, is to use a BV high-flow servo-activated valve for the gear and a xicoy (or equivalent) single action electronic valve for the doors. Because the doors stay open when the gear is down on a phantom, I Tee the gear down line to the door open line. When you select gear down it opens the doors at the same time. Then I use the single action valve to close the doors. Works like a champ and is very simple while providing a good volume of air to the big gear.
Fuel system: There are three tanks. One in-between the intakes and one on either side of the motor. I think the forward tank accounts for 50ish% of the fuel and the two saddles are 25ish% each for the other 50. When you plumb the system, you determine how the fuel will feed. Most guys set this plane up to feed from the saddles to the forward tank and then the forward tank to the UAT. My issue with that was that depending on how long you flew you would have a varying amount of fuel in the forward tank on landing, and therefore a variable CG on landing. My technique was to feed from the forward tank to one saddle, from that saddle to the other, and then to the UAT. The forward tank empties completely every flight that way and I have a consistent CG on every landing. I used high-flow fuel fittings/lines throughout the system to minimized fuel system drag. This has been a great set up. When I land I usually have a full saddle and sometimes a bit of fuel in the other saddle (which sits very close to the CG so the effects are minimal). It also ensures full useage of the fuel whereas in a parallel fuel system if one of the saddles goes dry you cannot get fuel out of the other one. I used a BVM hi-flow UAT and would do that again. It fits nicely on equipment tray on top of the intakes. To mount the forward fuel tank I made wood mounts that screw together…I’d probably just stick it in with good velcro today if I had to do it again.
CG: LOTS of discussion on this on the web. I dug forever through it and got more and more confused. I think a lot of the confusion had to do with the way guys were feeding their fuel as discussed above. What I found/like us 330mm back from the leading edge of where the wing meets the fuse. If you have a xicoy balancer it equates to about 192mm forward of the main wheels. Different guys will argue all kinds of different stuff and I think a lot of those numbers were driven by the varying CG…Ie they balance with this much gas in forward tank etc…mine is done with fuel in UAT and that was it. When Phantoms are nose heavy they fly really poorly: they tuck their nose low into turns, they fly a million miles an hour on final, they struggle to settle into that comfortable squat attitude on final etc. When you get the CG right on a Phantom, once you’re in the correct attitude on final you feel like you can just glue the elevator stick in place and go get a cup of coffee…they’re that stable on final…BUT the CG has to be right.
Radio Placement: There is a tray on top of the intakes that sits in the spine aft of the aft cockpit. I thought I was going to be smart and run all my radio gear up there: gyro, retract valve/servo, xicoy valve for the doors, power distribution etc. I would not recommend doing that! The plate moves too much for it to be a good gyro platform. All the servo wires running up there makes it a huge pain in the ass to move the plate. The UAT has to come out of mount to move the platform etc. If I had to do it over, I would make the cockpit come out from the top of the plane so you just pull the canopy and the cockpit slides out. Mine goes in from the bottom because I intended to make the canopies open (but never did). If the cockpit came out easy, there would be plenty of room for radio gear in the nose (like my buddy with the red phantom that was in PHX). I would stick the UAT on that platform like I did and maybe a rx or something. I’d put the power distribution unit in the nose, gyro in the nose, etc.
Radio Gear/flight controls: I used MKS 1220 servos on all the flight controls except the stab. I used two MKS 777s for that. Some room for discussion here: when a servo fails, it often locks in place. IF a stab servo were to fail and lock in place, it would prevent the other servo from moving the stab and cause the loss of the plane. Therefore, putting two servos on the stab, in essence, doubles the chance of a stab servo crashing the plane. When Lindberg was asked why he didn’t fly a twin engine across the Atlantic his response was “because it doubles the chance of an engine failure”. Kind of the same thought here. With modern servos being as strong and precise as they are, a really high quality single might be a better answer. When I built my BVM F-100, it calls for two JR8411s on the stabs….I put a single MKS 777 on mine for the above logic. That said, my SM F-4 has been flying 7 years on two servos…do what makes sense to you here. Lately I have really come to love Pro-Modeler servos as well. They are very quick, precise, strong and reasonably priced. I installed the flap horns backwards. This allows me to get the flaps down very far for landing flap which the plane absolutely loves. When in that position, the servos are at a great geometric position and draw little amperage. The “bad” thing for that is that in the takeoff position, the flap servos aren’t in as good a position so they draw a bit more amperage but it isn’t excessive and landing is where I want all the drag I can get. For throws I used: ailerons: 27mm up, 23mm down, Elevator: 28mm up throw, 40mm down (gives a balanced feel when inverted), flaps: takeoff 40mm down from neutral, 115mm down for landing (full scale was 60 deg full flap if I recall correctly…this approximates that—full scale was ridiculously stable in the pattern FWIW), rudder 25mm L/R (that was all I could get based on how it was hinged). For the elevator neutral position I measured the LE at 50mm below the panel line in that area for flying and takeoff flap and 55mm bellow the panel line for landing flap (F-4 gets up elevator with more flap). Obviously these elevator neutral points coincide with the CG I gave above.
Intakes: my buddy that had the one where the nose ripped on a hard landing said that where the intakes were glued into the plane (where the interior intake met the extrerior part of the intake ) was weak and he could see the interior intake collapsing at high power settings. To counter this I poured an epoxy/microballoon slurry into that area. My intakes are now very very solid with zero propensity to collapse. Necessary? I don’t know. I did it but choose your own adventure here. Remember that mine is chubby (43# dry) so all of this stuff contributes to that.
Bypass: I installed both the lower and upper bypass in my plane. I filled/finished them on mine more as a place to put a squadron zap (sticker) and give the plane a very finished look. Probably not necessary but looks nice.
Air kit: I also had SM do the doors and install airlines etc. When it showed I was glad they had done that because it mapped out where/how to run air lines etc. That said I tore almost all of it out. I didn’t like the airline used and I wanted to paint my interior (for a finished look and also for fuel protection). Their air cylinders are marginal at best but more on that later.
Air tanks/fill etc: I used the area aft of the aft edge of the main hatch and around the pipe to put in all my air tanks. I run three separate air systems in mine: Gear/doors/drag chute, brakes, and a blowdown system (this is another system that through the use of a single action valve I can open, run through a one way check valve into the main air supply for gear etc. If I bleed out the air system while flying I can select gear down and them open the blowdown valve and give the gear a chance to come down). Some people look at the blowdown as extraneous and it probably is, but with the inhospitability for gear up landings where we fly I thought it was good. If I lived somewhere with grass I’d just put it in the grass gear up worst case. For the half circle that is the spine aft of the main hatch I put a piece of wood there and put my air fill valves/guages for the three air systems.
Pipe: Lots of discussion online about this as well. The stock SM pipe has a little bend at the end. My understanding is the tif you install it as directed you get a big pitch up with power. It sounds like a lot of guys flipped that pipe upside down to mitigate the climb with power. As you know the FS had the engines pointed down at 12 deg I think to mitigate that issue. I used a TAM pipe which is straight. I get a tiny bit of climbing with power. To mitigate that I simply mixed in 5-10% down elevator with throttle and don’t notice it at all. TAM is no longer in business but I hear his pipe maker Hiep is still producing TAM’s stuff. If it were me, I would skip the SM pipe and order a Hiep pipe, but that’s technique.
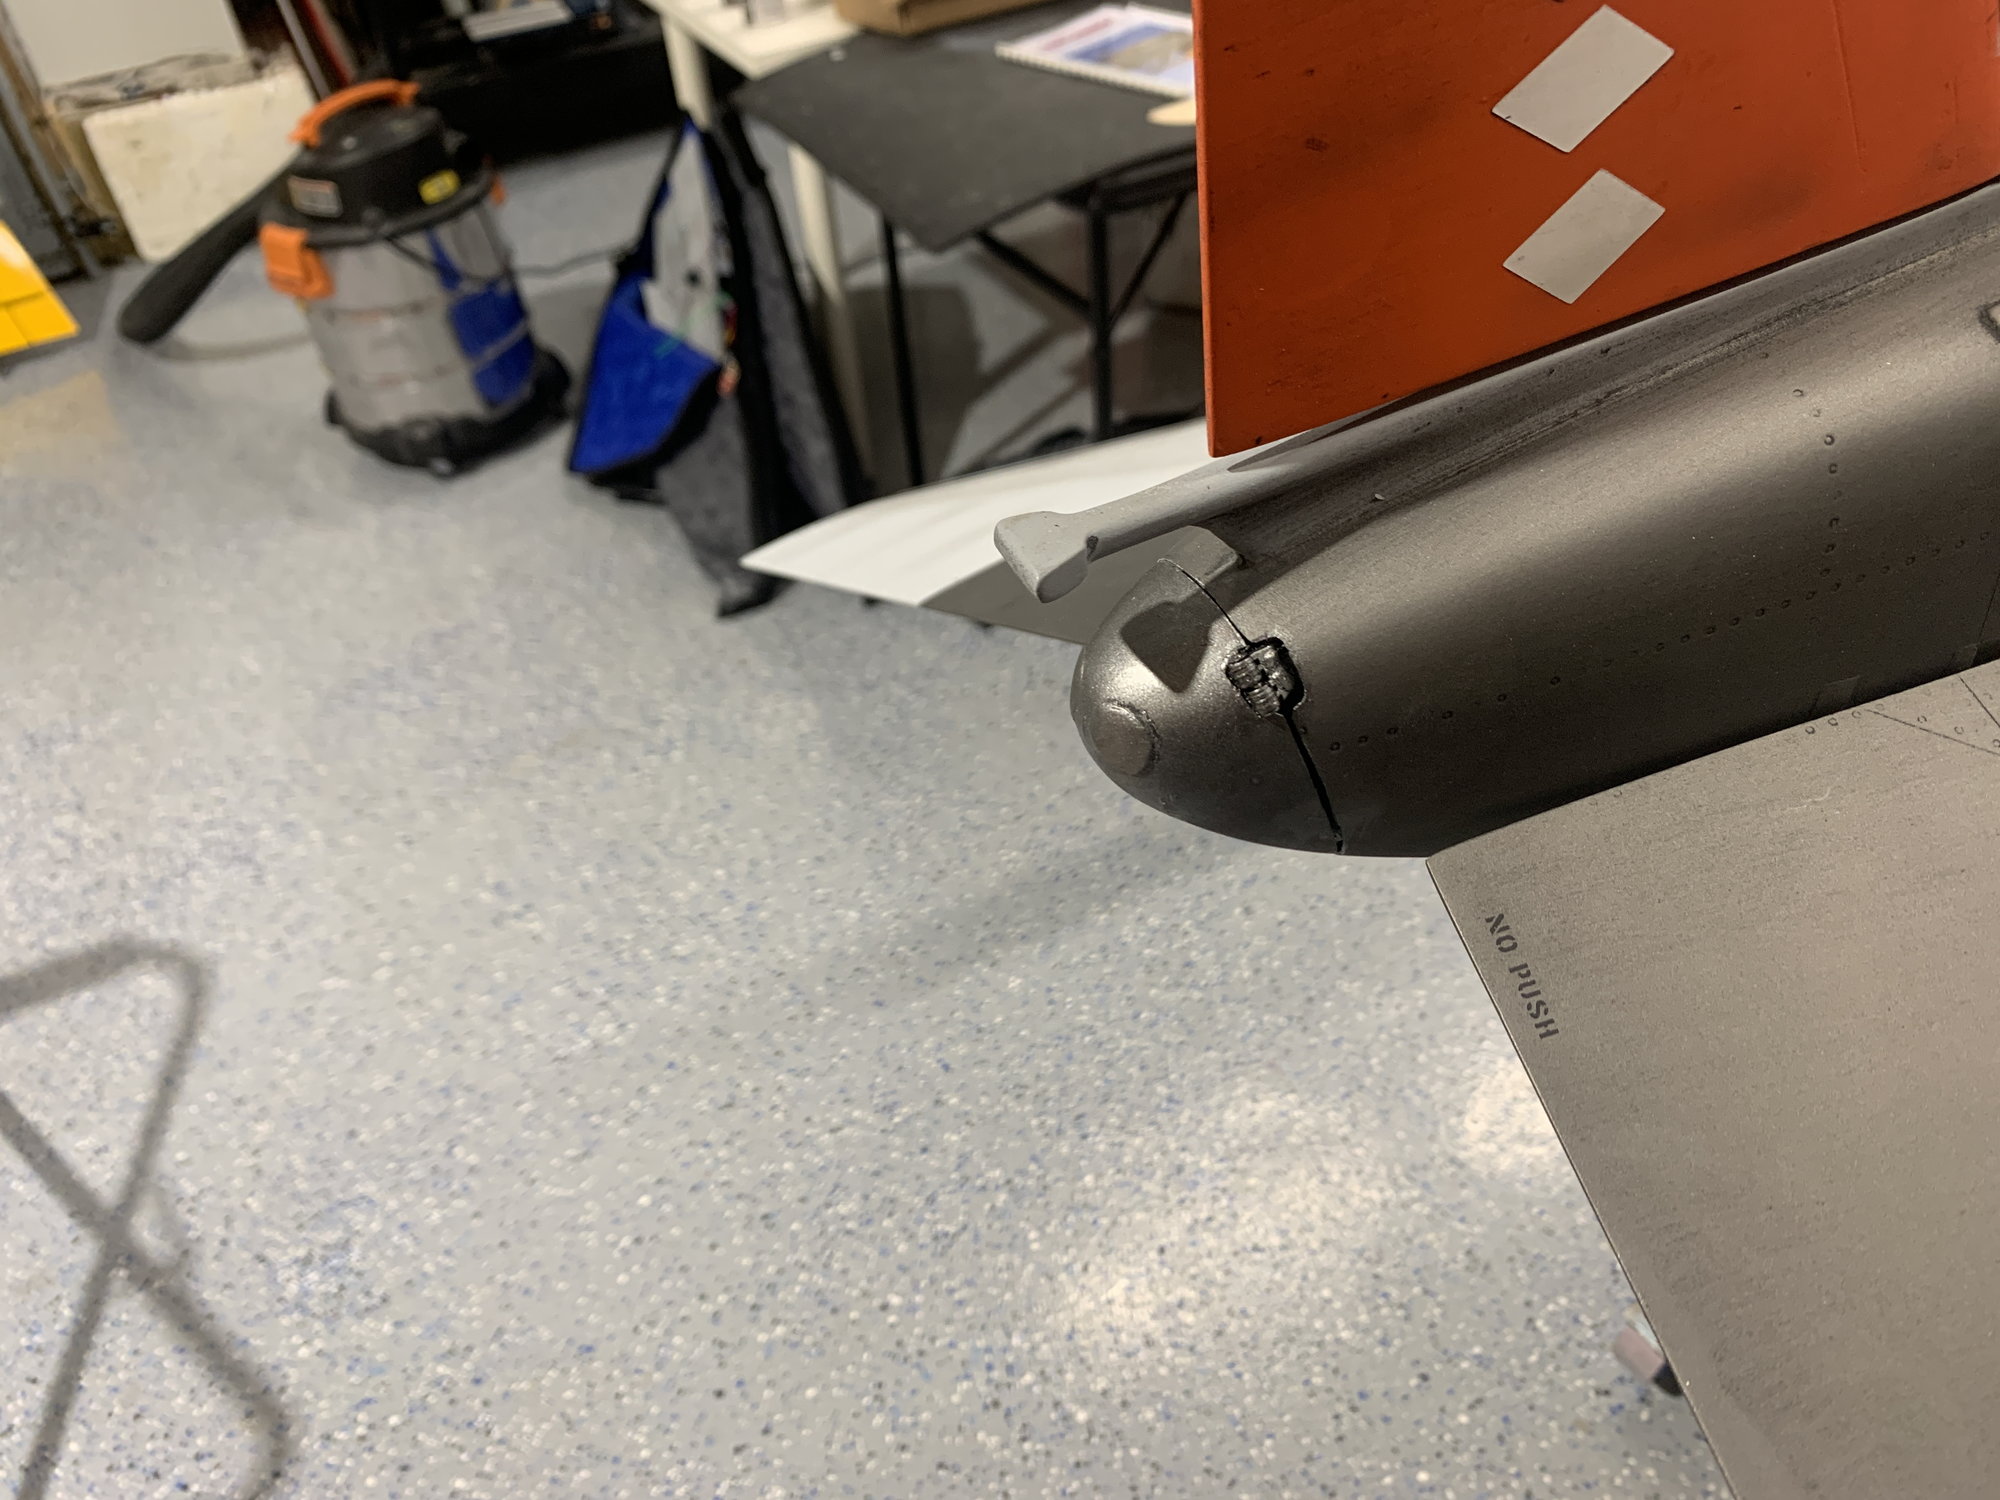
Nozzles: I ordered the TAM stainless nozzles as well. It’s not exactly scale in that for the E model (which mine is) they had a different dash number J-79 so it had much longer nozzles than yours and they were black. These are SS so a silver-ish color. Very few people know that and I think they look cool as they are. I would bet Hiep has the templates for these nozzles as well. For me, I had to create standoffs for those nozzles to get them to stick out far enough to look scale. For you, with your short nozzles you could just screw them to that bulkhead back there and be good. You might have to creat standoffs to the top two screws to give the nozzles the down angle that’s so pronounced on a phantom (although with the short nozzles it’s probably less noticeable ).
Metal on the back end: as you know the whole ass end of a phantom is titanium (I think) and is unpainted. SM uses silver paint. I wasn’t in love with that so I took the time to put Flite Metal on all the “raw metal” portions of the aft fuse/stab. There are lots of places that describe how to FM something, but I think the result is stunning. It took some time and added weight but damn does it look good. Also, if you run diesel, when you shut down there is a lot of smoke. This gets all over the FM and really adds to the sooty/scale look!
Stab opening covers: Because the stab is on a rocking platform below the hinge point you have to have a horizontal hour-glass shaped cutout to allow the stab to move. So, just like the FS you worked on, it gets a cover plate. SM gives you a brittle ****ty piece of plastic for this. Mine was curved very badly and would have been a major pain in the ass. I used their piece as a template to cut a new piece from .015-.020 G10. I also did this for the half moon tracks that the cover rides in. These were then covered in FM and the end result has been Maint free for the 80 some flights I have on mine. They look much better than SM std as well.
Drag Chute: Back when I built mine there was a company called Details for Scale that produced kits for a drag chute. I purchased that and installed it. D4S has had a bunch of issues, changed hands etc. I’m not sure of their current status. Making your own kit wouldn’t be too hard. You create a tube for the chute to go in. It will be a bit oblong from a cross-sectional view. In terms of length, the forward edge of that tube is screwed into the elevator stab plate just aft of the elevator hinge mechanism and extends to back end of the plane. You have to cut off what would be the chute door on the FS. The D4S kit had a molded tailcone that came with it but you could use the piece you cut off if you were careful. The chute is expelled by a long air ram with a plunger on the end that physically pushes the chute. The air ram could be made by ordering the ends from BVM, and then sourcing appropriate diameter aluminum tubing and cutting to length and using a piece of music wire for the “silver” part of the actuator if you follow. The forward end of the ram sits below and forward of the rocking portion of the stab (ie the middle of the stab that goes through the fuse). There is a cover plate that covers the whole stab mechanism. I put a piece of square stock wood that covers the lower “spine” of this area (ie the lateral area immediately above the hook). That square stock gave me a place to attach the forward portion of the ram to. When compressed the plunger for the ram sits in the front of the chute tube, and when extended the ram is flush with the aft portion of the fuse without the tailcone/chute door. To mount the chute door I used two robart pin hinges that, when the door is closed, are at approx a 60 deg angle. Then when the door is open the hinges are almost straight. Once I had the hinging all correct I created a “bulkhead” in the very forward portion of the tailcone. When you push the chute out, it pushes on that bulkhead and opens the door slick as snot. To secure the chute, I ran a piece of yellow nyrod from my chute release servo up to and along the upper spine of the jet. Just forward of the aft end of the fuse I created a little gap (~1/4”) in the yellow nyrod and then there is another piece of yellow nyrod that is approx 1/2-3/4 long that I hysoled all in. I then run braided brass cable from the servo, through the nyrod, across the 1/4” gap in nyrod into that 1/2-3/4” aft piece of nyrod. In the area where the cable goes across the gap I silver soldered it to make it stiff. There is a loop in the end of the chute line that I place in the gap, and then use the servo to push the cable across the gap and into the short piece of nyrod. To release the chute I simply use the servo to pull the braided cable back freeing the chute and I can drop it at the end of the runway when I want. I got my chute from D4S as well but there is a guy on FB that is making them now. They aren’t cheap but they sure are a crowd pleaser when they work and are very effective at slowing the plane.
Lights: I installed the D4S lighting system, I drive them with the Jet Cat lighting controller which also drives my AB lights. In hindisght I would probably skip all this. It was a ****-ton lot of work and the effects are cool but it adds weight. I did the position lights on the wings, white beacon on the aft end of the vertical, red beacon on the LE of the vertical, landing light on nose gear (for mine, I think NG door for yours) and under-intake lights. Cool yes but a TON of work and some weight. As far as AB lights are concerned: because they are buried up in there you rarely see them…only at specific aspects do they show…and then they are quite cool.
Gear doors: my nose gear doors have been fine. Nothing significant to report there. Main gear doors are a different issue however. The inner gear doors absolutely don’t work as they come from SM. They use too small a door cylinder and their geometry is TERRIBLE. I’ll skip all the steps I went through, and skip to how I solved the problem: I ordered BVM 1” stroke door cylinders. There is enough room to basically mount them forward of the retracted main wheels in an almost vertical position when the door is closed. This has been exceptionally consistent and awesome. The cylinders have significantly more power than SM actuators (larger diameter) and with them nearly vertical the geometry is excellent yielding closed doors even at 200 mph. As I mentioned before these are T’d to the gear down line to open, and are on a xicoy single action electronic valve with a 5ish second delay from gear retraction (ie, gear up, 5ish seconds later the valve activates and sends air to the close side of the door cylinder). The little outer doors (outboard of the main gear leg door) are spring closed from the factory. I have yet to have one flight where I get the left one to close. I have tightened the spring up significantly and it still hangs open (see Barry’s pics from PHX). The right one has been fine. I think my next step is to put a small piece of plastruct on the LE of that little door that has an L cross section. I think the door is acting like a little wing and its form of lift is to open itself. I’m thinking that Plastruct will act like a spoiler to prevent the lift from happening and the spring will hold the door shut.
Main gear mounts: I think these are weak at best from the factory. What you’ll see when you look in there is a rail the retract mounts to that is keyed into the ribs etc around it but not to the fore/aft spars. What I did is create hardwood blocks that filled the space from the aft spar forward to the forward edge of the gear rail and from rib to rib and bottom of the rail to the top skin of the wing. Essentially a rectangular piece that filled all “free” space that I hysoled in (and then the same for the forward gear mounts). I also added a CF strip to the top of the gear rails that I tapped for the gear screws. Before I glued those blocks in I marked where the machine screws for the gear would be and drilled relief holes in the blocks. Once this was all glued in, the structure becomes VERY solid. My buddy gave me crap when I told him to do that to his red Phantom…he said “why don’t you just learn to land the plane?” He’s right of course…with good landings it wouldn’t be a problem. Of course he blew one of his wings apart on his next landing. When a Phantom gets slow it doesn’t stall in a traditional sense…it just picks up a HUGE sink rate. That happened to him and he was unable to arrest it before touchdown and the gear/wing couldn’t take it. An ounce of prevention now may save a ton of work in the future. This I would highly recommend
Gyro: yes please. I don’t know how close you were watching my 6-9 flights in PHX but the first flight after I put the TERs with the six MK-82s on, the plane was just a *****. Not uncontrollable by any stretch but just pitchy and *****y. I kept thinking it was the bombs causing that. I finally figured out that I had the gyro off. I turned it on and she was a sweetheart again. Again, it can be flow without but the experience is better with. Mine has a Powerboat iGyro 3e. I usually use cortex but couldn’t get them to get along with my turbine noise. The iGyro did fine with it and has the added benefit of the “Attitude Assist” mode. That works well for Phantom finals if it’s windy.
Engine: Mine started life with a KT 210. That was sufficient power but if I wanted to do a loop on center I’d go full power on downwind before starting my base/final turn in. I finally stumbled on a good deal for a 260 and put that in. Now if I want to go up right this second I can
. Of note I have an airspeed indicator in mine so I have a speed warning set up to keep it at/below 200 mph. I test flew the red one that you saw for my buddy and he had a KT210 G4 in his but his is much lighter without all the stuff (lights, chute, FM on the tail, bombs, etc etc etc) and that was a really sweet setup that I enjoyed a lot. Mine handles the extra weight no problem but the lighter one was very enjoyable to fly and the 210 was plenty of power. I think you said you’re doing a Swinin 190. I think that’ll be a nice setup if you can keep it light.Prepping to fly it: I think two things are important: turbine time and delta wing time. If you are proficient in those and have someone next to you that knows what they’re doing you’ll be fine. For the turbine time I think 50 flights on something would be good…your cougar for instance. For the delta wing time I would suggest buying a FW F-4. Yes it’s a foamy but it can be a good training aid if you let it. If you force yourself to fly it slow, get used to that nose up attitude…drive it down final where the elevator stick is stuck in place and you control descent with power (F-4s need power on approaches-hence the drag from the flaps all the way down being good). If, however, you allow yourself to roll out on final, pull it to idle and push the nose down, flare and land, that foamy will be a terrible training aid. The big one will NOT like that and it doesn’t look scale. Spend a TON of time flying the plane slow. It’s not scary, it’s totally predictable. Most guys fly their jets fast and then try to land at that same speed (or close to it because they’re afraid “jets have to fly fast”…not necessarily). If you want, take a couple days and come to vegas, I’ll pull mine out, show you the picture as many times as you want. We can maiden yours together and I’ll talk you through it. It’s not hard, but it is different. When the Air Force developed Red Flag they found that if a guy survived his first ten combat missions, he was likely to survive the war. Red Flag was to get you your first ten “combat” missions in a semi-controlled environment. Flying a Phantom is similar…if you can get through the first ten flights you’ll never want to be without a Phantom!
Hope all this helps. I know it was a long email but I wanted to get all the data out while I was thinking about it. Let me know what you need and we’ll get it for you.
The following 5 users liked this post by ozief16:
CobraJet (02-22-2024),
Ron S (02-23-2024),
Shanehendo (02-26-2024),
SkyKnight (02-23-2024),
yeahbaby (02-22-2024)