


Need help making a silicon mold
 04-08-2018 | 03:30 PM
#1

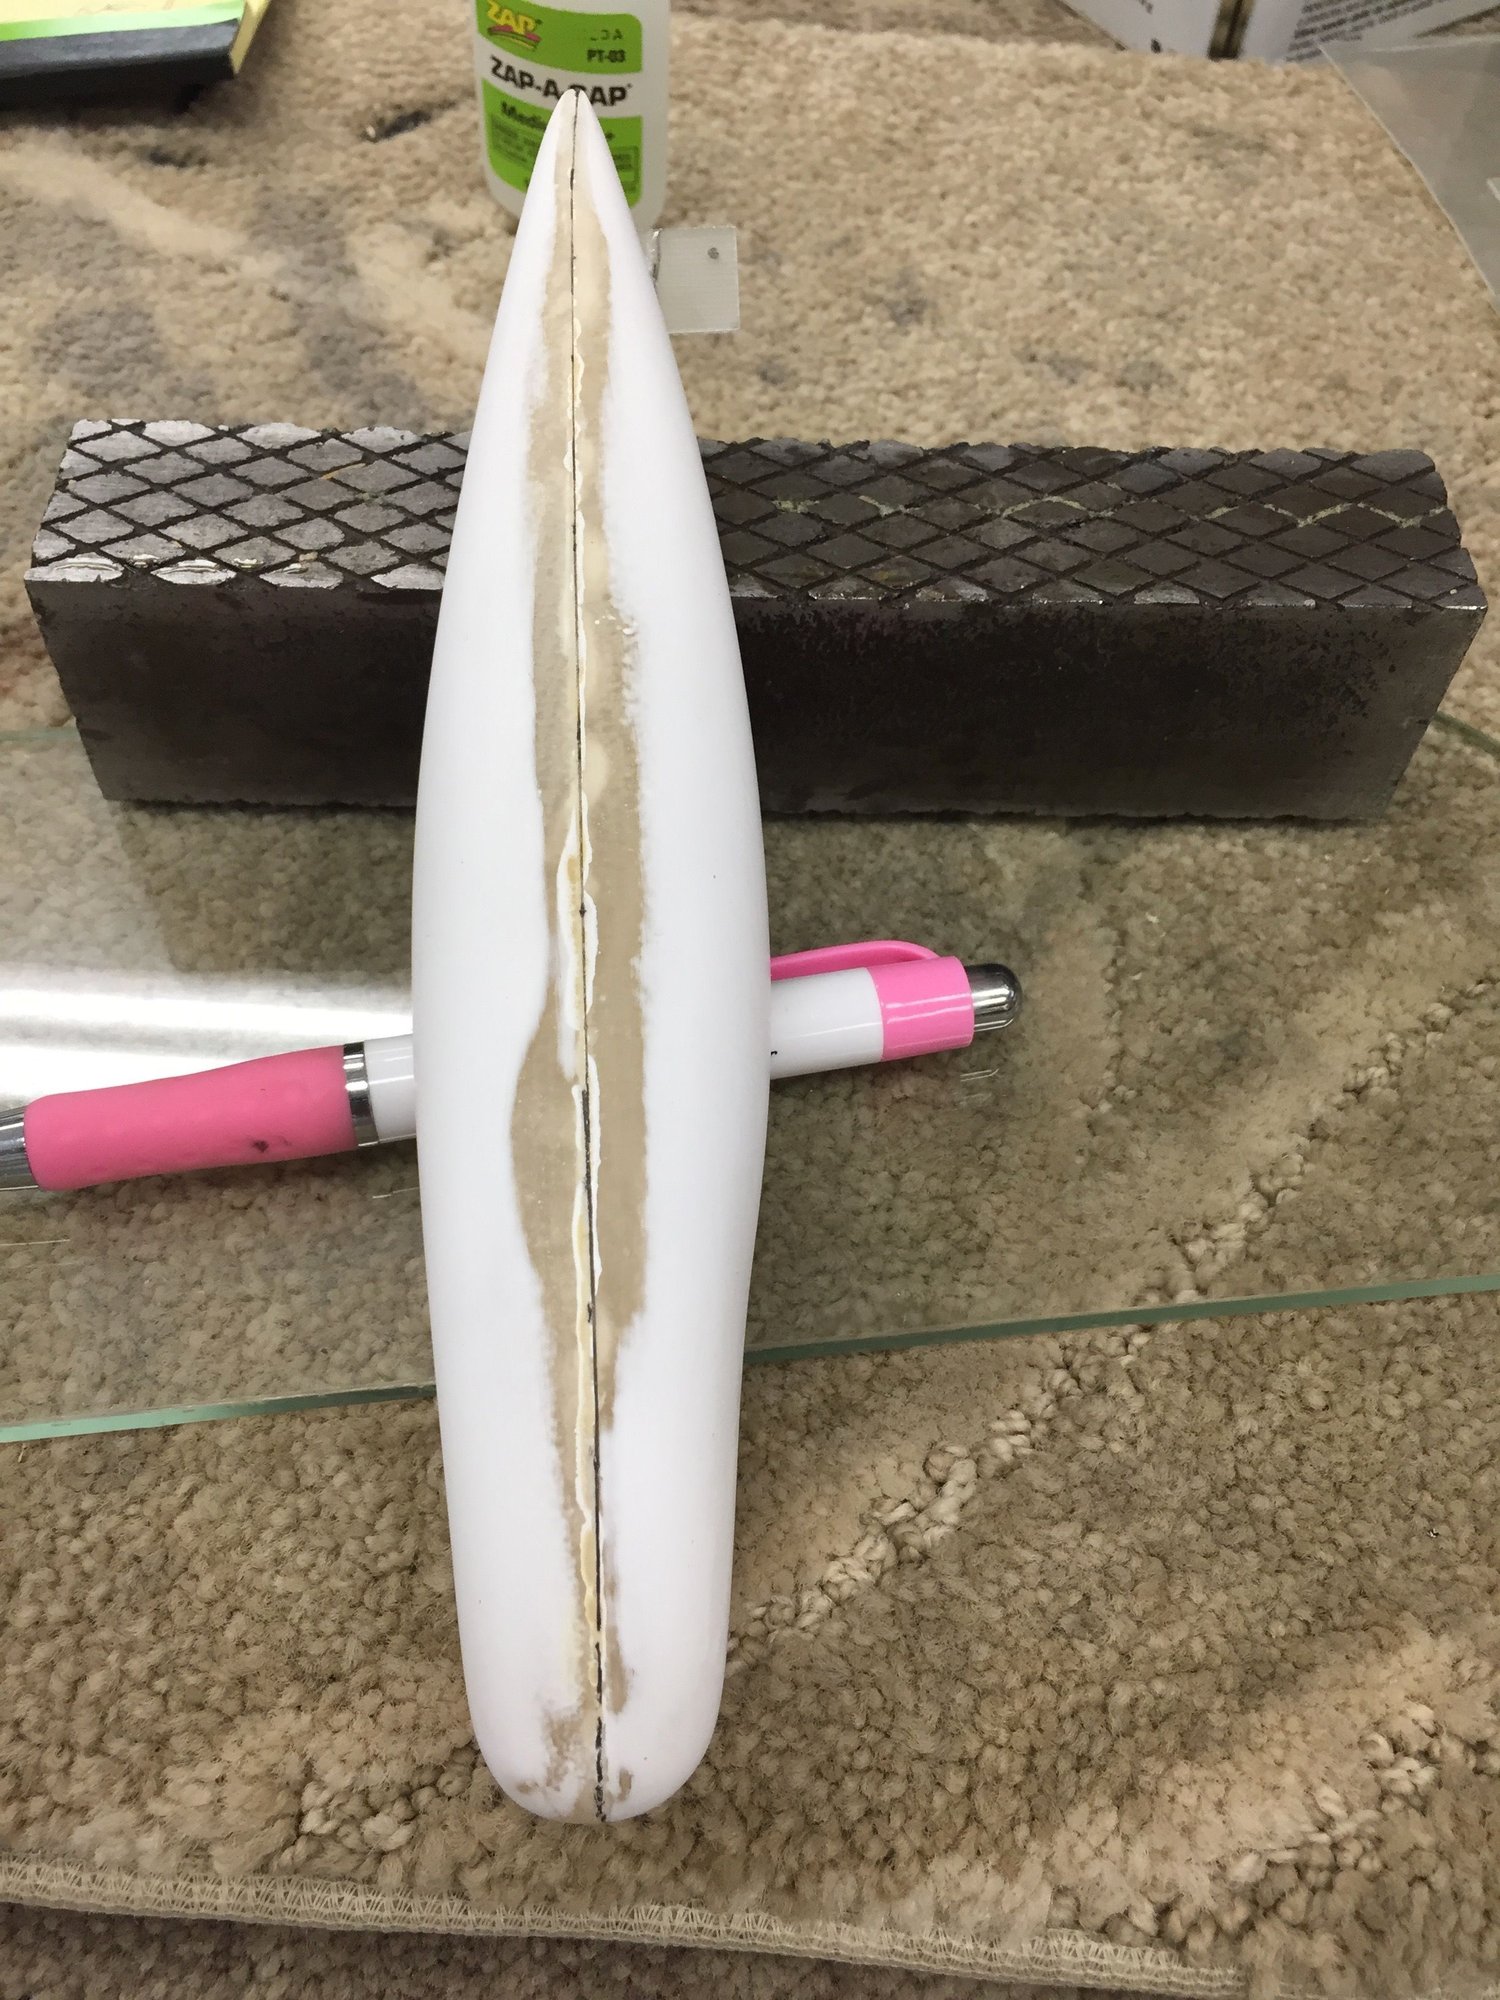
I have a Skymaster F4. I want to make a silicone mold of the EMS that hangs off the nose cone. If the nose gear doesn't lock it gets grounded down. My thinking is to use clay up to the part line and build a box around it and pour silicone over it. I would have to make a left and right mold. I was wondering if some one has had any luck doing that way. Once the mold is made I would use fiberglass in it. Would I need to use mold release for the plug and the fiberglass parts? If you have done this PM me your contact Info. Thanks Dan Avilla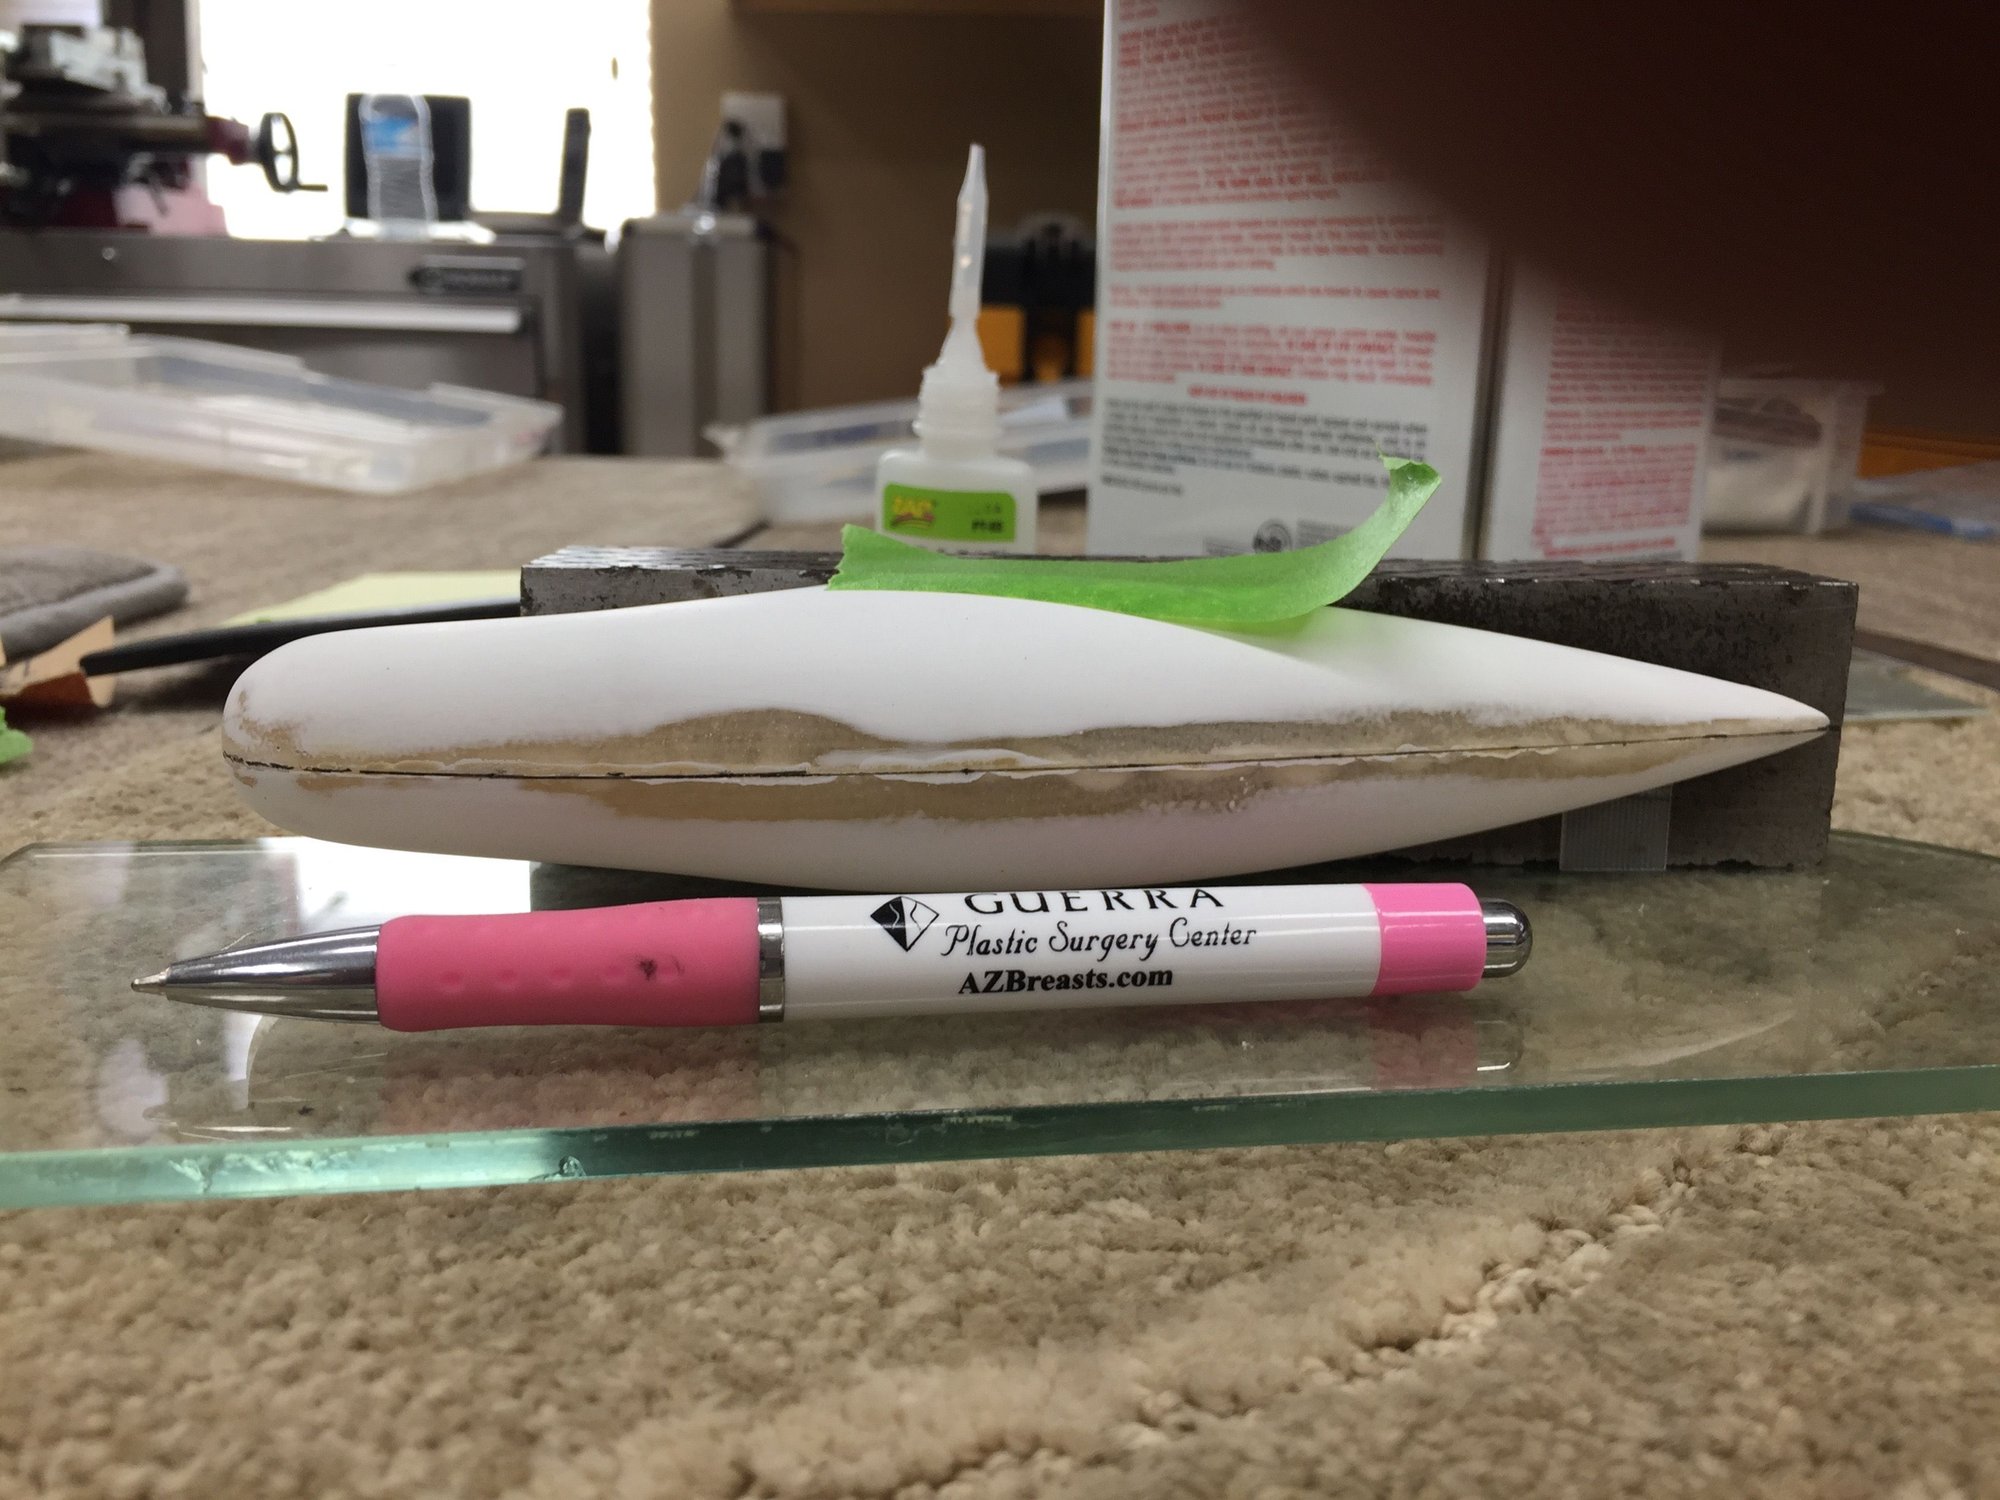


 04-08-2018 | 03:43 PM
#2
If the finshed parts are made of fiberglass I would make the mold out of fiber glass. You need a very good (smooth) finish on the part you use for the plug that makes the mold. Below is a link to molds I made for tip tanks and rocket pods.
Sid
Sid
Last edited by sidgates; 04-08-2018 at 03:46 PM. Reason: Wont let me send link , will try to sent in PM
04-12-2018 | 09:43 PM
#4


My Feedback: (3)
For that part and for you to learn I’d say yes try it. From your brief description you have the basic concept.
On the other hand a fiberglass mold is fine as well.
The silicone mold will cost more and take longer to make but you will learn a lot.
Which way do you want to go?
To to answer your question yes you need mold release to protect the mold, release the part easier, and get in the habit of the process.
04-13-2018 | 05:49 AM
#5

My Feedback: (26)
For parts like what you're wanting to make I think the fastest and easiest way would be to make fiberglass molds. You're going to be making the parts out of fiberglass so you'll already have the materials and the skill to use the glass with no learning curve. Split the part in half, mount to a flat board then body work, prime and sand down to 600 grit just like the way you prep fiberglass for paint. I like to use 3/4 ounce cloth for the first layer (for mold and finished part) for anything where final surface finish is important so you get the smoothest possible part. Next add a few layers of either 6 or 9 ounce cloth. If it's a bigger mold that needs to be really stiff I use a layer or two of the heavy cloth or mat like what you can get at the auto parts stores or Wal Mart. If you cut it into smaller strips it will conform to pretty small parts. Every time you mold something, whether making the original mold or the final parts you need to use some type of mold release, I use PVA (polyvinyl alcohol). You can brush it on with a foam brush or spray with an airbrush and it can be found or Amazon or at O'reilly. In addition to the PVA I like to wax everything (either mold or plug depending on what stage you're at) really good before applying the mold release. Some people will tell you that you only need one or the other, but I like to use both as extra insurance. Plain old Johnson's paste wax in the yellow can works as good as any of the specialty mold waxes for this.

 04-13-2018 | 03:25 PM
#7
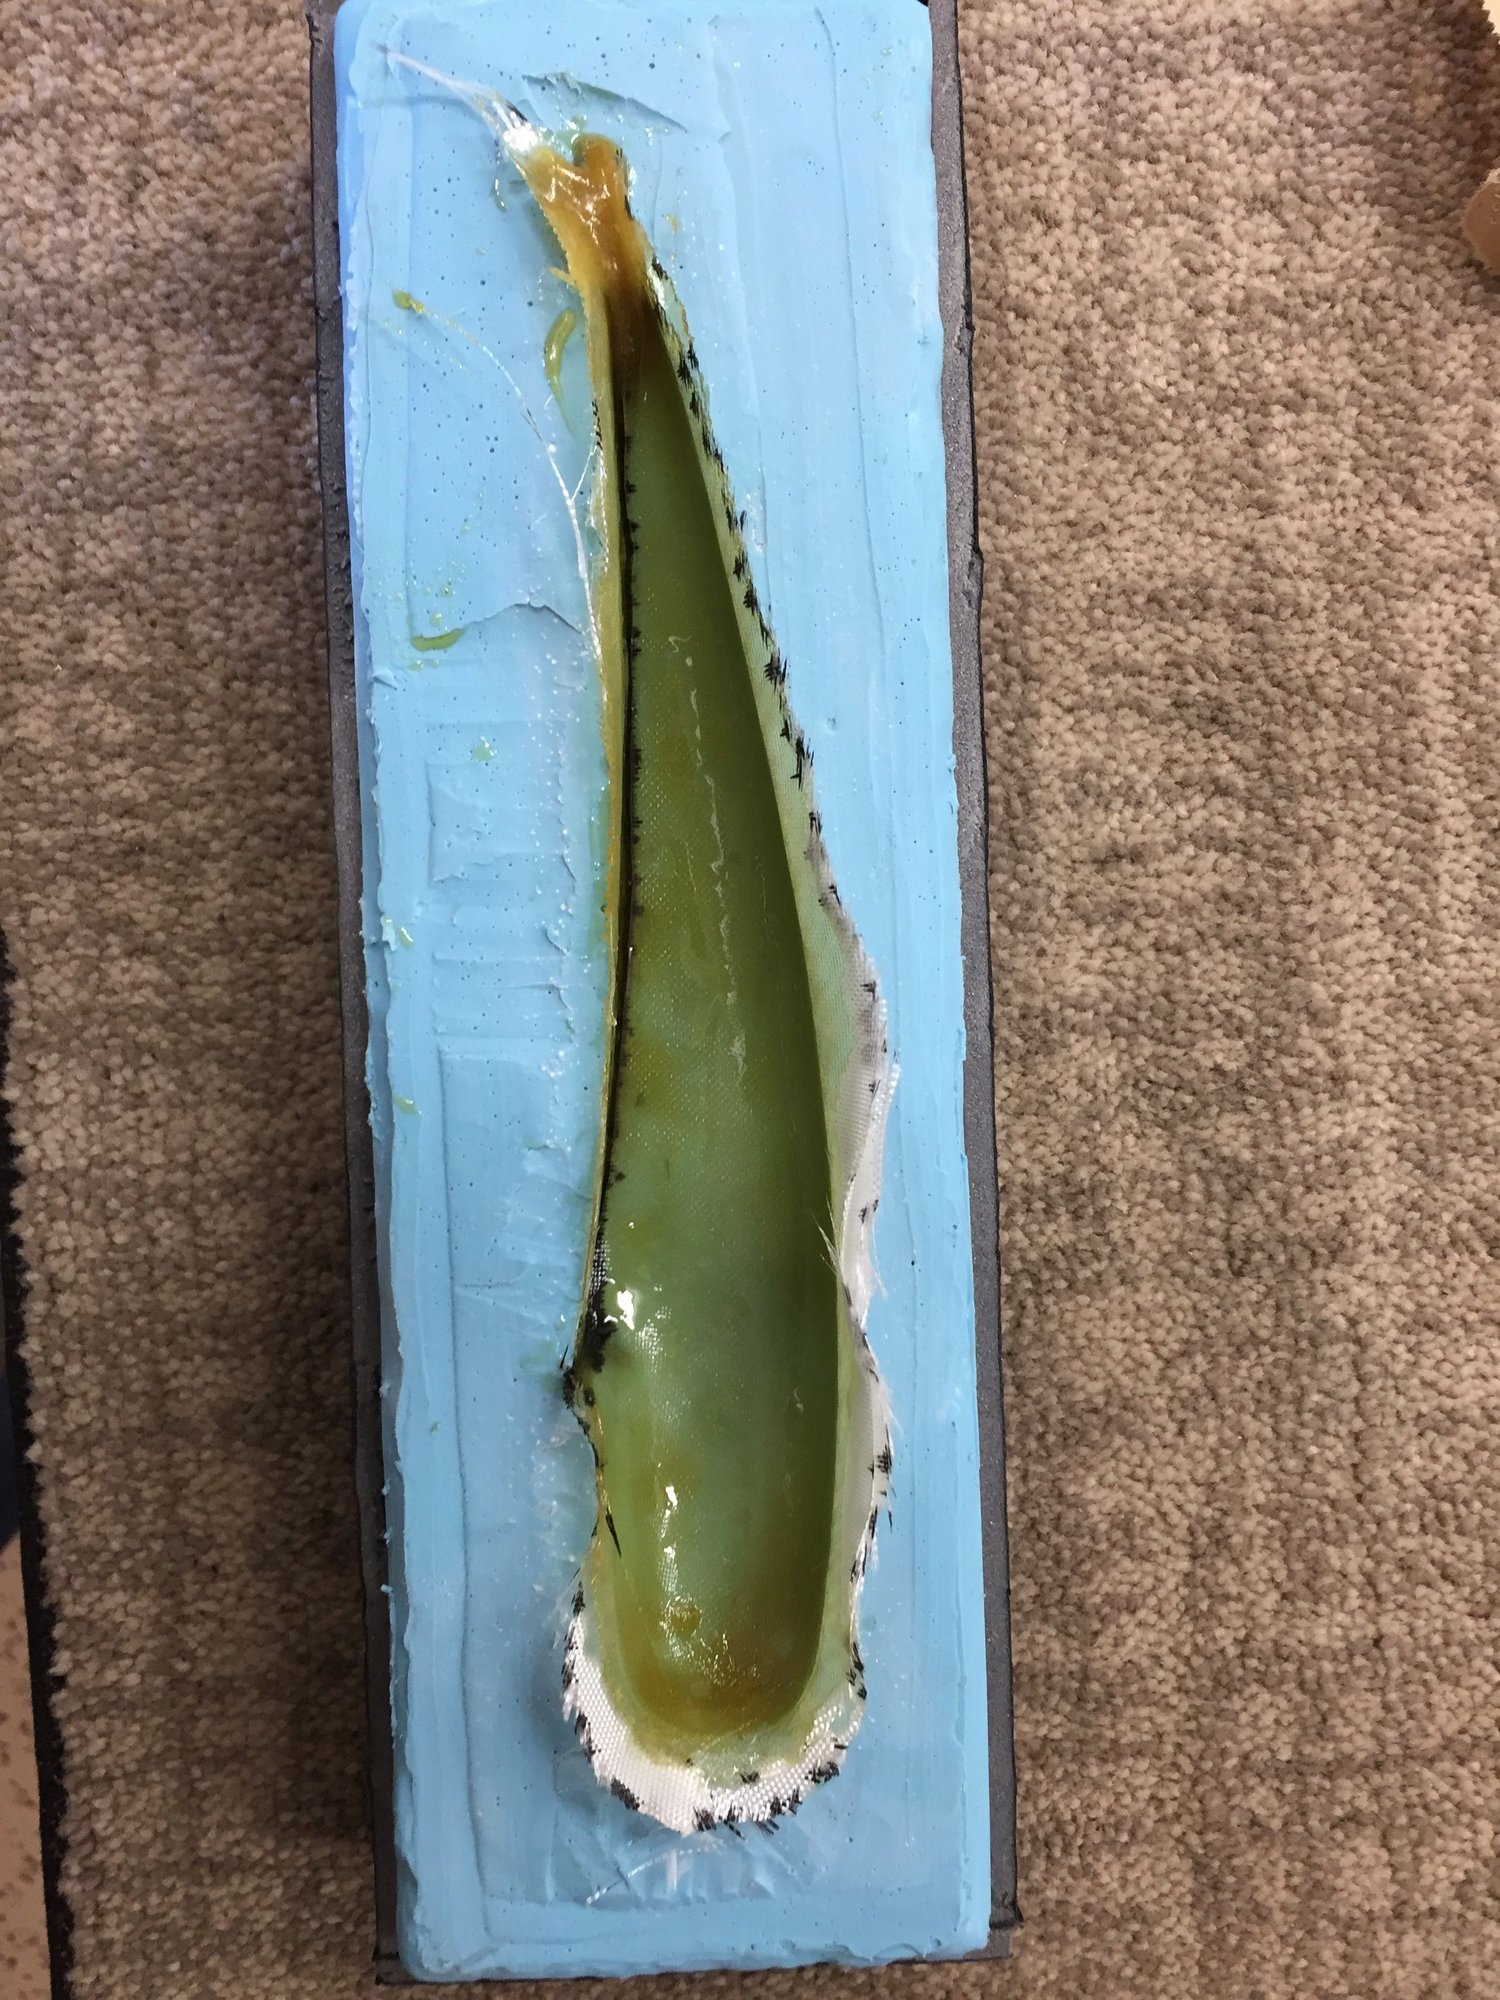
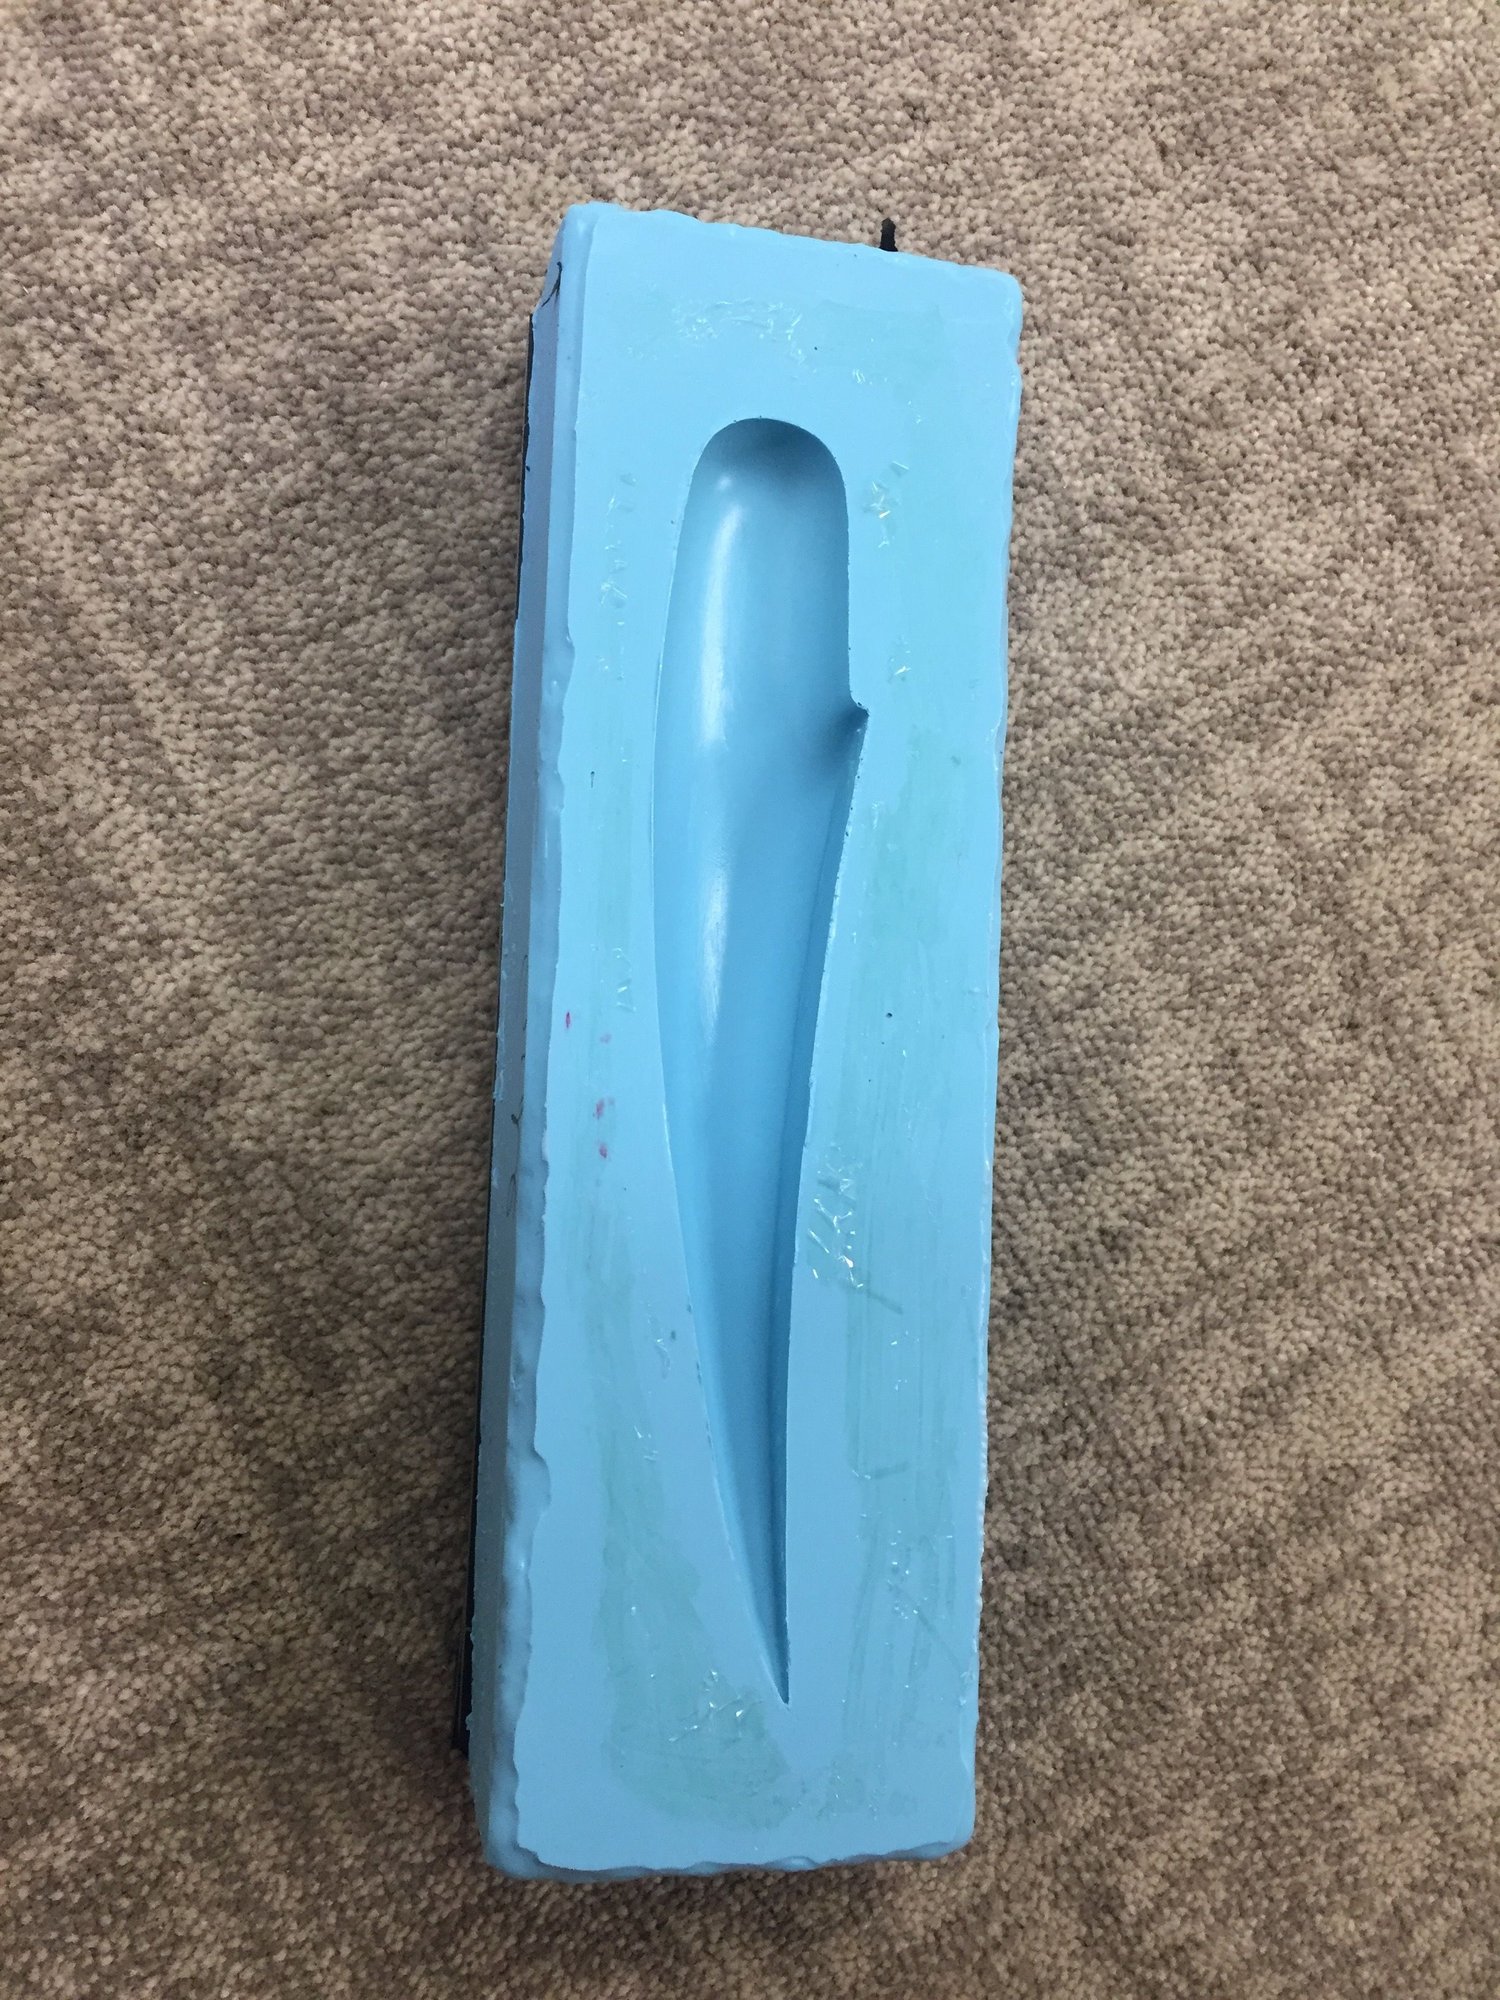
To all that responded thanks. At the time when Sid responded I all ready order the silicone. It cost me 100.00 to my door. I wish I knew about the great videos that were posted . I would have done it in glass. Im not sure the up front cost would have been cheeper but the supplies they used would have made a lot of molds in the future. The part came out good. The mistake I made was not doing my home work on the second silicone pour. It stuck to the original silicone mold. I had to cut it apart so the seam line was not as crisp. Good learning experience . Dan

04-13-2018 | 05:33 PM
#8

My Feedback: (67)
Dan,
Cool to see you experimenting with making molds and parts. Like others suggested, for making FG parts using a FG mold would be ideal and it’s not that difficult, just takes a few more steps than silicone and resin. However now that you have created and silicone mold you could do a test and make a resin part. I really like Smooth-on products for silicone and resins. Their website offers a lot of helpful videos but i’m Fortunate to live close to them so i can get help in person. Anyways, if you’re interested try some smooth cast 65D and use your mold and roto mold the new part. Mix the resin. Pour some in half the mold, clamp both halves together and manually rotate the mold in your hands 360 degrees round and round (basically a poor man’s roto molder) while the resin kicks off. 5-8 mins then let cure for another 5-10 mins before opening the mold. You will wind up with a complete resin part. To get a thicker wall just use a bit more resin, some experimentation may be in order, but once you get the amount to your liking you could knock out 3-4 parts in an afternoon and have some spares. Also you can tint the resin if you want (not sure what color you need your final part) but that also saves you some finishing time.
Just a thought. The fact you don’t have a clean part line isn’t a problem, in fact it helps the two halves key together better. I often use their sorta clear series of silicone to make molds and pour it around my part completely in a block then (because it’s clear) cut the mold apart to remove the plug.
Hope this wasn’t too wordy, happy to share any suggestions on this topic if you want.
04-13-2018 | 05:37 PM
#9
My Feedback: (67)
https://www.smooth-on.com/tutorials/...licone-rubber/
here is a good video showing what i mean by making the clear mold in one block. I’ve done this a lot for scale parts and it works well.
here is a good video showing what i mean by making the clear mold in one block. I’ve done this a lot for scale parts and it works well.
04-13-2018 | 05:39 PM
#10
My Feedback: (67)
And here is one on the roto casting that i was speaking of. Or more or less what i meant, hope it’s of interest.
https://www.smooth-on.com/tutorials/...ooth-cast-65d/
https://www.smooth-on.com/tutorials/...ooth-cast-65d/
04-14-2018 | 12:43 PM
#12
Dan- I don't know if your part is heavier than you want. It looks like there is excess resin in the layup. I have a rocket pod I made for my F-94C that is 13" long x 1 3/4" dia. Finished weight is 1 3/4oz. Lay up is first layer 3.2oz cloth, second is 5.0oz cloth and 3rd layer is 3.2oz. cloth. On my tip tanks I did 3.2oz on all three layers and they are strong enough. I am not criticizing, just saying what worked for me.
Other mold work I did for the F-94C is on this web page.
http://www.sidgates.us/HOBBIES/F-94C/F94C%20PROJECT.htm
Other mold work I did for the F-94C is on this web page.
http://www.sidgates.us/HOBBIES/F-94C/F94C%20PROJECT.htm
Last edited by sidgates; 04-14-2018 at 12:46 PM. Reason: I tried to include picture of finishe rocket pod but failed.


