


1/7 Scale Blackburn Buccaneer All Composite Scratch Build


 01-31-2019, 08:00 PM
#202

Thomas,
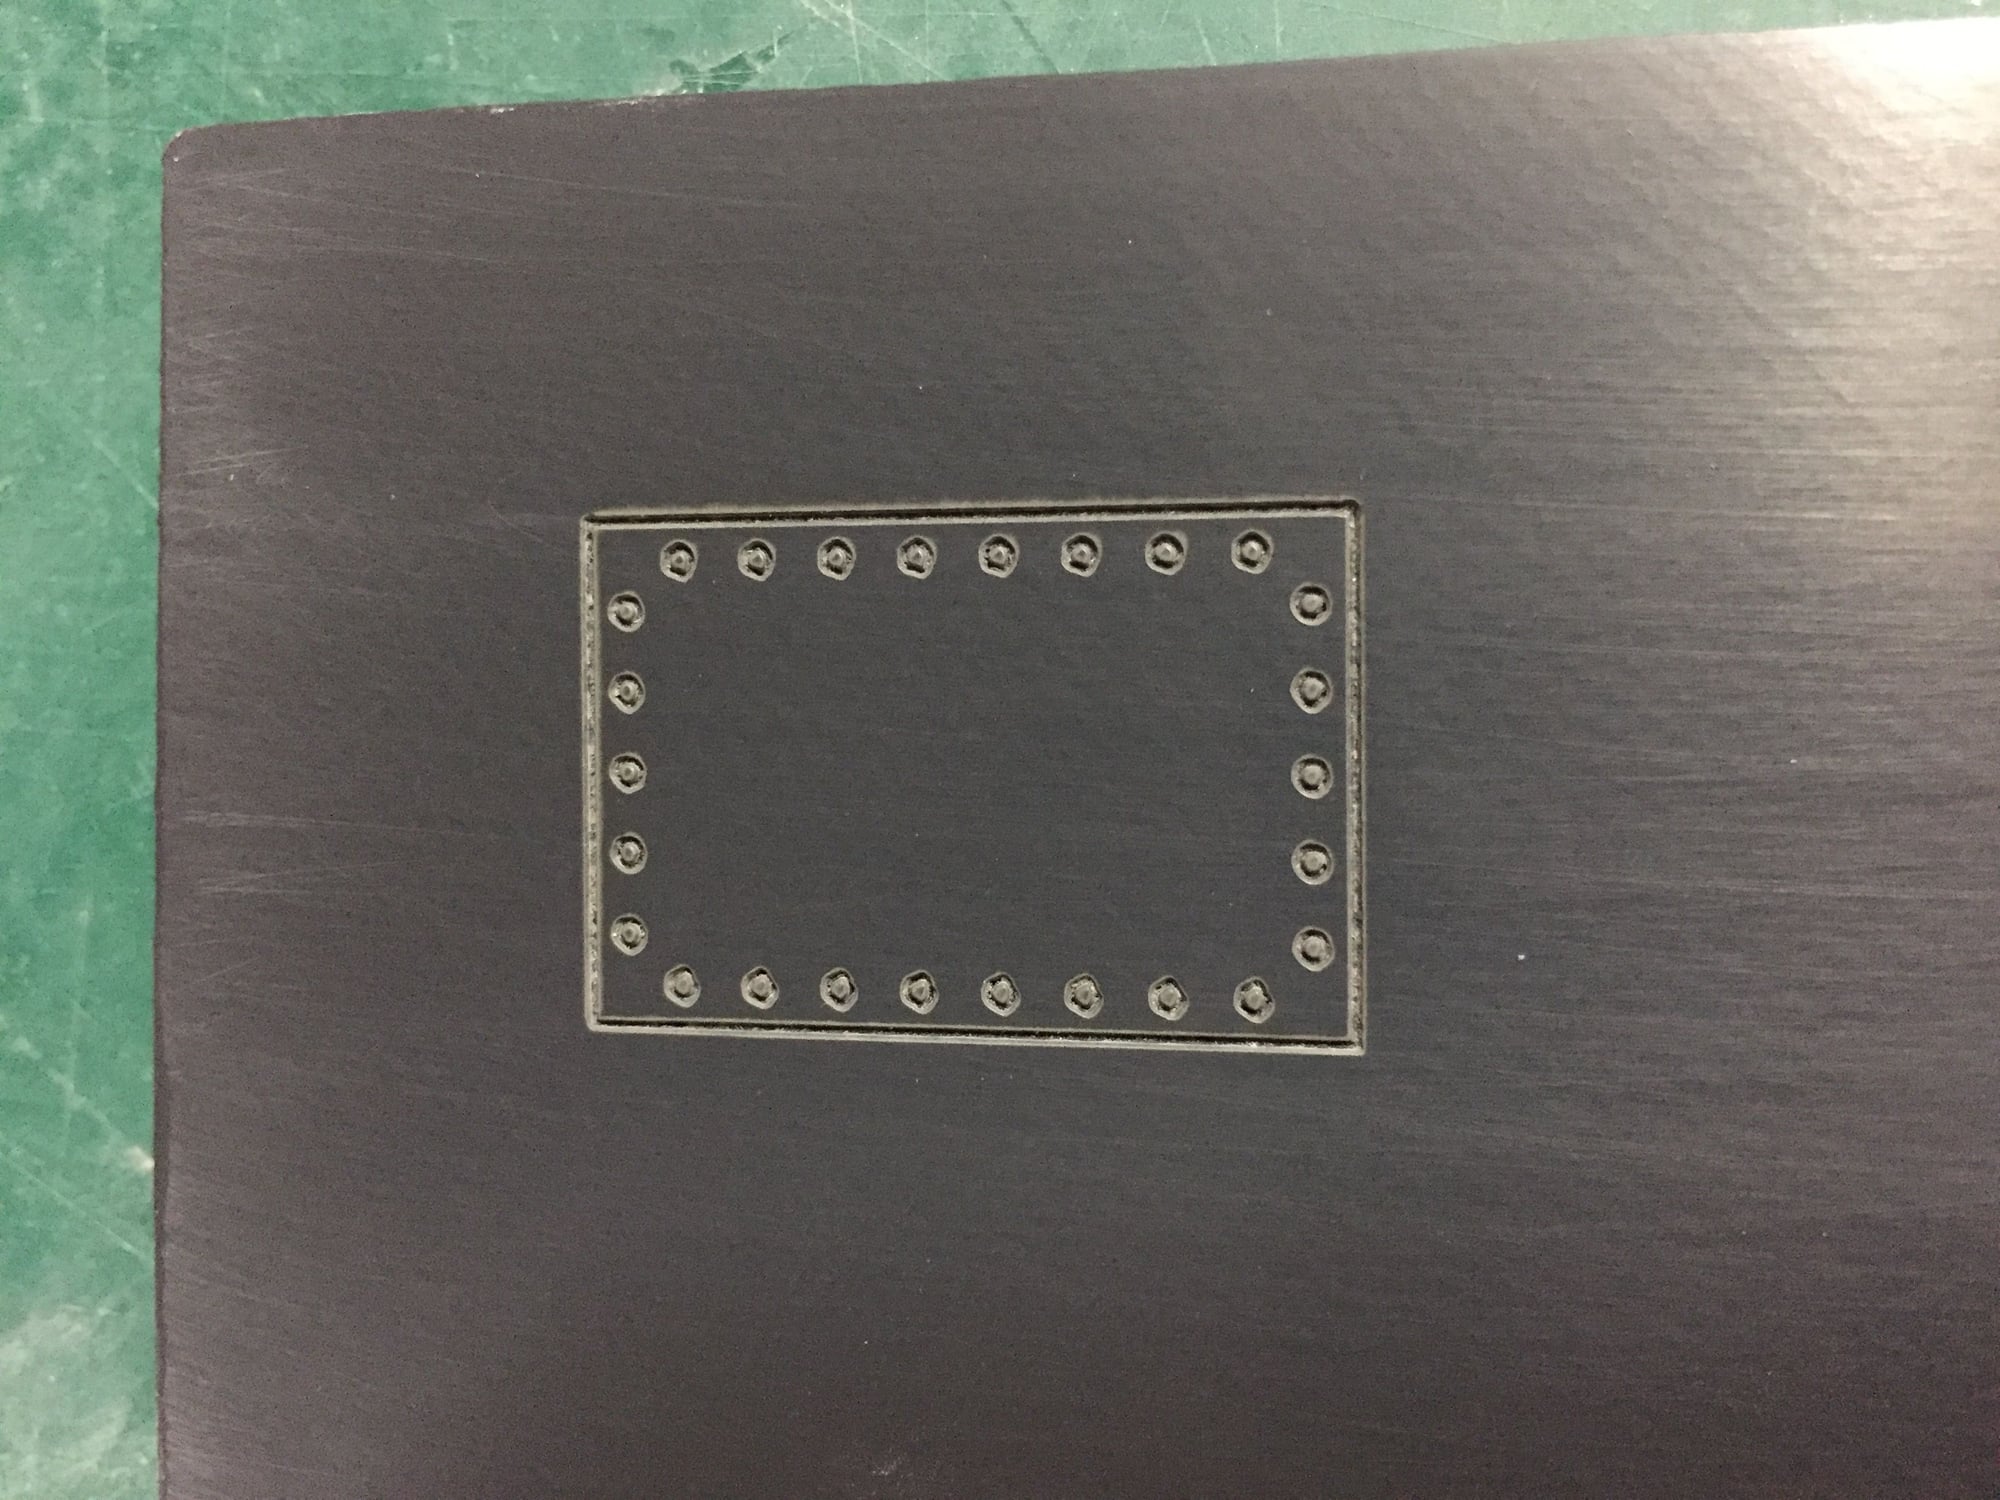
I tried your laser cutting (engraving) of panel lines. I made up a test piece by glassing a sheet of balsa and finishing it with 2k primer then Duratec. I drew up a notional panel, 30mm x 20mm. The rivets were 1mm in diameter.
It worked really well, and ended up with a very cleanly defined set of lines which would reproduce well in the mold. I was very impressed. 20% power at 25mm/sec on my 50W cutter.
The only issue I have is that while it works very well on flat surfaces, getting it to work consistently on a typical model surface would be a challenge. I guess you could do a wing surface in sections, but I don't see how you could fit a fuselage into a typical laser cutter - their working depth is normally fairly limited.
An interesting experiment. I'm sure you could develop it further.
Paul
01-31-2019, 08:08 PM
#203
The current motto is measure twice and cut once!!
I have been working on finishing the speedbrake plugs, and I got as far as adding the surface detail to the inner surfaces. Almost finished when I realized that they didn't close cleanly and it turns out I didn't completely level the inner faces when I started so that they closed flush against each other. I ended up with an unsightly gap of 1-2mm.
So, back-tracking 3 days, I sanded them flat and they now mate together. Am now in the process of adding back on the surface detail.
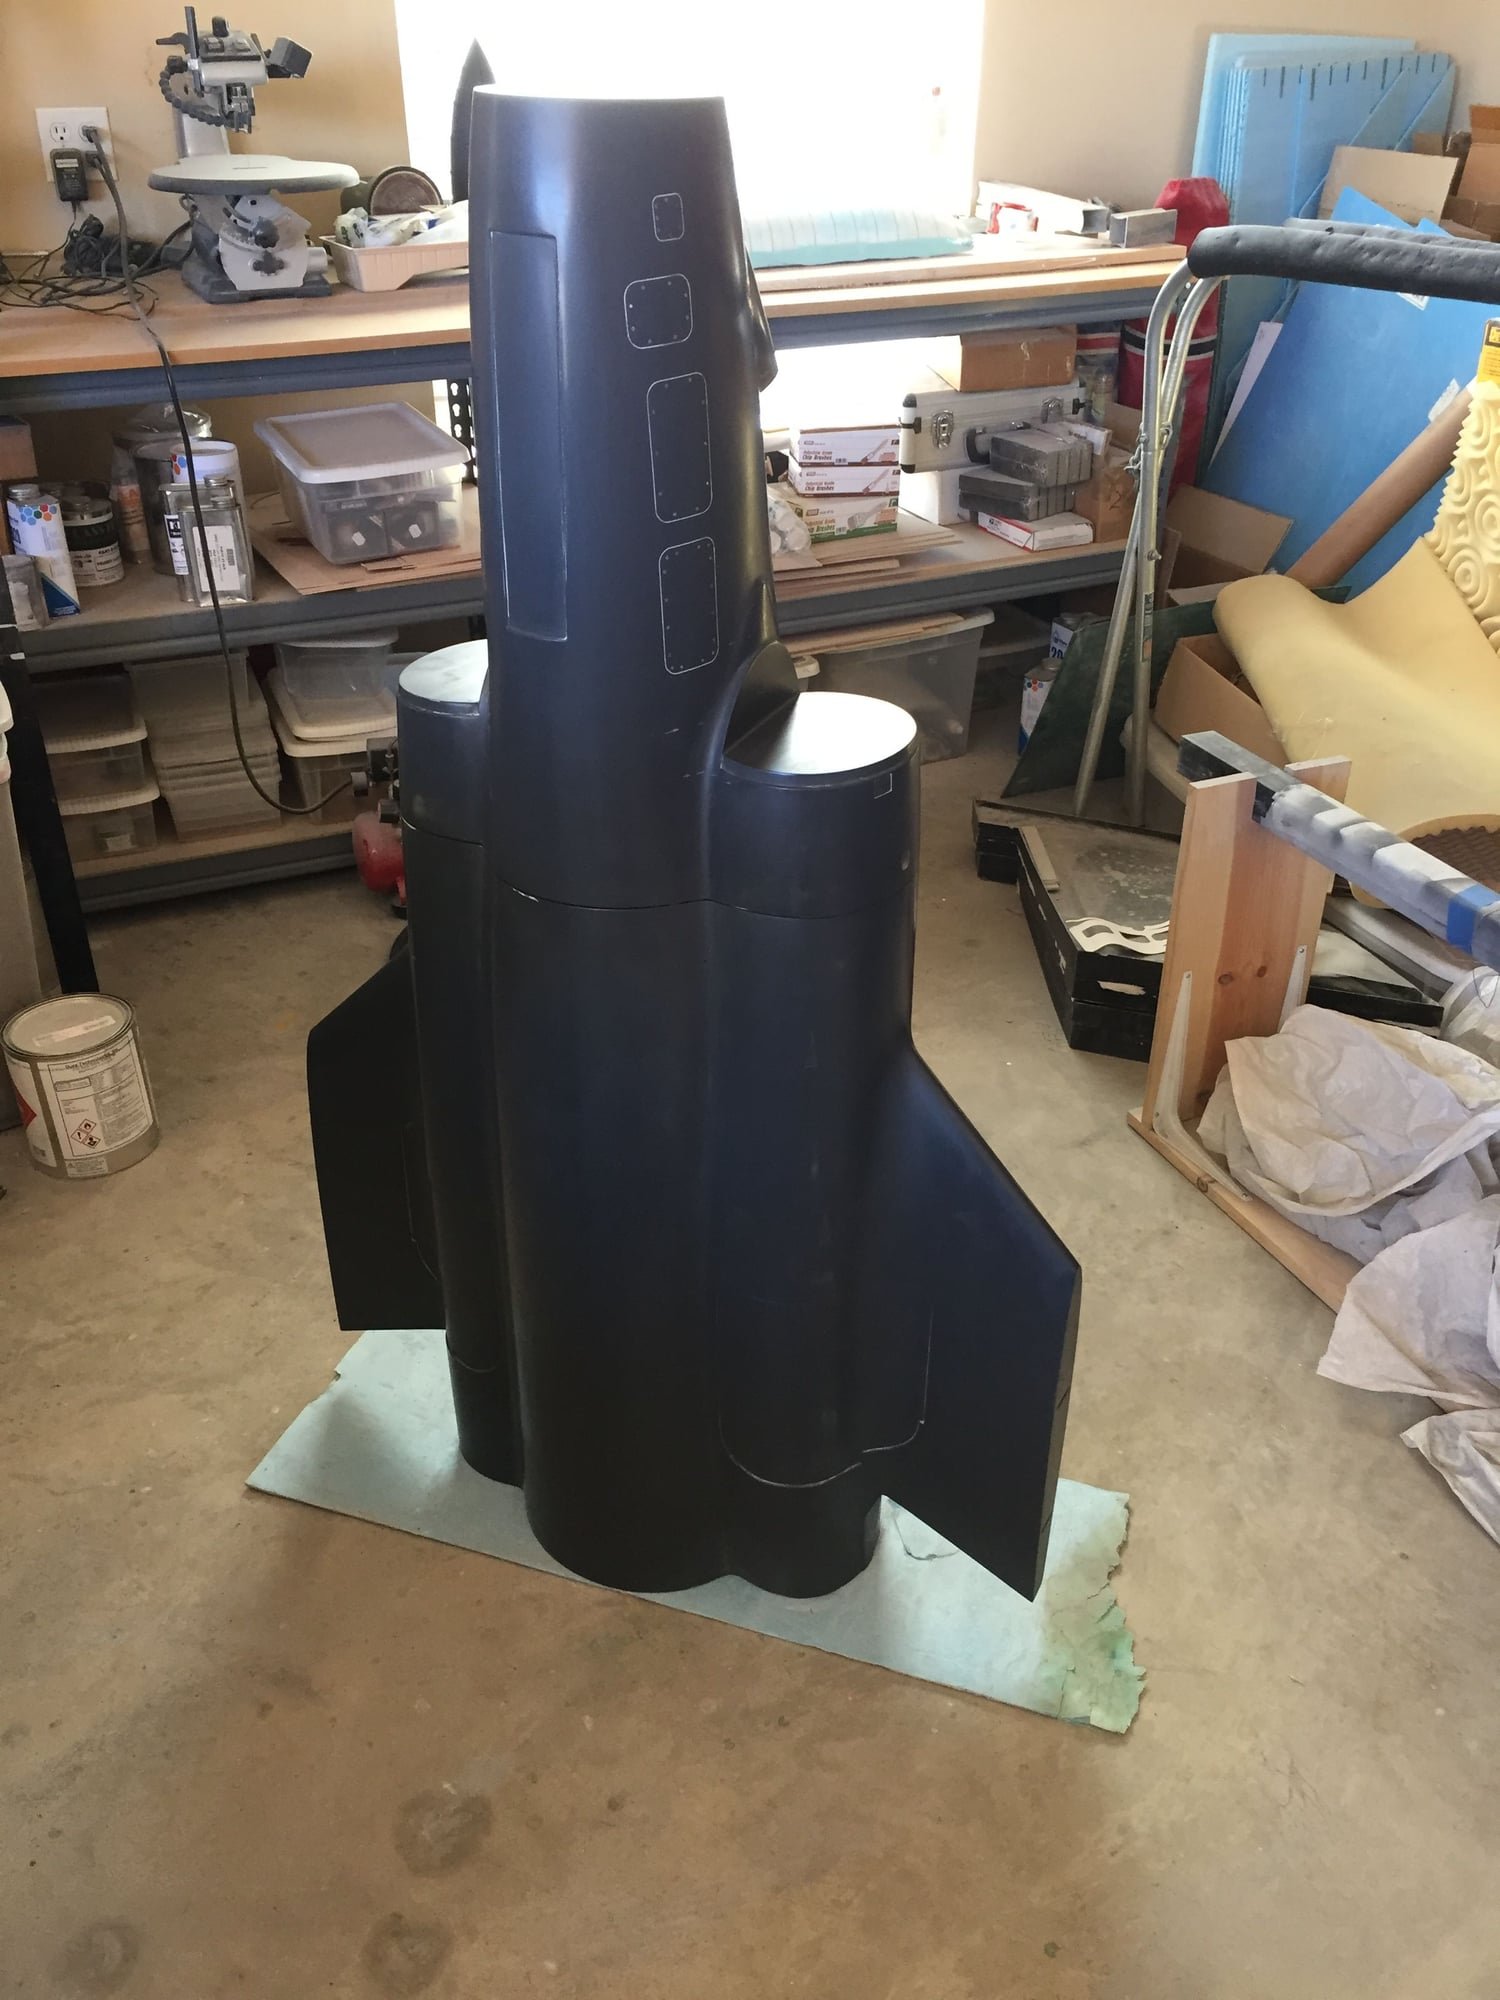
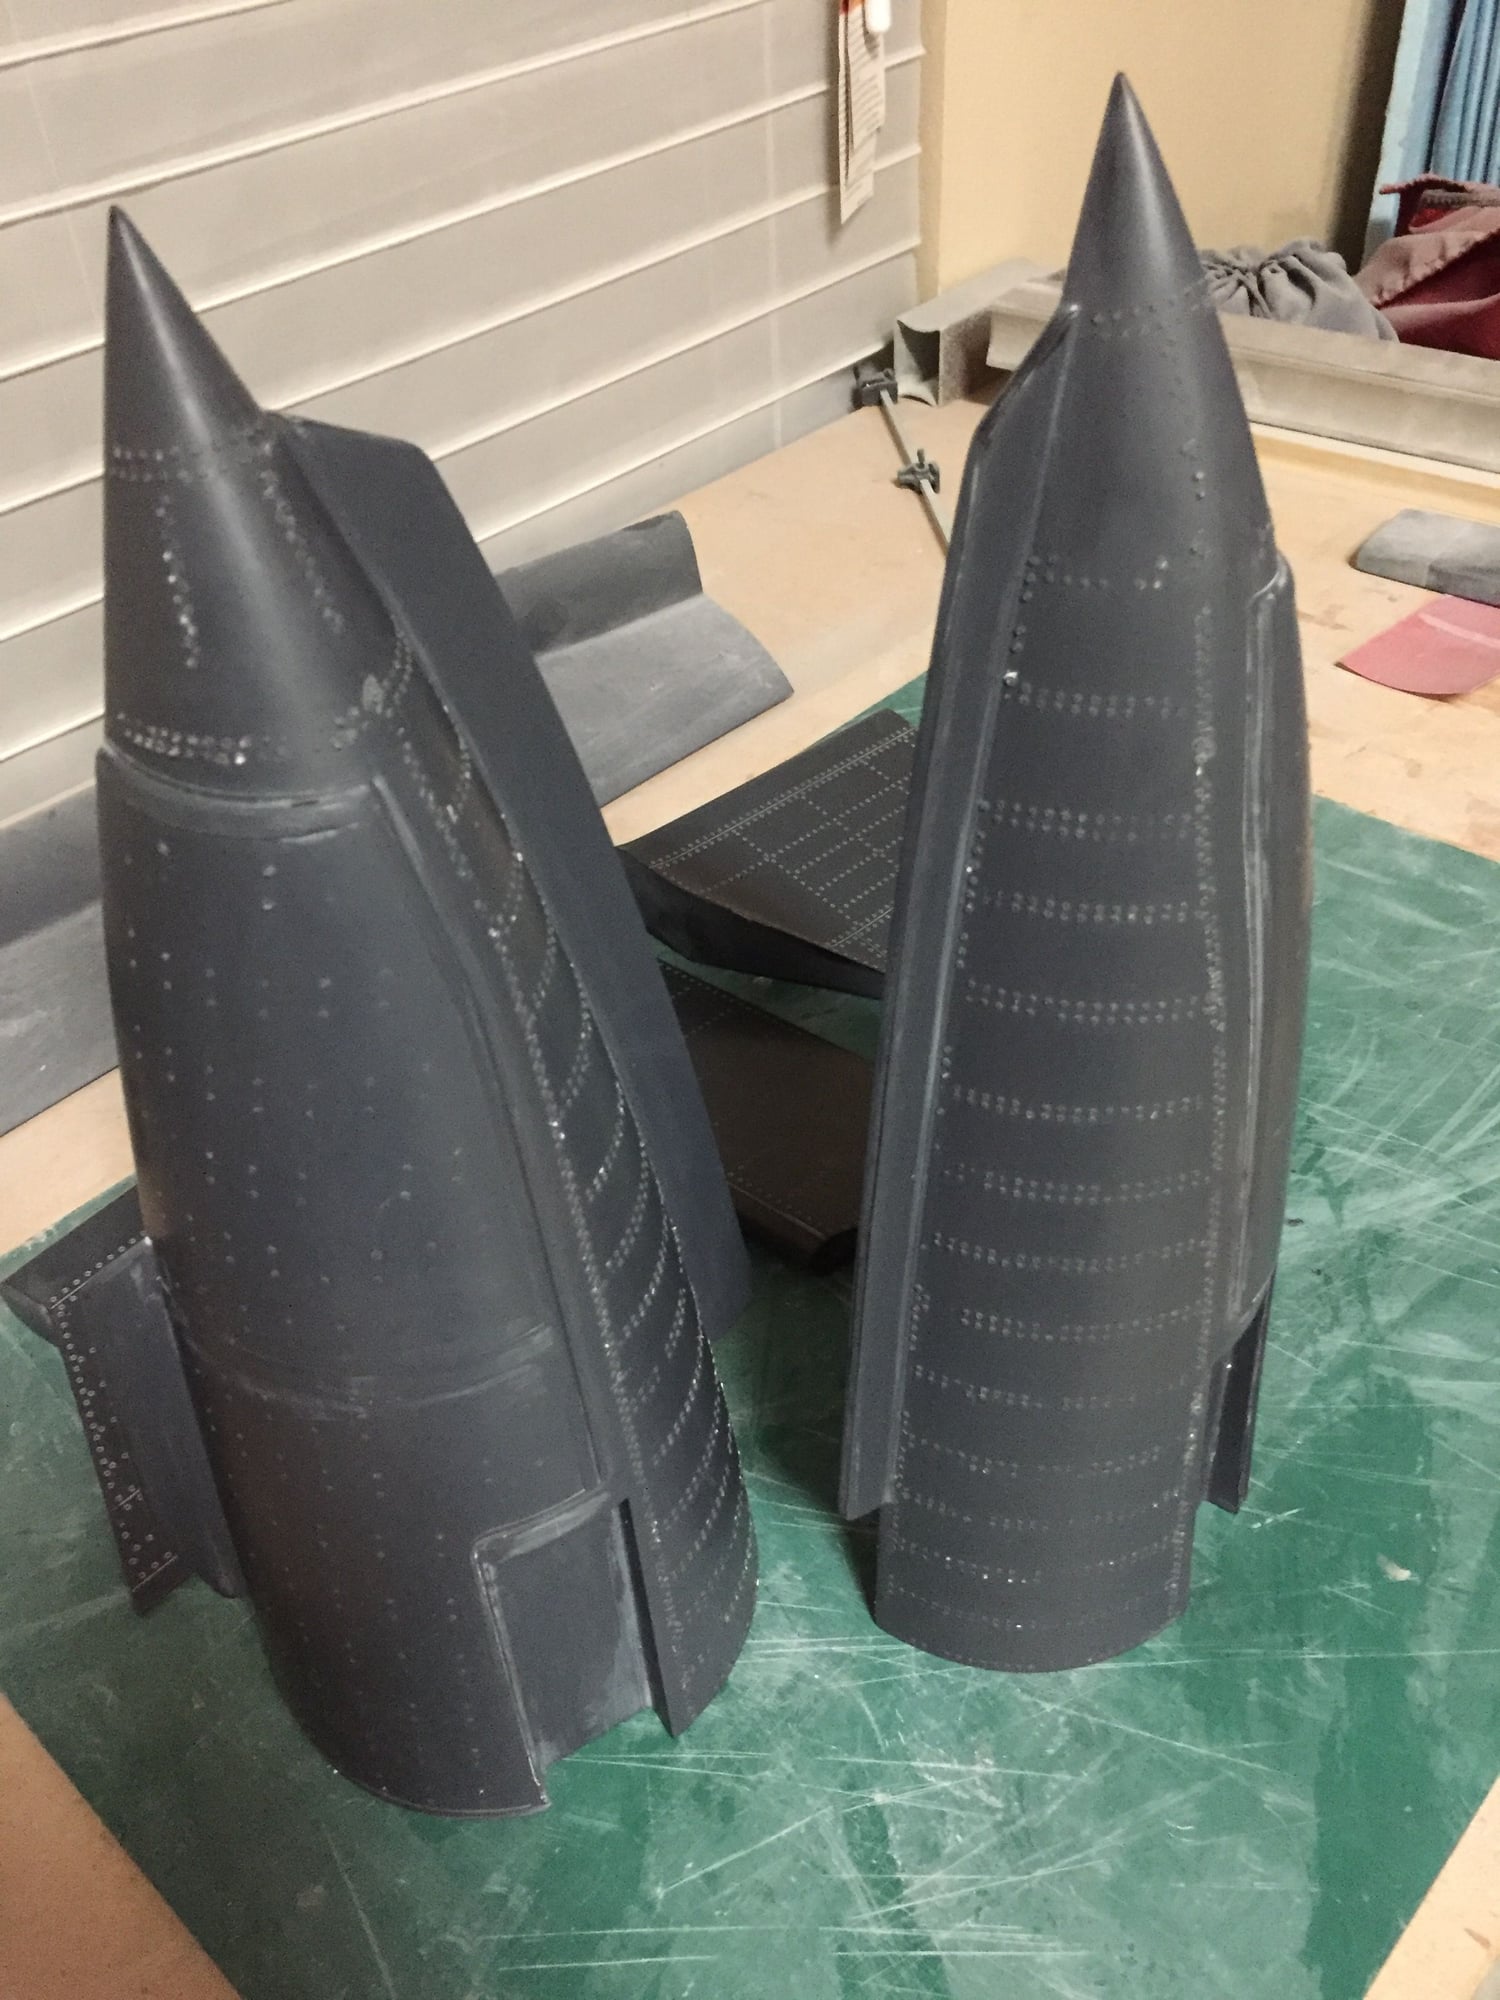
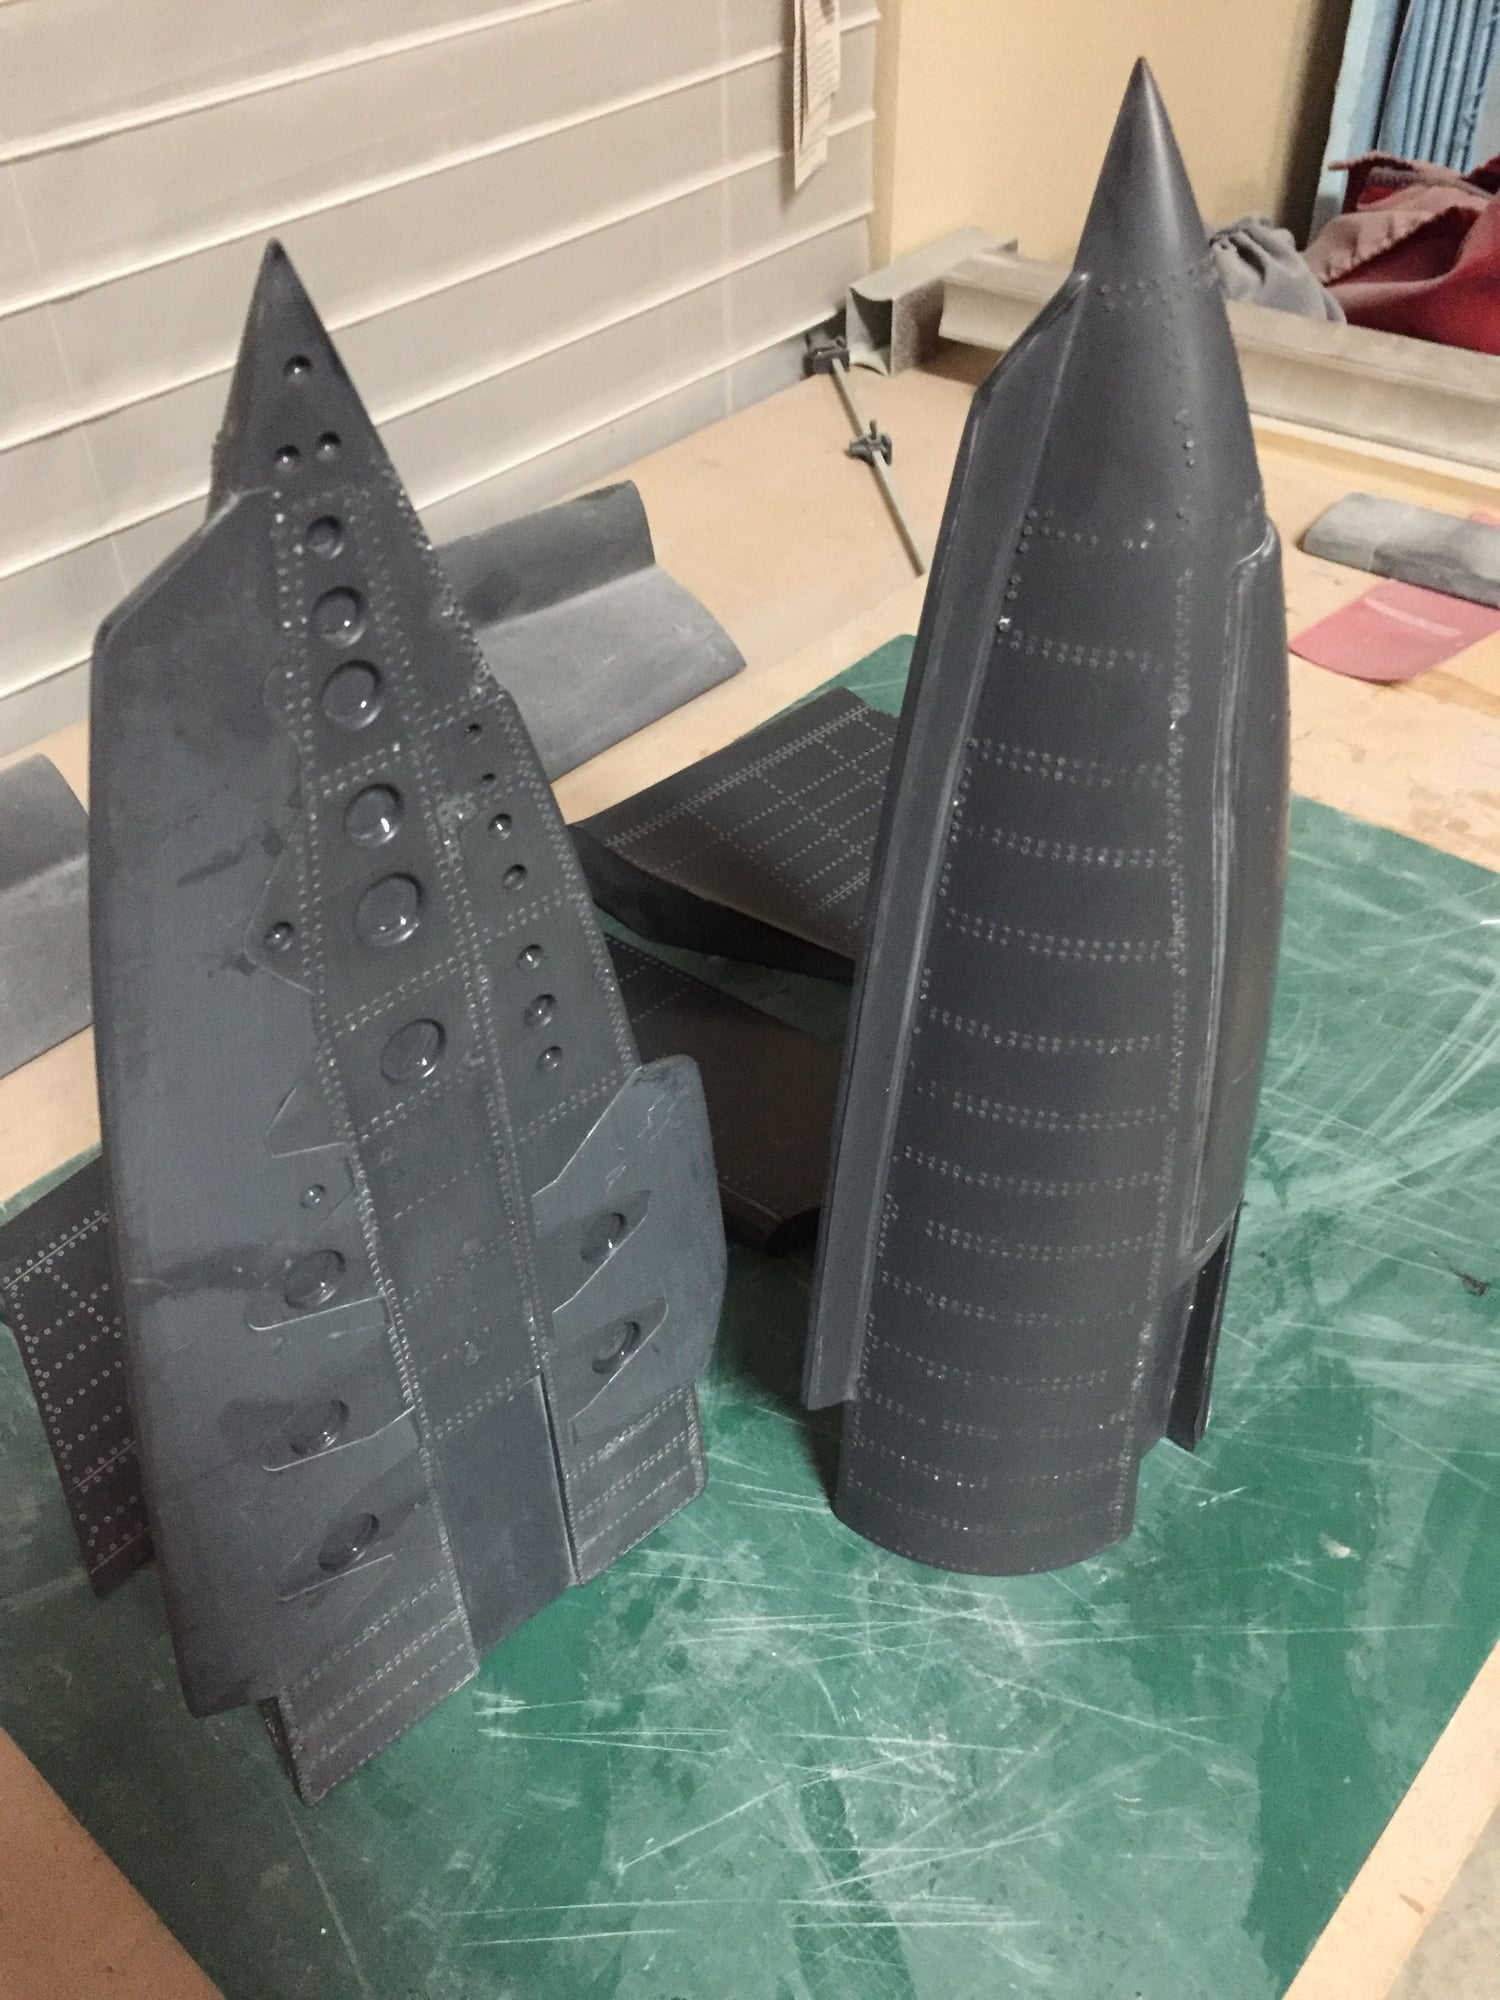
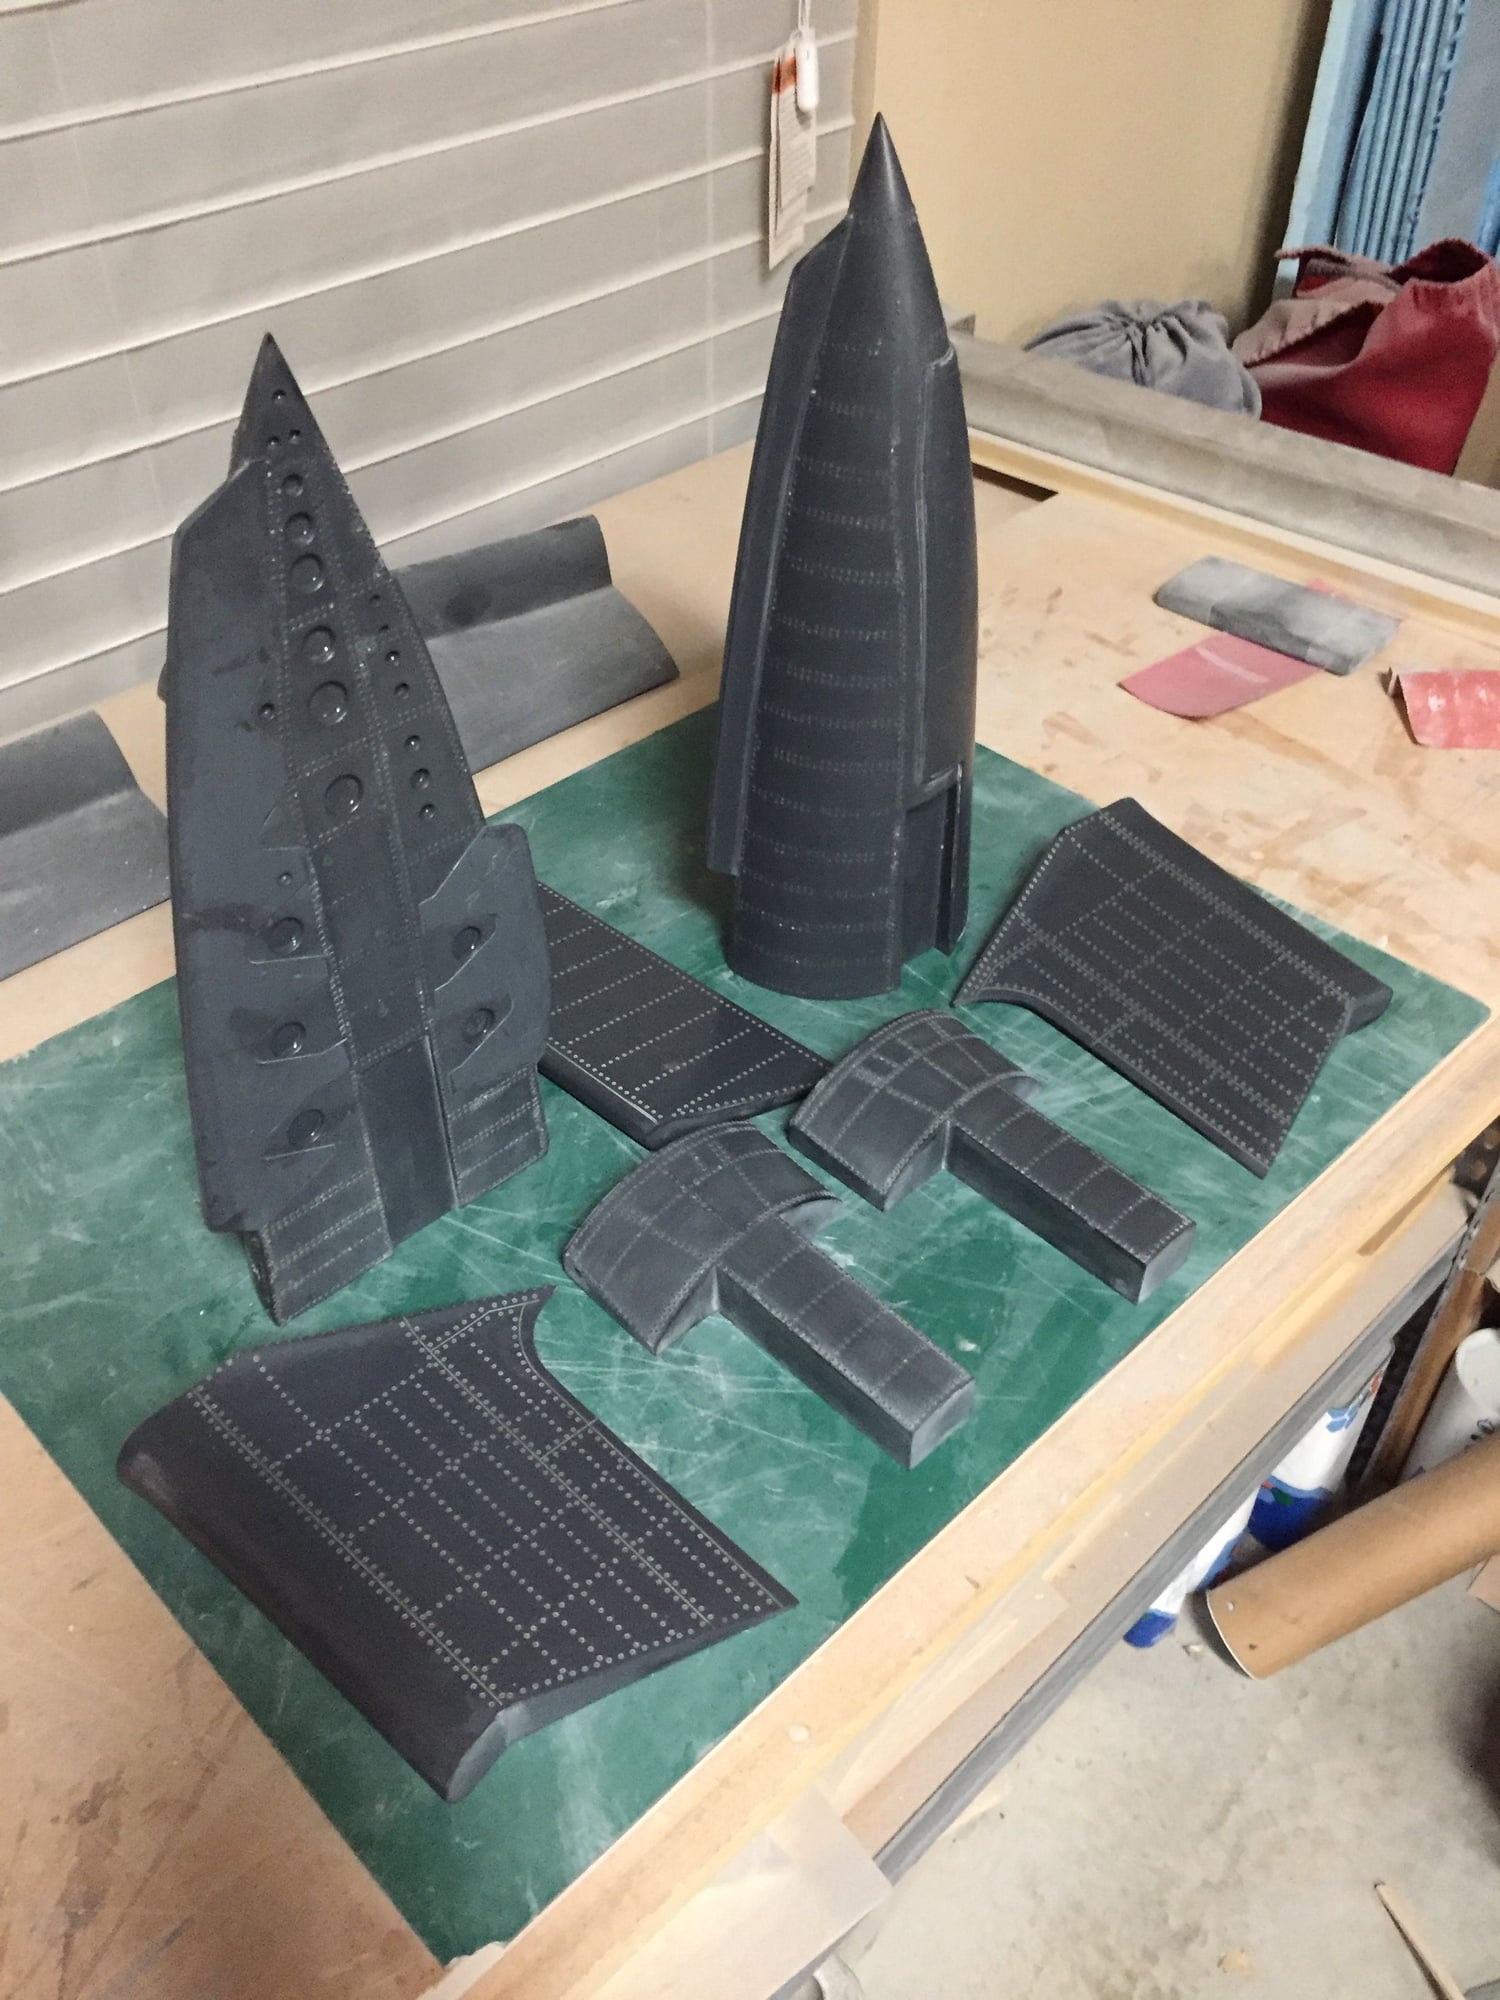
With better news, I have finished sanding the forward and center fuselage plugs down through 800grit and levelling compound and have started adding on the surface detail to the blank canvas to bring them to life. The rear fuselage is ready for its final sanding.

Paul
I have been working on finishing the speedbrake plugs, and I got as far as adding the surface detail to the inner surfaces. Almost finished when I realized that they didn't close cleanly and it turns out I didn't completely level the inner faces when I started so that they closed flush against each other. I ended up with an unsightly gap of 1-2mm.
So, back-tracking 3 days, I sanded them flat and they now mate together. Am now in the process of adding back on the surface detail.
With better news, I have finished sanding the forward and center fuselage plugs down through 800grit and levelling compound and have started adding on the surface detail to the blank canvas to bring them to life. The rear fuselage is ready for its final sanding.
Paul
Last edited by JSF-TC; 01-31-2019 at 08:10 PM.
02-01-2019, 12:30 PM
#204
The current motto is measure twice and cut once!!
I have been working on finishing the speedbrake plugs, and I got as far as adding the surface detail to the inner surfaces. Almost finished when I realized that they didn't close cleanly and it turns out I didn't completely level the inner faces when I started so that they closed flush against each other. I ended up with an unsightly gap of 1-2mm.
So, back-tracking 3 days, I sanded them flat and they now mate together. Am now in the process of adding back on the surface detail.
With better news, I have finished sanding the forward and center fuselage plugs down through 800grit and levelling compound and have started adding on the surface detail to the blank canvas to bring them to life. The rear fuselage is ready for its final sanding.
Paul
very nice!
thanks for trying out the engraving method, i guess i need to purchase that laser cutter now. I�ll mostly use it for wings/tail components and the fuselage will get the old school method
02-01-2019, 01:09 PM
#205

My Feedback: (1)
Join Date: Sep 2010
Location: Bury St Edmunds, UNITED KINGDOM
Posts: 12
Likes: 0
Received 0 Likes
on
0 Posts
Hi
Have not been on here for a very long time down to illness of my wife.
I completed my 1/9 Buccaneer end of last year mine is nothing compared to your masterpiece. I went for a single engine as two was a bridge to far in weight.
Waiting for weather to break in the uk and then will give it a go.
Have not been on here for a very long time down to illness of my wife.
I completed my 1/9 Buccaneer end of last year mine is nothing compared to your masterpiece. I went for a single engine as two was a bridge to far in weight.
Waiting for weather to break in the uk and then will give it a go.
02-01-2019, 04:49 PM
#206
James,
Thanks for the comments. Yours is very impressive. Please share some more details - construction method, finish, engine, pipe etc.. Would love to see how you tackled the landing gear.
Would be grateful if you could share your c.g. once you get it flying as a cross-check for mine when its ready.
Thomas - you can never have too many cool tools. The laser cutter was probably my most helpful tool I have purchased in a long time, closely followed by the 3D printer.
Paul
02-01-2019, 09:03 PM
#207
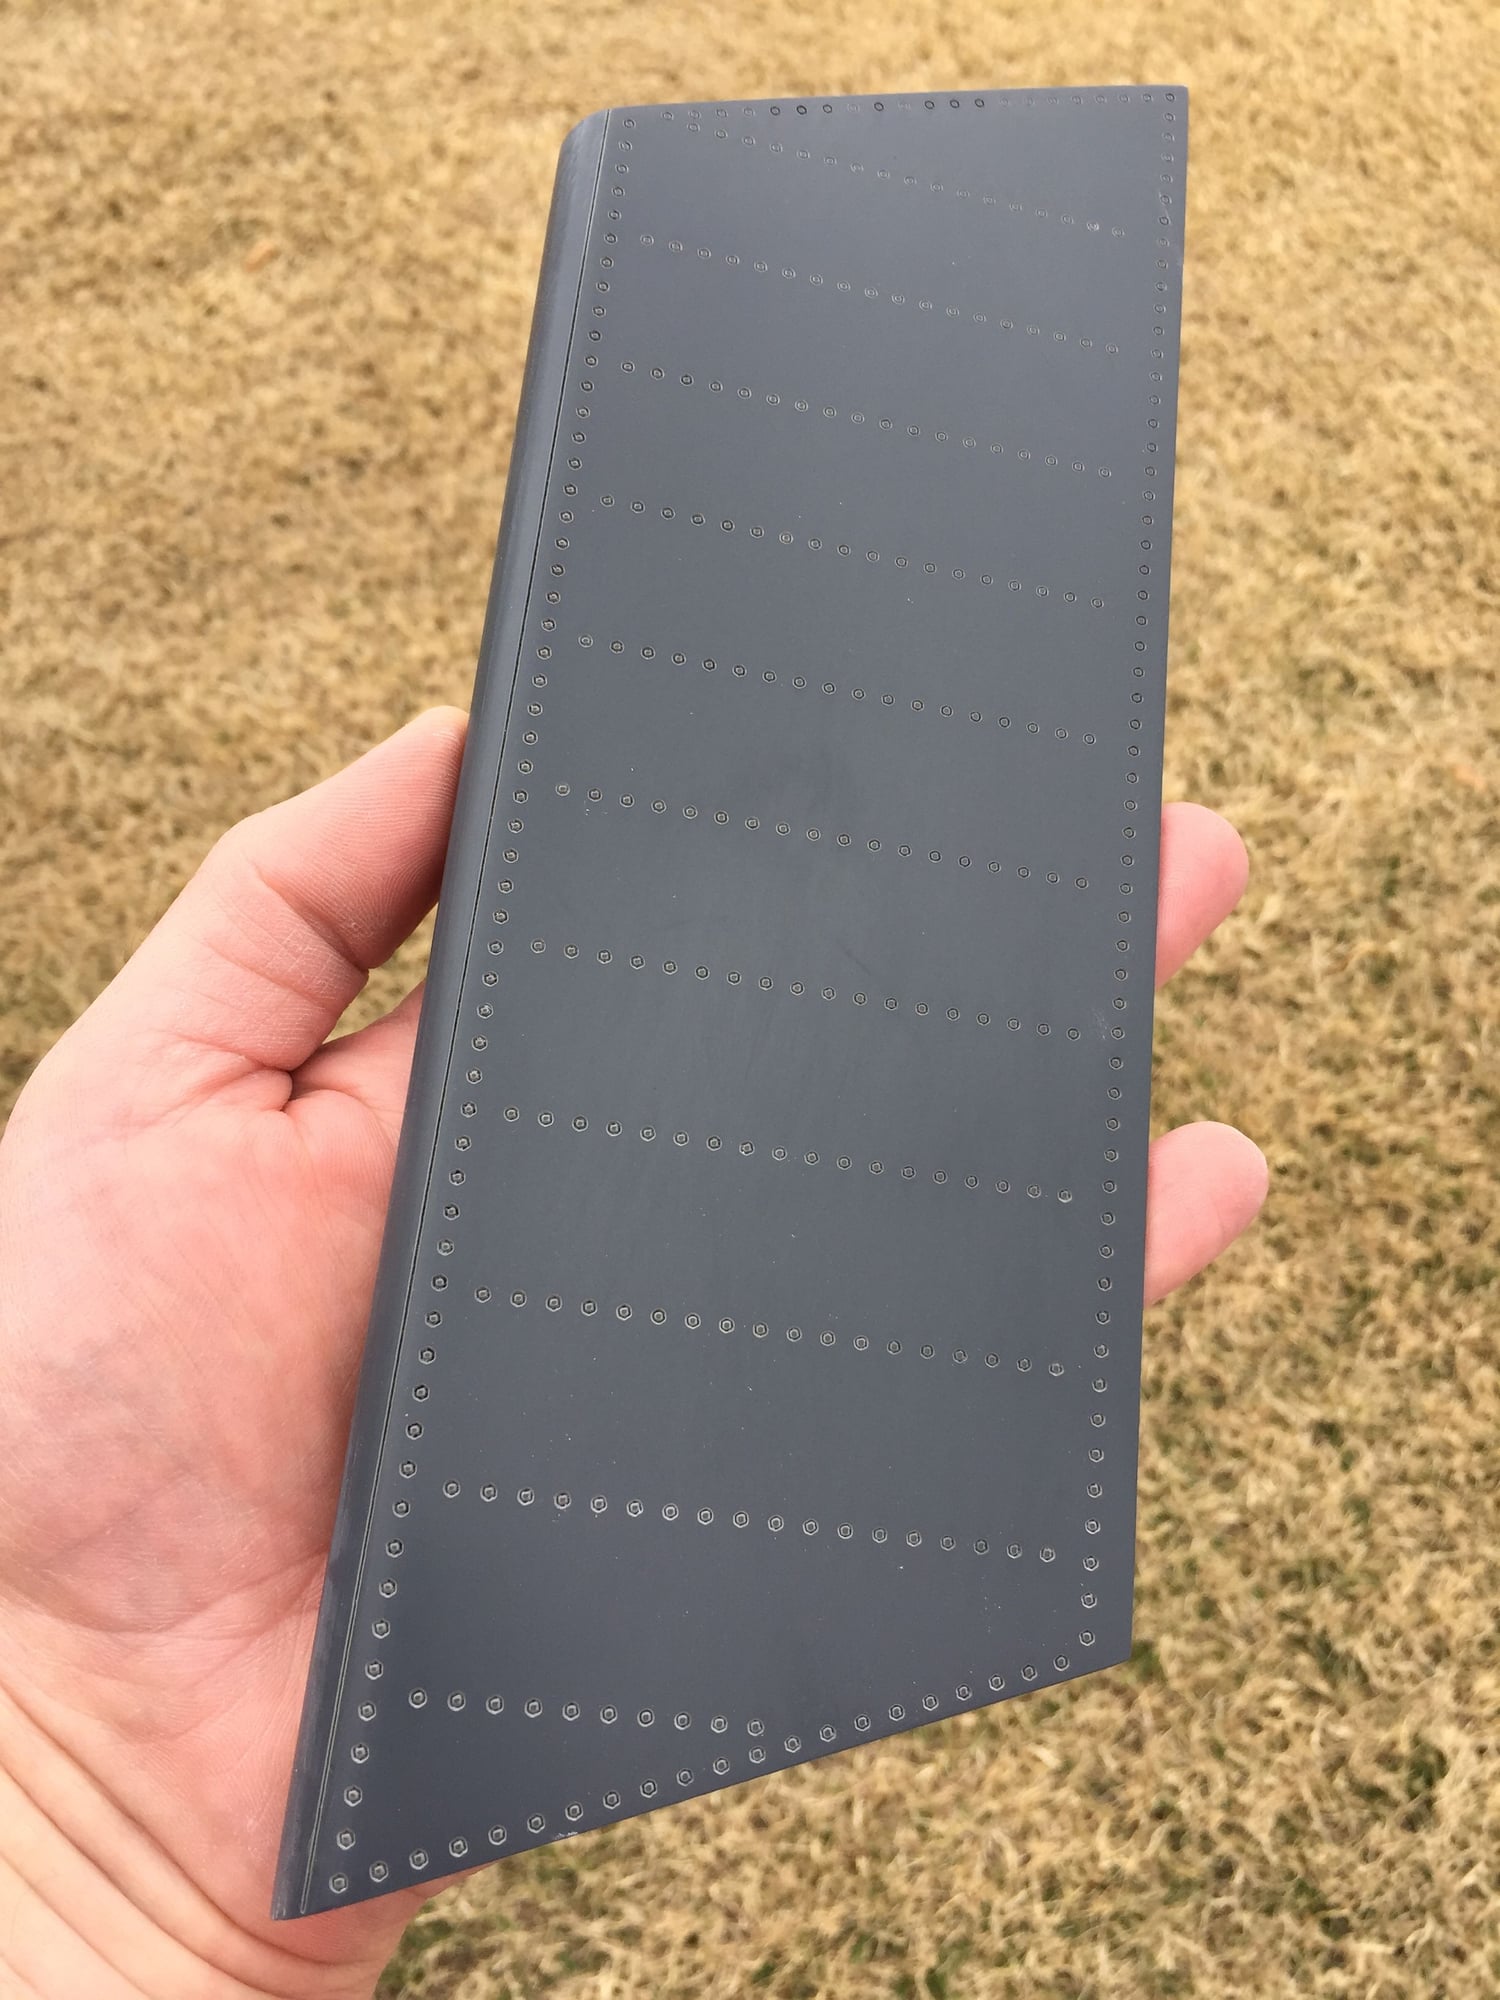
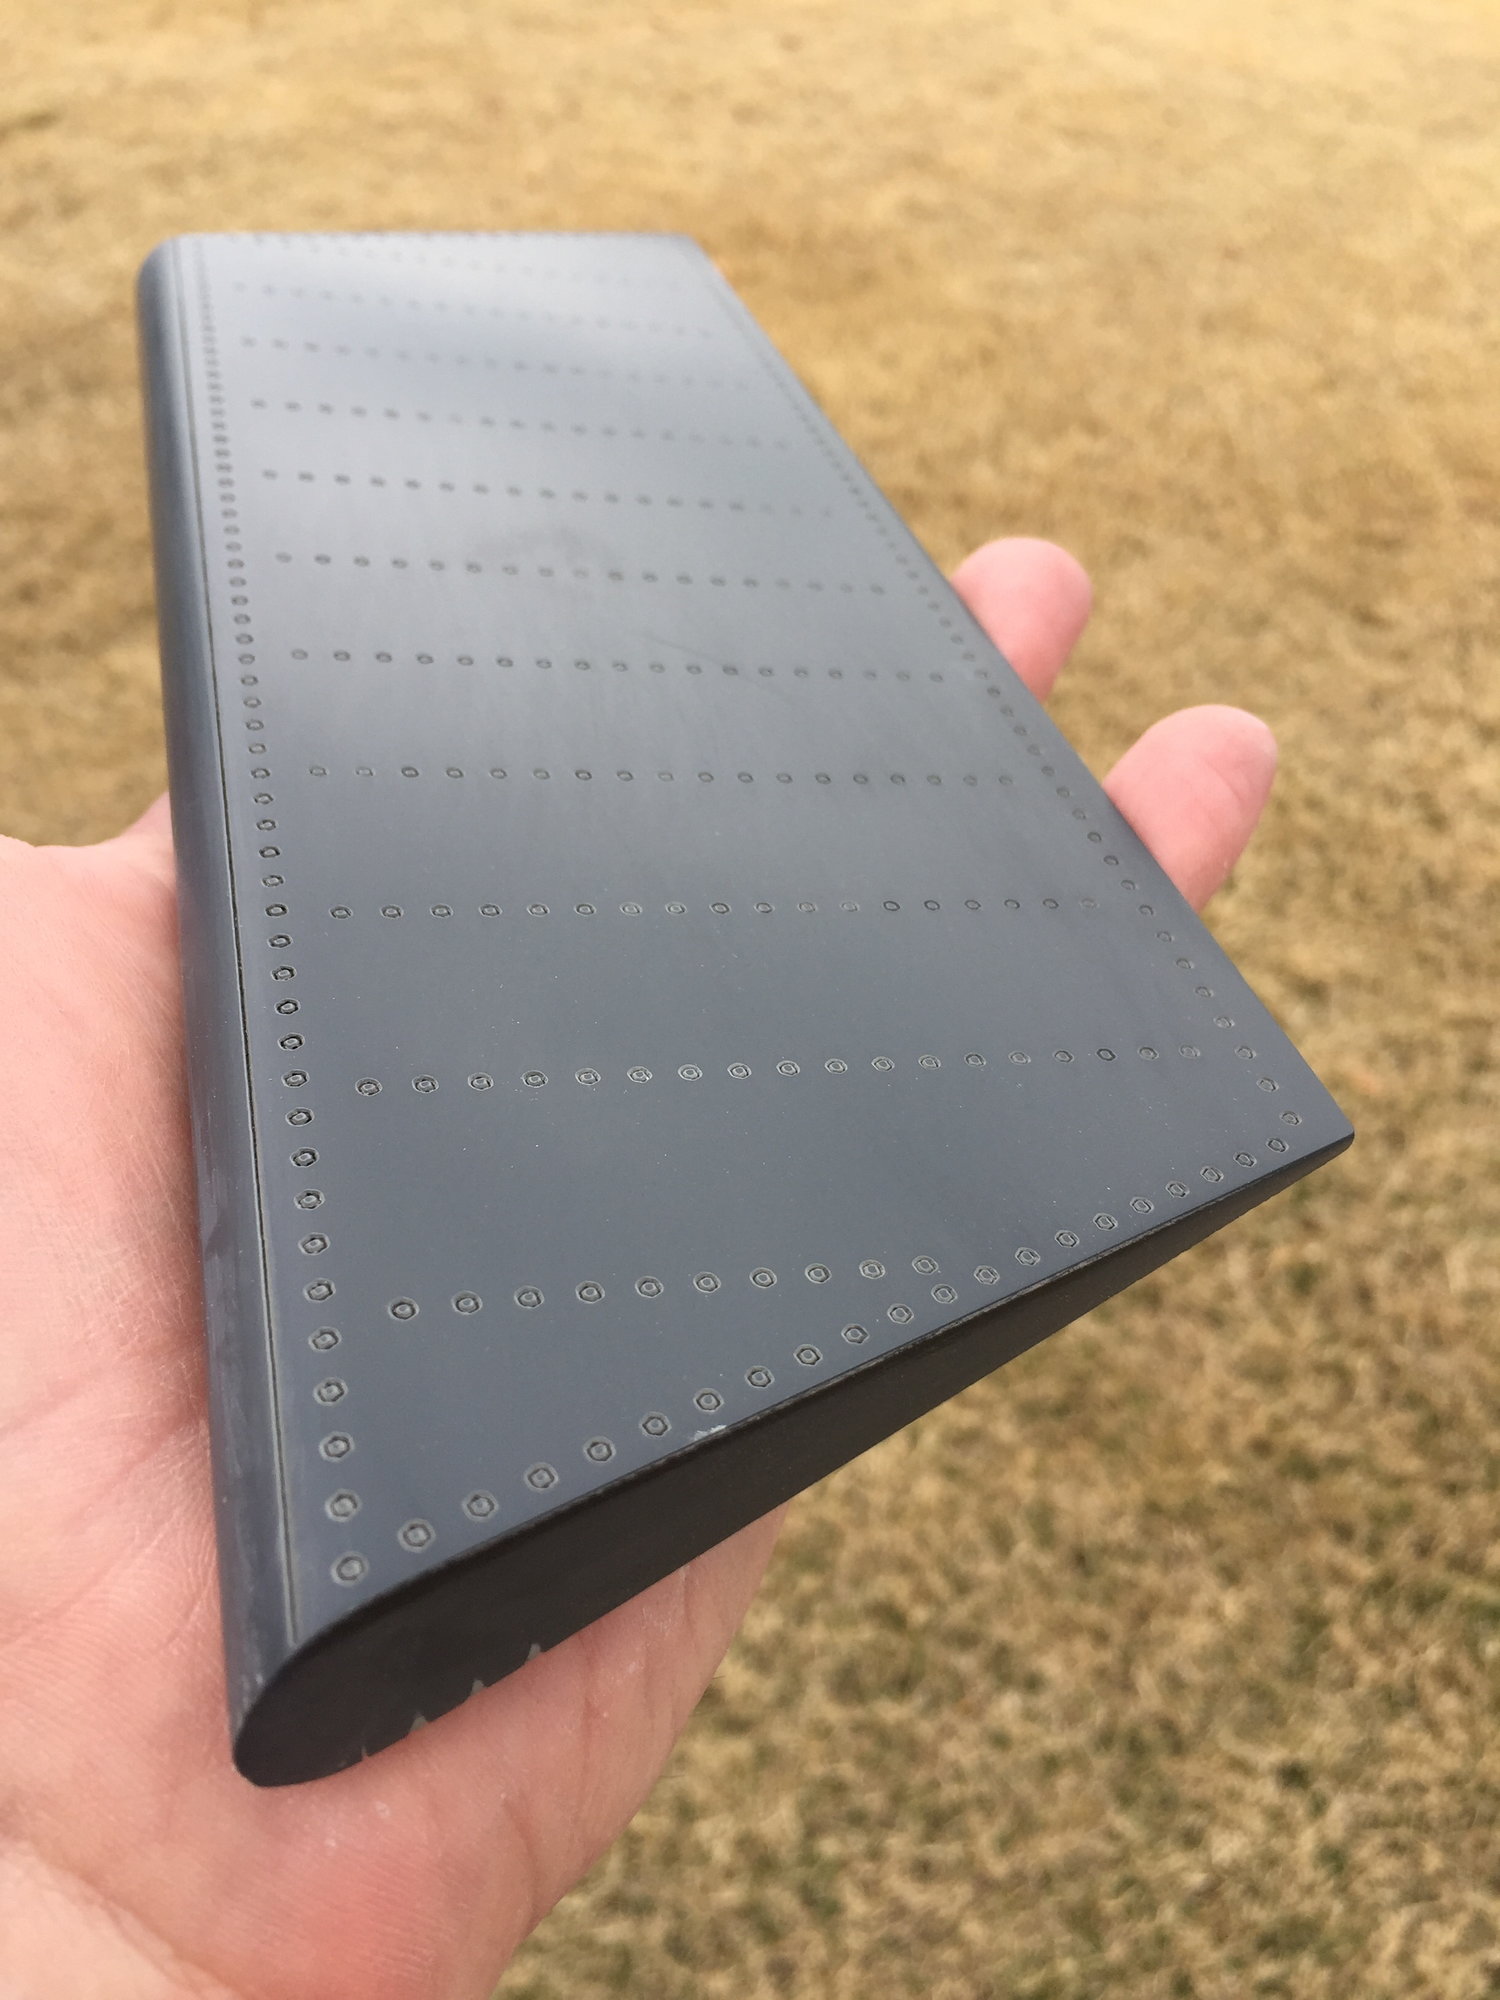
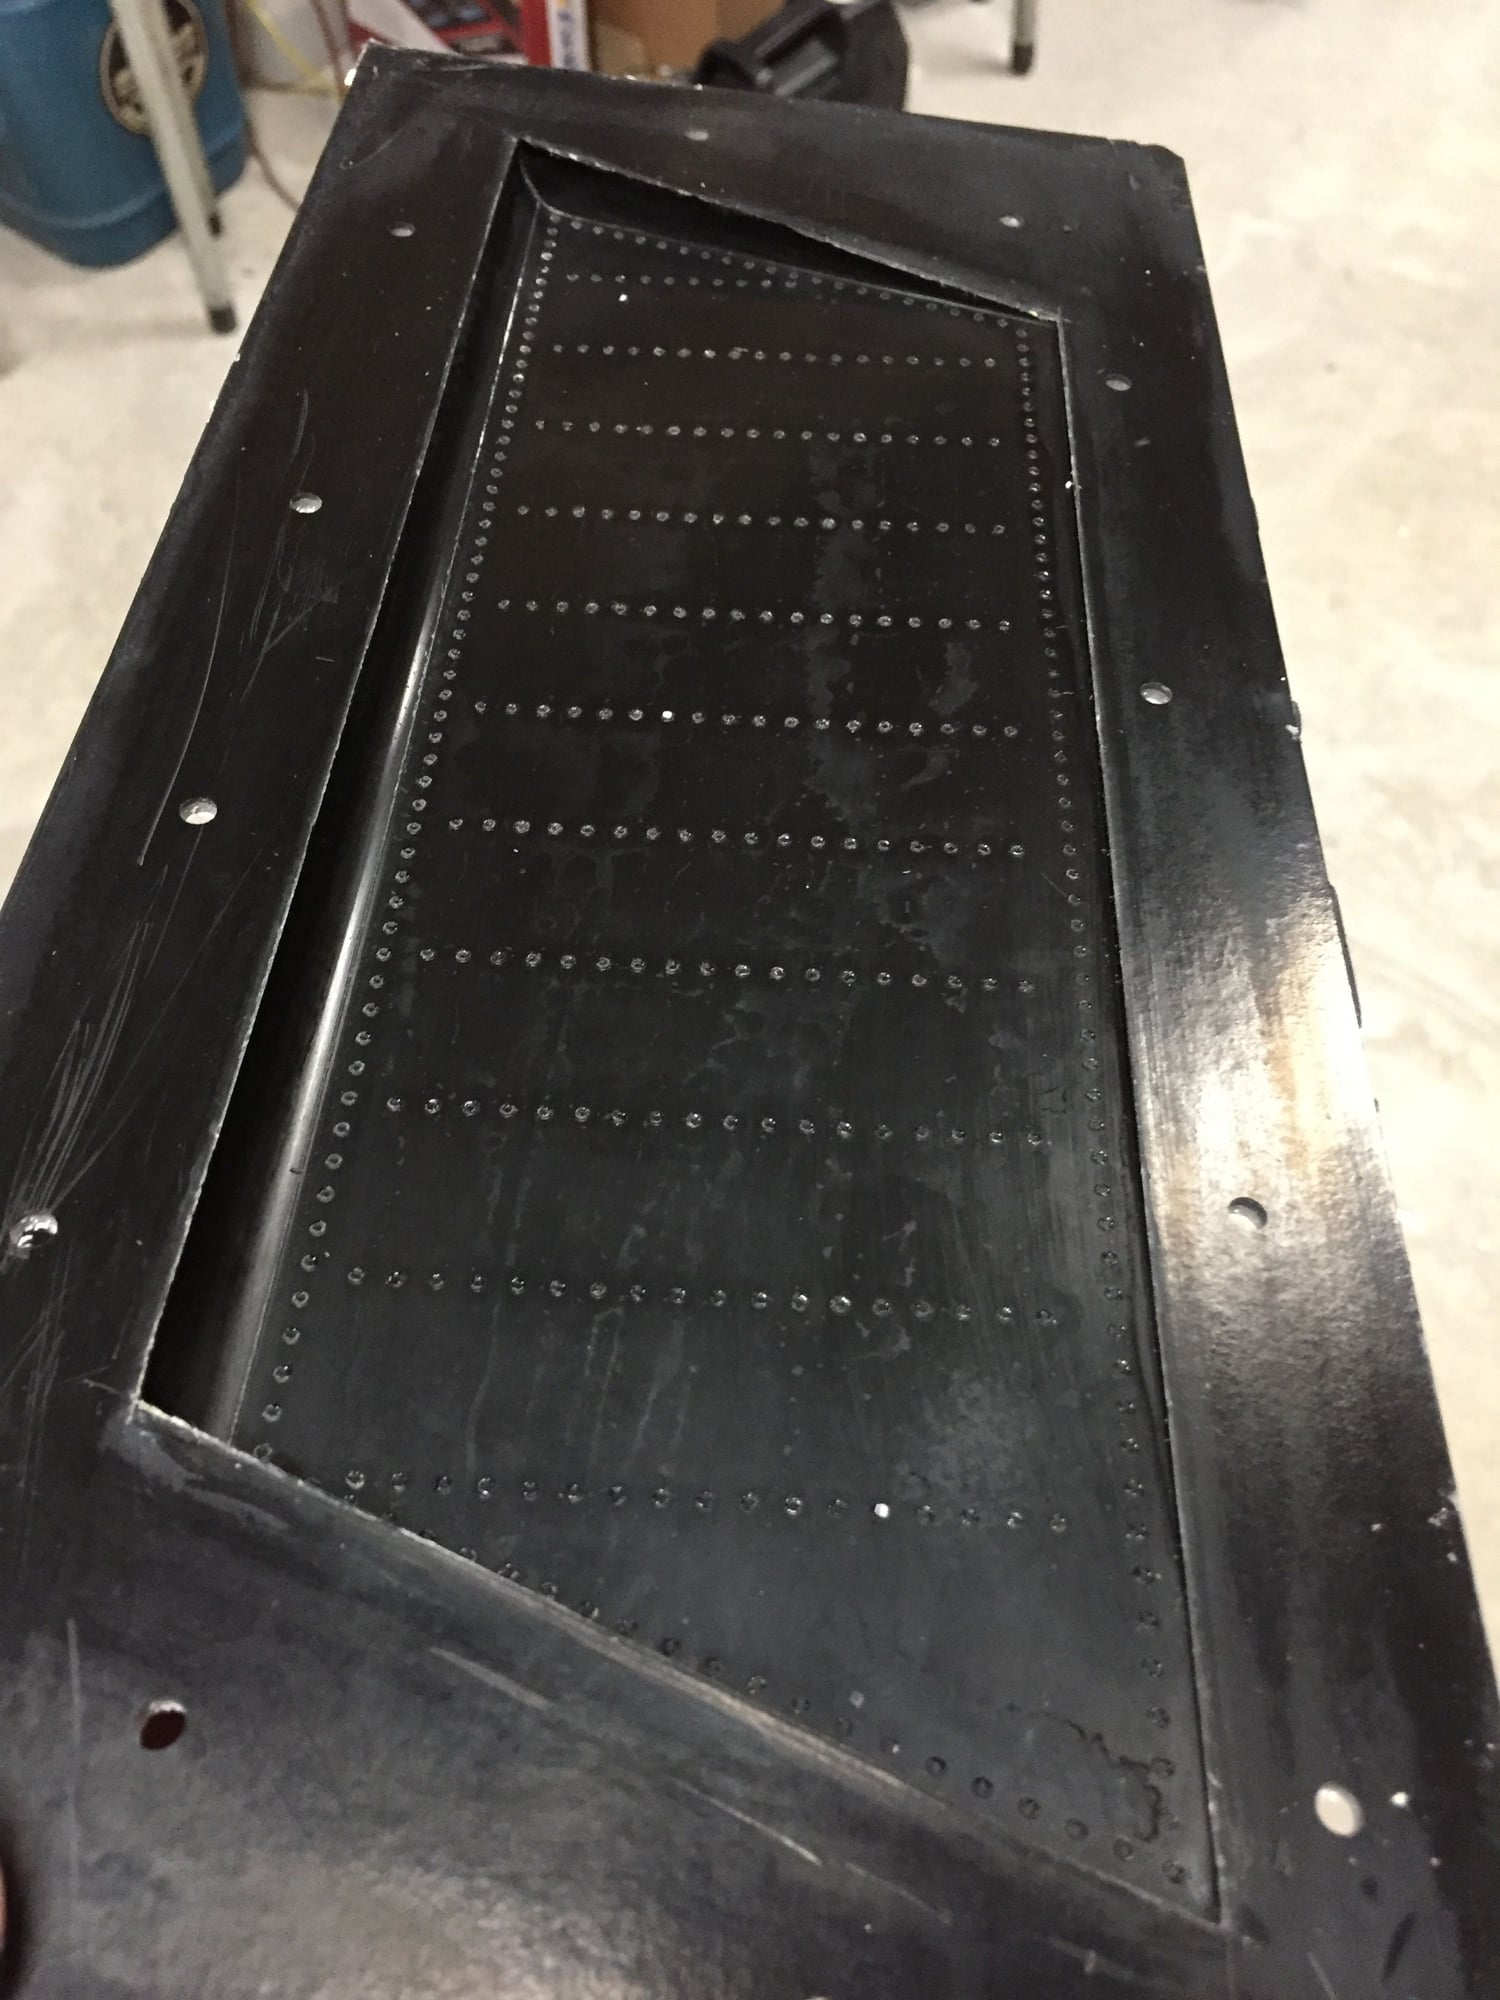
Not to tempt you in any way
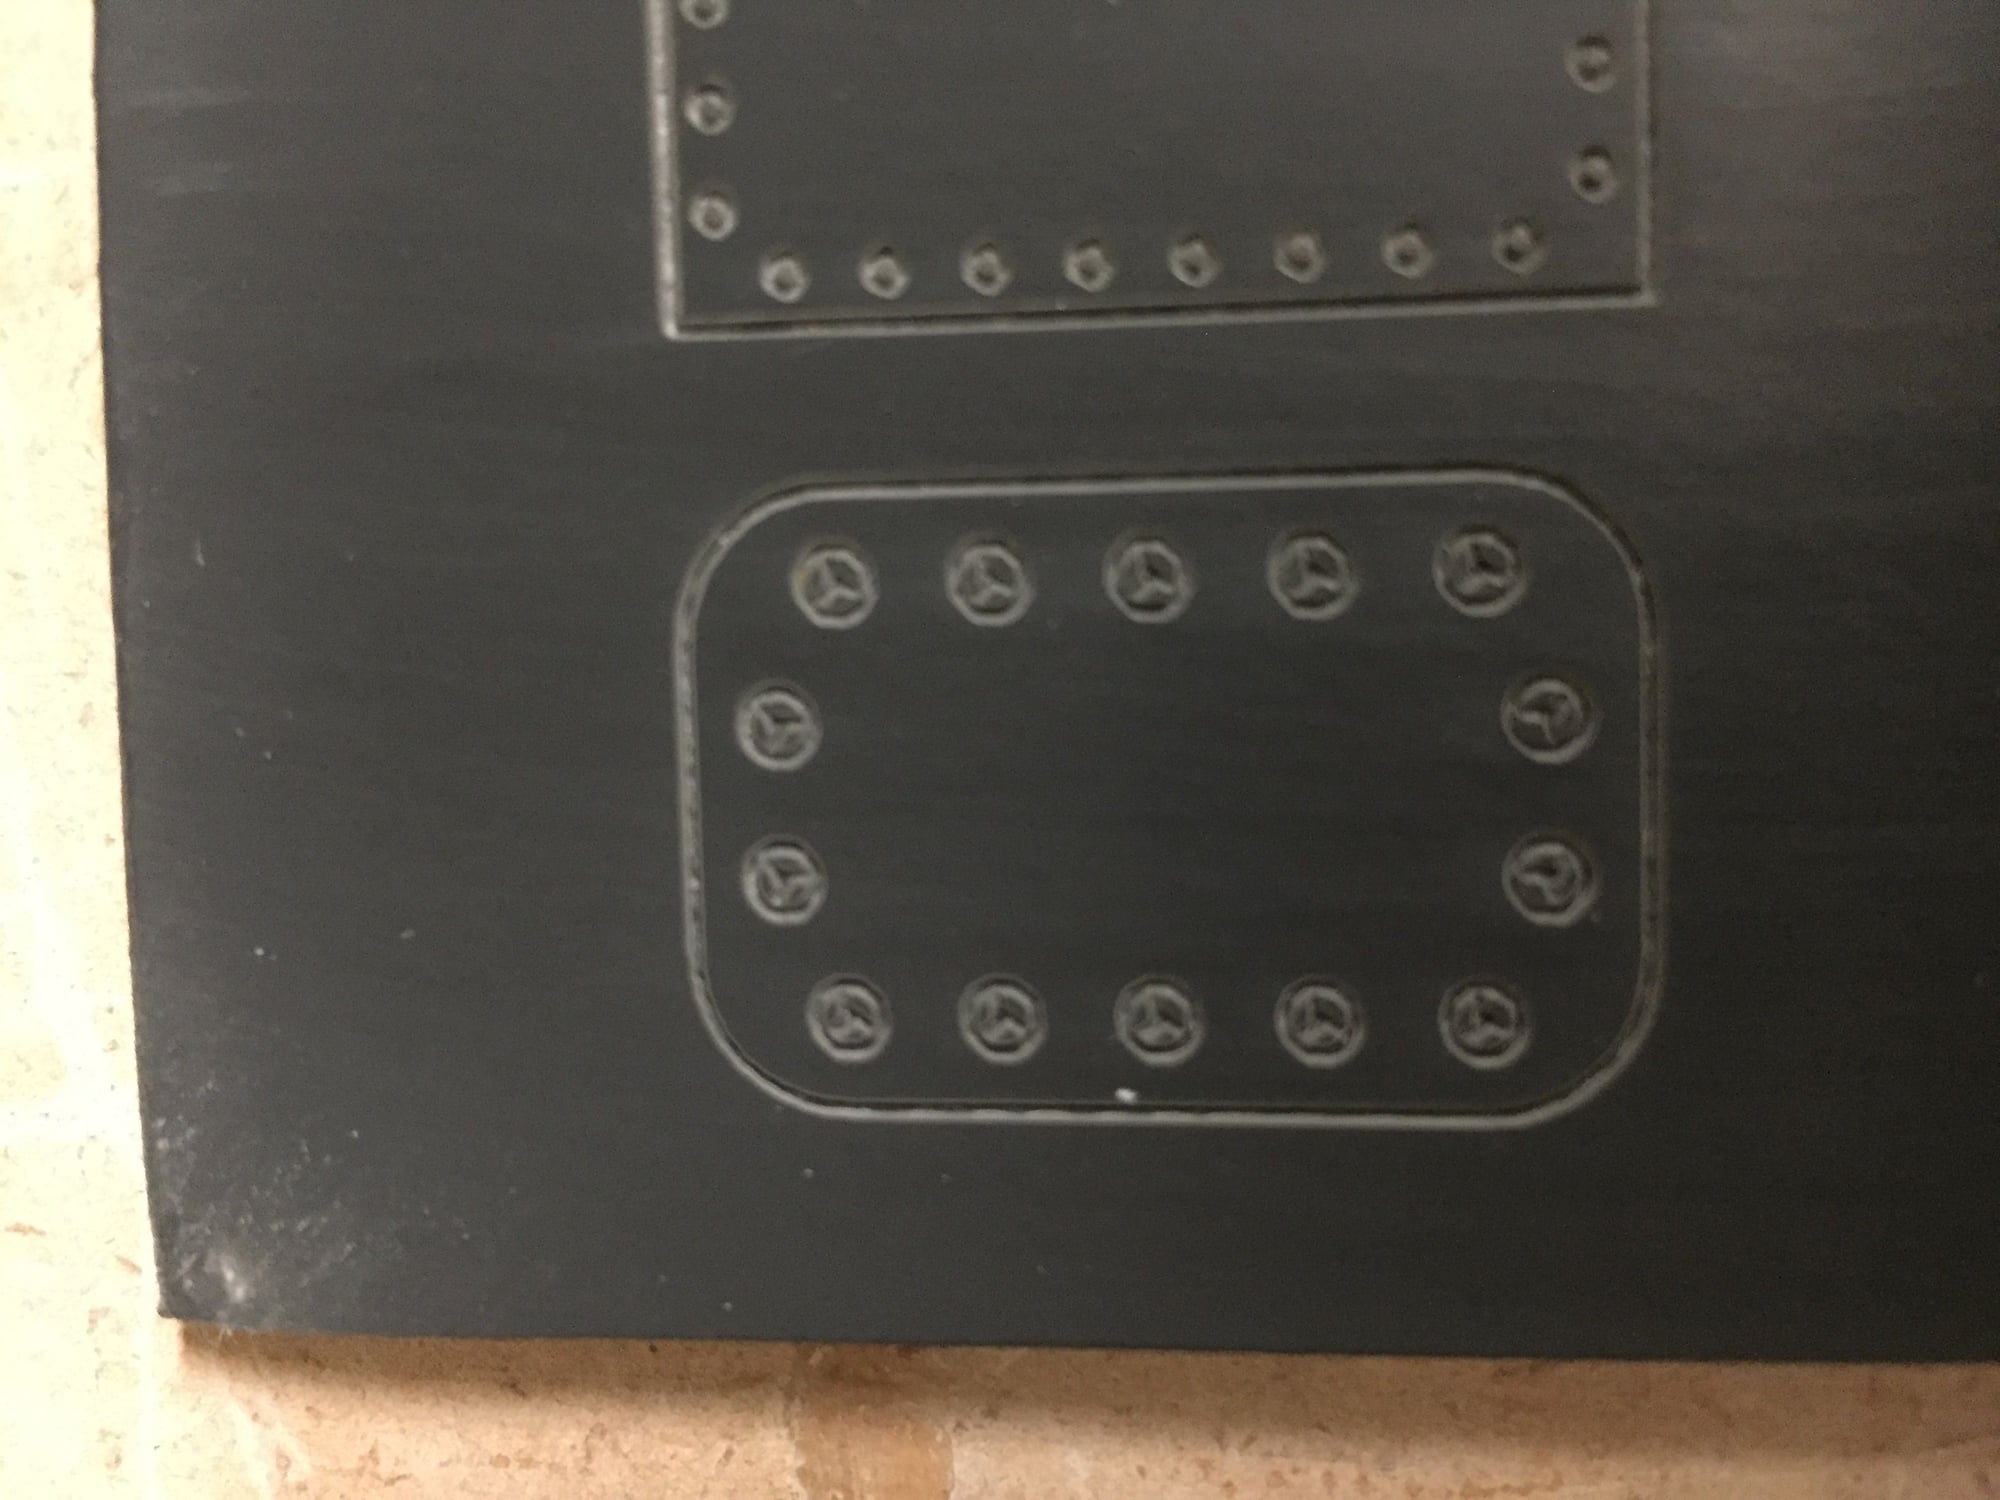
 , but it looks like now we have a way to add scale screw head detail. I quickly drew up a panel with tri-wing screws as used on some full-size, just to see if it were possible. Screws are 2mm in diameter.
I've always wondered the best way to try to get screw head detail onto the plug - maybe this is it, at least for flat surfaces.
Paul
02-02-2019, 12:52 PM
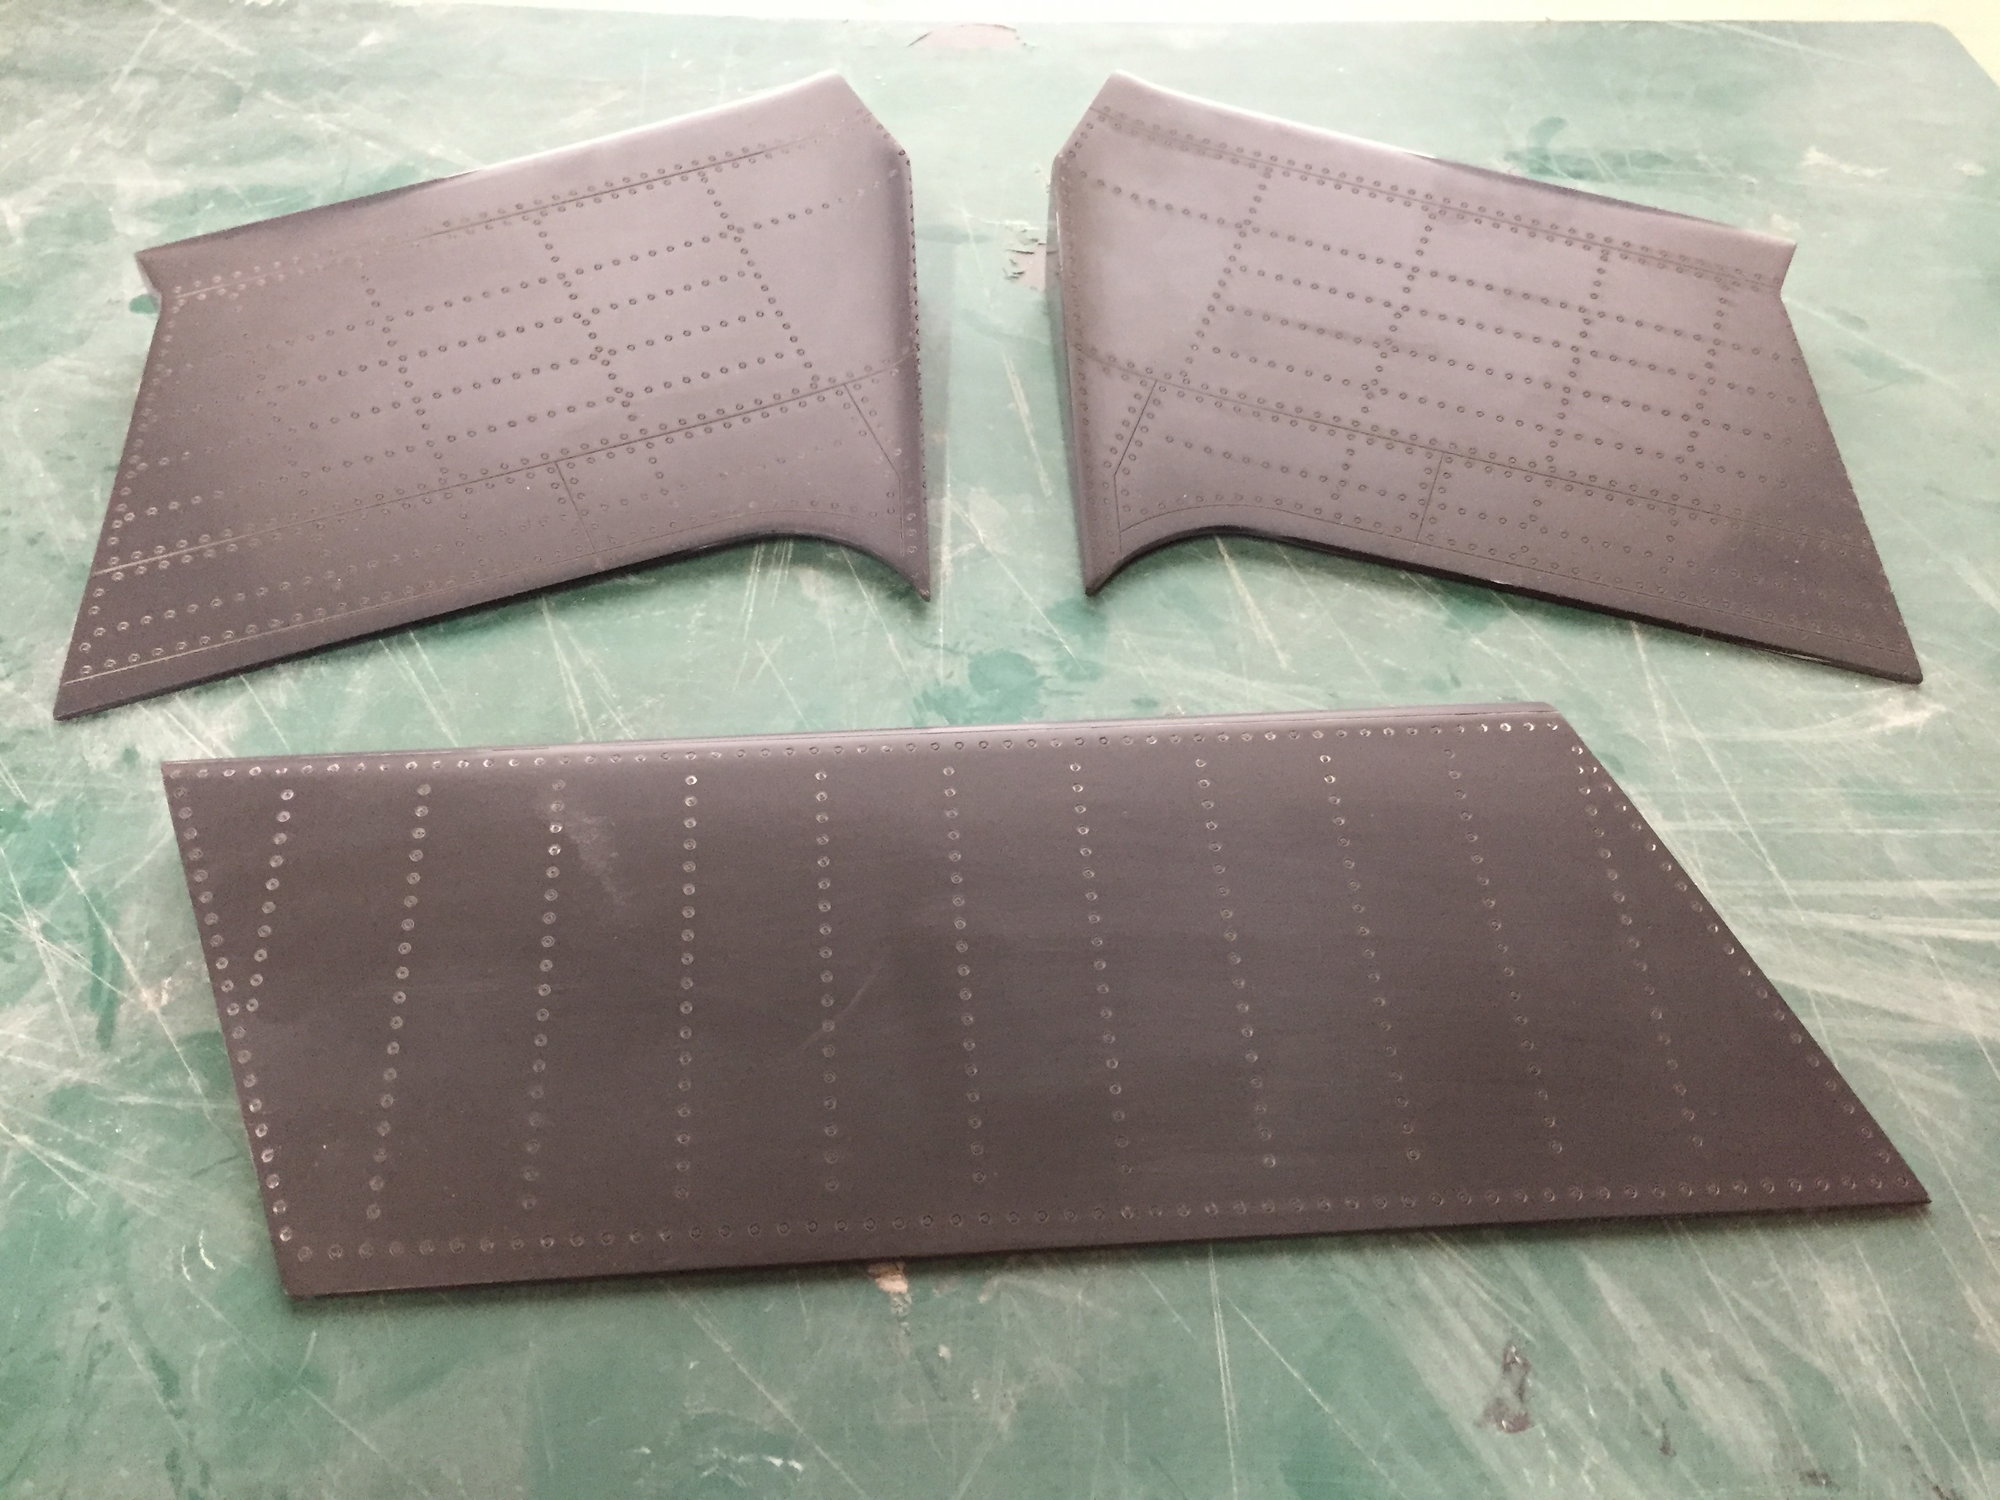
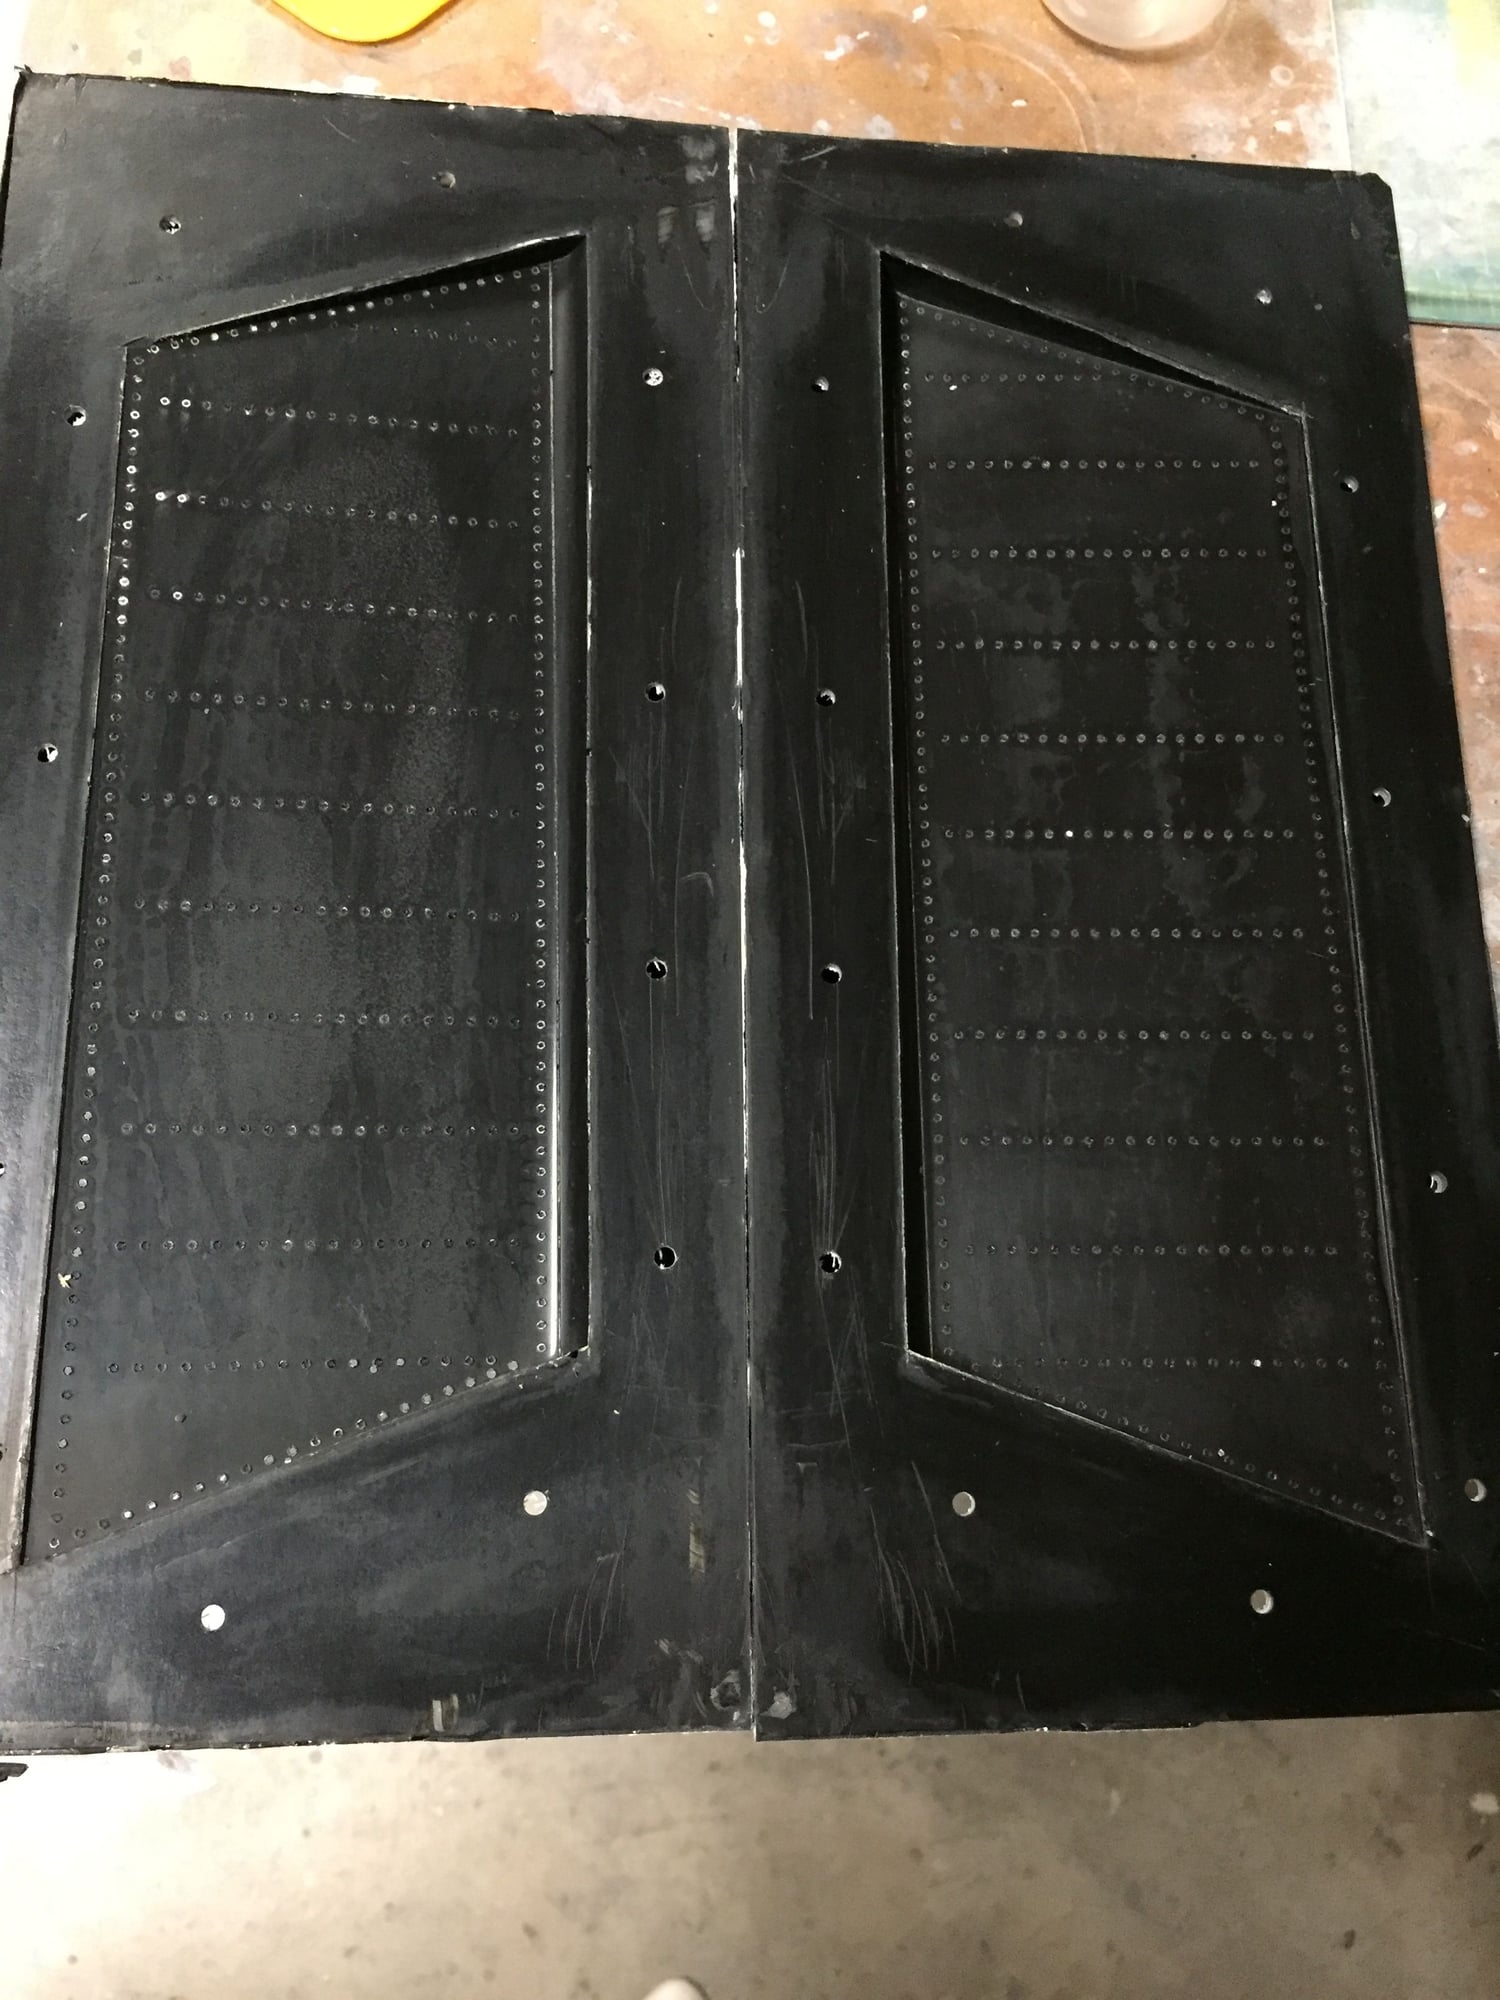
#208
I used the new, laser cutter method to add the surface detail to the rudder. After laying out the rivet pattern in CAD, the laser cutter made quick work of engraving the detail. It worked really well, and zero effort on my part.
The hardest part was referencing the laser cutter to the actual part. Easy on one side due to the shape, but there wasn't any place on the right side. I have an idea to try to next time that may help.
Paul
The hardest part was referencing the laser cutter to the actual part. Easy on one side due to the shape, but there wasn't any place on the right side. I have an idea to try to next time that may help.
Paul
Last edited by JSF-TC; 02-02-2019 at 12:54 PM.
02-02-2019, 02:48 PM
#209
I used the new, laser cutter method to add the surface detail to the rudder. After laying out the rivet pattern in CAD, the laser cutter made quick work of engraving the detail. It worked really well, and zero effort on my part.
The hardest part was referencing the laser cutter to the actual part. Easy on one side due to the shape, but there wasn't any place on the right side. I have an idea to try to next time that may help.
Paul
The hardest part was referencing the laser cutter to the actual part. Easy on one side due to the shape, but there wasn't any place on the right side. I have an idea to try to next time that may help.
Paul
YOUR WELCOME! LOL
definitely going to invest in one soon now. Which one do you have? (I cant remember if i asked that already).
 02-07-2019, 04:28 AM
#217
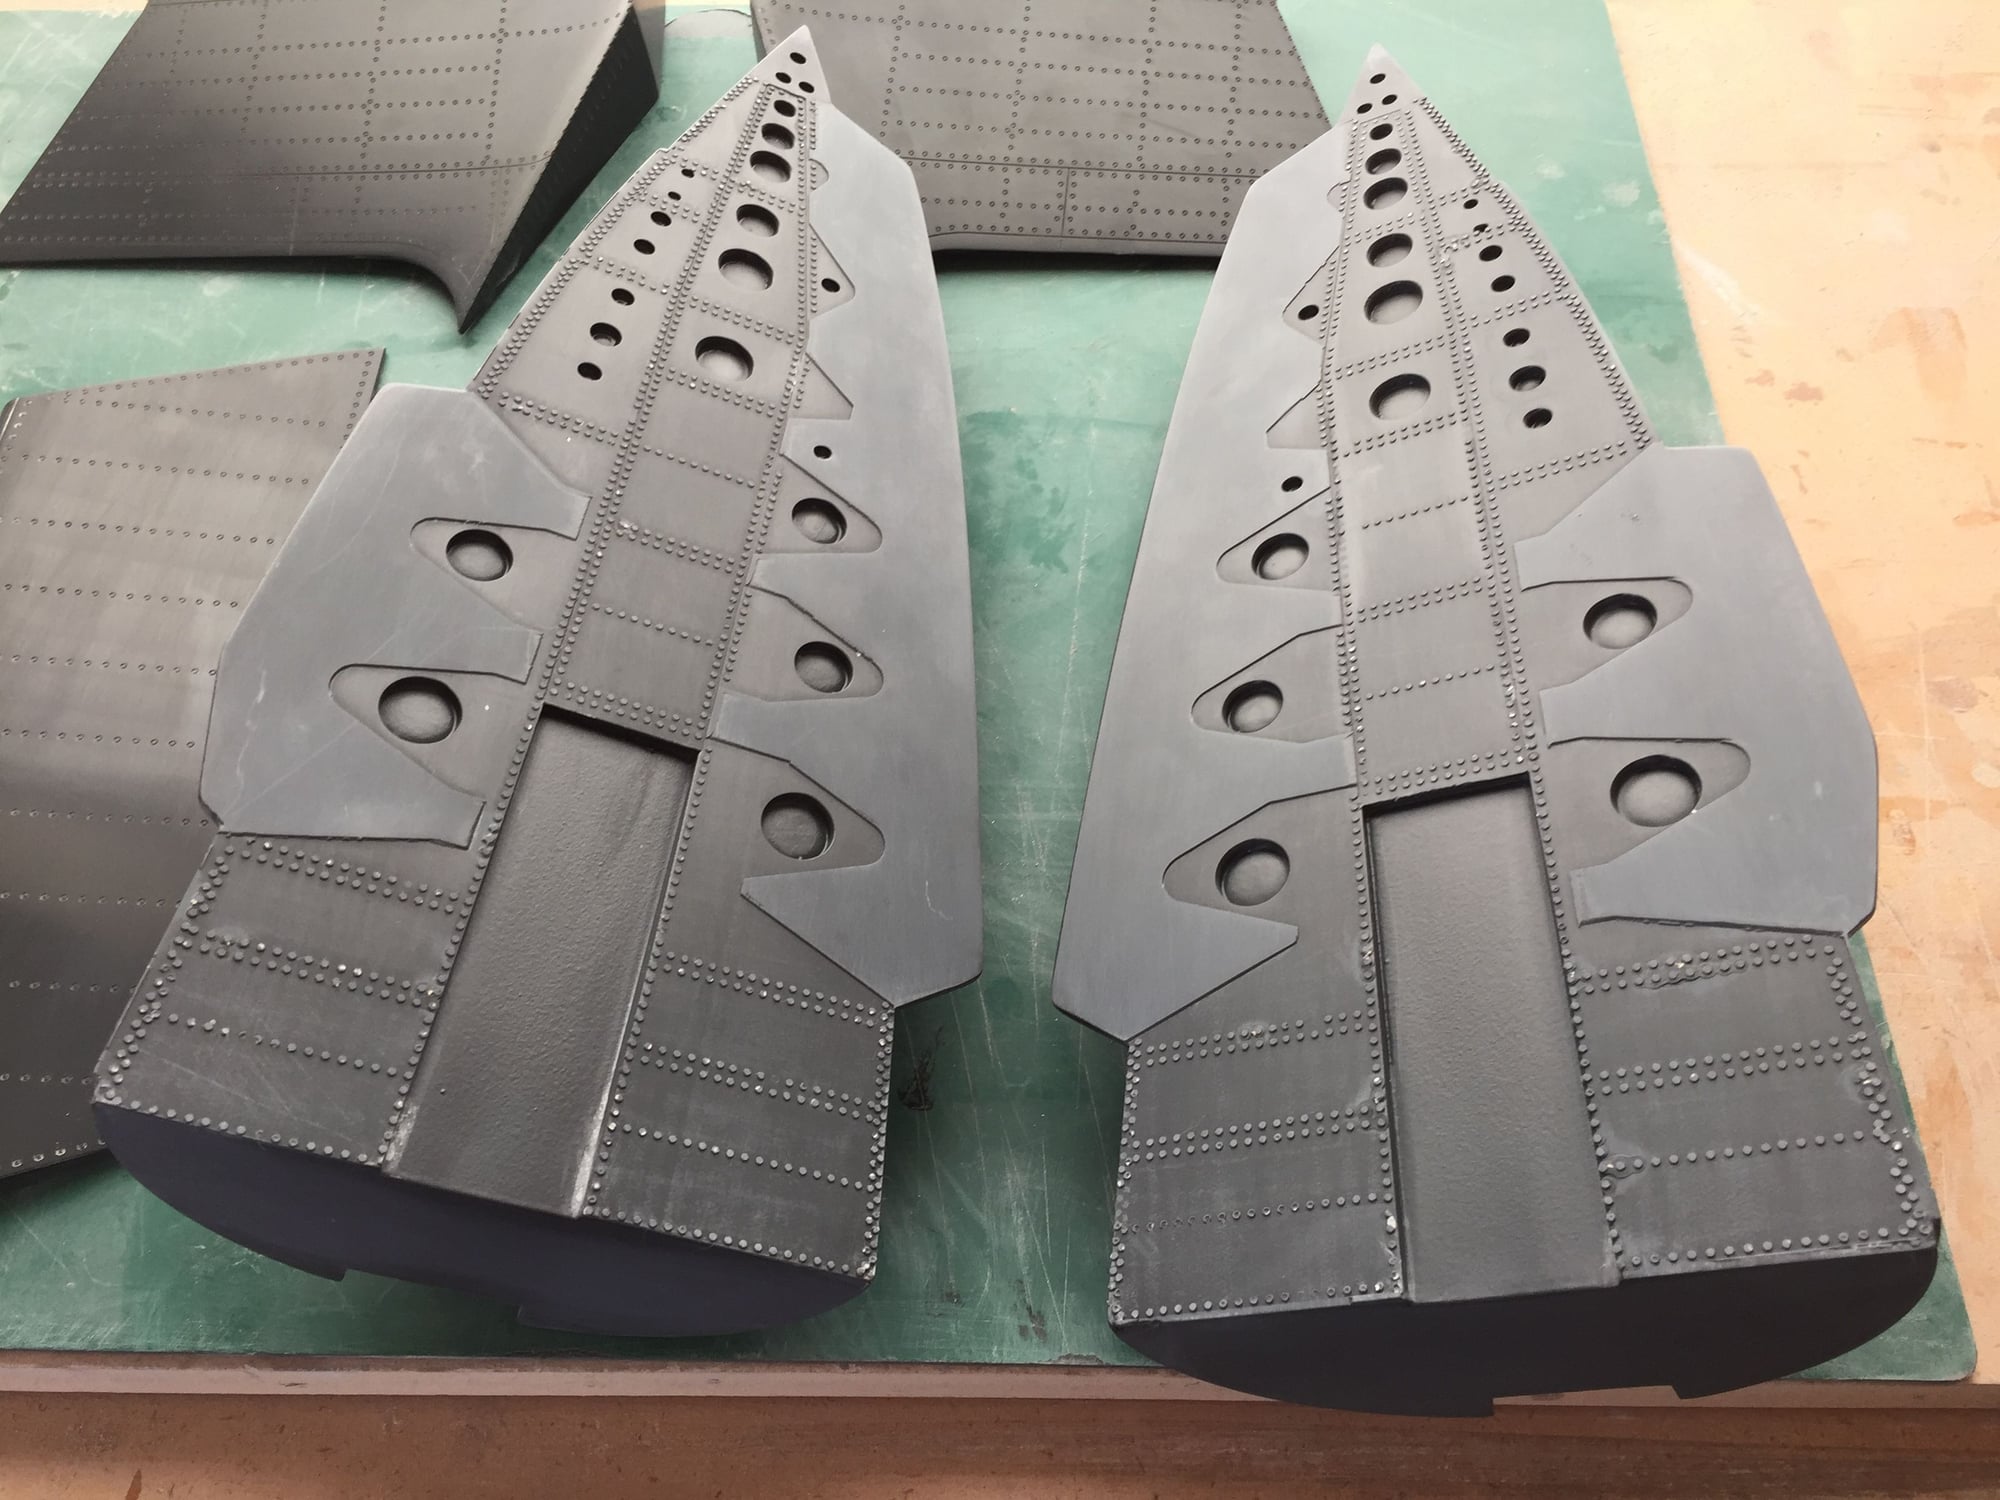
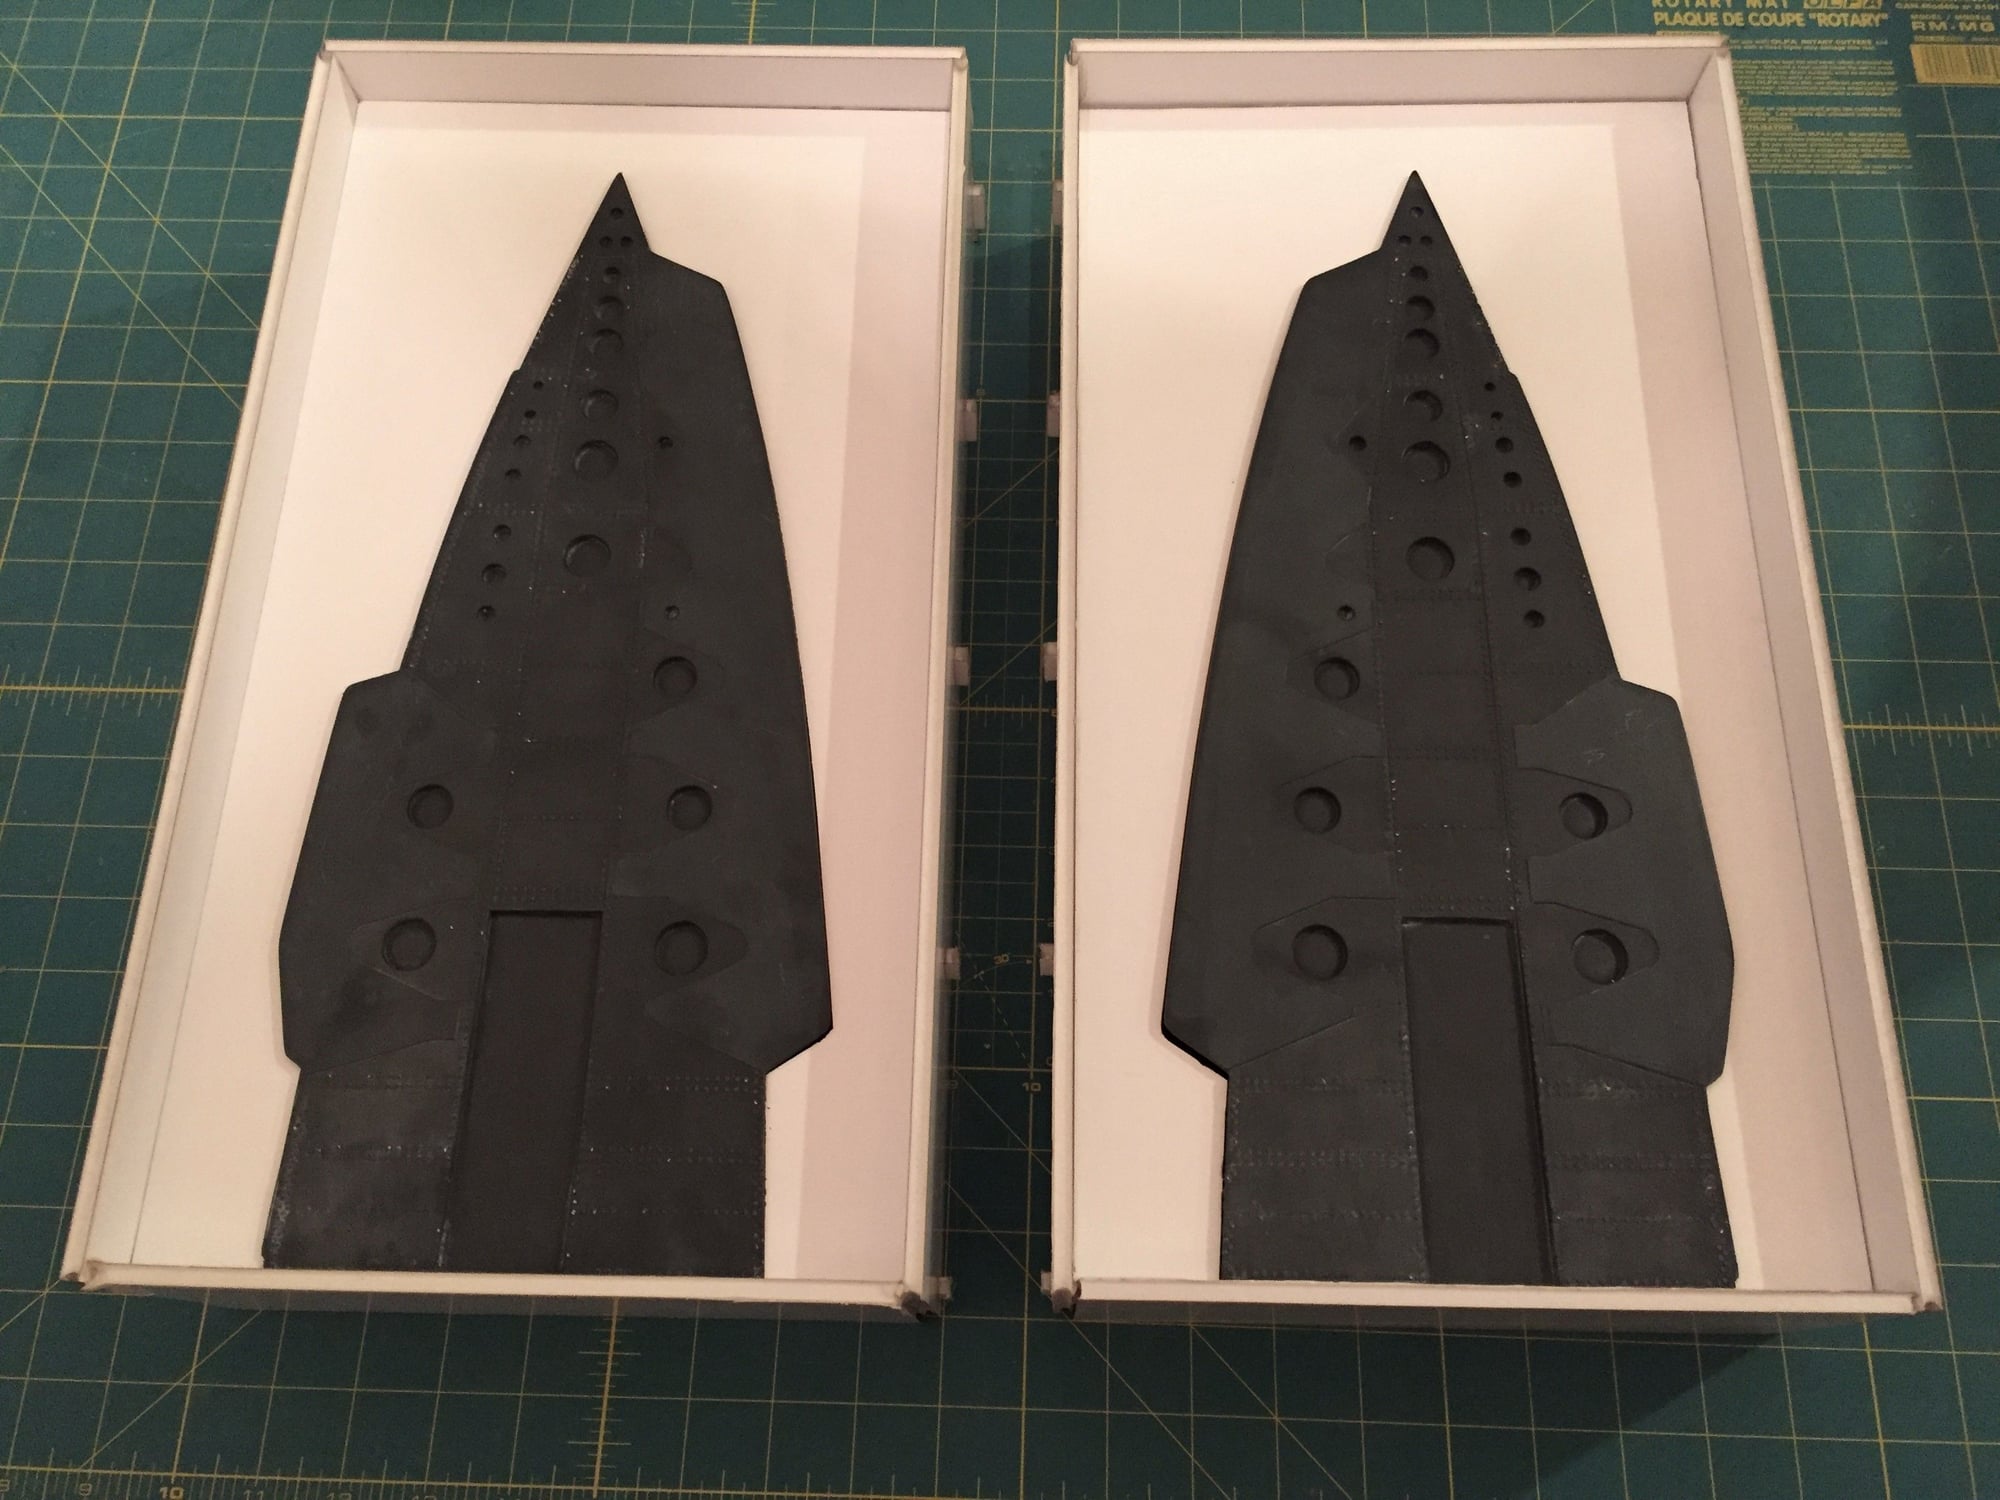
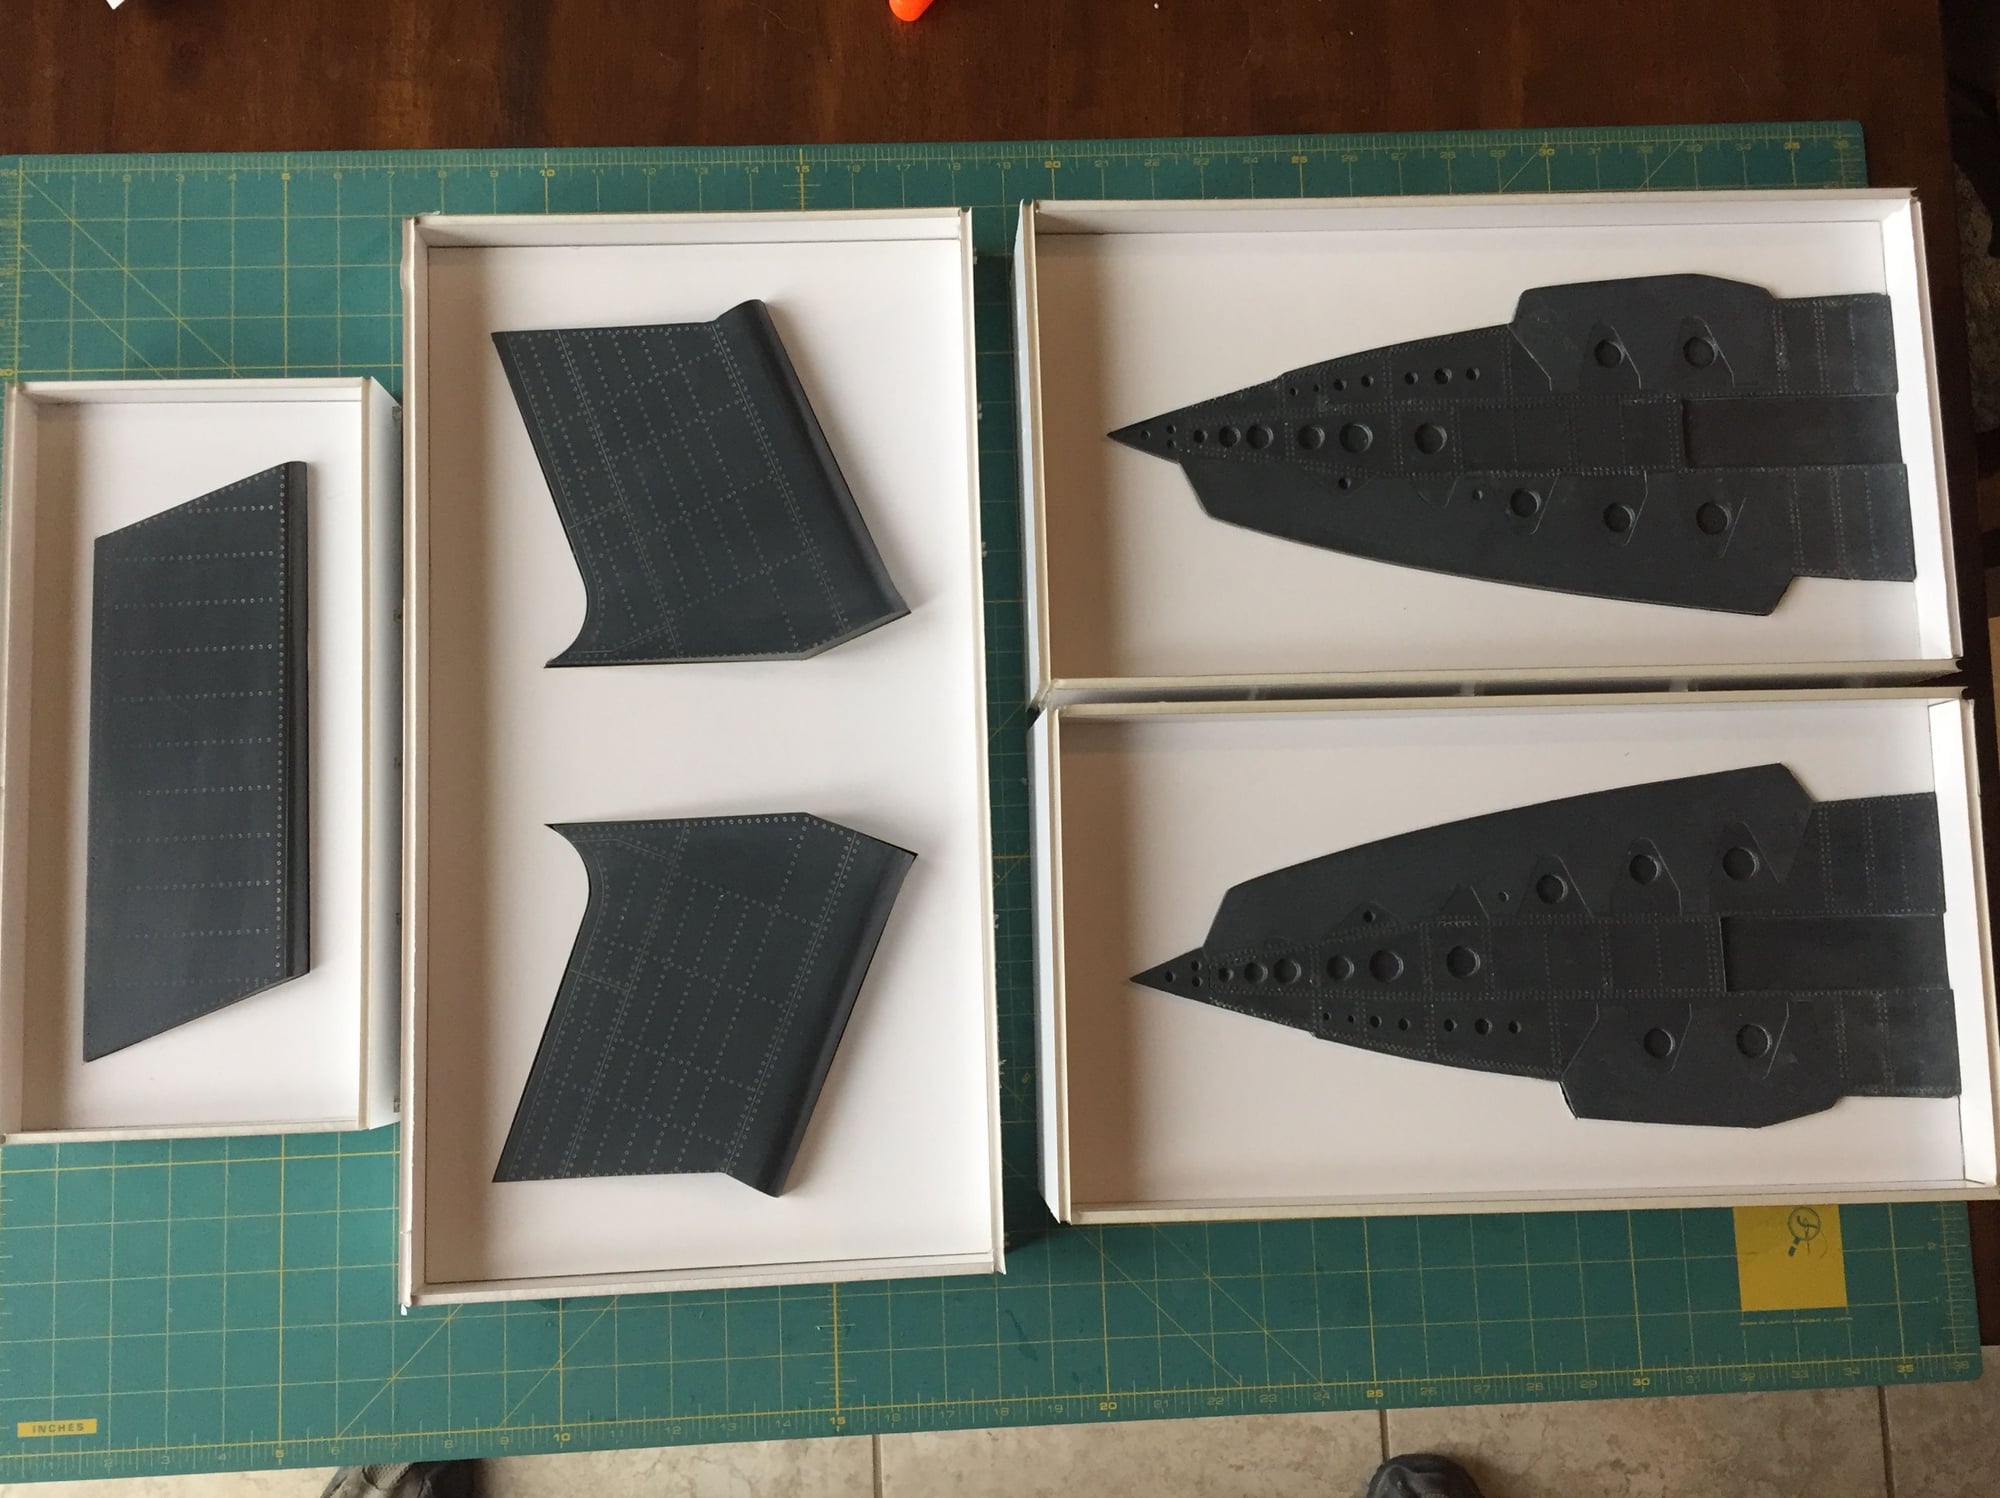
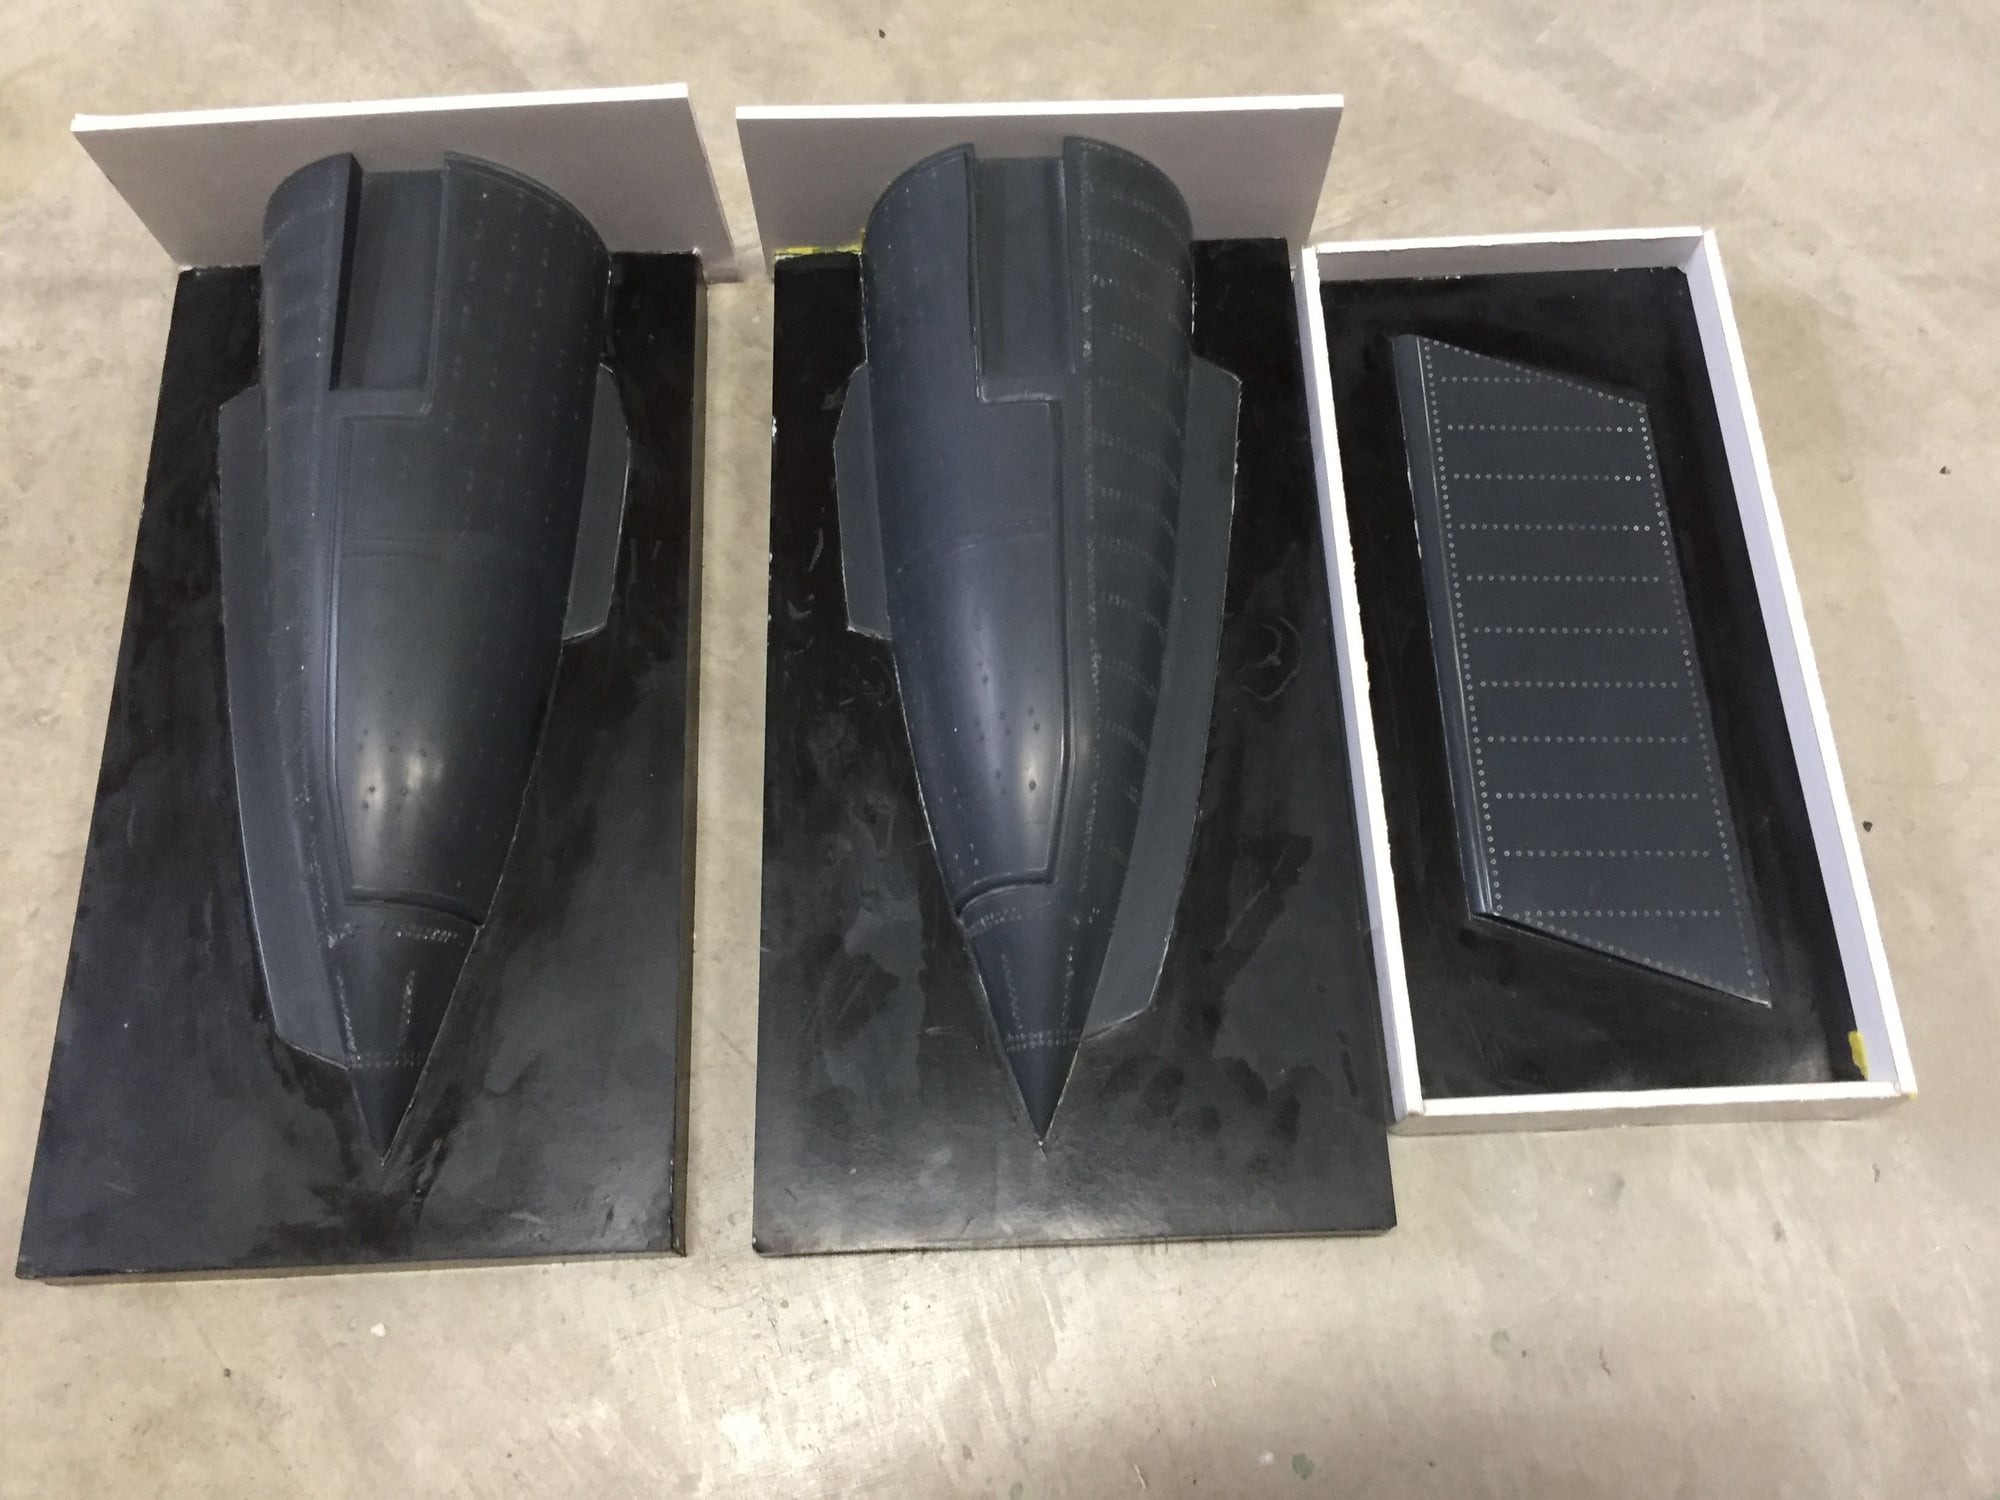
I think I'm going to call the speedbrake plugs complete.
Time to take my OCD meds and go lie in a darkened room")
Starting to see some of the smaller pieces get completed. Just need to finish detailing the fuselage and finish the weapons bay plug.
Paul
Time to take my OCD meds and go lie in a darkened room
Starting to see some of the smaller pieces get completed. Just need to finish detailing the fuselage and finish the weapons bay plug.
Paul

 02-16-2019, 02:24 PM
#222
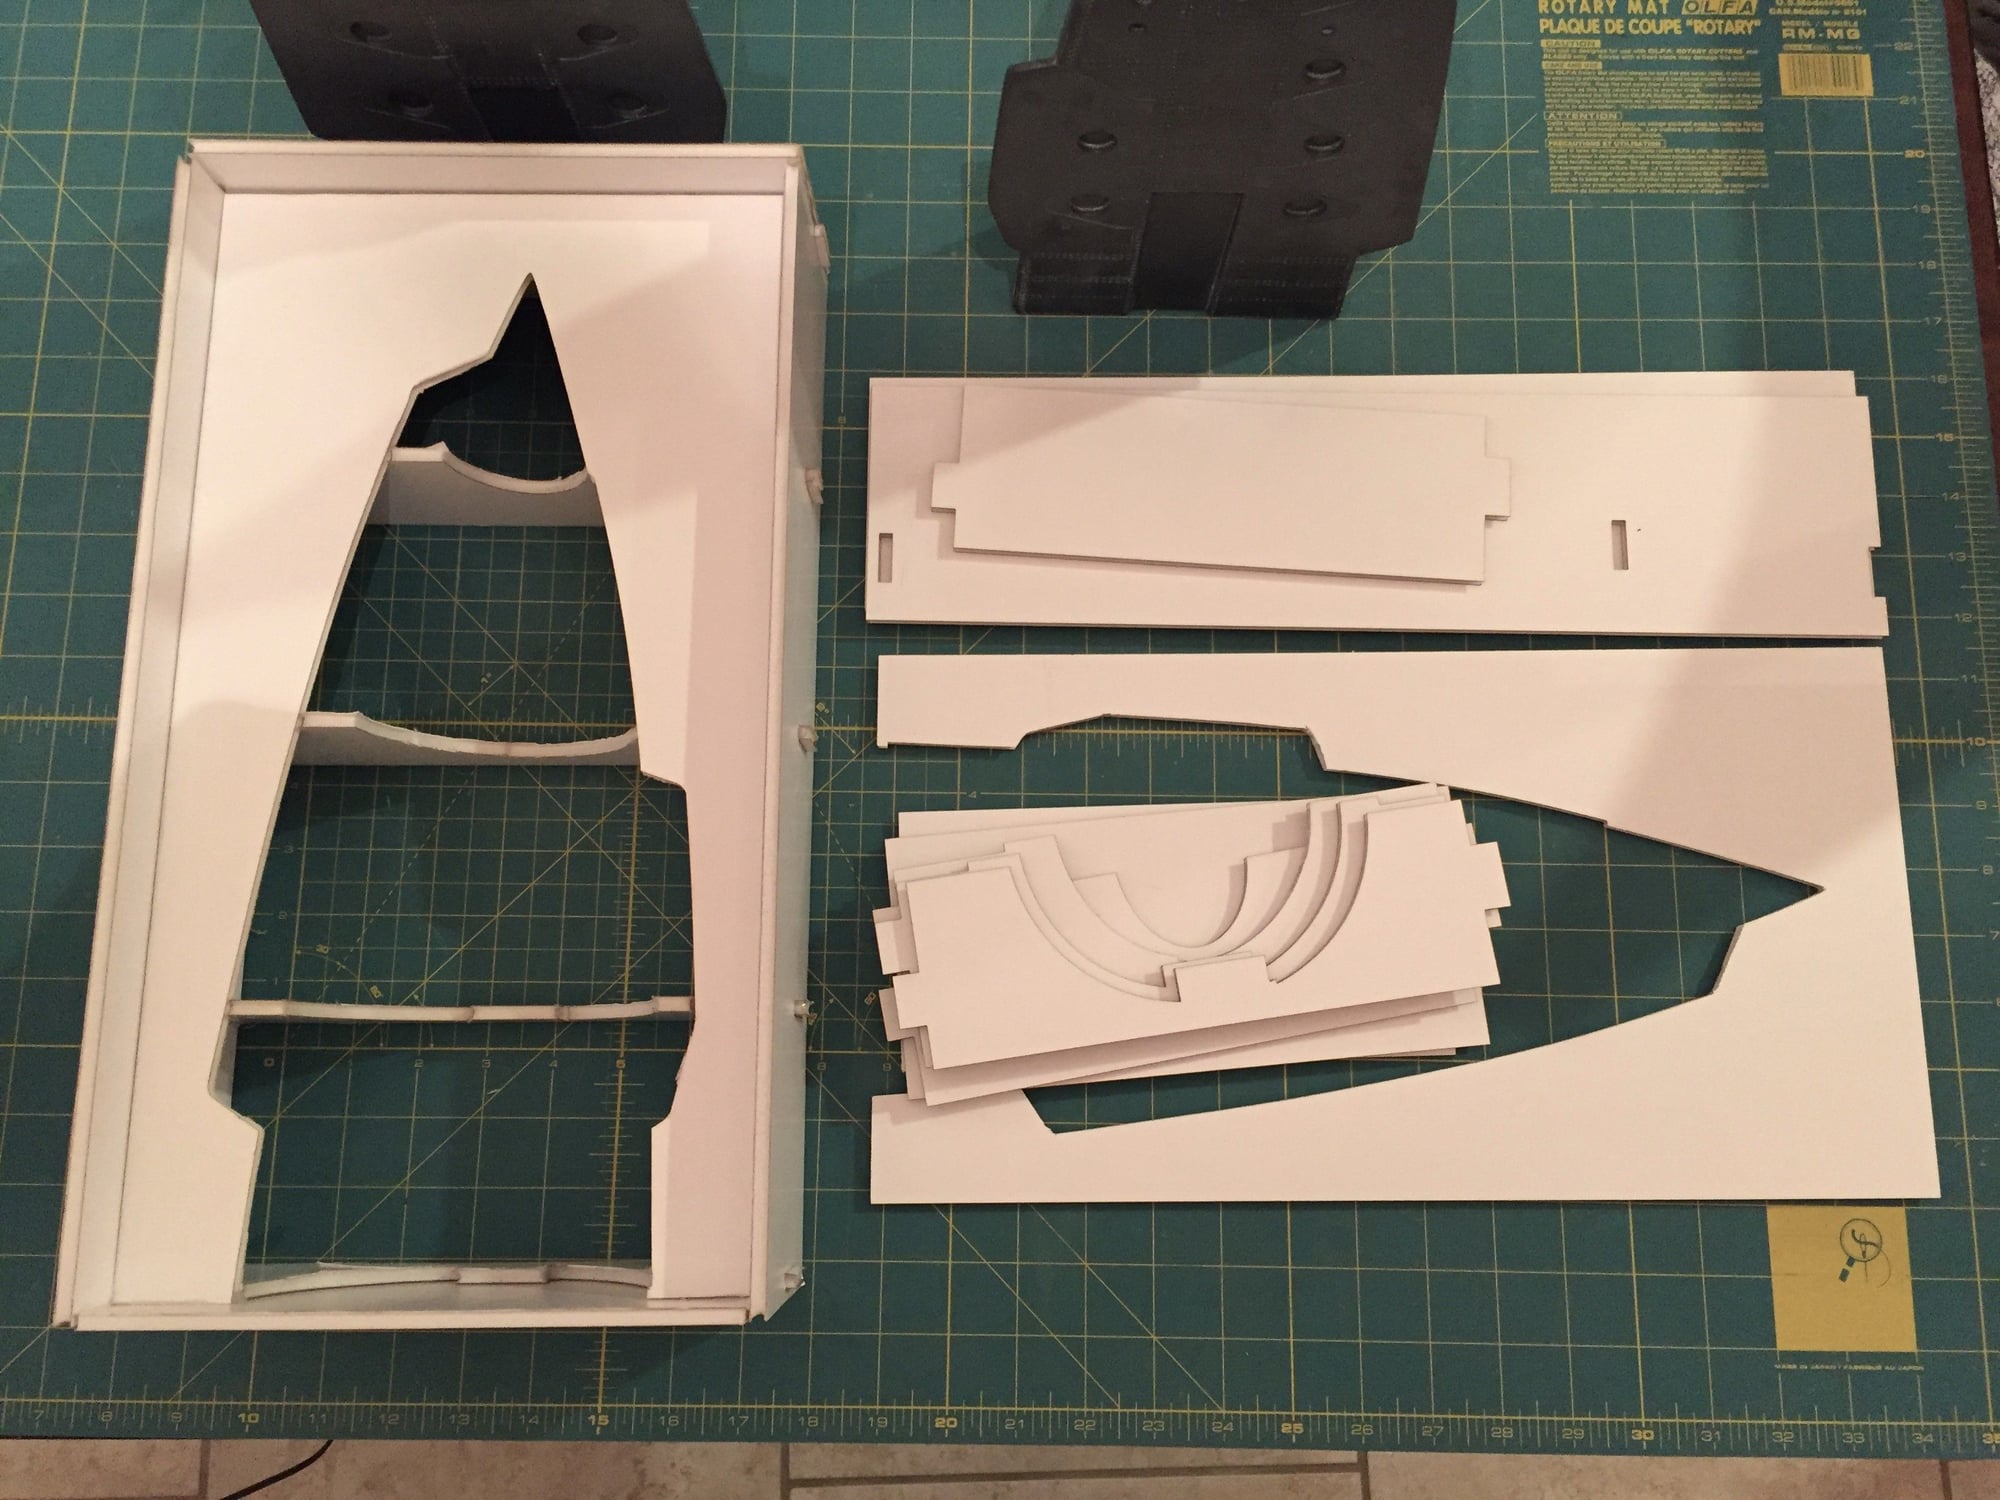
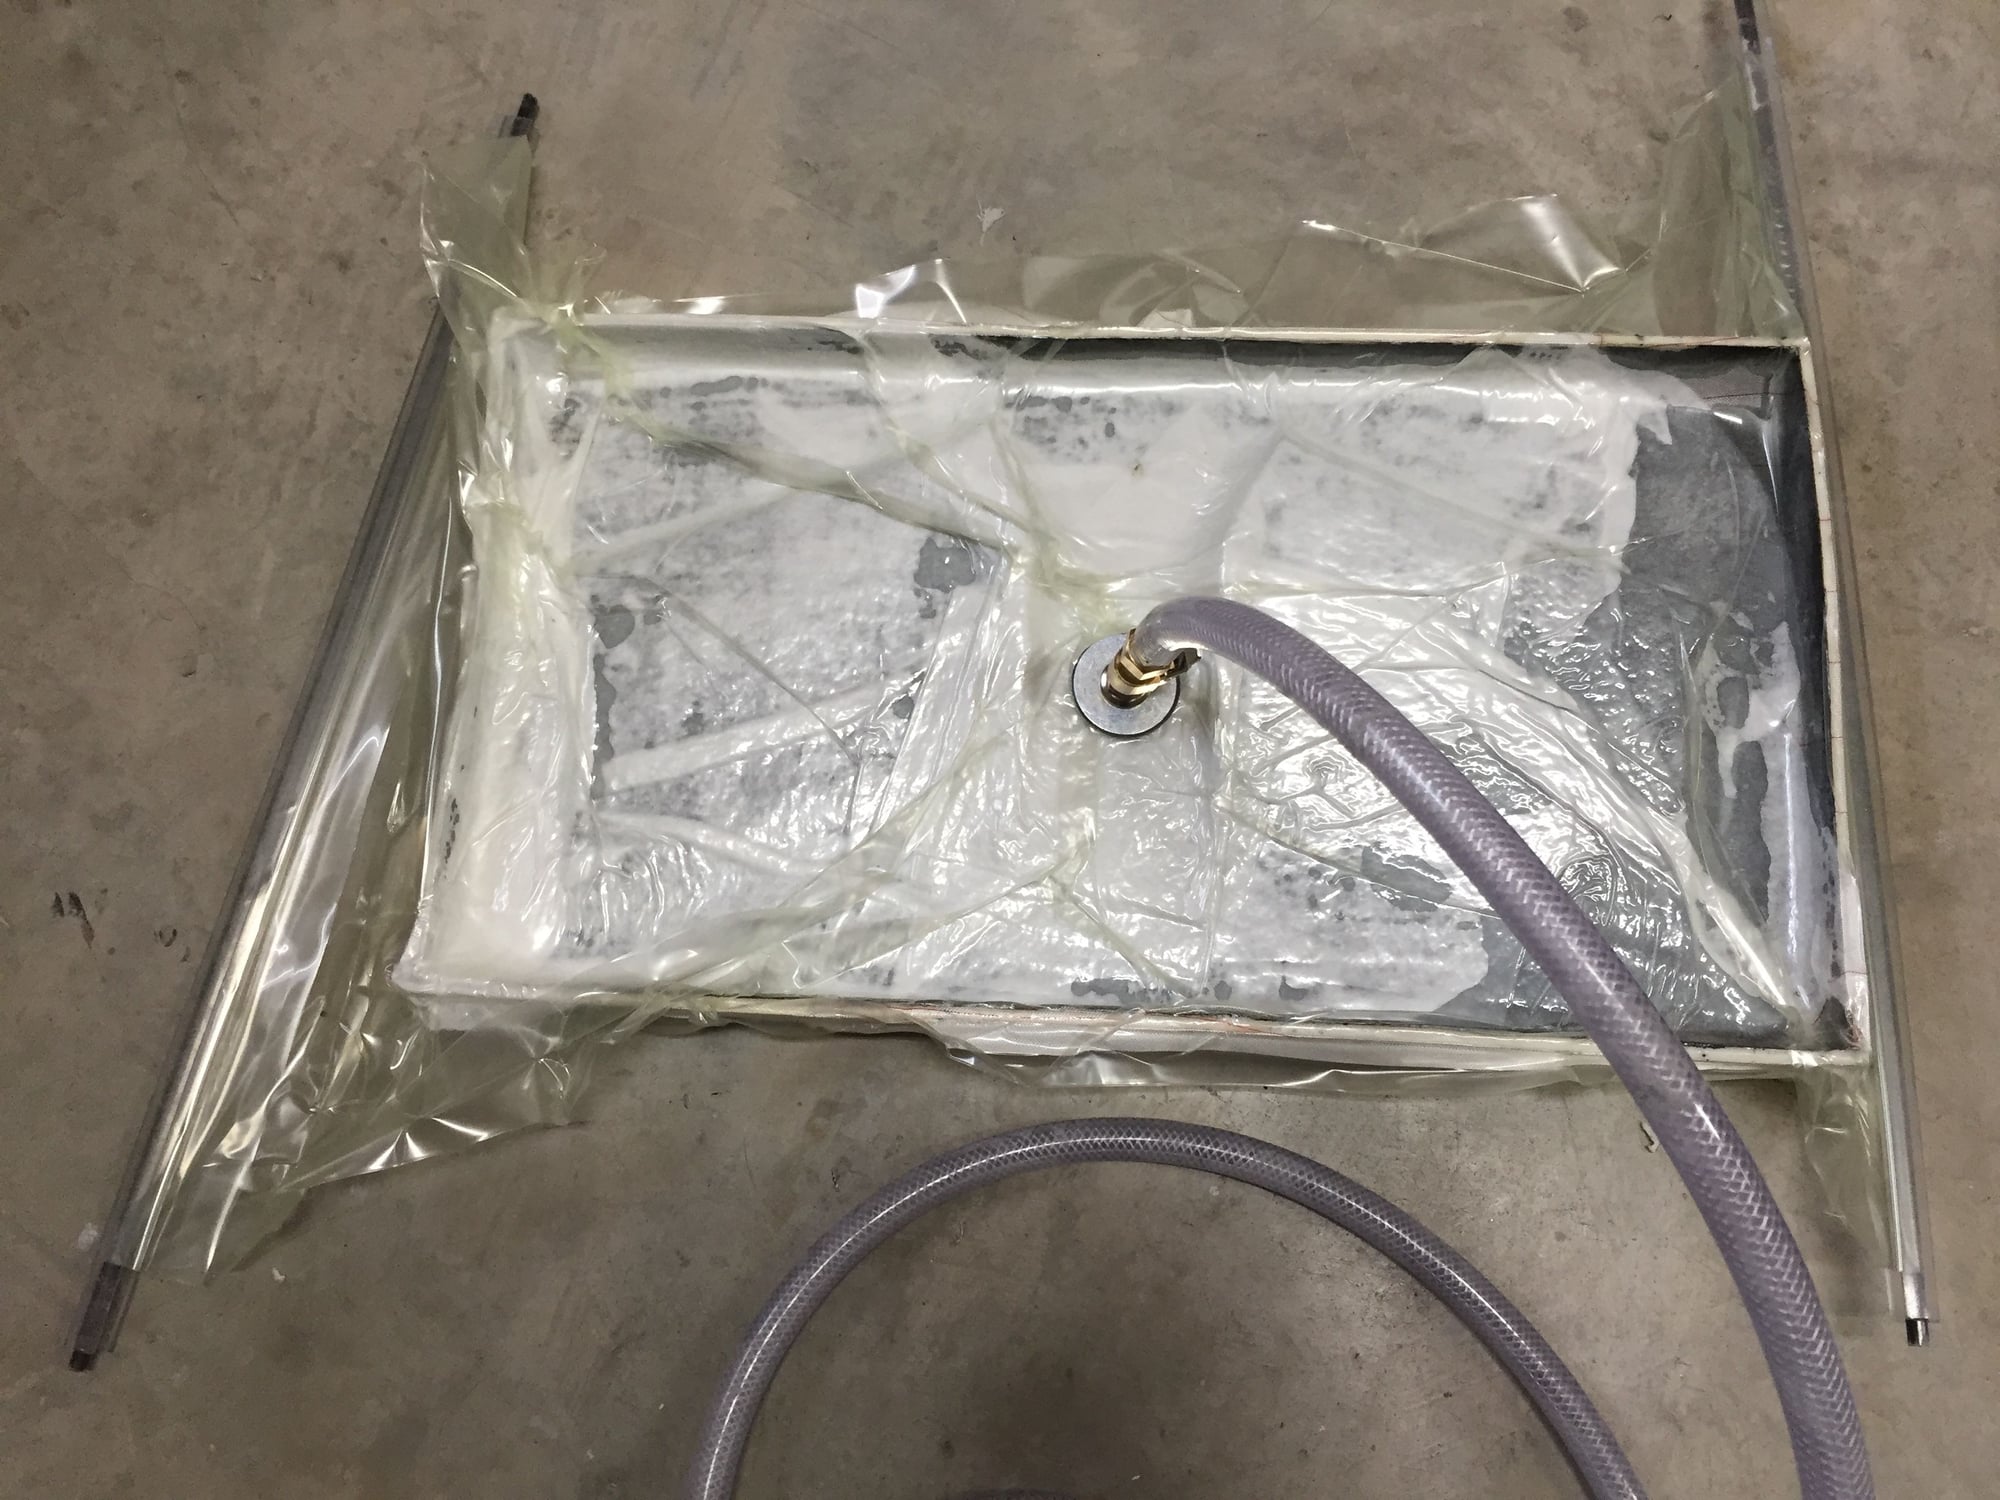
First half of the speedbrake and rudder molds complete. Frames set up ready to start the second side.
I forgot to add locating dimples on the first side, so I will use plenty of bolts to ensure a good alignment.
Because I used 6 layers of 6oz plain weave glass cloth for the molds, it didn't want to lay down and follow the contours of the inner flap plugs, so I decided to vacuum bag the first half of the inner flap mold to avoid any air pockets.
Paul
 02-18-2019, 04:52 PM
#225
My Feedback: (20)
What kind of glass was it that you used on the fuse plug that followed the contours so well. I need it make a fuel tank and will use the lost foam method but sometimes the plain weave glass does not want to lay down and follow the curves or corners well.
Thanks,
Gary