


1/4.5 T-38C Talon scratch build
 11-23-2021, 02:13 PM
#176

[QUOTE=Viper1GJ;12703899]
For 100 grams of resin (and its proper hardener amount)....
I typically do 2 to 3 oz of milled fiberglass and whatever amount of cotton flock it takes to get the dryness of the splooge mixture, which is somewhere around another 2 to 3 oz. I use the plastic epoxy mixing cups for all my measuring.
For applying it , i put them in cake decorating pastry bags. i bought a 100 count of them a few years back from Aircraft spruce for a couple of bucks and still have half of them left.

The following users liked this post:
Viper1GJ (11-23-2021)
01-02-2022, 07:03 PM
#178
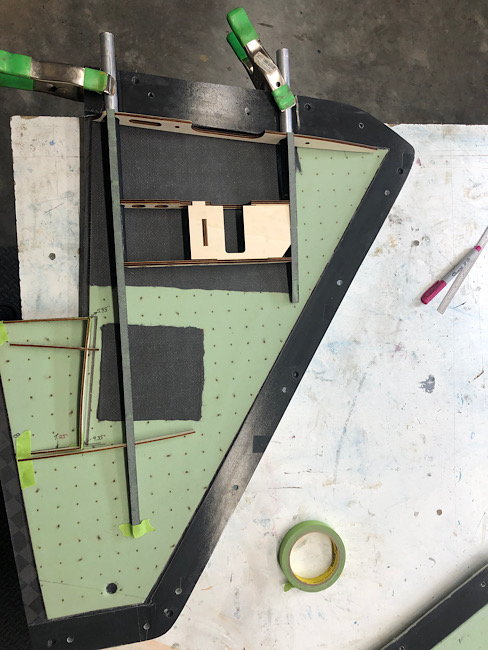
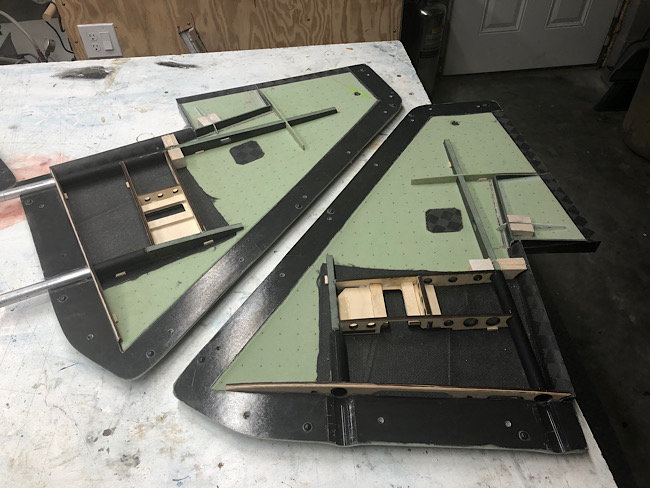
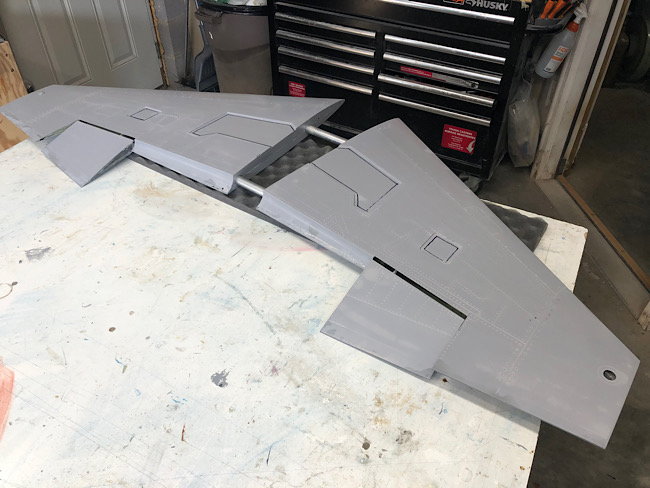
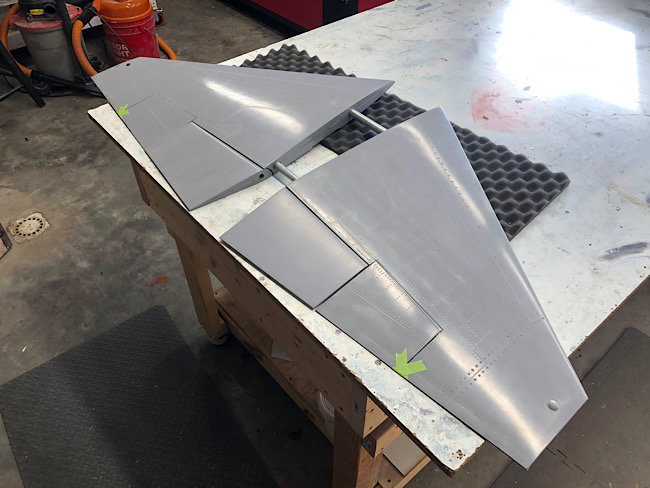
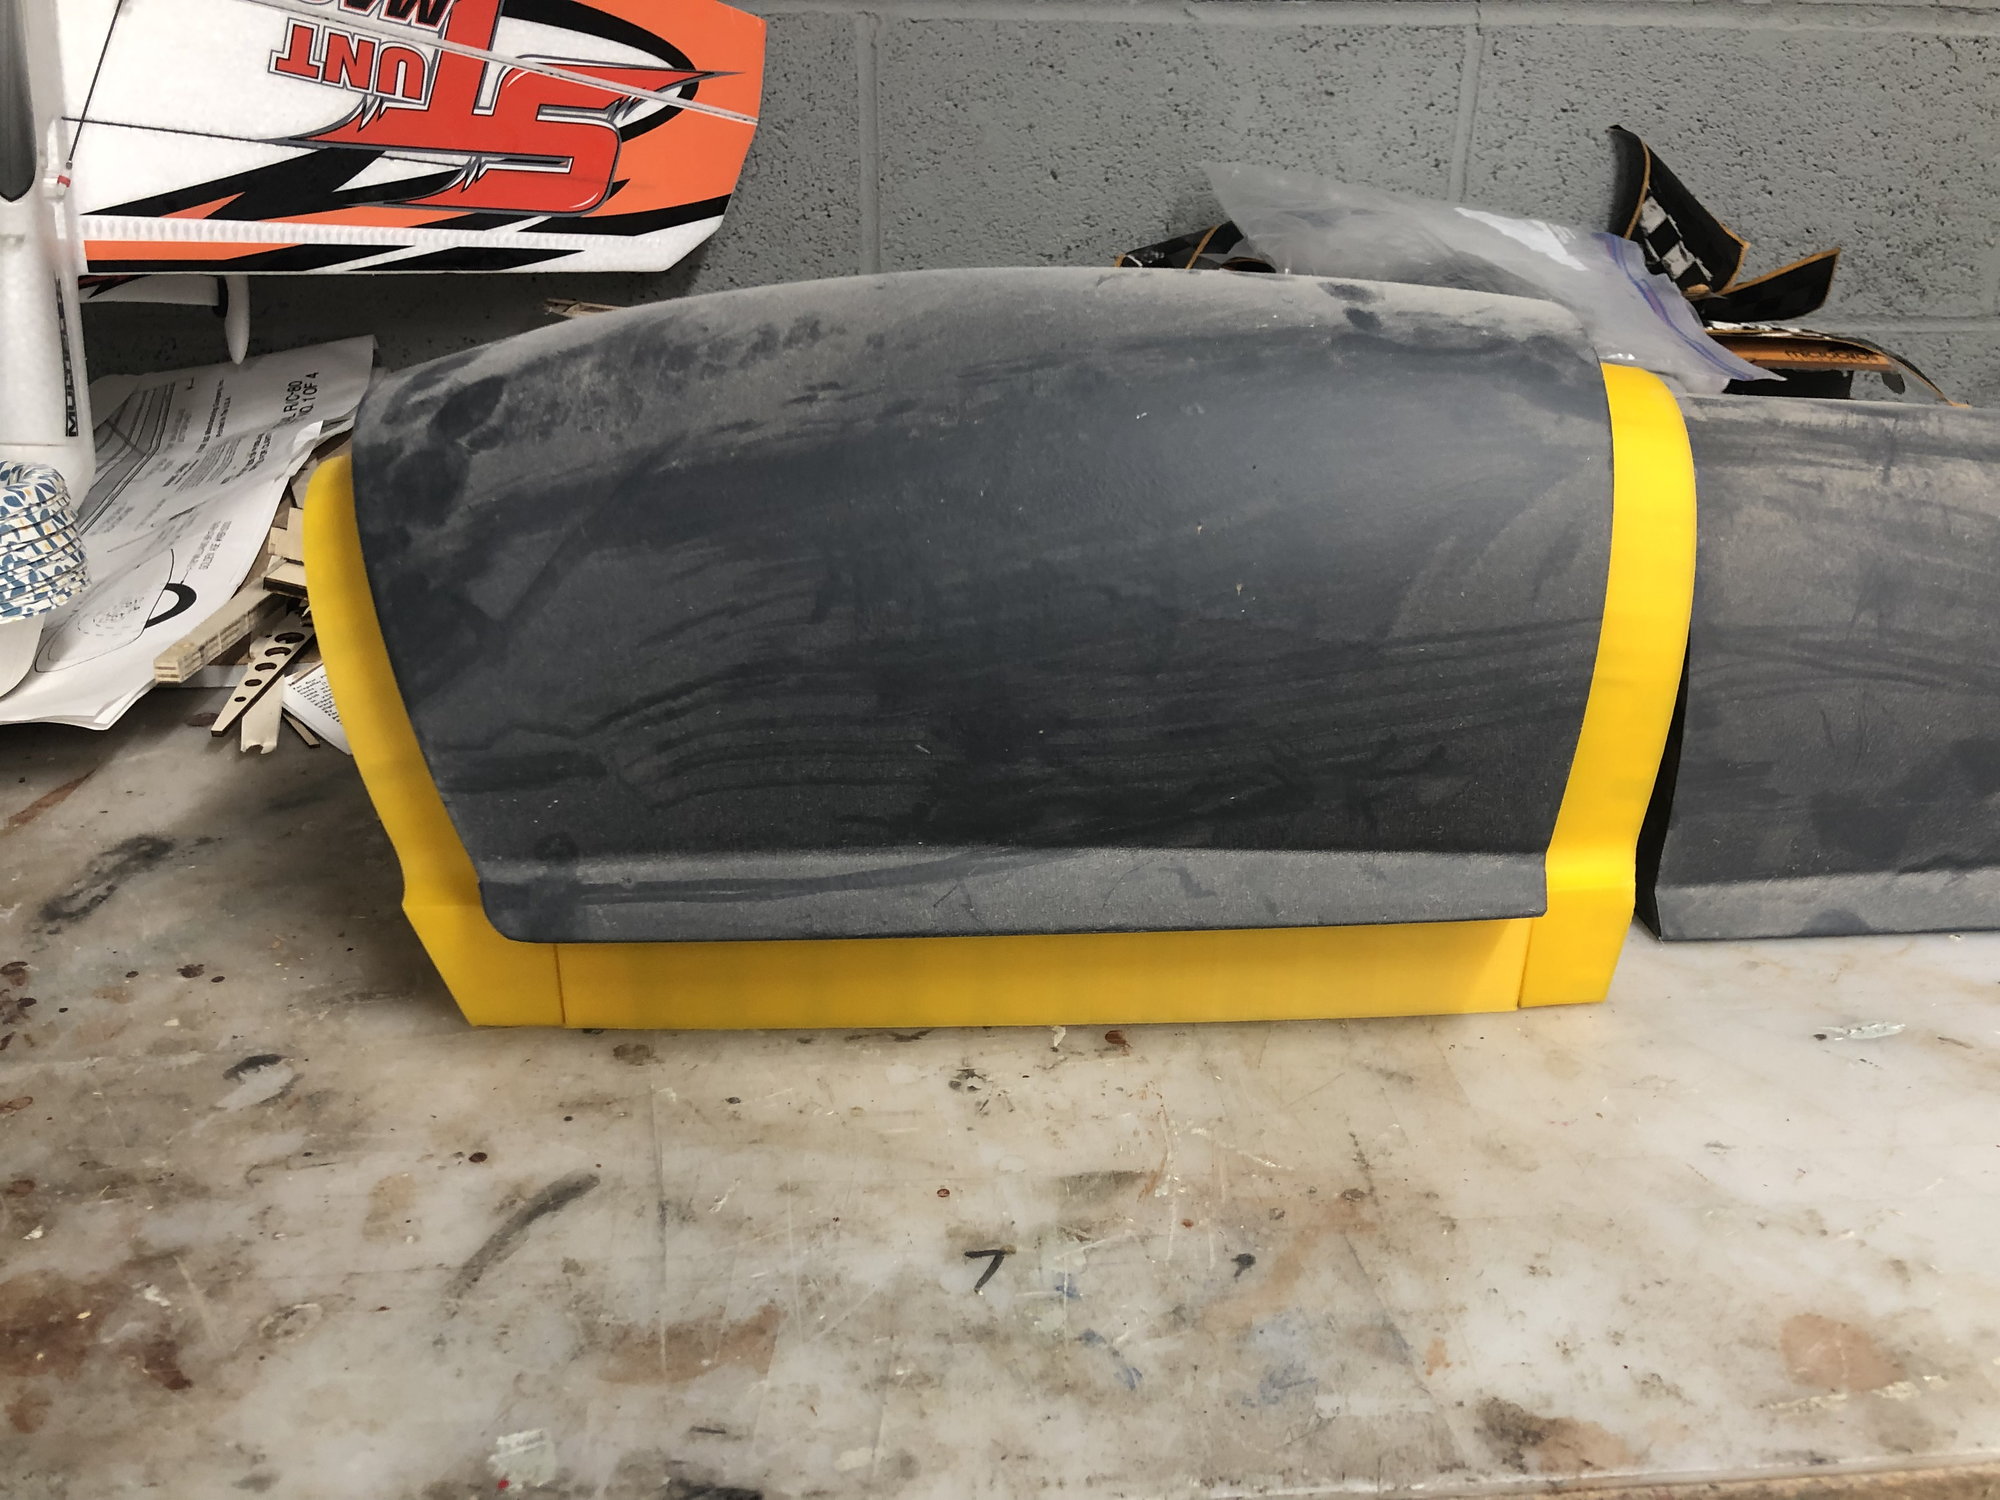
The first pair of wing panels are done. The ailerons are live hinged and i figured out i need to make up a jig to make the skin cuts more accurate. For the prototype set, they will work just fine how they are.
they are a little stout at 4lbs total for both with the flaps included. I have a few idea�s for reducing the weight if needed later on.
they are a little stout at 4lbs total for both with the flaps included. I have a few idea�s for reducing the weight if needed later on.
01-03-2022, 05:41 PM
#180

My Feedback: (20)
Hi Thomas,
The T-38 is looking awesome!
I have a question. A buddy and I were admiring your build today (wishing we could do it like you do it...) and were wondering why you did not use any front to rear ribs in the stabs. Can you let us know why there aren't any?
Thanks,
Gary
The T-38 is looking awesome!
I have a question. A buddy and I were admiring your build today (wishing we could do it like you do it...) and were wondering why you did not use any front to rear ribs in the stabs. Can you let us know why there aren't any?
Thanks,
Gary
 01-04-2022, 05:20 AM
#182


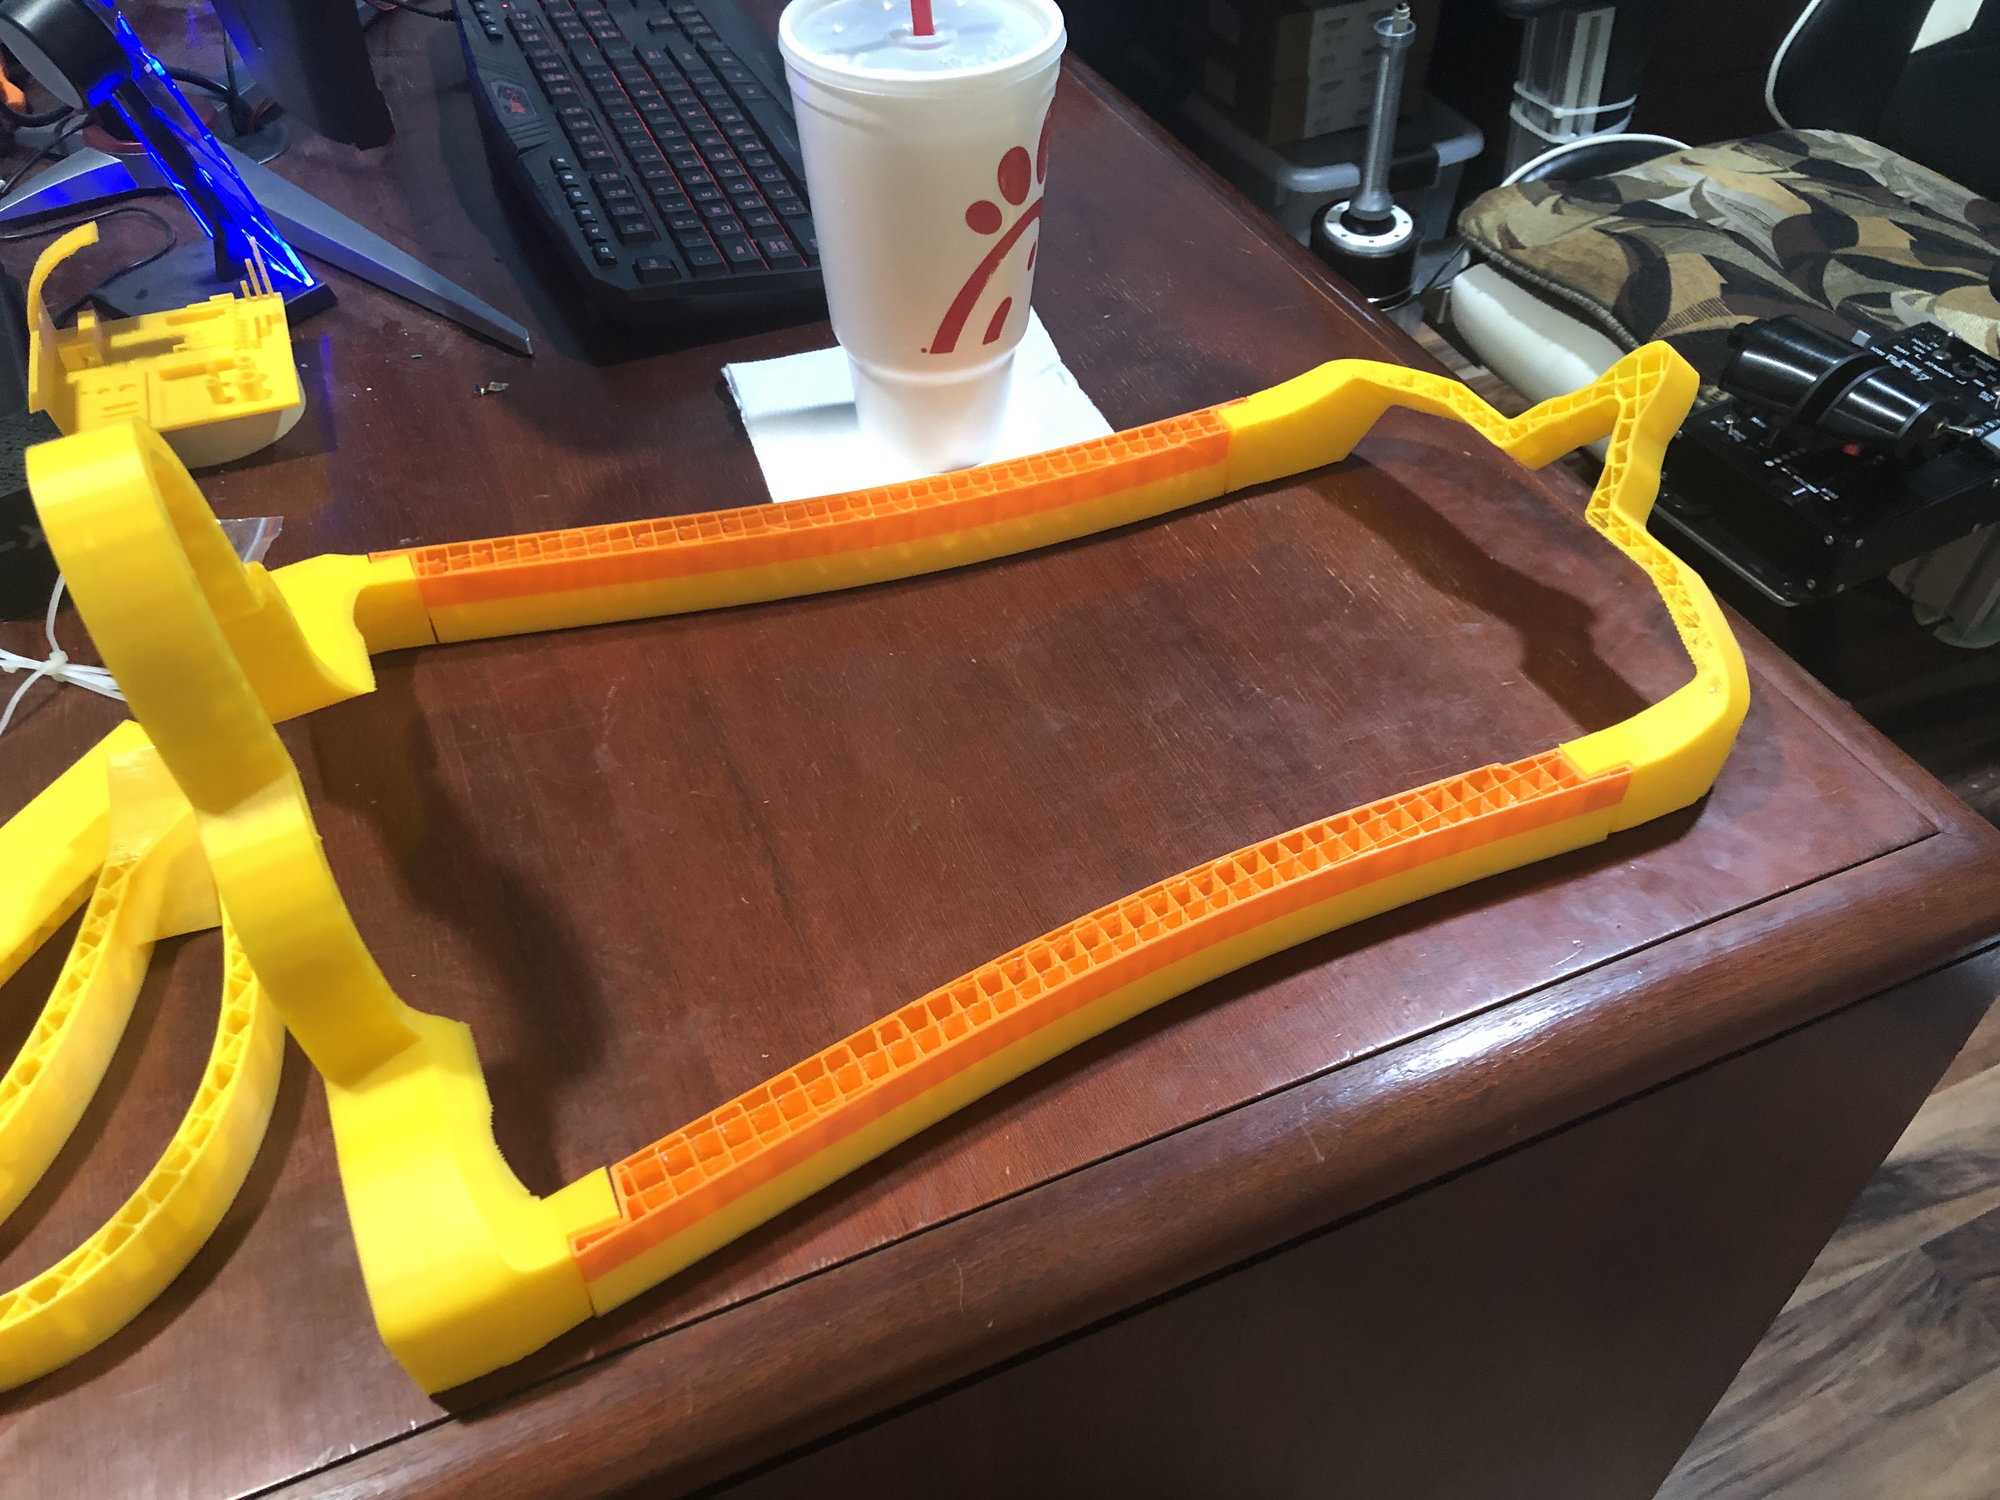
It was me. I'm not an engineer (but I have stayed in a Holiday InnExpress). I was wondering if the 2 spars that contain the torque tube will have enough torsional rigidity to hold the flight loads. Seems like a rib/ribs along the longitudinal axis of the stab would spread the loads better. Your project is awesome and I wish you much success.
01-04-2022, 07:34 AM
#183
Hi Thomas,
The T-38 is looking awesome!
I have a question. A buddy and I were admiring your build today (wishing we could do it like you do it...) and were wondering why you did not use any front to rear ribs in the stabs. Can you let us know why there aren't any?
Thanks,
Gary
The T-38 is looking awesome!
I have a question. A buddy and I were admiring your build today (wishing we could do it like you do it...) and were wondering why you did not use any front to rear ribs in the stabs. Can you let us know why there aren't any?
Thanks,
Gary
The following users liked this post:
Viper1GJ (01-04-2022)
01-04-2022, 07:39 AM
#184
It was me. I'm not an engineer (but I have stayed in a Holiday InnExpress). I was wondering if the 2 spars that contain the torque tube will have enough torsional rigidity to hold the flight loads. Seems like a rib/ribs along the longitudinal axis of the stab would spread the loads better. Your project is awesome and I wish you much success.
 02-24-2022, 10:06 PM
#188

I would be interested in one of these too. I was thinking shipping would be an issue but now it looks like I'm in drivung distance. I just hope you finish it before I'm too old to fly
I just hope you finish it before I'm too old to fly
03-19-2022, 03:26 AM
#191

Thomas,
This is an extremely awesome build! I hope you get the motivation back soon and continue working on it.
I've seen Brent fly his scratch T-38 many times and it is a thing of beauty! He recently told me he is thinking of converting to turbine now that he has gone to the dark side.
This is an extremely awesome build! I hope you get the motivation back soon and continue working on it.
I've seen Brent fly his scratch T-38 many times and it is a thing of beauty! He recently told me he is thinking of converting to turbine now that he has gone to the dark side.
03-19-2022, 10:55 AM
#192
Thomas,
This is an extremely awesome build! I hope you get the motivation back soon and continue working on it.
I've seen Brent fly his scratch T-38 many times and it is a thing of beauty! He recently told me he is thinking of converting to turbine now that he has gone to the dark side.
This is an extremely awesome build! I hope you get the motivation back soon and continue working on it.
I've seen Brent fly his scratch T-38 many times and it is a thing of beauty! He recently told me he is thinking of converting to turbine now that he has gone to the dark side.
The following users liked this post:
Viper1GJ (03-19-2022)
03-27-2022, 03:48 PM
#194
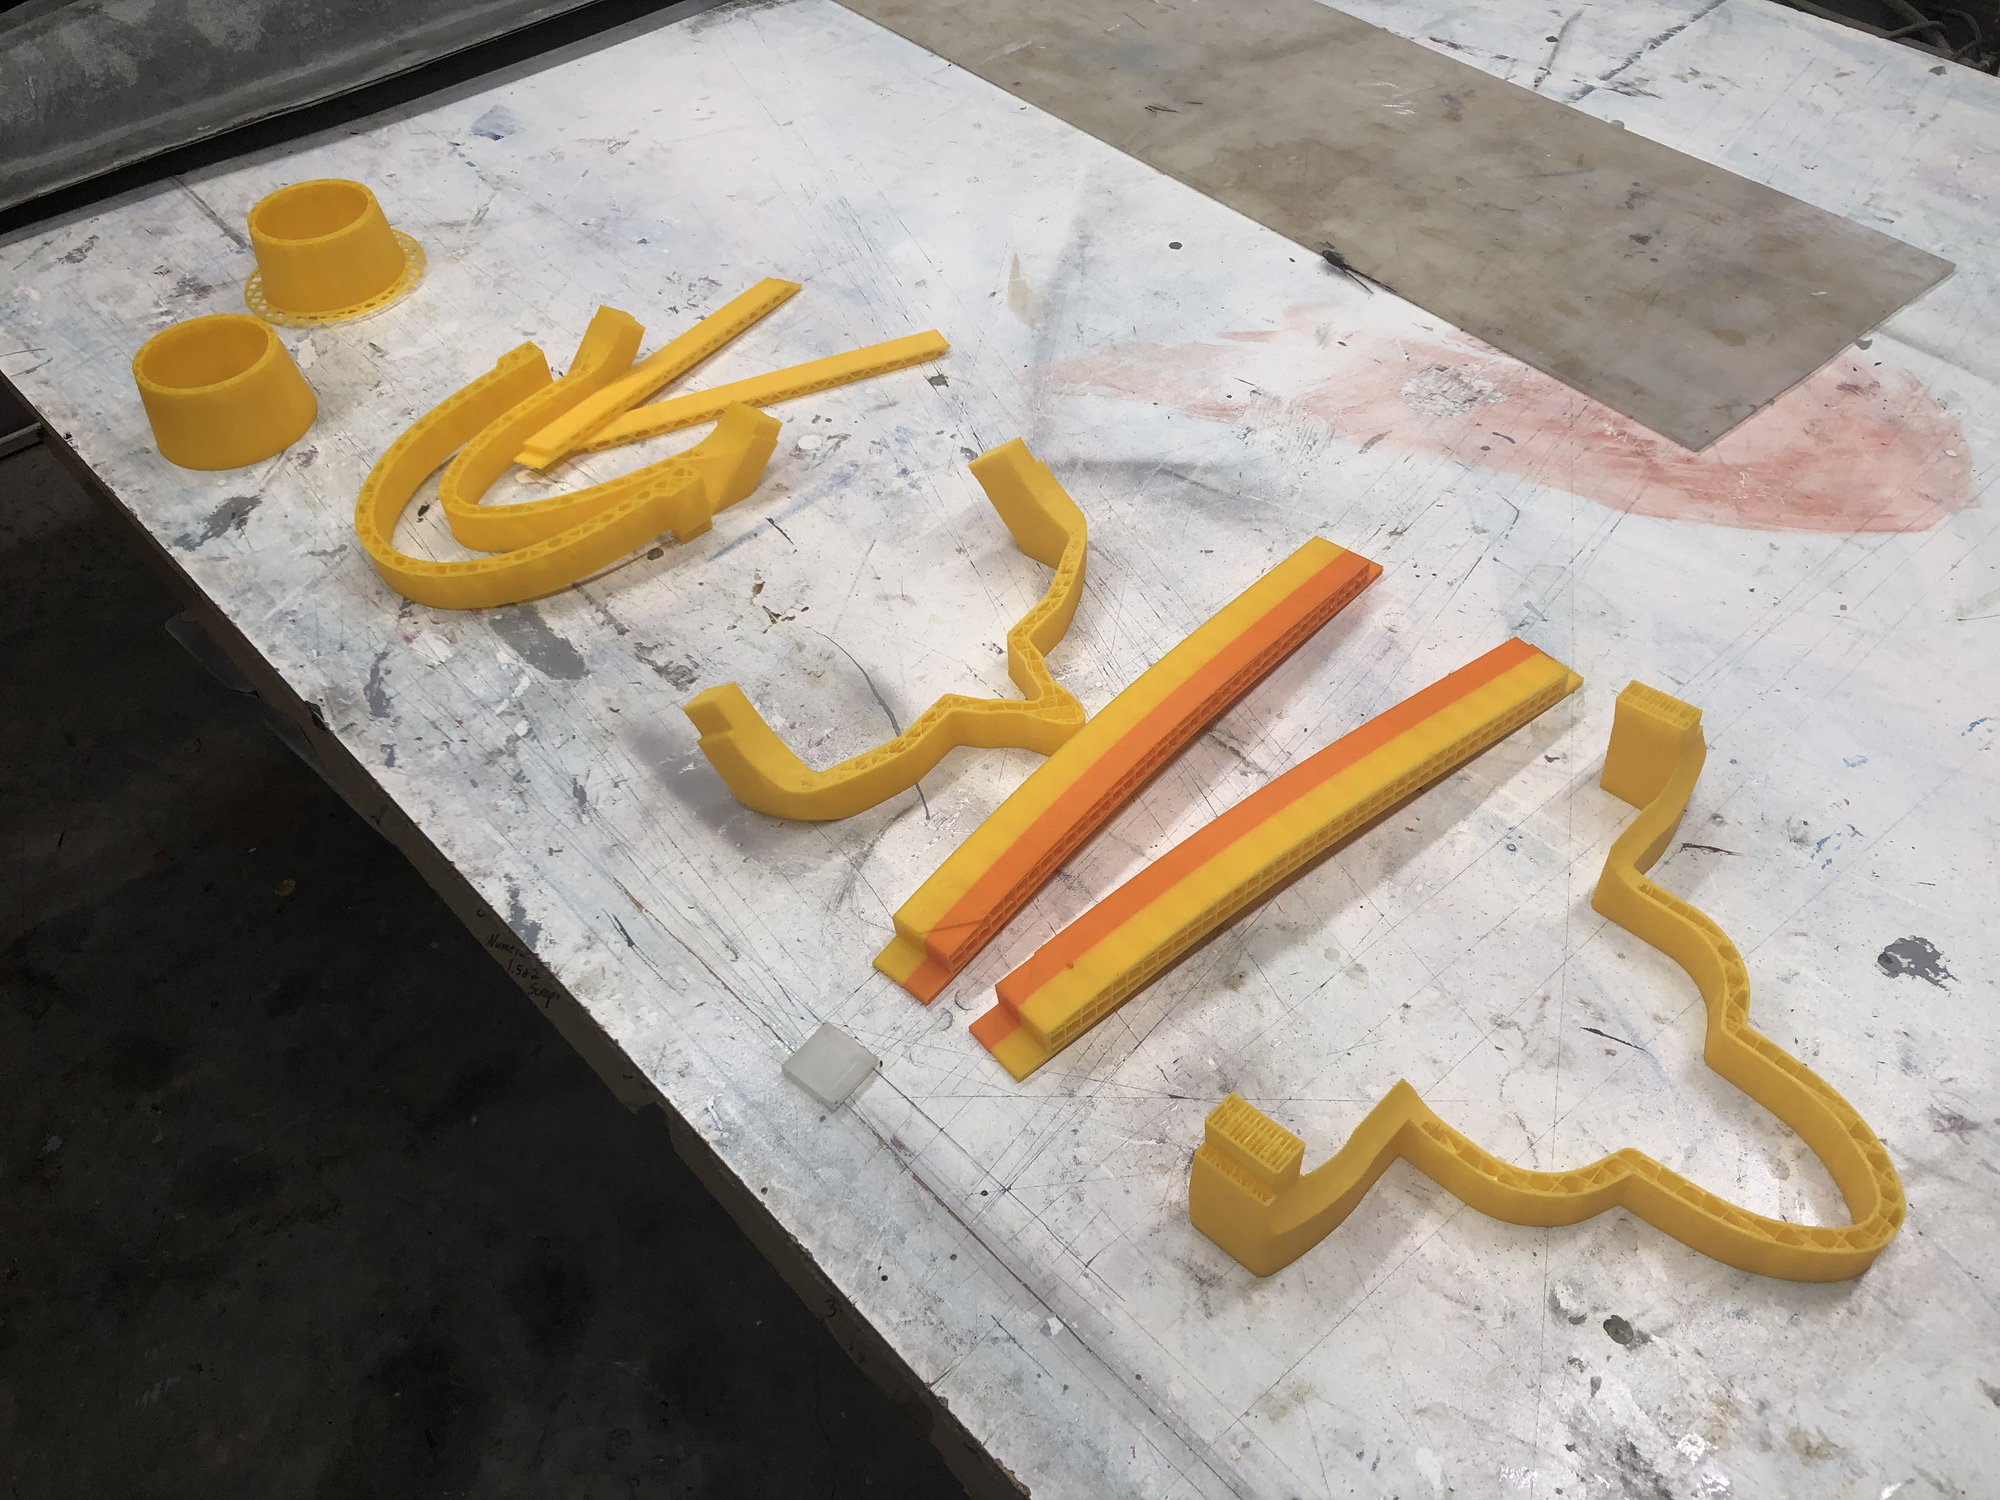
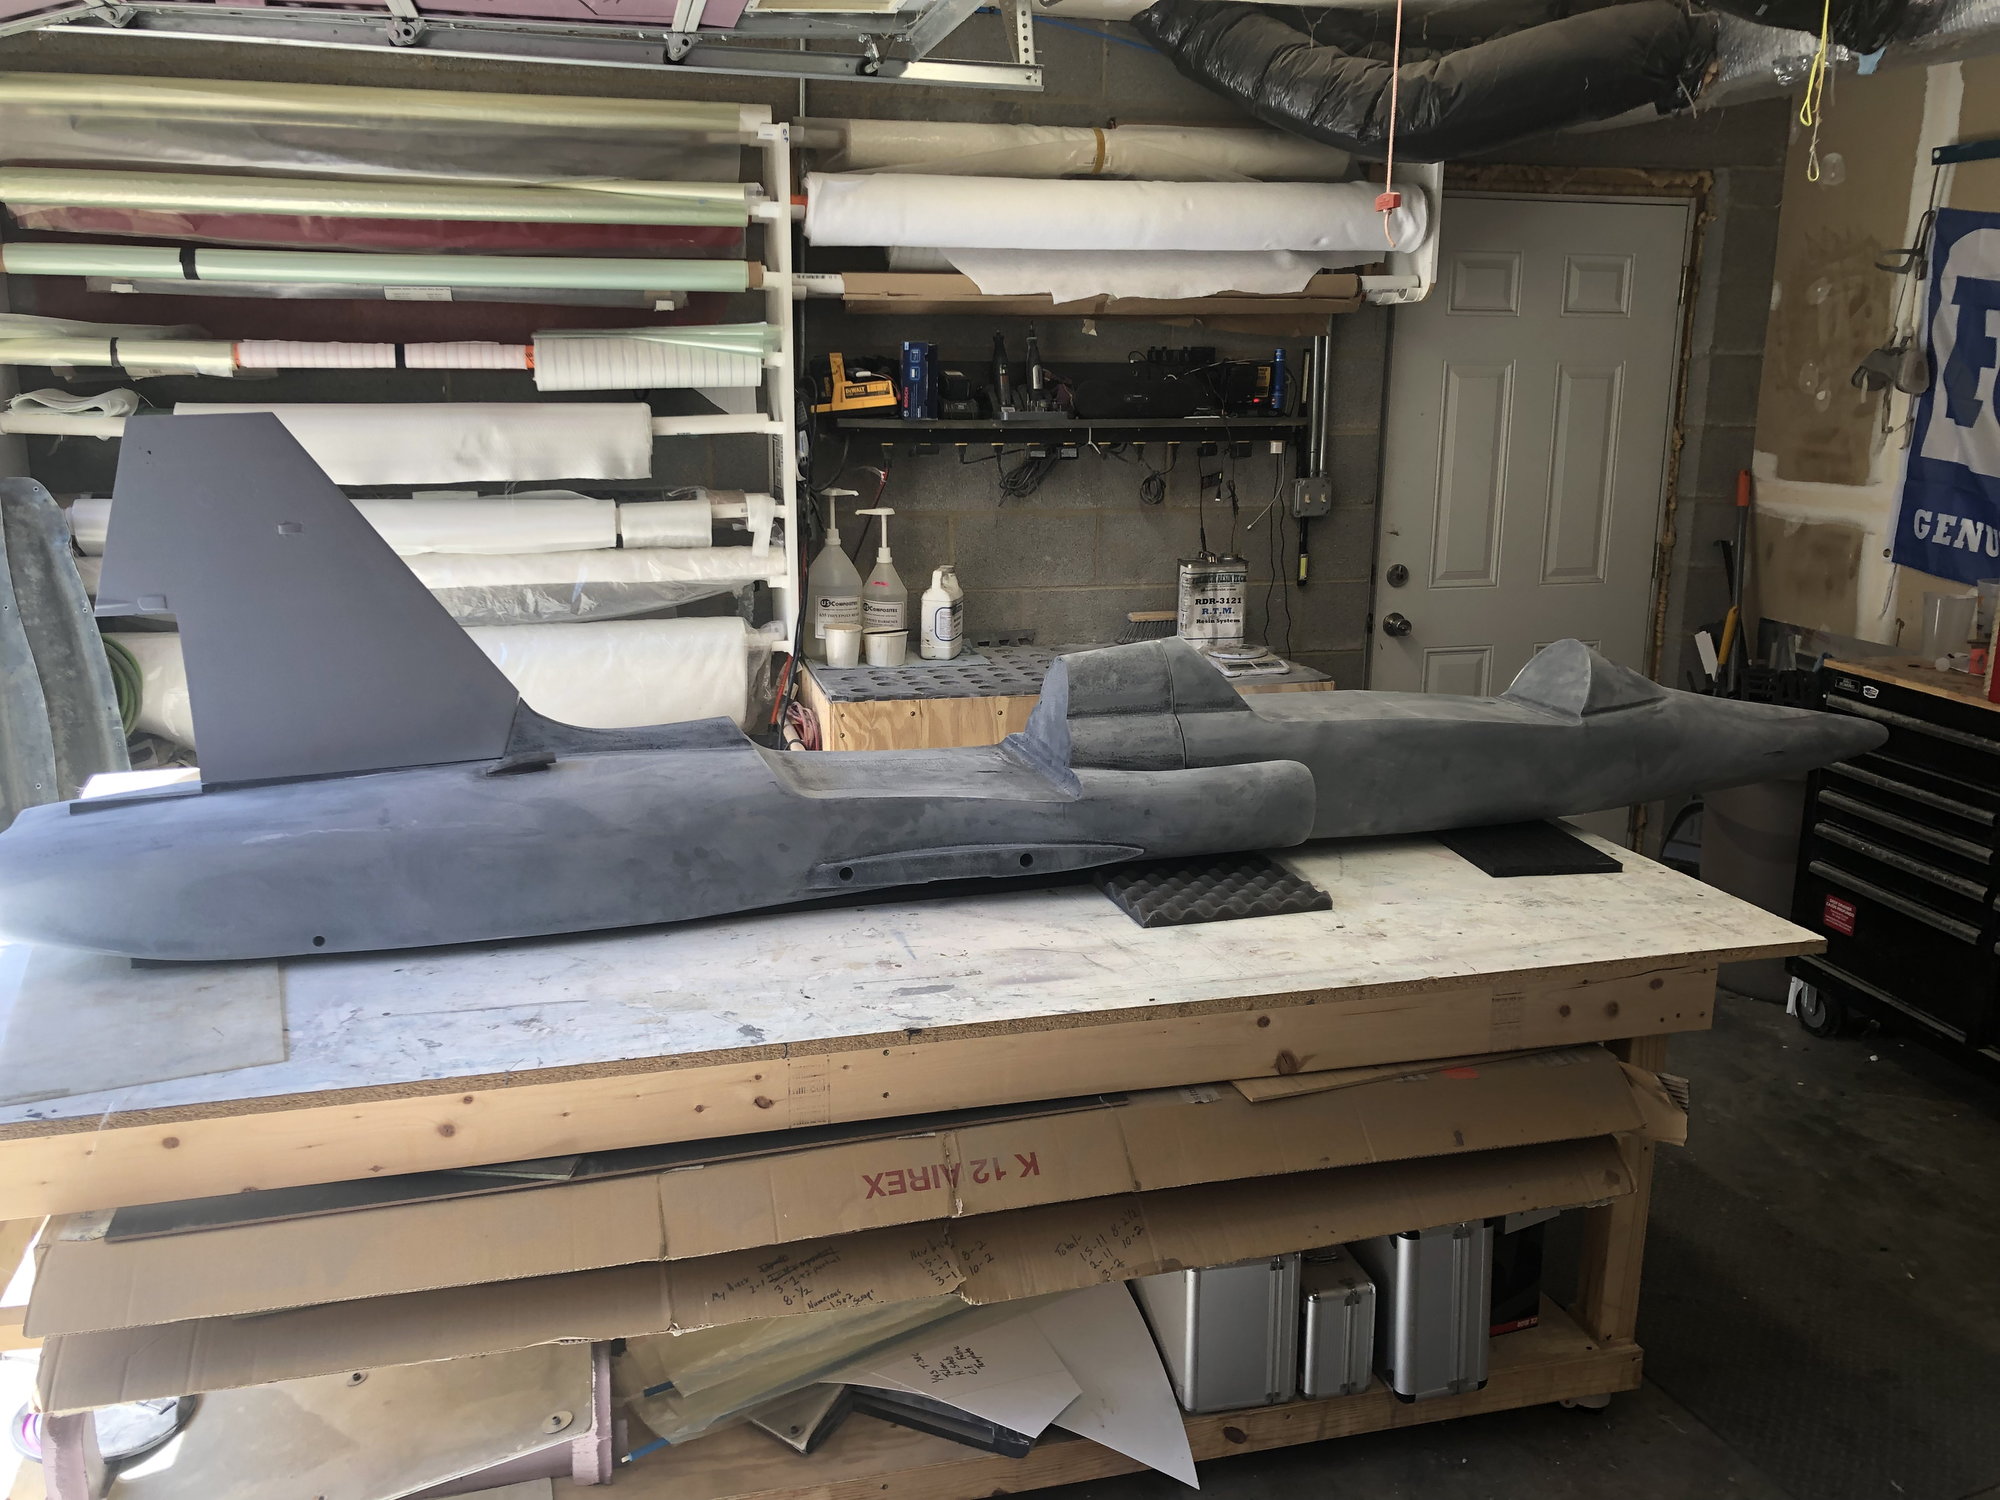
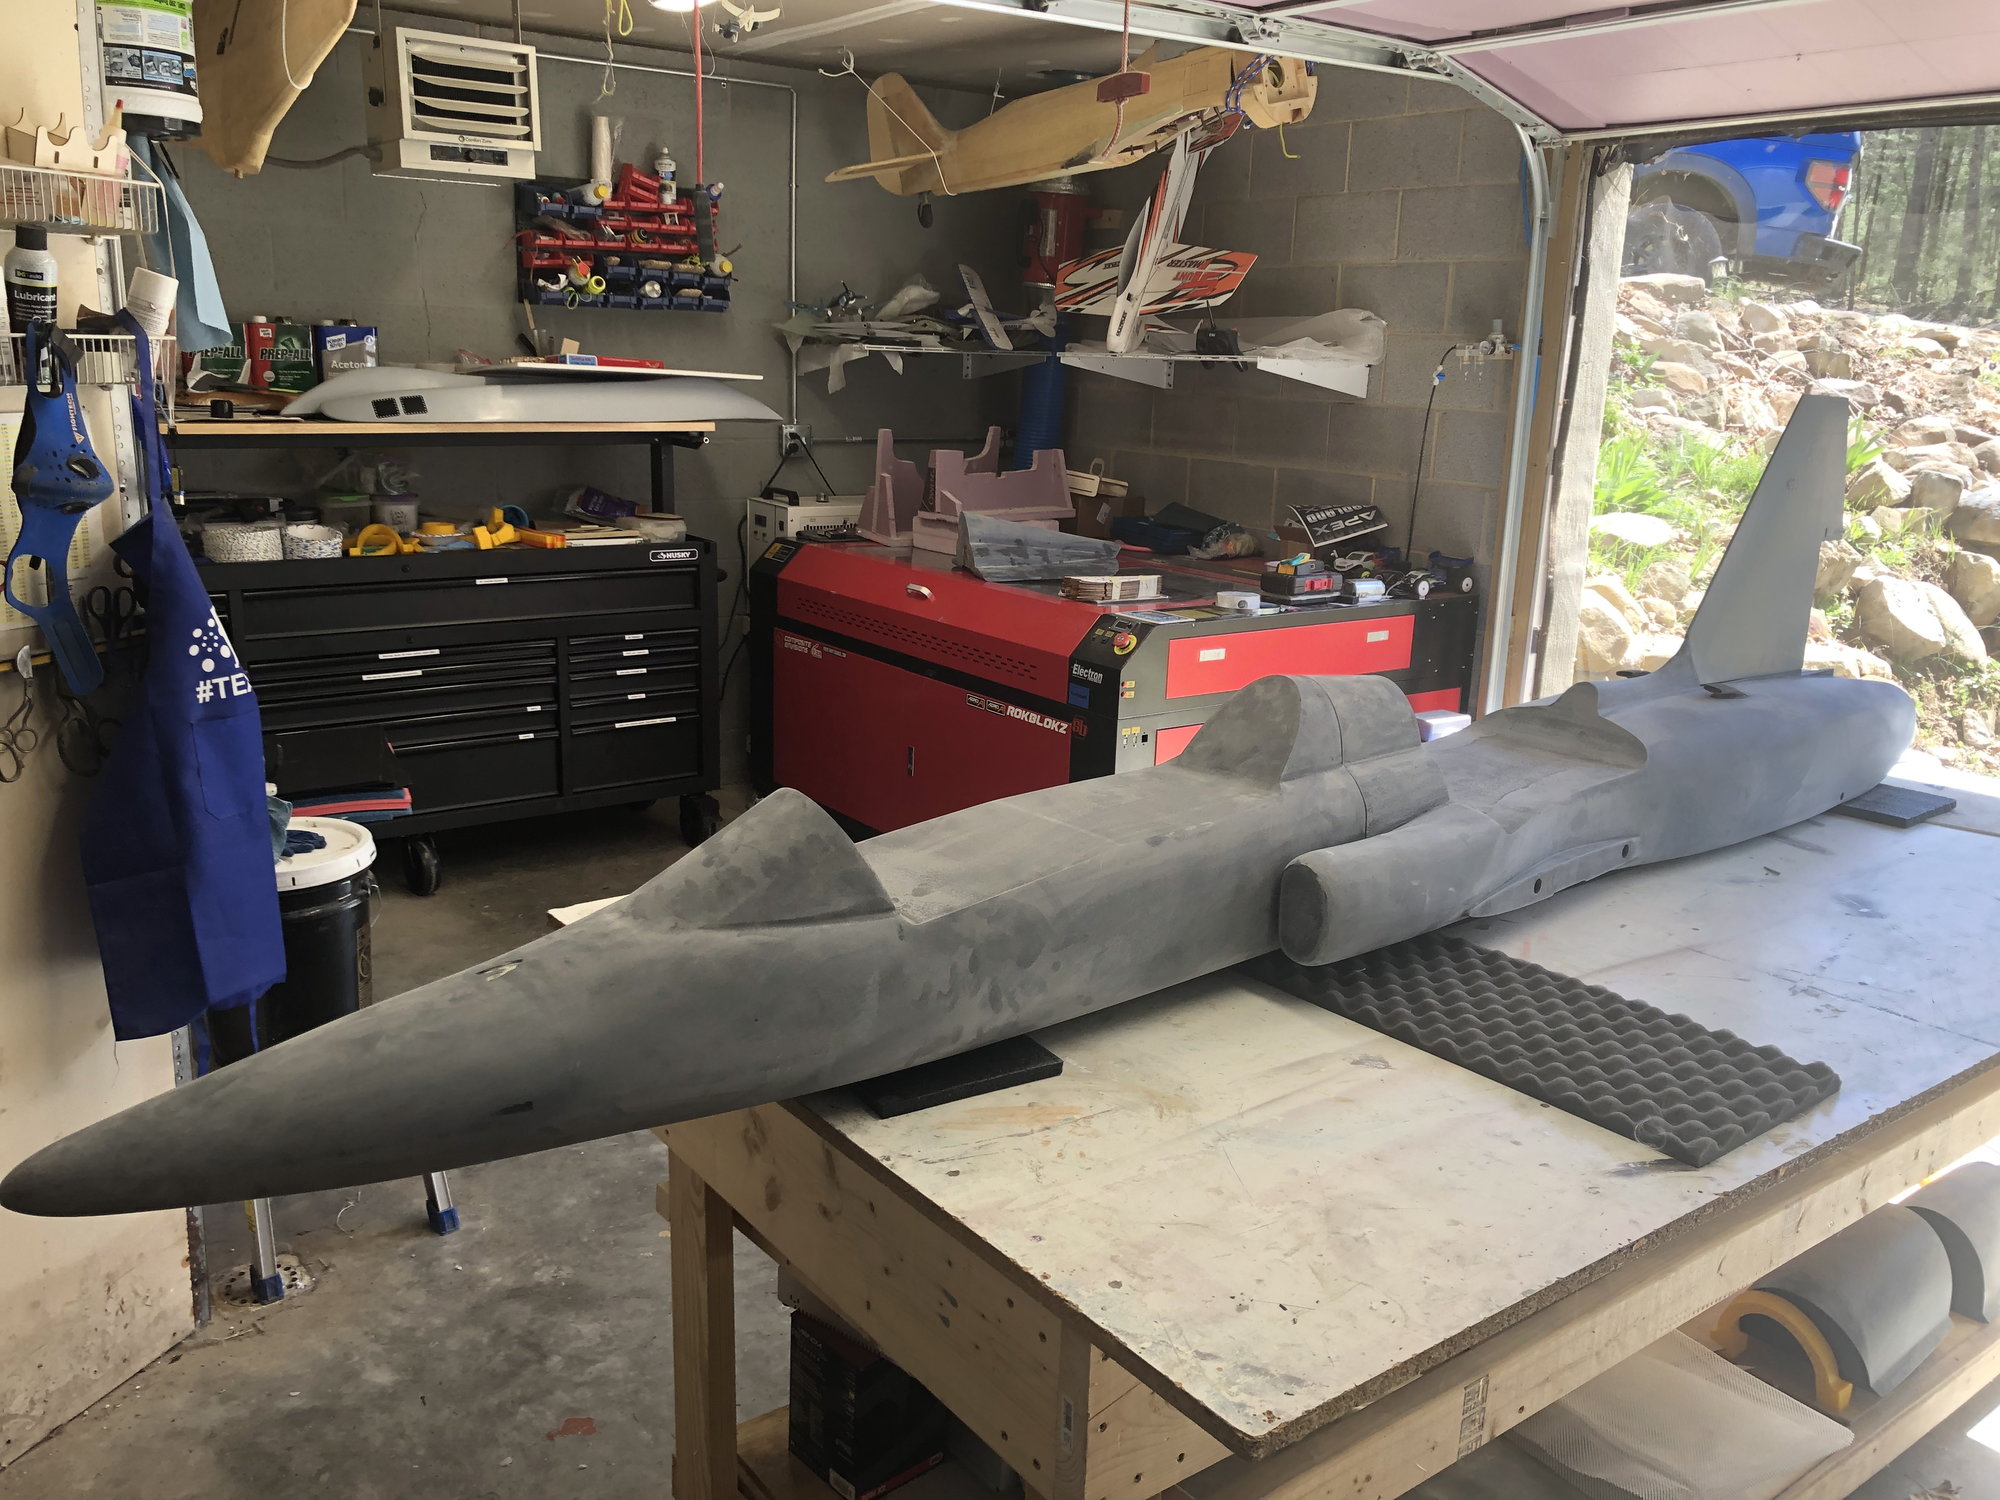
Here�s the past few weeks progress as the 3D printer has been busy printing parting planes.
in this photo is the main engine hatch, both canopies and the fuselage flange (at the exhaust) parting planes.
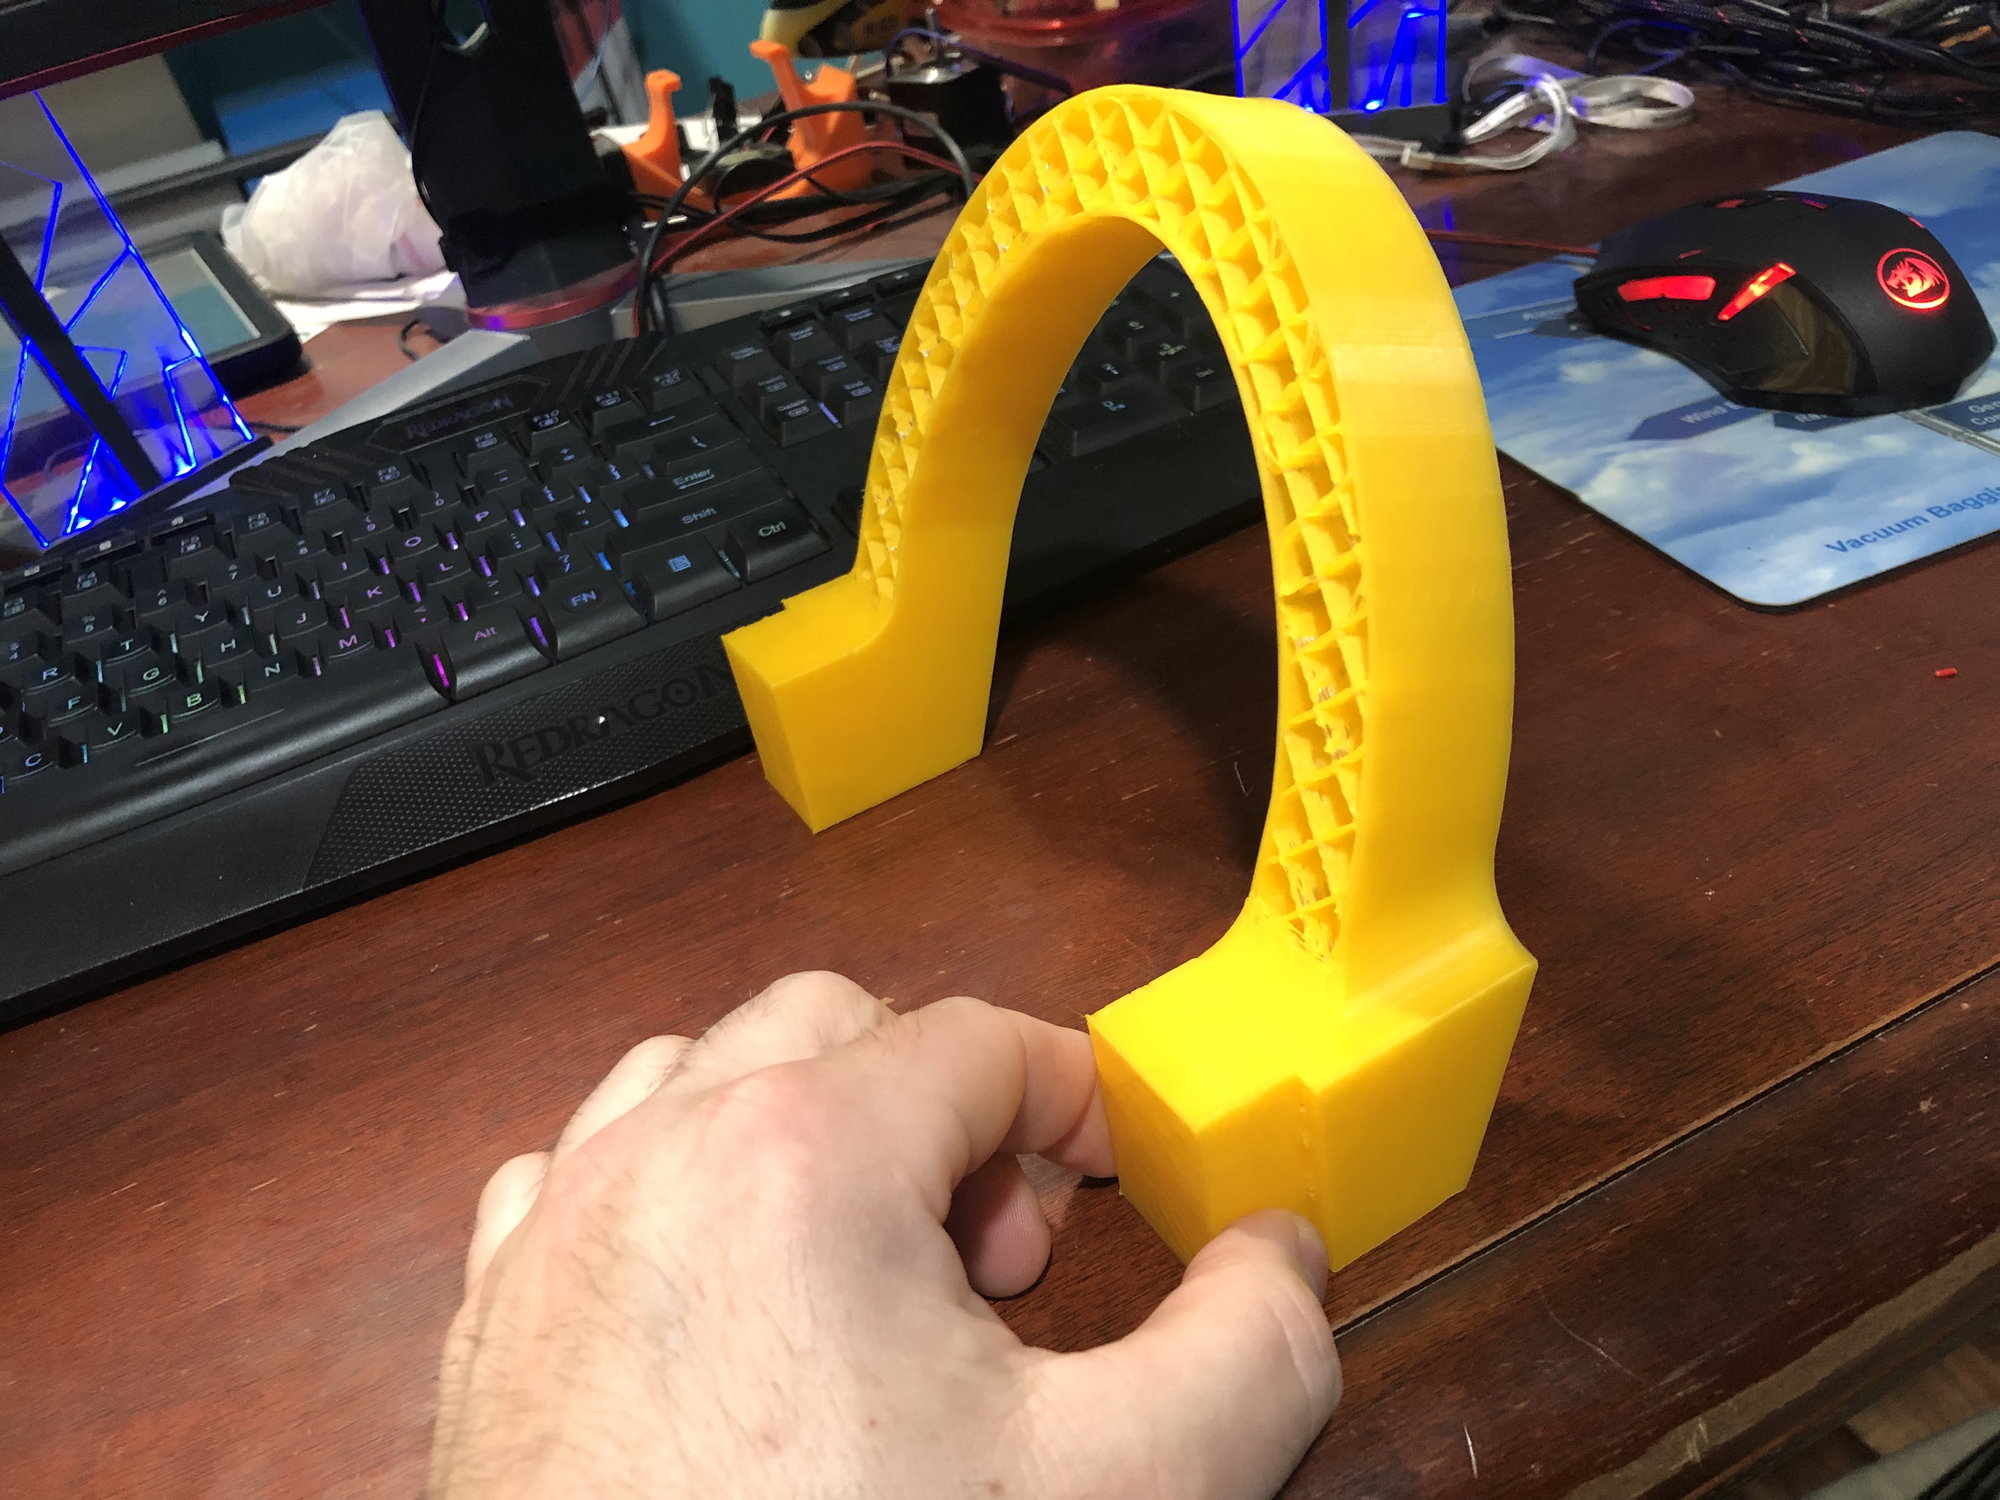
The forward canopy frames from parting plane.
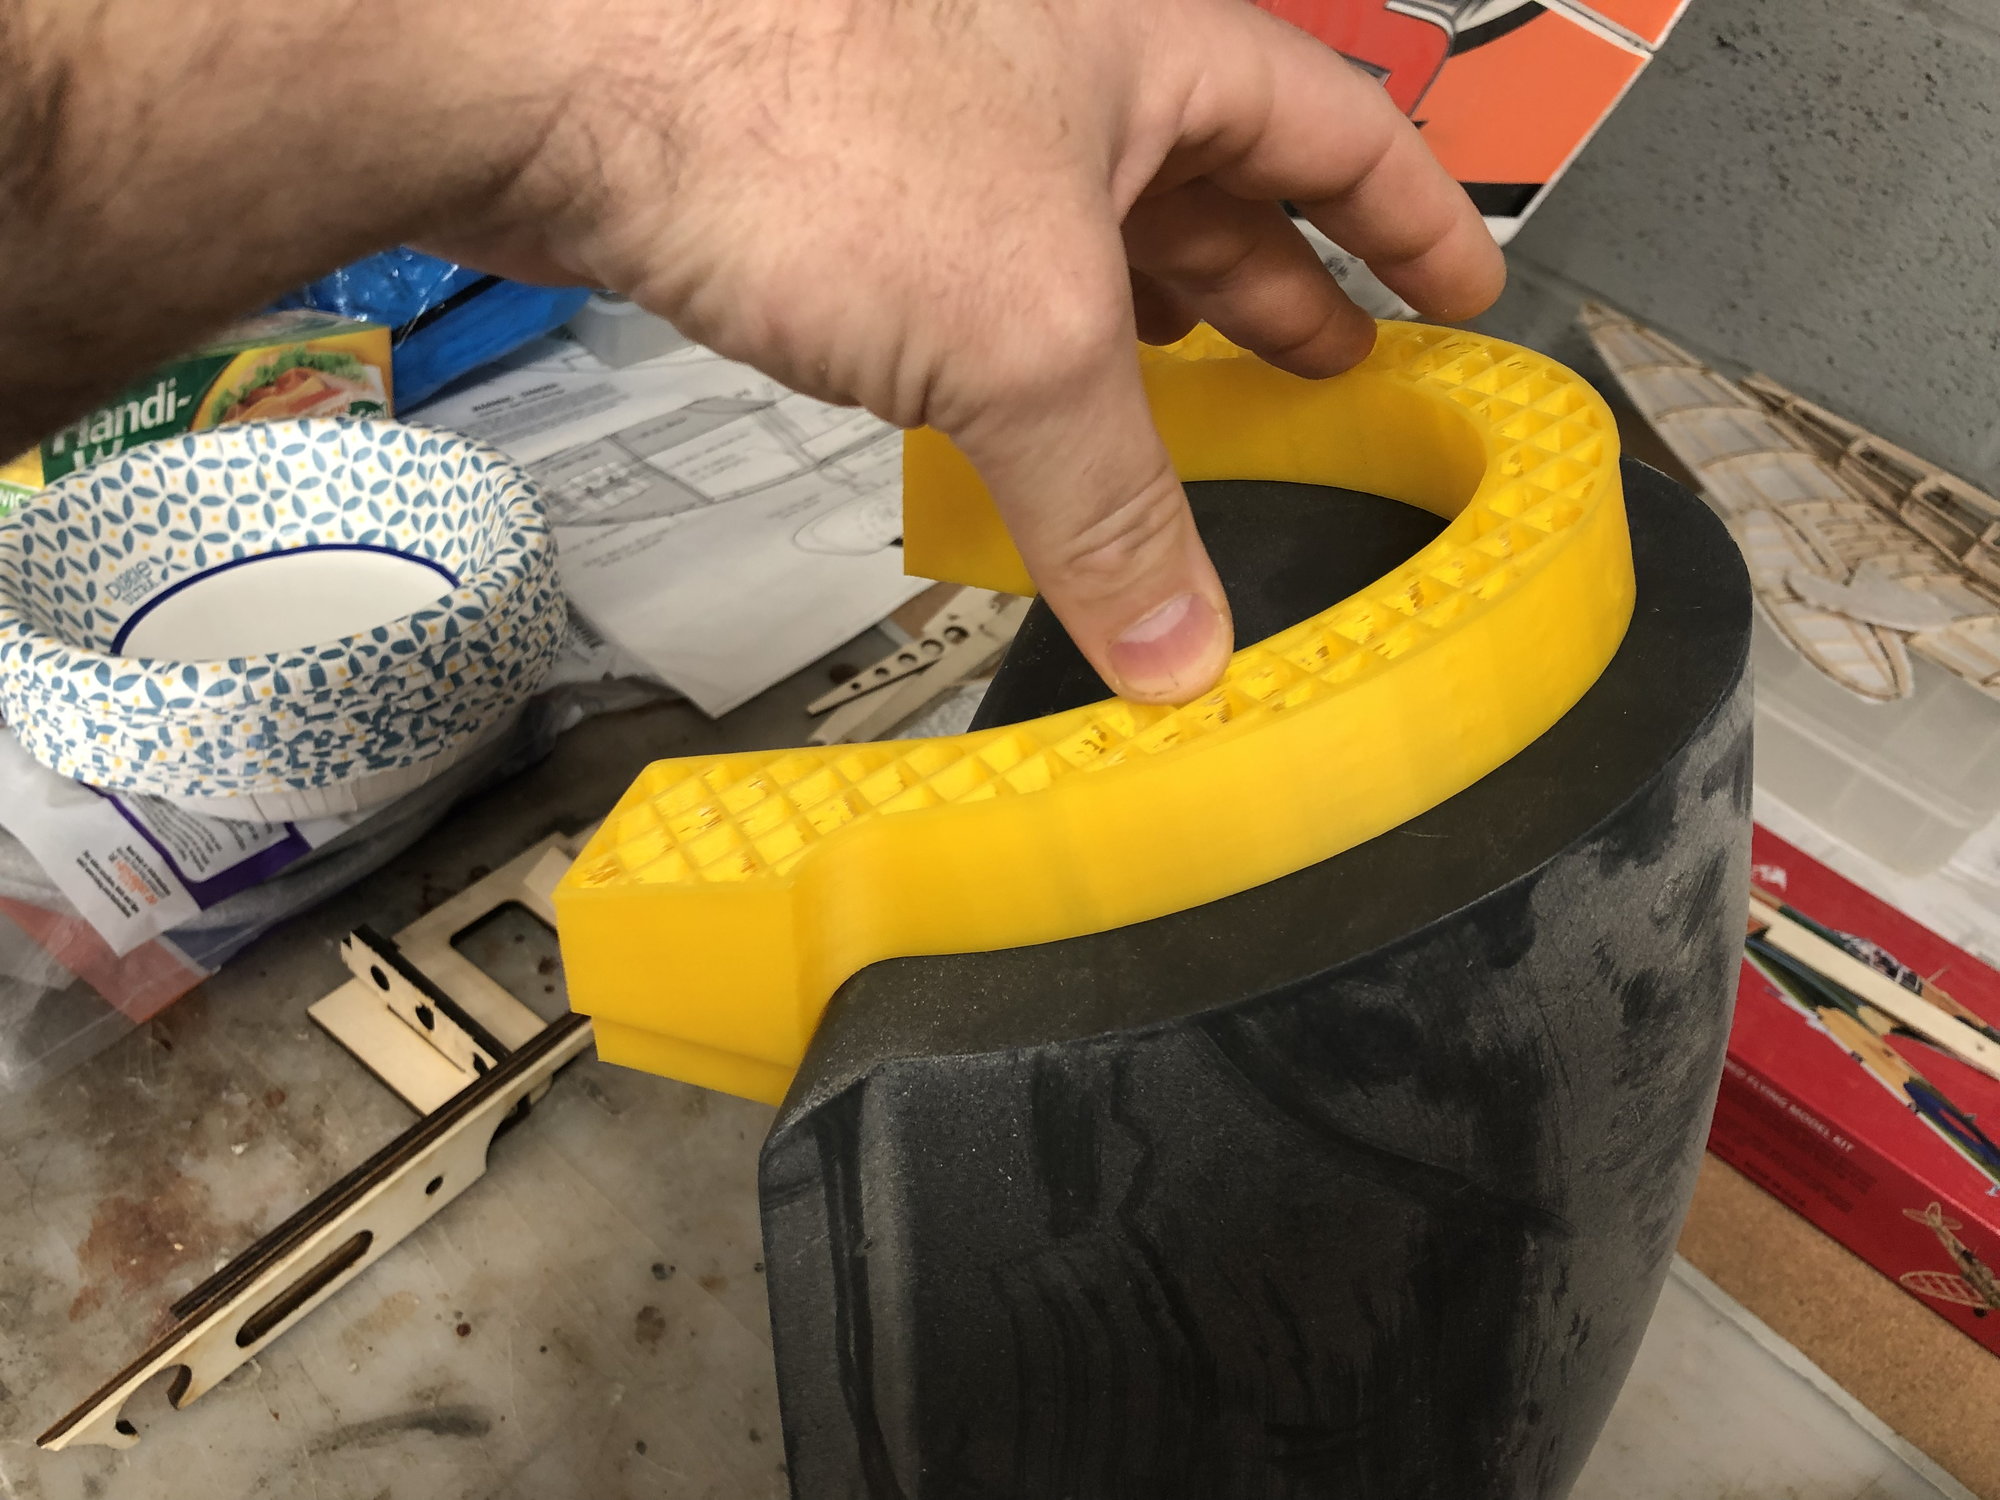
PP test fit to the plug
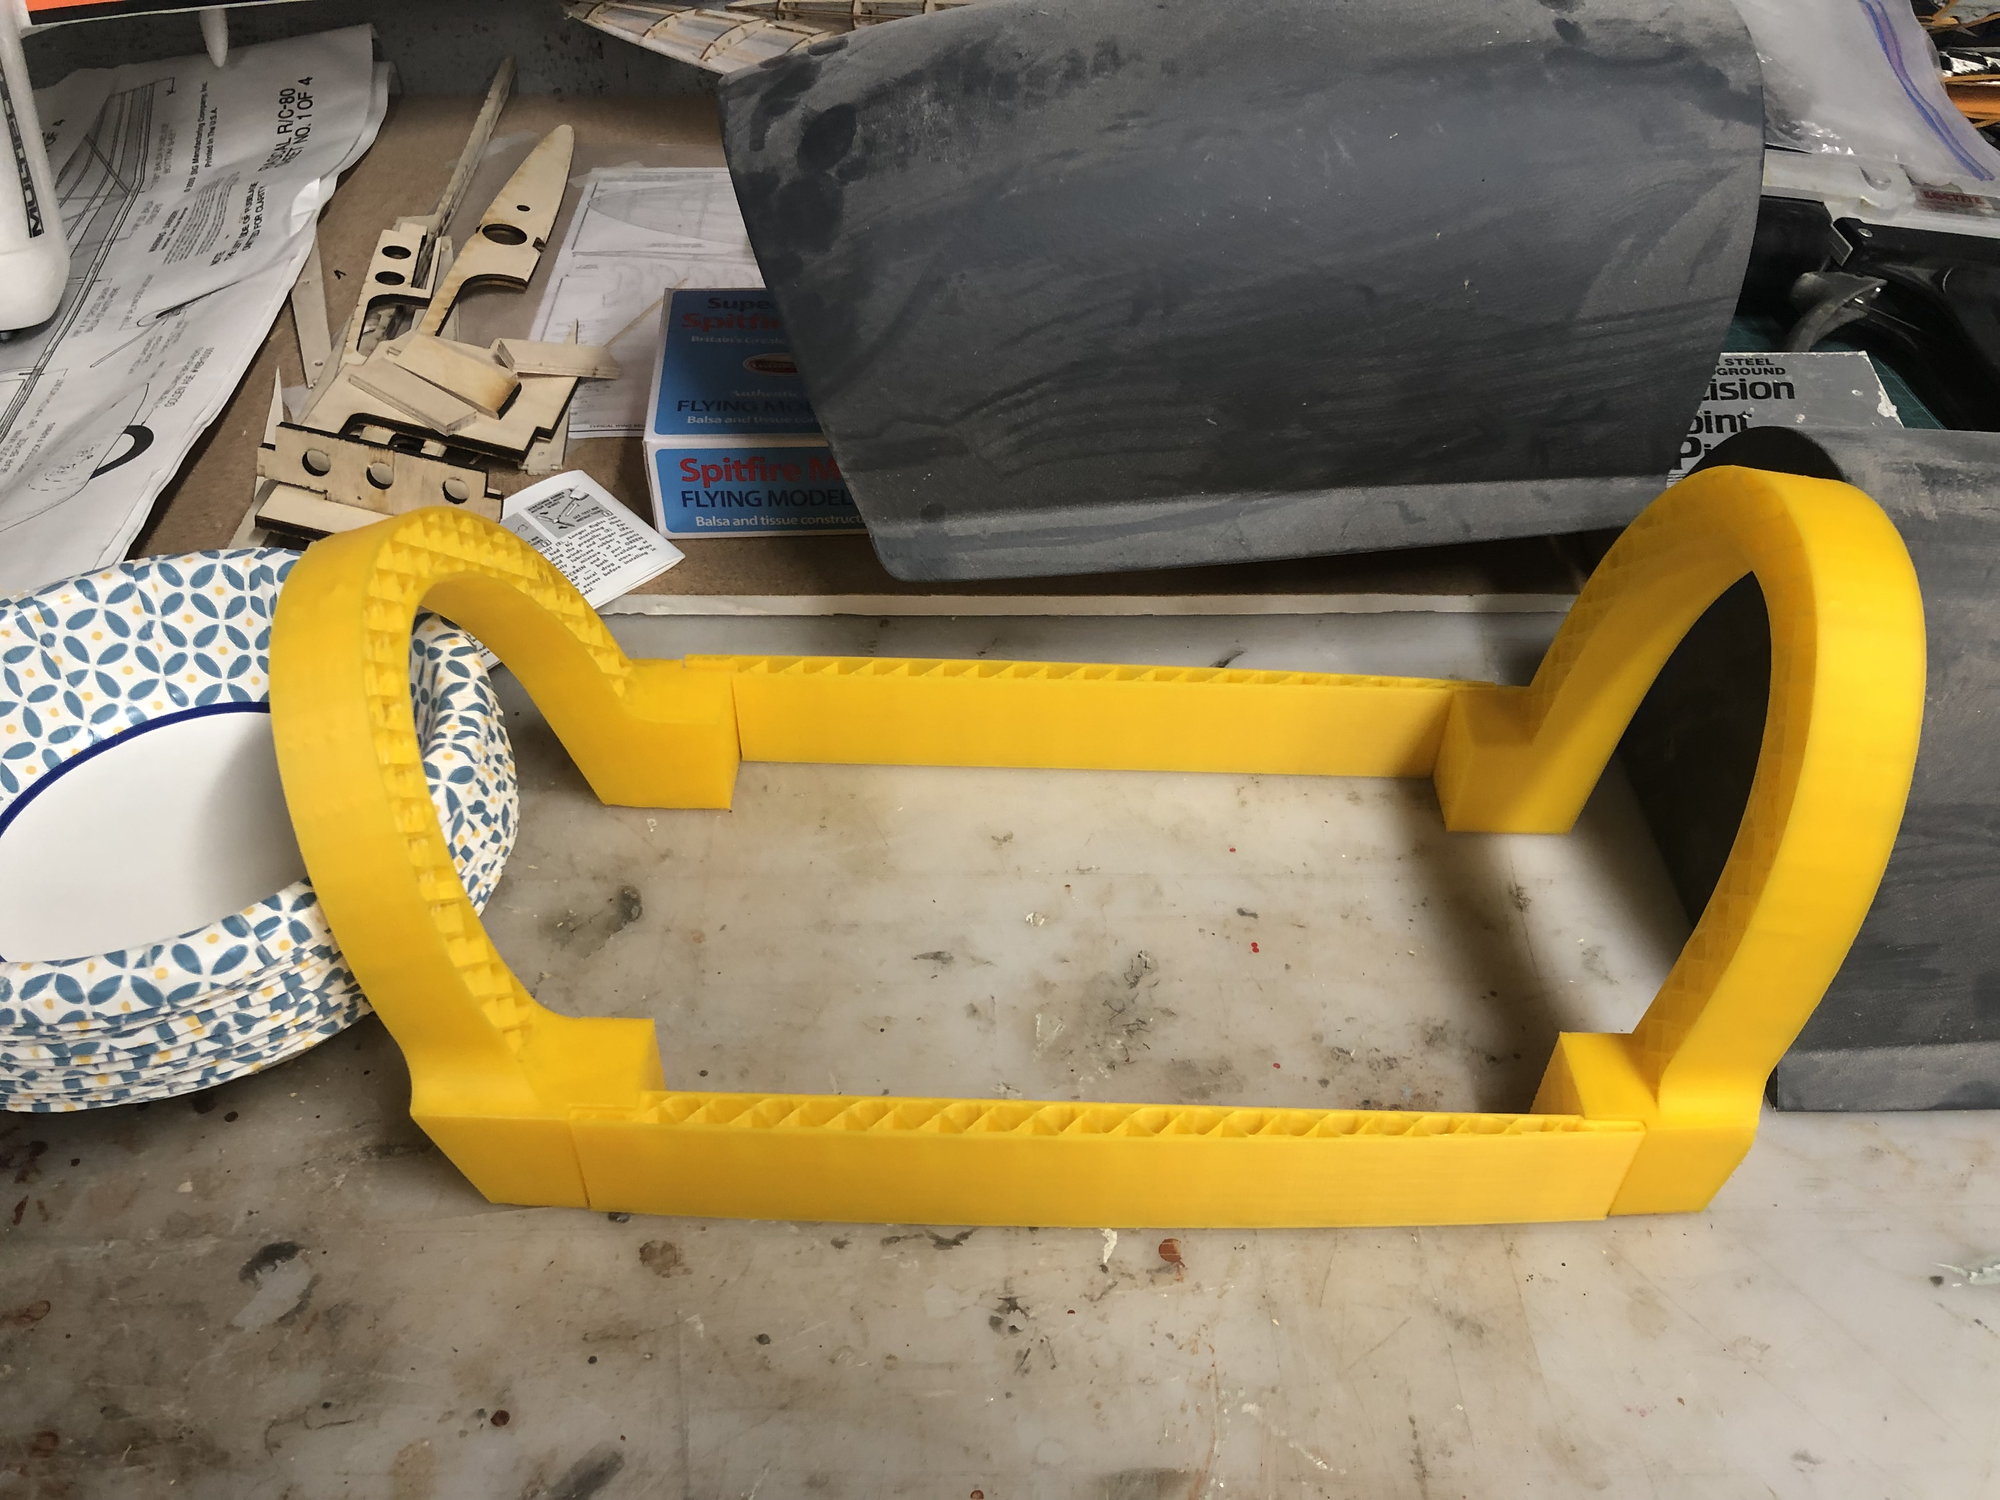
all four parting plane pieces assembled
canopy sitting on its parting planes.
engine hatch parting plane pieces assembled.
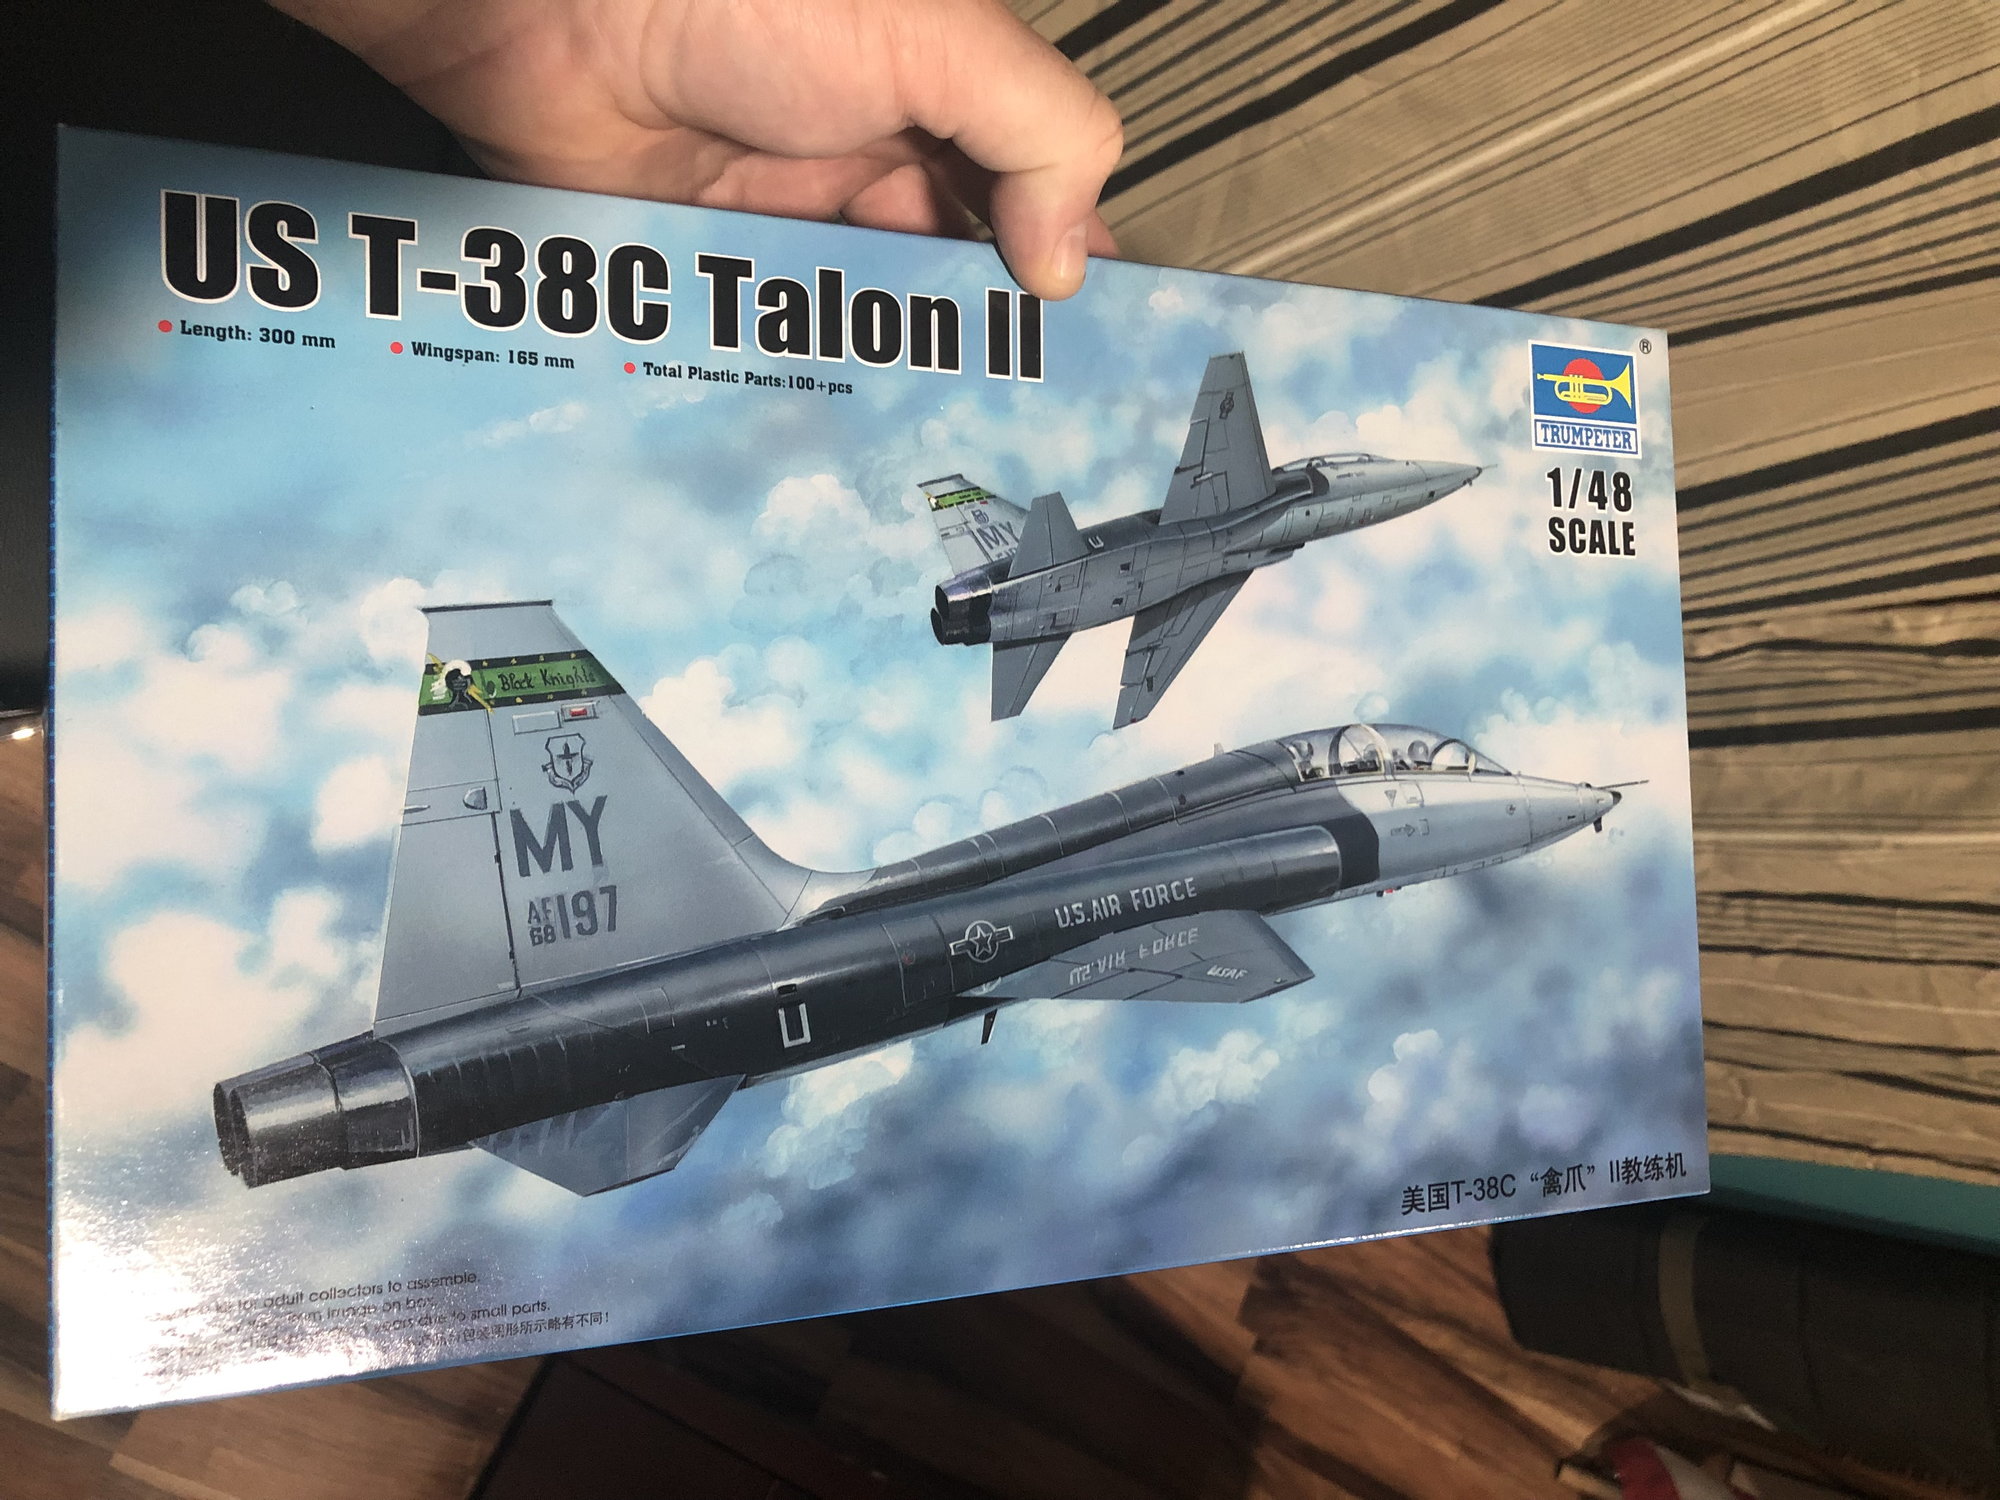
i also picked up this plastic model to assist with the fuselage detailing. I also picked up a Draco Publications T-38C in detail book to help as well.
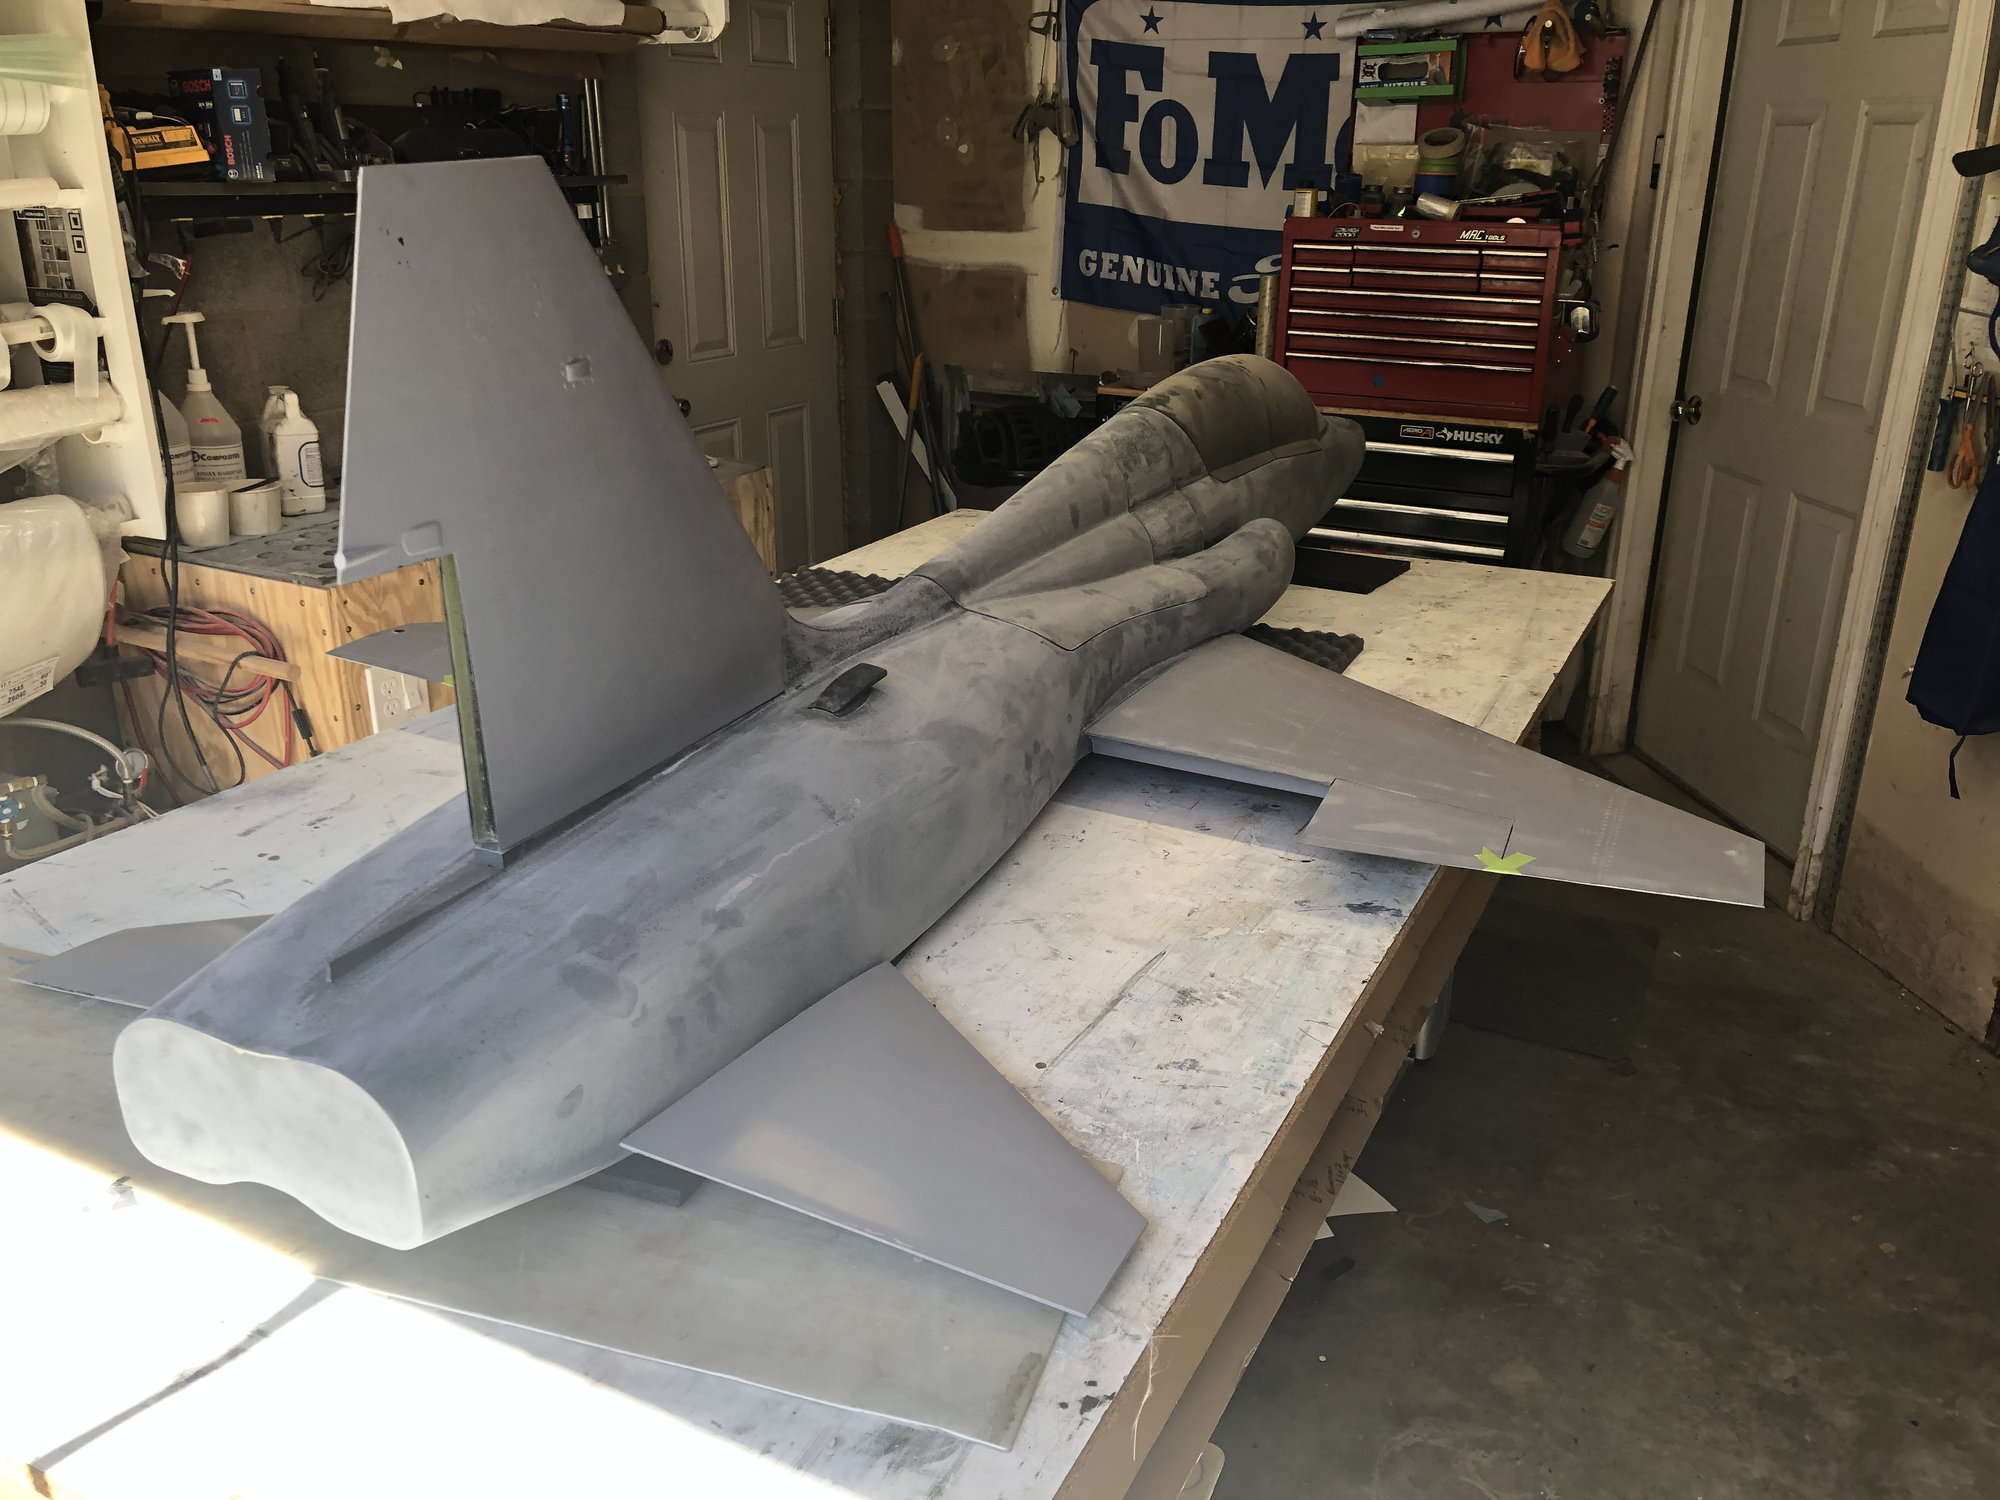
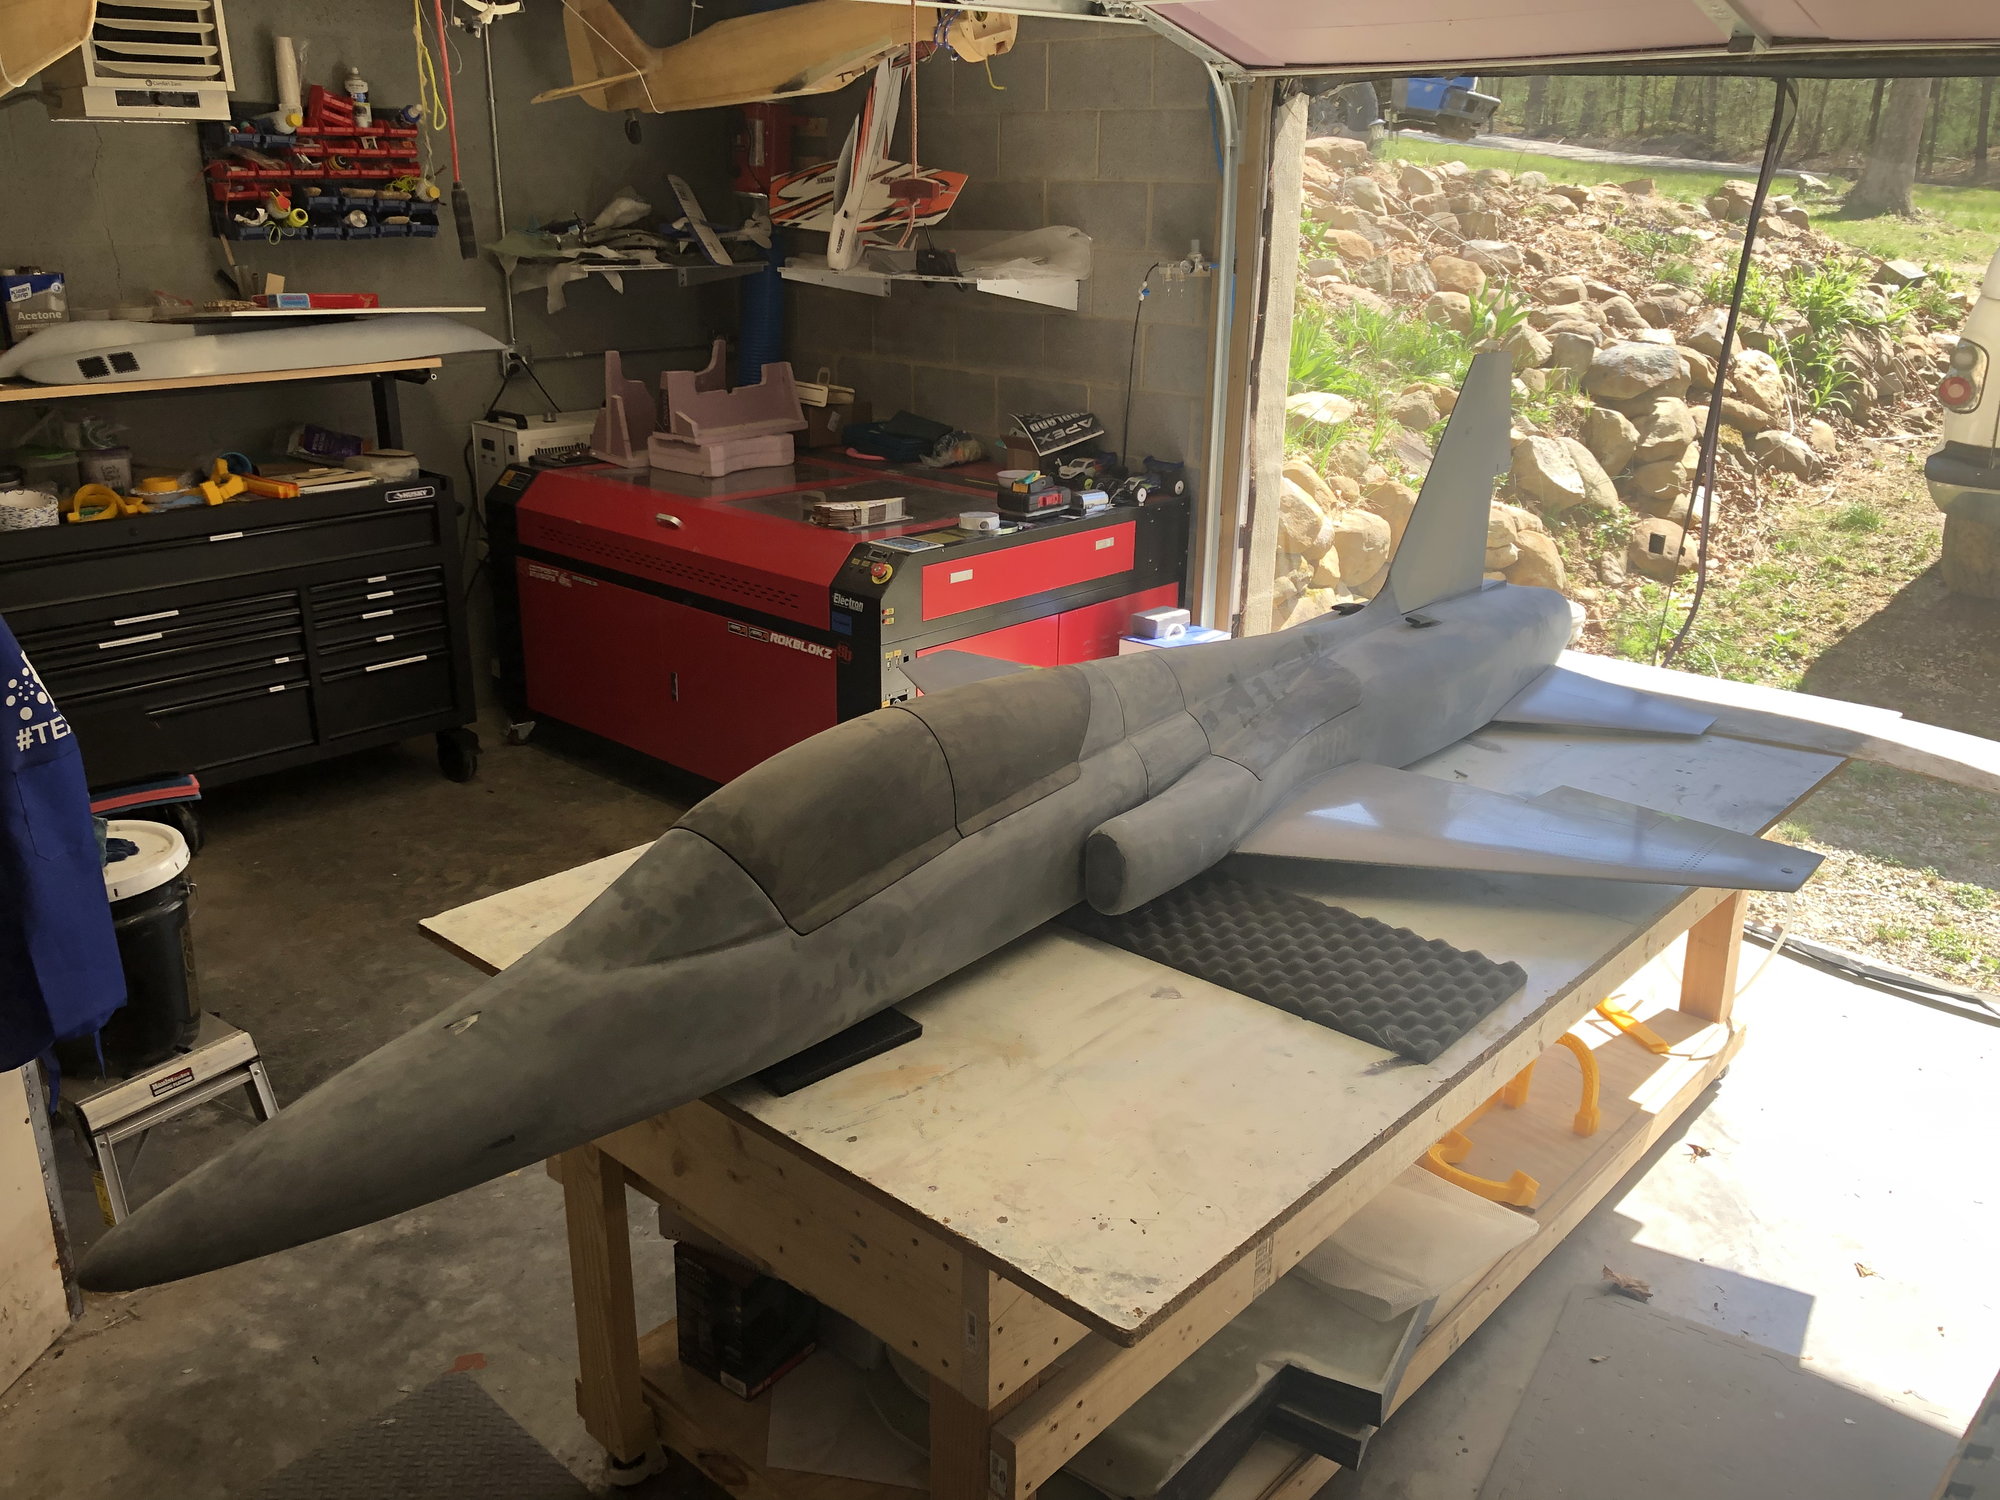
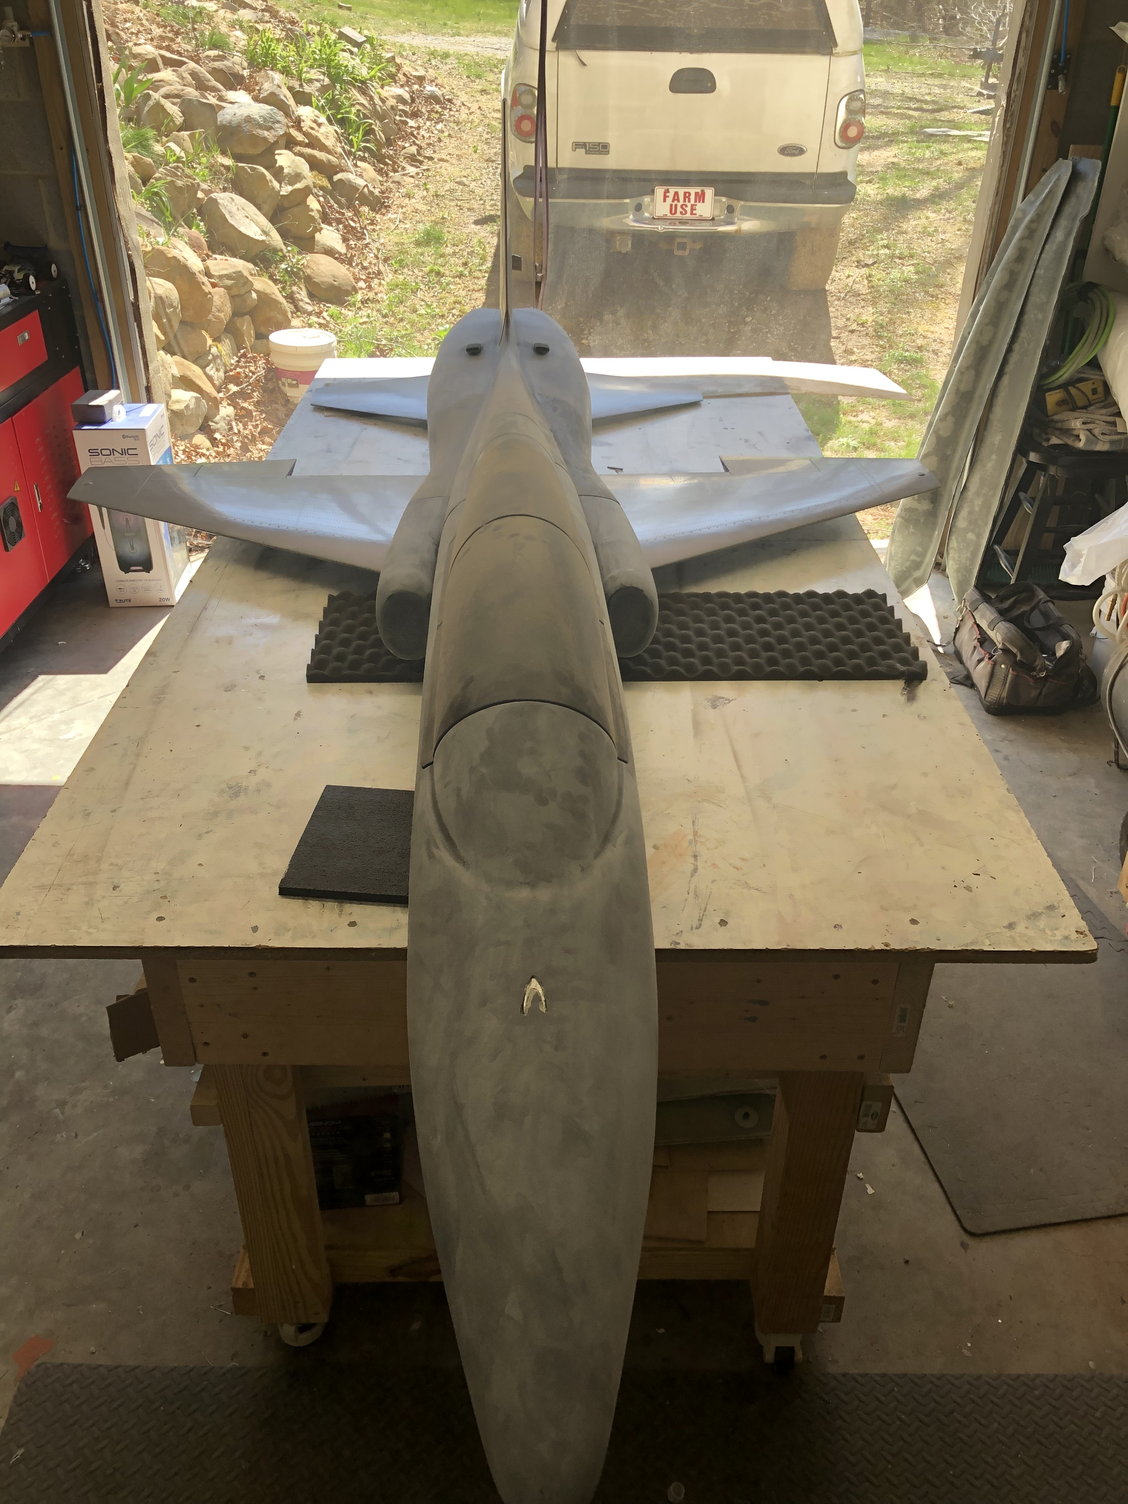
i also pulled the main fuselage off of the shelf that has been its home for the past 2? Years.
once i get back home from work later this week, i�ll begin to sand the fuselage smooth so the detailing can begin.
in this photo is the main engine hatch, both canopies and the fuselage flange (at the exhaust) parting planes.
The forward canopy frames from parting plane.
PP test fit to the plug
all four parting plane pieces assembled
canopy sitting on its parting planes.
engine hatch parting plane pieces assembled.
i also picked up this plastic model to assist with the fuselage detailing. I also picked up a Draco Publications T-38C in detail book to help as well.
i also pulled the main fuselage off of the shelf that has been its home for the past 2? Years.
once i get back home from work later this week, i�ll begin to sand the fuselage smooth so the detailing can begin.
04-12-2022, 03:47 PM
#198
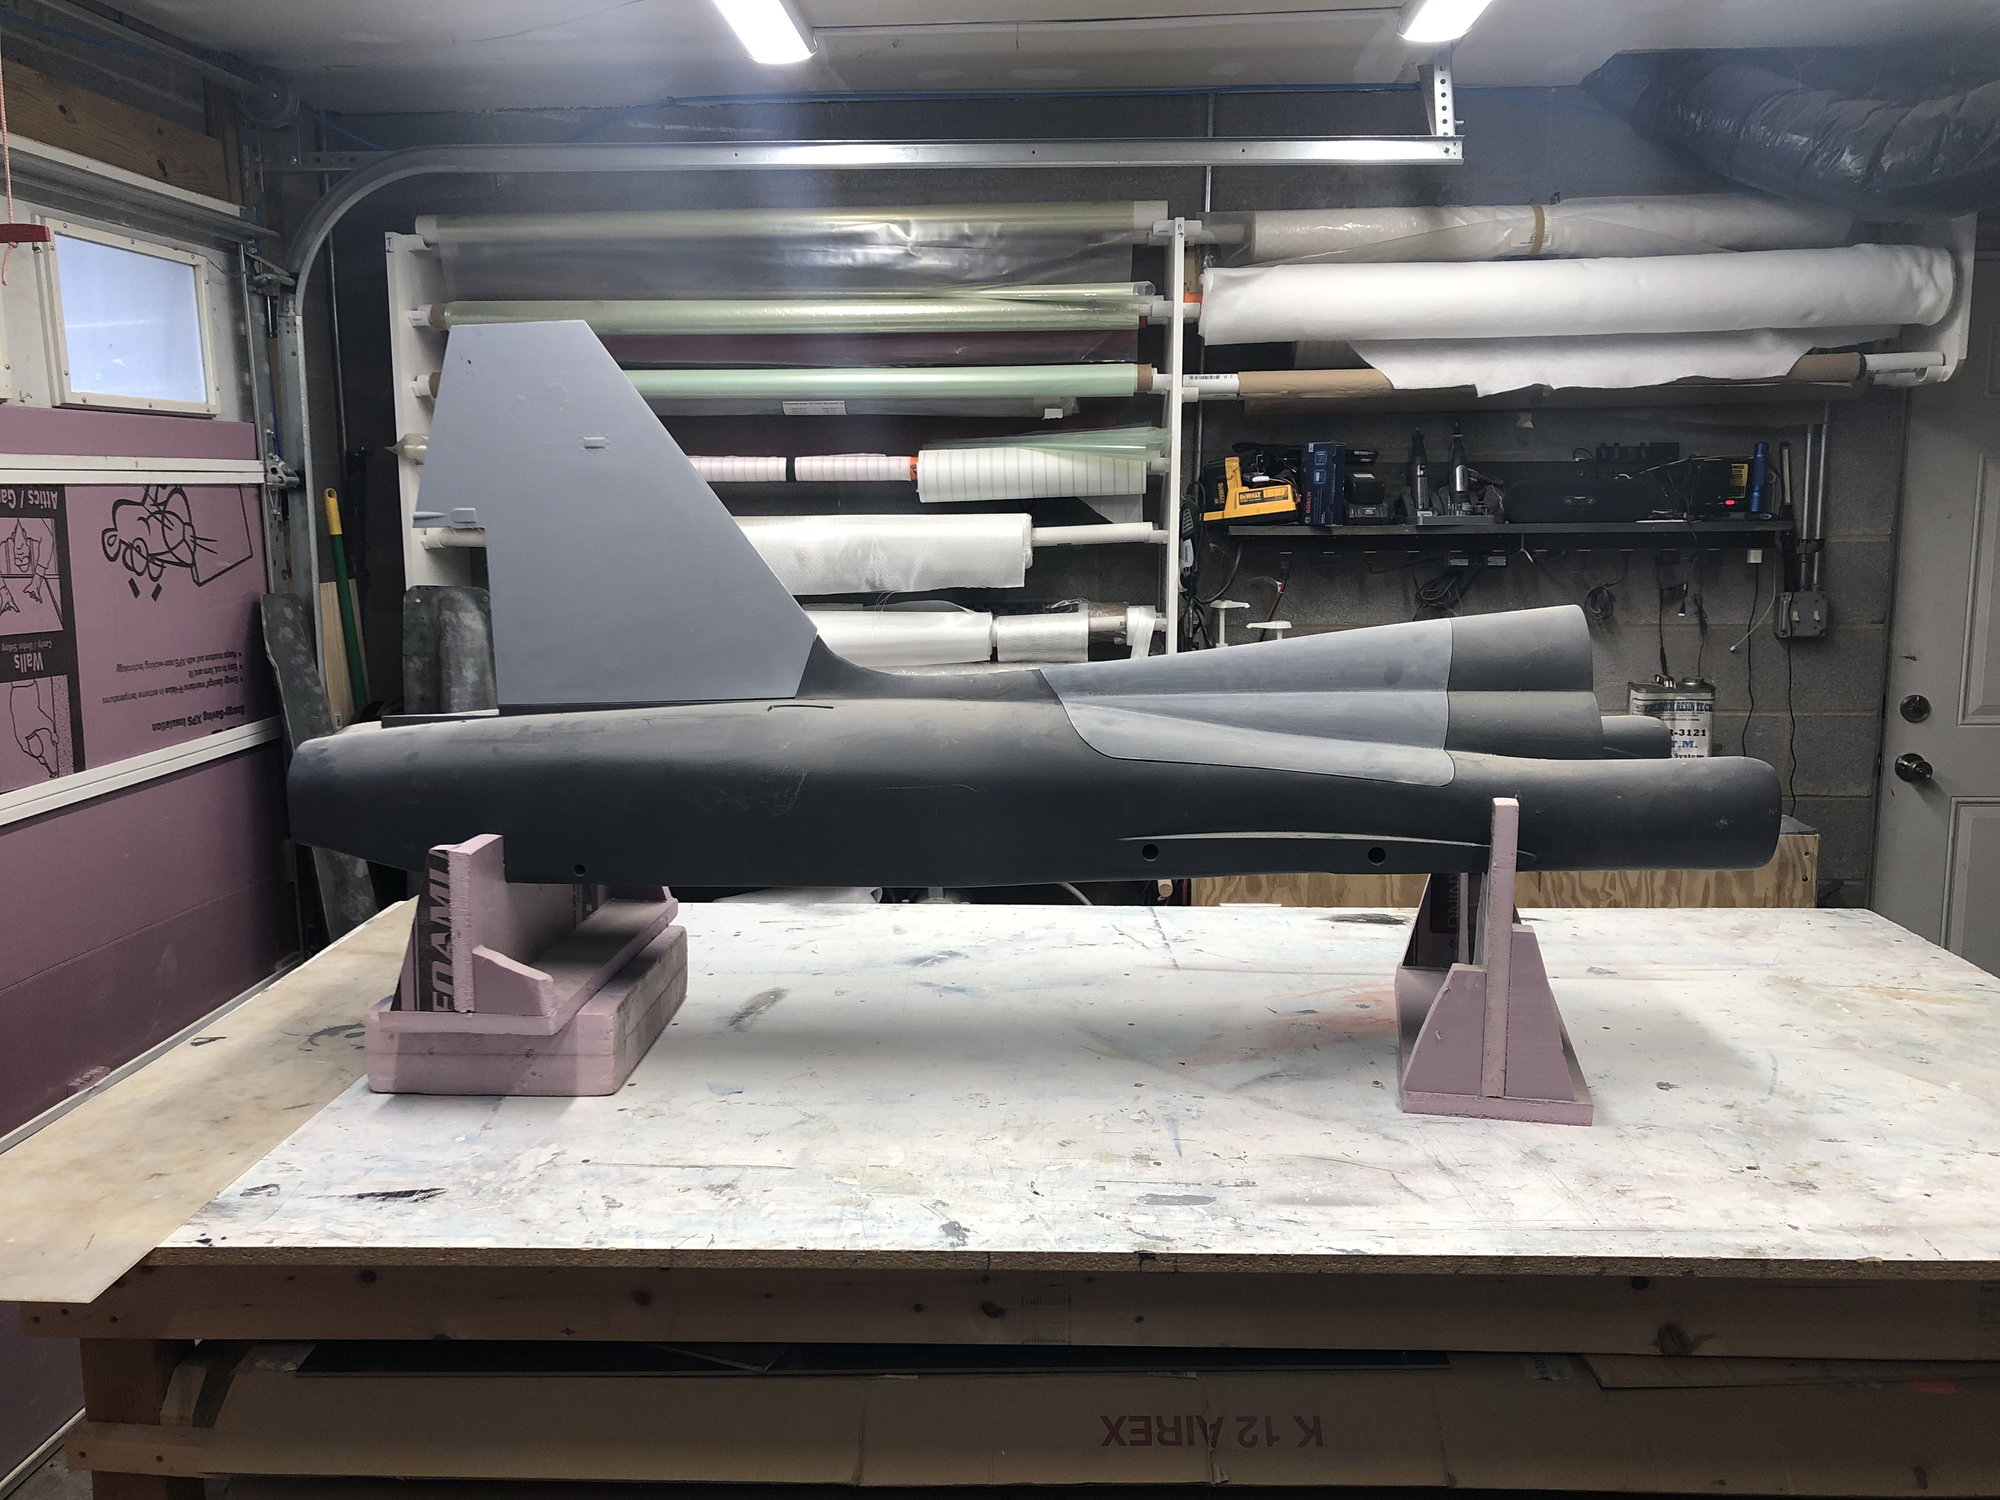
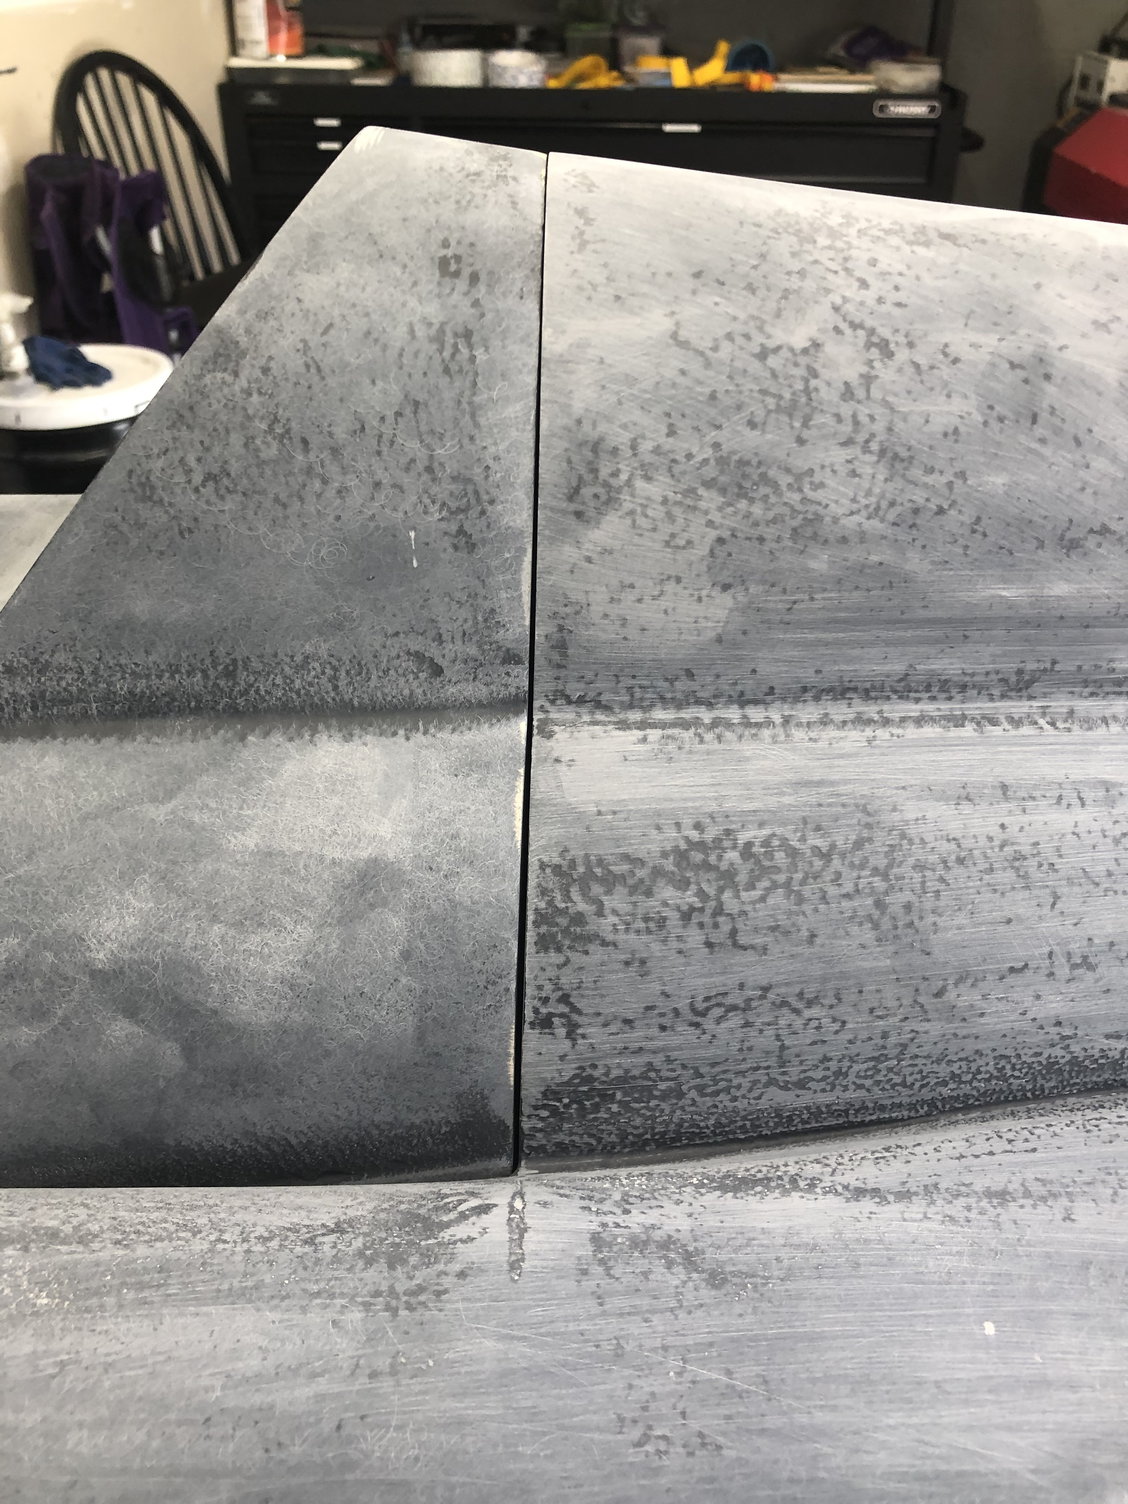
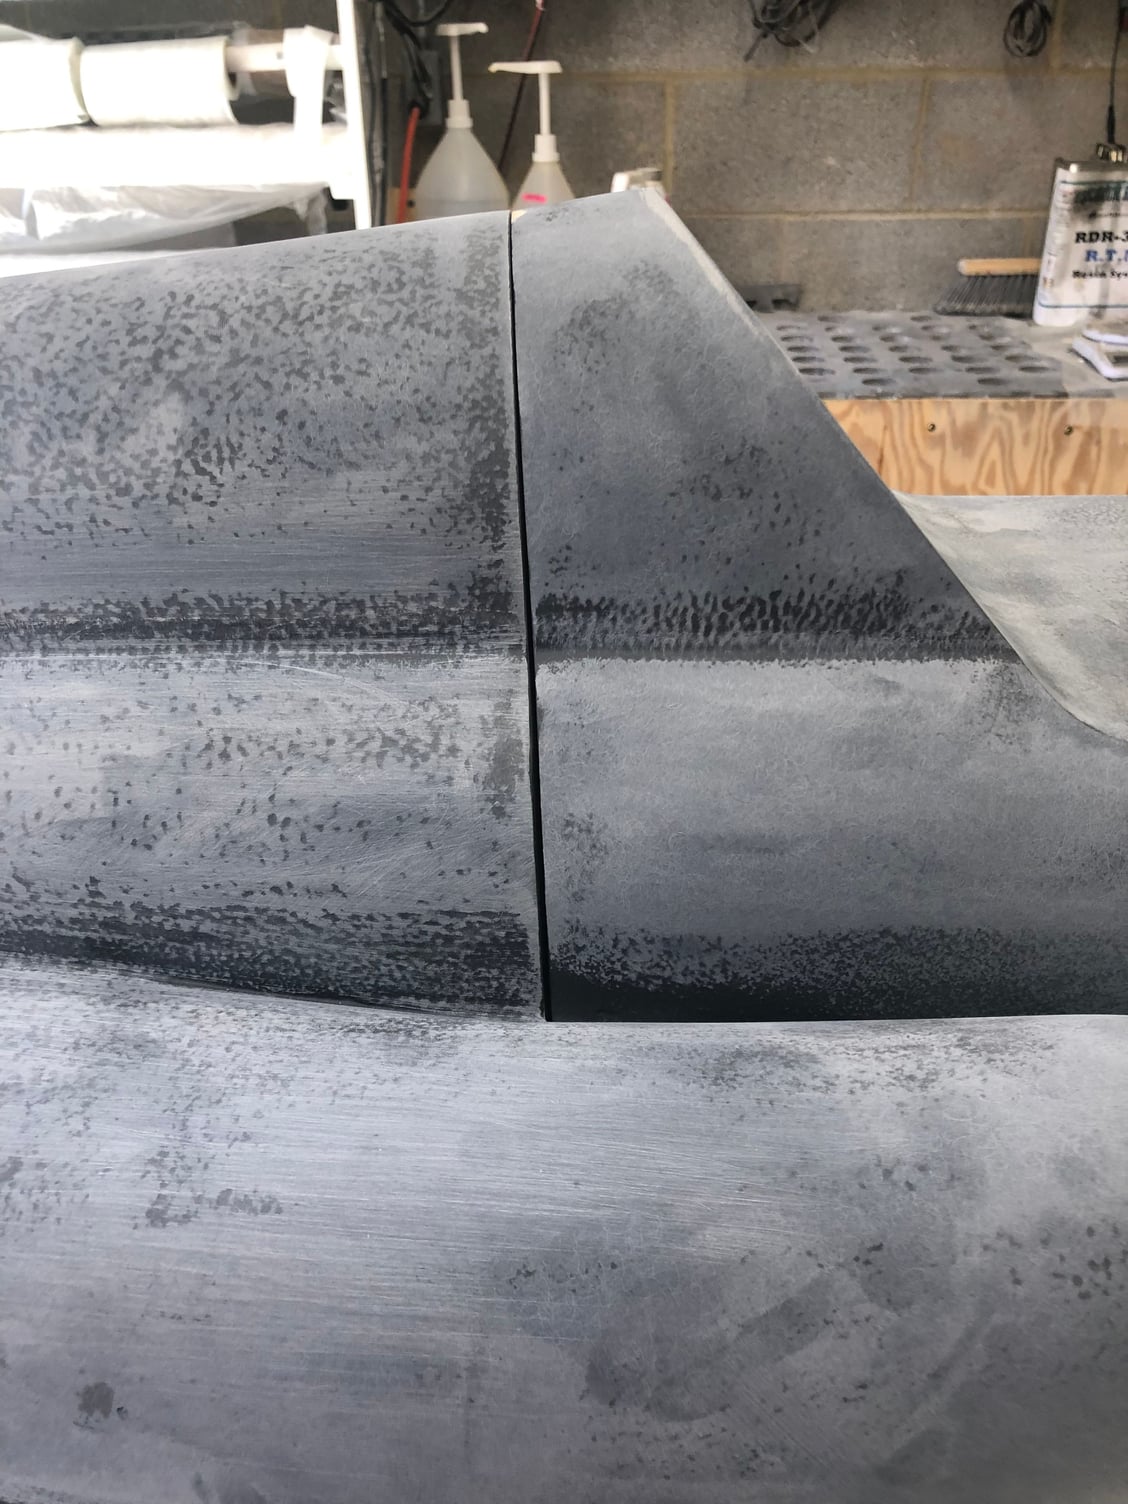
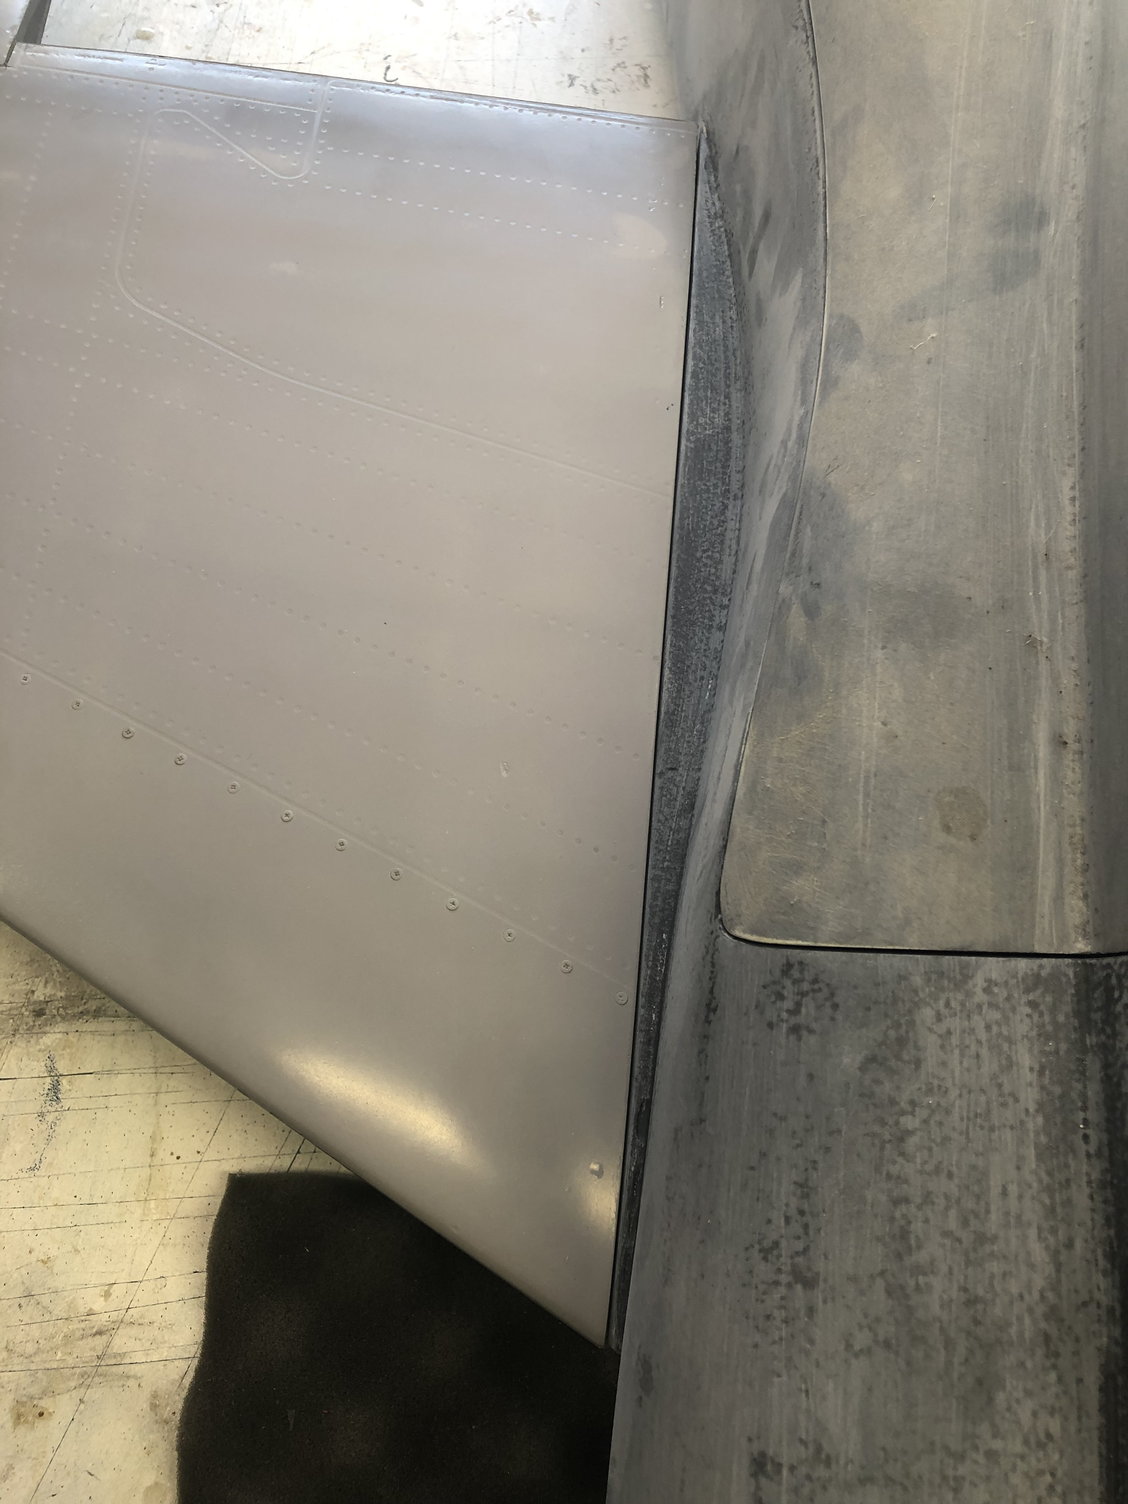
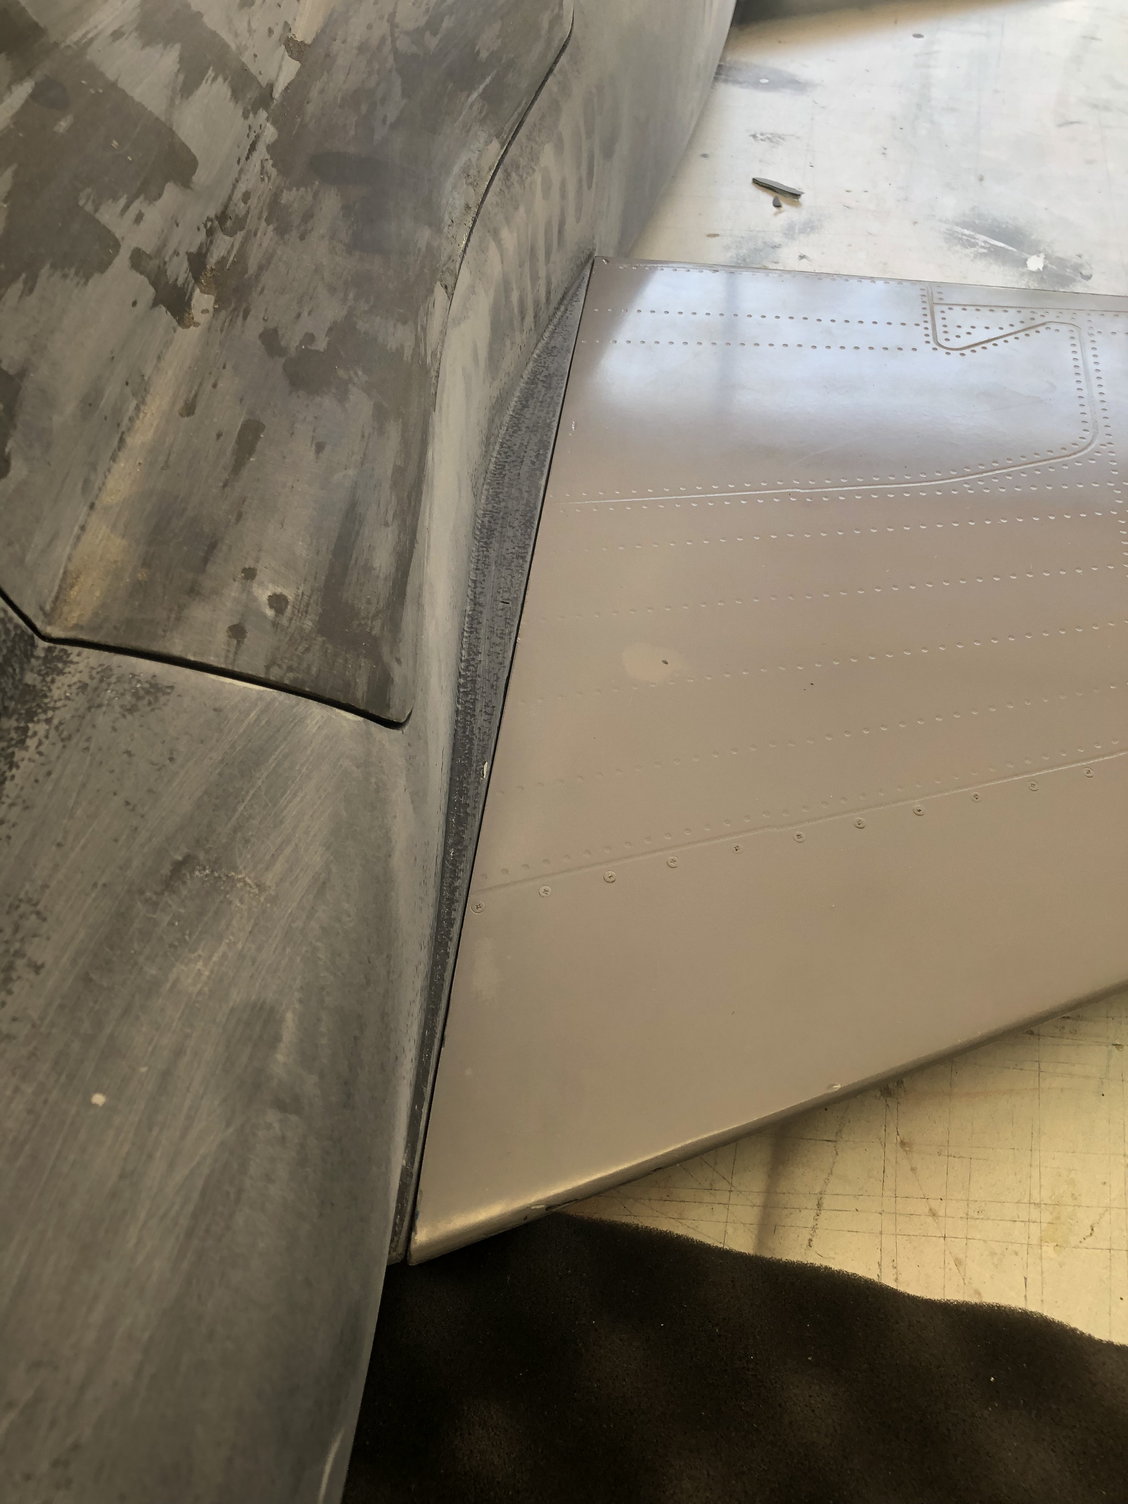
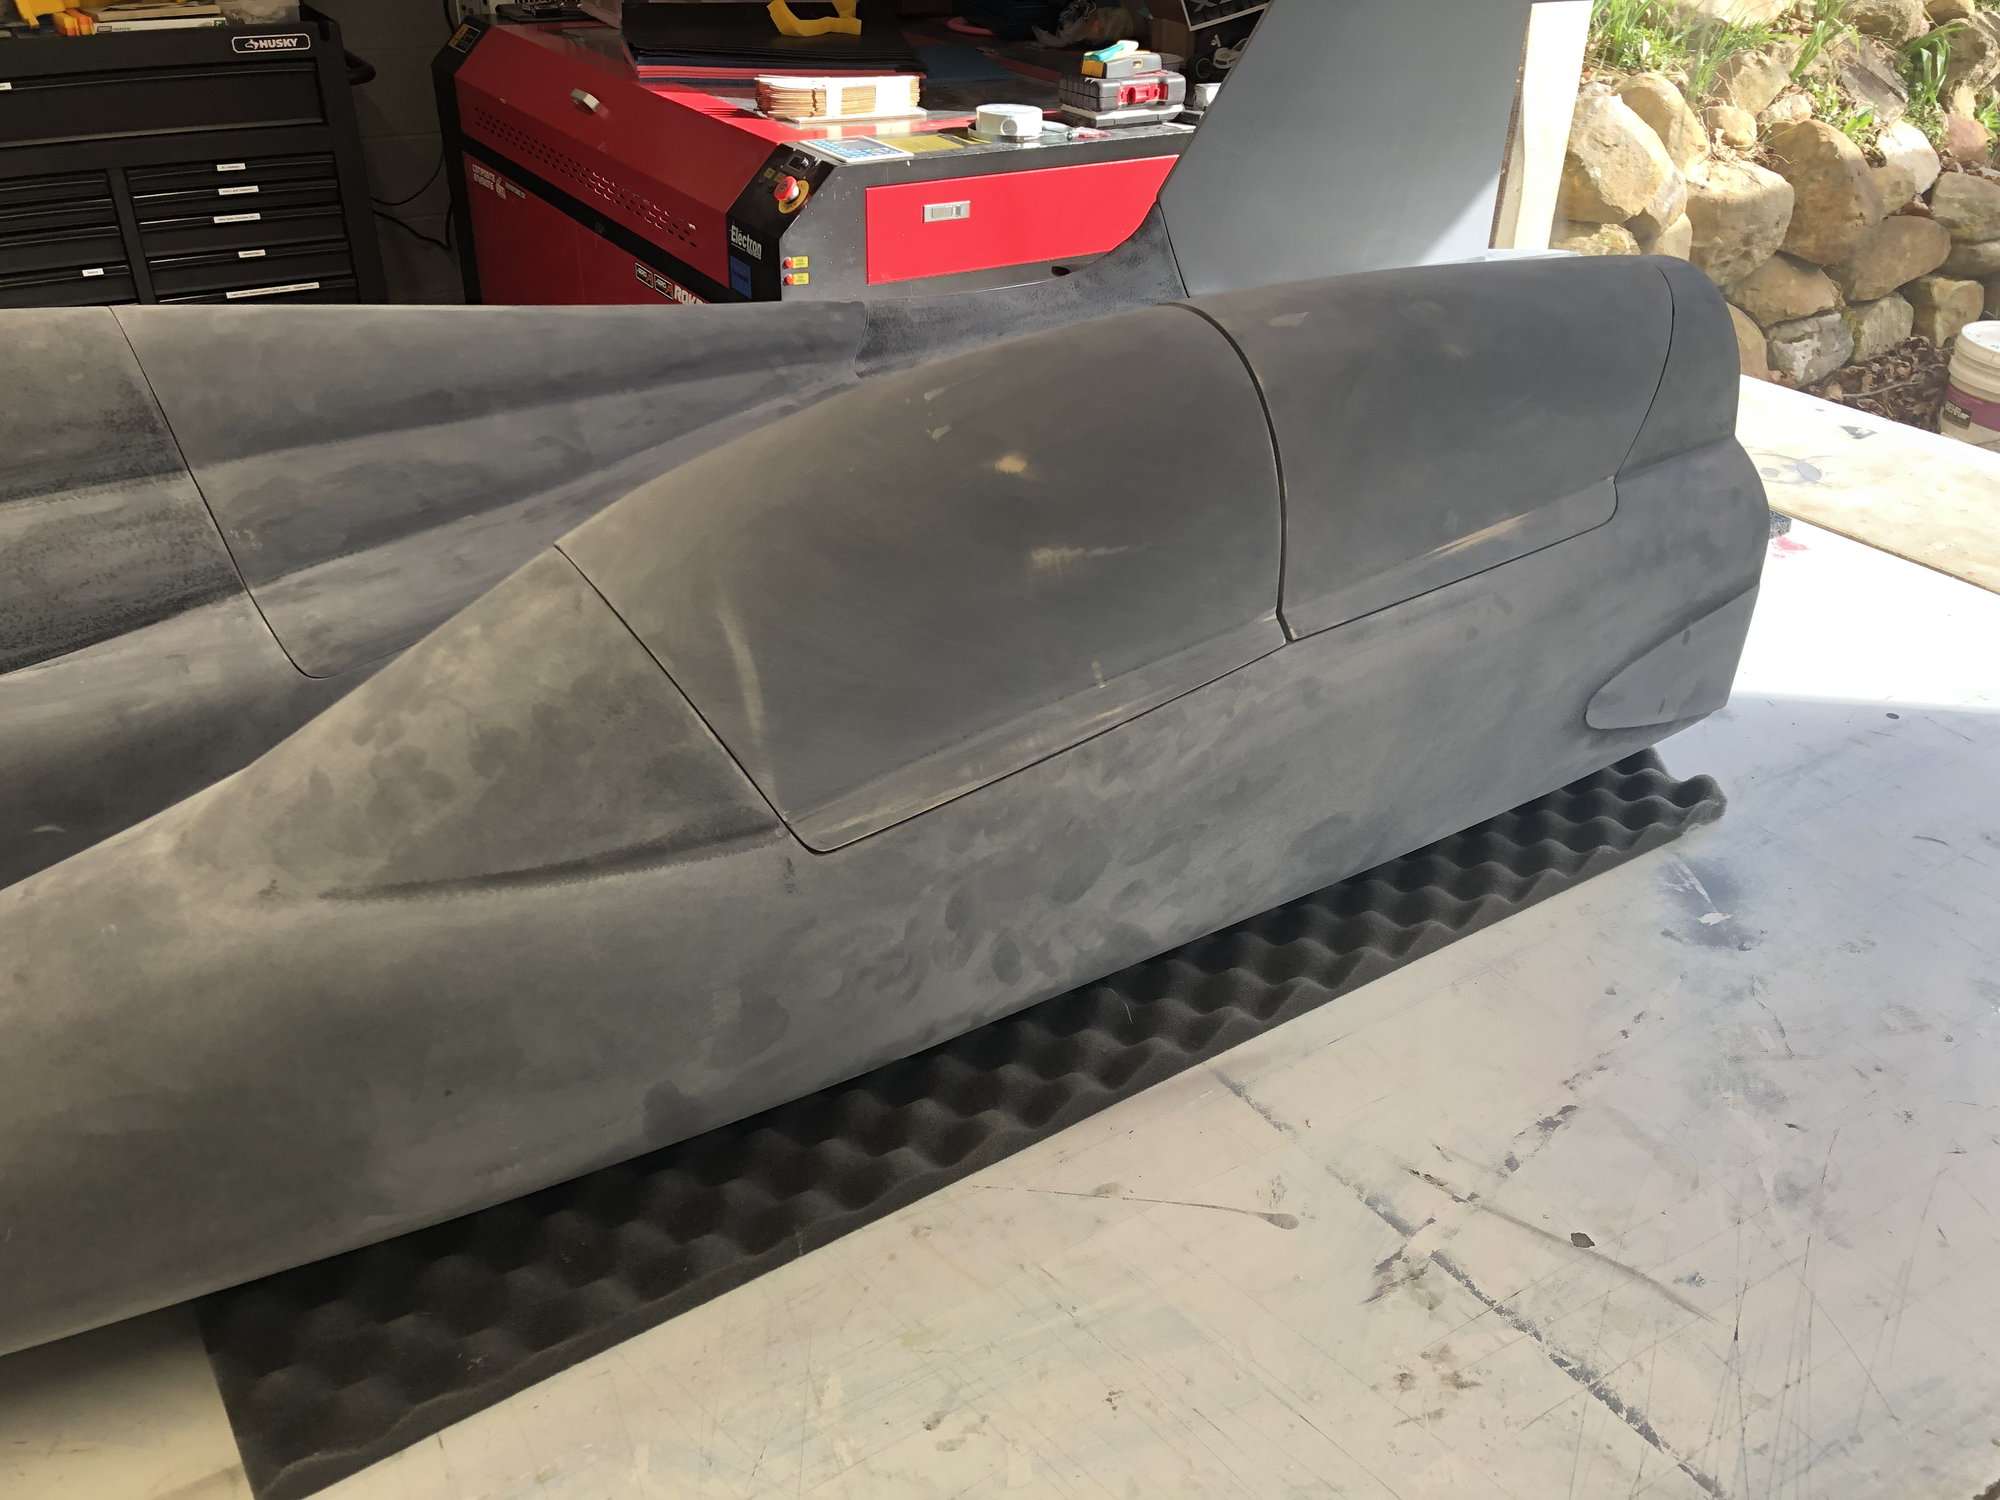
Alrighty, here�s another photo dump. Not a whole lot of progress outside of more sanding. I did realize the nose around the windscreen has some chipmunk cheeks. Here i am thinking i was done with all the substantial body work. 
 I�ll draw up and 3D print some correction pieces to add to the plug since tge windscreen needs the weird fairing thing infront it added anyways. It�ll be quicker and more symetric this way..
The canopy frame plugs are done being sanded, so i can so the detail and mold those two items. The fuselage will then get worked (if it needs it) to perfect the fit of those pieces. I�ll also get what little work needs done around the fuselage seam done so that is a nice fit. Then its detail time!

The canopy frame plugs are done being sanded, so i can so the detail and mold those two items. The fuselage will then get worked (if it needs it) to perfect the fit of those pieces. I�ll also get what little work needs done around the fuselage seam done so that is a nice fit. Then its detail time!
04-12-2022, 04:43 PM
#200
Glad you're back onto it!  When I did my project, I'm not sure why I never thought of FDM printing some of the parting planes... Good idea!
I did print out some 90 degree brackets to HOLD the parting planes to the plug, but not larger contoured pieces like you did...
When I did my project, I'm not sure why I never thought of FDM printing some of the parting planes... Good idea!I did print out some 90 degree brackets to HOLD the parting planes to the plug, but not larger contoured pieces like you did...