BajaHobby L39


 03-28-2020, 07:37 AM
#54
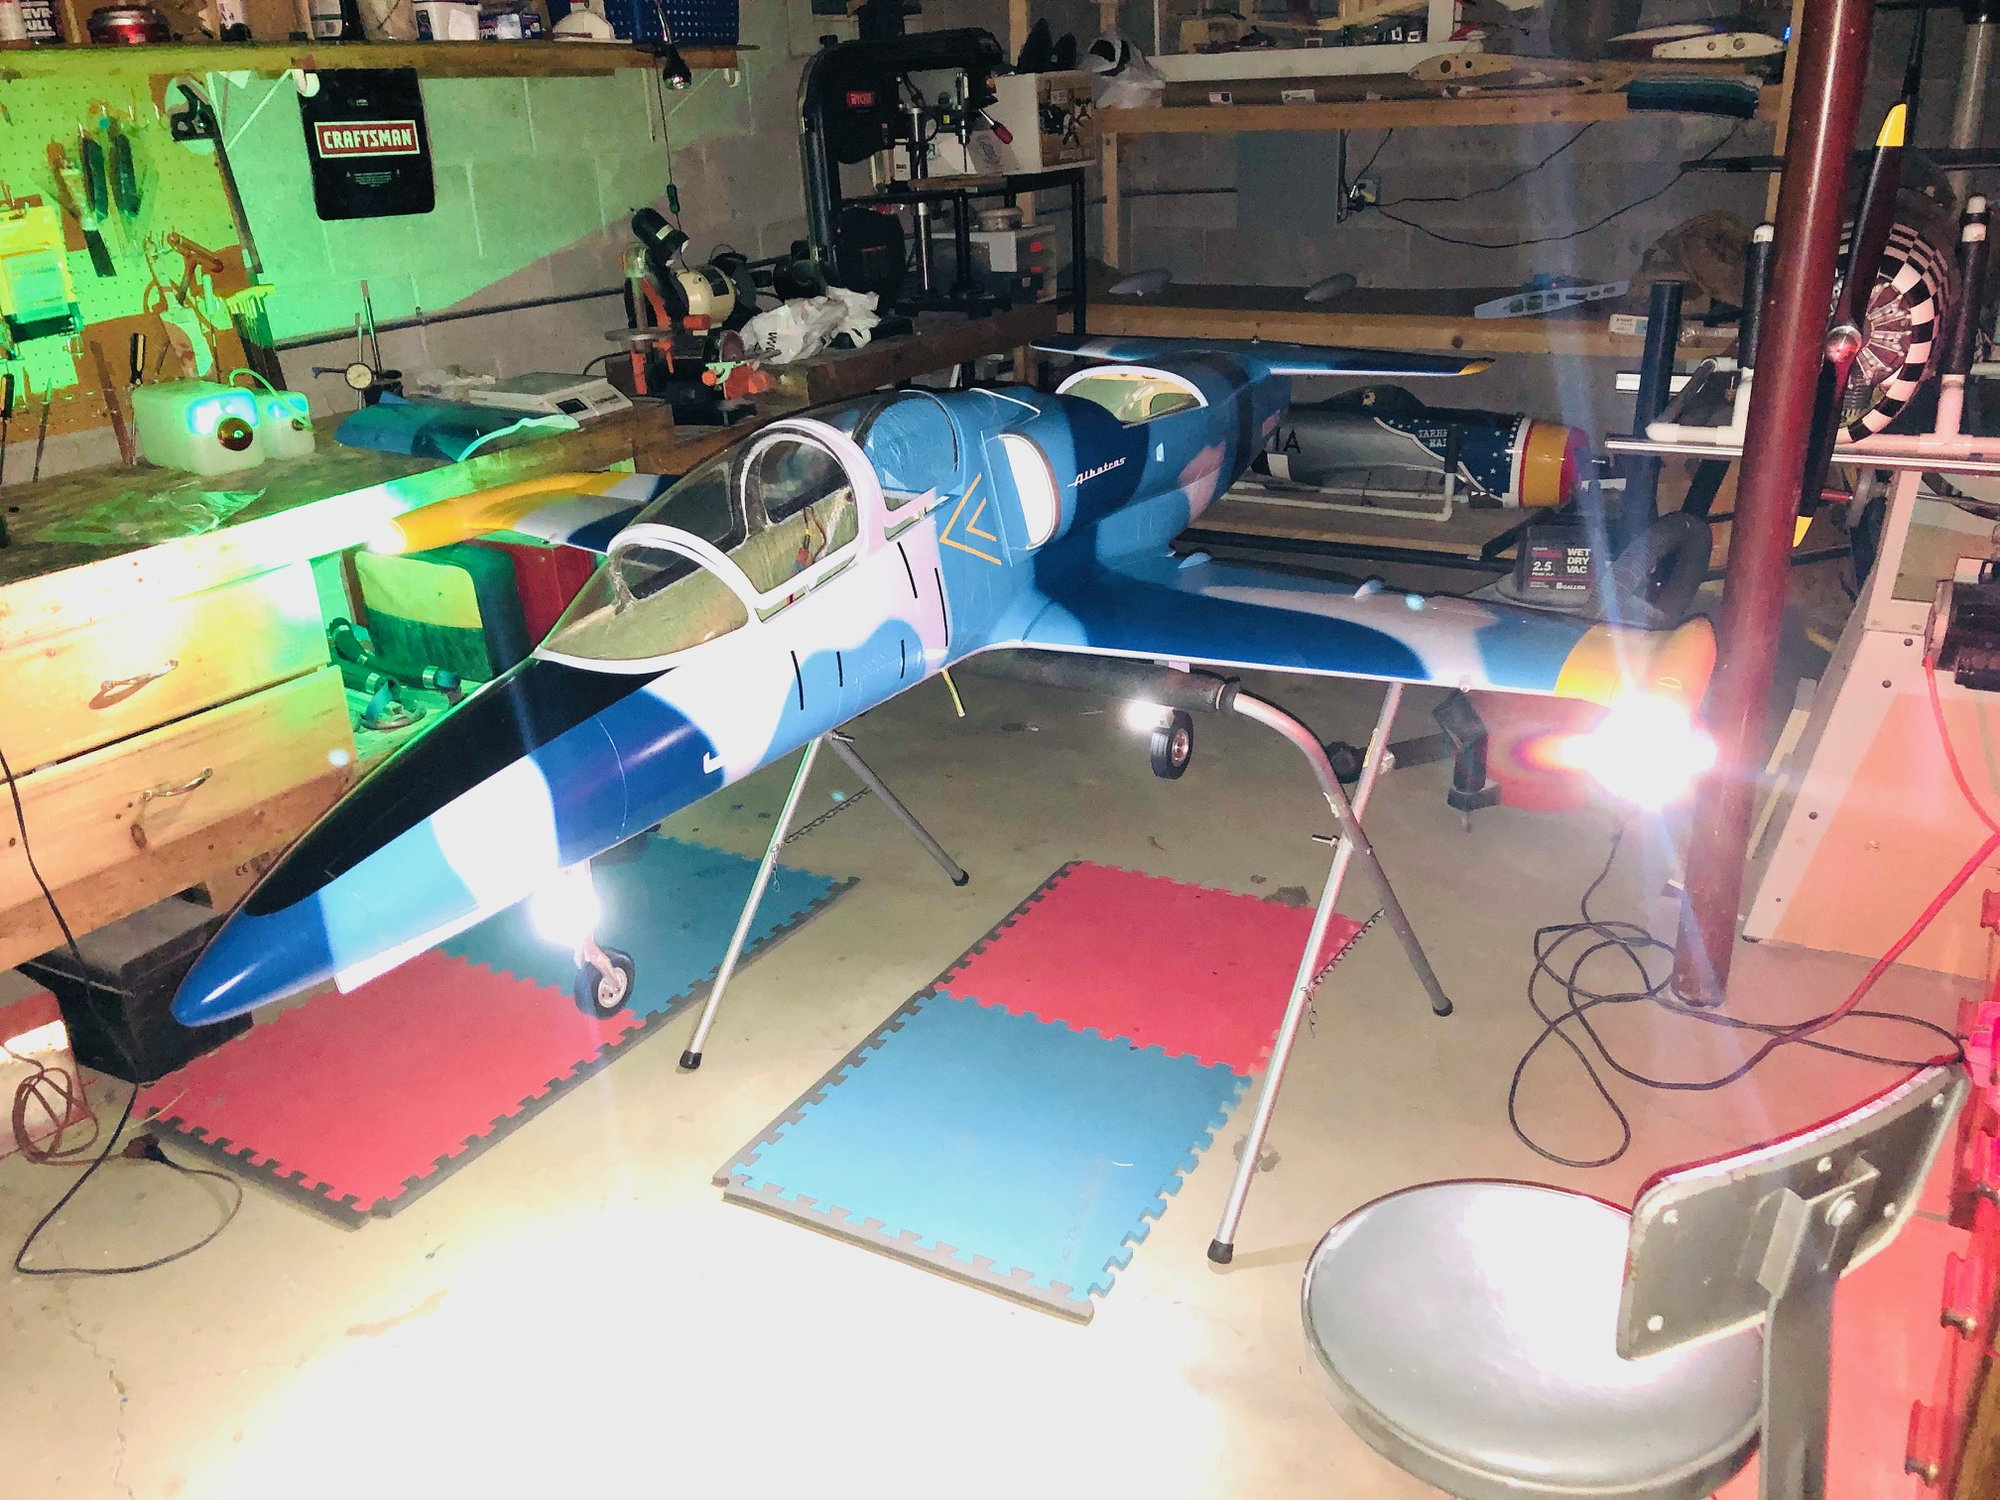
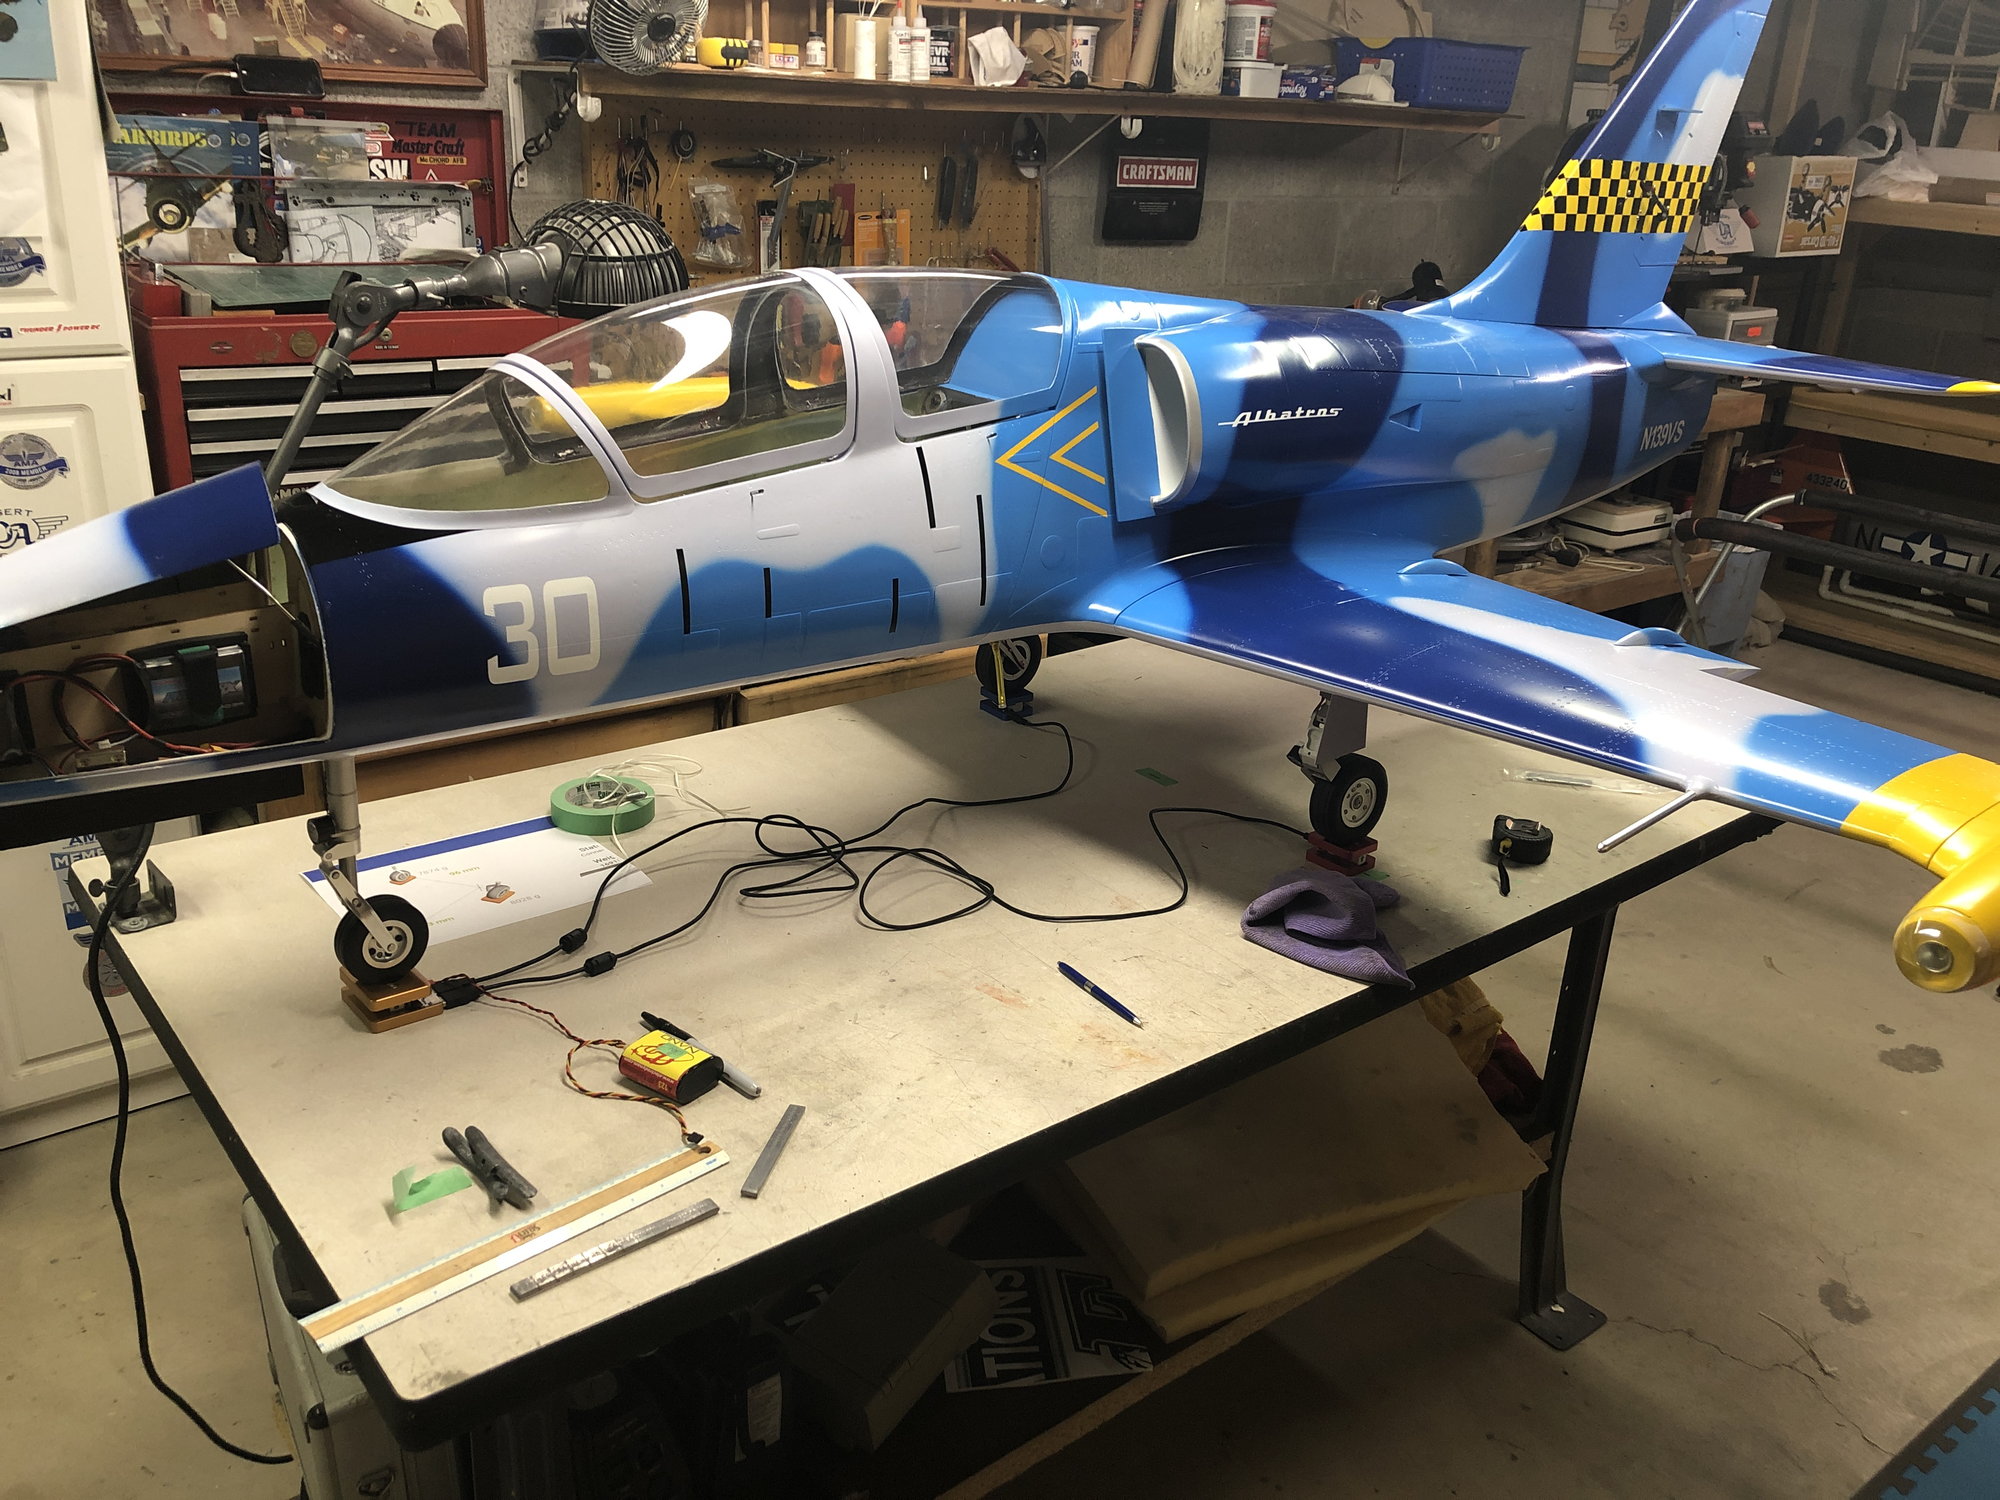
Here's an update to my progress.
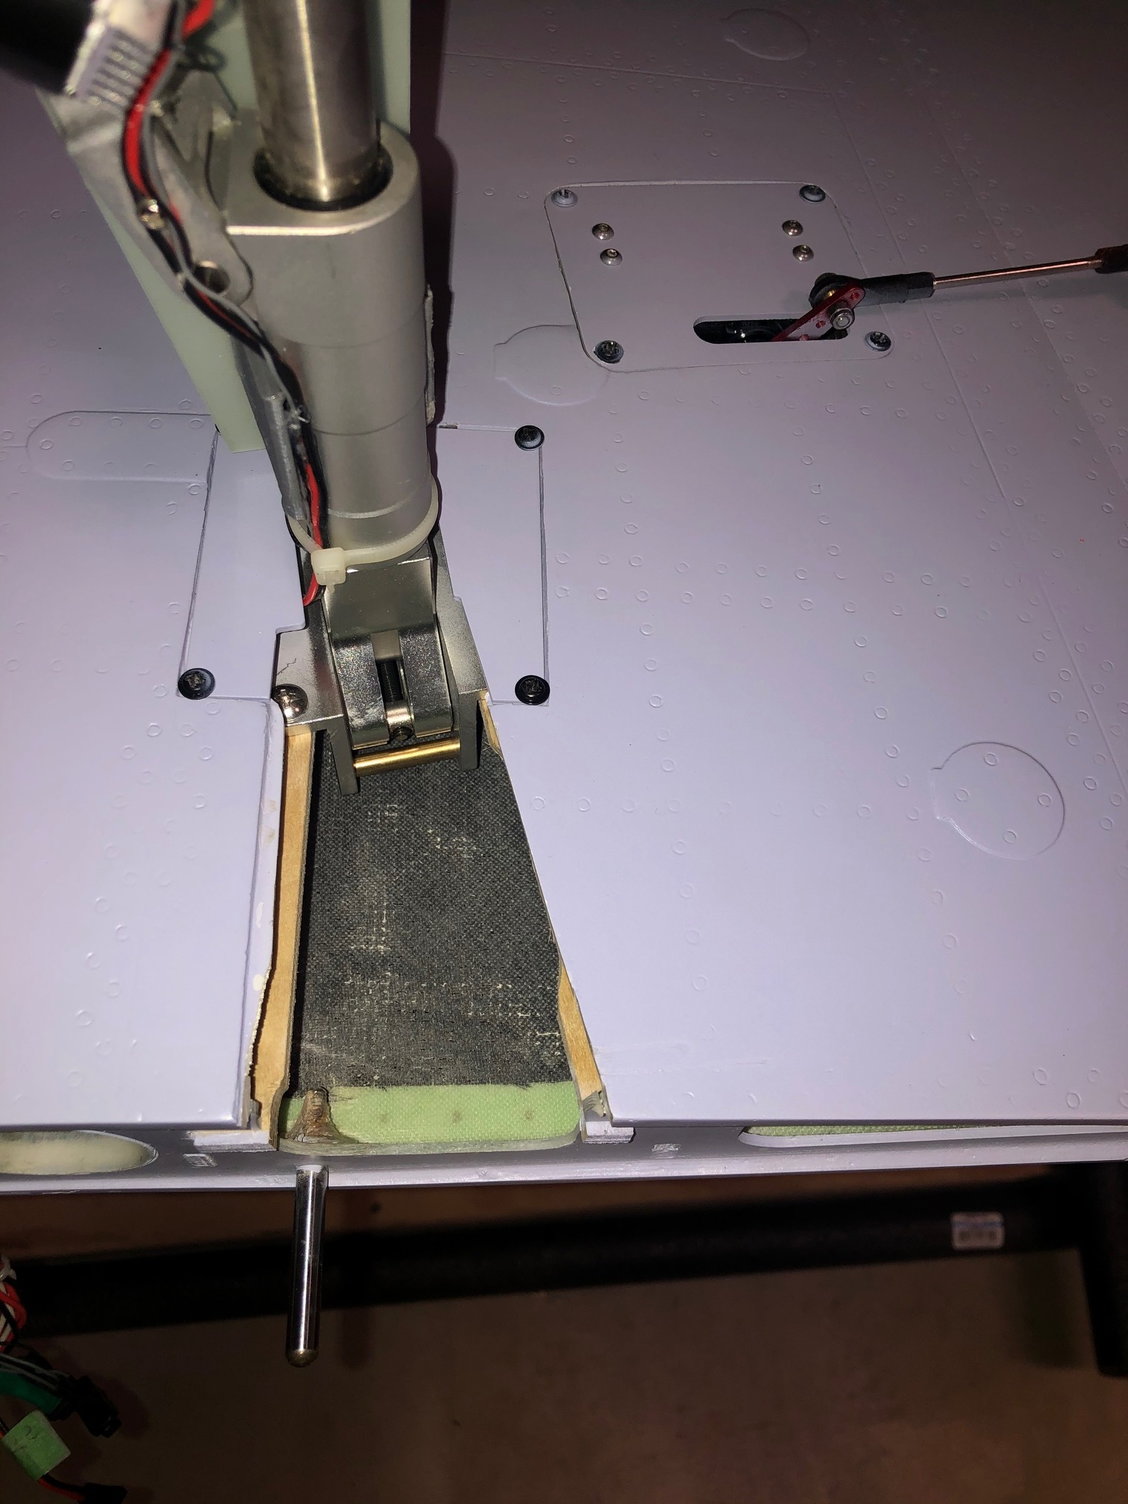
I have the MKS servos installed. For those that are familiar with them you'll know that they are a little larger than a standard servo, so I had to use the dremel to remove a little bit of material from the wing servo plate mount to accommodate, no big deal.
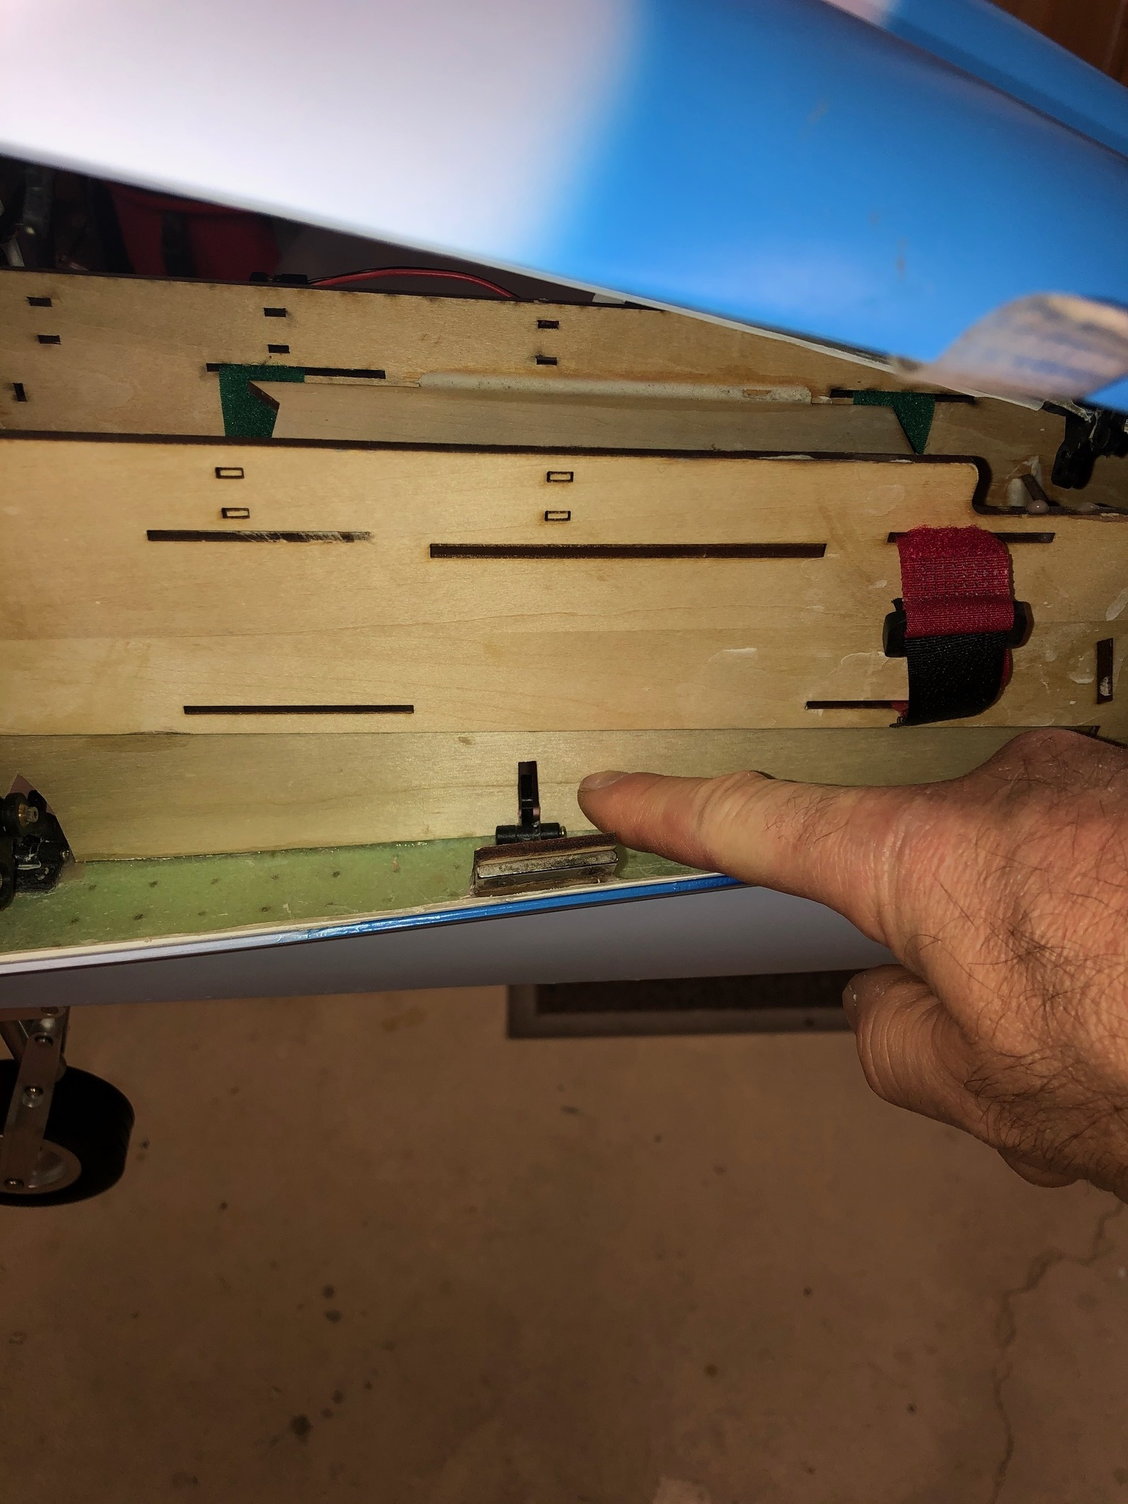
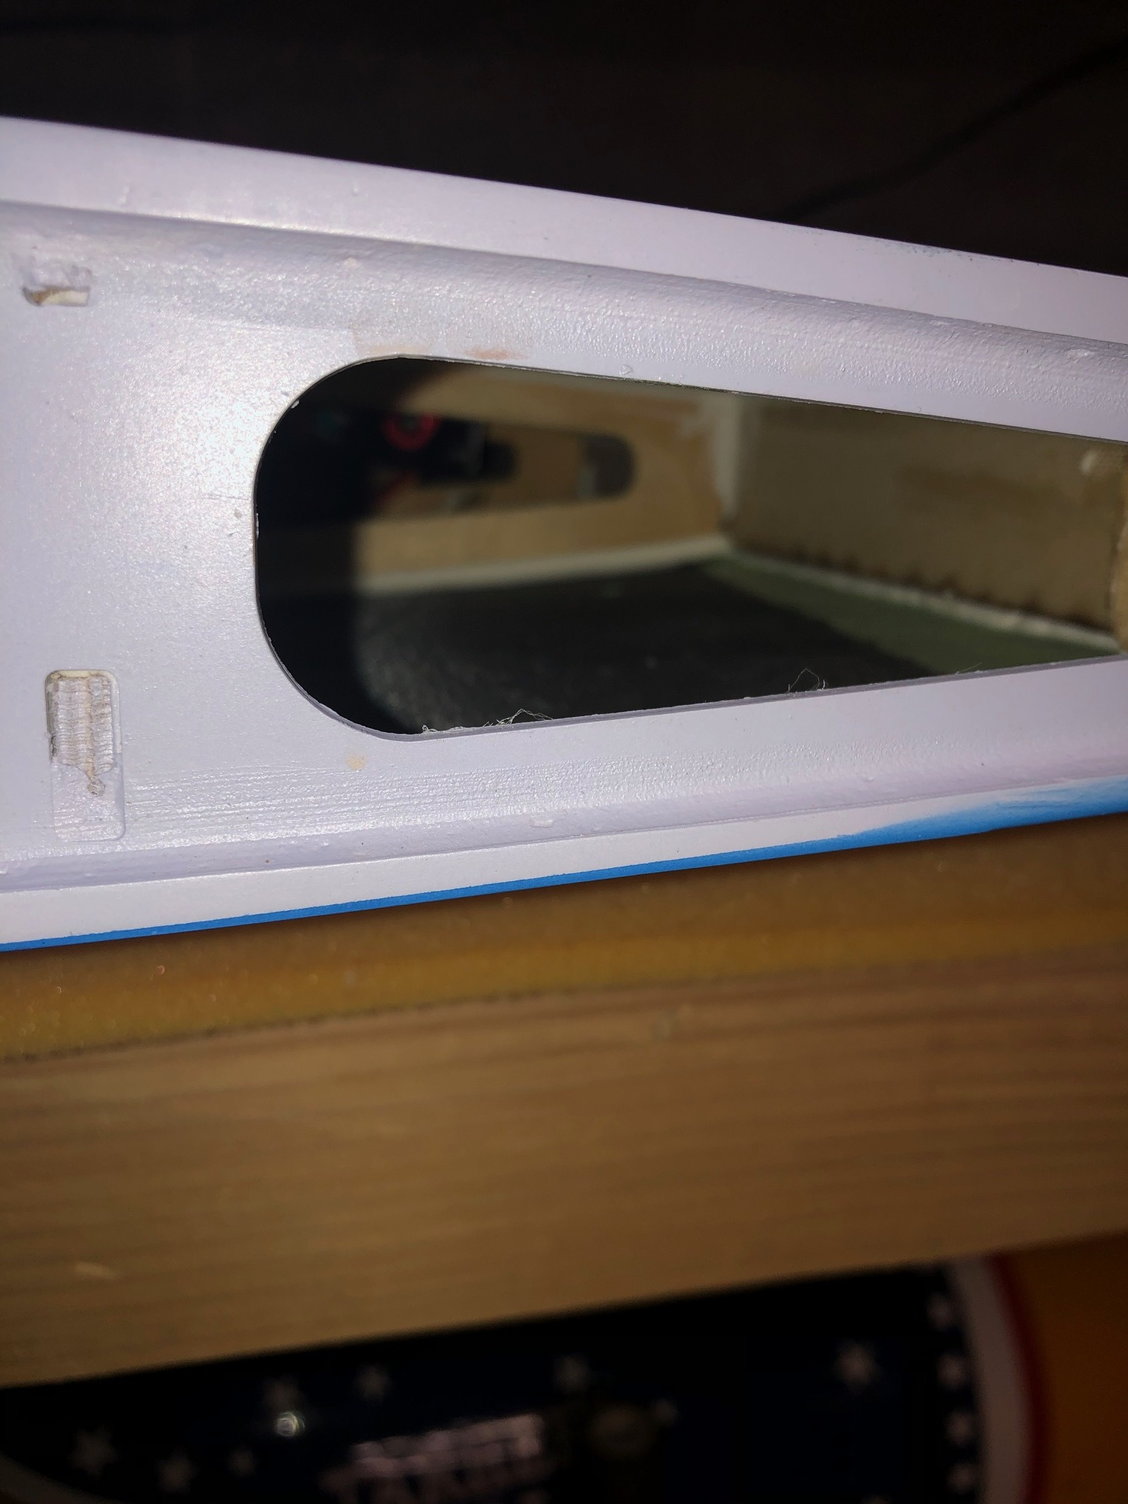
When I was putting the servos in I adjusted the routing of the wires in the wing. Factory has the flap/aileron wires running through the wheel well area, there's a channel and access to the flap/aileron servos from the leading edge so I moved the wires there.
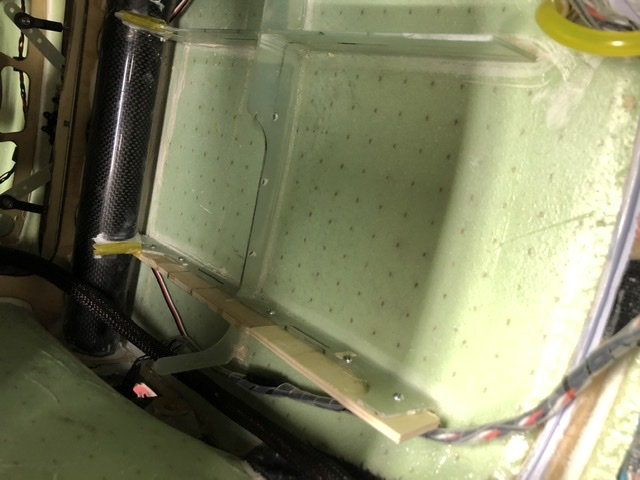
I noted the ample use of carbon fiber as part of the wing build process in both the inside of the wing surface skin and on the spar, nice stuff!
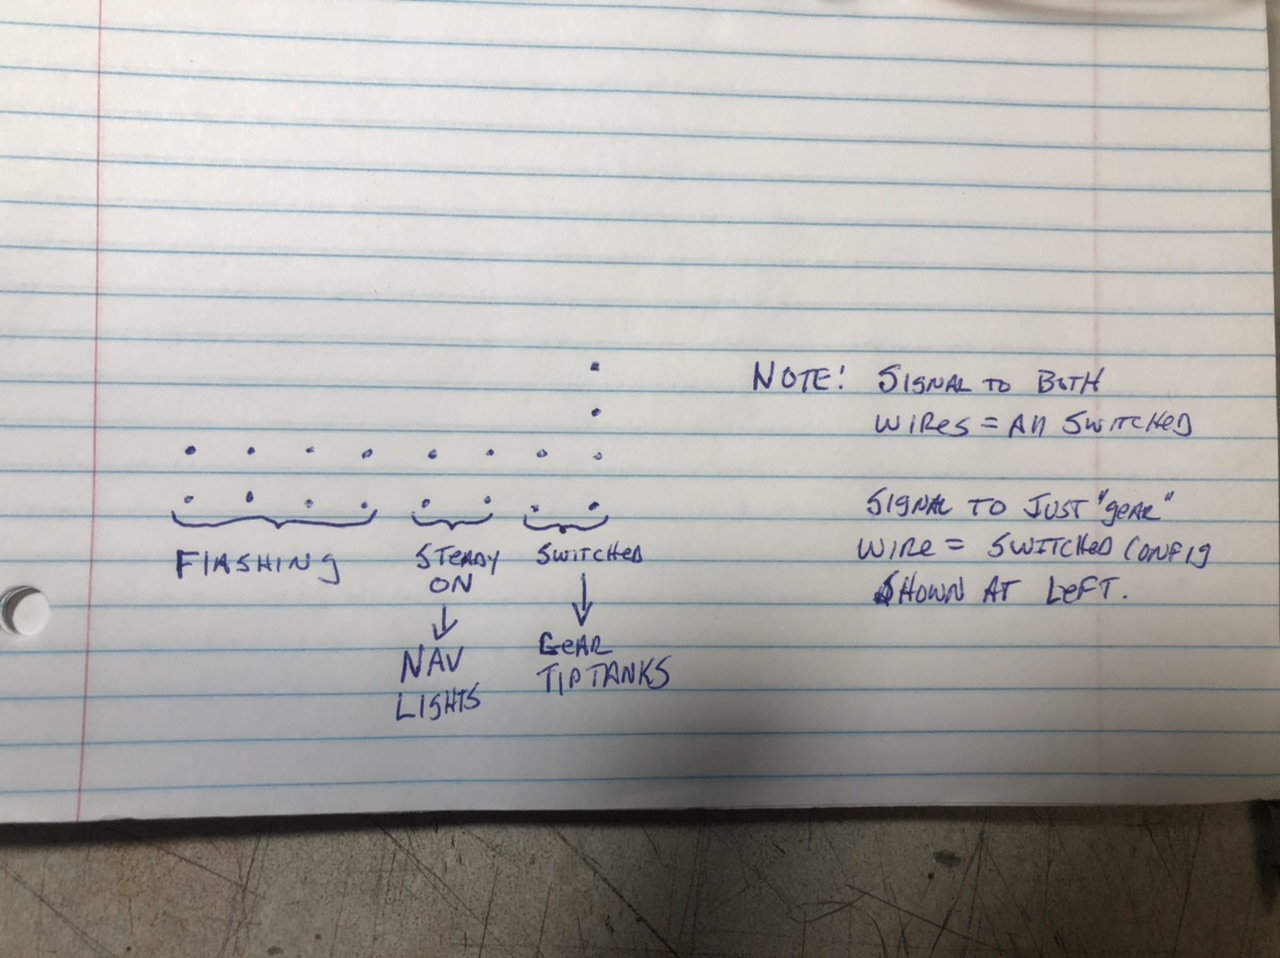
I got the lights working how I want them. Red/Green nav lights on steady. Landing lights on a switch, both the gear and tip tank lights on/off together. The light controller only has three switched outputs for the lights so I ended up soldering a couple together to get he desired result. Worked out well.
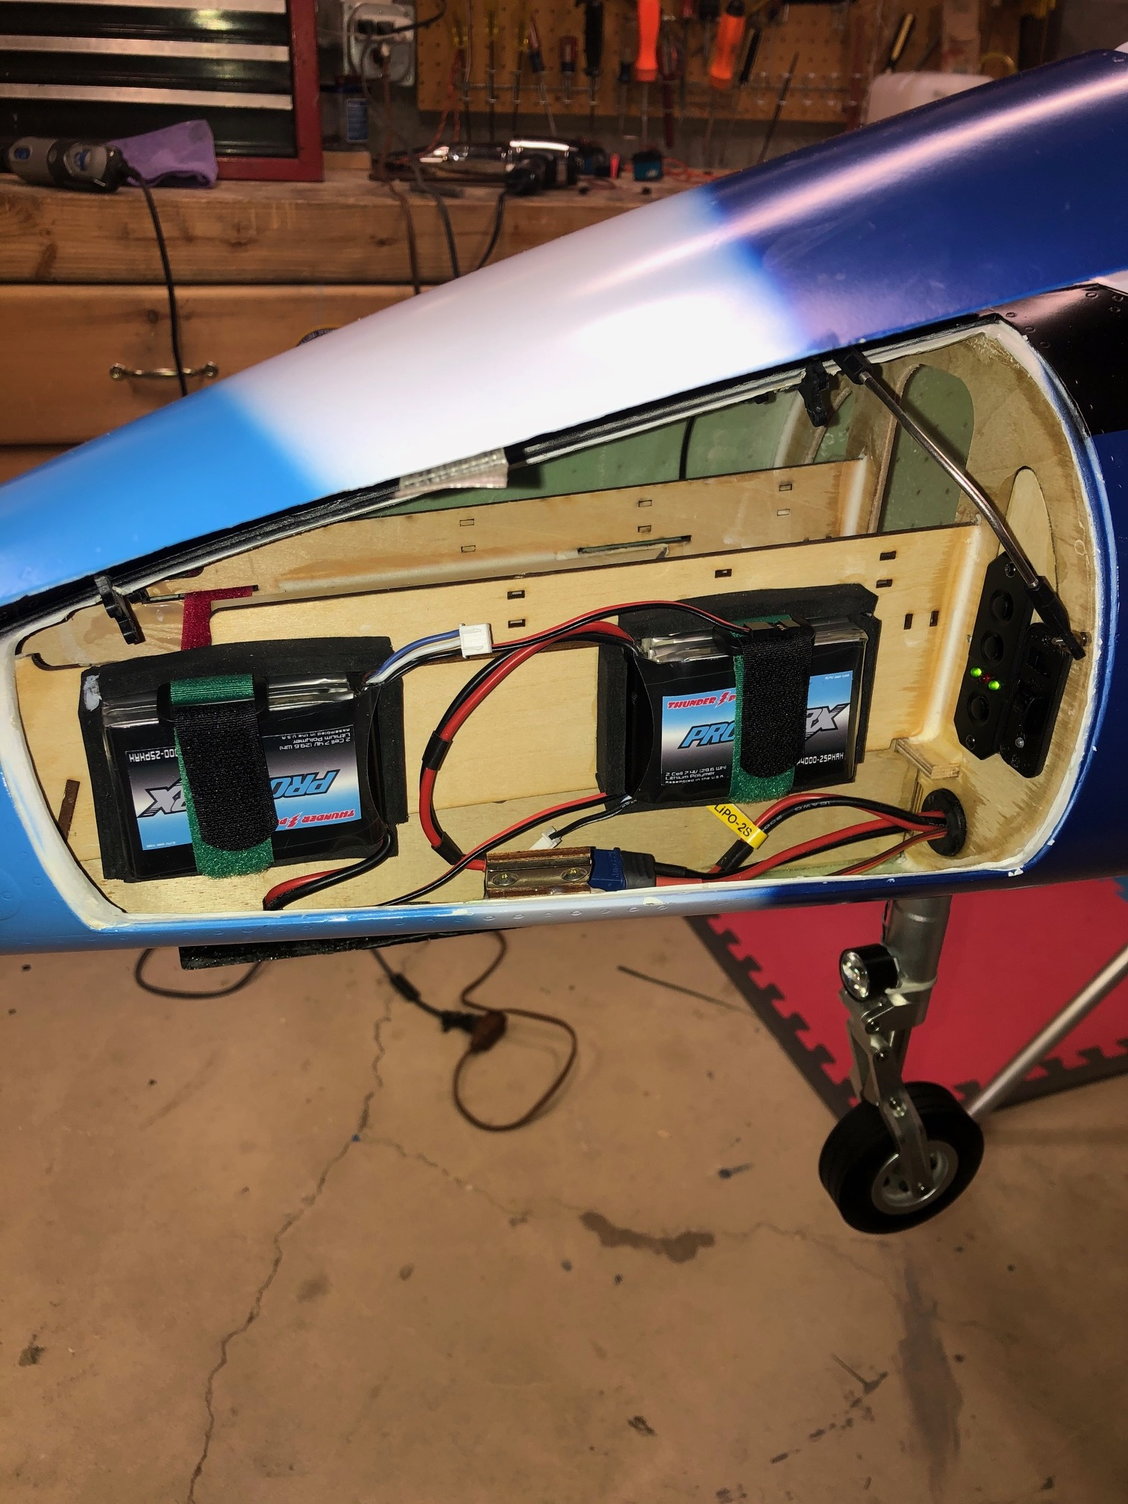
I installed some 1/32 ply in the nose wheel area where it was open to the extend/retract action of the nose gear. The batteries/wires are in there and I didn't want to take any chances for those items to get mixed up with the gear moving.
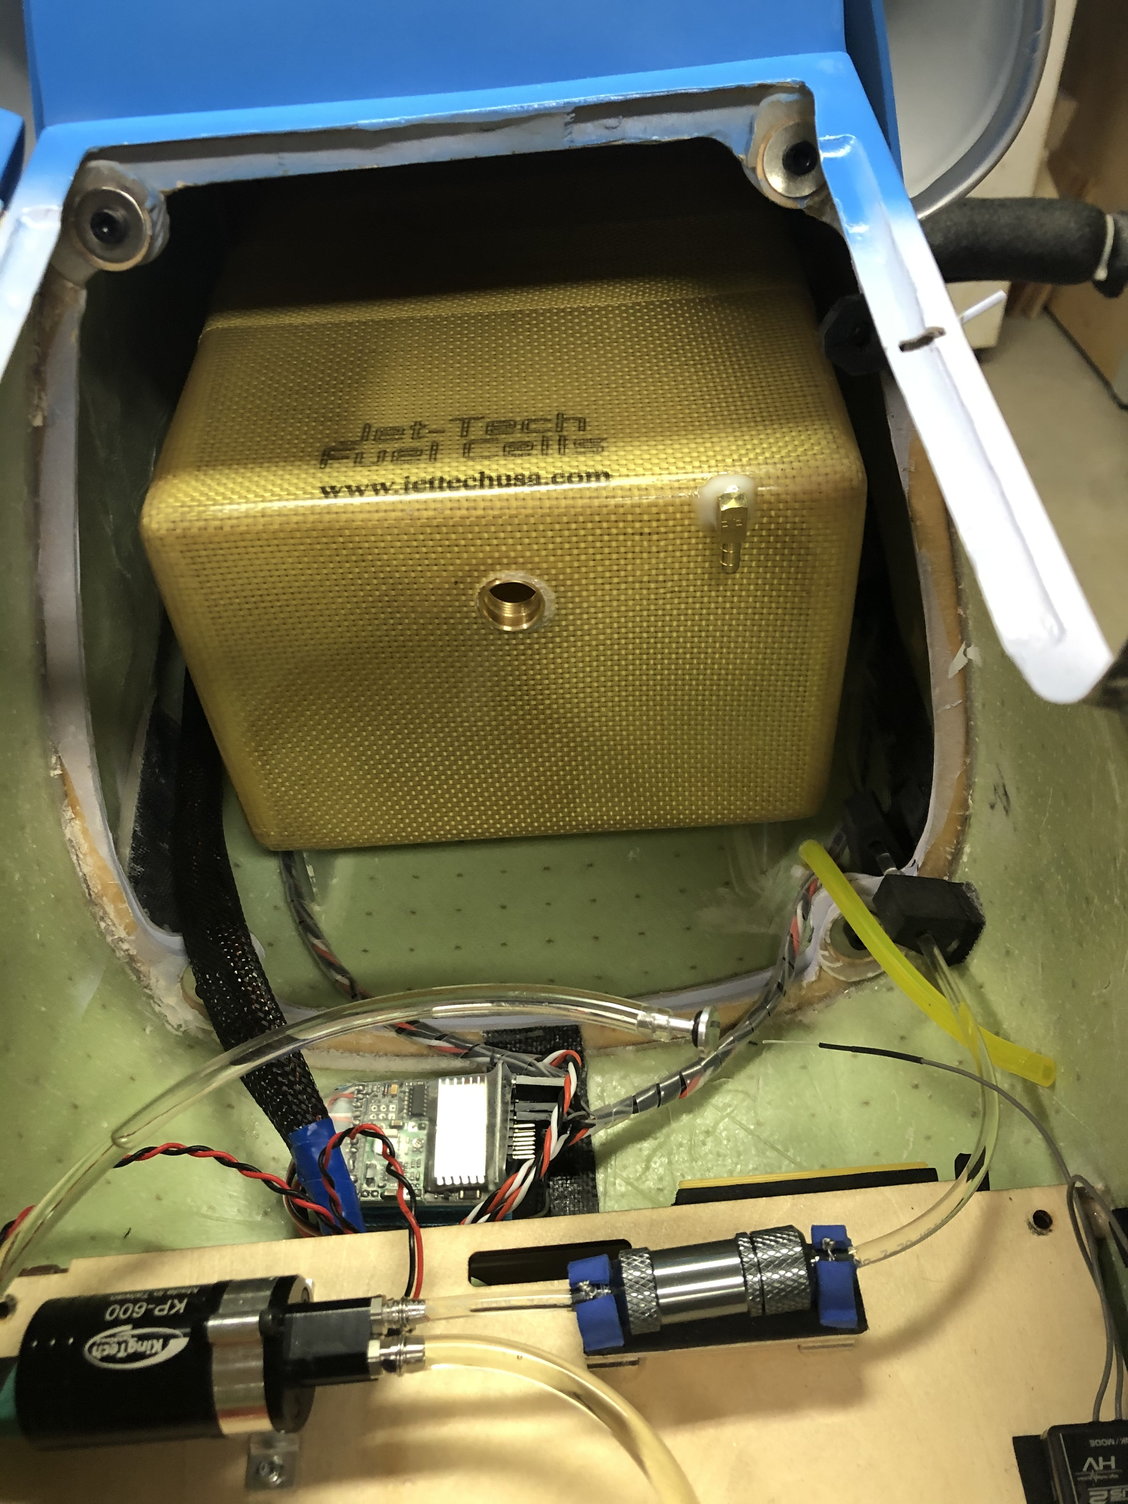
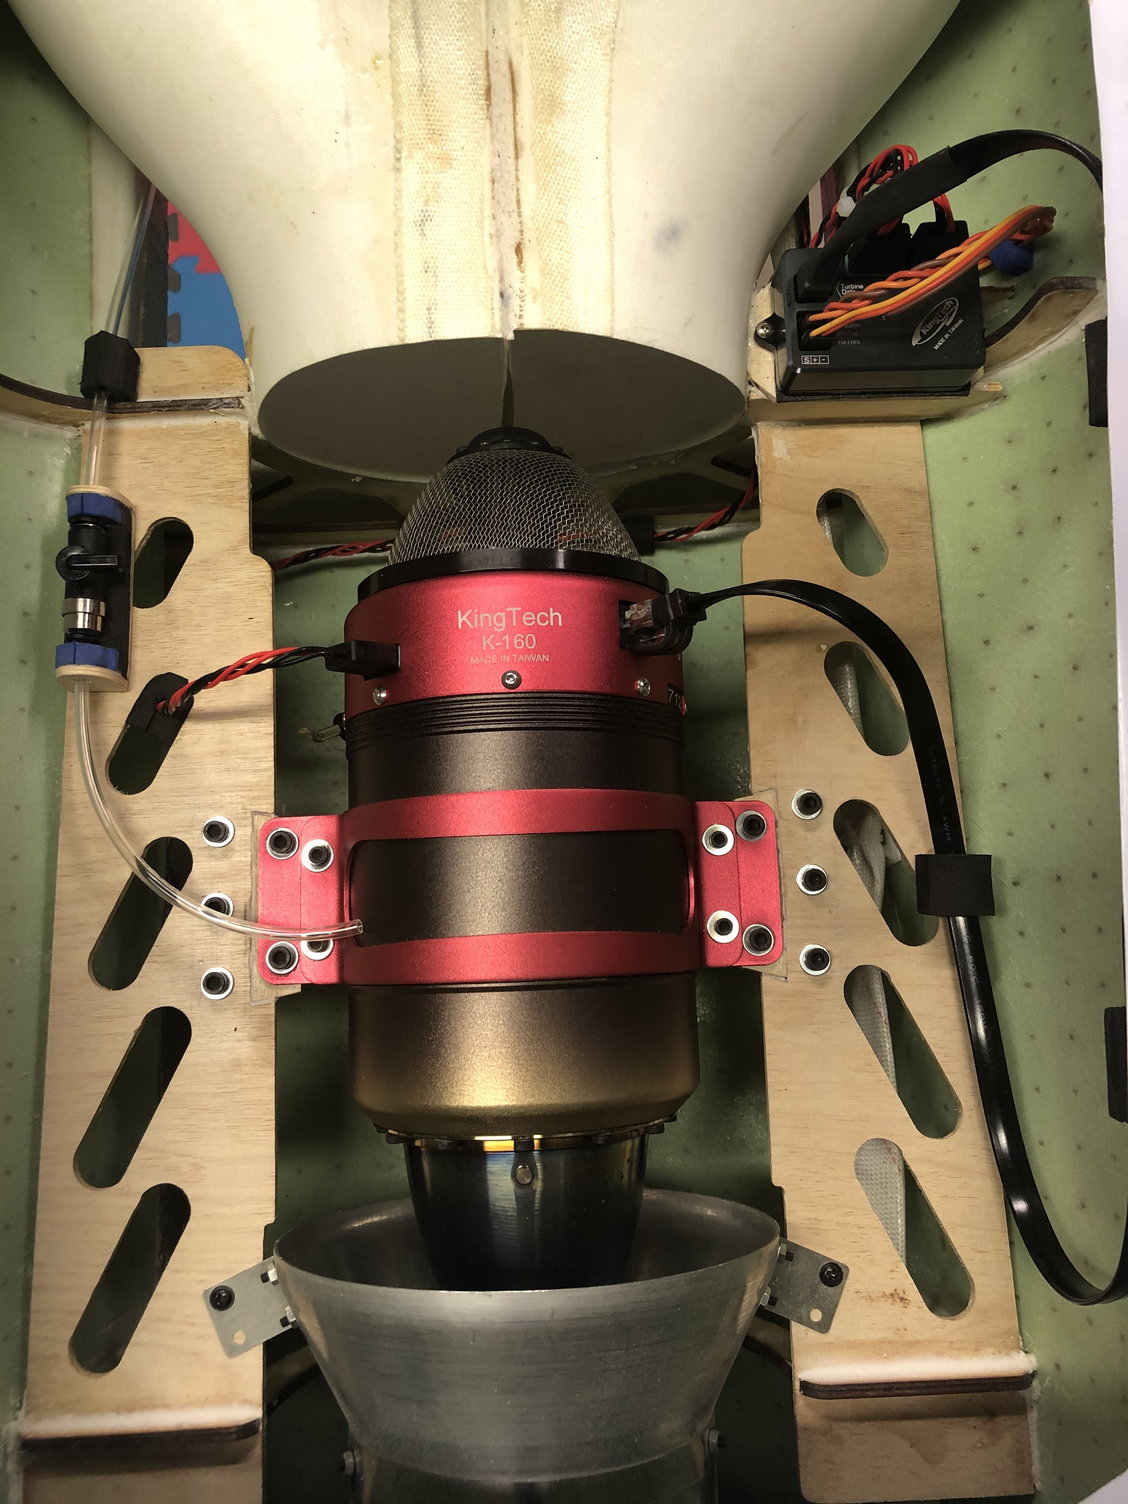
I was able to get a hold of Kingtech this week, the K160 is on it's way.
I started to program the Powerbox Mercury SRS. It's a very nice intuitive system, easy to use and program with some powerful features. They have some nice video tutorials on their web page which are very helpful.
I decided to use the second switch to power the gear, brake and light controller direct from the batteries.
Two 4000mah Thunder power Lipos installed in the left battery bay, with the switches, turbine pack will go on the right side.
Here's a few photos.
I have the MKS servos installed. For those that are familiar with them you'll know that they are a little larger than a standard servo, so I had to use the dremel to remove a little bit of material from the wing servo plate mount to accommodate, no big deal.
When I was putting the servos in I adjusted the routing of the wires in the wing. Factory has the flap/aileron wires running through the wheel well area, there's a channel and access to the flap/aileron servos from the leading edge so I moved the wires there.
I noted the ample use of carbon fiber as part of the wing build process in both the inside of the wing surface skin and on the spar, nice stuff!
I got the lights working how I want them. Red/Green nav lights on steady. Landing lights on a switch, both the gear and tip tank lights on/off together. The light controller only has three switched outputs for the lights so I ended up soldering a couple together to get he desired result. Worked out well.
I installed some 1/32 ply in the nose wheel area where it was open to the extend/retract action of the nose gear. The batteries/wires are in there and I didn't want to take any chances for those items to get mixed up with the gear moving.
I was able to get a hold of Kingtech this week, the K160 is on it's way.
I started to program the Powerbox Mercury SRS. It's a very nice intuitive system, easy to use and program with some powerful features. They have some nice video tutorials on their web page which are very helpful.
I decided to use the second switch to power the gear, brake and light controller direct from the batteries.
Two 4000mah Thunder power Lipos installed in the left battery bay, with the switches, turbine pack will go on the right side.
Here's a few photos.
03-28-2020, 07:42 AM
#55
Here's an update to my progress.
I have the MKS servos installed. For those that are familiar with them you'll know that they are a little larger than a standard servo, so I had to use the dremel to remove a little bit of material from the wing servo plate mount to accommodate, no big deal.
When I was putting the servos in I adjusted the routing of the wires in the wing. Factory has the flap/aileron wires running through the wheel well area, there's a channel and access to the flap/aileron servos from the leading edge so I moved the wires there.
I noted the ample use of carbon fiber as part of the wing build process in both the inside of the wing surface skin and on the spar, nice stuff!
I got the lights working how I want them. Red/Green nav lights on steady. Landing lights on a switch, both the gear and tip tank lights on/off together. The light controller only has three switched outputs for the lights so I ended up soldering a couple together to get he desired result. Worked out well.
I installed some 1/32 ply in the nose wheel area where it was open to the extend/retract action of the nose gear. The batteries/wires are in there and I didn't want to take any chances for those items to get mixed up with the gear moving.
I was able to get a hold of Kingtech this week, the K160 is on it's way.
I started to program the Powerbox Mercury SRS. It's a very nice intuitive system, easy to use and program with some powerful features. They have some nice video tutorials on their web page which are very helpful.
I decided to use the second switch to power the gear, brake and light controller direct from the batteries.
Two 4000mah Thunder power Lipos installed in the left battery bay, with the switches, turbine pack will go on the right side.
Here's a few photos.
 03-28-2020, 09:31 AM
#56

Nice work Todd. Those lights look nice and bright. Was if difficult to program the light sequence that you were looking for? Also, did the kit come with a decent UAT?
thanks,
Tone
thanks,
Tone
03-28-2020, 10:48 AM
#57
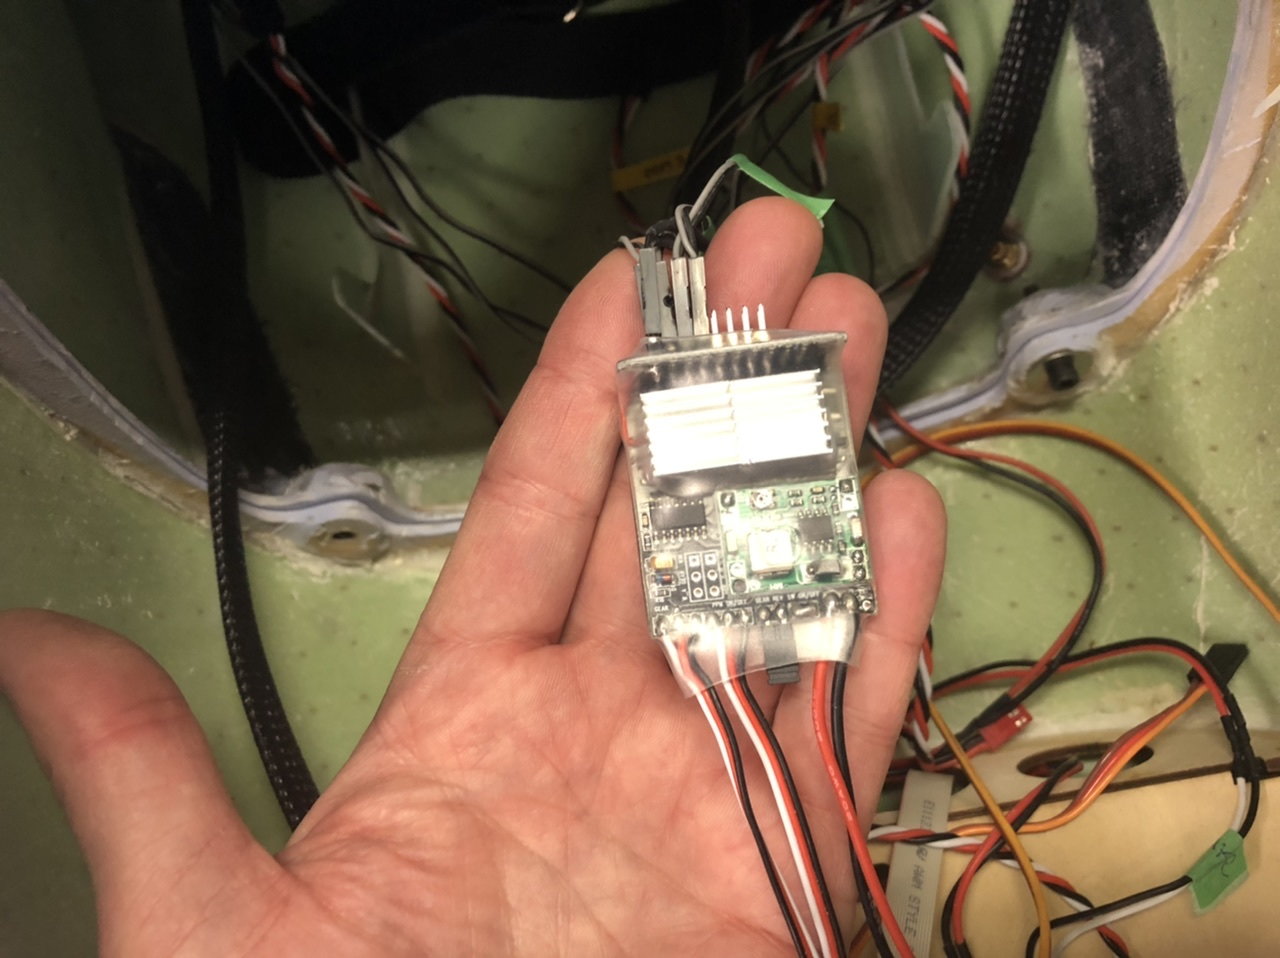
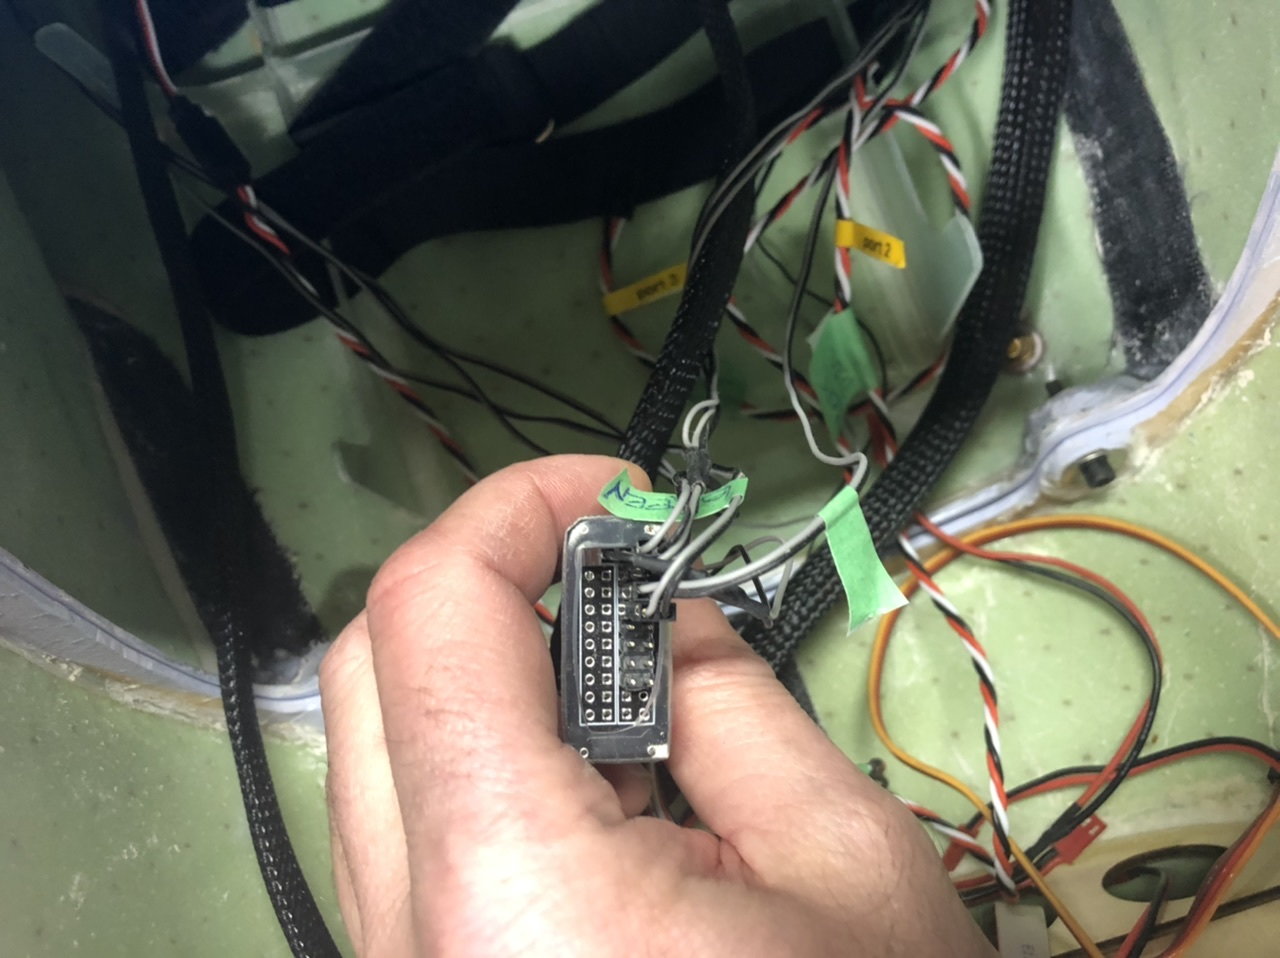
Well, once I figured out how the supplied controller works it was pretty easy. There�s two control wires that go to the receiver from the controller. It you use both then all the outputs are switched. I used just the one marked �gear� and power the controller from the supplied connector. The controller has three outputs that are switched. I �y� or actually soldered the tank tip light and main gear light for each wing together and plugged to the controller. . The nose gear light has the third output plug. The two nav lights are on steady and have the own outlets at the controller. The rest of the outlets at the controller flash the lights. lol use one of those for the light I plan to add to the tip of the vertical stab. Here�s a a few pics of the controller. First photo shows the output pins on the controller.
 03-29-2020, 07:02 AM
#59
Another note, I intended to use the servo arms that came with the plane on the MKS servos I put in, that didn't work out so I ordered replacement arms from SWB right here in West Bend WI. If you're familiar with SWB you know that his servo arms are the best. I learned that he is retiring and may or may not find a buyer for his business, so if you're thinking about getting SWB arms for an upcoming project, don't wait too long!.
03-29-2020, 09:56 AM
#60
Another note, I intended to use the servo arms that came with the plane on the MKS servos I put in, that didn't work out so I ordered replacement arms from SWB right here in West Bend WI. If you're familiar with SWB you know that his servo arms are the best. I learned that he is retiring and may or may not find a buyer for his business, so if you're thinking about getting SWB arms for an upcoming project, don't wait too long!.
Thanks,
Tone
03-29-2020, 01:11 PM
#61
Hey Tone,
Well, the arms are on the servos pretty snug and I din't have one of those nifty little servo arm pullers so I had a really hard time wiggling it off. Then it didn't fit onto the new servo very easily and I may have buggered up the splines trying, so I decided to just get new ones.
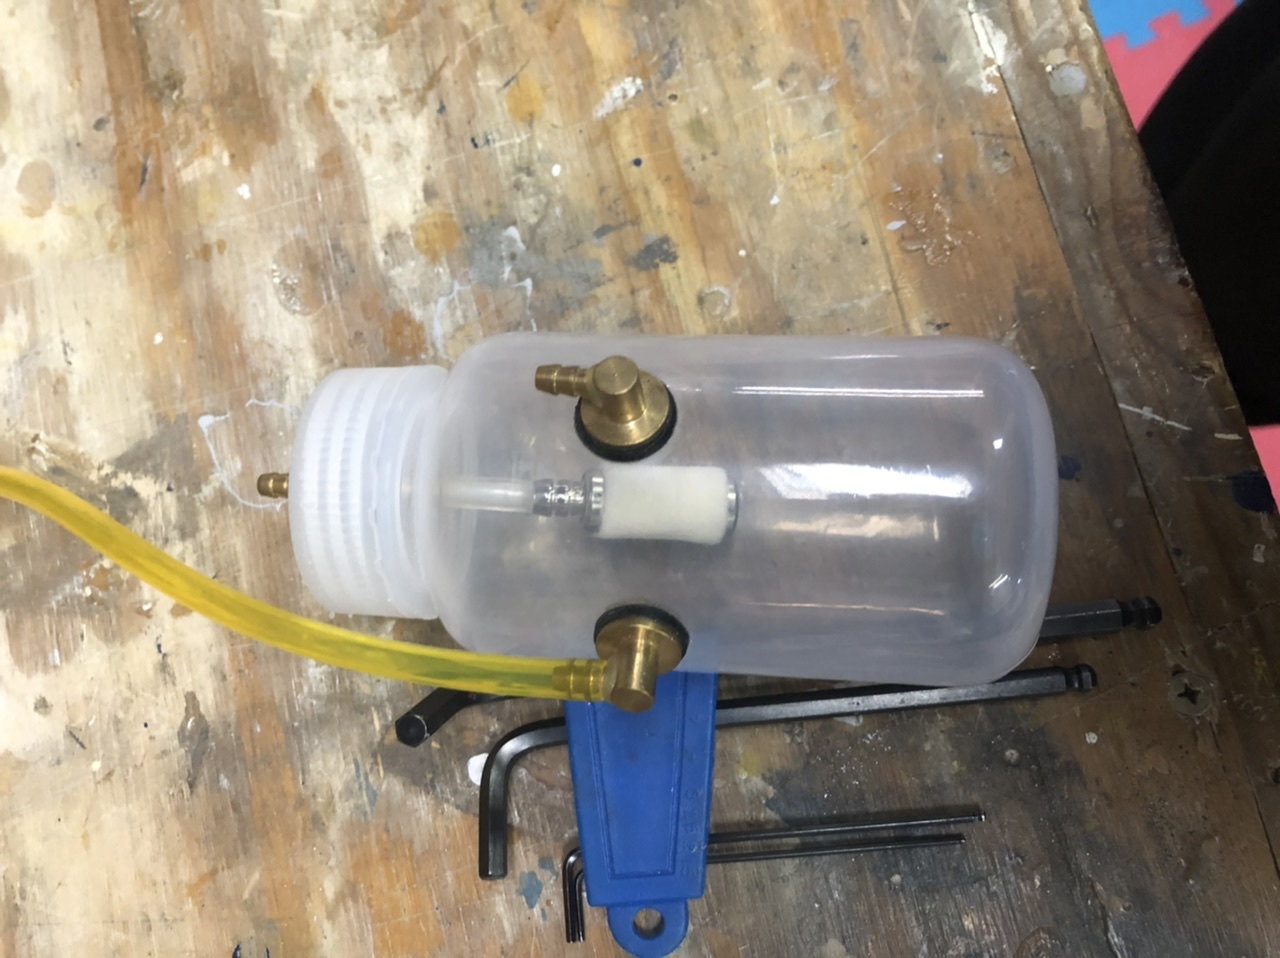
The supplied UAT measures 10 fluid ounces.
Well, the arms are on the servos pretty snug and I din't have one of those nifty little servo arm pullers so I had a really hard time wiggling it off. Then it didn't fit onto the new servo very easily and I may have buggered up the splines trying, so I decided to just get new ones.
The supplied UAT measures 10 fluid ounces.
The following users liked this post:
Agrav8ed (03-29-2020)
04-18-2020, 04:39 AM
#66
 04-18-2020, 04:17 PM
#68
Well, as of this week mine i pretty much ready to go. I finished balance last weekend. I had to put 20 ounces in the nose to balance where Lior and Peter indicated. Mine came out at just shy of 38lbs. The quality of the jet is really good. I've had to correct a few minor things no big deal. Here's a few photos.
Thanks,
Tone
04-19-2020, 04:35 AM
#70
Tone, sorry it's taking so long for your plane to get here. I think you'll be happy so it should be worth the wait.
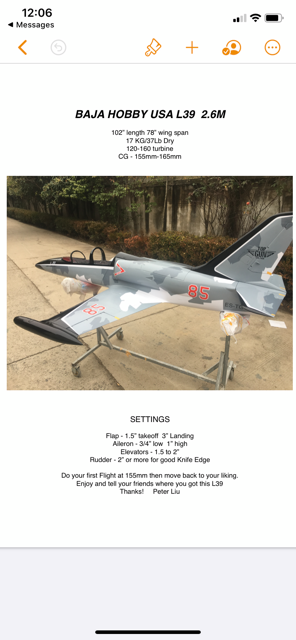
Peter sent me this, but the elevator throws are not correct. No way to get 1.5 to 2 inches of throw on this plane without breaking something. He subsequently told me the numbers are mistranslated for the elevator and to set them at 1 inch high rates and 3/4 low. The rest of the info seems good.
04-19-2020, 06:35 AM
#71
Tone, sorry it's taking so long for your plane to get here. I think you'll be happy so it should be worth the wait.
Peter sent me this, but the elevator throws are not correct. No way to get 1.5 to 2 inches of throw on this plane without breaking something. He subsequently told me the numbers are mistranslated for the elevator and to set them at 1 inch high rates and 3/4 low. The rest of the info seems good.
Thanks,
Tone
06-02-2020, 01:02 PM
#72
Tone, sorry it's taking so long for your plane to get here. I think you'll be happy so it should be worth the wait.
Peter sent me this, but the elevator throws are not correct. No way to get 1.5 to 2 inches of throw on this plane without breaking something. He subsequently told me the numbers are mistranslated for the elevator and to set them at 1 inch high rates and 3/4 low. The rest of the info seems good.
Thanks,
Tone
06-02-2020, 02:57 PM
#73
Tone, yes we flew it. Plane itself flew very well, zero trim added. I had two issues, one was that one of the bearings in the wheel was bad so the wheel was really rough. Had a good friend of mine who runs a machine shop machine up some bushings so I replacing the ball bearings with oil lite bushing material. We've done that on other jets with success. Also had a servo issue on the flaps that I am working through, sent one servo back to MKS for review, awaiting return. The plane is a great flyer and will be a lot of fun for you.
06-02-2020, 03:34 PM
#74
Tone, yes we flew it. Plane itself flew very well, zero trim added. I had two issues, one was that one of the bearings in the wheel was bad so the wheel was really rough. Had a good friend of mine who runs a machine shop machine up some bushings so I replacing the ball bearings with oil lite bushing material. We've done that on other jets with success. Also had a servo issue on the flaps that I am working through, sent one servo back to MKS for review, awaiting return. The plane is a great flyer and will be a lot of fun for you.
Tone