


F-4 Phantom 1/8 scale Scratch Built
 02-02-2021, 09:12 AM
#176
Senior Member
Thread Starter
Excellent build and I wish you every success with it!
Since I have a BVM F4 , same scale, but with AMT Pegasus power, about twice your thrust, a few points may help:
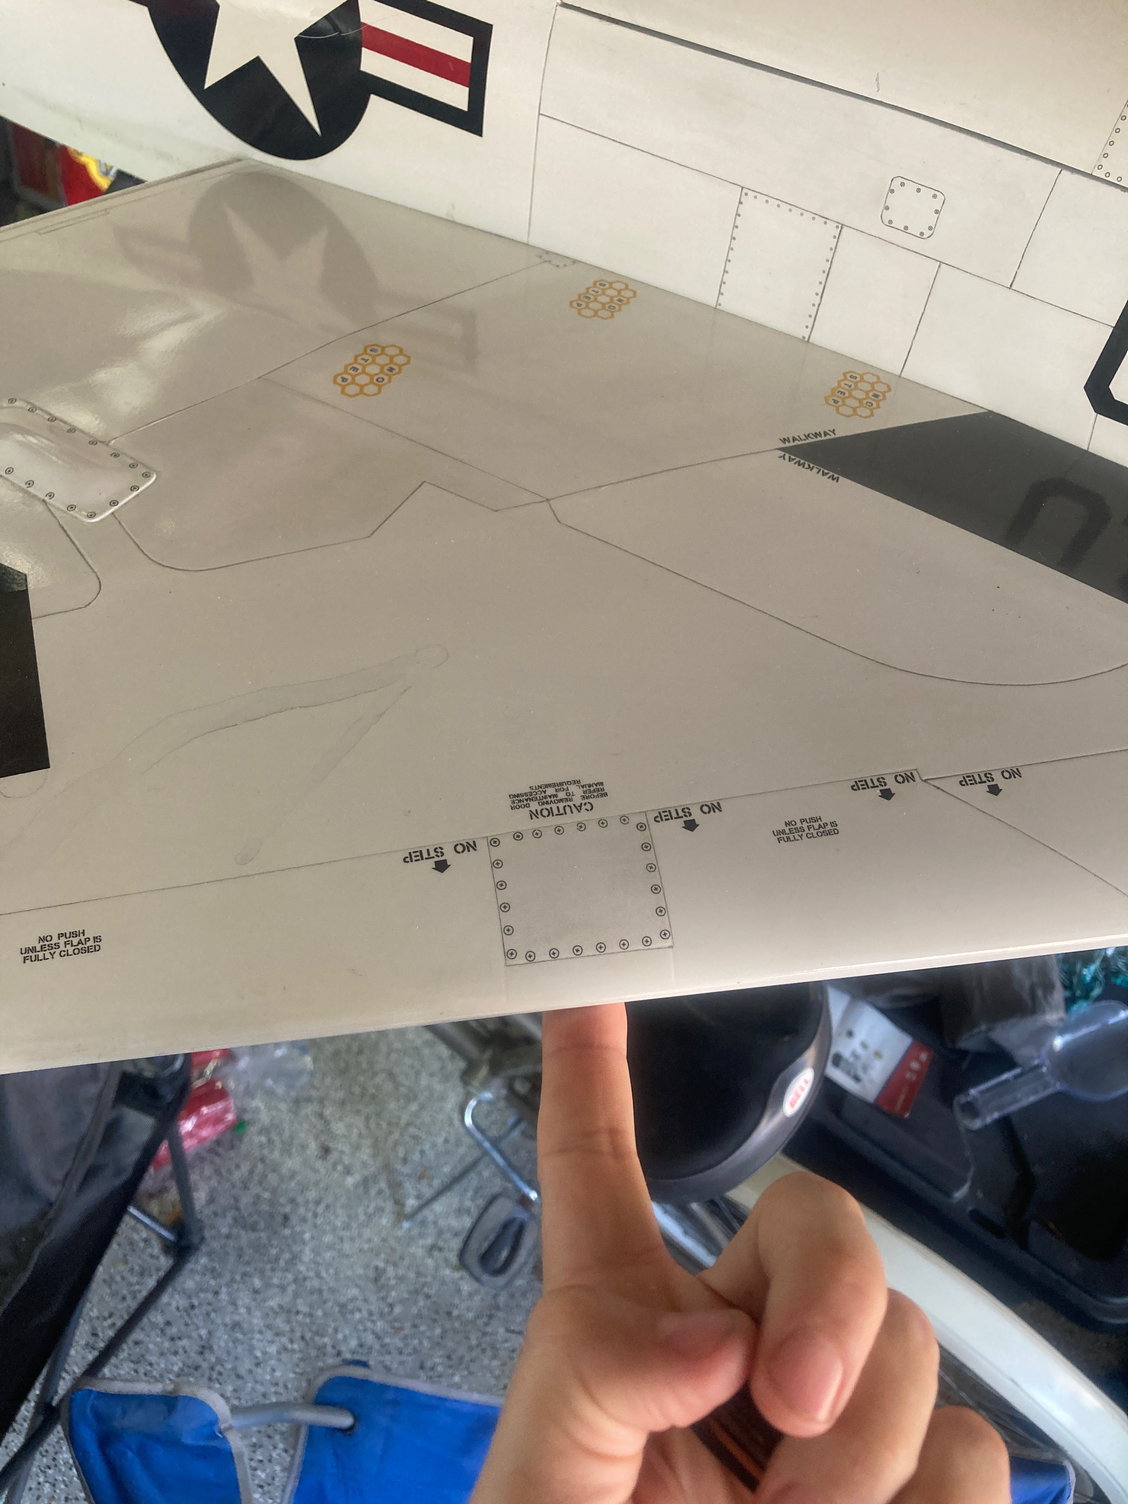
The BVM F4 tailpipes are exactly in line with scale datum, no extra downthrust needed and the model is not affected by pitch changes due to thrust, it is neutral. Mine also has the scale le slat of the J on the stab, and still not affected by jet efflux.
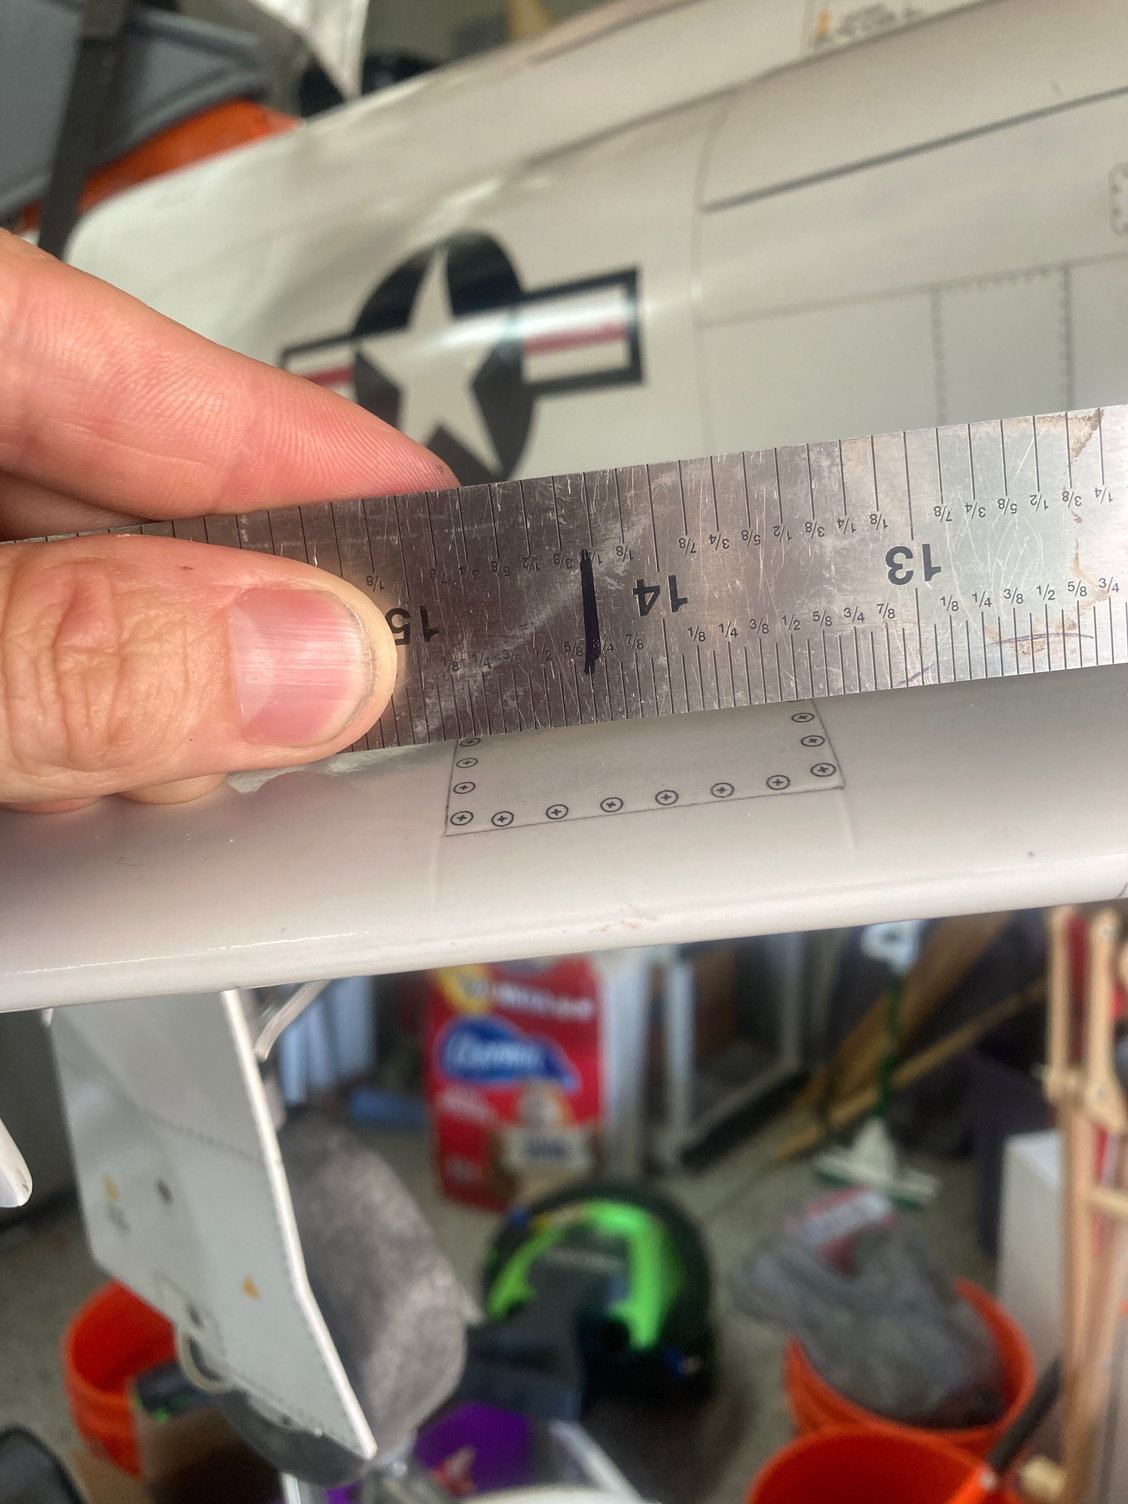
The C of G is 12 3/4 inches along the leading edge, from the root, as the LE is. 34 1/2 inches long so about 38 % along, beware, it is further forward than one might think !
Your model will be significantly lighter than mine, so I guess twin X45s will be perfect, they are quite brilliant engines, just installed mine in my BVM F16 ( original )
Good luck, I very much look forward to seeing it.
PS I have lots of F4 books and drawings inc the BVM ones if needed.
Since I have a BVM F4 , same scale, but with AMT Pegasus power, about twice your thrust, a few points may help:
The BVM F4 tailpipes are exactly in line with scale datum, no extra downthrust needed and the model is not affected by pitch changes due to thrust, it is neutral. Mine also has the scale le slat of the J on the stab, and still not affected by jet efflux.
The C of G is 12 3/4 inches along the leading edge, from the root, as the LE is. 34 1/2 inches long so about 38 % along, beware, it is further forward than one might think !
Your model will be significantly lighter than mine, so I guess twin X45s will be perfect, they are quite brilliant engines, just installed mine in my BVM F16 ( original )
Good luck, I very much look forward to seeing it.
PS I have lots of F4 books and drawings inc the BVM ones if needed.
Soon I will move to play with CG, I just hope I don't need to add weigh on nose,
 02-03-2021, 12:41 AM
#177
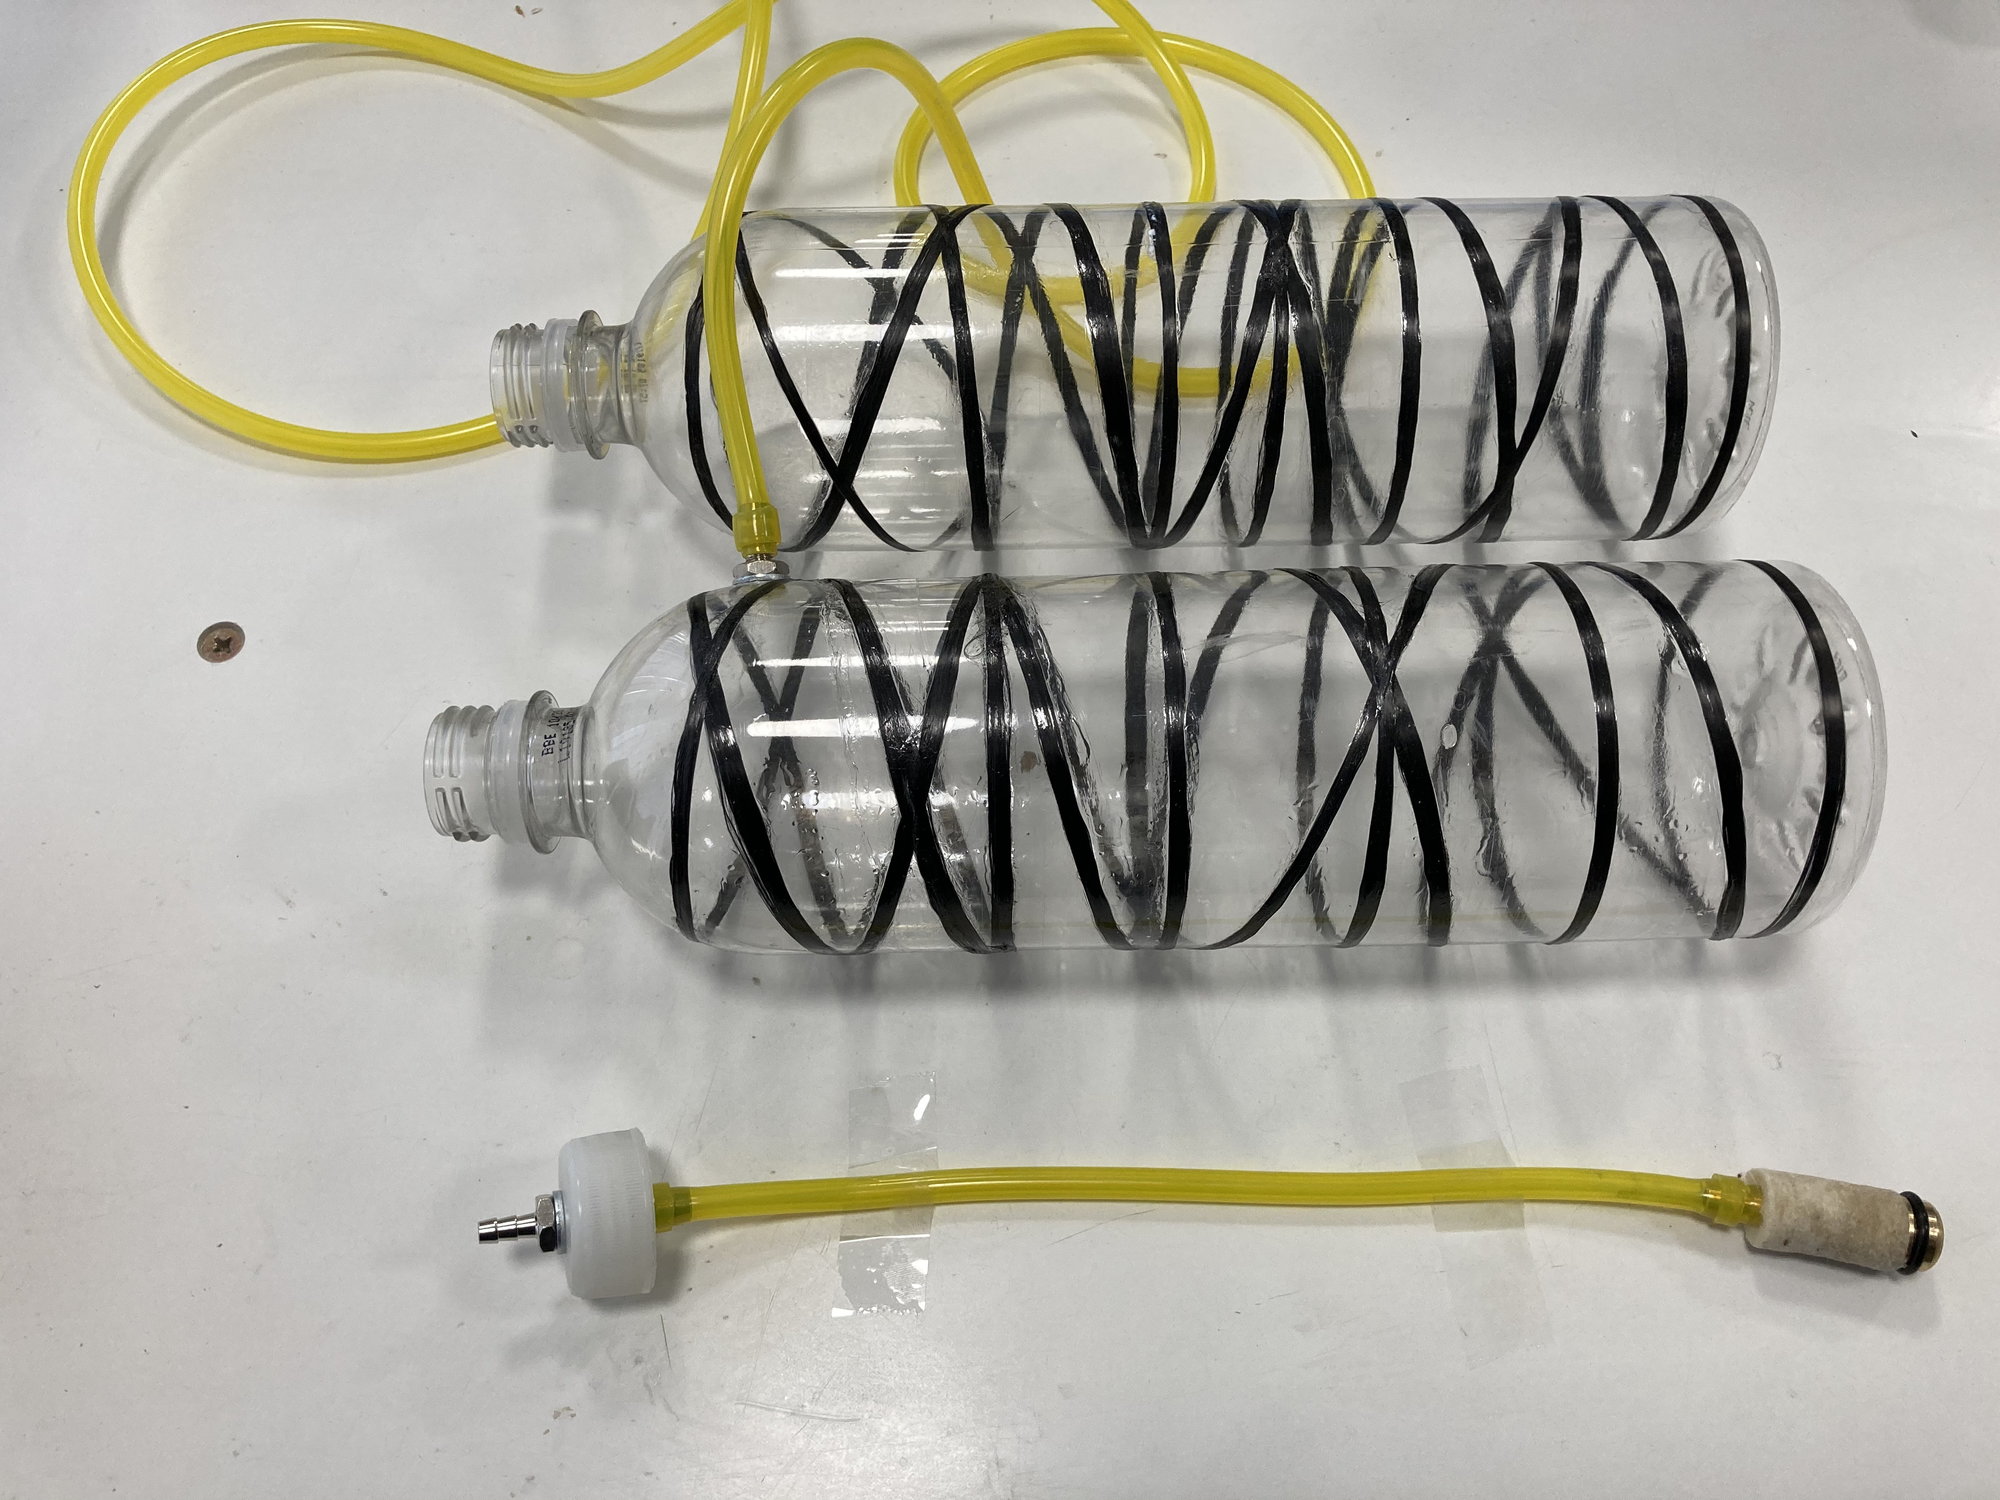
I made two 1 litre fuel tanks and reinforced them using Carbon Fibre Two and CA Super glue.
I started to run servo extension, wires, fuel pipe etc. I made two pieces platform to accommodate receiver, ECU, Valve etc, But god help me, its difficult to tidy up all huge mess on very small space
")
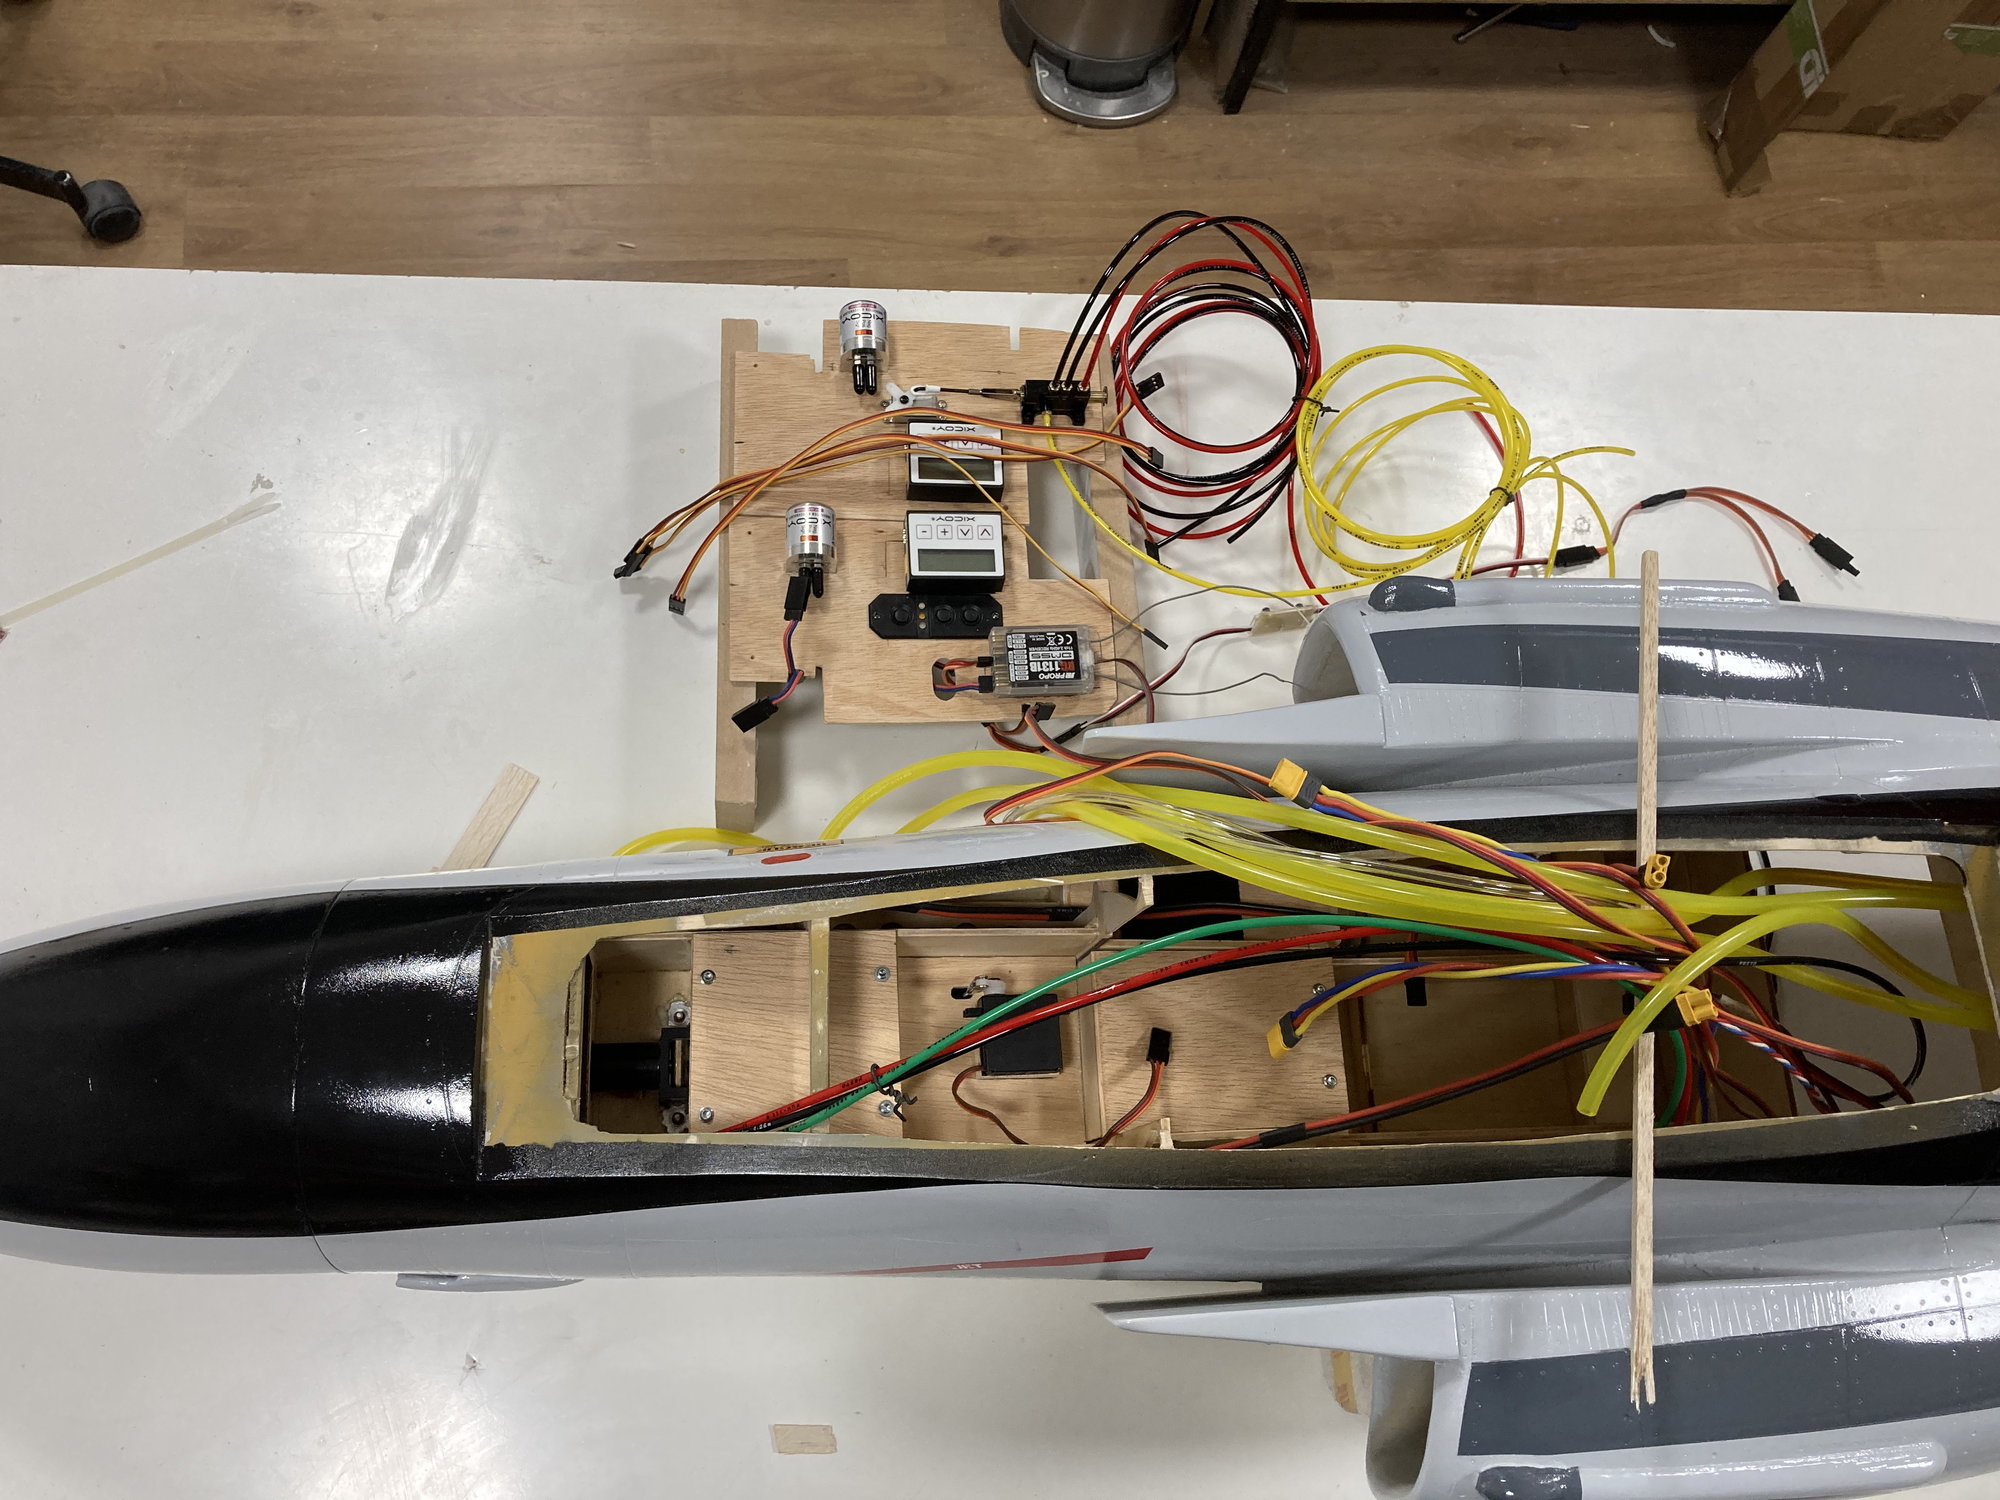
I started to run servo extension, wires, fuel pipe etc. I made two pieces platform to accommodate receiver, ECU, Valve etc, But god help me, its difficult to tidy up all huge mess on very small space
You are a true master builder. Thank you for sharing and informing.
Regarding the engines and fuel tanks bays wouldn't it be better to have those areas covered against fuel/heat? I had great results with the BVM heat shield.
BTW-where is the UAT/ Air trap tank?
Avi
Last edited by avi sirota; 02-03-2021 at 12:44 AM.
02-03-2021, 11:28 AM
#178
Senior Member
Thread Starter
Hello Avi,
Sure, I agree with you so I did as below:
Javad,
Sure, I agree with you so I did as below:
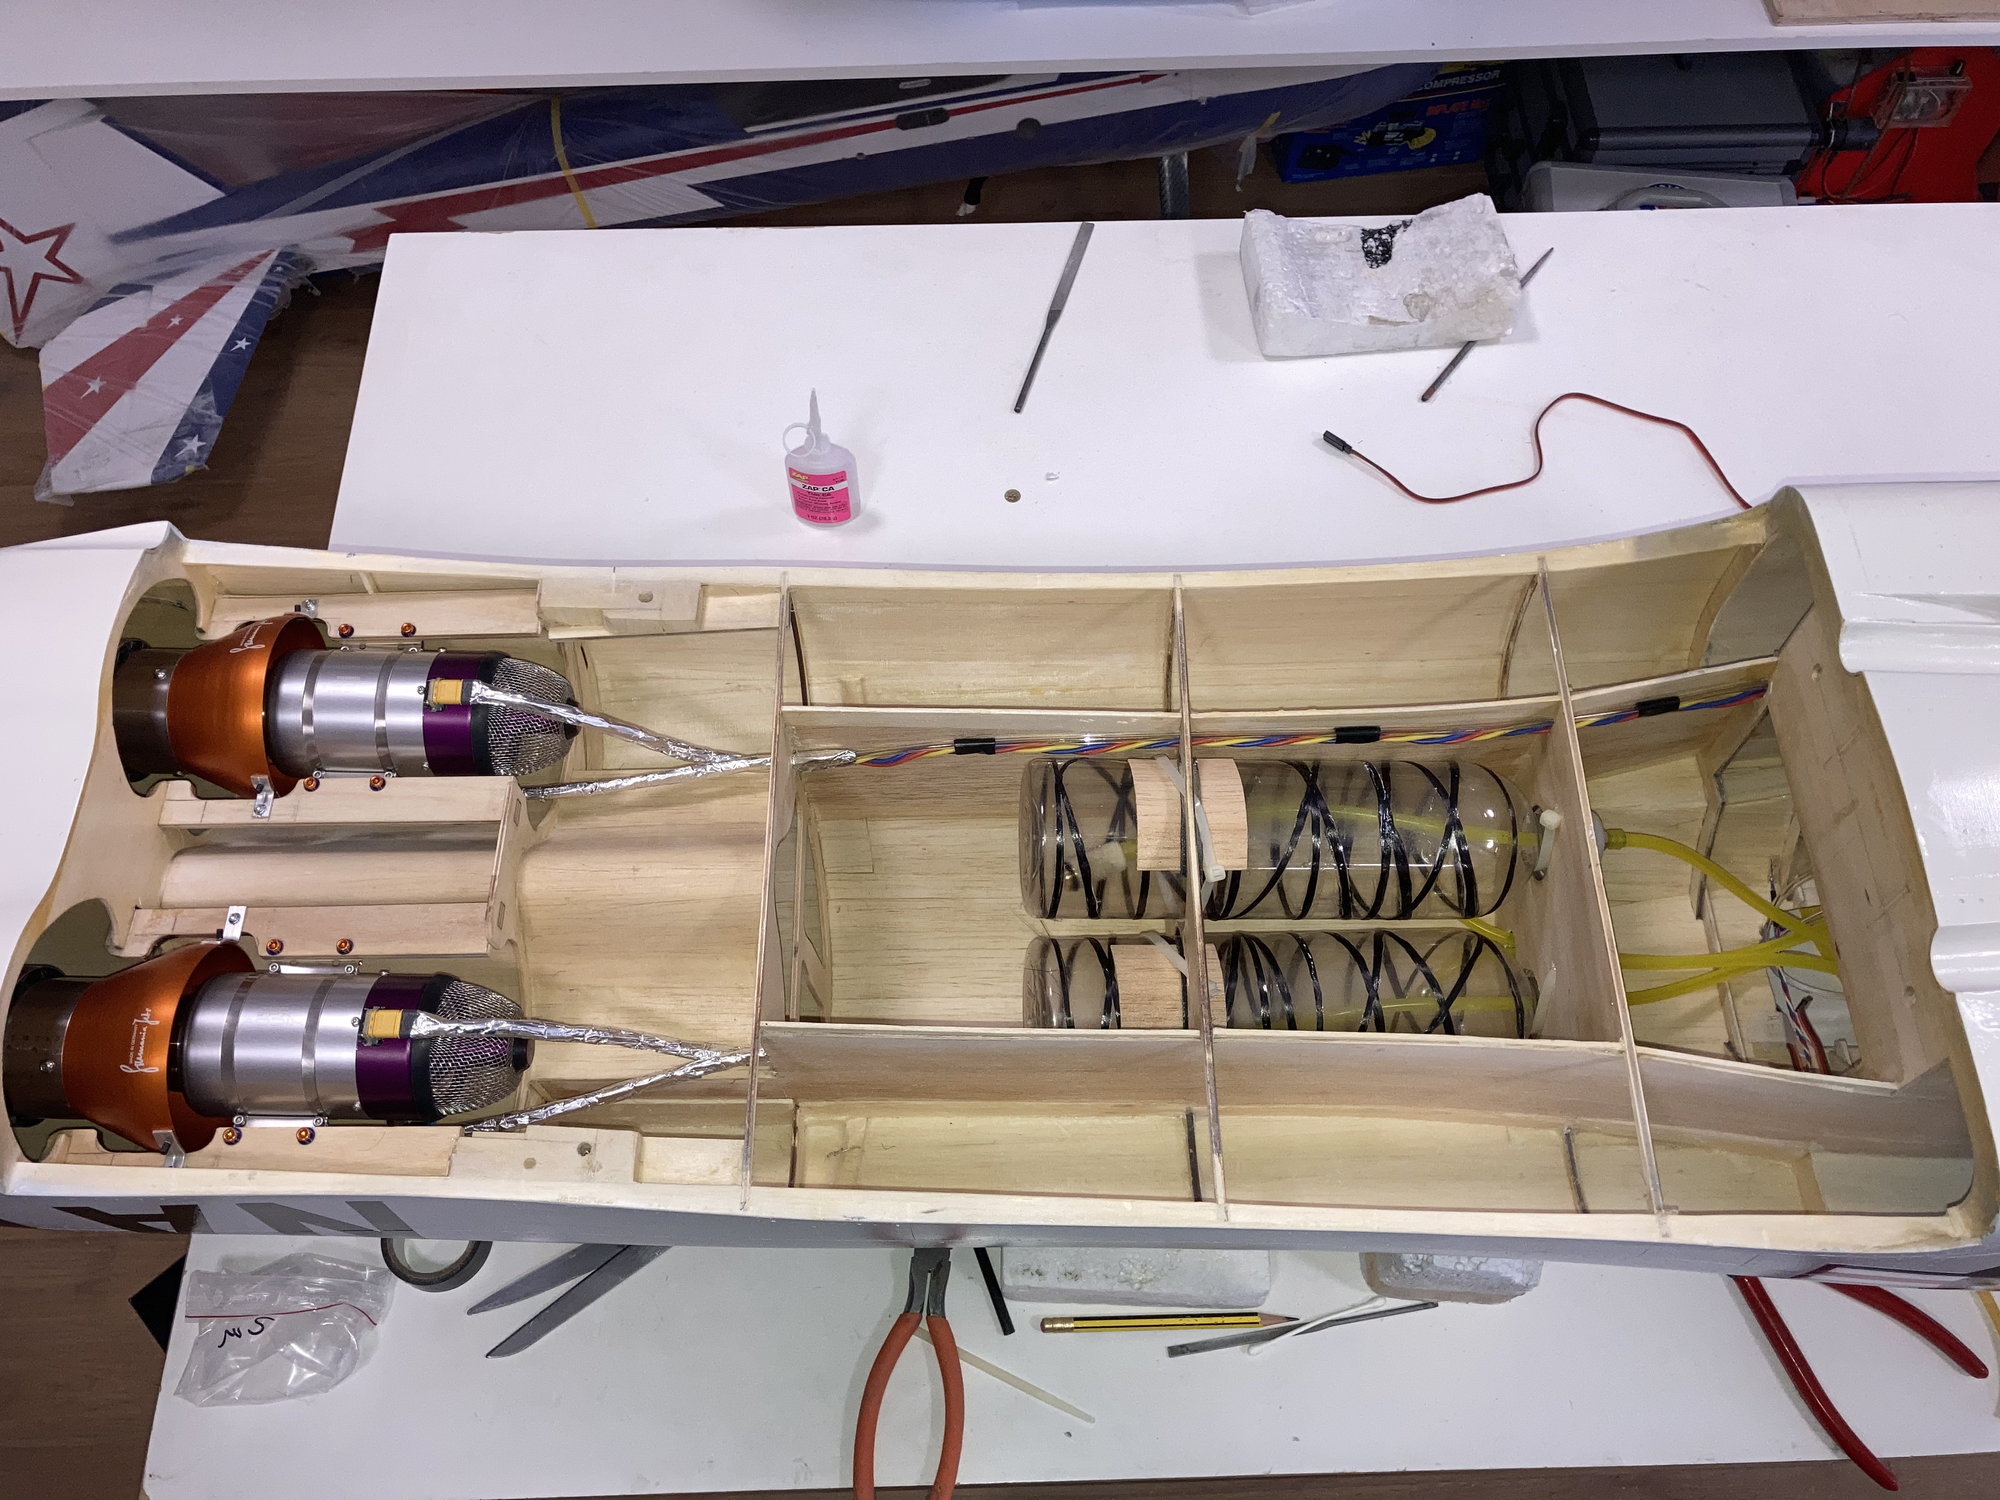
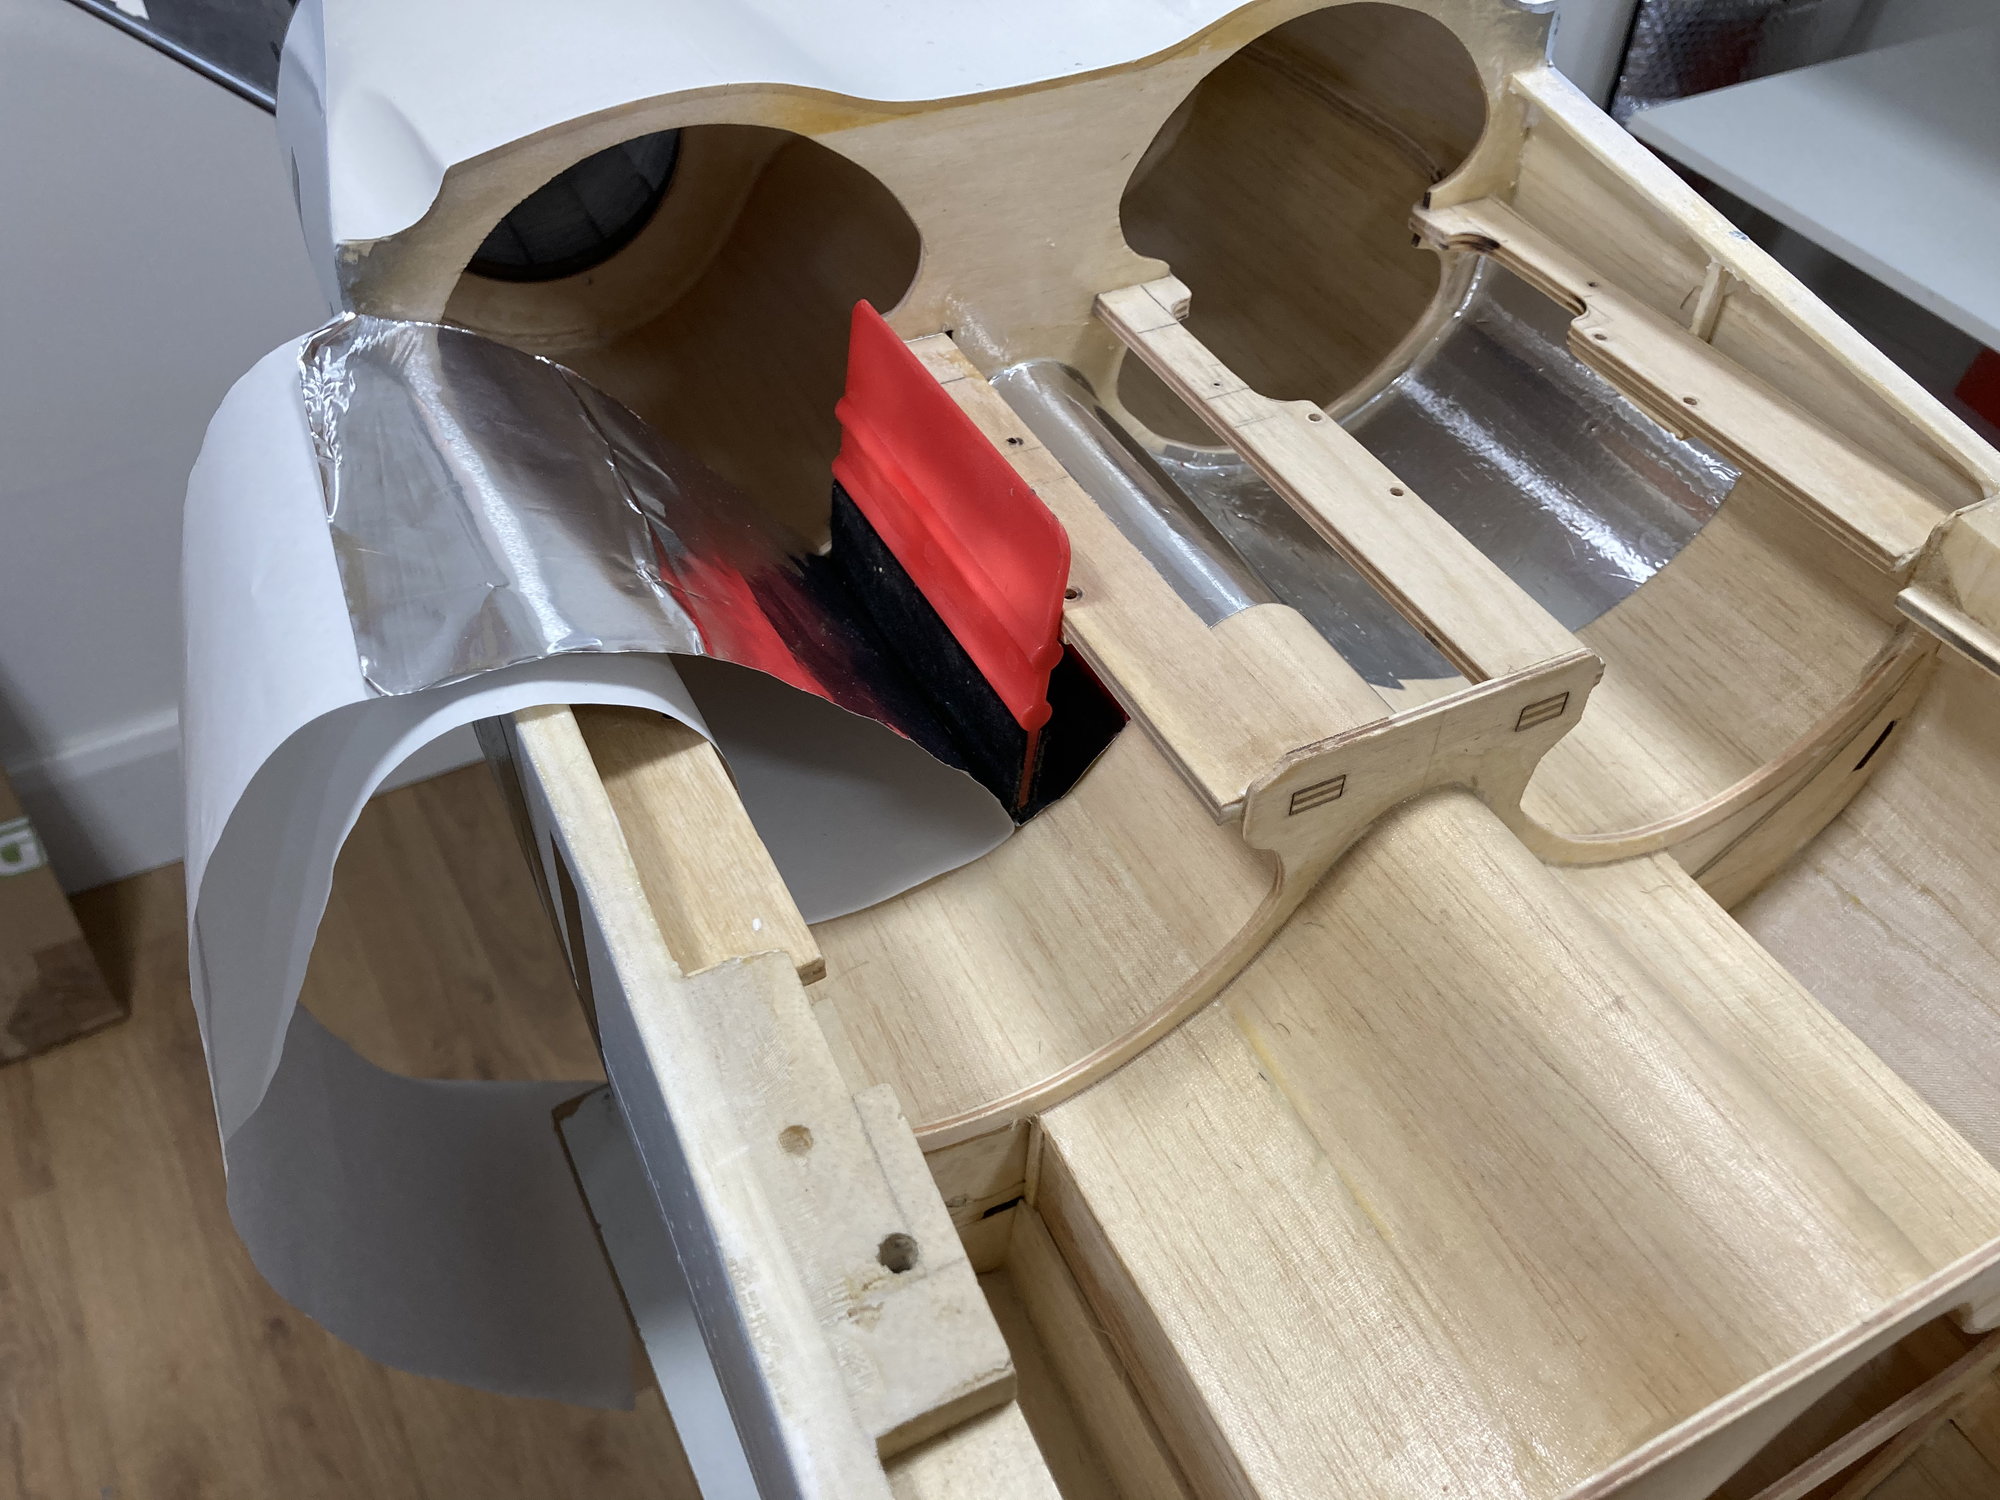
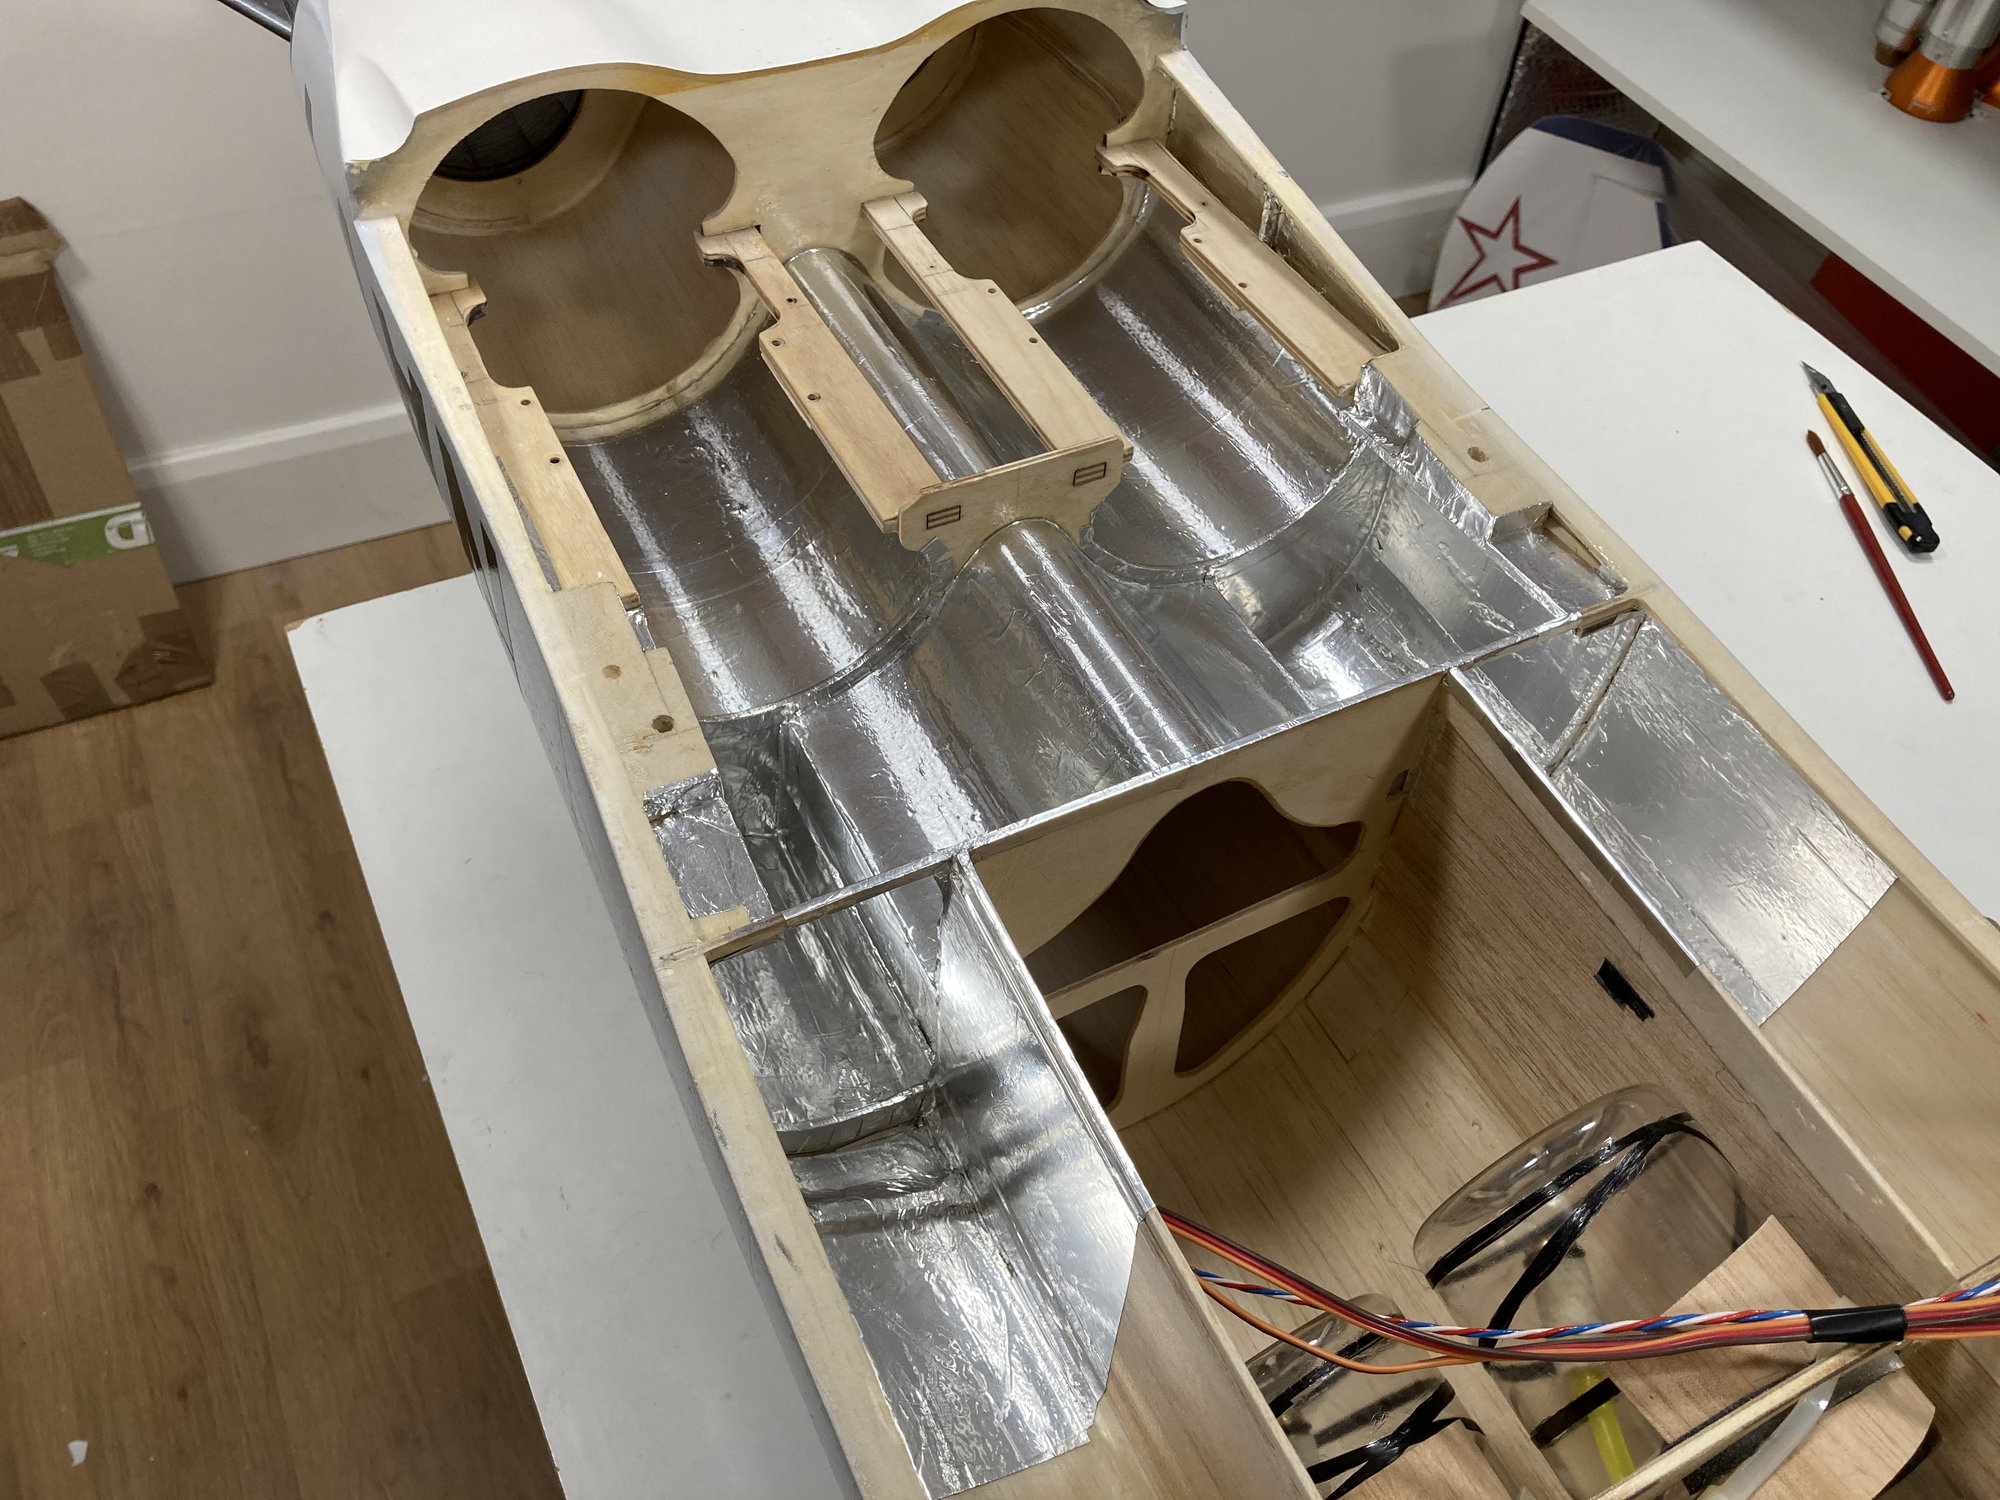
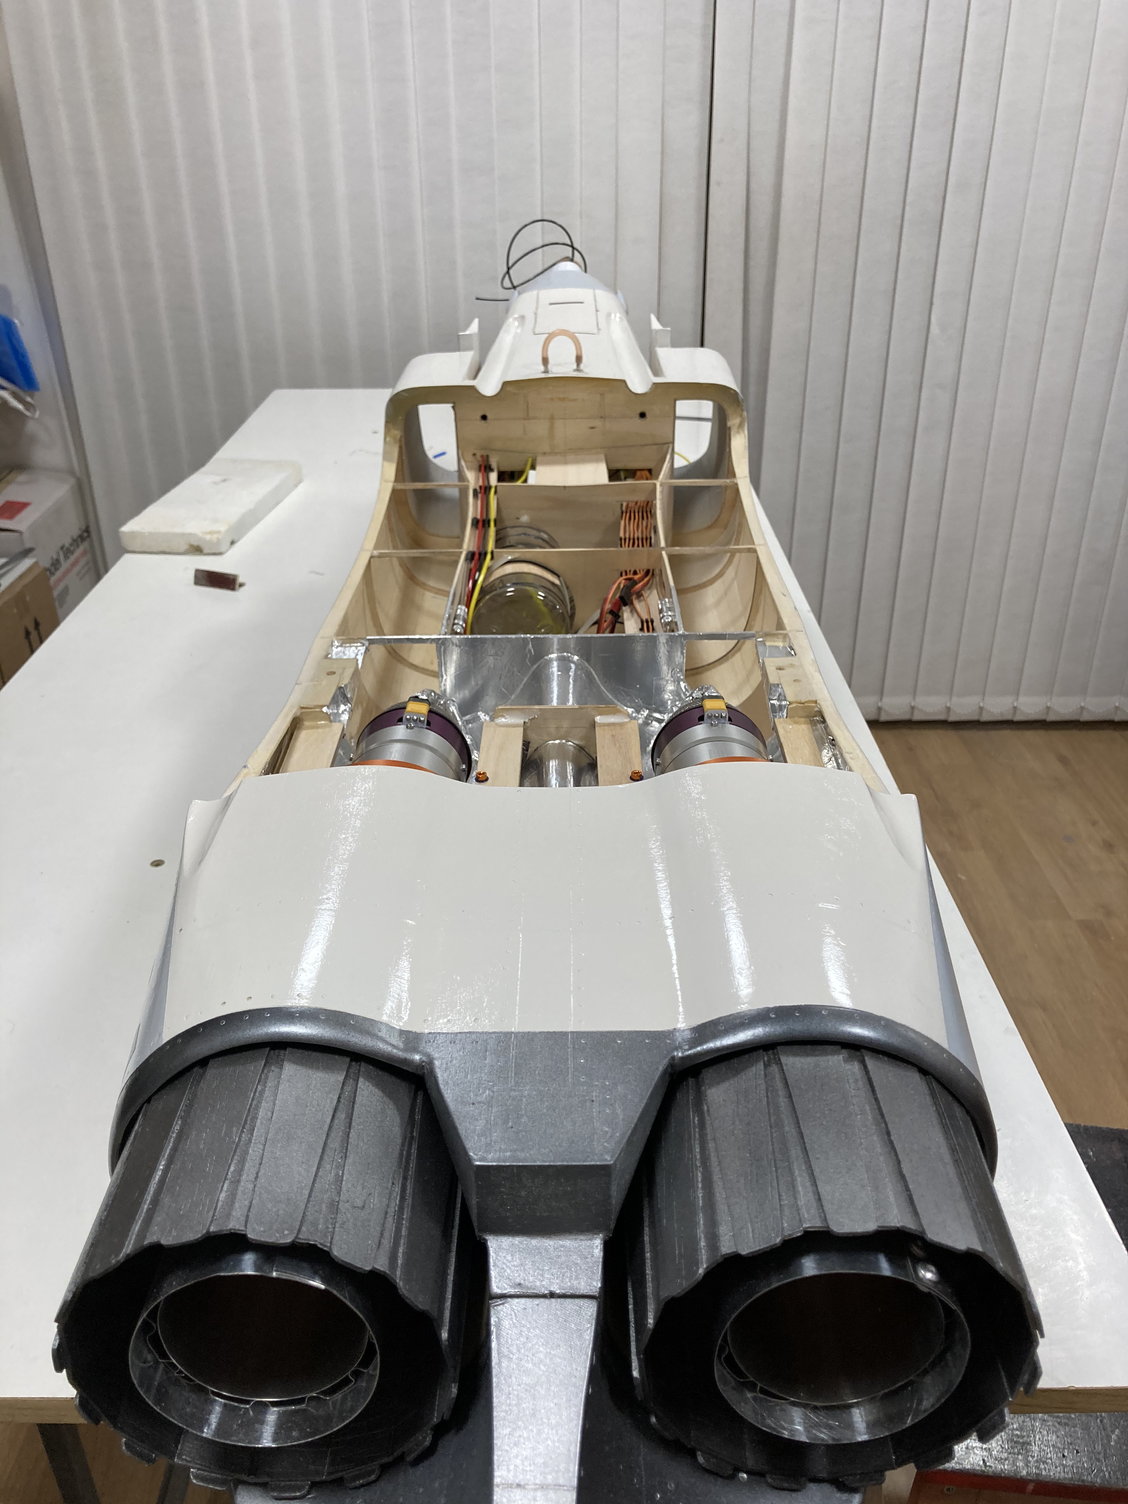
- engines area is separate from fuel tanks, once wings are on, those ply & balsa walls will isolate engine area from fuel tanks, at the same time it will create air ducts. Basically, I designed it in a way to have clear air ducts and have an isolated area for fuel tanks.
- both areas are already fuel proof,
- for heat, engine area is covered by a tick aluminium tape,
- UAT/ Air trap tank are located below canopy to help CG, I haven't finished yet, I'll post photos once it is done,
Javad,
Last edited by Javad; 02-03-2021 at 12:24 PM.
 02-08-2021, 01:27 PM
#180
Senior Member
Thread Starter
 02-08-2021, 01:43 PM
#181
Senior Member
Thread Starter
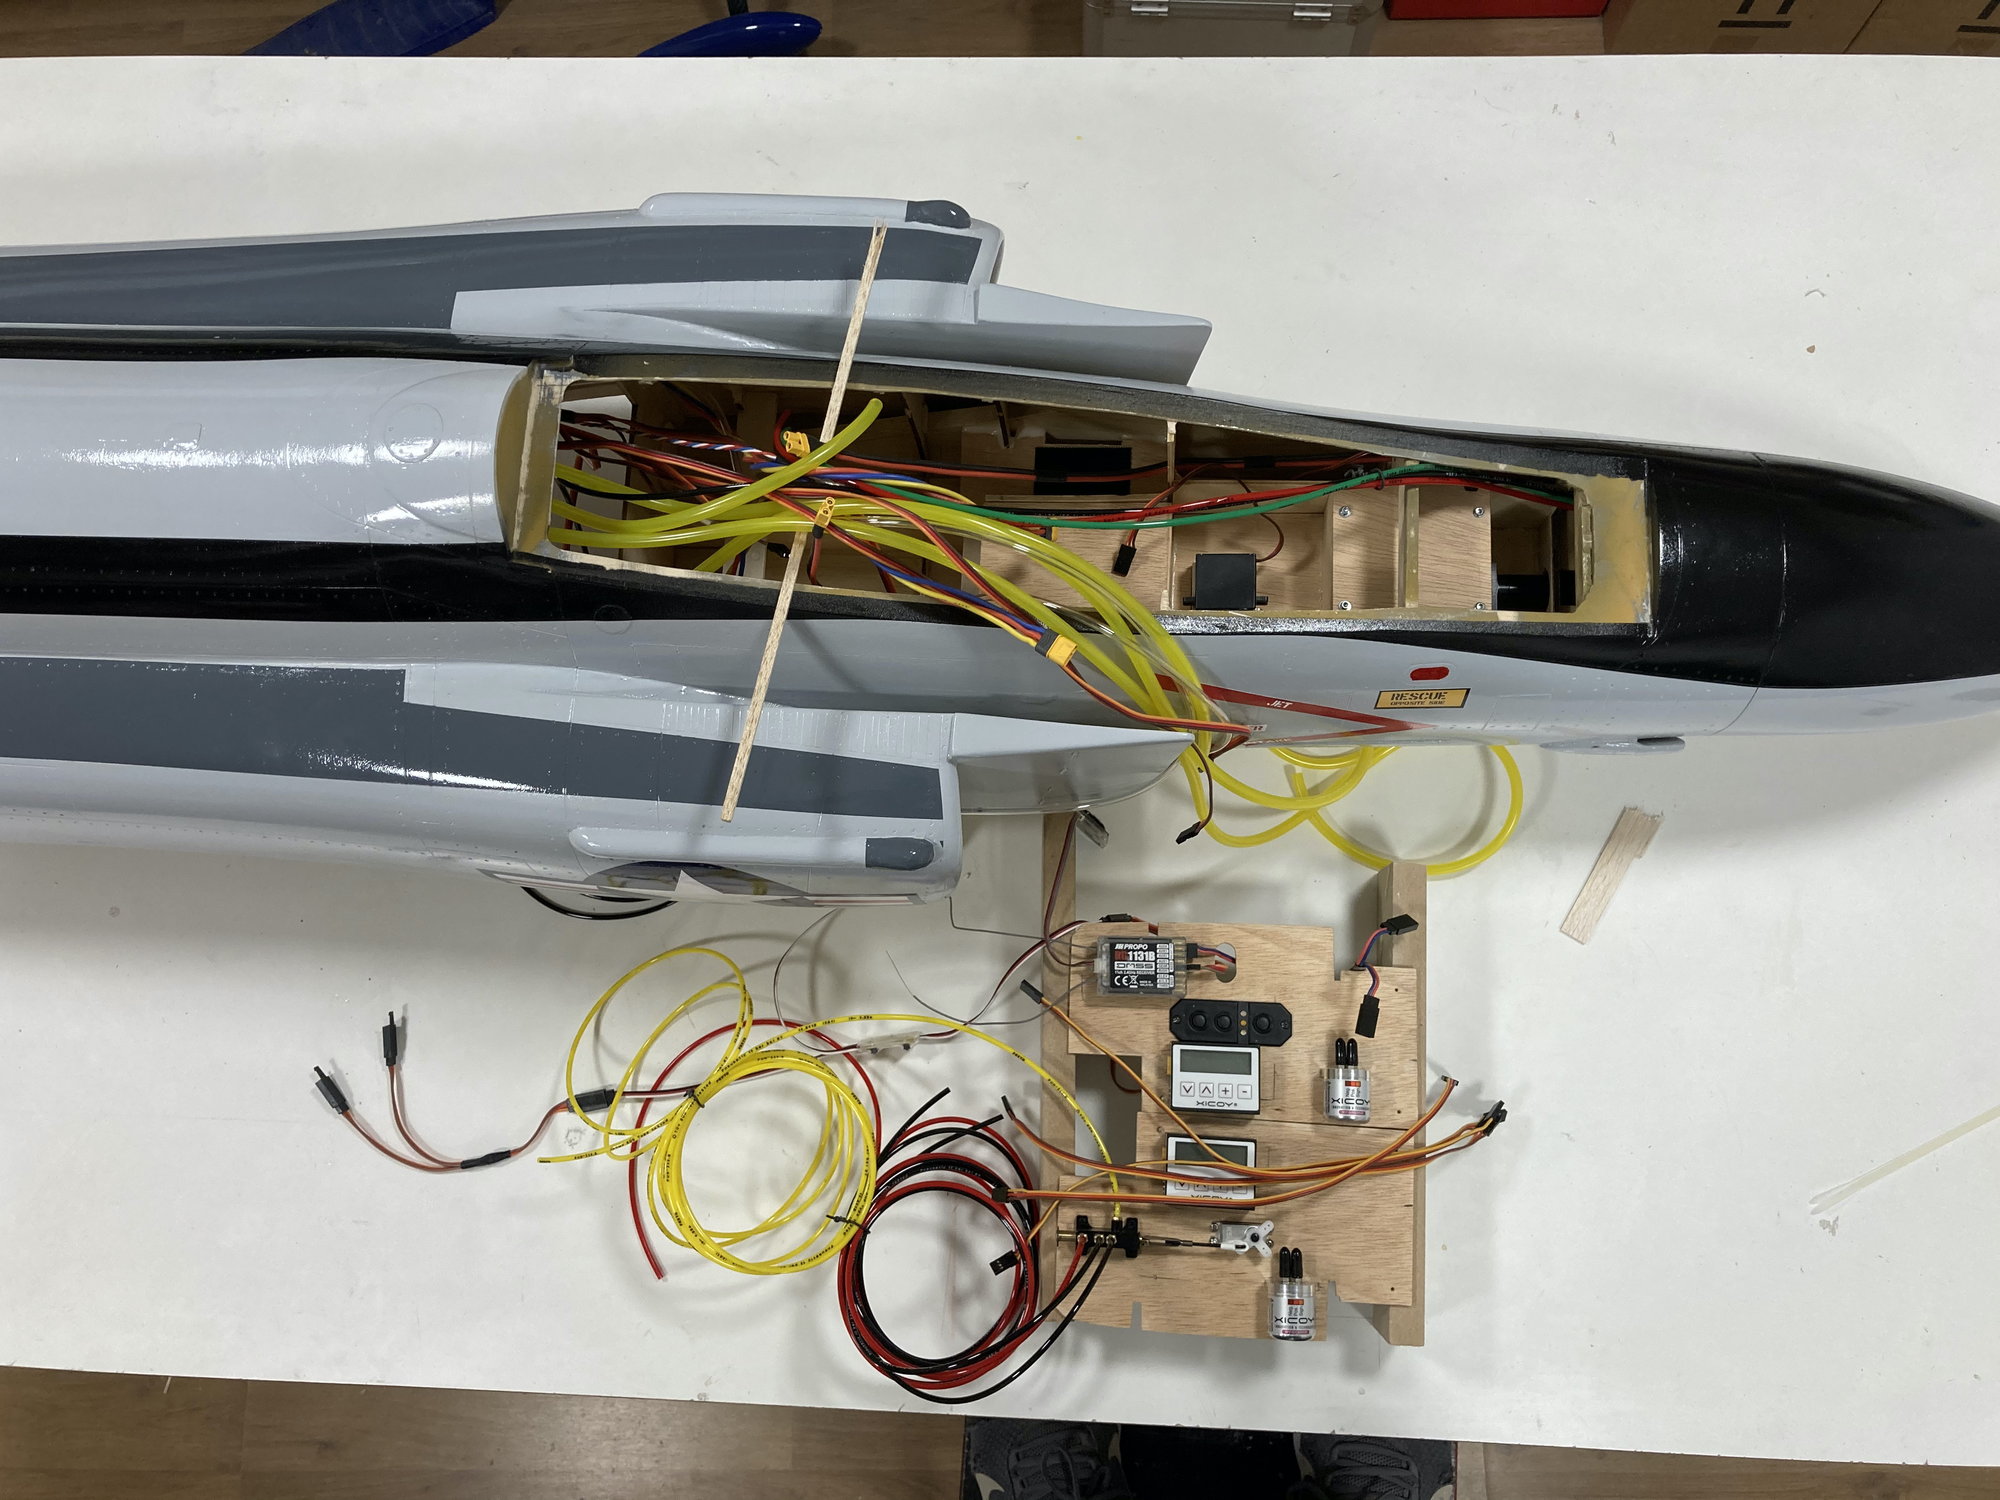
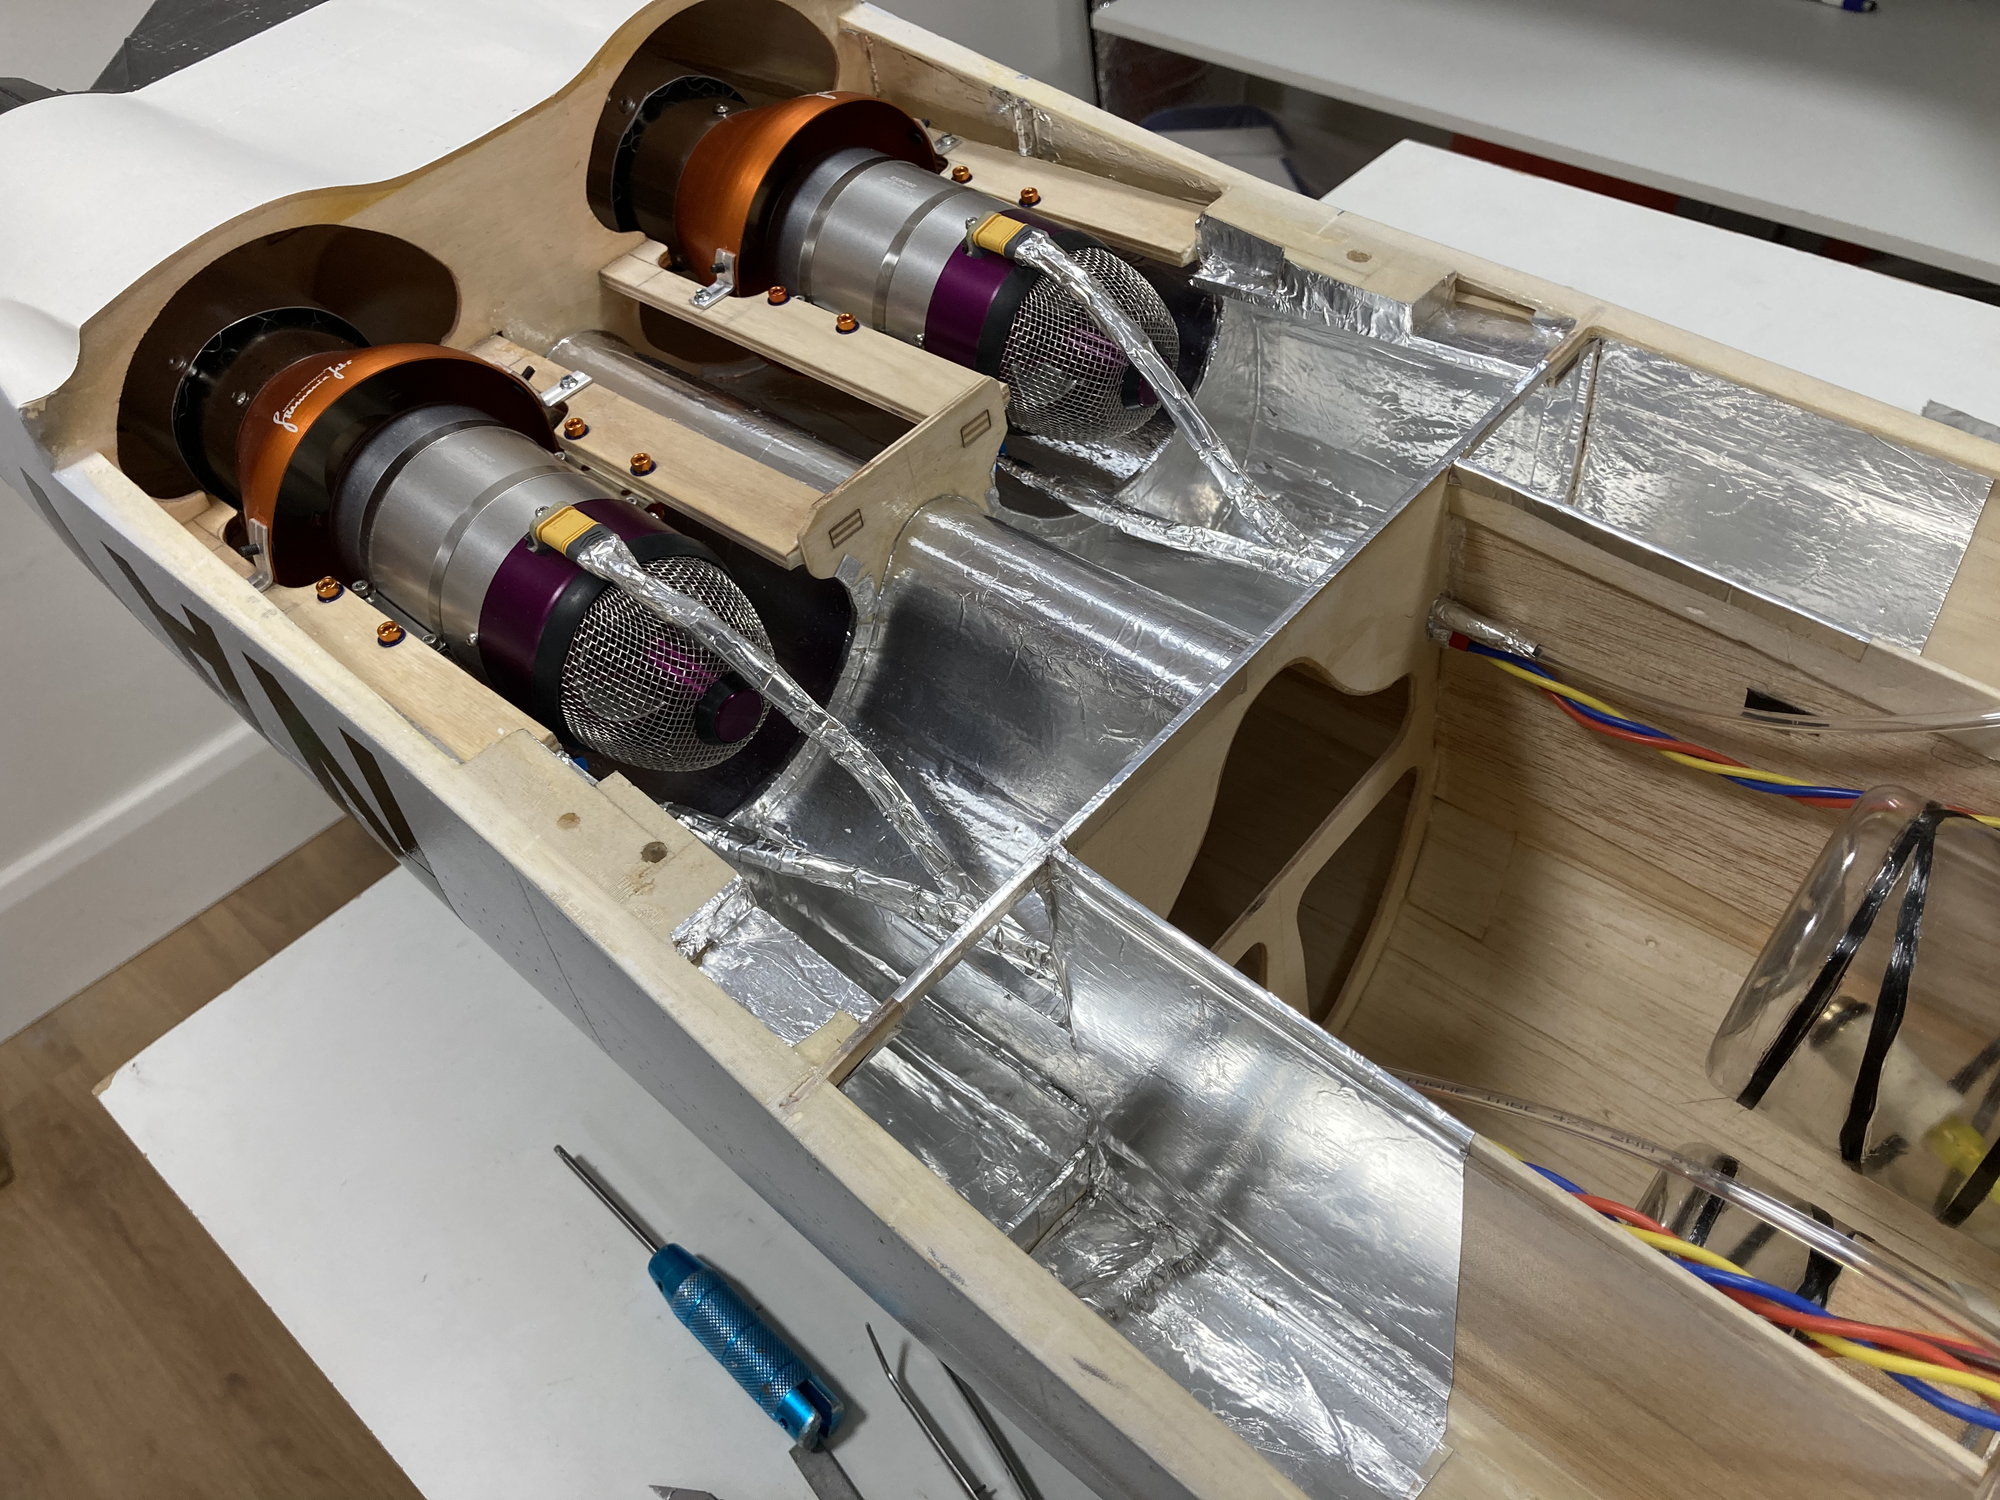
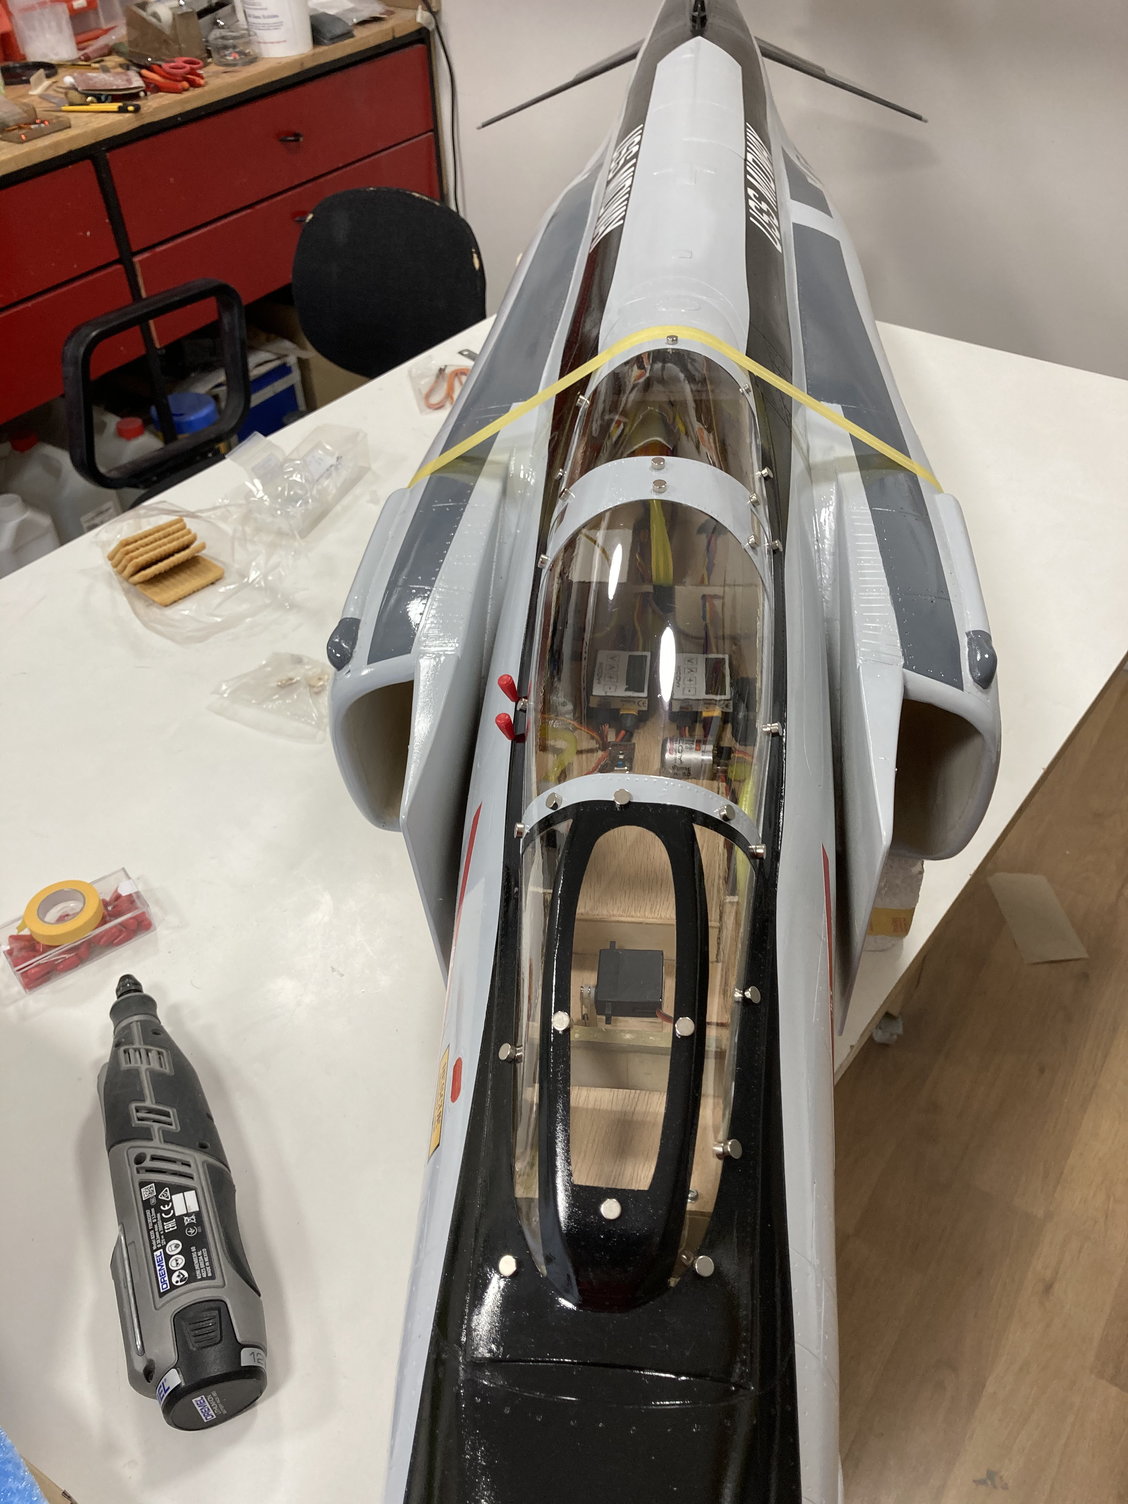
Following covering the engine area by aluminium tape, I finished plumbings. I used 2 "MAP Mini Bubble Trap Tank (2 oz)" and I located them just about below canopy on two sides.
I also added two narrow ply platform in fuel tanks area to accommodate extension leads, airlines and fuel lines, and just added fuel filter by Dave recommendation as I wanted to not have them, :
.
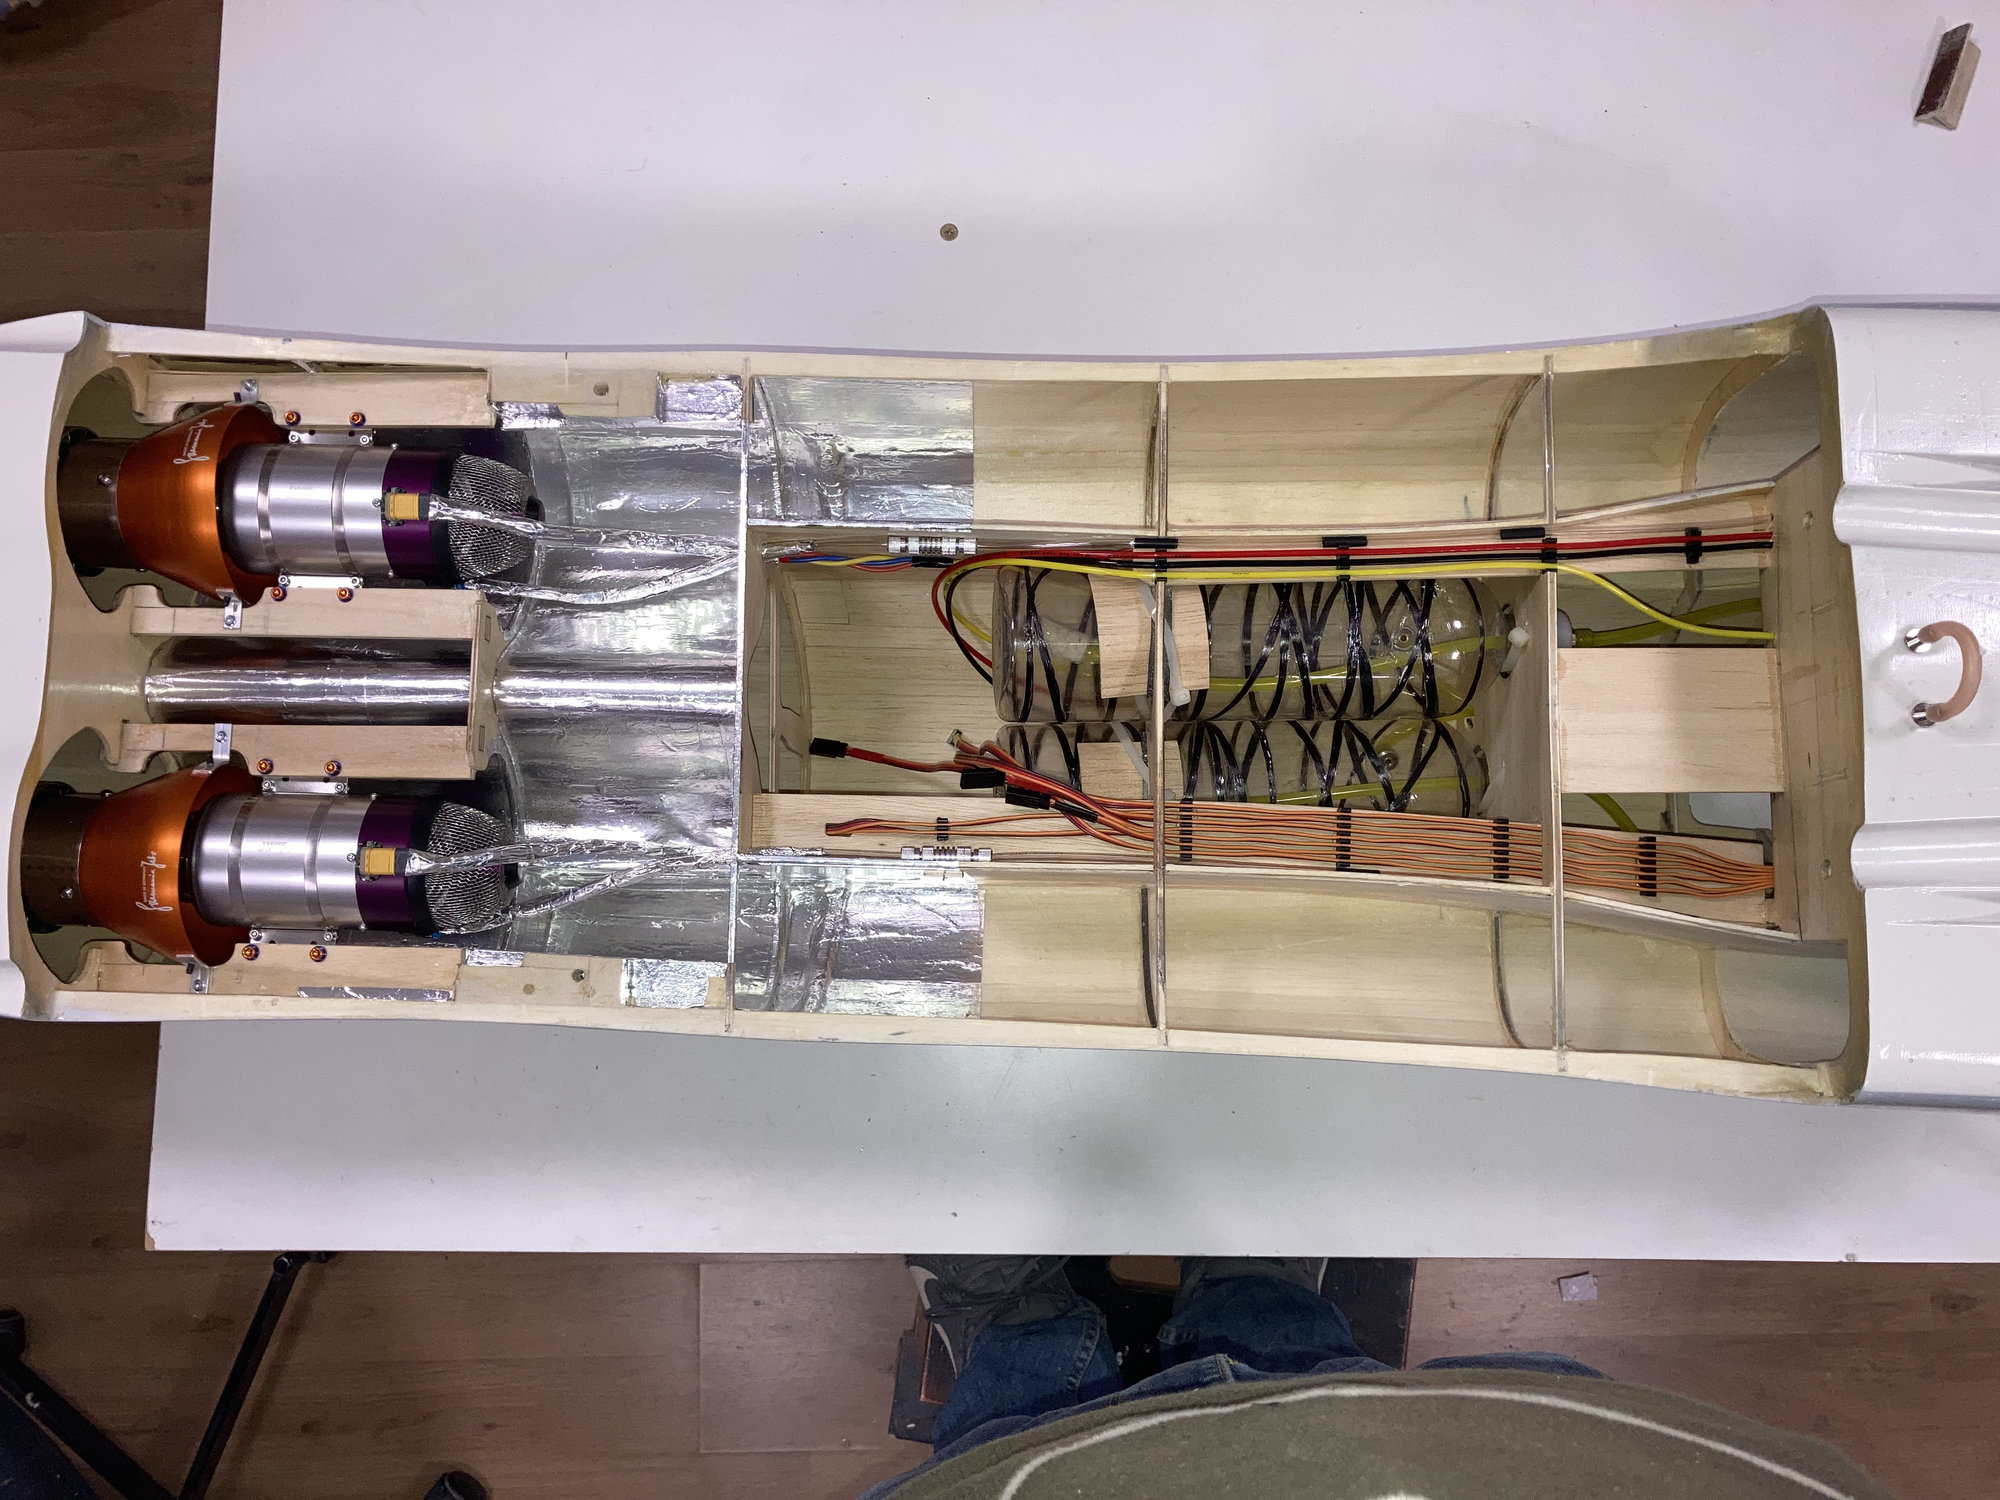
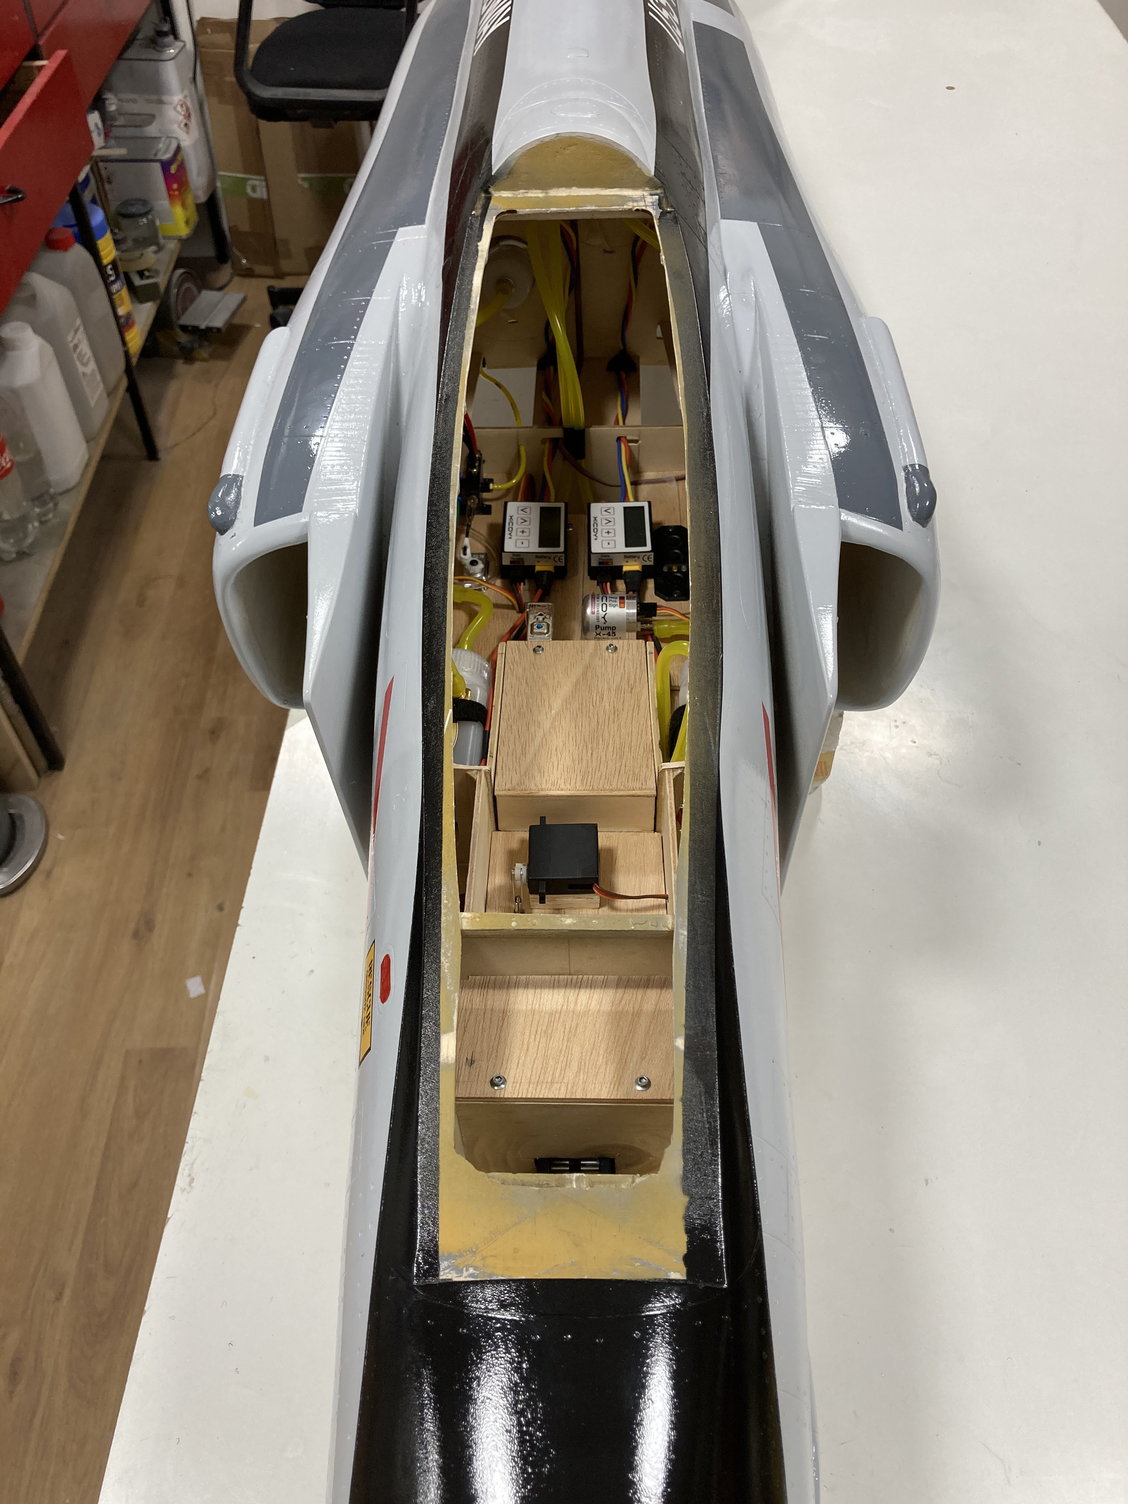
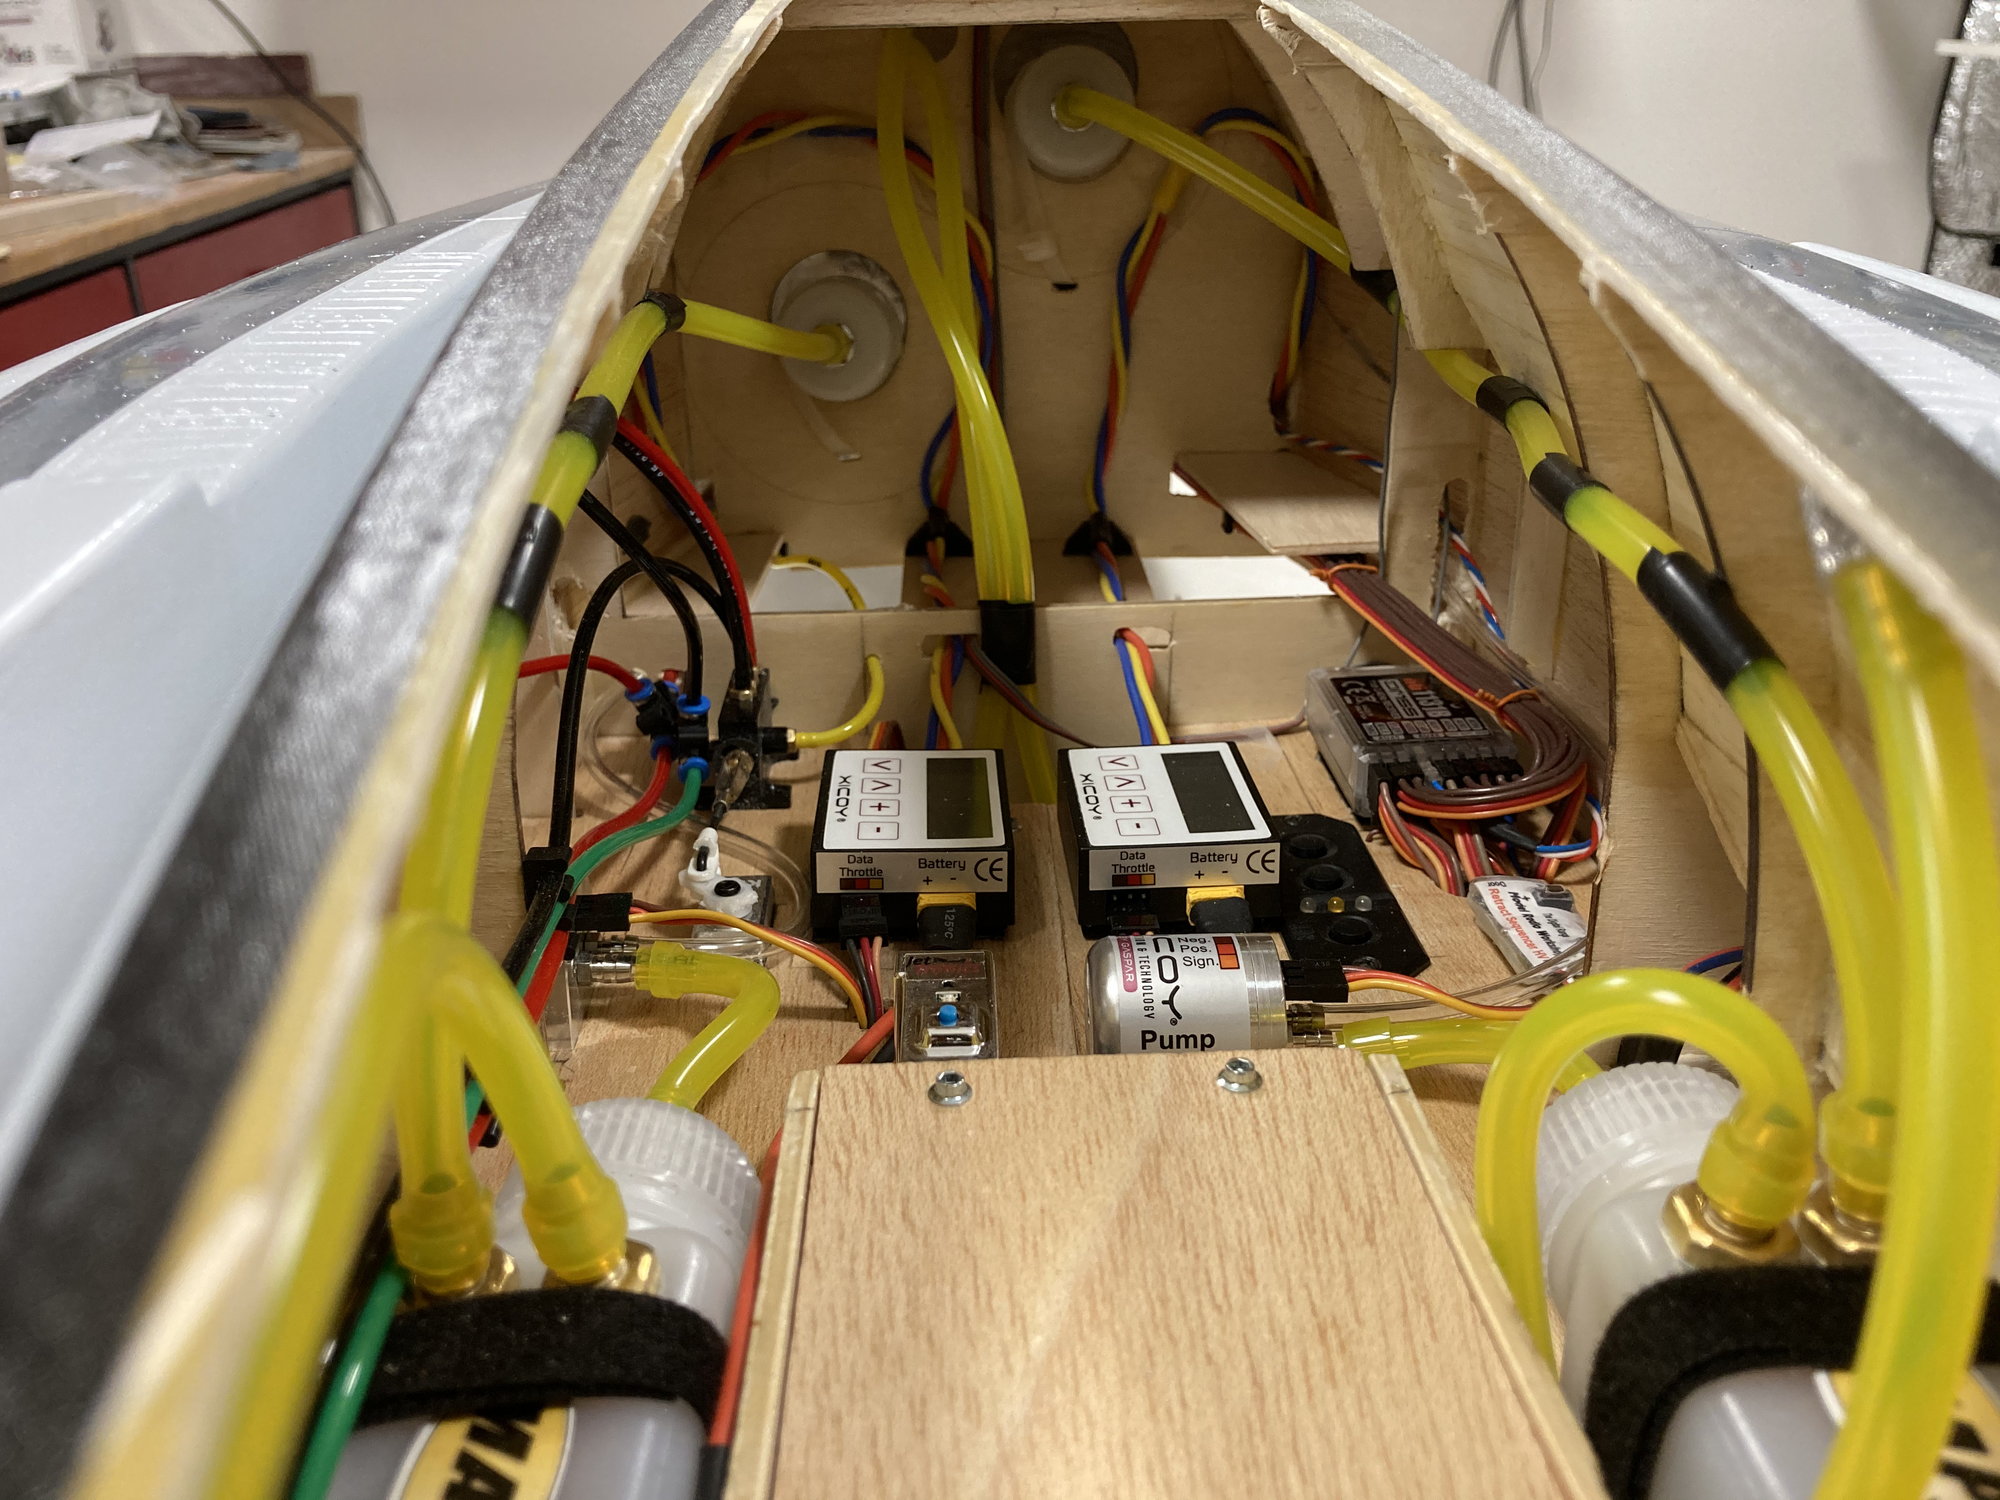
I also added two narrow ply platform in fuel tanks area to accommodate extension leads, airlines and fuel lines, and just added fuel filter by Dave recommendation as I wanted to not have them
, :.
02-08-2021, 01:58 PM
#182

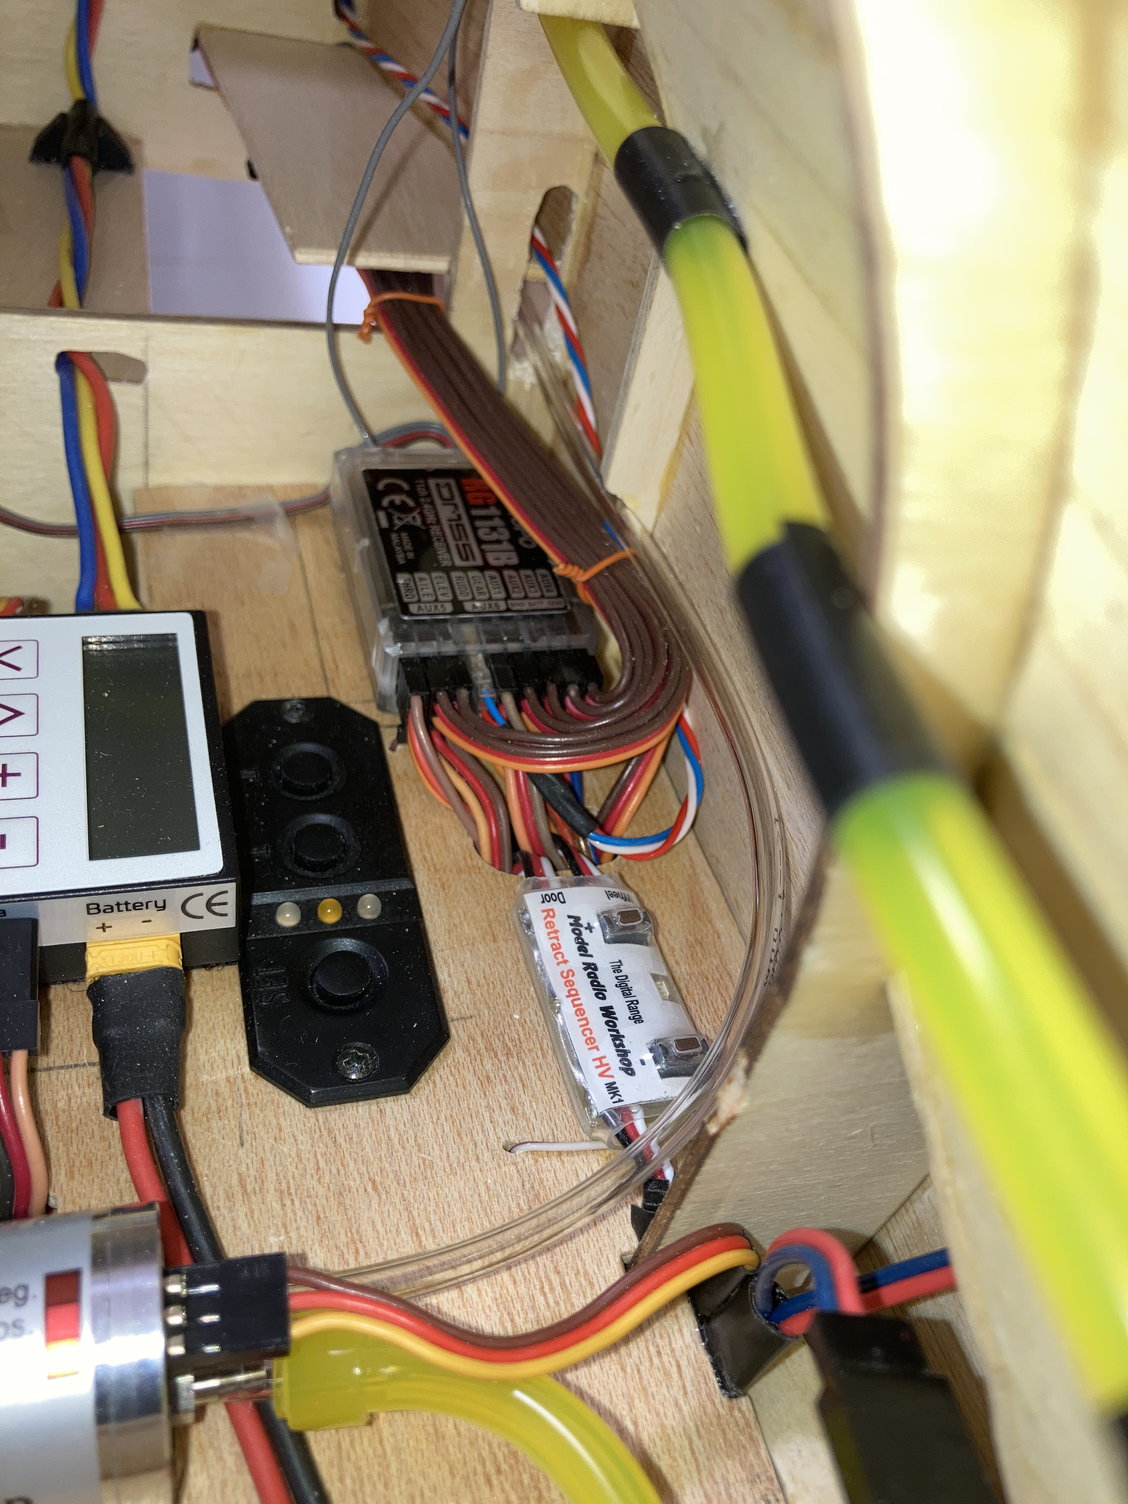
Can you move the Rx aerials away from the servo extension leads...if they are touching they could pick up noise. Also the aerial ends want to be away from the fuel lines.
D
D
02-13-2021, 02:07 PM
#183
Senior Member
Thread Starter
 02-13-2021, 03:06 PM
#184
Senior Member
Thread Starter
Hi Again,
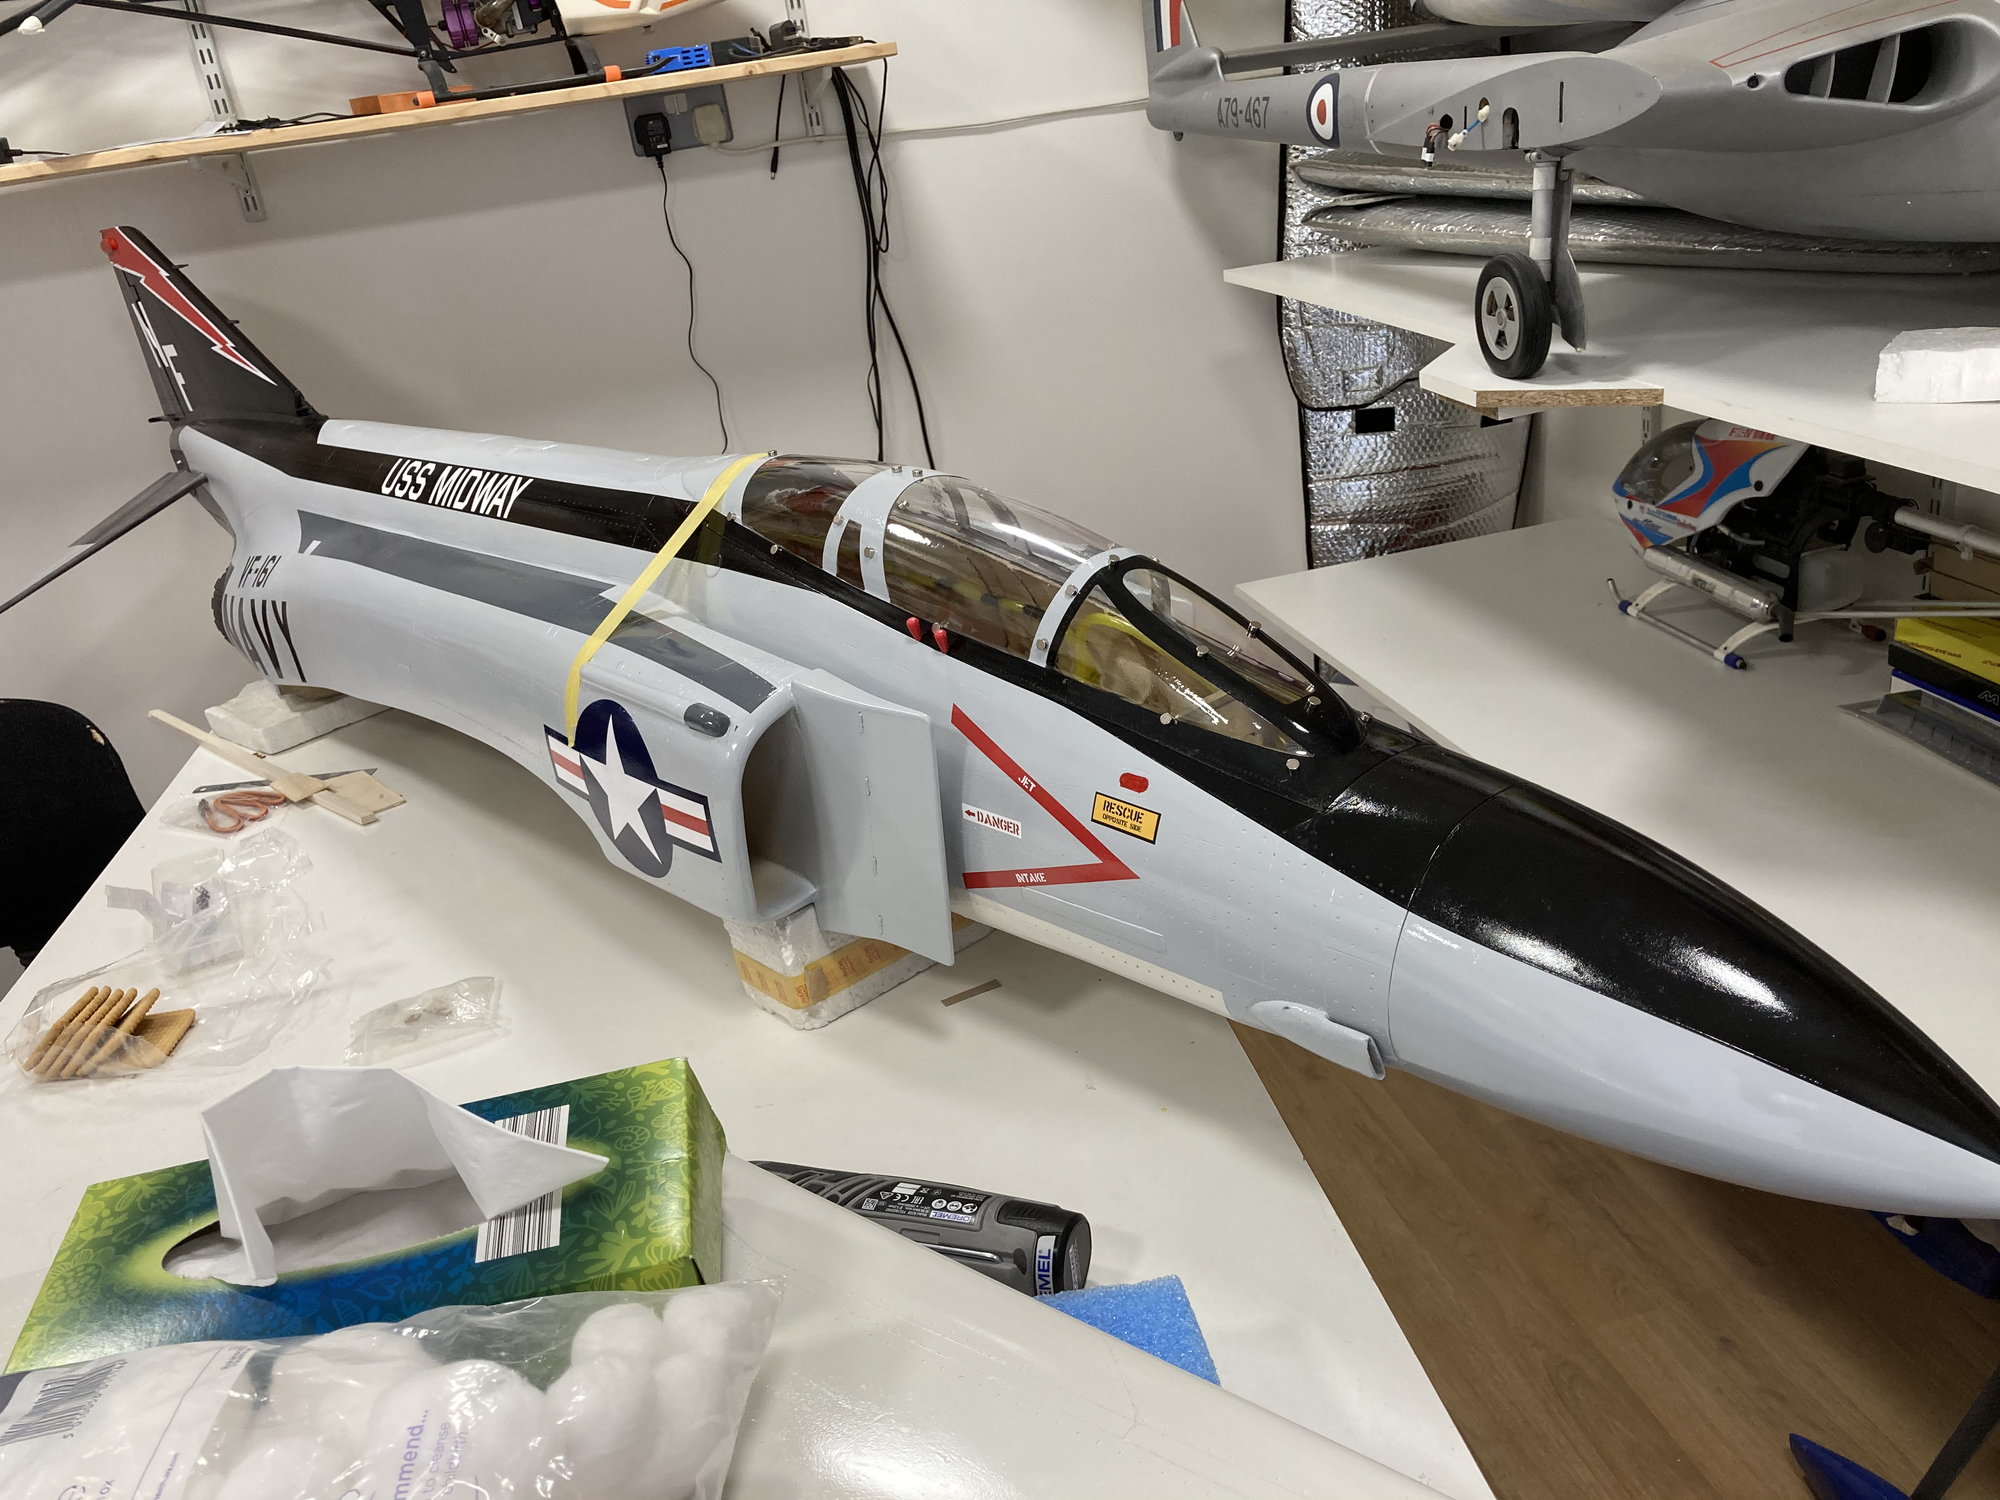
I just made the Tail hook which has been missed during build :-)), Also, paint on rudder as I wasn't happy with decals,
,
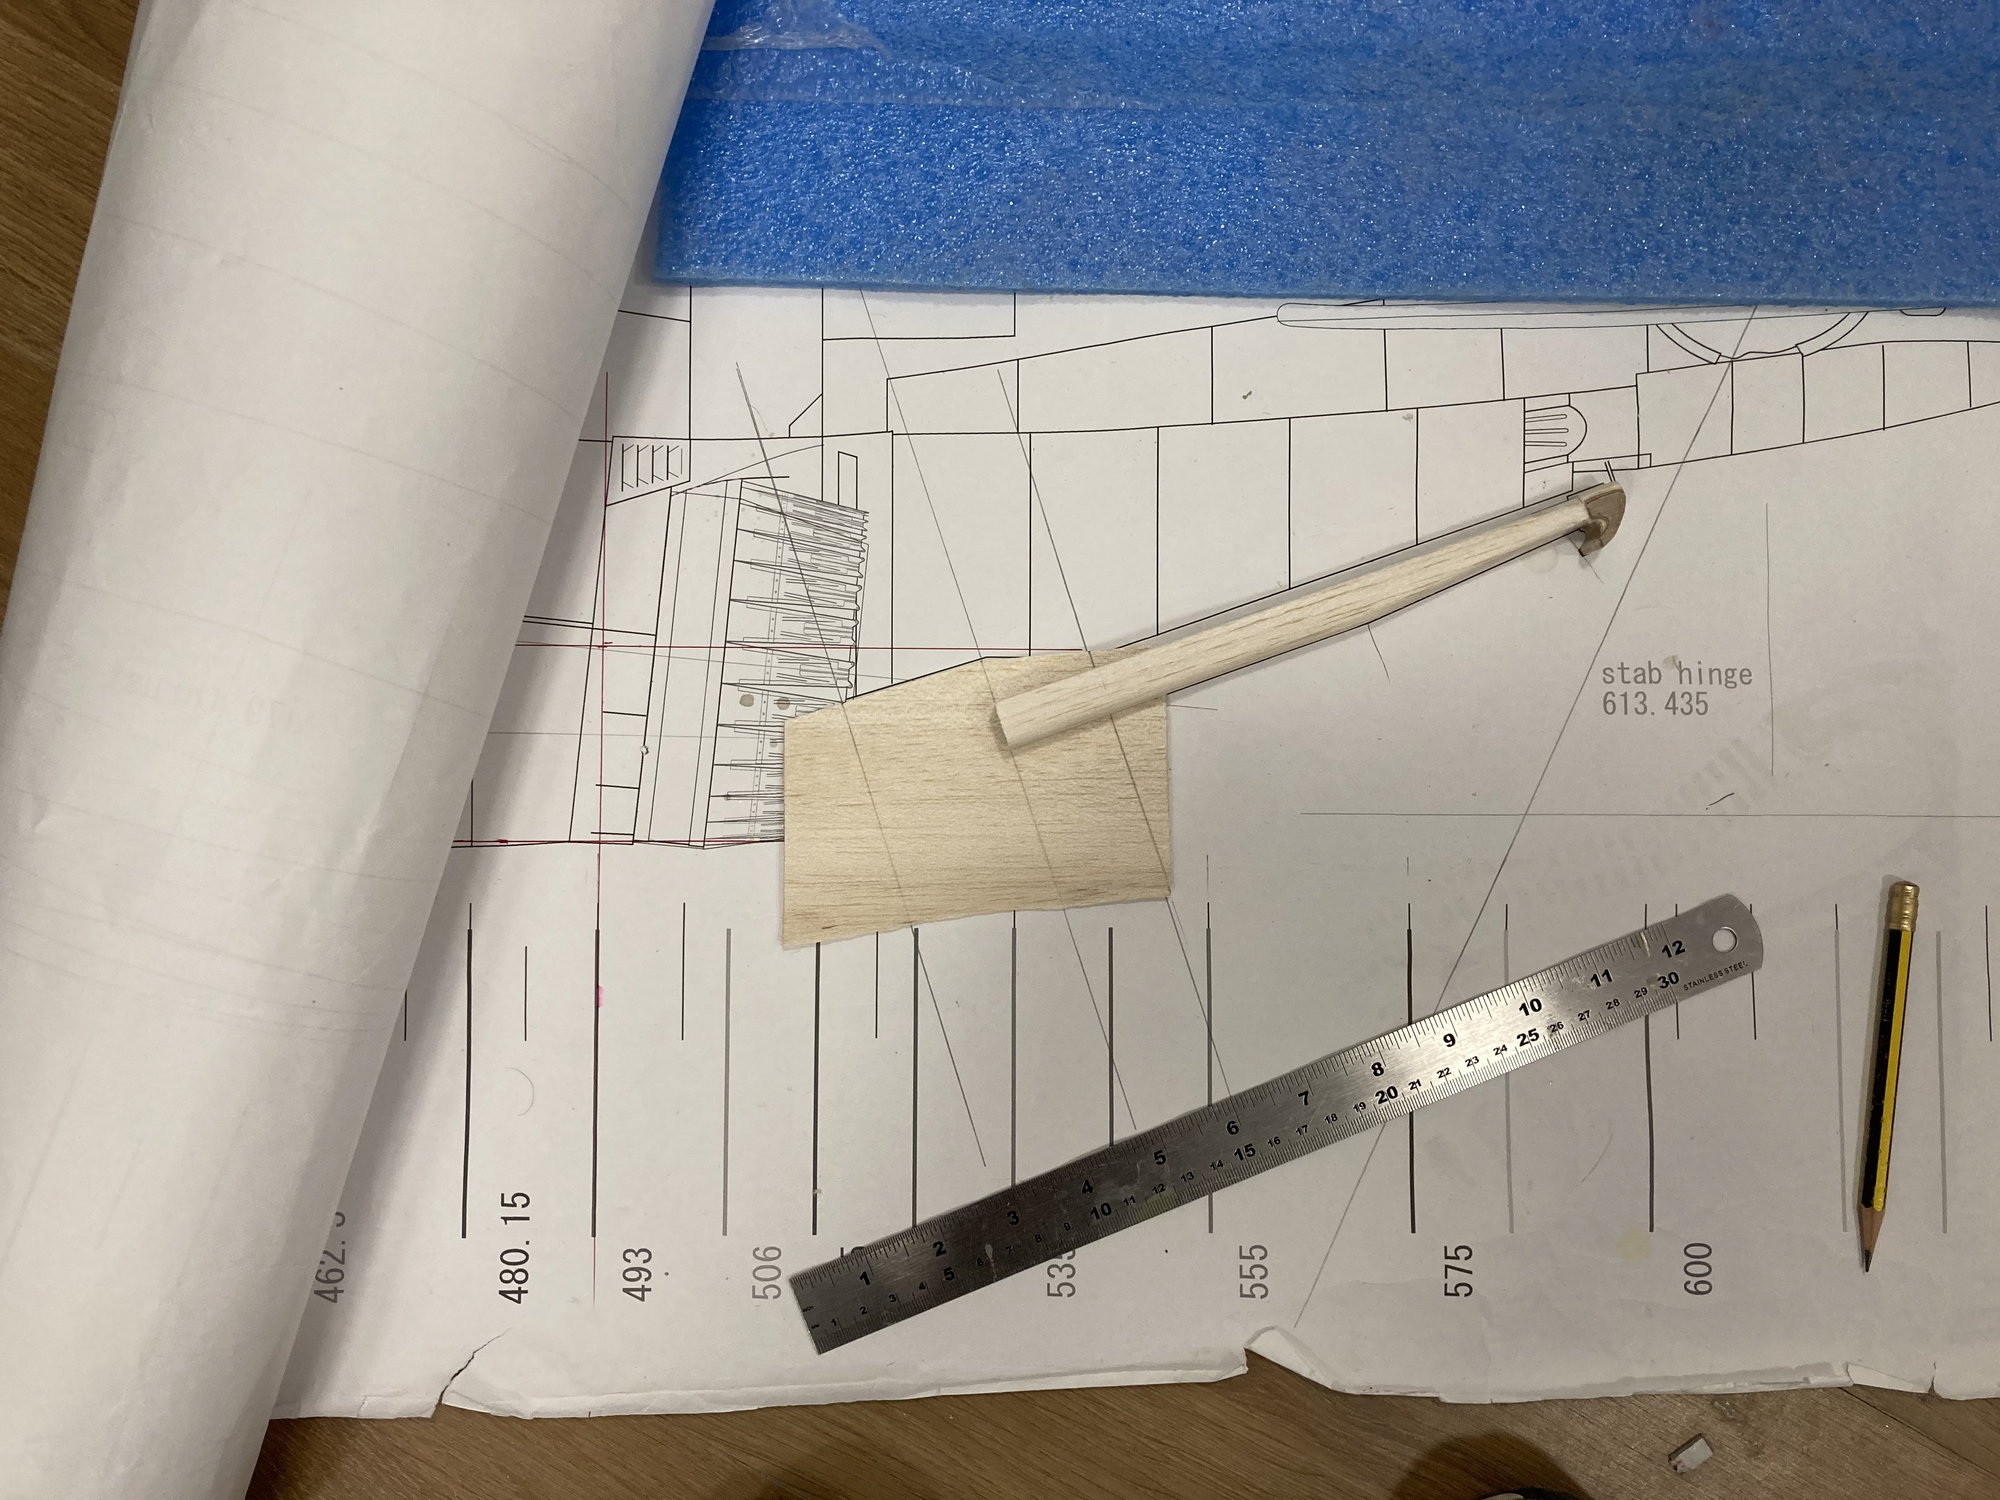
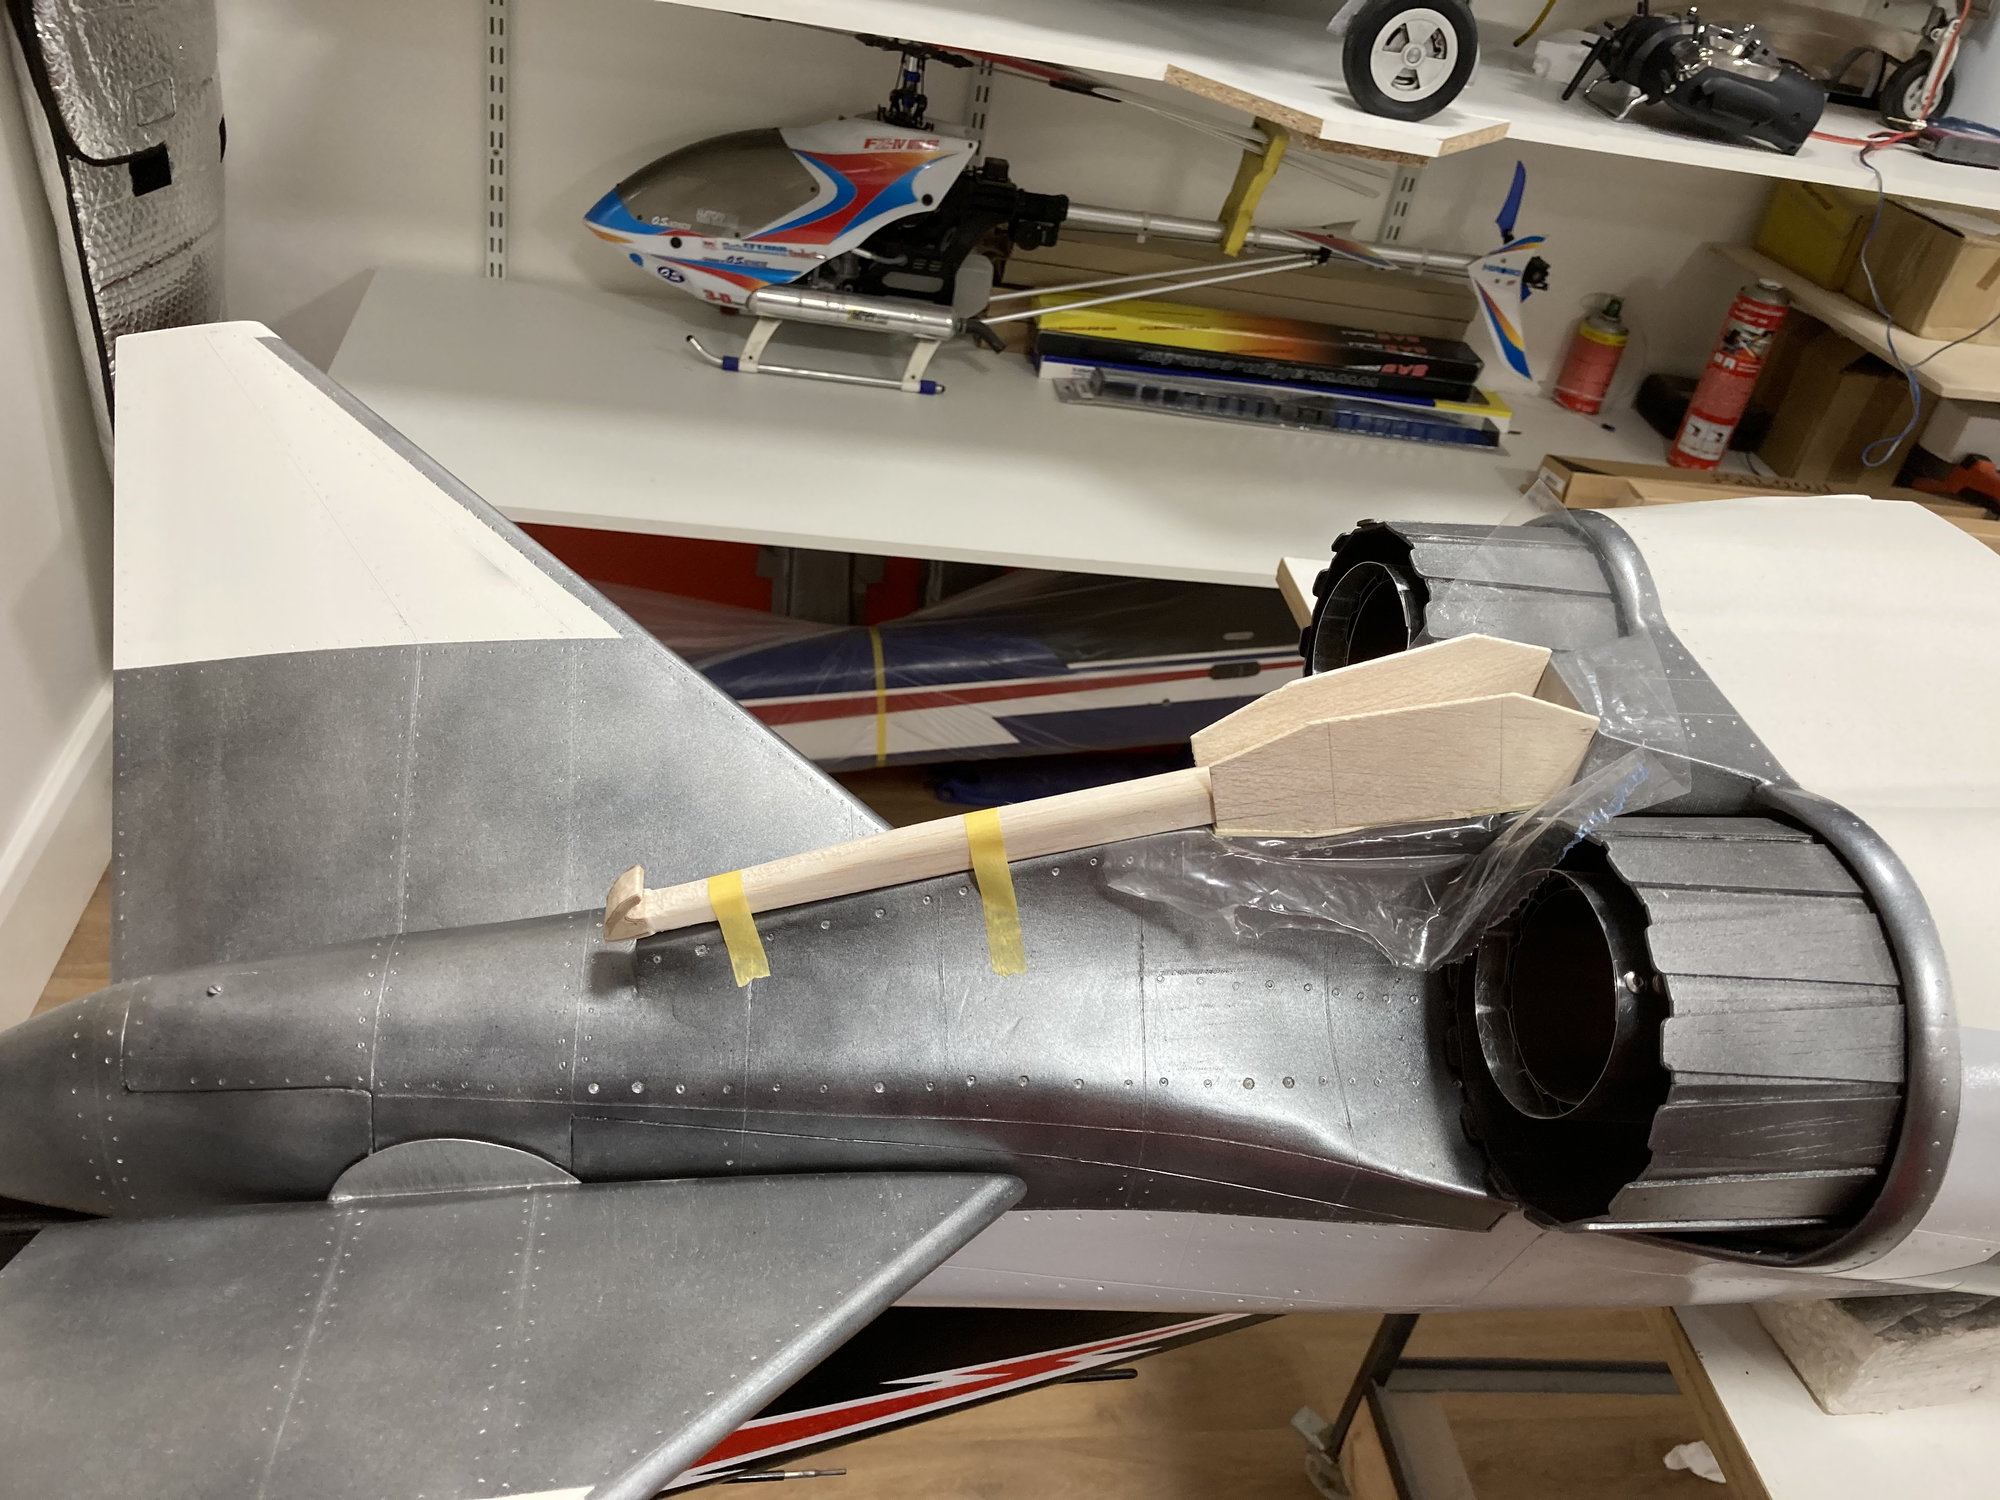
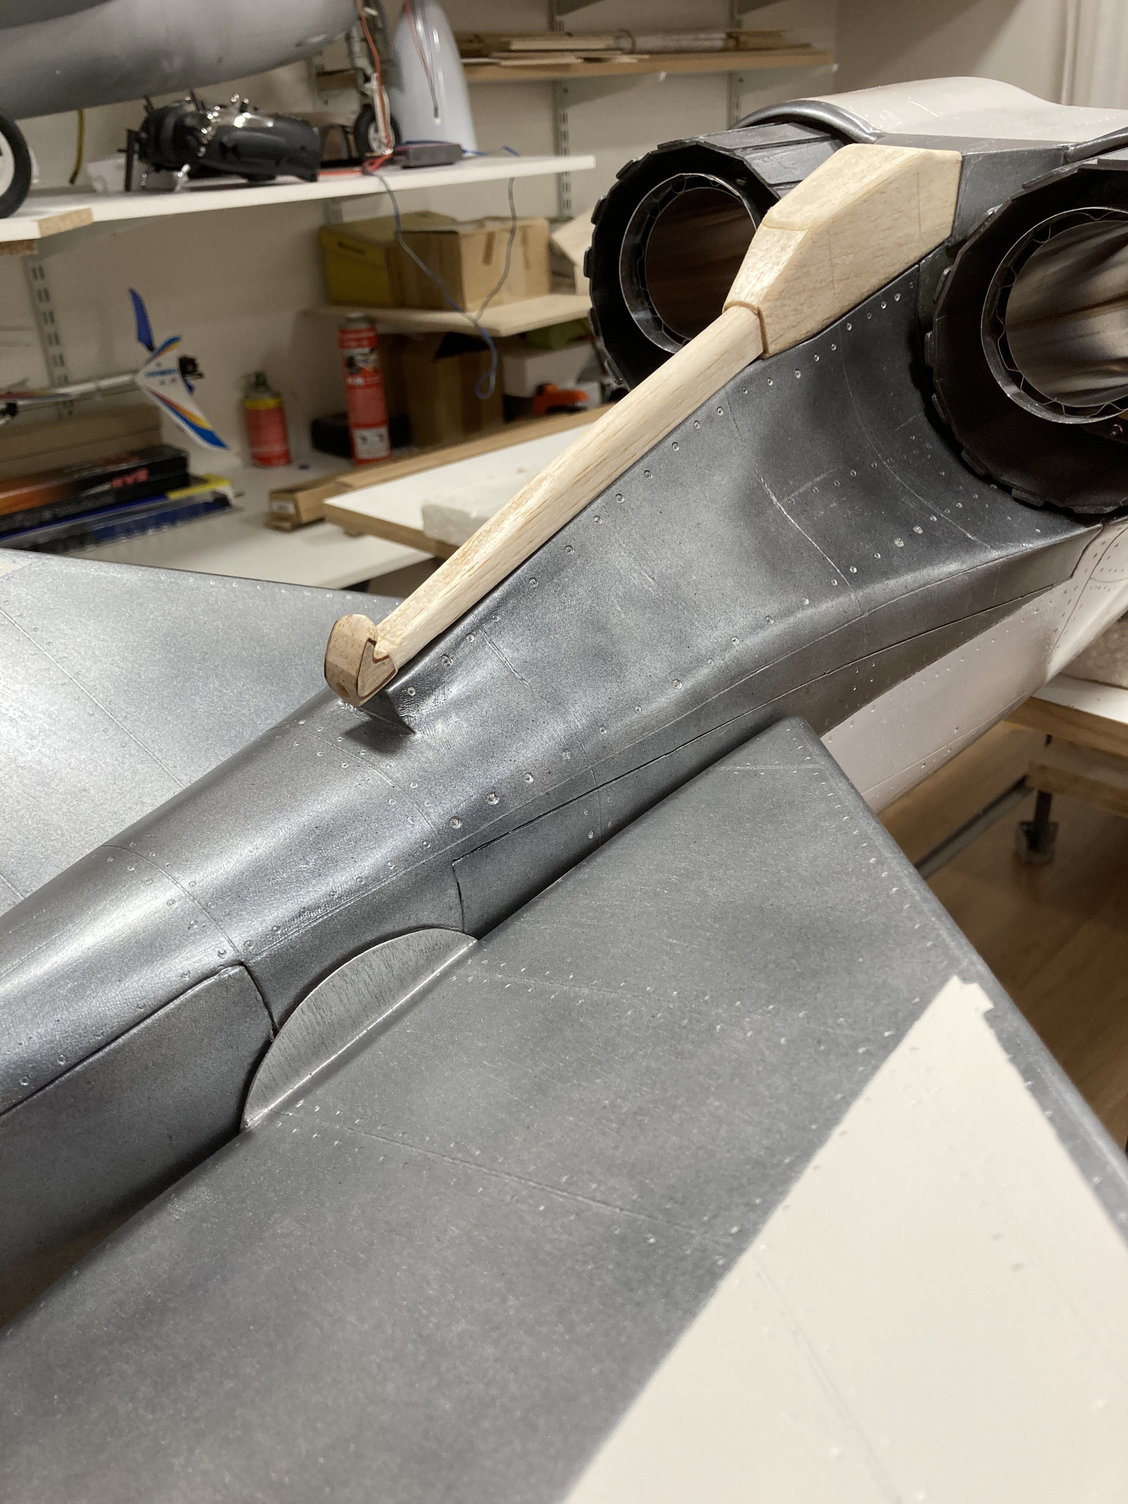
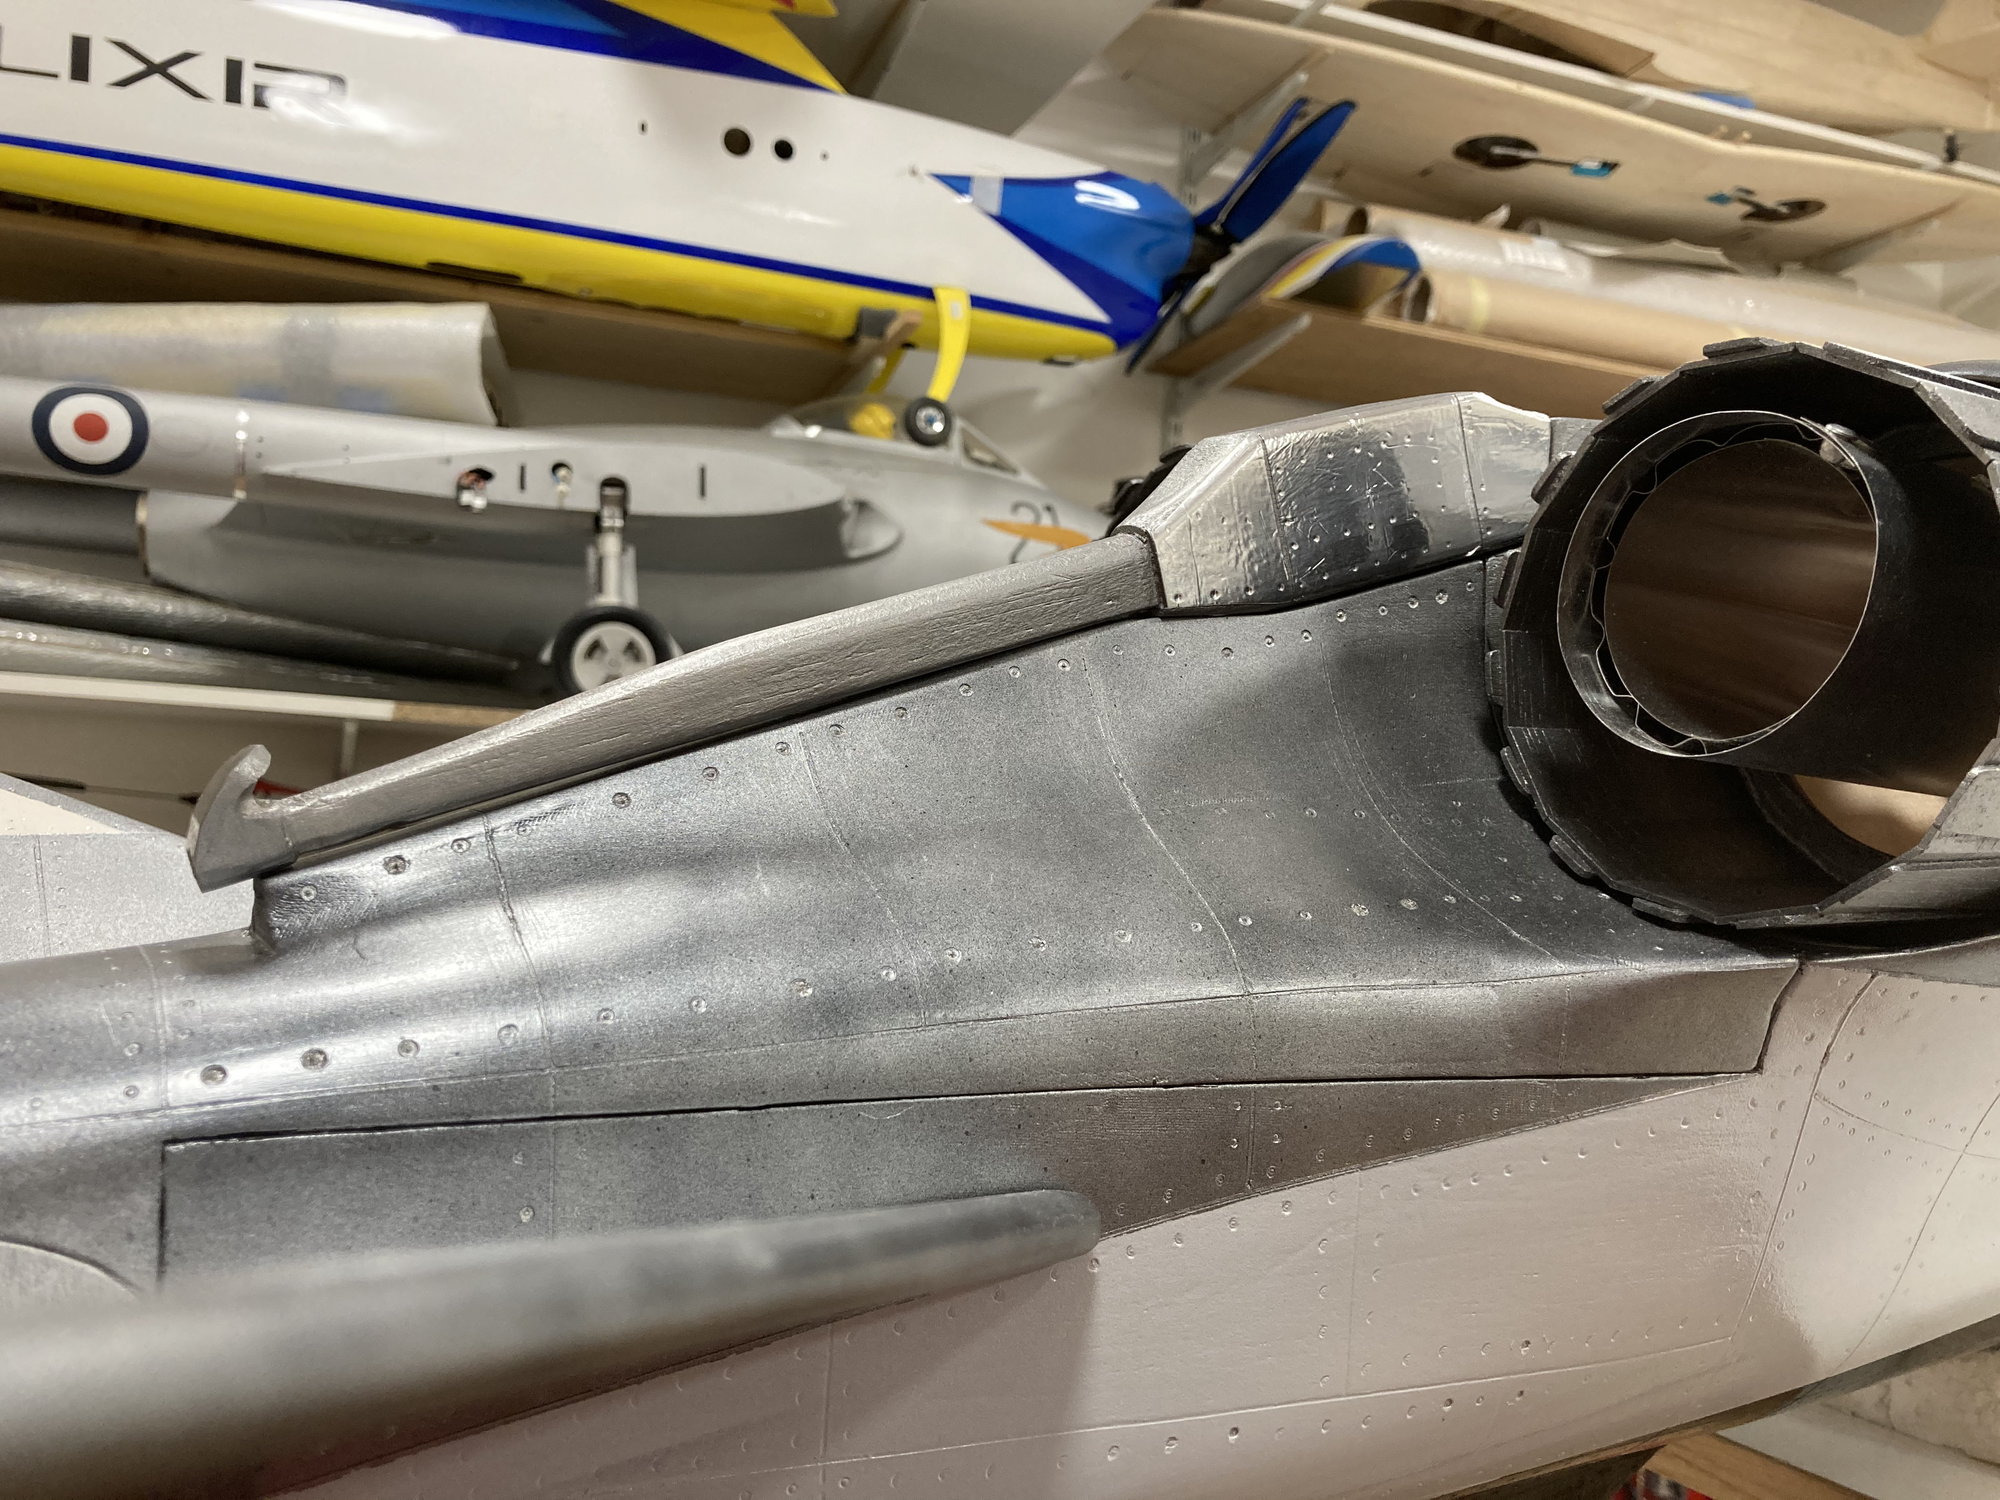
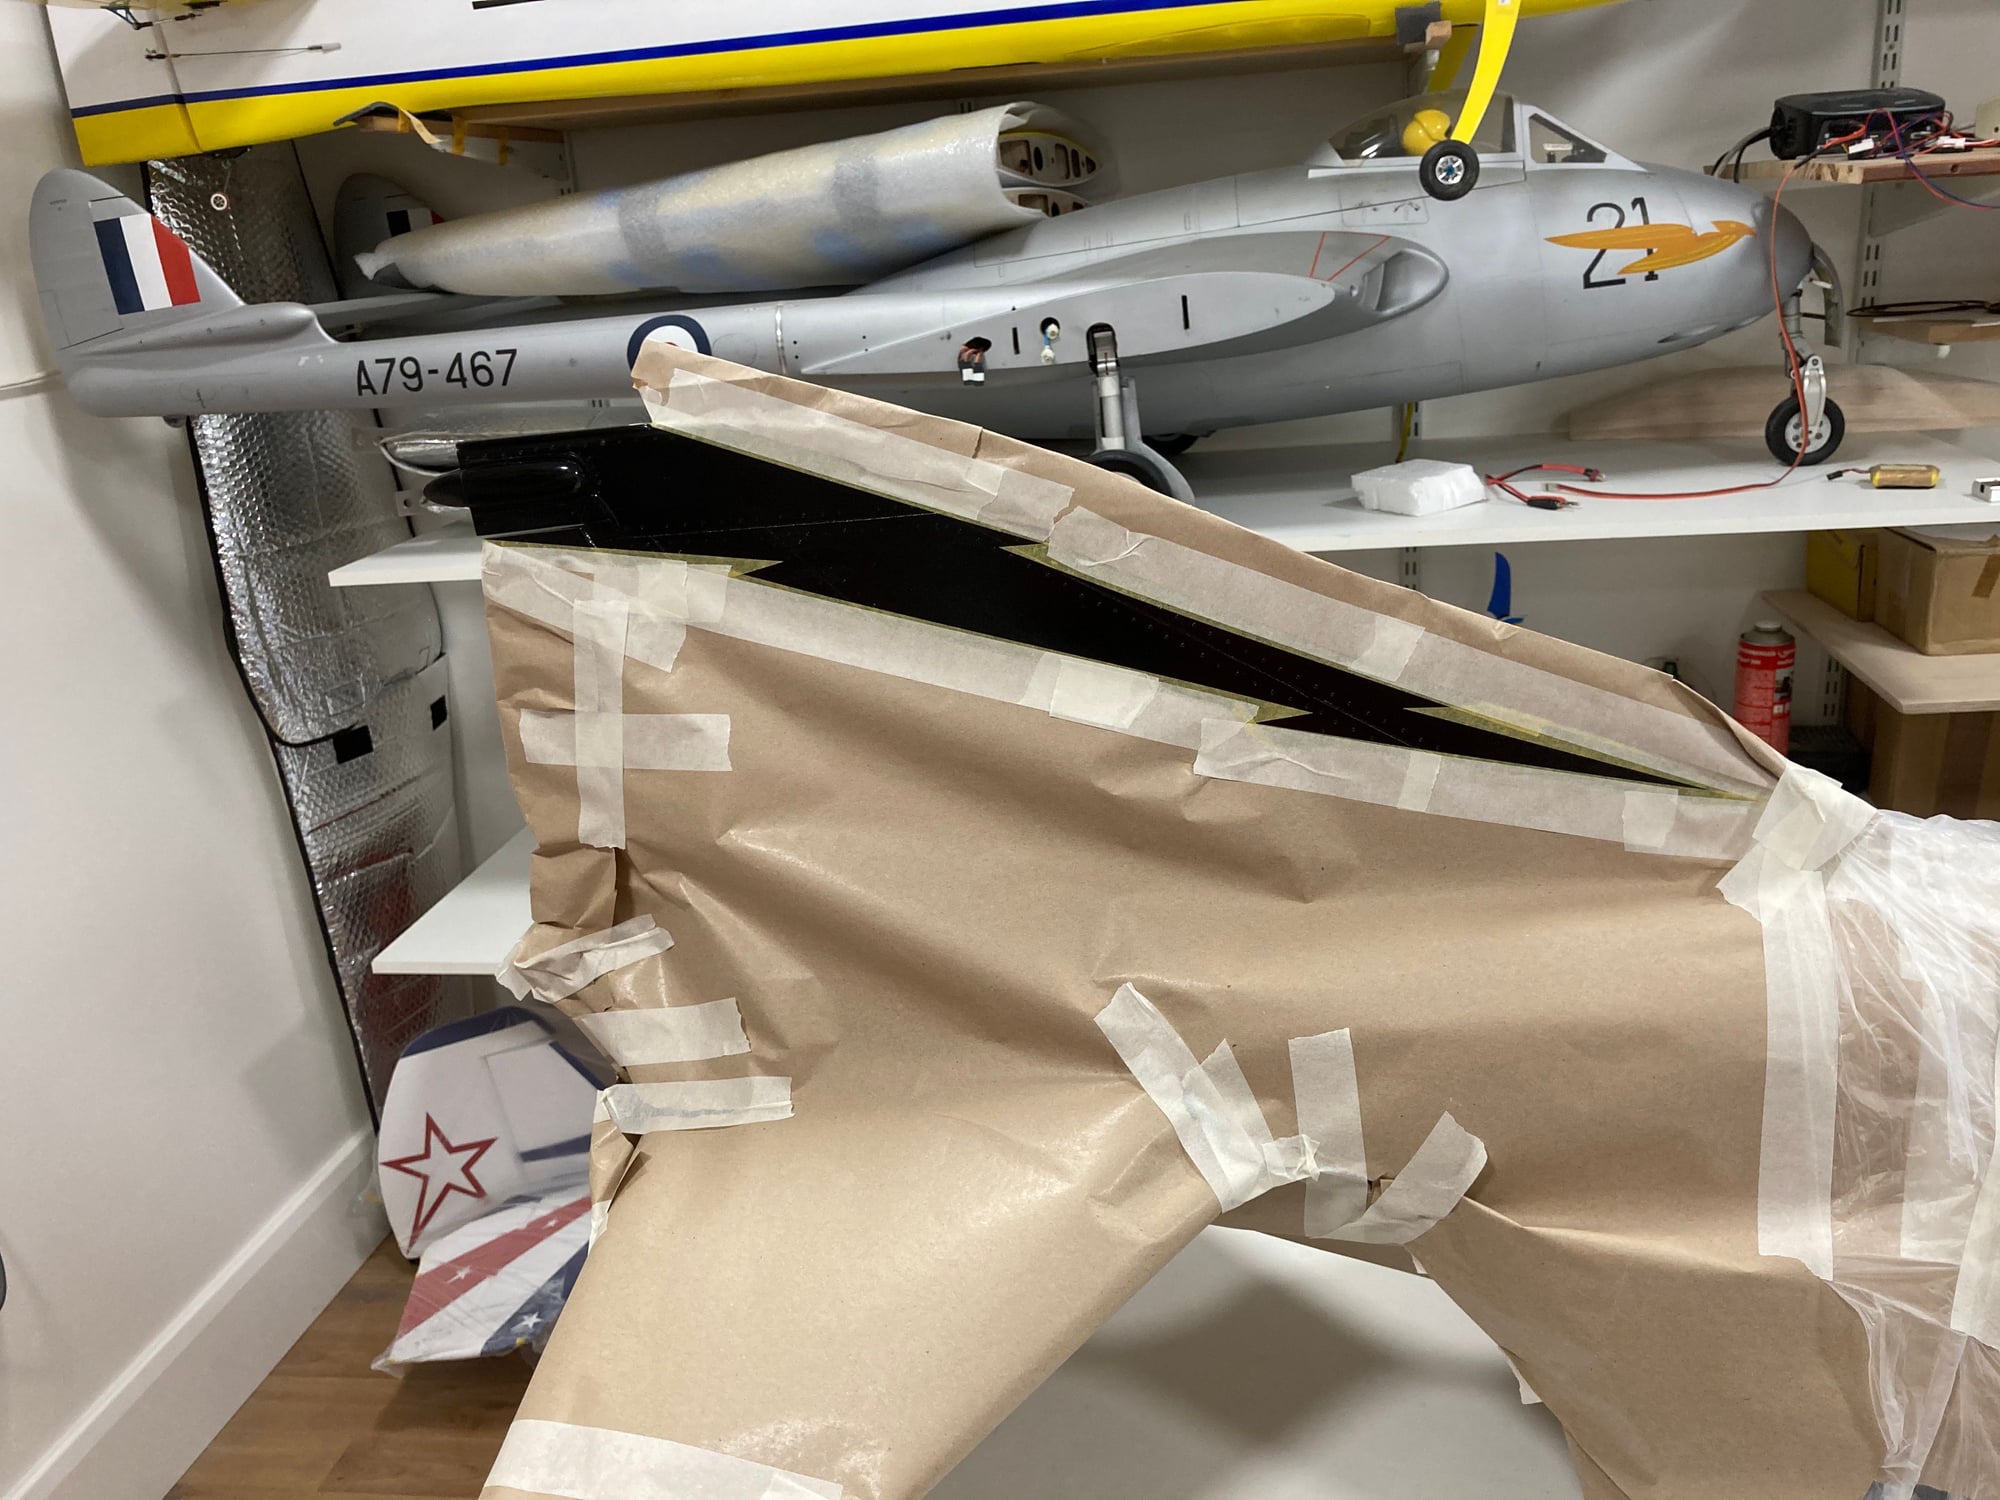
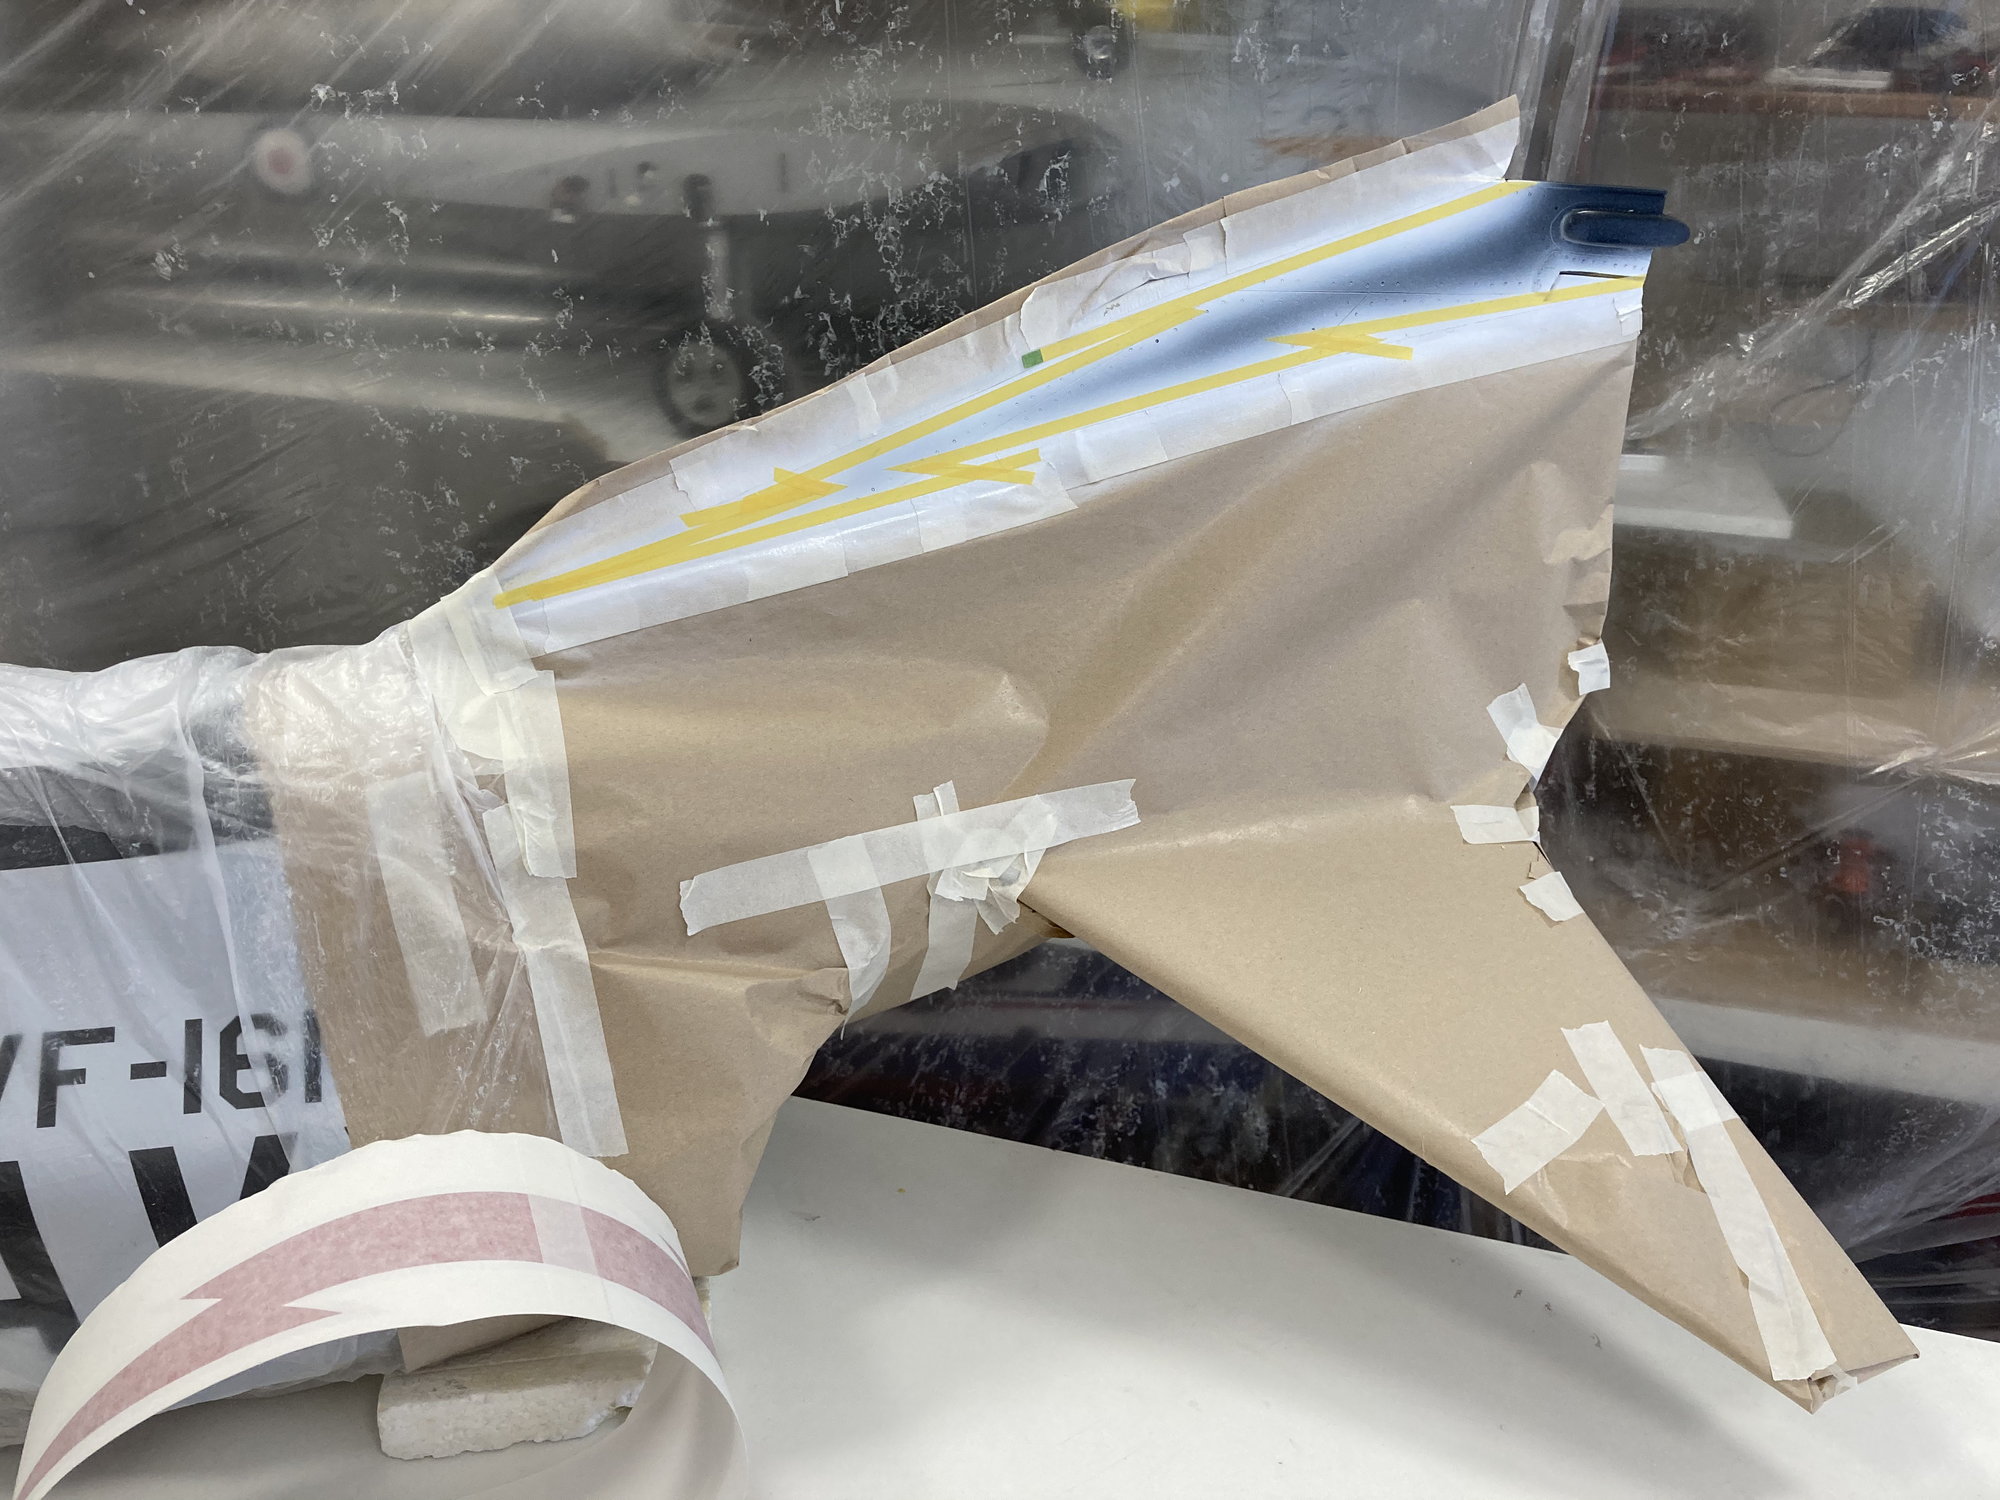

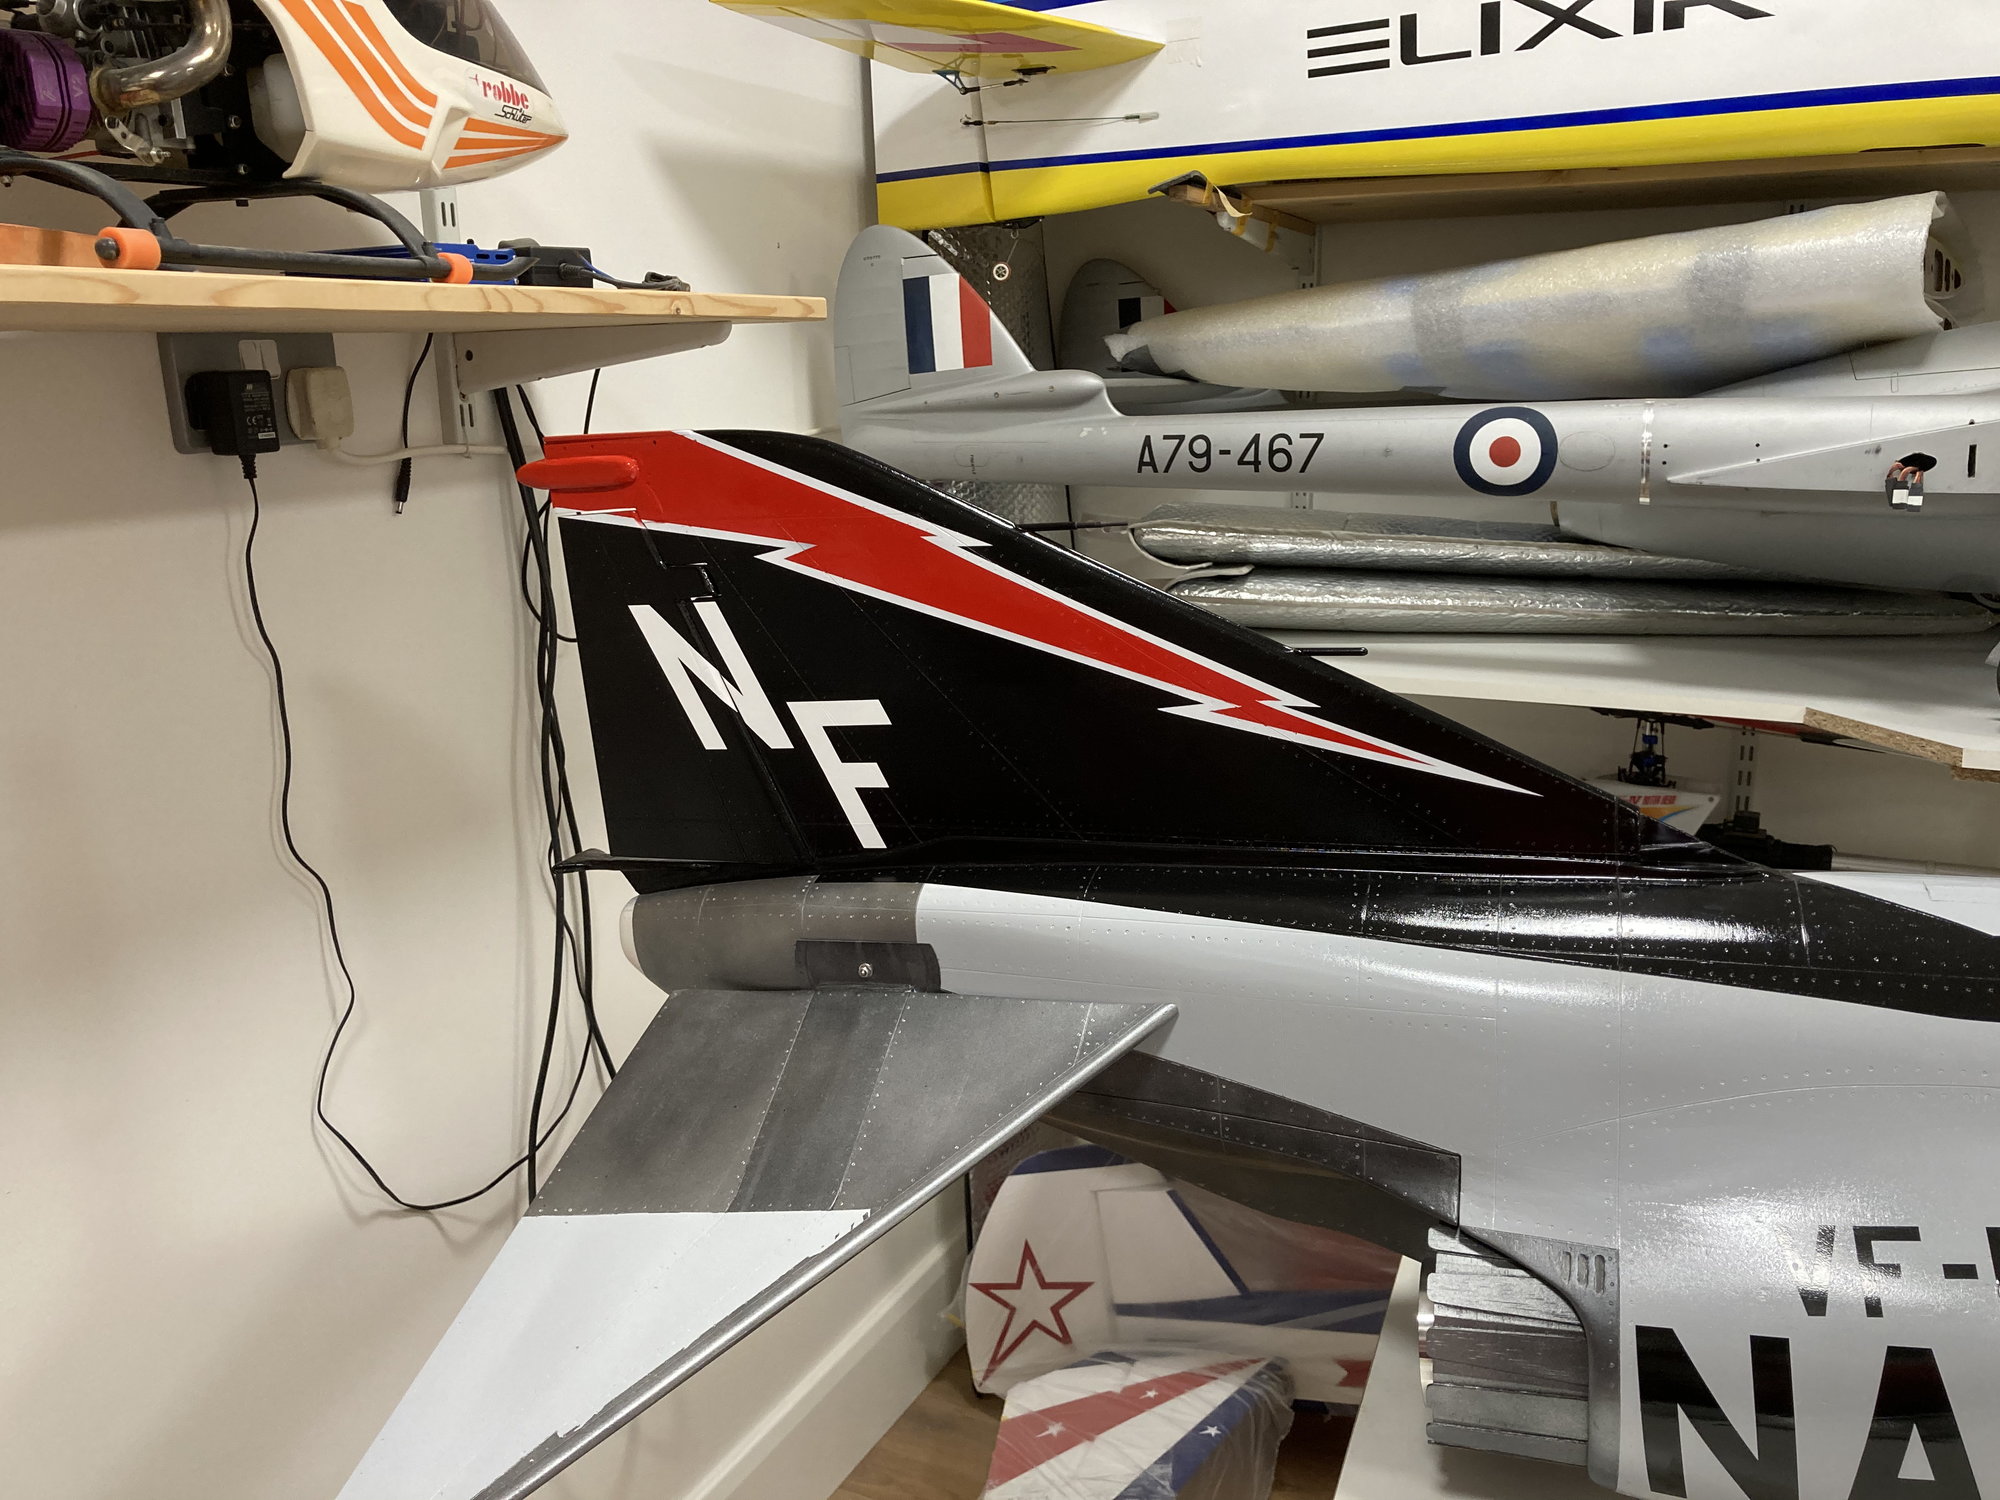
I just made the Tail hook which has been missed during build :-)), Also, paint on rudder as I wasn't happy with decals,
,
Last edited by Javad; 02-13-2021 at 05:38 PM.
02-14-2021, 07:18 PM
#186

Excellent build and I wish you every success with it!
Since I have a BVM F4 , same scale, but with AMT Pegasus power, about twice your thrust, a few points may help:
The BVM F4 tailpipes are exactly in line with scale datum, no extra downthrust needed and the model is not affected by pitch changes due to thrust, it is neutral. Mine also has the scale le slat of the J on the stab, and still not affected by jet efflux.
The C of G is 12 3/4 inches along the leading edge, from the root, as the LE is. 34 1/2 inches long so about 38 % along, beware, it is further forward than one might think !
Your model will be significantly lighter than mine, so I guess twin X45s will be perfect, they are quite brilliant engines, just installed mine in my BVM F16 ( original )
Good luck, I very much look forward to seeing it.
PS I have lots of F4 books and drawings inc the BVM ones if needed.
 02-15-2021, 01:27 AM
#188
Senior Member
Thread Starter
02-16-2021, 11:31 AM
#190
Senior Member
Thread Starter
Hi Guys,
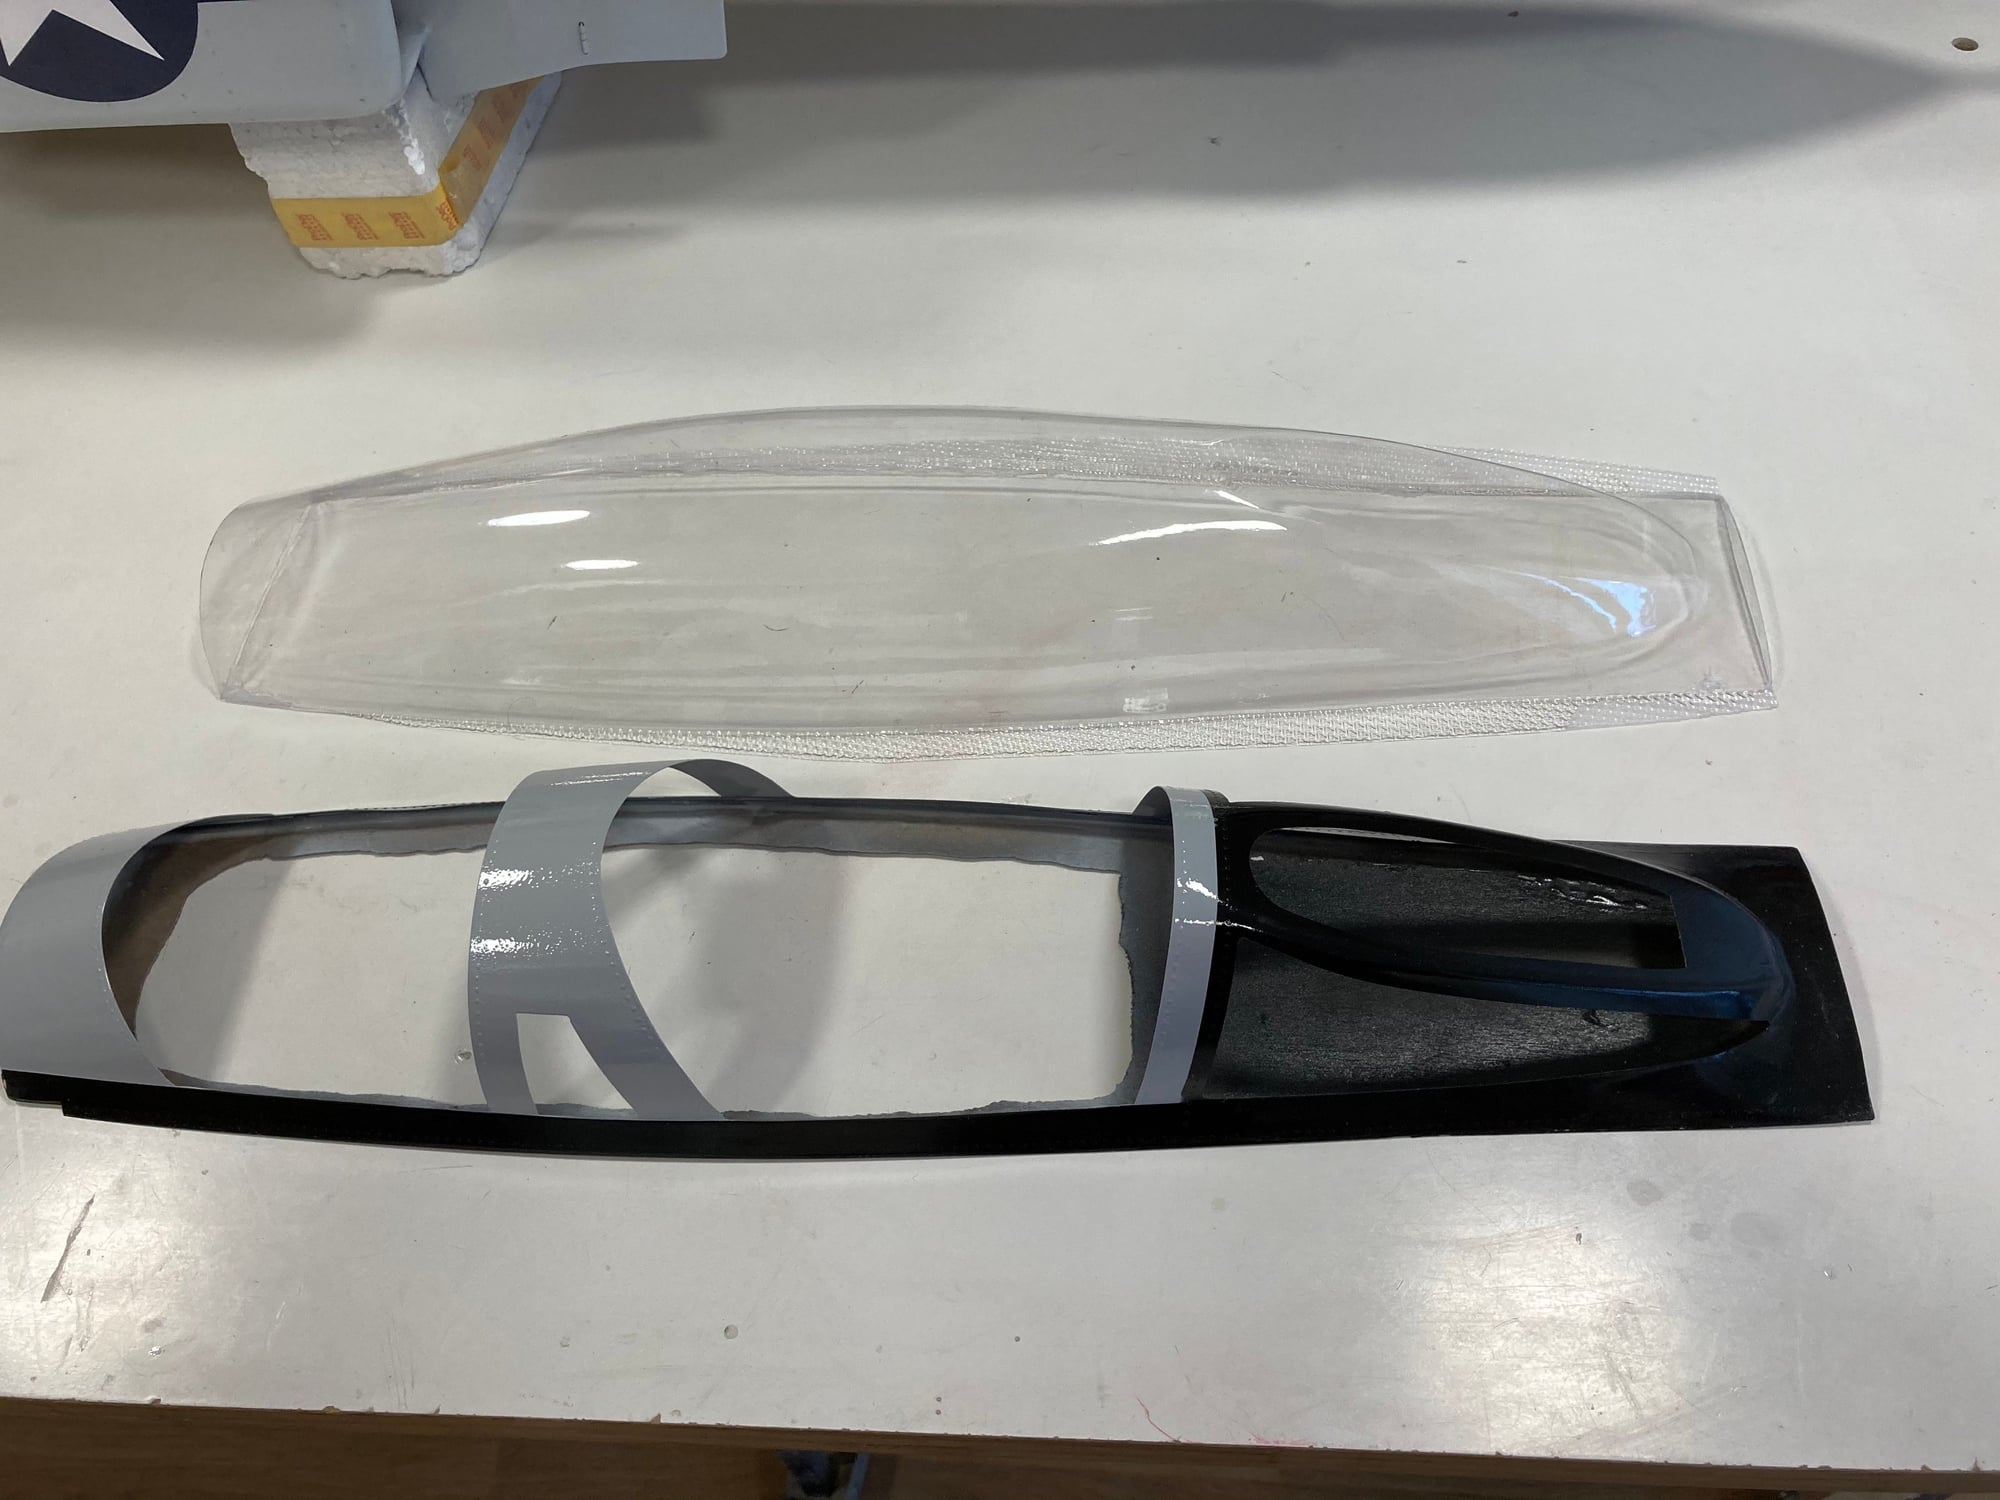
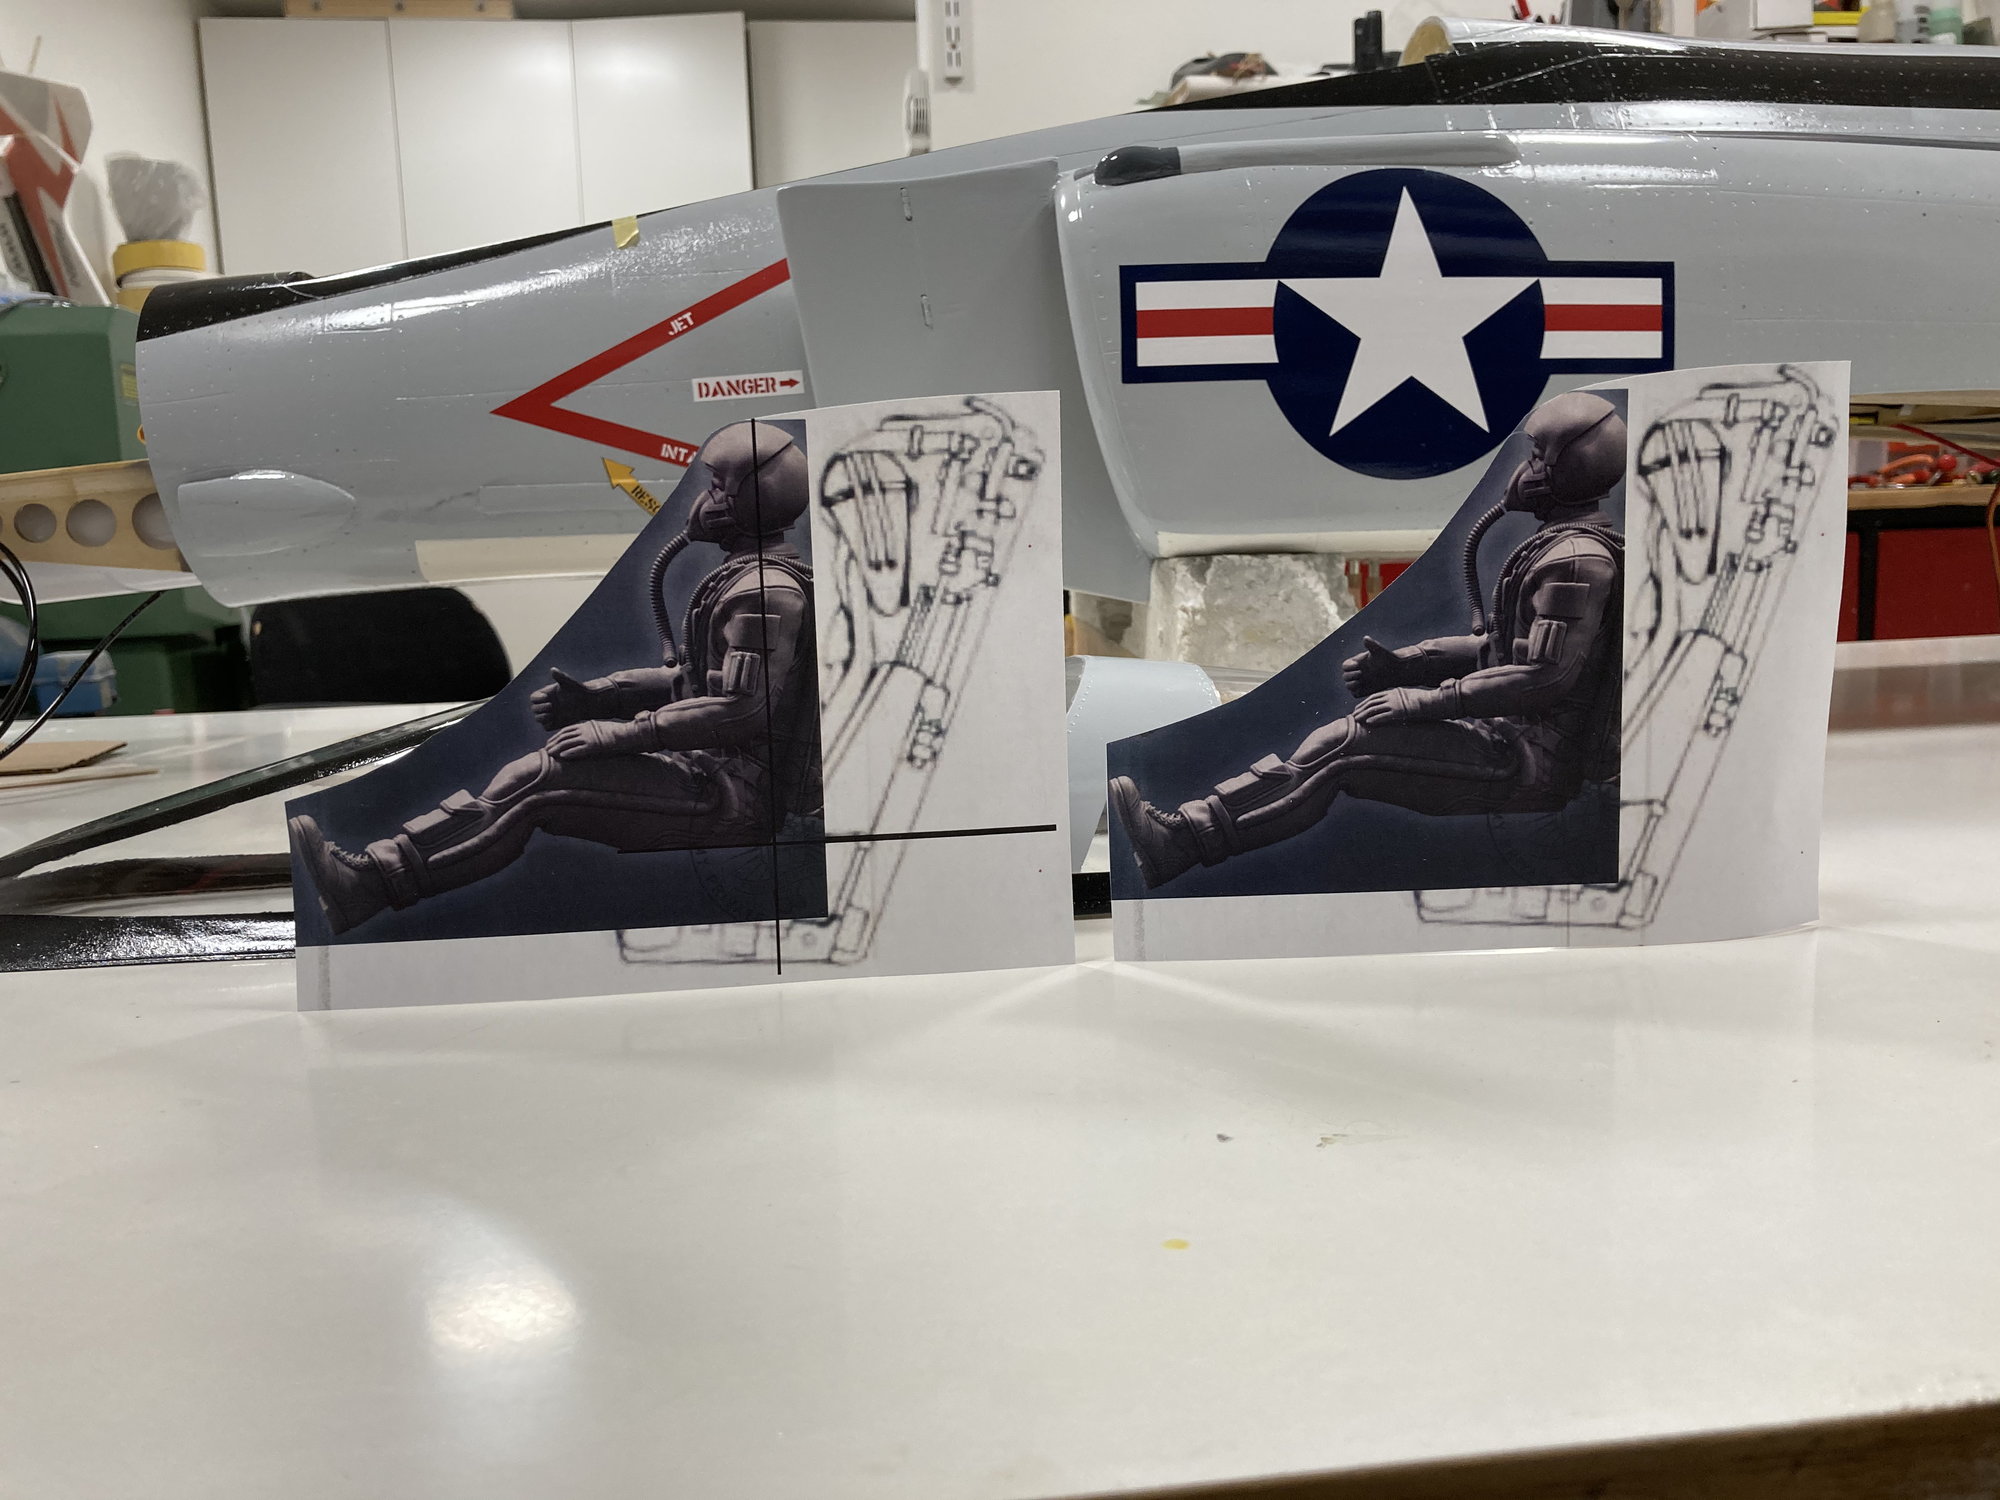
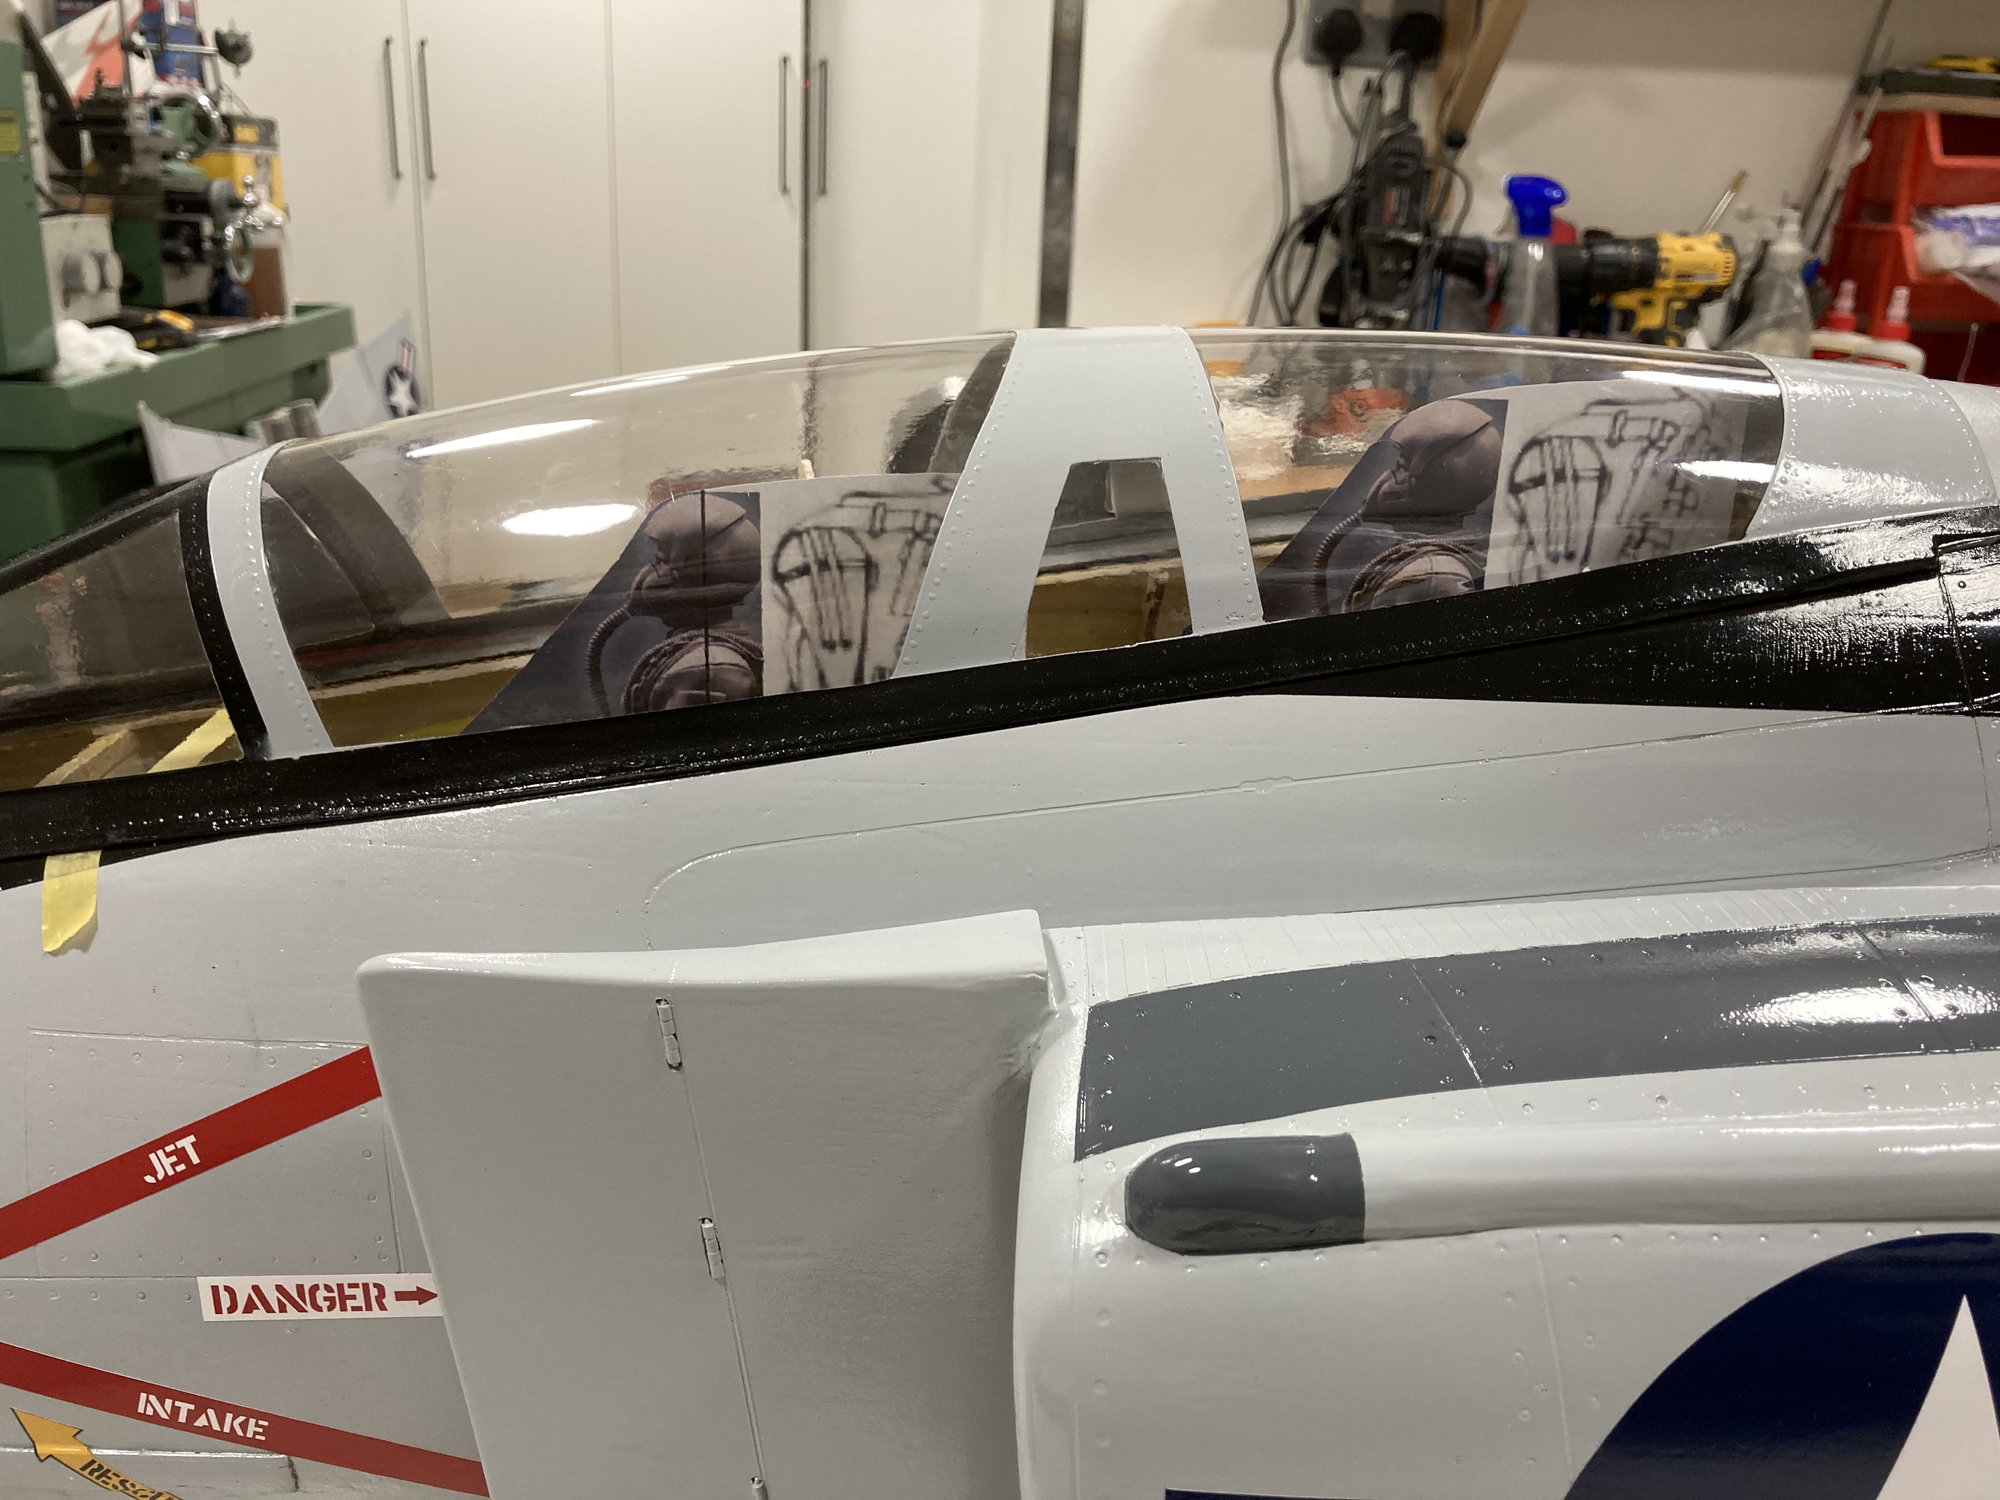
Using Zap Canopy glue, I installed clear canopy into the frame. I printed different size of Seat& Pilot on a paper, to make sure I'm not going to have a too big seats and pilot,
I will start to work on cockpit now, and hopefully we will do test fly soon,
Using Zap Canopy glue, I installed clear canopy into the frame. I printed different size of Seat& Pilot on a paper, to make sure I'm not going to have a too big seats and pilot,
I will start to work on cockpit now, and hopefully we will do test fly soon,
02-16-2021, 12:14 PM
#192
Senior Member
Thread Starter
02-17-2021, 01:28 PM
#193

Javad, just found your thread and I'm very impressed with the quality of your work.
Starting with the building board on castors, the excellent planning, the meticulous woodwork, and now a fabulous paint finish.
I've been modelling for a long, long, long time and I will never get to your standard!
I look forward to the flight reports.
Starting with the building board on castors, the excellent planning, the meticulous woodwork, and now a fabulous paint finish.
I've been modelling for a long, long, long time and I will never get to your standard!
I look forward to the flight reports.
02-21-2021, 03:12 PM
#194
Senior Member
Thread Starter
Javad, just found your thread and I'm very impressed with the quality of your work.
Starting with the building board on castors, the excellent planning, the meticulous woodwork, and now a fabulous paint finish.
I've been modelling for a long, long, long time and I will never get to your standard!
I look forward to the flight reports.
Starting with the building board on castors, the excellent planning, the meticulous woodwork, and now a fabulous paint finish.
I've been modelling for a long, long, long time and I will never get to your standard!
I look forward to the flight reports.
Many thanks for your comment,
We are close, hopefully by lifting lockdown, if weather be good, then we are good to go for test fly :-)),
03-13-2021, 04:07 PM
#195
Senior Member
Thread Starter
Hi Again,
I have used a sequencer for landing gears & gear doors, but I had some challenge to make them working. Doors operation as below:
1) Middle part of gear doors are attached to the legs, so they open and close as gear down& up,
2) Part of doors covering wheels on wings + main ( back) part of nose wheel doors open and close by servo trough a sequencer
3) Small gear doors on wings and front part of nose gear where the lights are are mechanical pushed to open by legs, but the one on wings close by a spring following gear up & nose one just by air pressure (which I hope it will work) ;-))
In edition, lights on nose door are switching on and off by a mechanical switch, so gear down lights on& gear up lights off,
Last edited by Javad; 03-13-2021 at 04:12 PM.
The following users liked this post:
jescardin (03-27-2021)
 03-14-2021, 05:18 AM
#199
Senior Member
Thread Starter