Community
Search
Notices
RC Pattern Flying Discuss all topics pertaining to RC Pattern Flying in this forum.

Zeus

Thread Tools
 
Search this Thread
 
Old 05-25-2018 | 04:42 PM
  #126  
CW
 
Joined: Oct 2003
Posts: 58
Likes: 0
Received 0 Likes on 0 Posts
From: Wollongong, AUSTRALIA
Default

Looking good Rodney. What glue did you use?
Old 05-26-2018 | 01:44 AM
  #127  
RodneyFord's Avatar
Thread Starter
 
Joined: Apr 2015
Posts: 424
Likes: 0
Received 1 Like on 1 Post
From: Lower Hutt New zealand
Default

Originally Posted by CW
Looking good Rodney. What glue did you use?
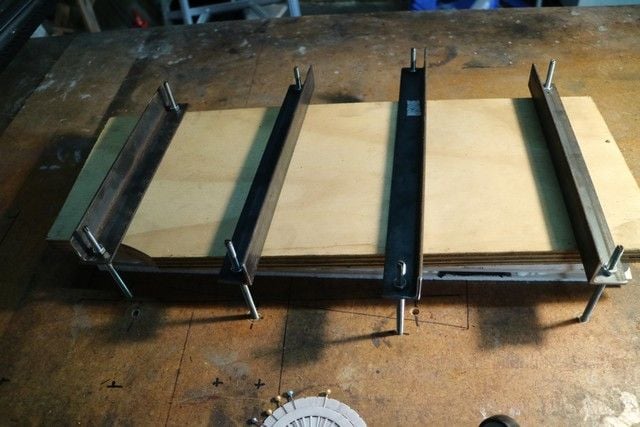
I used epoxy mixed with microballons. I think it was a bit thick and didn't flow as well as I would have liked. I've got the other half in the press with mostly PVA. We will see what the difference is.

Last edited by RodneyFord; 05-26-2018 at 02:14 AM.
Old 05-26-2018 | 01:57 AM
  #128  
RodneyFord's Avatar
Thread Starter
 
Joined: Apr 2015
Posts: 424
Likes: 0
Received 1 Like on 1 Post
From: Lower Hutt New zealand
Default


Shaped the spinner pattern and soaked with epoxy then a coat of microballoon mix.
Old 05-26-2018 | 02:16 AM
  #129  
CW
 
Joined: Oct 2003
Posts: 58
Likes: 0
Received 0 Likes on 0 Posts
From: Wollongong, AUSTRALIA
Default

OK Thanks Rodney. Have you tried polyurethane glue for sheeting? Would need about 15gms total for both stabs with your honeycombing. Was the balsa sheeting 1.5 mm?
Old 05-26-2018 | 03:55 AM
  #130  
RodneyFord's Avatar
Thread Starter
 
Joined: Apr 2015
Posts: 424
Likes: 0
Received 1 Like on 1 Post
From: Lower Hutt New zealand
Default

Originally Posted by CW
OK Thanks Rodney. Have you tried polyurethane glue for sheeting? Would need about 15gms total for both stabs with your honeycombing. Was the balsa sheeting 1.5 mm?
Well I haven't actually used it for sheeting, but of course I am aware of it as an option. Usually I dope the inside of the balsa, apply epoxy and vacuum bag them to the cores. This is simple light and strong. However I do like to try different systems and this is the latest experiment. Tomorrow we will see how this variation turns out.
Old 05-26-2018 | 03:56 AM
  #131  
kenh3497's Avatar
 
Joined: Jan 2010
Posts: 1,517
Received 3 Likes on 3 Posts
From: Rockwell, IA
Default

I know kevlar is very popular fabric to use. From my limited experience with kevlar it seems the epoxy does not really bond with the kevlar. the epoxy only seems to encapsulate it. What is your experience? What is the reasoning to use kevlar instead of another product? I'm not bashing your choice, I'm just trying to understand why kevlar was chosen over another cloth.

Thanks! Ken
Old 05-26-2018 | 02:28 PM
  #132  
RodneyFord's Avatar
Thread Starter
 
Joined: Apr 2015
Posts: 424
Likes: 0
Received 1 Like on 1 Post
From: Lower Hutt New zealand
Default

Originally Posted by kenh3497
I know kevlar is very popular fabric to use. From my limited experience with kevlar it seems the epoxy does not really bond with the kevlar. the epoxy only seems to encapsulate it. What is your experience? What is the reasoning to use kevlar instead of another product? I'm not bashing your choice, I'm just trying to understand why kevlar was chosen over another cloth.

Thanks! Ken
Hi Ken
I have made a few full kevlar fuselages and my experience is that it is strong and light. I have not experienced any problems with the resin fabric matrix. The issues I have had are just the usual ones, you need aramid scissors and it can't be sanded easily. Fully wetting it out is an issue too as it doesn't take the wet look of glass.
I suppose I could have used the 80 gm carbon instead but it is very expensive and there is the RF issue so I just used it for local reinforcement. I could make it neater and also improve the resin to fabric ratio. All in all this would have to be one of my best fuselages

Last edited by RodneyFord; 05-26-2018 at 05:05 PM.
Old 05-26-2018 | 02:57 PM
  #133  
RodneyFord's Avatar
Thread Starter
 
Joined: Apr 2015
Posts: 424
Likes: 0
Received 1 Like on 1 Post
From: Lower Hutt New zealand
Default

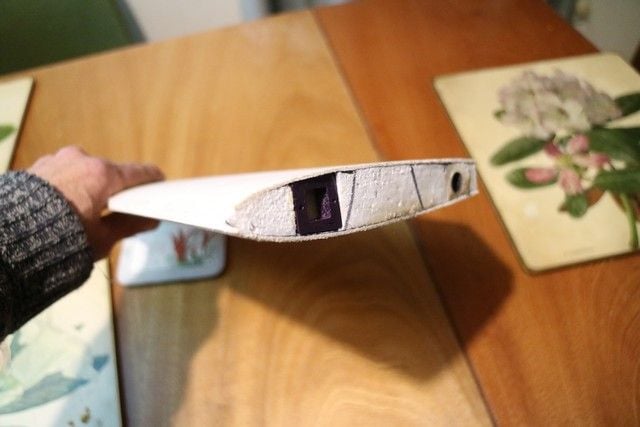
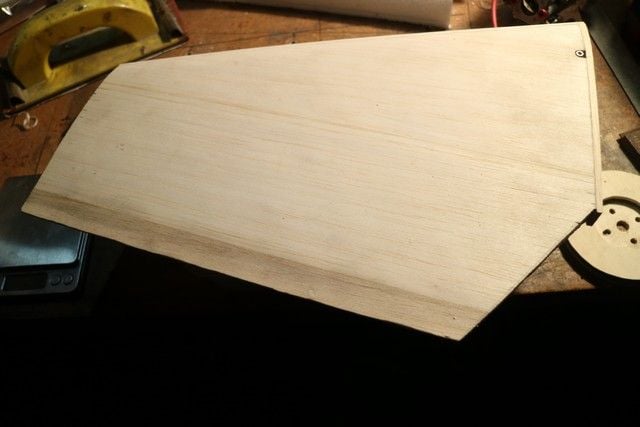
The second stab half out of the press. It weighs 78gm but feels damp and you can see where the glue is. I expect it to lose a fair bit of weight as it drys properly. I cant see it being a lot lighter than the first half though.

Old 05-26-2018 | 04:47 PM
  #134  
RodneyFord's Avatar
Thread Starter
 
Joined: Apr 2015
Posts: 424
Likes: 0
Received 1 Like on 1 Post
From: Lower Hutt New zealand
Default


A few hours in our dehumidified and warm lounge then a trim has bought the weight down.
Old 05-27-2018 | 11:46 AM
  #135  
RodneyFord's Avatar
Thread Starter
 
Joined: Apr 2015
Posts: 424
Likes: 0
Received 1 Like on 1 Post
From: Lower Hutt New zealand
Default


3D printed incidence adjuster. I need these in so I can face the root of the stab.
Old 05-28-2018 | 12:53 AM
  #136  
RodneyFord's Avatar
Thread Starter
 
Joined: Apr 2015
Posts: 424
Likes: 0
Received 1 Like on 1 Post
From: Lower Hutt New zealand
Default


Got the adjusters in and the root and leading edges lined. All ready for mounting to the fuselage.
Old 05-28-2018 | 12:55 AM
  #137  
RodneyFord's Avatar
Thread Starter
 
Joined: Apr 2015
Posts: 424
Likes: 0
Received 1 Like on 1 Post
From: Lower Hutt New zealand
Default


Getting the fixture set up for gluing the stab tube to the fuselage.
Old 05-28-2018 | 01:00 AM
  #138  
RodneyFord's Avatar
Thread Starter
 
Joined: Apr 2015
Posts: 424
Likes: 0
Received 1 Like on 1 Post
From: Lower Hutt New zealand
Default


Thinking about the motor mount. Thick rubber sheet and 2mm titanium plate.
Old 05-28-2018 | 01:02 AM
  #139  
RodneyFord's Avatar
Thread Starter
 
Joined: Apr 2015
Posts: 424
Likes: 0
Received 1 Like on 1 Post
From: Lower Hutt New zealand
Default


3D printed spacer with 1/2 a degree down thrust.
Old 05-28-2018 | 04:26 PM
  #140  
RodneyFord's Avatar
Thread Starter
 
Joined: Apr 2015
Posts: 424
Likes: 0
Received 1 Like on 1 Post
From: Lower Hutt New zealand
Default


Glued in the tail plane tube donuts.
Old 05-28-2018 | 04:33 PM
  #141  
RodneyFord's Avatar
Thread Starter
 
Joined: Apr 2015
Posts: 424
Likes: 0
Received 1 Like on 1 Post
From: Lower Hutt New zealand
Default

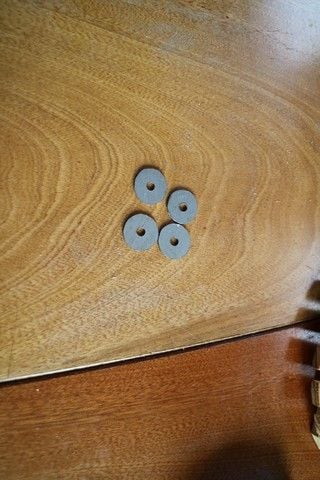
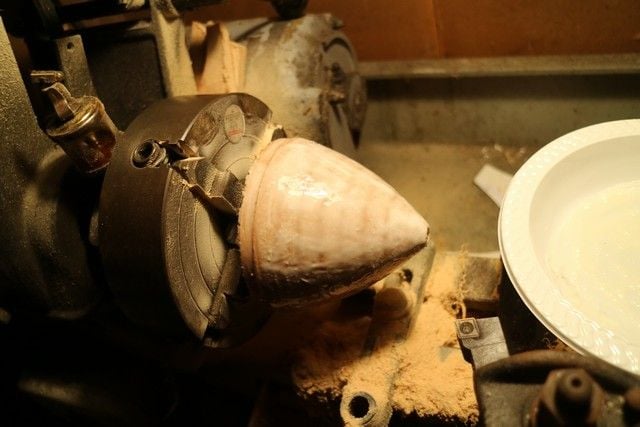
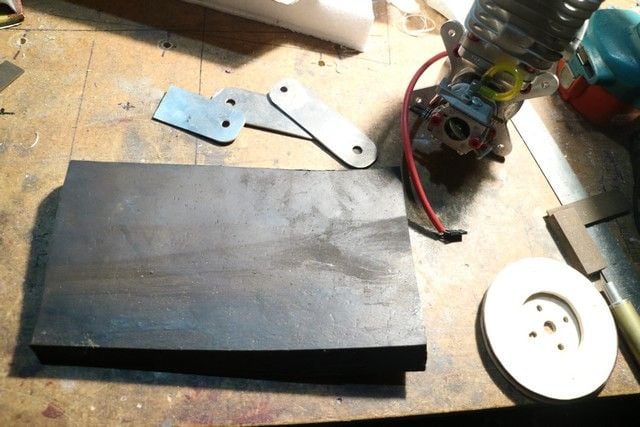
Working on the engine mount while waiting for the epoxy on the tail donuts to cure.


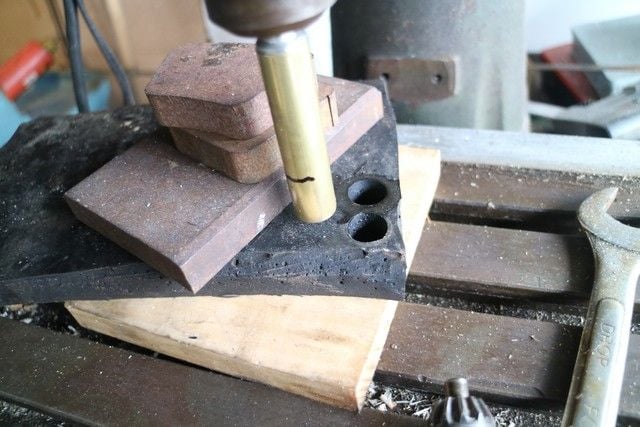
16mm brass tube to cut 20mm thick rubber.


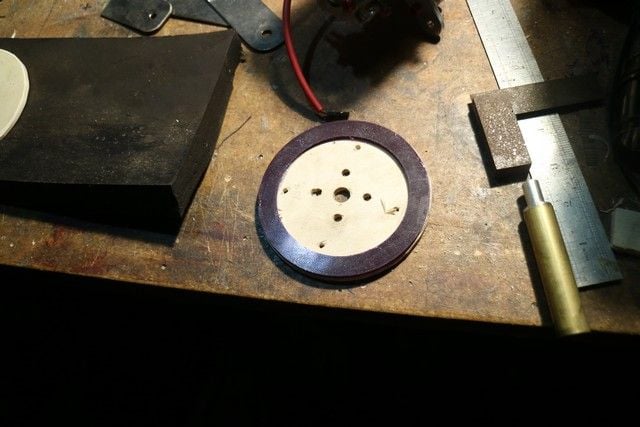
Into the lathe to cut the 4mm hole in the middle.


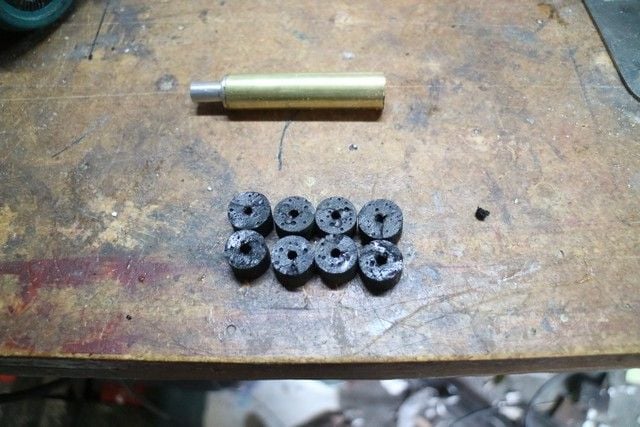
Cut them in half for 16mmx10mm bushes.
Old 05-28-2018 | 09:28 PM
  #142  
RodneyFord's Avatar
Thread Starter
 
Joined: Apr 2015
Posts: 424
Likes: 0
Received 1 Like on 1 Post
From: Lower Hutt New zealand
Default


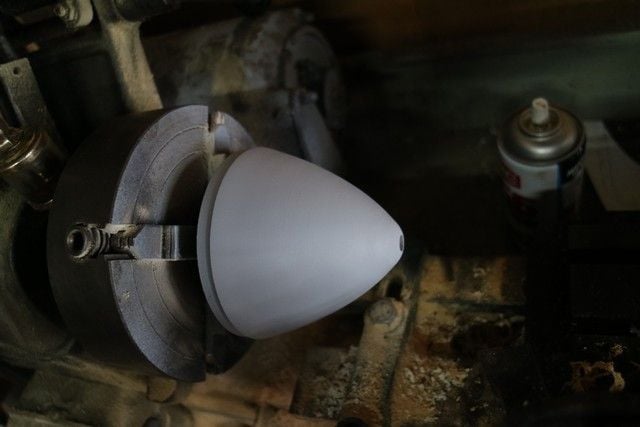
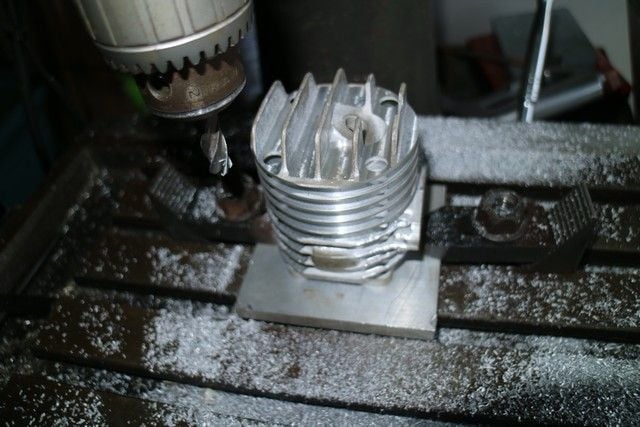
I've taken the head off the DA50 to lighten it. DA says they take off 4 oz but I doubt whether I can.


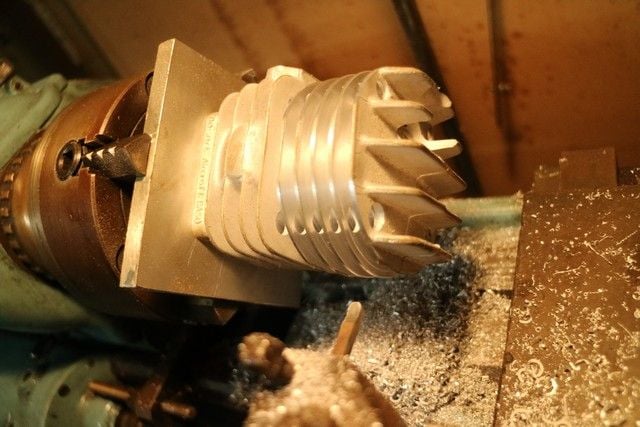
Lathe work done next it will go on the mill.
I had to make a fixture to hold the cylinder for machining.
Old 05-29-2018 | 03:58 PM
  #143  
RodneyFord's Avatar
Thread Starter
 
Joined: Apr 2015
Posts: 424
Likes: 0
Received 1 Like on 1 Post
From: Lower Hutt New zealand
Default


In the rotary chuck.


83 gms difference.
Old 05-29-2018 | 05:08 PM
  #144  
RodneyFord's Avatar
Thread Starter
 
Joined: Apr 2015
Posts: 424
Likes: 0
Received 1 Like on 1 Post
From: Lower Hutt New zealand
Default


Quite a different look.
Old 05-29-2018 | 06:19 PM
  #145  
 
Joined: Sep 2006
Posts: 415
Likes: 0
Received 0 Likes on 0 Posts
From: boca raton, FL
Default

Amazing work!
Old 05-29-2018 | 06:56 PM
  #146  
RodneyFord's Avatar
Thread Starter
 
Joined: Apr 2015
Posts: 424
Likes: 0
Received 1 Like on 1 Post
From: Lower Hutt New zealand
Default

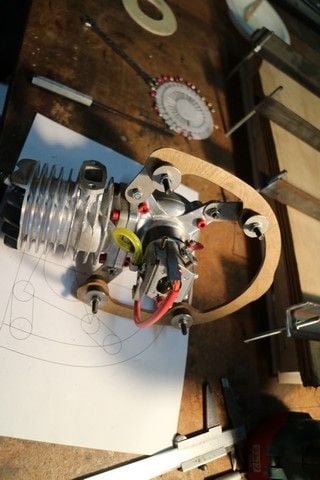
Cheers Jim. Working on the engine mount.


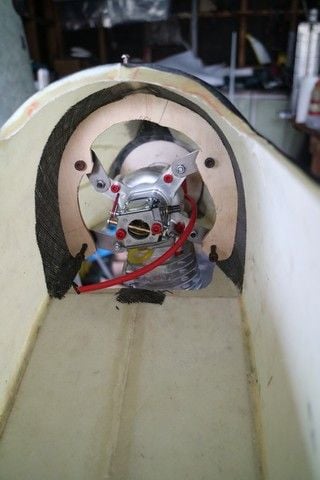
Mock up of engine mount to see if it works.


Tilting the engine 10 degrees for exhaust clearance. There is lots of room in there though.
Old 05-30-2018 | 07:28 PM
  #147  
RodneyFord's Avatar
Thread Starter
 
Joined: Apr 2015
Posts: 424
Likes: 0
Received 1 Like on 1 Post
From: Lower Hutt New zealand
Default


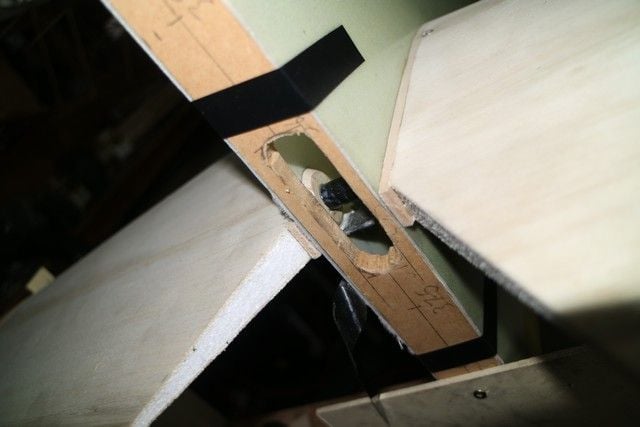
Installed the anti rotation pin for the tail planes.


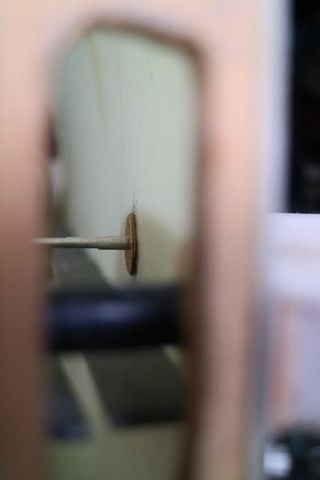
It is difficult to get the donuts in for the pin.


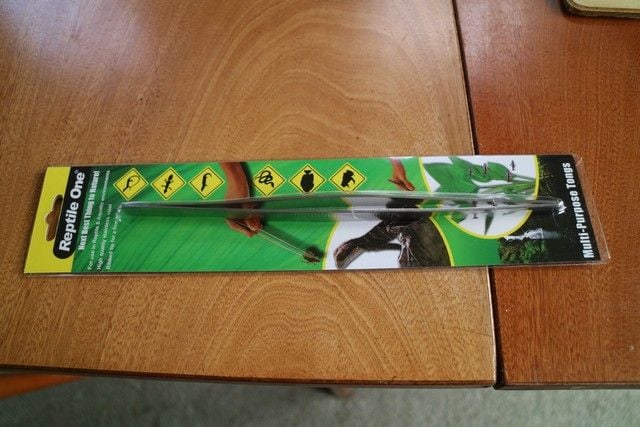
Long tweezers from an aquarium shop makes it easy though.
Old 05-31-2018 | 08:16 PM
  #148  
RodneyFord's Avatar
Thread Starter
 
Joined: Apr 2015
Posts: 424
Likes: 0
Received 1 Like on 1 Post
From: Lower Hutt New zealand
Default


Preparing the rudder for the press.


In the press.
Old 05-31-2018 | 08:18 PM
  #149  
RodneyFord's Avatar
Thread Starter
 
Joined: Apr 2015
Posts: 424
Likes: 0
Received 1 Like on 1 Post
From: Lower Hutt New zealand
Default


The spinner cone is ready for molding.
Old 05-31-2018 | 08:22 PM
  #150  
RodneyFord's Avatar
Thread Starter
 
Joined: Apr 2015
Posts: 424
Likes: 0
Received 1 Like on 1 Post
From: Lower Hutt New zealand
Default


Made titanium washers for the engine mount.


Assembled the engine mount to check the fit.


I will replace the steel screws with high tensile aluminium ones.


Contact Us - Archive - Advertising - Cookie Policy - Privacy Statement - Terms of Service

Copyright © 2026 MH Sub I, LLC dba Internet Brands. All rights reserved. Use of this site indicates your consent to the Terms of Use.