


Tamiya IS-2 build
 05-25-2015 | 02:00 PM
#1
Thread Starter

I finally got round to tidying my hobby room, so the time was right for building the IS-2.
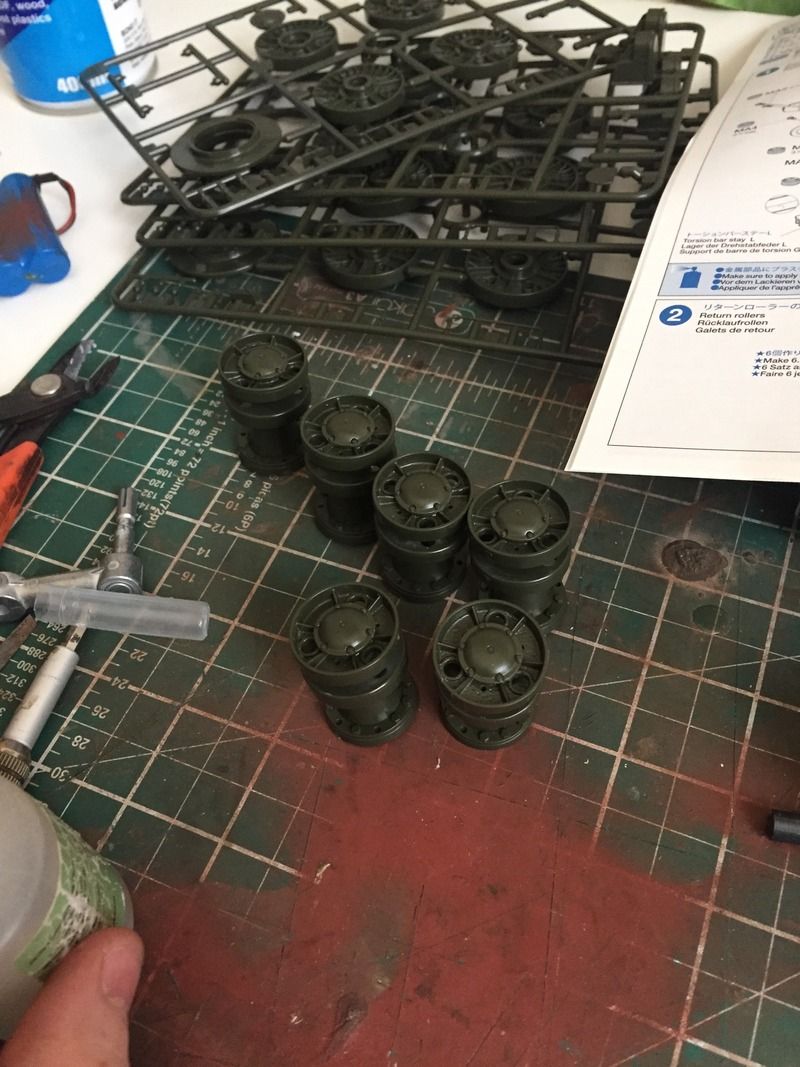
Only modifications so far have been to add bearings to the road wheels. All gone together very well, makes a change from my usual projects!
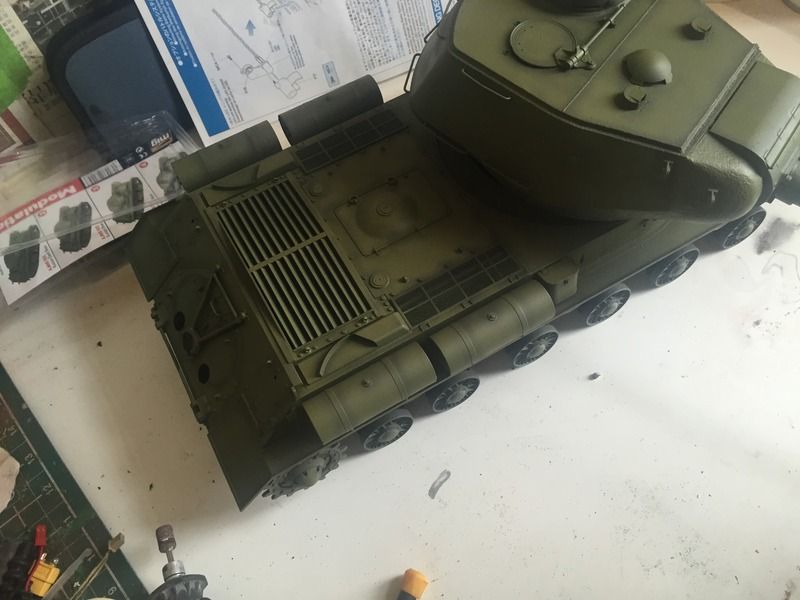
Assembling the tub:
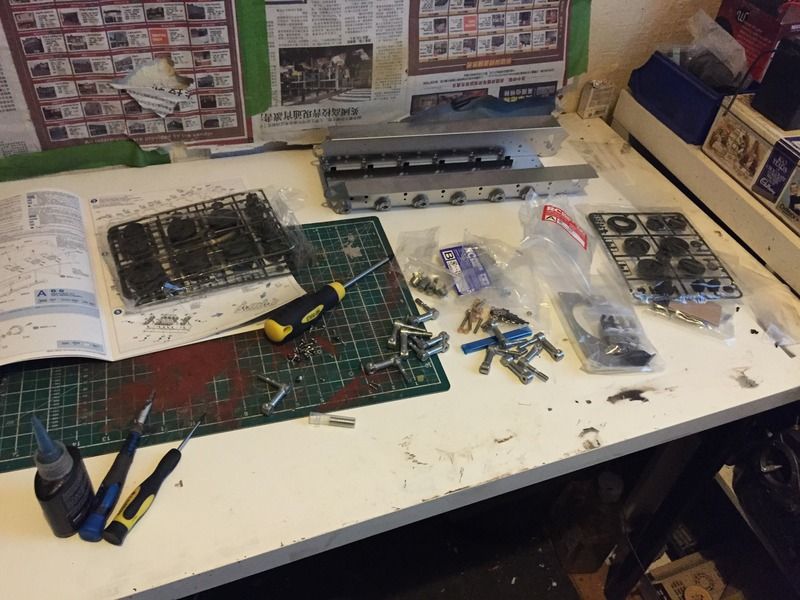


Close up of the cast texture:

Return rollers:
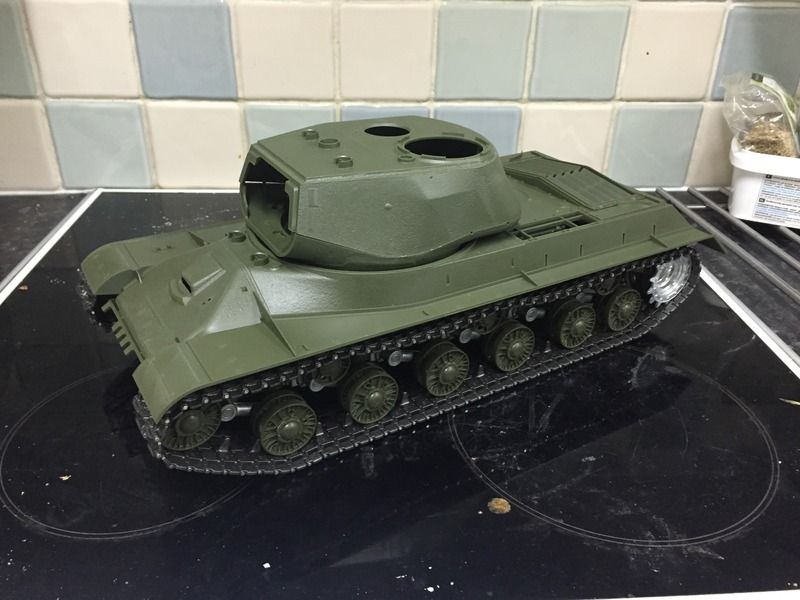
Lower hull finished:


Upper hull:
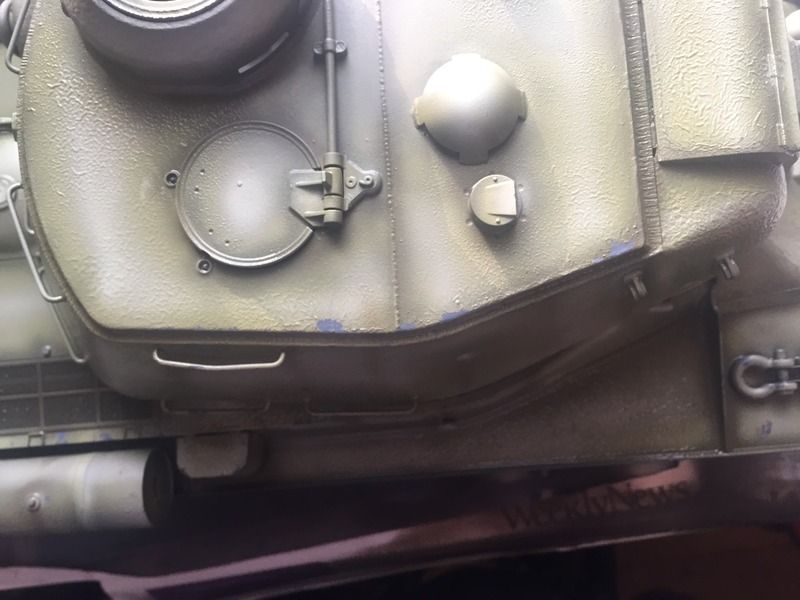
Lovely cast texture on the hull
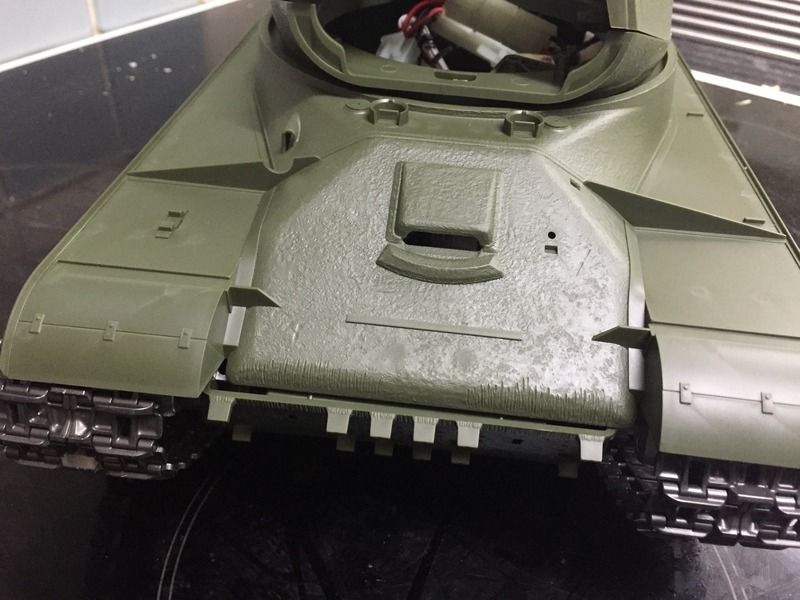
Weld lines:

Only modifications so far have been to add bearings to the road wheels. All gone together very well, makes a change from my usual projects!
Assembling the tub:


Close up of the cast texture:

Return rollers:

Lower hull finished:


Upper hull:

Lovely cast texture on the hull

Weld lines:

 05-26-2015 | 11:28 AM
#3
Dang Tom... now I know where all your tank money went! (lol) ")
Looking good!
Jeff
Looking good!
Jeff
05-26-2015 | 01:39 PM
#4
The casting detail on this kit is just crazy cool. Nasty looking grinding marks rough texture. Ugly weld beads. It's Russian and Tamiya sold the look!!! You may not have to spend to much time on this kit like you have in the past Tom???
05-26-2015 | 02:04 PM
#5
Thread Starter
I have a ve a feeling the build phase will be pretty quick, hard works done for me (and imo done really well!).
05-26-2015 | 02:44 PM
#6

Don't forget to counterweigh that monster canon in the rear of the turret. And it's not a bad idea to drill out an access hole underneath the overhang for the rear TBU base screw in case you need to get at it after assembly.
Love the JS-2 and yes Tamiya did a great job on cast texture, but c'mon Tom, you know you'll need to ugly it up further with some casting marks, tie down clips and the hideous cut offs on the cupola...
Love the JS-2 and yes Tamiya did a great job on cast texture, but c'mon Tom, you know you'll need to ugly it up further with some casting marks, tie down clips and the hideous cut offs on the cupola...
06-01-2015 | 12:01 PM
#7
Thread Starter
Ausf, loving the detail on yours, have you a build I can shamelessly get steal ideas from?!
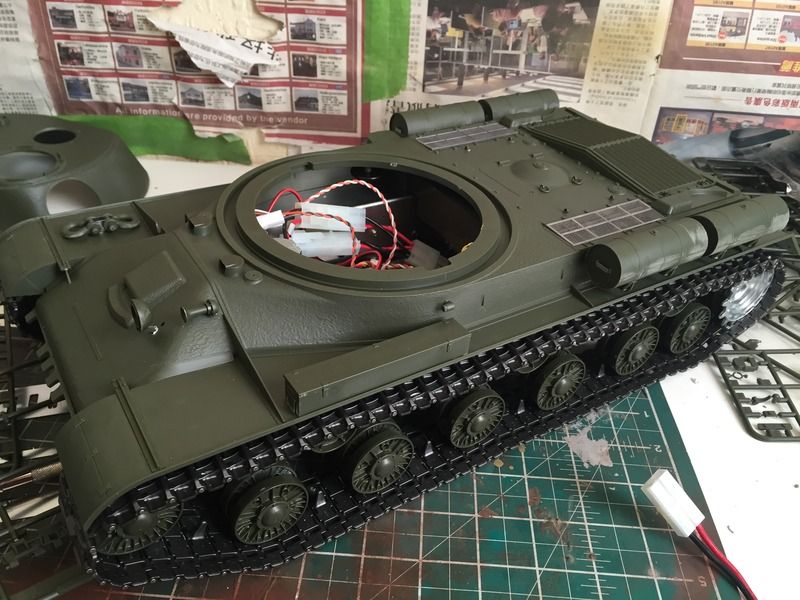
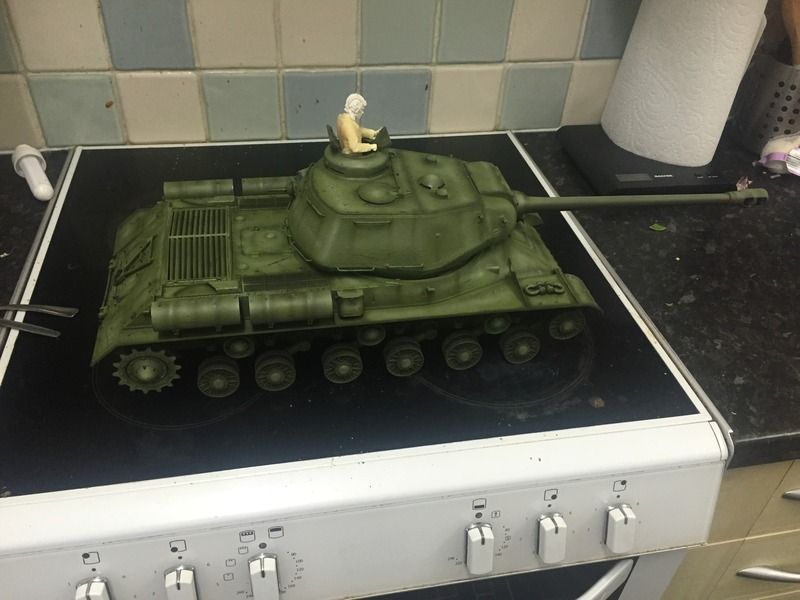
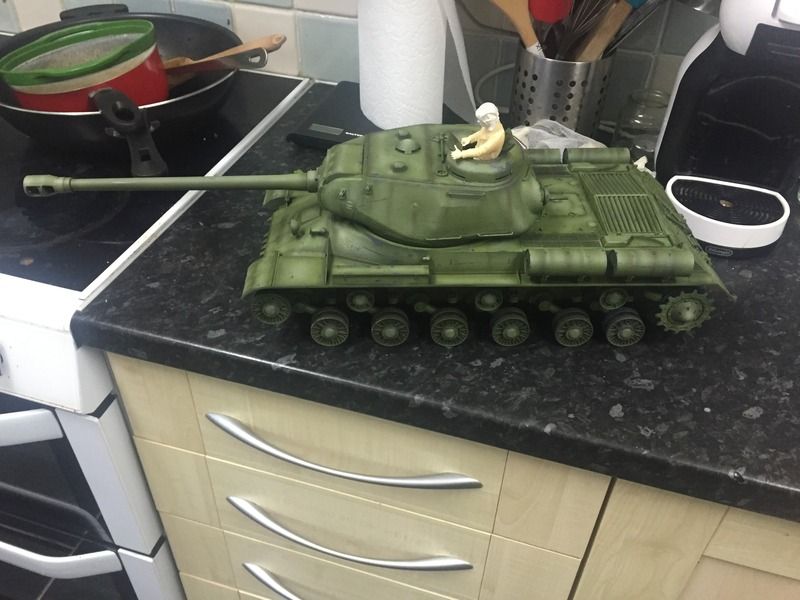
A wee bit more progress, have done the turret basics. Fitting a tbu so have hidden the emitter in the HUGE muzzle break. Hulls had all the detail I don't need to pre paint added. Next week the lower hull goes off to guido Henn for an improved idler system that should help the front end rigidity


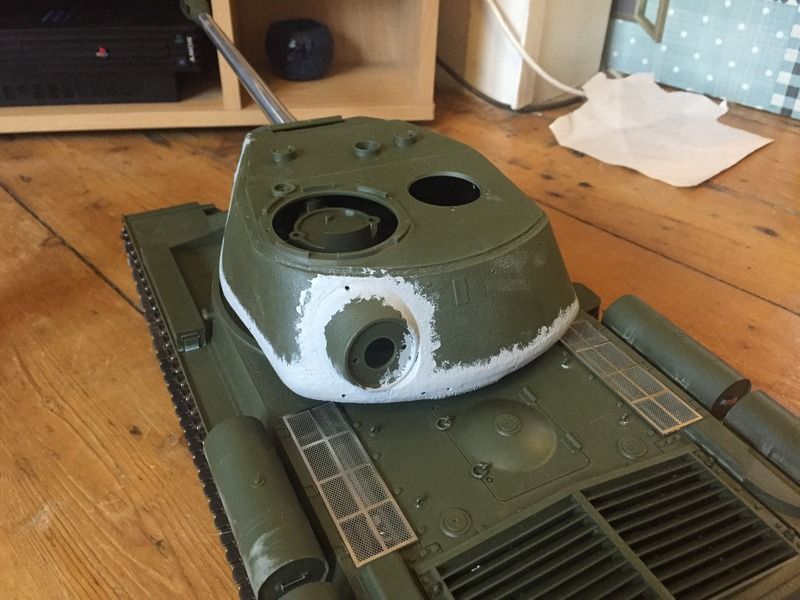
Some more progress, trying to smooth the turret seams, about 5 layers of Mr surfacer so far, to ably a couple more required. Also added magnetic hub caps for the sprockets


A wee bit more progress, have done the turret basics. Fitting a tbu so have hidden the emitter in the HUGE muzzle break. Hulls had all the detail I don't need to pre paint added. Next week the lower hull goes off to guido Henn for an improved idler system that should help the front end rigidity


Some more progress, trying to smooth the turret seams, about 5 layers of Mr surfacer so far, to ably a couple more required. Also added magnetic hub caps for the sprockets


 06-02-2015 | 01:29 PM
#8
I don't know why the thread ended, but this is what I have in terms of a build:
http://www.rcuniverse.com/forum/rc-t...under-way.html
Edit, found more:
http://www.rcuniverse.com/forum/rc-t...king-ugly.html
http://www.rcuniverse.com/forum/rc-t...technique.html
And here's the figure you locked down on (although yours is different colors of resin):
http://www.rcuniverse.com/forum/rc-t...ct-teaser.html
Last edited by ausf; 06-02-2015 at 01:33 PM.
06-02-2015 | 11:53 PM
#9

Member
Joined: Feb 2014
Posts: 43
Likes: 0
Received 0 Likes
on
0 Posts
From: Hong Kong, China
Tom, Have to watch out the hinge of the commander cupola is too weak, mine one already broken..
considering to make a metal one for it. but struggling in the working travel lock at the moment. LOL
Carson L
considering to make a metal one for it. but struggling in the working travel lock at the moment. LOL
Carson L
09-04-2015 | 03:36 PM
#11
Thread Starter
Been a long time since I made progress on this but got my ammo modulation set through so time to get cracking.
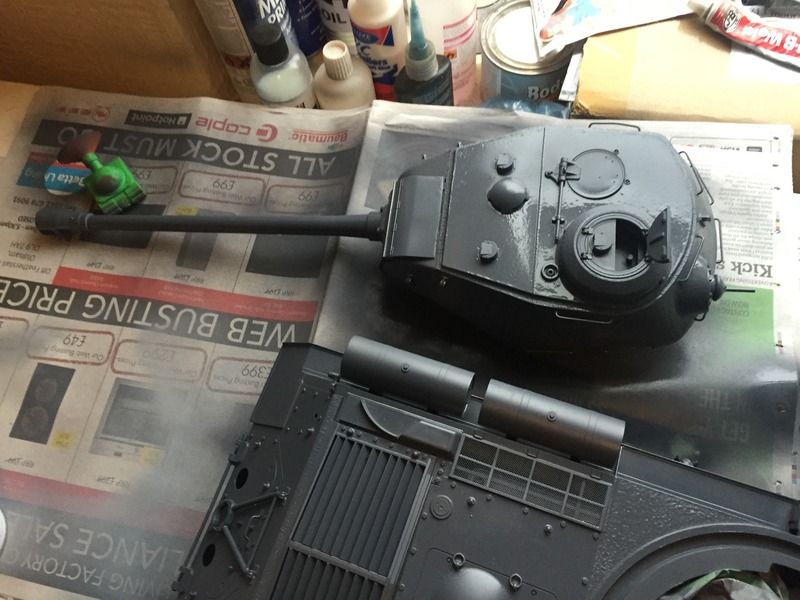
First was a coat of Tamiya fine surface primer to all the photo etch and metal parts. Then a base coat of gunship grey to serve as the metal coat.

Next after it had cured a coat of hairspray ready for the 4bo base.
The mig set has four colours, dark base, base, light base and highlights.
Dark base:

Base:
Light base and highlights
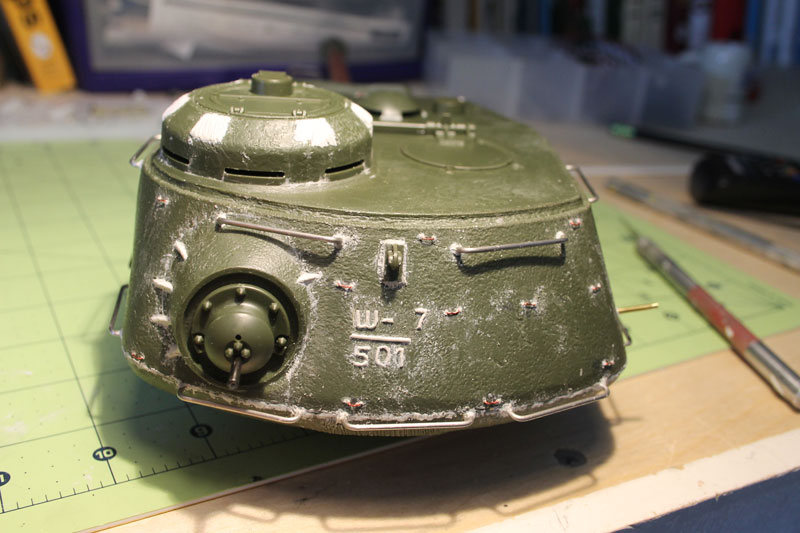
After this I added some of the dark base as streaks and post shading.
Final result with chipping


That's all for now
First was a coat of Tamiya fine surface primer to all the photo etch and metal parts. Then a base coat of gunship grey to serve as the metal coat.


Next after it had cured a coat of hairspray ready for the 4bo base.
The mig set has four colours, dark base, base, light base and highlights.
Dark base:

Base:

Light base and highlights

After this I added some of the dark base as streaks and post shading.
Final result with chipping


That's all for now


