


Taigen Panther
 01-25-2016 | 08:40 AM
#1

Thread Starter
Senior Member
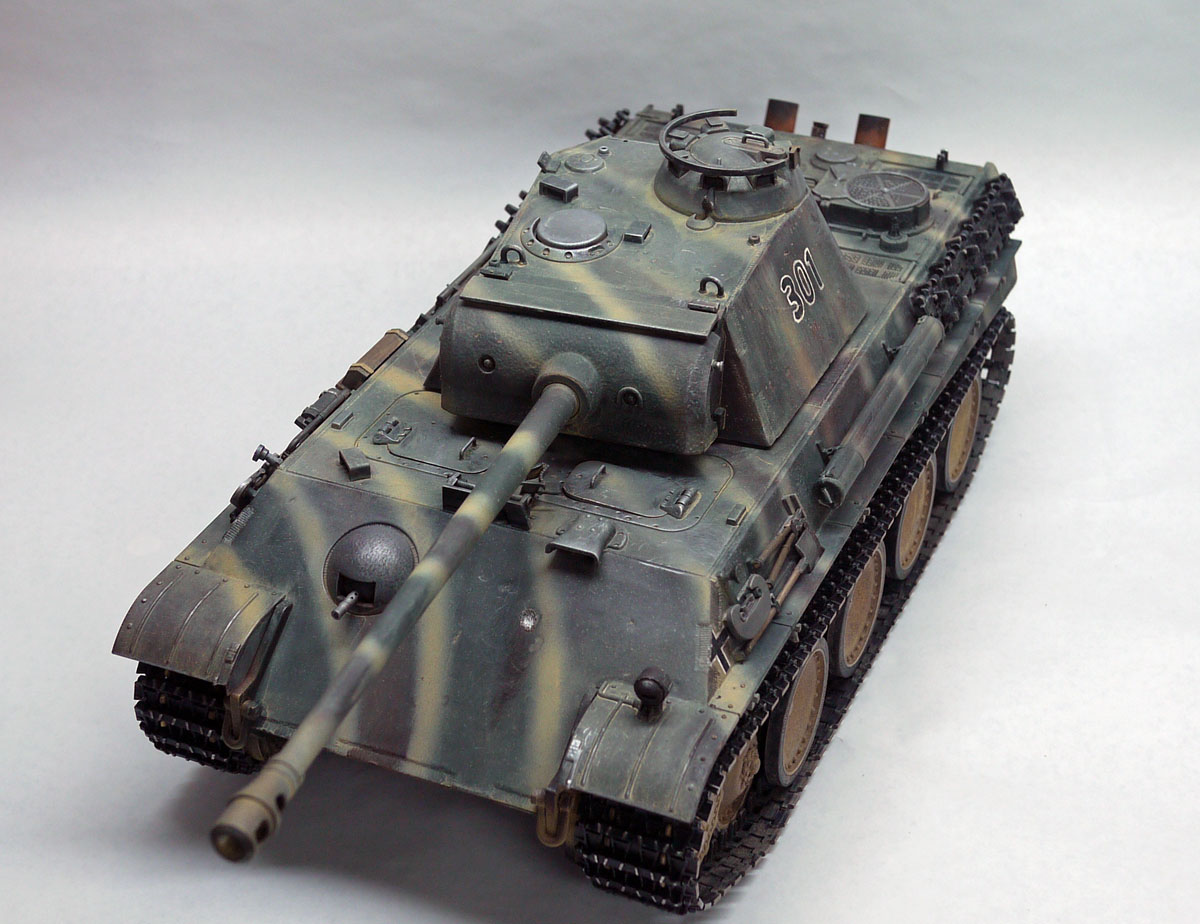
I just finished up a Taigen Panther for a customer. This one came from Germany with the metal torsion bar suspension, bearings in the metal wheels and metal turret. Also had the 4 shaft gear boxes in it.
It turned out to be a nice base tank, which is the point of the post. These Taigens cost more, but you get more as well. Also I liked the roller bearings they put in the turret. As you know I used to use the 6mm airsoft rounds to add this to my tanks, so by Taigen doing this it saves me the trouble.
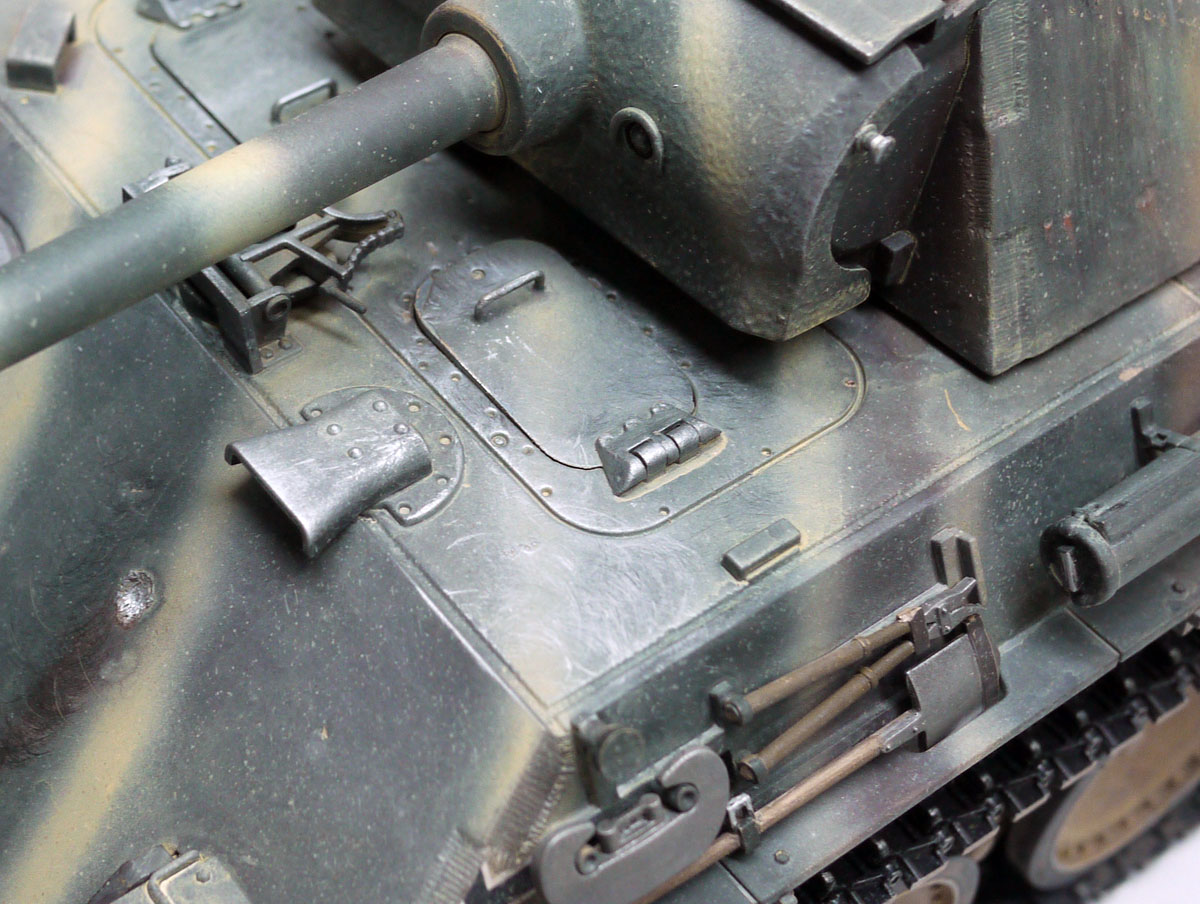
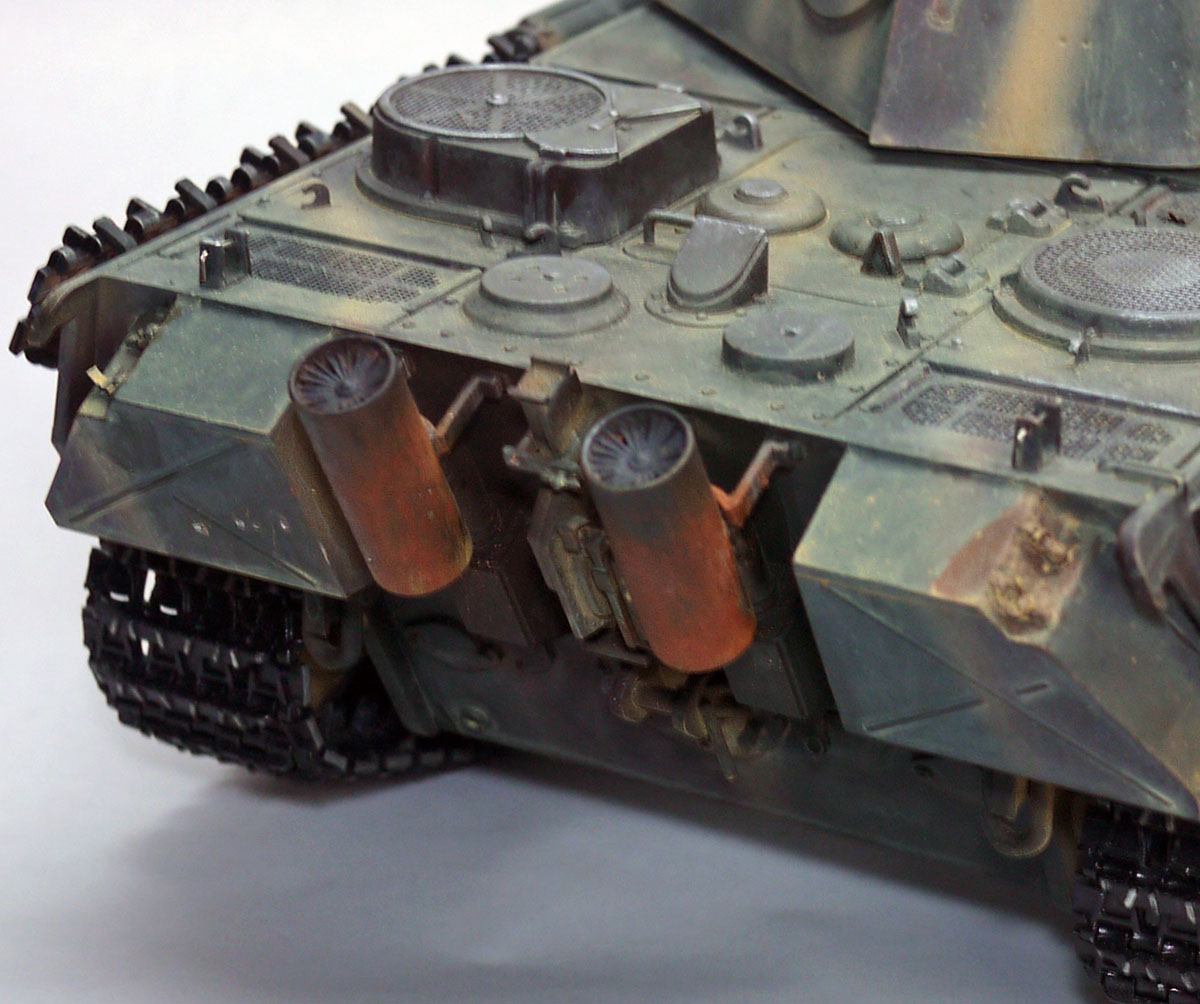
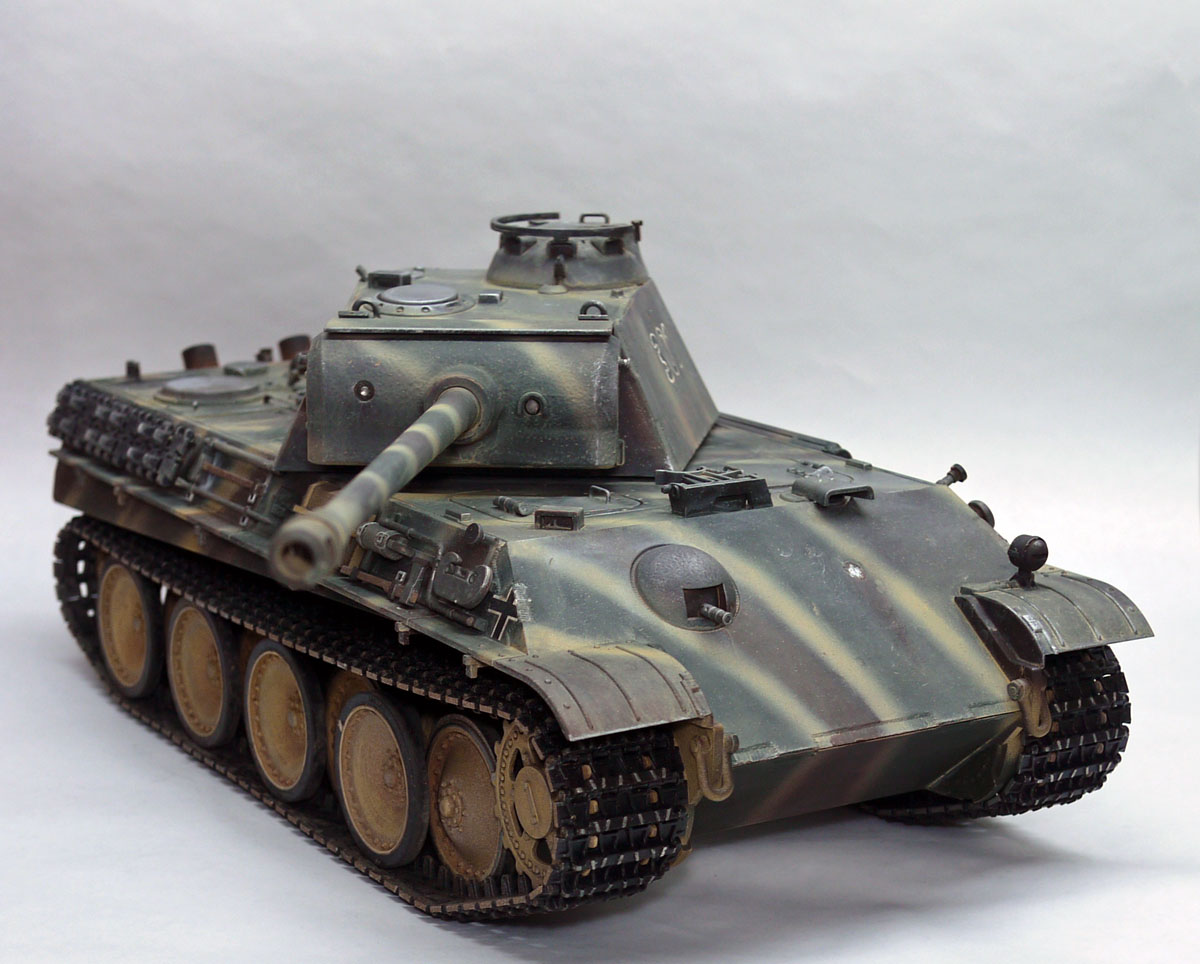
Paint was OK, but I resprayed parts of it as the Taigen painter got a little carried away and almost obliterated the base yellow. Customer wanted a heavily weathered tank. So I gave him a battle hardened tank, but not derelict as my thought is these things were built, rushed to the front and destroyed in less then a couple of years. They hardly had time to rust. The exhaust shrouds being the exception with the heat and thinner metal. Wear areas have seen the paint wear off.
This tank got a paint job, and basic weathering. I added the rear clasps on the back toolboxes for the customer, but the rest is pretty much stock.
Electronics are BARC4/TBS. This particular customer is quite familiar with the TBS and generates some real nice sound files of his own. He sent me a dynamite Panther file he did up.
Everyone likes to see pictures so here a some with the customers permission.
 .
.
It turned out to be a nice base tank, which is the point of the post. These Taigens cost more, but you get more as well. Also I liked the roller bearings they put in the turret. As you know I used to use the 6mm airsoft rounds to add this to my tanks, so by Taigen doing this it saves me the trouble.
Paint was OK, but I resprayed parts of it as the Taigen painter got a little carried away and almost obliterated the base yellow. Customer wanted a heavily weathered tank. So I gave him a battle hardened tank, but not derelict as my thought is these things were built, rushed to the front and destroyed in less then a couple of years. They hardly had time to rust. The exhaust shrouds being the exception with the heat and thinner metal. Wear areas have seen the paint wear off.
This tank got a paint job, and basic weathering. I added the rear clasps on the back toolboxes for the customer, but the rest is pretty much stock.
Electronics are BARC4/TBS. This particular customer is quite familiar with the TBS and generates some real nice sound files of his own. He sent me a dynamite Panther file he did up.
Everyone likes to see pictures so here a some with the customers permission.
 01-25-2016 | 09:07 AM
#2

Looks great!
I'm considering one of these Taigen Panthers as a future build, but I haven't seen too many reviews of their internals, areas well done, areas for improvement, etc. Didn't know they had roller bearings between the turret and the hull...good to know.
Any more pictures of the internals or other review information you can share? (with the customer's permission, of course )
)
I'm considering one of these Taigen Panthers as a future build, but I haven't seen too many reviews of their internals, areas well done, areas for improvement, etc. Didn't know they had roller bearings between the turret and the hull...good to know.
Any more pictures of the internals or other review information you can share? (with the customer's permission, of course
)
01-25-2016 | 09:17 AM
#3
Thread Starter
Senior Member
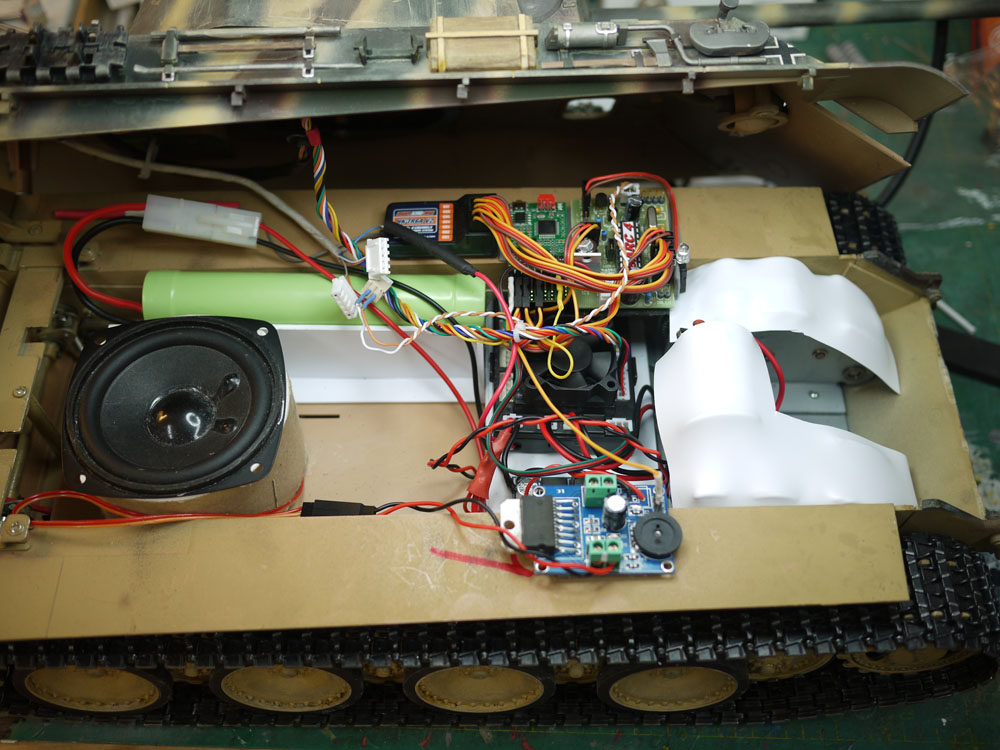
inside this is a typical Asiatam torsion bar insert. I had to change the battery position, and mount the battery standing on its narrow side to allow room for a 3" Visatron speaker
All the electronics were removed and then reinstalled with all the electroinics in the front of the tank. This has a 15 watt amp and power invertor to drive the amp with 12 volts
Taigen have the power switch and volume control on the bottom of the tank. I wish they would rethink this. These European ones also have a charging port wired in( Located underneath the rear end tool box)
Also I added vacuum formed plastic gear housing guards to keep the lube oil out of the rest of the tank
Last edited by YHR; 01-25-2016 at 09:22 AM.
01-25-2016 | 09:23 AM
#4
VERRY nice work Dan! Luv the paint!
Ahh... you don't build Taigen tanks! Besides, the Tamiya Panther kit has rollers between the hull and turret as well.
Jeff
Looks great!
I'm considering one of these Taigen Panthers as a future build, but I haven't seen too many reviews of their internals, areas well done, areas for improvement, etc. Didn't know they had roller bearings between the turret and the hull...good to know.
Any more pictures of the internals or other review information you can share? (with the customer's permission, of course )
I'm considering one of these Taigen Panthers as a future build, but I haven't seen too many reviews of their internals, areas well done, areas for improvement, etc. Didn't know they had roller bearings between the turret and the hull...good to know.
Any more pictures of the internals or other review information you can share? (with the customer's permission, of course
)Ahh... you don't build Taigen tanks!
Besides, the Tamiya Panther kit has rollers between the hull and turret as well. Jeff

 01-25-2016 | 06:25 PM
#9
Thread Starter
Senior Member
The owner uses an acoustic smoke machine so the extra room will be filled up with that installation, and that is why it was imperative that I found a spot for the electronics up front. The acoustic smoke machine speaker will be hooked up to the the other side of the amp
01-25-2016 | 07:41 PM
#10
Joined: Dec 2014
Posts: 192
Likes: 0
Received 0 Likes
on
0 Posts
I agree that controls on the bottom of the tank are no good. Would feel much better not having anything on the bottom that could get wet or take a hit. Had a corroded power switch on my JP, same metal hull as your panther I think. Relocated the controls and fit a piece of scrap plastic in place of the bottom plate. Not too difficult.
01-26-2016 | 08:18 AM
#11
[QUOTE=YHR;12167079]inside this is a typical Asiatam torsion bar insert. I had to change the battery position, and mount the battery standing on its narrow side to allow room for a 3" Visatron speaker
All the electronics were removed and then reinstalled with all the electroinics in the front of the tank. This has a 15 watt amp and power invertor to drive the amp with 12 volts
Taigen have the power switch and volume control on the bottom of the tank. I wish they would rethink this. These European ones also have a charging port wired in( Located underneath the rear end tool box)
Also I added vacuum formed plastic gear housing guards to keep the lube oil out of the rest of the tank
Is that a RX18 with a fan on it? I wasn't aware they had fans or they could be equiped with fans??
 01-26-2016 | 11:23 AM
#13
Thread Starter
Senior Member
I used the fan off of the Taigen MFU an just added it to the RX18.
Tank is all packaged up so no video, sorry, but it had my standard Panther sound set in it. I think the customer will be adding his own flavor to it.
Tank is all packaged up so no video, sorry, but it had my standard Panther sound set in it. I think the customer will be adding his own flavor to it.
02-07-2017 | 01:00 PM
#15
Junior Member
Joined: Dec 2016
Posts: 26
Likes: 0
Received 0 Likes
on
0 Posts
From: Wilmington NC
Very nice work! I have the same Taigen Panther and am planning to make some similar modifications.
Out of curiosity, (Since you seem to know your way around) I need to remove the stars on my Taigen Sherman. Do you think a good decal solvent will do the trick without damaging the underlying paint? The Taigen paint seems pretty robust but I am not really skilled enough to repaint it well should I mess it up.
Out of curiosity, (Since you seem to know your way around) I need to remove the stars on my Taigen Sherman. Do you think a good decal solvent will do the trick without damaging the underlying paint? The Taigen paint seems pretty robust but I am not really skilled enough to repaint it well should I mess it up.
02-07-2017 | 01:05 PM
#16
Nice rebuild Dan. Weathering is great, I like the used but not abused look. A little metal shining through. Was the cast effect something you added to the mantel and MG Kugelblend?
02-08-2017 | 05:32 PM
#17
Thread Starter
Senior Member
This is an old thread. All I did was add some details and weather the tank. I don't think I added any casting details, but honestly can't remember. To metalize the paint I use a drybrush technique using silver paint with a soft metal brush in a drill.It gives the paint that look to it, and ends up making the whole tank seem heavy.


