


It's time for something different
 07-23-2019 | 11:41 AM
#26
Quote: Losing myself in my shop with my way of doing things was my escape, my sanctum. I play Baroque, Renaissance and Rococo period
music in my shop and it is peaceful for me. :Quote
And here I thought I was the only one listening to that type of music! That, and good waltzes and sometimes Big Band. When I need to get away, I am either in the Tank Fabrik or my little office writing, something blue snoring at my feet and when writing the earphones are on.
Your machining skills are amazing. With CNC I'm sure your skills, like mine from an old vocation, are dying, and more's the pity for that.
 07-24-2019 | 03:45 PM
#27
Your work is so good. I wish I had those skills!!!!
07-24-2019 | 07:36 PM
#28
I wish I had better skills paint and weather my models. I see all the wonderful paint schemes many of you do and I never have anything to compare,
showcase. I've been wanting to try some of the techniques I've seen but usually my models end up looking like they've just been deployed from a factory.
If you ever see a model of mine that looks good paint wise it's likely someone else did it. The Hetzer above was painted by whoever built it. The Panther sadly was me.
In fairness many of my models are glow( alcohol) powered which limits the types of paint I can use; I've never found top coat fuel resistant satin or gloss
coats that work well. A few worn spots and the fuel residue gets under it and it's done. These trucks happily will be electric but most of the tanks
I'd likely run near them are gas. I actually did have one model running of actual gasoline but it ended up running so hot I had to convert it back to alcohol
based fuel. Being able to use gasoline made painting easier. There have been a couple of aircraft paint manufacturers who still make fuel proof or resistant
paints that I have used but the variety is slim. Klasscote is one such maker. I would love it if one of you pro painters lived nearby- I'm commission you to
paint my models!
Jerry
07-25-2019 | 08:12 AM
#29

My Feedback: (1)
 07-27-2019 | 09:13 PM
#30
For me personally, that's actually a good thing. All the young people these days want to learn CNC. Everybody's hooked on CNC like it's some kind of a magical beast that will make their life better when all it really is an operating system like Windows or Mac. But since all the young people are hooked on CNC and don't want to learn the old manual machines that means that guys like me are becoming very hard to find. A seriously skilled lathe or Mill hand can command more money per hour now than ever before and I credit a lot of that to the scarcity of skilled machinists that can use manual machines. All thanks to that wonderful, Magical Beast, CNC.
castings I get as many requests for short run foundry work. The answer is always the same (no) and really for only one reason: my hobby and those meager skills
associated with it have been my sanctuary and escape and I want to keep them that way.
Jerry
08-04-2019 | 10:17 PM
#31
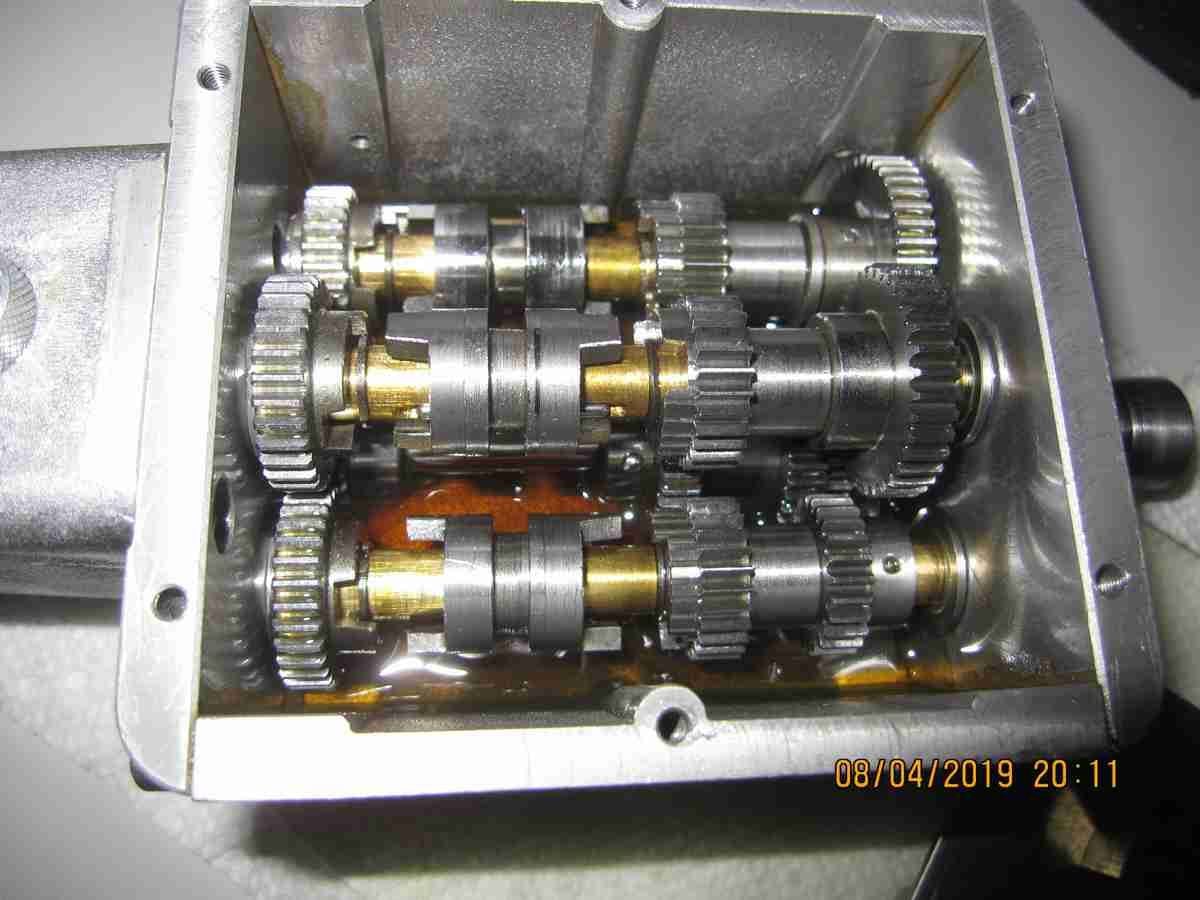
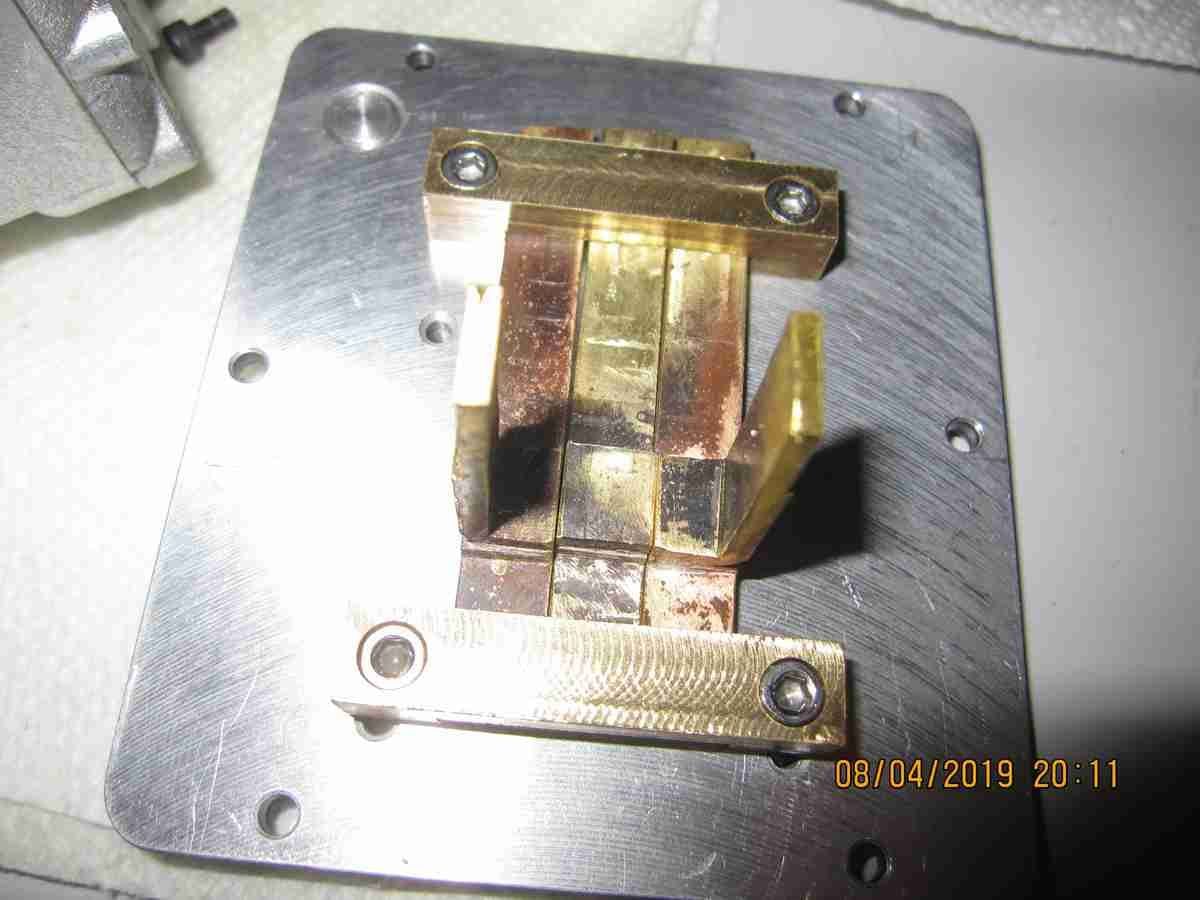
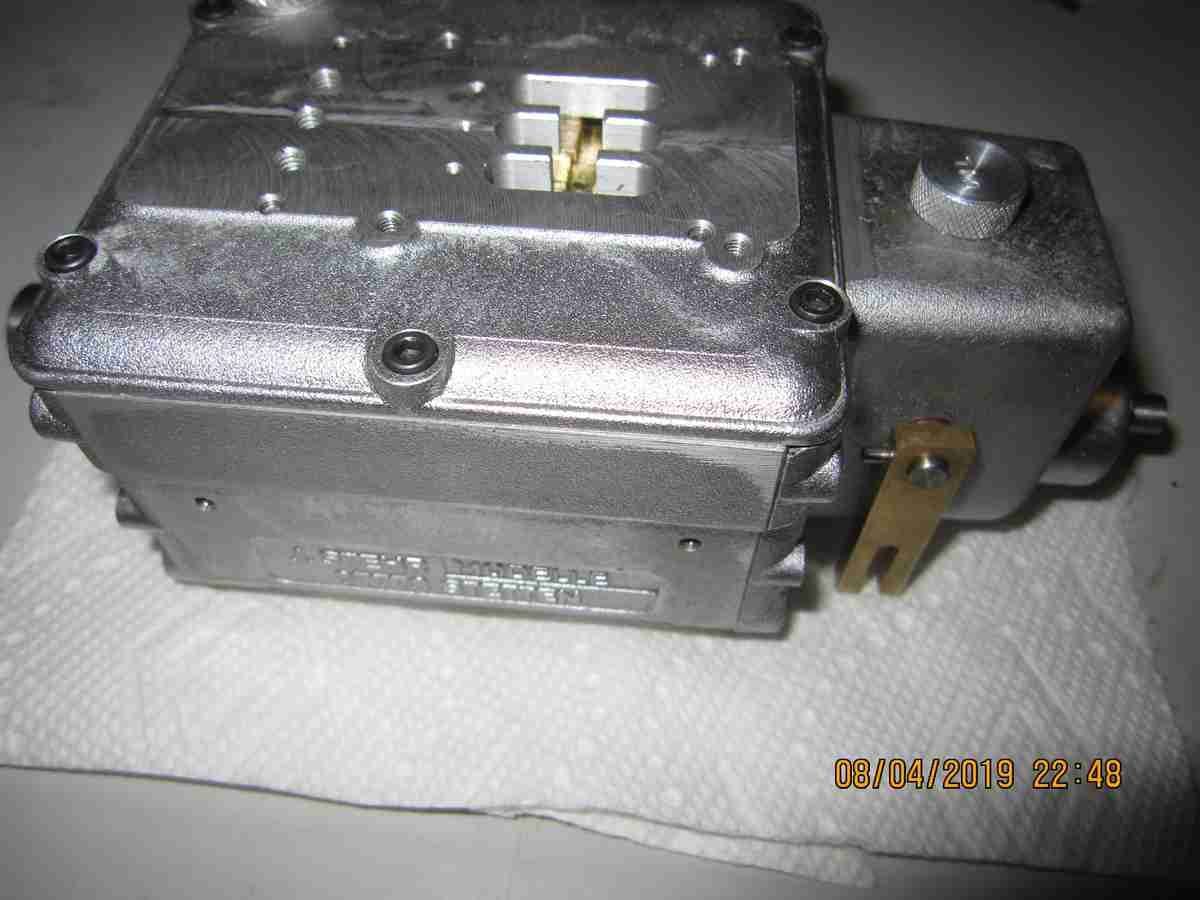
I've just about finished the transmission. I made the last parts which were the selectors for the gears. It's impossible
to test this gearbox without them, one cannot allow more than one of the three selectors to engage at one time, as
it simply will not function and worse you'll either be injured or damage the unit or both! I'm awaiting ball selectors (screws with a integral spring loaded ball
to keep the unused gear selectors in place while you operate one gear pair) however as I made my selectors stiff
which kept them from sliding around on their own I was able to test the gearbox anyway. I filled the unit with air tool oil which I've been using
in most of my transmissions for years. It seems to work! a bit noisy in some ranges but it works! I need to fix a bearing on the input shaft as the
mounting hole if not a tight fit. Along with that there are several things I need to finish and resolve but so far nothing major. I think one of my
self made gears isn't all it could be but it was the first made and if it causes too much grief I may replace it sometime. The output universal
isn't yet pinned to the shaft and I must confess it's difficult to see the differences between the gear ratios, perhaps this would change when the truck
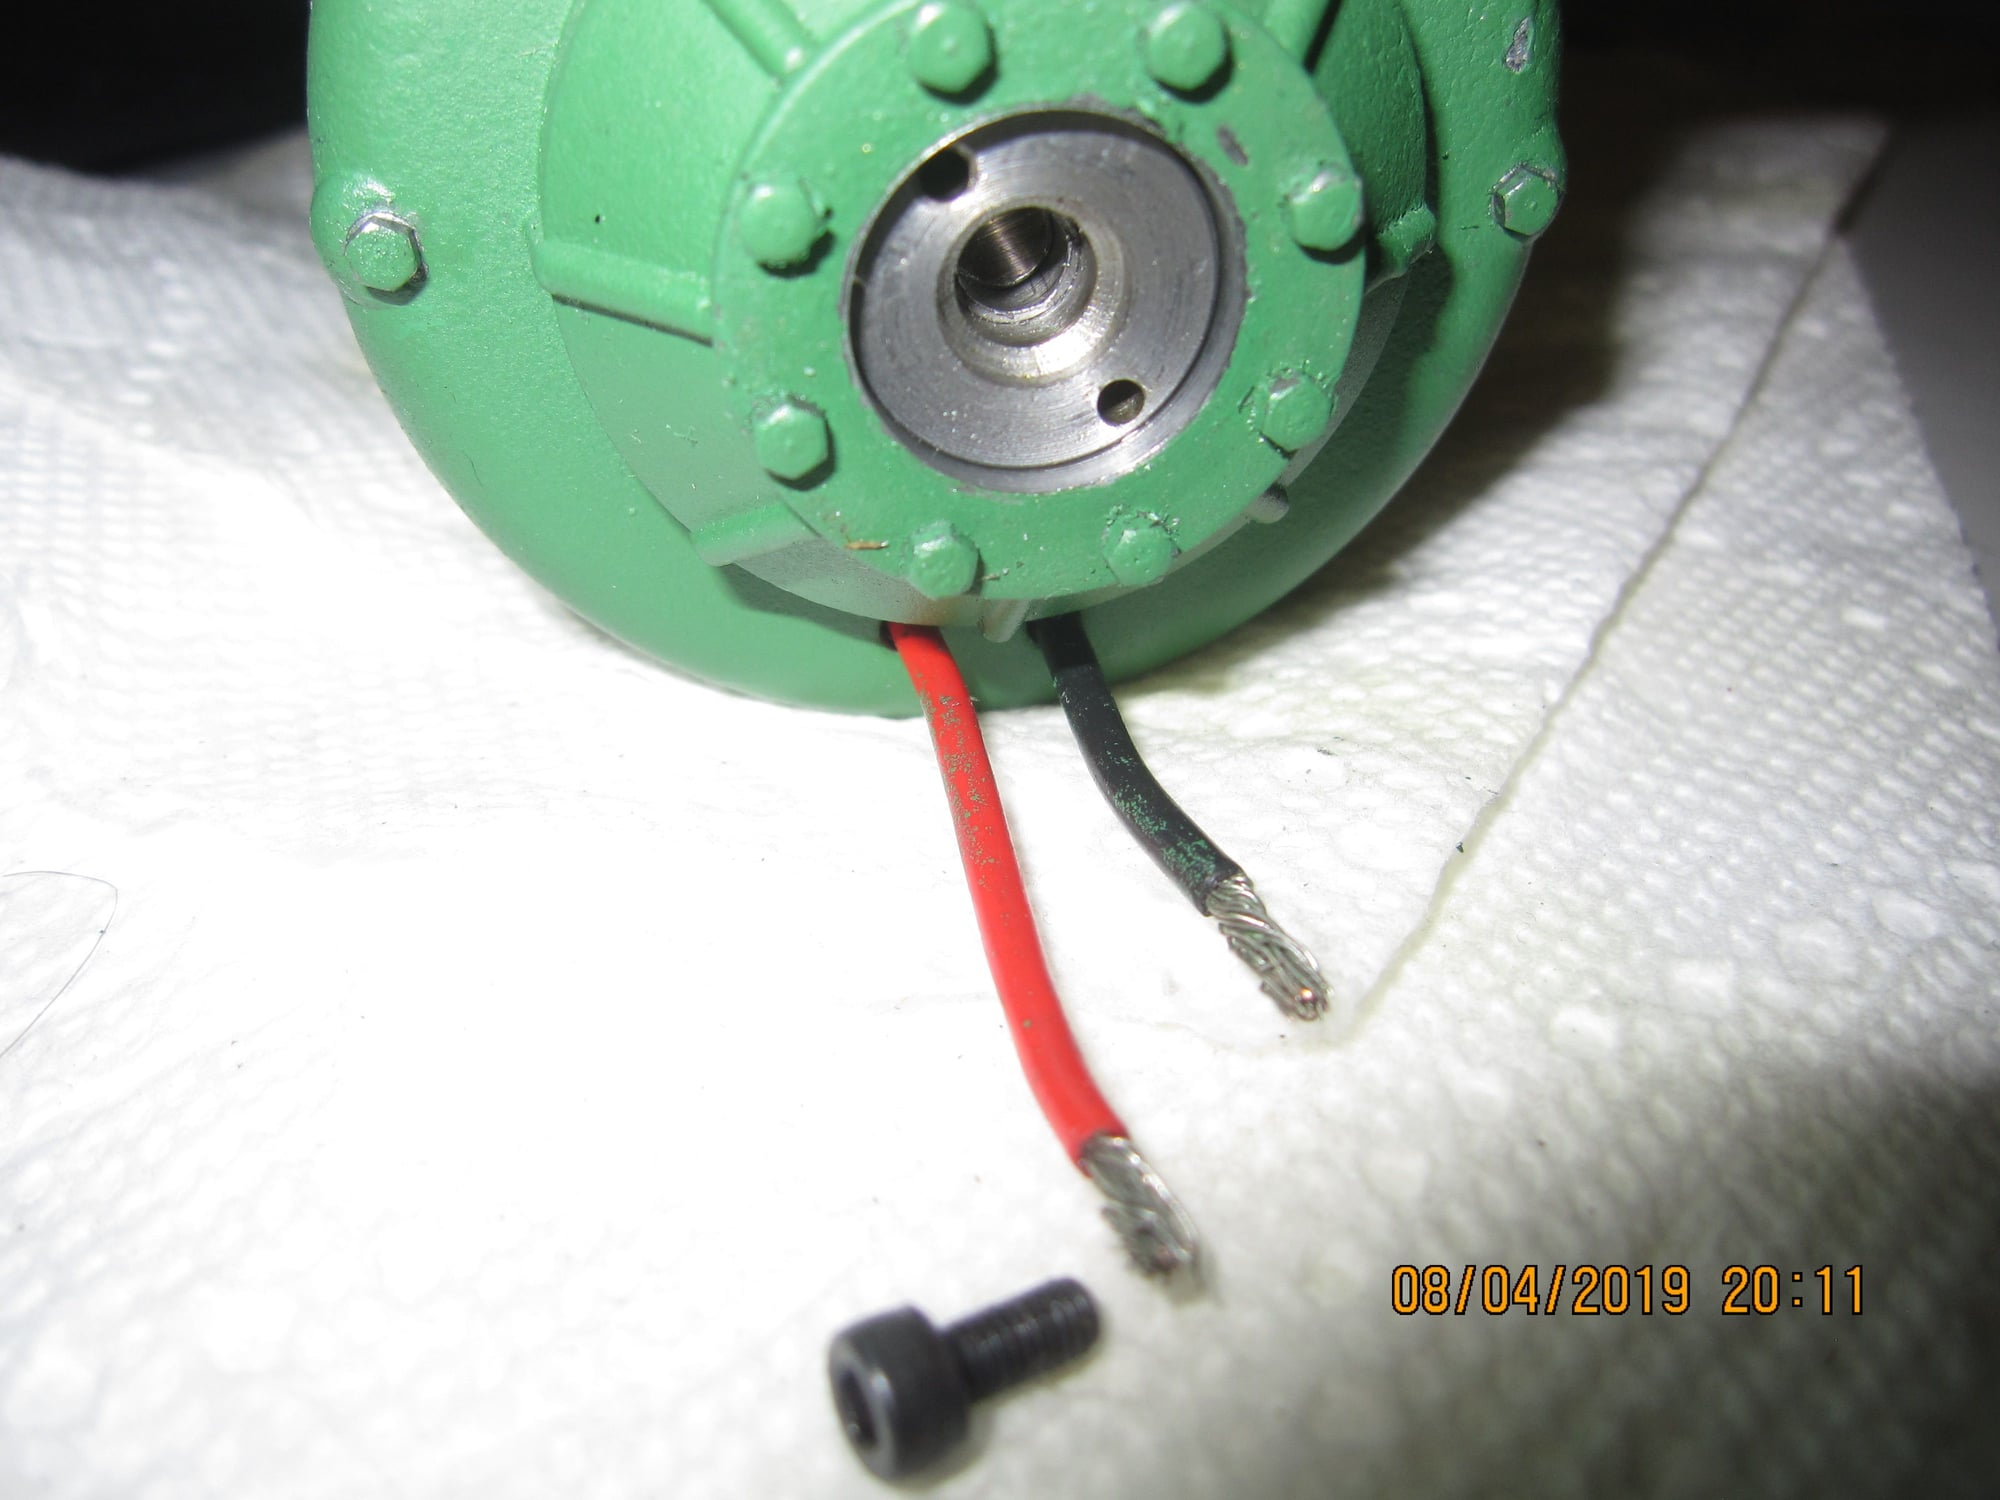
actually does some work. I also made a modification to the electric 'engine' output shaft I detailed above as I finally had a clear picture of the actual mating
connection.
I'm going to call it 98% complete and begin cleaning up my shop...
Jerry
to test this gearbox without them, one cannot allow more than one of the three selectors to engage at one time, as
it simply will not function and worse you'll either be injured or damage the unit or both! I'm awaiting ball selectors (screws with a integral spring loaded ball
to keep the unused gear selectors in place while you operate one gear pair) however as I made my selectors stiff
which kept them from sliding around on their own I was able to test the gearbox anyway. I filled the unit with air tool oil which I've been using
in most of my transmissions for years. It seems to work! a bit noisy in some ranges but it works! I need to fix a bearing on the input shaft as the
mounting hole if not a tight fit. Along with that there are several things I need to finish and resolve but so far nothing major. I think one of my
self made gears isn't all it could be but it was the first made and if it causes too much grief I may replace it sometime. The output universal
isn't yet pinned to the shaft and I must confess it's difficult to see the differences between the gear ratios, perhaps this would change when the truck
actually does some work. I also made a modification to the electric 'engine' output shaft I detailed above as I finally had a clear picture of the actual mating
connection.
I'm going to call it 98% complete and begin cleaning up my shop...
Jerry
08-12-2019 | 04:04 PM
#32
Did a brief bench test of Kaelble Nr 2. All worked well. There are a few things to resolve. Model draws a boatload of power
with the lowest draw at ~4 amps but I have to keep in mind that the simulated diesel motor on its own draws nearly three amps.
It's powered by 2 tandem brushed performance truck motors of about 55 turns if I remember what I used....
Jerry
with the lowest draw at ~4 amps but I have to keep in mind that the simulated diesel motor on its own draws nearly three amps.
It's powered by 2 tandem brushed performance truck motors of about 55 turns if I remember what I used....
Jerry
08-13-2019 | 08:59 AM
#33
Wow, Jerry!!! you have it going on with this referb!!!
09-17-2019 | 12:55 AM
#35
I've made progress on my third Kaelble truck.I've been working on the simulated diesel motor for this model so that I could properly test the transmission and axles that I
built out as described above. You'll note that the motor is complete just enough so I can run it; it has no detail parts. As you might recall, my number 2 truck seemed to draw more current than I expected using the dual 55T performance motors. With this one I used a pair of Graupner 540 "Speed 500" 7.2V motors which are basically your older type Mabuchi 540. When running this test I also employed an inline
power meter. I'm pleased with these results, it worked even better than I'd hoped and power use, as a no load test was very favorable topping out at about 7.5 amps with transmission/ transmission over drive and axle lockers all engaged
as may be seen ( if you look carefully) in the latter portion of this video. There is much to do on all three of these trucks and even though these three represent a lot of work it's really just scratching the surface; that said the work of the machining and mechanics are complete for all three. Now all that remains mechanically of note is the rear mounted winch and that's not immediately required for operation. Final decision as to the three trucks configuration and other details will be the fun part.
Obviously I have to finish the motor, the drive shaft between transmission and axles needs work, I'll like make another as I did for truck 2 and all three trucks will need details, radio gear and all that jazz.
I'm going to spend some time on my King Tiger/Jagd Tiger project and I have some 1/16 scale guys that need love.
Component integration test
Jerry
Last edited by Tanque; 09-17-2019 at 12:57 AM.
09-25-2019 | 07:00 PM
#36
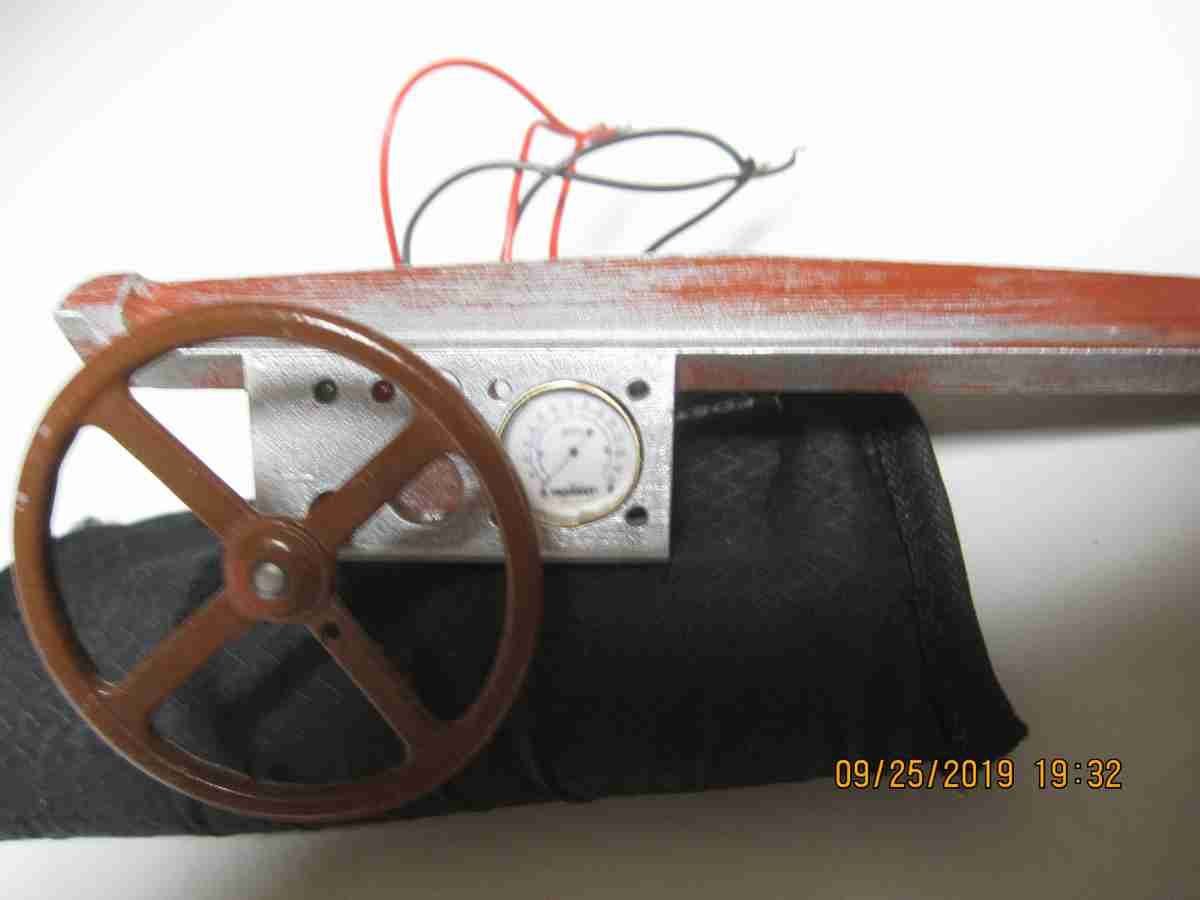
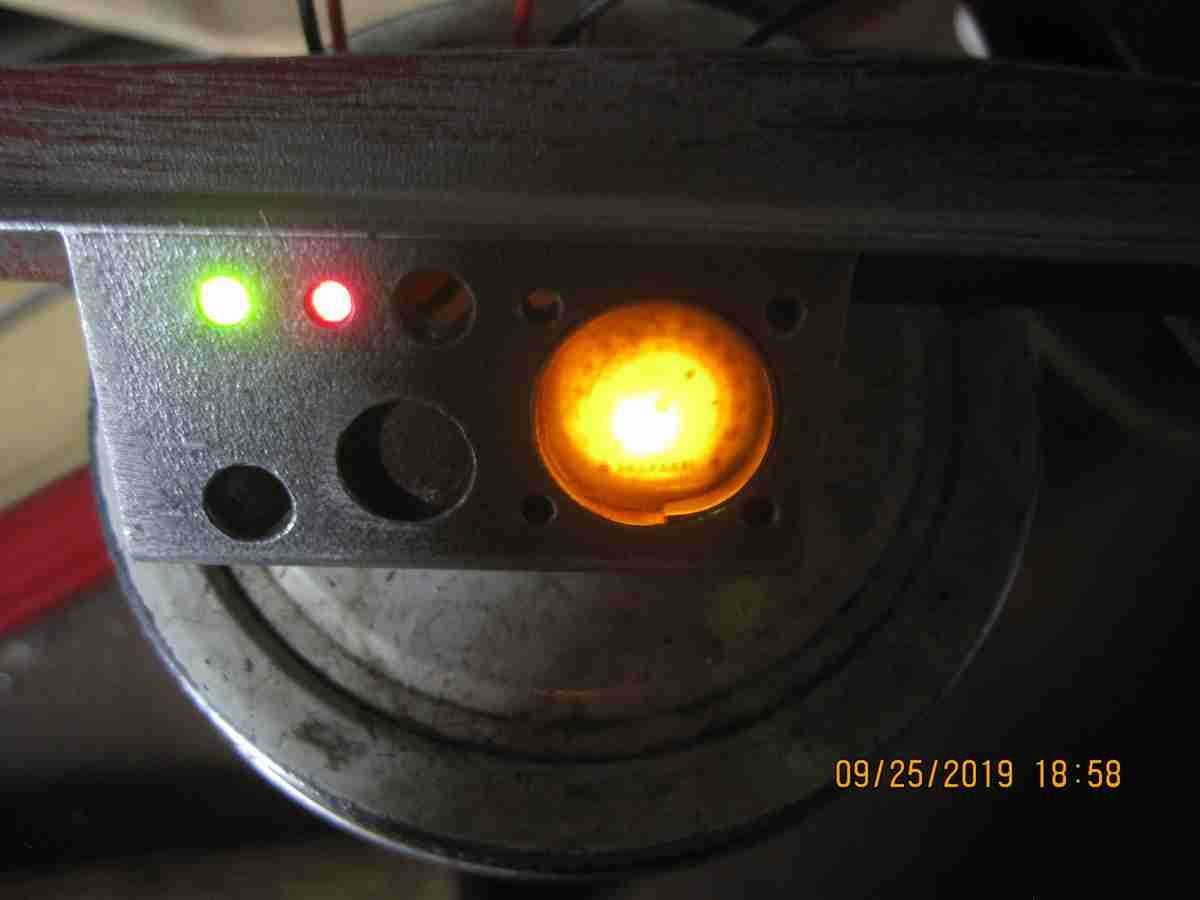
While I'm working on other projects I couldn't resist spending a little time on the dashboards of these trucks.
I've not yet found a photo of a dash of a full size truck so I'm purely just using imagination. Photo documentation on these trucks is scarce even in the Kaelble specific book I have: a few outside shots and that's it. In fact considering Kaelble built a few hundred of these machines for the German Army it's difficult imagine more photos weren't taken. I suppose perhaps the fact that they aren't as high profile as Tigers, Panthers and other all the other highly studied military hardware of the day contributes to the slim pickings for information. Anyway I've tried a few things using small, 3mm LEDs for lighting and photos of vehicle instruments I've massaged into the correct size. Below is a in progress first attempt at one dashboard. Apologies in advance for the poor quality of the lit-up dash photo. I'm still working out the instrument bezels/ rings. My first attempt came apart (as may be seen) while pressing it in place...also lighting the entire dial will be the next trick...
Jerry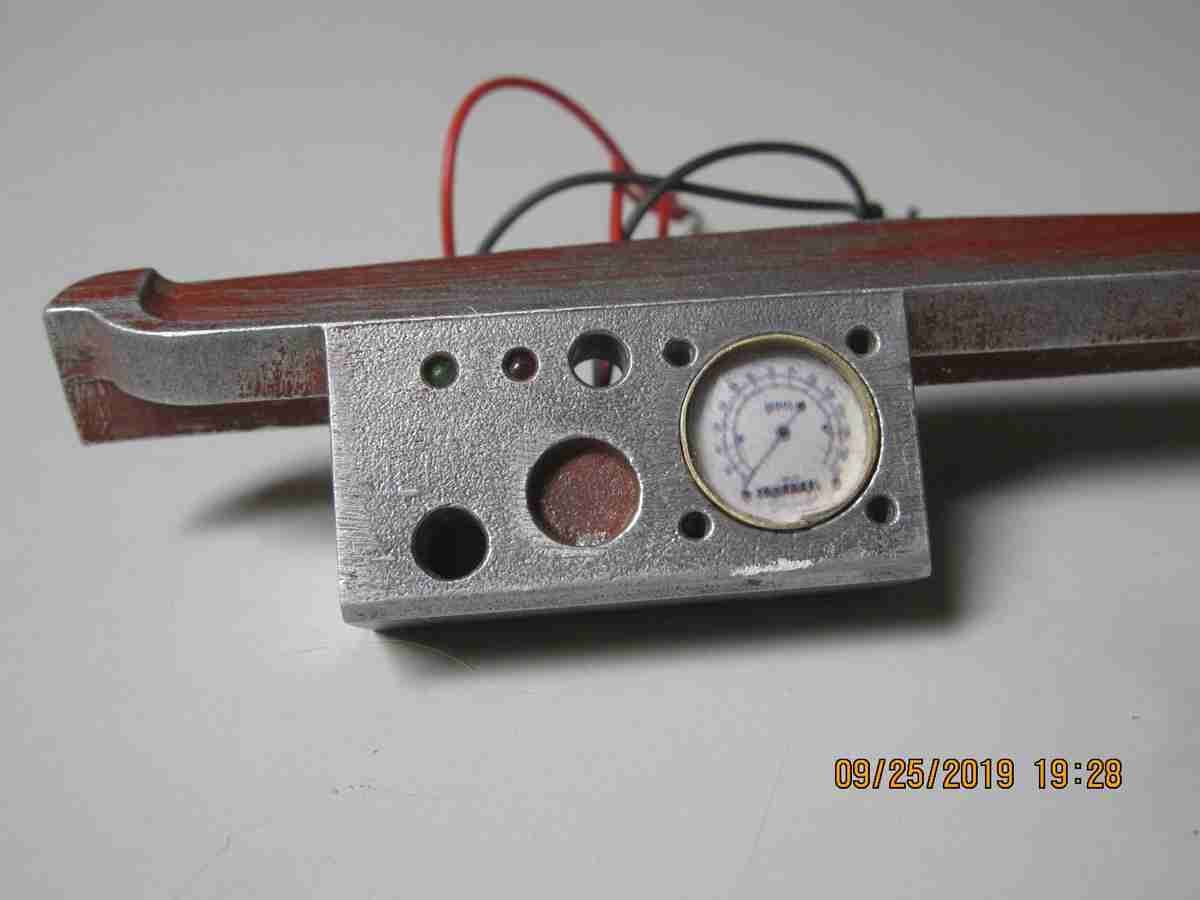
12-09-2019 | 10:49 PM
#38
I've been plugging away at these things slowly. I assembled the cab for the third truck after I had assembled the drive line. The cab needed more
fitting and actual machine work than I'd expected as the parts did not fit well at all. Once I had the cab mounted I decided that I want to make the
side windows in the doors function; I believe Maier originally offered this option on his built out trucks however I've never seen this. So I've been
tinkering and the result is shown in the referenced video. I did this work while I'm waiting for more information on another mechanical component
of the trucks.
Oh yes and this also marks the first time I've uploaded a video to YouTube since they've implemented that new "Children’s Online Privacy Protection Act" (COPA) that all YouTube content 'creators' have to comply with. I don't want any little dears to be traumatized by any of my poorly running models so I set my entire channel as having content NOT suitable for children.
Instead of working myself up into a lather because yet another questionable control (the internet was NOT designed for children) I just decided children can do without my video content.
Because many parents refuse to take an active role in policing their children's content and implementing controls (router based exclusions being one of the better ways) the sage and wizened protectors of the 'net impose responsibilities on the rest of us....ah well there's my rant for the day!
Jerry
Last edited by Tanque; 12-09-2019 at 11:03 PM.
12-11-2019 | 09:09 AM
#42
My Feedback: (1)
The part that makes me a little bit angry is that I know we wouldn't even need Copa if parents would take responsibility and monitor what their children are doing online. Lazy parents are all for creating more laws so they won't have to take responsibility. And People wonder why I prefer my cats. Mankind is the worst thing that ever happened to this planet.
08-17-2020 | 05:12 PM
#43
I'm still working on these!
I managed an initial test of the first of my Kaelble trucks to have the shift mechanism installed. Very awkward trying to film and operate at the same time. Pardon the poor quality of the video. This is the first x-y axis rc mechanism I've ever implemented. I need to have a shift 'gate' (three legged "H") pattern on my transmitter to prevent hunting/pecking and straining the servos..
Jerry


