


1:10 Su-12 Scratch
 02-28-2023, 09:08 AM
#1

Thread Starter
This is an odd story but I was building a T-80 and was progressing well and then I ordered a disk of aluminium that I need that the turret sits on.
It was ordered on Aliexpress 6 weeks ago and even though it said delivery in late March (!!), stuff usually shows up quicker than they state. But it didnt. And I could not progress. So I started making small bits for something else. And now that something else is almost further along than th et-80 so I will start a thread.
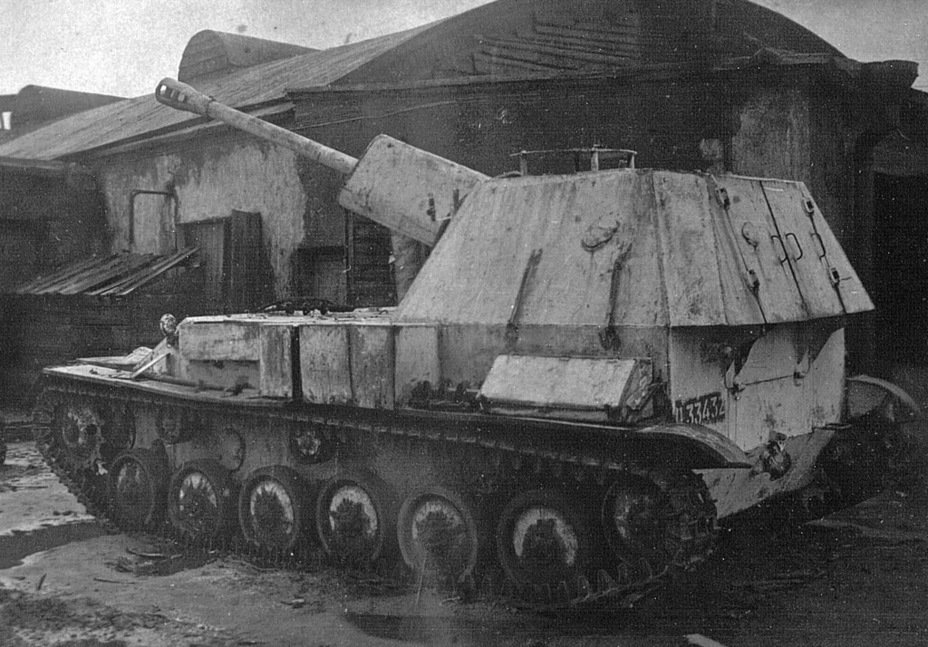
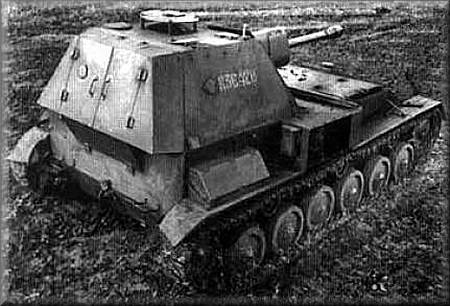
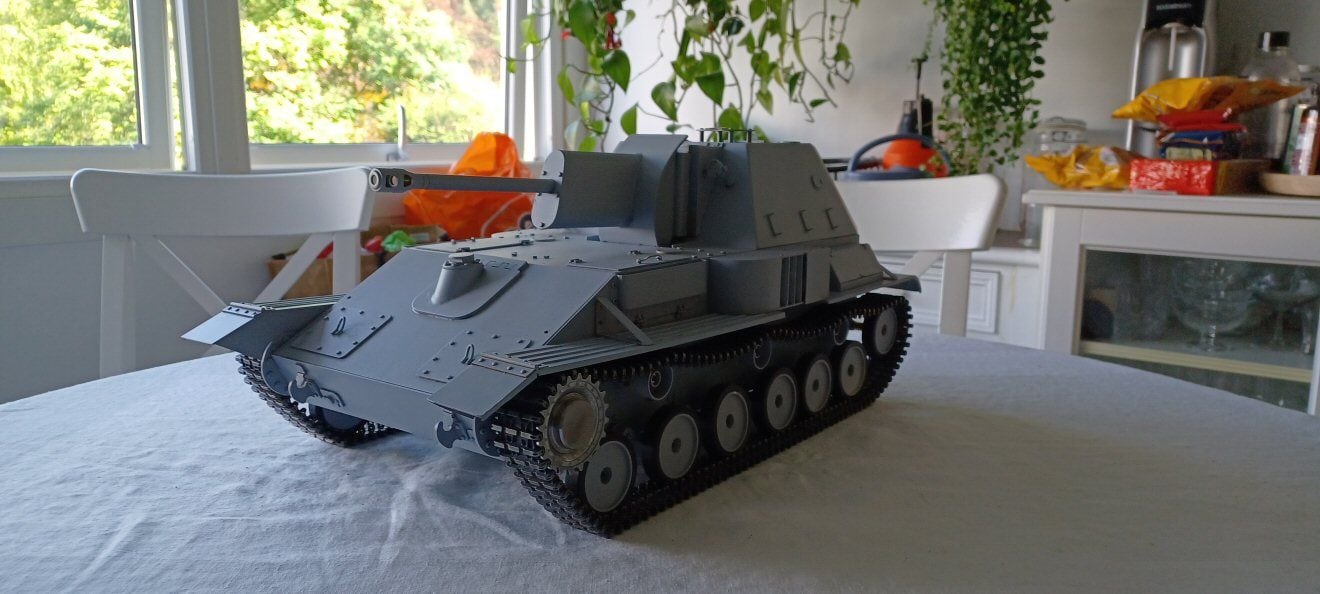
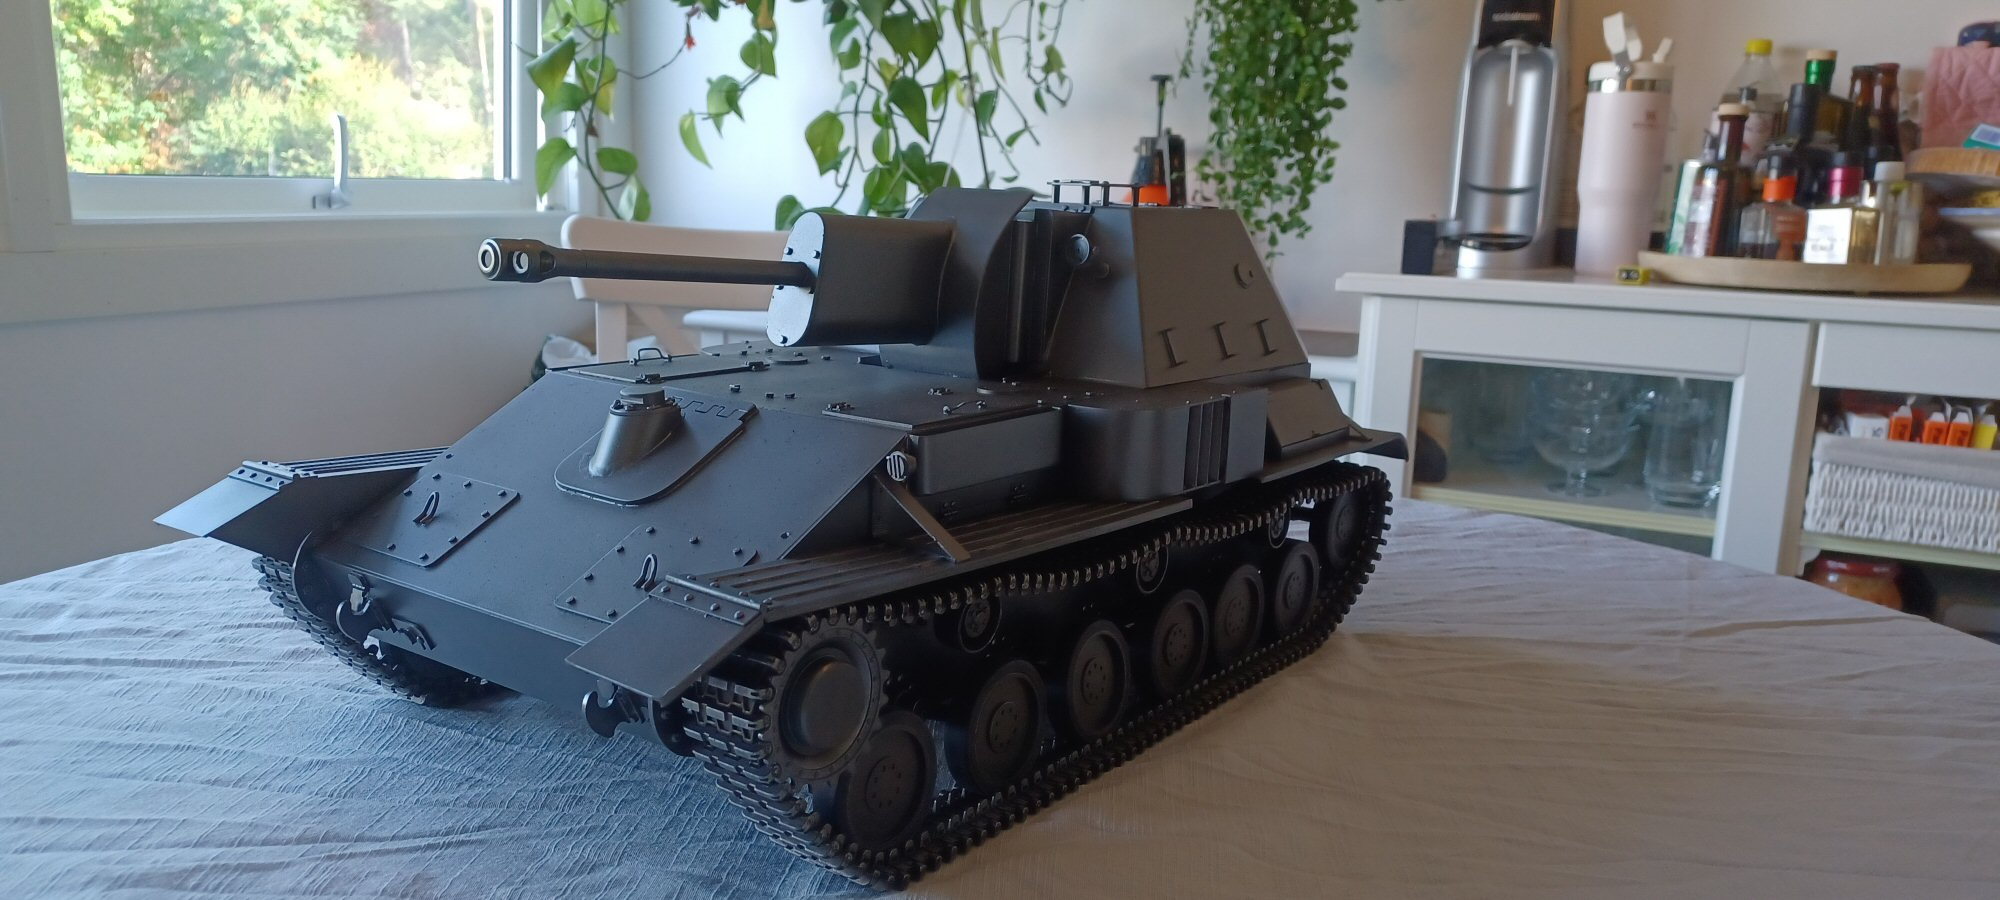
It is a 1:10 Su-12 as I am sick of small tanks now. I have built other tanks of similar shape and am fairly familiar with the ins and outs of them.
And Su -12 is basically an Su-76 with the original roof. I am not getting into the discussion of whether or not Su-76's had rooves as it is all covered in confusing detail here: https://www.tankarchives.ca/2018/04/...fated-spg.html and elsewhere.
It looks like this:
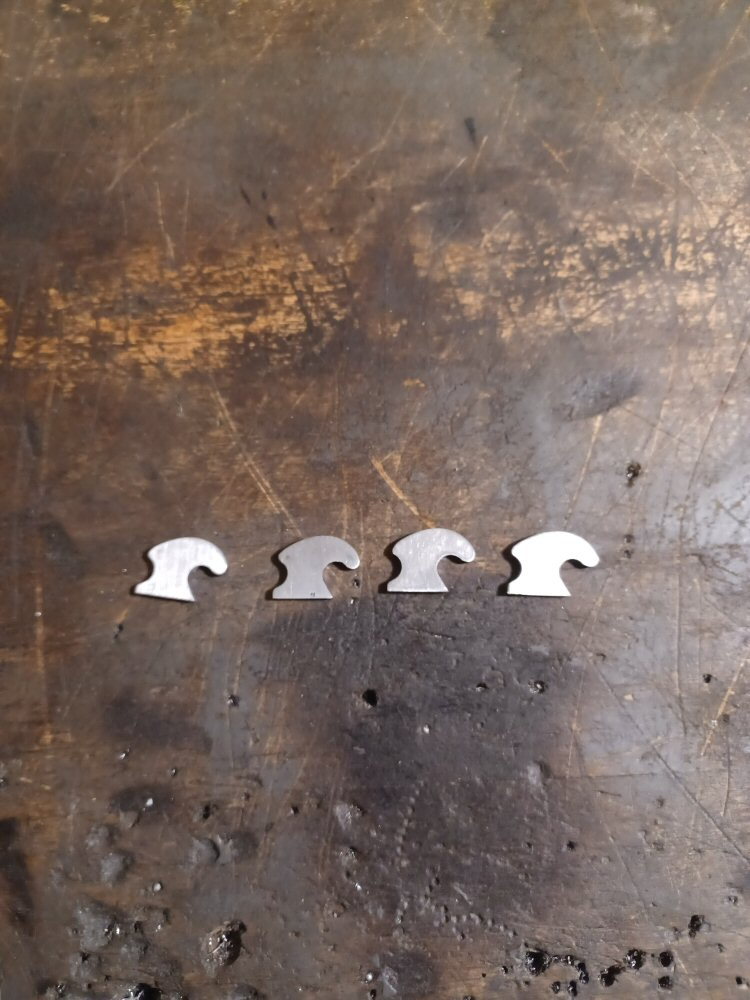
I had no real plan and was making bits to fill time on the other project so I started with the tow hooks naturally enough. I needed three identical ones and a Harry (the spare one) so I stuck some sheet steel together with solder and started filing.
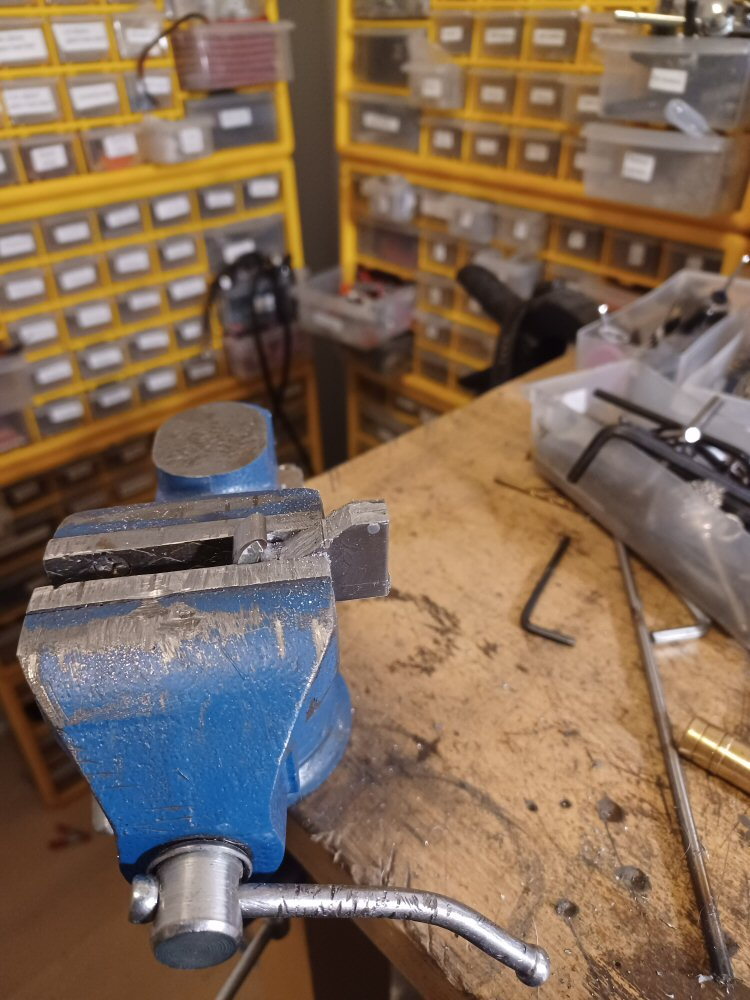
Then I heated them up to separate and cleaned them up.
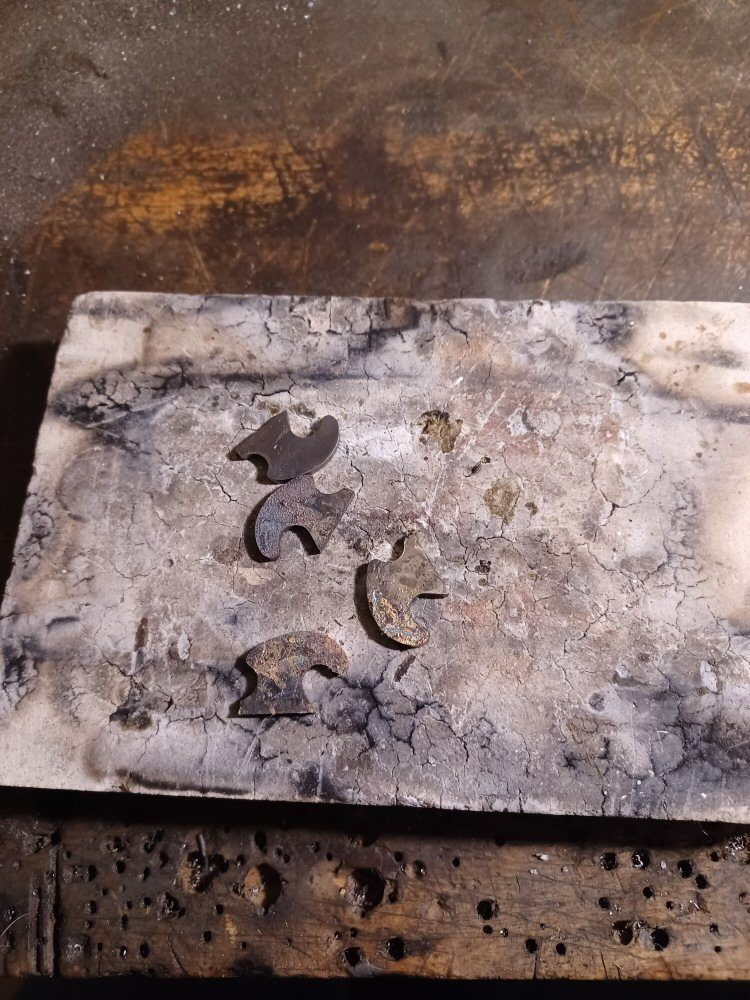
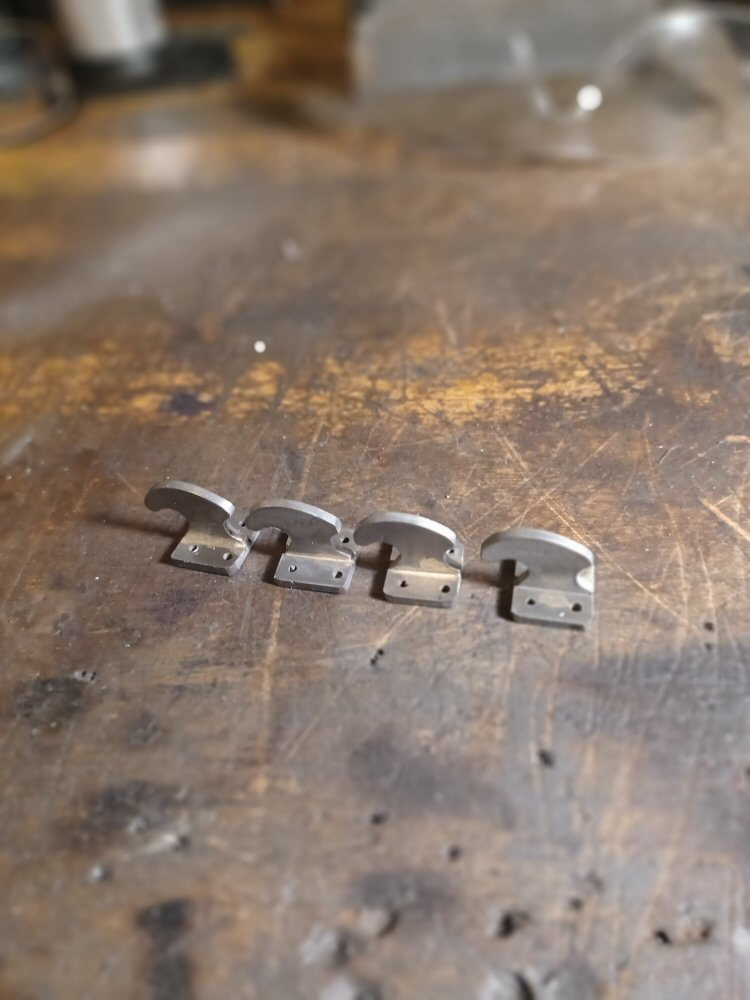
Then I silver soldered them to another bit and then there were four.
Then I started on the big vent things with the louvres.
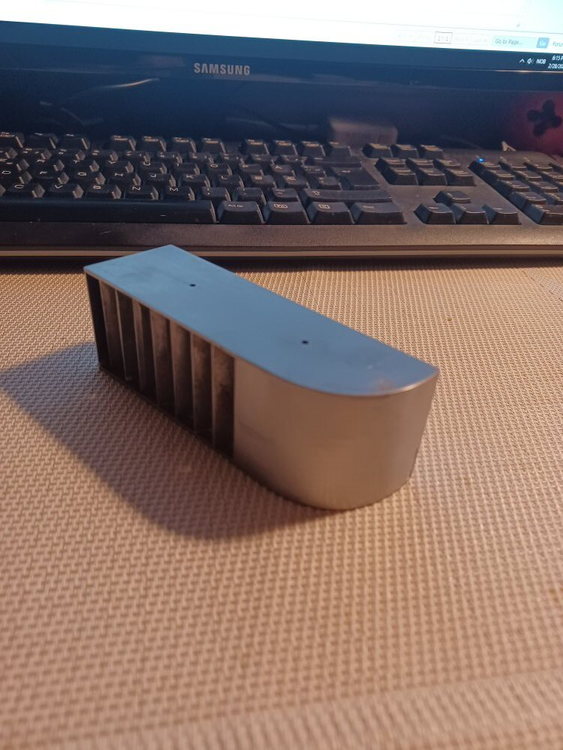
This was just a boxy thing but getting the slats in was grief as you can see in the picture. But two were made. One is not great so it will be featuring the sheet metal snow covers or whatever than cover the vents in some pictures.
Then I roughed out the swing arms which need some finishing but the bones are there.
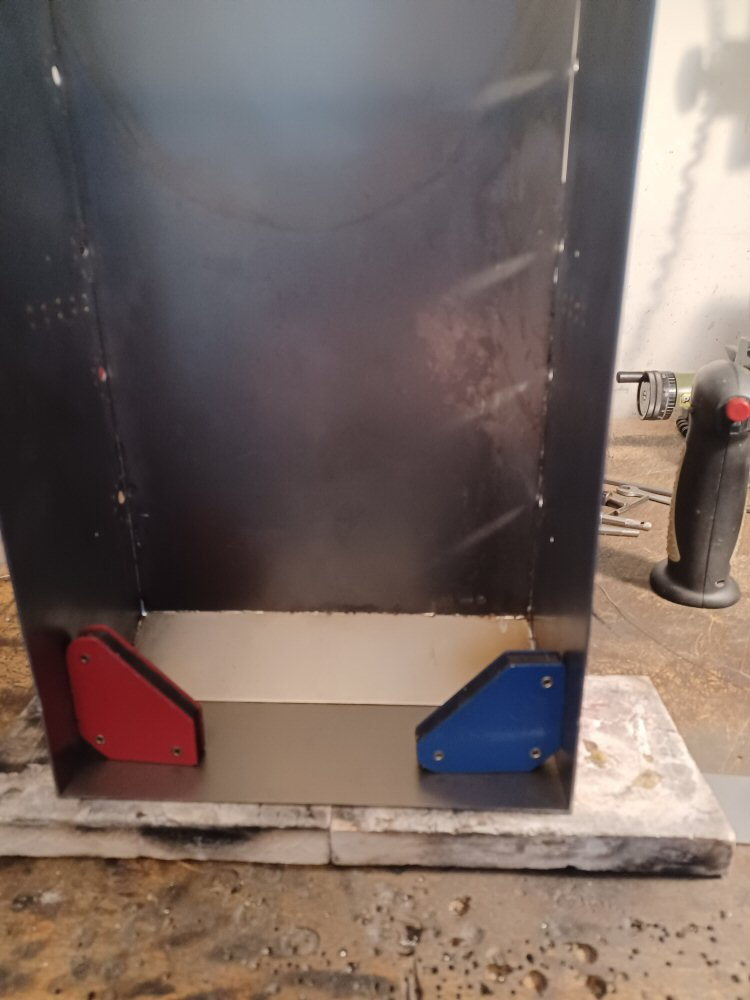
Then it was onto the hull which was a bit shaky but went together in the end. This is 1.2 mm steel and I think that is as thin as I would want to go on a tank this size - way too much flex before its all joined together.

I also have made various boxes and other vents that go on and will get pictures soon. Wheels are all roughed out but need finishinging.
The motors I am using are curtain motors - big old motor coupled to an old fashioned gearbox for pulling curtains or blinds or something. They needed some tweaking to get the shafts pointing the right way but they should be fine.
I will keep at this until my T-80 disk shows up - whenever that will be I guess.
P
It was ordered on Aliexpress 6 weeks ago and even though it said delivery in late March (!!), stuff usually shows up quicker than they state. But it didnt. And I could not progress. So I started making small bits for something else. And now that something else is almost further along than th et-80 so I will start a thread.
It is a 1:10 Su-12 as I am sick of small tanks now. I have built other tanks of similar shape and am fairly familiar with the ins and outs of them.
And Su -12 is basically an Su-76 with the original roof. I am not getting into the discussion of whether or not Su-76's had rooves as it is all covered in confusing detail here: https://www.tankarchives.ca/2018/04/...fated-spg.html and elsewhere.
It looks like this:
I had no real plan and was making bits to fill time on the other project so I started with the tow hooks naturally enough. I needed three identical ones and a Harry (the spare one) so I stuck some sheet steel together with solder and started filing.
Then I heated them up to separate and cleaned them up.
Then I silver soldered them to another bit and then there were four.
Then I started on the big vent things with the louvres.
This was just a boxy thing but getting the slats in was grief as you can see in the picture. But two were made. One is not great so it will be featuring the sheet metal snow covers or whatever than cover the vents in some pictures.
Then I roughed out the swing arms which need some finishing but the bones are there.
Then it was onto the hull which was a bit shaky but went together in the end. This is 1.2 mm steel and I think that is as thin as I would want to go on a tank this size - way too much flex before its all joined together.
I also have made various boxes and other vents that go on and will get pictures soon. Wheels are all roughed out but need finishinging.
The motors I am using are curtain motors - big old motor coupled to an old fashioned gearbox for pulling curtains or blinds or something. They needed some tweaking to get the shafts pointing the right way but they should be fine.
I will keep at this until my T-80 disk shows up - whenever that will be I guess.
P
 02-28-2023, 09:21 AM
#2
You know, when they banned me from rctw I figured the Silver Lining to that little Cloud would be that I would no longer have to compete with one of the best tank Builders I've ever seen. And now you're here! No fair! 
I'm just teasing you, bro, as usual, absolutely fantastic work here. I can't wait to see this puppy complete. It's also good to see you here on rcu.
I'm just teasing you, bro, as usual, absolutely fantastic work here. I can't wait to see this puppy complete. It's also good to see you here on rcu.
02-28-2023, 09:23 AM
#3
Thread Starter
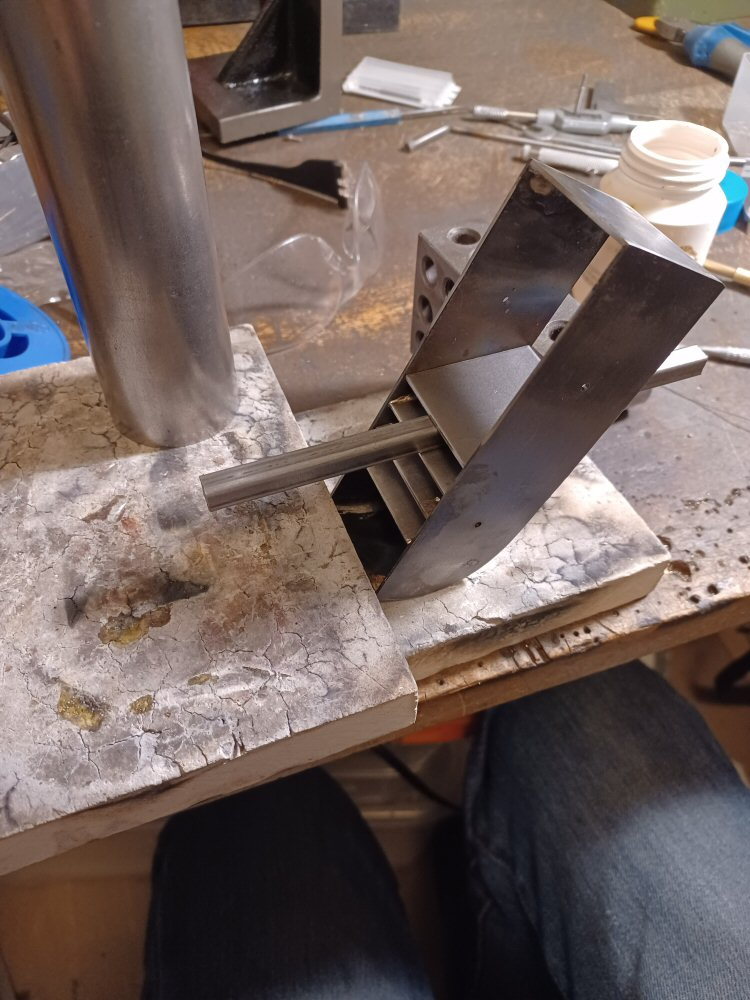
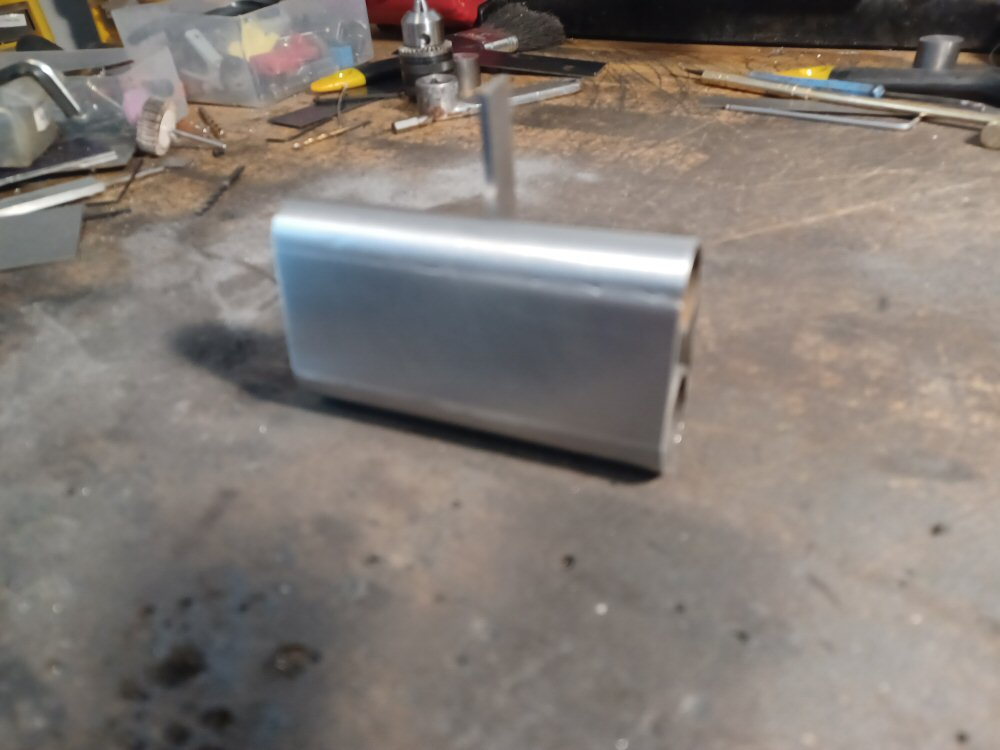
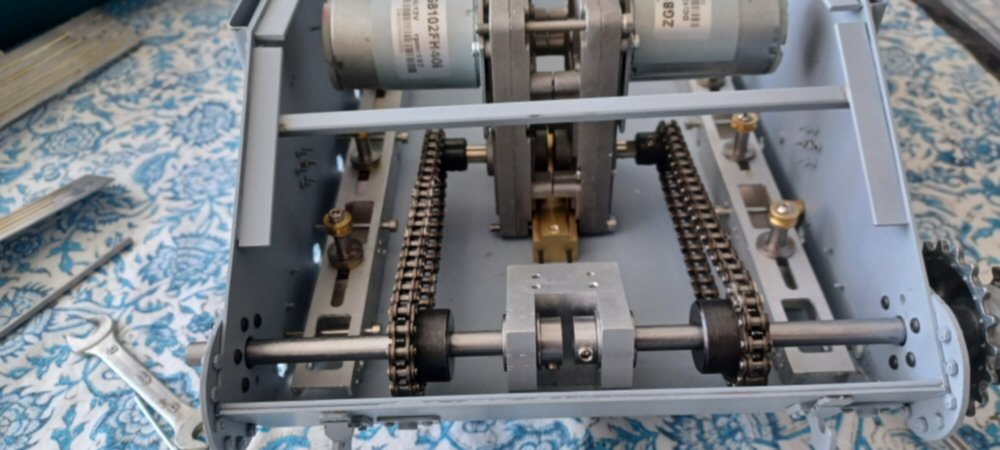
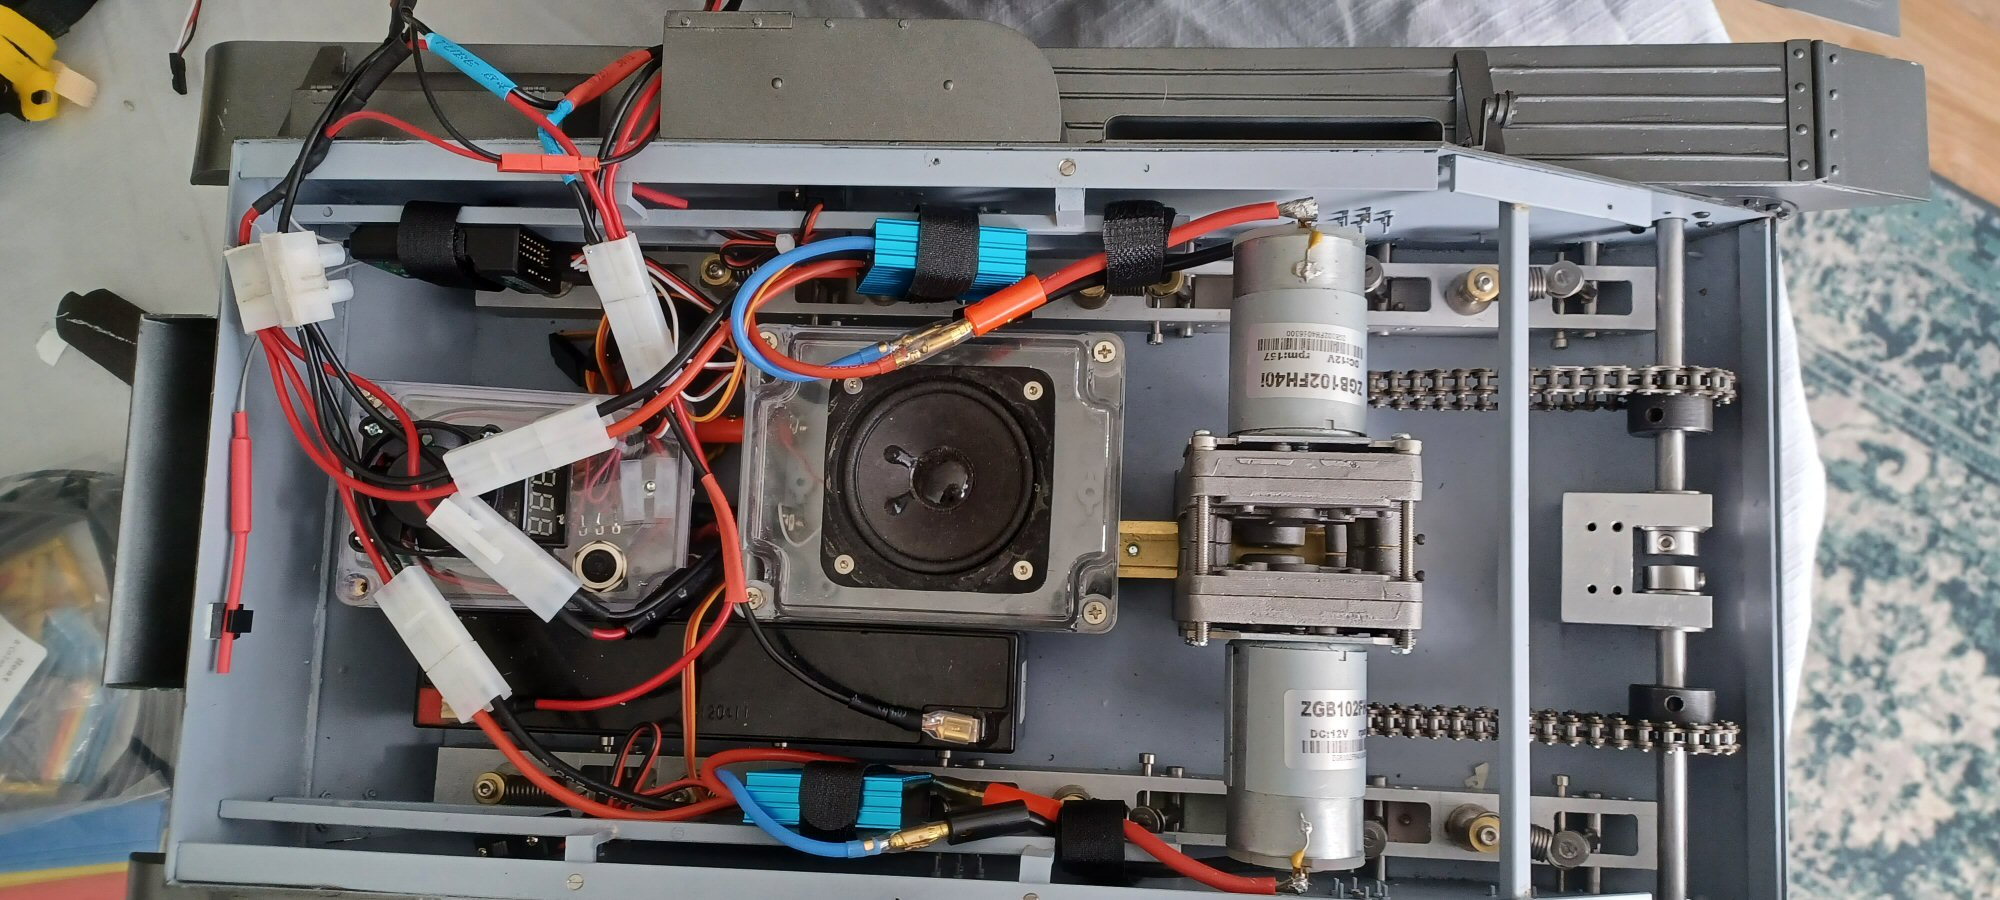
These are the motors - the brass thing they are sitting on will bolt to the floor of the tank. The gear boxes are connected together by bolts that go through the slot. Tightening the bolts clamps the gearboxes to the brass mount. The two M2 bolts on the front of the brass bit can go in and out and will be used to tension the chains. The motors will be standing like that to free up space behind. They lie about 2 mm under the upper roof of the hull so I lucked out there.
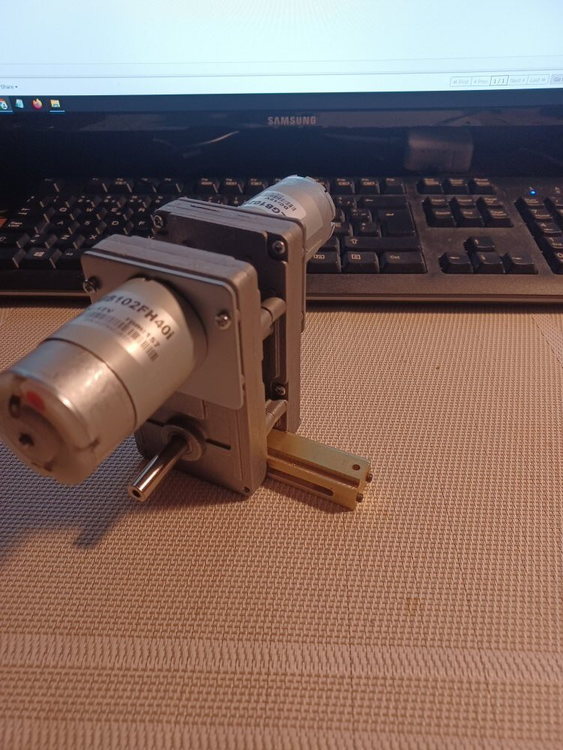
The motors are 157 rpm at 12 V and I will gear them down a smidgin to end up with 120 or so which should be about right.
Here are the finished side vents (the good one at any rate).
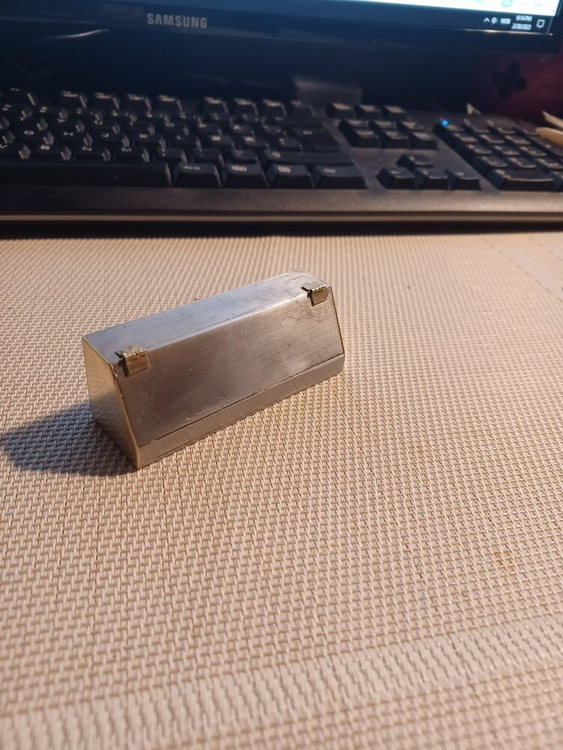
And here is the basic form of one of the stowage boxes that will go on the side.
p
The motors are 157 rpm at 12 V and I will gear them down a smidgin to end up with 120 or so which should be about right.
Here are the finished side vents (the good one at any rate).
And here is the basic form of one of the stowage boxes that will go on the side.
p
 03-12-2023, 07:46 AM
#5
Thread Starter
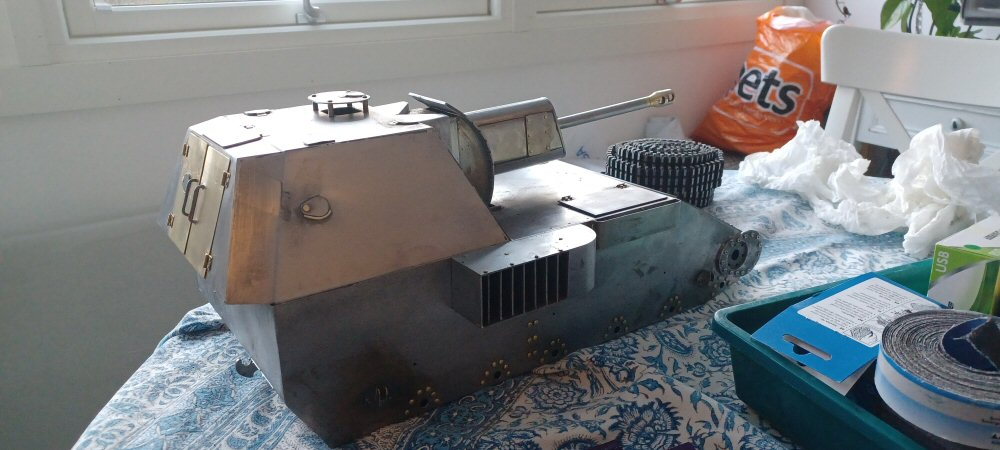
I moved onto the upper hull....the casement is relatively complex and the gun assembly is a bit awkward.
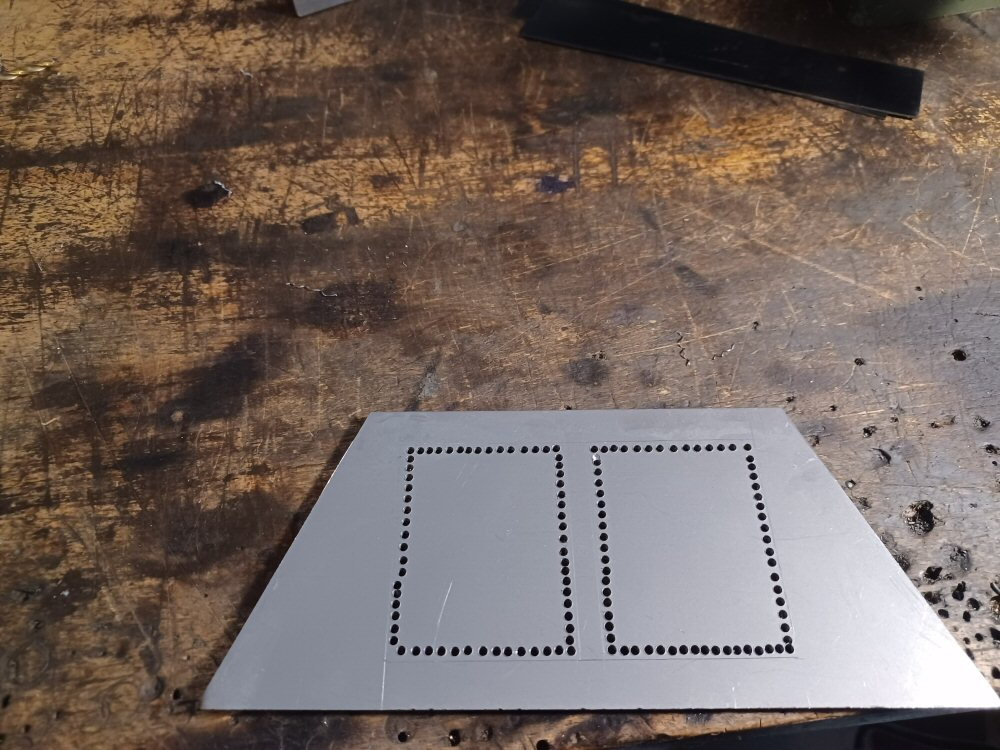
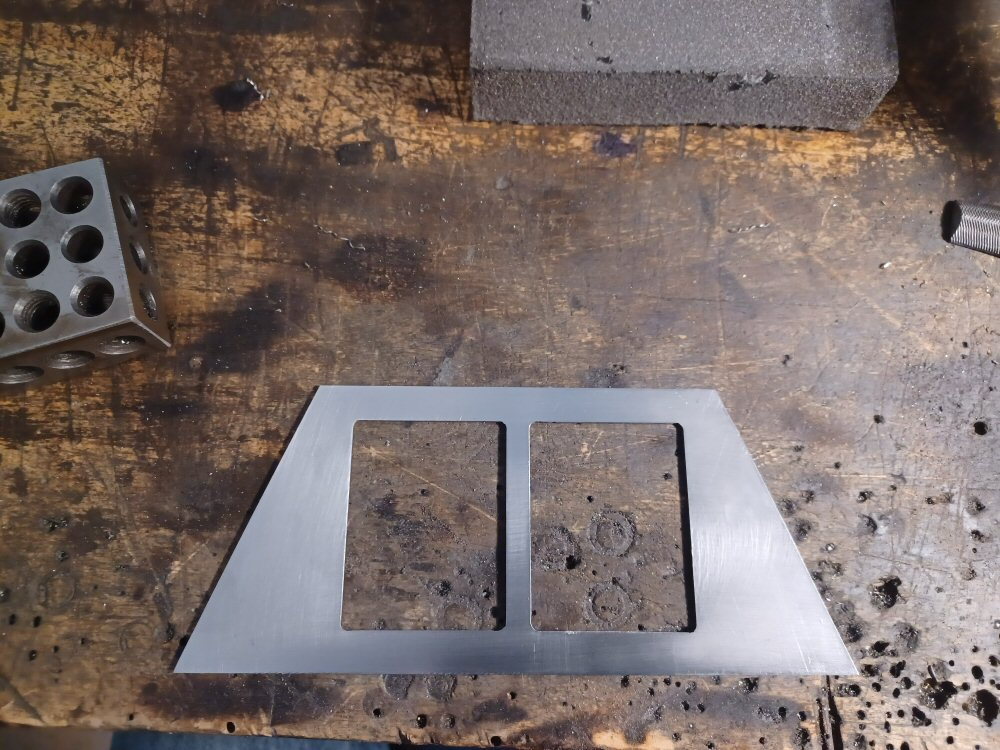
Making the upper hull is annoying as it needs a giant hole over which the casement sits. So I chain drilled it out and then deafened the neighbours with the screeching of the metal as I filed it down.
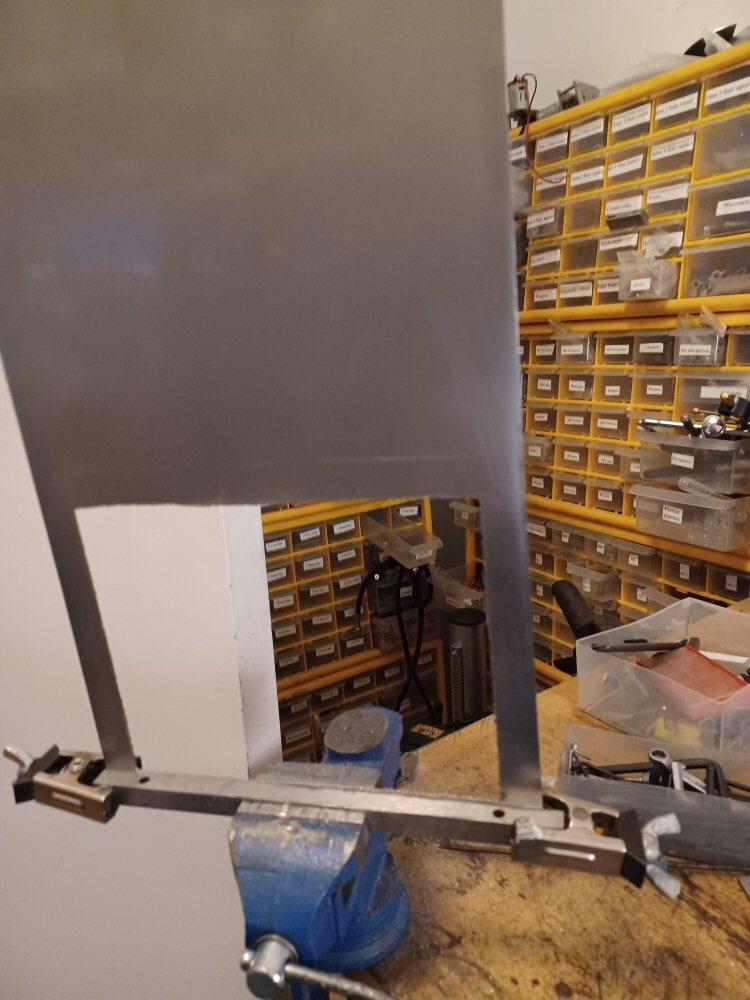
I was definitely at the limits of what is possible with this size vice and a hand file...
Then I did the same of the rear plate of the casement where I need two doors. Chain drilling and filing out...
Then I assembled the most of the casement. Im sorry for the quality but it didn't look so bad on the phone and then did when I put it on the pc...
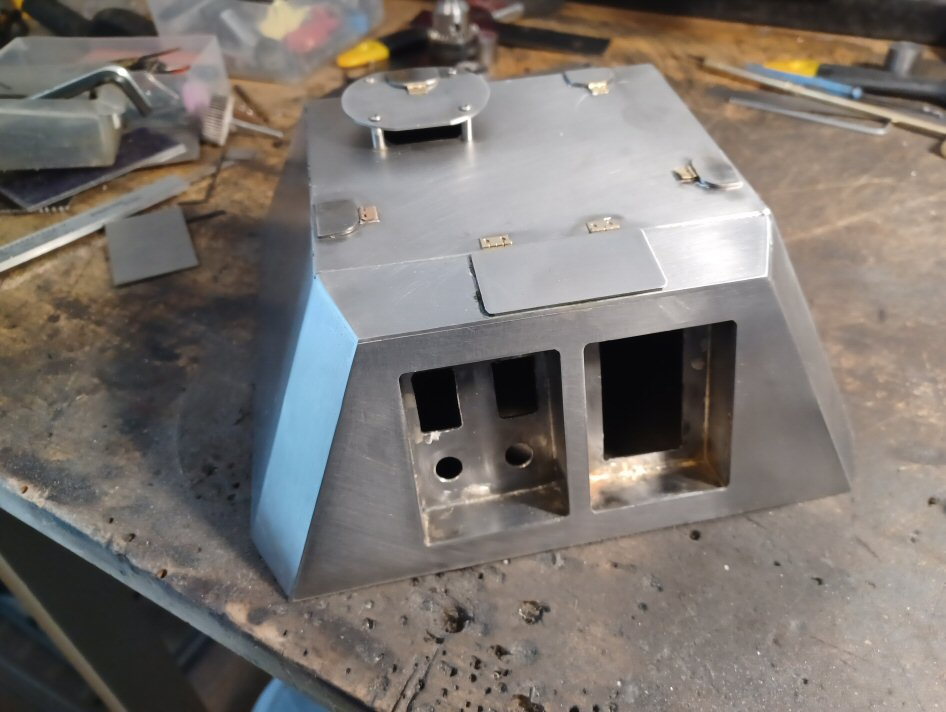
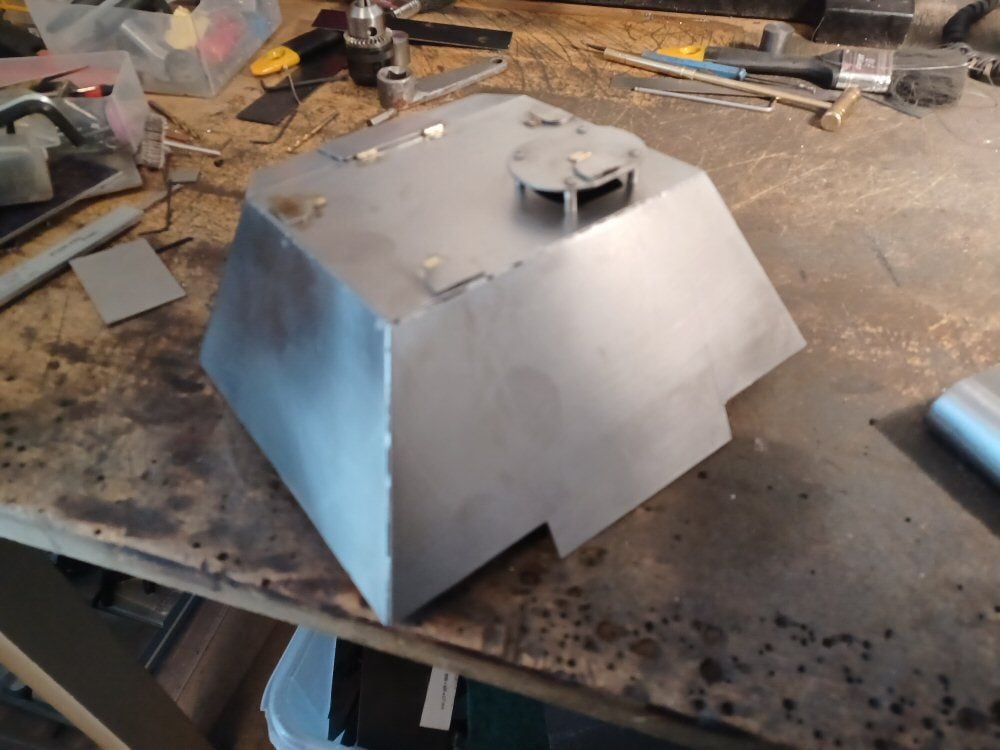
The seams need a lot of bondo but the whole tank will be getting body work before painting. The cutouts behind the doors will be for charging ports, switches and a voltmeter/ammeter. Hopefully all hidden behind opening doors.
The next tricky bit was the rear bit of the gun (recoil assembly?). It has two curves - one top, one bottom and the sides taper up to the smaller curve on the top.
I have no mill or access to one and even if I did , this would be a problem as you eventually run out of flat surfaces to hold the piece.
I got two steel tubes, one 20 and the other 25 mm in diameter. Then I joined them with some spaces and silver solder-
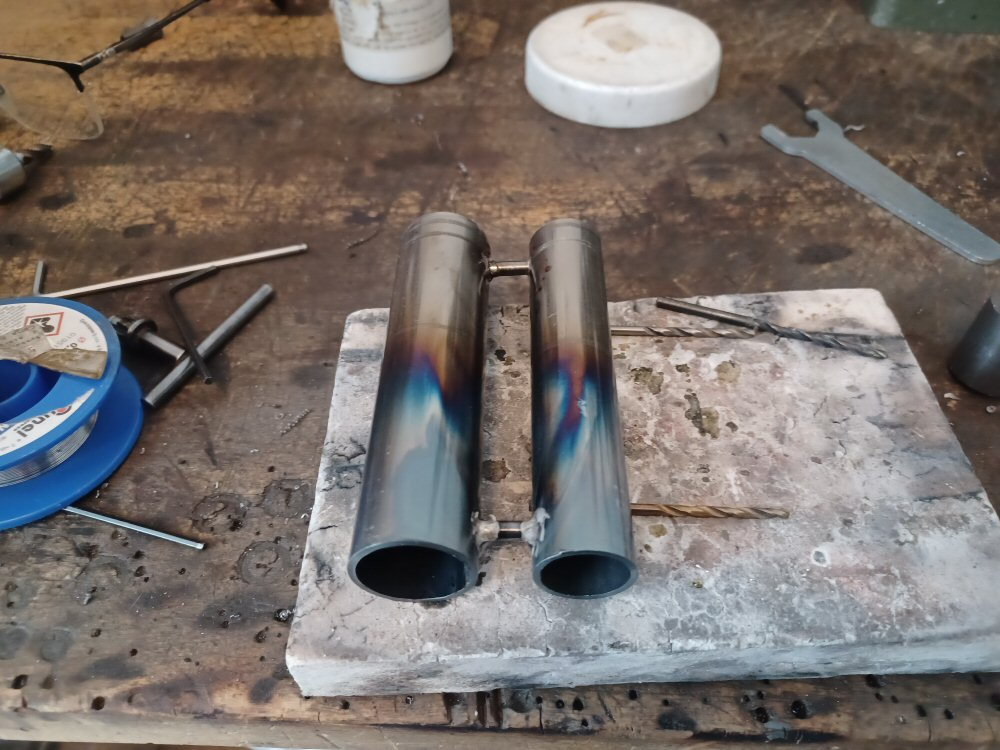
They look really rough so I cleaned them a bit. It doesn't matter as they will be invisible.
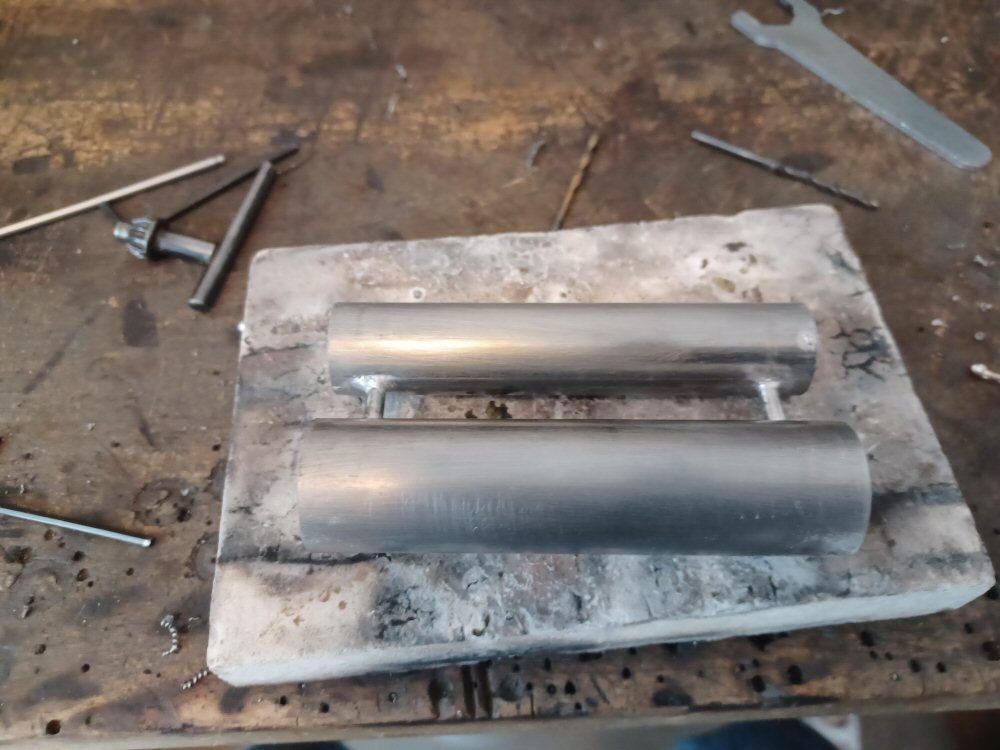
I then ground a series of flats along the lengths of each cylinder on both sides using a dremel wheel mounted in the chuck of my proxxon.
Then one each side I soldered some flat panels to reproduce the shape of the real life item.
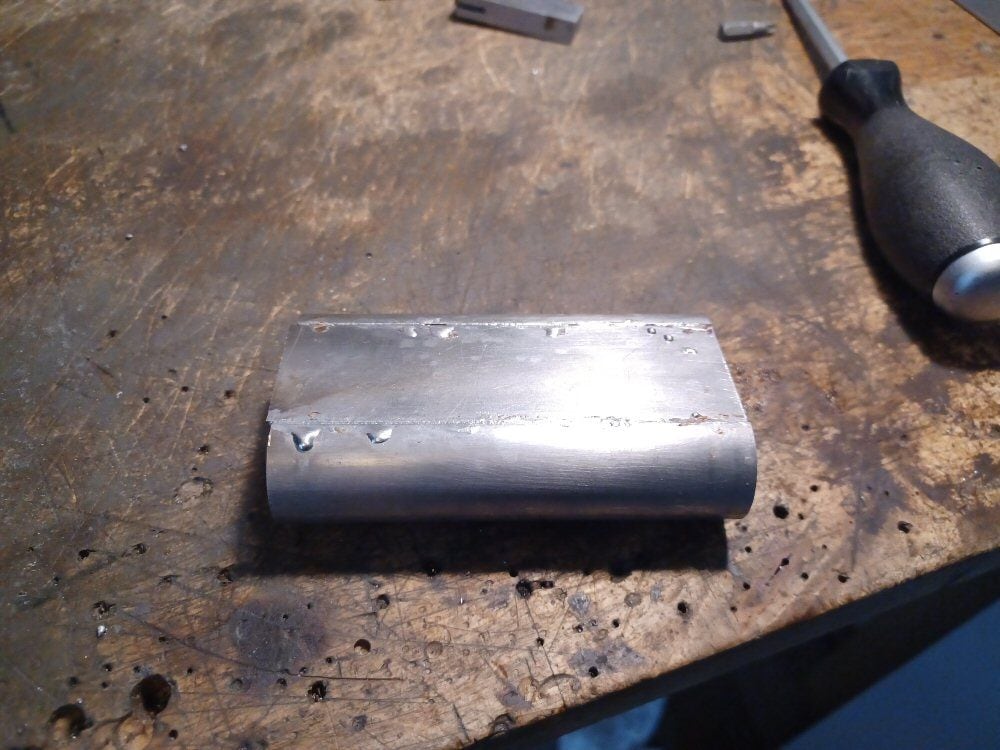
Looked rough but a quick going over with a sander and scotch brite cleaned up the blobs nicely.

There are obviously a set of profiles on either end but I will cross that bridge when I get to it.
O also think the bottom of the lower curve on this assemble is flattened out but I can deal with that with a file later.
P
The following users liked this post:
JeeSib (03-13-2023)
03-26-2023, 09:35 AM
#7
Thread Starter
Just an update to confirm that I am still tipping away at this tank.
80% of the hull structure is done now. I even did the gun mantlet and structure and that was like pulling teeth. I have a woeful amount of sanding and filling to do before it gets some paint to hide the terrible finish. Filling seams and sanding is probably the one aspect of building a tank that puts me right off......
Still lots of bits and pieces to do on the hull but the running gear is starting to appear on the horizon.
Apologies for the sellotape and bits of brass keeping everything upright in these pictures!
P
03-26-2023, 10:57 AM
#9
Thread Starter
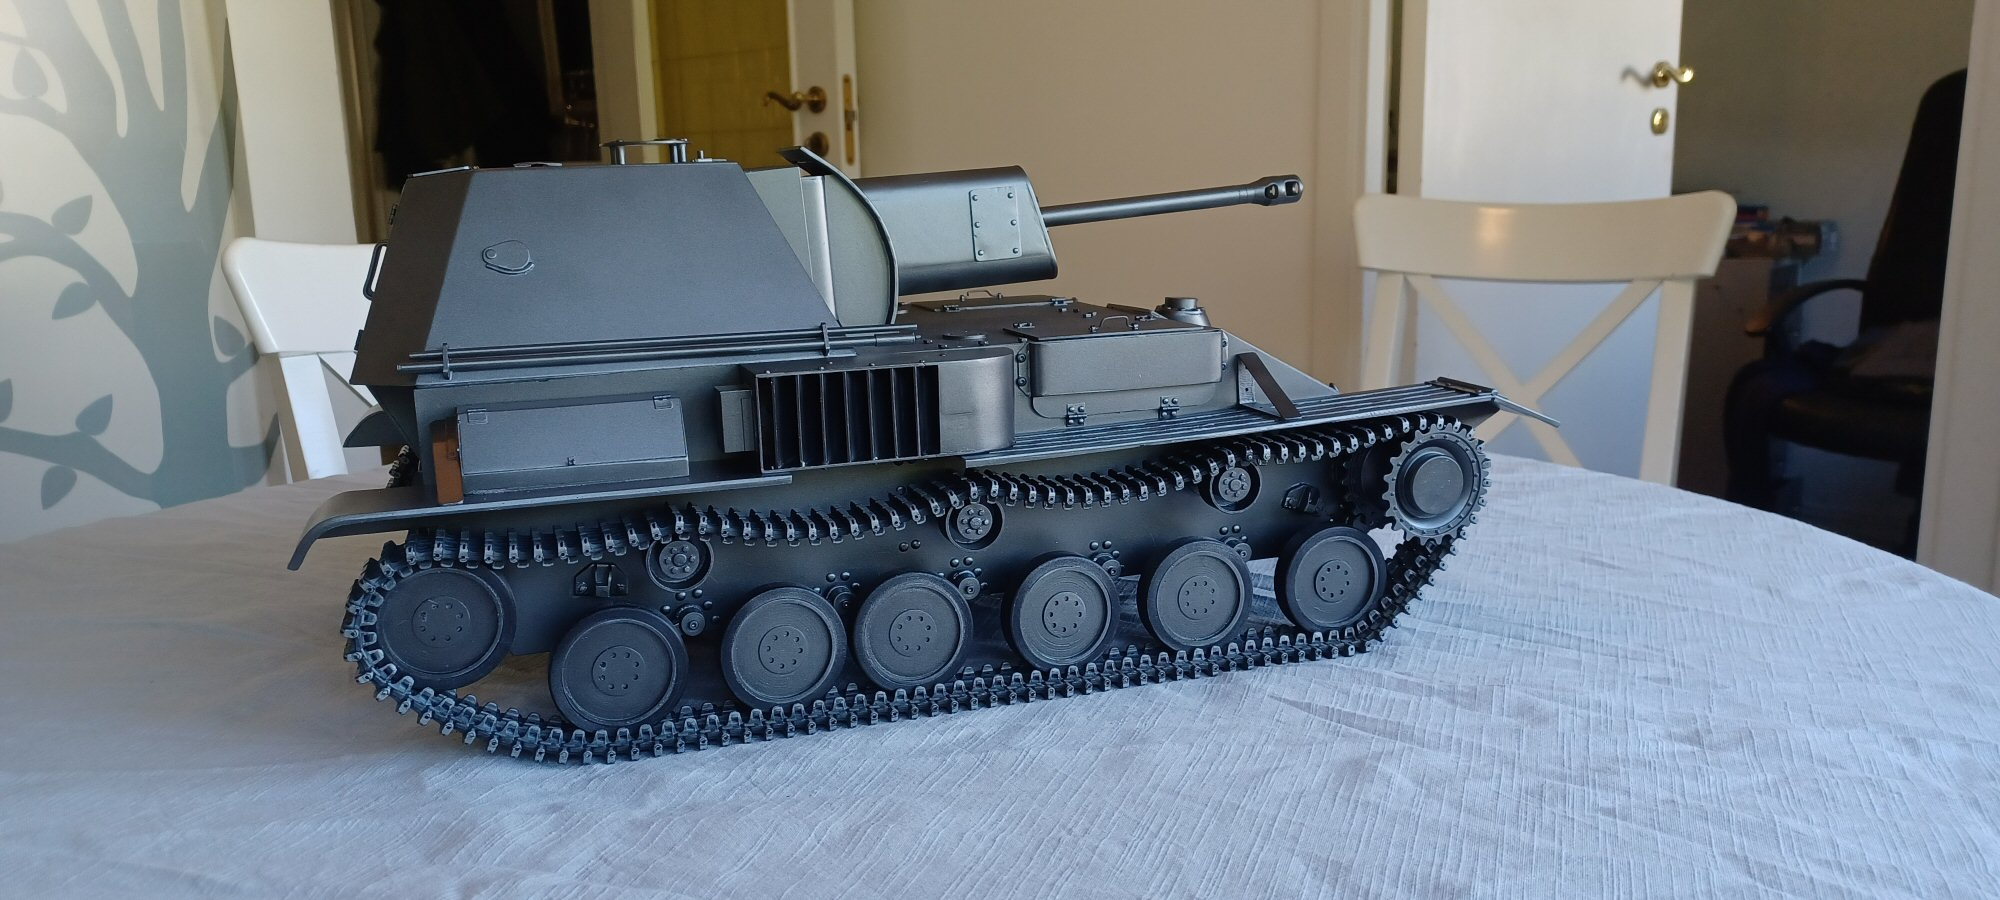
Im not.....I have a couple of meters of tiger transport tracks of good quality I hope to use. They are exactly the right width but.........they will not facilitate a single tooth sprocket.
So I hope to modify/disguise a tiger sprocket and use that. With any luck it will not be too noticeable.
I cannot afford to waste those tracks so I really hope it is ok.
P
So I hope to modify/disguise a tiger sprocket and use that. With any luck it will not be too noticeable.
I cannot afford to waste those tracks so I really hope it is ok.
P
04-06-2023, 09:21 AM
#10
Thread Starter
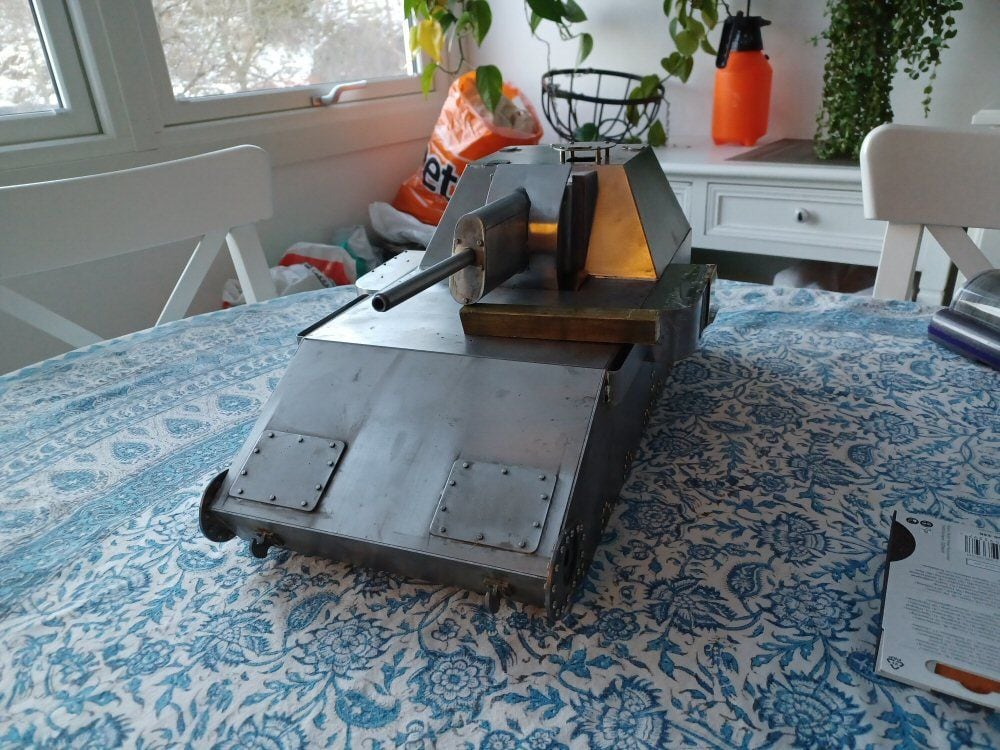
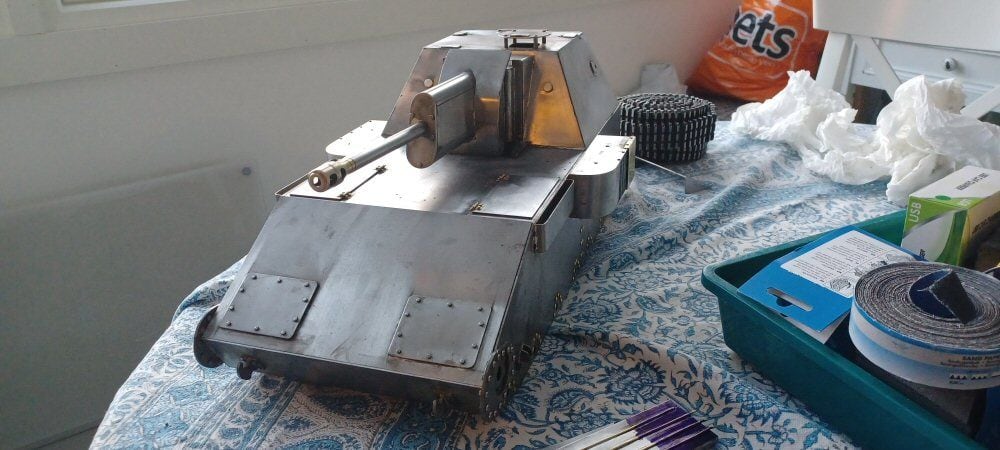
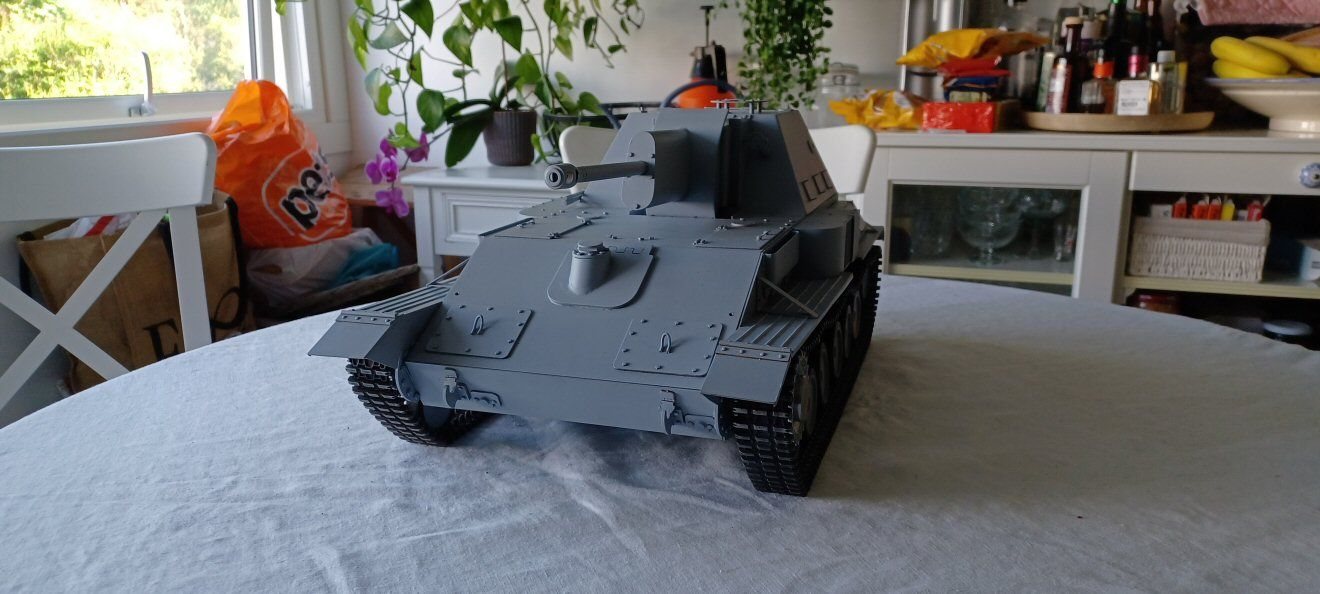
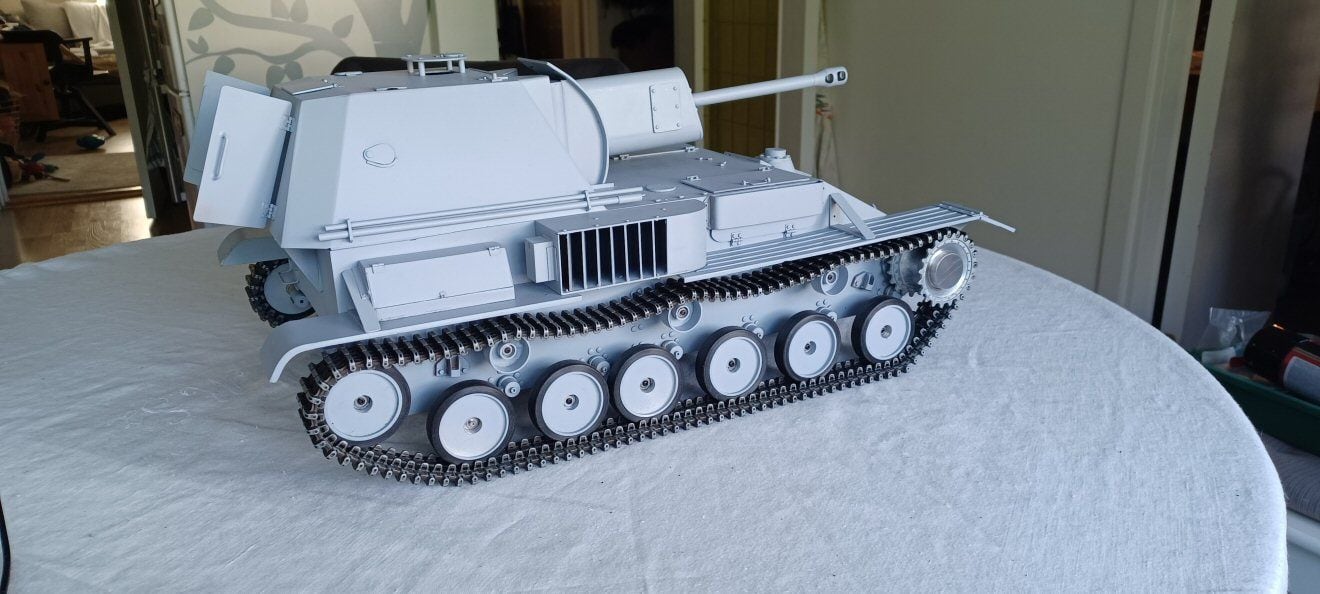
Thought I would post a small update. The upper hull is now getting close to complete - the entire gun assembly is mounted on the front casement glacis and other bits a pieces attached.
Still looks grubby but once the entire top hull is finished....its off to the paint shop so I can stop annoying myself with how horrible the finish is! An awful lot of filling and patching to do but I am stocked up with milliput and that should work just fine!
Then it will be the lowers turn and once primer is on that...I will deal with the running gear.
The following 2 users liked this post by lposter:
JeeSib (04-06-2023),
Pah co chu puk (04-06-2023)
04-23-2023, 07:43 AM
#11
Thread Starter
Thought I would just give a sign of life on this project.
The past few weeks have been focused primarily on the running gear. This was very consuming because it involved a large number of disks and rods with very small deep holes being tapped to M1.6 and M2.
To cut disks I simply clamped Dremel cutoff wheels in the Proxxon and mounted the tube or bar to be cut in the rotary table and tediously cut the slices. I used a lot of cut off wheels but I had a lot got cheap from aliexpress so that was OK. But it took a long time indeed.
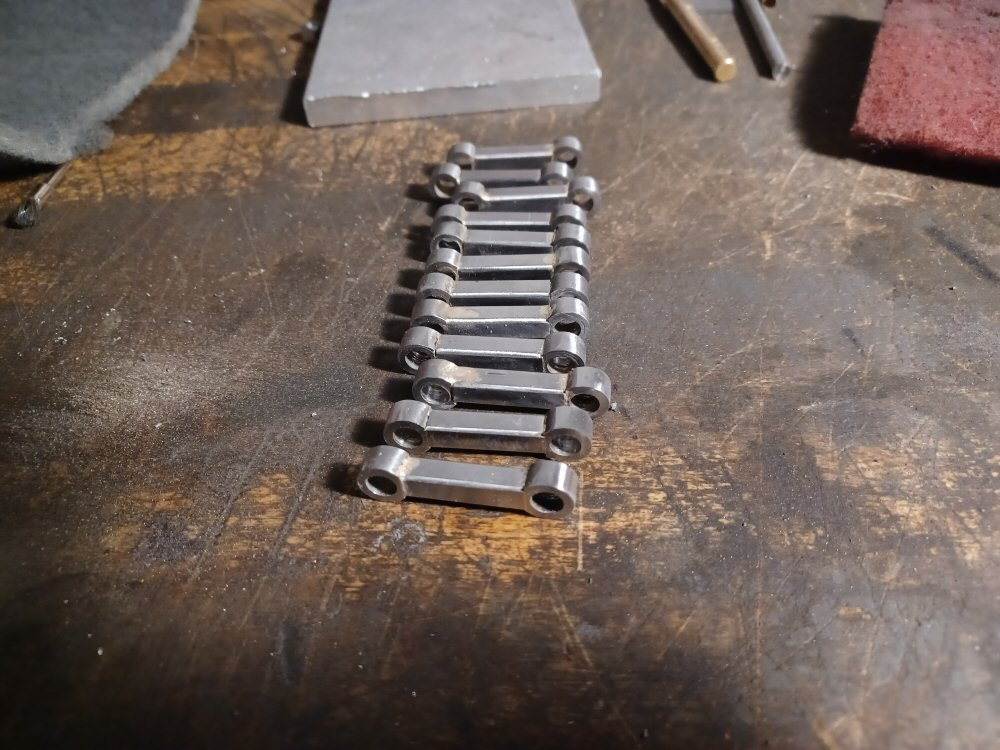
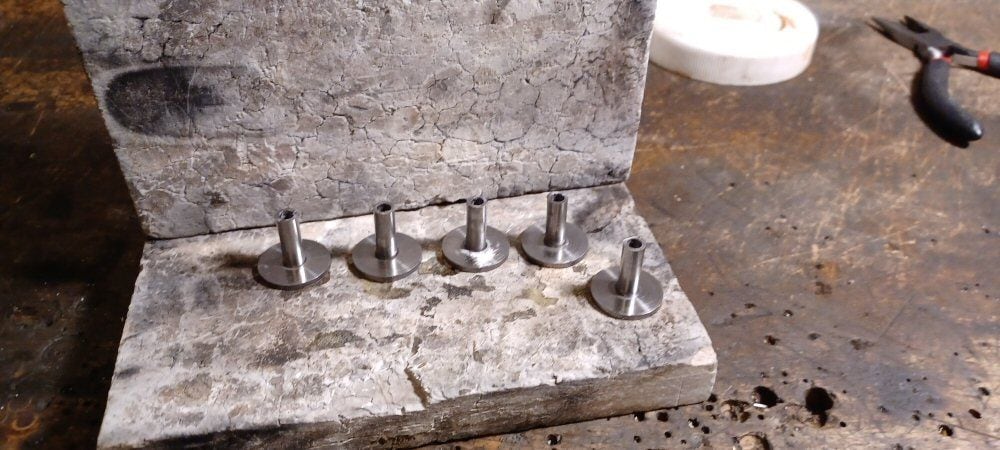
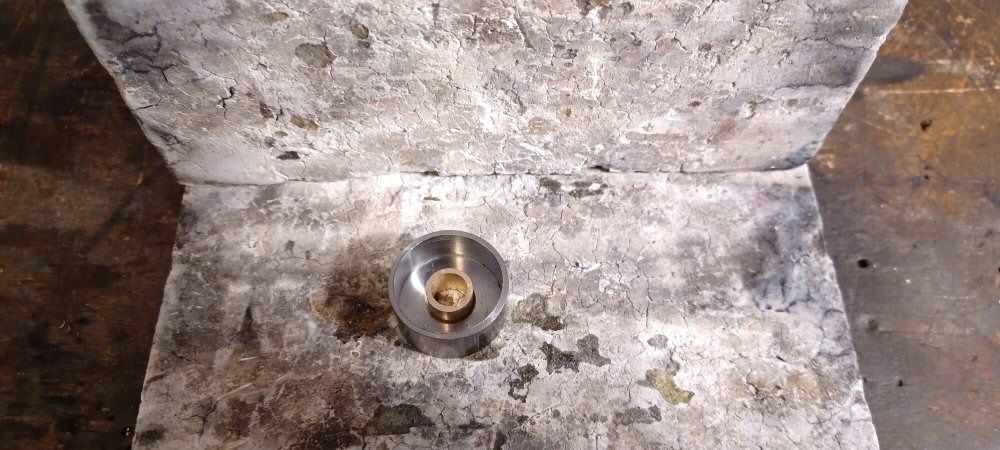
First I made the return roller mounts. Simply 6 mm steel rod silver soldered into disks with 6mm holes drilled in them. Then the centre bar was drilled out to 4 mm. Into this will go the axle for the return roller.
This is the mounts before soldering.
Here are all the bits for the rollers and the finished mounts:
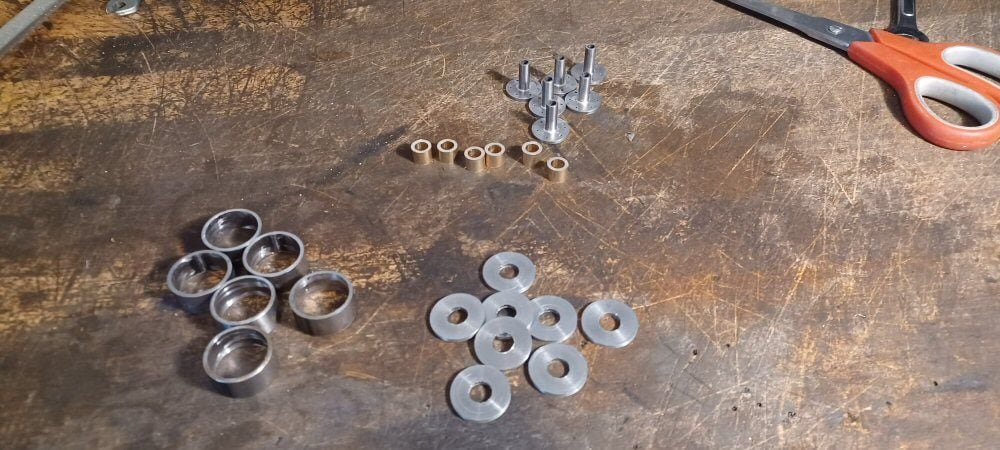
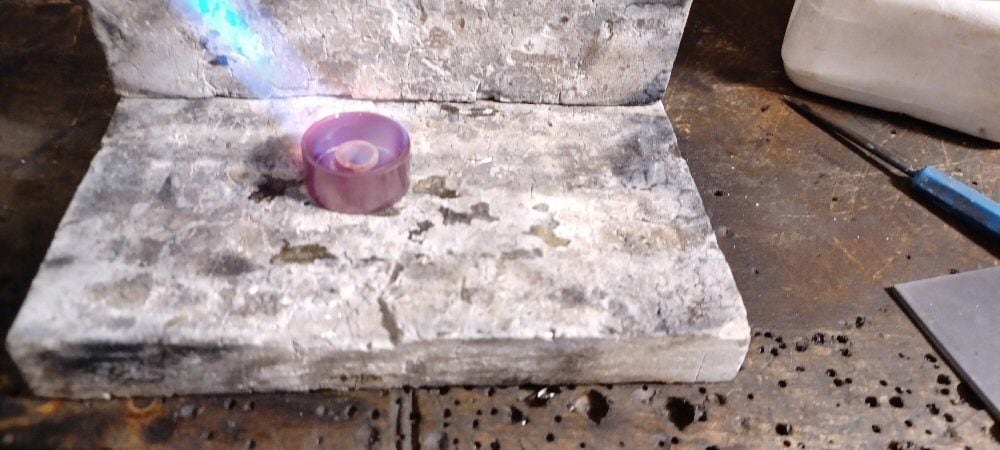
The rims are just slices off the same tubing I used in the gun mantlet.
here it is being soldered.
I then press fit 4mm ID needle bearings into the central hole. I now need caps for the rollers to cover the hole but that will have to be later.
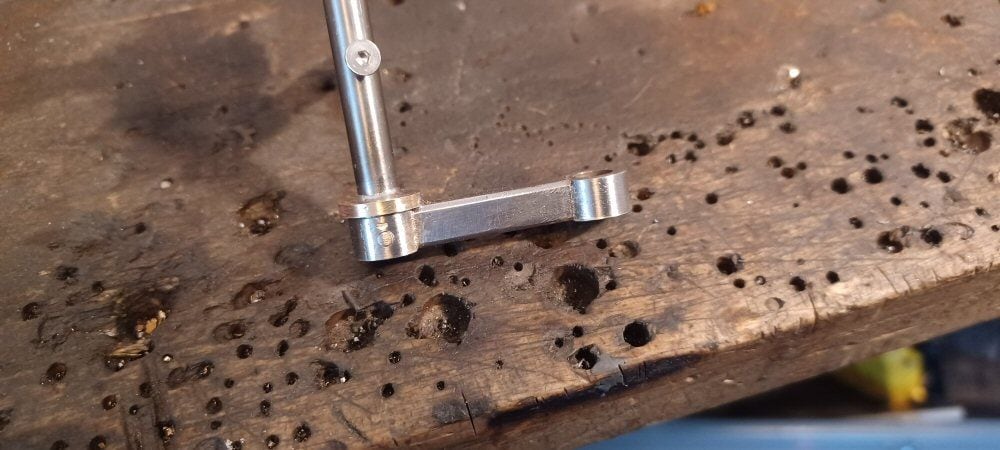
Then I started making the swing arm fixtures. This is just 6 mm silver steel silver soldered into the top end of the swing arm.
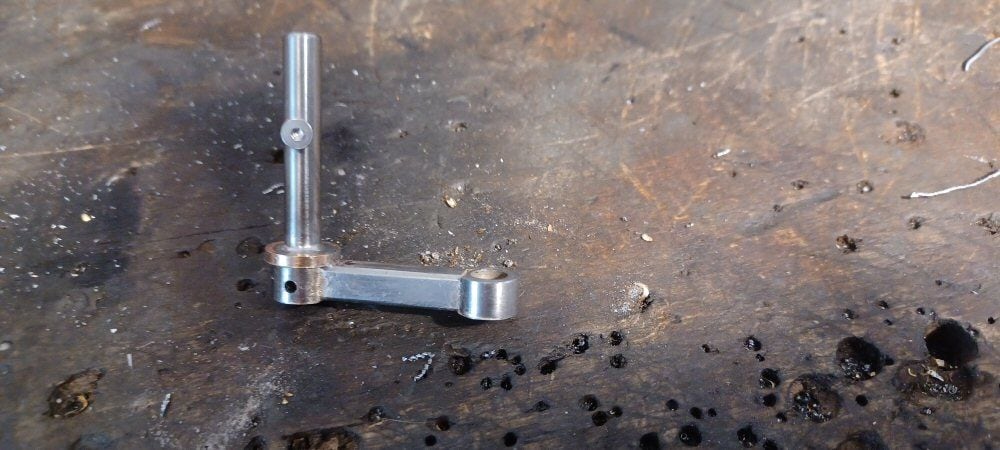
These joints will be under the most stress and while I trust silver solder, I am not always 100% I have done a good job and a failure later after paint is a major issue. So I drilled a 2mm hole through the swing arm and into the shaft and pinned them together with 2mm drill rod.
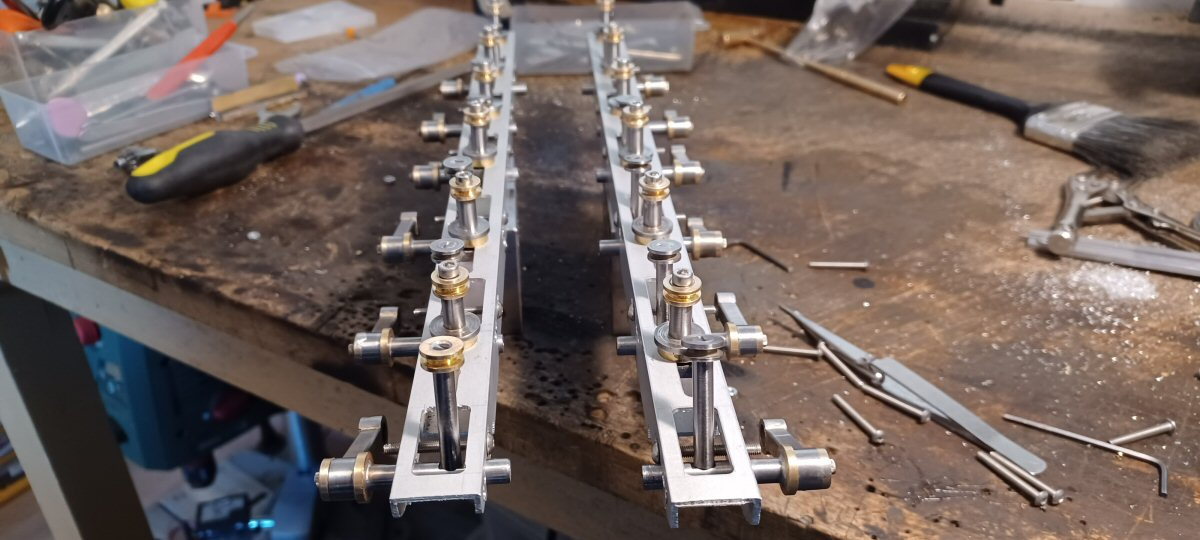
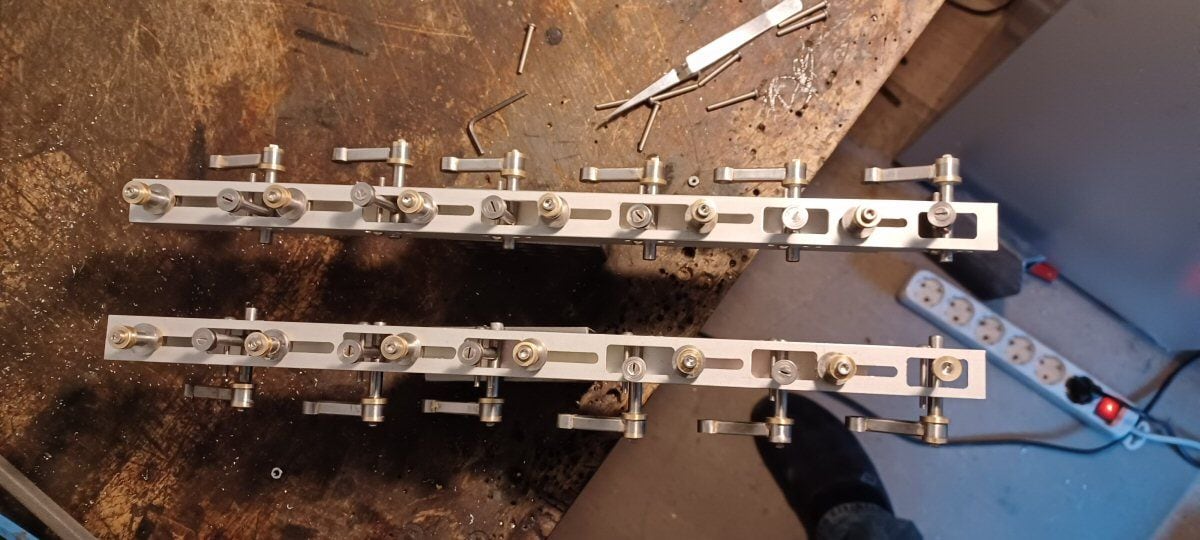
And here are all the bits for the running gear. The racks are simply off the shelf 20 mm square aluminium tube with approporiate holes drilled. The entire thing is adjustable for swing angle etc.
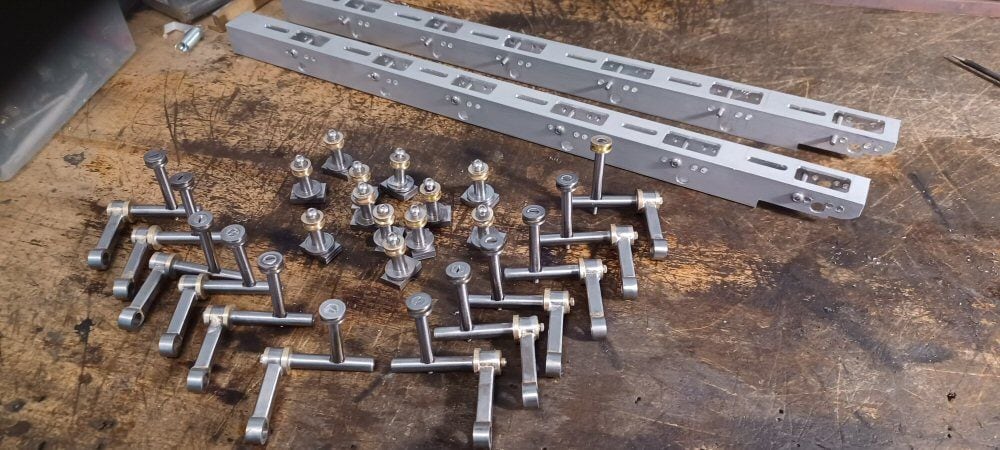
Its a bit hard to visualize but the brass rims on the shafts off the swing arms hold onne end of the spring and the things that look like chess pawns hold the other. These bits are clamped to the slots in the top of the racks.
The springs I was going to use are way too stiff but ebay has really stepped up its game in the spring world and I have ordered some more suitable ones. If they dont work I will just get some made.
I know this is not exactly visually interesting but there was a lot of work sunk into this and it all had to be done as I am pushing to get to a state where I can primer the whole thing.
p
The past few weeks have been focused primarily on the running gear. This was very consuming because it involved a large number of disks and rods with very small deep holes being tapped to M1.6 and M2.
To cut disks I simply clamped Dremel cutoff wheels in the Proxxon and mounted the tube or bar to be cut in the rotary table and tediously cut the slices. I used a lot of cut off wheels but I had a lot got cheap from aliexpress so that was OK. But it took a long time indeed.
First I made the return roller mounts. Simply 6 mm steel rod silver soldered into disks with 6mm holes drilled in them. Then the centre bar was drilled out to 4 mm. Into this will go the axle for the return roller.
This is the mounts before soldering.
Here are all the bits for the rollers and the finished mounts:
The rims are just slices off the same tubing I used in the gun mantlet.
here it is being soldered.
I then press fit 4mm ID needle bearings into the central hole. I now need caps for the rollers to cover the hole but that will have to be later.
Then I started making the swing arm fixtures. This is just 6 mm silver steel silver soldered into the top end of the swing arm.
These joints will be under the most stress and while I trust silver solder, I am not always 100% I have done a good job and a failure later after paint is a major issue. So I drilled a 2mm hole through the swing arm and into the shaft and pinned them together with 2mm drill rod.
And here are all the bits for the running gear. The racks are simply off the shelf 20 mm square aluminium tube with approporiate holes drilled. The entire thing is adjustable for swing angle etc.
Its a bit hard to visualize but the brass rims on the shafts off the swing arms hold onne end of the spring and the things that look like chess pawns hold the other. These bits are clamped to the slots in the top of the racks.
The springs I was going to use are way too stiff but ebay has really stepped up its game in the spring world and I have ordered some more suitable ones. If they dont work I will just get some made.
I know this is not exactly visually interesting but there was a lot of work sunk into this and it all had to be done as I am pushing to get to a state where I can primer the whole thing.
p
The following users liked this post:
JeeSib (04-23-2023)
05-01-2023, 07:10 AM
#12
Thread Starter
This is just a "sign of life" on this project.
I'm going full tilt at getting the lower hull finished for two reasons - I need it to be finished before I can start on the running gear proper and I need to get it to a state where I can do all the body work and de-rusting to get some primer on it.
AS you can see from these pictures...I have lost all self respect and stopped cleaning it before I take pictures.
Mudguards are almost done (the left one needs its triangular bracket to keep in straight), return rollers are done (as are the mounts), idler mounts are done and whats left is a lot of fiddly things. Then a week of filling, scraping and sanding and then paint. I'm debating whether to mount everything and then prime it or dismantle it and primer everything separately.
The lazy in me says to just primer everything in situ.
Luckily winter has finished and I will soon be able to rattle can things outdoors.
P
The following users liked this post:
tankme (05-01-2023)
05-07-2023, 09:19 AM
#13
Thread Starter
Just trying to keep some life in this thread...
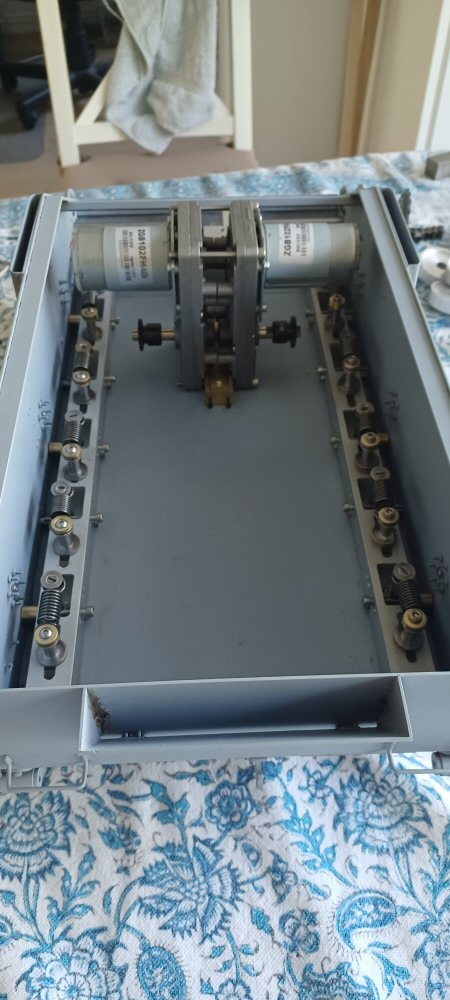
Today was the first dry fitting of the suspension system so I could take some measurements. My springs did not arrive yet so they are not mounted.
Pretty pleased with the most of it. Some things need adjusting - the front swing arms need a different angle than the others due to their being on the upward sloping glacis plate but thats no issue.
For some reason I doubted my first measurements and thought that the rear spring retainers were 3 mm too low relative to the retainer on the swinging bit. So Im ade a load of spacers.
But when I mounted them I see that my original measurements were fine. So the spacers have to come out again. What a pain in the ass.
Lower hull is hanging in the garage right now having gotten primed - then I will do the mudguards and assemble the entire lower hull.
Then its onto the upper to finish that.
P
05-11-2023, 09:41 AM
#14
Thread Starter
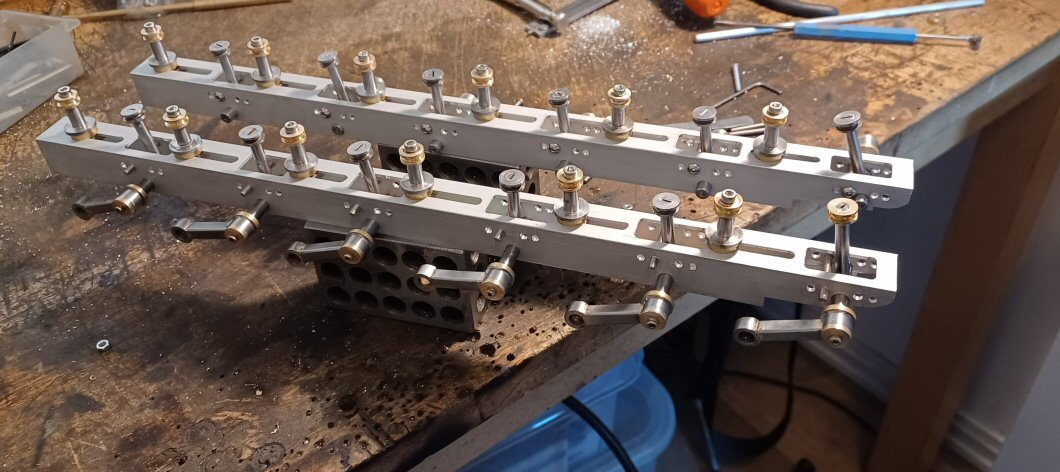
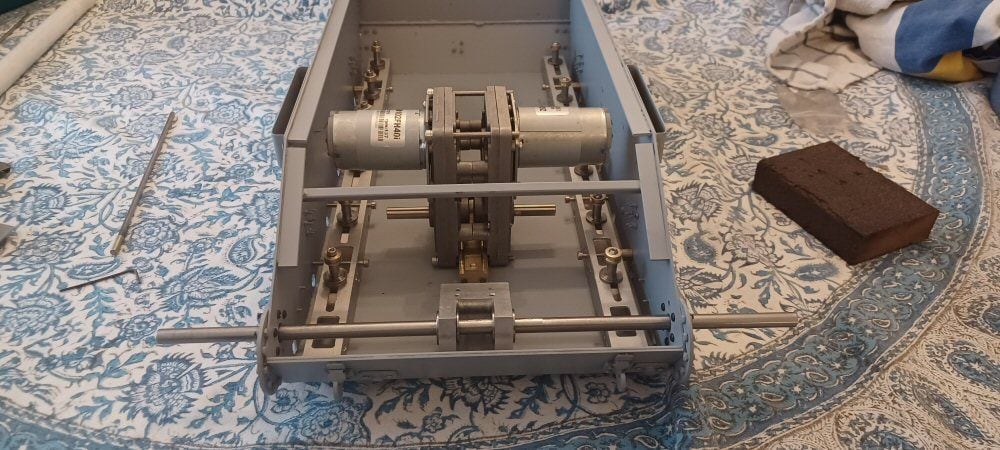
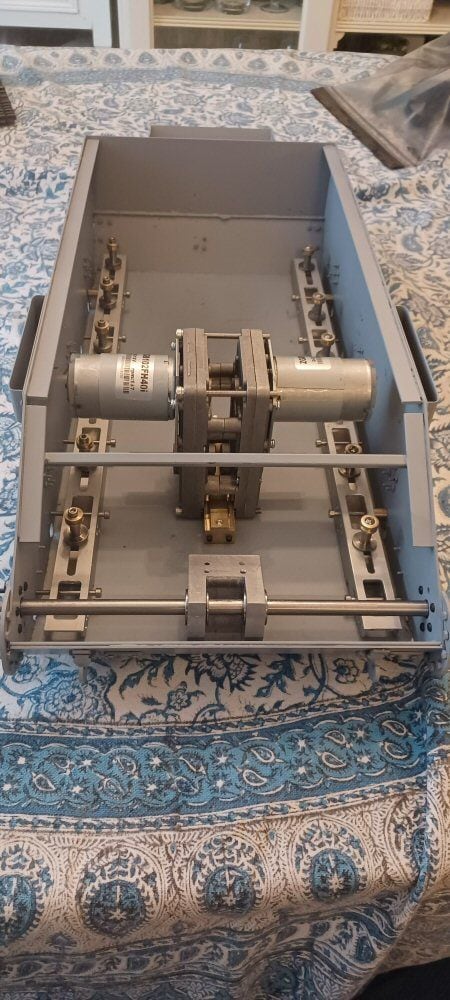
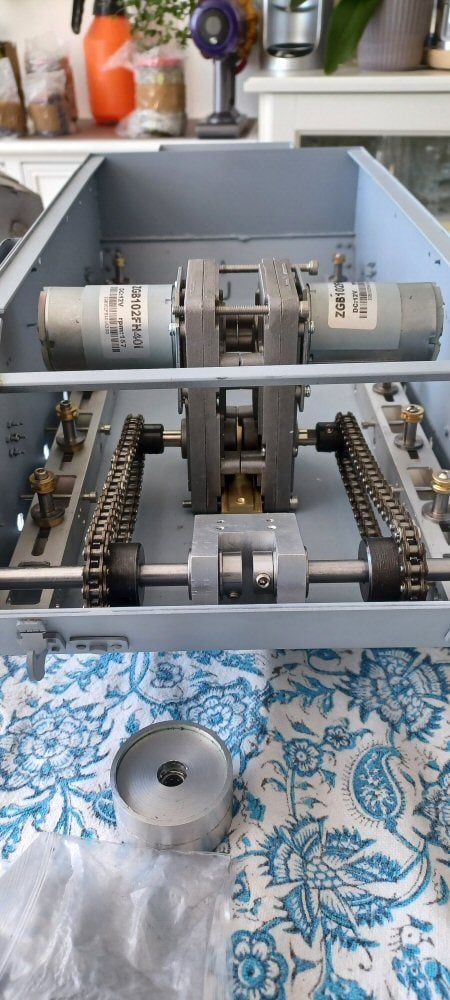
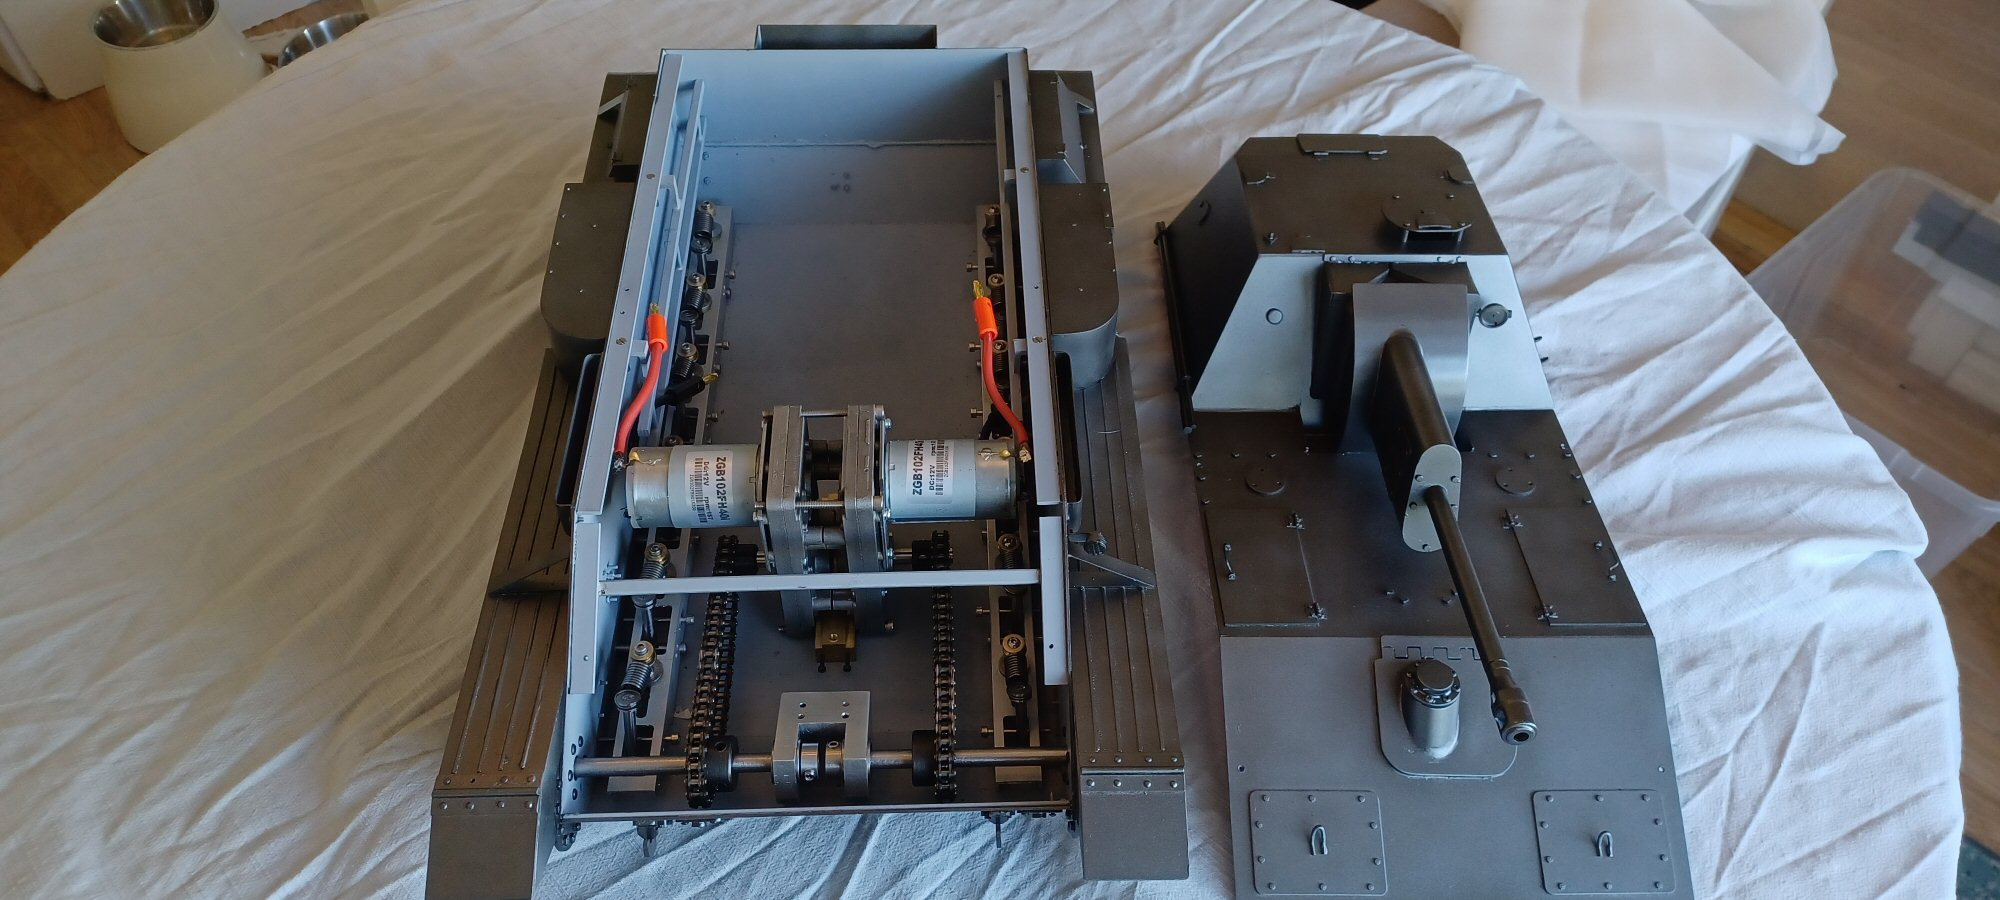
Today I got my drive shaft mounted and all line up....the rod that is in it served solely to line everything up and then I was able to tighten all the mounts. Needless to say, once I advance a bit more, this will be two shafts.
I also go my motors mounted and the suspension racks installed. 2 mm to spare on the top of the motors! cutting it fine to say the least. Im reasonably pleased with them but they need some finessing to get them precisely how I need them.
Overall pleased ..its a nice clean setup with lots of finger space and no scrimping on fitment and the like.. Plus I have room on the drive axle to use a larger sprocket wheel allowing me to gear down the motors a bit more.
p
The following users liked this post:
tankme (05-12-2023)
05-19-2023, 07:17 AM
#15
Thread Starter
Yesterday and today I set about installing axles, chains and suspension/swing arms for the first time. Not so bad.
Tough on the fingers, not at all user friendly and tedious but it works fine. Springs could be softer but I say that every single time. Not a problem though as springs are cheap, available and of great variety.
Wheels are next.
P
Tough on the fingers, not at all user friendly and tedious but it works fine. Springs could be softer but I say that every single time. Not a problem though as springs are cheap, available and of great variety.
Wheels are next.
P
The following users liked this post:
Panther F (05-22-2023)
07-08-2023, 08:06 AM
#16
Thread Starter
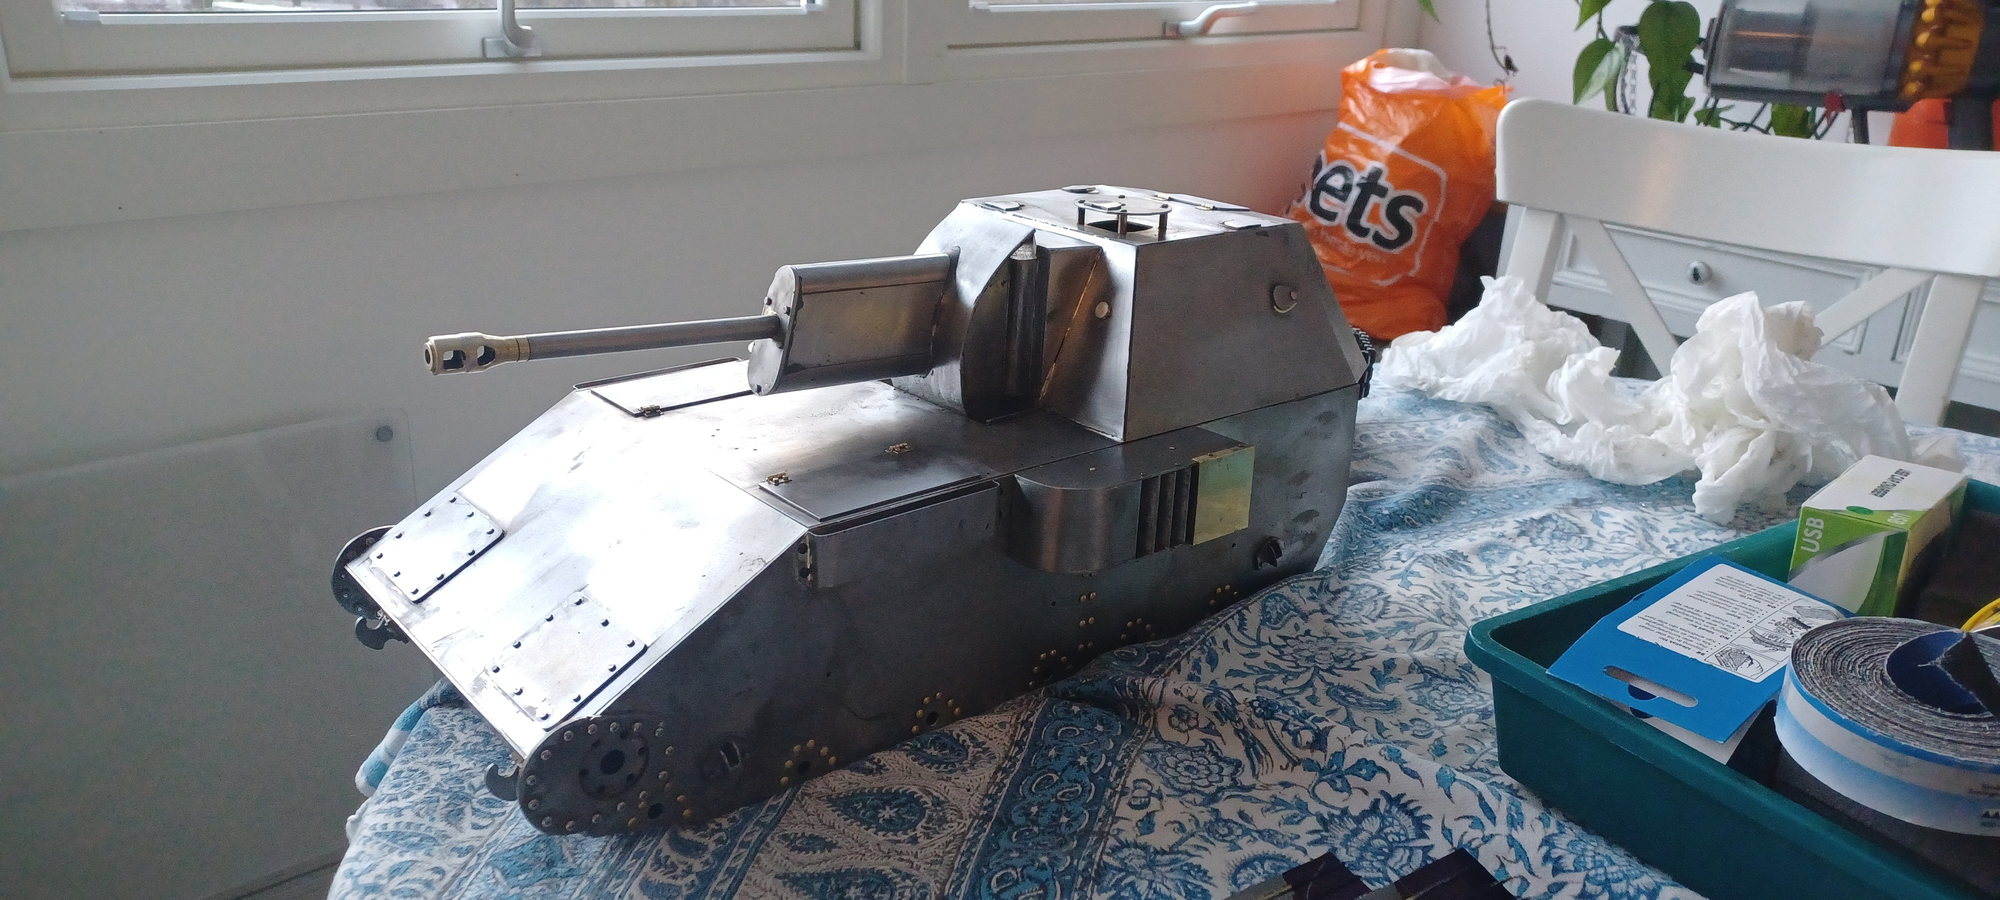
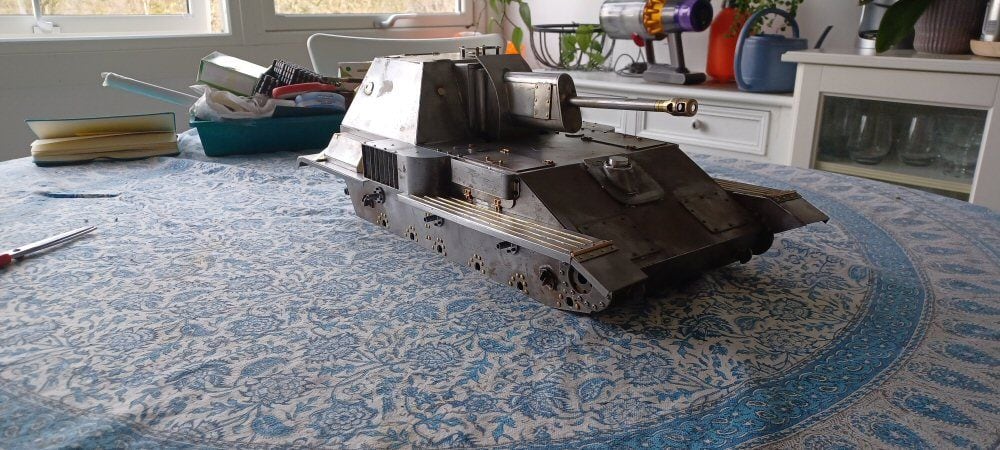
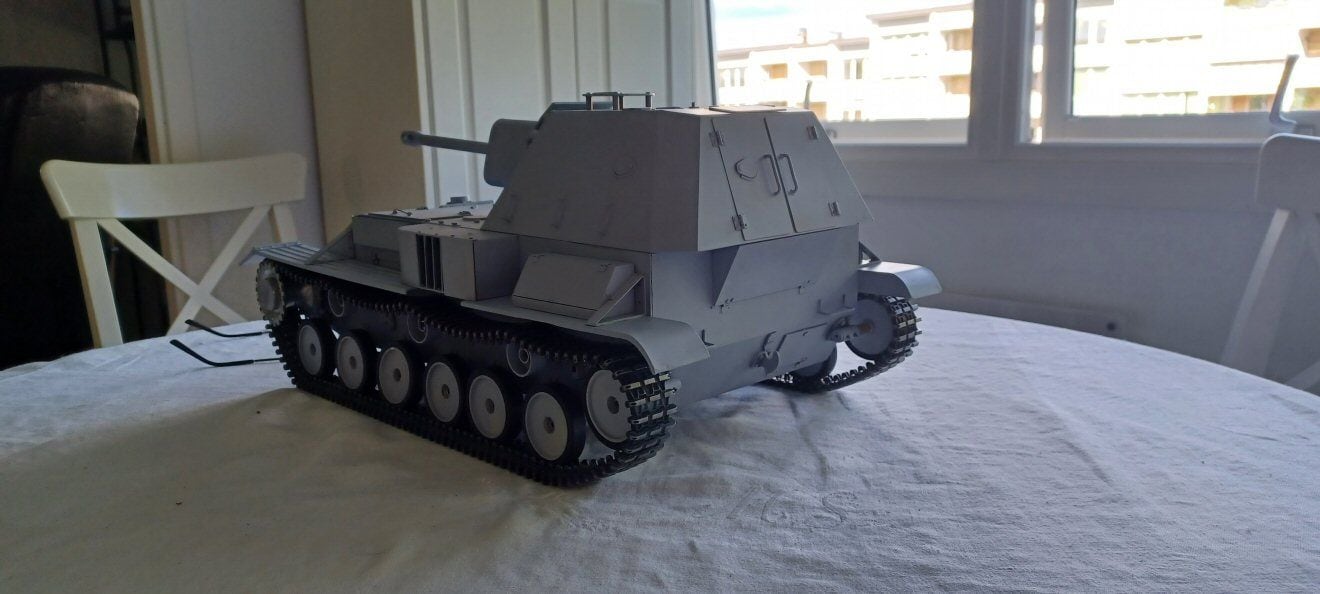
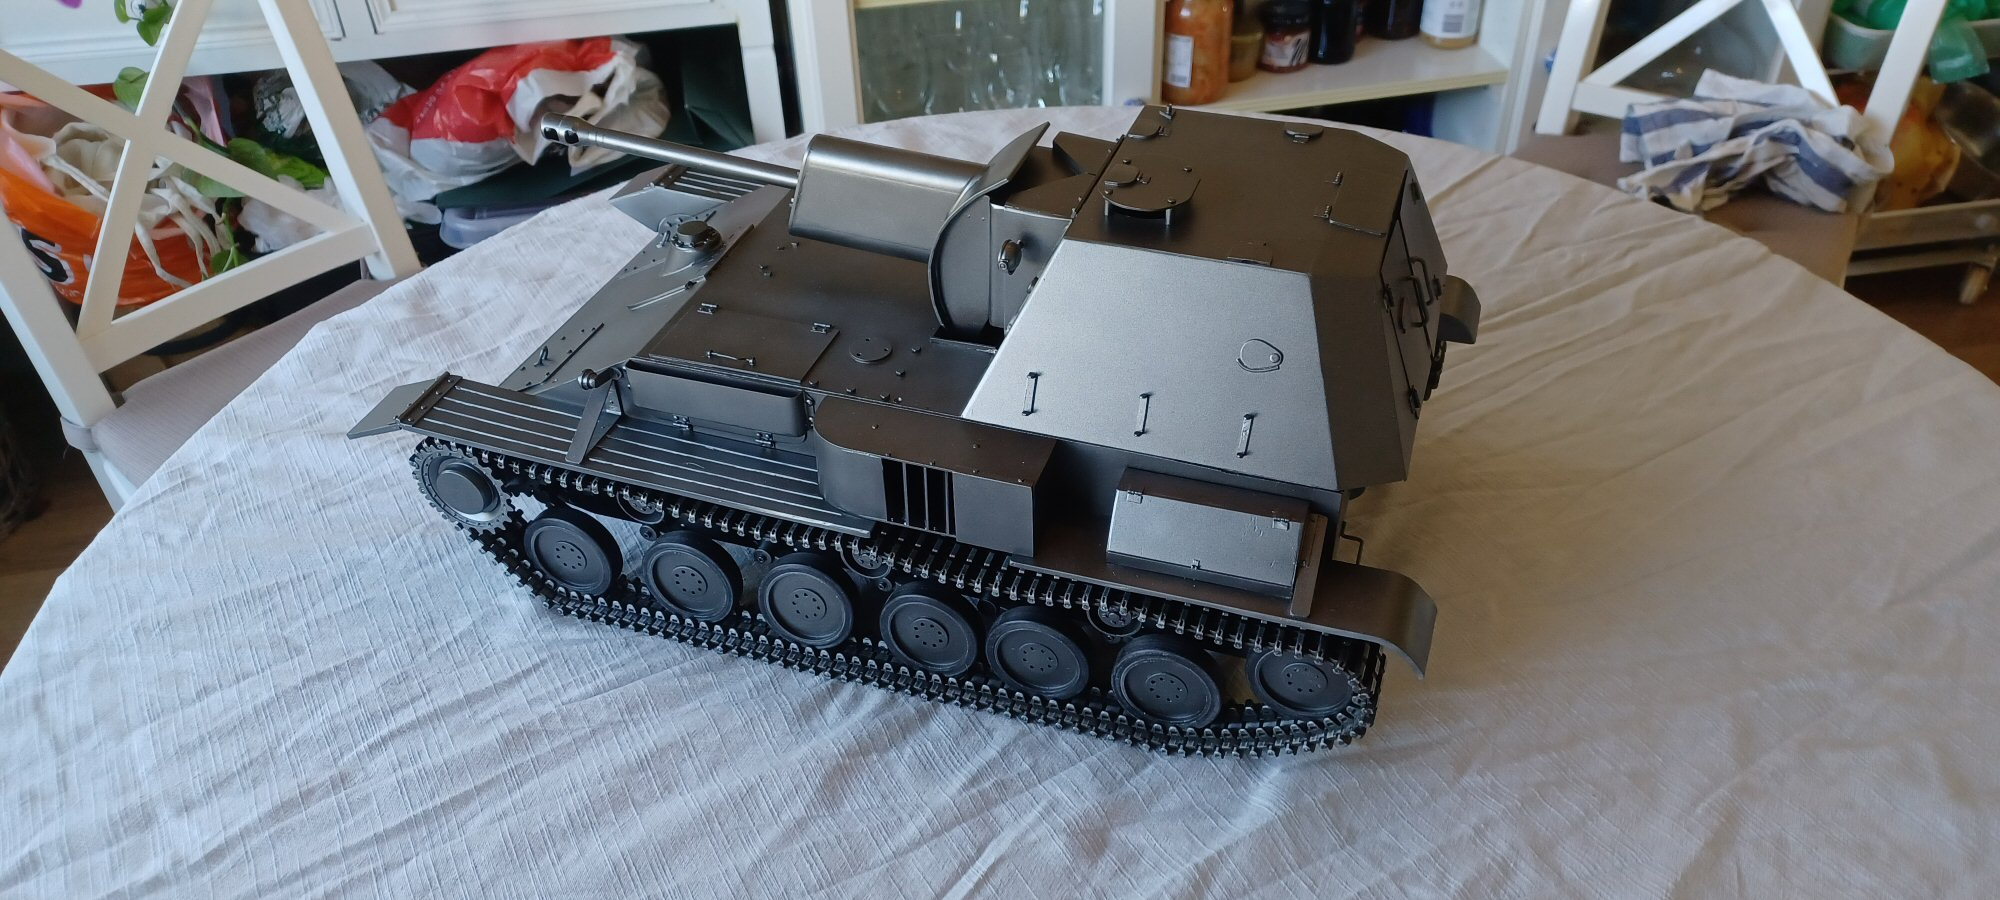
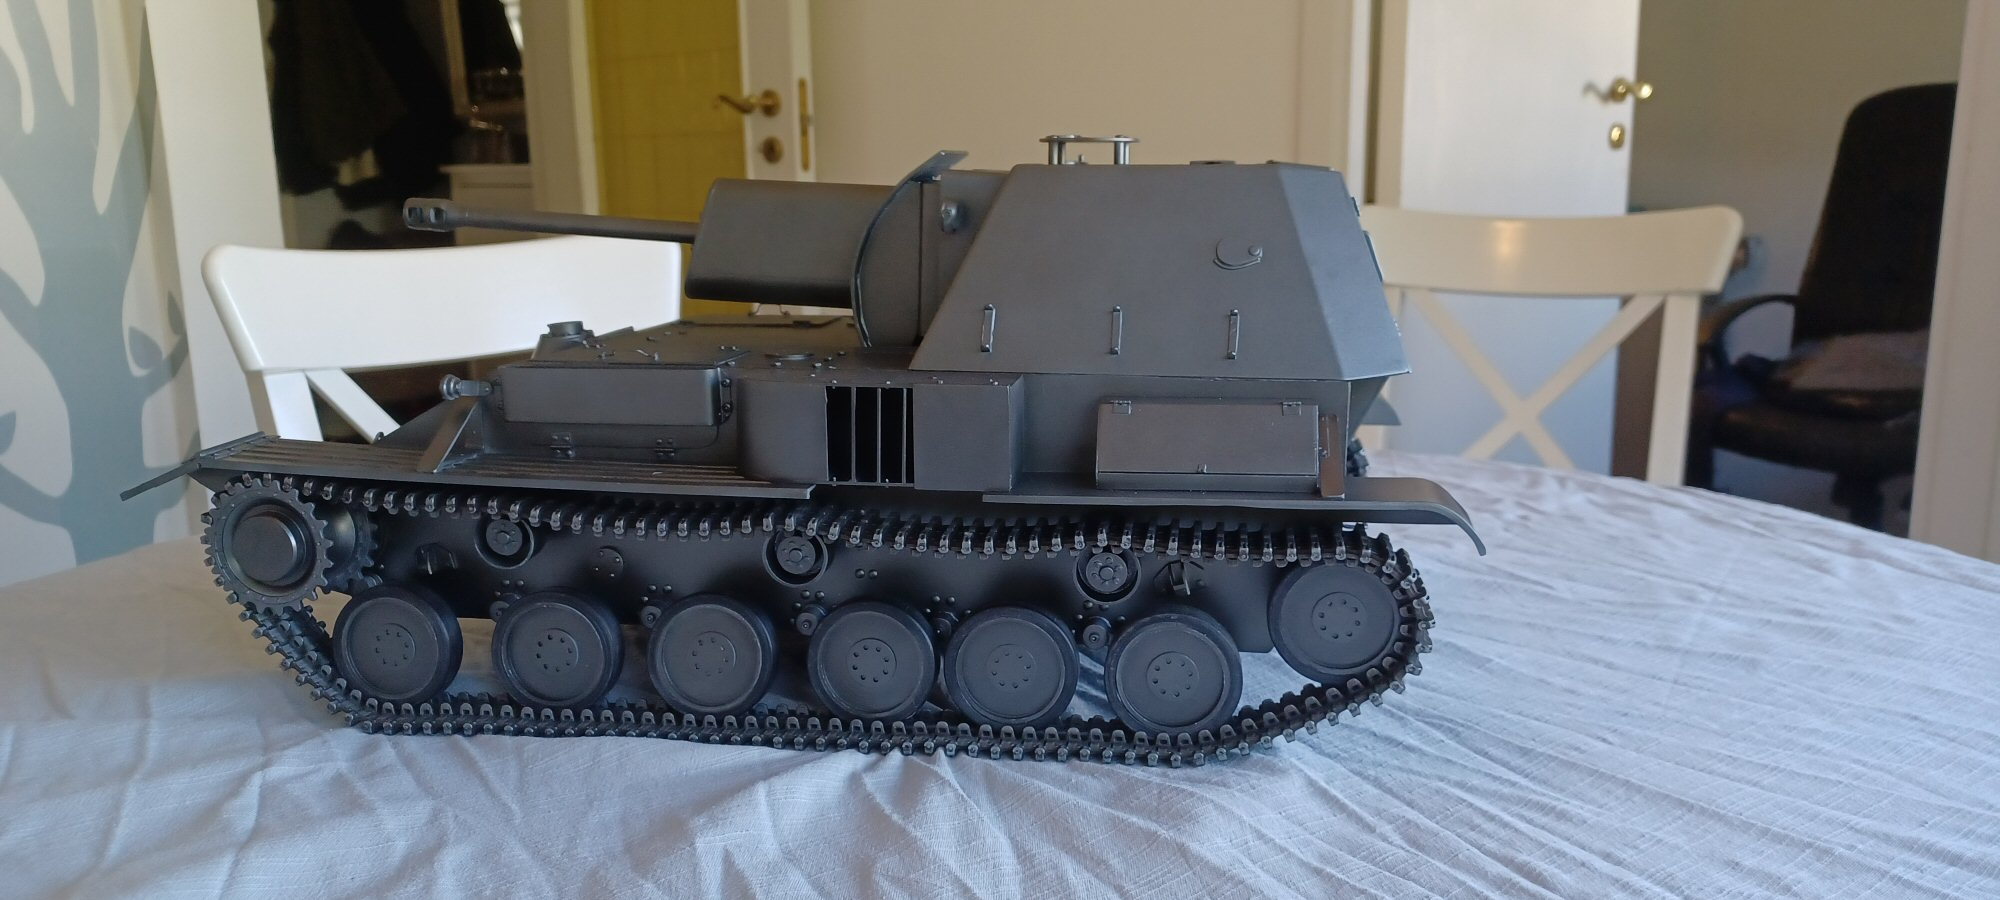
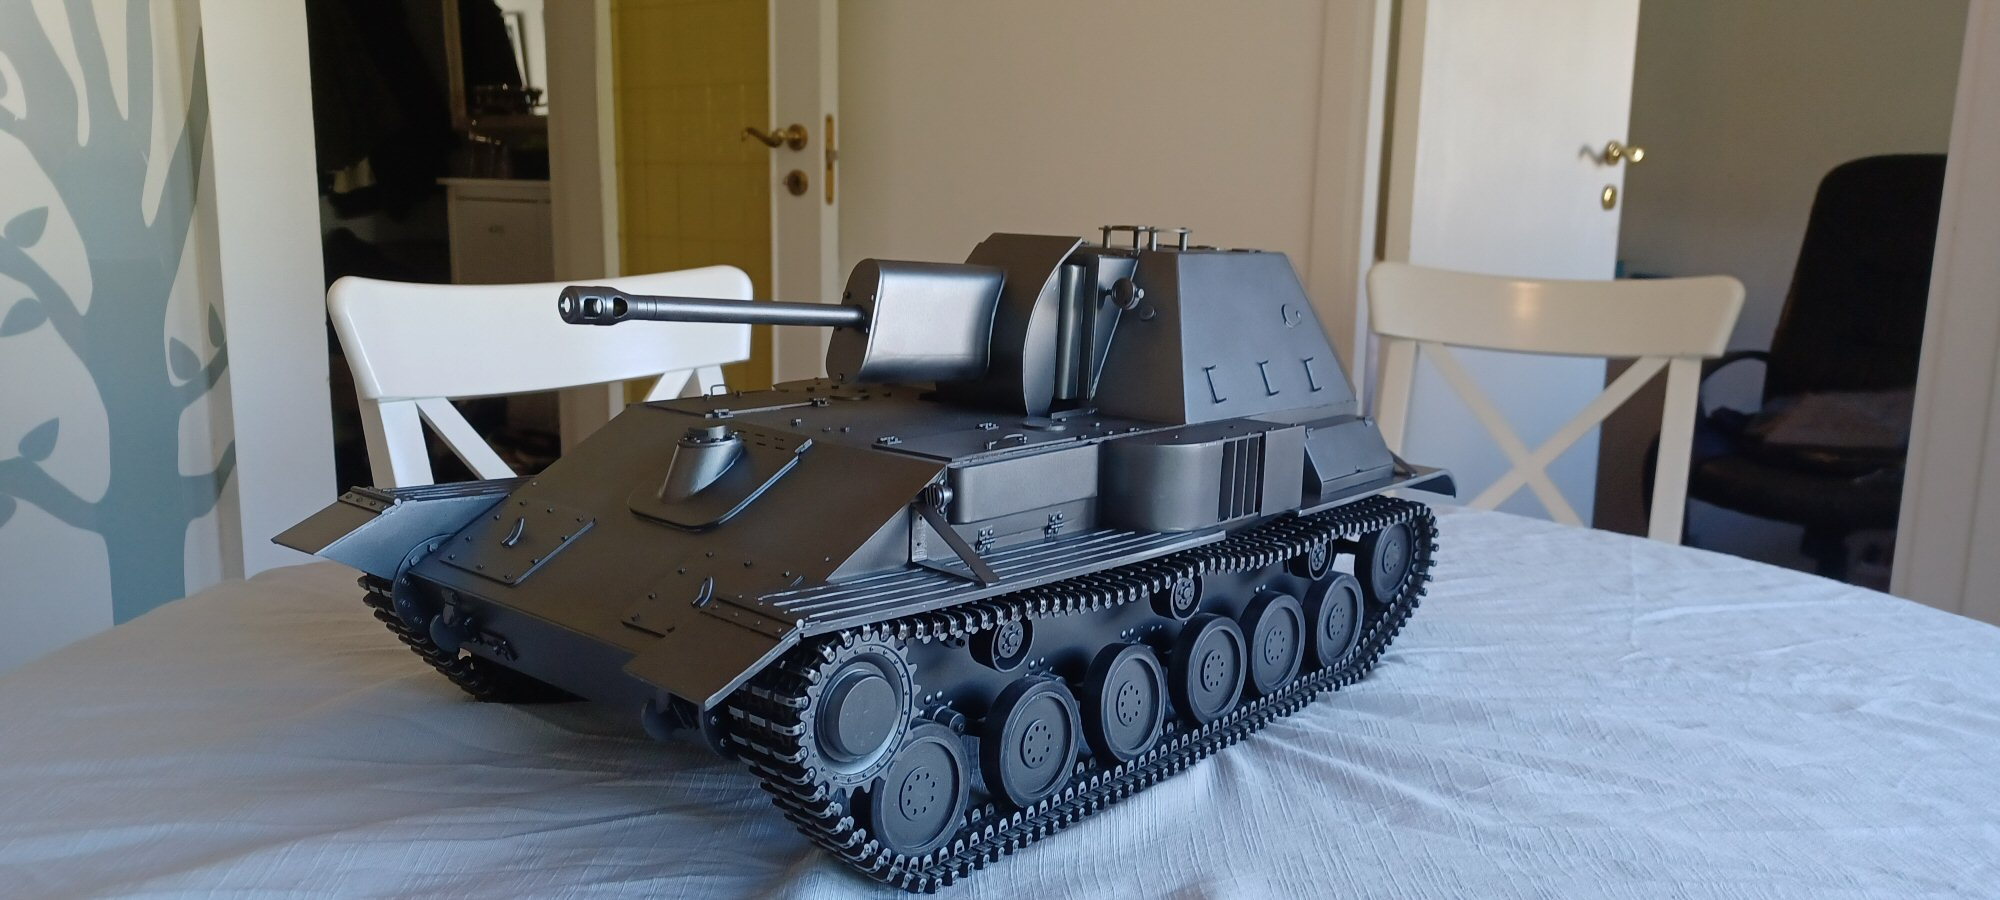
Its been a while since I updated this so I thought I would as I seem to be in the final lap.
Essentially...construction is complete. I have to make and attach a horn. One or two rivets need replacing. Hubcaps for the return rollers are made ... I just could not be ar&ed to attach them now. I need to make hubcaps for the road wheels and there is a lot of them Then I need to start wiring up.
It was painted with primer all over but I notice some rust (or something else) so it may need a respray. Corners were cut - primarily on the sprockets. There are two halves to a tiger sprocket - the front and back. These sprockets are two back halves joined. I then made a hubcap that sits over the central boss. And that was it. Not perfect but it was the only solution as I did not fancy making sprockets from scratch.
The whole thing is actually quite smooth - it rolls on its tracks when I shove it! Bit surprised about that but I will take the win.
P
07-23-2023, 07:51 AM
#18
Thread Starter
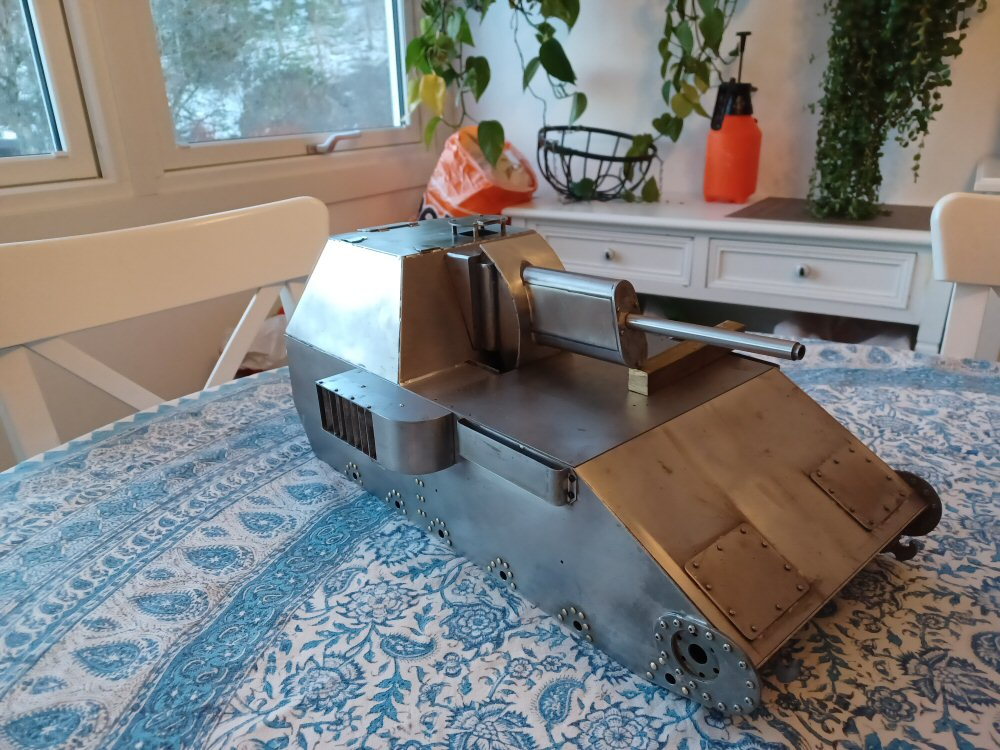
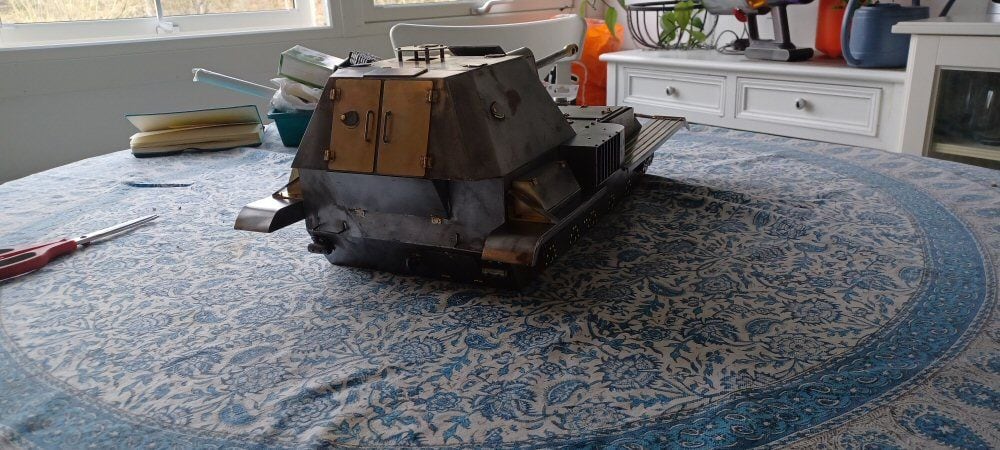
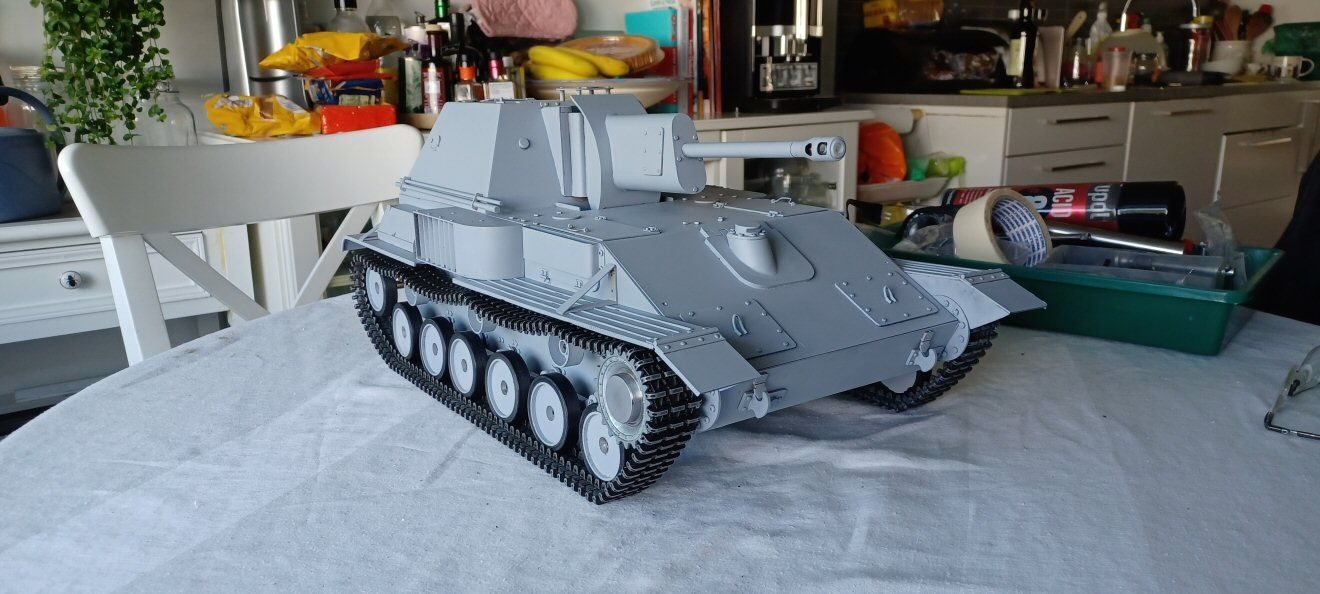
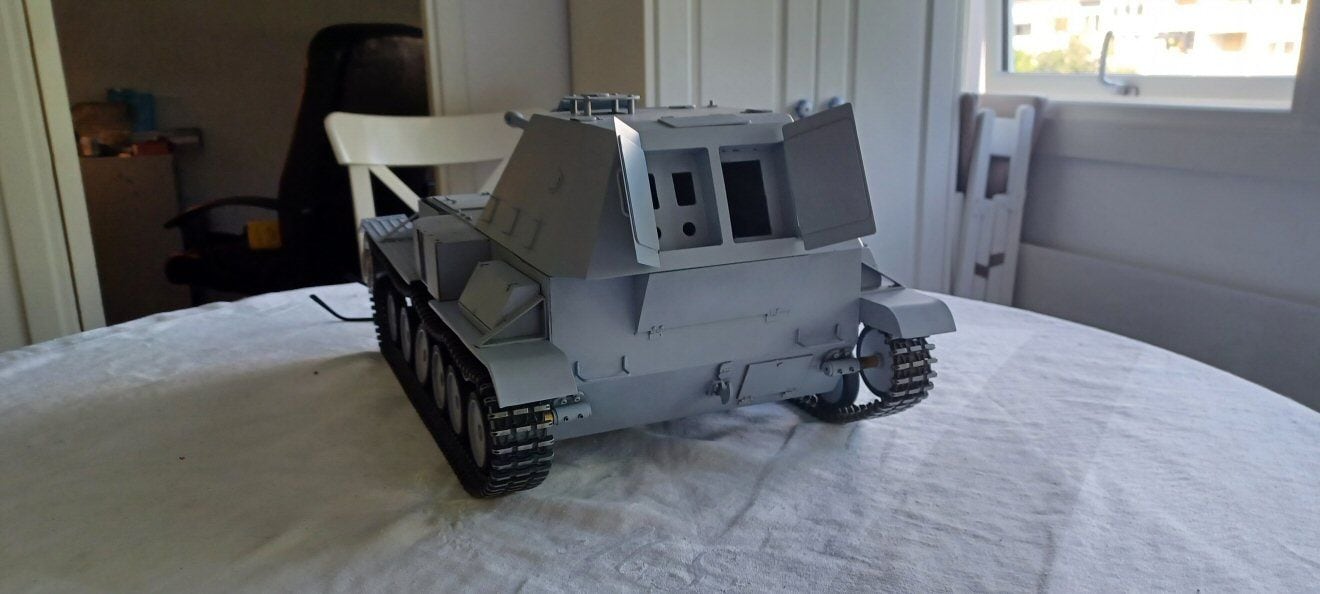
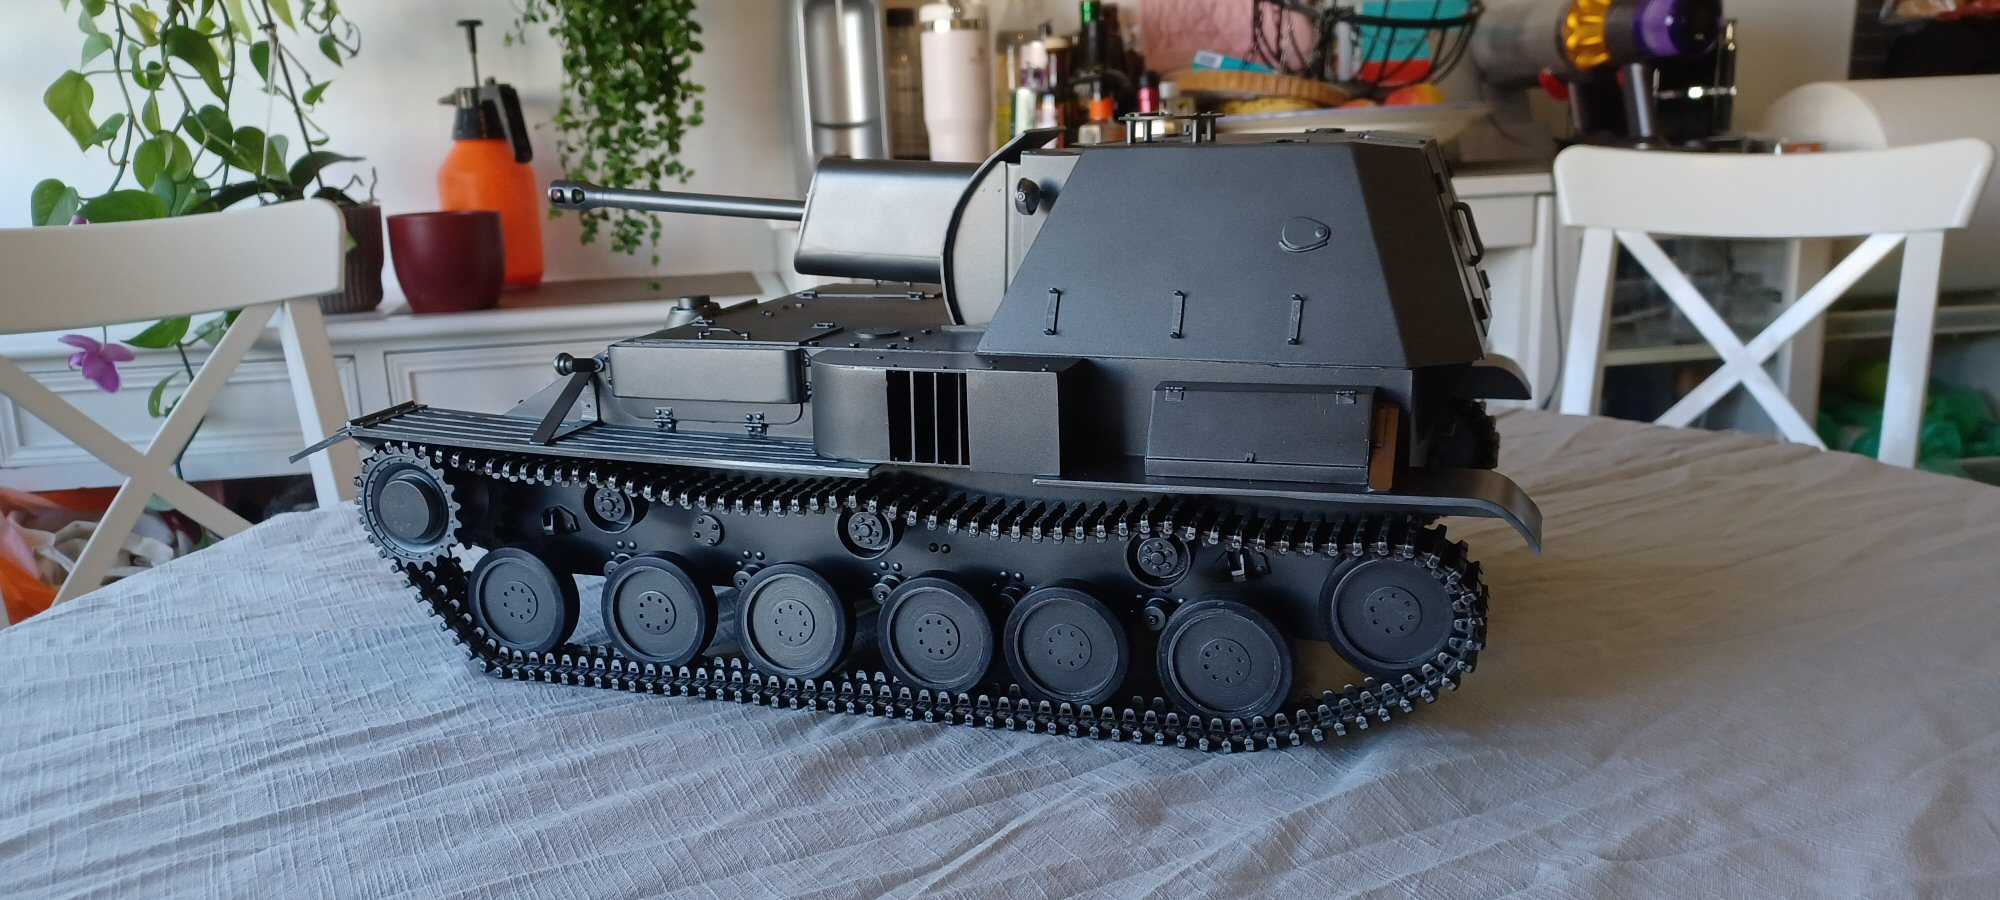
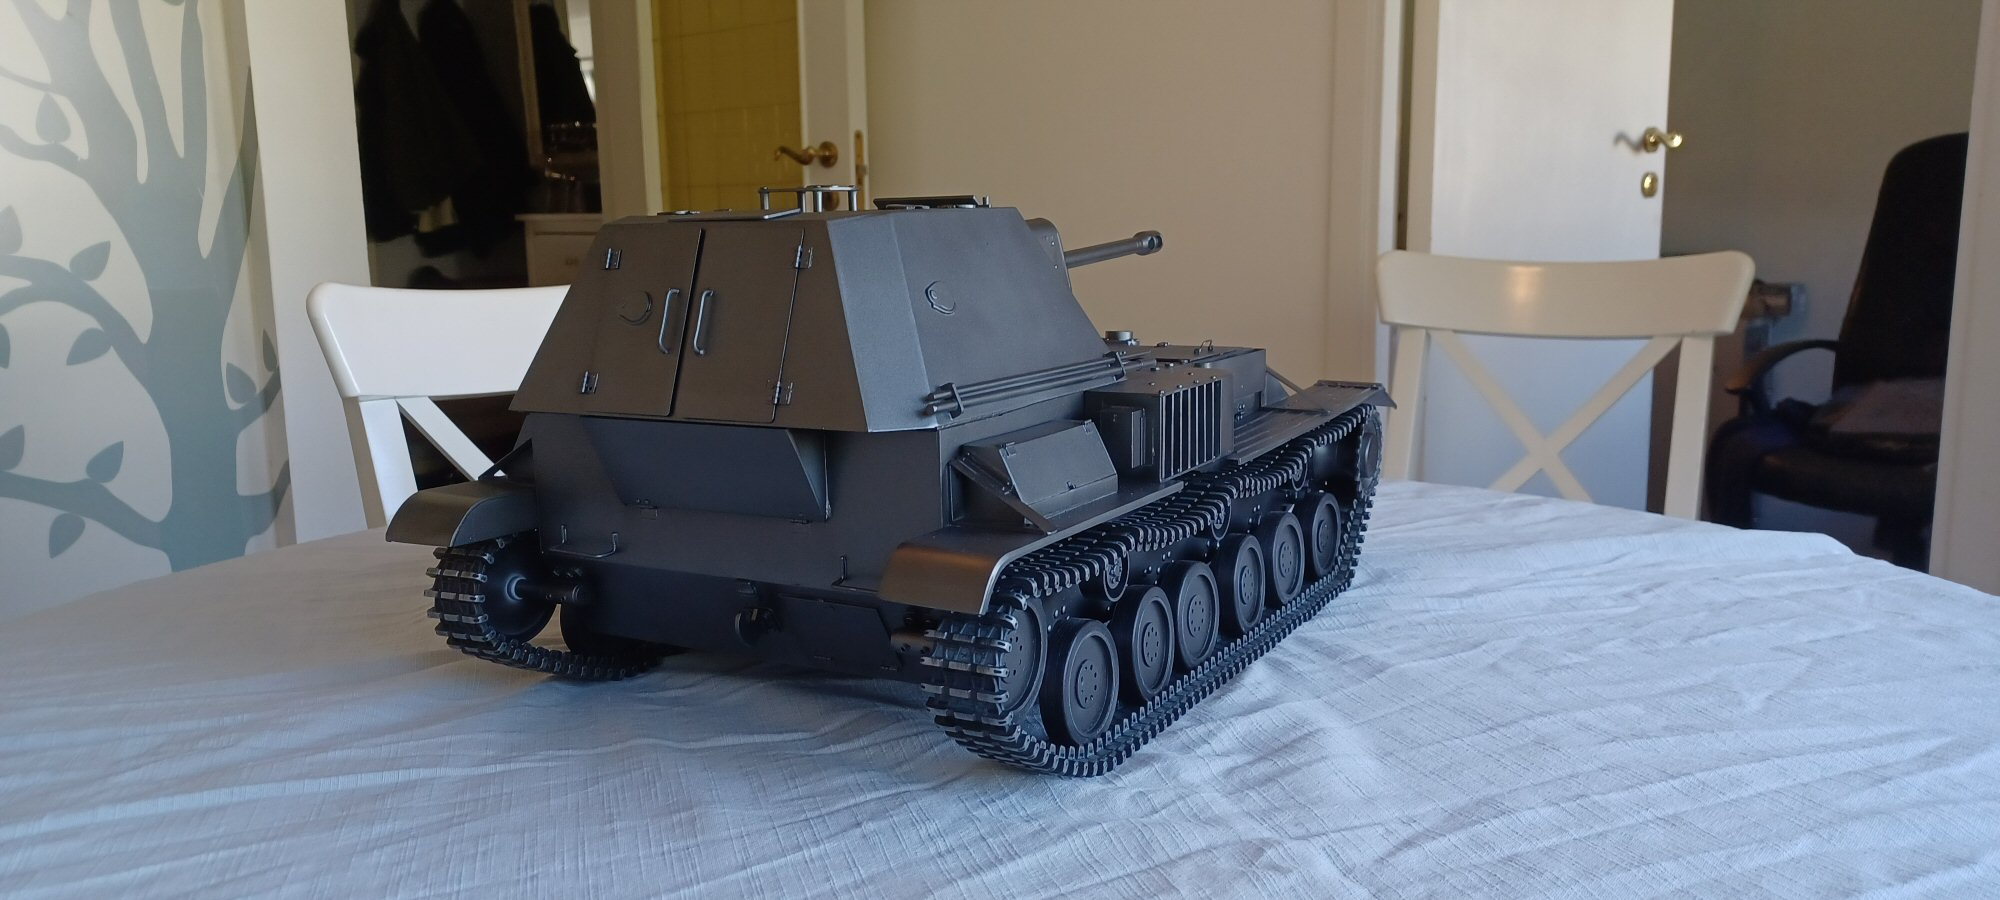
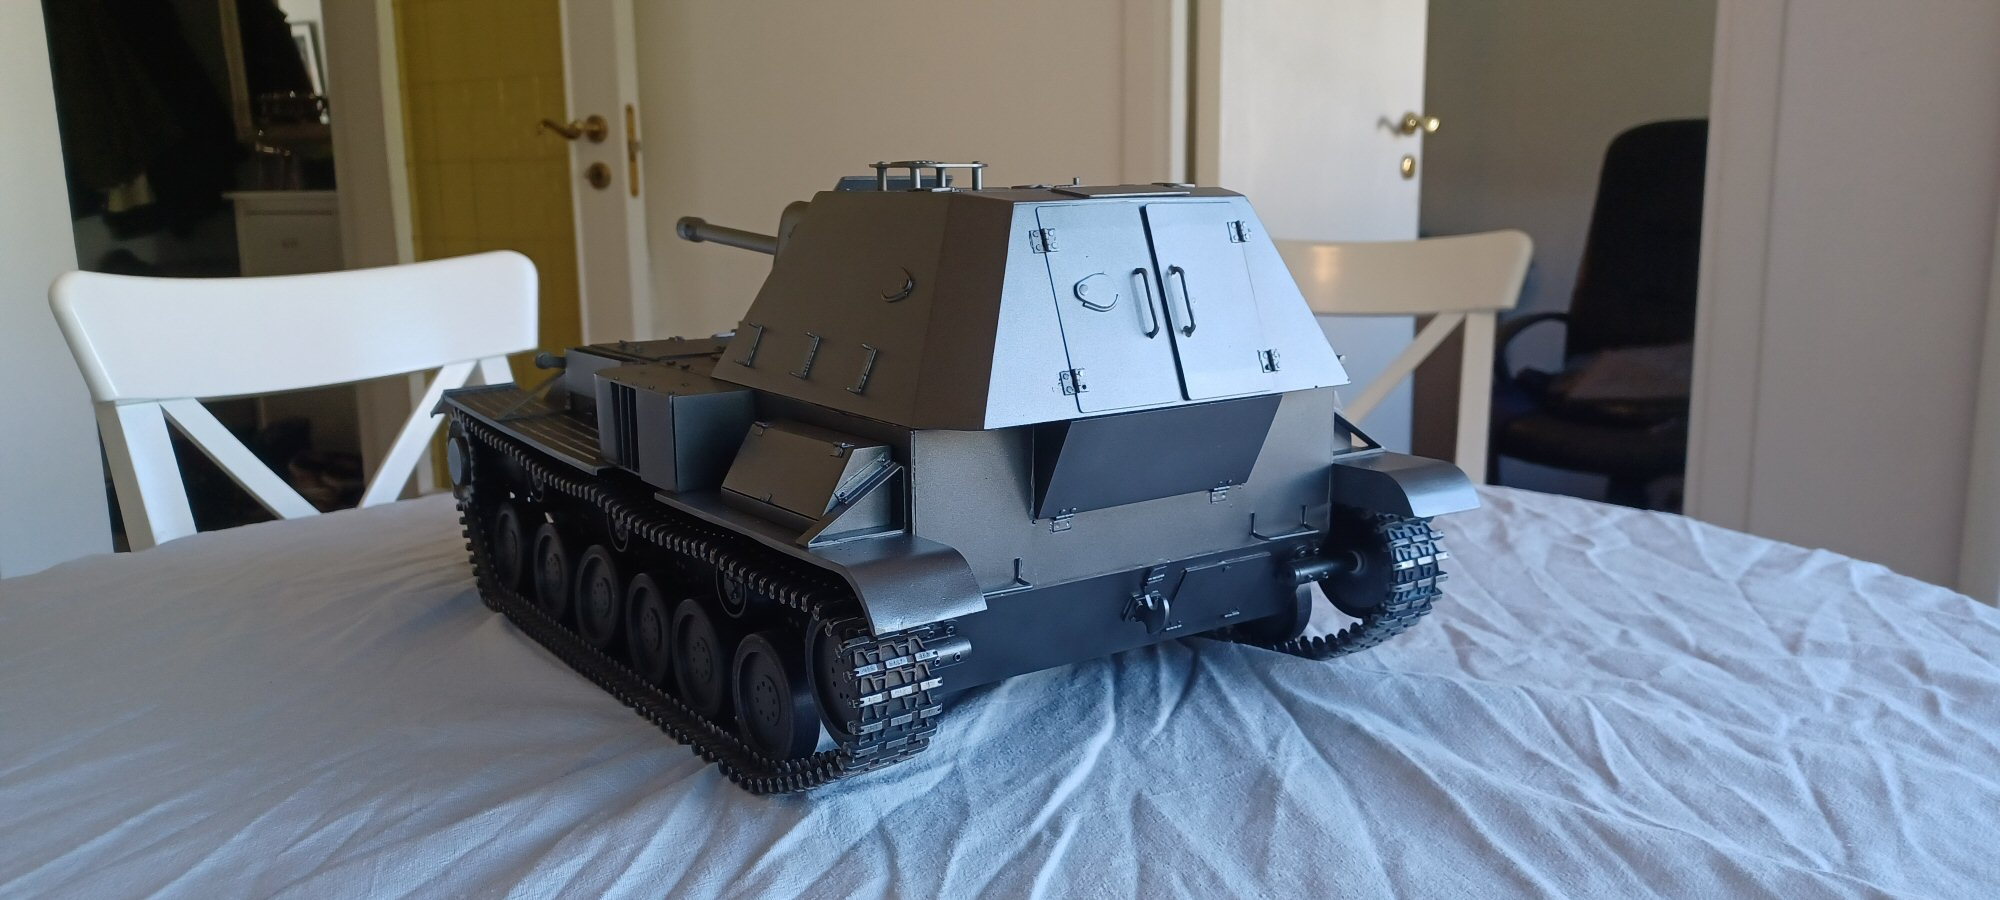
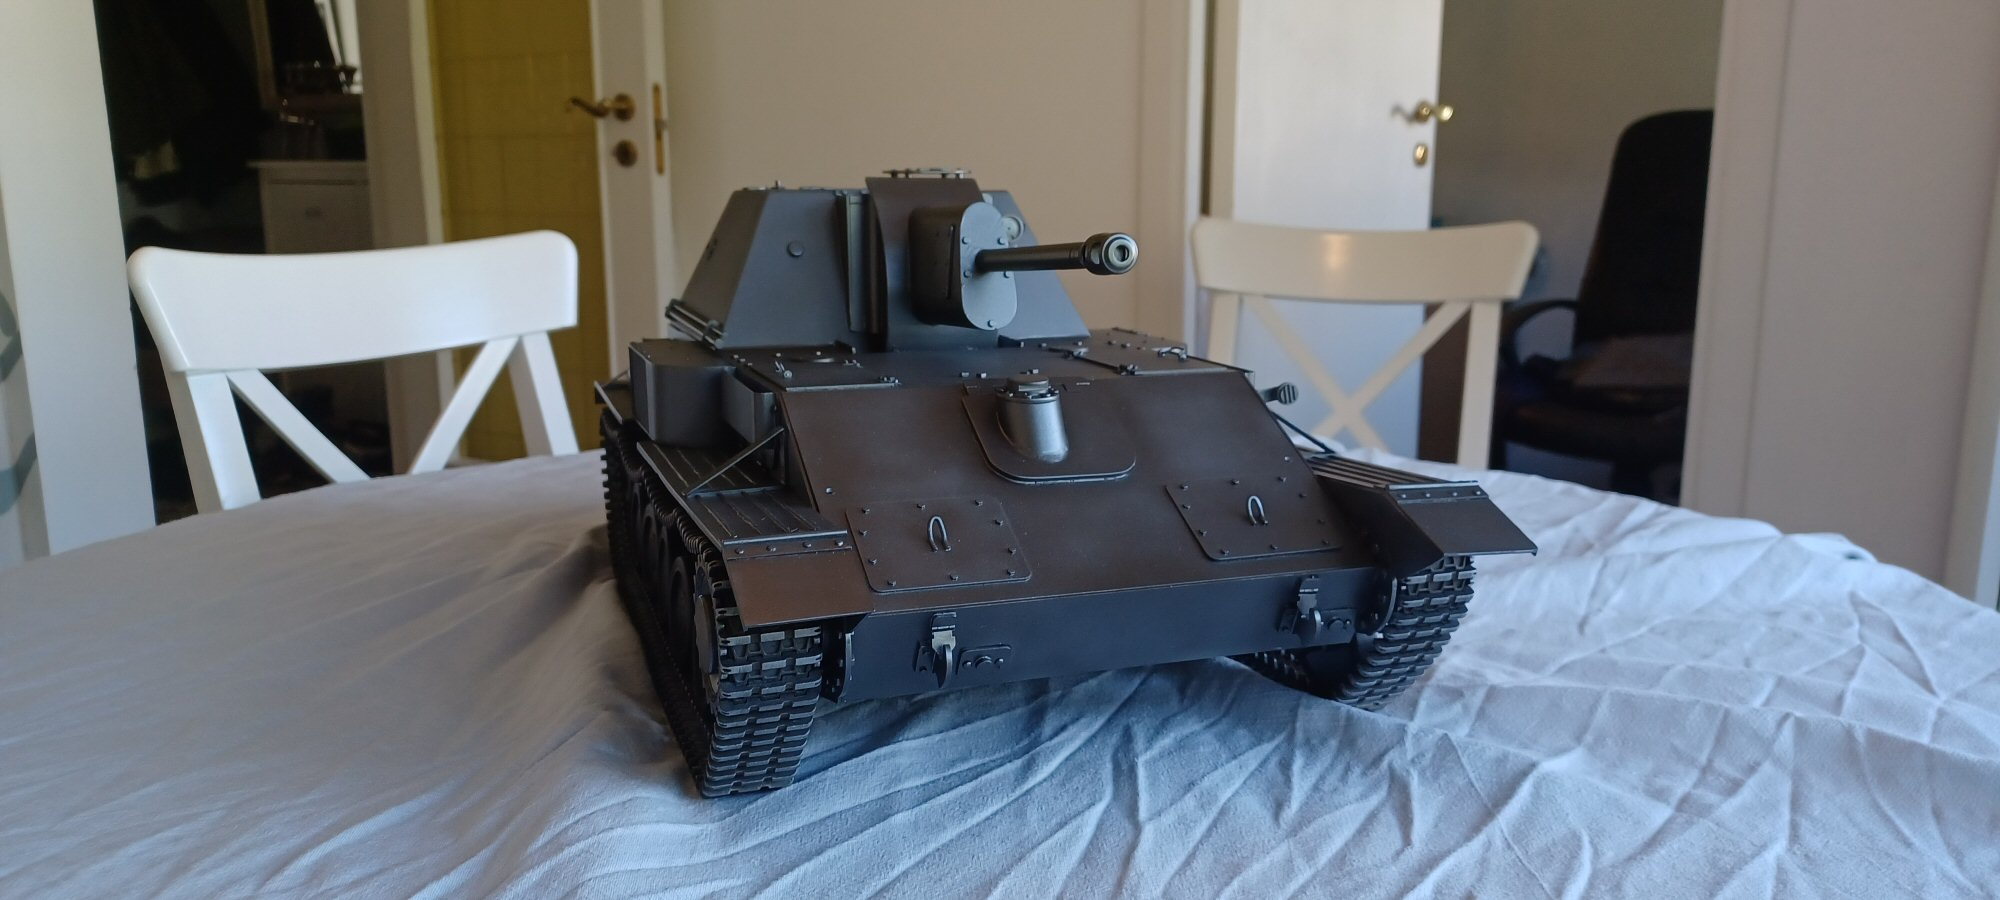
As far as I am concerned...construction is now complete on this. Two outstanding issues:
Headlight lens
two missing rivets needing replacement.
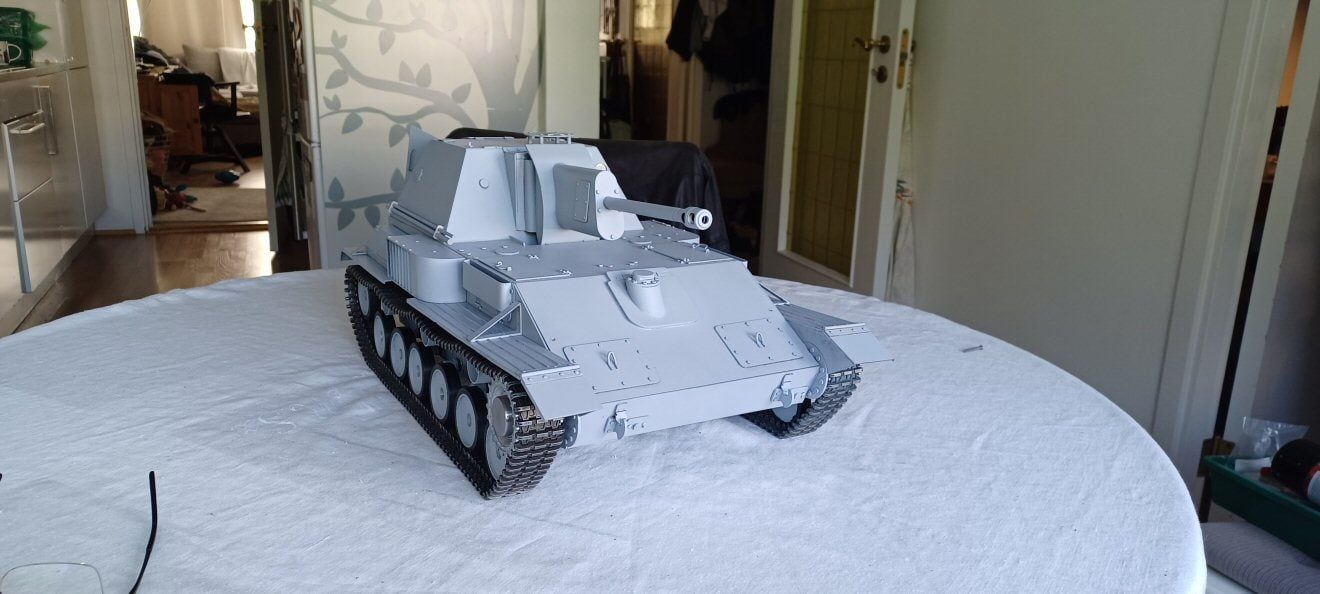
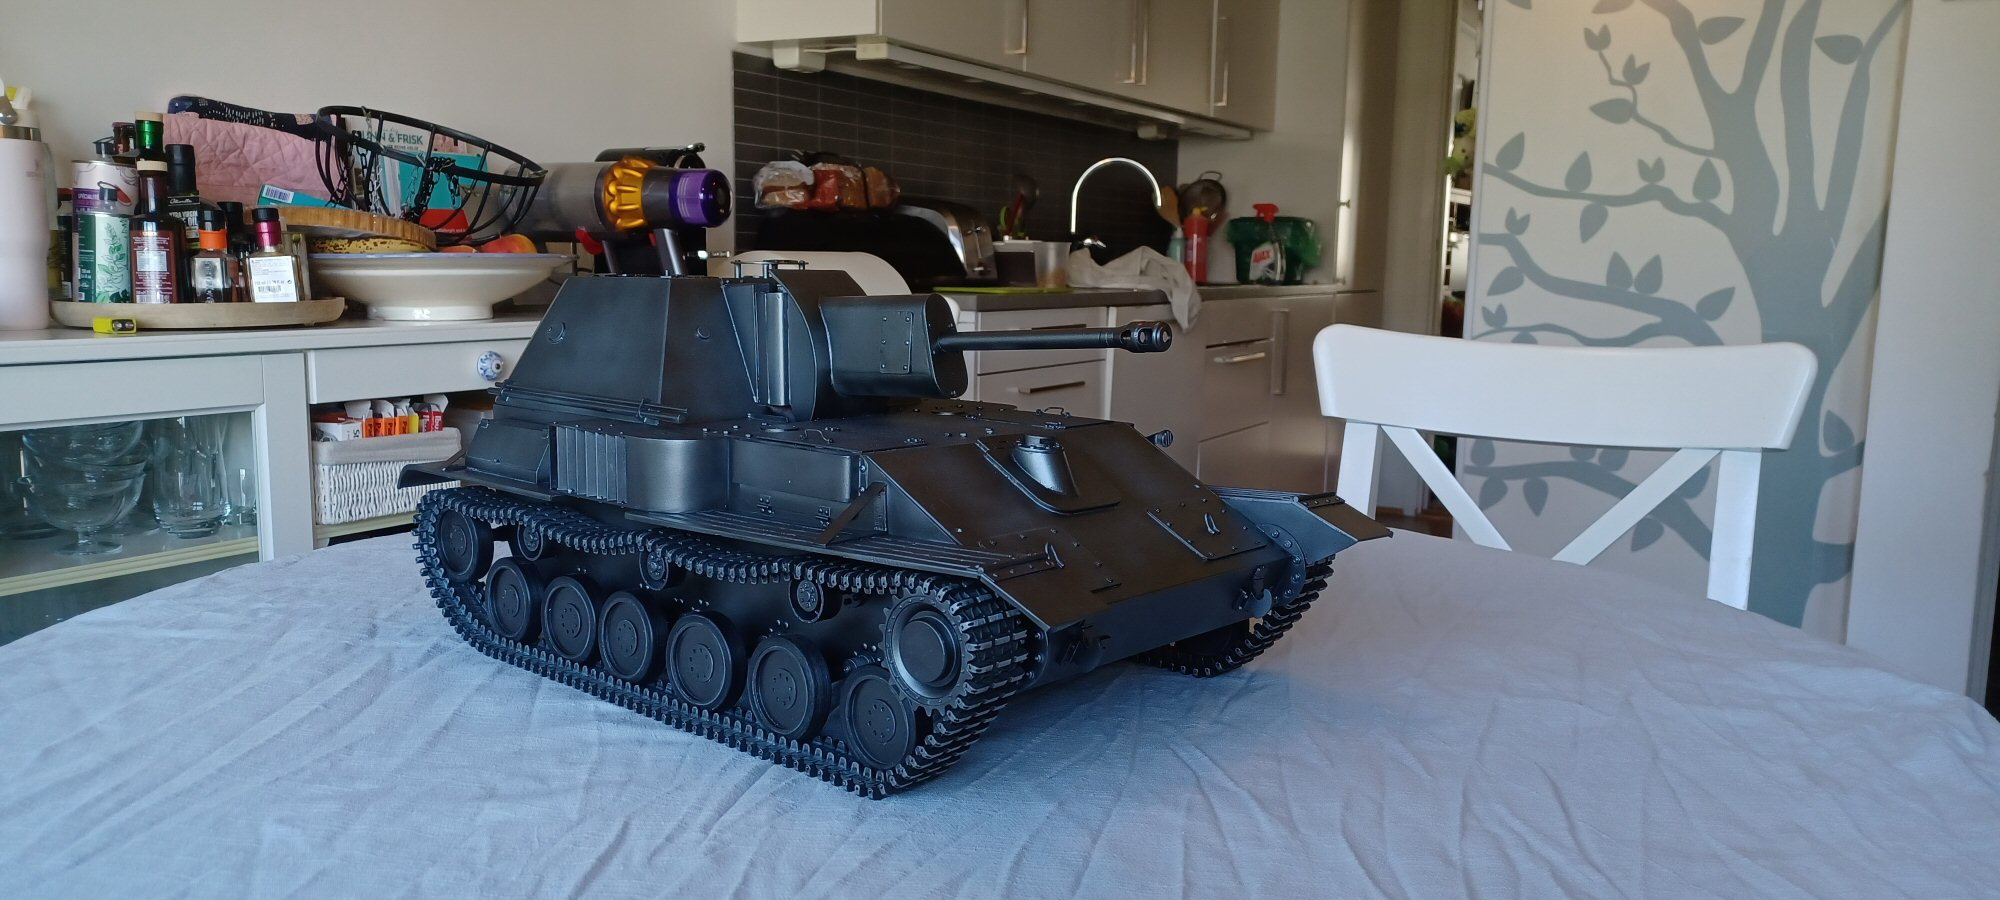
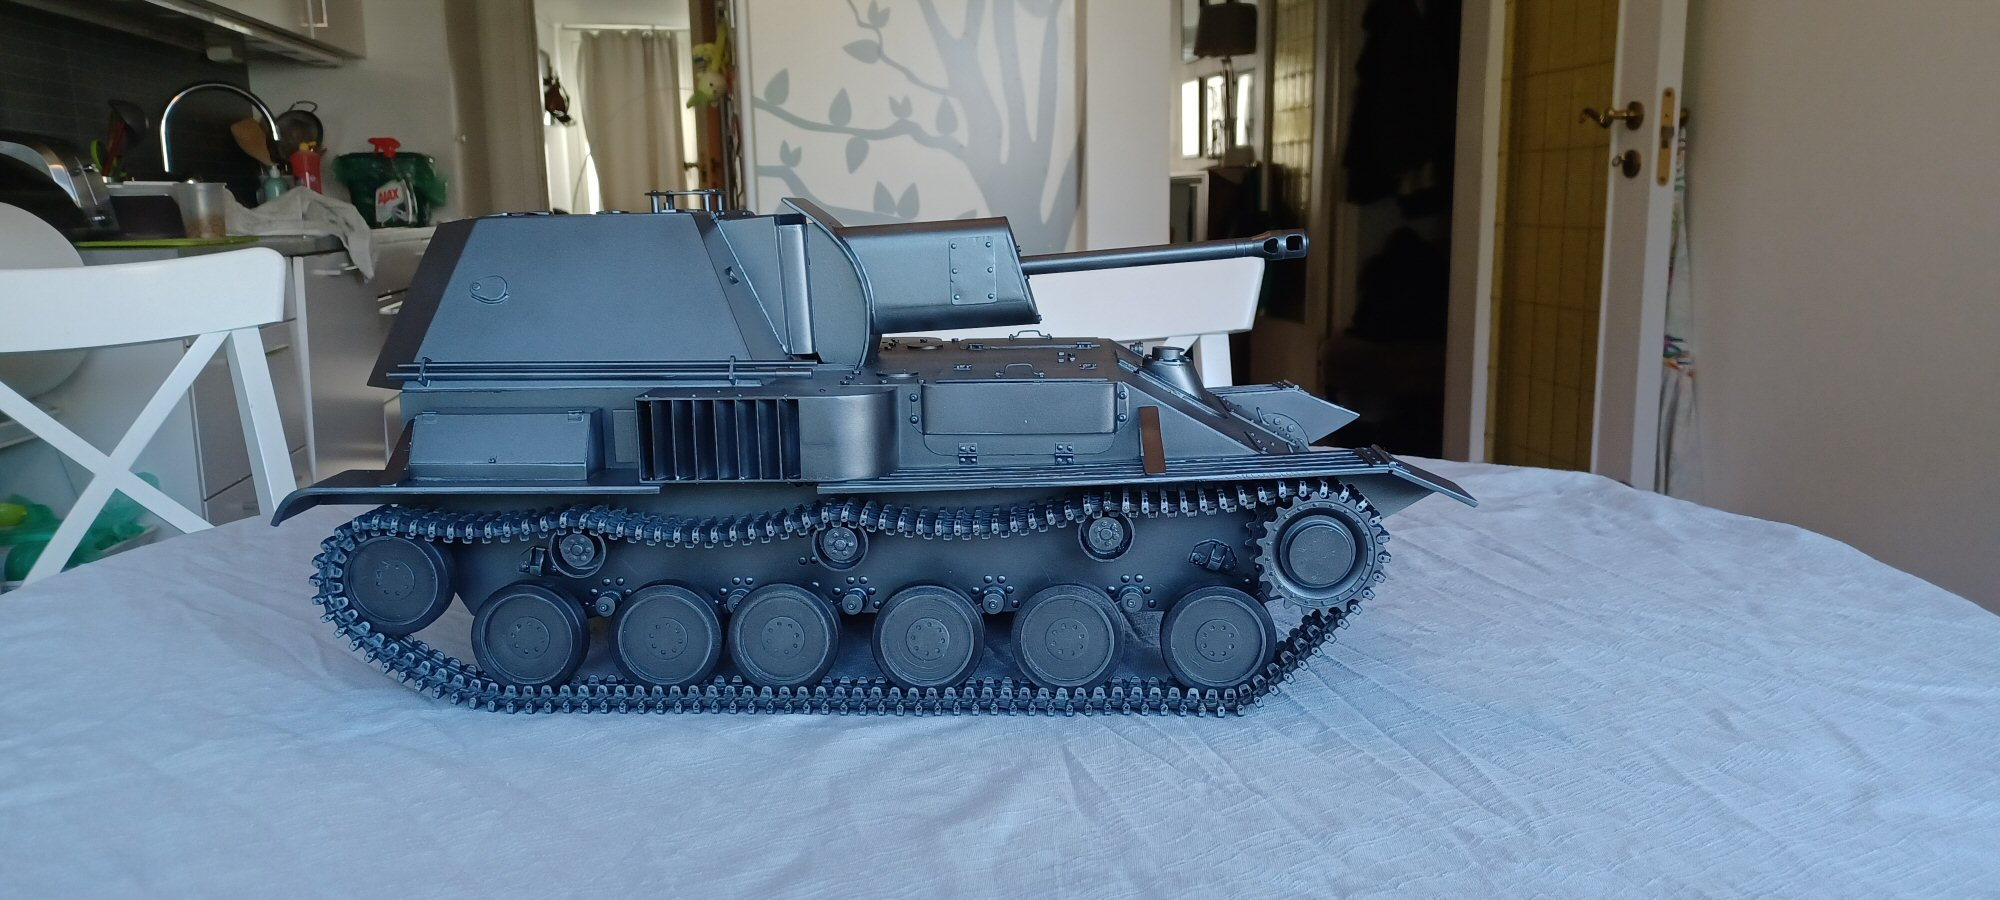
I am no Michelangelo so I just painted it to hinder rust and hide the blemishes. Some mistakes, some lessons learned. Bit crude in places but thats the limit of my skill.
Oceans of room inside and I hope to start on the electronics as soon as I can.
It will only ever be a backyard runner so Im not overly fussy as to the minor details and the ignored details.
P

Headlight lens
two missing rivets needing replacement.
I am no Michelangelo so I just painted it to hinder rust and hide the blemishes. Some mistakes, some lessons learned. Bit crude in places but thats the limit of my skill.
Oceans of room inside and I hope to start on the electronics as soon as I can.
It will only ever be a backyard runner so Im not overly fussy as to the minor details and the ignored details.
P
07-24-2023, 01:51 PM
#19
Is that the headlight right next to the gun kind of high up on the front of the tank? Do you think you could modify a metal T34 headlight to go there? I can send you one with the LED already installed.No charge. I'll even cover postage if you think it will work.
07-26-2023, 03:11 AM
#23
Thread Starter
Today I rigged it up with the electrics. I am using JP Marine 60 Amp ESCs (for boats) - not fancy, no jumpers or switches but they are bullet proof and easy to work with.
A beier sound card and a Visatron speaker. And the wiring loom from hell. And some kind of Motorbike battery. I hate wiring up ammeters but got it done in the end.
Here are some shots:
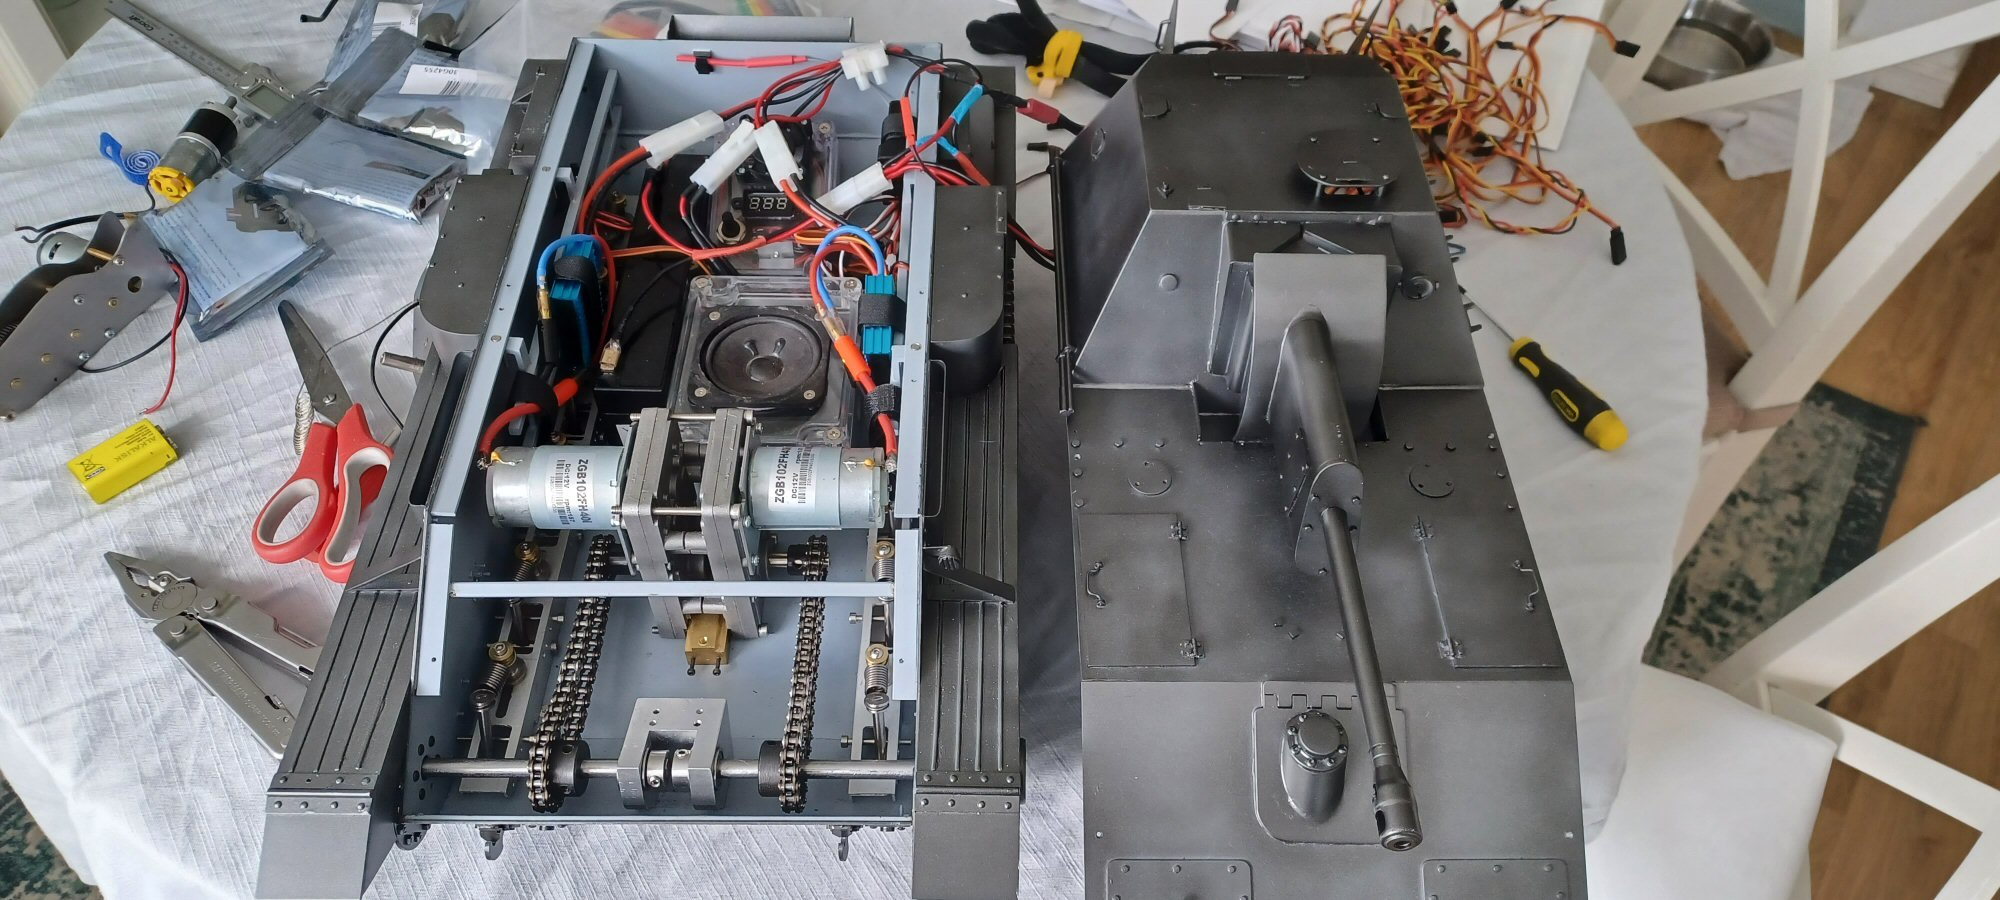
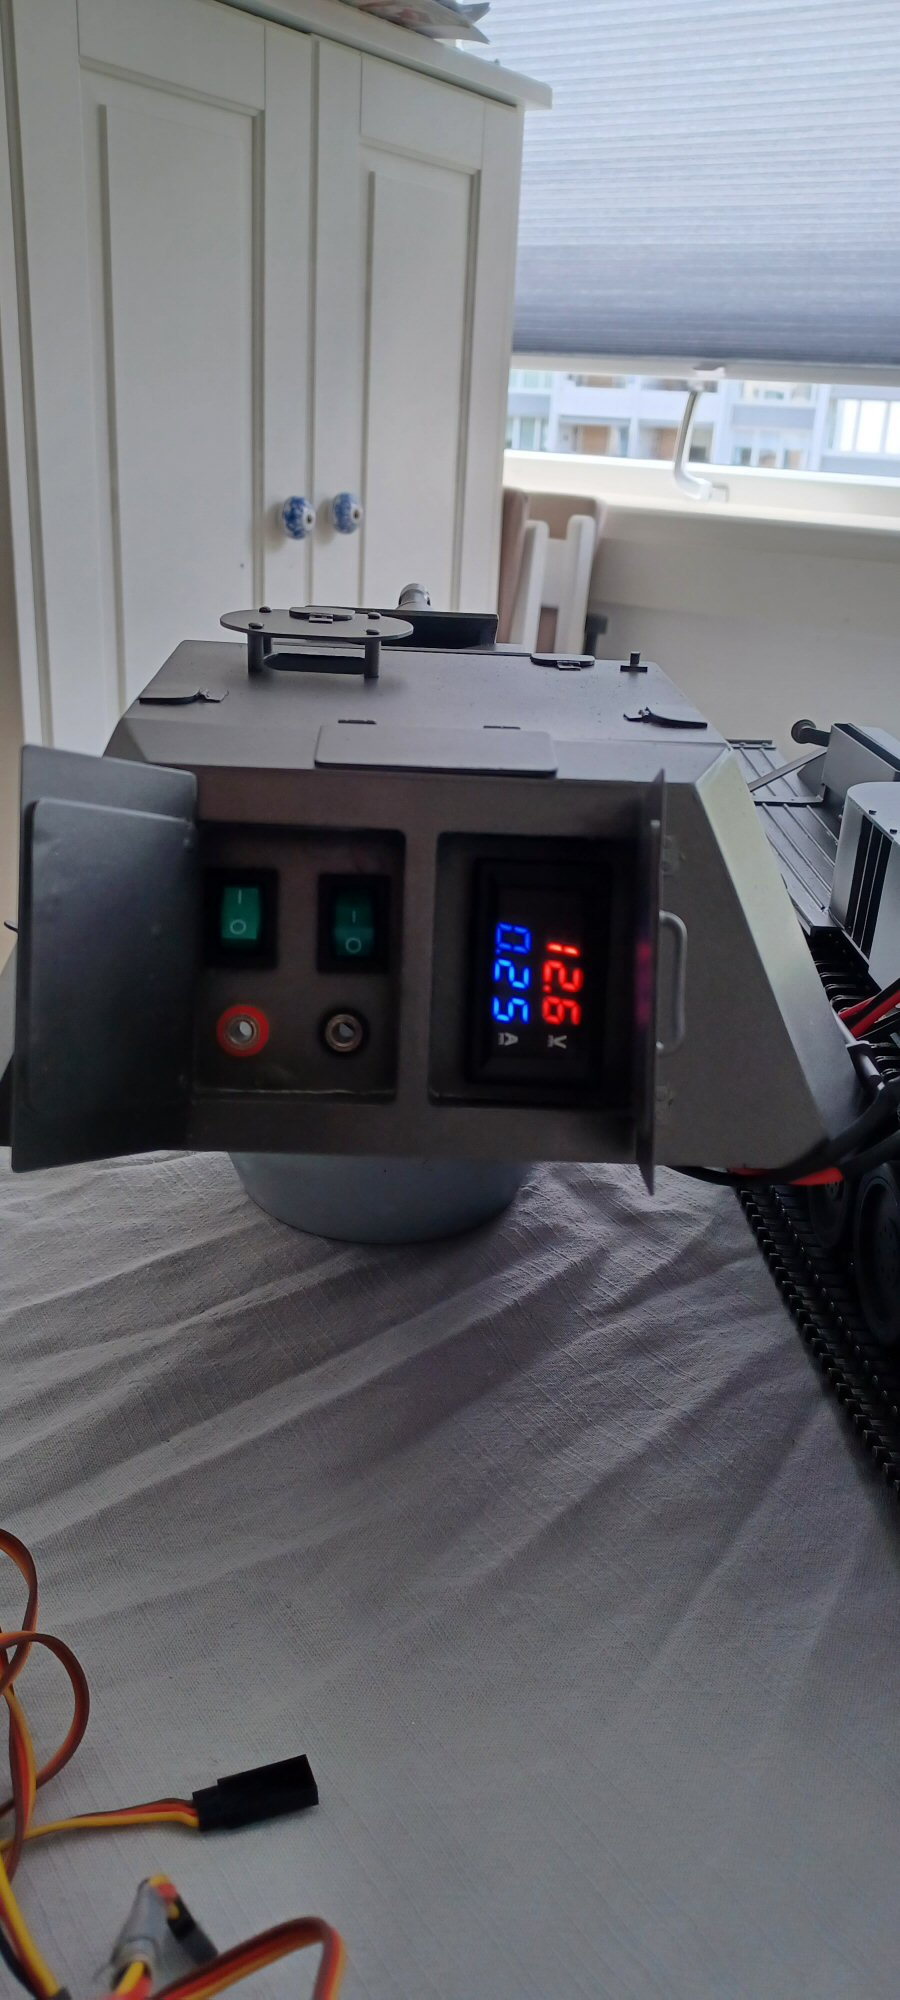
And here is a litttle video of its first maiden test run. I really need to sort out the mix on the tx but it will do as proof of mobility! Really sorry about the dog. He is a pest and hates tanks.
And now onto the next one...
P


