


ESM 50cc Spitfire rework


 12-24-2011, 02:33 AM
#52
Senior Member
Thread Starter

Join Date: Feb 2004
Location: Barrowhill, Staffordshire, UNITED KINGDOM
Posts: 586
Likes: 0
Received 0 Likes
on
0 Posts
Cheers for the kind words folks  Its comments, good or bad that keep a thread alive.
Ian.
Its comments, good or bad that keep a thread alive. Ian.
12-26-2011, 01:12 PM
#53

My Feedback: (3)
Join Date: Feb 2003
Location: Jackson,
MS
Posts: 538
Likes: 0
Received 0 Likes
on
0 Posts
Ian
Your sliding canopy works well. I'm at approximately the same stage on the 30cc ESM Spitfire. I am not going to quite the detail you are but would like to add some extras like the sliding canopy. I am planning my first attemp at weathering an aircraft. I hope you will be doing the same and will post pictures. Will you make your exhaust stacks functional? Also, I'm trying to find a close up of the stacks so I can get the color right. It looks like they turn white from the heat.
Thanks.
Hal
12-28-2011, 06:02 AM
#54
Senior Member
Thread Starter
Join Date: Feb 2004
Location: Barrowhill, Staffordshire, UNITED KINGDOM
Posts: 586
Likes: 0
Received 0 Likes
on
0 Posts
Cheers for the comment Hal, this Spifire is being modelled as a current restored but well used Spitfire. It has light weathering, but nothing like some of the wartime examples. Heres a walkround of the full size, great site too with lots of other walkrounds.
http://ipmsnl.netfirms.com/walkaroun...tfire-CH1.html
http://ipmsnl.netfirms.com/walkarounds/walkarounds.html
Ian.
http://ipmsnl.netfirms.com/walkaroun...tfire-CH1.html
http://ipmsnl.netfirms.com/walkarounds/walkarounds.html
Ian.
01-09-2012, 09:41 AM
#55
Senior Member
Thread Starter
Join Date: Feb 2004
Location: Barrowhill, Staffordshire, UNITED KINGDOM
Posts: 586
Likes: 0
Received 0 Likes
on
0 Posts
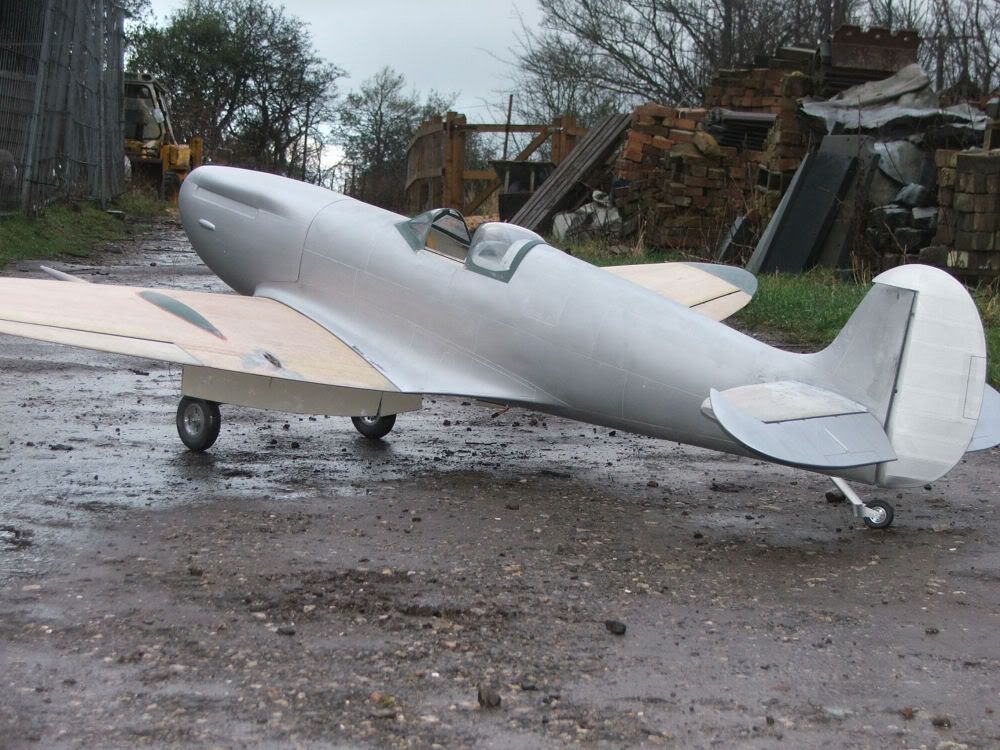
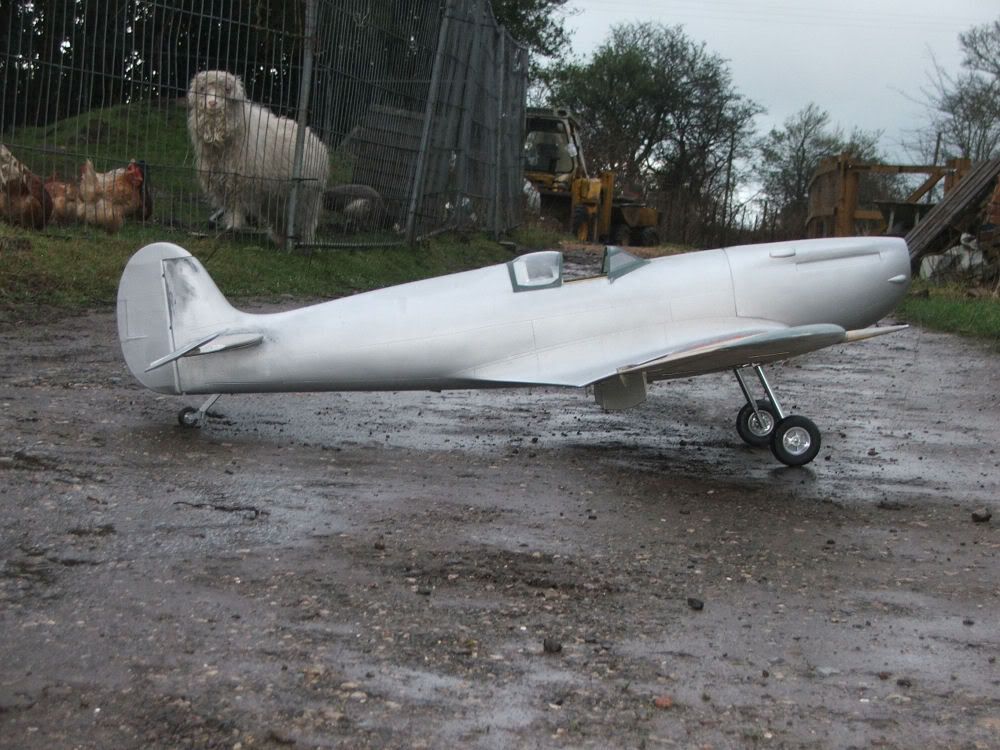
Spent most of the day wet flatting and fettling the glasswork in the err, wet. The cannon mounts are now finished, they feel very secure but instantly removable. First fixed the retracts and sat it on its wheels for a butchers. I know its only an ARTF, but its still a good feeling seeing it sat there for the first time. Motor mount and cowl fixing is next.
Ian.


Ian.
01-16-2012, 03:14 PM
#56
Senior Member
Thread Starter
Join Date: Feb 2004
Location: Barrowhill, Staffordshire, UNITED KINGDOM
Posts: 586
Likes: 0
Received 0 Likes
on
0 Posts
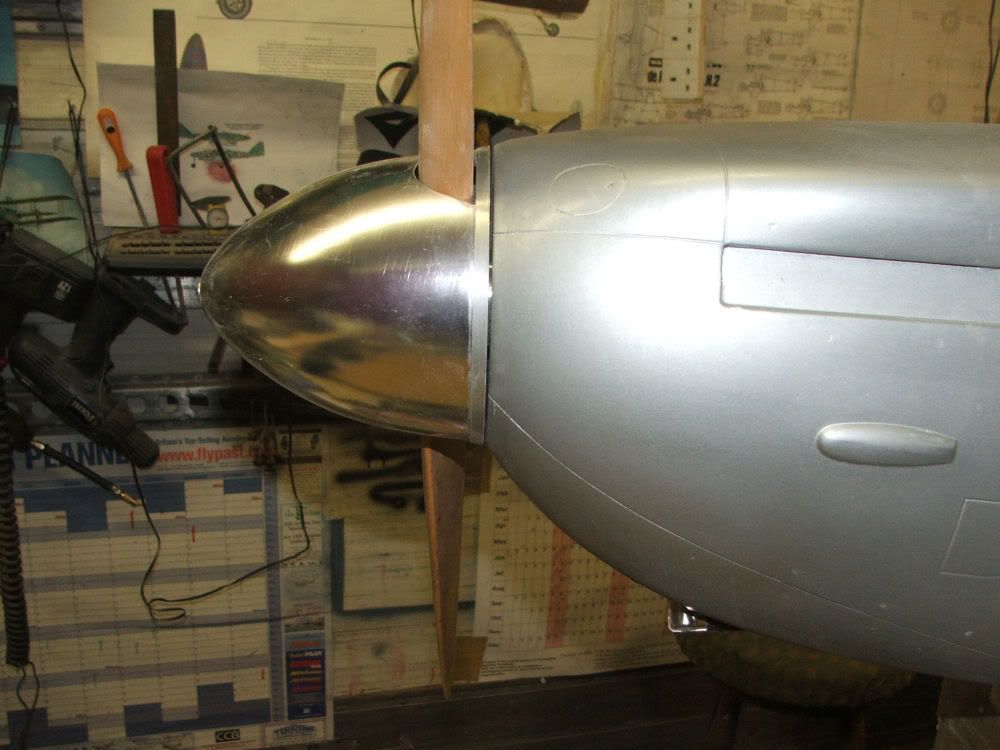
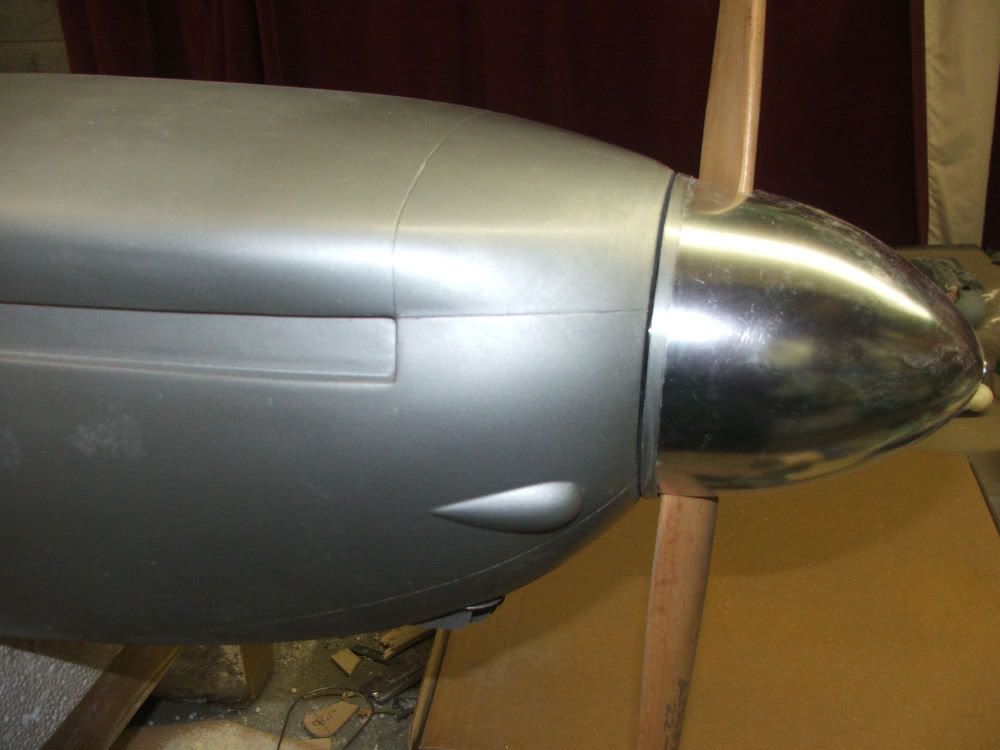
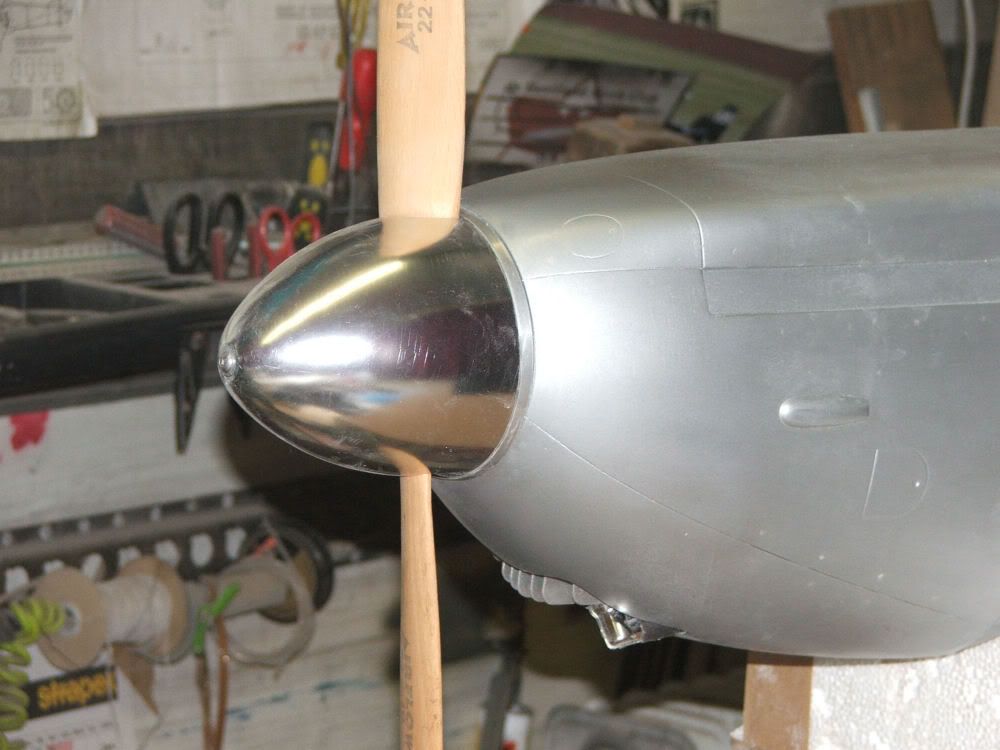
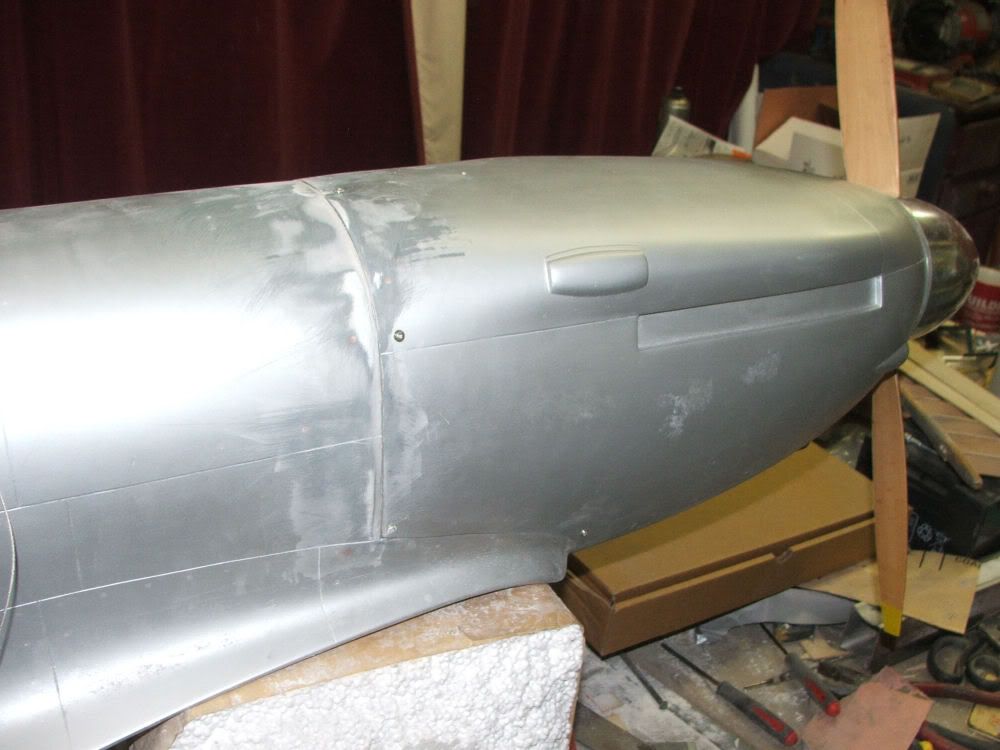
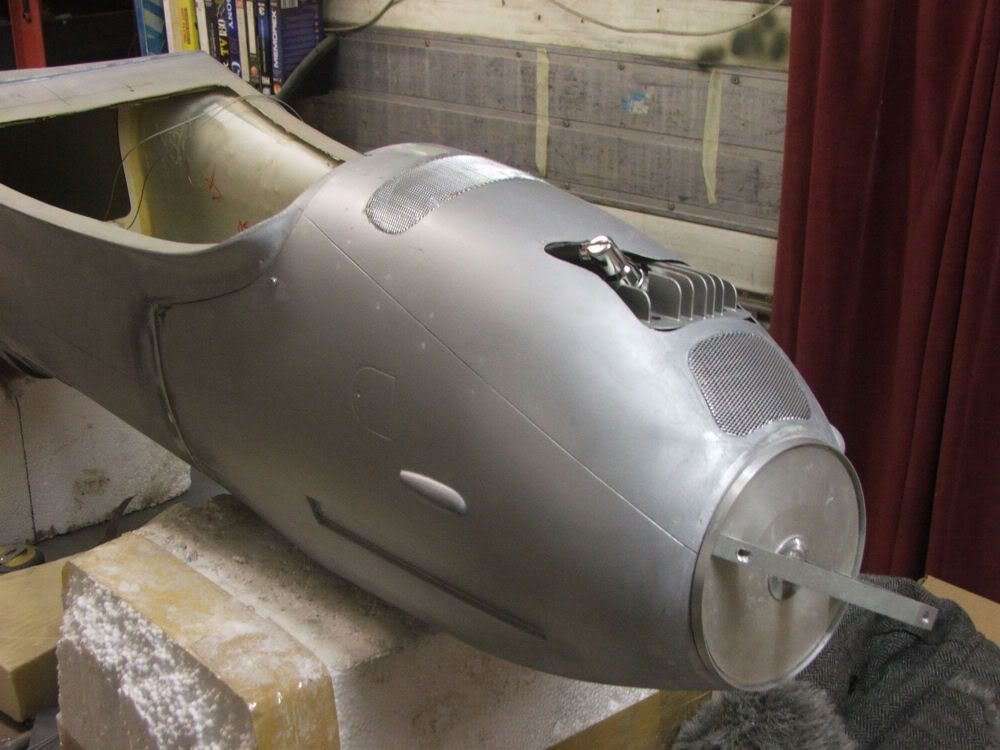
Spent most of the day getting the DL55 mounted. It doesn't completely go in the cowl but it isn't that obtrusive. I doubt there is a motor that fits inside the outline, but then you'd have to chop into it to cool it anyhoo. Mounted completely inverted, the manifold would stick out of the side of the cowl and be quite visible from most angles (related to that side anyway!) However, if the motor is installed just off inverted the manifold fits in and the head and plug disappear a bit more too since this is the deepest section of the cowling. So now from most top and side angles the motor isn't seen. I've cut the bare minimum at the minute, to get it all in and lined up, I'll cut more out for cooling after a think. The cowling wasn't the best, almost as if it was removed from the mould before it had fully cured and it had 'settled' out of shape so it required a bit of filler around the spinner since I couldn't get an oval spinner to fit for love nor money. I like to spend a bit of time lining up cowls to spinners as it always shouts out if its misaligned. OCD, moi?? I also fettled the rear end of the cowl fit to the fuselage because as the final colour is silver it shows up every blemish. I'll get some pics of the installation itself tomorrow.
Ian.
Ian.
01-17-2012, 10:06 AM
#57
Senior Member
Thread Starter
Join Date: Feb 2004
Location: Barrowhill, Staffordshire, UNITED KINGDOM
Posts: 586
Likes: 0
Received 0 Likes
on
0 Posts
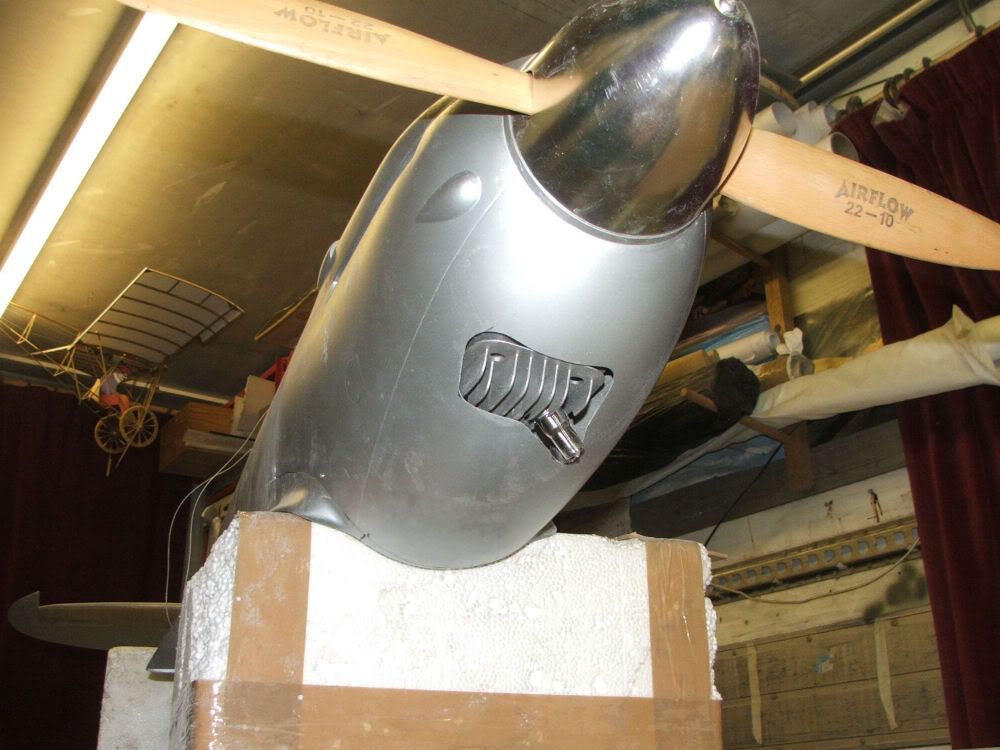
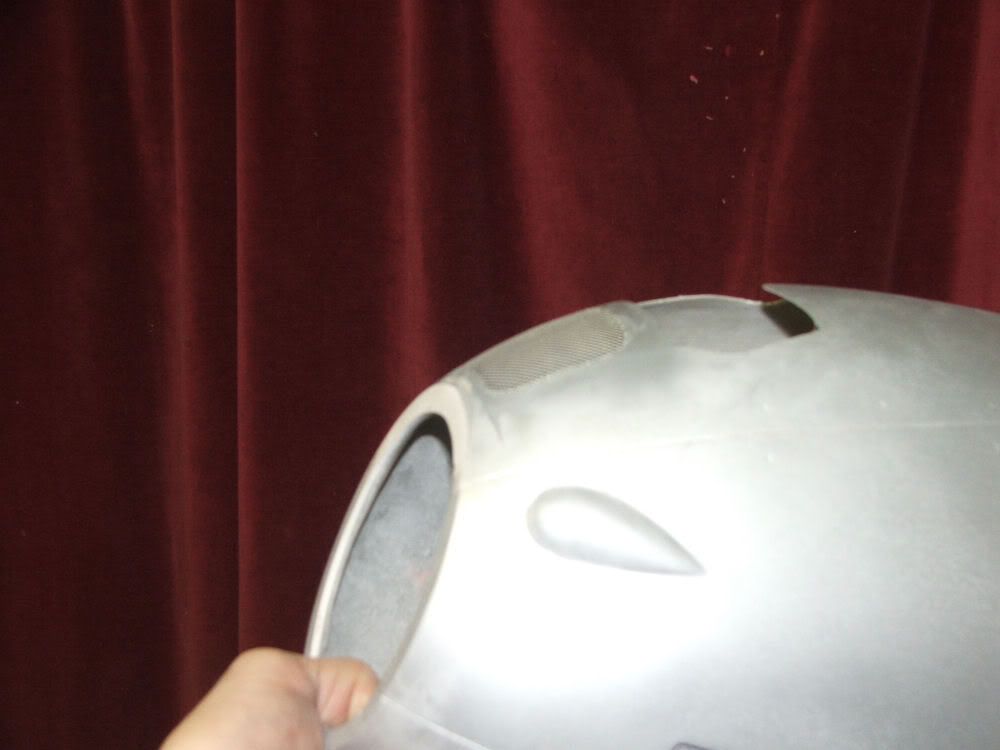
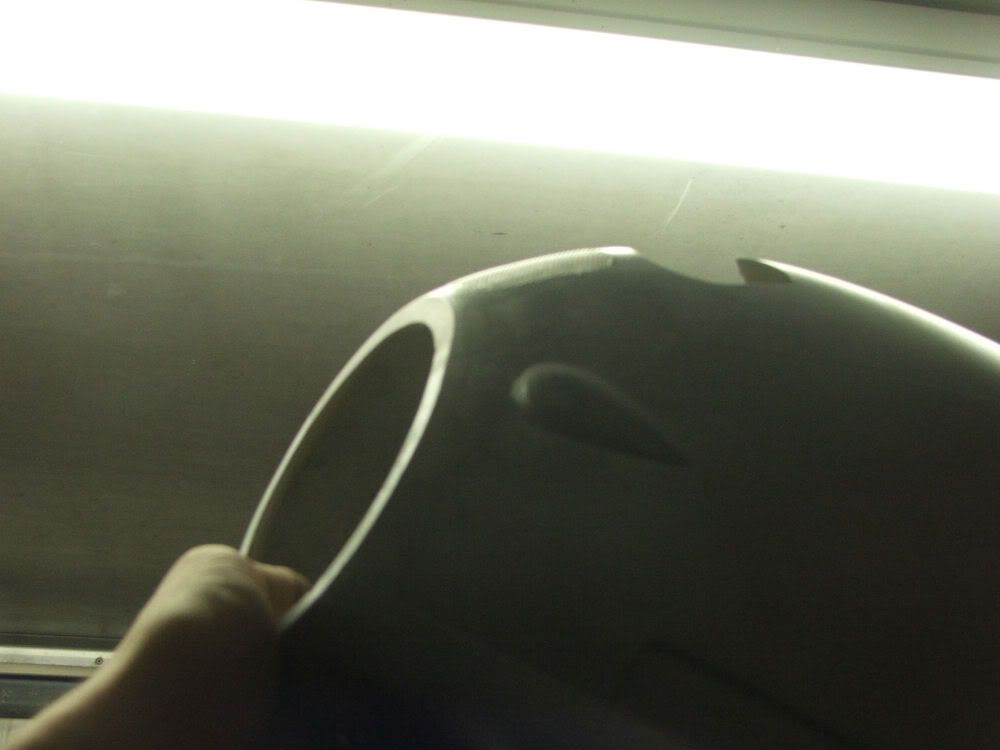
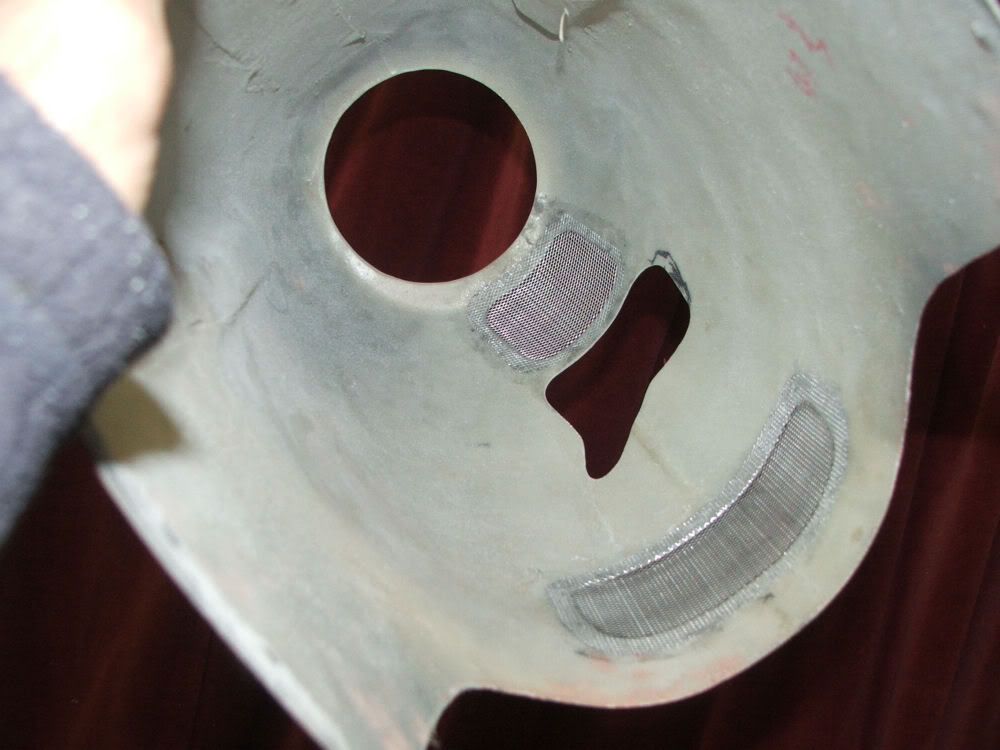
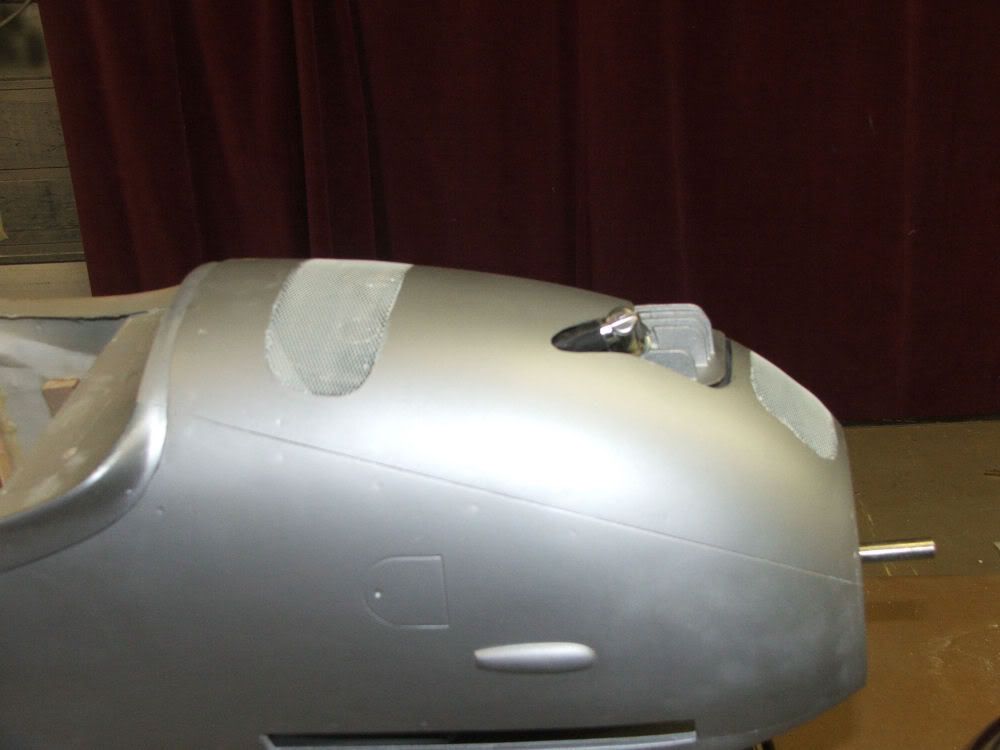
The plan was to use mesh for the inlet and the outlets. I wanted to get everything fitting right, then 'tweak' the exhaust pipes back to be central on the fuselage bottom, since with the off inverted installation one pipe would be off to one side. Once the motor and exhaust install was done, I could then cut the cooling holes in the cowl. The exhaust outlets are cut back to about 15mm below the mesh surface and angled well back, so the gasses will pass through the mesh without problem. The only issue is if the ali mesh is a bit cack in quality, then the gasses will make a hole in it. I doubt it, never happened before but we'll see. Once the holes were cut in the cowl, the mesh was trimmed and resined into the inside. Then the mesh was carefully formed to suit the compound curves of the cowl, also to remove the external step from cowl to mesh. The firewall 'tube' is all glued in and drying at the moment, more pics later.
Ian.
Ian.
01-17-2012, 10:43 AM
#58

Ian, Be carefull here. I burned my DLE 50 up in my Brian Taylor 1/5 scale. It was a new engine. I guess I overstressed it in the spitfire cowl.
I had a tunnel that went into the wing to allow more air to get out. I had to open the bottom up even more (no pix of this) But on the 25 flight she gave up on me. She landed underpower but the engine never ran agian. I think the problem was there wasn't enough air getting in the cowl.
I've always heard have 1:3 ratio in to out. I think I had a .5:3 ratio.[8D]
Kelly
I had a tunnel that went into the wing to allow more air to get out. I had to open the bottom up even more (no pix of this) But on the 25 flight she gave up on me.
She landed underpower but the engine never ran agian. I think the problem was there wasn't enough air getting in the cowl.I've always heard have 1:3 ratio in to out. I think I had a .5:3 ratio.[8D]
Kelly
01-17-2012, 12:30 PM
#59
Member
Join Date: Jul 2007
Location: auckland, NEW ZEALAND
Posts: 85
Likes: 0
Received 0 Likes
on
0 Posts
Idigbo
You work is awesome I have been following this thread with much excitment. My biggest issue with my model has been the cooling the first 4 flights resulting in deadsticks due to overheating I flew with no cowling and it was just great. I have managed to get it to keep it running with the cowl on but she still heats up a little too much. I have made more mods but yet to fly it again. I have had to open the front till I get a full view of the cylinder and baffle the sides to guide air through the engine. I have also opened the rear off the exhausts the allow a venturi effect, the exit I have opened up very large the model was last flowen with this configuation and ran the entire flight but was showing signs of sagging near the end. I have now added a 5mm lip to the leading edge of the exit hole this has made a huge difference to the cooling during ground running. The model has not flowen like this yet but I am confident that it is alot closer to a good out come. I have no current photos of the install but can be arranged if need be.
Chris
01-17-2012, 02:50 PM
#61
Senior Member
Thread Starter
Join Date: Feb 2004
Location: Barrowhill, Staffordshire, UNITED KINGDOM
Posts: 586
Likes: 0
Received 0 Likes
on
0 Posts
Kelly, cheers for the heads up [8D] I must say I'm suprised you had issues with your Spitfire set up, baffled air in, lots of out etc, could it have been a dud motor? How did it fail, bearings or piston / ring / cylinder?
Chris, cheers for the kind words mate. I too plan on having more hot air escape around the exhausts when I fit them. One thing to ensure too is to get some 'new' air around the carb. With tightly ducted engines you run the risk of air heating and staying in the cowl as the flow of cooling air stops it getting out. The exit at the exhausts should help to ensure there is no stagnant air in the system.
Ian.
01-18-2012, 01:51 AM
#64
My Feedback: (2)
Join Date: Jul 2003
Location: Brisbane, QLD, AUSTRALIA
Posts: 2,787
Likes: 0
Received 8 Likes
on
4 Posts
Really nice work there Idigbo,
Looking forward to seeing the completed model.
Do you think that a 1" prop shaft extension would have brought the DLE far back enough to be totally enclosed?
I have seen a spitty build where the guy building used an EDF to blow air over the motor? He used a pretty small EDF, with a cheap ESC and small battery pack to make it all happed and it was Y leaded in with the throttle so as the motor worked harder, the fan pumped more air! Looked like an interesting solution on a much smaller spitty? Just a thought.
Thanks
dave
01-18-2012, 02:07 AM
#65
Senior Member
Thread Starter
Join Date: Feb 2004
Location: Barrowhill, Staffordshire, UNITED KINGDOM
Posts: 586
Likes: 0
Received 0 Likes
on
0 Posts
Cheers Dave, an 1" extention would taken the motor inside completely, though the plug cap would still be out. If you feel like butchering the DL, you could reshape the top edge of the fins to match the cowl profile, not much would have to come off and it certainly would alter the performance. If it were my motor I'd be tempted, but it don't look bad as is. The idea with this model is to keep it practical and simple, whilst making it look a bit more like.
Ian.
Ian.
01-18-2012, 03:26 AM
#66
Member
Join Date: Jul 2007
Location: auckland, NEW ZEALAND
Posts: 85
Likes: 0
Received 0 Likes
on
0 Posts
Ian
You are of course right about getting air to the carb to this end after much soul searching I opened a hole hehind the carb throught the fire wall. I am still not sure if i did the right thing but it does not seem to have done any harm. My thinking was that the carb was sucking hot air or a worst operating in a low pressure area. I have also taken a vent from the back of the metering diaphram to inside the fuse to help the carb read true air pressure. My other thought is that my rather large muffler is shielding the escaping air. I have followed other threads and most have no trouble with overheating. Keep up the good work!
Cheers Chris
01-20-2012, 02:03 PM
#67
Senior Member
Thread Starter
Join Date: Feb 2004
Location: Barrowhill, Staffordshire, UNITED KINGDOM
Posts: 586
Likes: 0
Received 0 Likes
on
0 Posts
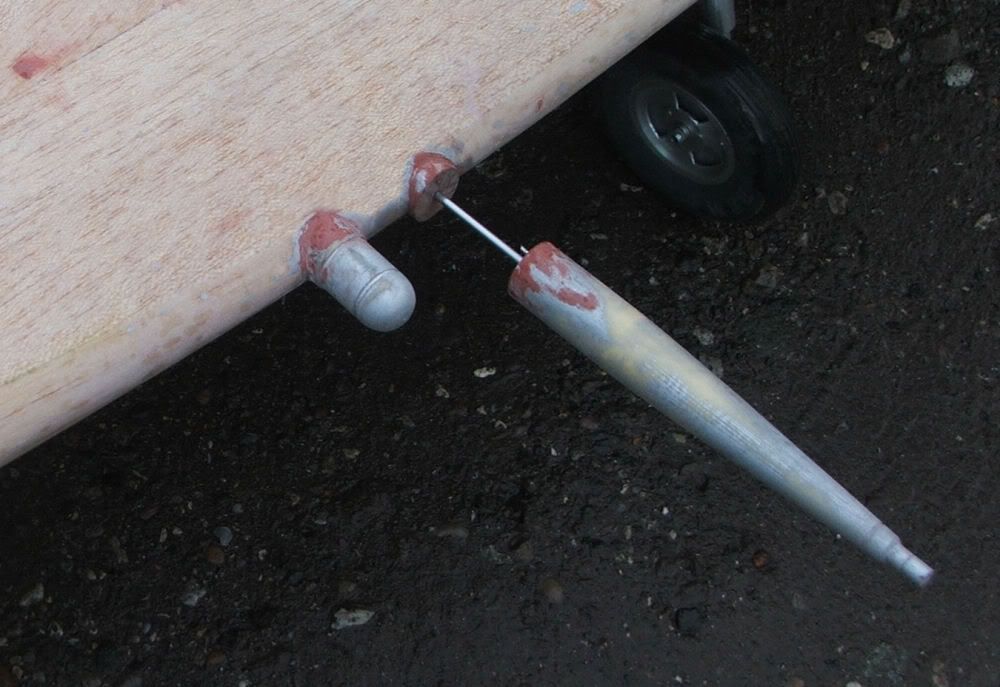
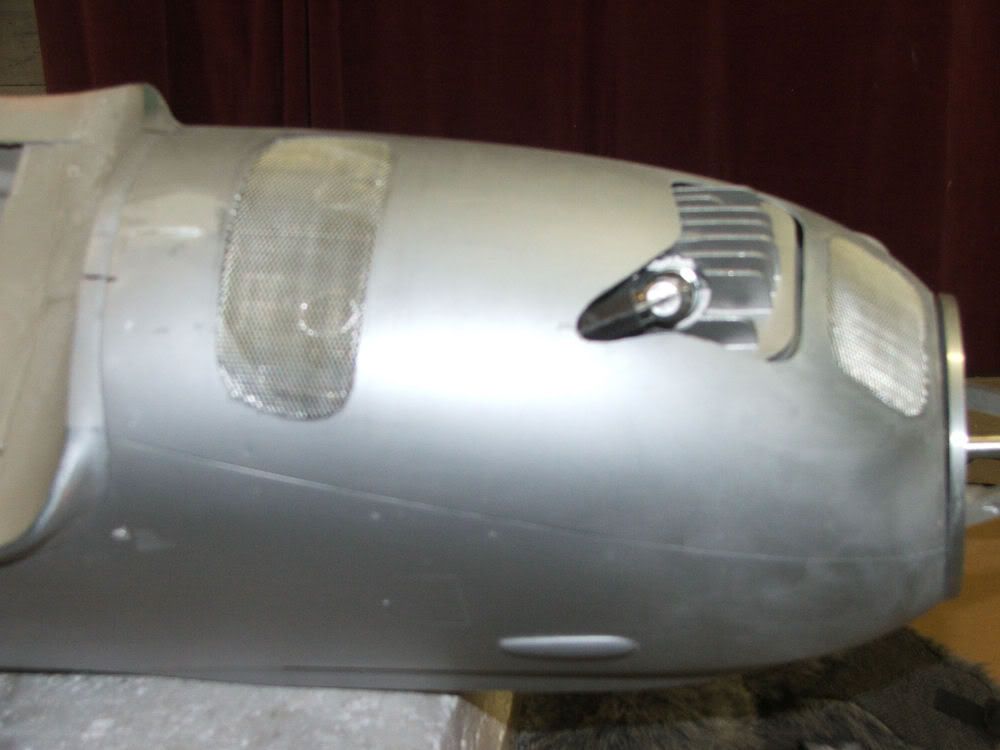
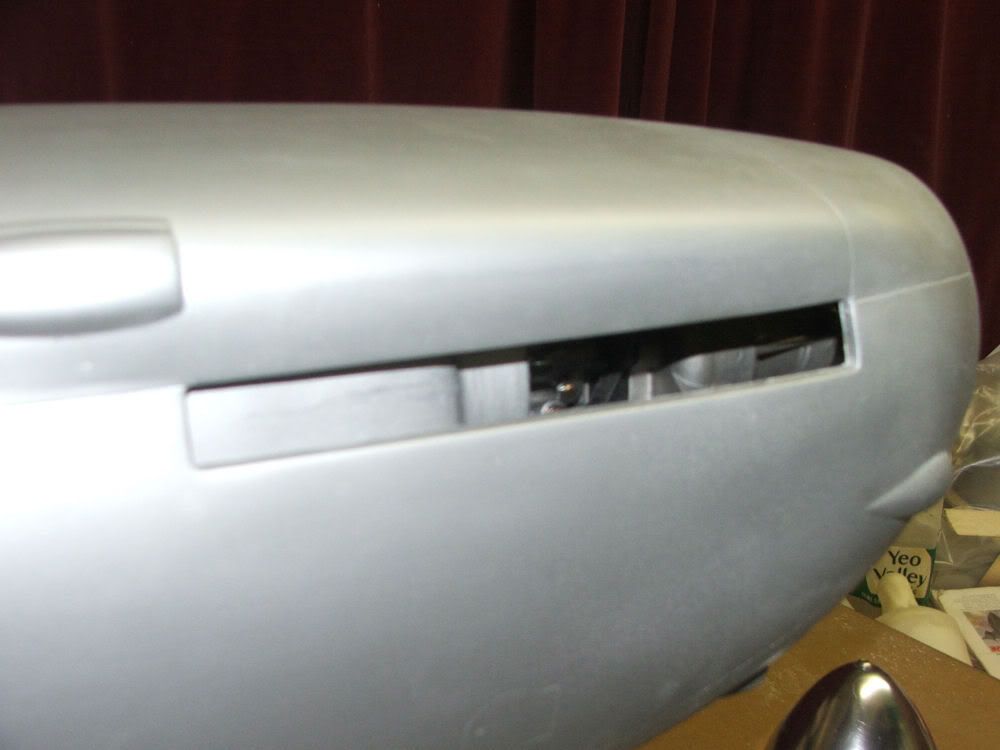
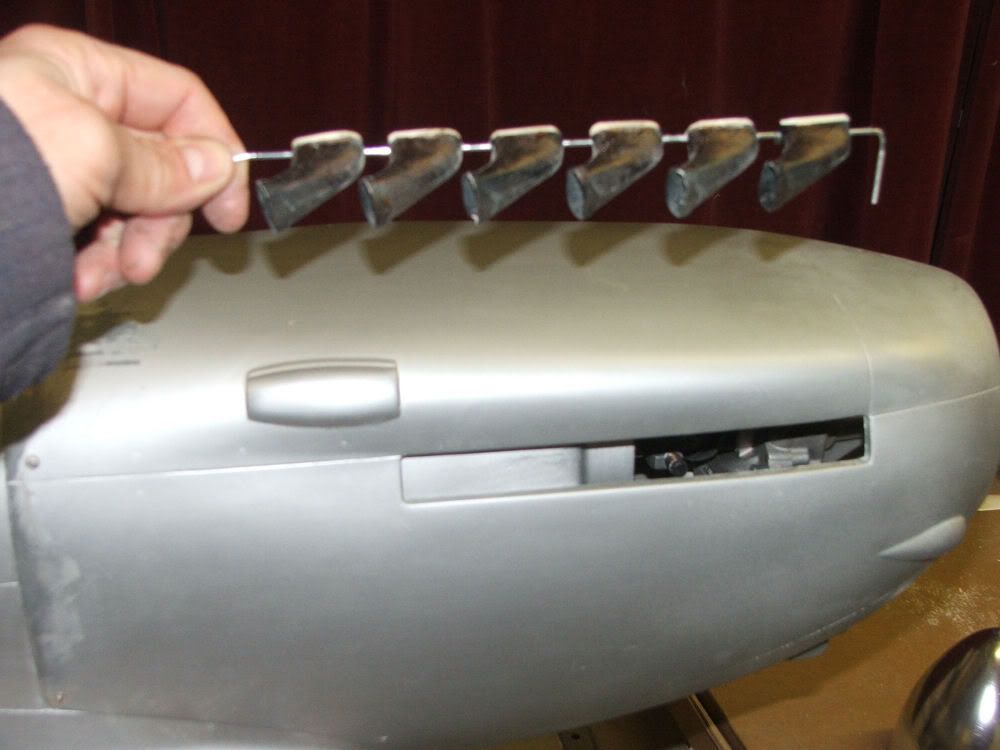
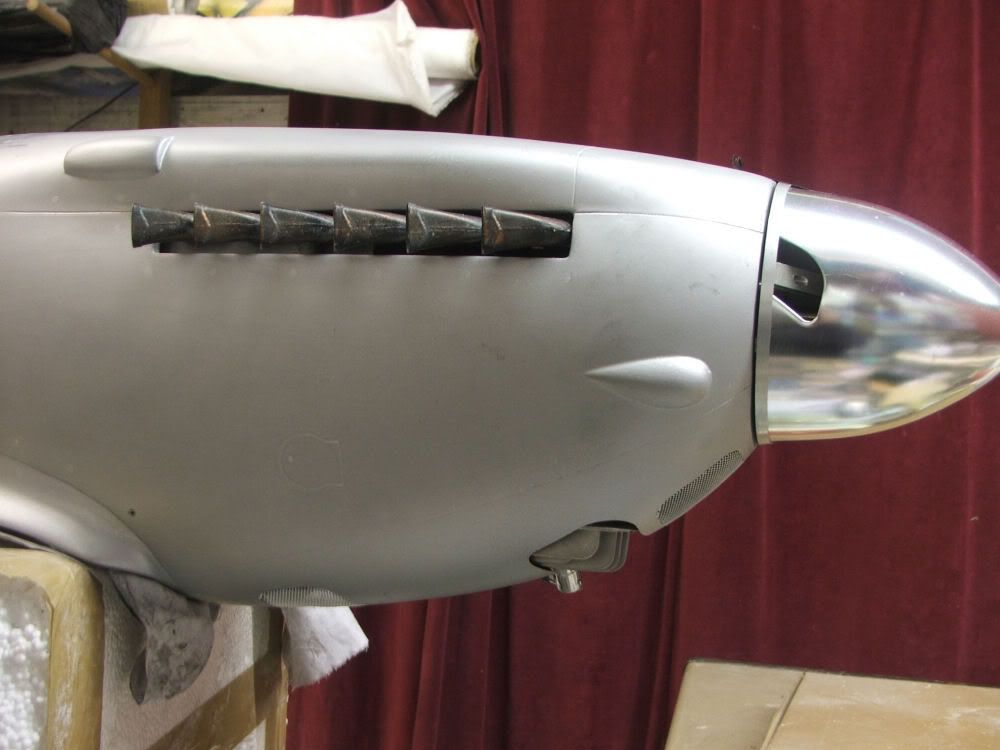
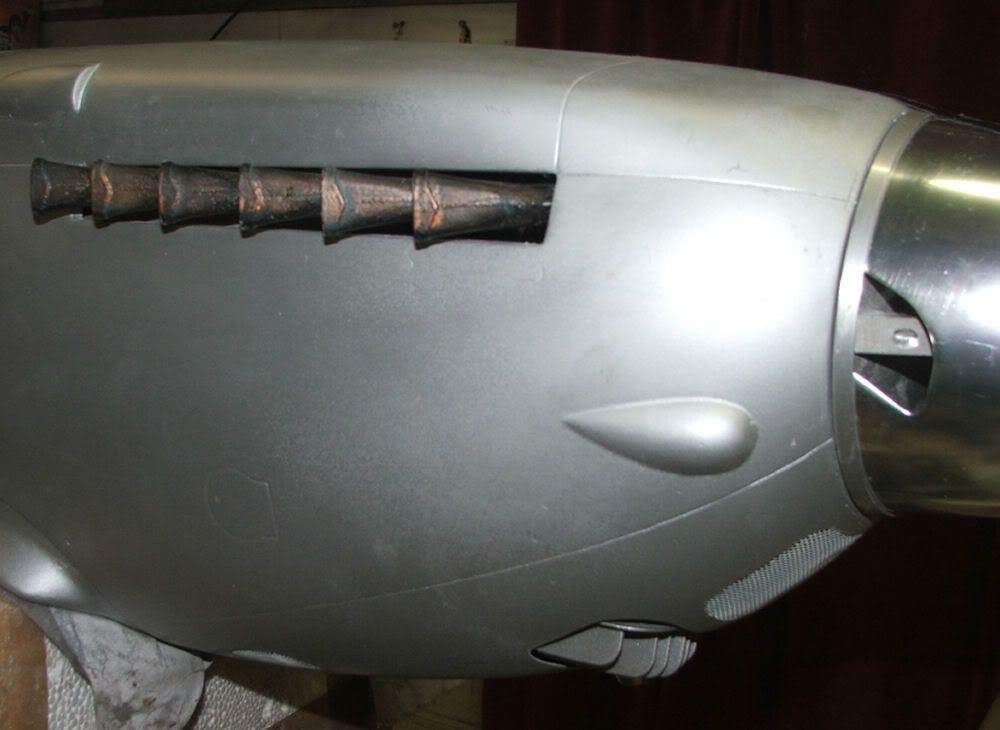
Got a bit more done, amongst finishing a Tardis (not for me!!!). Cut out the exhaust slots and made up the stack for one side, since I haven't got the other side yet. I could have hollowed each one out, but the time involved would be a bit on the high side. They are joined together at the right spacing, by a continuous wire rod. This wire rod will be glassed into the cowl front and back. Its about the most minimal fixing I could think of, allowing maximum air outlet area. The stacks are only light, so they'll stay on fine. Also experimented painting the mesh, finished up white, so when viewed in the air, the white is 'mixed' with the almost black of the holes, I'll get a tone of grey similar to the silver.
Ian.
Ian.
01-20-2012, 05:39 PM
#68
My Feedback: (1)

Join Date: Jul 2004
Location: Perth WA, AUSTRALIA
Posts: 2,200
Likes: 0
Received 0 Likes
on
0 Posts
Totally awesome work Ian. You must have the patience of a saint to do this to your model.
Very nice work indeed and you say you made those exhaust stubs??
Watching with interest,
Brad
Very nice work indeed and you say you made those exhaust stubs??
Watching with interest,
Brad
01-20-2012, 09:19 PM
#69
My Feedback: (3)
Join Date: Feb 2003
Location: Jackson,
MS
Posts: 538
Likes: 0
Received 0 Likes
on
0 Posts
Ian what material did you use to make the exhaust pipes? Those look exactly like the real thing. I would like to do the same with my Spitfire.
Hal
Hal
01-21-2012, 02:16 AM
#70
Senior Member
Thread Starter
Join Date: Feb 2004
Location: Barrowhill, Staffordshire, UNITED KINGDOM
Posts: 586
Likes: 0
Received 0 Likes
on
0 Posts
ORIGINAL: Brad330l
Totally awesome work Ian. You must have the patience of a saint to do this to your model.
Very nice work indeed and you say you made those exhaust stubs??
Watching with interest,
Brad
Totally awesome work Ian. You must have the patience of a saint to do this to your model.
Very nice work indeed and you say you made those exhaust stubs??
Watching with interest,
Brad
Ian.
 01-21-2012, 09:05 AM
#72
My Feedback: (3)
Join Date: Feb 2003
Location: Jackson,
MS
Posts: 538
Likes: 0
Received 0 Likes
on
0 Posts
Ian
I assume you painted the exhaust stacks. Would you mind describing how you did it and what colors you used? Those are excellent. It's impossible to tell them from the real thing.
Thanks in advance.
Hal
I assume you painted the exhaust stacks. Would you mind describing how you did it and what colors you used? Those are excellent. It's impossible to tell them from the real thing.
Thanks in advance.
Hal
01-22-2012, 03:00 PM
#73
Senior Member
Thread Starter
Join Date: Feb 2004
Location: Barrowhill, Staffordshire, UNITED KINGDOM
Posts: 586
Likes: 0
Received 0 Likes
on
0 Posts
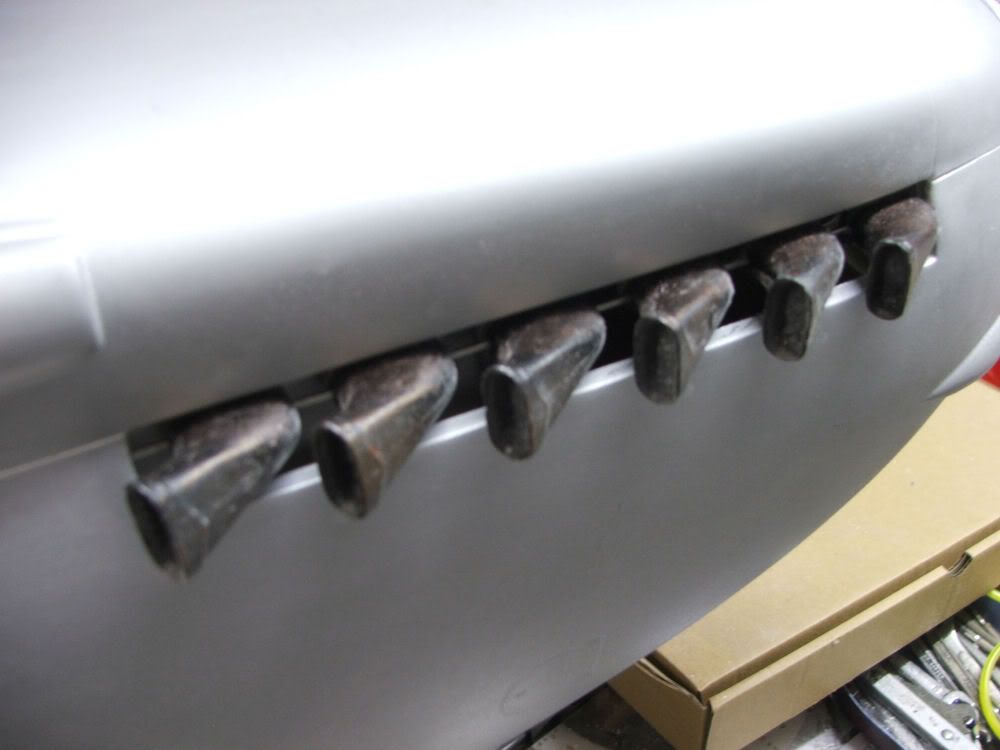
Cheers Hal, these exhausts aren't finished yet, still more paint to apply. Firstly I painted them satin black, followed by airbrushing some Humbrol enamel in shades like copper and bronze etc. Once I get the full set I'll finish them up and explain exactly what I did. The final colour would be the exhaust staining, in a mixture of light grey and blacker shades depending on the Merlin's mixture settings.
Ian.
Ian.
01-22-2012, 05:33 PM
#74
Senior Member
Join Date: Jul 2006
Location: , MA
Posts: 183
Likes: 0
Received 0 Likes
on
0 Posts
I'm just now finding this thread. Great mods. Really like the solartex tailplane details... wish you showed step by step pictures on that one.
I assume you found a solution to lock your canopy...and it would be too late to do on this build since your rails are in place already) but if you are going to leave the canopy a manual open close affair, a simple method for locking is to use a sharp centering punch to deform the back of the brass square stock just behind or right at the center of the front most screw. This creates a "detent" that makes a positive friction lock against the head of the screw in the closed position...the same can be at the rear to hold the canopy open using the rear most screw. Practice first on a piece of scrap to get the right amount of dimple for the screw size you have and the amount of locking force you want to employ. Properly done it can be reliable and there is nothing simpler.
oops..posted before I noticed you have a servo operated linkage...well...maybe the tip will help others.