


3W Bearcat with Moki 300


 07-07-2019, 05:48 AM
#254

My Feedback: (7)
Once again this build thread has helped me out. I have to thank Rob (where are you Rob?!) for taking the time for posting his motor mount geometry picture. I took his word for the setup and used my milling machine digital readout to duplicate his setup exactly.
If you look back to the beginning of this (Rob�s) build thread you will see at least three different builds - all of them approaching the Engineering challenges a different way. The motor mount is a really good example. Rob went old school with a wood buildup. Detlef did some kind of composite buildup that even with tons of pictures I have ZERO idea how he did it!! It�s beautiful - but wouldn�t work for the Rare Bear which has no cowl flaps. My airflow setup - which is absolutely critical on this aircraft- is different. The following pictures show my response to the challenges.
If you look back to the beginning of this (Rob�s) build thread you will see at least three different builds - all of them approaching the Engineering challenges a different way. The motor mount is a really good example. Rob went old school with a wood buildup. Detlef did some kind of composite buildup that even with tons of pictures I have ZERO idea how he did it!! It�s beautiful - but wouldn�t work for the Rare Bear which has no cowl flaps. My airflow setup - which is absolutely critical on this aircraft- is different. The following pictures show my response to the challenges.
07-12-2019, 03:09 AM
#255
My Feedback: (7)
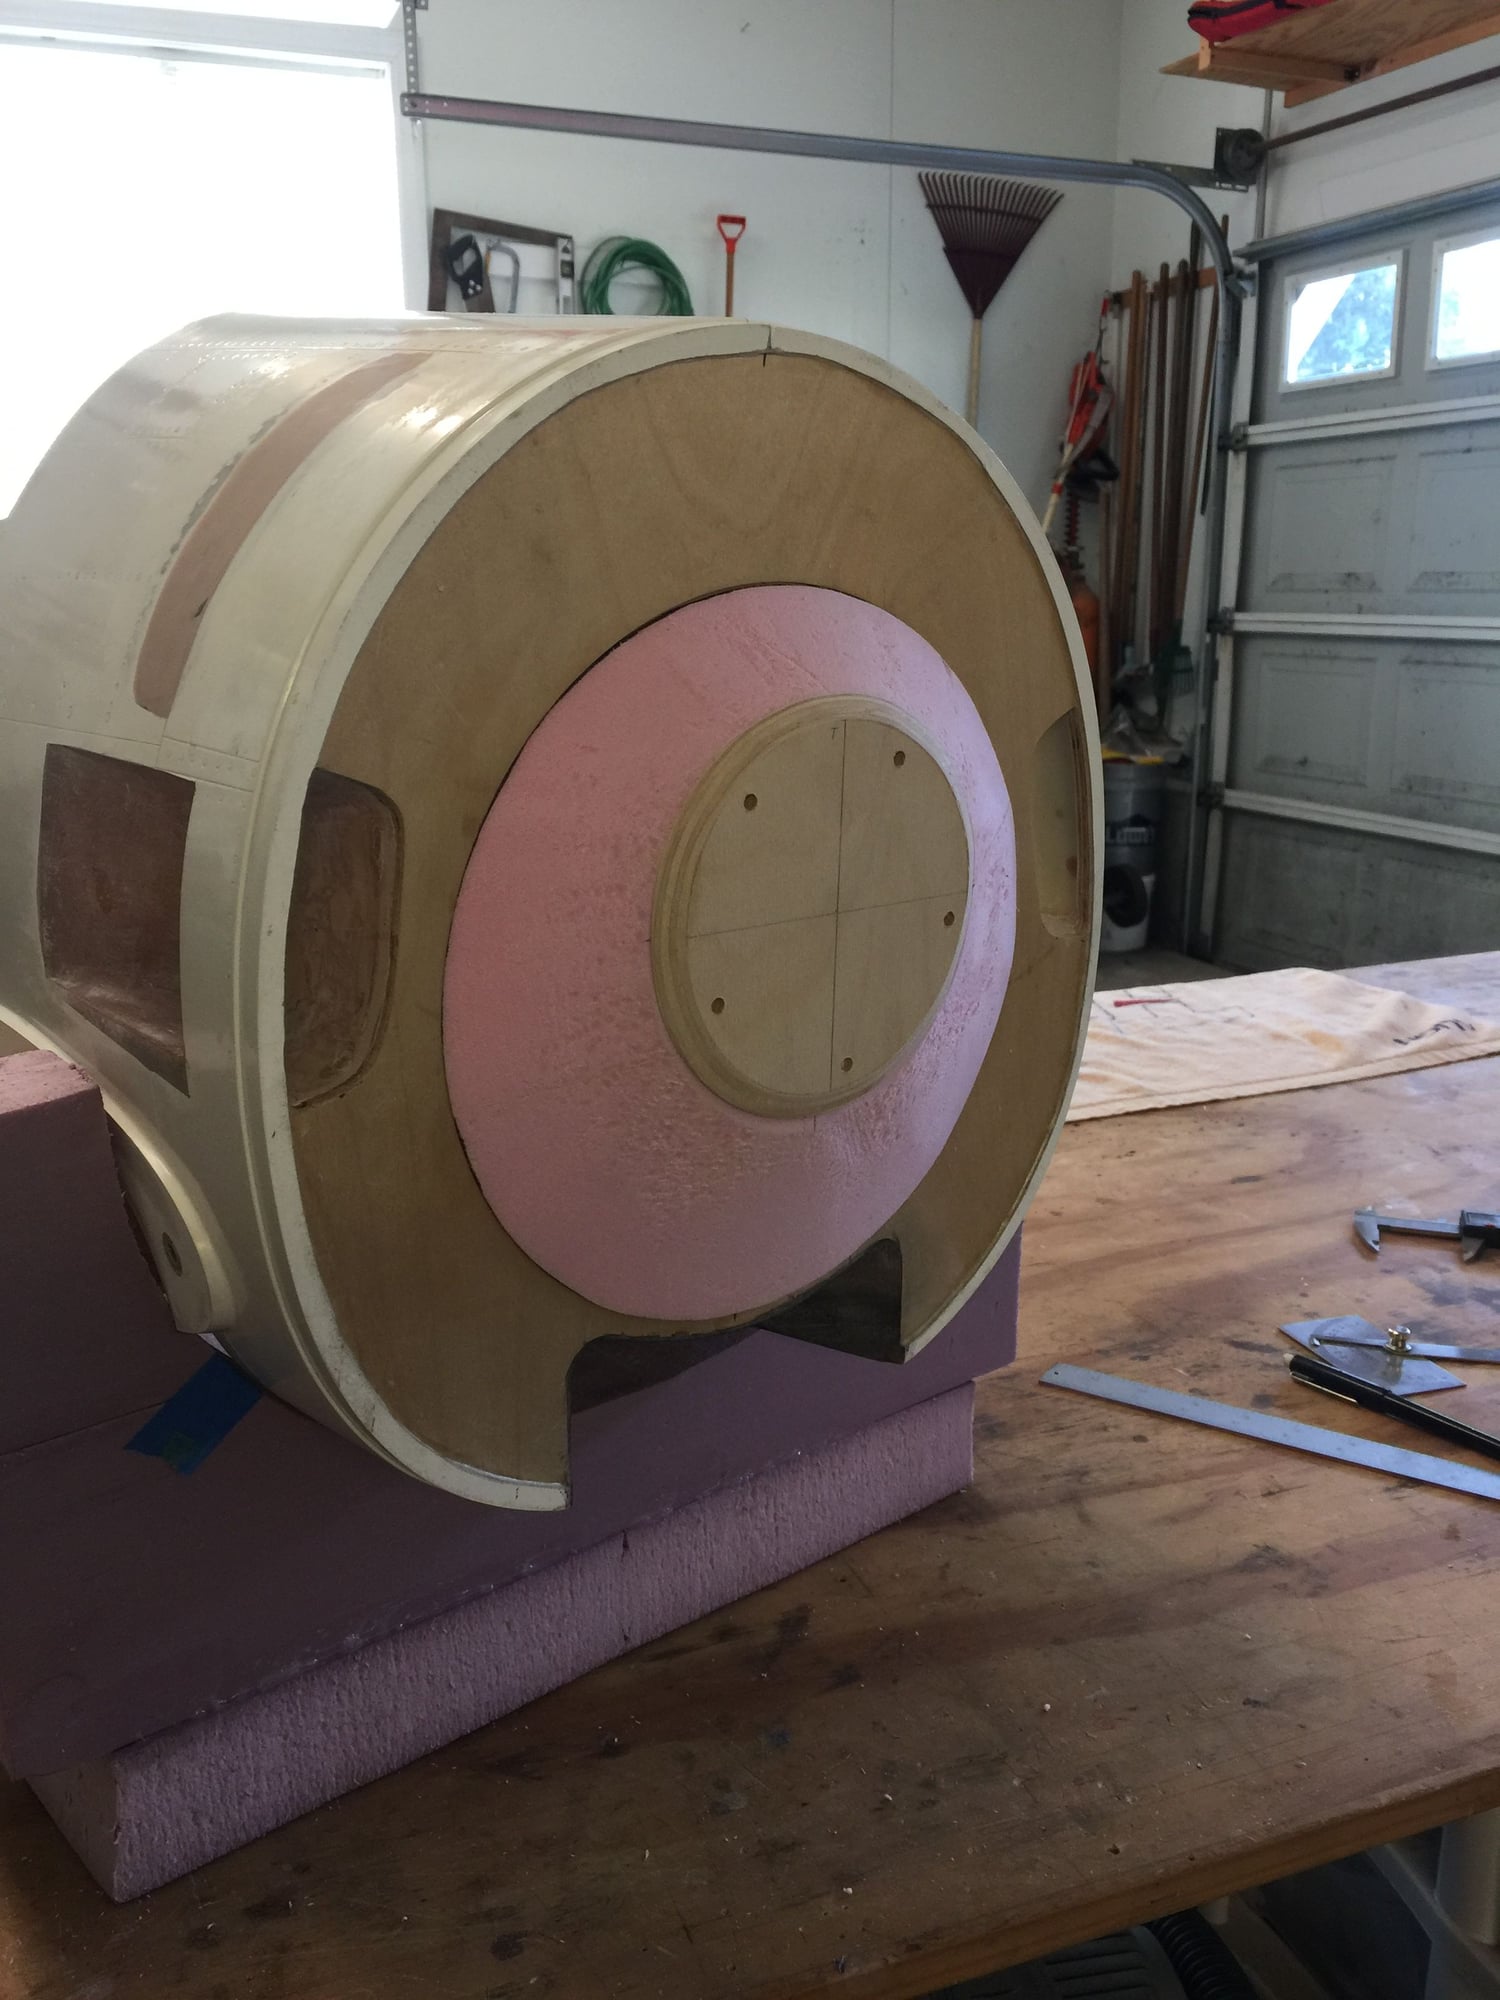
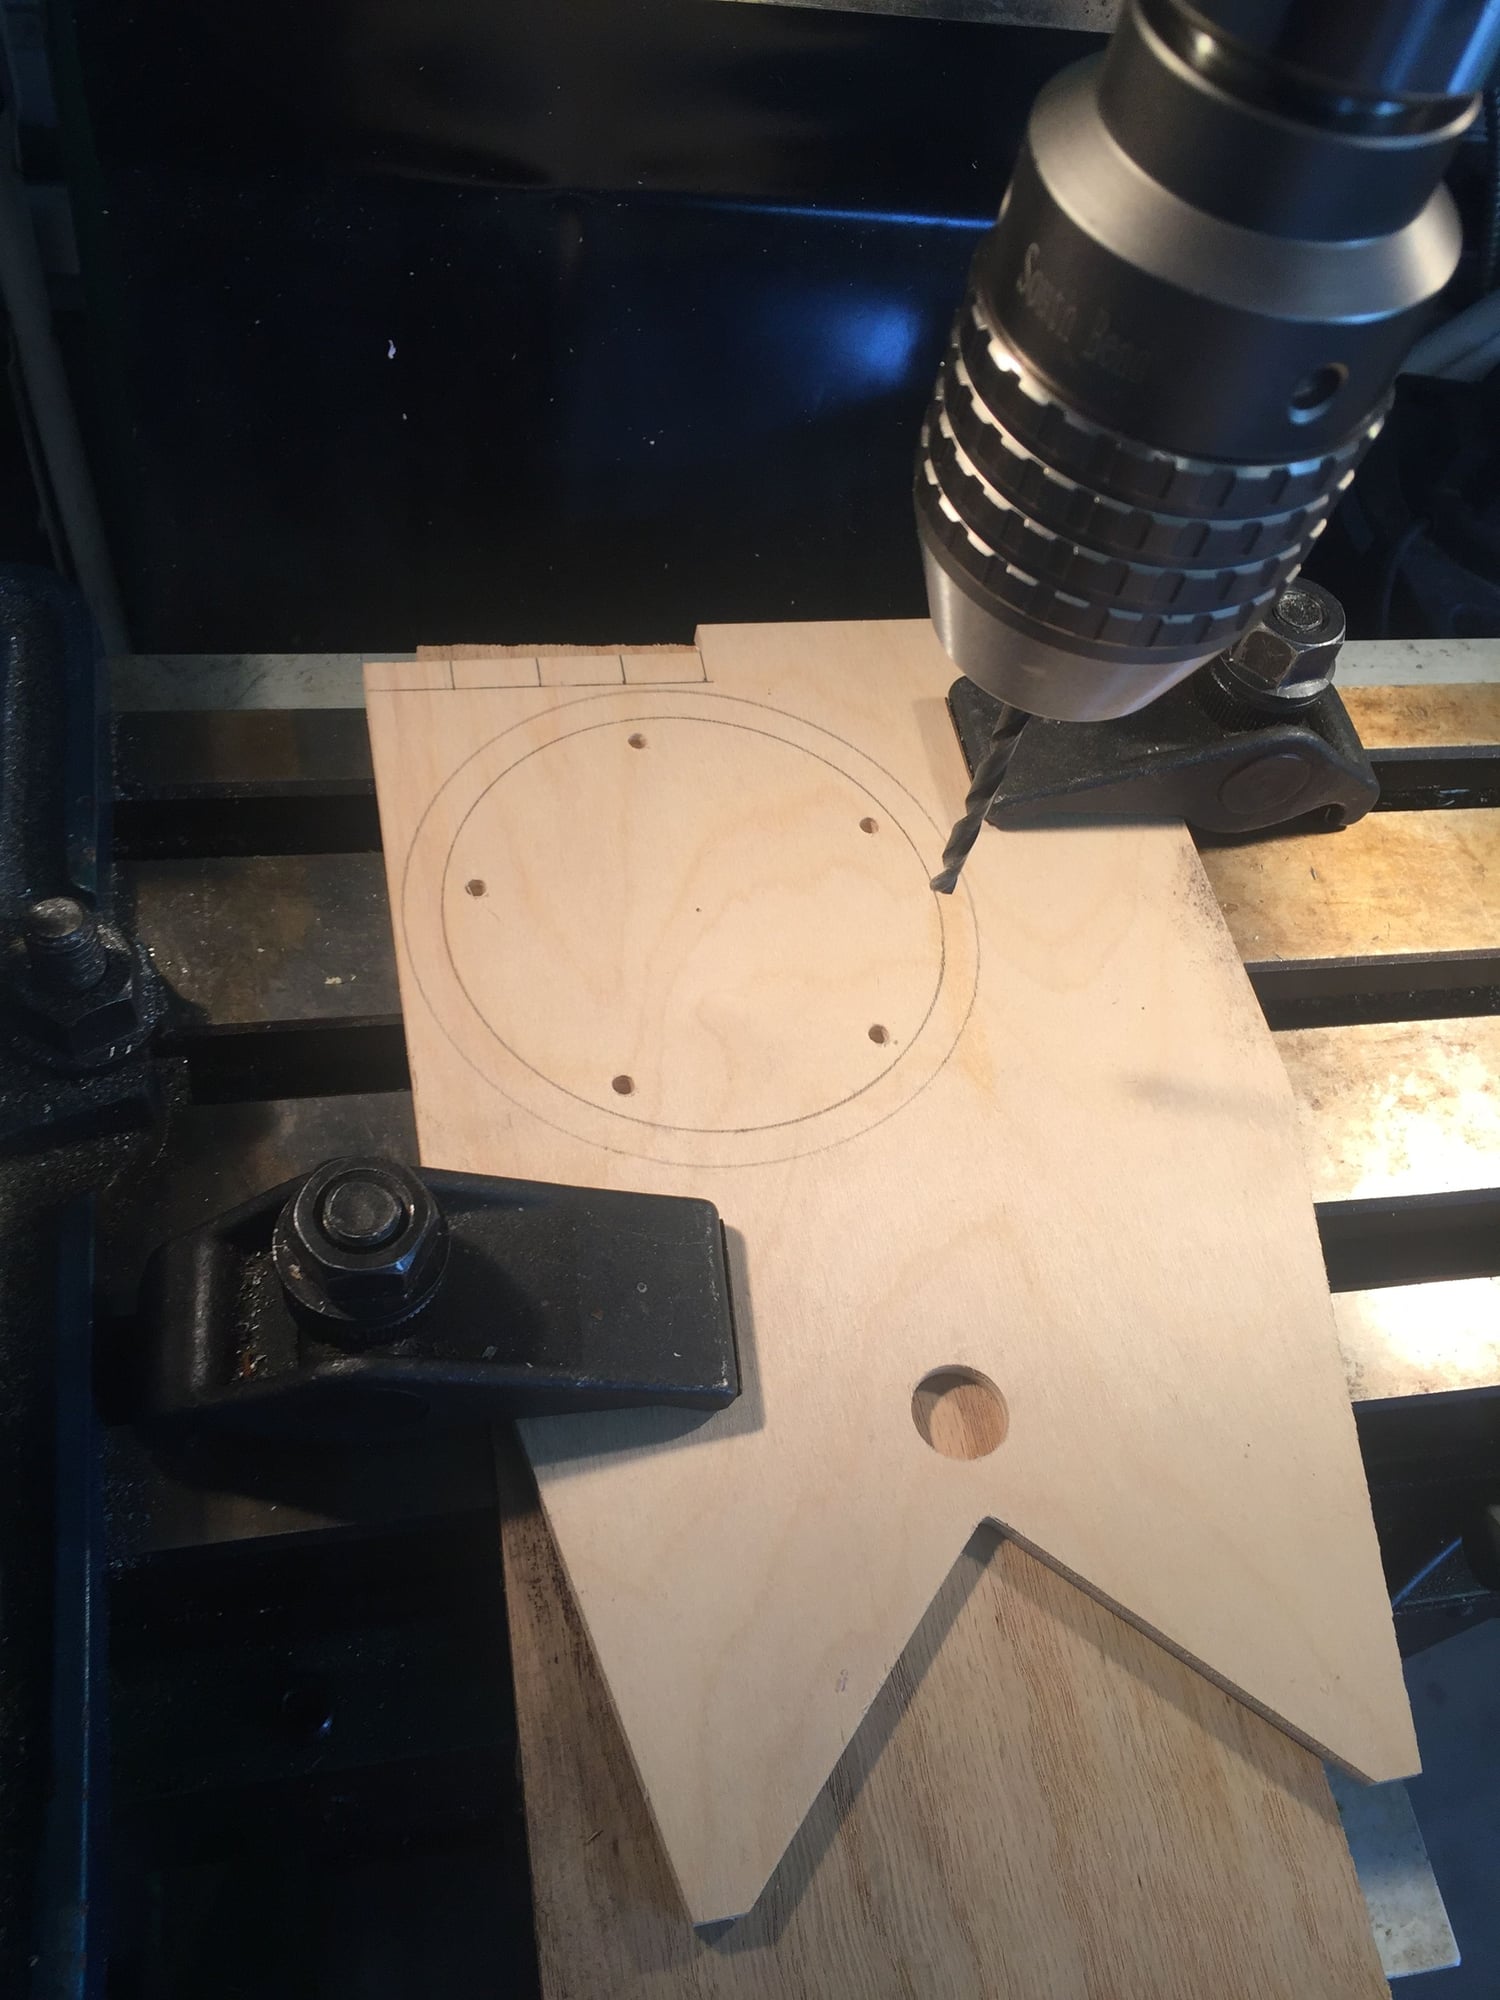
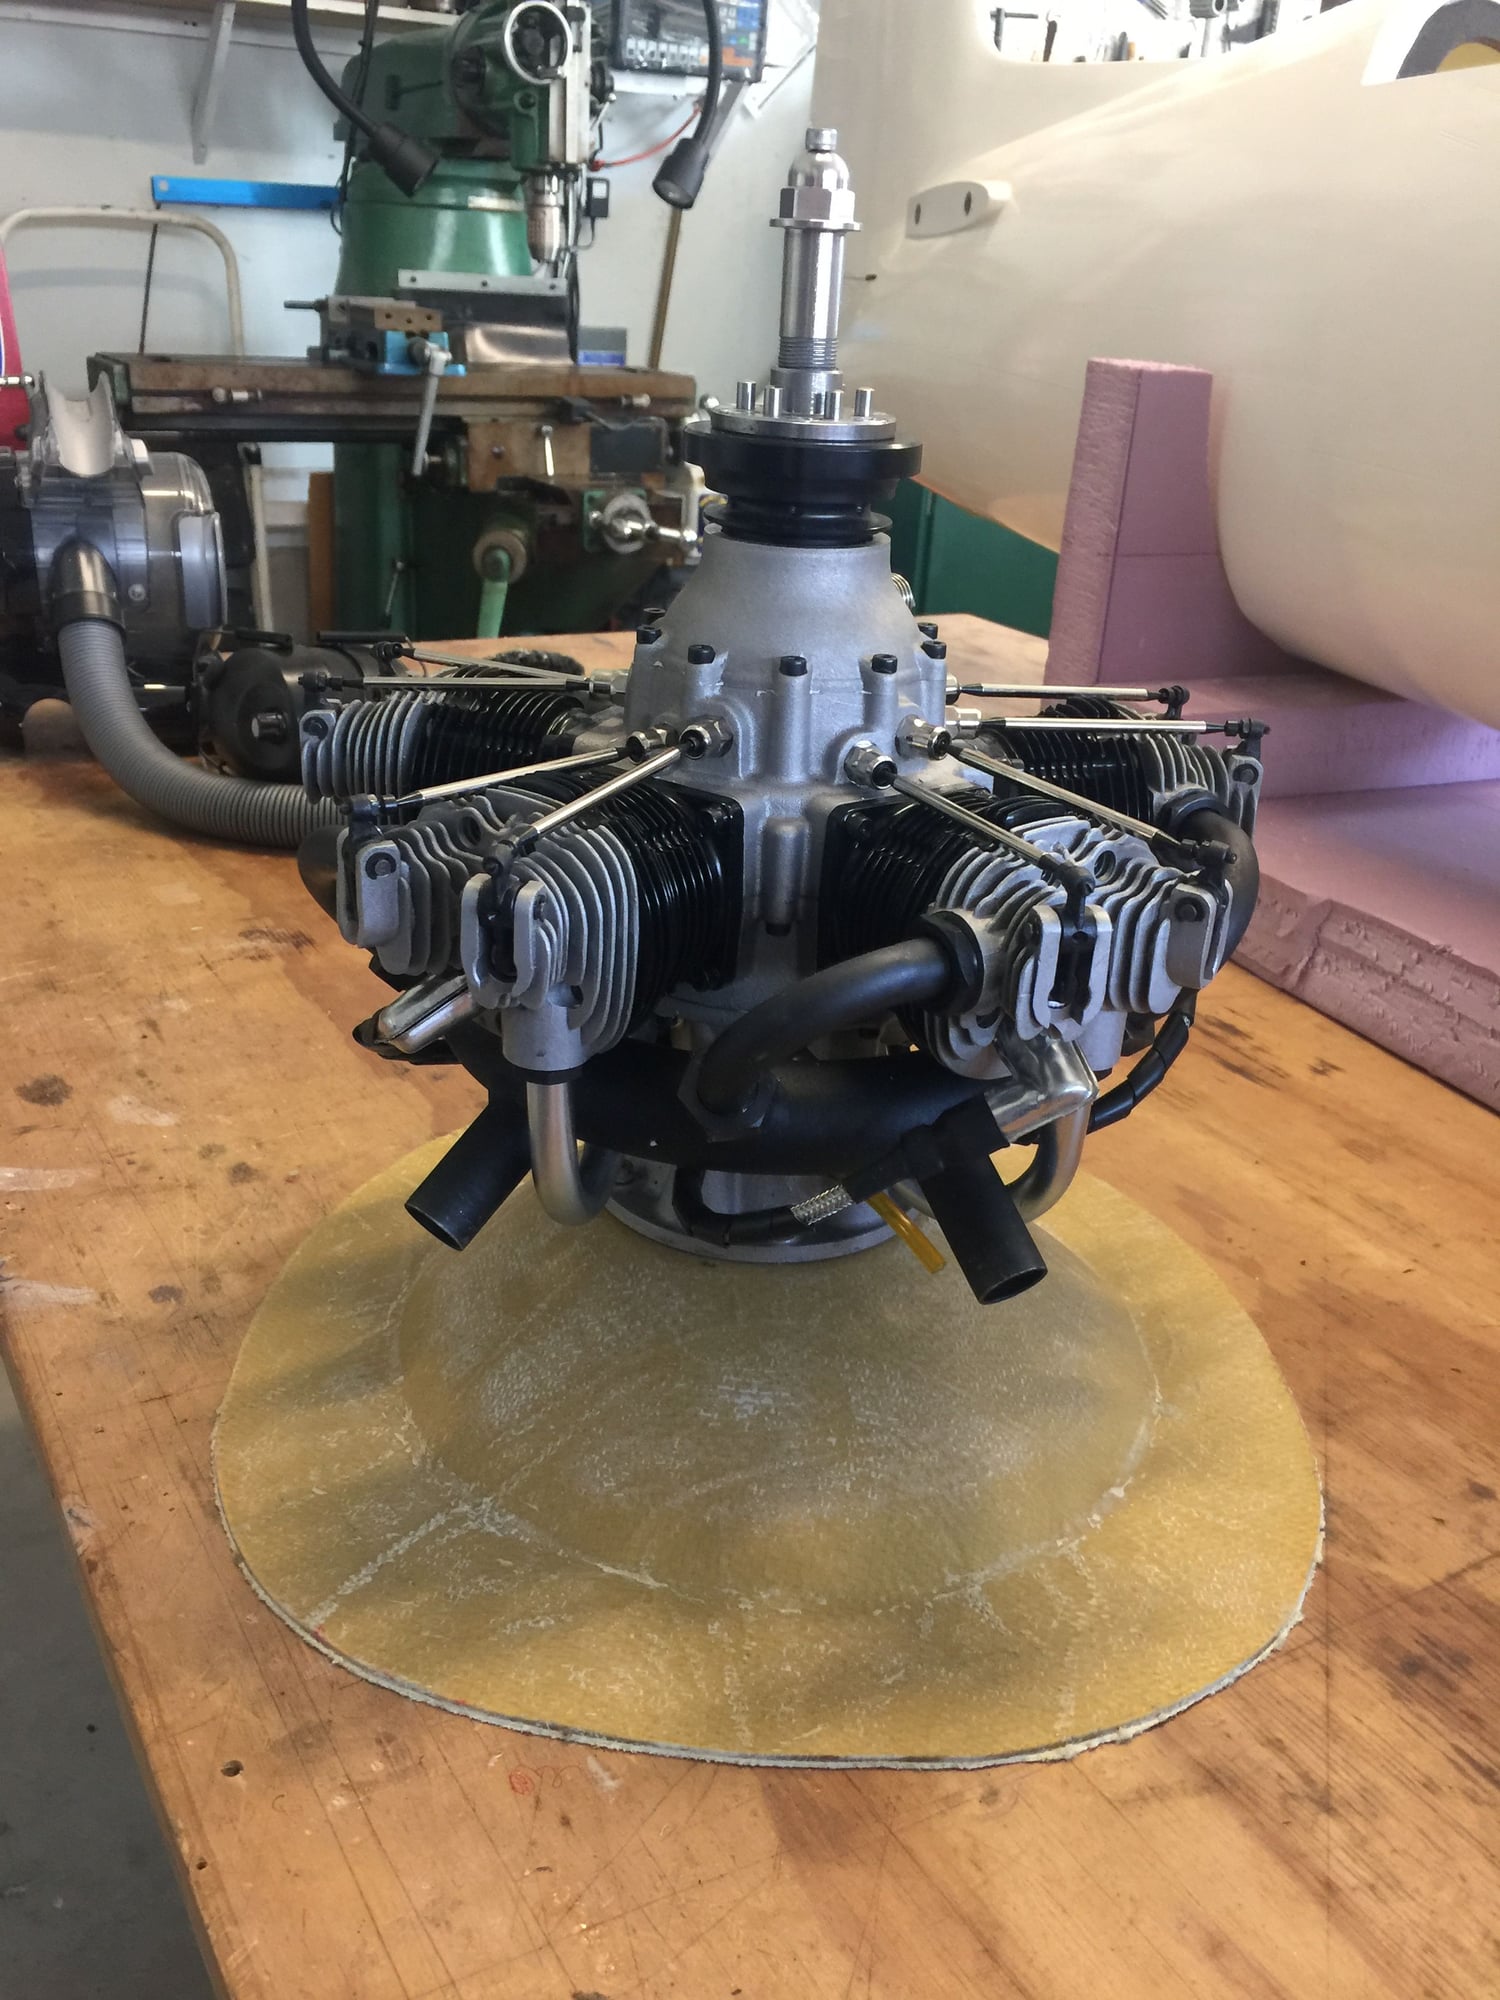
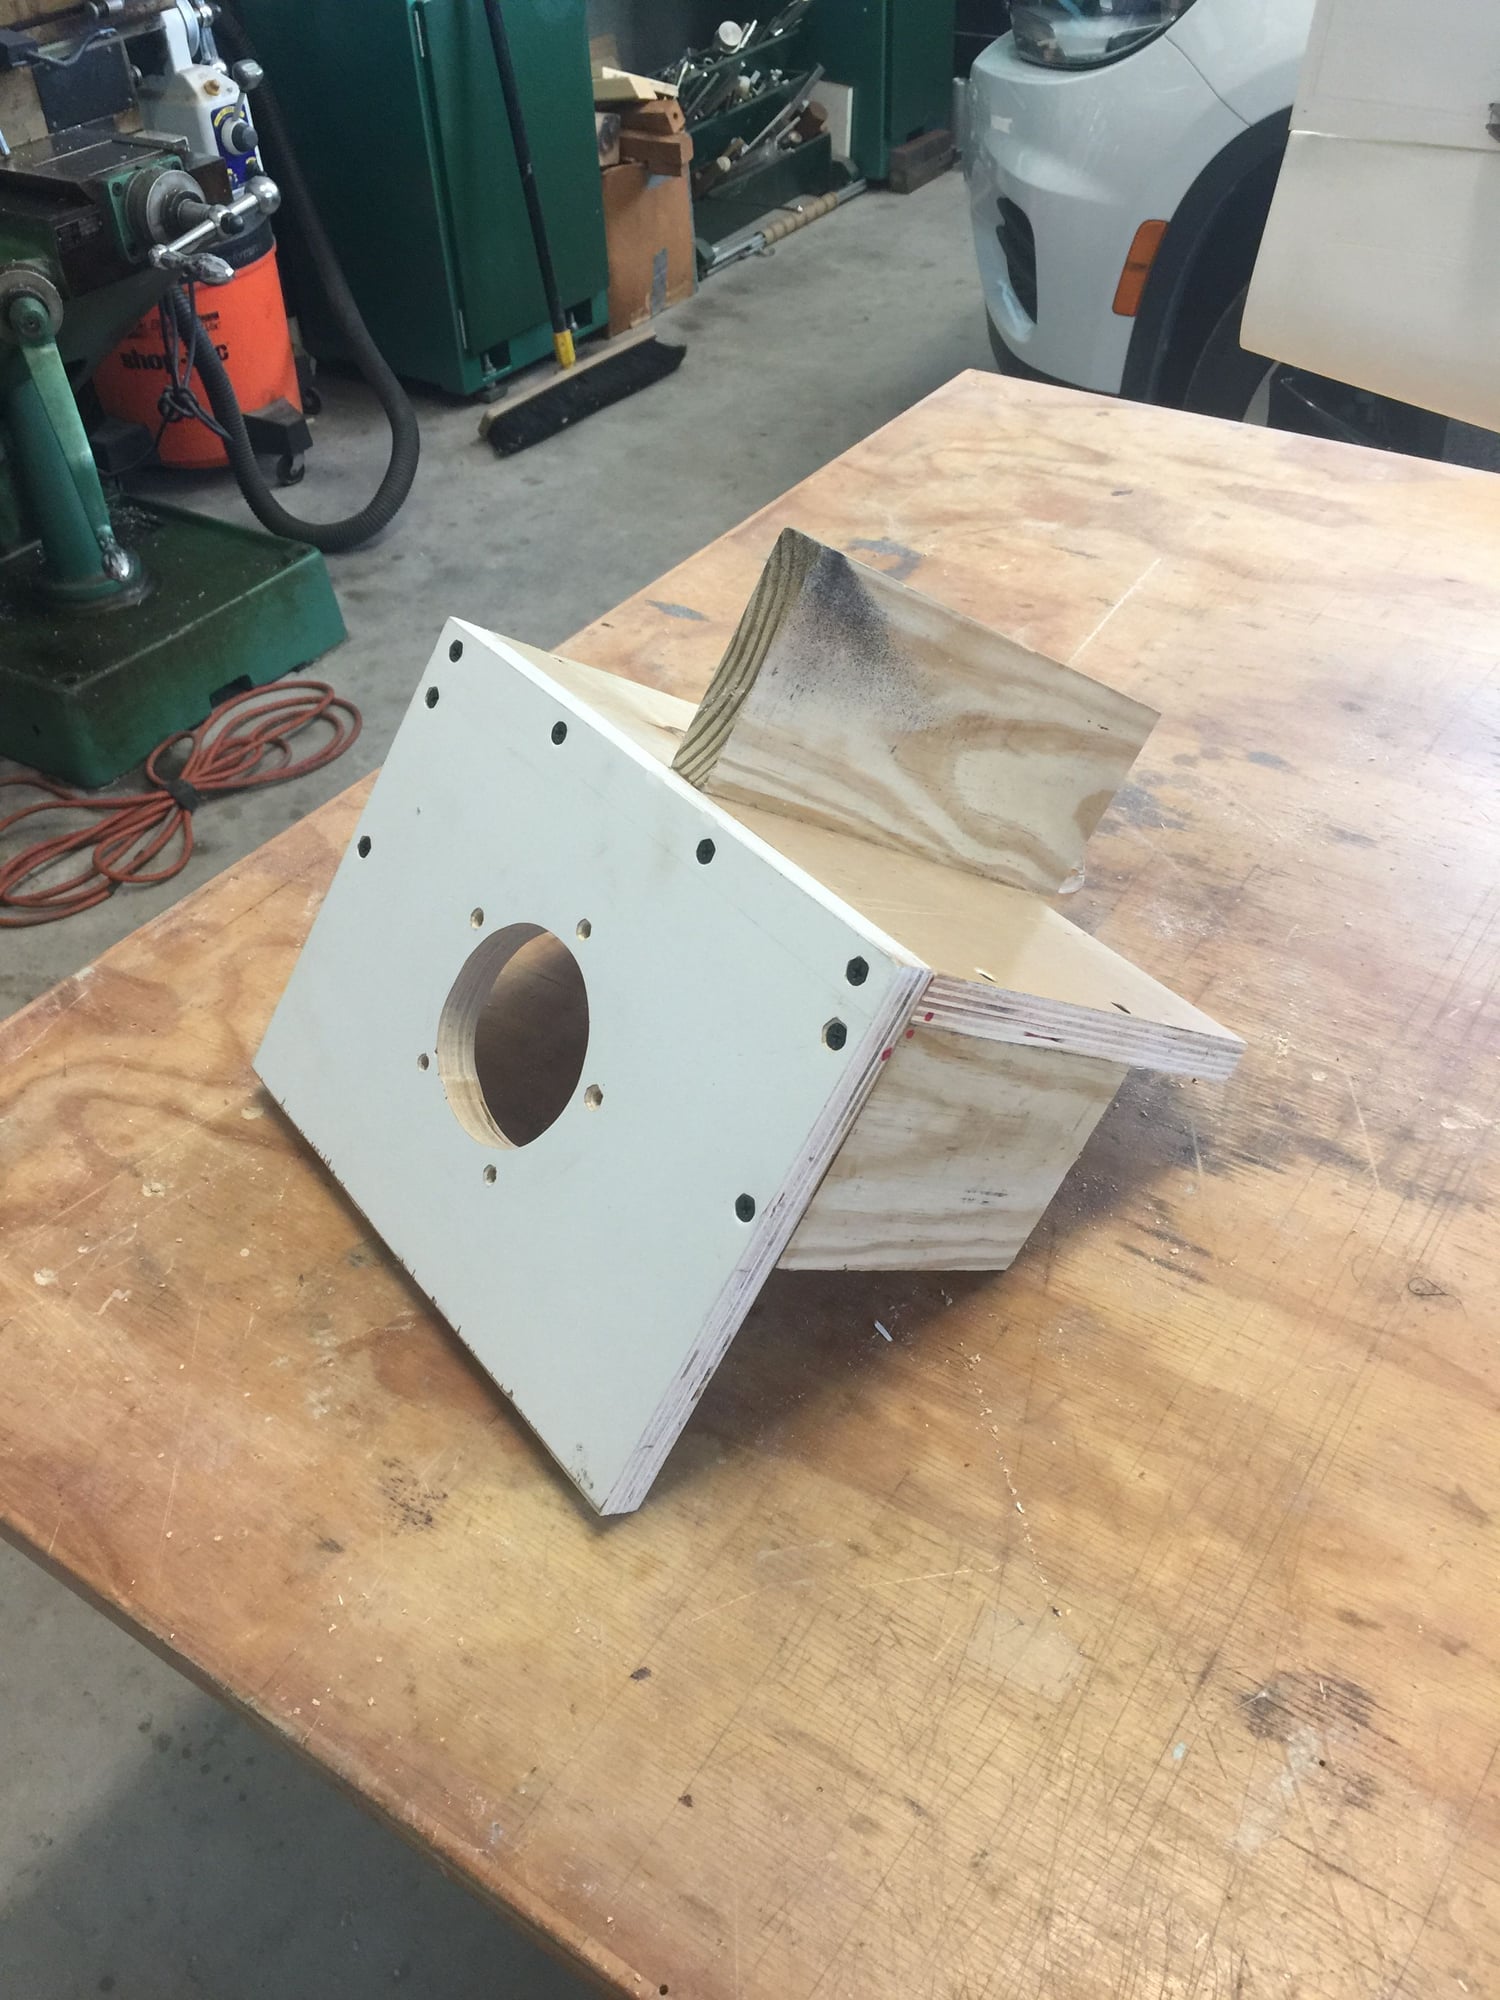
This is my �orientation jig.� Once I cover the dome with Kevlar all firewall orientation will be lost. So I drilled two small holes on the vertical axis of the plywood disk for locating pins to engage. The arm they are on is mounted with removable countersink screws. The paper pattern will be transferred to the base of the mold when it�s done 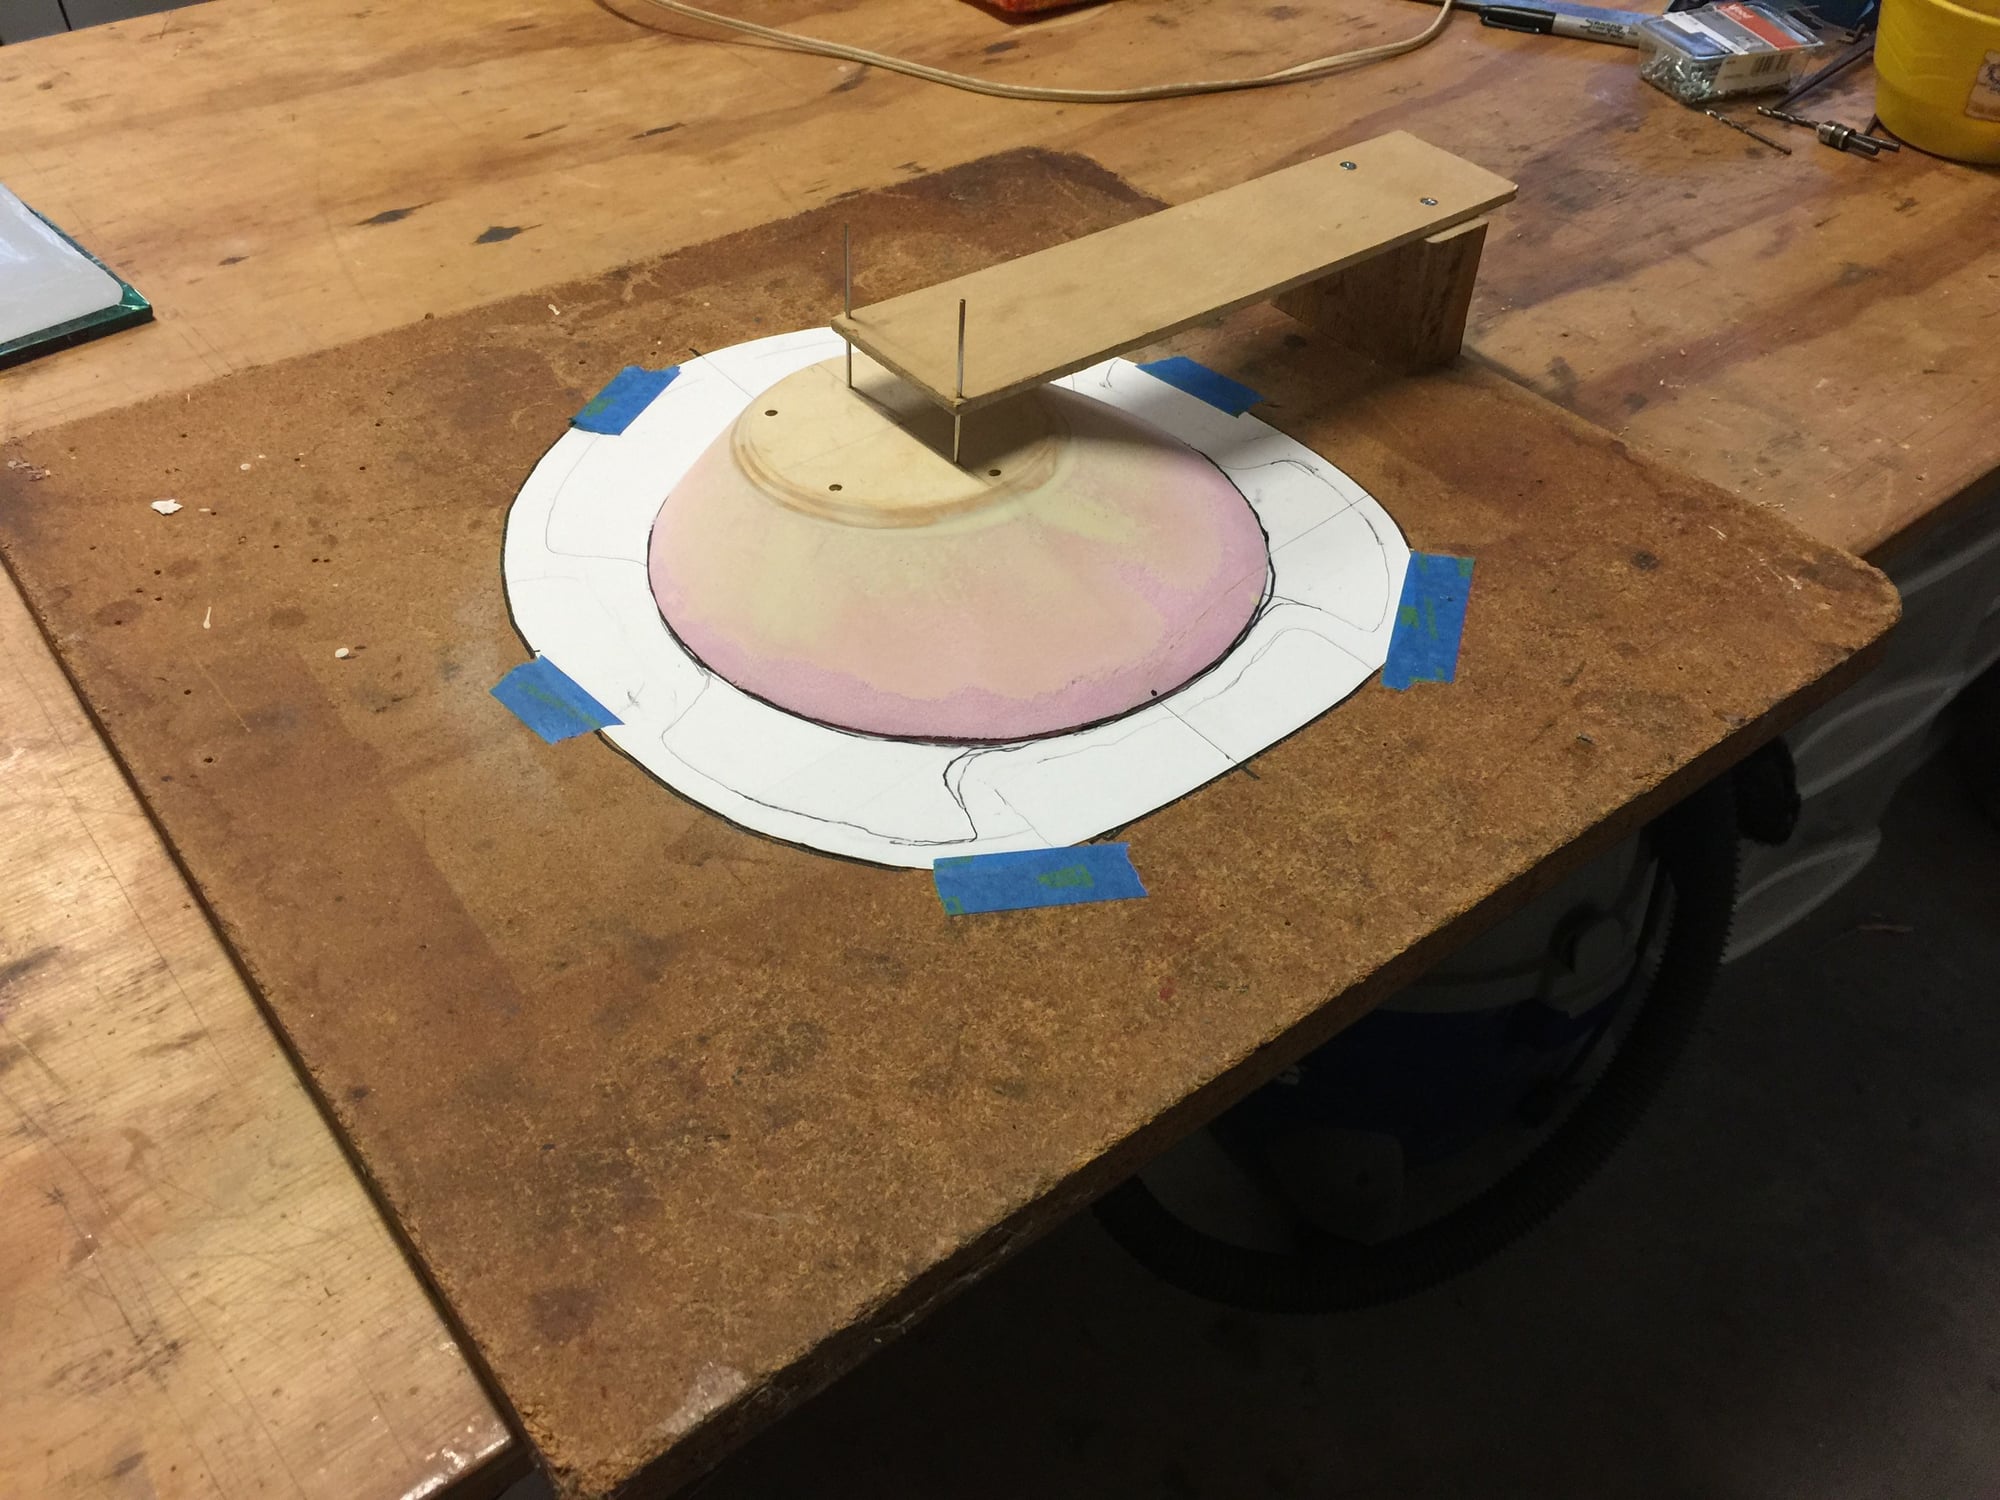
so I know where to cut.
so I know where to cut.
07-14-2019, 05:58 AM
#256
My Feedback: (7)
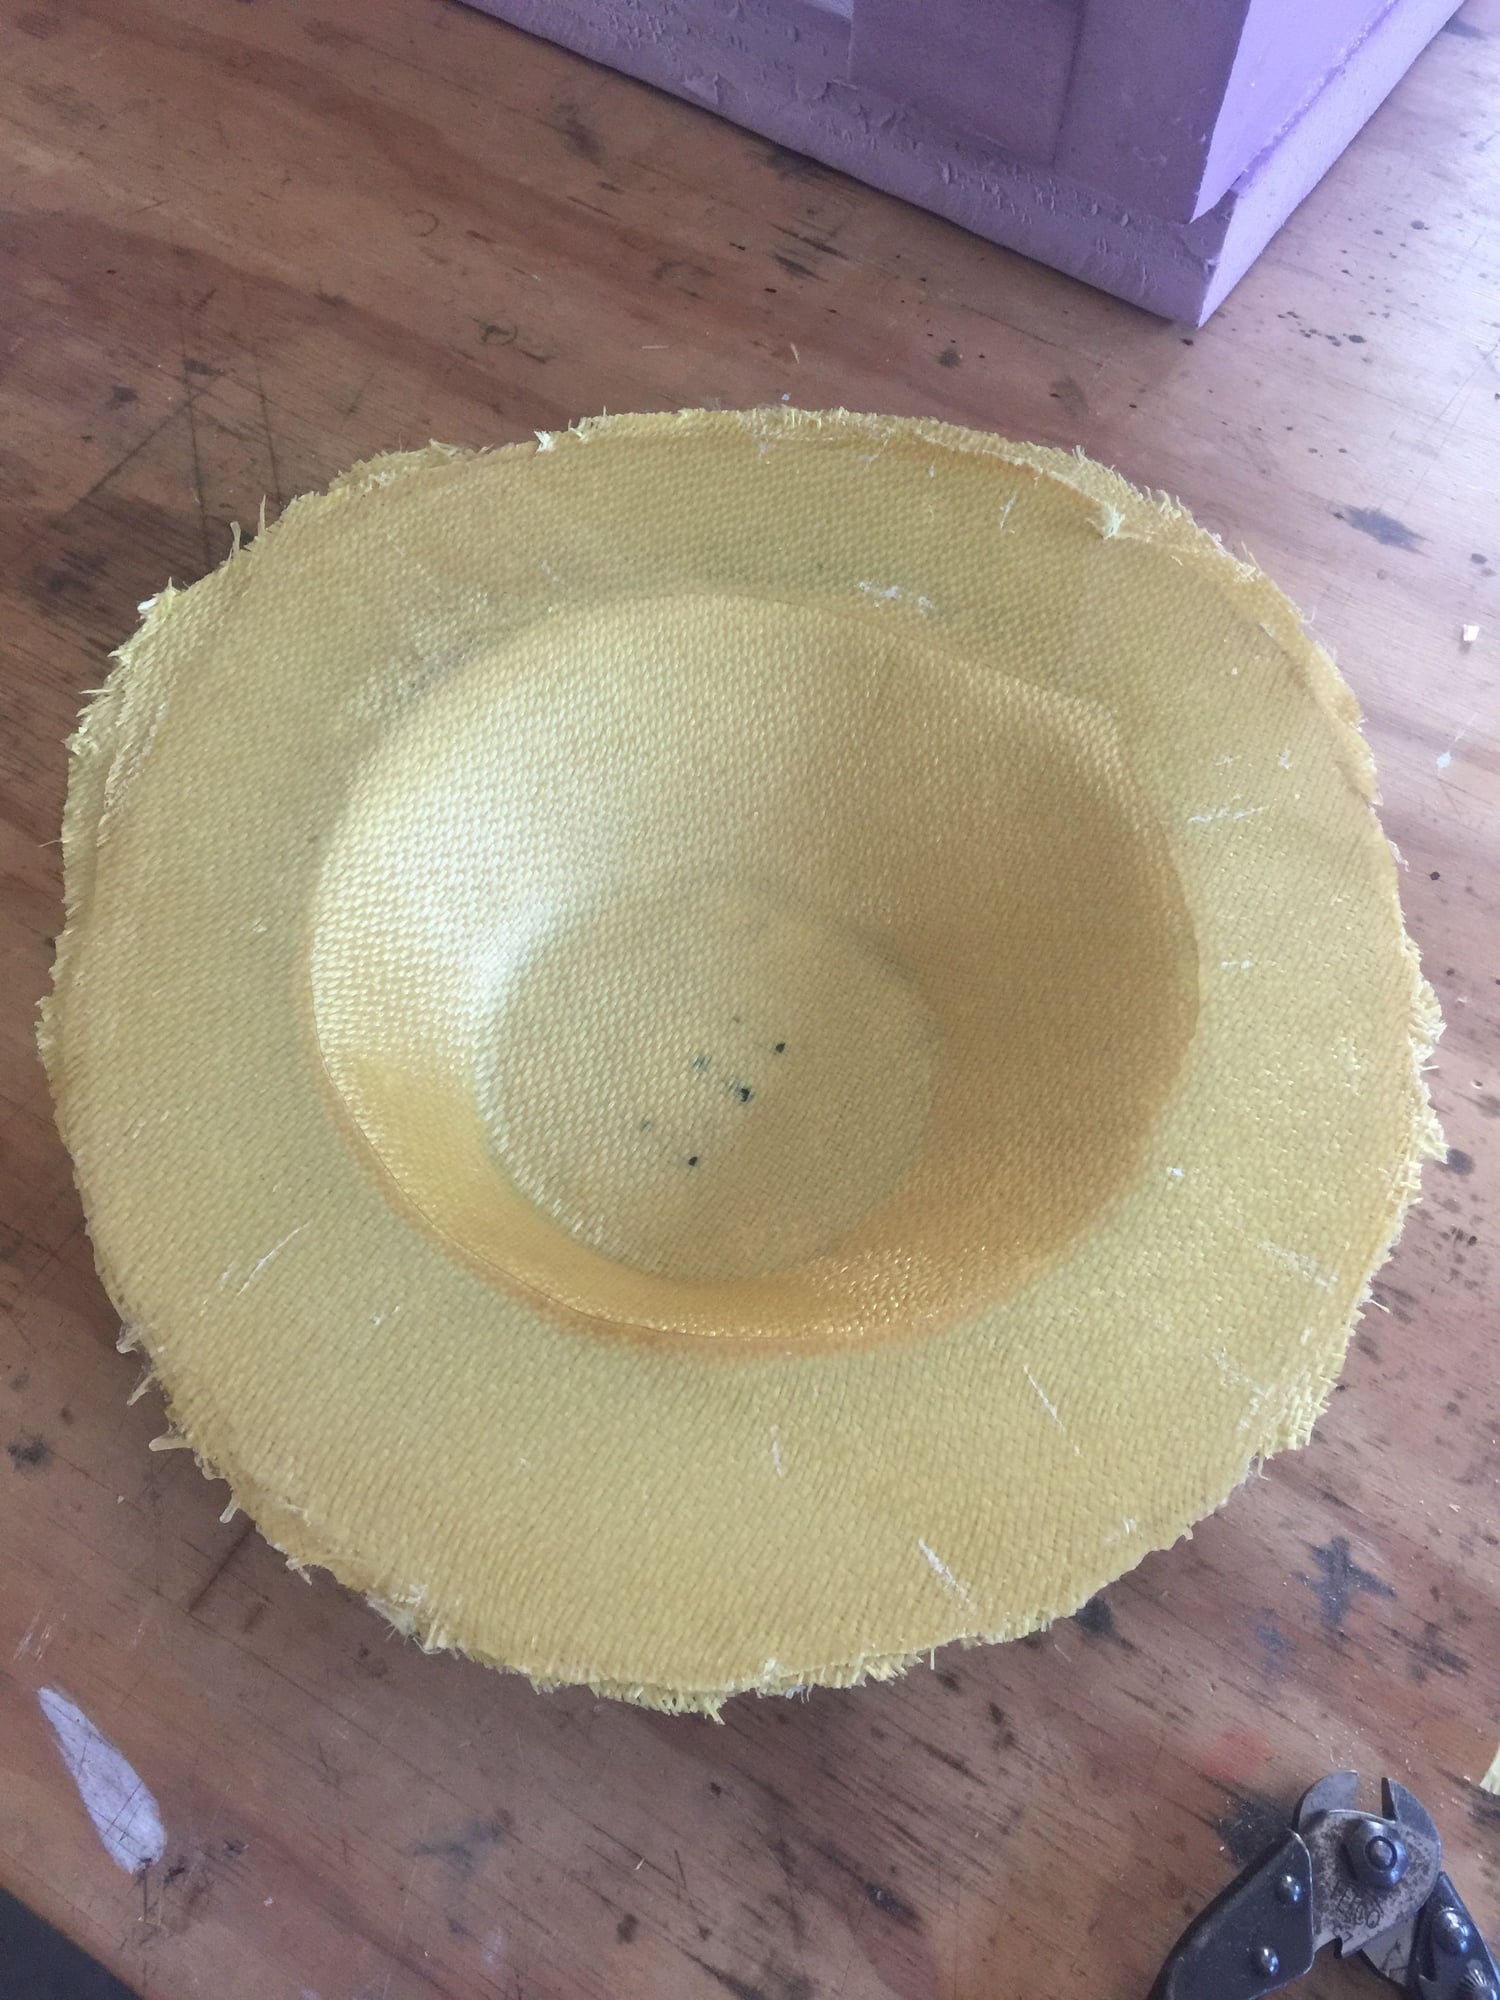
Well, it all worked well. Laid 5 layers of 6oz Kevlar over the plug and vacuum cured. After that the pattern transfer jig worked great and after cutting to size I hand laid 3 more layers of 6oz on the backside (total of 8 layers!) then flipped onto a glass plate to cure (picture). I�m pretty sure this motor mount would stop a bullet! 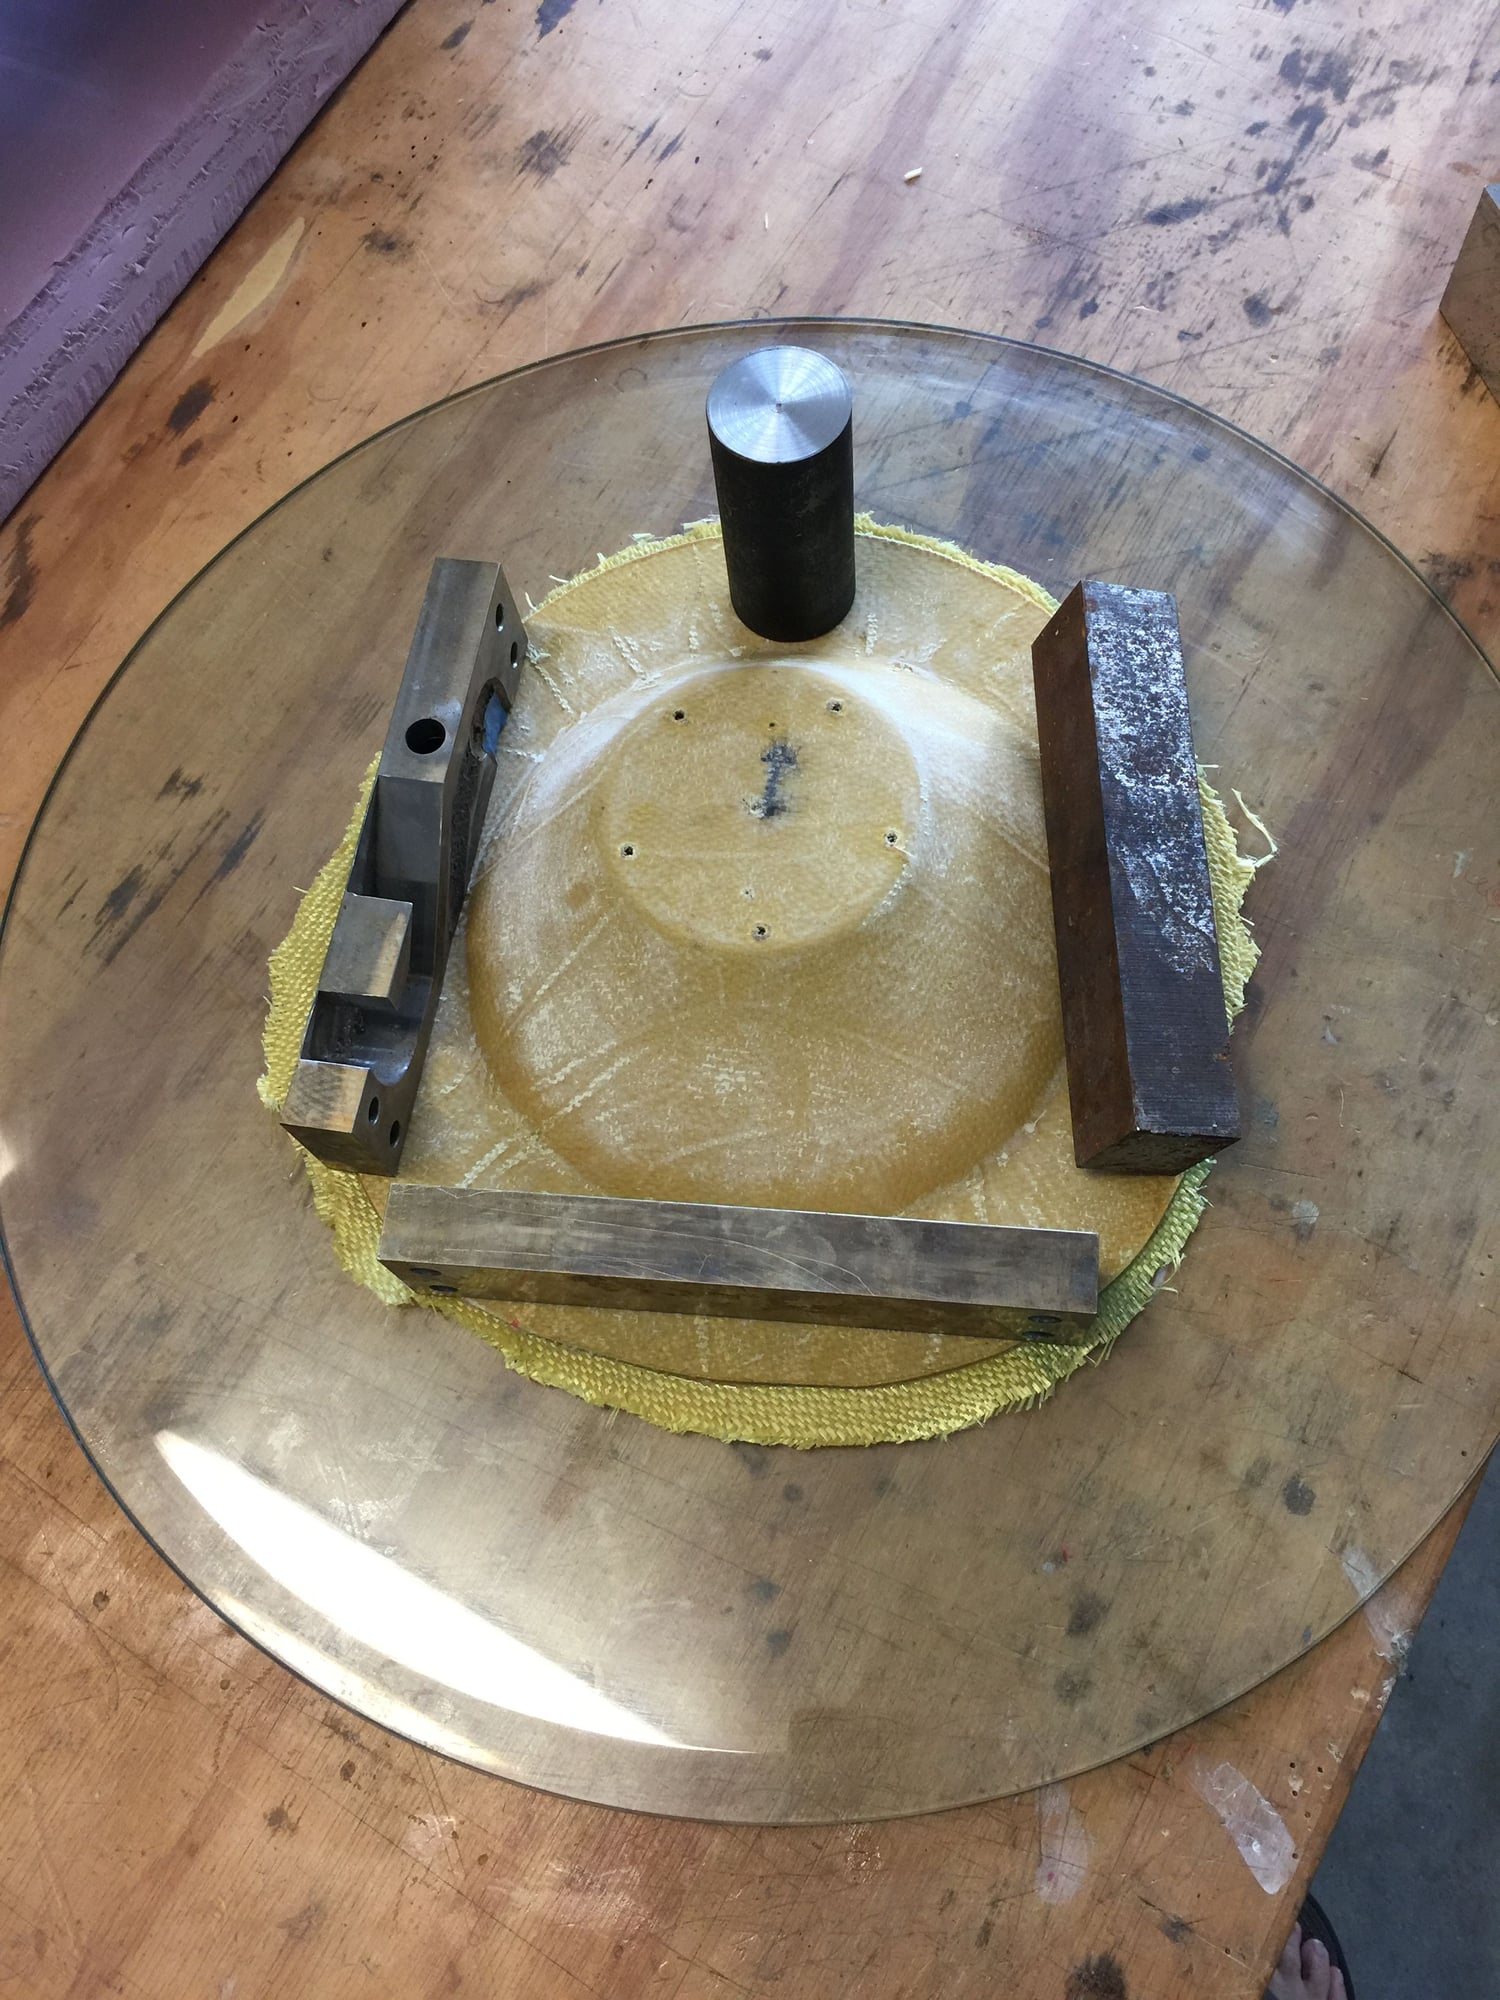
07-15-2019, 02:00 PM
#257
My Feedback: (7)
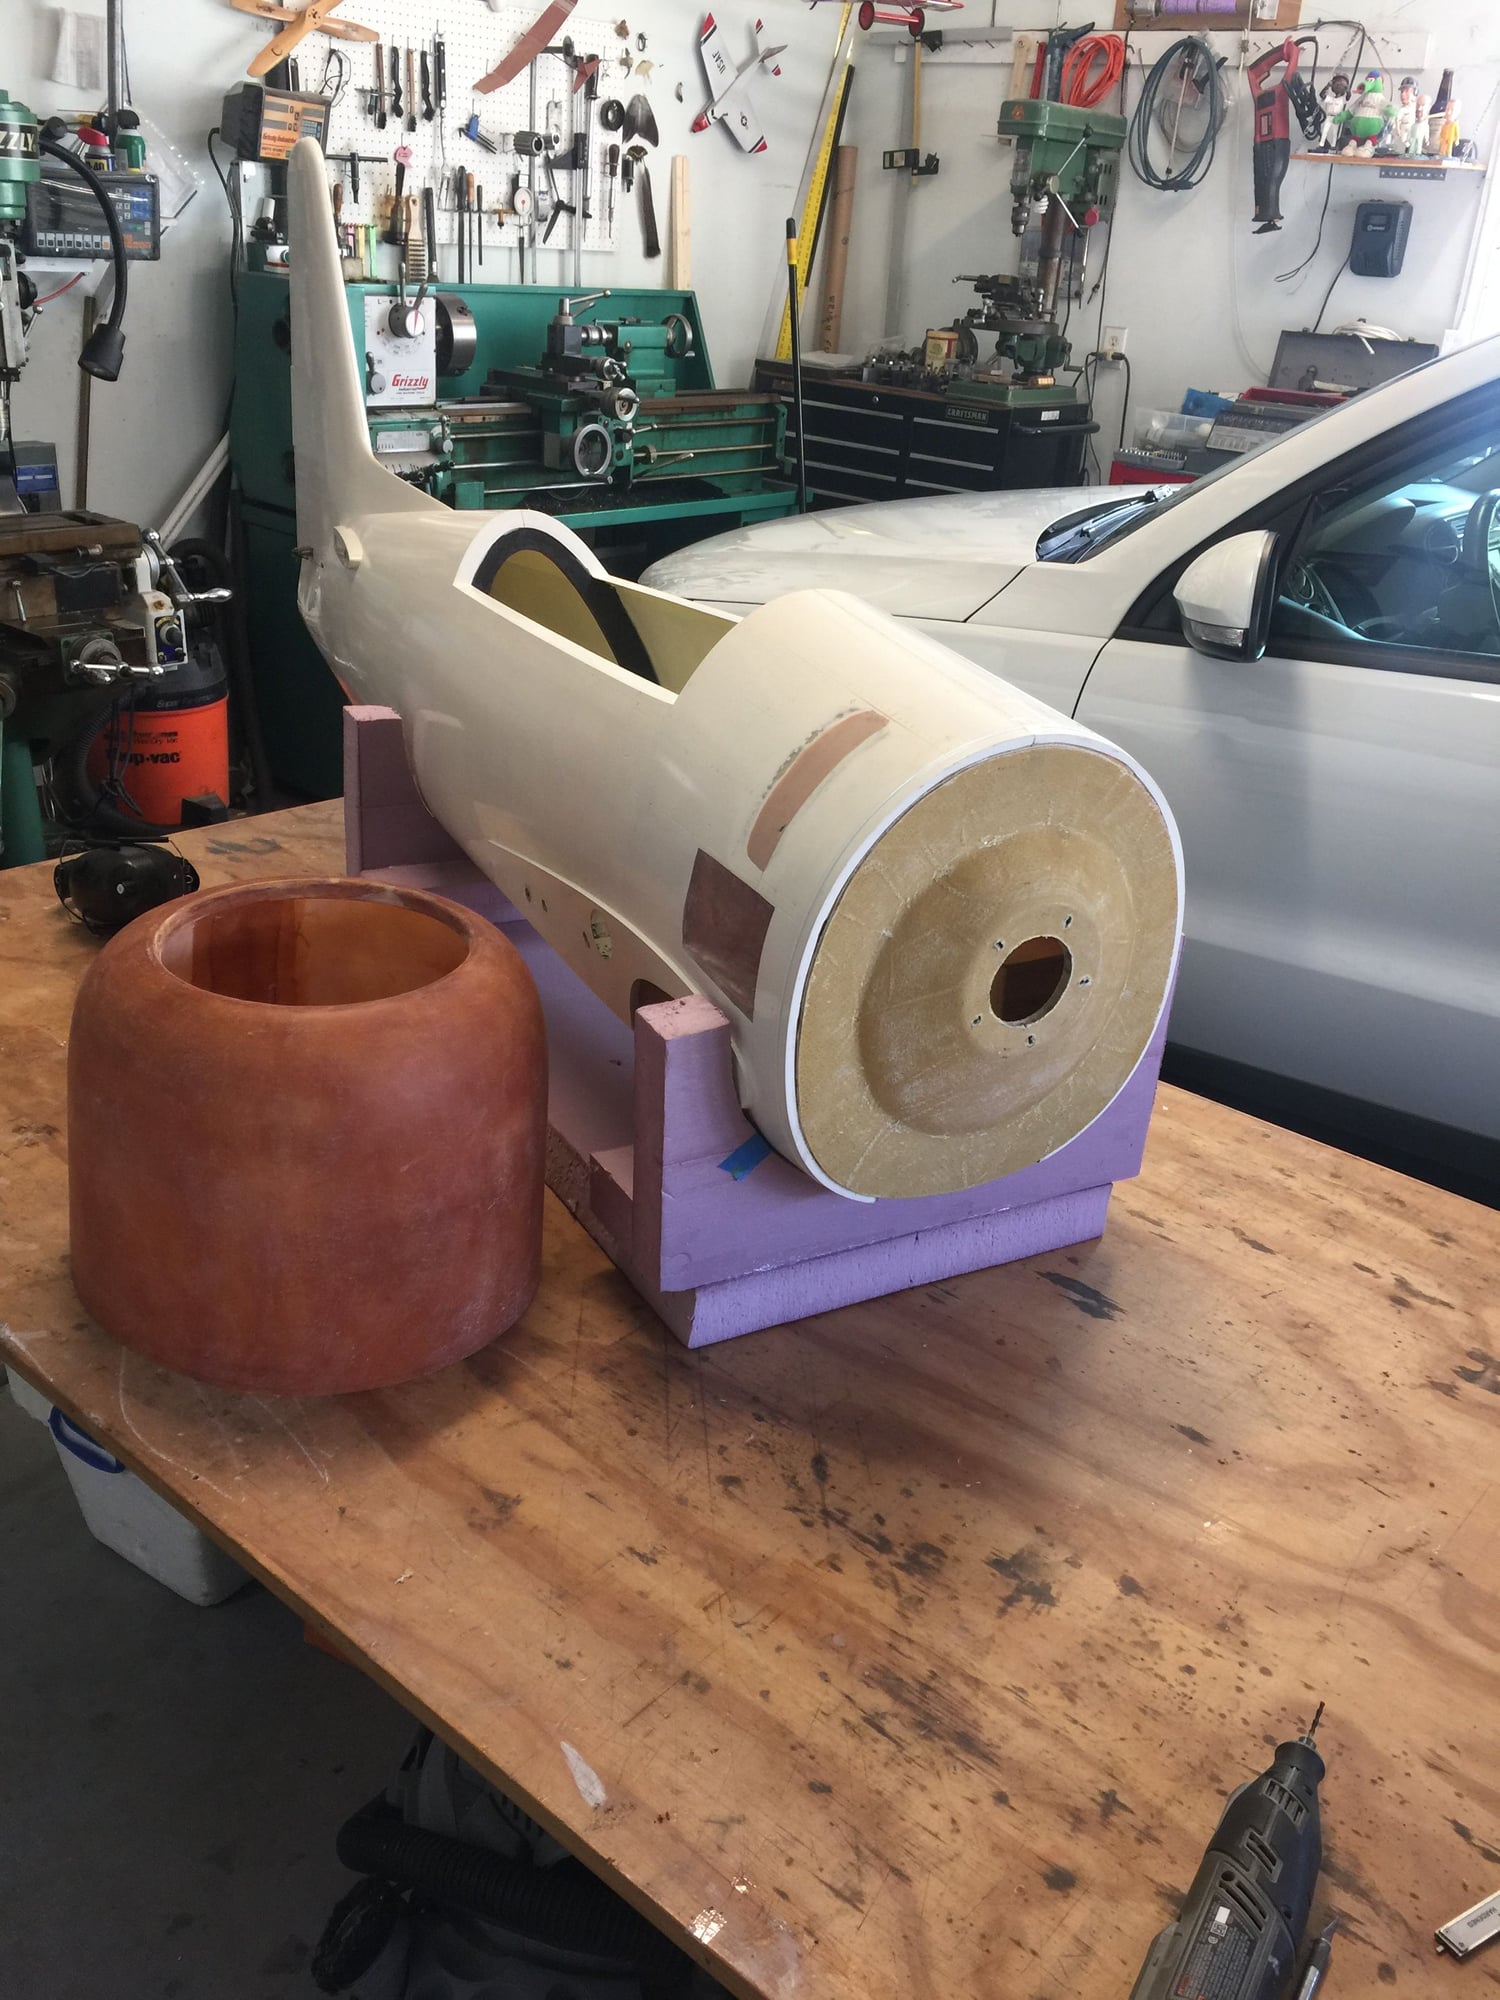
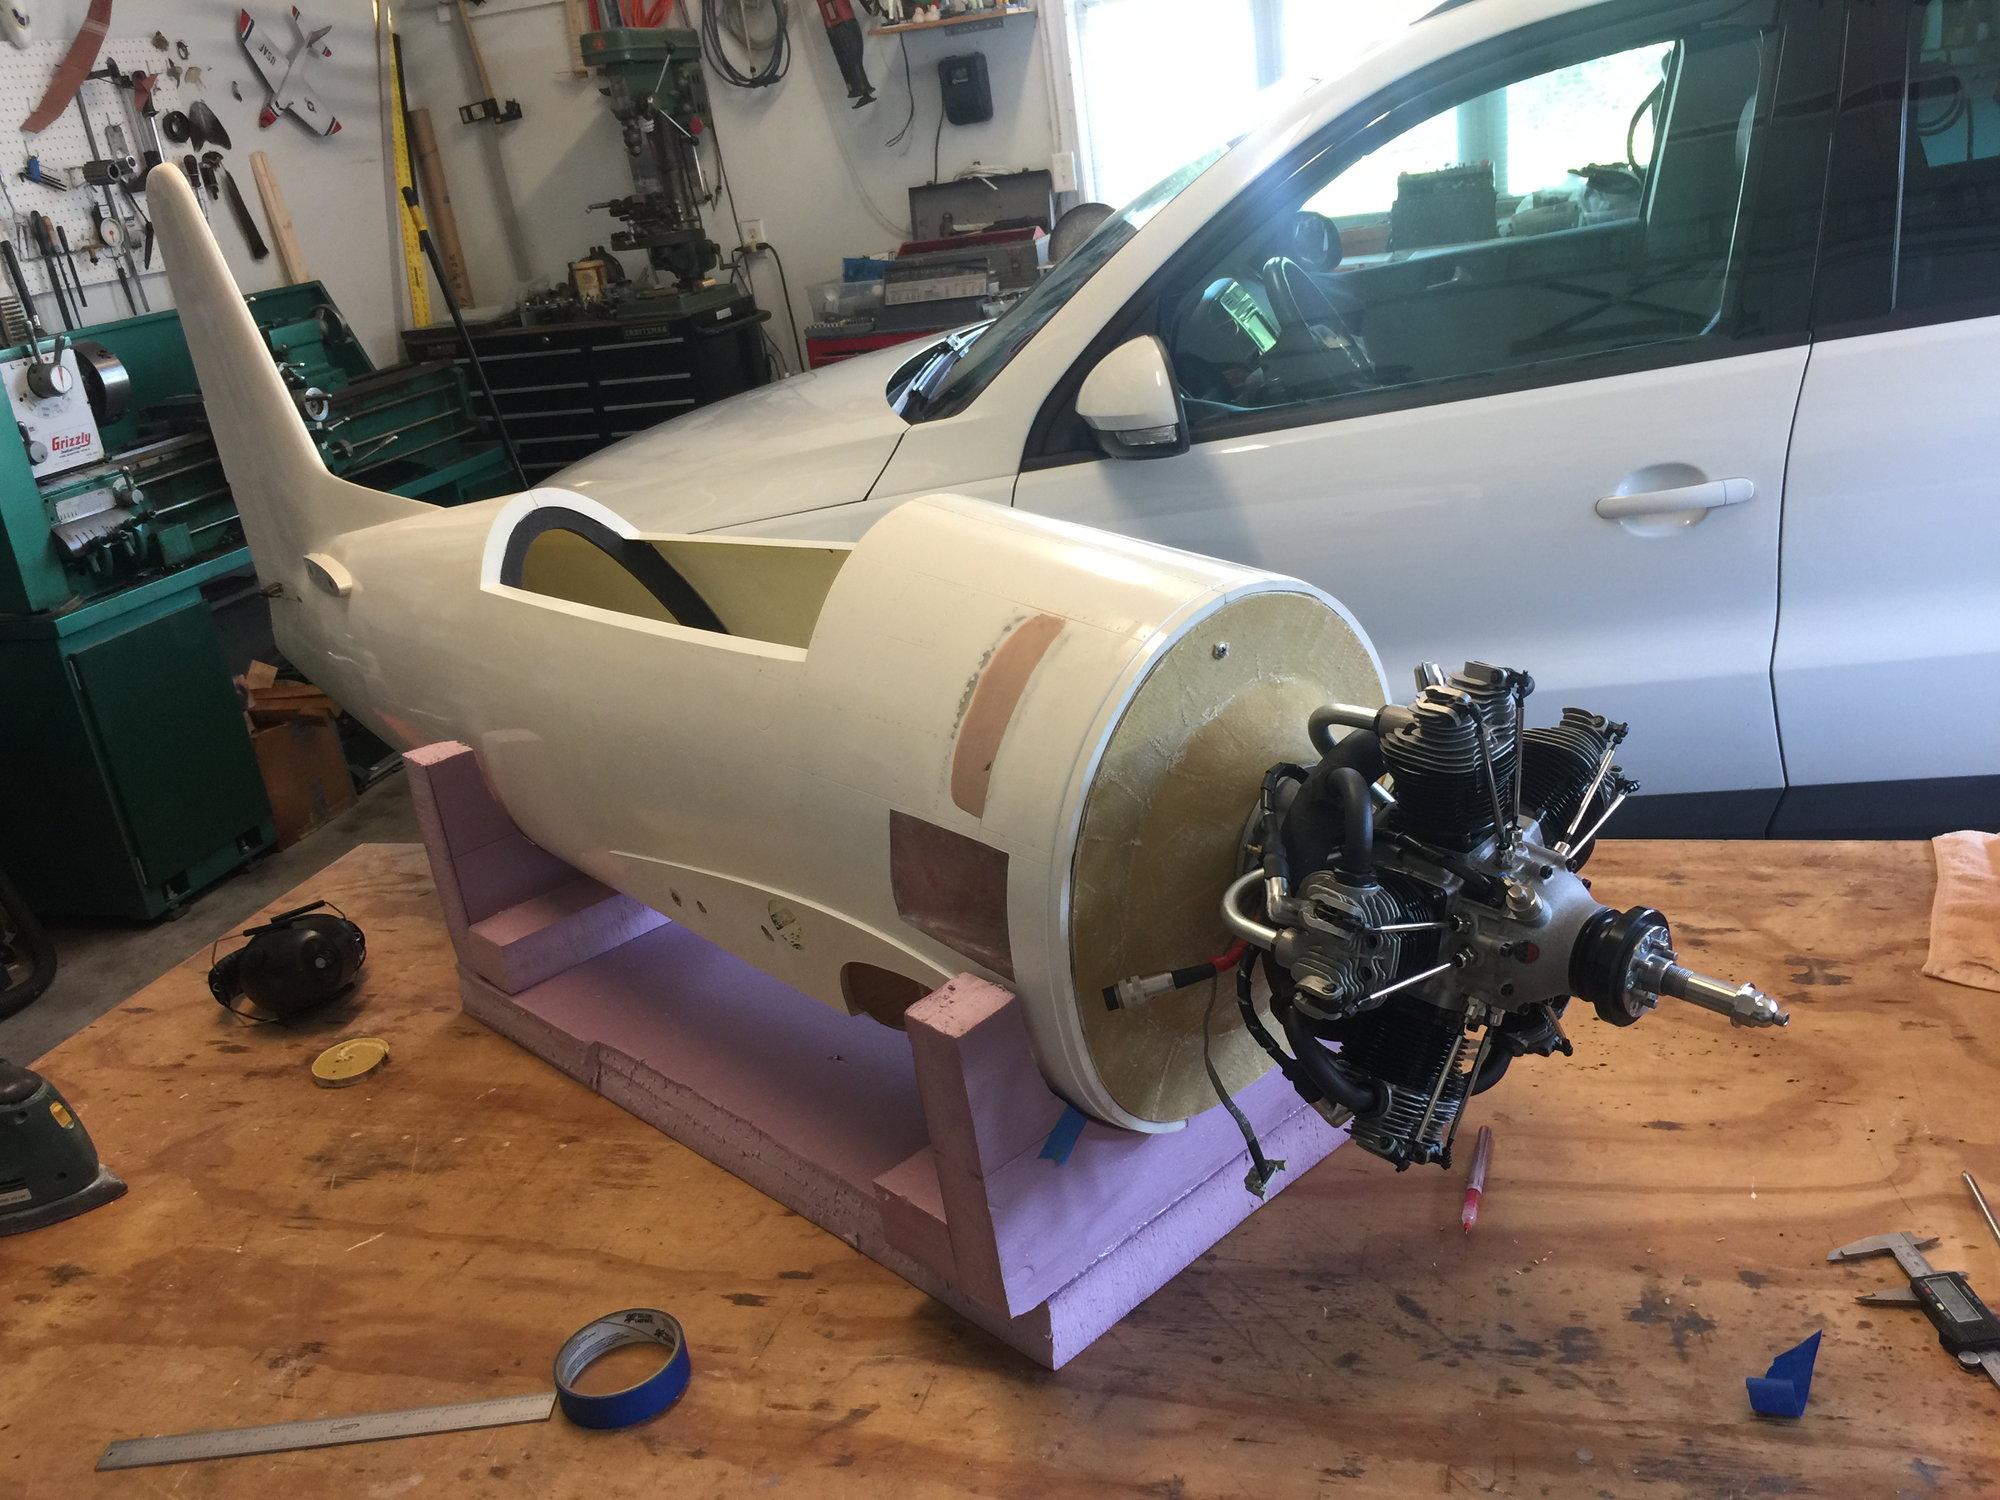
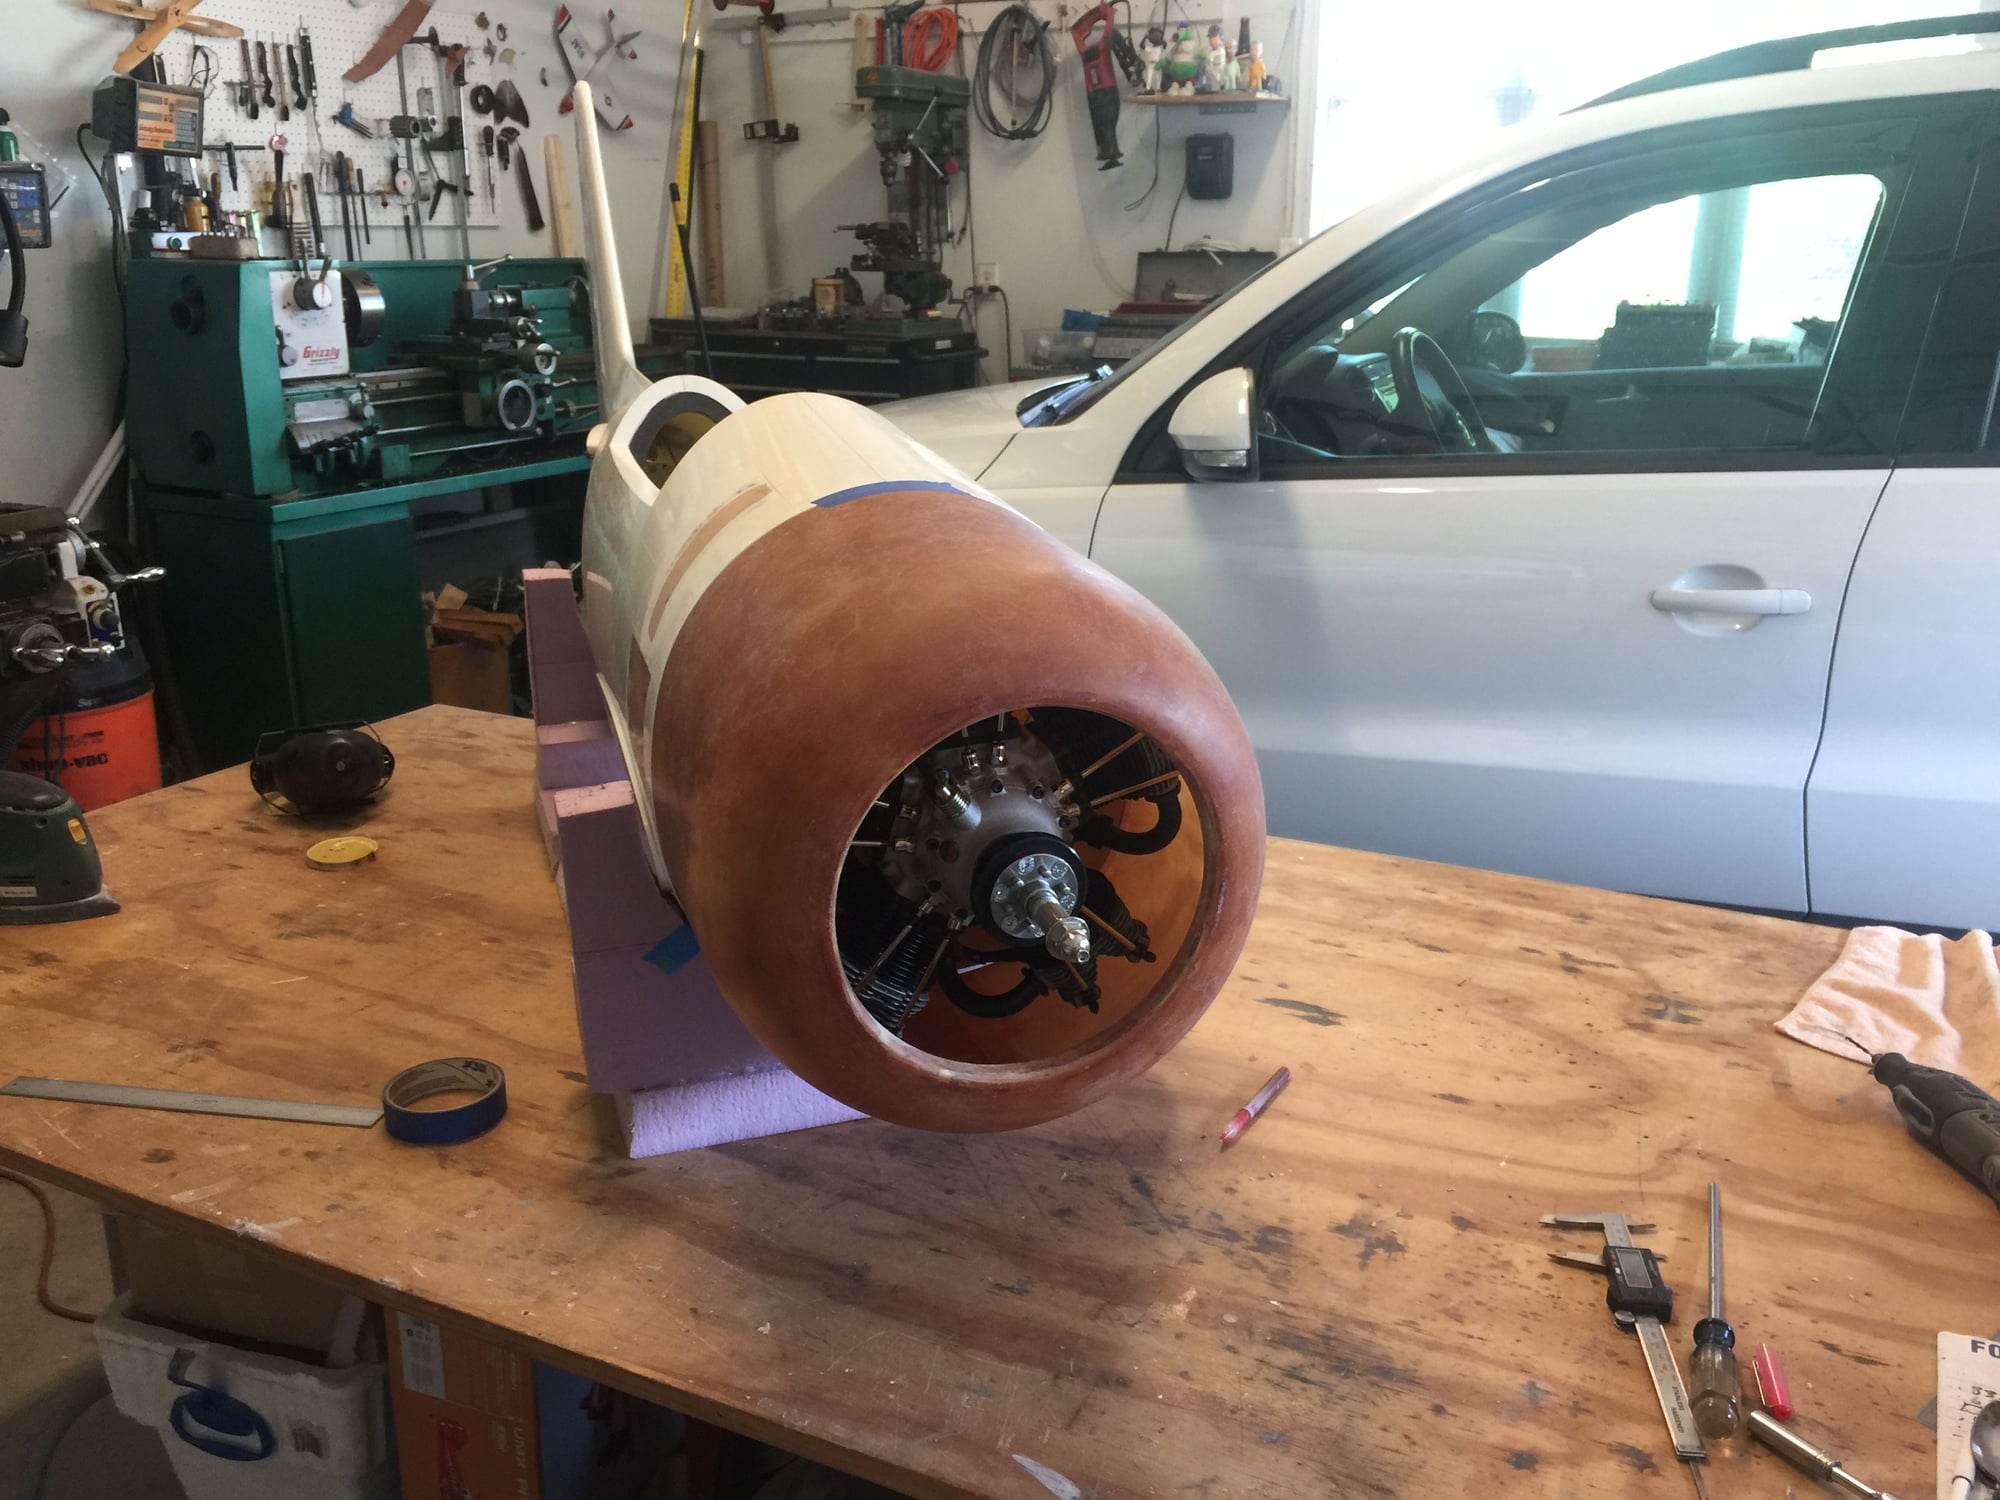
Making progress. I think Kevlar is the perfect material for this motor mount. It�s TOUGH and it absorbs vibes much better than carbon. BUT - it cannot be sanded. That�s just a price to pay with the stuff. I�m not going for pretty just STRONG (and light). Pictures in no particular order:


Last edited by mitchilito; 07-15-2019 at 02:42 PM.


 07-19-2019, 05:54 AM
#261
Thread Starter

Some airframe issues early on, like on the ailerons with the pre-set hinges. Lost one aileron once. Lucky to still have it.. so just make sure those phenolic hinges are glued good and then I balanced the aileron. The Engine is perfect. Never an issue and running with fuel pump for over three years. Every season starts right up. On the smoke I used a header tank like on turbines, it gives a constant stream of smoke. The photo is the beginning of a big loop and the engine just pulls the 52# plane right through.
07-19-2019, 03:00 PM
#263
Thread Starter
Yes. In the very beginning when I turned the pump on it immediately flooded the engine. I finally sent it to Julian at JM to look at it. He found no issues and sent it back. I installed and the problem was gone. Who the heck knows. Problem never came back again. Several years ago Greg came to help me maiden. I�m glad he did. At that time it was the largest and heaviest plane I flew. He checked everything over and talked me through my anxiety
 08-17-2019, 11:25 AM
#267
My Feedback: (7)
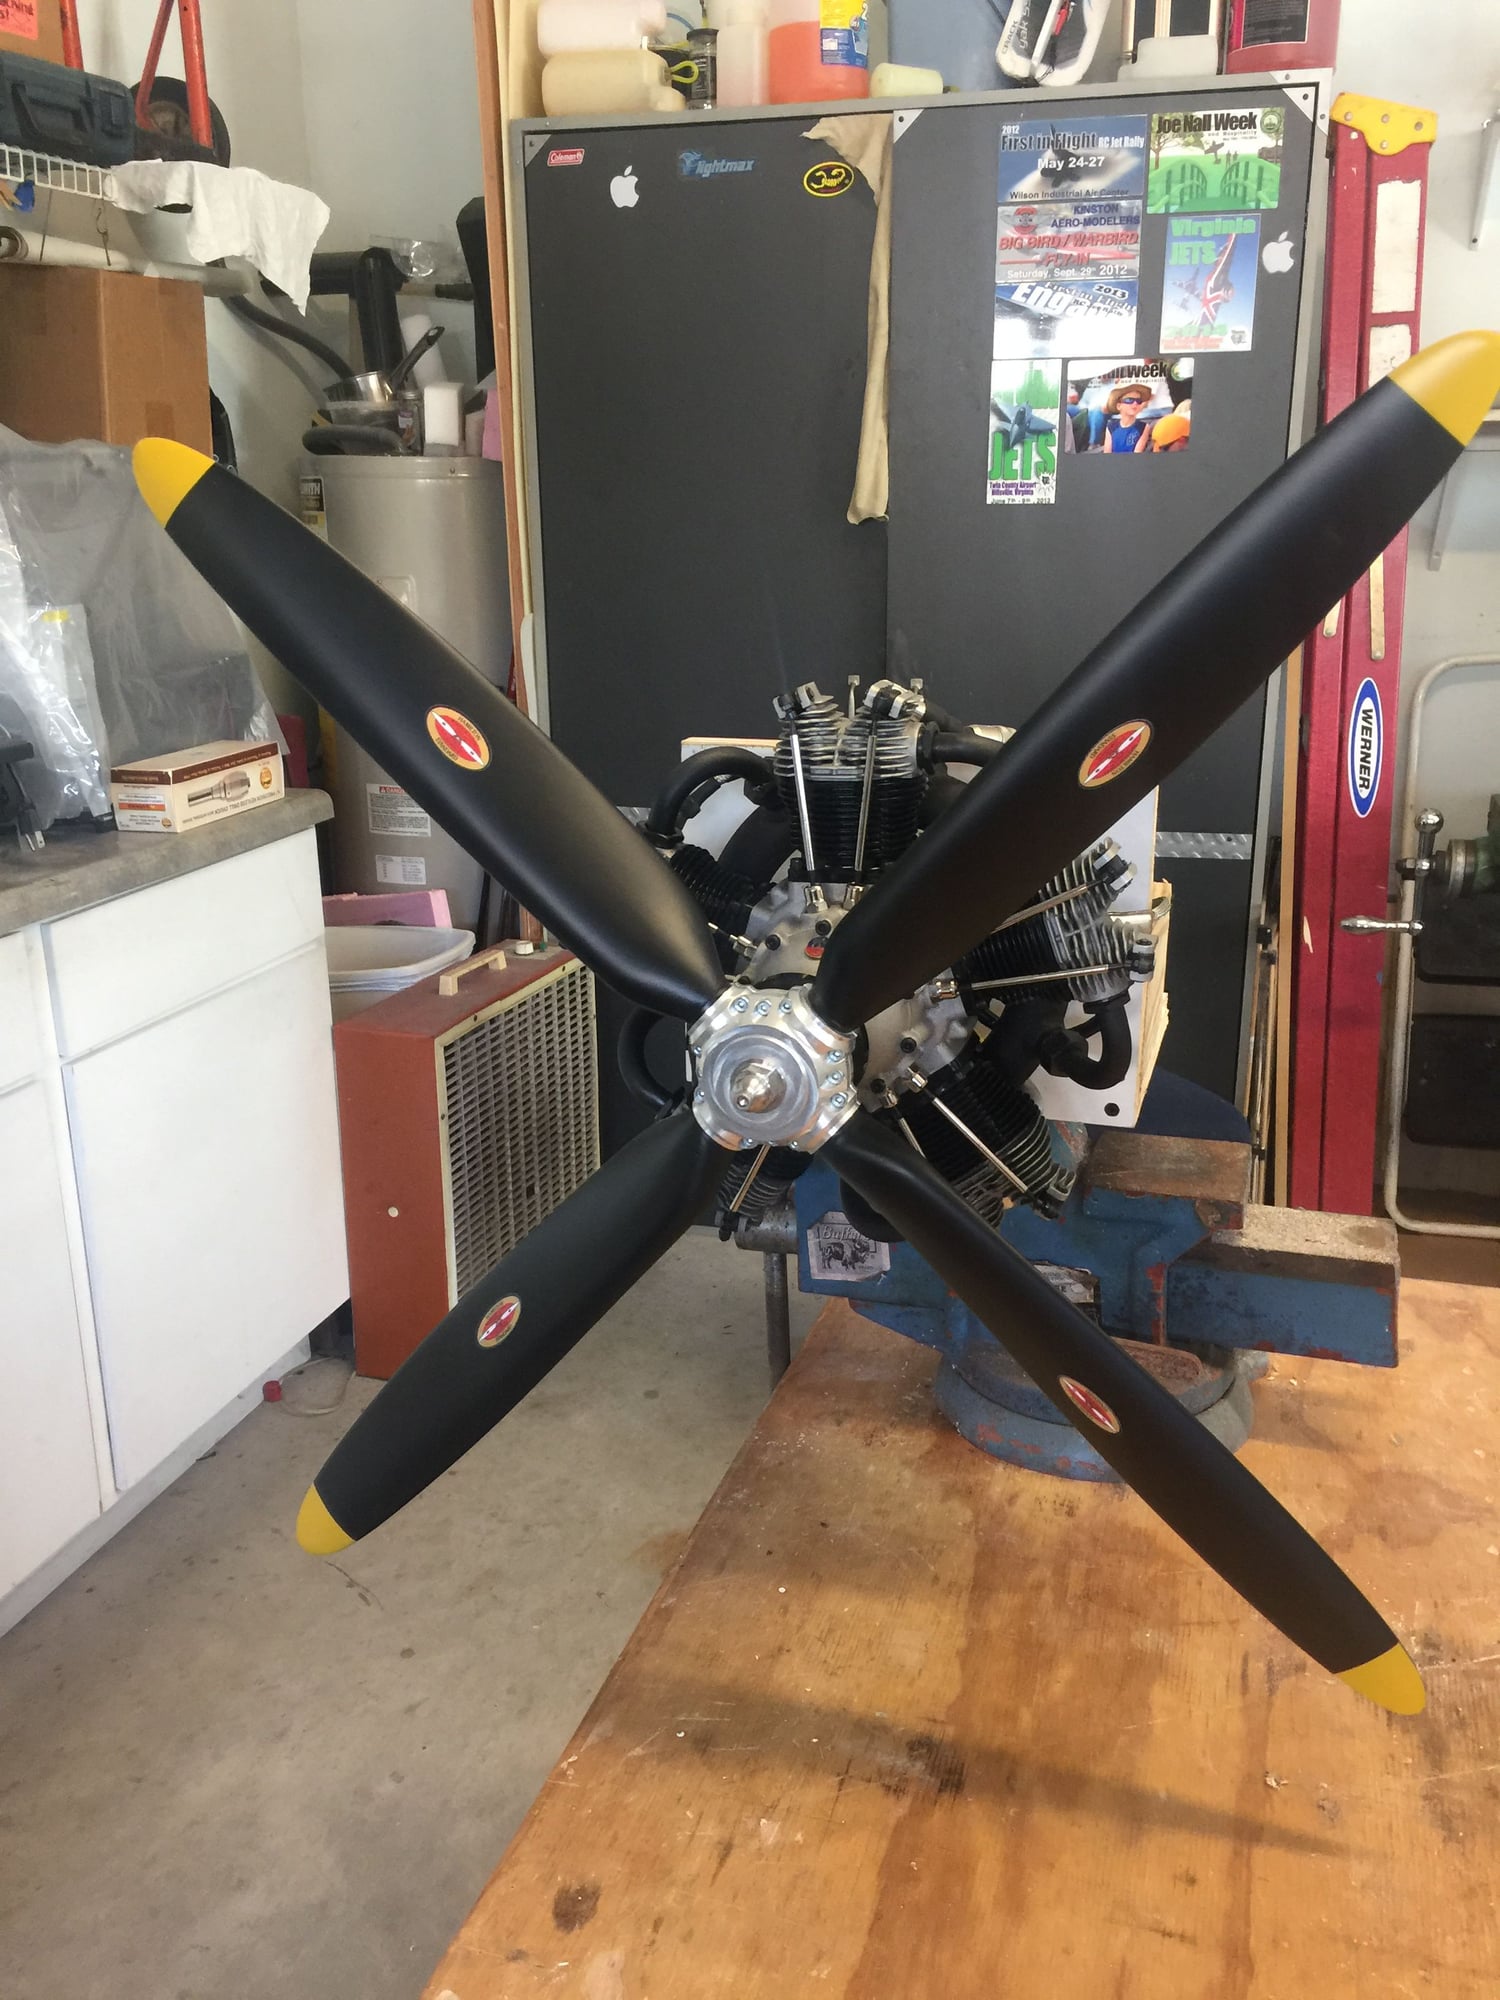
Well, I ran it for the first time today. You'll see in the video that the run stand is NOT up to the task. I didn't realize what kind of MONSTER I was dealing with. The stand accomplished it’s purpose though. It allowed me to test the various systems and get a feel for the handling qualities - which are simply superb. I'm running 2 IBECs to pull power off the radio system - one for the ignition and one for the Powerfuel RX pump. I know there will be some pushback about these choices but I think it is an awesome setup when combined with the Spektrum Powersafe receiver running two BIG 2s Lipos. That is all I will have in the plane - two big lipos.
I set up a mix to vary the speed of the fuel pump with throttle setting which works great. I'm telling you, the handling qualities cannot be beat: radio on, pump switch on, choke on, flip prop until it pops, choke off and three or four blades later its running. It really is a sweetheart handling but with regard to power it is just a BEAST. There was no way I could maintain more that a second or two of full power with that whimpy run stand. It's just to much power. I can't imagine what it's going to be like when I turn it loose in the Rare Bear.
I set up a mix to vary the speed of the fuel pump with throttle setting which works great. I'm telling you, the handling qualities cannot be beat: radio on, pump switch on, choke on, flip prop until it pops, choke off and three or four blades later its running. It really is a sweetheart handling but with regard to power it is just a BEAST. There was no way I could maintain more that a second or two of full power with that whimpy run stand. It's just to much power. I can't imagine what it's going to be like when I turn it loose in the Rare Bear.
Last edited by mitchilito; 08-18-2019 at 01:52 AM.
08-17-2019, 01:39 PM
#268
Thread Starter
Yes. it is a beast and has a lot of tork. I usually take-off around half power and slowly move the throttle forward. definitely you do not want to full to full power too quick. Also, if you test run the engine, try and check the temps on each cylinder.
08-20-2019, 02:29 AM
#269
My Feedback: (7)
My test stand didn�t allow sustained full power running but I did touch each cylinder after a vigorous run and they were all hot except the lower right cylinder (looking at the engine). It was noticeably cooler. I figure there�s not much we can do about that given the induction system.
Do do you have a cool cylinder Rob? Detlef? Fixes?
Do do you have a cool cylinder Rob? Detlef? Fixes?
08-20-2019, 04:53 AM
#270
Thread Starter
I do have cylinders the run a little cooler then then others. But I usually check with the temperature meter. Example, I had 4 cylinders running between 130 F - 145 F ( 55C - 62C) but one cylinder was only at 90F (32C), I found out for some reason that cylinder wasn't firing.
Also, when I ran the engine with a fuel pump it seemed to have more even temps on all cylinders.
Also, when I ran the engine with a fuel pump it seemed to have more even temps on all cylinders.
08-21-2019, 02:42 AM
#271
My Feedback: (7)
That�s good info, Rob. I don�t think there�s any way to get away from cool cylinders on these engines due to the induction system going through the crankcase. It�s good for cooling and lubrication but surprisingly it doesn�t disperse the charge evenly. Hence Detlef�s �turbulator.�
 08-25-2019, 07:32 AM
#273
My Feedback: (7)
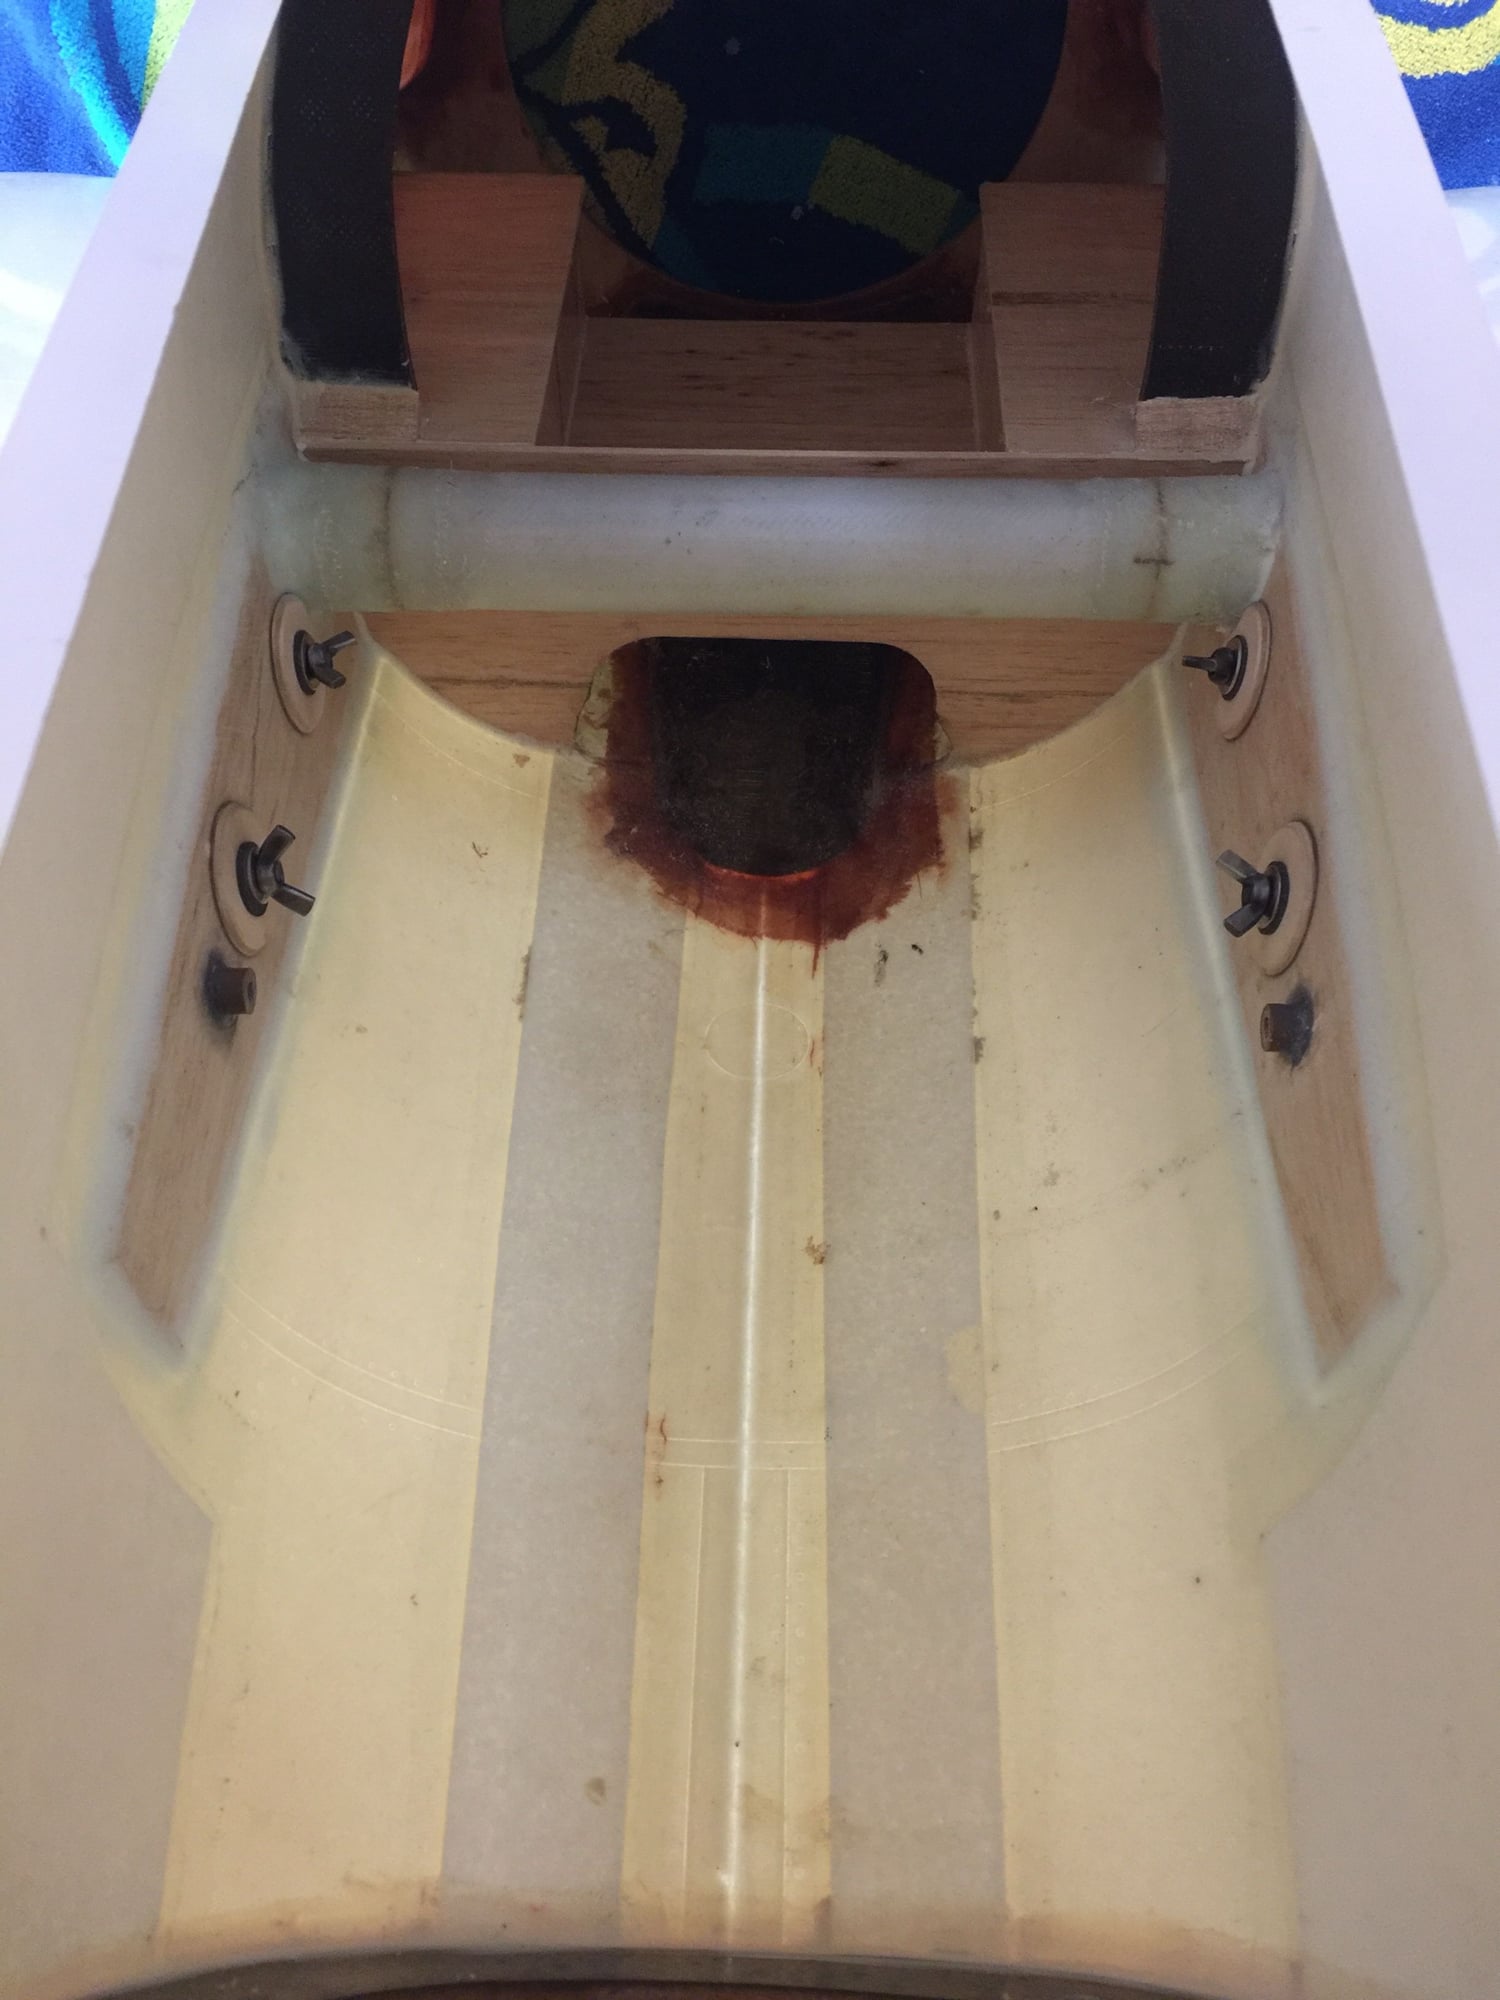
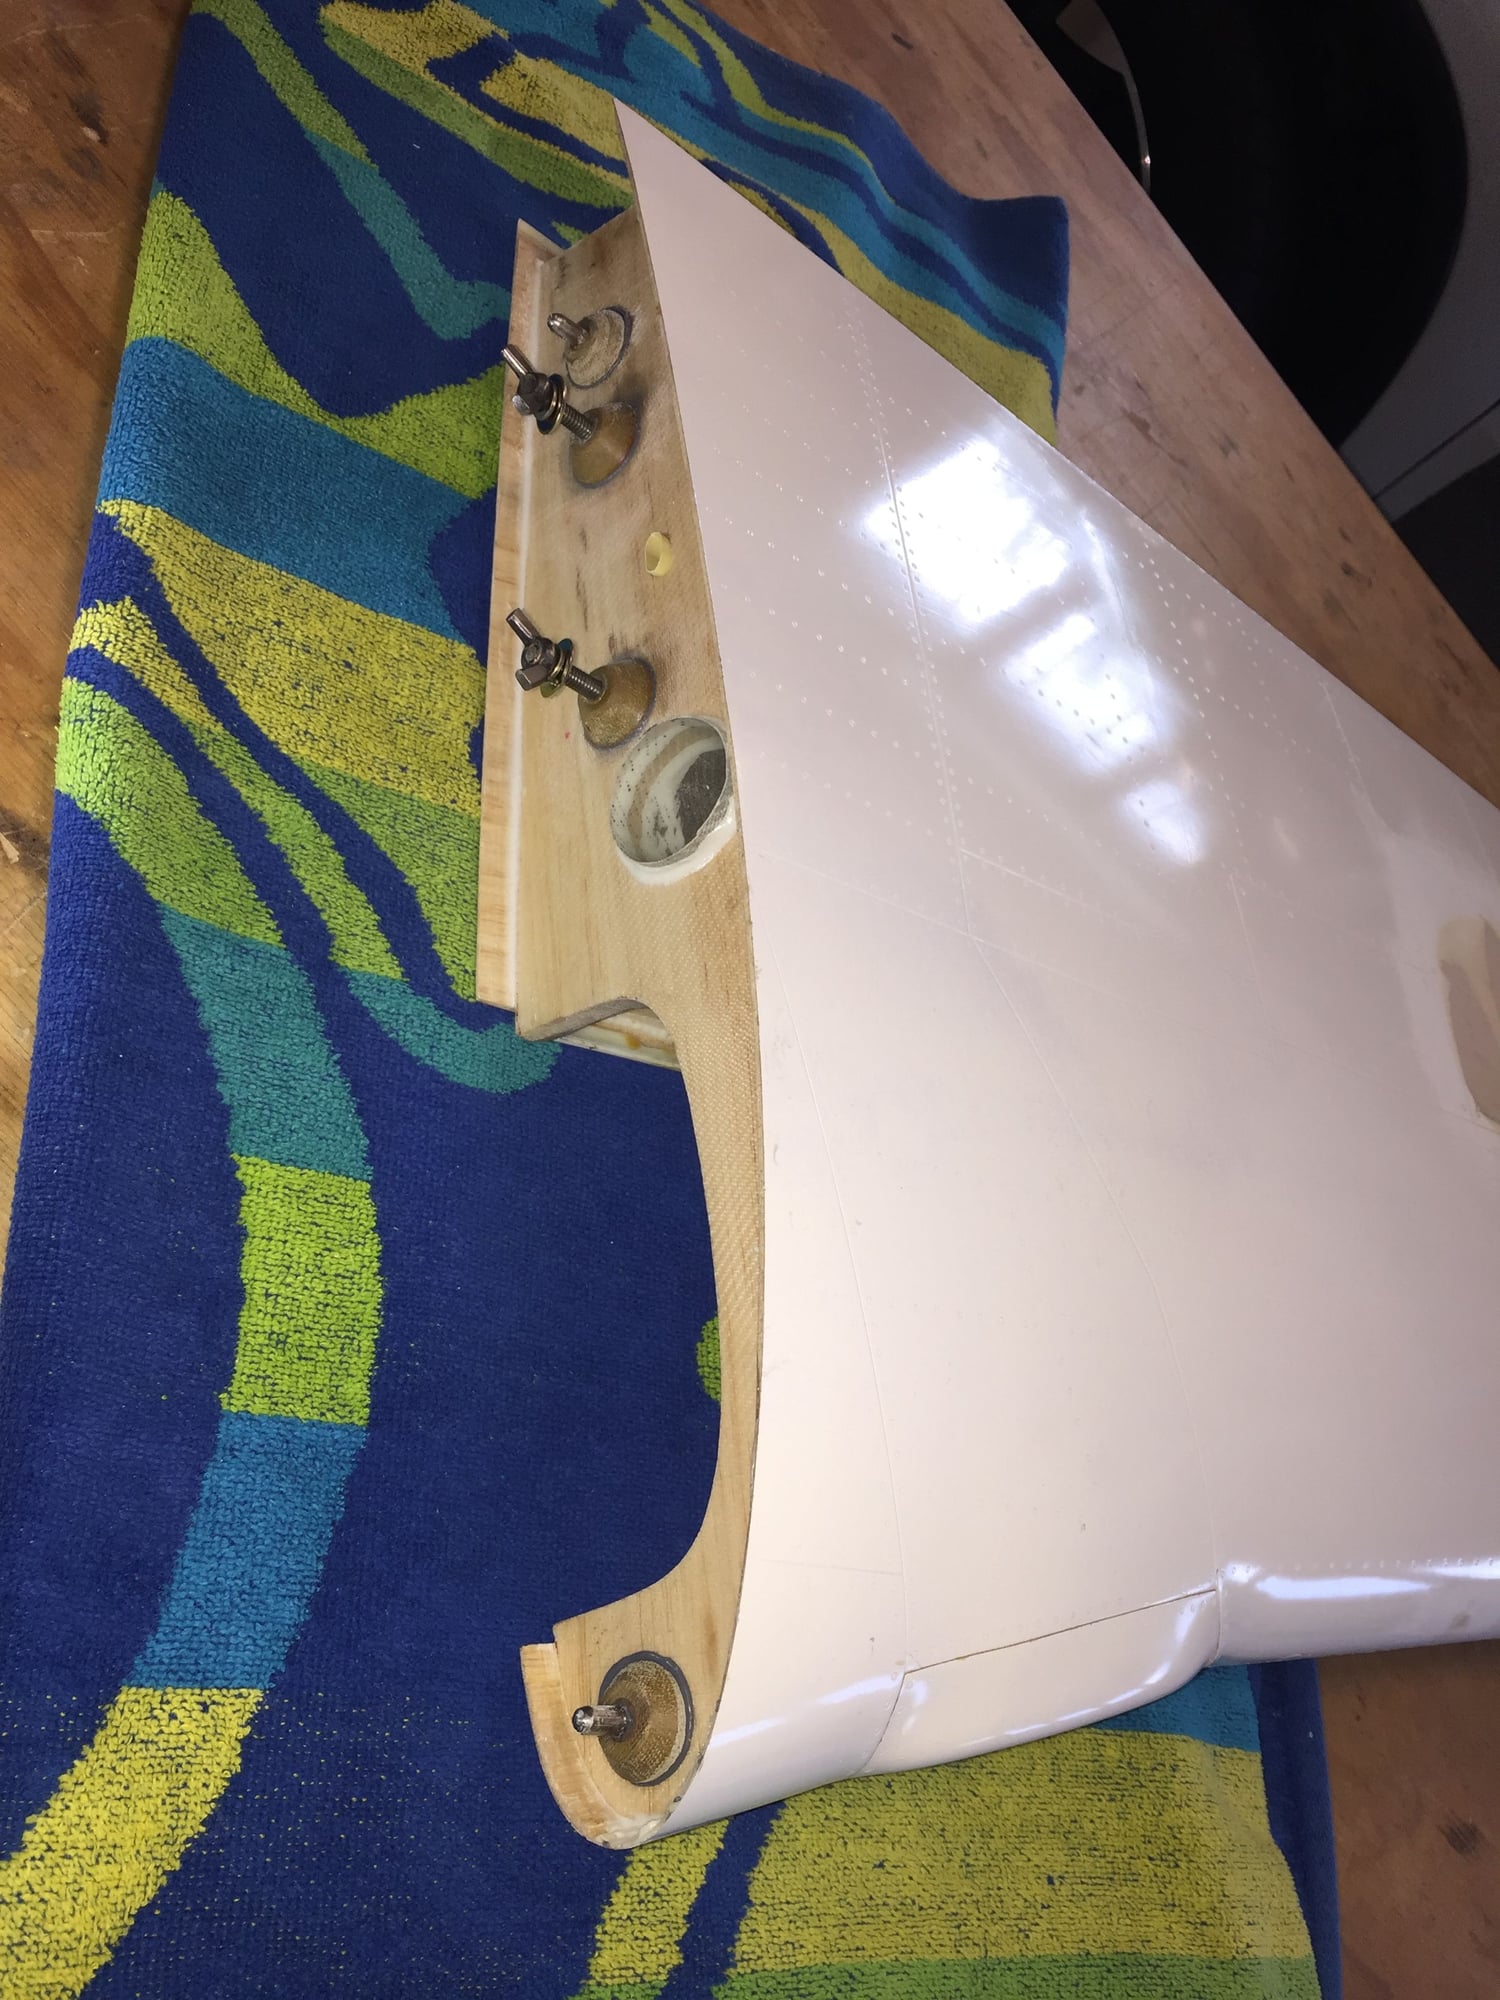
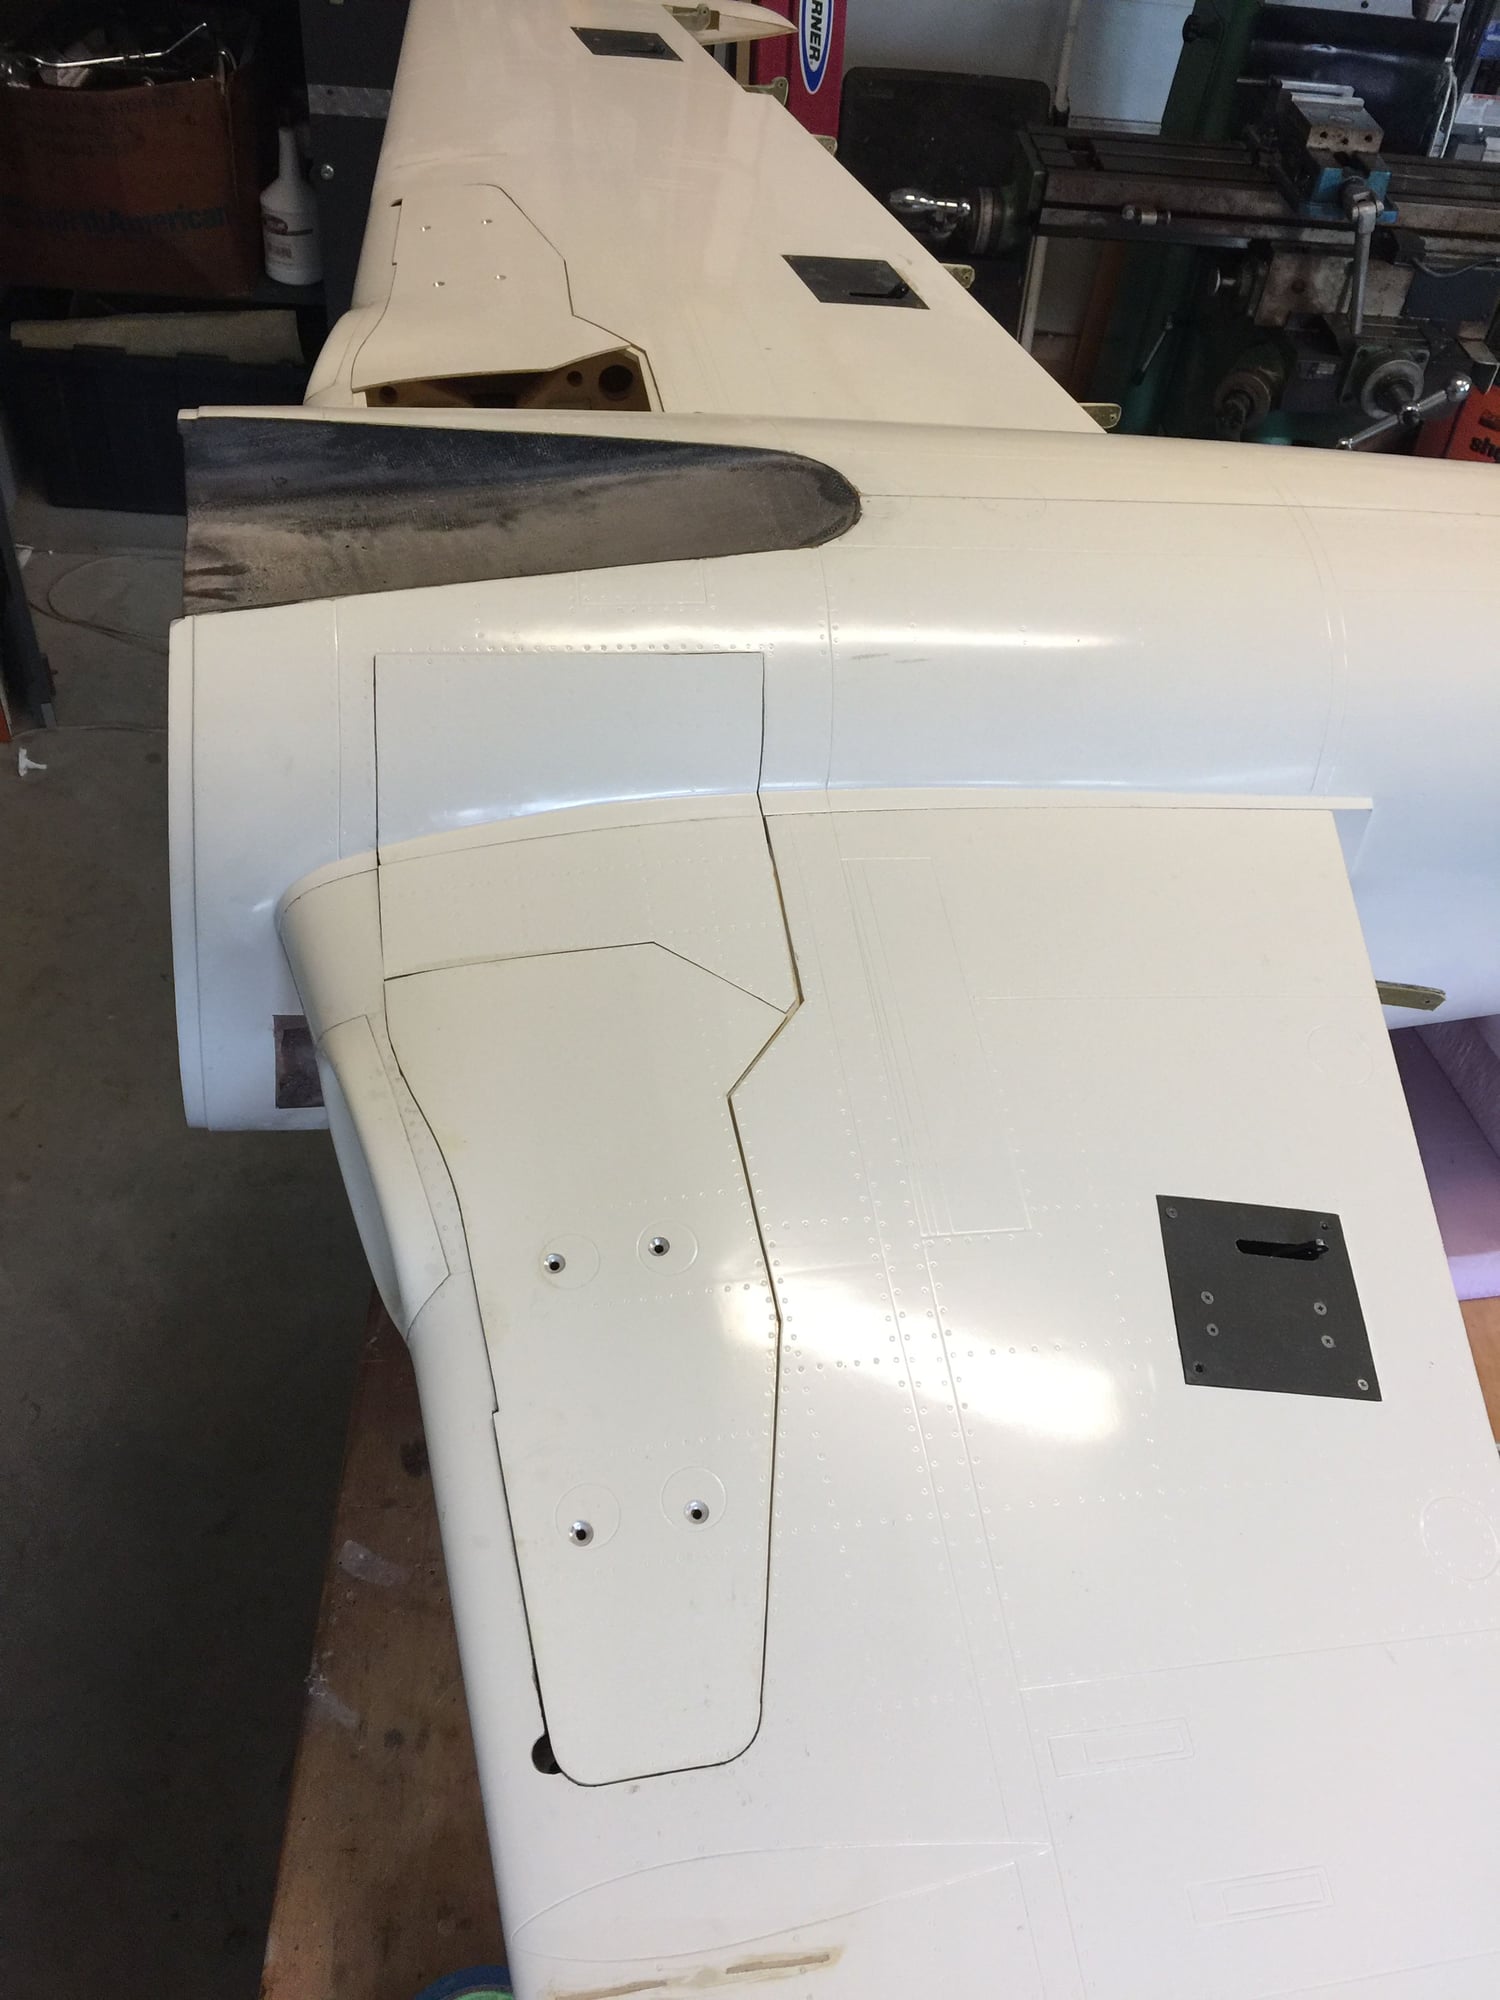
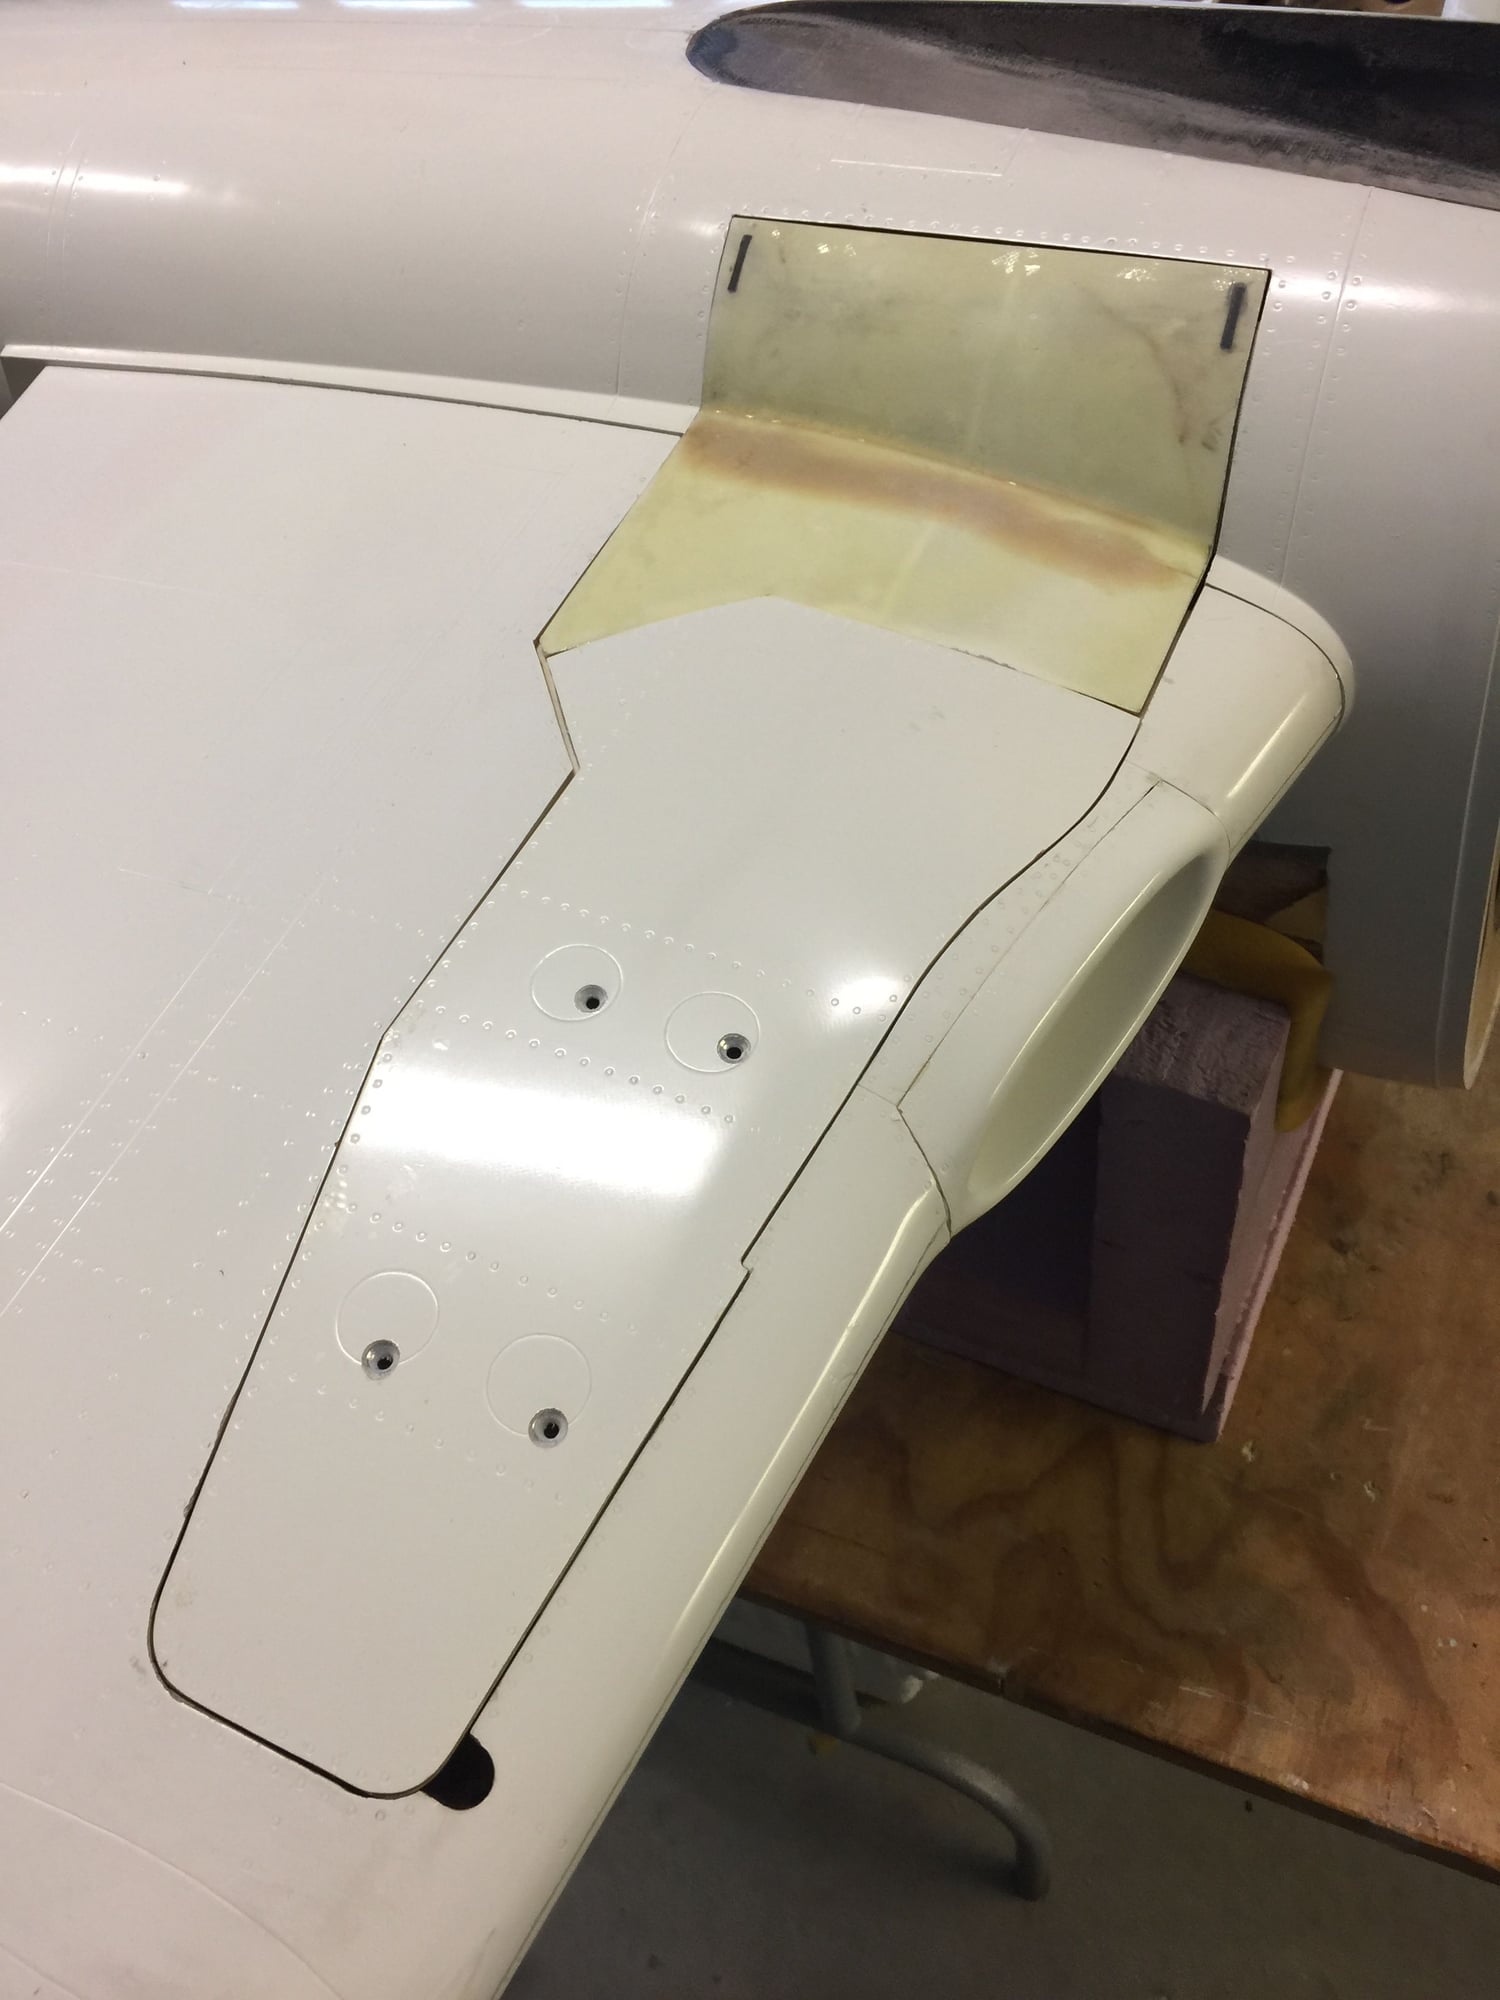
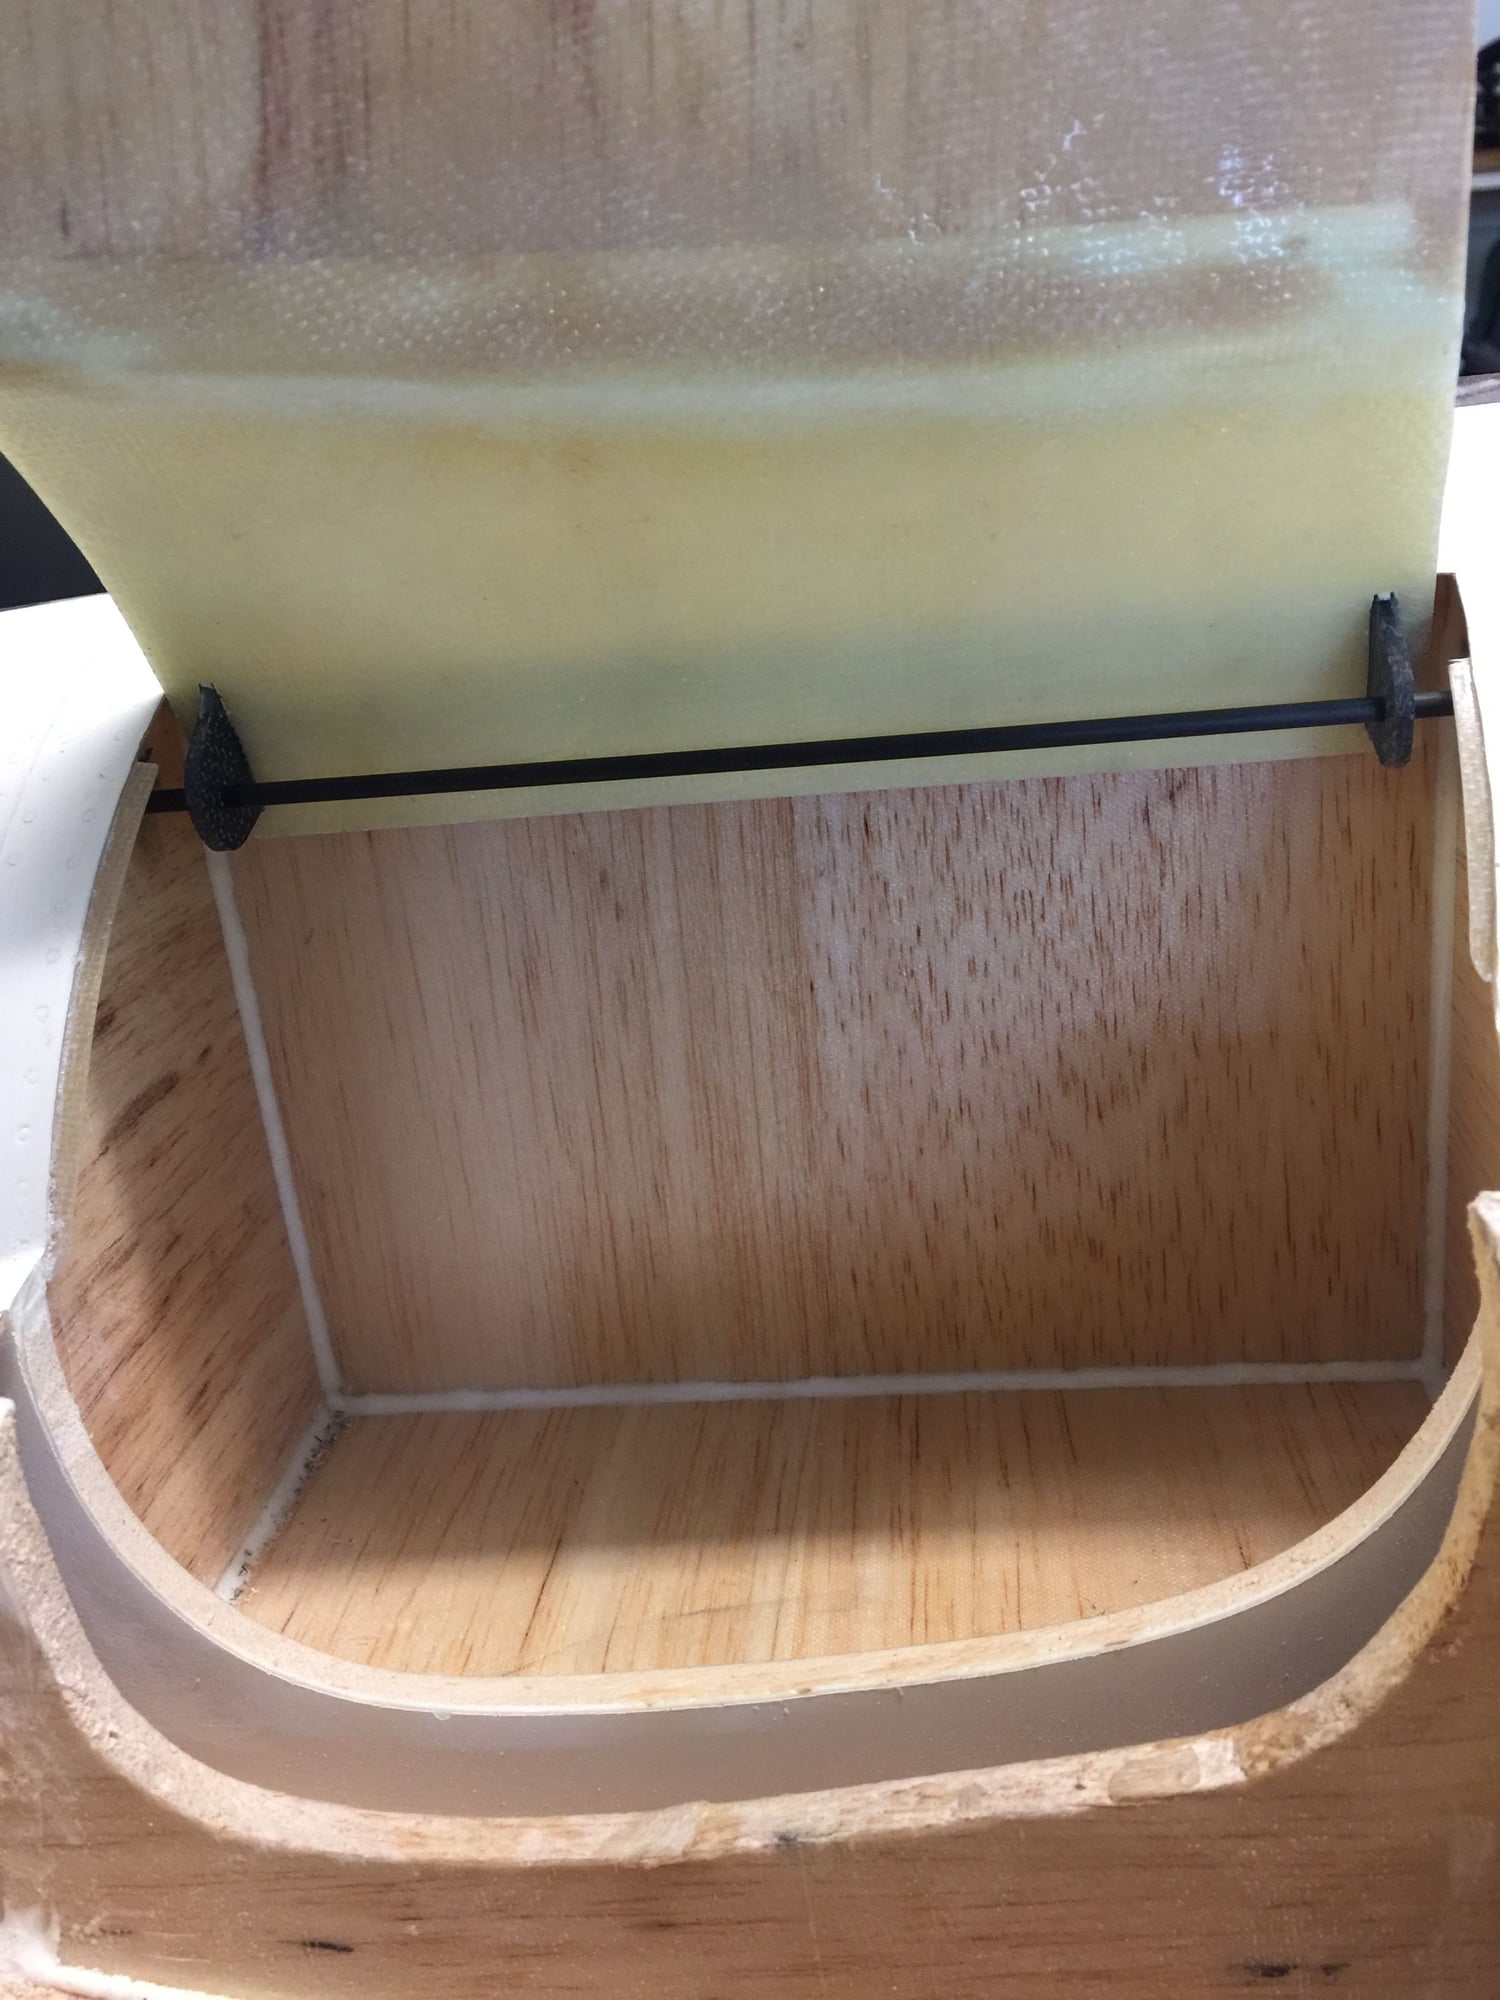
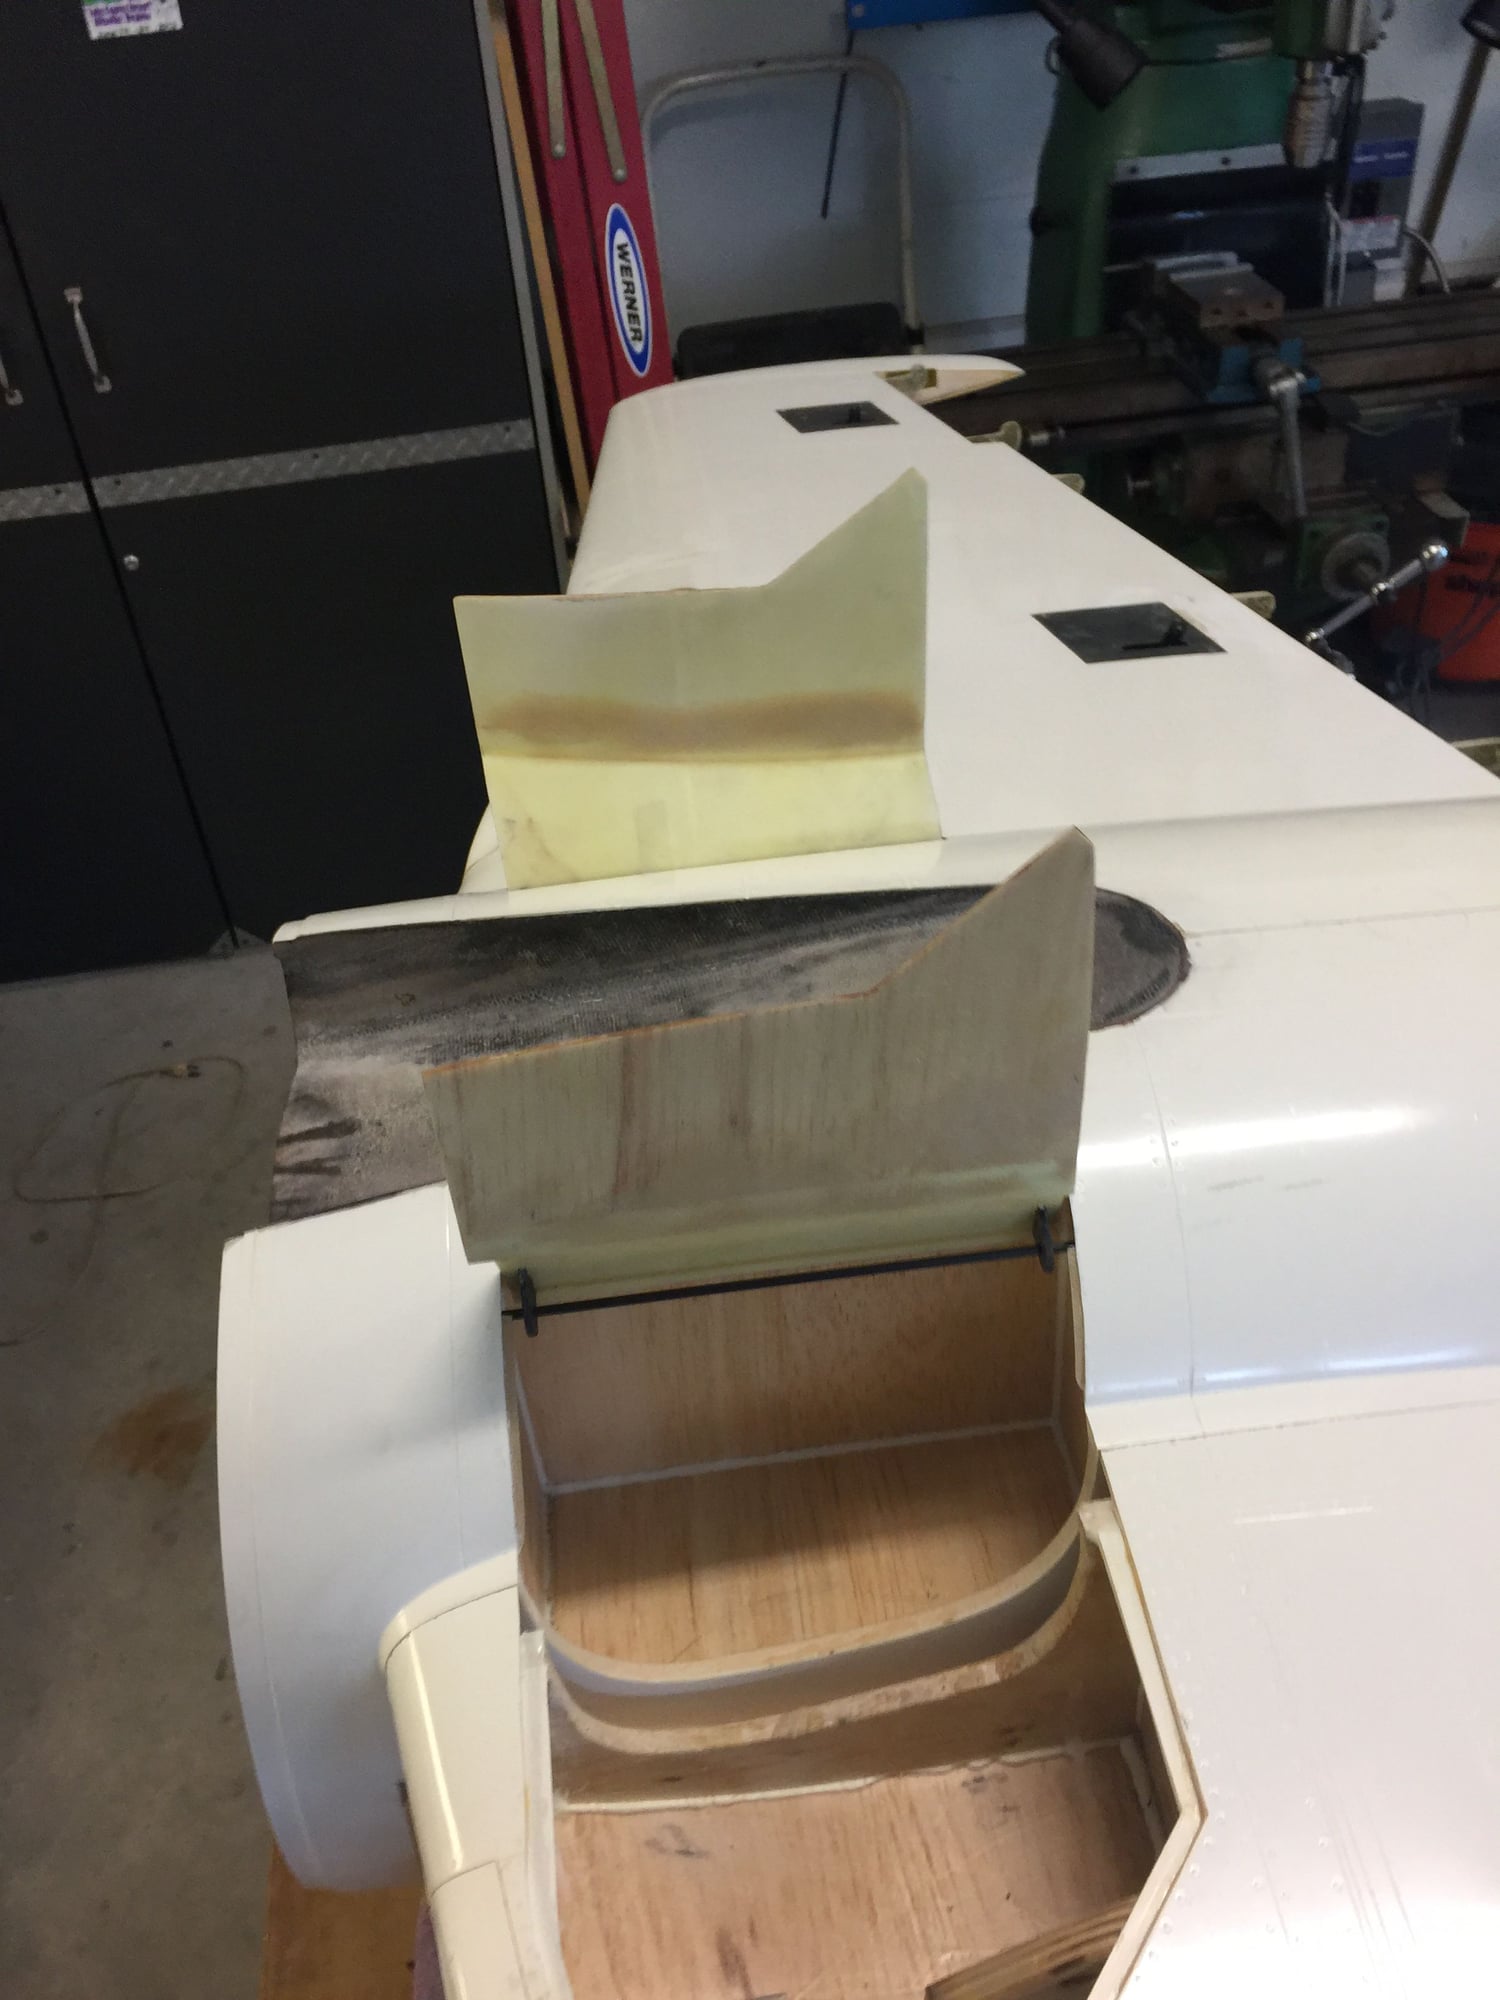
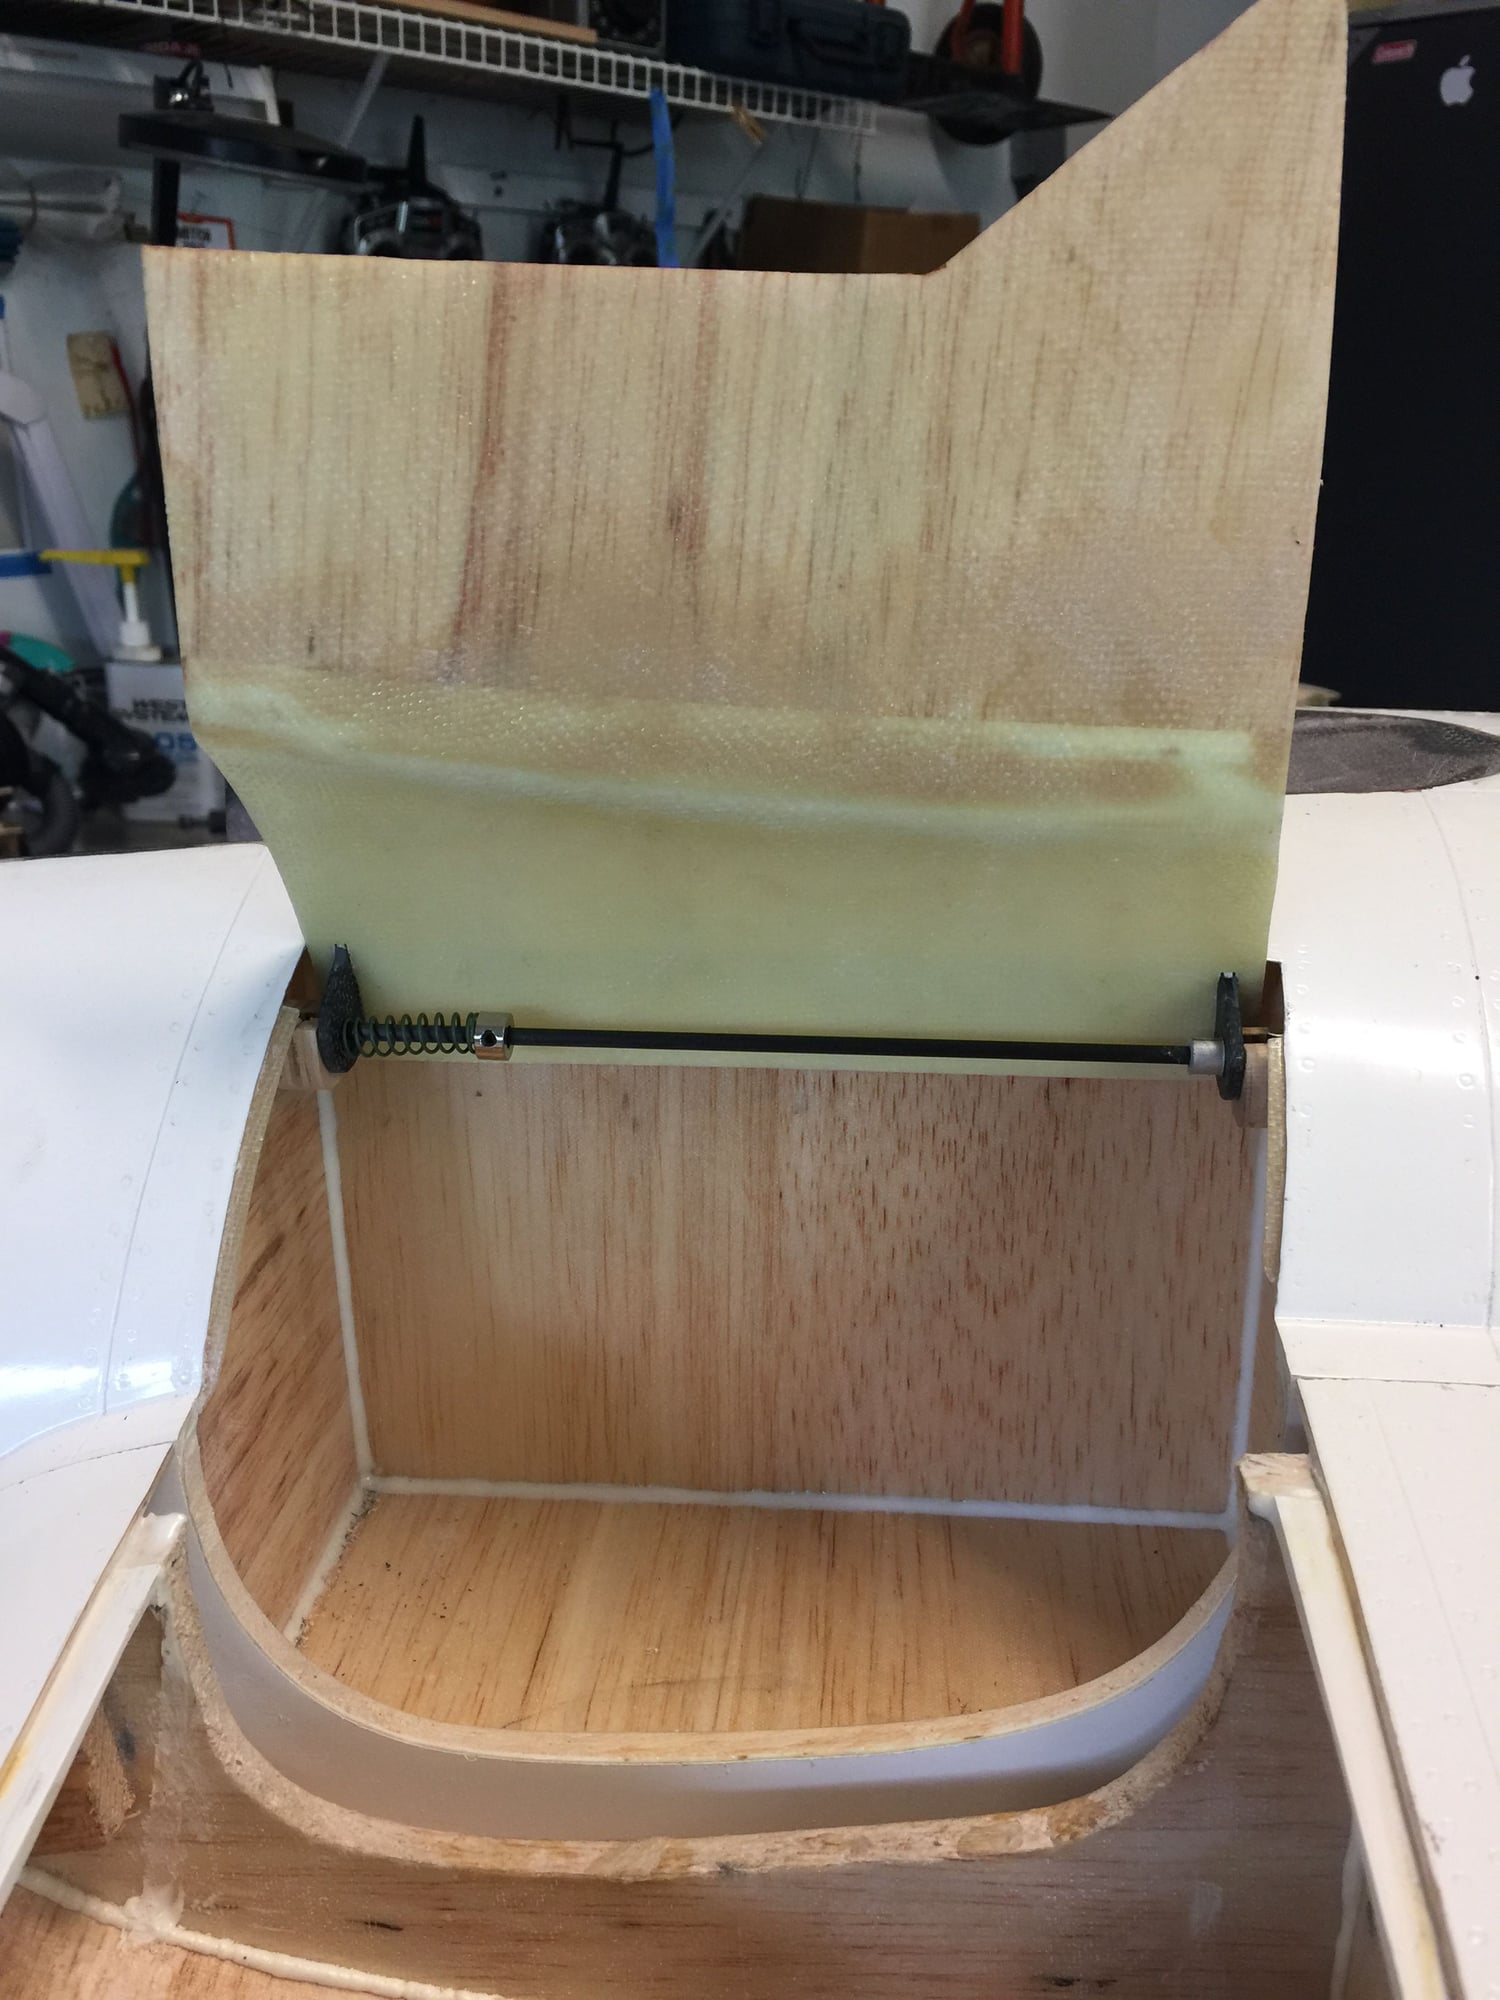
Well, it�s too late to offer gear door hinging advice ☺️. Several things entered into my design work on the inner gear door hinges. First and foremost, smooth operation and absolute reliability. Secondary to virtually everything I�m doing with this build is the fact that I�m emphasizing durability and reliability over absolute scale fidelity. I�ve never really been a �scale guy.� So I�m concentrating on building a reliable daily flyer. I built the hinging system with an 1/8 inch carbon rod axle and 1/8 inch carbon receptacle plates. I�m designing the system to allow easy door removal for transportation/storage due to the design of these door. With the wings removed the outer sections of the door really stick out in harm�s way. When not flying the axles will be sprung for removal and I will store the doors inside the fuselage.
Last edited by mitchilito; 08-25-2019 at 02:41 PM.
10-11-2019, 09:50 AM
#274
Mitch,
that will be truly a very fine Bearcat you are building.
You also take good care of the hot air to exit the fuselage- very good!!
Keep up the good work mate! It is fun watching :-)
My 300 was by far not running as good as I wanted it to run, it was a four cylinder engine up to 90% of power, only at full throttle it was firing on all 5.
No matter what I did, this wouldnt change much. And I did a lot (!)
I then rebuild the entire intake System including the rear part of the crank case. Wantedt to try if I was on the right track.
A lot of work, but it paid off.. Now it is running like a modern fuel injection engine, the idea worked very well . Exhaust is completely gray and dry like in your car, no oil spilling on the bottom of the fuselage. AND a significant lower fuel consumption. All Cylinders have the same temperature ALL THE TIME. A true *****cat.
Disappointing only that you purchase a brand new expensive engine and have to work so hard to make it match its price. I wonder who else is able to invest such a lot of know how and manufacturing, building major parts of the engine completely new.
I then had stick�ng exhaust vaves 2 times, bending the pushrods and coming home on Four of Five twice. You often heard the engine squeak when turning it by Hand before starting it.
Always removed the prop and cowling to get the exhaust valves greased with Teflon spray. Something I never knew from my 180 or 250 in 8-9 years. The 300 has a different material on the valve guides, allowing no dry-run. Not an improvement in my eyes . They did this better before.
I then re-equipped the engine with an external lubrication system that greases only the 5 exhaust valve gides with some high temperature Teflon oil, and I enlargened the too tight fitting of the exhaust valves in their guides.
Now the engine is fun and truly a power plant, but I had somehow higher expectations to a new engine on the market.
Just my opinion.
-----------------------
U/C:
we were not too lazy on the scale undercarriage.
I told you some time ago about the construction, and the long way with some plastic test parts that we had printed, before we go to expensive metal manufacturing.
We were the lucky ones, finding a small Company with the right machines, and with a boss who had a heart for challanges like we had.
Still some work on that, but all the complicated major parts are machine now. Parts made from High grade Aluminium T7075 , Titanium and stainless steel 1.4301
Look yourself:
Last edited by Detlef Kunkel; 10-11-2019 at 11:41 PM.
10-17-2019, 02:43 AM
#275
My Feedback: (7)
It�s great to hear from you Detlef. Too bad you live so far away. I would be camping in your shop if you were closer HA HA HA HA!!
I�m green with envy for your landing gear. I can�t wait to see what kind of wing you put them in. Maybe 3W will want to pay attention to your process. I hope so!
Now the important stuff: we Moki 300 owners need to know MORE about your reliability/smoother running mods:
Did you lap the exhaust valve stems or open/ream the guides?
We need to know every detail of your induction mods AND your address so I can send you the money for a set. Do you take PayPal?????
What? You think I�m joking??
Latest progress below.
Last edited by mitchilito; 10-17-2019 at 04:40 AM.