Road trips: 2023


 06-18-2023, 04:30 AM
#28
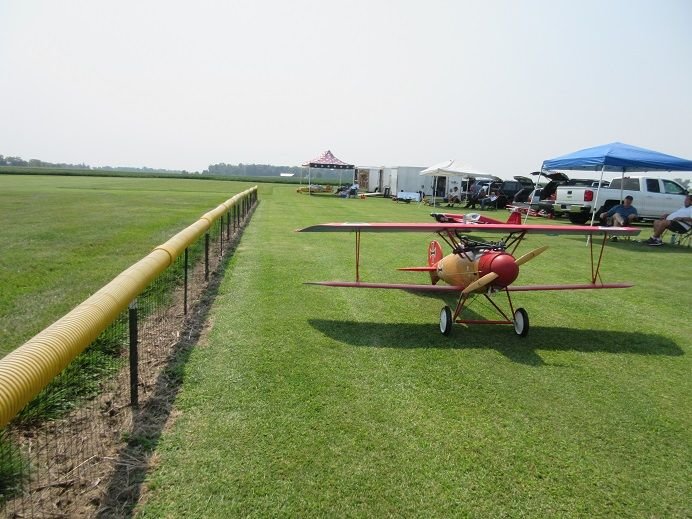
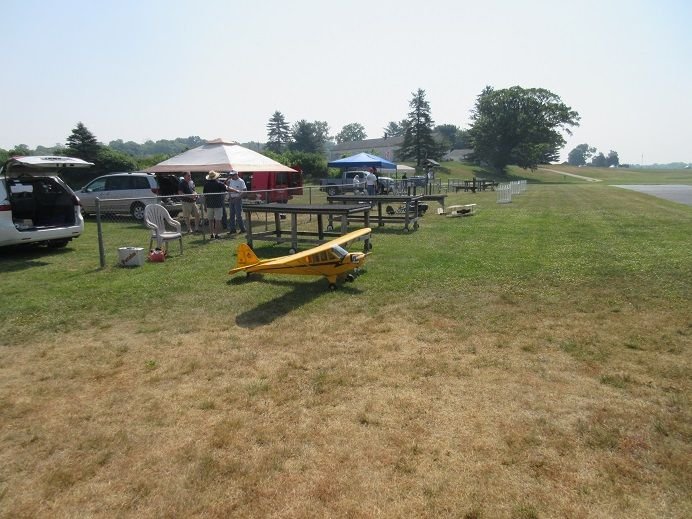
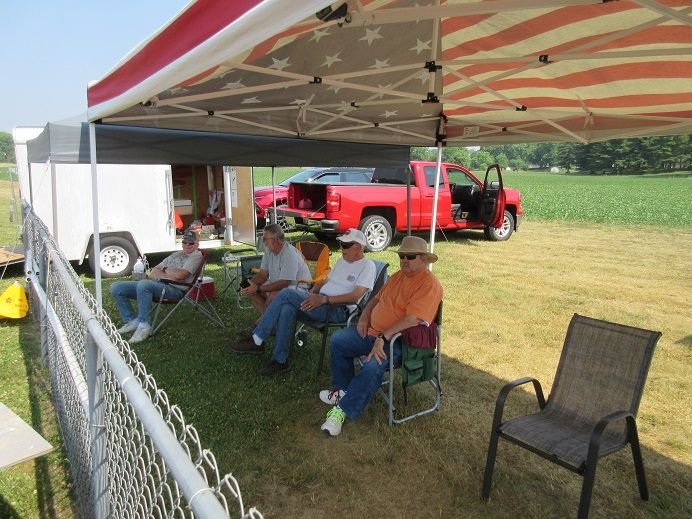
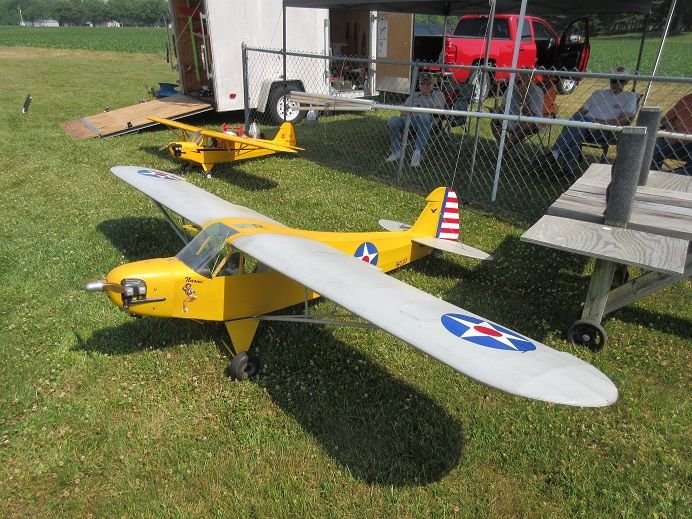
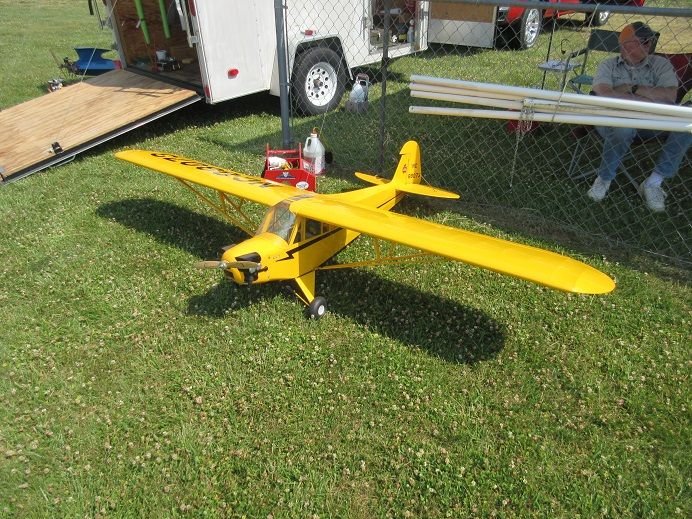
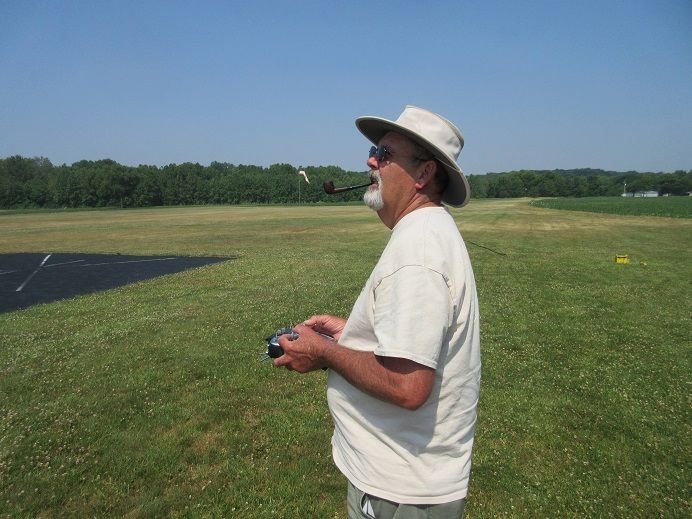
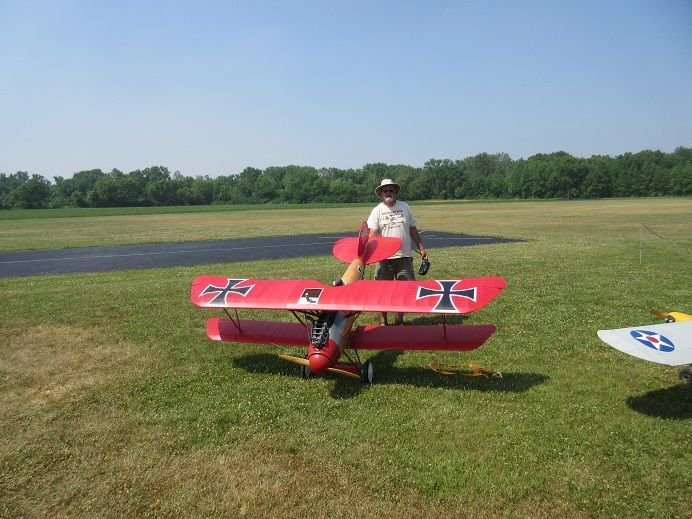
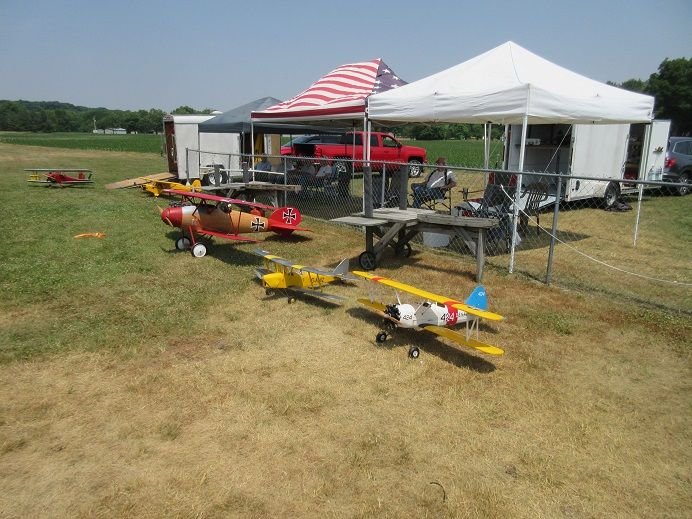
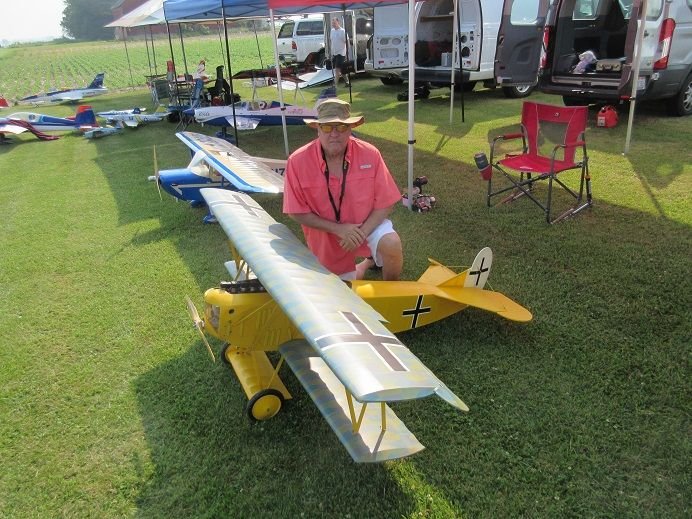
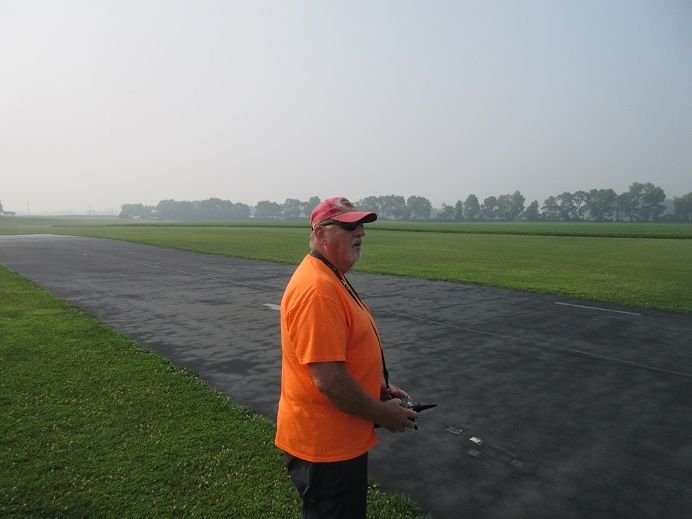
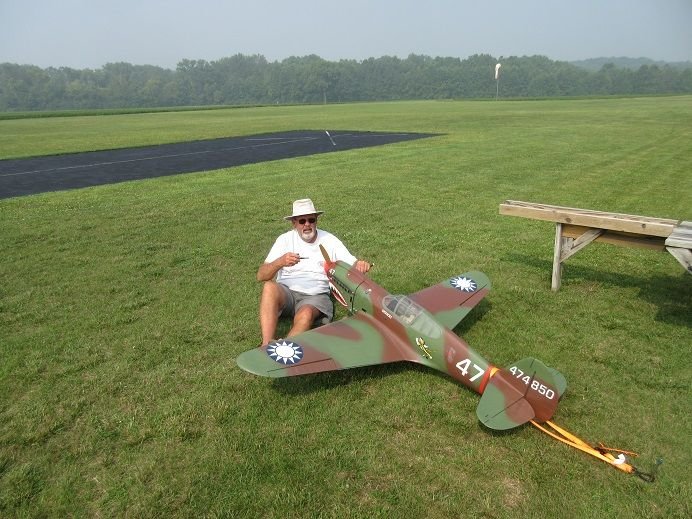
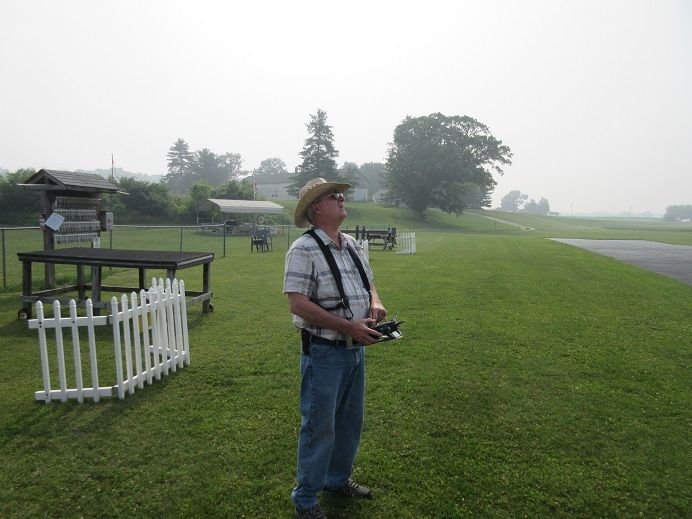
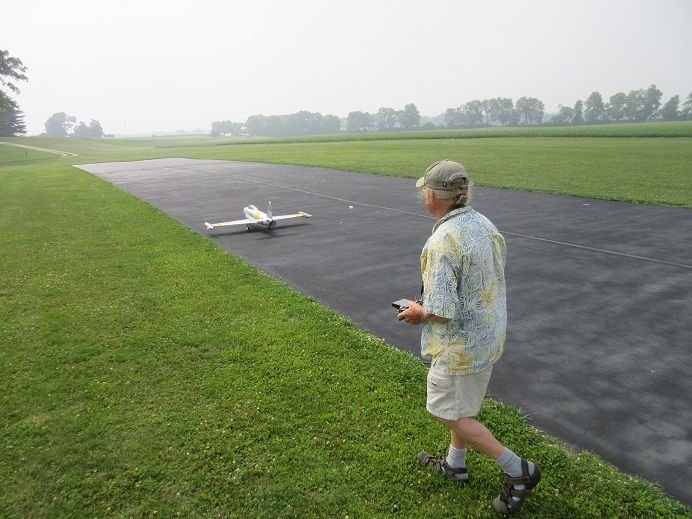
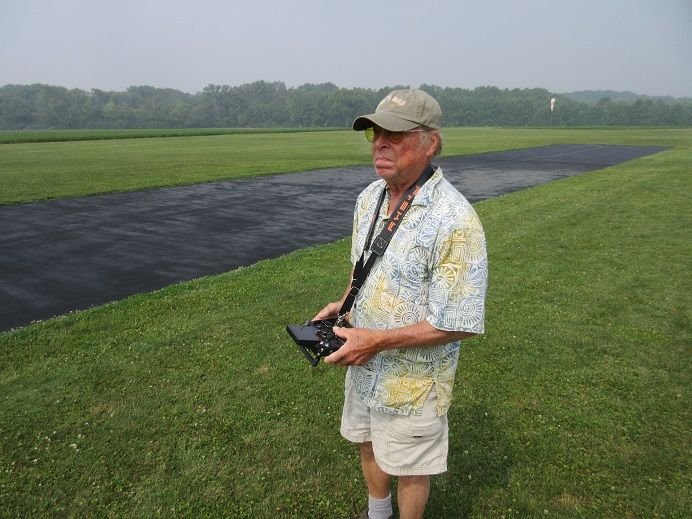
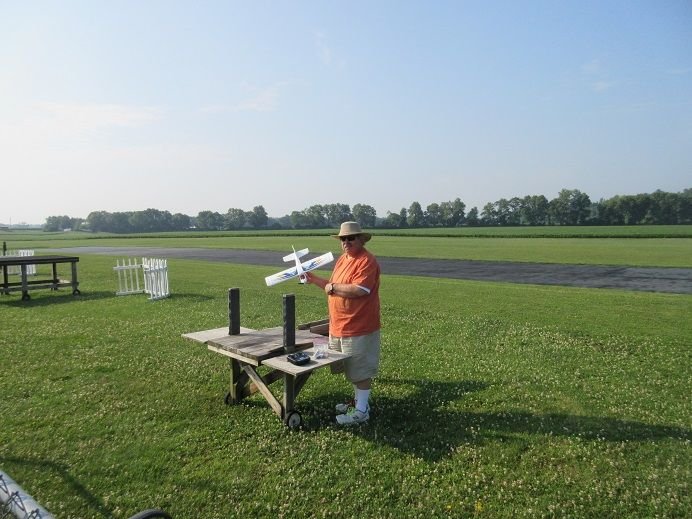
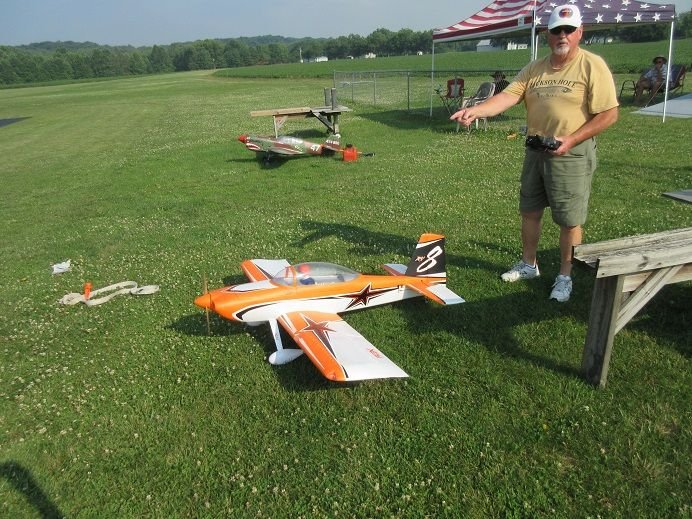
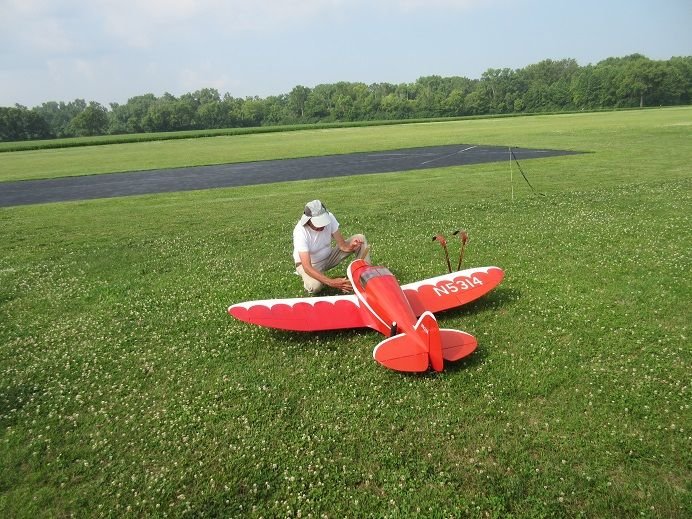
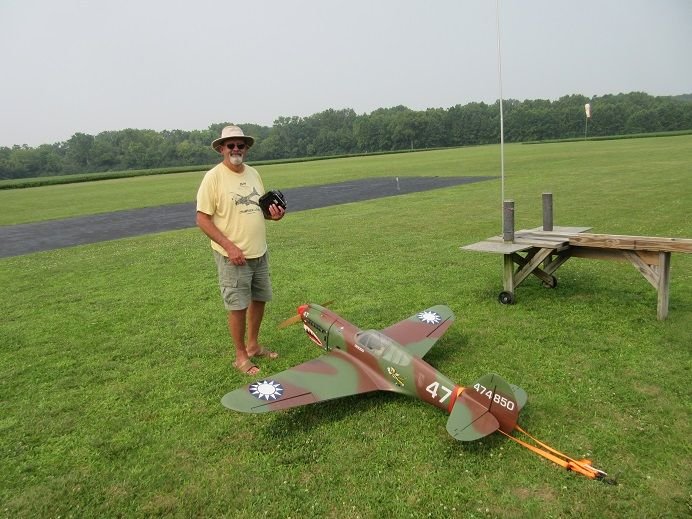
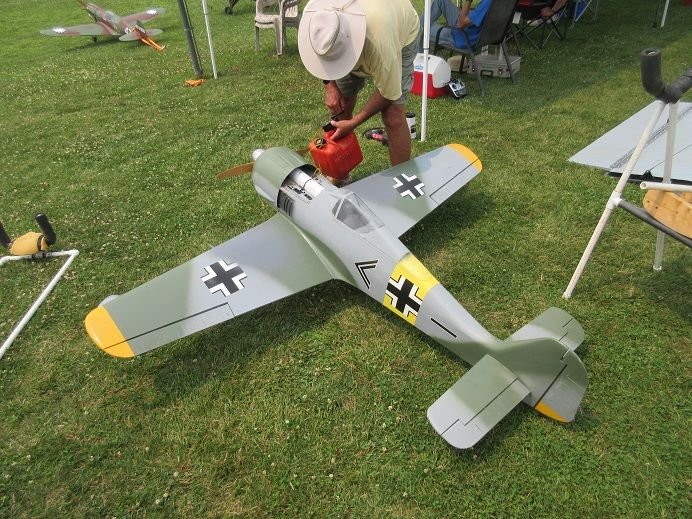
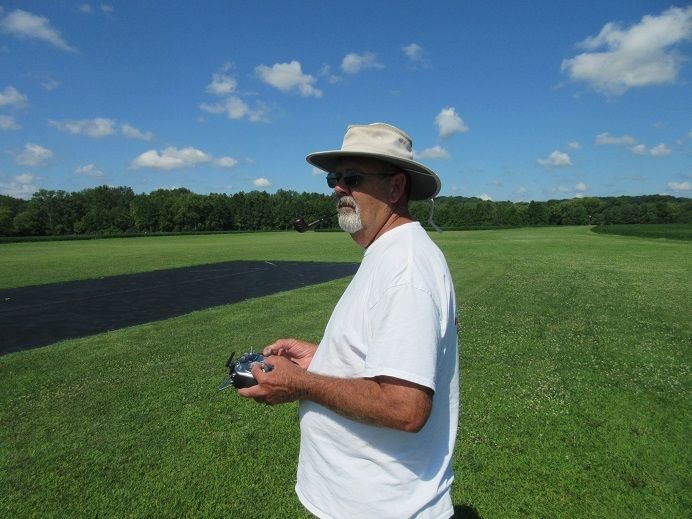
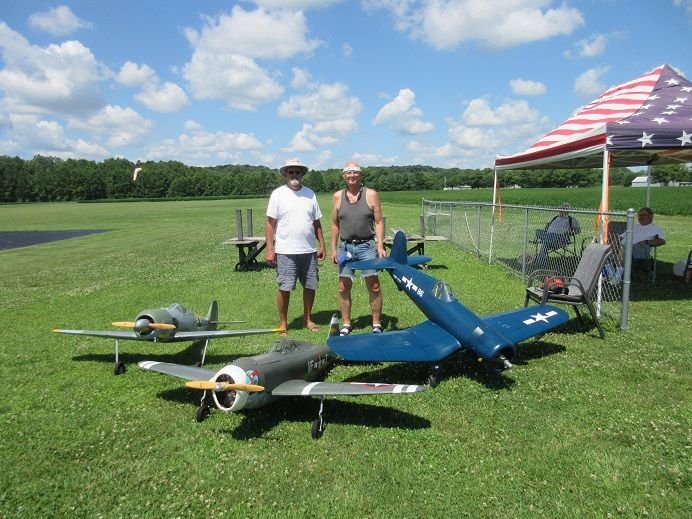
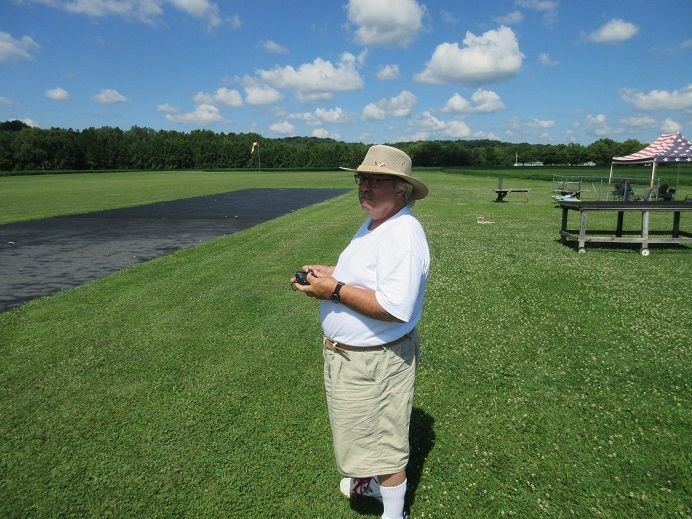
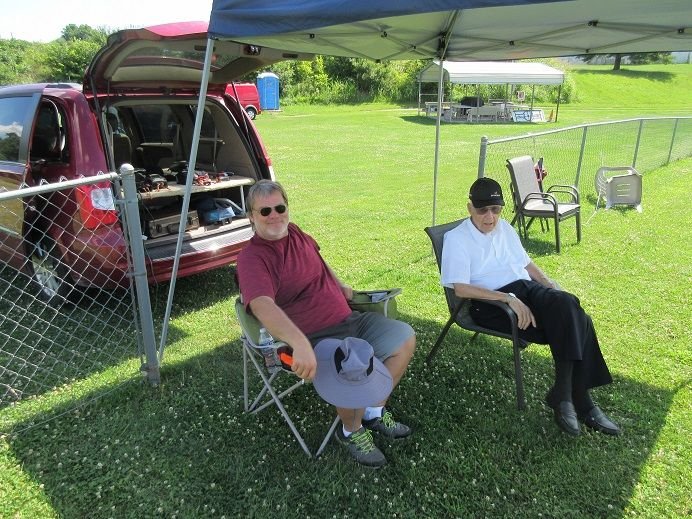
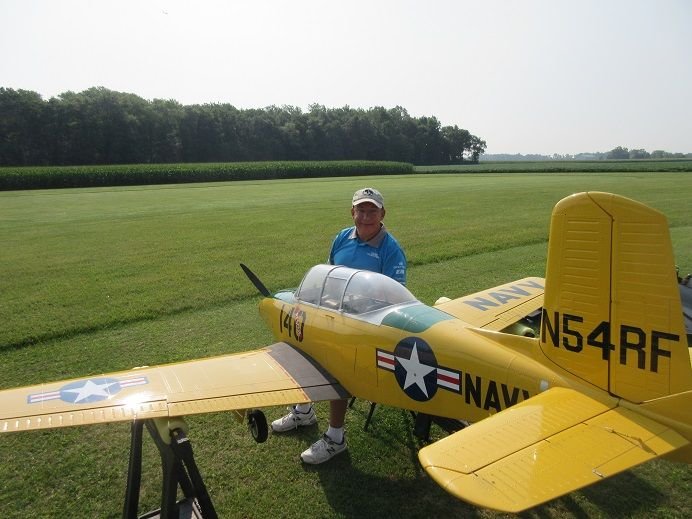
June 17. Father's day flyin at Wilmington, Ohio RC club.
Miles: 50.
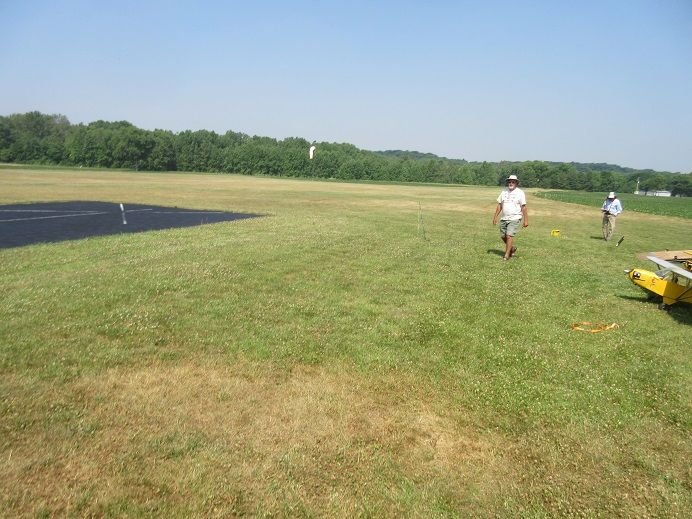
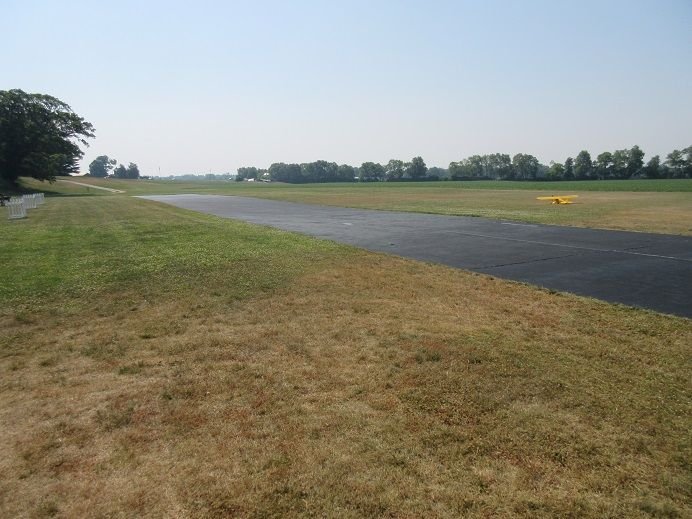
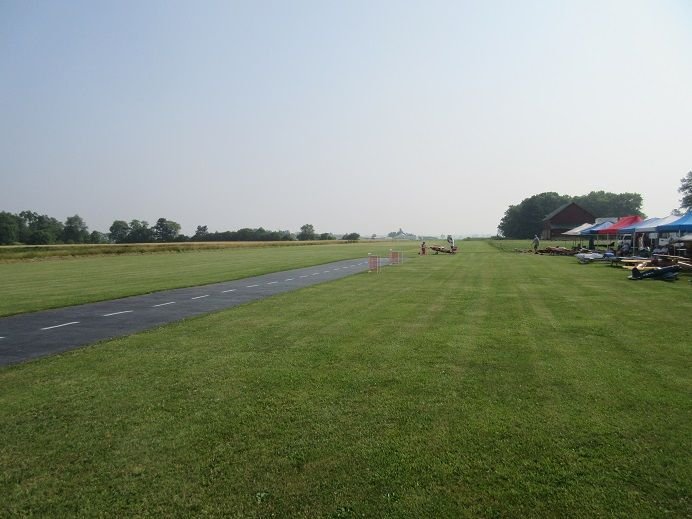
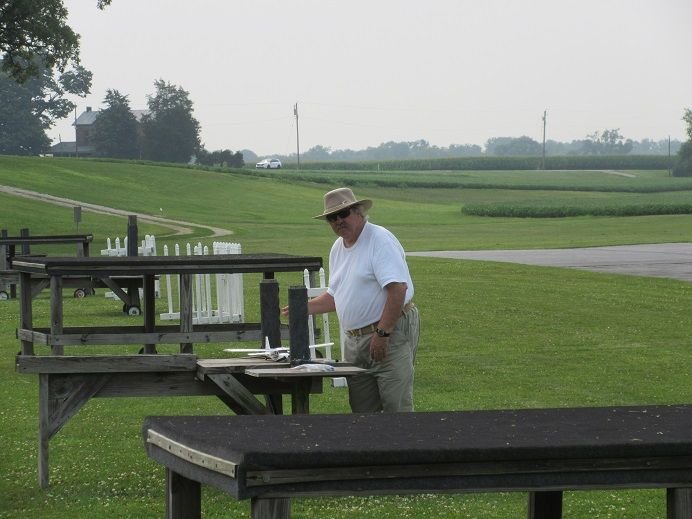
Another nice all grass runway that is part of the County's full size airport.
Back in the 60's the 'then governor' Rhodes of Ohio had an airport built in every county in Ohio.
Low winds and around 80 degrees.


===========
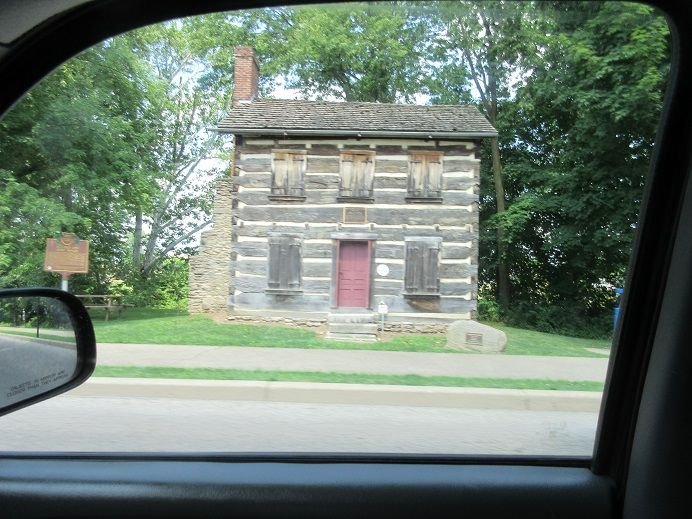
Americana.
Farmers have their crops 'in'.
Amazing how much 'open area' there is in the USA.
My favorite time of the year: everything is 'green'.
Video:
The 'trip' home from my truck on one of Ohio's 'back roads'
Never taking any videos from my truck. Thought I'd try something 'different'!
The 'speed limit' on most of Ohio's 'back roads' is 55 MPH.


Miles: 50.
Another nice all grass runway that is part of the County's full size airport.
Back in the 60's the 'then governor' Rhodes of Ohio had an airport built in every county in Ohio.
Low winds and around 80 degrees.
===========
Americana.
Farmers have their crops 'in'.
Amazing how much 'open area' there is in the USA.
My favorite time of the year: everything is 'green'.
Video:
The 'trip' home from my truck on one of Ohio's 'back roads'
Never taking any videos from my truck. Thought I'd try something 'different'!
The 'speed limit' on most of Ohio's 'back roads' is 55 MPH.
Last edited by samparfitt; 06-18-2023 at 04:47 AM.
The following users liked this post:
aghost (06-18-2023)
06-19-2023, 03:02 AM
#29
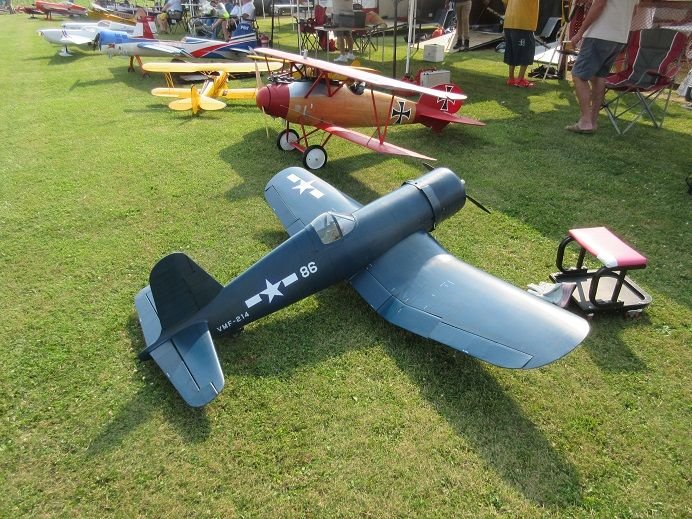
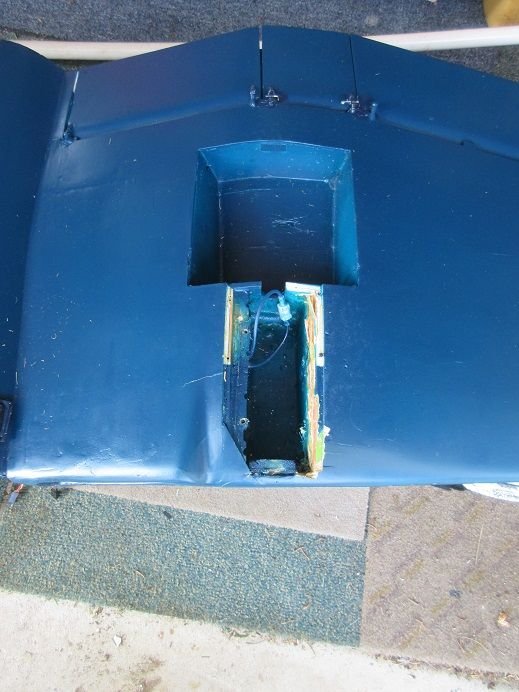
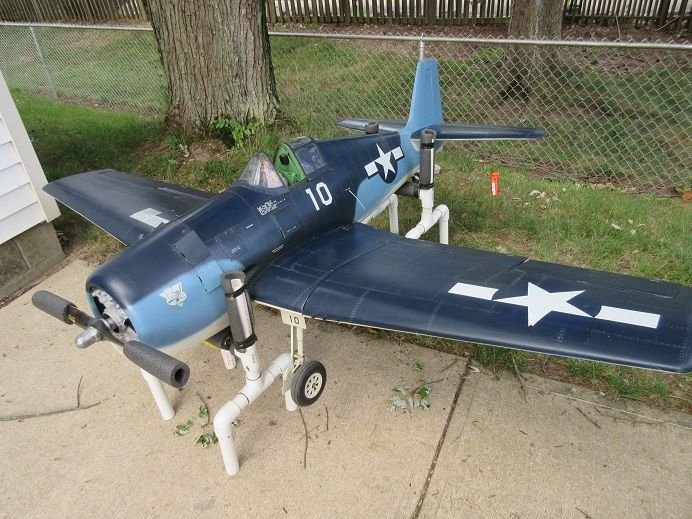
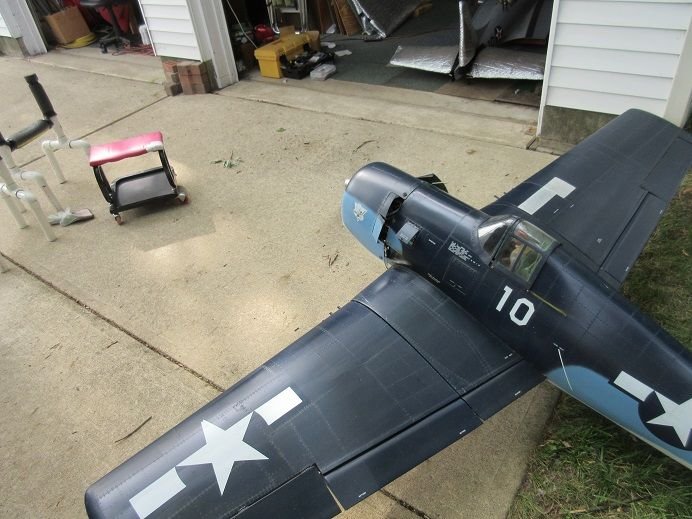
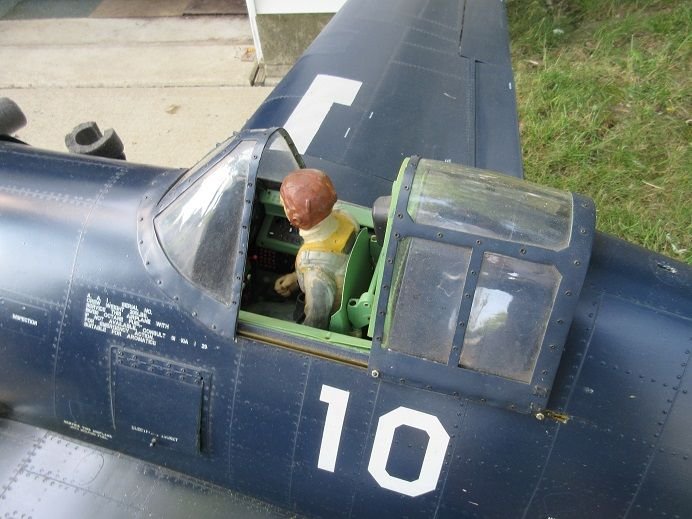
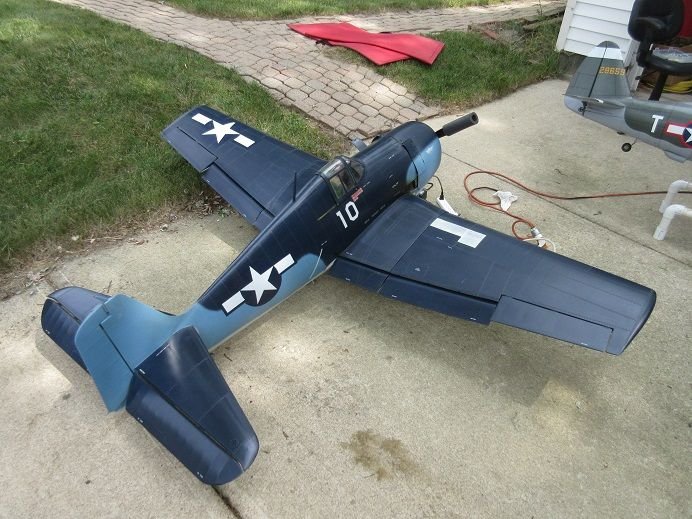
PM the Ziroli F4U Corsair.
IDIOT: at Wilmington the runway was a little narrow, the edge had a lot of dead grass clippings and, on take off, I was veering to that edge.
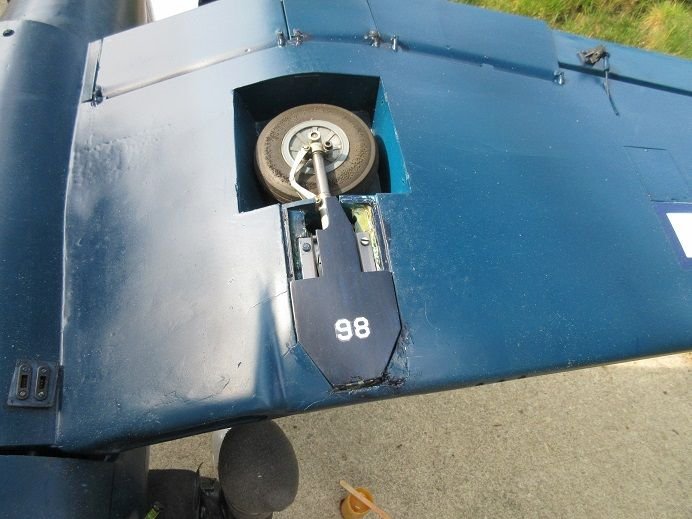
I aborted the take off but hit the grass clippings and ripped out one wood gear mount.
Right wood mount needs to be re-glued.
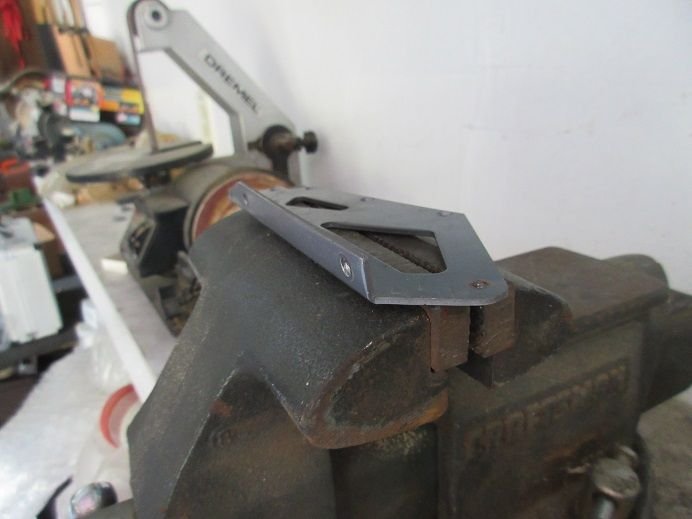
One side frame was bent.
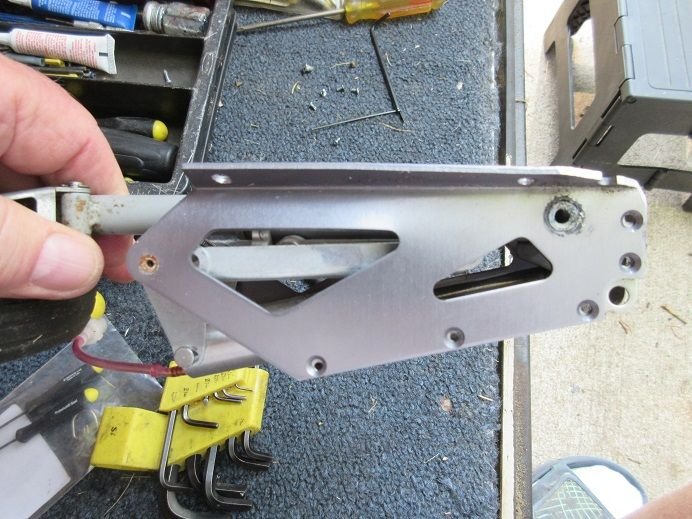
Some auto fender repair tools used to straighten the frame.


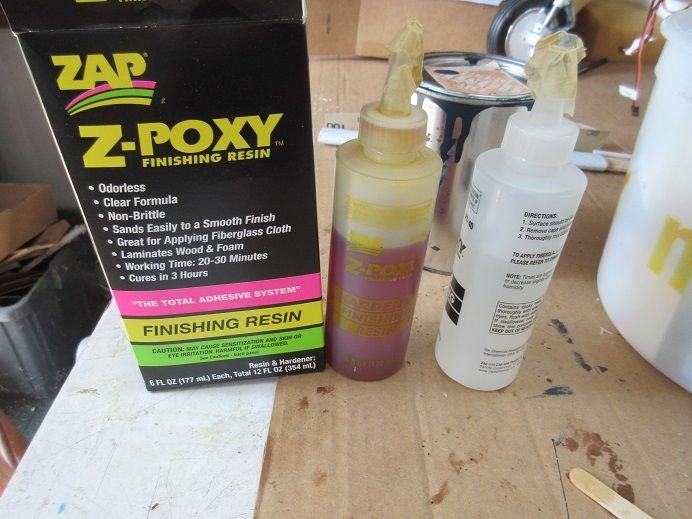
Usually I use epoxy but the left wood mount has a small crack in it so I used the thinner finishing resin to secure the wood mount to the wing.
The gear was used to insure the wood mount was glued in the proper orientation.
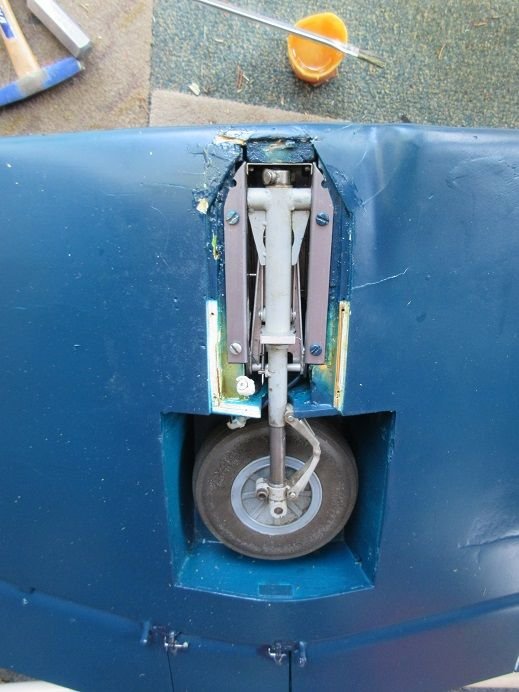
Testing. All's 'good'.
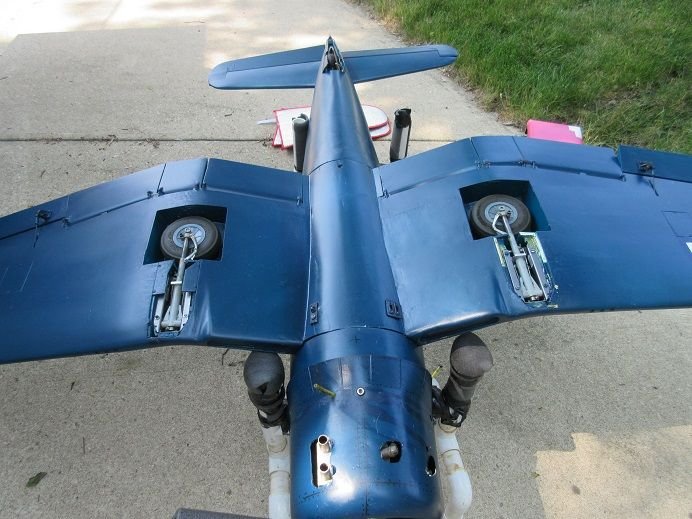
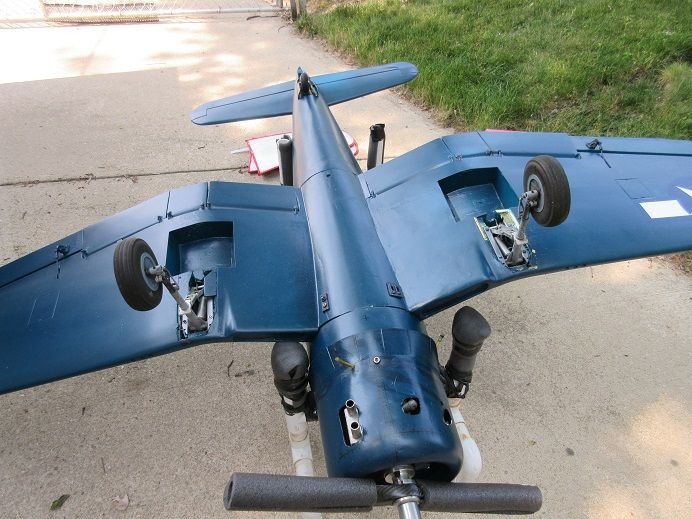
Had to replace the Dubro hinges on the front gear doors that connect to the wing.

Metal cut off disk used to remove the old hinge in the wing.
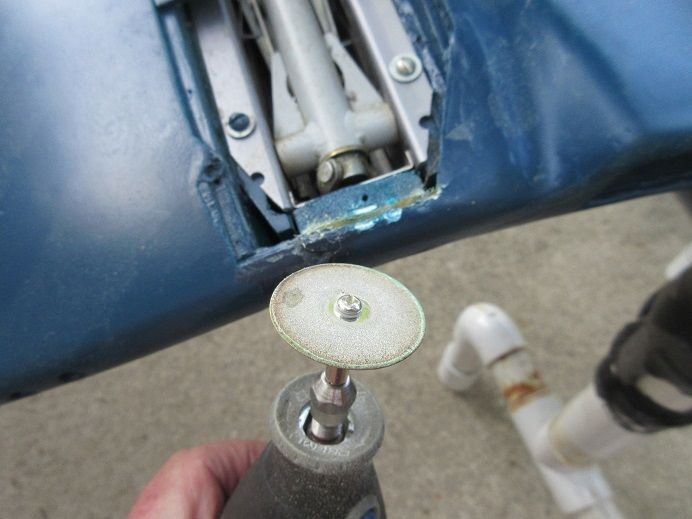
Took more 'time' waiting for the glue to dry than to fix it!
IDIOT: at Wilmington the runway was a little narrow, the edge had a lot of dead grass clippings and, on take off, I was veering to that edge.
I aborted the take off but hit the grass clippings and ripped out one wood gear mount.
Right wood mount needs to be re-glued.
One side frame was bent.
Some auto fender repair tools used to straighten the frame.
Usually I use epoxy but the left wood mount has a small crack in it so I used the thinner finishing resin to secure the wood mount to the wing.
The gear was used to insure the wood mount was glued in the proper orientation.
Testing. All's 'good'.
Had to replace the Dubro hinges on the front gear doors that connect to the wing.
Metal cut off disk used to remove the old hinge in the wing.
Took more 'time' waiting for the glue to dry than to fix it!
Last edited by samparfitt; 06-19-2023 at 03:06 AM.
06-28-2023, 10:48 AM
#30
Local flying field.
A nice low wind mid 80's day after about a week of cool windy weather.
Lots of smoke that 'came in' from Canada.
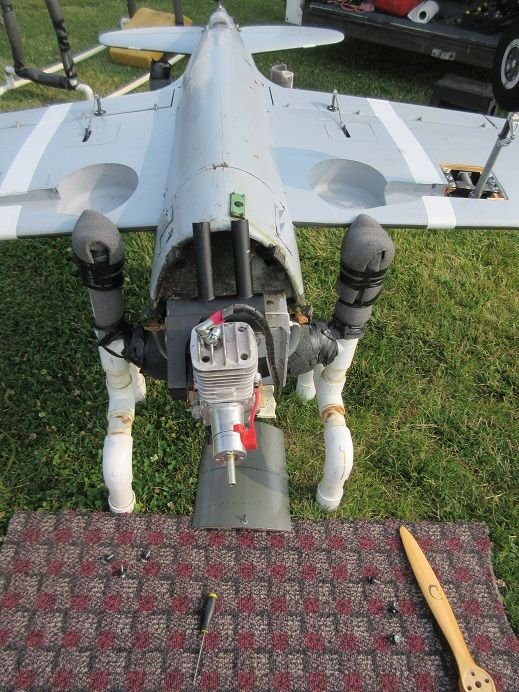
The muffler on the TF P-47 was loose as well as two of the 6 cowl mounts but 4 mounts were 'good enough' for flying.


A nice low wind mid 80's day after about a week of cool windy weather.
Lots of smoke that 'came in' from Canada.
The muffler on the TF P-47 was loose as well as two of the 6 cowl mounts but 4 mounts were 'good enough' for flying.
06-29-2023, 10:22 AM
#31
TF P-47 PM.
Purchased a new canopy from Dino at:
https://www.aero-accessories.com/
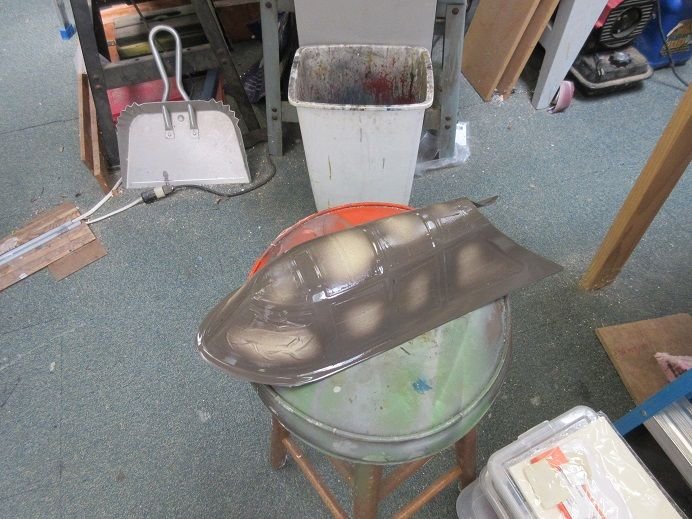
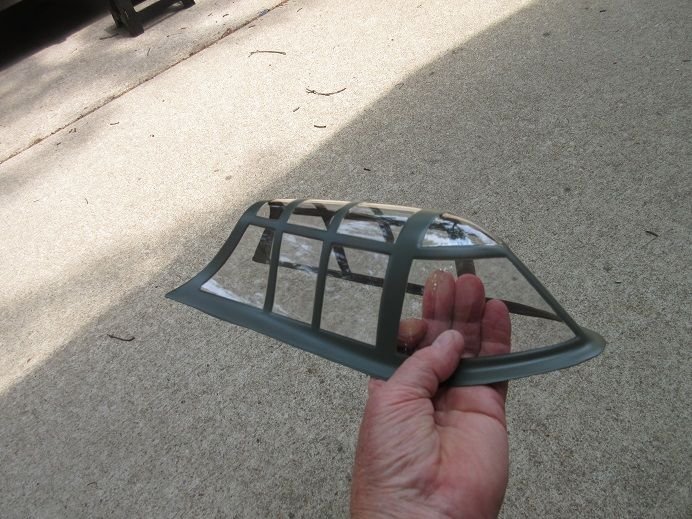
Painting.
First I cleaned it with alcohol.
Taped all the edges.

Some glass, a metal straight edge and new X-acto blade works well.

Filled in the center sections of the windows.

Since sprayed paint 'gets everywhere' the inside is 'taped up'.
Picked the 'best match' for the existing paint.
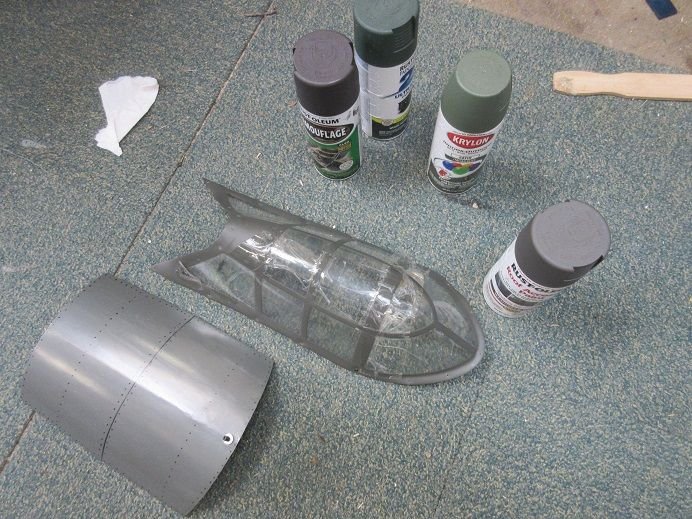
The one color was a little 'dark' so I lightly sprayed the next 'light color' over the 1st color.
Will have to wait for the canopy glue to dry in all the old screw holes that held the old canopy to the fuse.

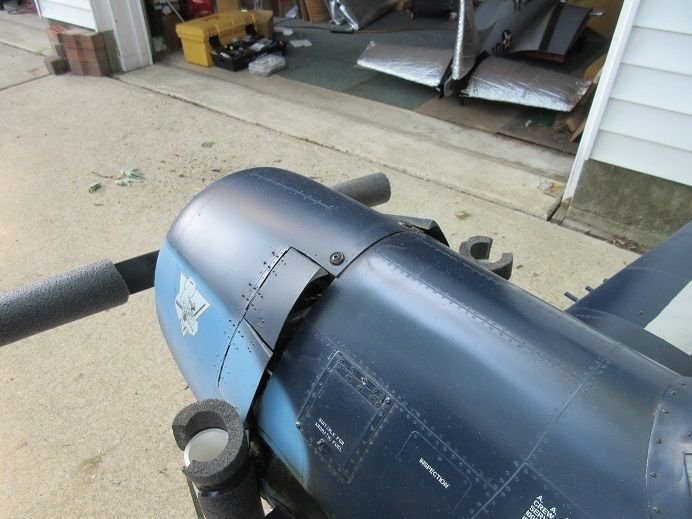
Had to fix the two top cowl mounts that were 'loose'.
Ziroli F4U front corsair doors adjusted with some wire connecting the door to the oleo.

Purchased a new canopy from Dino at:
https://www.aero-accessories.com/
Painting.
First I cleaned it with alcohol.
Taped all the edges.
Some glass, a metal straight edge and new X-acto blade works well.
Filled in the center sections of the windows.
Since sprayed paint 'gets everywhere' the inside is 'taped up'.
Picked the 'best match' for the existing paint.
The one color was a little 'dark' so I lightly sprayed the next 'light color' over the 1st color.
Will have to wait for the canopy glue to dry in all the old screw holes that held the old canopy to the fuse.
Had to fix the two top cowl mounts that were 'loose'.
Ziroli F4U front corsair doors adjusted with some wire connecting the door to the oleo.
07-05-2023, 12:11 PM
#32
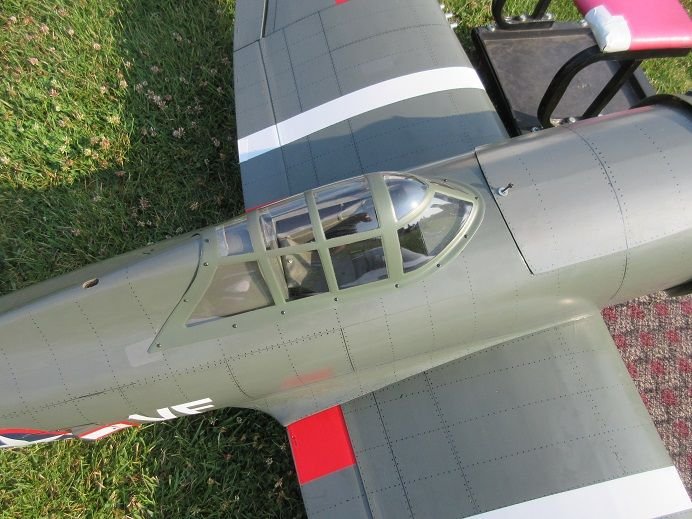
July 5:
Some flying at the local field.
Got there early at 8:30 since it was going to be 90 but low winds.
We were 'out of there' by noon!
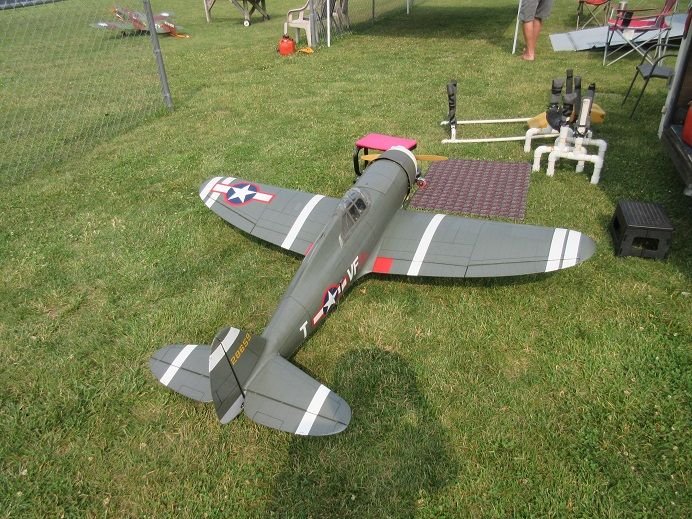
The TF P-47 new canopy.


==================
Americana.
Corn is growing well!

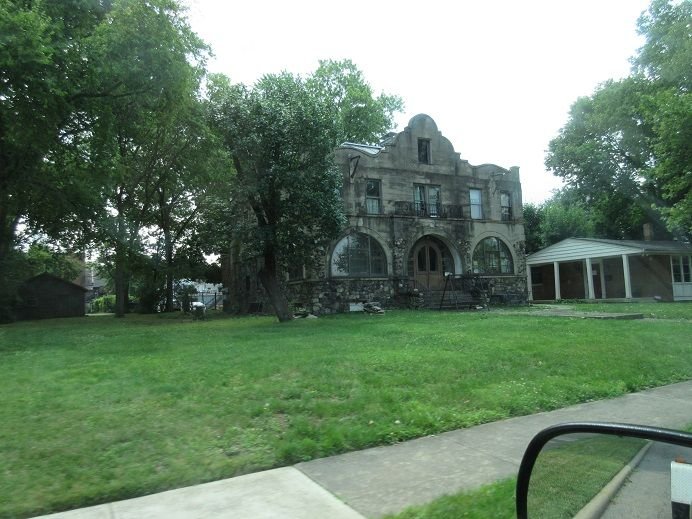
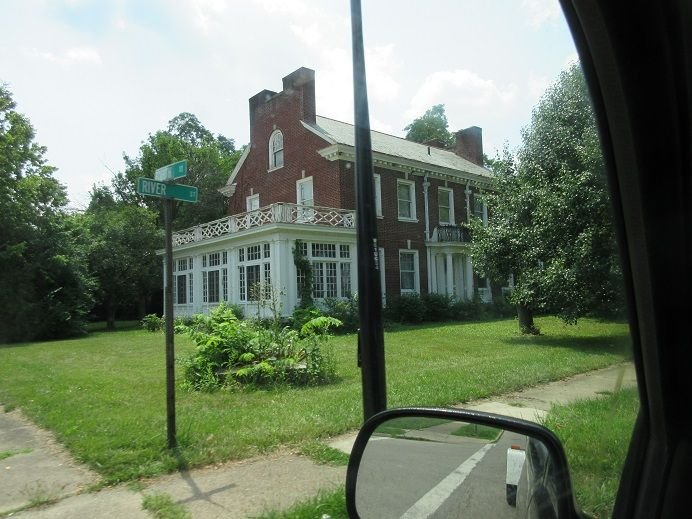
Some nice old houses along the Little Miami river.
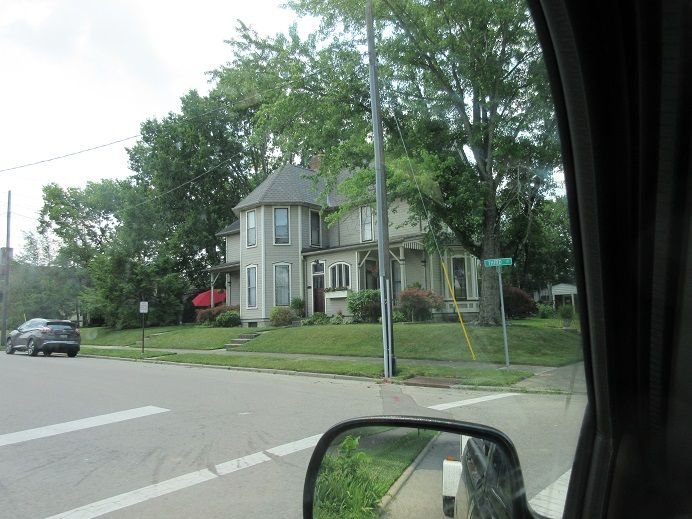

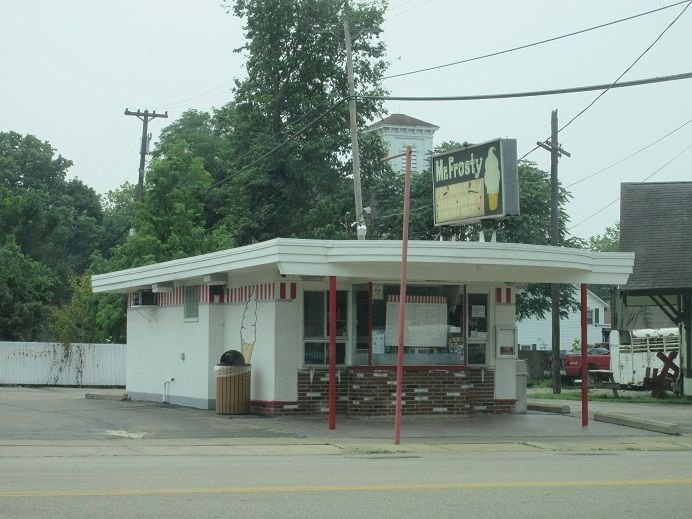
We stopped at 'MR. Frosty' for ice cream which is next to an old railroad freight station.

Some flying at the local field.
Got there early at 8:30 since it was going to be 90 but low winds.
We were 'out of there' by noon!
The TF P-47 new canopy.
==================
Americana.
Corn is growing well!
Some nice old houses along the Little Miami river.
We stopped at 'MR. Frosty' for ice cream which is next to an old railroad freight station.
07-16-2023, 02:25 PM
#33
July 16.
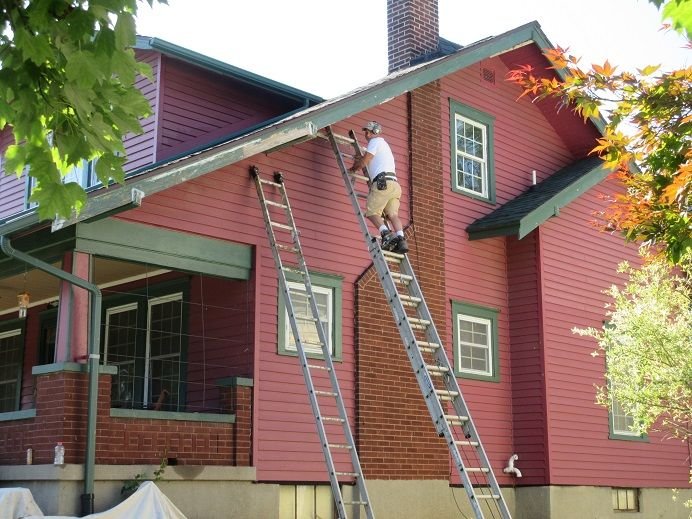
I was 'signed up' to go to Goshin, Indiana's great warbird flyin but my daughter's house trim needed painting.
Last year's pictures of Goshin's flyin;
Posts 36-41:
Road trips: 2022
Hired the painting but I had to be there and it took 4 days, (Monday - Friday, Thursday it rained).
The 'painter' was really good at his job scrapping off the flaking paint and applying 2 coats of paint to all the surfaces.
The last 2 Saturdays we were going to flyins but it rained on both days so we went to the local club on Sunday.
Hot in the upper 80's but low winds down the runway.


We go to the local 'soft ice cream' place after flying.
I was 'signed up' to go to Goshin, Indiana's great warbird flyin but my daughter's house trim needed painting.
Last year's pictures of Goshin's flyin;
Posts 36-41:
Road trips: 2022
Hired the painting but I had to be there and it took 4 days, (Monday - Friday, Thursday it rained).
The 'painter' was really good at his job scrapping off the flaking paint and applying 2 coats of paint to all the surfaces.
The last 2 Saturdays we were going to flyins but it rained on both days so we went to the local club on Sunday.
Hot in the upper 80's but low winds down the runway.
We go to the local 'soft ice cream' place after flying.
Last edited by samparfitt; 07-16-2023 at 02:29 PM.
The following users liked this post:
aghost (07-26-2023)
07-21-2023, 08:45 AM
#35
Been watching Andy's videos of Goshen.
I see a lot of new planes were built over the winter.
I miss seeing you guys as much as seeing the planes!
I'm signed up for Muncie and Rosewood.
Daughter's house trim had to be painted during the Goshen week.
07-24-2023, 07:13 AM
#36
One of these days I'll have this fixed!
Twice this summer the cowl mounts have come loose.
This time I put heavy duty FG cloth on them!
Interesting in that only the right side (viewed from the cockpit) come loose.

Twice, now, I've accidentally pushed my 'wire' to the receiver switch and had 2 low batteries when arriving at the 'field'
so I cut a piece of removable wood to remove that possibility, hopefully!
Sunday was a good day to fly!
Twice this summer the cowl mounts have come loose.
This time I put heavy duty FG cloth on them!
Interesting in that only the right side (viewed from the cockpit) come loose.
Twice, now, I've accidentally pushed my 'wire' to the receiver switch and had 2 low batteries when arriving at the 'field'
so I cut a piece of removable wood to remove that possibility, hopefully!
Sunday was a good day to fly!
The following users liked this post:
maddog-RCU (07-25-2023)
07-26-2023, 10:34 AM
#37
Junior Member
Join Date: Jul 2023
Posts: 1
Likes: 0
Received 0 Likes
on
0 Posts
In order to drive a vehicle doorless in New York, certain safety measures must be met. The vehicle in which you're traveling must be equipped with all required safety equipment, including mirrors, lights, and turn signals. You also must wear a seatbelt, just as you would in any other vehicle. Choose the best 4x4 off road accessories for the experienced riding.

 08-03-2023, 02:18 PM
#39
Lots of PM!
My JR 11X gave me some trouble several weeks ago.
I loaded all my planes into the new transmitter but only 'binded' two of them.
Today, finally, I 'binded' the remaining planes into the 'back up' 11X transmitter.

The Ziroli F4U already was done, previously.

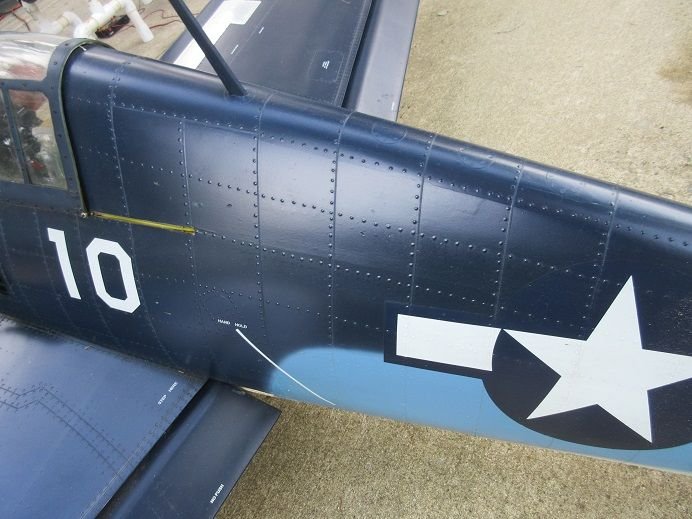
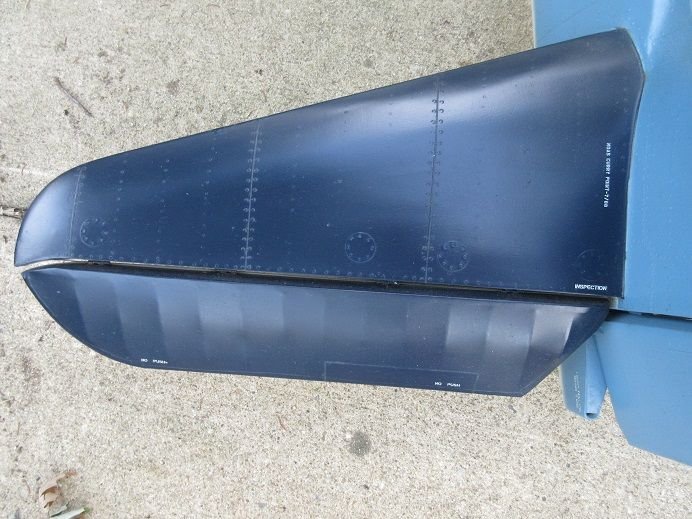
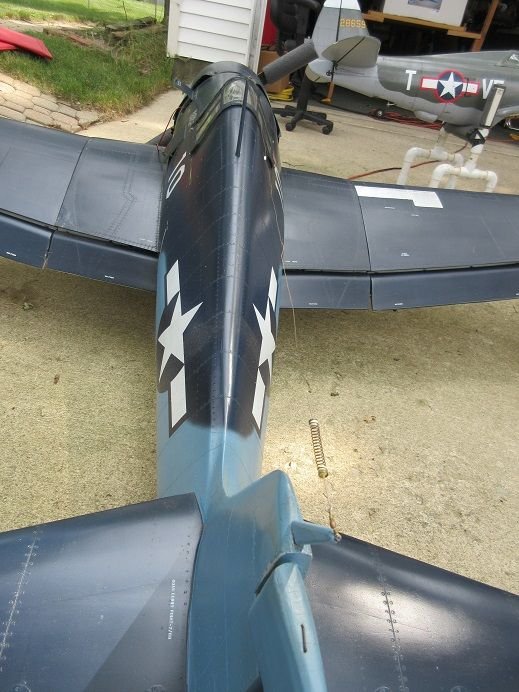
Ziroli F6f Hellcat.
This is an 'oldy' as it was built about 13 seasons ago when the SBD was built.
Nice that the gear worked after sitting for a long time!
The GT-80 took 3 'starts' to get the fuel into carb.
I built this plane with lots of 'bells and whistles'.
Full cockpit and remote sliding canopy.
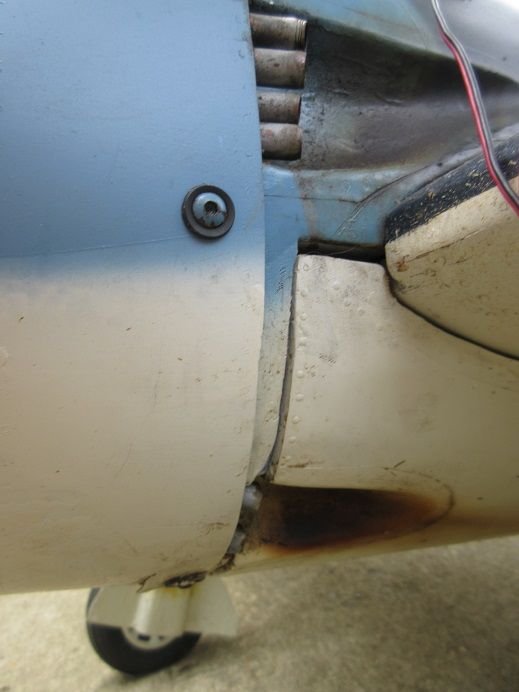
Functioning cowl flaps.
2 access hatches: ignition/fuel and receiver/air.

Rivets 'burned in' with soldering iron and brass tubing.

Unusual for warbirds in that the rivets were 'raised' on the fuse after the cockpit.
All moving surfaces removable.
Functioning exhaust; top and bottom.
That's real weathering on the fuse!
Removable antenna to prevent 'hanger rash'.
Ziroli F4U needed some aileron adjustment. Hopefully, this is enough!

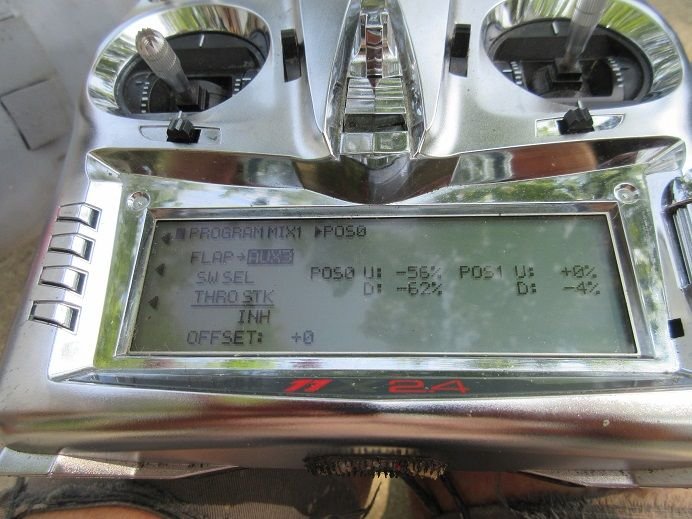
Ziroli SBD gave me some trouble on the 'dive brakes'.
The 'dive brakes' did not 'carry over' when I 'binded' the plane.
They are mixed with the flaps but I had to move the control arm 90 degrees and reverse the servo plus a lot of 'mix adjustments'.
I spent about 30 minutes getting the right 'values'.
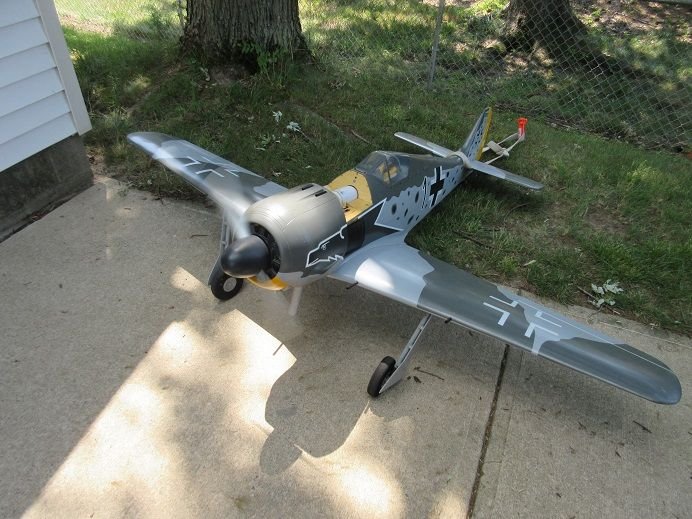
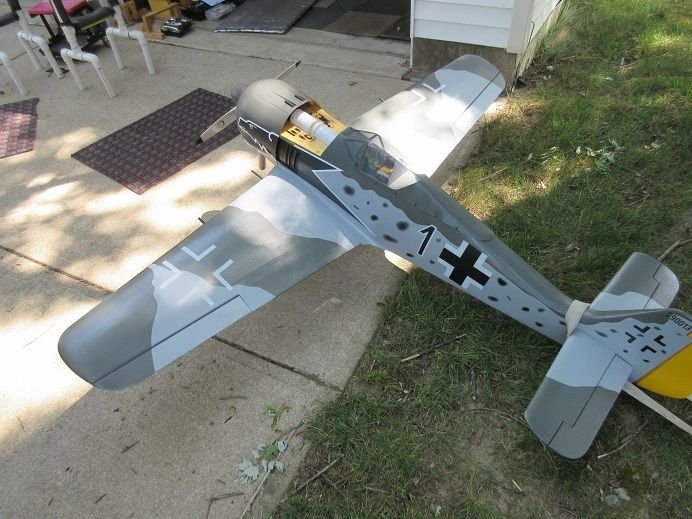
Top Flite FW-190.
All went well on the re-bind, engine test and gear test plus all moving surfaces.
Will work on the Ziroli P-47, tomorrow.

Also, the A-1 skyraider!
My JR 11X gave me some trouble several weeks ago.
I loaded all my planes into the new transmitter but only 'binded' two of them.
Today, finally, I 'binded' the remaining planes into the 'back up' 11X transmitter.
The Ziroli F4U already was done, previously.
Ziroli F6f Hellcat.
This is an 'oldy' as it was built about 13 seasons ago when the SBD was built.
Nice that the gear worked after sitting for a long time!
The GT-80 took 3 'starts' to get the fuel into carb.
I built this plane with lots of 'bells and whistles'.
Full cockpit and remote sliding canopy.
Functioning cowl flaps.
2 access hatches: ignition/fuel and receiver/air.
Rivets 'burned in' with soldering iron and brass tubing.
Unusual for warbirds in that the rivets were 'raised' on the fuse after the cockpit.
All moving surfaces removable.
Functioning exhaust; top and bottom.
That's real weathering on the fuse!
Removable antenna to prevent 'hanger rash'.
Ziroli F4U needed some aileron adjustment. Hopefully, this is enough!
Ziroli SBD gave me some trouble on the 'dive brakes'.
The 'dive brakes' did not 'carry over' when I 'binded' the plane.
They are mixed with the flaps but I had to move the control arm 90 degrees and reverse the servo plus a lot of 'mix adjustments'.
I spent about 30 minutes getting the right 'values'.
Top Flite FW-190.
All went well on the re-bind, engine test and gear test plus all moving surfaces.
Will work on the Ziroli P-47, tomorrow.
Also, the A-1 skyraider!
Last edited by samparfitt; 08-03-2023 at 02:33 PM.
08-04-2023, 01:57 PM
#40
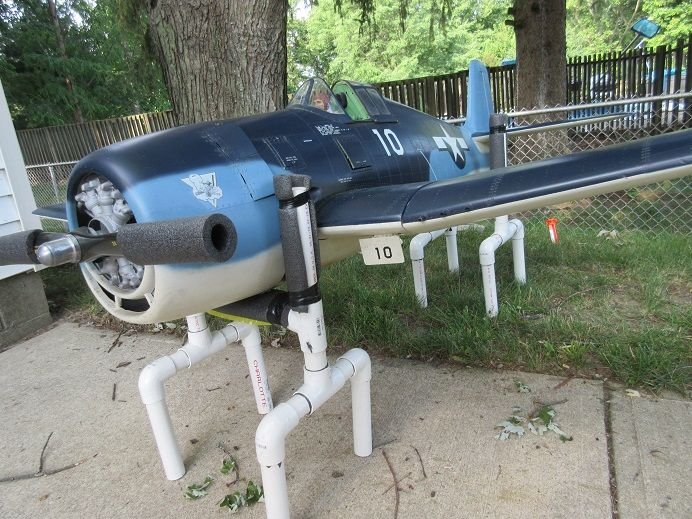
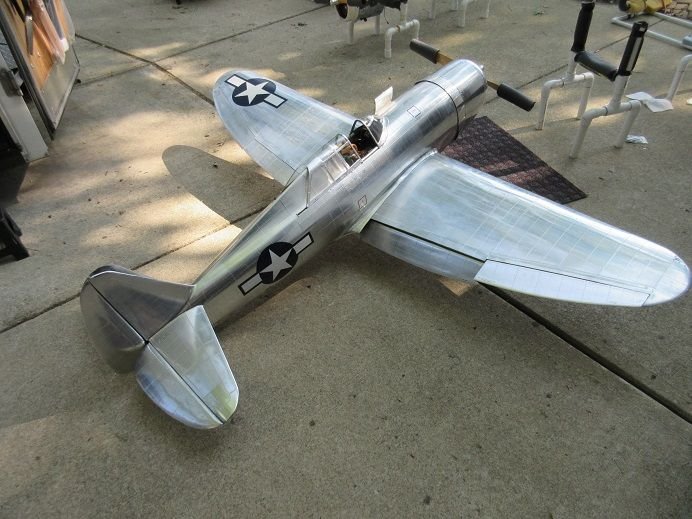
PM my Ziroli P-47.
As with the other planes I needed to re-bind this plane to my other transmitter.
This plane was built in 2014 (there's a build thread on it).
Ziroli 92" p-47 build thread
I cut all the wood from using the Ziroli plans.
Lots of 'bells and whistles'.
Functioning main, inner and tail doors.


Darrell's scale gear with the shrink bar as on the prototype, the gear 'shrinks' when retracted.
Very heavy duty struts and oleos.
Darrell's P-47 wheels.


Nav lights, left, right and tail.

Rotating landing light.
All lights are LED's and operate off the receiver.
I have two 4,200 MA battery packs so that should be 'enough'!

Moving surfaces checked after the re-bind.
All moving surfaces removable.

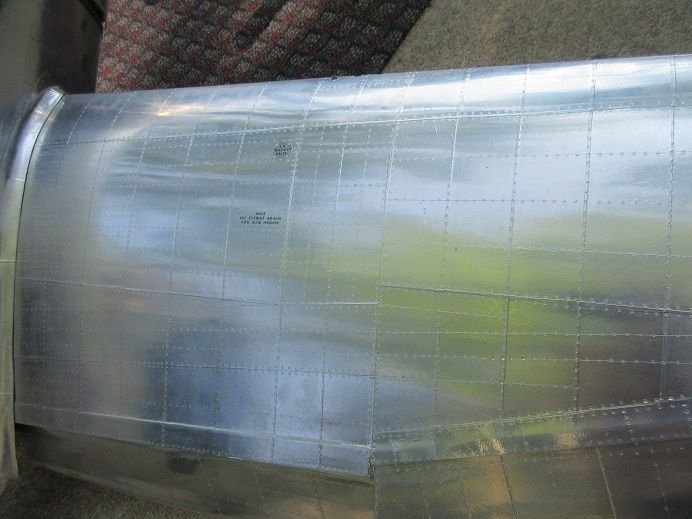
130 hours to apply the aluminum tape and rivets!

Fortunately, the electrons know where to go!
4 bolts to secure the wing.

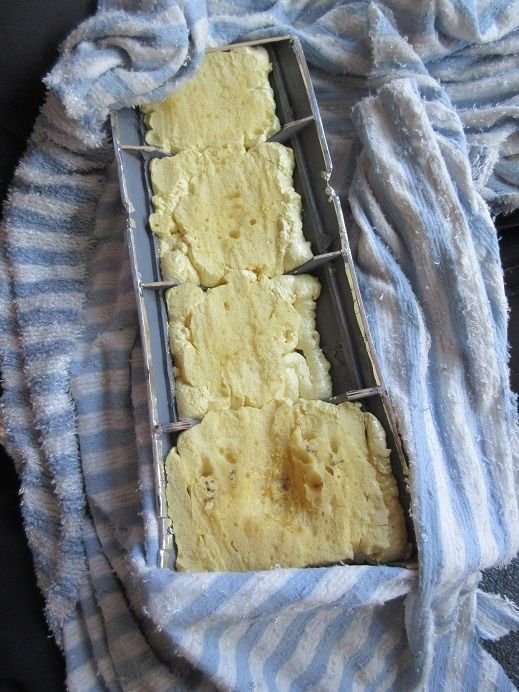
Foam in the belly pan for any 'gear up' landings!
At my age, this baby is getting harder and harder to 'right side up'!
Functioning canopy.

Complete cockpit detail.
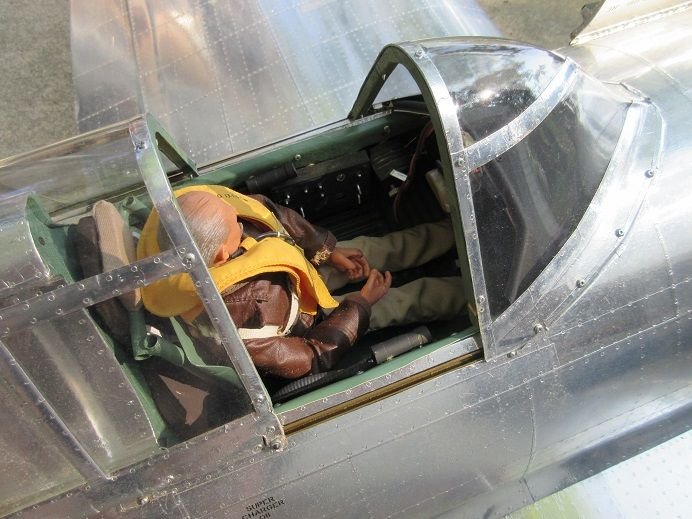
Lighted 'gun site' and 'dash'.

All service functions under one hatch.

As with the other planes I needed to re-bind this plane to my other transmitter.
This plane was built in 2014 (there's a build thread on it).
Ziroli 92" p-47 build thread
I cut all the wood from using the Ziroli plans.
Lots of 'bells and whistles'.
Functioning main, inner and tail doors.
Darrell's scale gear with the shrink bar as on the prototype, the gear 'shrinks' when retracted.
Very heavy duty struts and oleos.
Darrell's P-47 wheels.
Nav lights, left, right and tail.
Rotating landing light.
All lights are LED's and operate off the receiver.
I have two 4,200 MA battery packs so that should be 'enough'!
Moving surfaces checked after the re-bind.
All moving surfaces removable.
130 hours to apply the aluminum tape and rivets!
Fortunately, the electrons know where to go!
4 bolts to secure the wing.
Foam in the belly pan for any 'gear up' landings!
At my age, this baby is getting harder and harder to 'right side up'!
Functioning canopy.
Complete cockpit detail.
Lighted 'gun site' and 'dash'.
All service functions under one hatch.
Last edited by samparfitt; 08-04-2023 at 02:36 PM.
08-04-2023, 02:10 PM
#41
PM the Ziroli P-47 (cont).
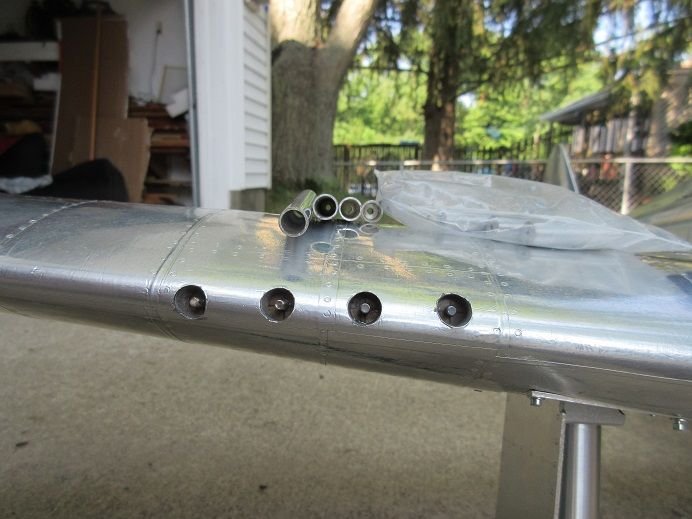
The guns are screwed into the wing to prevent 'hanger rash'.
They are parallel to the ground as on the prototype.
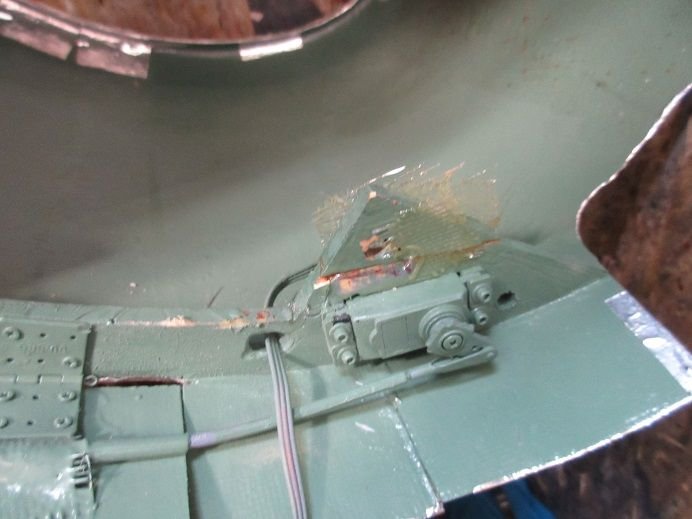
Functioning cowl flaps.
Inner doors controlled by air cylinders.

One of the 4 tabs to secure the cowl to the firewall was broke.
The 2 servos in the cowl control the cowl flaps.
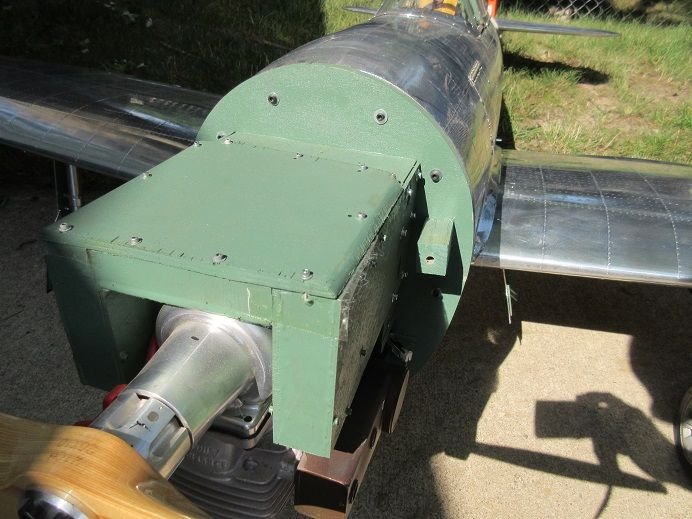
Had to remove the cowl to remove the spark plug to get some fuel into the cylinder in order to start the engine that's been 'sitting' since last year.

Fire wall is removable as it is modular having the engine, throttle/choke servos and tank all contained in this module.
Many screws secures it to the secondary fire wall.
Box is for lead.
Noticed that 2 of the 4 satellites LED's were not on. Had to replace one and re-bind to get all 4 'on'.

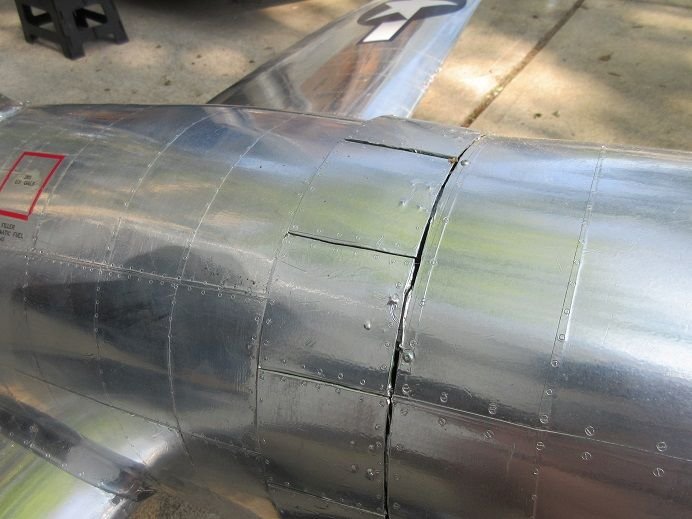
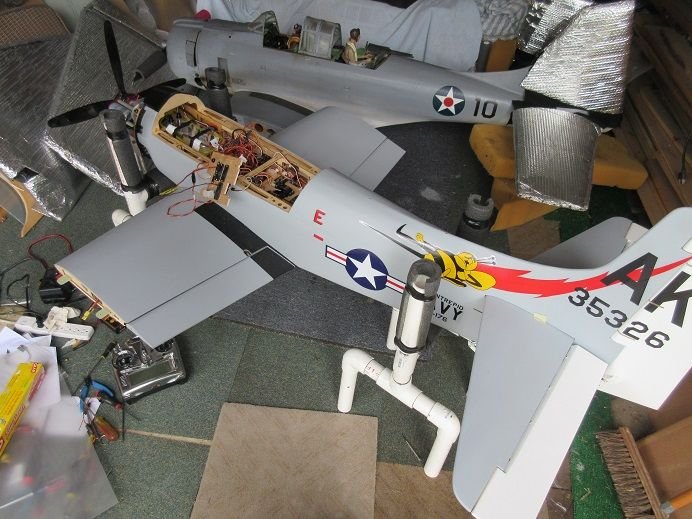
TF P-47.
Needed to re-balance the prop with some clear lacquer.

While at the field I, accidentally, stepped on part of the hatch and it needed some 're-gluing'.

One of these days I'll assemble this plane!

The guns are screwed into the wing to prevent 'hanger rash'.
They are parallel to the ground as on the prototype.
Functioning cowl flaps.
Inner doors controlled by air cylinders.
One of the 4 tabs to secure the cowl to the firewall was broke.
The 2 servos in the cowl control the cowl flaps.
Had to remove the cowl to remove the spark plug to get some fuel into the cylinder in order to start the engine that's been 'sitting' since last year.
Fire wall is removable as it is modular having the engine, throttle/choke servos and tank all contained in this module.
Many screws secures it to the secondary fire wall.
Box is for lead.
Noticed that 2 of the 4 satellites LED's were not on. Had to replace one and re-bind to get all 4 'on'.
TF P-47.
Needed to re-balance the prop with some clear lacquer.
While at the field I, accidentally, stepped on part of the hatch and it needed some 're-gluing'.
One of these days I'll assemble this plane!
Last edited by samparfitt; 08-04-2023 at 02:14 PM.
The following users liked this post:
aghost (08-07-2023)
08-08-2023, 03:00 PM
#42
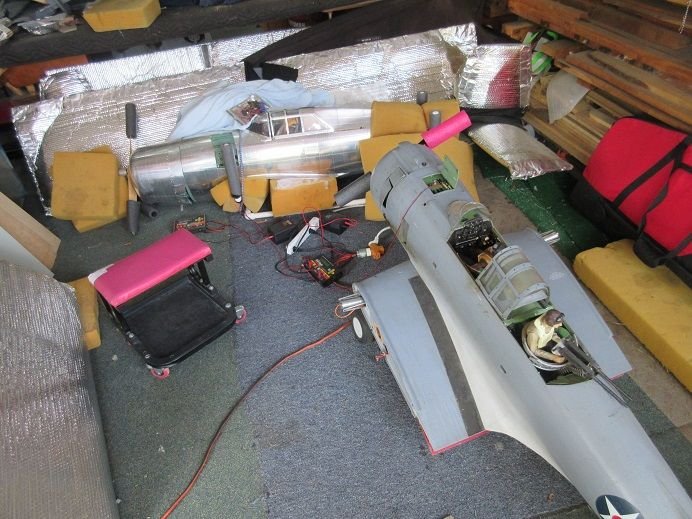
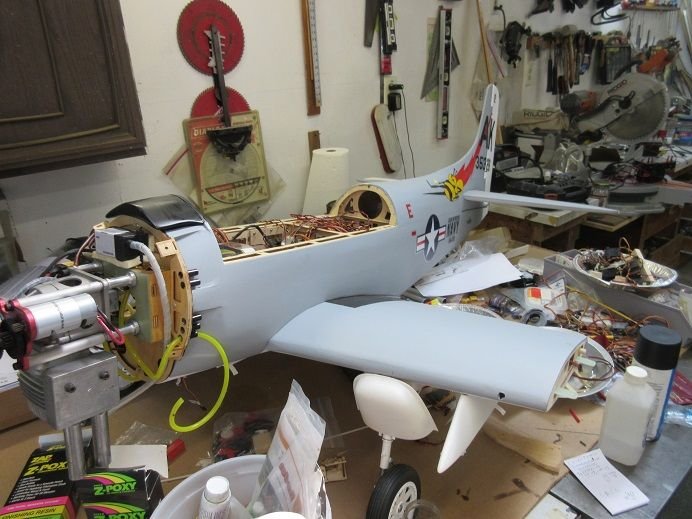
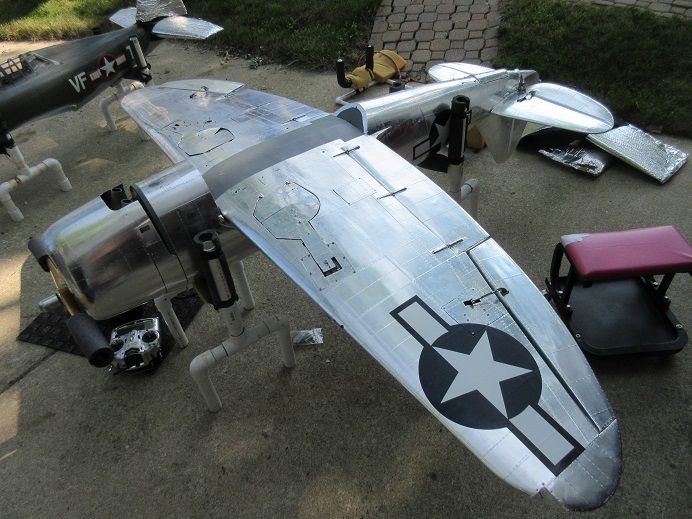
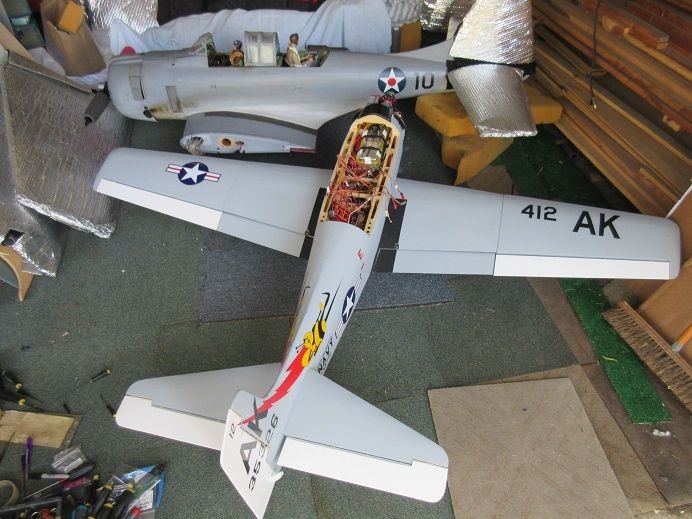
A-1 Skyraider by Legend Hobbies.
PM (Cont).
This plane was purchased from an estate sale and already assembled.
I'm binding the receiver to my transmitter and getting all the moving surfaces operating correctly.
The original assembler did a nice job using digital servos and a very expensive Spektrum $450 receiver AR14400T
(I thought my $250 'power safe' receivers were expensive!).
Initially, I had trouble binding the transmitter to the receiver thinking, maybe, my transmitter is too old for it.
On my 'power safe' receivers I can 'bind' using any port but this receiver has a specific port for 'binding'.
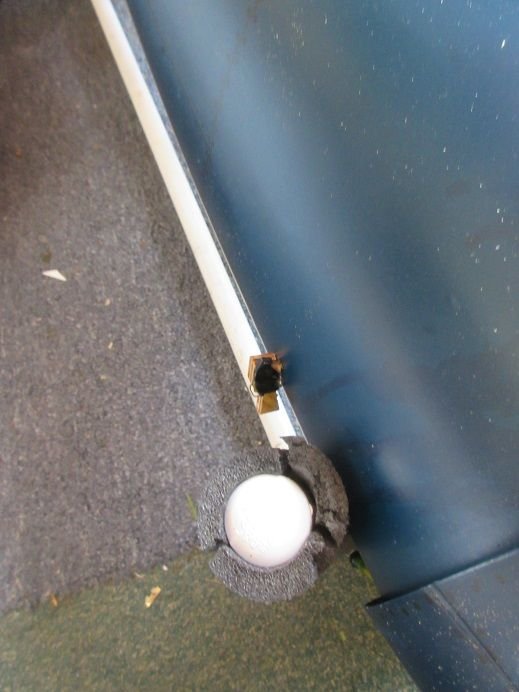
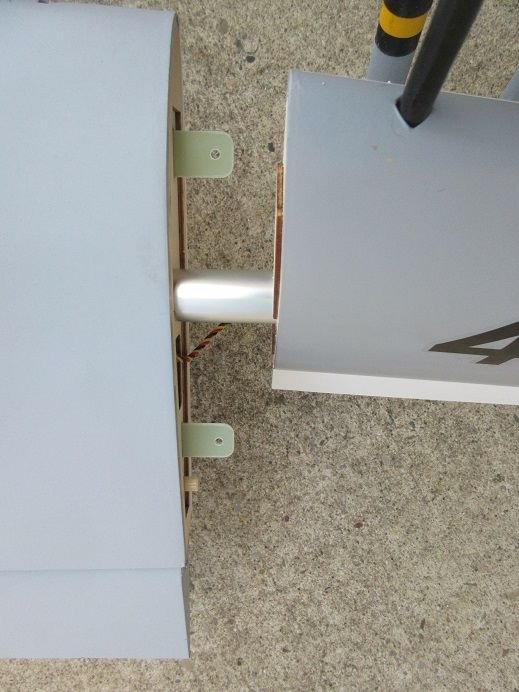
Initially, I thought this was a 'fuel dot' but it's a 'push button' ON/OFF switch.

This receiver has a lot more 'bells and whistles' than my 'power safe' receivers,
although I won't be able to use a lot of them since my transmitter can't handle those options.

This receiver has 'satellites' like my 'power safe' receivers but no antennas on two of them.

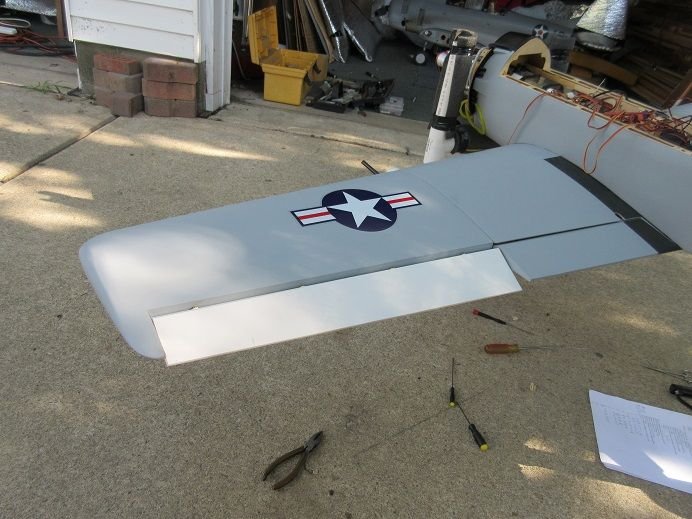
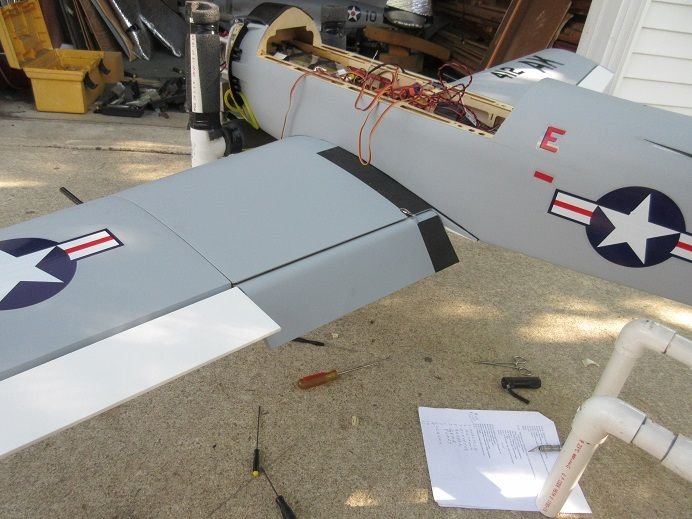
Nice secure way of attaching the outer wings to the inner wing.
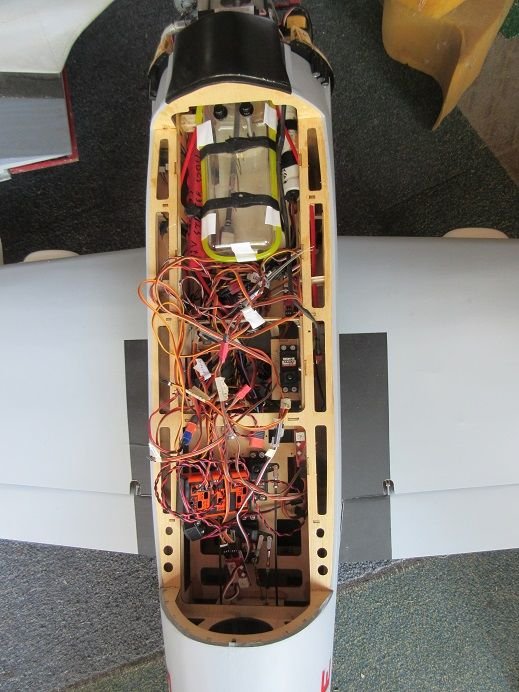
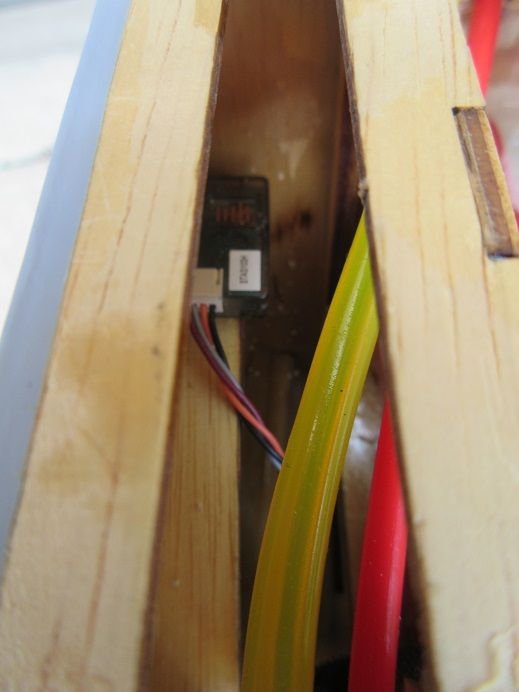
I got all the moving surfaces to move except the ailerons as I couldn't find the wires inside the fuse
so I tracked the aileron wire through the gear bay and flap servo area and found the wire never reached the fuse!
Had to thread a piano wire with a hook to route a new extension wire to the aileron servo.
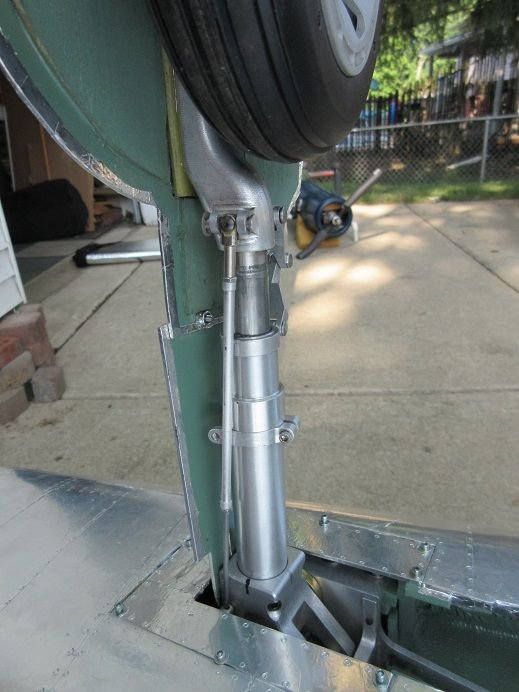
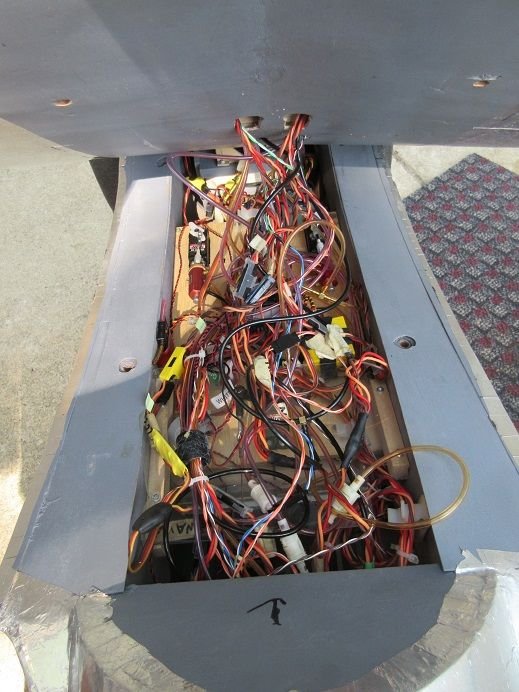
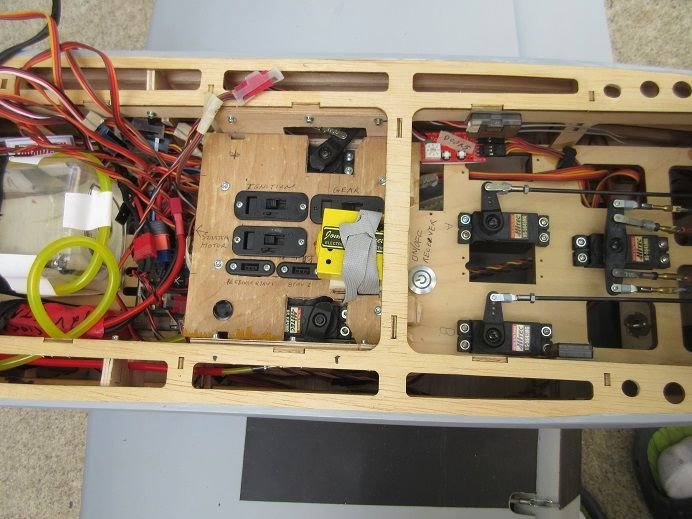
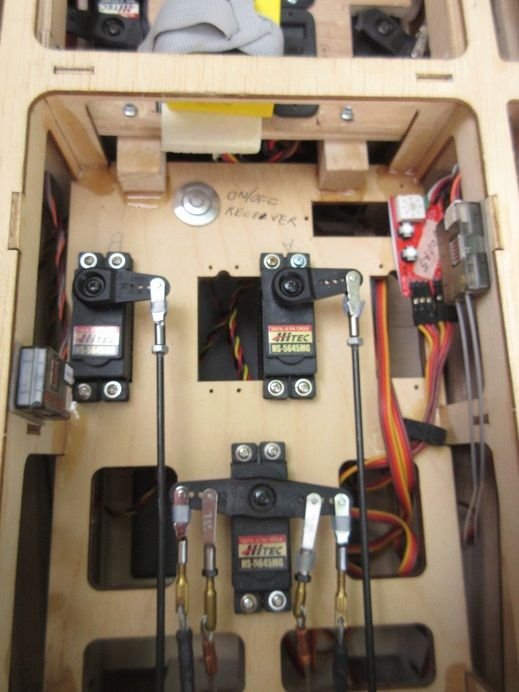
Gear bay.
Previous owner used some nice wire 'holds'.

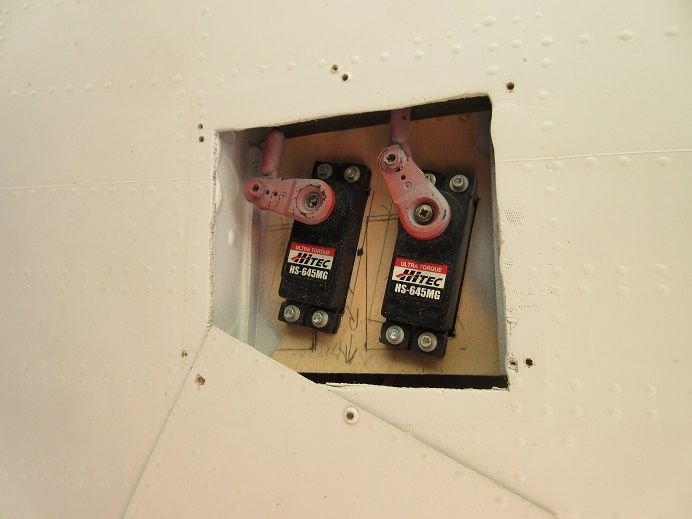
Flap servo area.

All surfaces working well including the throttle/choke servos.

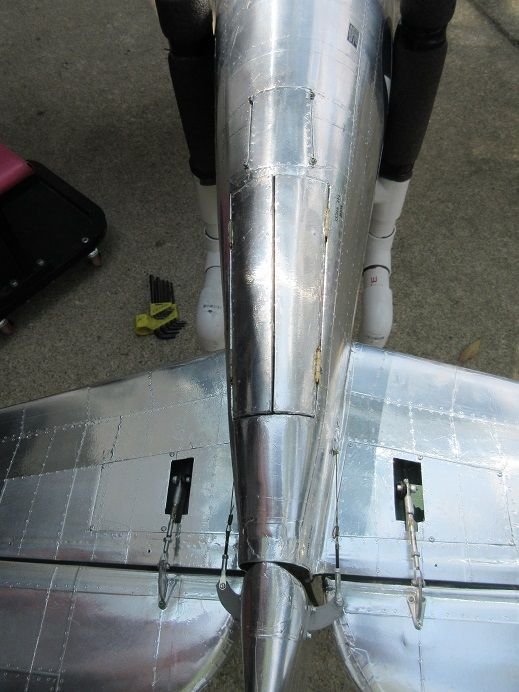
Tail wheel was pointing forward which didn't look 'right' so checked a picture and rotated it as the set screw was loose.
Took awhile to figure out where all those wires 'went'!
Tomorrow should be able to 'work on' the gear, drop tanks and starter motor.
PM (Cont).
This plane was purchased from an estate sale and already assembled.
I'm binding the receiver to my transmitter and getting all the moving surfaces operating correctly.
The original assembler did a nice job using digital servos and a very expensive Spektrum $450 receiver AR14400T
(I thought my $250 'power safe' receivers were expensive!).
Initially, I had trouble binding the transmitter to the receiver thinking, maybe, my transmitter is too old for it.
On my 'power safe' receivers I can 'bind' using any port but this receiver has a specific port for 'binding'.
Initially, I thought this was a 'fuel dot' but it's a 'push button' ON/OFF switch.
This receiver has a lot more 'bells and whistles' than my 'power safe' receivers,
although I won't be able to use a lot of them since my transmitter can't handle those options.
This receiver has 'satellites' like my 'power safe' receivers but no antennas on two of them.
Nice secure way of attaching the outer wings to the inner wing.
I got all the moving surfaces to move except the ailerons as I couldn't find the wires inside the fuse
so I tracked the aileron wire through the gear bay and flap servo area and found the wire never reached the fuse!
Had to thread a piano wire with a hook to route a new extension wire to the aileron servo.
Gear bay.
Previous owner used some nice wire 'holds'.
Flap servo area.
All surfaces working well including the throttle/choke servos.
Tail wheel was pointing forward which didn't look 'right' so checked a picture and rotated it as the set screw was loose.
Took awhile to figure out where all those wires 'went'!
Tomorrow should be able to 'work on' the gear, drop tanks and starter motor.
Last edited by samparfitt; 08-08-2023 at 03:04 PM.
08-09-2023, 04:40 AM
#43

My Feedback: (20)
Sam,
We are not going to be able to fly our Skyraiders together. The left wing on mine failed just outboard of the wheel well at Old F**t Flyers yesterday. It came off in level flight at cruise speed. Destruction was total, including breaking the crankcase of the DLE 61 in half. I'm not surprised it broke: the bottom wing spar does not carry through the wheel well area. The "spar" itself broke.
Chuck
08-09-2023, 02:21 PM
#45
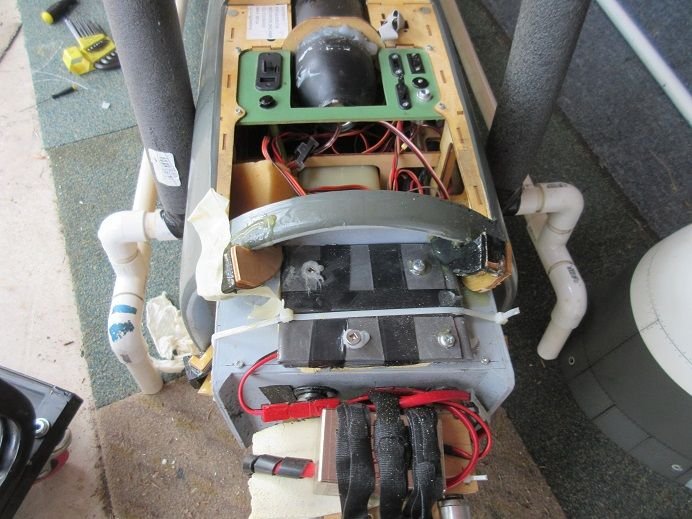
Hobby Legends Skyraider PM (Cont).
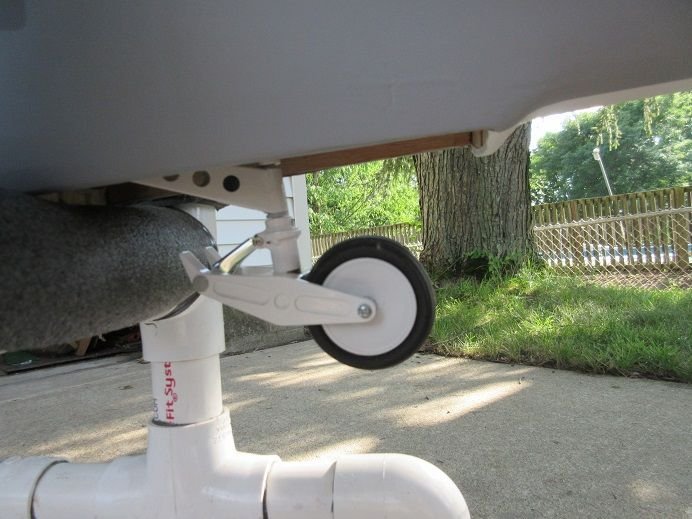
Gear setup.
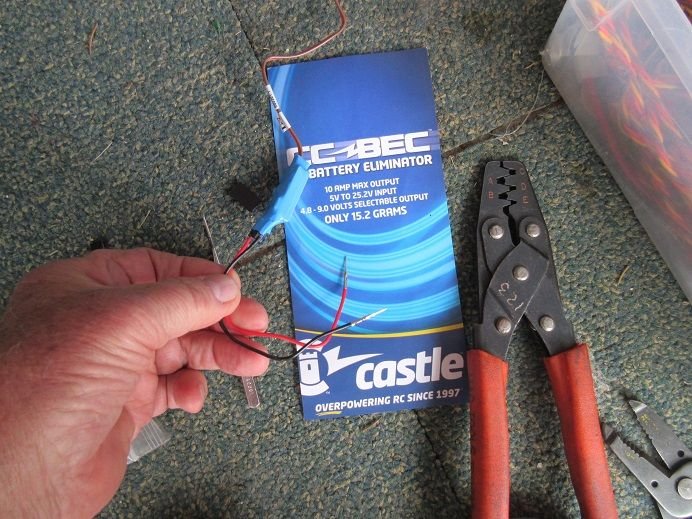
Robart suggested I use castle creations CC-BEC battery regulator to insure I don't exceed 9 volts.
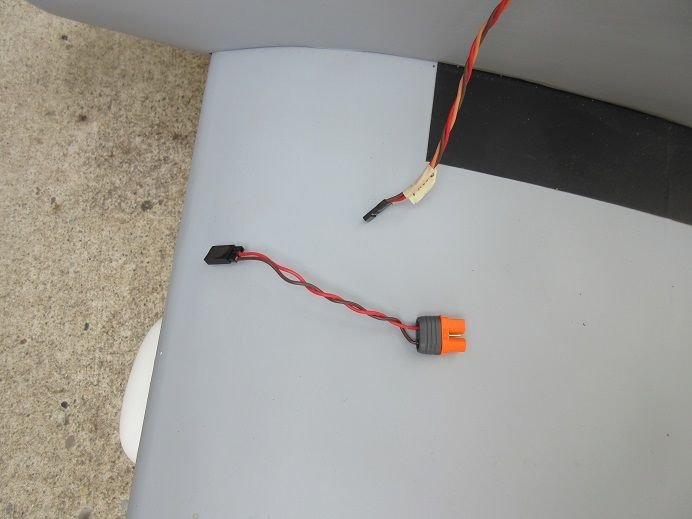
I purchased the item and it needed a female connector on the incoming wires so that was done.
I turned on the transmitter and receiver and the gear didn't move.
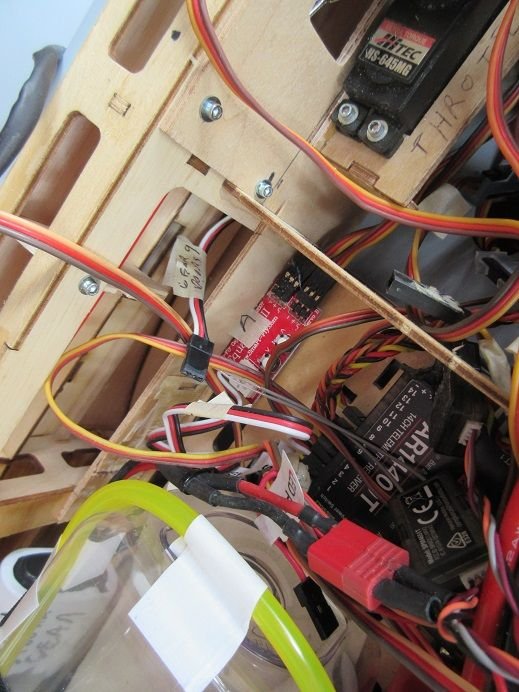
I connected a servo to the gear port on the receiver to insure it was working and the servo moved so I know 'commands' are going to the Robart control box (orange box in picture).
I checked the CC-BEC and it's only putting out 5.1 volts.
The Robart instructions say I need 6-9 volts.
There was no 'adjustments' on the CC-BEC so I went to their web site and I need to buy USB programming kit plus download their software.
Well I bought the kit online and it should be here by Friday and I downloaded their software.
I checked the output of my 3,400 MA 6 cell battery and it puts out 8.42 volts after a full charge
so it seems like I wouldn't need any 'voltage regulator'?

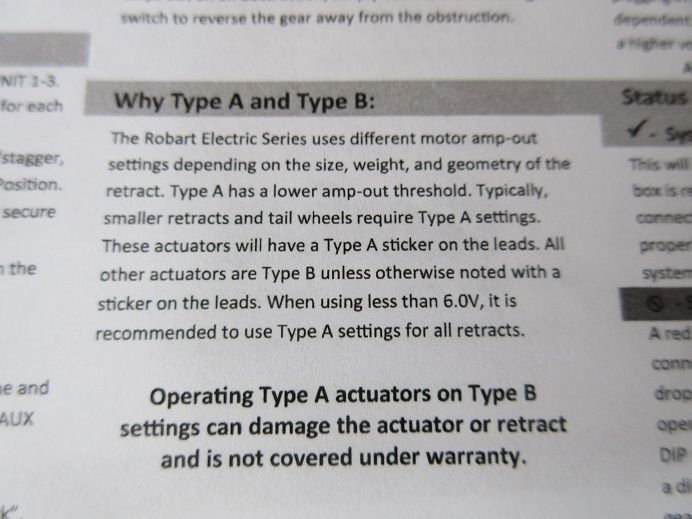
Robart instructions stating minimum 6 volts.
The original owner has a separate connector in channel 9 for the gear doors.
When I turn the receiver on the gear door servos were on.
There are 3 ports in the Robart control box so I'm guessing 2 ports are for each main gear and the 3rd for the tail wheel
which tells me the doors cannot be controlled by the 'control box' and must be 'mixed in' with the gears.
These electric retracts seem very limited as using an air valve I can, easily, control all these functions with air retracts?
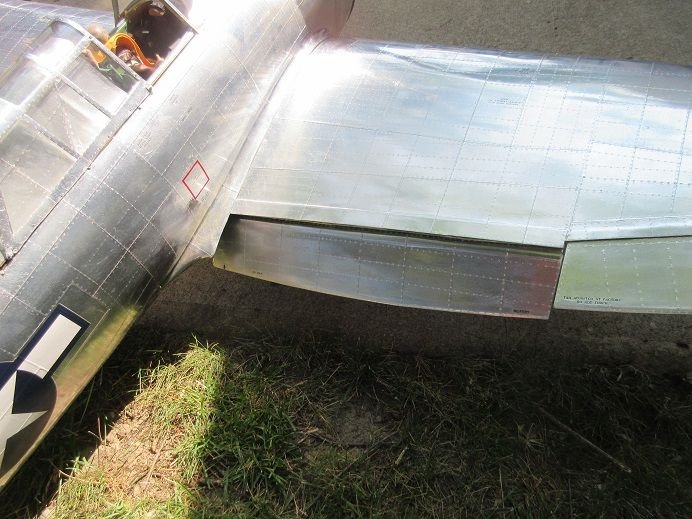
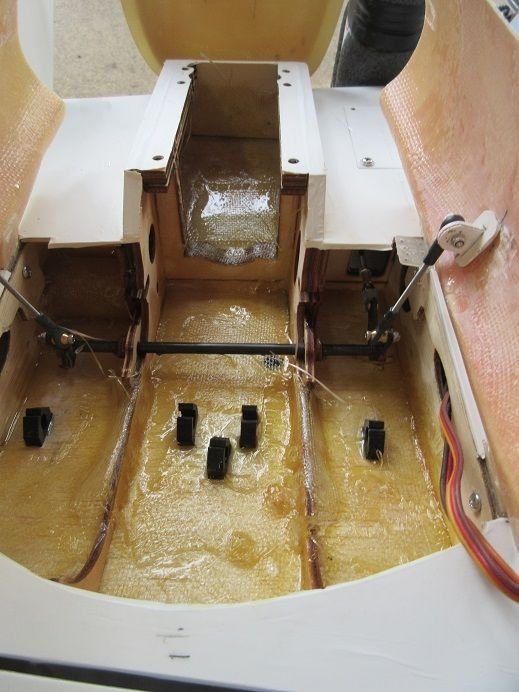
Since I'm on 'hold' with the retracts I figure I might as well re-enforce the wheel wells since a fellow comrade had his wing 'fold' on him.
I always re-enforce the main gear wells but I'm glad I was reminded as, getting old, I may have forgot to do it!
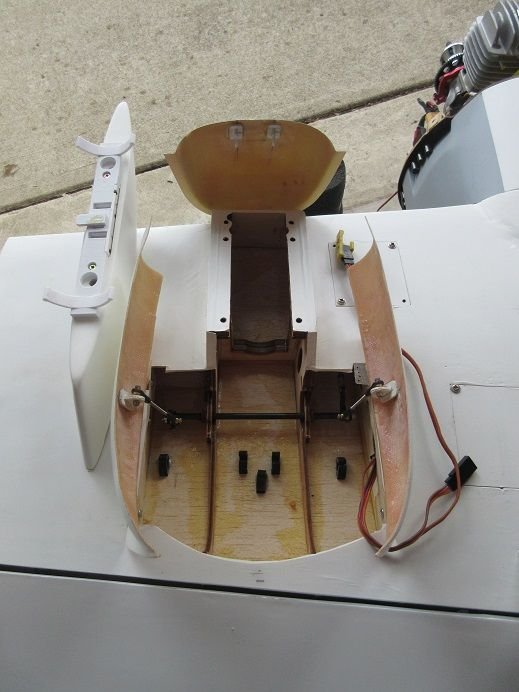
BEFORE:
Those wire 'holds' were CA'ed to the balsa so I left them there as I didn't want to damage the balsa sheeting.
Very heavy duty (from auto store) FG cloth dry fitted into the wheel wells.
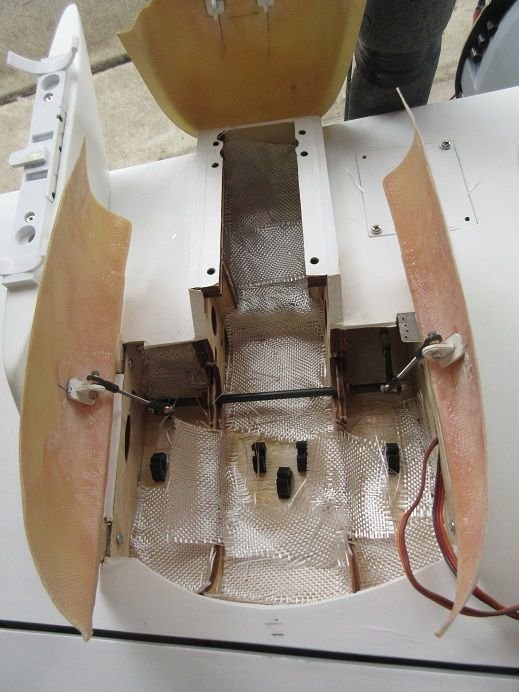
AFTER:
ZAP finishing resin used on the FG cloth.
FG cloth on the wing tube support.
I had to be careful not to get any resin on the door's moving linkage.
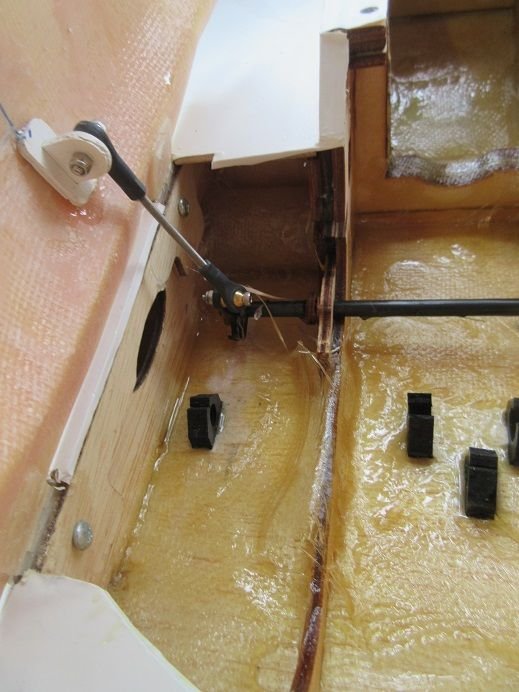
Other side of well.
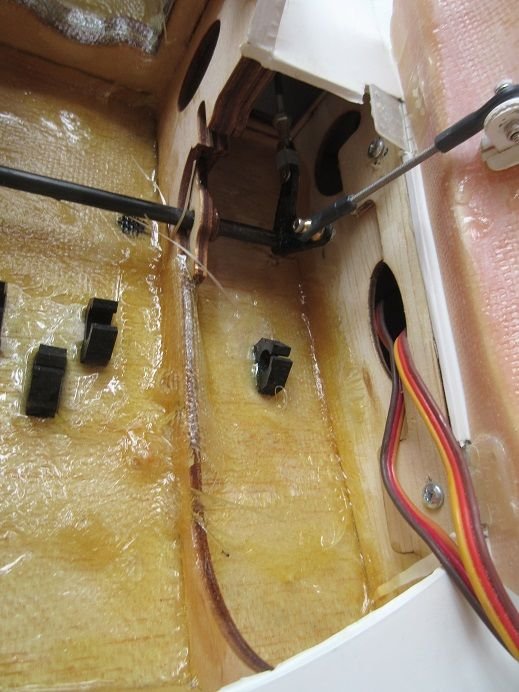
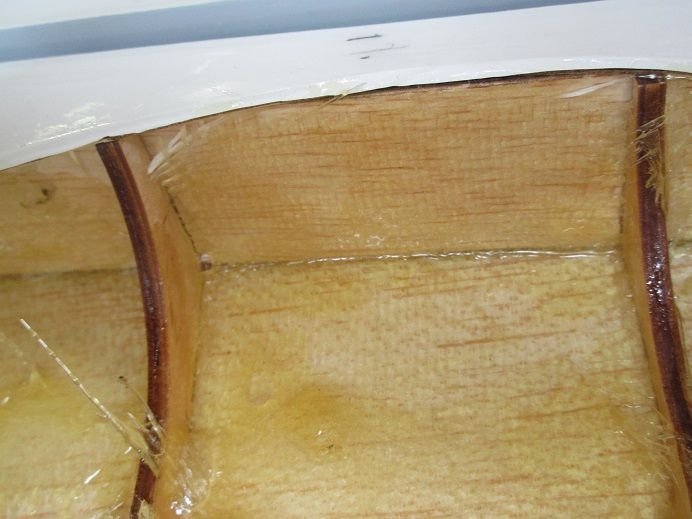
Front of well. FG cloth, also, laid 'crossways' to secure both ribs.

Front of well.
Let that 'cook' overnight.
Tomorrow, I should be able to work on the starter motor.
Gear setup.
Robart suggested I use castle creations CC-BEC battery regulator to insure I don't exceed 9 volts.
I purchased the item and it needed a female connector on the incoming wires so that was done.
I turned on the transmitter and receiver and the gear didn't move.
I connected a servo to the gear port on the receiver to insure it was working and the servo moved so I know 'commands' are going to the Robart control box (orange box in picture).
I checked the CC-BEC and it's only putting out 5.1 volts.
The Robart instructions say I need 6-9 volts.
There was no 'adjustments' on the CC-BEC so I went to their web site and I need to buy USB programming kit plus download their software.
Well I bought the kit online and it should be here by Friday and I downloaded their software.
I checked the output of my 3,400 MA 6 cell battery and it puts out 8.42 volts after a full charge
so it seems like I wouldn't need any 'voltage regulator'?
Robart instructions stating minimum 6 volts.
The original owner has a separate connector in channel 9 for the gear doors.
When I turn the receiver on the gear door servos were on.
There are 3 ports in the Robart control box so I'm guessing 2 ports are for each main gear and the 3rd for the tail wheel
which tells me the doors cannot be controlled by the 'control box' and must be 'mixed in' with the gears.
These electric retracts seem very limited as using an air valve I can, easily, control all these functions with air retracts?
Since I'm on 'hold' with the retracts I figure I might as well re-enforce the wheel wells since a fellow comrade had his wing 'fold' on him.
I always re-enforce the main gear wells but I'm glad I was reminded as, getting old, I may have forgot to do it!
BEFORE:
Those wire 'holds' were CA'ed to the balsa so I left them there as I didn't want to damage the balsa sheeting.
Very heavy duty (from auto store) FG cloth dry fitted into the wheel wells.
AFTER:
ZAP finishing resin used on the FG cloth.
FG cloth on the wing tube support.
I had to be careful not to get any resin on the door's moving linkage.
Other side of well.
Front of well. FG cloth, also, laid 'crossways' to secure both ribs.
Front of well.
Let that 'cook' overnight.
Tomorrow, I should be able to work on the starter motor.
Last edited by samparfitt; 08-09-2023 at 02:25 PM.
The following users liked this post:
FokkerD7 (08-10-2023)
08-10-2023, 11:41 AM
#46
Legend Hobbies A-1 Skyraider PM (CONT)
Got the retracts to work
With the 'voltage regulator' in line with the power to the retract control unit I was only getting 5.1 volts.
Since the manual says it needs 6-9 volts and my battery only puts out 8.2 volts I eliminated the 'voltage regulator'.
When I turned on the power to the gear, one was up and one was down.
MAN: I had to read the instructions!
The manual says the wires in the 'control unit' can be reversed 180 degrees.
That fixed it!
The control unit has the option to delay one retract so I'll have to see if that was the 'case' with the Skyraider.
I'm using a separate battery for the retracts and not the receiver batteries, even though I'm using 2 receiver batteries,
as I've seen and read where the retracts can interfere with the receiver's reception from the transmitter.
Video:
After the FG cloth and finishing resin cured 'overnight' the gear and wiring were re-installed.

One of the gear door hinges 'broke free' so I epoxied and screwed it.

Control unit:
Unit 1 has 'black/red' wires from left to right but I had to reverse Unit 2's wires as someone put it in 'back wards'.
Unit 3 is for the tail wheel and one would 'think' that it should, also, be 'black/red' but that one had to be reversed.
As long as they work I'm happy!
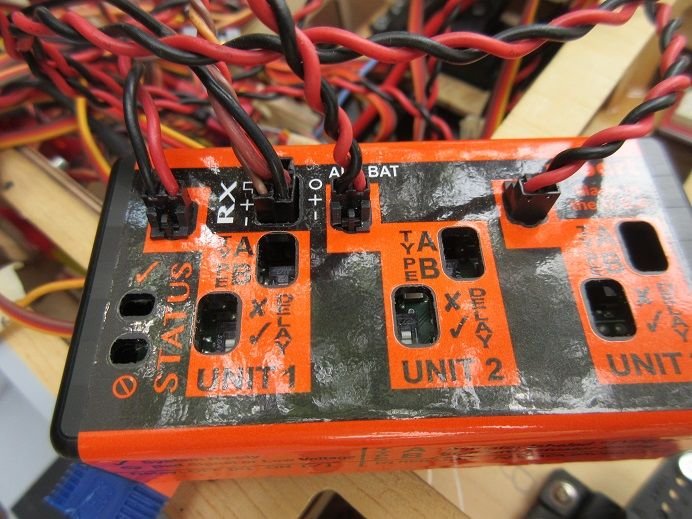
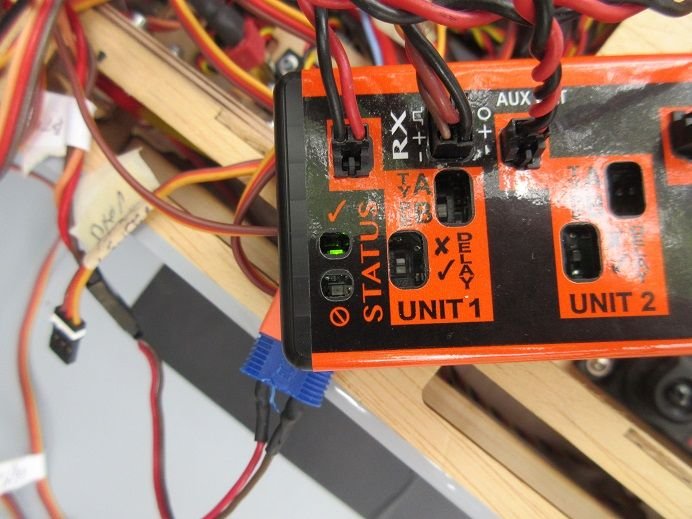
The green light indicates all is 'good'!
Now I have to figure out how to connect the main gear doors so they close after the gear is UP and open before the gear goes DOWN!
Disappointed in that the 'control unit' is not 'sophisticated enough' to handle that operation!
Yesterday I charged my old transmitter and, today, the battery is 'jumping' from 10.5 to 9.5 volts
which makes me believe the transmitter isn't faulty but the battery is!
I never fly if my voltage is below 10.0 so 9.5 is, definitely, scary!

Got the retracts to work
With the 'voltage regulator' in line with the power to the retract control unit I was only getting 5.1 volts.
Since the manual says it needs 6-9 volts and my battery only puts out 8.2 volts I eliminated the 'voltage regulator'.
When I turned on the power to the gear, one was up and one was down.
MAN: I had to read the instructions!
The manual says the wires in the 'control unit' can be reversed 180 degrees.
That fixed it!
The control unit has the option to delay one retract so I'll have to see if that was the 'case' with the Skyraider.
I'm using a separate battery for the retracts and not the receiver batteries, even though I'm using 2 receiver batteries,
as I've seen and read where the retracts can interfere with the receiver's reception from the transmitter.
Video:
After the FG cloth and finishing resin cured 'overnight' the gear and wiring were re-installed.
One of the gear door hinges 'broke free' so I epoxied and screwed it.
Control unit:
Unit 1 has 'black/red' wires from left to right but I had to reverse Unit 2's wires as someone put it in 'back wards'.
Unit 3 is for the tail wheel and one would 'think' that it should, also, be 'black/red' but that one had to be reversed.
As long as they work I'm happy!
The green light indicates all is 'good'!
Now I have to figure out how to connect the main gear doors so they close after the gear is UP and open before the gear goes DOWN!
Disappointed in that the 'control unit' is not 'sophisticated enough' to handle that operation!
Yesterday I charged my old transmitter and, today, the battery is 'jumping' from 10.5 to 9.5 volts
which makes me believe the transmitter isn't faulty but the battery is!
I never fly if my voltage is below 10.0 so 9.5 is, definitely, scary!
Last edited by samparfitt; 08-10-2023 at 11:51 AM.
08-11-2023, 12:51 PM
#47
Hobby Legends A-1 Skyraider PM (cont).
Service tray and functional drop tanks and remote engine starter done.
Videos:
Dry test of drop tanks:
Dry test of remote engine starter (dry test; no gas):
Service tray install.
Glued 3 'hard points' in the fuse.
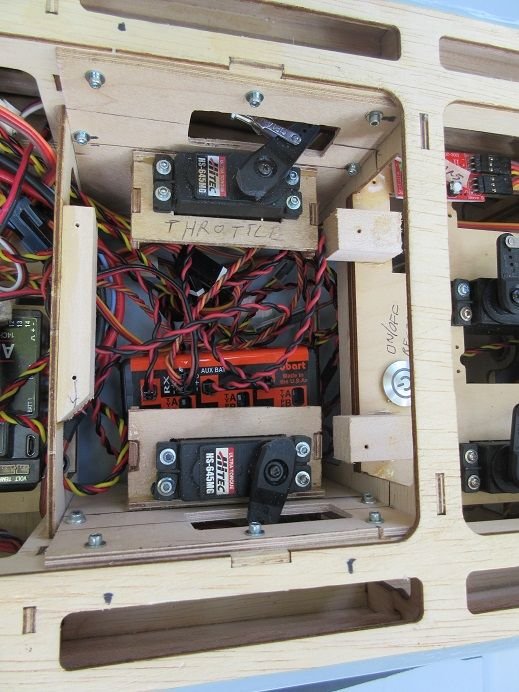
Scroll saw used to cut all the holes for all the switches.

4 hex head servo screws used to secure the service tray.
The only way I can think of having the main gear doors close is the use of a Jomar gear control unit.
I have used them on air retracts and, hopefully, it will work with the electric retracts!
I'll call Robart on Monday and get their 'expertise' on the 'situation'.
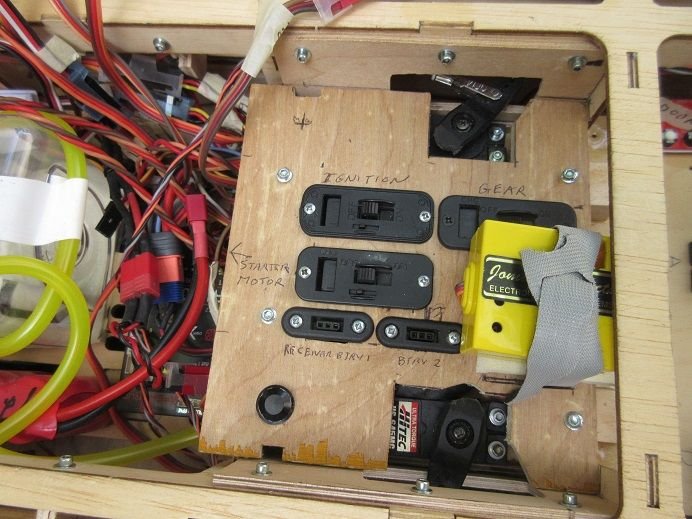
I left the receiver ON/OFF switch where the original owner had installed it.
Double 'stick taped' 2 of the satellites on each side of the fuse....
and left one where the original owner installed it.
The manual says the receiver came with 4 satellites but I only have 3.
I may purchase a 4th.
I've never used these but the original owner installed them on 3 moving surfaces.
They seem to work fine so I'll just leave them 'as is'.
Will have to get their manual online and read it.

Had to make a few connections for the 'non normal' connectors!
I put a servo on port 9 and the servo moved which is AUX 4.
This port isn't assign to any toggle so I had to update the transmitter.
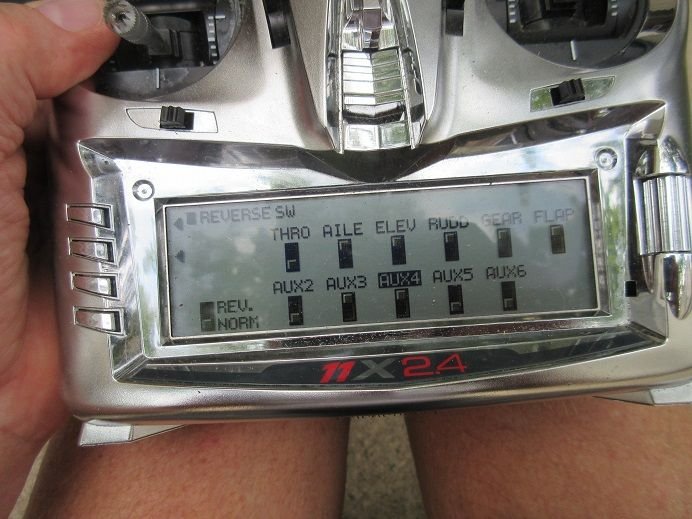
I assigned AUX 4 to the right top trim tab, made it a 2 position toggle and activated it.
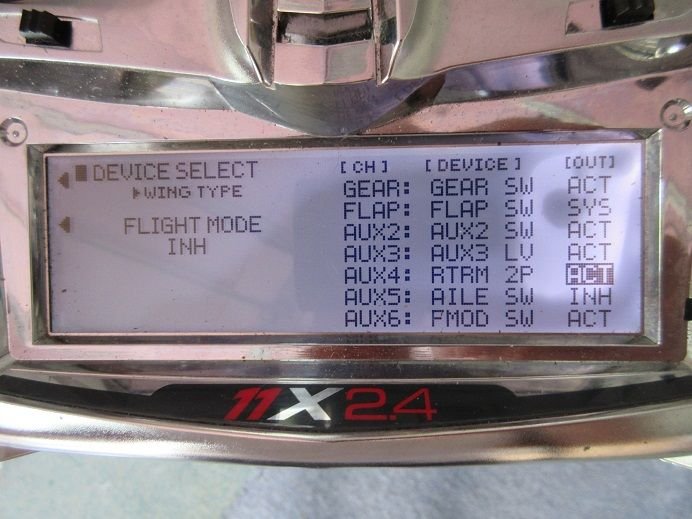
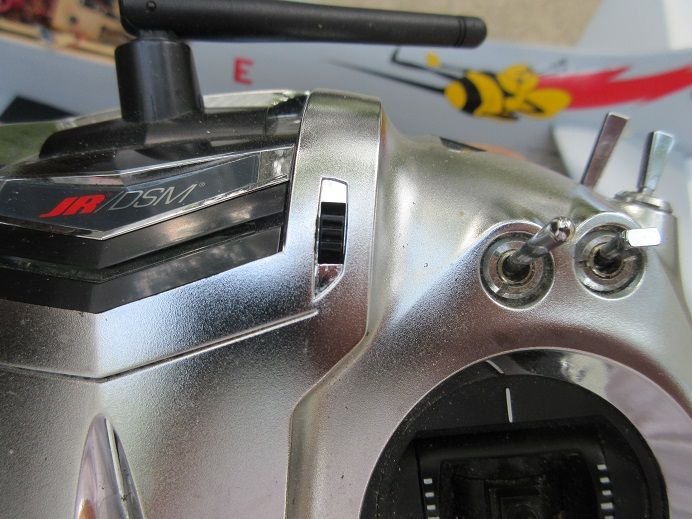
This right top trim activates the drop tanks (black toggle).
To the right is the toggle used to remote start the engine.
I put both of these functions to the upper right of the transmitter to insure I never, accidentally, move those toggles
as all gear/flaps/choke are on the left top side of the transmitter.
I used this procedure on my CARF F4U with the folding wings to insure I never raised the wings while in flight!
Drop tanks.
Before:
After.
Dry test the remote engine starter.
Service tray and functional drop tanks and remote engine starter done.
Videos:
Dry test of drop tanks:
Dry test of remote engine starter (dry test; no gas):
Service tray install.
Glued 3 'hard points' in the fuse.
Scroll saw used to cut all the holes for all the switches.
4 hex head servo screws used to secure the service tray.
The only way I can think of having the main gear doors close is the use of a Jomar gear control unit.
I have used them on air retracts and, hopefully, it will work with the electric retracts!
I'll call Robart on Monday and get their 'expertise' on the 'situation'.
I left the receiver ON/OFF switch where the original owner had installed it.
Double 'stick taped' 2 of the satellites on each side of the fuse....
and left one where the original owner installed it.
The manual says the receiver came with 4 satellites but I only have 3.
I may purchase a 4th.
I've never used these but the original owner installed them on 3 moving surfaces.
They seem to work fine so I'll just leave them 'as is'.
Will have to get their manual online and read it.
Had to make a few connections for the 'non normal' connectors!
I put a servo on port 9 and the servo moved which is AUX 4.
This port isn't assign to any toggle so I had to update the transmitter.
I assigned AUX 4 to the right top trim tab, made it a 2 position toggle and activated it.
This right top trim activates the drop tanks (black toggle).
To the right is the toggle used to remote start the engine.
I put both of these functions to the upper right of the transmitter to insure I never, accidentally, move those toggles
as all gear/flaps/choke are on the left top side of the transmitter.
I used this procedure on my CARF F4U with the folding wings to insure I never raised the wings while in flight!
Drop tanks.
Before:
After.
Dry test the remote engine starter.
Last edited by samparfitt; 08-11-2023 at 12:56 PM.
08-15-2023, 09:01 AM
#48
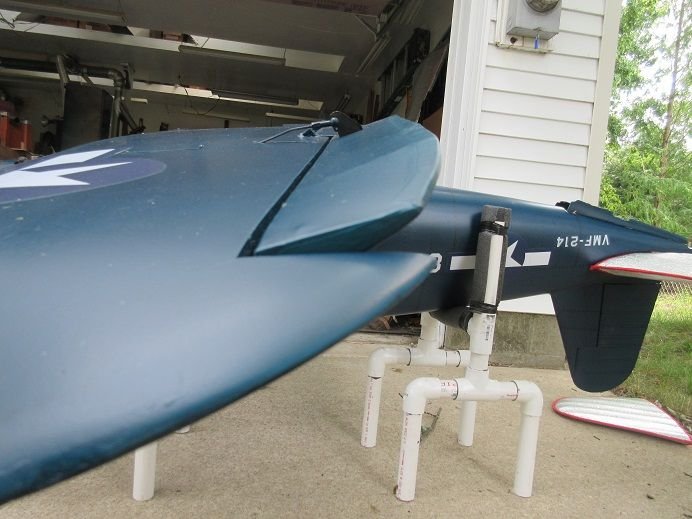
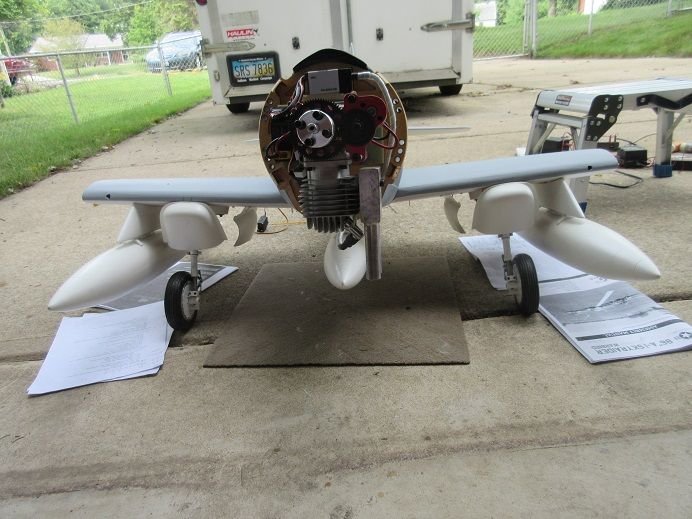
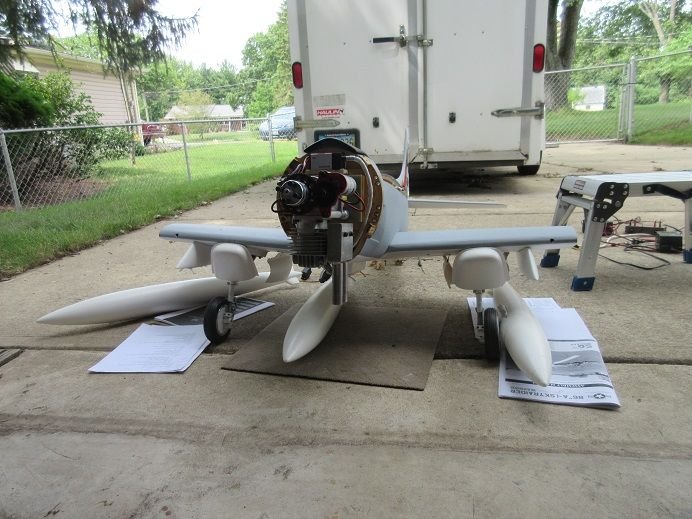
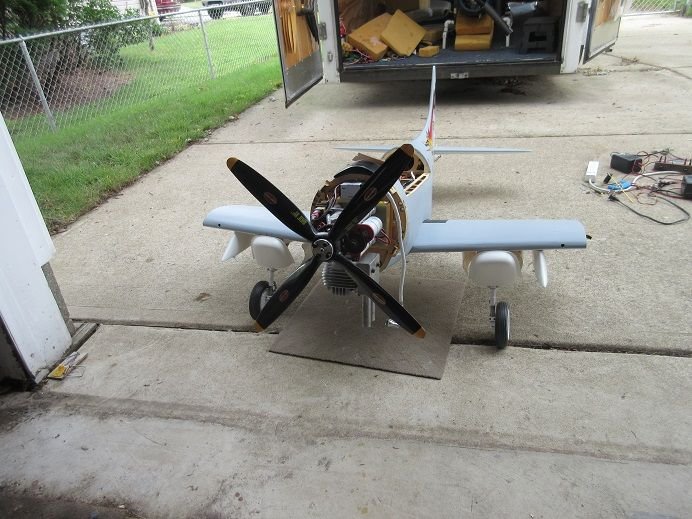
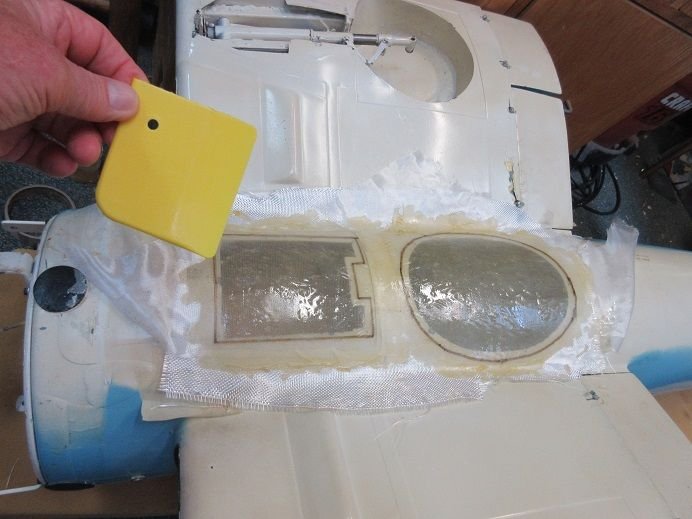
F4U Corsair by Byron and Skyraider.
F4U Corsair.
I obtained this last Spring at the Dayton, Ohio swap meet.

It's missing a motor and I'll, probably, have to change the hardware as it looks old.
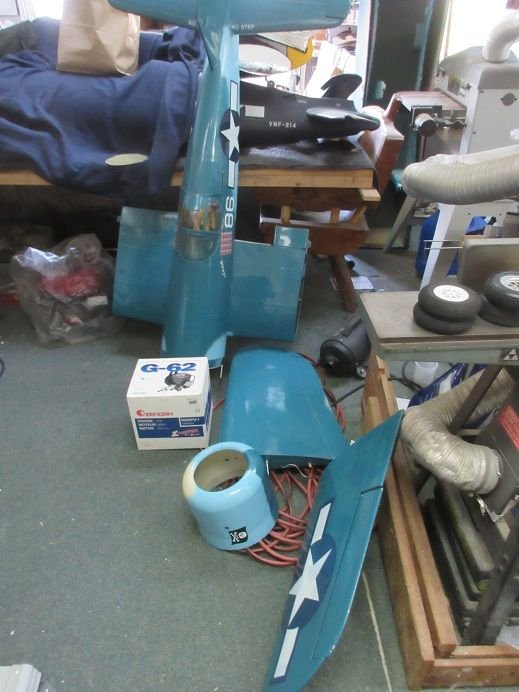
I'll, probably, use a G-62 for power.

PM:
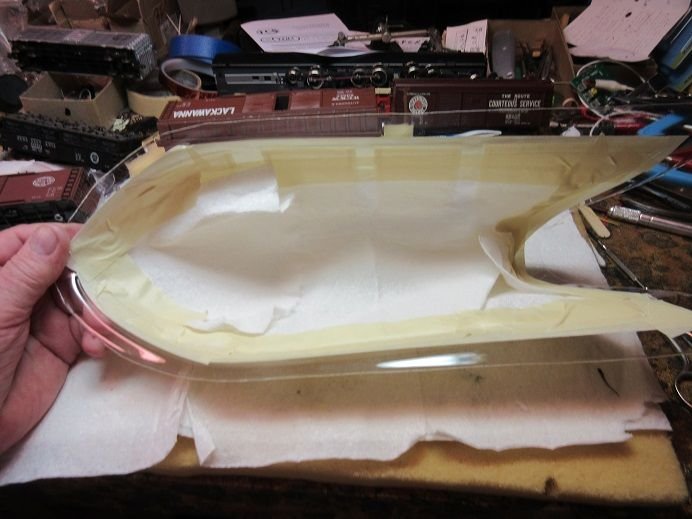
The fuse's access hatches are missing.
Appear to be Robart retracts.


Some thin clear flexible plastic sheeting taped over the holes.
Felt tip pen used so I can, accurately, cut the outline of the hatches.

Heavy duty boat FG cloth laid over the plastic sheeting.
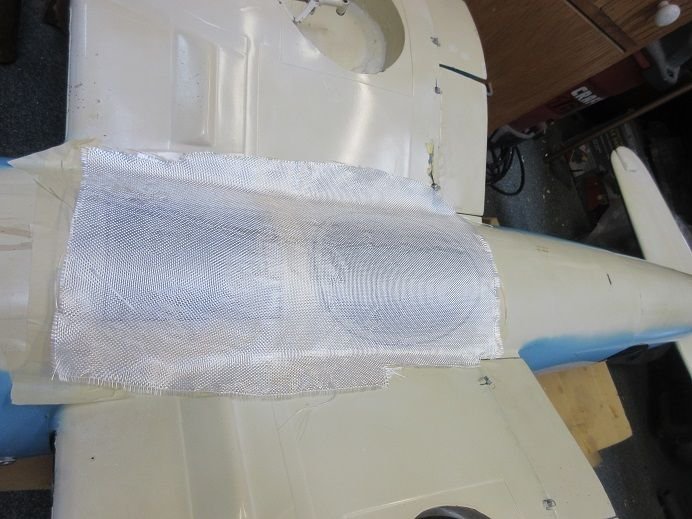
Some 0.5 oz FG cloth laid over the heavy duty FG cloth to give a smooth surface.

Zap finishing resin spread over the FG cloth.
Will have to let that 'cook' for several hours.
It is missing a Byron 5.25" wheel.
If anyone has one email me; thanks.

Skyraider (PM).
I couldn't get an old Jomar gear/door sequencer to work on the electrics.
Tried all kinds of variations.
Finally, I googled it and found that Jomar doesn't work for electric retracts.
I called Robart and they sell a sequencer for their electric gear so that should arrive around Friday.
F4U Corsair.
I obtained this last Spring at the Dayton, Ohio swap meet.
It's missing a motor and I'll, probably, have to change the hardware as it looks old.
I'll, probably, use a G-62 for power.
PM:
The fuse's access hatches are missing.
Appear to be Robart retracts.
Some thin clear flexible plastic sheeting taped over the holes.
Felt tip pen used so I can, accurately, cut the outline of the hatches.
Heavy duty boat FG cloth laid over the plastic sheeting.
Some 0.5 oz FG cloth laid over the heavy duty FG cloth to give a smooth surface.
Zap finishing resin spread over the FG cloth.
Will have to let that 'cook' for several hours.
It is missing a Byron 5.25" wheel.
If anyone has one email me; thanks.
Skyraider (PM).
I couldn't get an old Jomar gear/door sequencer to work on the electrics.
Tried all kinds of variations.
Finally, I googled it and found that Jomar doesn't work for electric retracts.
I called Robart and they sell a sequencer for their electric gear so that should arrive around Friday.
Last edited by samparfitt; 08-15-2023 at 09:06 AM.
08-19-2023, 08:41 PM
#49
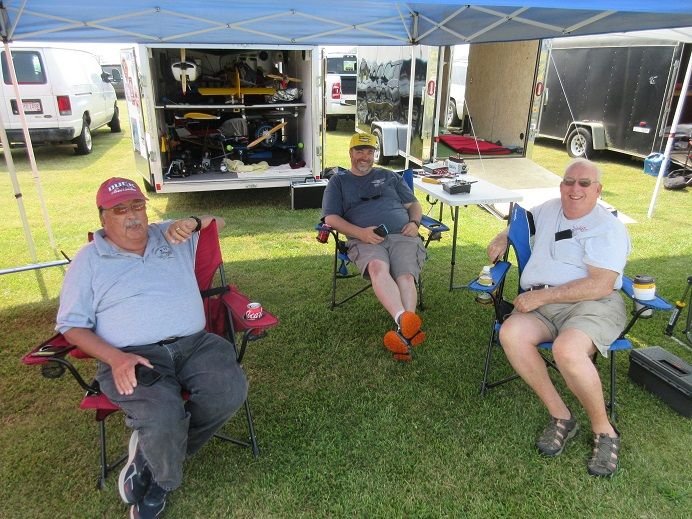
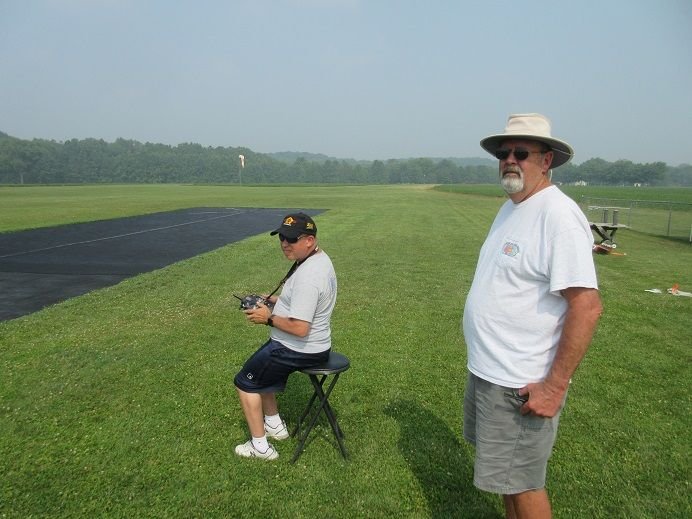
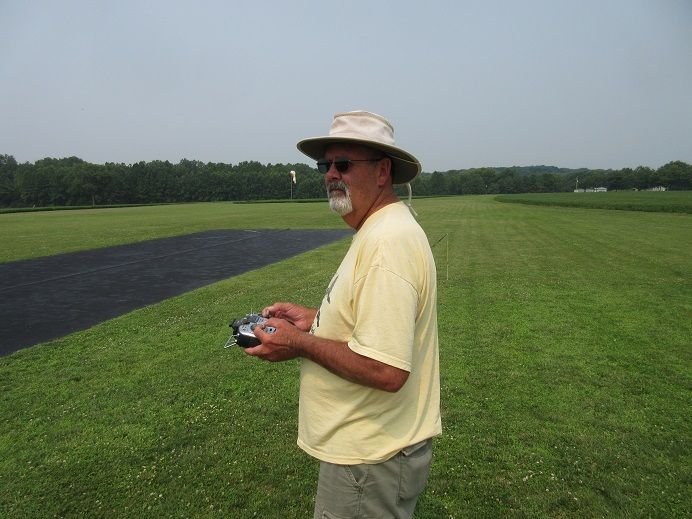
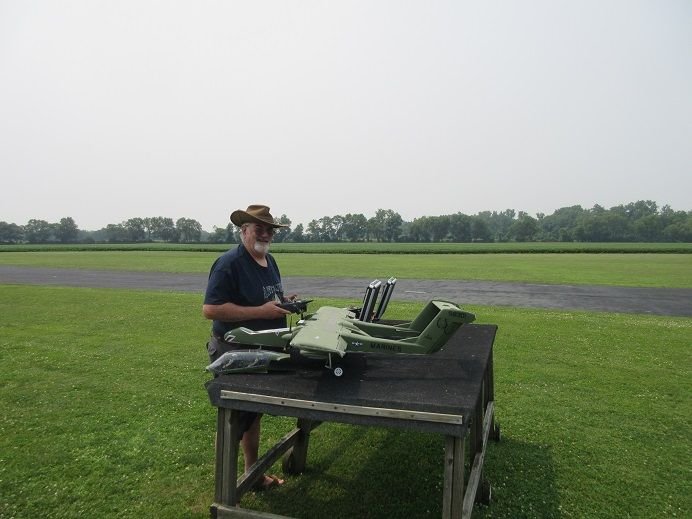
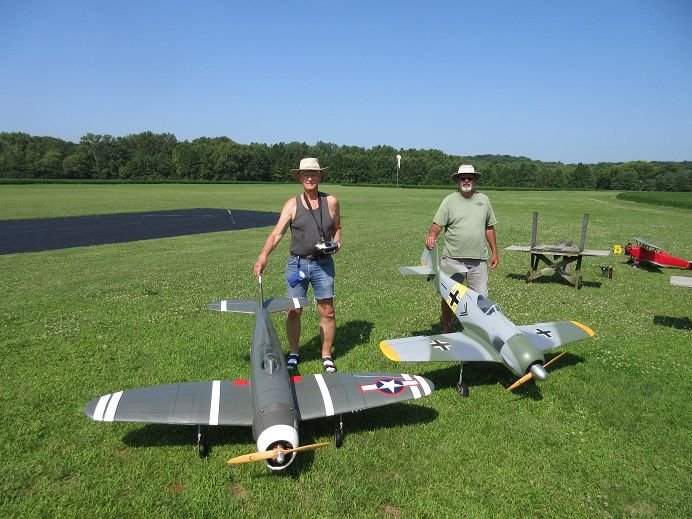
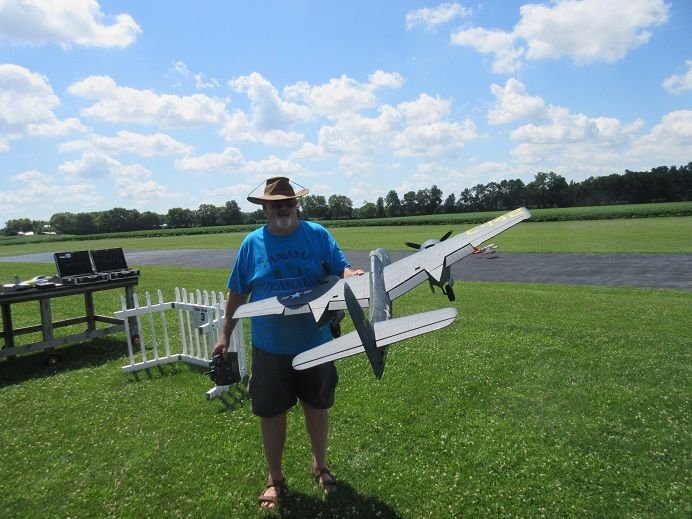
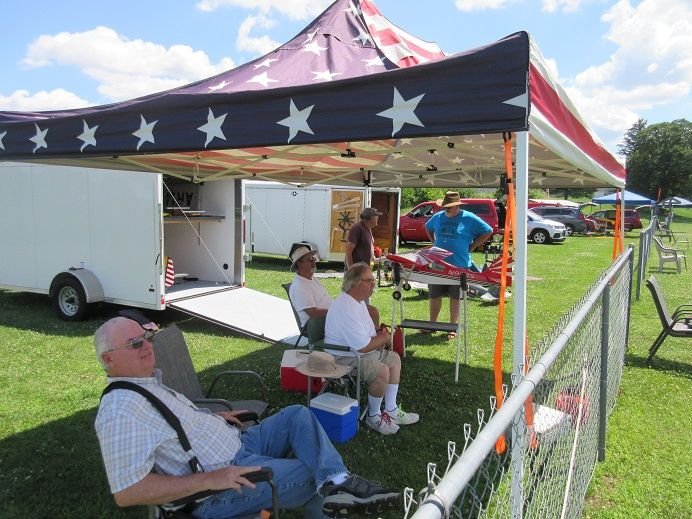
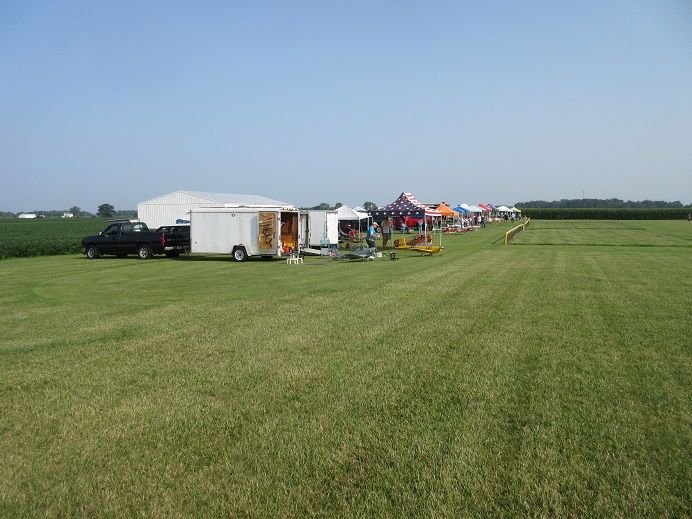
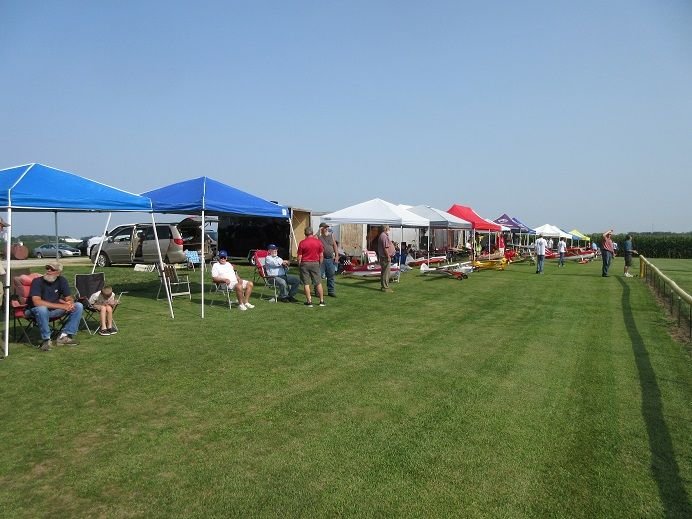
Big Bird flyin at FAST club northwest of Dayton, Ohio.
Miles: 50
Low 80's and low winds.
A mini convoy of Doug, John and I.

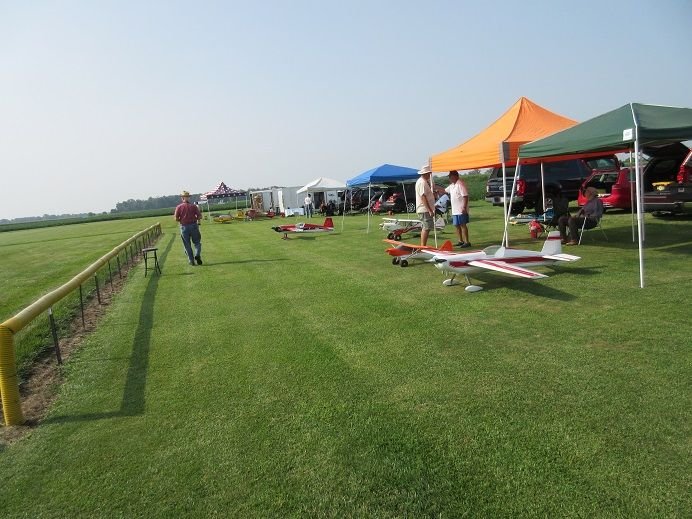
Nice all grass runway about 400' long.
Haven't seen grass cut this short since Mac's place.
Putting green length.

Our 3 trailers are on the 'end'.
Pilot's meeting.
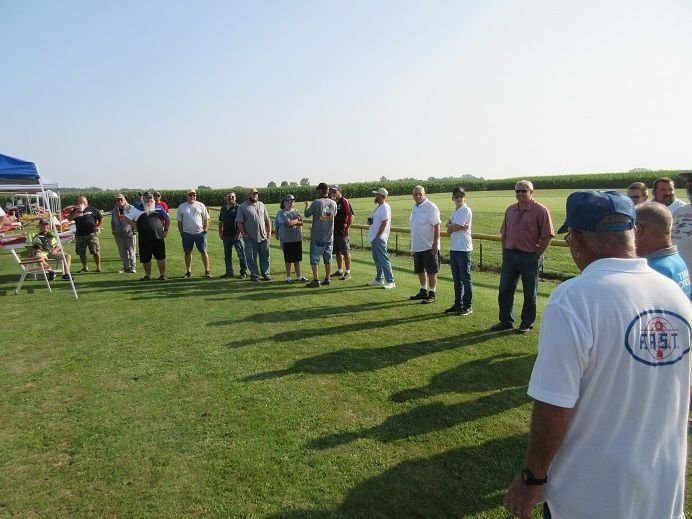
John.
Doug.
I brought my 13 year old SBD Dauntless.

Terry arrived later.


Miles: 50
Low 80's and low winds.
A mini convoy of Doug, John and I.
Nice all grass runway about 400' long.
Haven't seen grass cut this short since Mac's place.
Putting green length.
Our 3 trailers are on the 'end'.
Pilot's meeting.
John.
Doug.
I brought my 13 year old SBD Dauntless.
Terry arrived later.
The following users liked this post:
aghost (08-20-2023)