


8th Scale Aviation's, "CzechMate" Short-kit, Group build
 09-08-2020, 05:49 PM
#351

Thread Starter

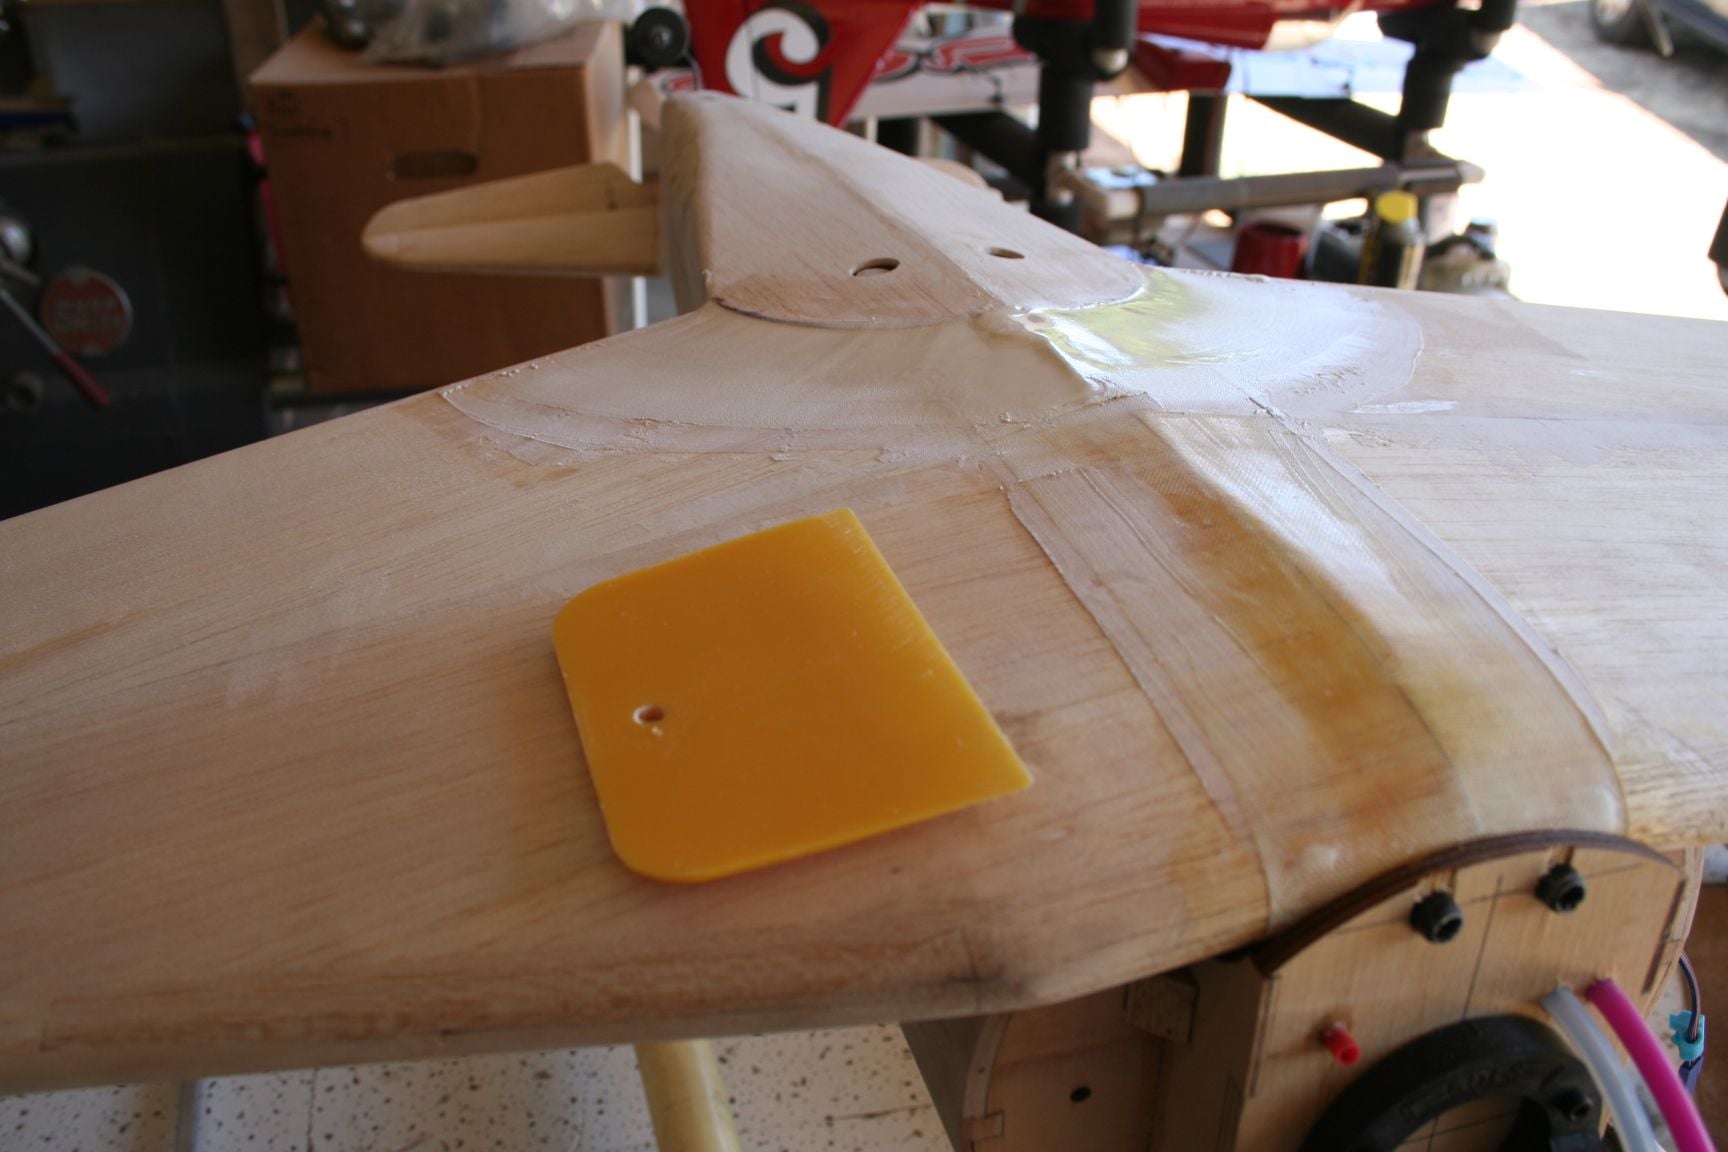
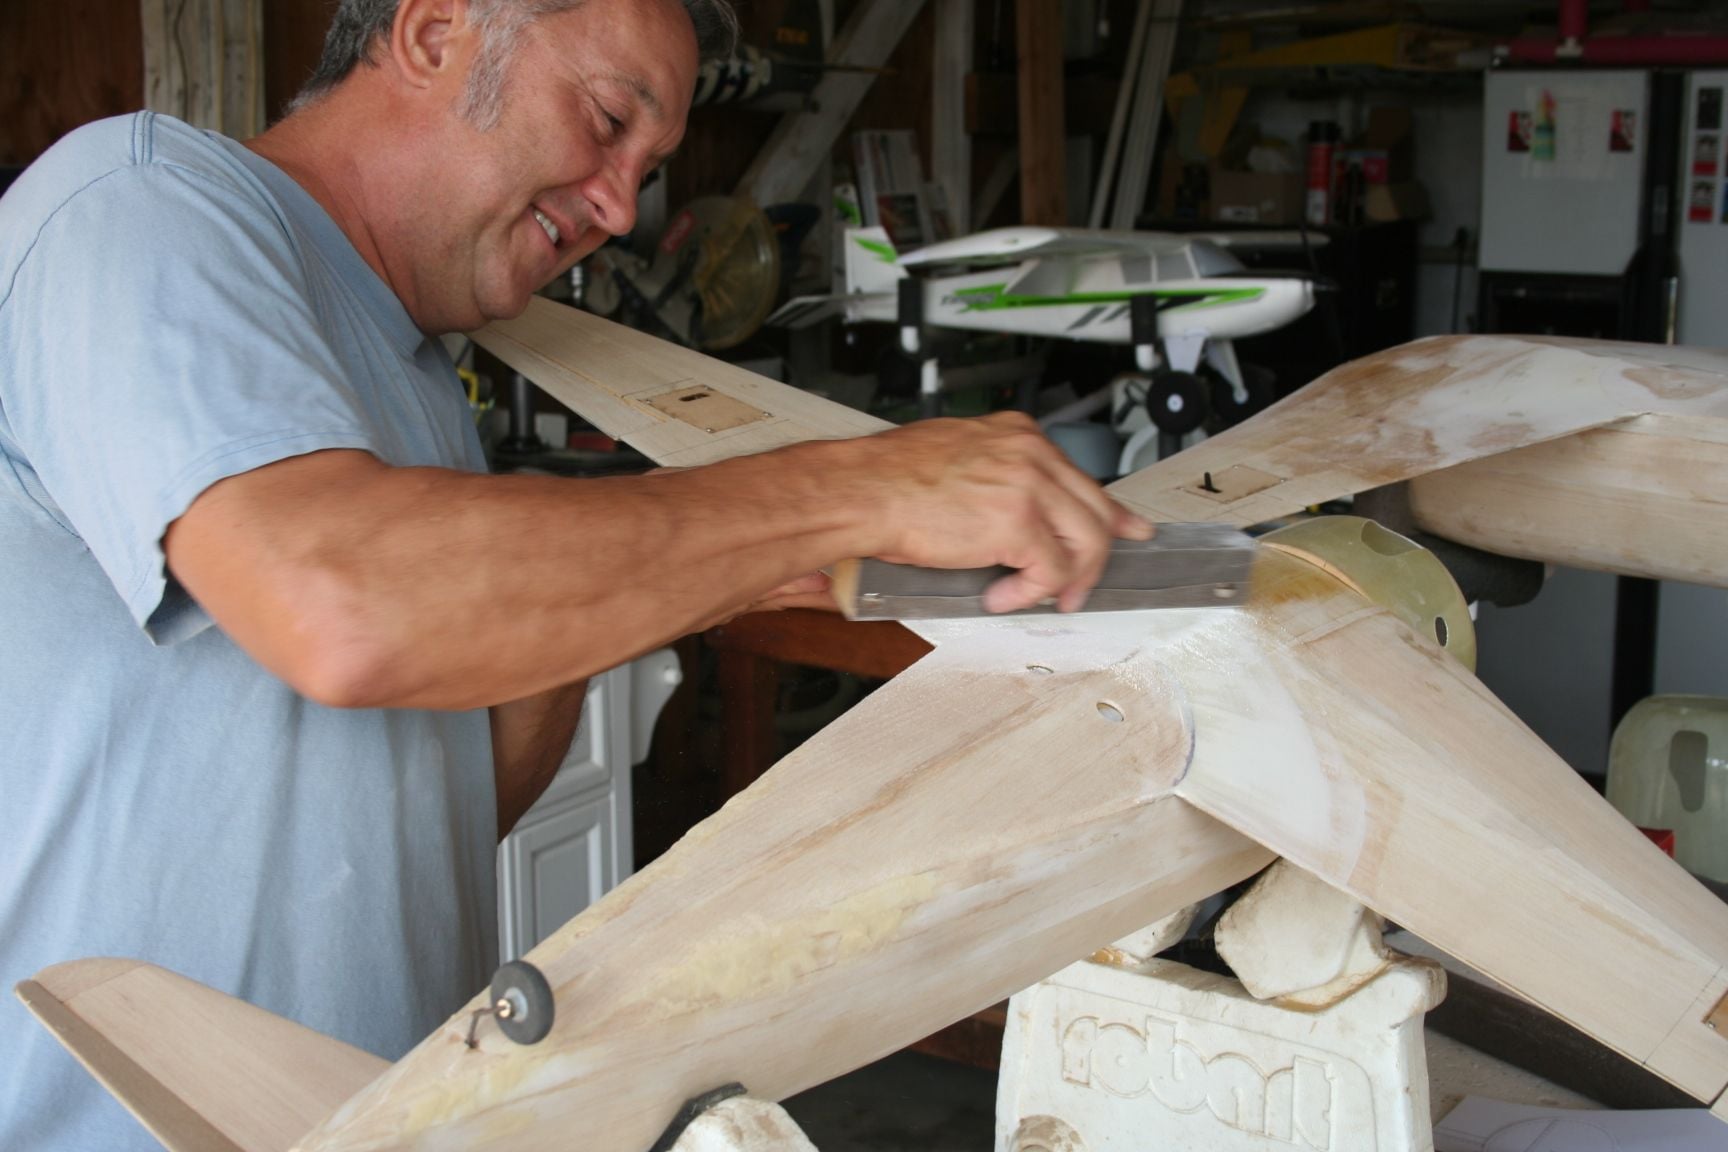
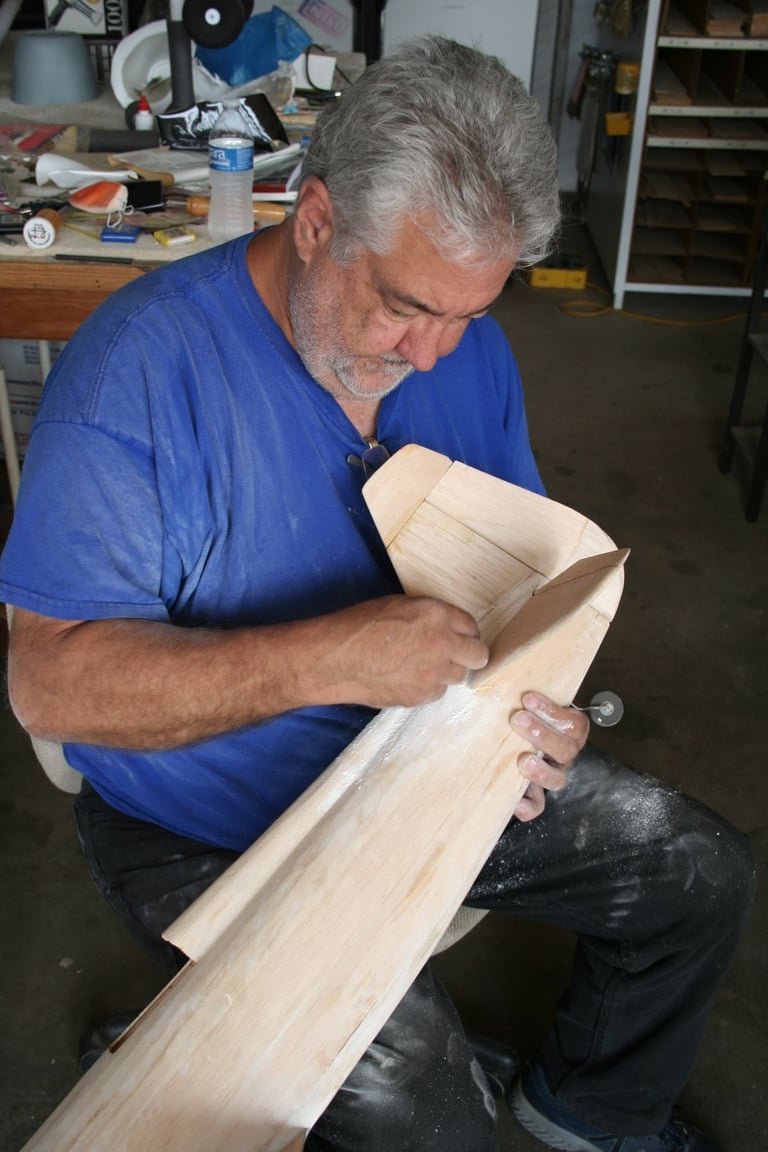
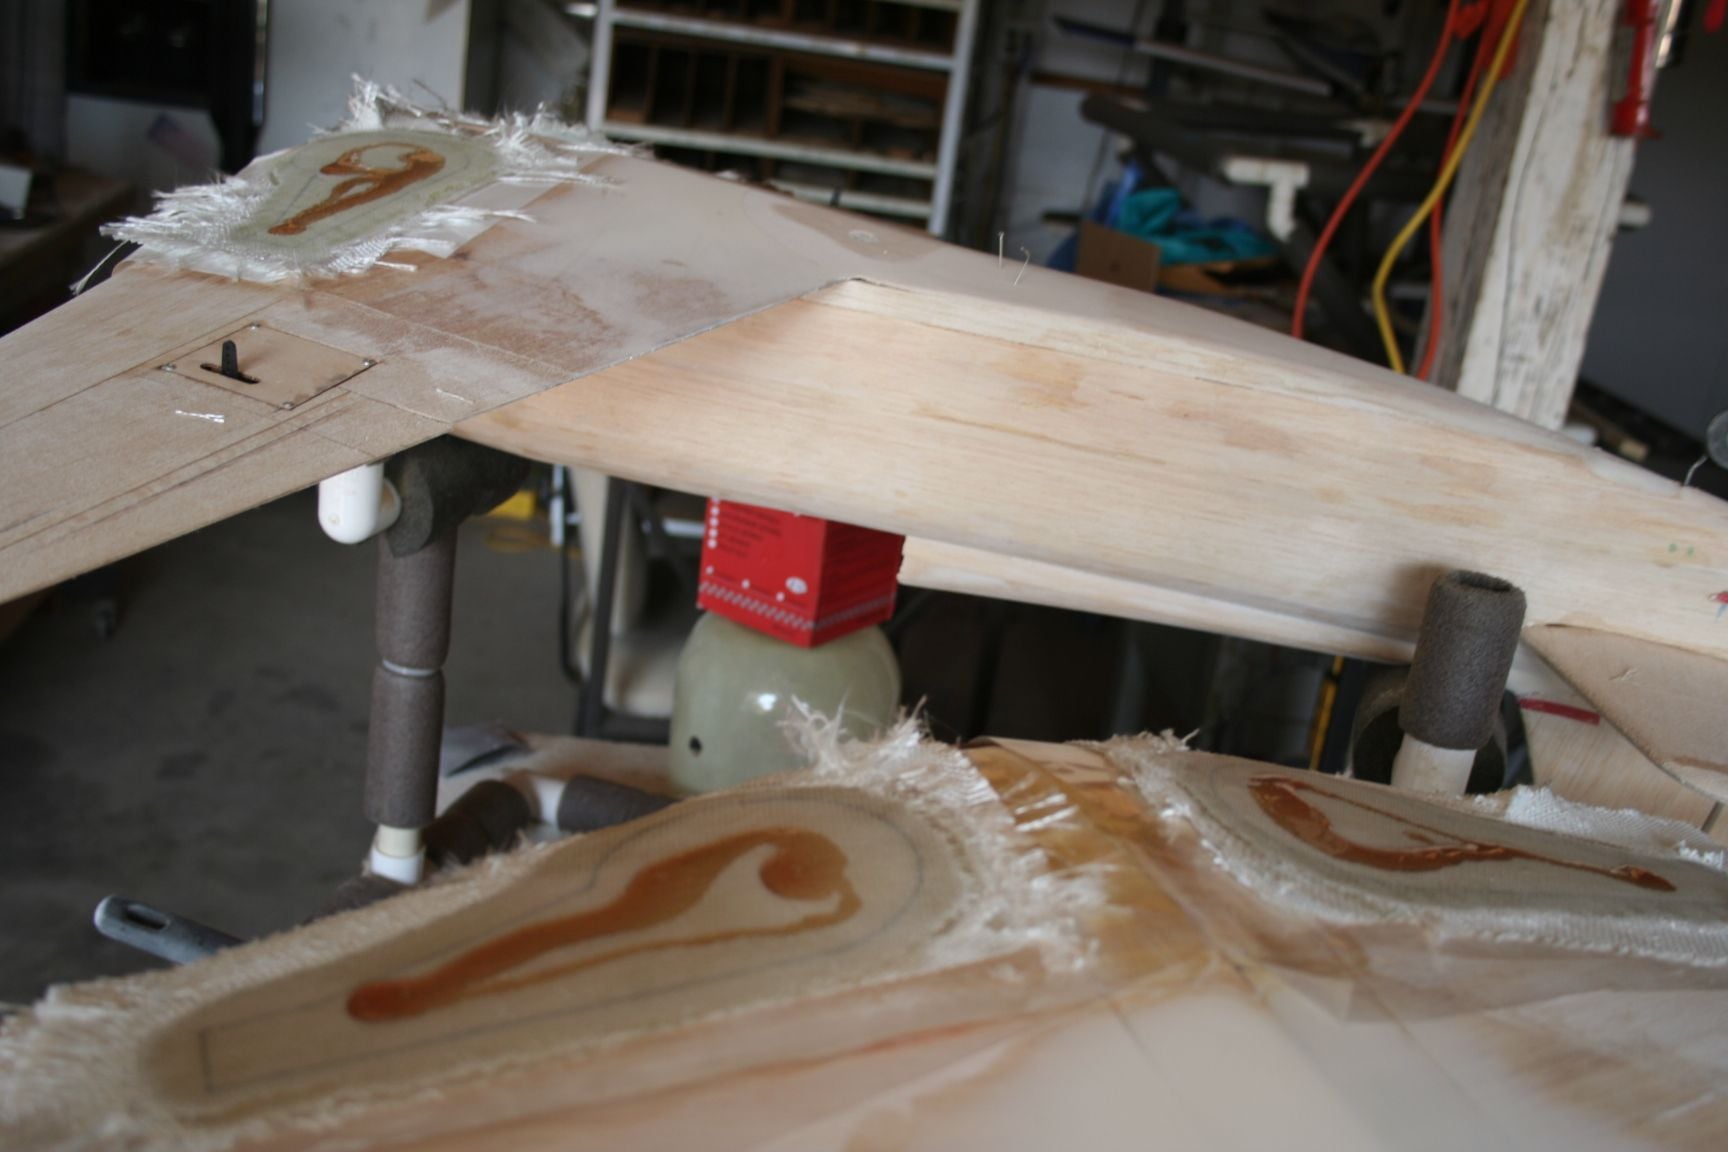
To make the fairing to blend the wing into the rear of the fuselage, Tim and I each used one metered pump of West Systems laminating resin in a wide, shallow 3 1/2 oz. soufflé cup, and mixed-in micro-balloons until achieving a "peanut butter" consistency. This mixture was poured onto the center section at rear of the wing; then a "Bondo" applicator/spatula was used to smooth and even-it-out, blending it into the balsa sheet that formed the bottom fuse sheeting and overlapped the rear of the wing.
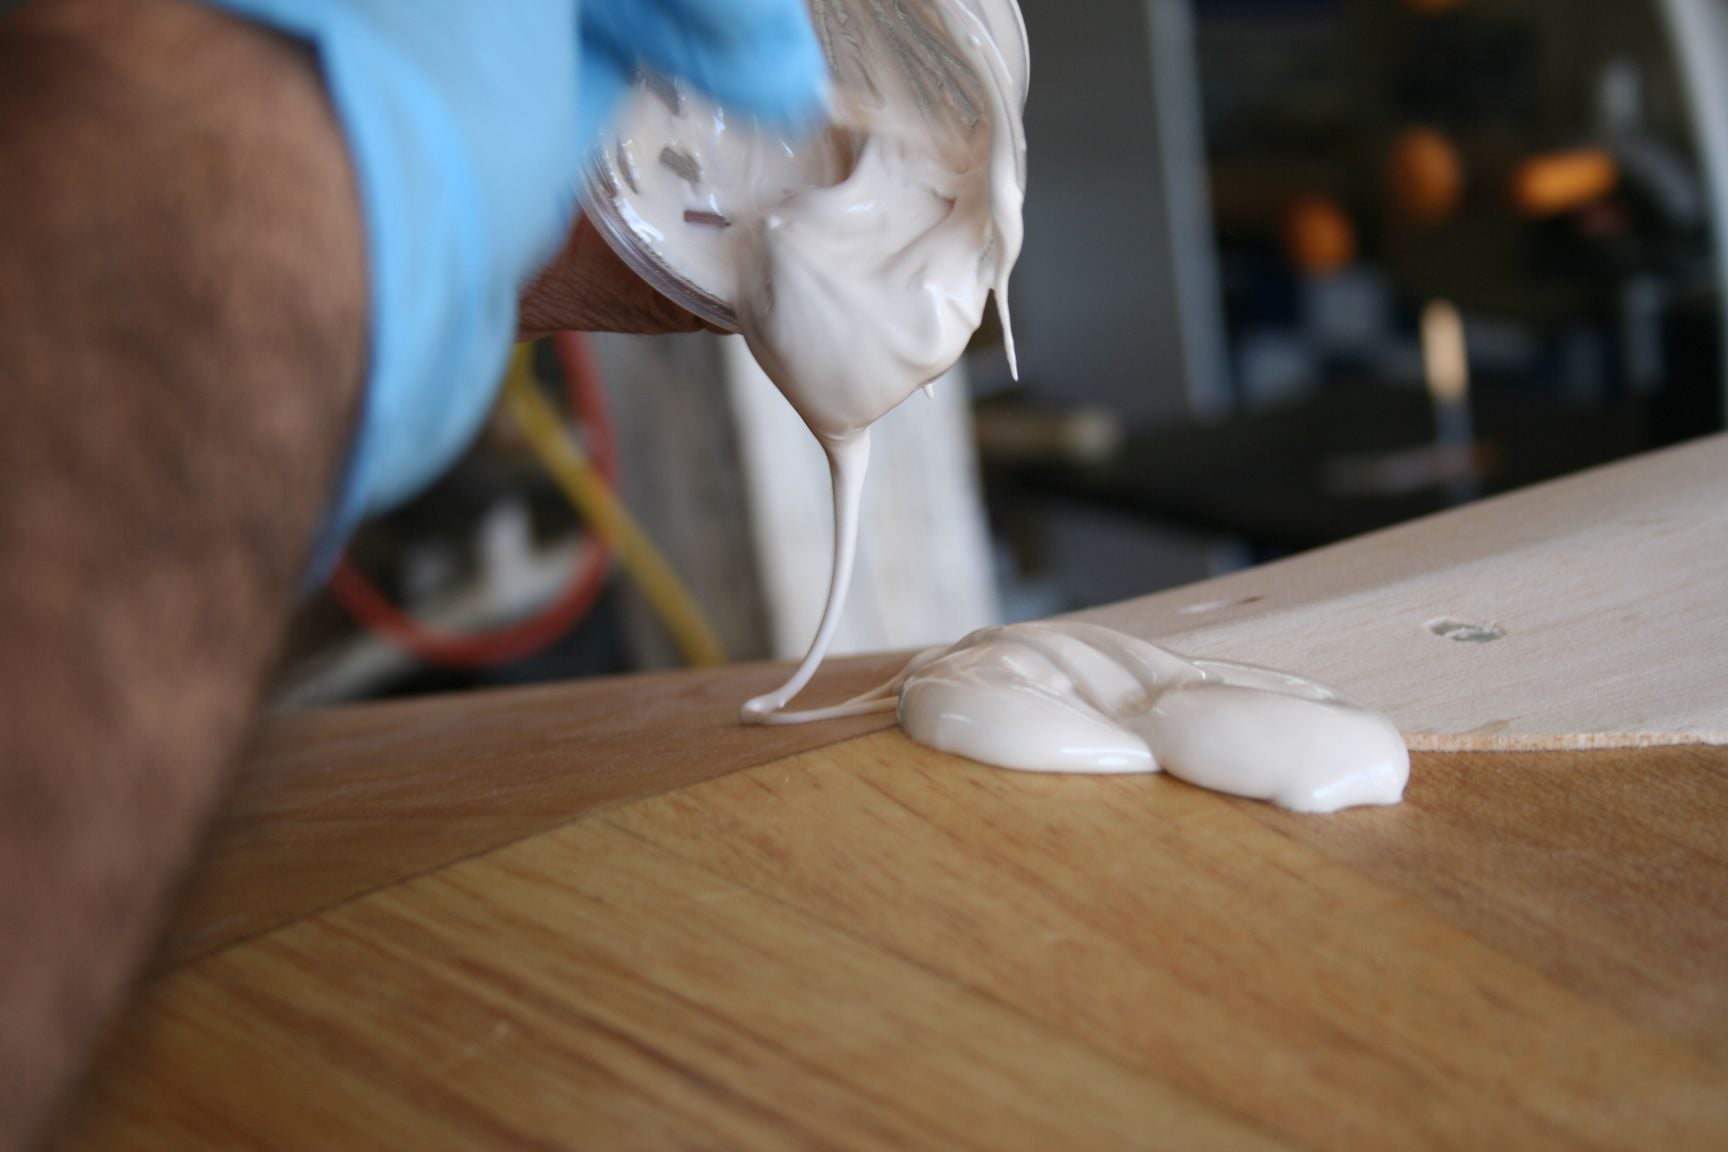
Tim pours the micro-ballon mixture onto the rearward center-section of his wing.
Using a Bondo applicator he works to smooth it out, and fill-in the "low" spot between the leading edge of the bottom fuse sheeting and the main wing spar.

Here in Sacramento, CA we had the hottest August ever on-record, so there isn't much time to work before the epoxy begins to set-up. Gotta work fast!

A-l-m-o-s-t there!
Okay, he's happy with it.
Tim pours the micro-ballon mixture onto the rearward center-section of his wing.
Using a Bondo applicator he works to smooth it out, and fill-in the "low" spot between the leading edge of the bottom fuse sheeting and the main wing spar.
Here in Sacramento, CA we had the hottest August ever on-record, so there isn't much time to work before the epoxy begins to set-up. Gotta work fast!
A-l-m-o-s-t there!
Okay, he's happy with it.
 09-08-2020, 05:56 PM
#352
Thread Starter
Now mine . . .
I mixed both our batches of epoxy at the same time, yet was so busy taking pictures of the procedure as Tim completed it, by the time his was done, there was even less time to work with mine before it started getting too thick to work with easily. Oops! (I think it still came out good though.)
I mixed both our batches of epoxy at the same time, yet was so busy taking pictures of the procedure as Tim completed it, by the time his was done, there was even less time to work with mine before it started getting too thick to work with easily. Oops! (I think it still came out good though.)
09-08-2020, 06:07 PM
#353
Thread Starter
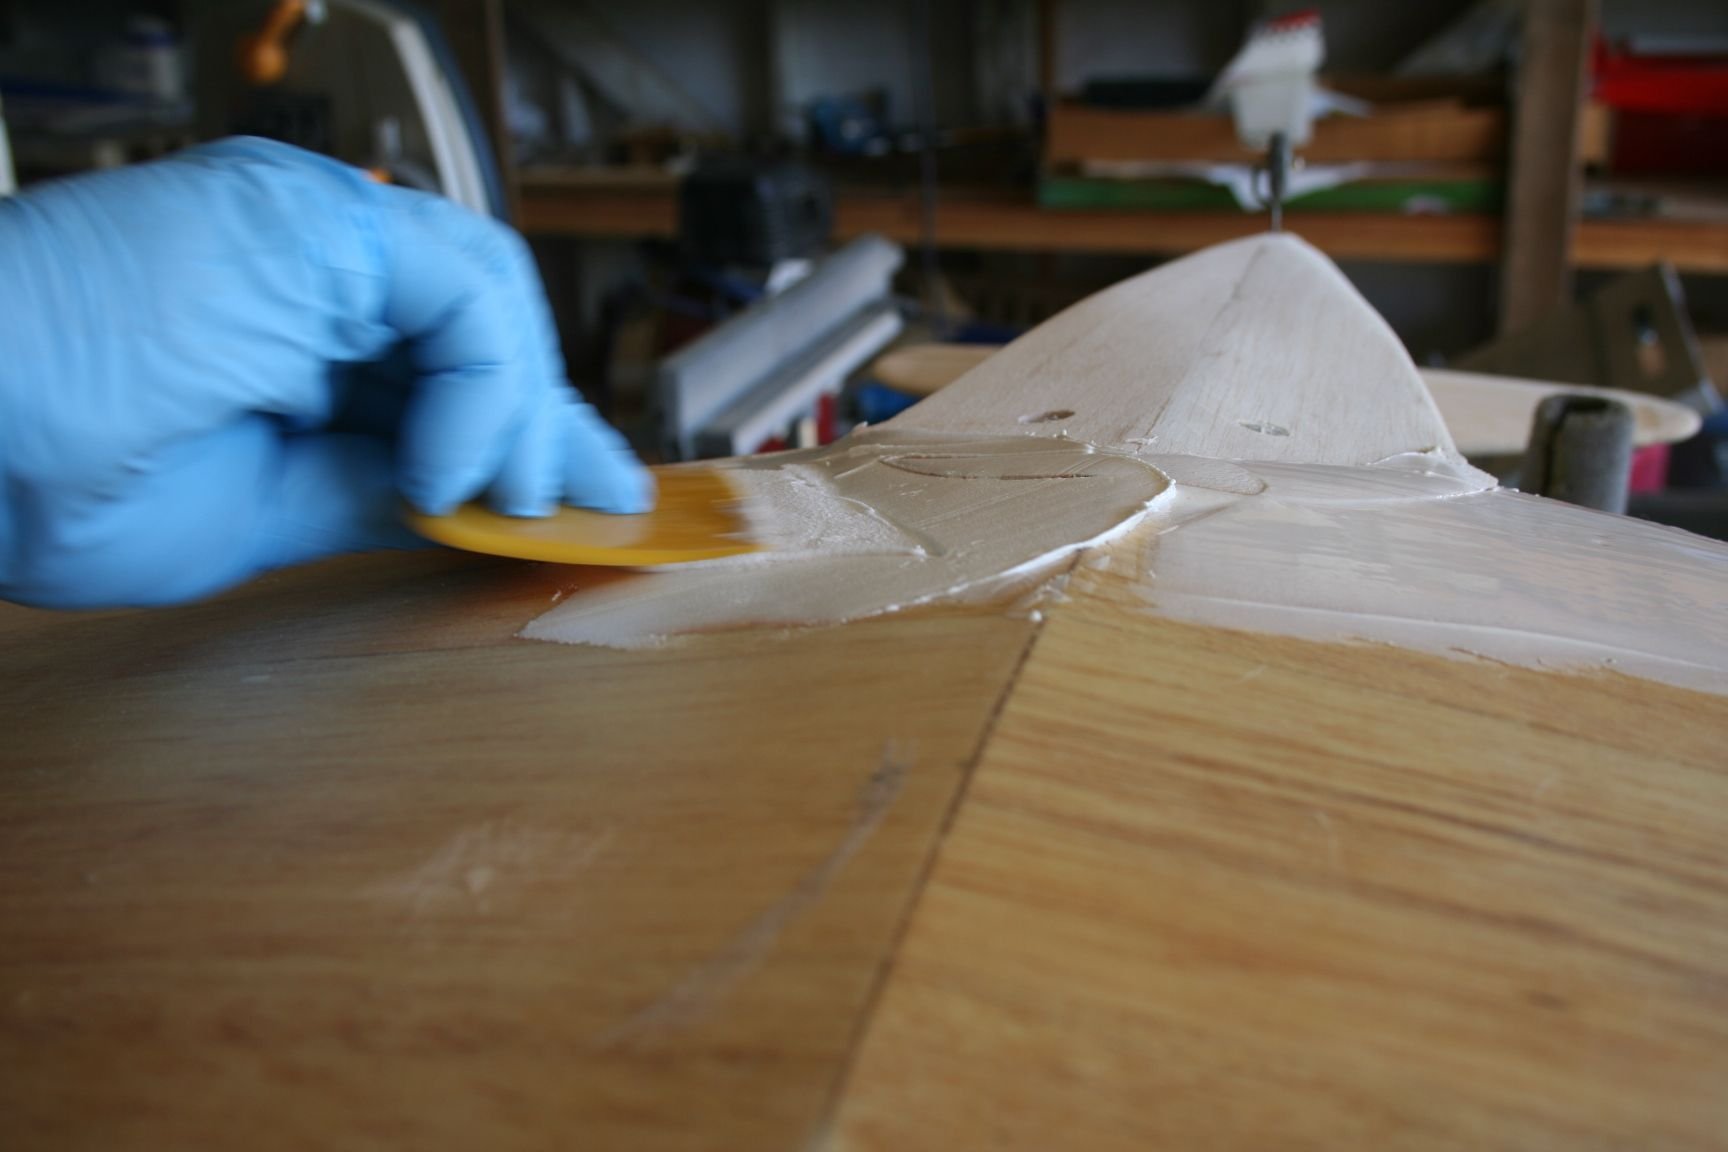
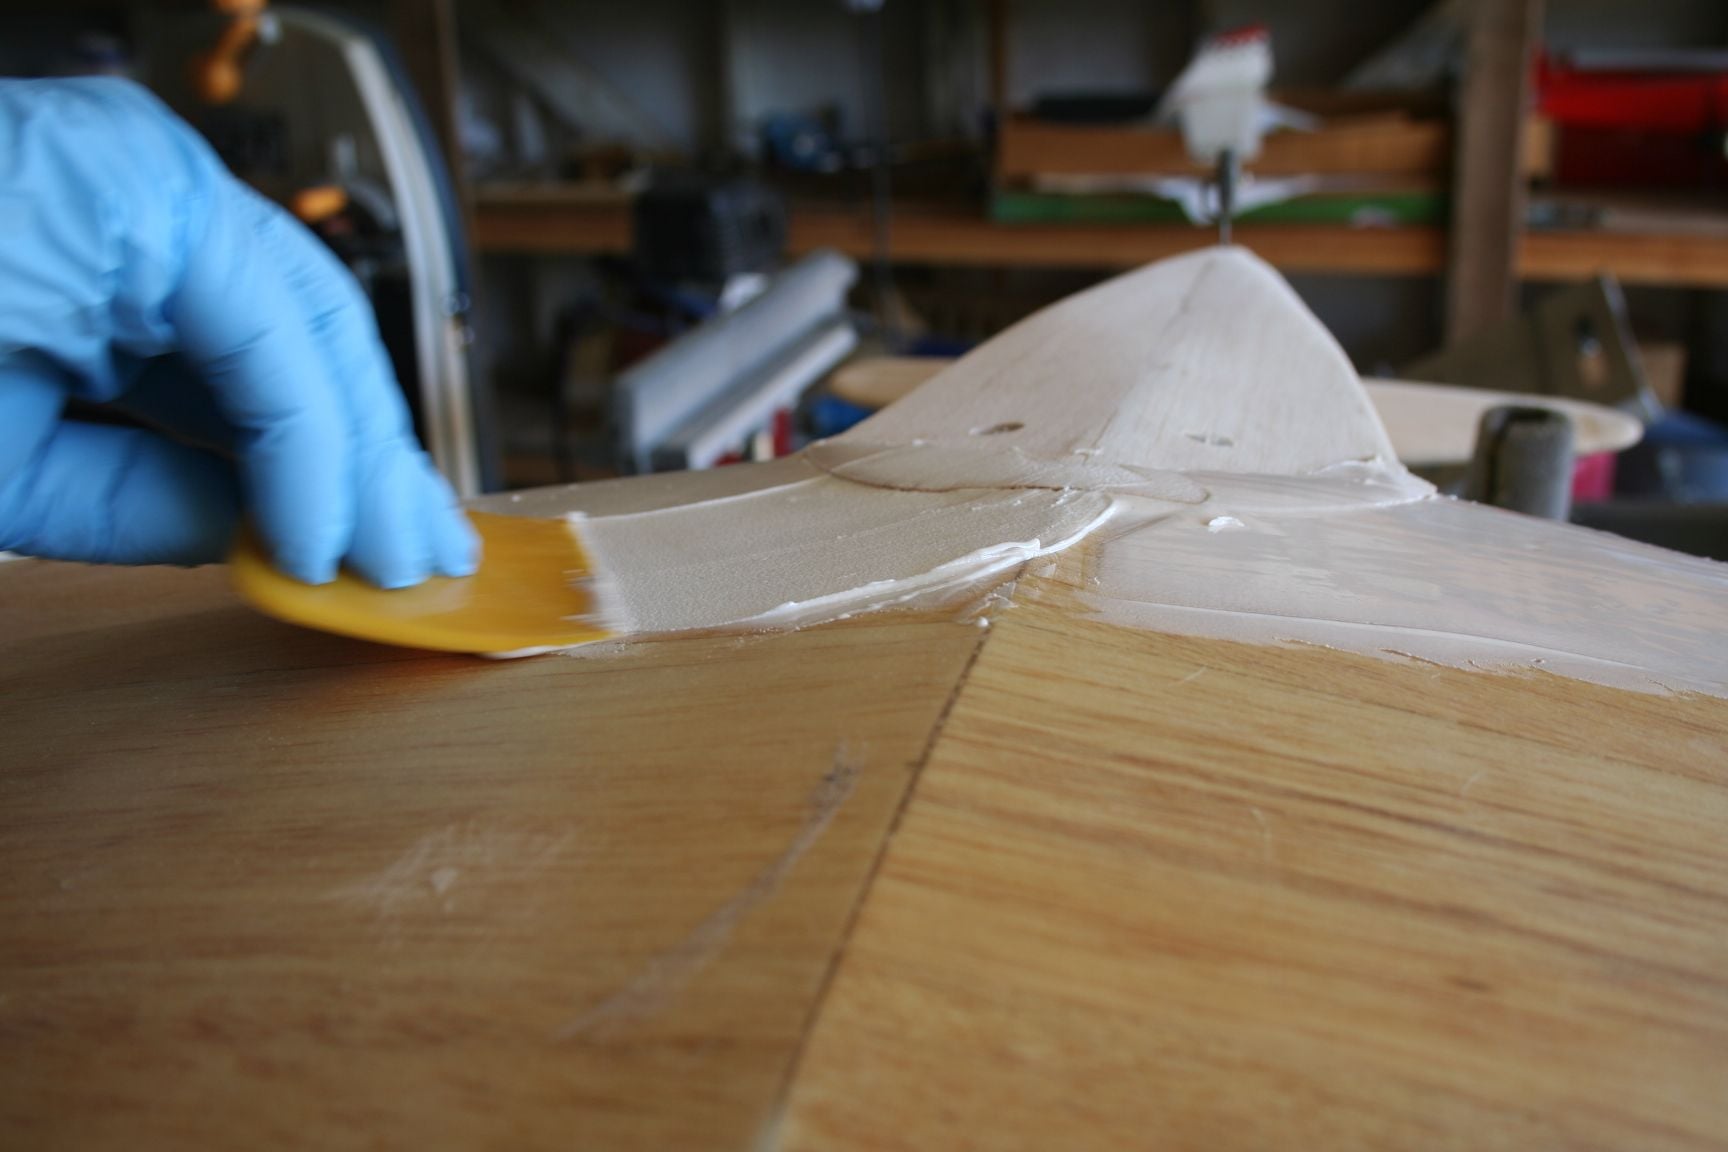
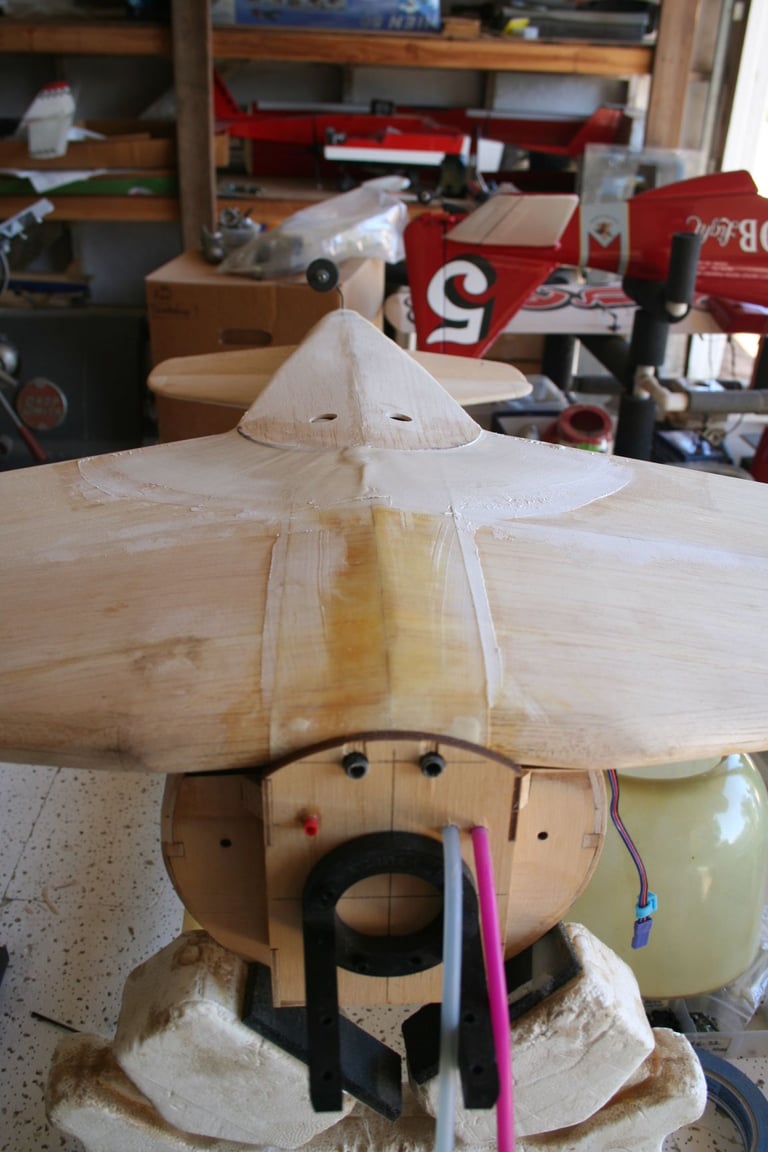
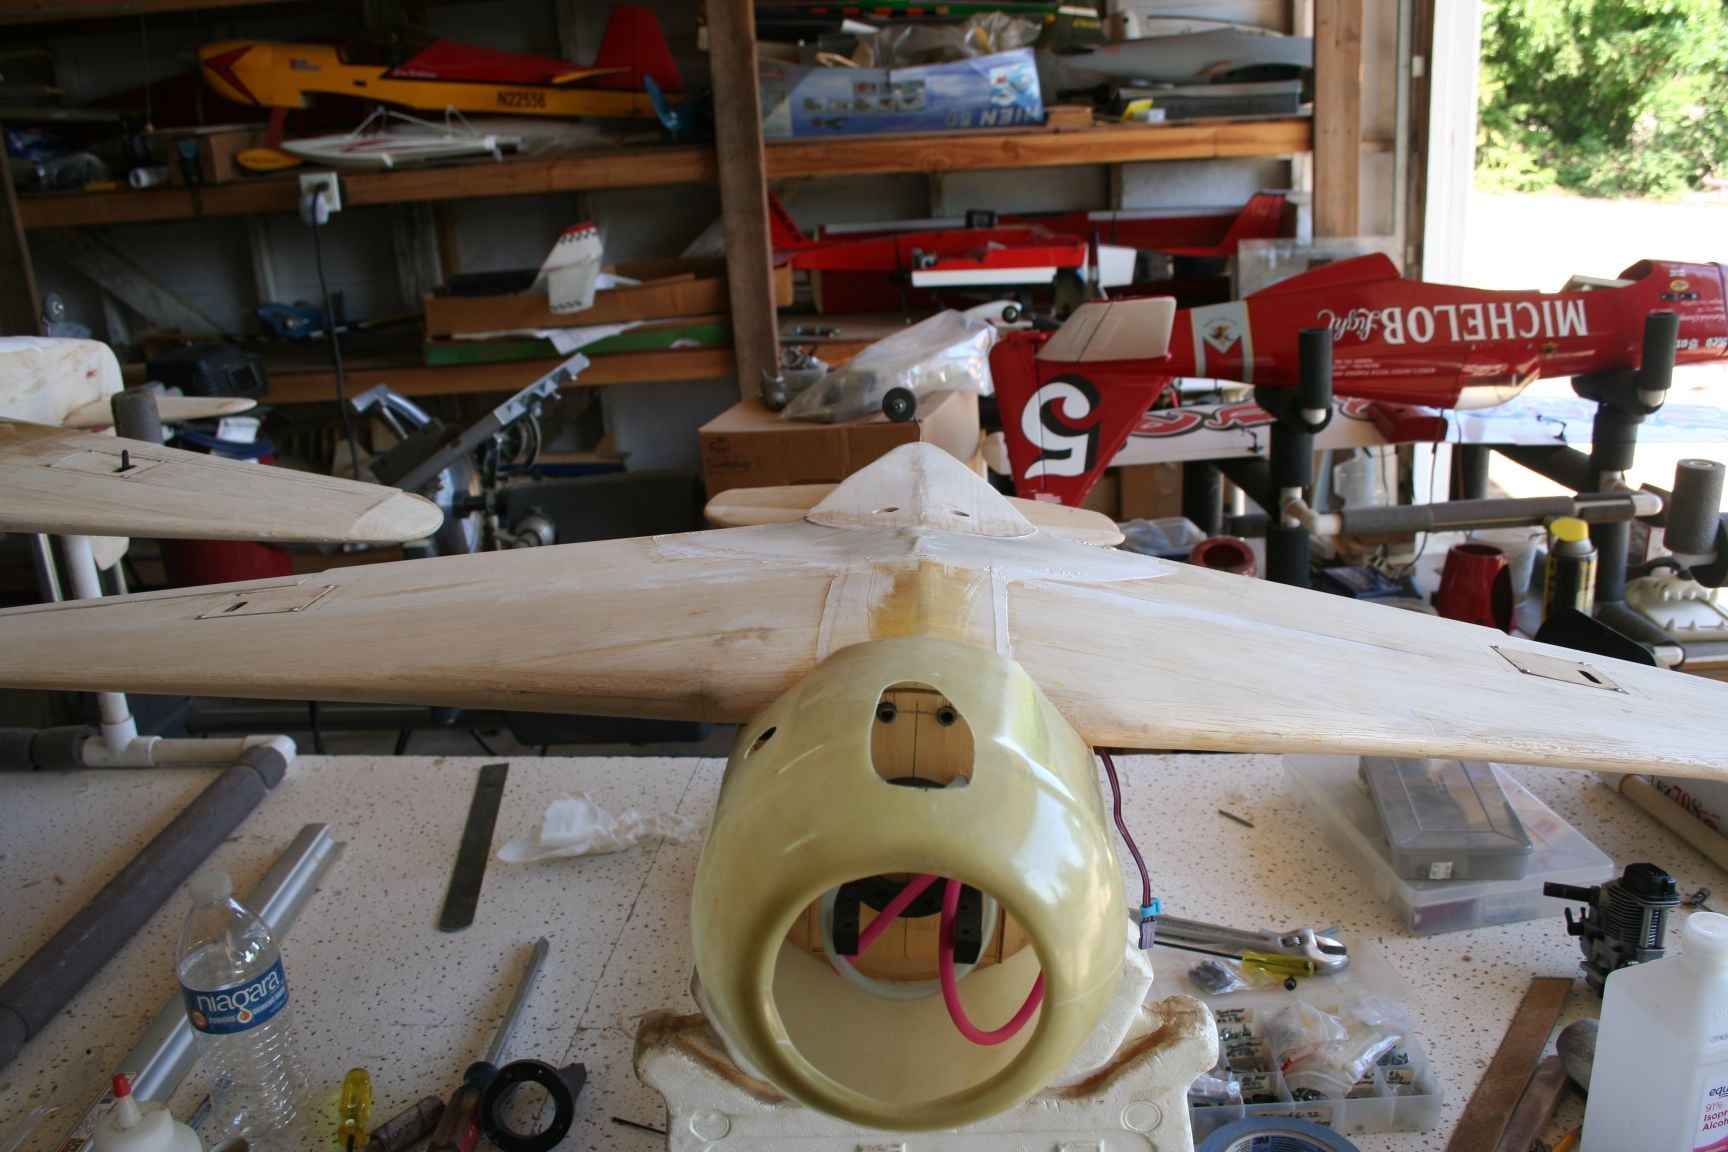
Our intent was to let them sit and cure until the following weekend when we could meet-up again. But the excessive heat wave continued, and regular 105 -109 degree temps extended that cure time to a couple of weeks.

The micro-balloons have been fully cured; and like us, the planes still await relief in the form of slightly cooler temps and better air quality for us to be able get back out into my shop. (The hundreds of wildfires raging in California have created hazardous air quality for a couple weeks, causing further complications with the progress of our build.)
The micro-balloons have been fully cured; and like us, the planes still await relief in the form of slightly cooler temps and better air quality for us to be able get back out into my shop. (The hundreds of wildfires raging in California have created hazardous air quality for a couple weeks, causing further complications with the progress of our build.)
Last edited by Iron Dog; 09-08-2020 at 06:13 PM.
09-08-2020, 06:32 PM
#354
Thread Starter
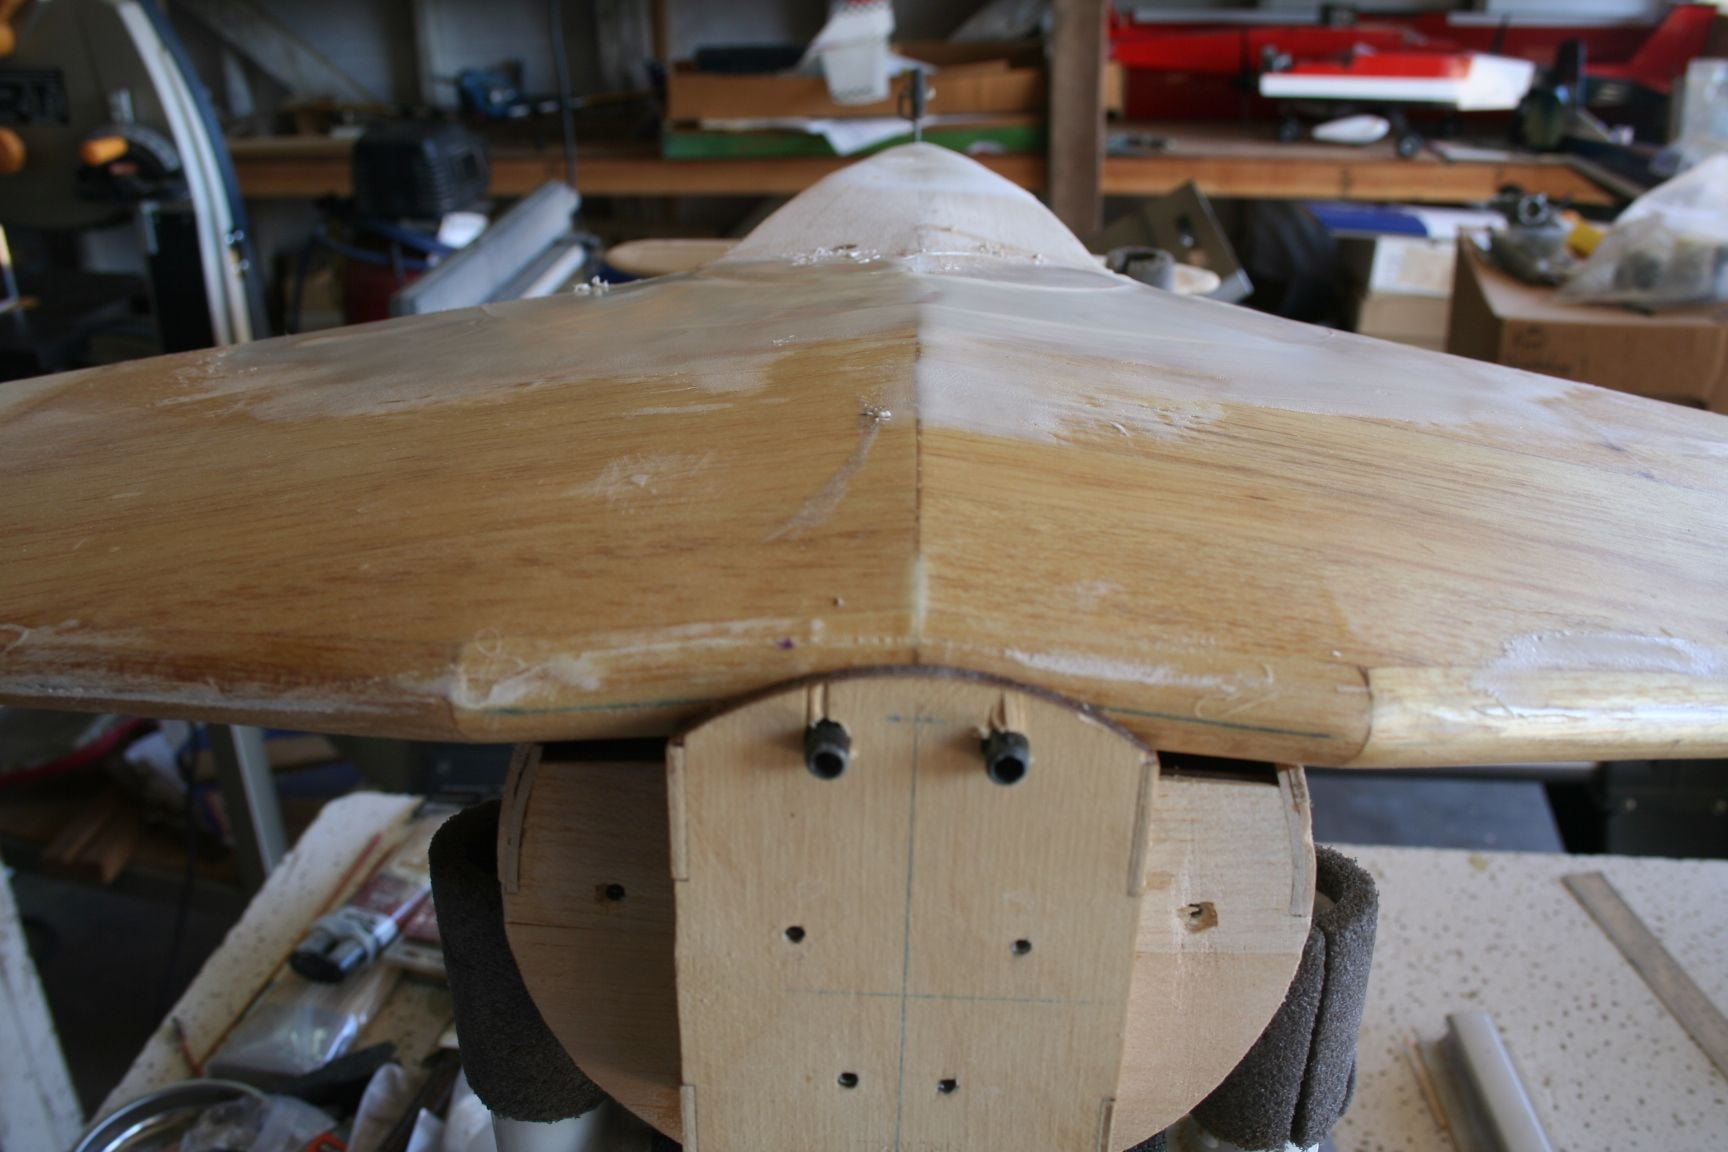
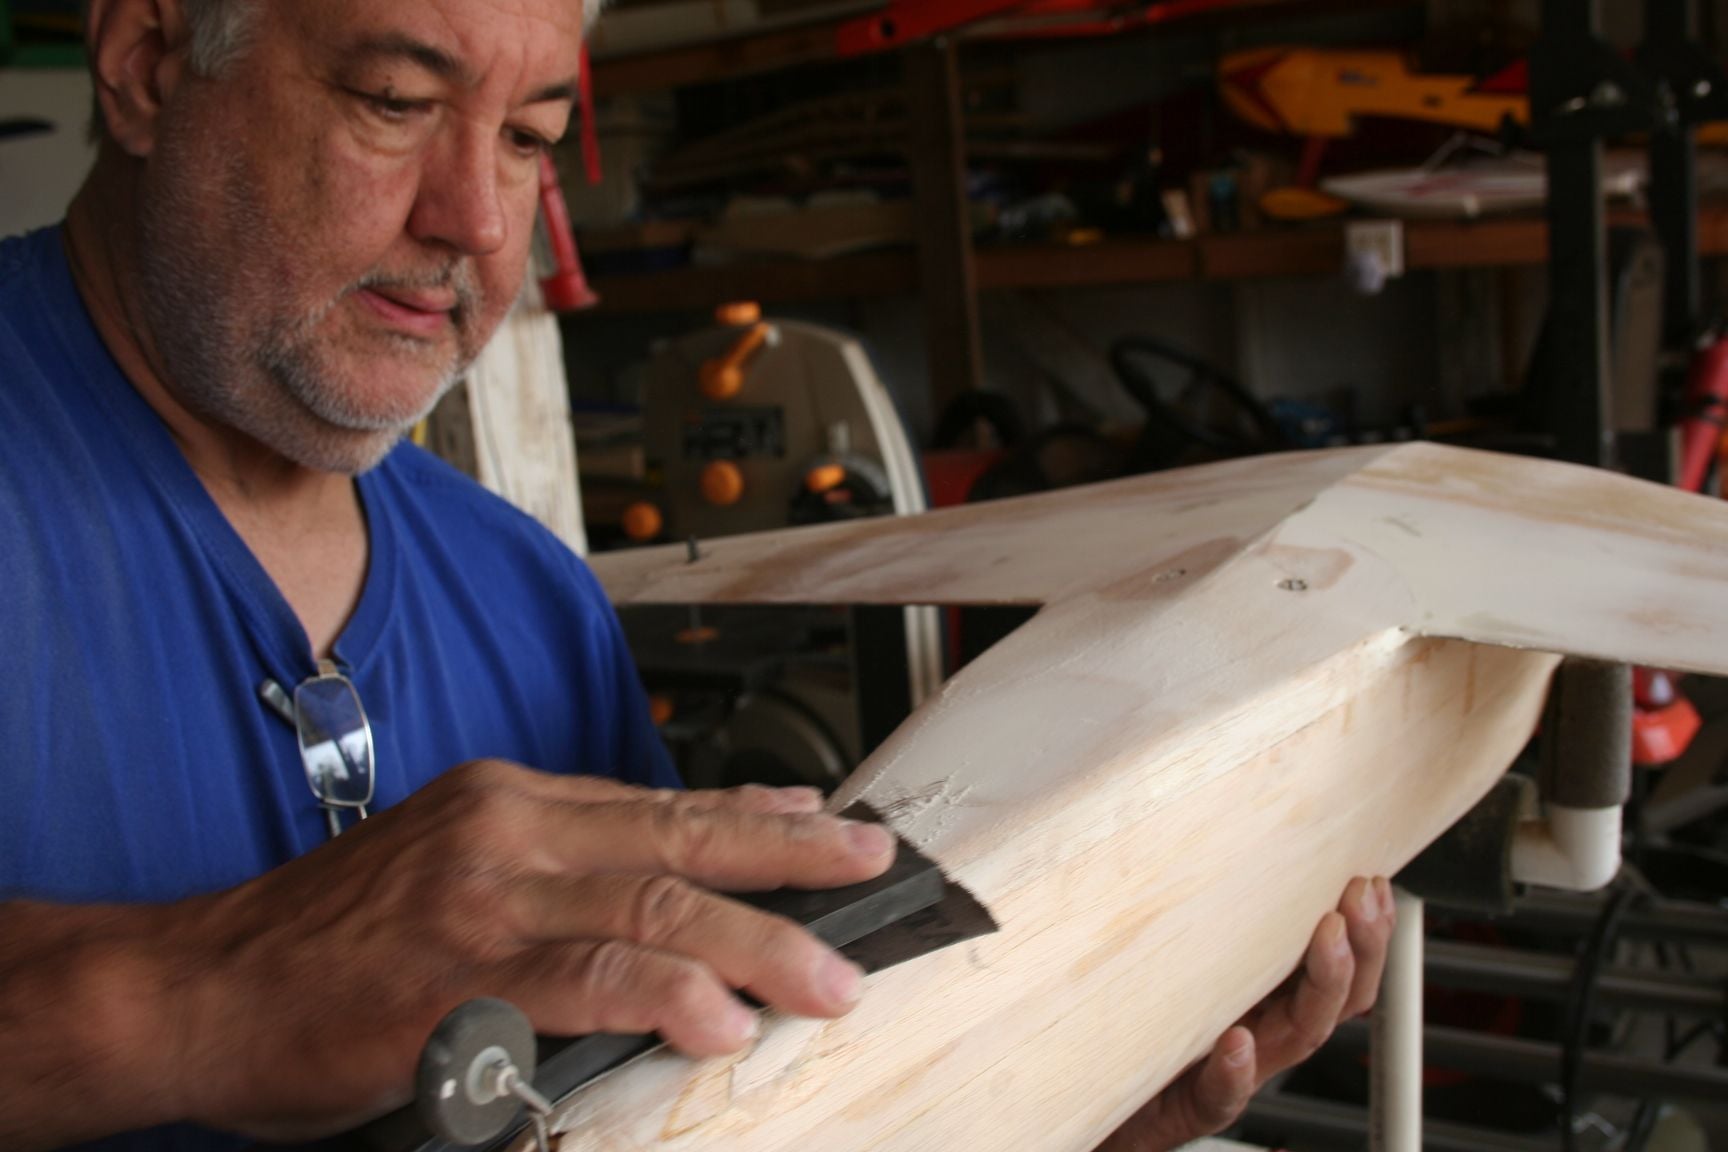
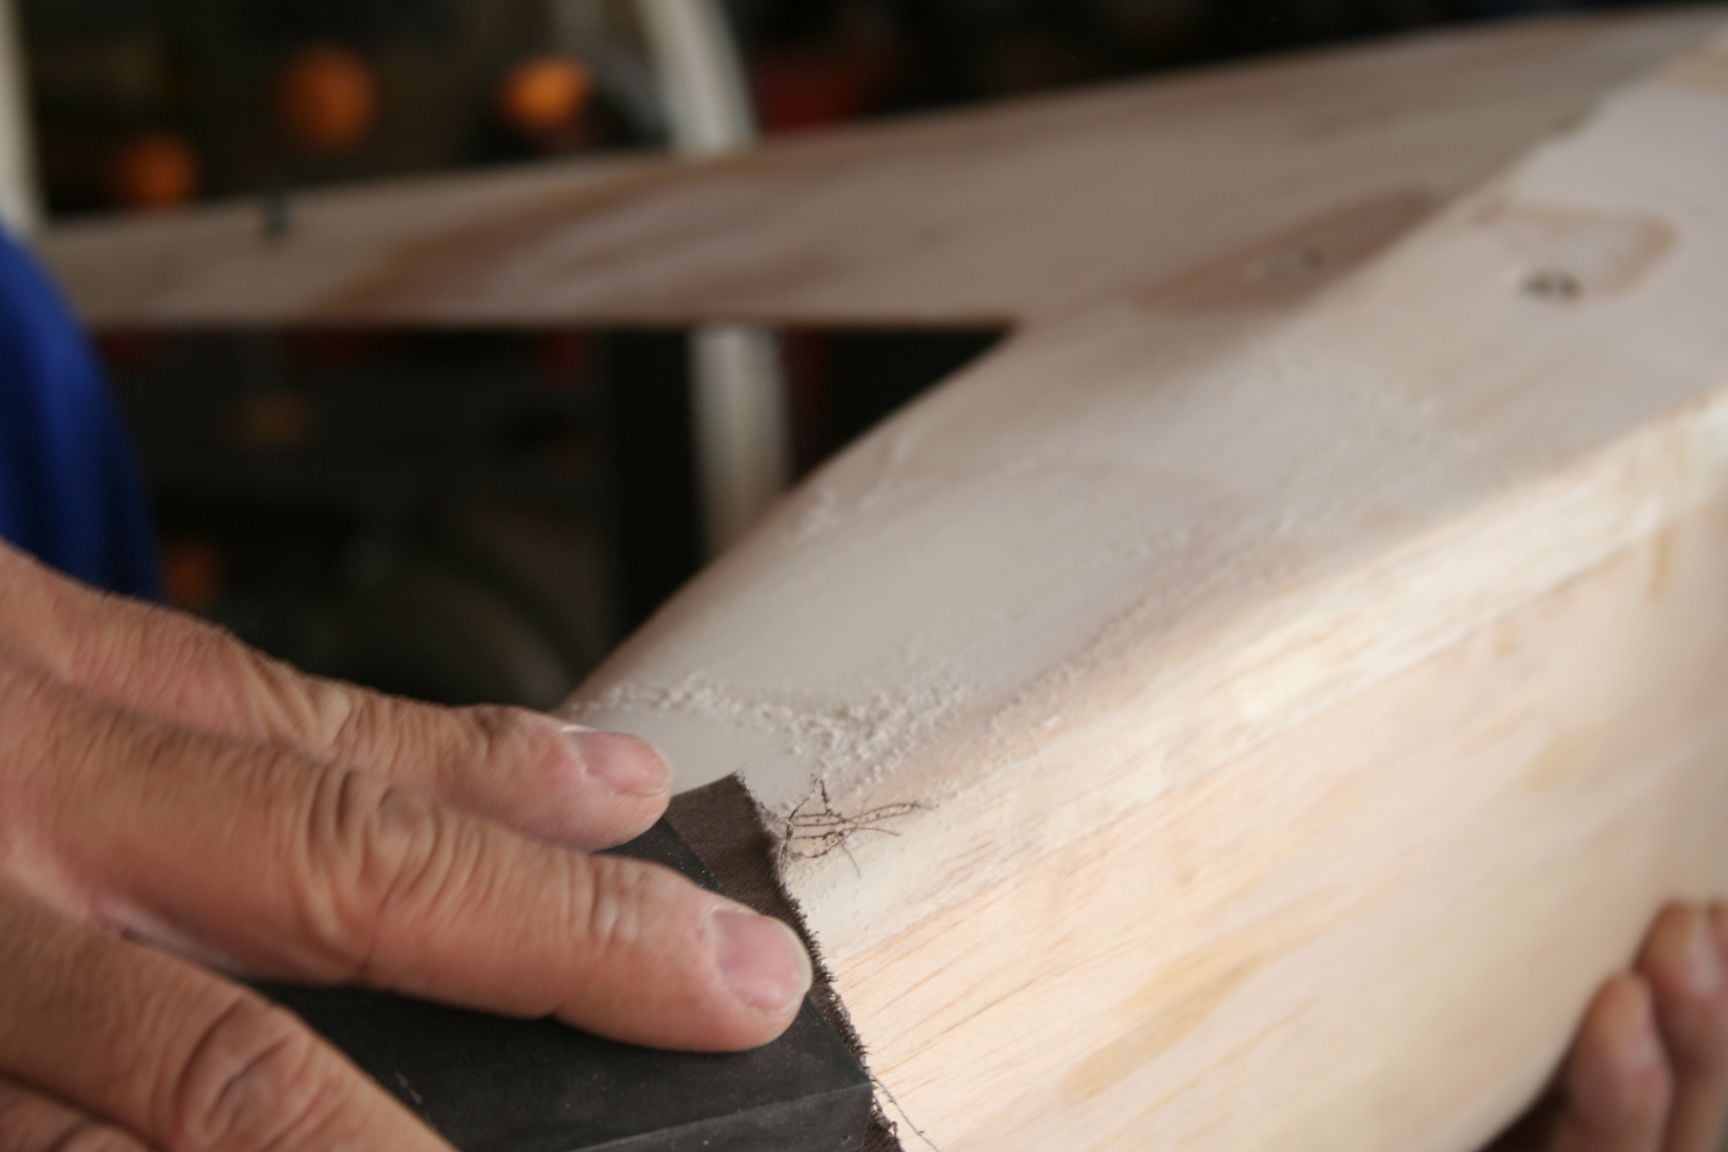
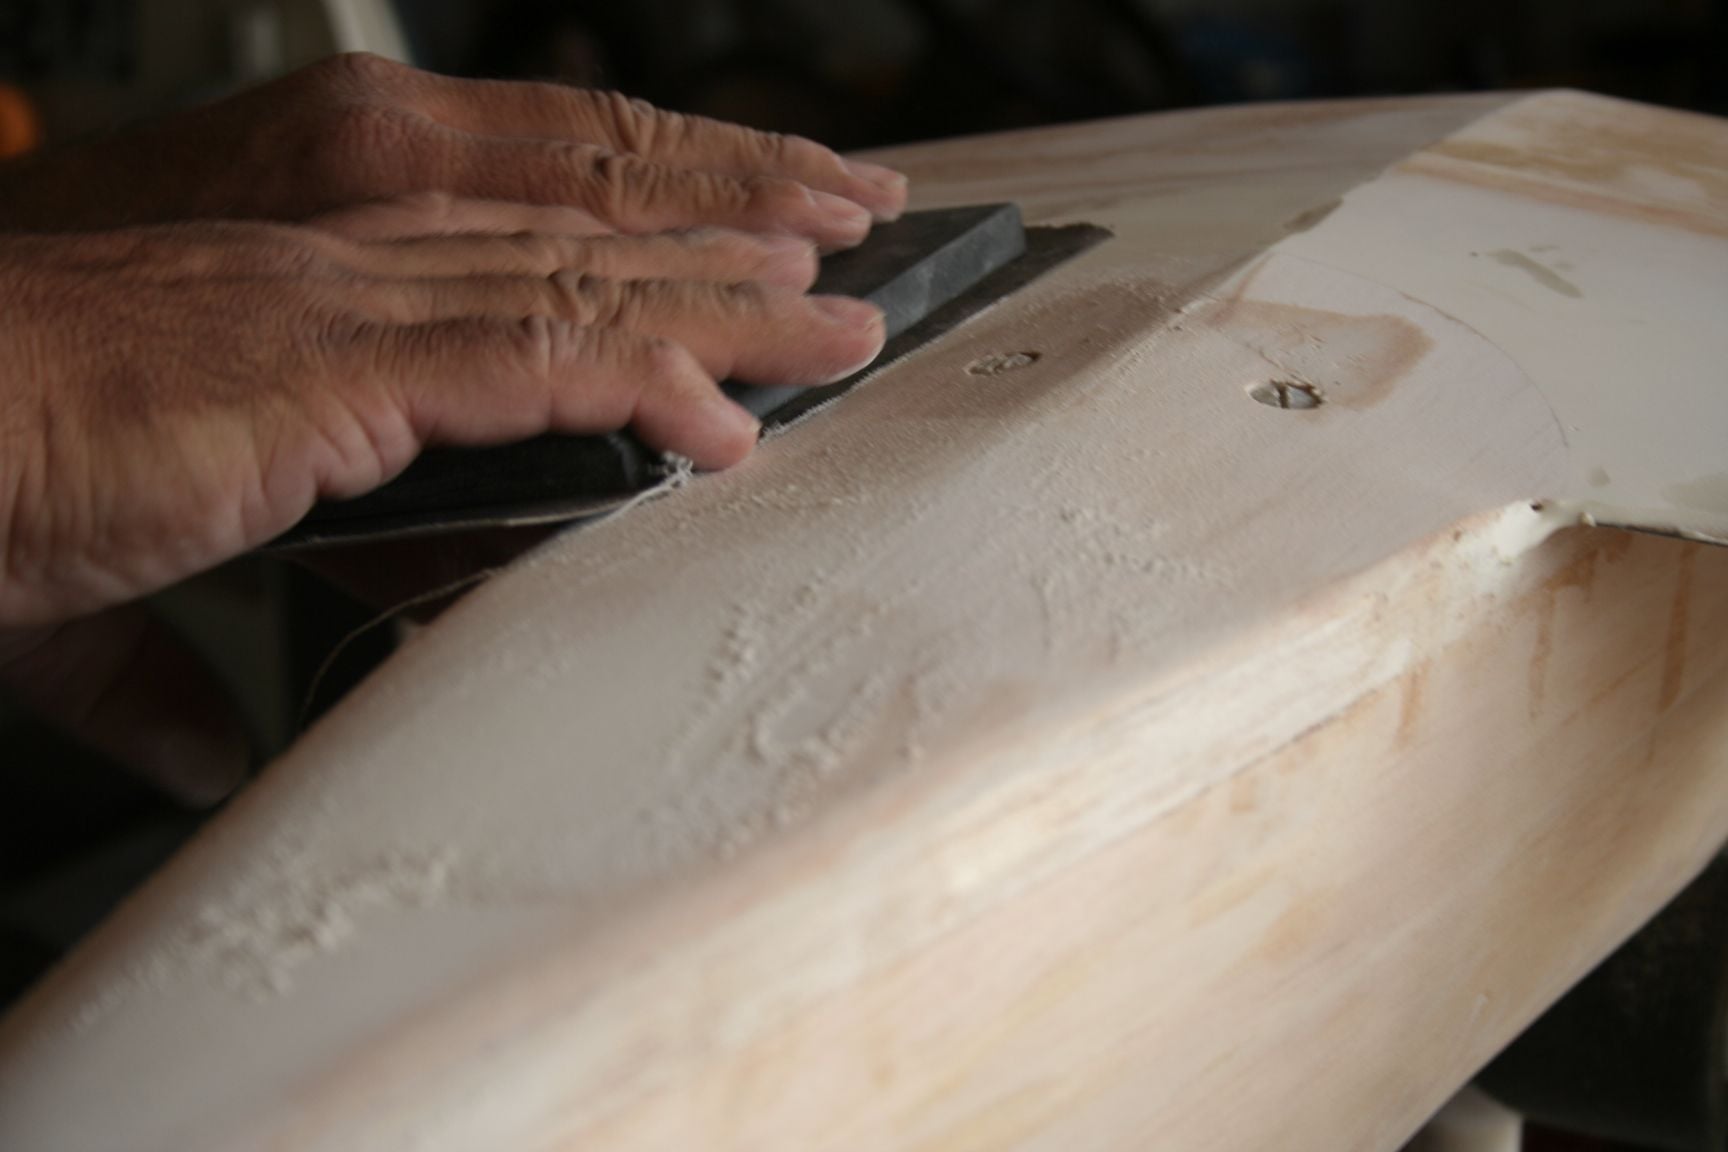
Finally, we are able to catch a break. We get to work, sanding off most of the micro-balloons to smooth the fairing into a clean transition.
. . . Tim starts with a power sander . . . (The key concept here is to keep it moving quickly and uniformly.)
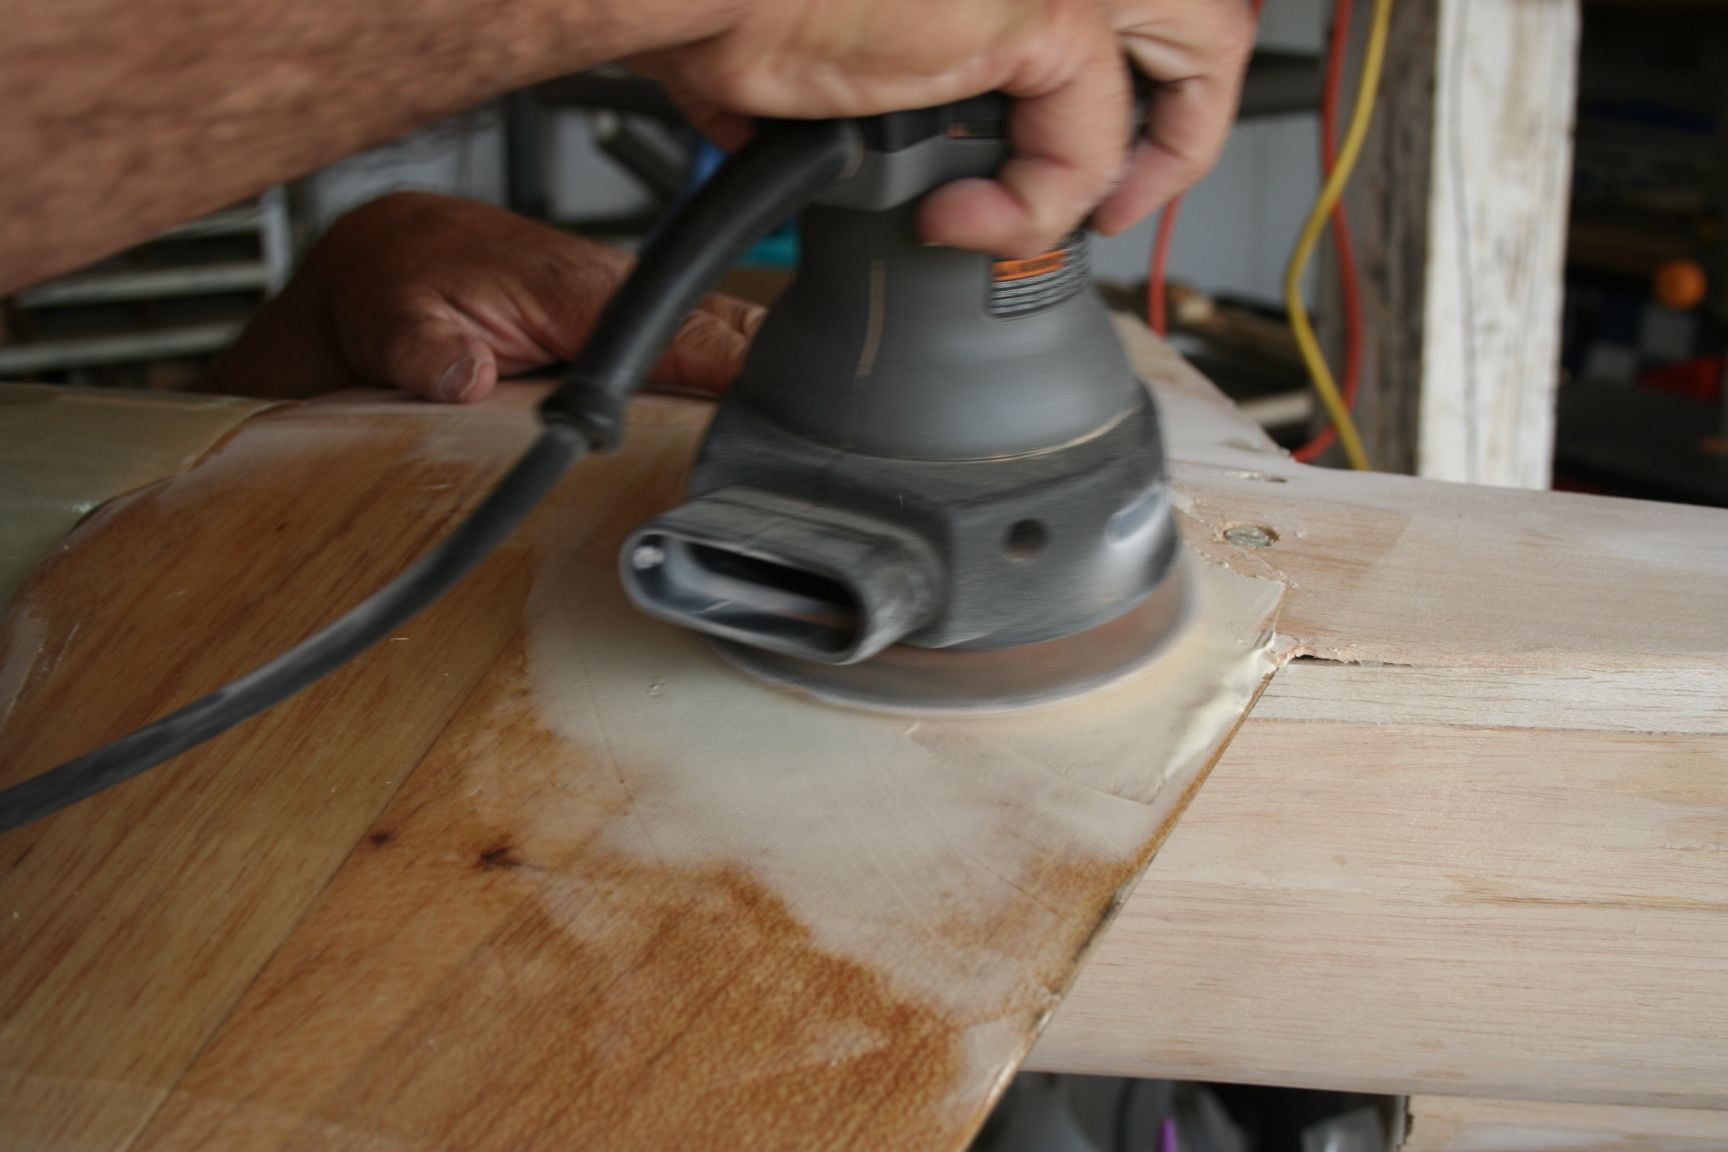
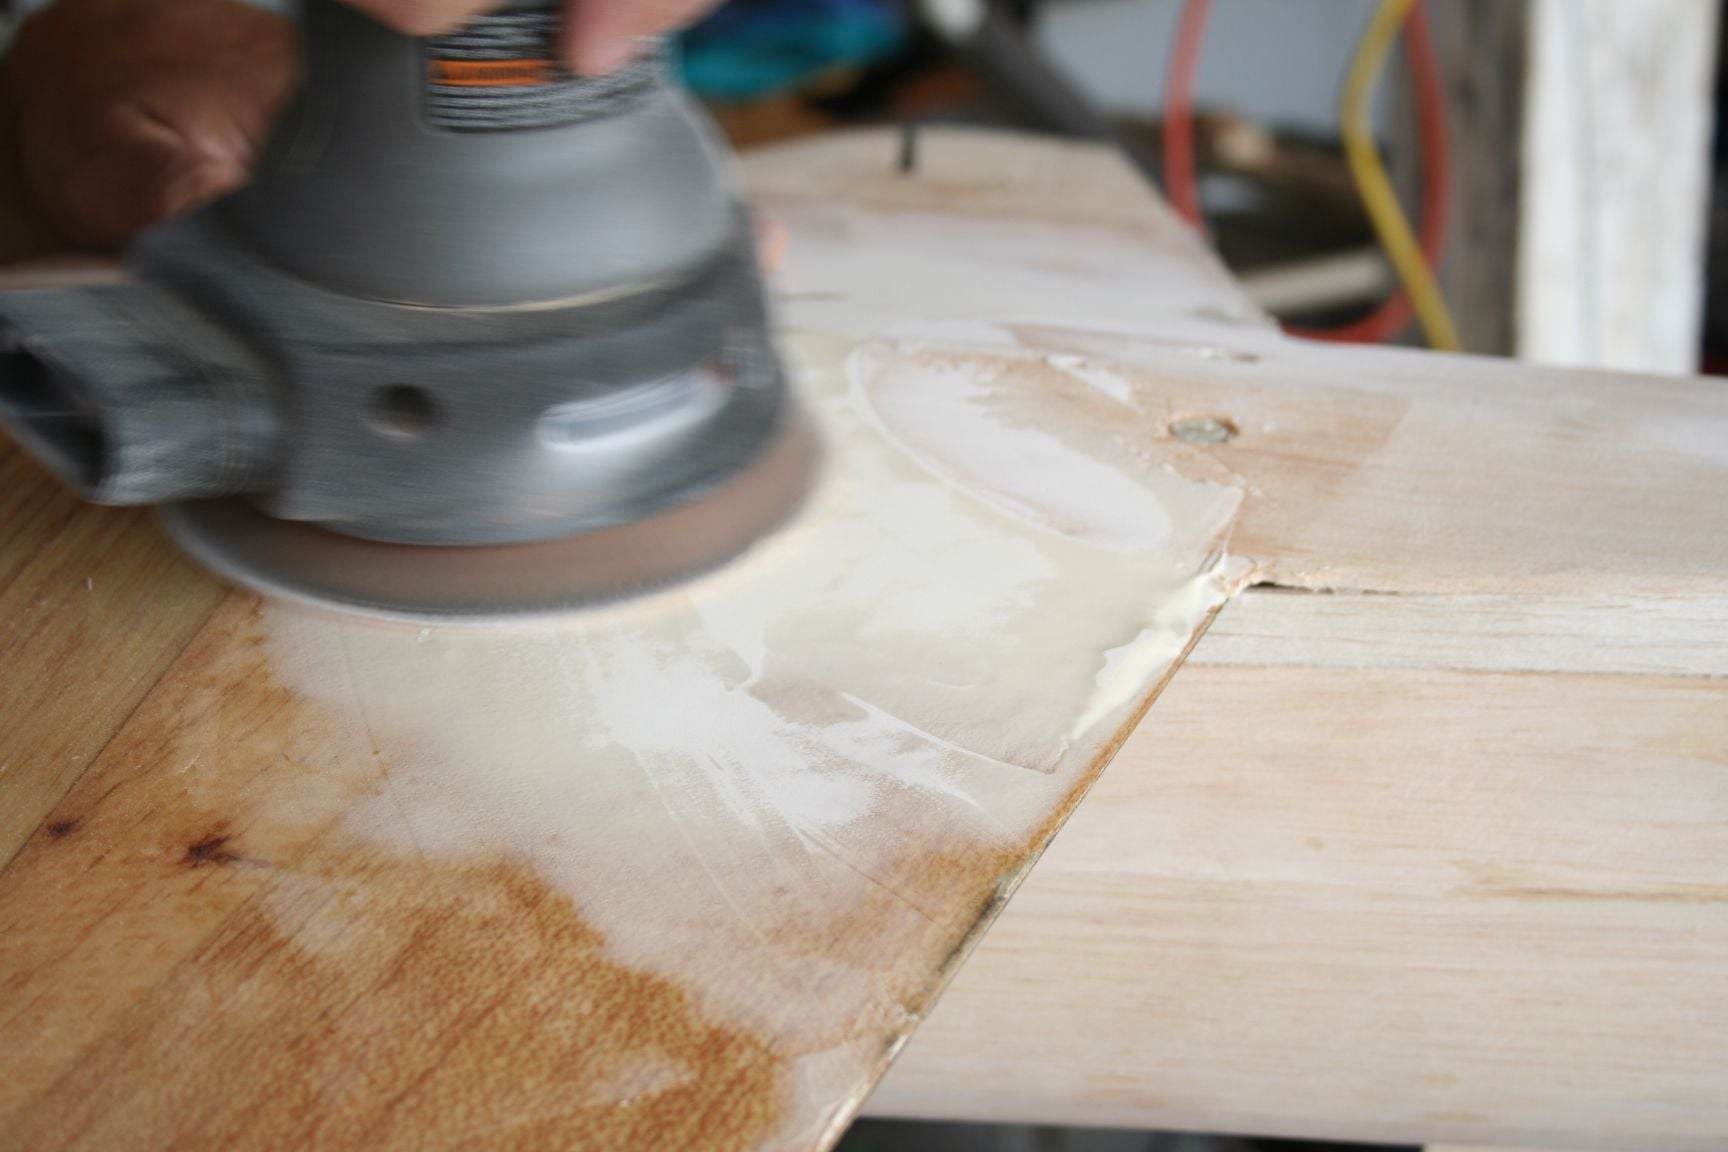
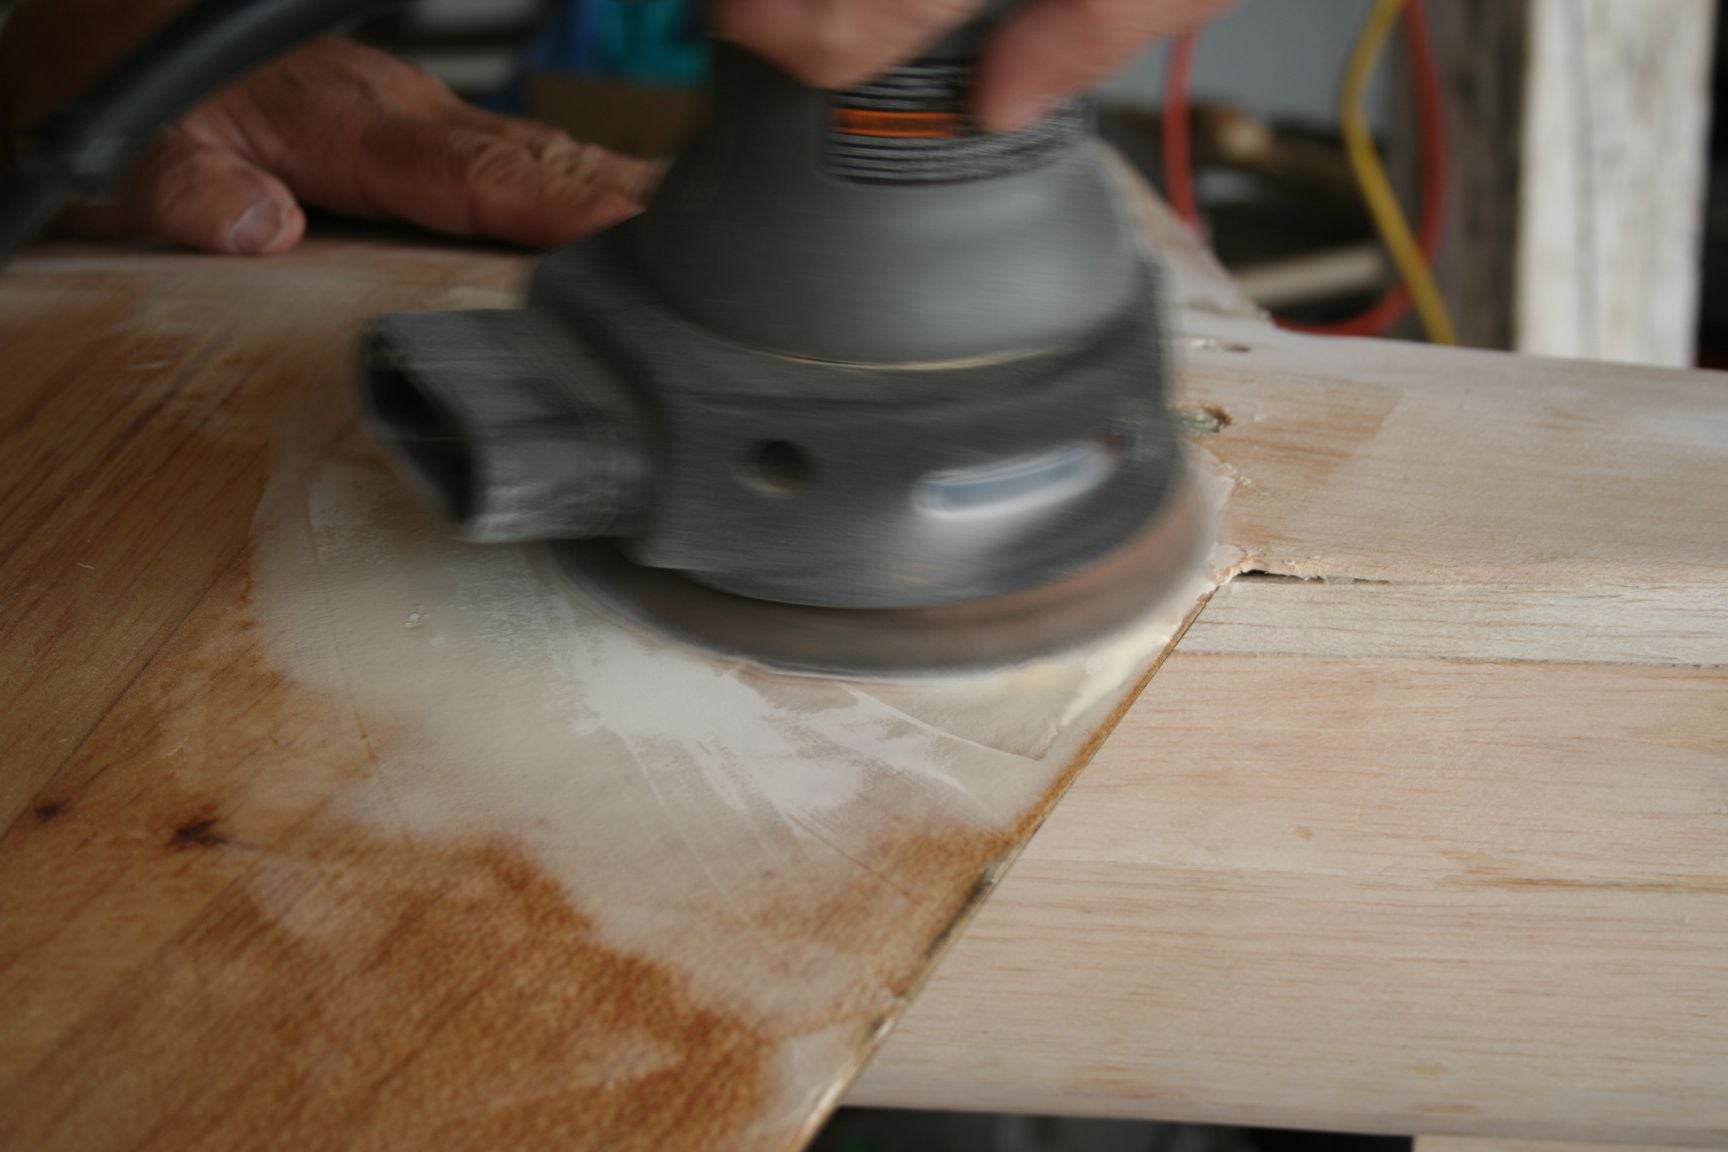
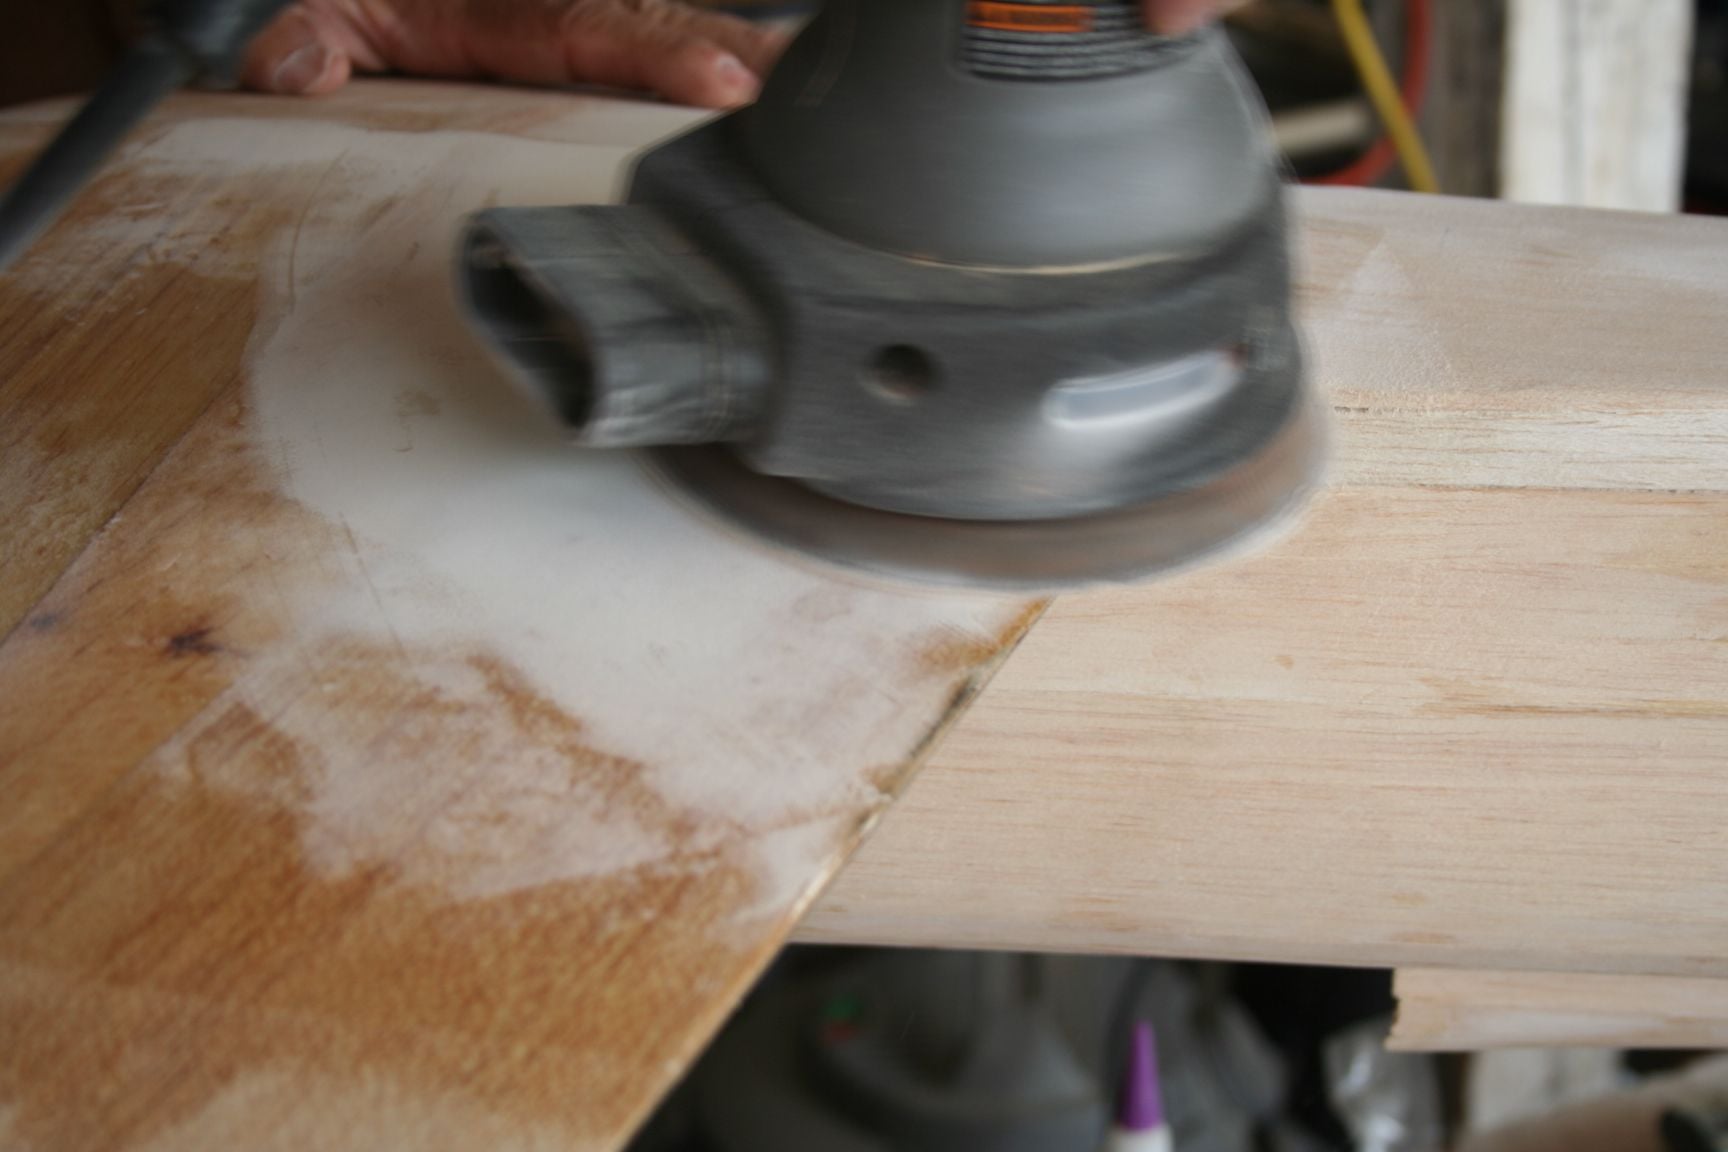
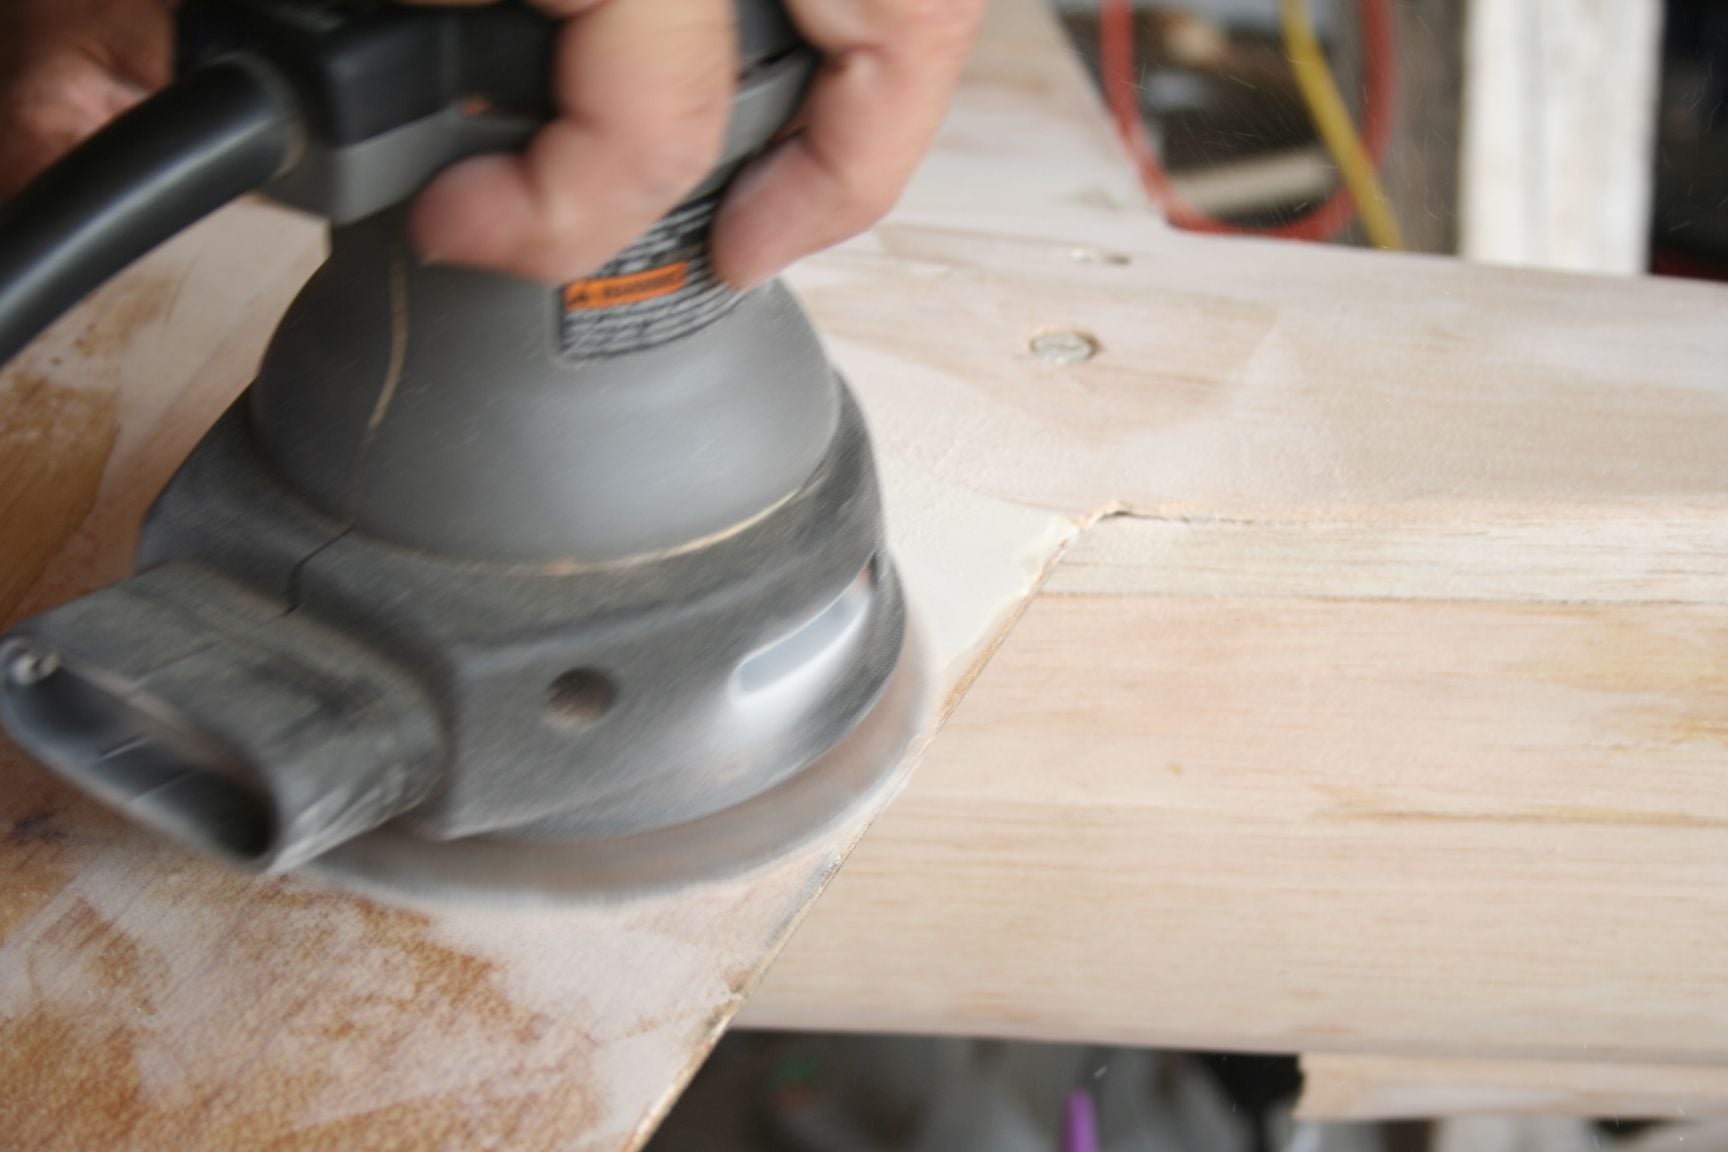
. . . Tim starts with a power sander . . . (The key concept here is to keep it moving quickly and uniformly.)


 09-09-2020, 07:08 PM
#359
Thread Starter
Thanks for your kind support and continued encouragement, Mike!
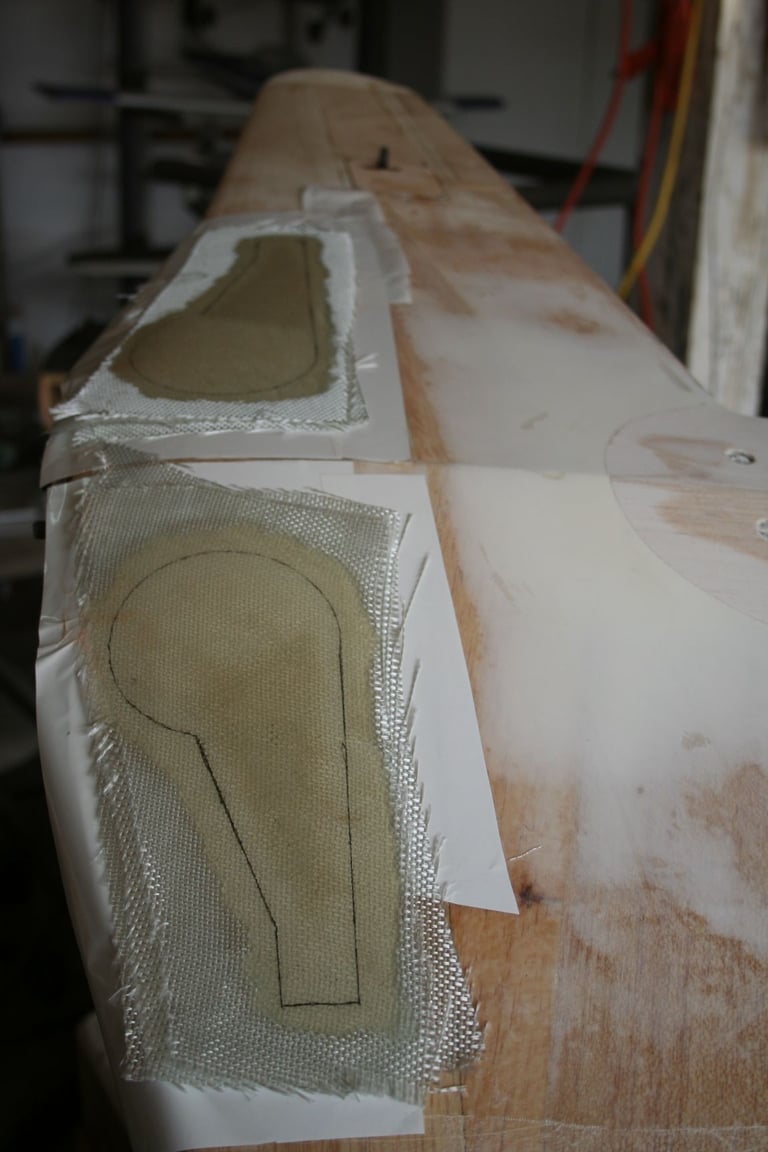
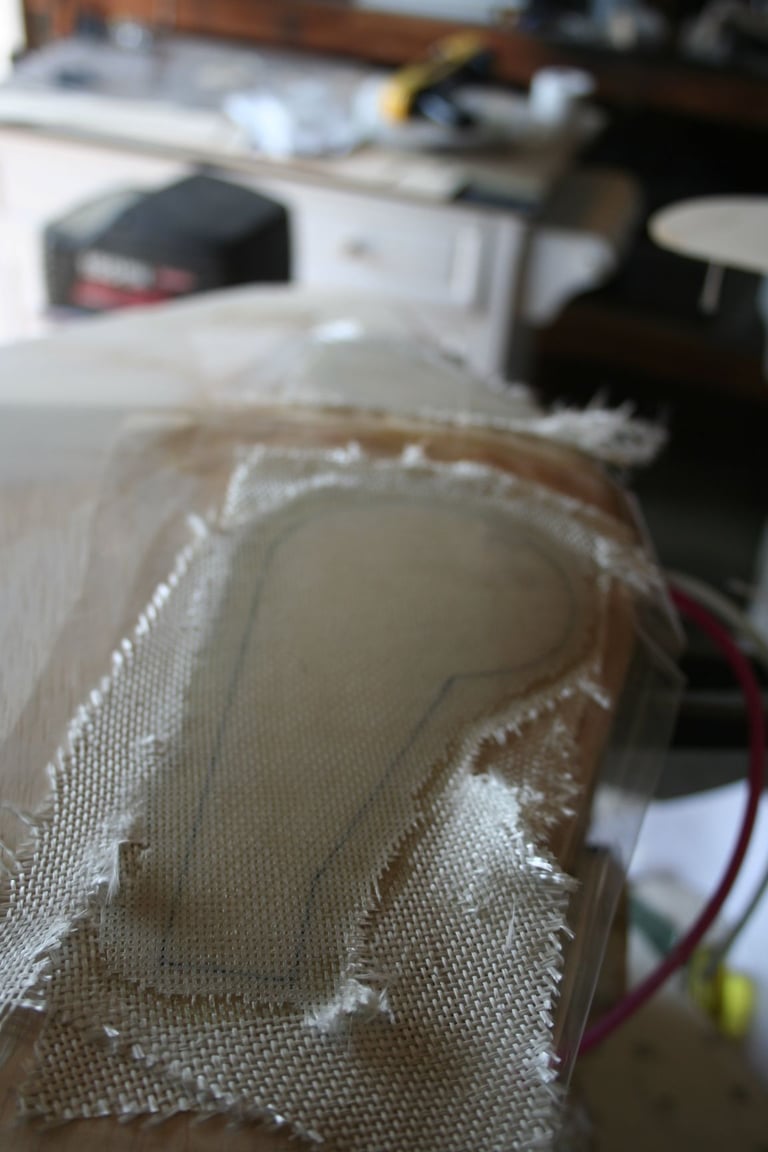
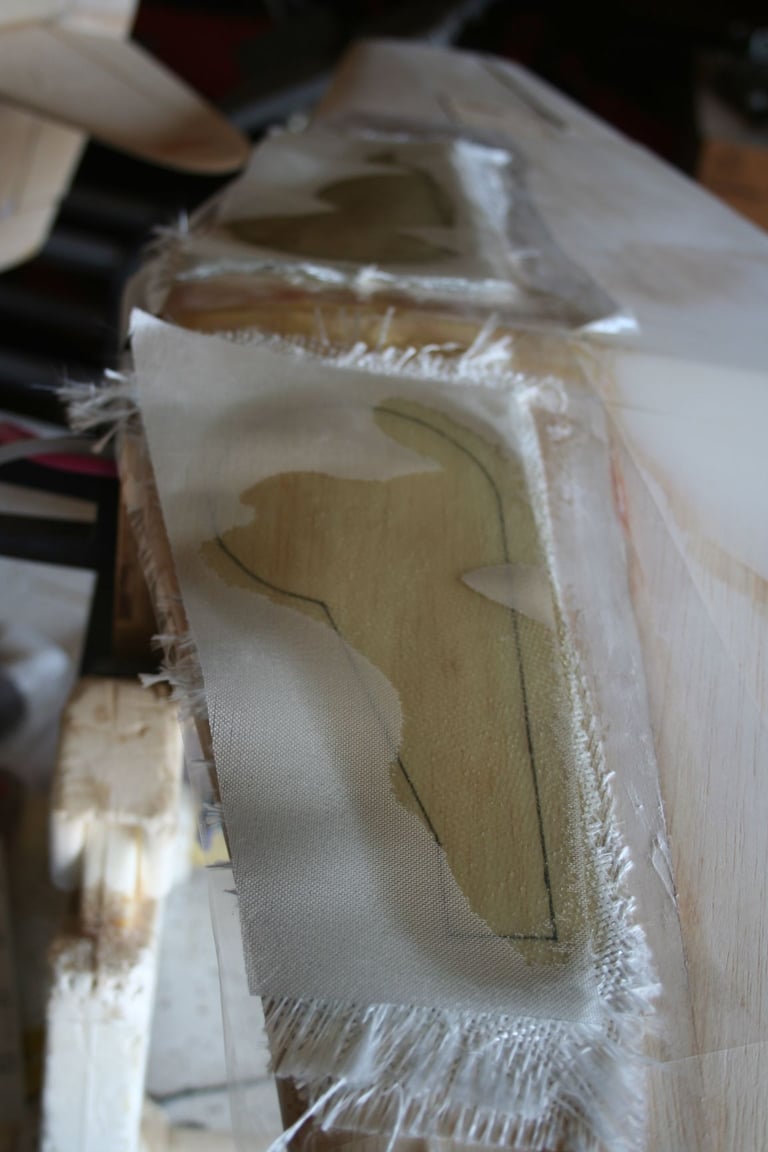
Once each of our fairings were sanded to our liking, the next step we took was to make fiberglass main gear doors:
I made a photocopy of the outline of one of the gear doors, as drawn on the plans. I was careful to also include the line representing the wing center section within the photocopy. This aids in proper placement and alignment of the template. Tim cut the paper template out with scissors, while I cut several layers of fiberglass cloth (3 layers of 6 oz., and one layer of 2 oz. cloth, for each gear door).
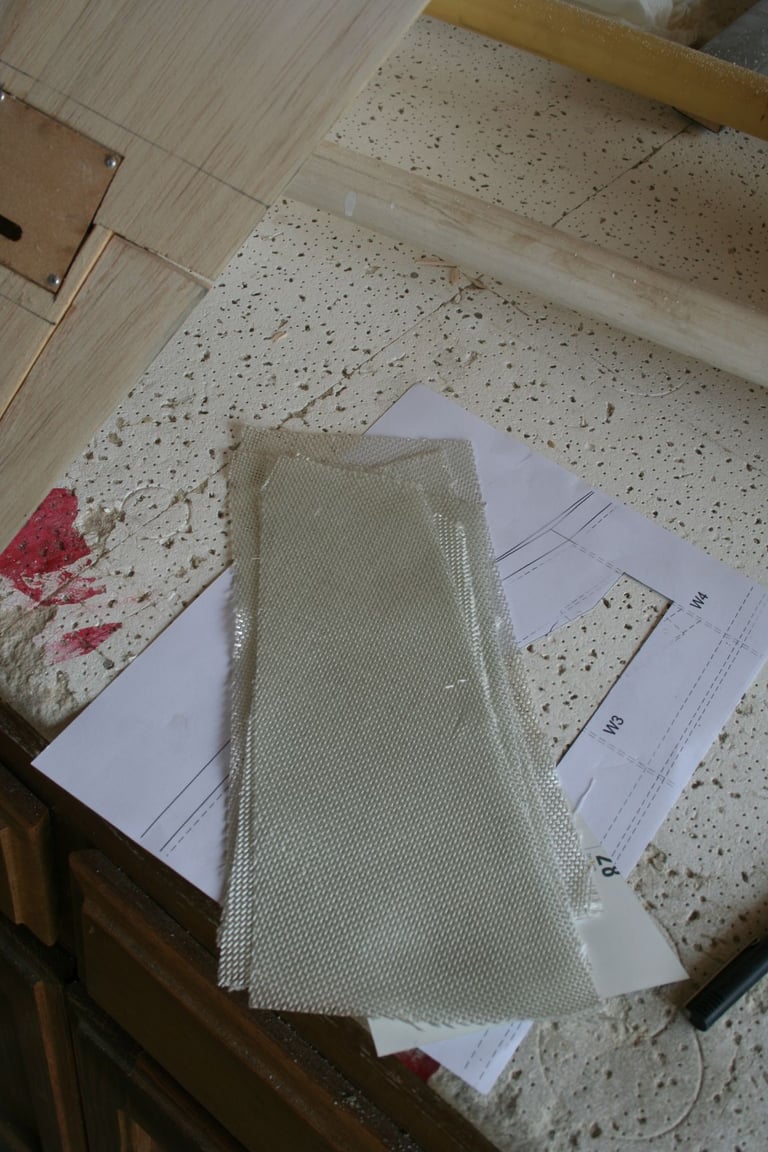
Layers of 6 oz. cloth cut and ready to apply; with the photocopied template, underneath.
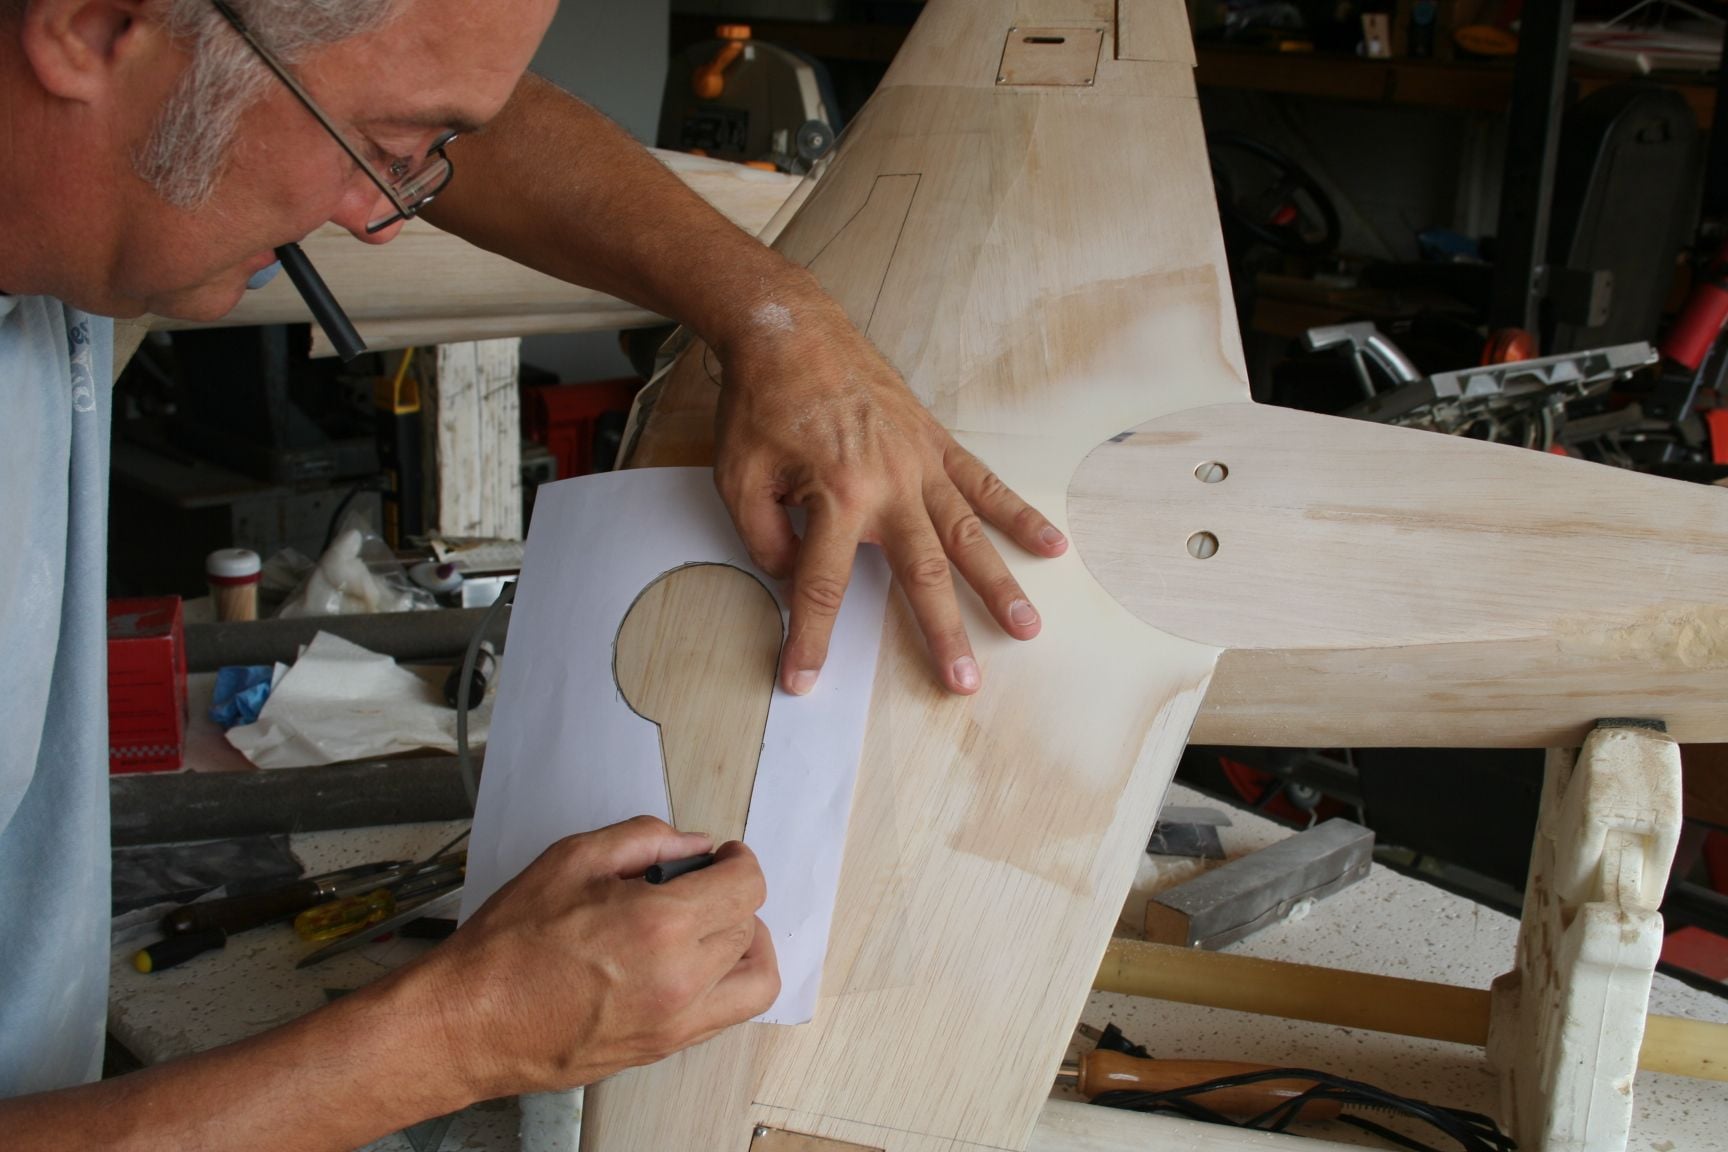
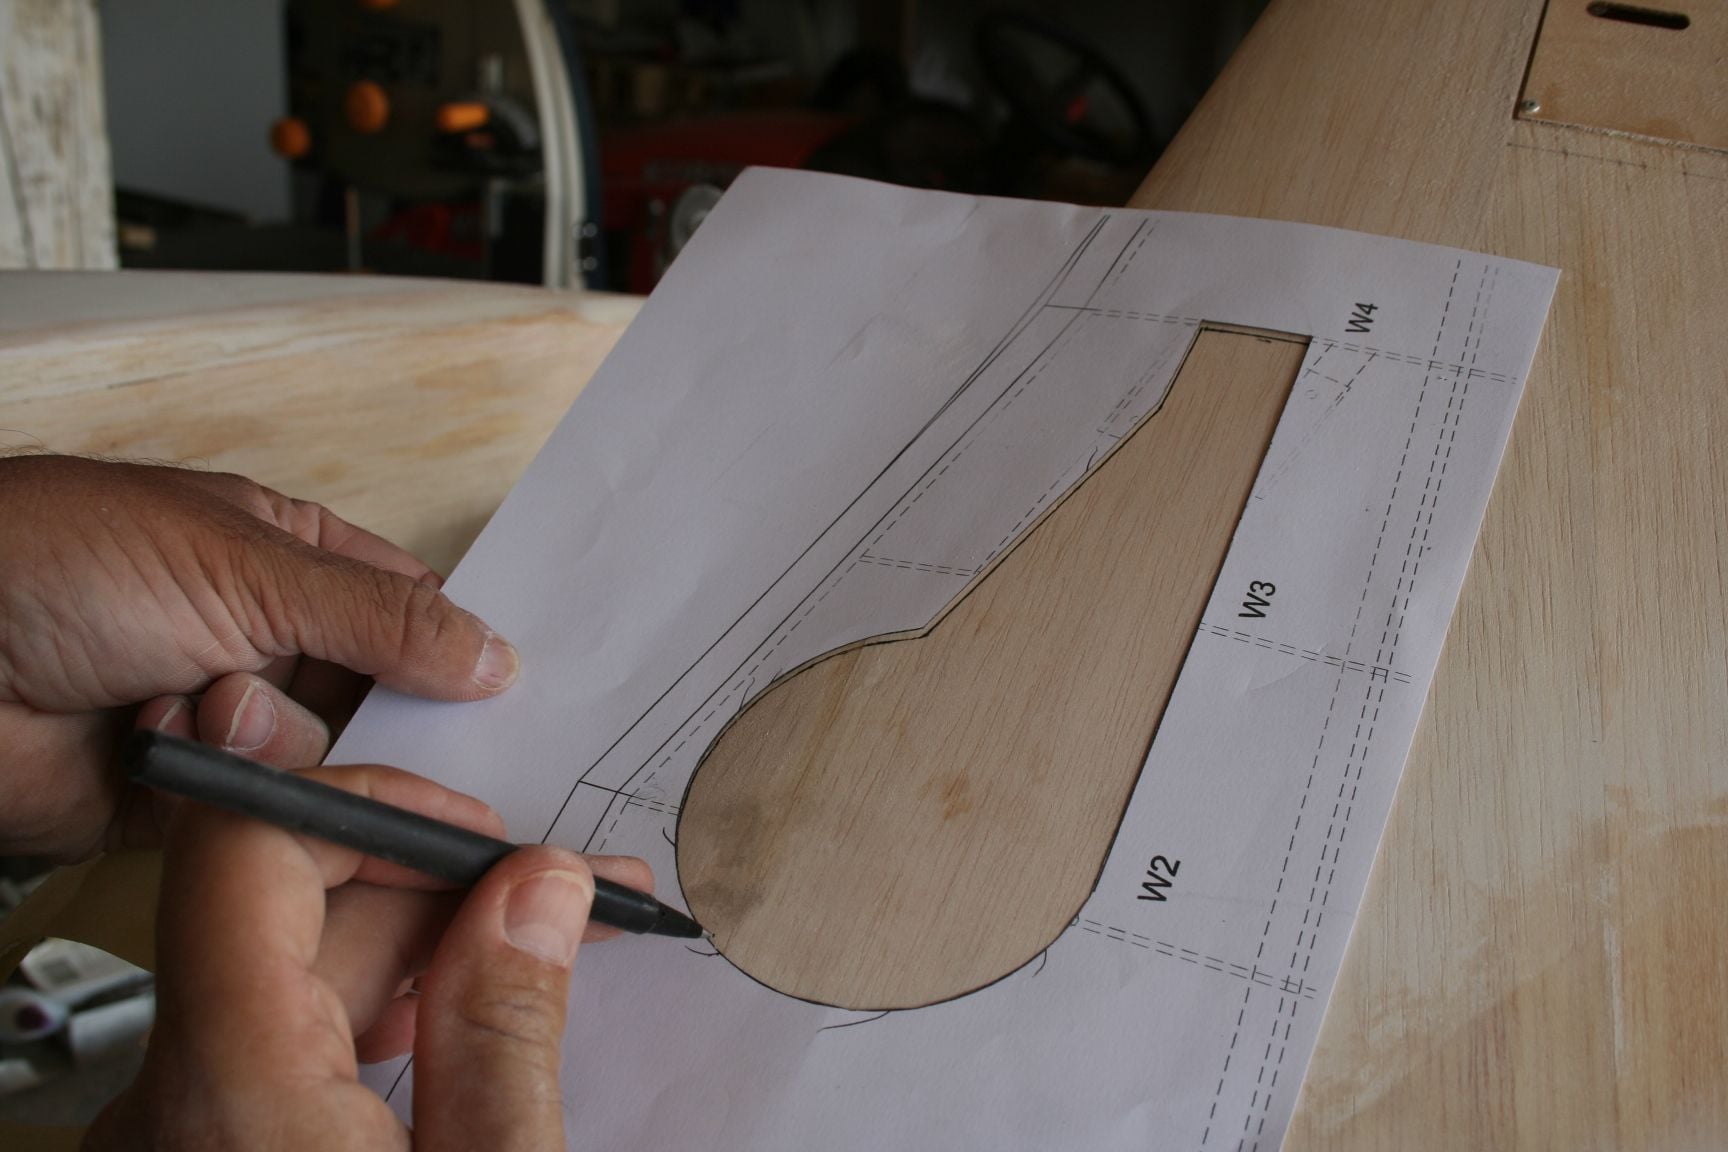
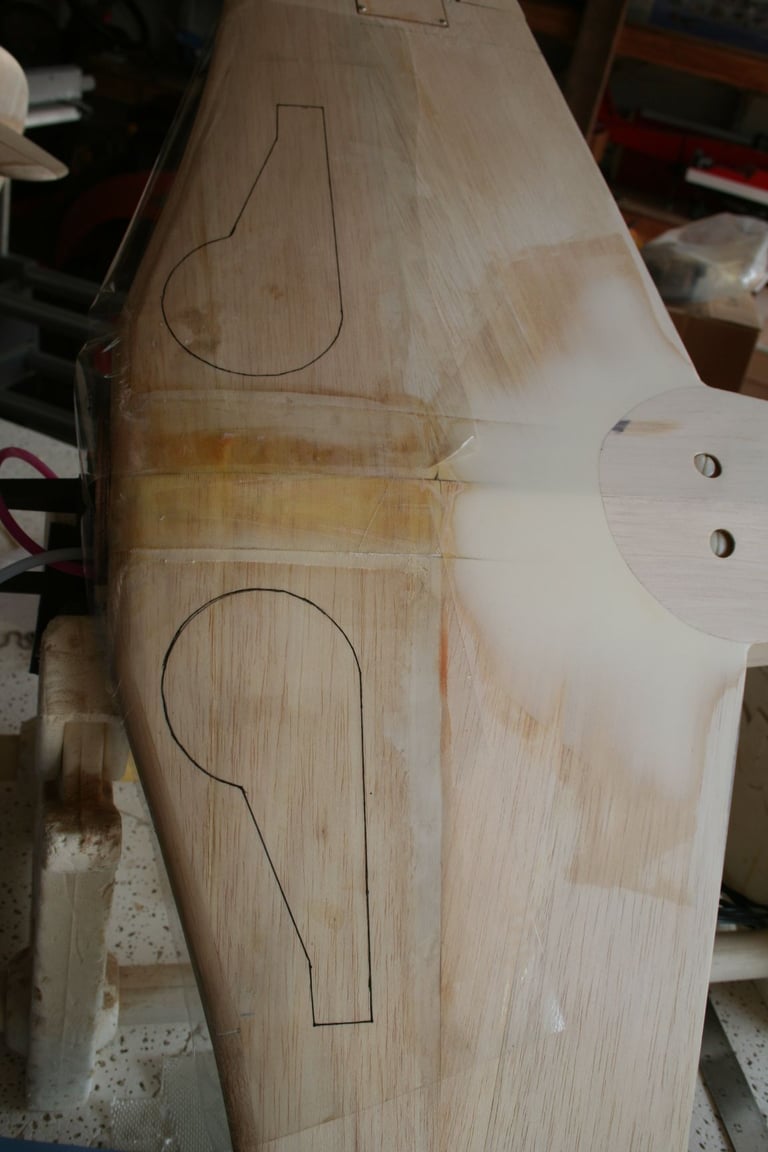
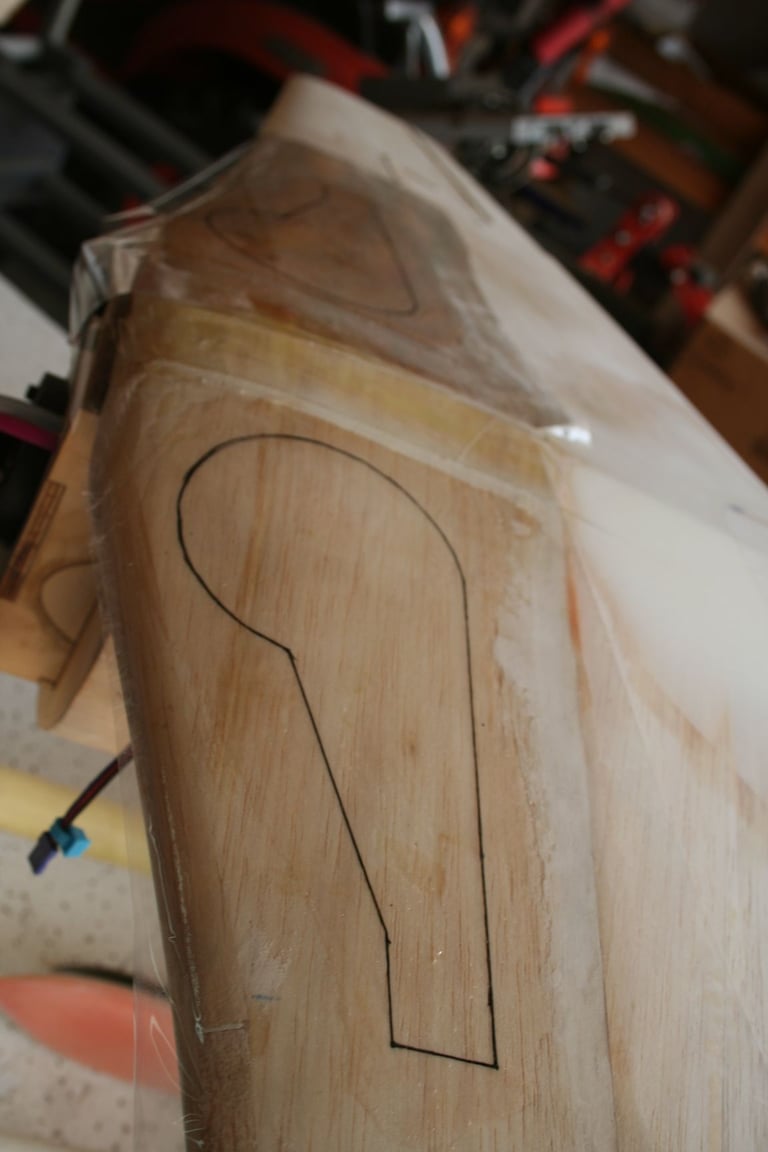
I have aligned the wing center section on my template and wing LE (all photocopied from plans on one 8 1/2 x 11" sheet of paper) with the actual wing center section and LE of my plane. Each gear doors' outline is then traced directly onto the balsa.
Tim does the same.
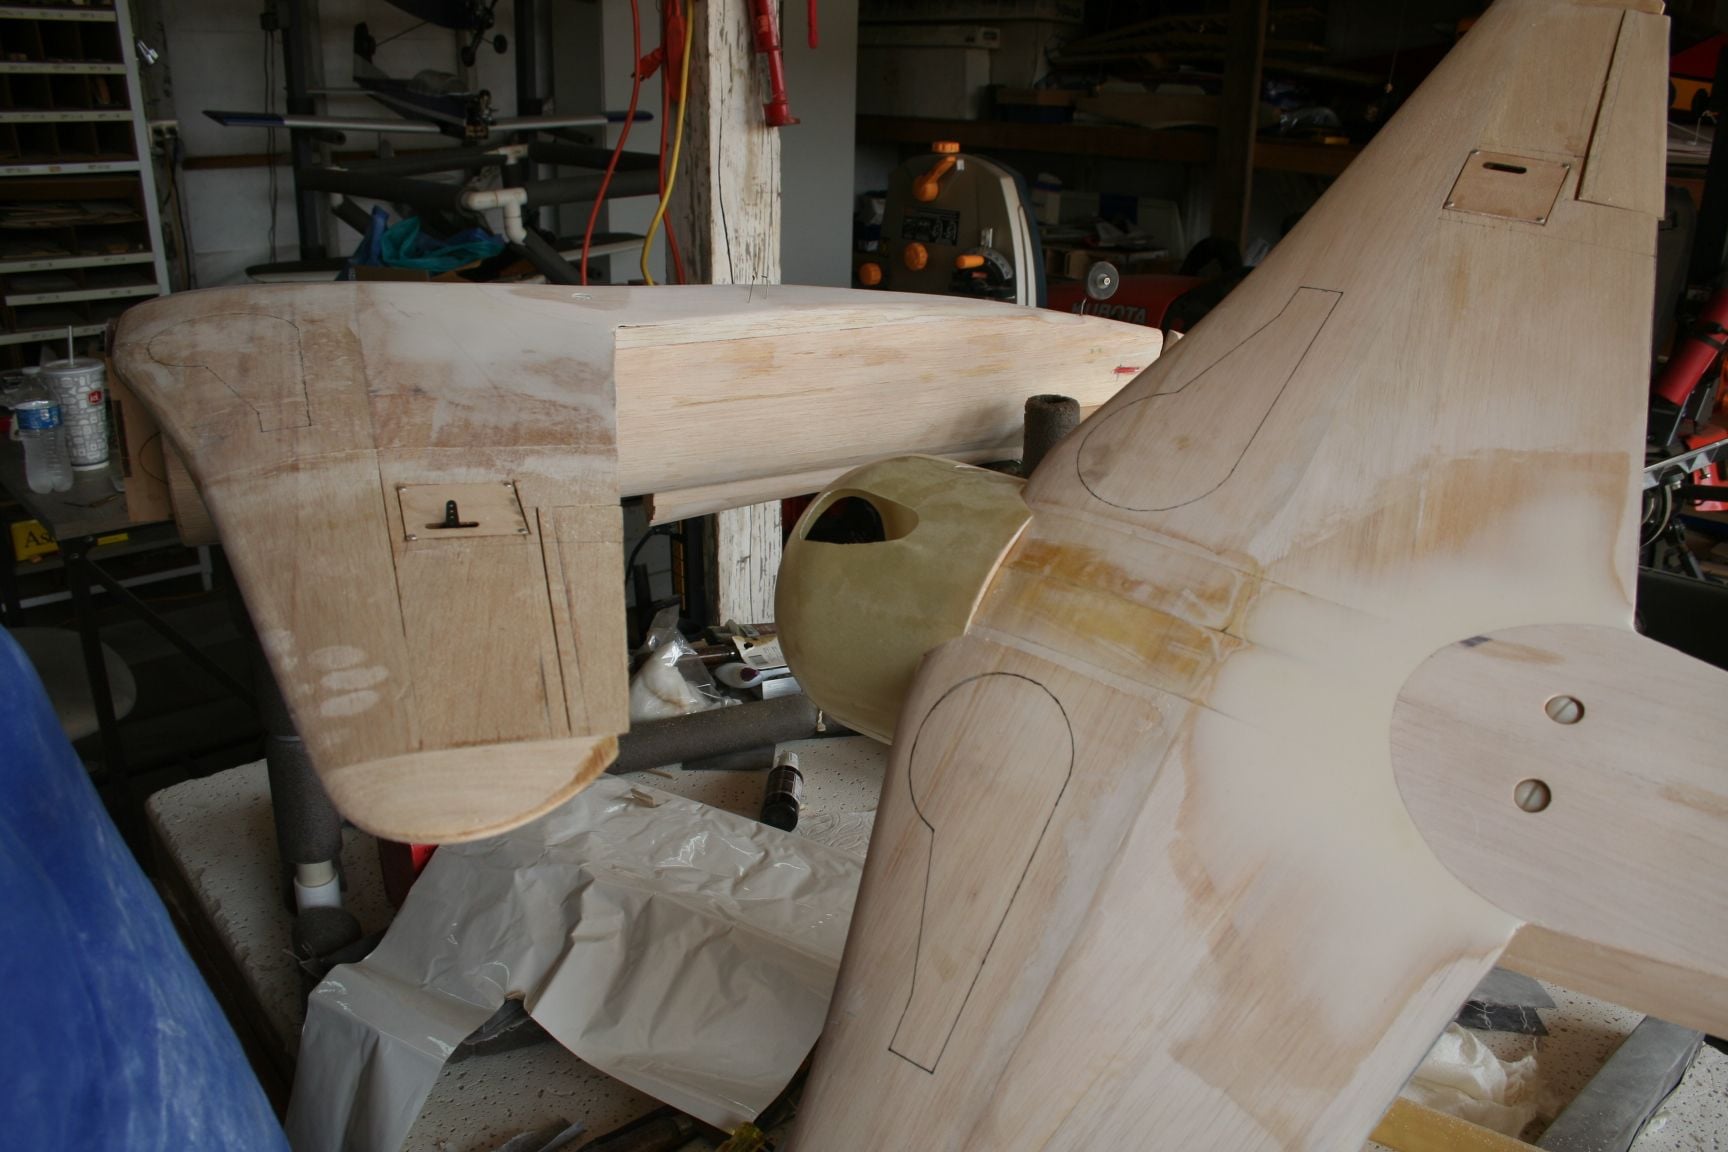
Both planes showing the door outlines traced.
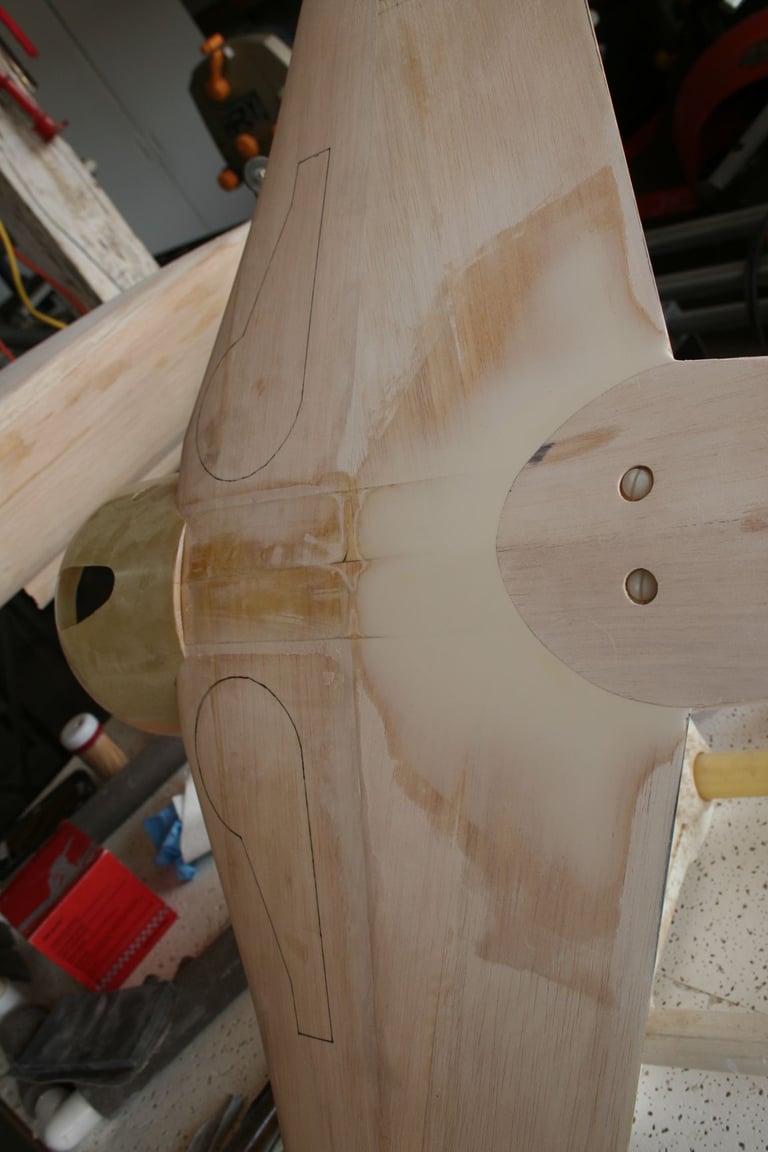
A close-up of mine.
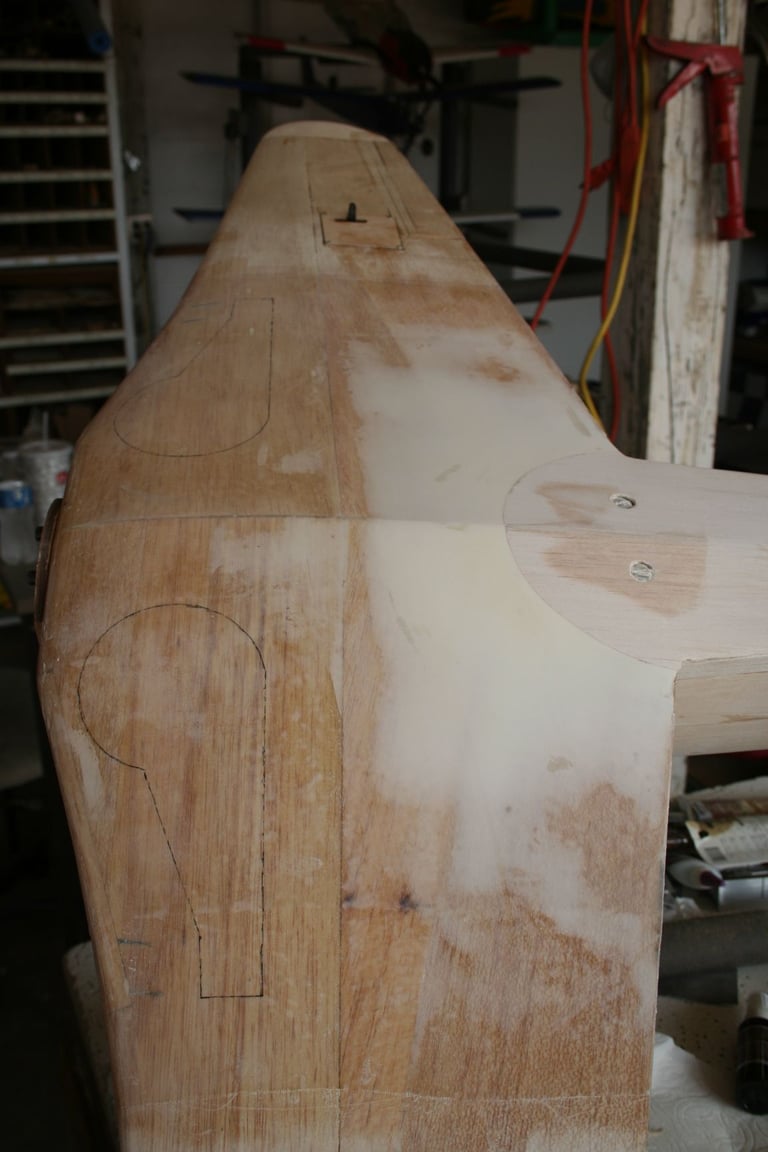
A close-up of Tim's.
Once each of our fairings were sanded to our liking, the next step we took was to make fiberglass main gear doors:
I made a photocopy of the outline of one of the gear doors, as drawn on the plans. I was careful to also include the line representing the wing center section within the photocopy. This aids in proper placement and alignment of the template. Tim cut the paper template out with scissors, while I cut several layers of fiberglass cloth (3 layers of 6 oz., and one layer of 2 oz. cloth, for each gear door).
Layers of 6 oz. cloth cut and ready to apply; with the photocopied template, underneath.
I have aligned the wing center section on my template and wing LE (all photocopied from plans on one 8 1/2 x 11" sheet of paper) with the actual wing center section and LE of my plane. Each gear doors' outline is then traced directly onto the balsa.
Tim does the same.
Both planes showing the door outlines traced.
A close-up of mine.
A close-up of Tim's.
Last edited by Iron Dog; 09-09-2020 at 10:31 PM.
09-09-2020, 09:38 PM
#361
Thread Starter
"Brilliant minds think alike," Mike!
I haven't used that method for this purpose before, but that is very similar to Tim's technique, as well. (However, I have placed plastic wrap conforming to the wing, prior to mounting the fuse in order to make wing fillets from chopped fiberglass, micro-balloons and resin; but you and Tim are the brilliant minds in this instance.)
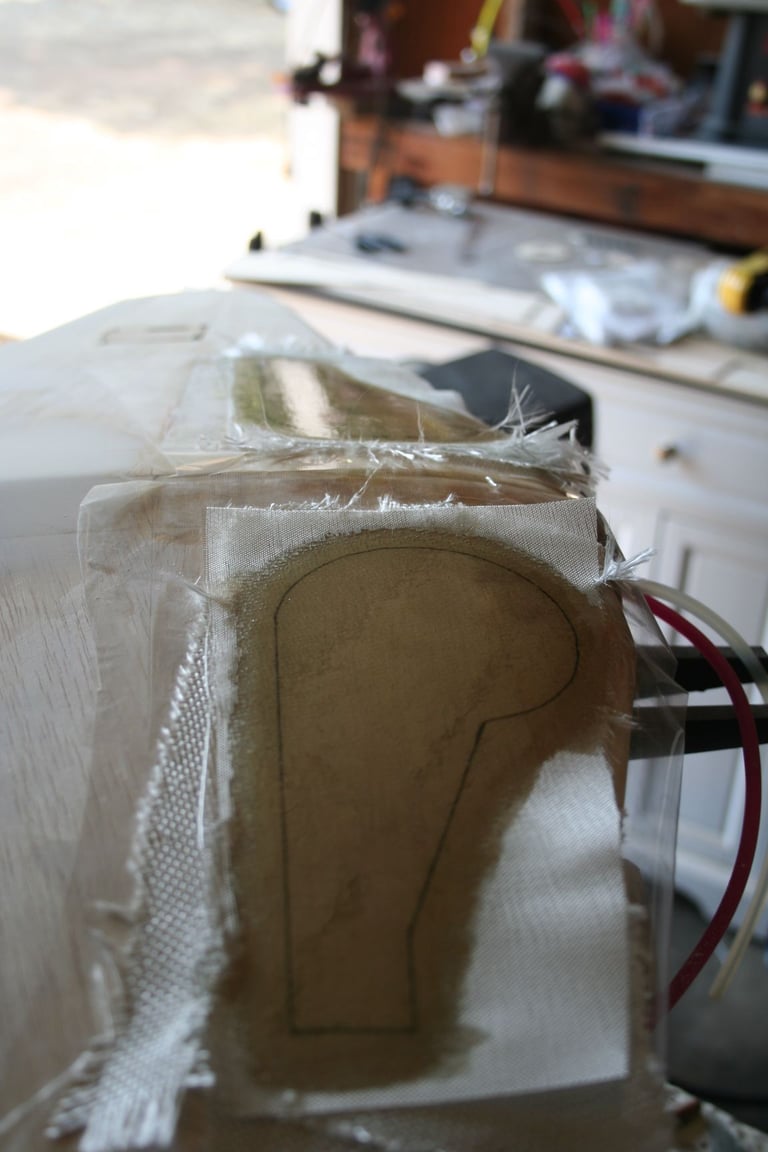
While I was heading into my basement to cut the fiberglass cloth, Tim instructed me to grab some Monokote. I grabbed scraps of white Ultracote. He applied it to the bottom of his wing, over the traced outline of the gear door; then stated that he prefers to use clear Monokote for this purpose, so the outline is very clear. I replied, that had he told me that earlier, I could have supplied him with clear. I then proceeded to return to the basement and cut clear to use on mine, so we can show everyone his preferred method:
1. Iron-on clear Monokote (or similar) plastic covering material -- pieces large enough to extend well beyond the outline already traced on the wing.
2. Align the paper template back over the Monokote, carefully aligning it with the first gear door tracing. Re-trace the outline of the door on the top of the Monokote. (The Monokote is a parting surface; and when the part is removed, the ink will adhere to the fiberglass part, supplying a perfect outline to the finished part. The finished part will then align perfectly with the line previously drawn on the balsa sheeting.)
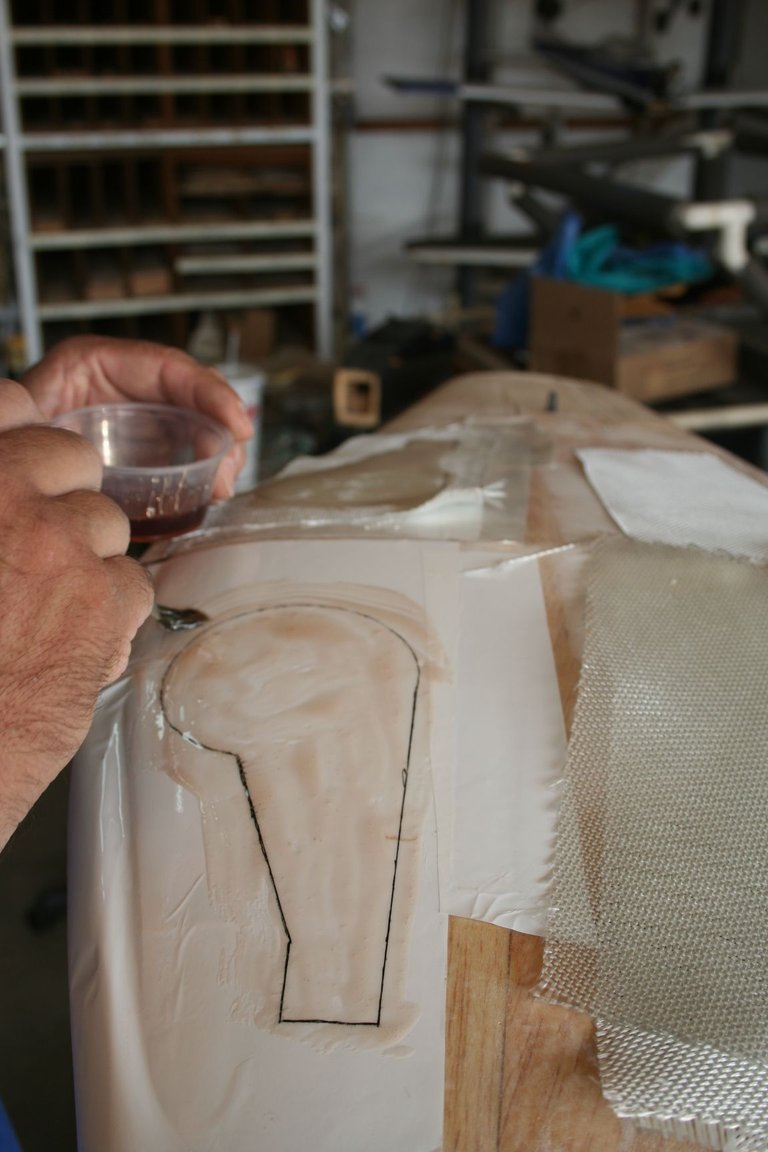
3. We each used one metered pump of West Systems Epoxy. Start the lay-up by brushing a layer of epoxy over the outline. (Tim's plane is pictured here -- easily recognized by the white covering material.)
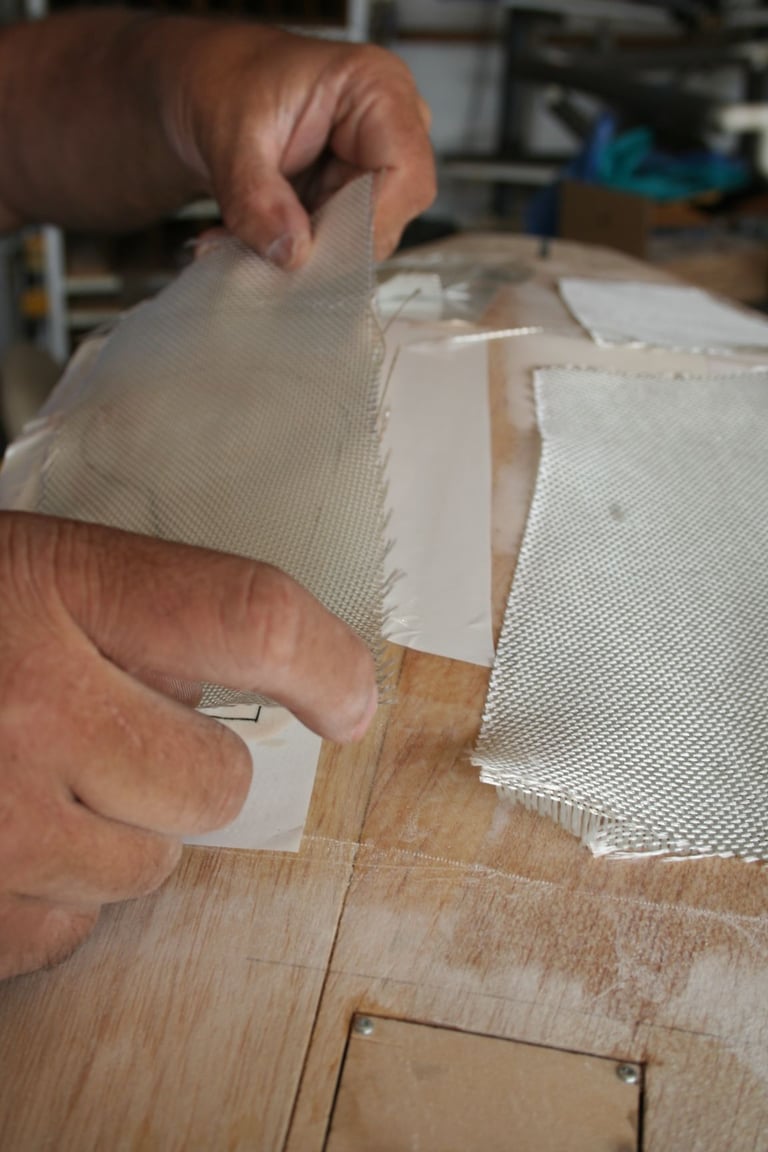
4. Lay the first layer of 6 oz. cloth over the outlined position.
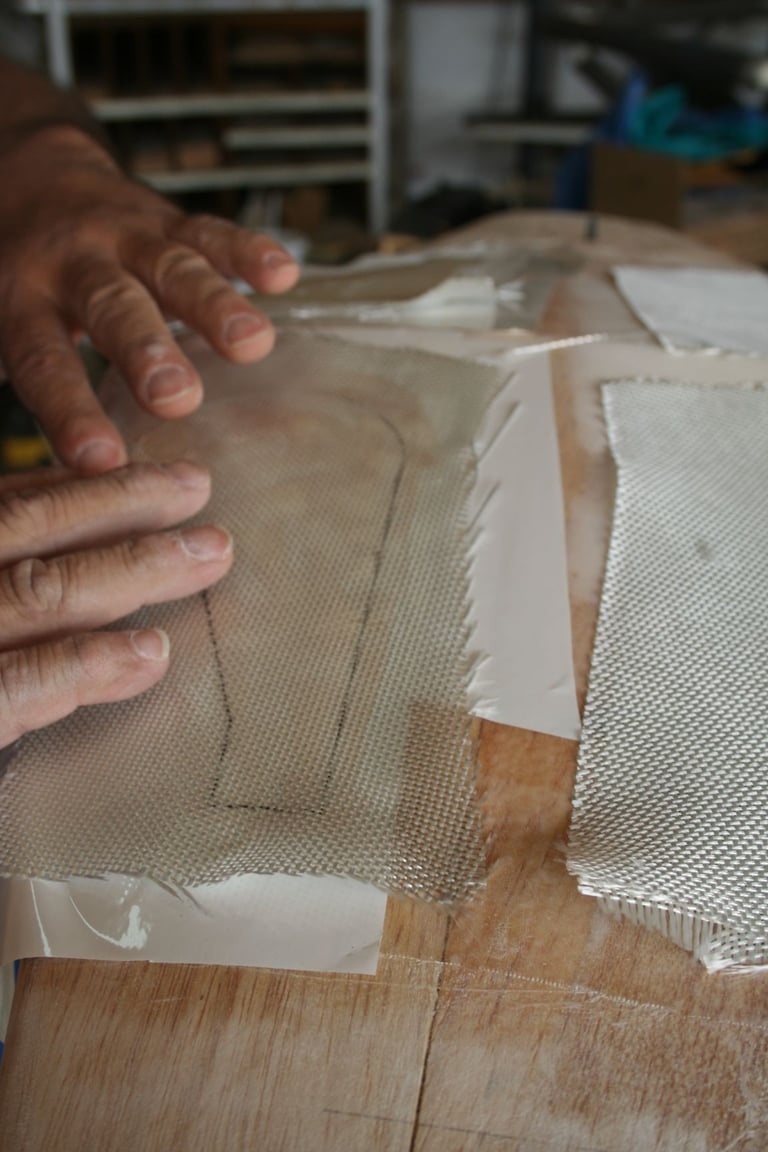
5. Tap it down very lightly to smooth it out and begin wetting-out the cloth. Using the brush, apply more epoxy to completely wet-out and seal the part against the Monokote. (Here, Tim has applied the first layer on one side, and has just set down the first layer on the other side.)
6. Continue this process for the remaining 2 layers of 6 oz. cloth. (Tim's wing with 3 layers of 6 oz. cloth applied to both gear door outlines.)
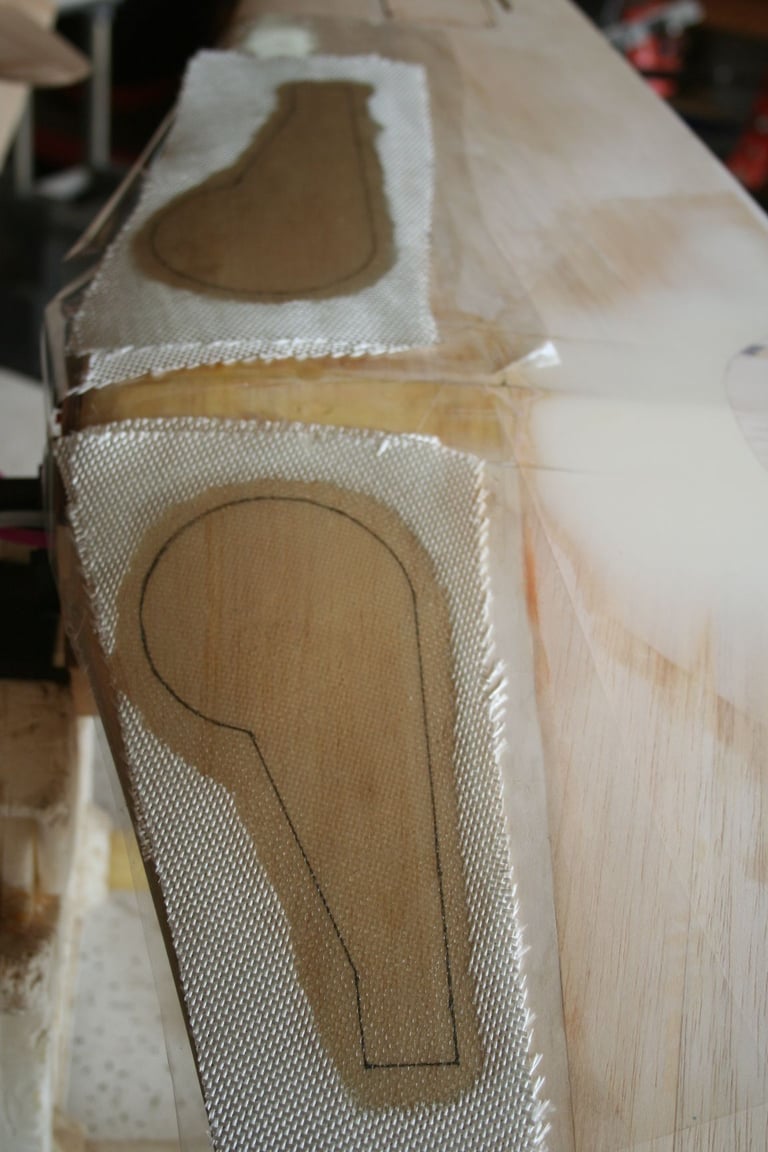
(Ollie's wing with 3 layers of 6 oz. cloth applied to both gear door outlines.)
I haven't used that method for this purpose before, but that is very similar to Tim's technique, as well. (However, I have placed plastic wrap conforming to the wing, prior to mounting the fuse in order to make wing fillets from chopped fiberglass, micro-balloons and resin; but you and Tim are the brilliant minds in this instance.)
While I was heading into my basement to cut the fiberglass cloth, Tim instructed me to grab some Monokote. I grabbed scraps of white Ultracote. He applied it to the bottom of his wing, over the traced outline of the gear door; then stated that he prefers to use clear Monokote for this purpose, so the outline is very clear. I replied, that had he told me that earlier, I could have supplied him with clear. I then proceeded to return to the basement and cut clear to use on mine, so we can show everyone his preferred method:
1. Iron-on clear Monokote (or similar) plastic covering material -- pieces large enough to extend well beyond the outline already traced on the wing.
2. Align the paper template back over the Monokote, carefully aligning it with the first gear door tracing. Re-trace the outline of the door on the top of the Monokote. (The Monokote is a parting surface; and when the part is removed, the ink will adhere to the fiberglass part, supplying a perfect outline to the finished part. The finished part will then align perfectly with the line previously drawn on the balsa sheeting.)
3. We each used one metered pump of West Systems Epoxy. Start the lay-up by brushing a layer of epoxy over the outline. (Tim's plane is pictured here -- easily recognized by the white covering material.)
4. Lay the first layer of 6 oz. cloth over the outlined position.
5. Tap it down very lightly to smooth it out and begin wetting-out the cloth. Using the brush, apply more epoxy to completely wet-out and seal the part against the Monokote. (Here, Tim has applied the first layer on one side, and has just set down the first layer on the other side.)
6. Continue this process for the remaining 2 layers of 6 oz. cloth. (Tim's wing with 3 layers of 6 oz. cloth applied to both gear door outlines.)
(Ollie's wing with 3 layers of 6 oz. cloth applied to both gear door outlines.)
Last edited by Iron Dog; 09-09-2020 at 10:40 PM.
09-09-2020, 10:02 PM
#362
Thread Starter
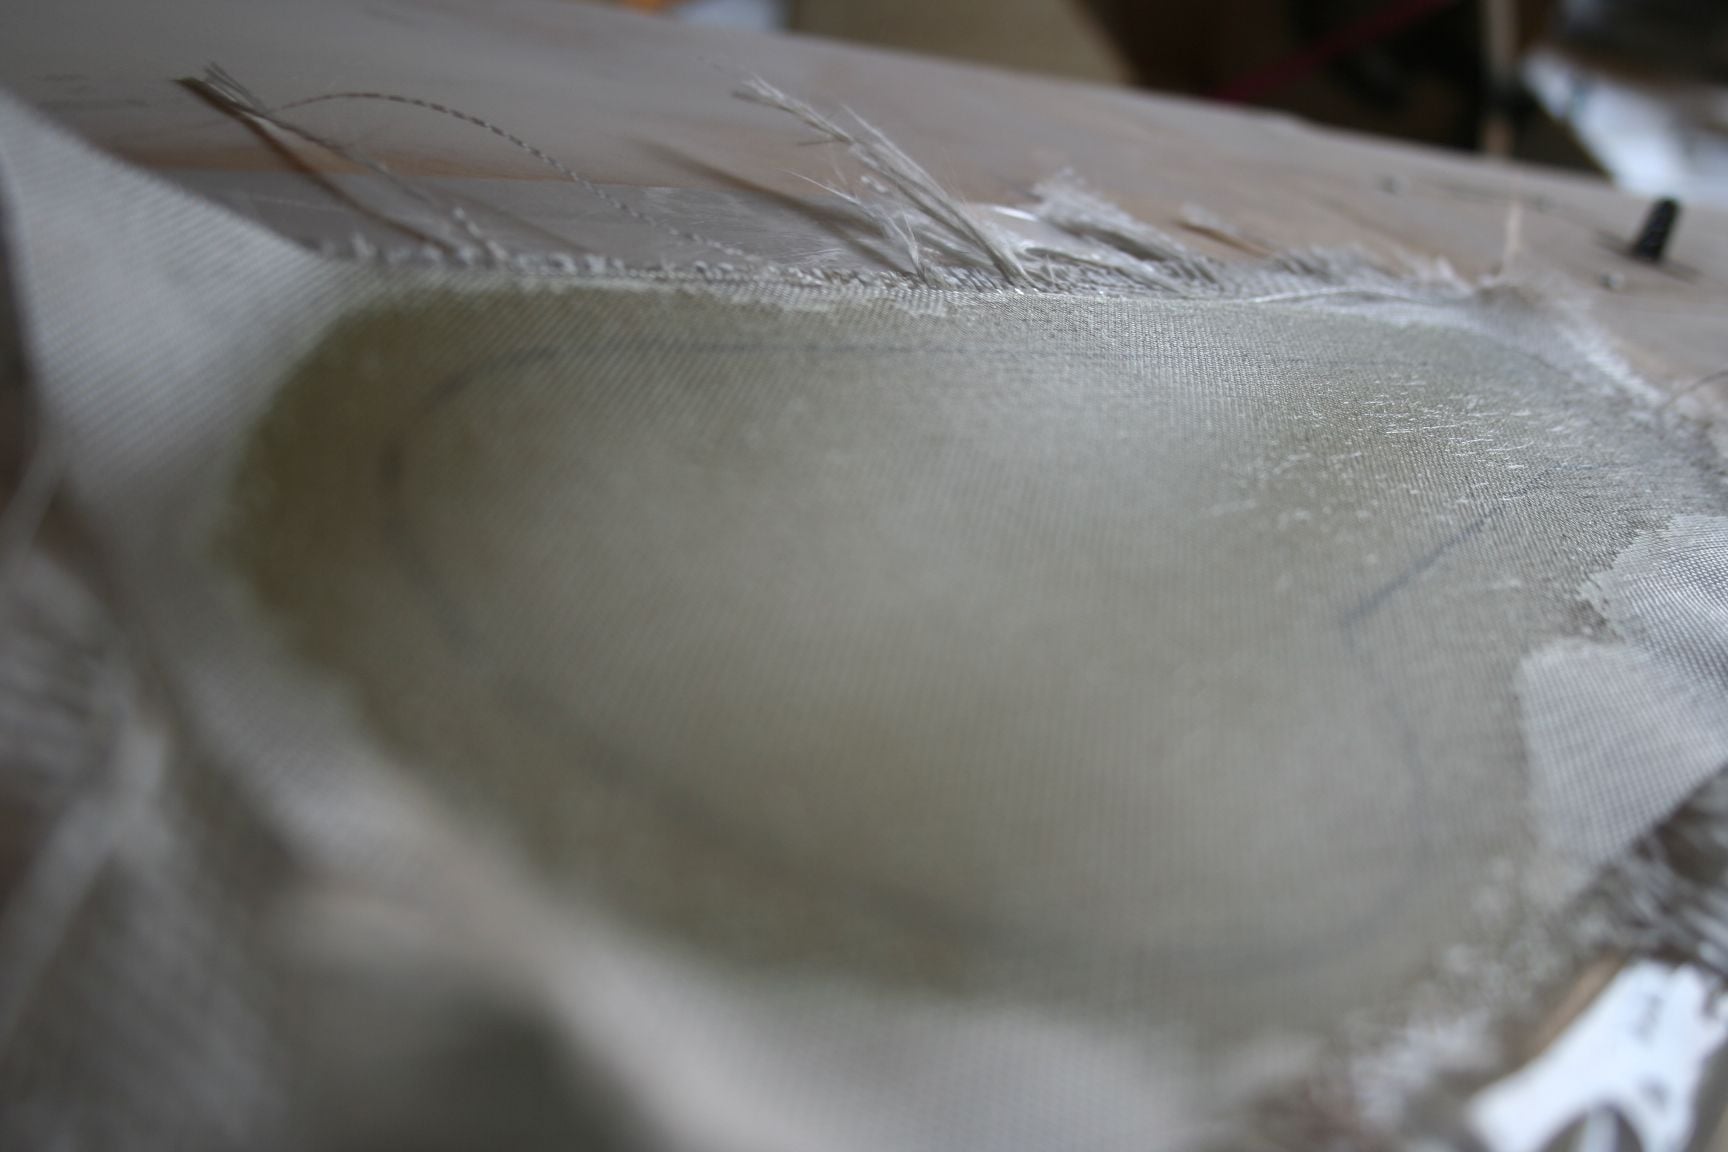
Again, this past weekend was too hot and with very hazardous air quality, so Tim and I had to postpone again. But after two days since lay-up of the gear doors began, I went out into the shop briefly -- just to sand the top layer of the 6 oz. cloth, hoping to minimize the visibility (or "bleed through") of the weave pattern of this cloth on the finished parts, prior to applying the single layer of 2 oz cloth.
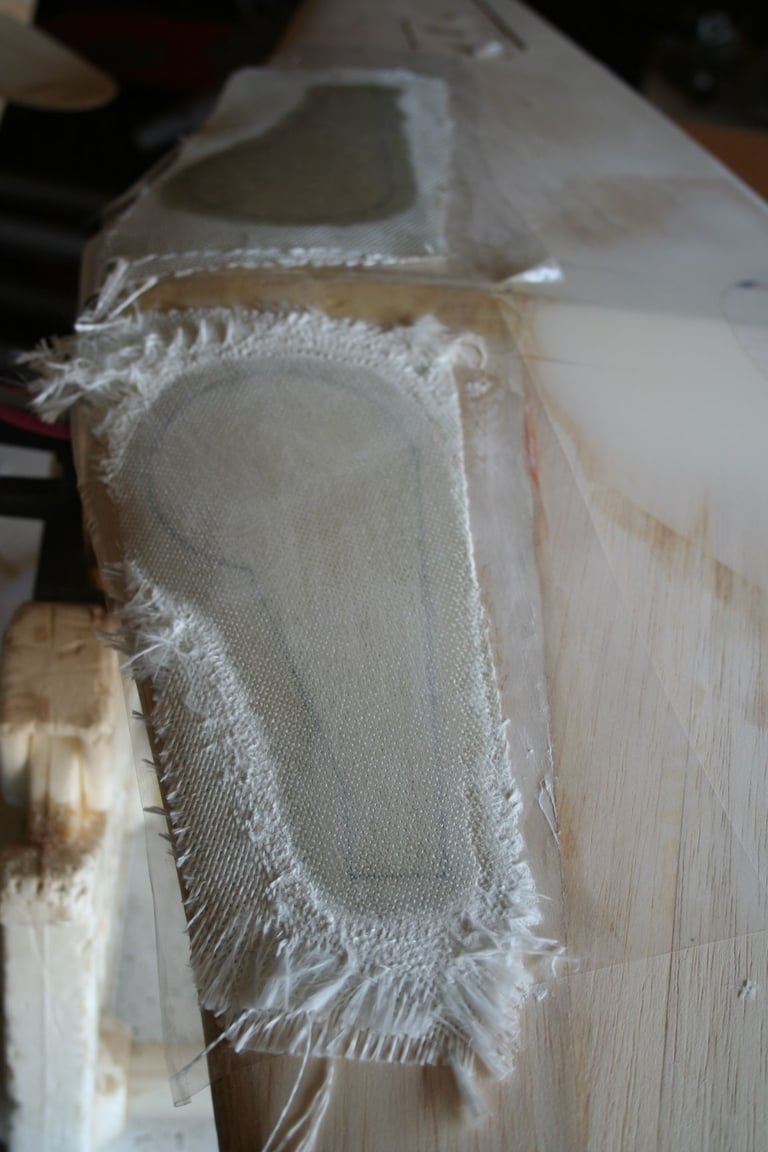
Sanding the first gear door on my wing.

Sanding the first gear door on Tim's wing.
This angle more clearly shows the weave pattern before lightly sanding (foreground), and after sanding (background). Lightly sanding really "knocks down" that weave pattern.
Sanding the first gear door on my wing.
Sanding the first gear door on Tim's wing.
This angle more clearly shows the weave pattern before lightly sanding (foreground), and after sanding (background). Lightly sanding really "knocks down" that weave pattern.
09-09-2020, 10:29 PM
#363
Thread Starter
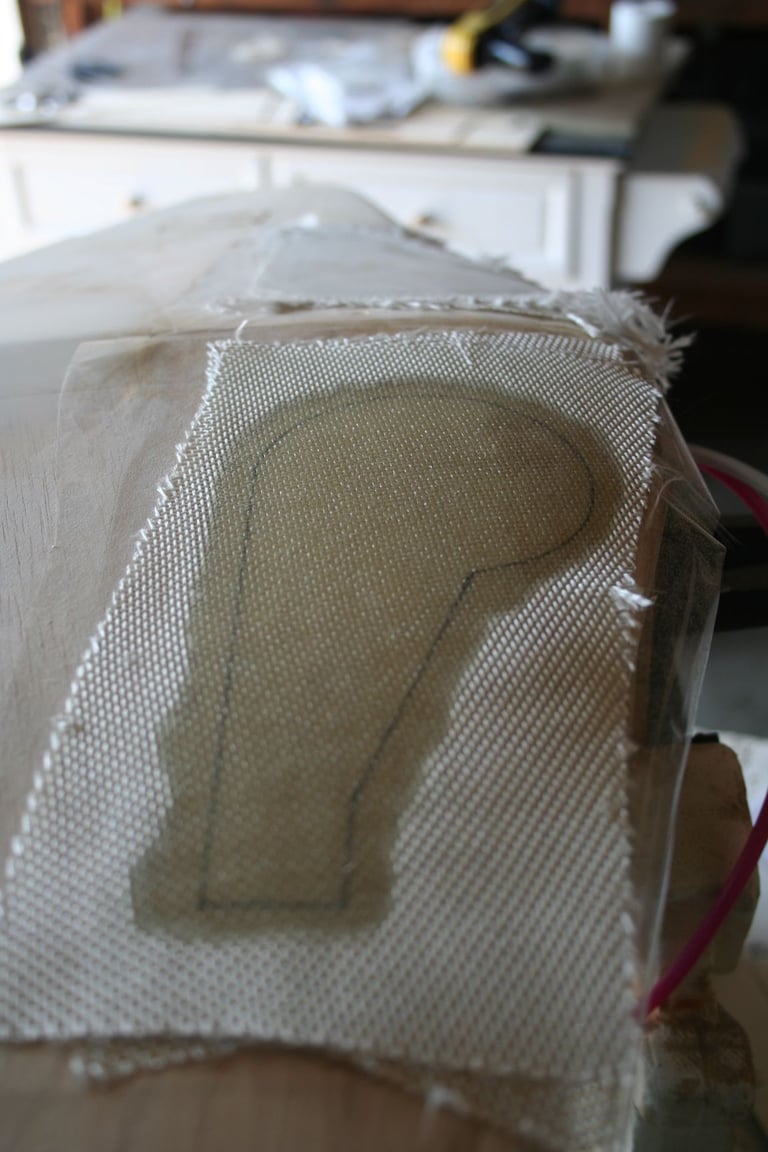
Both doors sanded.
After clearing-up some of the frayed "dry" cloth surrounding the desired part.
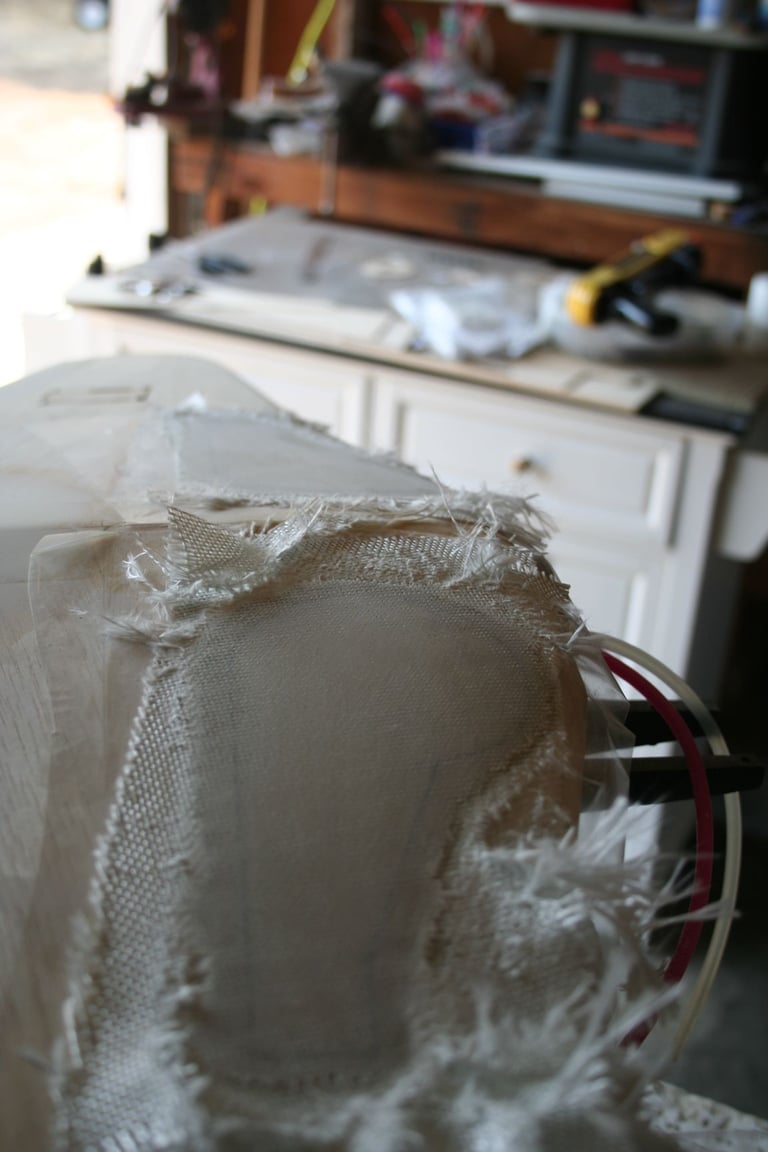
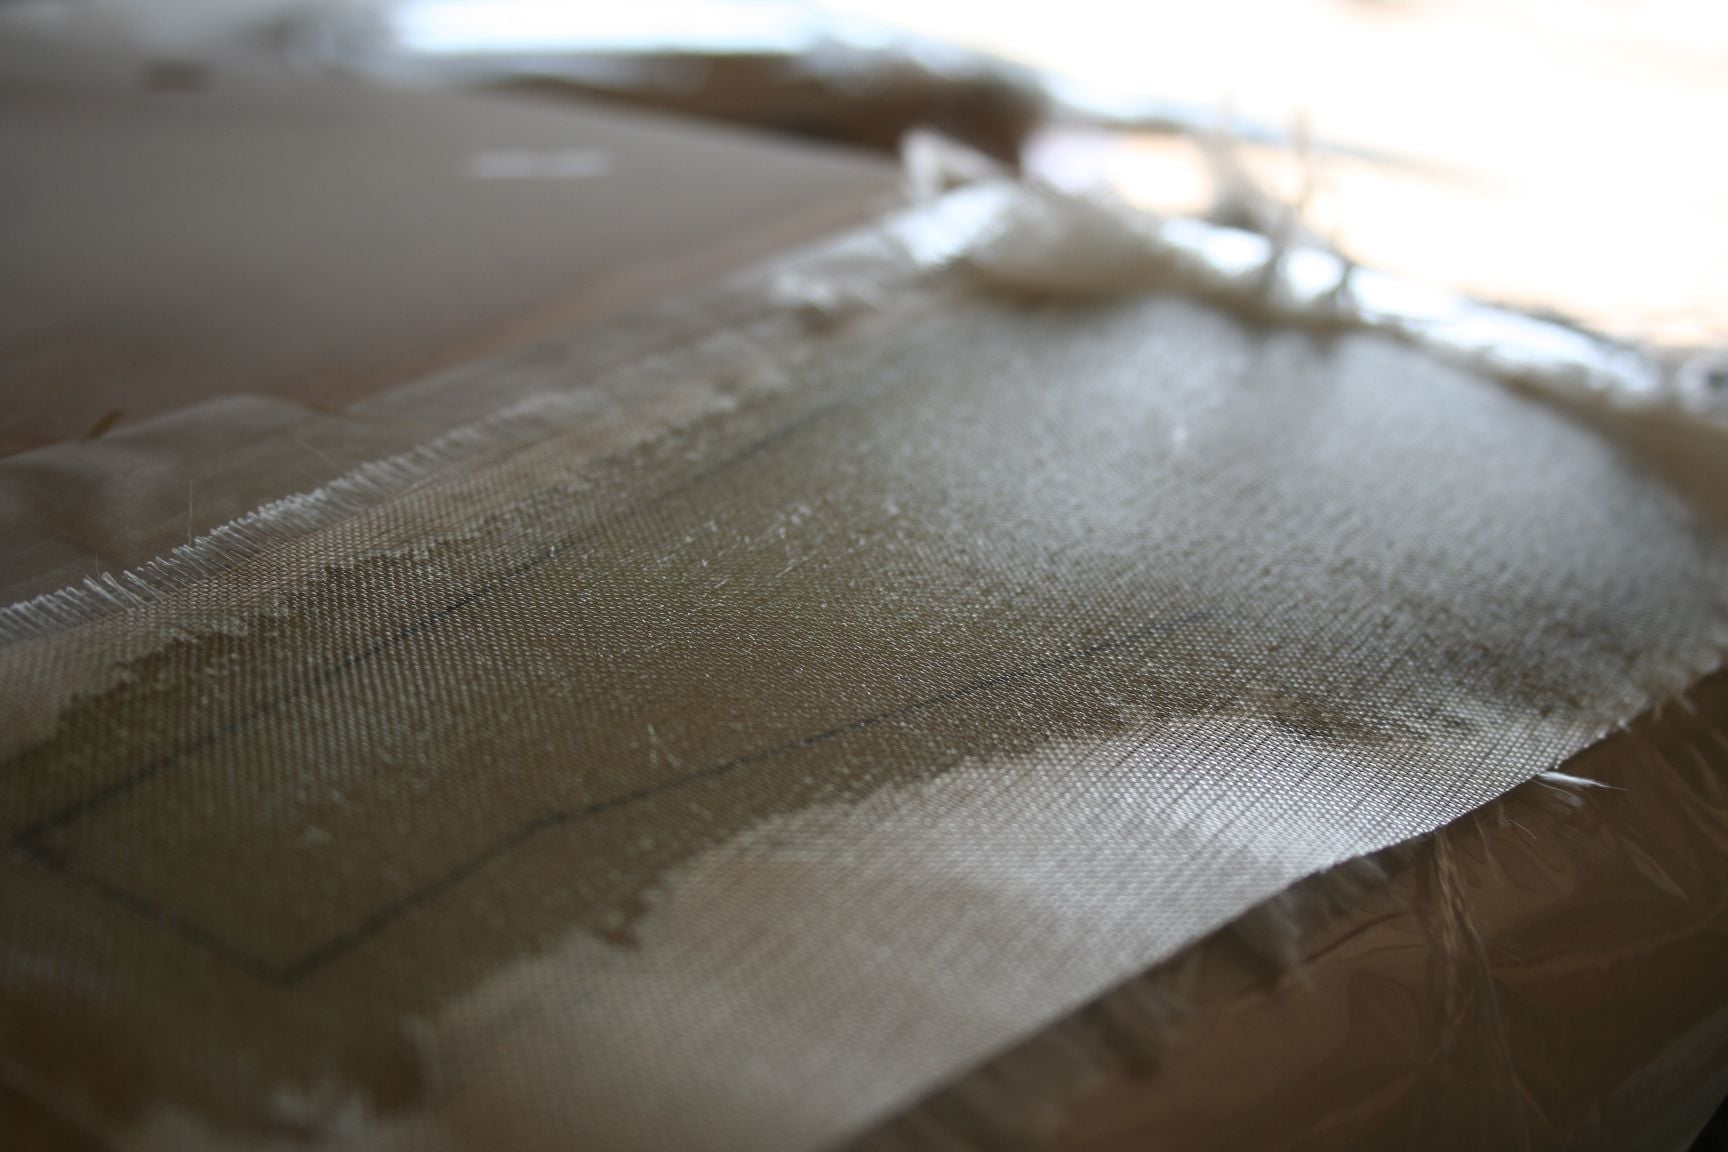
With both wings' gear doors sanded a little smoother, I cut layers of 2 oz. cloth, and began application in the same manner as with the previous layers of 6 oz cloth.
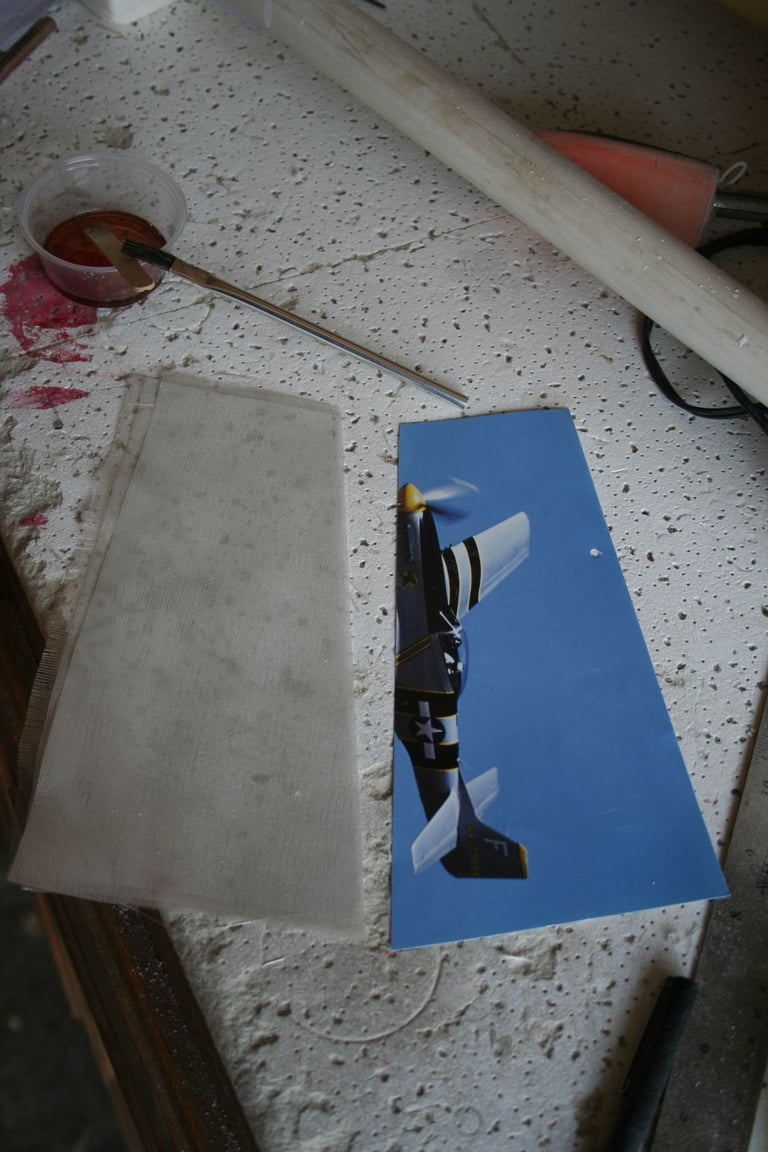
Layers of tight-weave 2 oz. cloth, cut and ready to apply. With so many layers of cloth to cut (16 total), for multiple planes, I made myself a quick cloth-cutting template out of an old Warbird calendar page. (Sorry, P-51 fans!)
Poor on a little epoxy and brush it out. ("Yes," my hardener is getting old and is turning dark. Don't worry, I'm not using this to make critical parts -- such as fuselages.)
Set the 2 oz. cloth in place and brush it and the epoxy out smoothly and evenly.
I applied the epoxy thinly, but evenly on Tim's to keep the weight down as much as possible.
Tim's other gear door.
I put an extra-thick layer of epoxy over mine, as I am thinking of sanding and polishing them to make a mold from them, first -- just in case anyone ever finds themselves in need of replacement parts. (Eventually, we will be cutting out wheel wells, so It's not like one could easily just do this again!)
Last edited by Iron Dog; 09-09-2020 at 10:44 PM.
09-10-2020, 10:13 AM
#365

I use the same method, and for smaller areas like potting in wings I have an even easier way. Use the clear 2" wide tape you close boxes with. Apply it smoothly and lay up right over it. Works perfectly.
Keep up the good work guys.
Scott
Keep up the good work guys.
Scott
09-10-2020, 12:41 PM
#366
Thread Starter
I like the idea of using clear packing tape for the fabrication of wing fillets. Should be faster and easier to apply than either plastic wrap or Monokote. Thanks for the tip, Scott! I’ll use it on my next design.
- Ollie
- Ollie
09-10-2020, 01:17 PM
#368
Yup. works great. Just don't get any wrinkles in it when you put it down, and don't scratch it. Ask me how I know resin sticks to it really well if it is scratched up........
Scott
Scott
