Scratch build McDonnell XP-67
 10-23-2017, 11:39 AM
#1

Thread Starter
Join Date: Oct 2017
Posts: 92
Likes: 0
Received 0 Likes
on
0 Posts
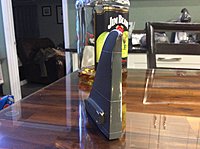
Hello, first time poster here. my name is matt. so like it says im working on a scratch build XP-67. Ive never done a scratch build. ive build up a couple kits but not that much. i couldnt find any real plans, or kits available for this aircraft. someone made some plans years ago but they are no longer for sale. so after much research i found a couple partial plans, and line drawings and decided to build my own. im going to be producing a plug and mould for fuse, wings, vert stab, and horiz stab. I will balsa build up the rudder, elevator, and ailerons. the unique shape of the aircraft leads me to make a top/bottom fuse mould instead of a left/right fuse mould. the wingspan is approximately 41". the scale is something like 1:12.6 or something. i didnt draw it to a specific scale. i actually intended it to be 50" span but somewhere when i made the transfers it got changed or i just messed up my addition lol. 25" + 25" = 50".......lol. i dont really know how i messed it up, but its all worked out ok. the length/width scaling is still correct so no real problem. ive spent about 100 hrs on this project so far. ill be uploading all the photos i have and some brief comments. ive learned a lot while doing this, would certainly do somethings differently and when this is done and flying, ill be producing a larger scale model. approx 100" ws, so i will have lots of opportunity to practice the craft.  im sure most people wont, but you all dont need to tell me everything i should have done differently producing the plug. its coming along nicely, and i have all my parting lines worked out in my head. i am in need of some advice on bulkheads and spars etc, when i get to the fuse production stage but that will be a while.
enjoy.
im sure most people wont, but you all dont need to tell me everything i should have done differently producing the plug. its coming along nicely, and i have all my parting lines worked out in my head. i am in need of some advice on bulkheads and spars etc, when i get to the fuse production stage but that will be a while.enjoy.
 10-23-2017, 12:10 PM
#2
Thread Starter
Join Date: Oct 2017
Posts: 92
Likes: 0
Received 0 Likes
on
0 Posts
10-23-2017, 12:21 PM
#3
Thread Starter
Join Date: Oct 2017
Posts: 92
Likes: 0
Received 0 Likes
on
0 Posts
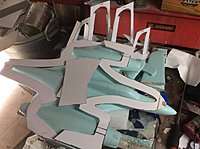
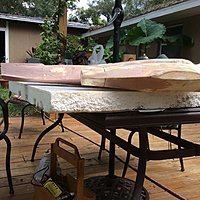
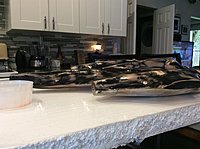
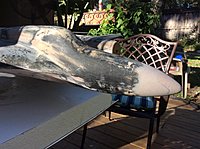
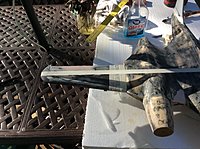
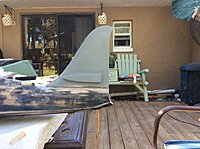
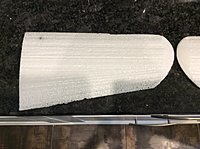
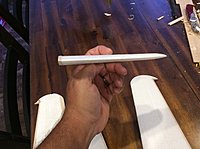
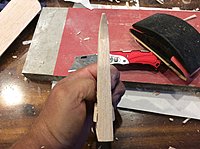
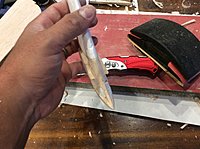
here i made my first mistake. i saw some build using dowel to line everything up. i should have made some form of a proper jig. this created some problems for me later. the fuse took a little warp on the center line. it required cutting the tail off and rebuilding the tail, and reshaping the canopy. if there is a warp now, it is practically imperceptible. second mistake was using foam the make the fuse plug, and not just doing a regular balsa build. would have saved me a lot of filling and sanding and filling and sanding :P i also think that the overall build would have been more precise left/right of center line. i have worked very hard on symmetry, but it is hand built. i expect that the end product will be symmetrical within a millimeter or so. i can live with that. anyway this is how i decided to start the build.
from this point i cut out a bunch of foam and glued it into all the cavities, then cut the basic contours with a knife and started sanding the foam to get it inline with all the formers.
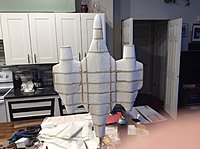
from this point i cut out a bunch of foam and glued it into all the cavities, then cut the basic contours with a knife and started sanding the foam to get it inline with all the formers.
10-23-2017, 12:32 PM
#4
Thread Starter
Join Date: Oct 2017
Posts: 92
Likes: 0
Received 0 Likes
on
0 Posts
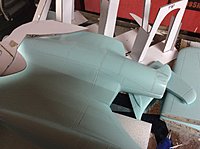
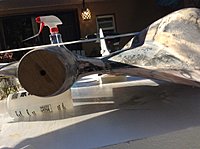
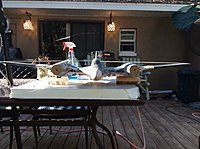
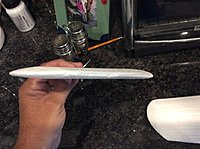
after i had the rough foam work done i glassed the fuselage.
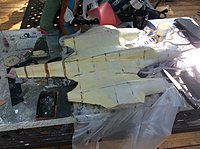
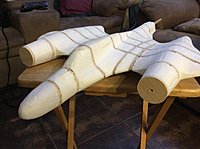
then i started the tedious process of filling and sanding and filling and sanding. found all my mistakes. cut stuff off rebuilt it, filled and sanded and filled and sanded :/ made templates, filled removed templates, sanded. filled sanded some more, on and on and on. 80grit so much love. also for a shape like this with so much contour you need a nice thin sanding block. meguiars sanding backing pad e-7200. saved my life. at this stage i was still trying to get everything symetrical. i had rebuilt the tail section was desperately trying to get all the rearward "wing" surfaces even and pretty 5th picture.

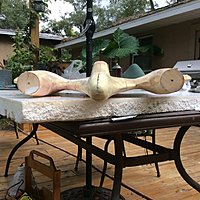
then i started the tedious process of filling and sanding and filling and sanding. found all my mistakes. cut stuff off rebuilt it, filled and sanded and filled and sanded :/ made templates, filled removed templates, sanded. filled sanded some more, on and on and on. 80grit so much love. also for a shape like this with so much contour you need a nice thin sanding block. meguiars sanding backing pad e-7200. saved my life. at this stage i was still trying to get everything symetrical. i had rebuilt the tail section was desperately trying to get all the rearward "wing" surfaces even and pretty 5th picture.
10-23-2017, 12:42 PM
#5
Thread Starter
Join Date: Oct 2017
Posts: 92
Likes: 0
Received 0 Likes
on
0 Posts
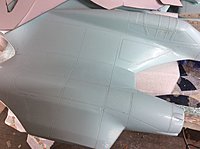
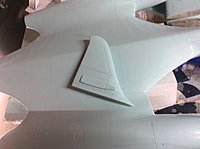
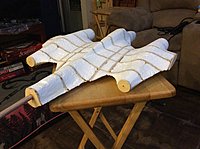
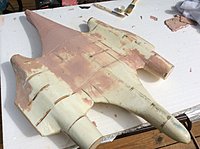
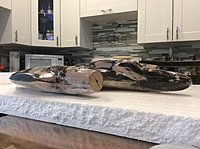
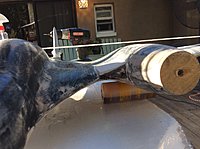
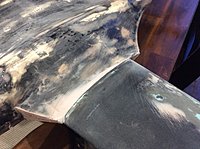
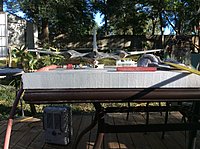
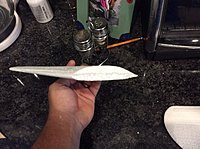
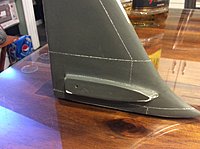
you can see the way the blended wing merges with the rear of the nacelle. i had some trouble with this aspect. in this scale or size its hard to sand these particular shapes but i think it came out well.
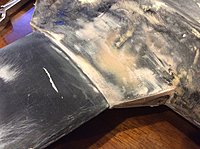
after the basic block out i started working high build primer and more filler on the low spots. the bondo over glass was becoming difficult to see the highs and lows, and i used the primer basically as a guide coat for the filler. i used so many different batches of bondo and didnt mix them all the same depending on how much time i wanted to work with it so it was a smash up of shades of pink
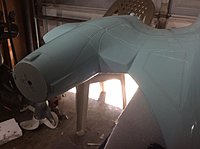
the primer helped immensely. i thought i had more photos of this stage but i guess i didnt. at this stage i also decided to focus on fairing the top half of the fuselage also. the bottom needs much work still.i realized that the front of the nacelles was too large. so i cut it down......too small. i cut all the foam off at an angle like you see and sanded it all flush
10-26-2017, 04:23 PM
#6
Thread Starter
Join Date: Oct 2017
Posts: 92
Likes: 0
Received 0 Likes
on
0 Posts
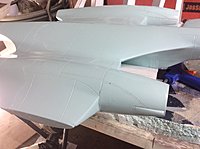
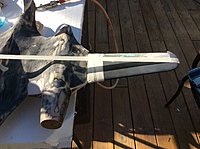
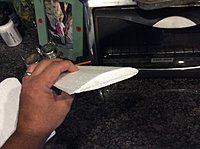
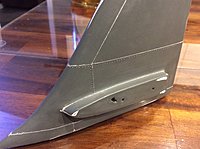
i glassed the nacelles that i cut and made a template for the filler. i filled and faired them, and was going to not work on the project for a few days so i took it inside and put a coat of epoxy over it. was a good idea, helped stiffen everything up a little more.
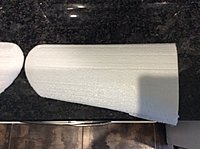
i decided to redo the nose. it was too blunt and didnt look scale. i put a bolt in a bondo blob and turned it in the press to a kinda cone-ish shape :P i made a template and filled the rest in and faired it
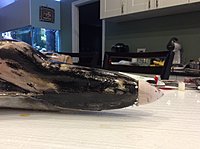
i also worked on the cooling intake on the inside of the nacelle. there will be a little more to do on this area later but i think i want to get some more balsa since its so much easier to manipulate.
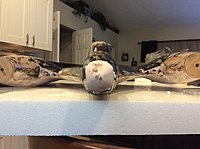
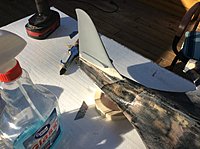
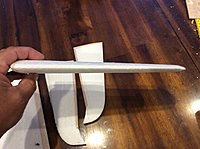
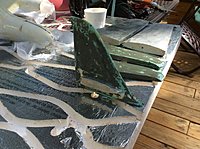
i attached the wings and the vert stab with some pins and spray adhesive so i could fair out the transitions
i decided to redo the nose. it was too blunt and didnt look scale. i put a bolt in a bondo blob and turned it in the press to a kinda cone-ish shape :P i made a template and filled the rest in and faired it
i also worked on the cooling intake on the inside of the nacelle. there will be a little more to do on this area later but i think i want to get some more balsa since its so much easier to manipulate.
i attached the wings and the vert stab with some pins and spray adhesive so i could fair out the transitions
10-26-2017, 04:30 PM
#7
Thread Starter
Join Date: Oct 2017
Posts: 92
Likes: 0
Received 0 Likes
on
0 Posts
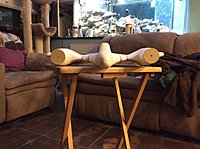
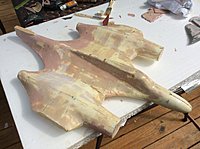
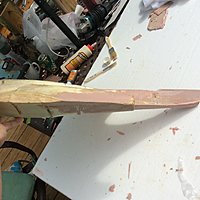
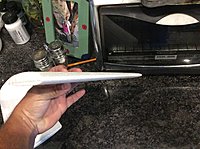
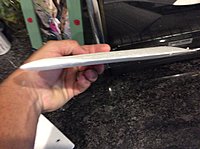
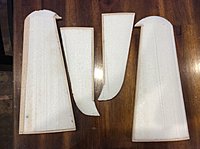
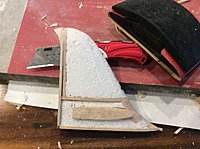
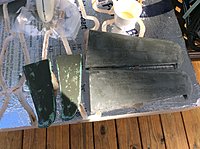
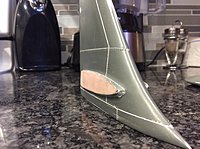
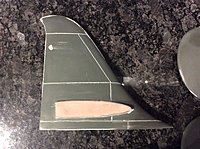
back tracking a bit here to the beginning of the project. i made a hot wire foam cutter out of some stuff i had lying around and guitar string. i cut out foam blanks. i modified the wing a bit. it had a lot of taper, so i fattened up and lengthened the wing tip rib a little bit. i filled them with some drywall spackle, and glassed them. then did some bondo, primer/filler work. theyre mostly finished. need a final sand and spray then i can start panel lines. the vertical stab was kinda crap. i made the most of it and it has worked out. i would approach many of these things differently next time.


Last edited by Mms_citrus; 10-26-2017 at 04:34 PM. Reason: omitted info
11-03-2017, 08:16 AM
#8


Very spiffy! Looks like you have come a long ways already. Looking forward to seeing where this progresses.
11-03-2017, 04:32 PM
#9
Thread Starter
Join Date: Oct 2017
Posts: 92
Likes: 0
Received 0 Likes
on
0 Posts
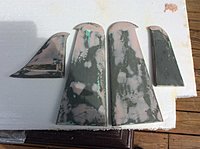
Thanks a lot. I've been tinkering with the wings and stuff a bit. They all faired out. I did some work on the vertical stabilizer. Panel lines and some "rivets" which I believe may actually be screws. I saw some similar detailing on other drawings around the nacelles and I think they are removable panels. First time doing panel lines and rivets. There are some mistakes in some of the panel lines. I'll fix them when a modeling putty comes in.

the panel lines aren't in perfect position either. I didn't measure anything on this part and scale it up from drawings etc. plane was only ever a prototype so I have some liberty I feel
the panel lines aren't in perfect position either. I didn't measure anything on this part and scale it up from drawings etc. plane was only ever a prototype so I have some liberty I feel
Last edited by Mms_citrus; 11-03-2017 at 04:42 PM. Reason: Cause
11-04-2017, 09:29 AM
#10
The Wylam drawings are probably as good as you are going to get in a hobbyist drawing. Unless you can get access to the MD construction drawings, photographs are your next best bet for the location of panel lines and details. Your best guess as to locations is probably as good as anybody else's.
11-05-2017, 05:12 PM
#11
Thread Starter
Join Date: Oct 2017
Posts: 92
Likes: 0
Received 0 Likes
on
0 Posts
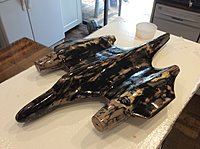
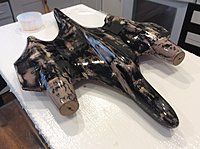
So I am looking at all the drawing I can find and I'm picking the ones I like and scribing them. I am mostly using the drawings you mentioned, since I used them for the plans anyway . Also I found a couple of pages with plastic model builds so I'm using those also. To bad o can't find a model anywhere. Would like one just to have. I'm basically done with the stabilizers and wings. I think it will be easiest to fix the couple of very minor mistakes on the actual part out of the mould. These plugs that I have produced are not perfect in paint uniformity and hardness so it's a little difficult to be precise and even.I have a feeling when I produce the parts I will have to scribe some of the panel lines and riveting details again, especially after painting. I don't want large gaping panel lines on a model of this size and I think if I do a dark part, when I paint on top and scribe thru the topcoat, the dark part will help accent the panel lines without a bunch of washes.
The fuse plug is coming out much harder so it may not be as much of a problem on it. I haven't finished fairing it out yet anyway.
I fixed ths vertical stabilizer a bit. I shaved down the parts where the horizontal stabs attach. I saw a slight chance in locking the mould to the plug on them, so better safe. The horizontal stabs still fit pretty well. I may do a little filling when I do an assembly on the flying model.
11-05-2017, 07:17 PM
#12
There is currently a 1/72 scale resin kit on eBay with a buy it now price of $43. Probably molded from the same drawings that you are using but it could serve as inspiration. Are you using a catalyzed paint for the final coats on the plugs? That should help with the hardness. I went back and read your first post. I'm pretty impressed that you are shooting for that much detail on what is going to be a relatively small model for a twin engined warbird.
11-06-2017, 08:08 AM
#13
Thread Starter
Join Date: Oct 2017
Posts: 92
Likes: 0
Received 0 Likes
on
0 Posts
I wasn't using any catalyzed paint. I do however have some acrylic urethane from painting my boat and I'll put a few coats of that on the fuse to build up a good hard layer. Thanks for the advice. I hadn't considered that.
The local flying club takes half hour to get to, I don't always have the desire to drive out there, so I wanted something a little smaller that I could fly around at the park and stuff. I wanted to do it nice tho. I won't be vacuforming a cockpit canopy or anything like that for this but I'm going to do retracts and doors, flaps. The nose wheel gear and doors will be tough cause there isn't a lot of space. May not get the scale 3 piece gear doors on the front. I think I have the retract and steering servo setup right, but I won't really know until I finish a production fuse and start fitting formers.
I plan on making a 1/5 scale or something close to that when this is done and all the kinks are worked out. If it flies well I'll probably just make up an extra fuse or 2 and cut them all up for templates.
11-07-2017, 09:03 AM
#14
It is the catalyzation process that gives the paint its hardness. That said, since I don't know what paints/coatings you already have on the parts, I'd suggest proceeding with caution. Some paints aren't compatible and may cause underlying layers to peel, lift or wrinkle. Some improvement in paint hardness may come from just letting it continue to dry. Most of what I know about paint chemistry comes from having painted a few cars. In that case the rule of thumb is pick a paint system and stick with it throughout the process. As long as the surface of the plug is hard enough to stand up to the waxing and application of mold release and your mold making process doesn't press hard enough on the plug to deform anything the mold surface itself shouldn't have to be diamond hard. The fact that you have produced what looks to be a sophisticated plug with a lot of compound curves leads me to think that you have researched the process pretty thoroughly. I'm looking forward to seeing your next steps.
11-07-2017, 11:45 AM
#15
Thread Starter
Join Date: Oct 2017
Posts: 92
Likes: 0
Received 0 Likes
on
0 Posts
Mgnostic. Have you done many moulds? I'm probably going to ask over on the composites thread also, but I'm wondering about the necessity of a tooling gelcoat over just using a nice finishing epoxy?
ive used 1k primer. No adhesion problems.
ive used 1k primer. No adhesion problems.
Last edited by Mms_citrus; 11-07-2017 at 04:38 PM.
11-08-2017, 09:00 AM
#16
My experiences are very limited. I've made urethane molds for casting replacement parts and fiberglass over balsa is one of my favored finishing techniques. I've even repaired fiberglass body parts so I have used the techniques but I haven't pulled a full mold on an airplane. Having a look at the composite threads would be a good plan.The RC Scale Builder website has some very detailed build threads that involve pulling molds. There are people out there who are way more expert than I.
I've always been interested in those "coulda been a contender" airplanes that were almost the cutting edge but got left by the wayside due to leapfrogging technology or underdeveloped engines.
I've always been interested in those "coulda been a contender" airplanes that were almost the cutting edge but got left by the wayside due to leapfrogging technology or underdeveloped engines.
Last edited by mgnostic; 11-08-2017 at 09:10 AM.
11-16-2017, 05:12 PM
#17
Thread Starter
Join Date: Oct 2017
Posts: 92
Likes: 0
Received 0 Likes
on
0 Posts
I bought the model on eBay. I decided to redo the panel lines. I found 1/32 tape and am using it. Wings, horizontal and vert stabs are lined. Top of fuse is done and half of bottom. Ran out of tape. Looks really cool. I'll post pics later. I hope all the detailing comes out in the mold. I got some epoxy primer upon recommendations from everyone to spray the panel line build up. And I've started ordering molding supplies. Im going to use a black tooling epoxy. 40 bucks a quart, but from what I've read it will give me the best chance to pull crisp detailing. At least that's how I understand it. Hope to have pics and an update in about a week. Also have worked out the landing gear, all the servos, wing mounts, vert andnhoriz stab mounts and control surfaces. The details will change slightly when I make parts but I drew out all the basic designs. I got a couple cheap sets of landing struts and broke them all down, and I have a good design to take to the machinist, unless I find a cheap lathe somewhere.
the canopy came out pretty good. If everything sprays and peels well I think I'm going to pull a mold on the canopy and either build a vacuum mold or maybe I can find someone who has one and can make a couple canopies for me. Pretty exciting. It's really starting to look cool now that all the crappy work is done.
the canopy came out pretty good. If everything sprays and peels well I think I'm going to pull a mold on the canopy and either build a vacuum mold or maybe I can find someone who has one and can make a couple canopies for me. Pretty exciting. It's really starting to look cool now that all the crappy work is done.
11-16-2017, 06:33 PM
#19
That should add a lot of visual interest to your finished product. I'm looking forward to seeing how the molds come out. Although it shouldn't cost nearly as much as the epoxy, a good quality wax/release agent is just as important. A clean release will preserve the details and make it easier to pull the plug from the mold.
11-27-2017, 09:29 AM
#22
You never know how much fuzz is in your pair booth until you start wet sanding.") Seriously though, I'm impressed. Keep up the good work.
Seriously though, I'm impressed. Keep up the good work.
Seriously though, I'm impressed. Keep up the good work.
11-28-2017, 03:23 AM
#23
Thread Starter
Join Date: Oct 2017
Posts: 92
Likes: 0
Received 0 Likes
on
0 Posts
I took the parts inside after a long day in the sun and fixed the one void I had. It's been there all along, I just forgot about it. Filled it with some resin so it's good now. I'm pretty happy with this outcome. Now I need to find some hypodermic needles......
11-28-2017, 08:53 AM
#24
I don't know what stores are in your part of the country but the farm supply stores such as Tractor Supply are a good source of veterinary size needles.
12-12-2017, 05:31 PM
#25
Thread Starter
Join Date: Oct 2017
Posts: 92
Likes: 0
Received 0 Likes
on
0 Posts
Welp, I've never done any riveting or anything of the sort. I'm not going to redo it. It's good enough. But I know what not to do next time. I went to the pharmacy and got the biggest hypo needle they had. Scored and broke the tip, and went to town. I originally intended to only leave a circle score in the paint but a couple pieces of paint popped up. So that's how it went. I got my parting planes made up. Moneys tight so taking it slow right now. Will,order some wax this week and start waxing.