


Brian Taylor OS2U Kingfisher Build
 01-29-2010, 08:43 AM
#26

Looking good so far,,,
When I made the plugs for mine, Never doing it before, I tried that foam method you describe, even with the glass they caved in a little. What I then did was take the canopies that were not usable, filled the plastic with plaster o paris . I worked the plaster to the right shaped, smoothed it out and added the canopy frames w/ 1/32 ply strips. This left a solid plug that worked great.
If I were to do it again, I'd use thicker glass, once the fiberglass was set, I'd remove the foam and fill with the plaster to make it solid.
p.s.
The reason I posted those pics of the canopies with the tape was if they were close in size, maybe you could use them,,I think they'd be too big though.
 01-30-2010, 12:35 AM
#27

Thread Starter
Hey, that's a good idea about the plaster of Paris, I'll have to remember that when the time comes. I have done more work on the tip floats. Here are the pictures. I am going to modify slightly from the CS plans. Those plans show flattening the streamline tubing and bolting thru the bulkhead for the angled support for the tip float. I will be making a 1/8 ply tongue like the top keel is and will cut a slot in it to go over the bulkhead in the correct place and angle. I will epoxy the tongue in place. I thought it would be best to do this after planking the top of the float as it will allow to sand it all over easier. I will take some more pictures of that step when I get there to better explain. These tip floats were pretty enjoyable making as it's something different but the planking is tedious as the pieces have to be tapered a lot to fit well. I haven't done this type of building in years but it's coming back to me. The fit of each one gets better as I go. LOL I put the 1/2" aluminum streamlined tubing on to check the fit. A little sanding to round the leading and trailing edges of the ply tongues and a little squeeze on the tubing and it fits great.
01-31-2010, 07:29 AM
#28
Junior Member
Join Date: Jan 2010
Location: , SWEDEN
Posts: 2
Likes: 0
Received 0 Likes
on
0 Posts
Hi again,
I will try to post som pictures later.
Anyway, here´s a very useful link I found about the Kingfisher with drawings, pictures etc. :
http://navsource.org/archives/01/057/
Regards,
Joakim
I will try to post som pictures later.
Anyway, here´s a very useful link I found about the Kingfisher with drawings, pictures etc. :
http://navsource.org/archives/01/057/
Regards,
Joakim
01-31-2010, 05:19 PM
#29
Thread Starter
Here is the first tip float all done with nose and tail cones installed and sanded. I will take pictures when doing the second float to better describe how I made and attached the angled ply strut mounts. Real happy with the looks.
 02-04-2010, 12:12 PM
#32
Thread Starter
Started on the main float. I traced out all the formers, cut them out, and then cut out the keels. The instructions call for all balsa keels and bulkheads but I made 3,4,5 bulkheads out of 1/8 ply and I made the top keel out of cedar. The two hardwood runners in the picture are mahogany but I think I will be making those out of cedar also to help with the weight. The mahogany is heavy.
Trying to upload pictures, system won't let me.
Trying to upload pictures, system won't let me.
02-04-2010, 01:13 PM
#34
Going back and studying the float plan, then seeing your marks when you intend to cut the keels, i have three comments
1- Why didn't the guy design it so those struts came down and glue directly to the closest former/bulkhead? this seem odd. It would be much stronger if they did.
2- I probably wouldn't cut the bottom keel for the struts, I'd butt that joint and use some scrap ply as a doubler
3- I think those top stringers could have been balsa,, when you plank it and Glass it, it will be plenty strong
Looking good
02-04-2010, 02:31 PM
#35
Thread Starter
The struts actually sandwich both the upper and lower keels. The struts are made of 2 pieces of 1/8 ply and then a 1/4" piece fills in above the top keel. If you look at the picture showing bulkhead 4 you can see the two ply struts and the note about the 1/4 ply filler. I agree with you on why the designer didn't put the struts up against the bulkheads as it would have been much stronger. The top stringers get the support "wires" screwed into them so the balsa wouldn't be strong enough to hold the screws. I think the cedar will be good as it is light and strong.
02-04-2010, 04:11 PM
#37
Thread Starter
They seem to be somewhat functional. There are hardwood mounting points in the float and the plane so I guess they hold somewhat. That is probably why they only use a small pin in the drawings for the front strut as the strapping is probably intended to hold the float up pretty tight. I would imagine they keep everything from twisting at least.
02-08-2010, 01:55 PM
#38
Thread Starter
Have a question for anyone. The Charlie Smith plans show the float step at 1 1/4" behind the CG. When I put the Brian Taylor plans over the CS plans there is a slight difference in the location of the wing and the CG. The BT plans have the leading edge of wing 3/8" further ahead than the CS plans but the CS wing is about 7/8" larger chord than the BT. What the problem is that when I line up the CS float to the BT fuse the step is going to be 2"+ behind the CG. I think this is too far. What do all you think. I can move the struts in the floats back on the keels moving the whole float further forward to move the step more forward. I thought about splitting the 3/4" to 7/8" difference and moving the float ahead 3/8". This would put the step at 1 5/8". What do you all think about that location? Should I move the step even further ahead?
02-08-2010, 07:56 PM
#39
Step location can be a point of confusion and debate for sure
IMO,
Looking over the picture you posted of the plans (post #8) it appears to me that the step is too far forward anyway. Drawing a line 90 degrees off the afterbody (part of the float aft of the step) at the step up to the CG, that line should be at or just slightly in front of the CG. Looks like you have plenty of room to move it back and stay within an acceptable range. I set mine right on the CG using this location it it flys off the water perfectly
Think of a float plane like a land based tricycle gear set up, and the step as the Mains, if the mains are too far back the plane can't rotate easy enough and needs a lot of speed/lift to fly, if they are to far forward, it will rotate too easy before it gets up to proper flight speed and possible lift off early and stall.
I uploaded a picture to illustrate what I mean,, good luck
02-08-2010, 11:08 PM
#40
Thread Starter
Excellent, I now understand the proper location. I should be fine then. I will adjust the float struts as needed to get it just right. I cut out the parts for the front strut and assembled it. I then sheeted one side of the main float so far. The knurled nut on the nylon stud works great and once it's all painted you won't even see the knurled nut much. This should make taking the float on and off pretty easy. I took a picture of the front strut from the uncovered side of the float. I will epoxy the struts in once the float is completely covered except for the bottom. Pretty happy with how it's coming out. I able to get things done a little faster now with more practice on the planking.
02-09-2010, 07:05 PM
#41
Thread Starter
Got another question. I built the main float as the Charlie Smith plans have you do and the float comes out a little "pointy" in the nose. My buddy thinks it will cause a problem and I'm not so sure. I posted a couple pics for your opinion. Should I cut off the planking from the #2 bulkhead to the tip and add blue foam in a rounder shape? I'm not sure if this part of the float doesn't end up out of the water most of the time but will it deflect enough water away from the prop? It almost looks like the float design was intended to look a little like the Vought float and the Edo one.
02-09-2010, 08:29 PM
#42
When I look at the 4th photo in post #40 it looks like you have plenty of upward sweep in the front of the float.
If you get to the point that the nose of the float starts purling (digging in),, you have bigger problems than how pointy it is.
Keep building,,, it looks great
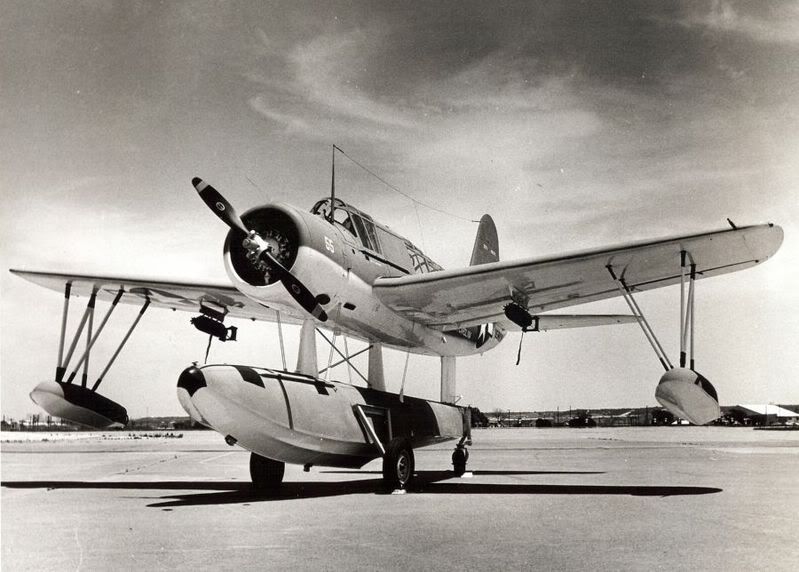
here is a typical full scale photo,, looks pretty pointy too
If you get to the point that the nose of the float starts purling (digging in),, you have bigger problems than how pointy it is.
Keep building,,, it looks great
here is a typical full scale photo,, looks pretty pointy too
02-11-2010, 09:31 PM
#43
Thread Starter
Worked on the rear and middle float struts today. I will be using the 1/4-20 nlyon threaded rod on the center strut also. I like the way it works and if I ever hit something hopefully the float will break away. I used a 1/2a nose wheel block and a control arm to make the upper water rudder mechanism. I silver soldered the required sizes I needed to get it all to work. I was going to use heavier brass stock and realized the weight would really start adding up. Looked on the old junk box and found the 1/2A parts. I used wire down the center of the ply rear strut with some plasticstruct round stock as the waterproof bearings. Will add 1/2" balsa front and rear and taper to the airfoil shape. Will need to do the same to the center strut but will now wait until the wing is built so I can get the pocket for the strut exactly where in needs to go. Starting to like the way it's looking.
02-12-2010, 08:56 AM
#44
Looking good,
I'm sure you thought of this too, but be sure and seal up all that balsa with thin CA or Exopy where ever water might touch the unpainted balsa.
I packed the water rudder push rod with water proof grease, had the servo completely sealed in and still water found it's way into the servo compartment and started to rot the balsa from the inside out. I never saw it until I had to replace the water rudder servo. This was after years and over 100 flights, but still. Yuck
It amazing where water under presure can sneak into. That linkage being completely out of the float might be a better idea after all, now that I think about it.
Carry on
02-13-2010, 09:19 AM
#45
Thread Starter
If you look in the 2nd picture in post 43 you can see a strip of thin CA down the center of the strut side before I assembled. I did think of the bare wood. Luckily, sometimes the mind is working right. Getting this far is really getting me inspired to work more on it. Got too much to do around the house and for work this coming week so will just have to look at it and maybe fit in a little in between. Thanks for the encouragement and all the help.
Getting this far is really getting me inspired to work more on it. Got too much to do around the house and for work this coming week so will just have to look at it and maybe fit in a little in between. Thanks for the encouragement and all the help.
02-14-2010, 11:42 PM
#46
Thread Starter
Got the water rudder set up done tonight and did some more fairing in of the main float support. Still have to work on the front one to make it a little more streamlined. Added the balsa to the front and back of the rear float support and tapered real nice. I got my old 6x48 belt sander going and it makes fast work of this sort of thing. Gone back to working on the elevator and rudder/fin. Got my Robart hinge points in and started doing that. Have to round out the leading edges more and lots of hand sanding to go yet.
 02-17-2010, 11:16 PM
#48
Thread Starter
Got a nice package in the mail. I ended up purchasing the cowl and canopies from Traplet in the UK and I'm glad I did. The cowl is very well made heavy FG, has the exhaust areas marked out, and has the very distinct shape that the Kingfisher has. Some use a Corsair cowl but that cowl is round and the Kingfisher is more of a oval shape and is narrower at the rear than the front. The canopies have no "caging" molded in but are very heavy weight and should almost be unbreakable. I cut out the canopies and put a piece of balsa across the firewall to just hold the cowl in place to take pictures. I got the tail feathers completed and got the front antennae made and installed.
02-17-2010, 11:27 PM
#49
Thread Starter
I ended up using the Dubro cowl brackets and some ply extensions to mount the cowl. I originally put the engine for a look and realized I couldn"t stop working on it! I continued by mounting the engine, using a Hitec H55 micro servo with four stroke linkage on the engine side for the throttle. I figure the more weight I can keep up front the better I will be. The Dubro system works great on the plane and the cowl is mounted firmly. I would suggest to anyone building this plane to use that system. You just have to add some ply plating off the firewall front to extend them out far enough. I cut the cowling for the Saito 62 and installed the needle extension. I put a 13" prop on it and there is a lot of room from the float. In one picture from the front you can see the plywood standoffs I made for the cowl mounts. I had to cut the fuel tank floor out as the BT plans build the tank area high and having the engine inverted the fuel tank would have been way above the carb. I put in two washers worth of right thrust in the engine so that should be good. Also mounted the rudder and elevator servos amidship in the fuse. Need to make up pushrods now. I will be going over my buddy's house to use his building table to do the wing as he custom made it with Homasote and cork on top. It is 8 ft long and completely flat. Perfect for wings!
I continued by mounting the engine, using a Hitec H55 micro servo with four stroke linkage on the engine side for the throttle. I figure the more weight I can keep up front the better I will be. The Dubro system works great on the plane and the cowl is mounted firmly. I would suggest to anyone building this plane to use that system. You just have to add some ply plating off the firewall front to extend them out far enough. I cut the cowling for the Saito 62 and installed the needle extension. I put a 13" prop on it and there is a lot of room from the float. In one picture from the front you can see the plywood standoffs I made for the cowl mounts. I had to cut the fuel tank floor out as the BT plans build the tank area high and having the engine inverted the fuel tank would have been way above the carb. I put in two washers worth of right thrust in the engine so that should be good. Also mounted the rudder and elevator servos amidship in the fuse. Need to make up pushrods now. I will be going over my buddy's house to use his building table to do the wing as he custom made it with Homasote and cork on top. It is 8 ft long and completely flat. Perfect for wings!
