


FokkeRC 1/5 Spitfire MKIX build log
 03-16-2023, 04:37 AM
#351

Thread Starter

Certainly is. Grandkids sleepover (????????) prevented progress and definitely falls into labor of love category. Shout out to Rumen @FokkeRC for helping me out and recutting vertical stab parts I screwed up. He is a blessing! Naive of me I guess as I assume a vertical stab is supposed to be more vertical than a drunken sailor! Long way of saying your precision is excellent! (I am mastering the art of shims to get where you want to be.) Anyway, I was re-skimming your thread and - forgive me if I missed - but wondered how you settled on powering your cockpit slider? (Originally I opted for the lazy one piece approach, then morphed to the two piece manual open/close, now at wondering �.. ahh, time, such an elusive commodity!)
Haha I have 3 kids in elementary and middle school, and they keep us very busy! If I get morning or afternoon in the shop here and there I chalk it up to a win.
On the canopy I decided to go with a manual one. It�ll secure with some small strip magnets on with the forward canopy.
Yes Rumen has been very helpful throughout the build. Emails are responded to in a timely manner and any support I�ve needed was answered or fixed and in the mail quickly. He�s great to work with.
 03-16-2023, 04:56 AM
#352
Thread Starter
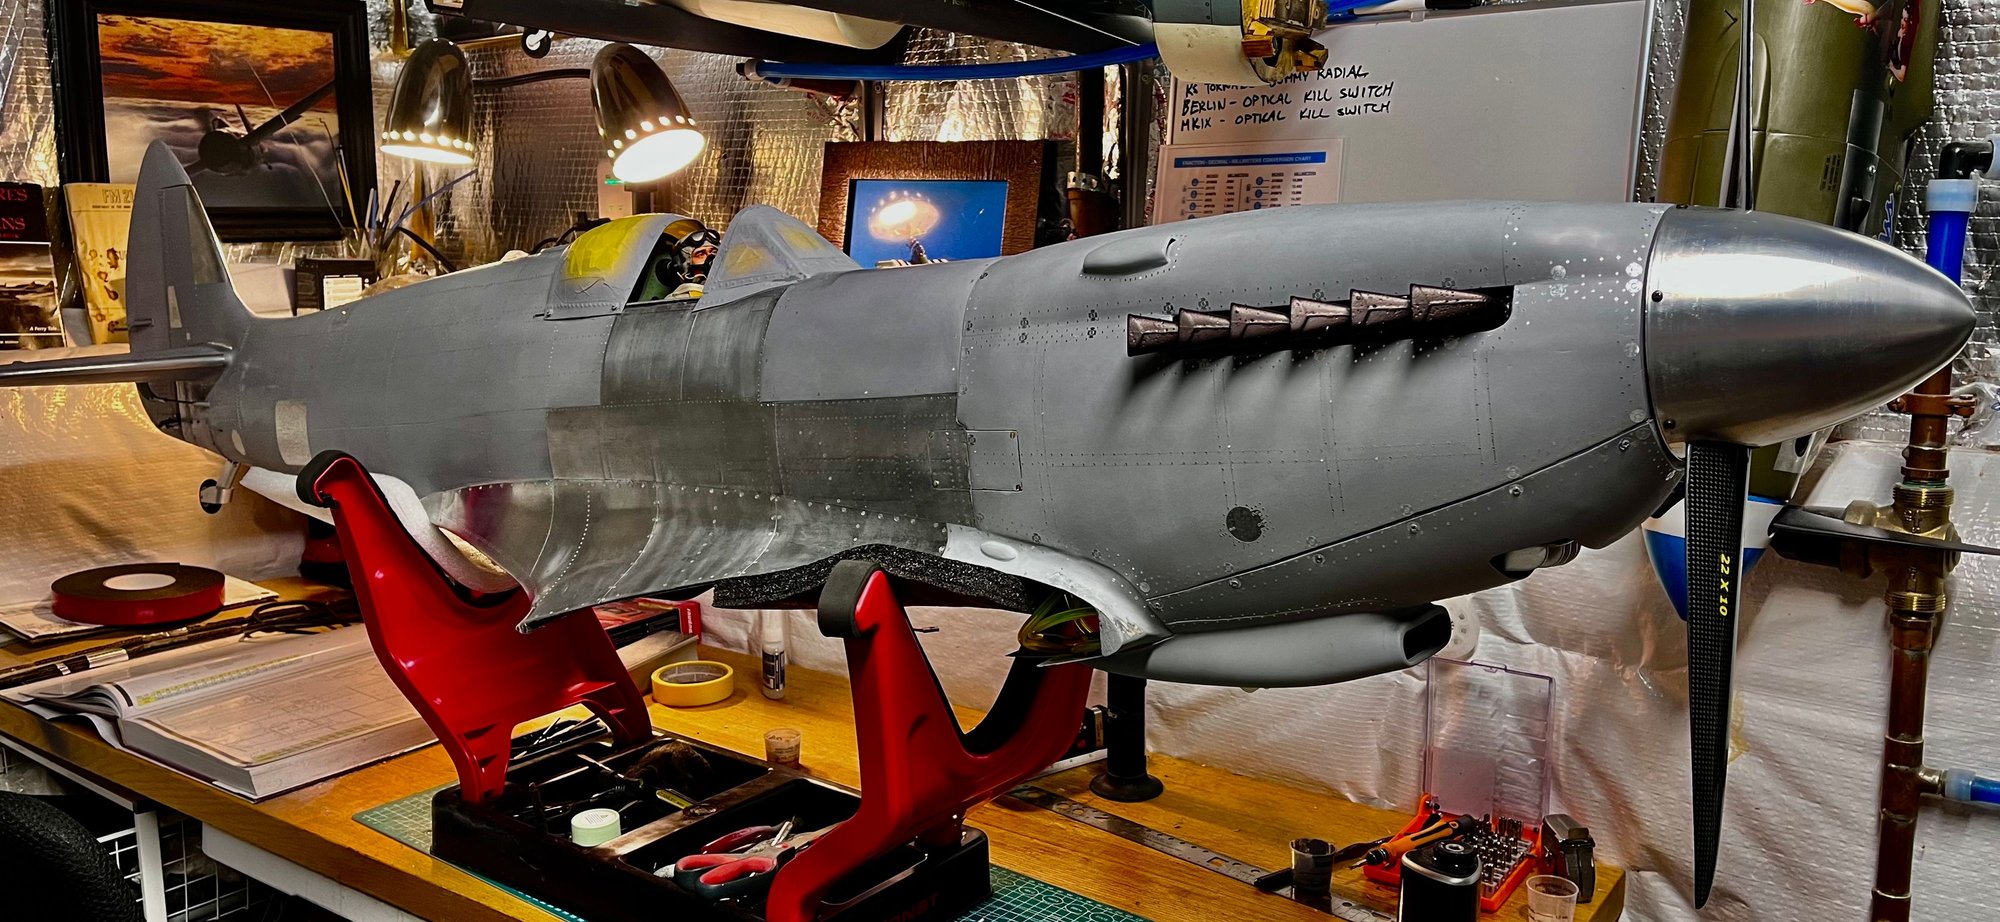
I began working on the interior yesterday, the engine was hard mounted, ignition and fuel tank was installed, throttle and choke servo plate was cut out of g-10 and all installed. Still need to solder pushrods to my clevis�s and install the fueler port as well as run baffling for the engine. There is not a lot of room in the fuselage box, so I spent a lot of time working on space management as I still have a receiver, retract controller and 3 life batts to install(which I want as forward as I can get). I need smaller hands!
I wanted to see how she looked with spinner/prop and dummy exhaust stack installed, so a few pictures of that as well.


I wanted to see how she looked with spinner/prop and dummy exhaust stack installed, so a few pictures of that as well.

 03-16-2023, 09:04 AM
#354
Thread Starter
 03-16-2023, 12:02 PM
#359
Thread Starter
03-18-2023, 05:51 AM
#361
Thread Starter
I shelved the fuse and brought the wing out yesterday, I have some final sanding on the underside to do. Then I�ll begin mapping out panels.
A good friend threw me some small strip magnets for the canopy lock, I believe they�ll work nicely, I�ll post pictures when I get them installed.
03-23-2023, 03:08 PM
#362
I offer a photo of my progress as a way to say THANK YOU - I would not have made this progress without. And yes, when I didn�t follow your flow I screwed up �.. and built the fuselage first I had to deconstruct the tail to put the horiz stab in place. Argh. Hence my appreciation of Ruman�s cutting a few replacement parts for me. If my Spit ends up being 1/2 (optimistic!) as good as your�s I shall be well pleased and even then it�s because I�ve learned from your build. Thanks again.

At least I got it square (and yes, 1st time I failed to level the table and jig ). I can spell ROOKIE in my sleep. (It�s actually square but I�d moved a shim from under the jig and didn�t realize for the this photo.)
At least I got it square (and yes, 1st time I failed to level the table and jig ). I can spell ROOKIE in my sleep. (It�s actually square but I�d moved a shim from under the jig and didn�t realize for the this photo.)
03-23-2023, 03:23 PM
#363
Thread Starter
I offer a photo of my progress as a way to say THANK YOU - I would not have made this progress without. And yes, when I didn�t follow your flow I screwed up �.. and built the fuselage first I had to deconstruct the tail to put the horiz stab in place. Argh. Hence my appreciation of Ruman�s cutting a few replacement parts for me. If my Spit ends up being 1/2 (optimistic!) as good as your�s I shall be well pleased and even then it�s because I�ve learned from your build. Thanks again.
At least I got it square (and yes, 1st time I failed to level the table and jig ). I can spell ROOKIE in my sleep. (It�s actually square but I�d moved a shim from under the jig and didn�t realize for the this photo.)
At least I got it square (and yes, 1st time I failed to level the table and jig ). I can spell ROOKIE in my sleep. (It�s actually square but I�d moved a shim from under the jig and didn�t realize for the this photo.)
03-29-2023, 02:55 PM
#365
Thread Starter
The last few days I�ve had in my shop I�ve been going through my other warbirds making sure they were ready to go. On poor weather days I�ll continue to work on the spit. But I�m not one to put deadlines on models, seems to add unneeded pressure and takes the fun out it.
The following users liked this post:
Findgareth (03-29-2023)

The following users liked this post:
Findgareth (03-31-2023)
12-20-2023, 12:21 PM
#368
Thread Starter
Ok, back at it! Began working on underside of the wing yesterday, mapping hatches and panel lines. I�ll begin riveting flush rivets using a soldering iron and brass pipe once it�s all mapped out.


 12-22-2023, 10:23 AM
#370
So much detail and so much patience. Discussed w/Chad Veitch how many rivets to use and I bottled out of the full deal and went for a mere 17,000 (applying them is a long way in my future so I have time for my patience to grow). It’s going to look awesome!!!
12-23-2023, 08:11 AM
#371
Thread Starter
[QUOTE=Findgareth;12790561]So much detail and so much patience. Discussed w/Chad Veitch how many rivets to use and I bottled out of the full deal and went for a mere 17,000 (applying them is a long way in my future so I have time for my patience to grow). It�s going to look awesome!!![/QUOTE/]
Thanks Gareth, the detailing does take time but you get in a groove and pretty soon you�re done with a section, and moving on to the next. Chad�s hatch and round headed rivet pack has been a huge timesaver on the fuselage for sure. And the soldering iron/pipe method has been going smoother than I first imagined it would.
Thanks Gareth, the detailing does take time but you get in a groove and pretty soon you�re done with a section, and moving on to the next. Chad�s hatch and round headed rivet pack has been a huge timesaver on the fuselage for sure. And the soldering iron/pipe method has been going smoother than I first imagined it would.

 01-04-2024, 06:29 PM
#373
Thread Starter
Underside is all but finished minus some blisters and a few other touches. Decided to get going with those as well as the ones on the upper surface of the wing. The main Hispano cannon blister is from Jiri at JPWarbirds, the others I built up and am in process of glassing.


