


Starting screws and nuts in tight places
 12-16-2014 | 06:32 PM
#1
Thread Starter
Member
Joined: Oct 2014
Posts: 48
Likes: 0
Received 0 Likes
on
0 Posts
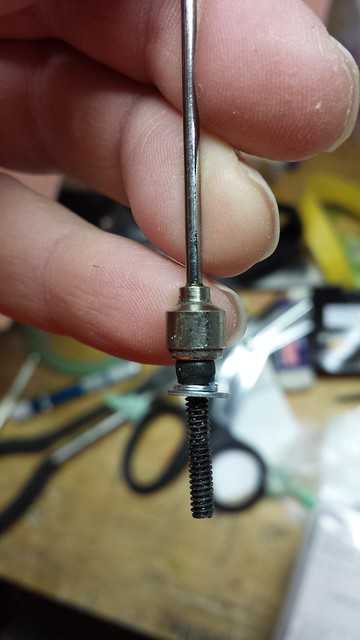
Just thought I'd share a little trick to help installing nuts and bolts in those tiny little spaces we all love so much. I use a section of silicone or rubber tubing. Insert your screw or nut into it and you will be amazed at the places you can easily start the threads in now. Added years to my life, I'm sure. LOL. Please post anything you have to make assembly less of a challenge. Thank you to all. And to all "Happy Holidays!"
 12-16-2014 | 09:31 PM
#2

My Feedback: (1)
On nylon 1/4-20 wing hold down bolts, I taper the first 3 or 4 threads using a cheap kids pencil sharpener. The hand held pencil sharpener has a small razor blade inside it (don't tell the school board people or they will ban them) and cuts a nice clean taper on the end of the nylon bolts, making them easy to start. On metal wing bolts, I also taper the starter threads on a bench grinder, and of course that requires cleaning the threads after grinding the ends. This makes airplane assembly at the field less of a hassle.
12-23-2014 | 08:30 AM
#3

A trick that I use is to always make a small hole for the screw. Sometimes I make a spade drill from a thin piece of piano wire by hammering flat one end and with a file turn that end into a point so that it will cut into soft material. It is now a SPADE DRILL. I chuck the wire in my electric hand drill and will bend the wire as needed to go around obstructions.
12-23-2014 | 11:13 AM
#4

Senior Member
Great thread!
I made a removable gas tank tray for my current build that is secured to three beams with six socket head cap screws, each with a lock washer and a flat washer.


It was easy enough to remove the tray after gluing the beams in place, but reinstalling the tray once the tank was strapped in was a little more difficult. I tried tweezers and pliers but what worked best for me was a small magnetic pickup tool. Held the washers on too.
Using the tool it's easy to put the bolt in the hole.

Sliding the tool sideways off the head of the bolt leaves the bolt and washers in place for the ball driver.
I made a removable gas tank tray for my current build that is secured to three beams with six socket head cap screws, each with a lock washer and a flat washer.
It was easy enough to remove the tray after gluing the beams in place, but reinstalling the tray once the tank was strapped in was a little more difficult. I tried tweezers and pliers but what worked best for me was a small magnetic pickup tool. Held the washers on too.
Using the tool it's easy to put the bolt in the hole.
Sliding the tool sideways off the head of the bolt leaves the bolt and washers in place for the ball driver.
12-24-2014 | 06:10 AM
#6


My Feedback: (11)
On nylon 1/4-20 wing hold down bolts, I taper the first 3 or 4 threads using a cheap kids pencil sharpener. The hand held pencil sharpener has a small razor blade inside it (don't tell the school board people or they will ban them) and cuts a nice clean taper on the end of the nylon bolts, making them easy to start. On metal wing bolts, I also taper the starter threads on a bench grinder, and of course that requires cleaning the threads after grinding the ends. This makes airplane assembly at the field less of a hassle.
 12-24-2014 | 06:10 AM
#7
My Feedback: (11)
On nylon 1/4-20 wing hold down bolts, I taper the first 3 or 4 threads using a cheap kids pencil sharpener. The hand held pencil sharpener has a small razor blade inside it (don't tell the school board people or they will ban them) and cuts a nice clean taper on the end of the nylon bolts, making them easy to start. On metal wing bolts, I also taper the starter threads on a bench grinder, and of course that requires cleaning the threads after grinding the ends. This makes airplane assembly at the field less of a hassle.
12-24-2014 | 10:57 PM
#8
My Feedback: (1)
BarracudaHockey, You didn't have to say it twice  you were right the first time. "Cuda man" is right, putting a nut up on the threads before you taper the ends is a good way to clean the now roughed up threads. Maybe a little touch with a fine file afterwards and you are good to go.
you were right the first time. "Cuda man" is right, putting a nut up on the threads before you taper the ends is a good way to clean the now roughed up threads. Maybe a little touch with a fine file afterwards and you are good to go.
 12-26-2014 | 05:17 AM
#11
Sometimes affixing the nut to one's finger with an adhesive putty, Elmer's Tac N Stik is one of several brands, provides a means of getting the nut where it's needed while also giving a bit of "feel" for starting the threads as the screw is turned.
 12-26-2014 | 07:06 PM
#13
Thread Starter
Member
Joined: Oct 2014
Posts: 48
Likes: 0
Received 0 Likes
on
0 Posts
Unfortunately the tape remains with the nut. Not so "pretty." Thank you all for posting. Keep them coming. Something simple to you may be the final straw for another. I've given up several good ideas only to be floored by an easier way after I scrapped it.Wasted alot of time and money due to a lack of knowledgeable fellow enthusiasts. I am at a point where most of what I do is second nature now and it's hard to remember the early tribulations. But, I am a fabricator/ welder with 20+ years paint experience. If I can help with anything? Please ask. I got into this hobby to have fun. Only to find stiff lipped competition. No fun in that. Trophies and titles are a loss when compared to winnings reaped from helping someone else reach a higher level.PEACE!
12-27-2014 | 10:18 PM
#14
Put the sticky side of the tape in the socket or nut driver. The loop of inside out tape is around you finger. "Rarely" have I had a piece of tape stay on the nut. If it does, it's usually in a place where it can be seen so no consequence.
+1 on sharing info to help a fellow modeler.
Ken
+1 on sharing info to help a fellow modeler.
Ken
12-29-2014 | 05:45 PM
#15
Thread Starter
Member
Joined: Oct 2014
Posts: 48
Likes: 0
Received 0 Likes
on
0 Posts
I had it backwards. Sorry. I taped the washers over the nuts in the driver. Since the tubing epiphany I just use my sons glue stick on the end of the tubing. holds the washer in place after I insert the nut into the tubing. No more pretty blue tape inside my hulls. You may not be able to see it. But, I know it is there. Eats at my soul.
12-30-2014 | 08:19 AM
#16
Senior Member
12-30-2014 | 02:57 PM
#17
Thread Starter
Member
Joined: Oct 2014
Posts: 48
Likes: 0
Received 0 Likes
on
0 Posts
I pretty much just build boats anymore. Haven't turned sticks into planes in a long time. Being boats, the socket heads are on the exterior. And the nuts and washers are inside. Small hardware and really small tight spaces or insane angles that won't afford the use of a ball driver or socket. I also have cannibalized a couple of my kids "magnetix" toys for the rare earth magnets inside them. They are 6mm and fit perfectly inside the tubing. They have several ounces of pull and will hold more hardware than you need to hang. Unfortunately they are attracted to everything ferrous in their proximity. Another thing I have done for years is to use cheap hollow core doors for layout tables for my wood kits. Perfectly flat. Push pins are easy to insert and hold. Can be cut to necessary size and store vertically with ease. Cheaper than a workbench and great for apartment dwellers. Keep rattling my brain. I'll keep recalling tidbits to share. Thanks for the input.
11-09-2017 | 11:12 AM
#18
Junior Member
Joined: Nov 2017
Posts: 1
Likes: 0
Received 0 Likes
on
0 Posts
I'm not even an RC owner.
I was struggling with this issue on a full sized Cadillac and your tubing suggestion was so amazing that I decided to sign up to this forum just to tell you how much I appreciate this amazing idea!
Thank You!
I was struggling with this issue on a full sized Cadillac and your tubing suggestion was so amazing that I decided to sign up to this forum just to tell you how much I appreciate this amazing idea!
Thank You!


