


90 size Kaos
 01-05-2015 | 03:15 PM
#1
Thread Starter

My Feedback: (11)
Hi gang! I'll be starting on a 90 size Kaos soon, and am looking for any advice or tips or criticism that the learned people here can provide. This will be built from the Eureka short kit, with a foam wing. I've built a number of kits over the years, but never a foam wing, so this will be exciting! I'll be powering it with an OS .91 FX with a Davis Diesel conversion head. Probably will run a 16 x 8 prop to start with. I'll be using Spring Air retracts on it, also a first for me. The plan is to use pull/pull rudder control, and some form of solid rods for the elevators, or I might put the elevator servos in the rear, we'll see. I also have a rotary drive setup that is just waiting to be used for the ailerons.

 01-15-2015 | 09:58 AM
#4
Senior Member
Many, perhaps most who post in the Classic Pattern Forum, have built the 60 and smaller Kaos. The build for the 90 size will be similar. You chose the best place to post your questions. You will get all the answers you need here because most of the guys still posting here, are avid builders.
The regular two meter Pattern column is for assemblers of prebuilt components (big bucks) and not builders per se. Good luck with your Kaos.
I have a 50cc sized Kaos in my workshop. One of these days I will get to it
The regular two meter Pattern column is for assemblers of prebuilt components (big bucks) and not builders per se. Good luck with your Kaos.
I have a 50cc sized Kaos in my workshop. One of these days I will get to it
02-10-2015 | 08:14 PM
#5

Senior Member
Joined: Apr 2014
Posts: 100
Likes: 0
Received 0 Likes
on
0 Posts
From: Near Deming, NM.
Hi JD,
Funny, I was just going through this forum looking for oversize Kaos builds. I built one back in the early 80s. I believe it had a 82" or 84" span, and powered by a piped 90s. I'm just finishing a 72" Top Flight Contender and then ready to start another big Kaos, this one with a 76" span and 78" fuse. Will fly with a ST 1.4, and weight will be under 10 lbs. The Kaos was a wonderful flying bird, but not overpowered as I remember. Lately have built several large light planes, so learning a lot about light builds.
The Kaos was so fondly remembered that I built a similar plane around 2003. It has a 82" span and a OS 1.08. Also thinned the airfoil to about 16%. The new Kaos will be 14% at the root and 12% at the tip. The thinner airfoils require a lot less power for large loops, yet still fly fantastic.
 02-19-2015 | 09:39 AM
#8
Thread Starter
My Feedback: (11)
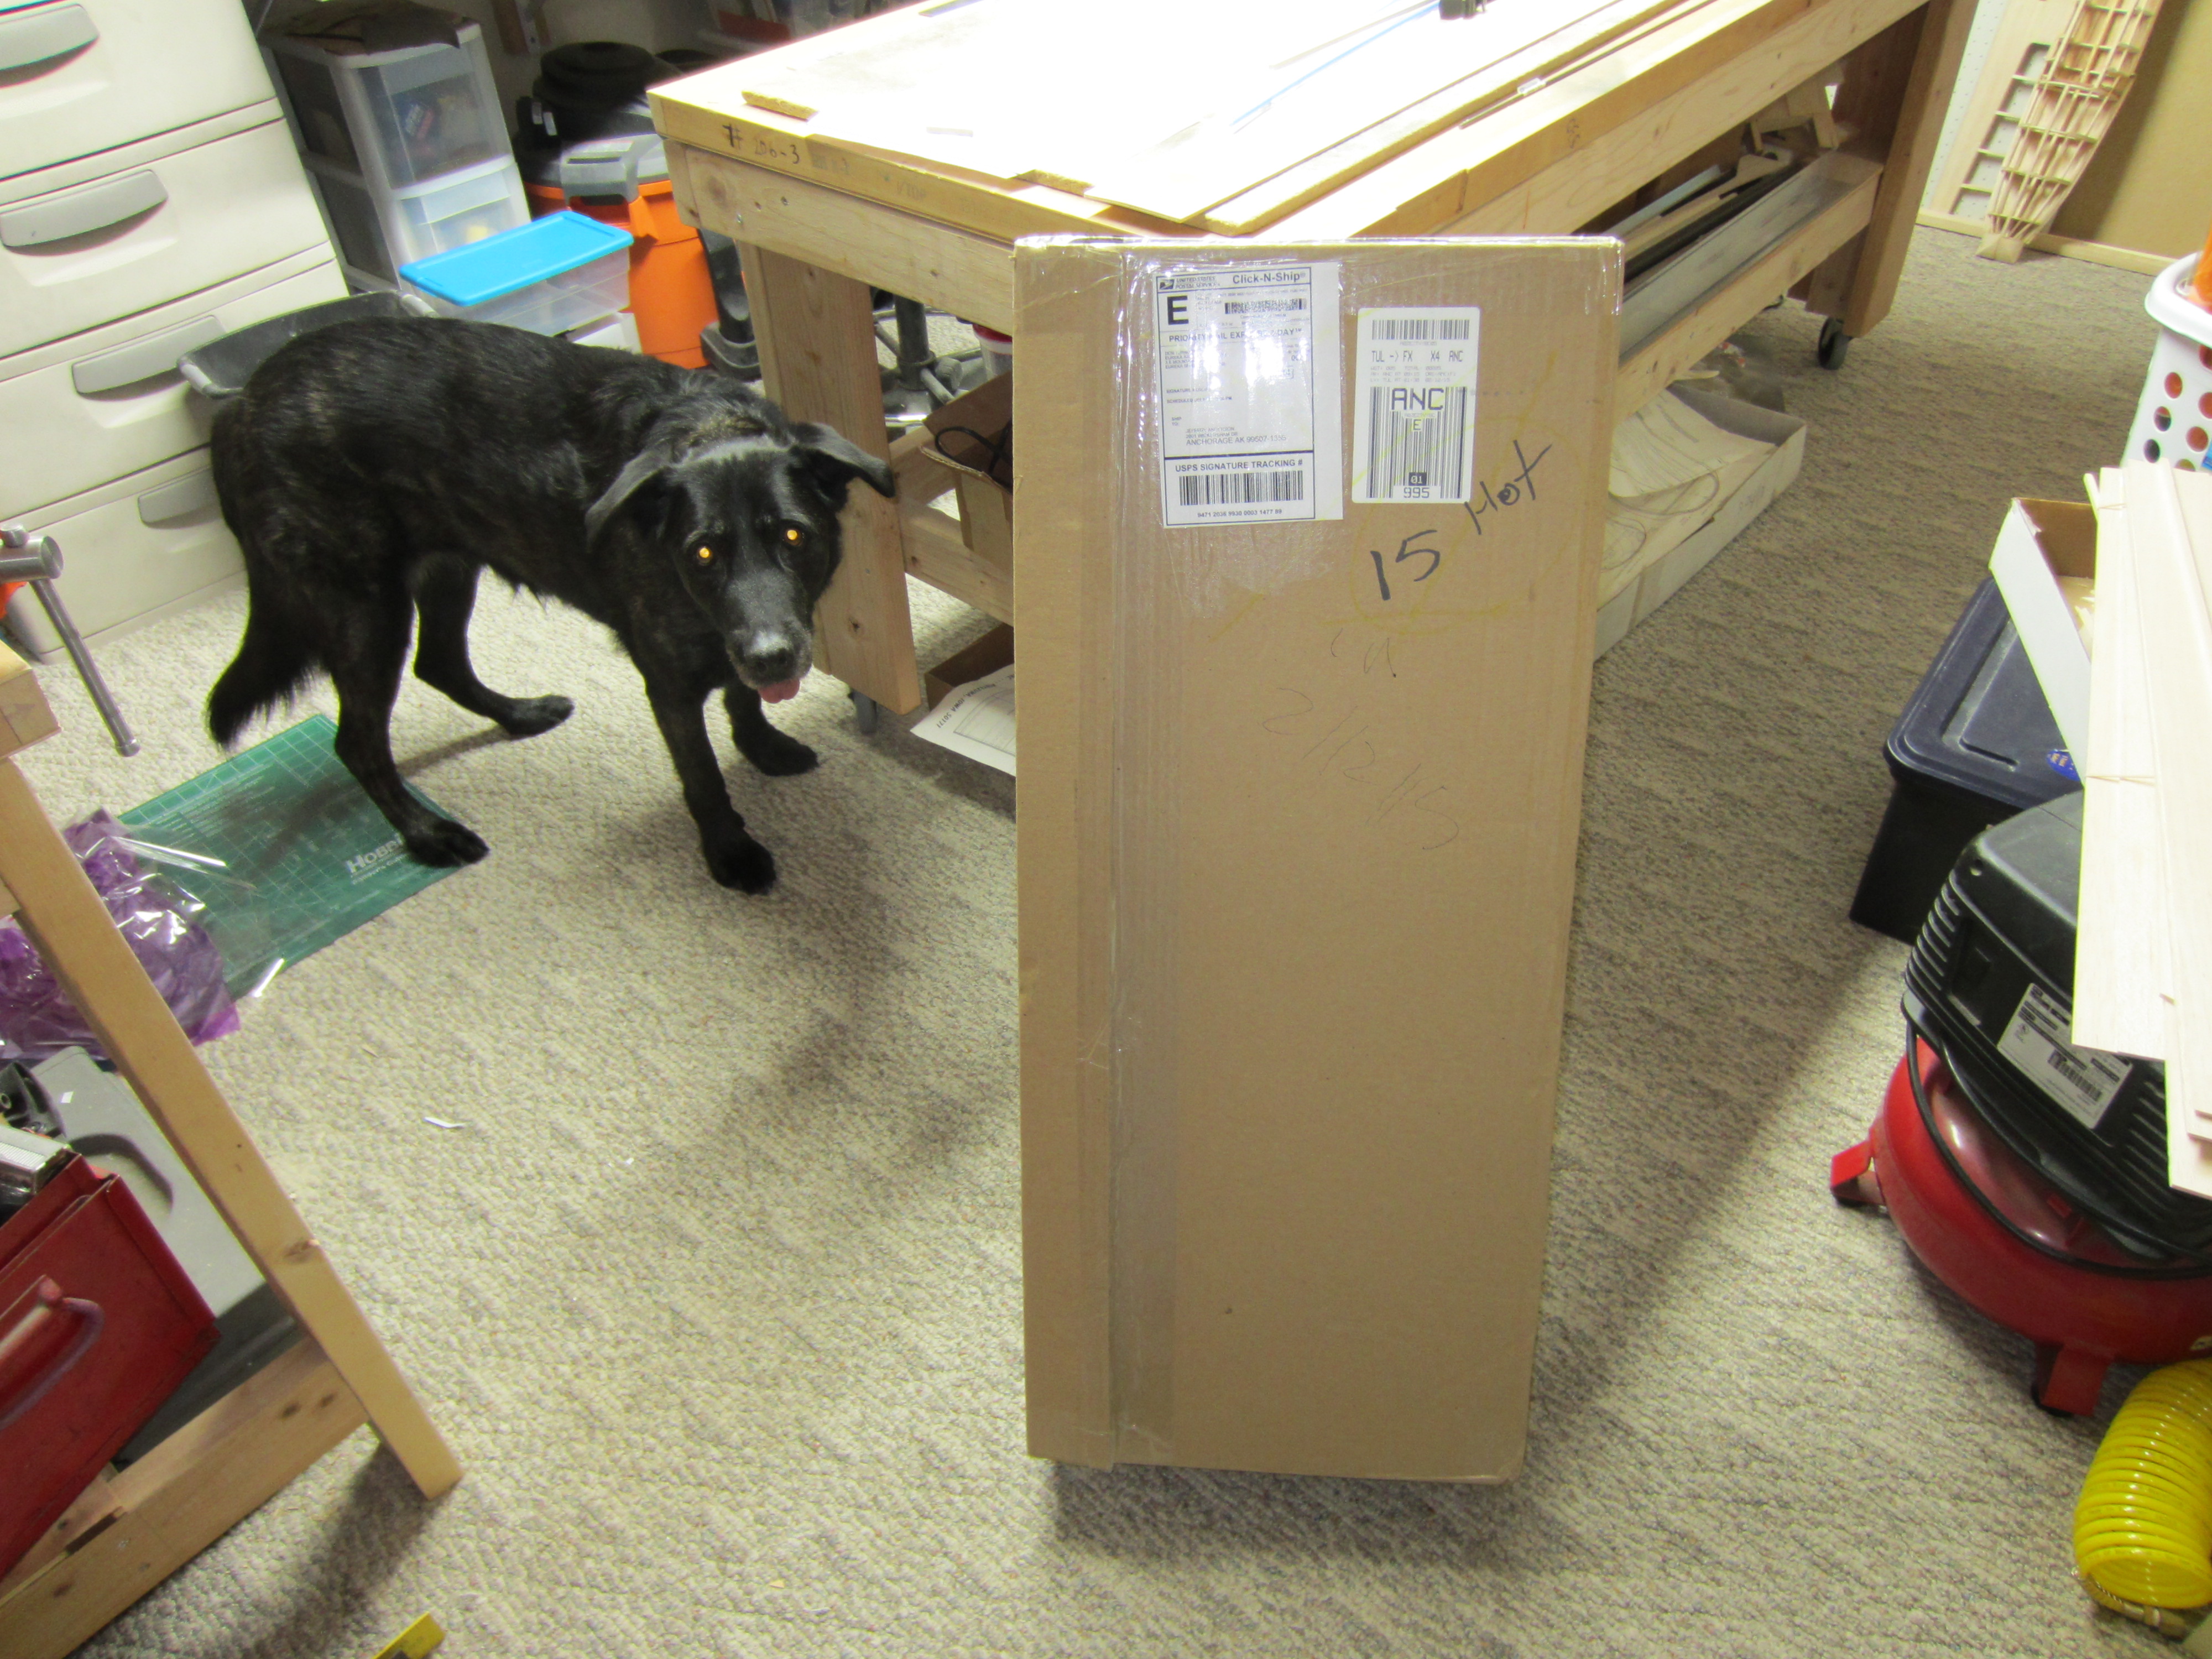
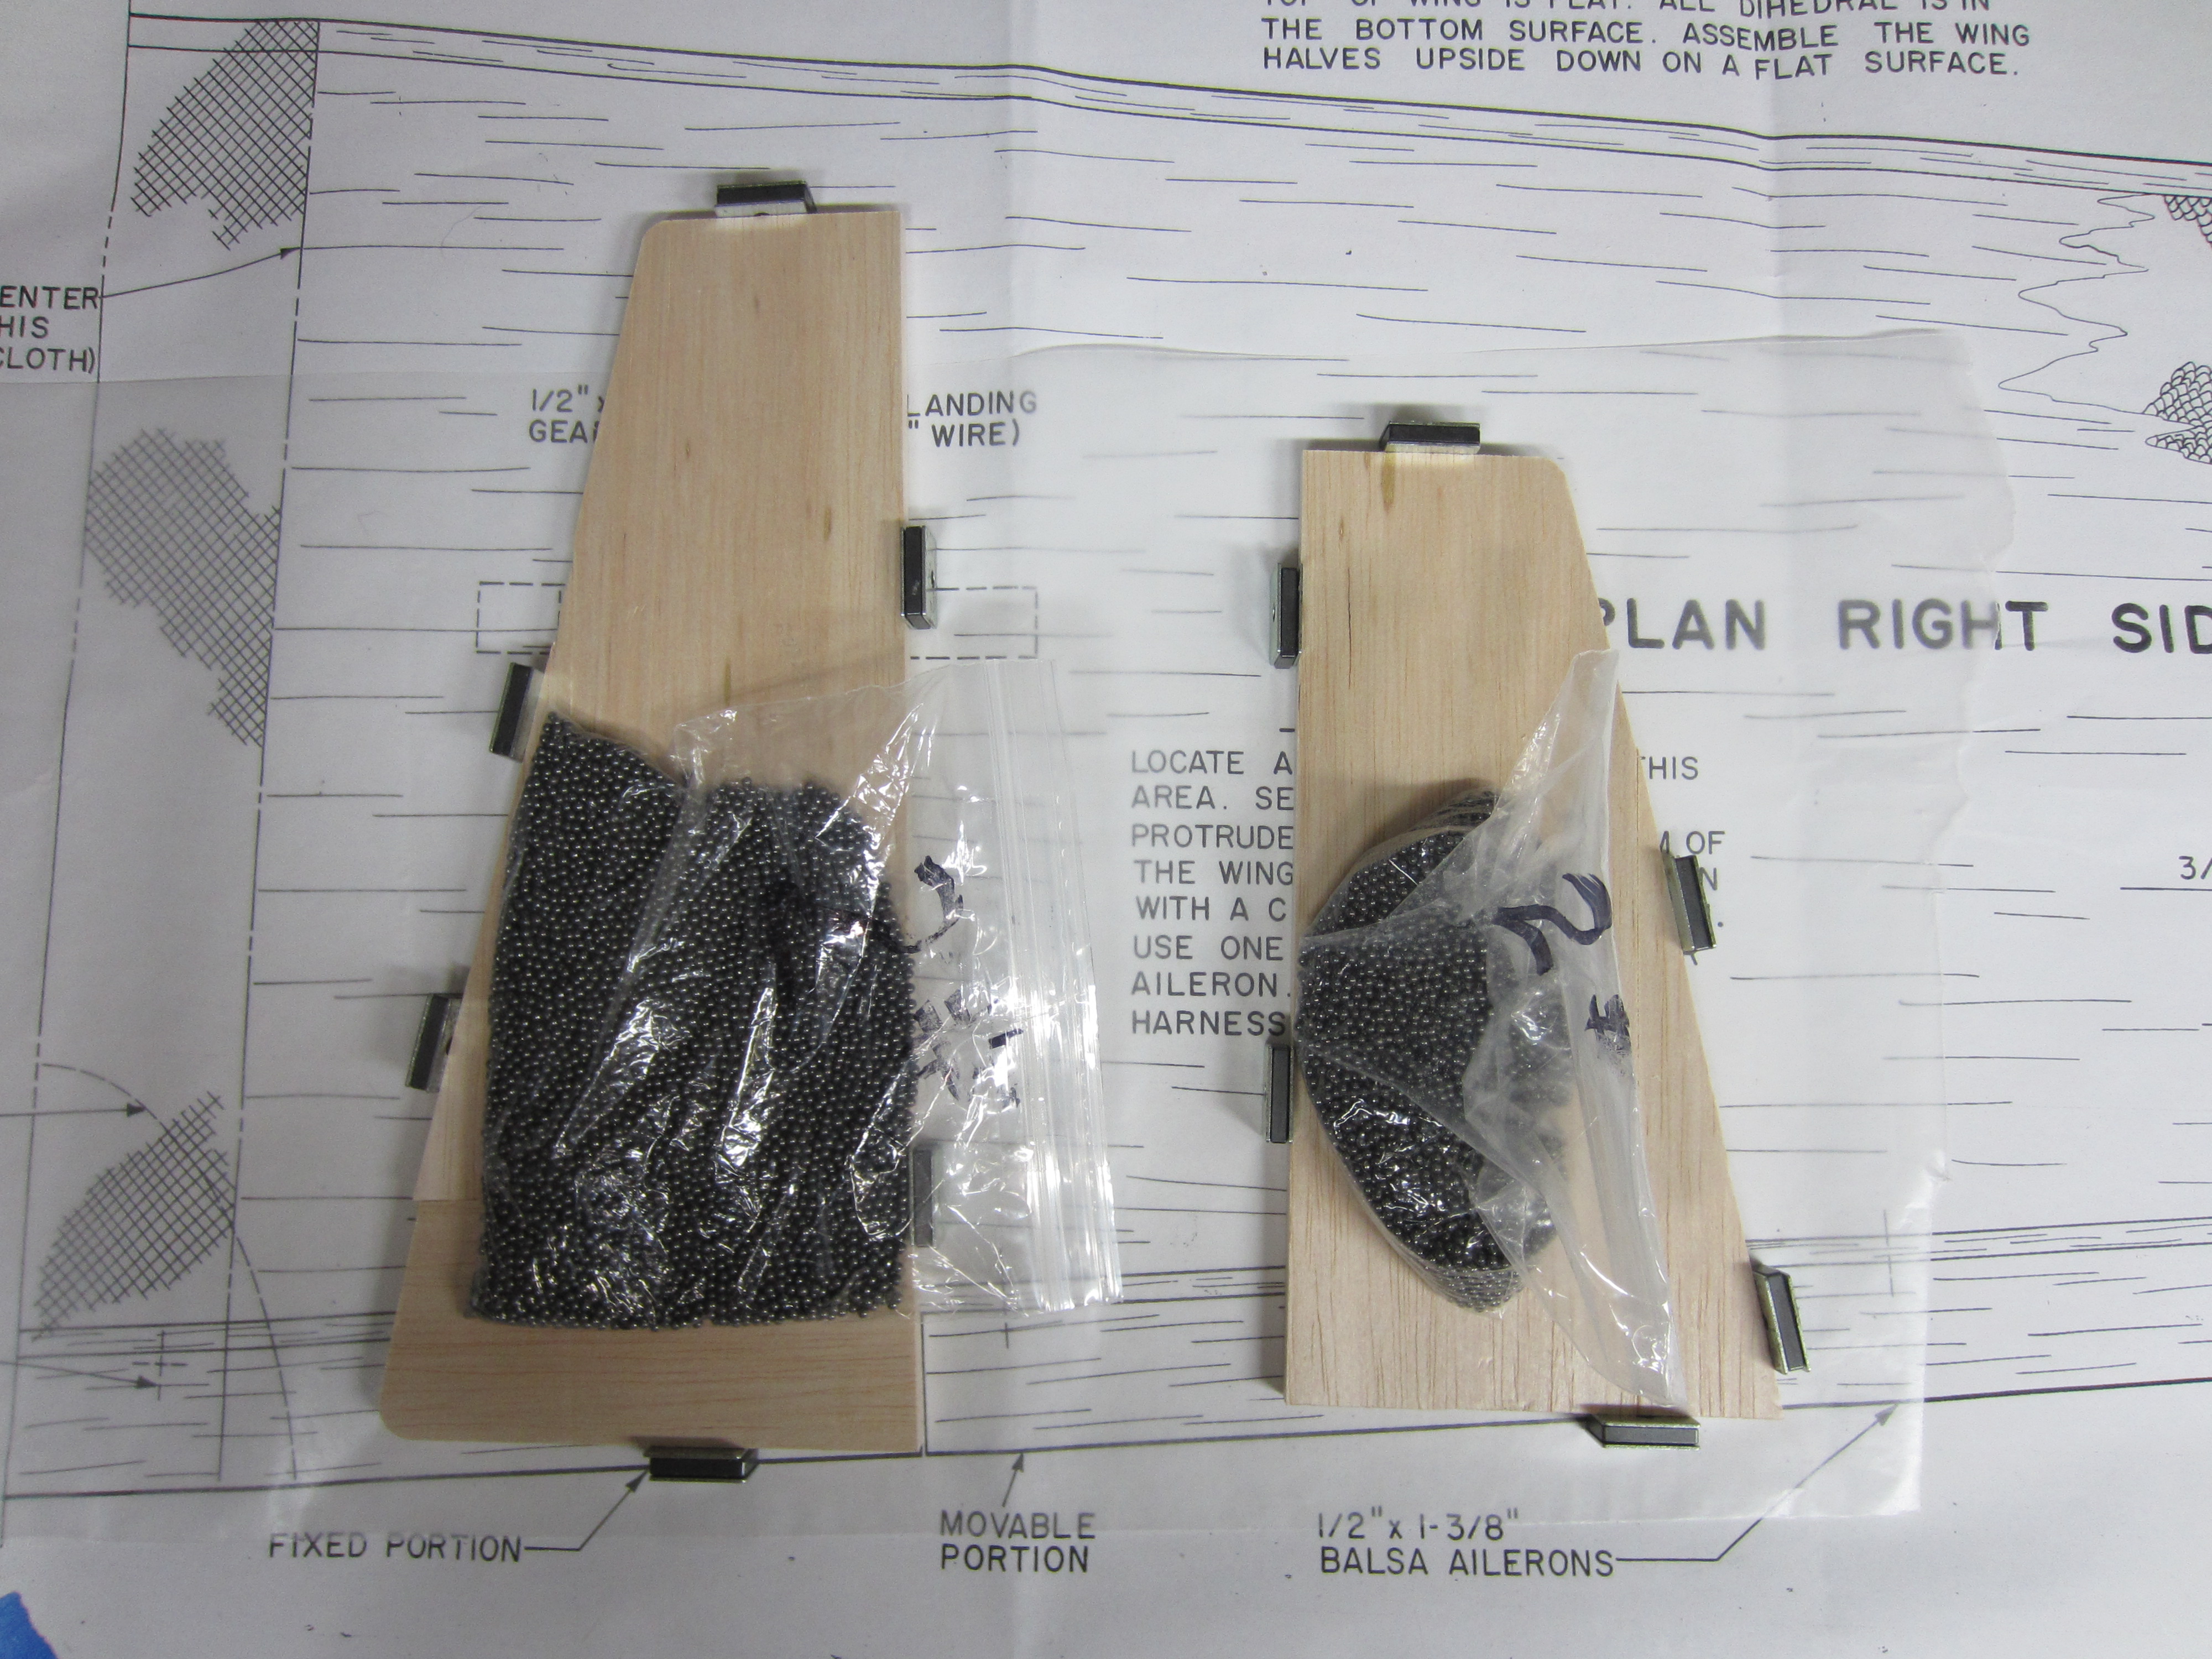
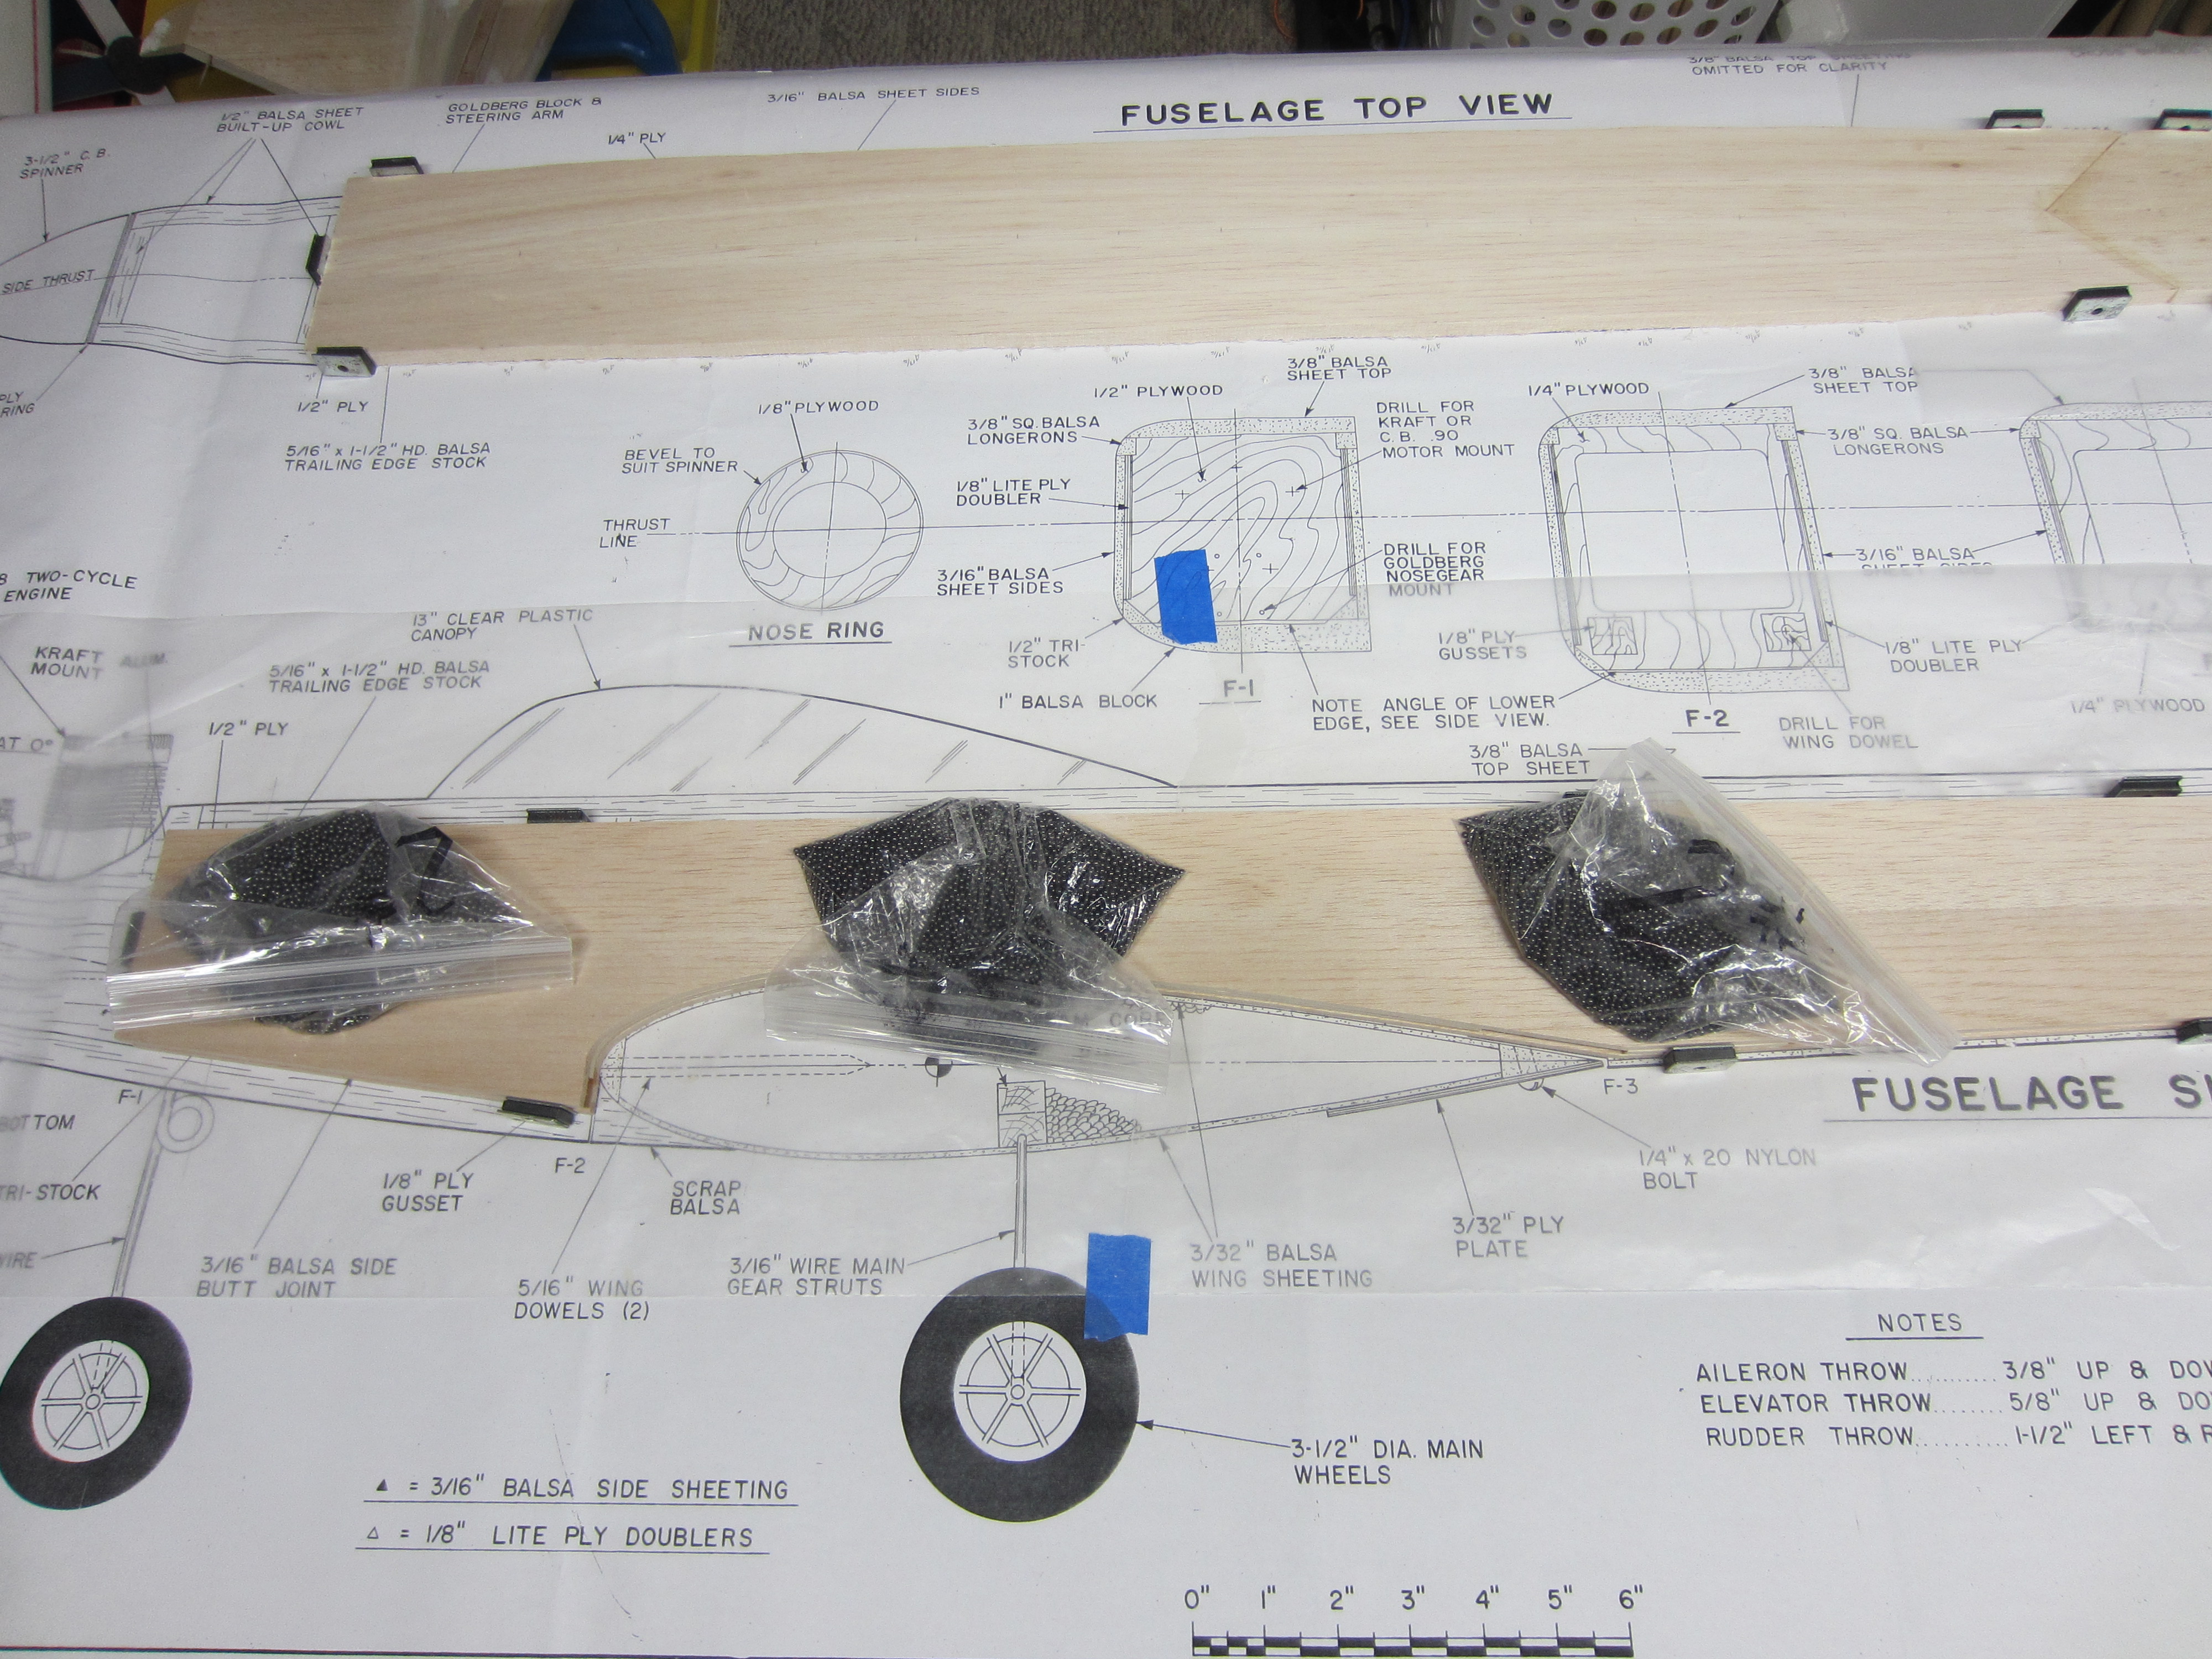
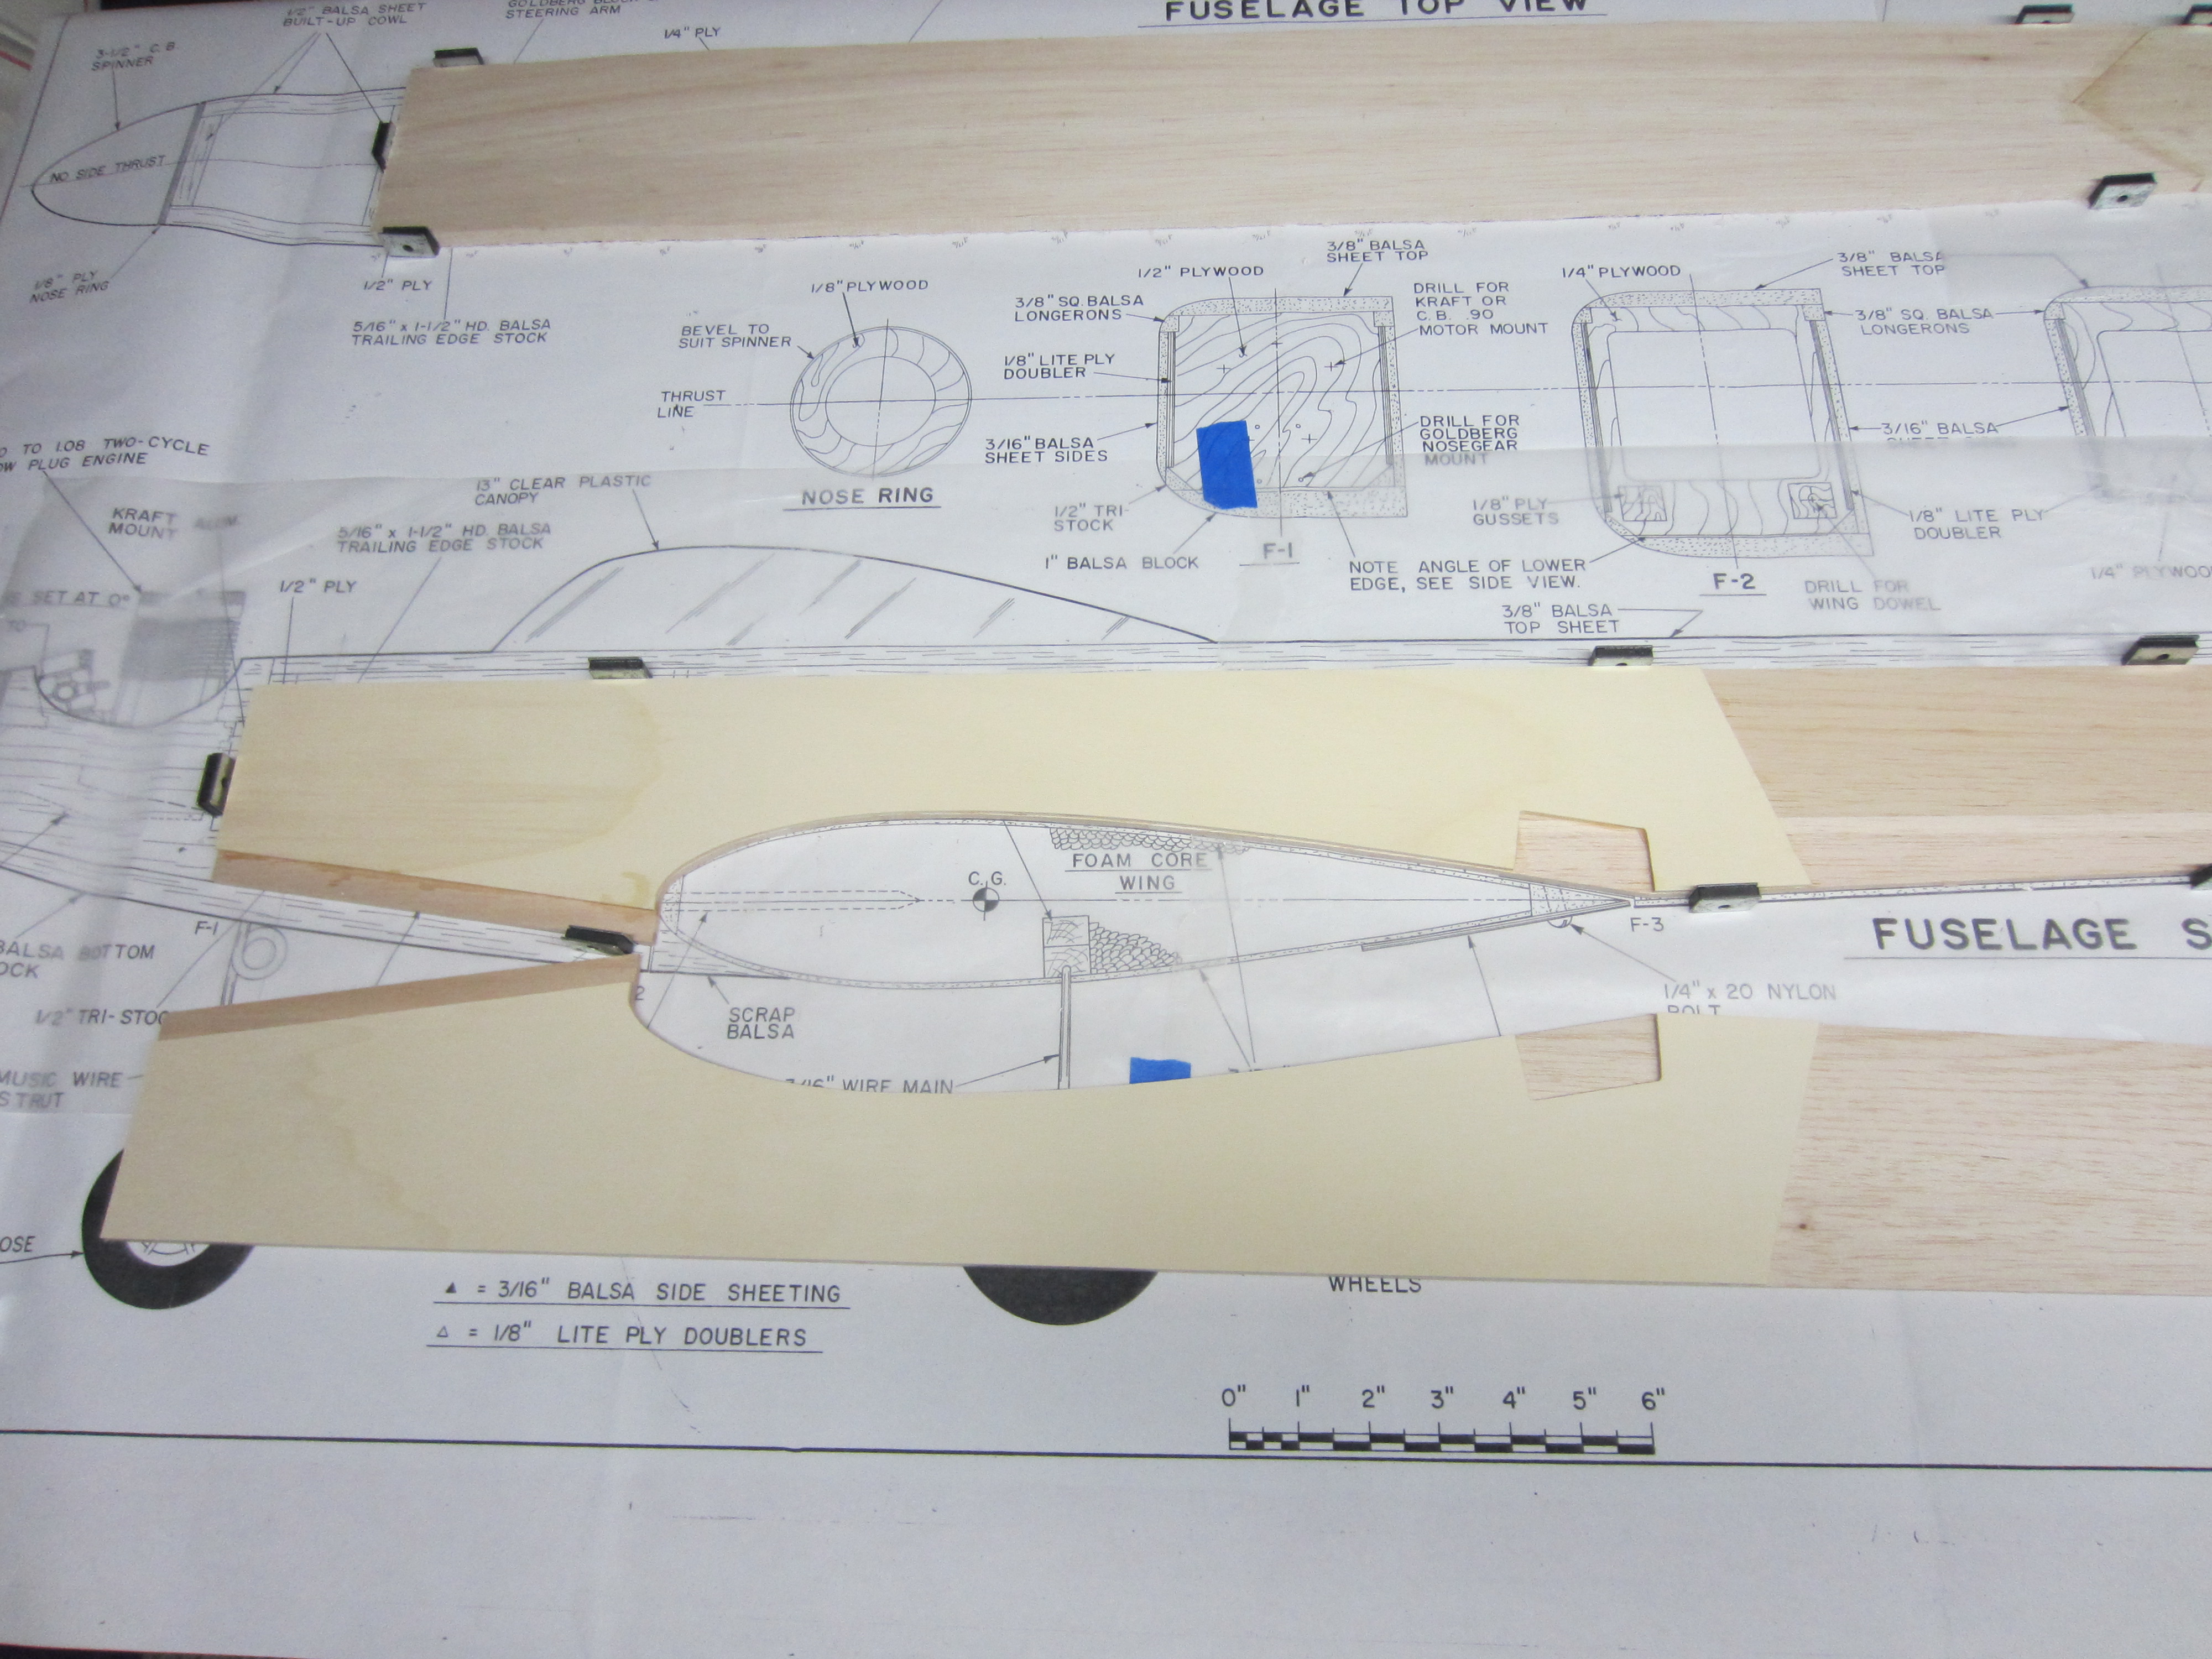
Oh alright, here's some pictures....
The first is how the Kaos showed up. The second is with the box open. The third is the current project on the bench. I'm still waiting for my Spring Air gear to show up, then I'll have everything I need for the Kaos!
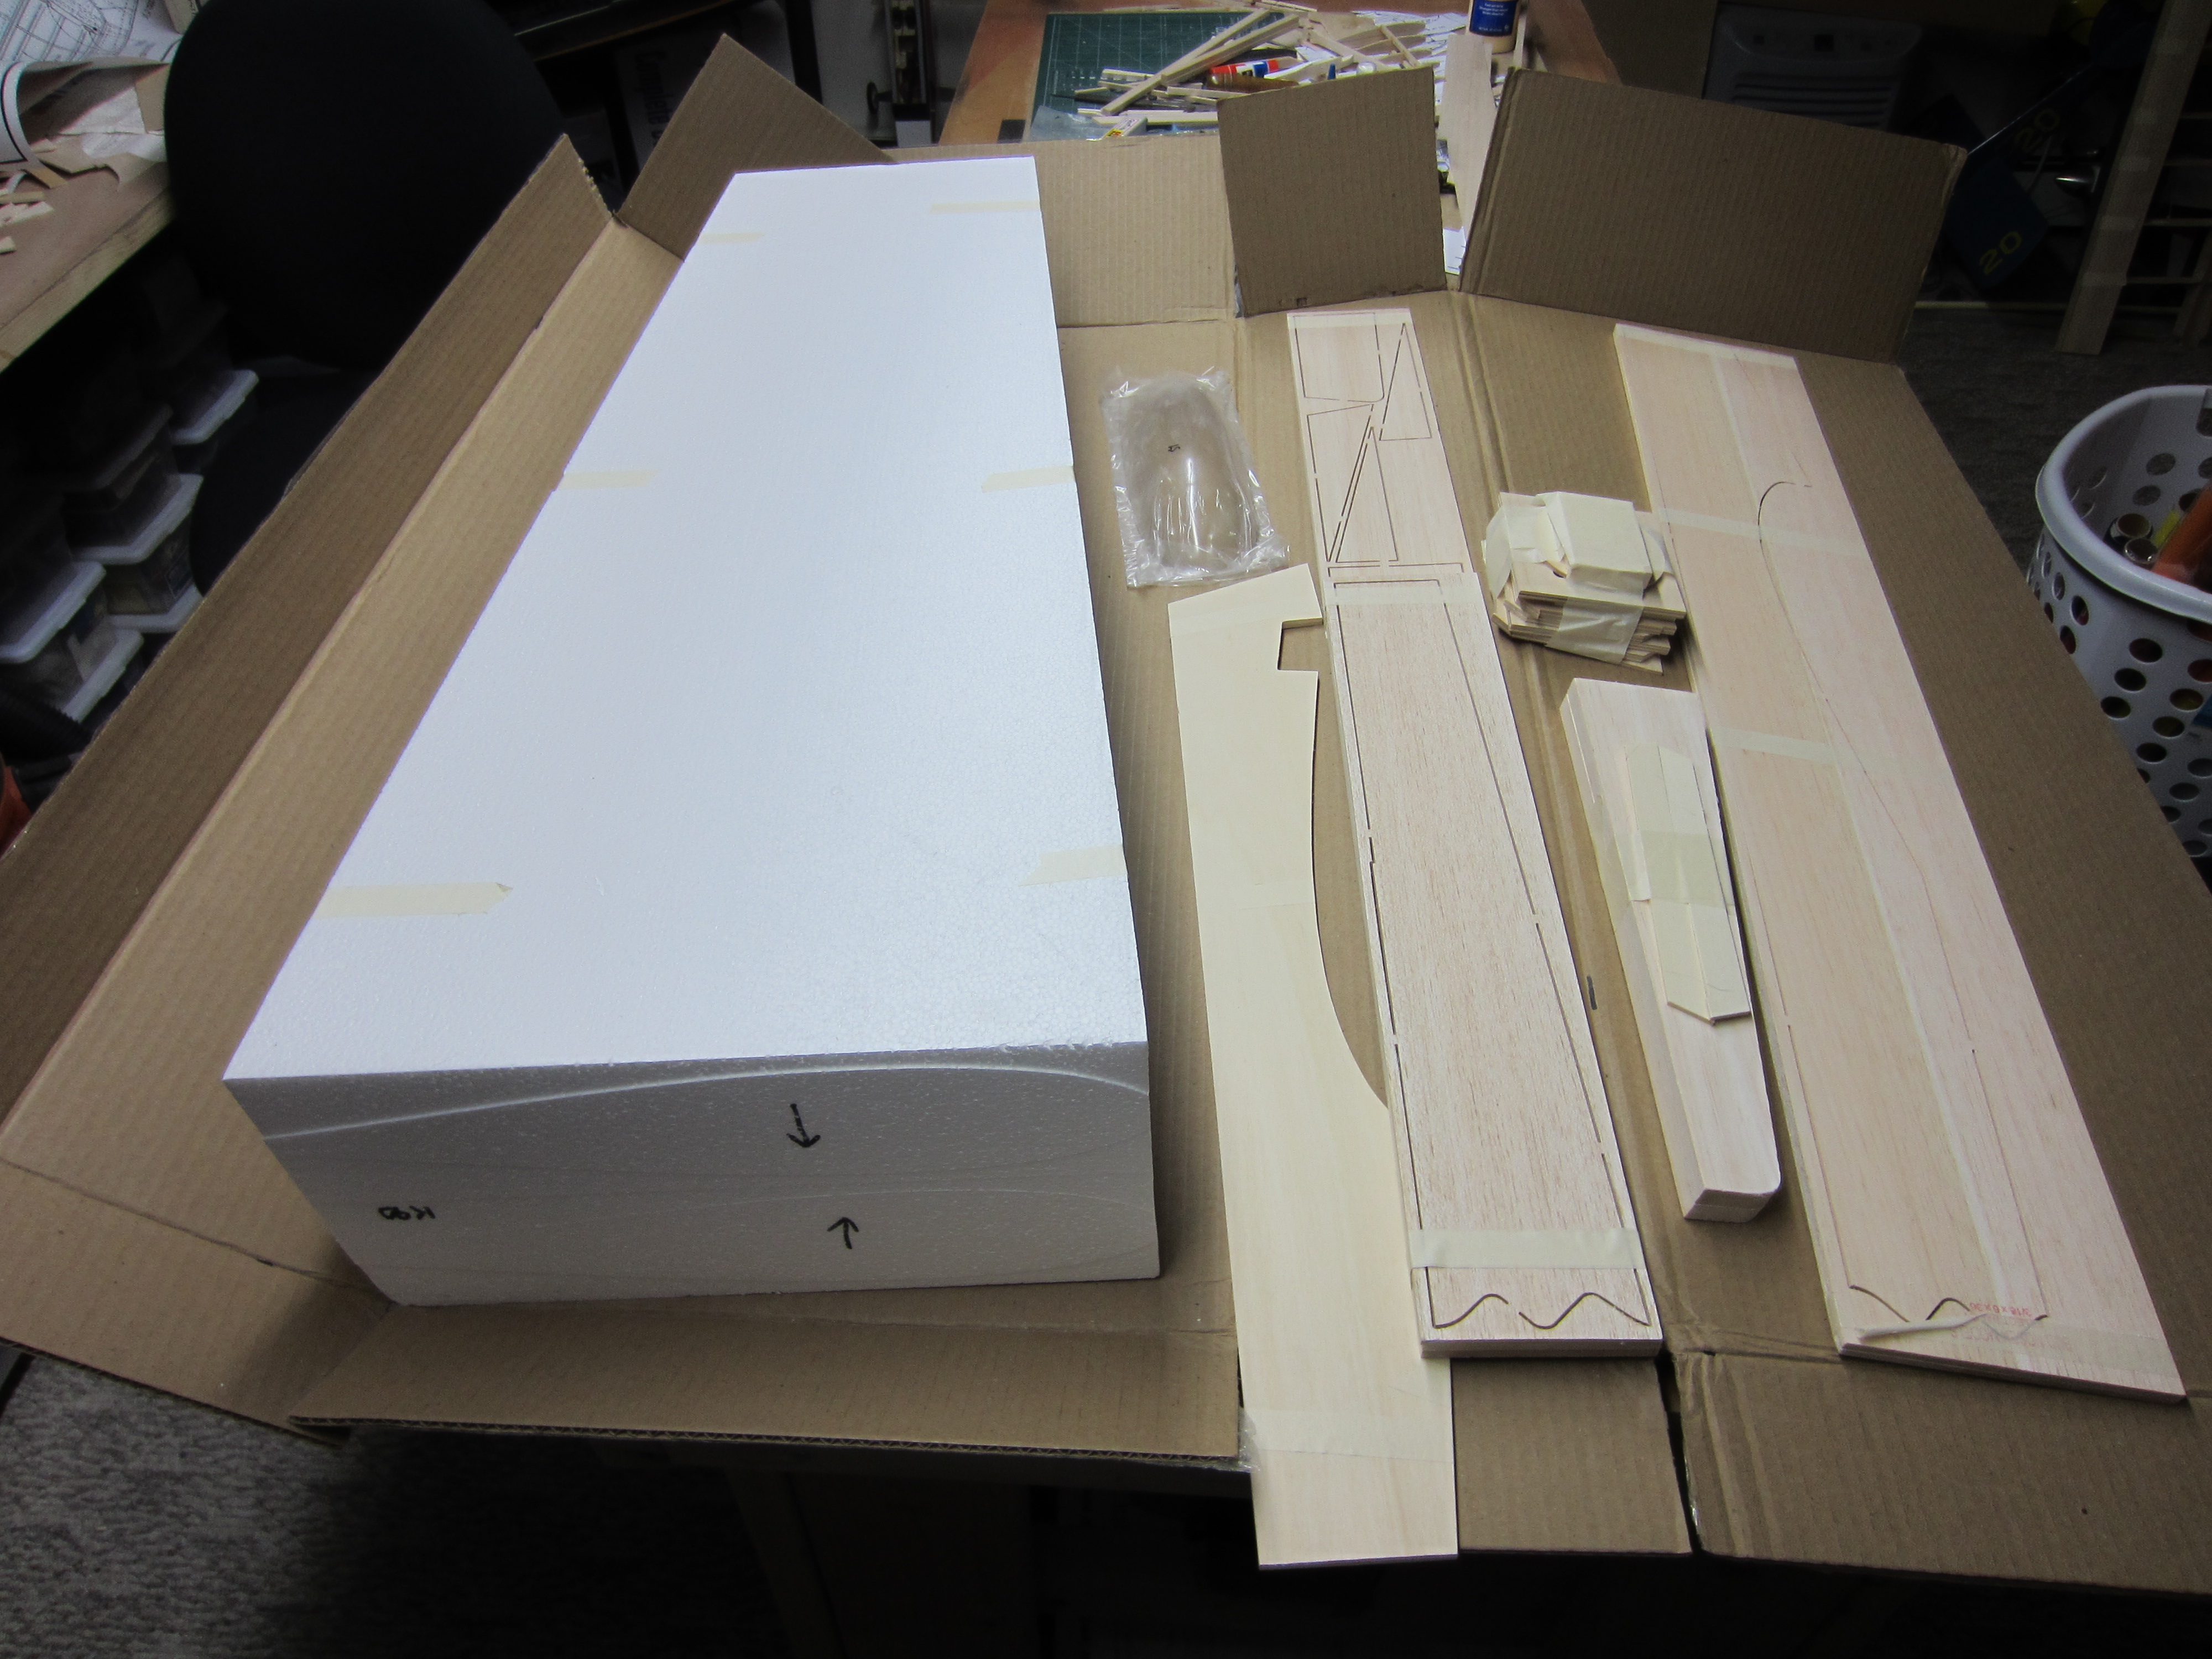
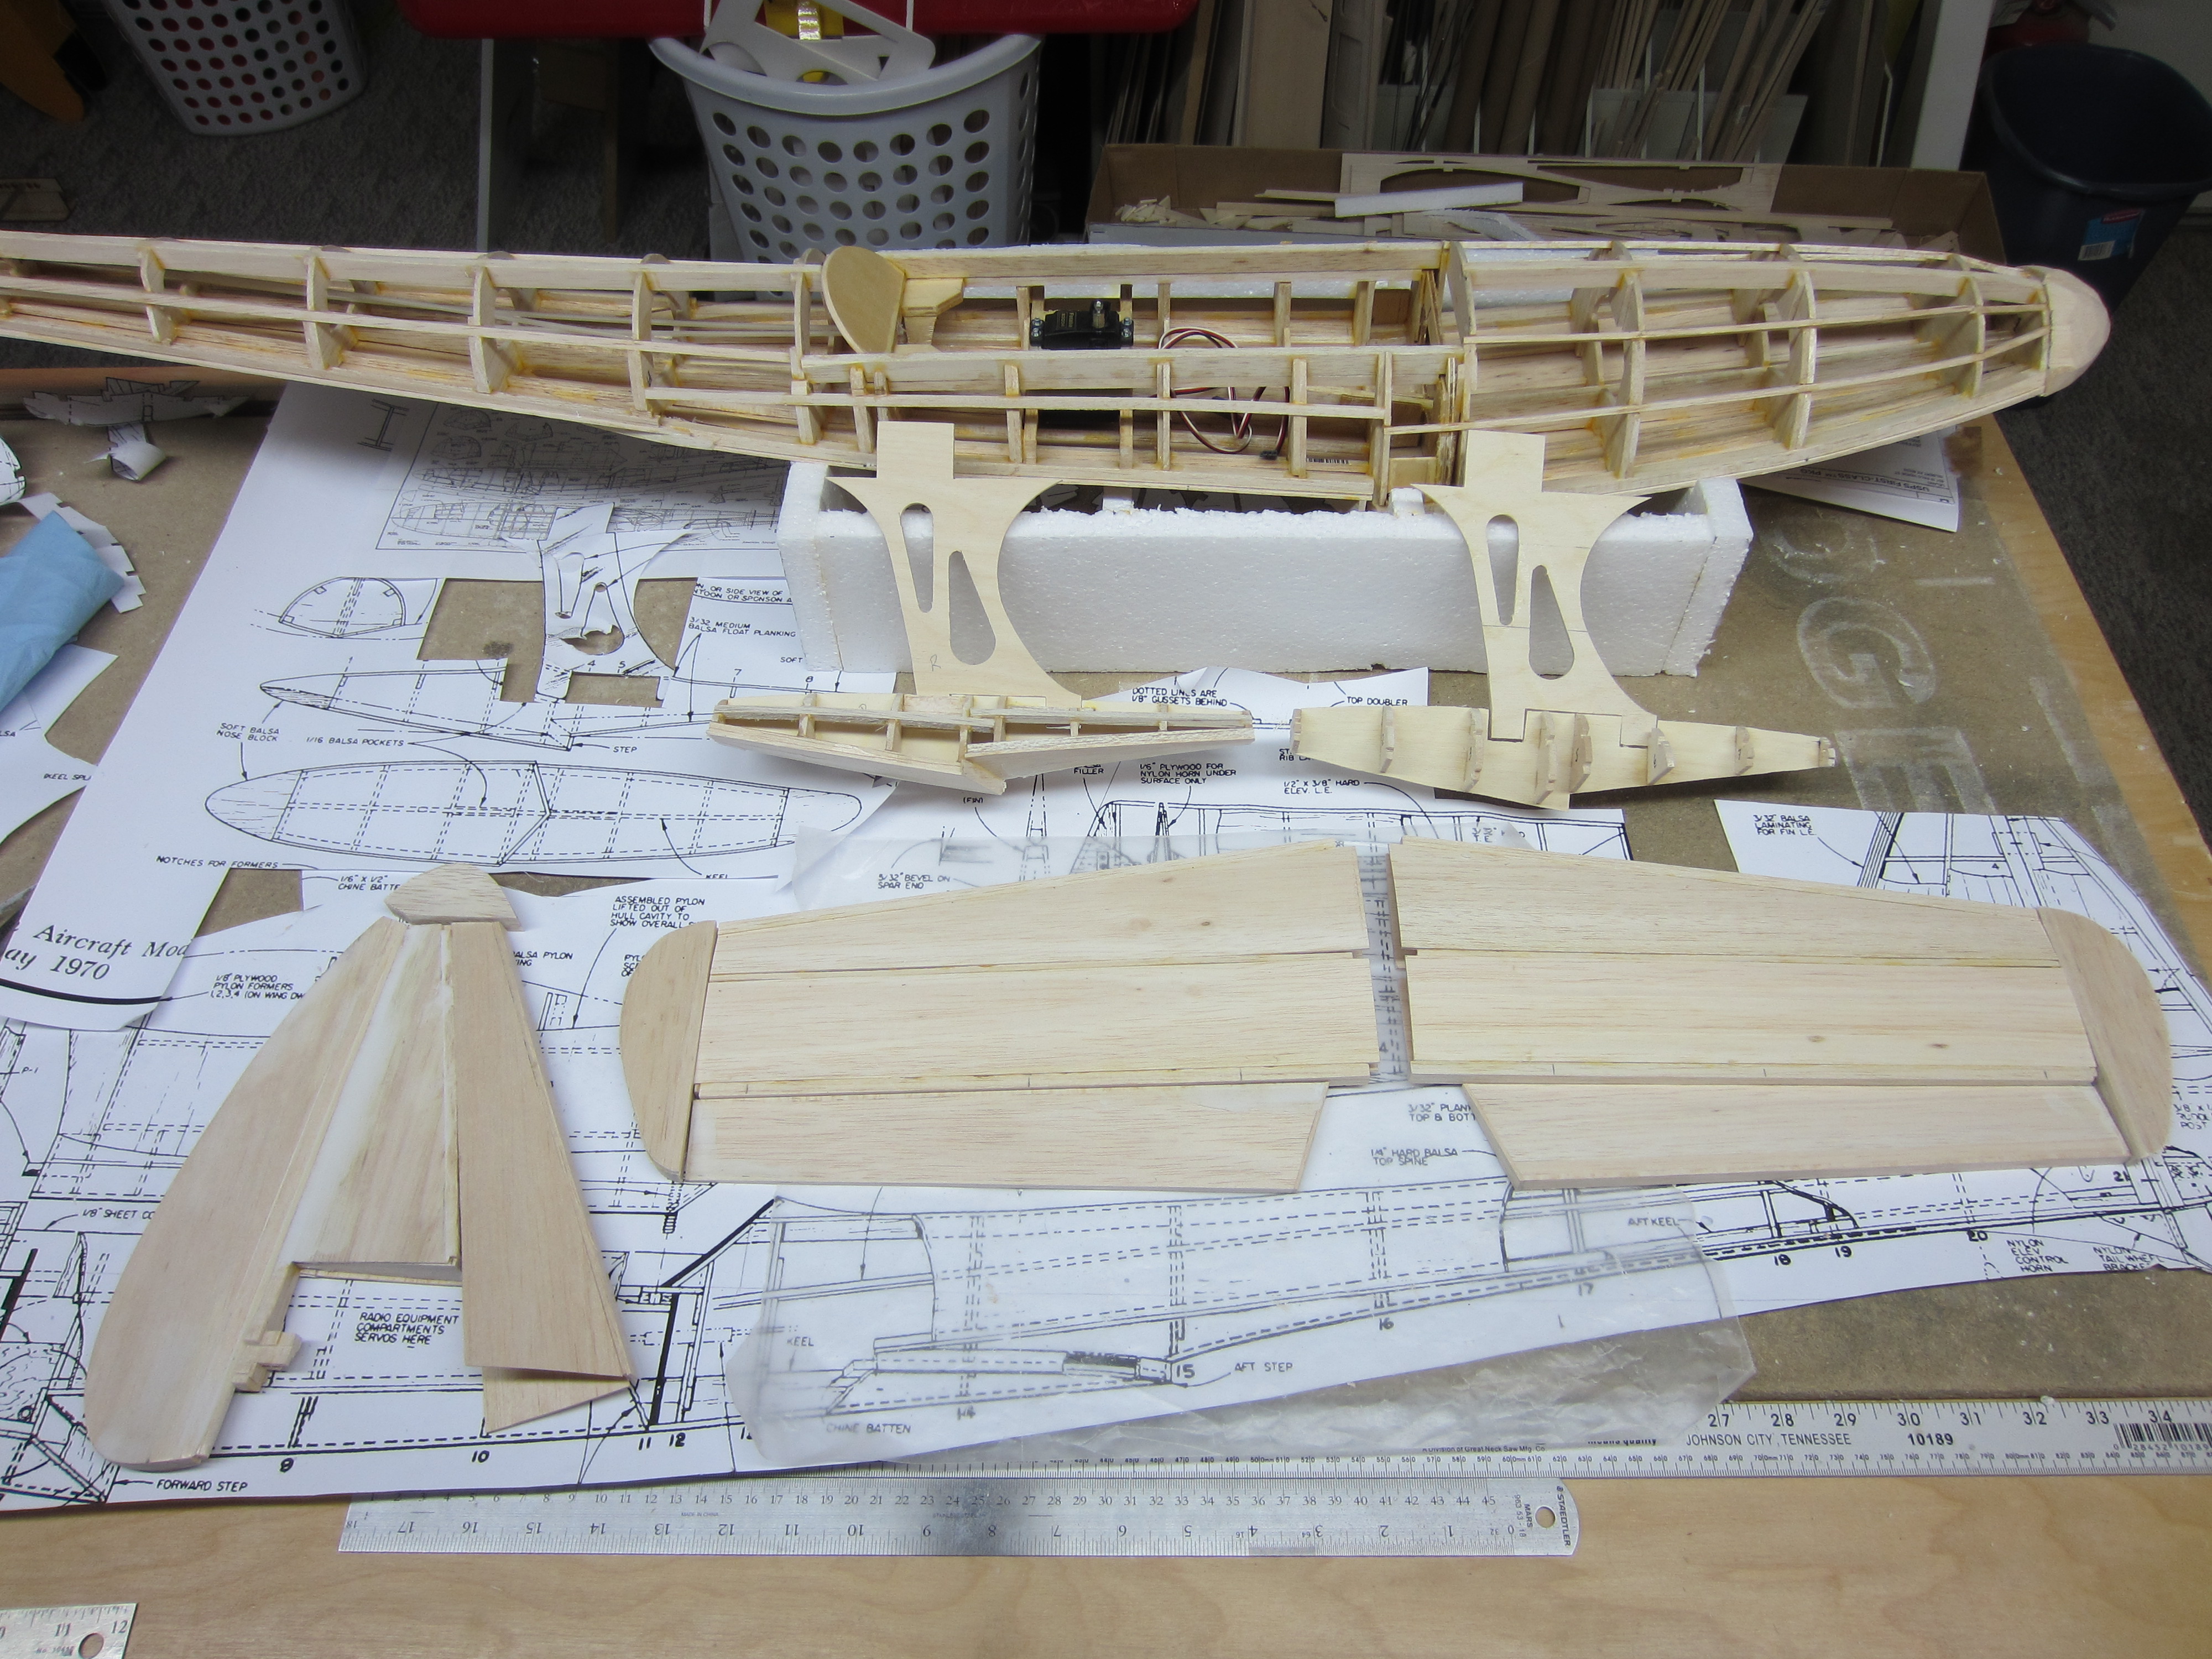
The first is how the Kaos showed up. The second is with the box open. The third is the current project on the bench. I'm still waiting for my Spring Air gear to show up, then I'll have everything I need for the Kaos!
02-19-2015 | 10:23 AM
#9
Looks like a nice kit. I like foam wings best, fast and straight. Love the thick section on a Kaos, makes them great slow flyers.
I know that flying boat, i just can't think of the name right now... Privateer?
Chris...
I know that flying boat, i just can't think of the name right now... Privateer?
Chris...
02-26-2016 | 09:36 AM
#12
Thread Starter
My Feedback: (11)
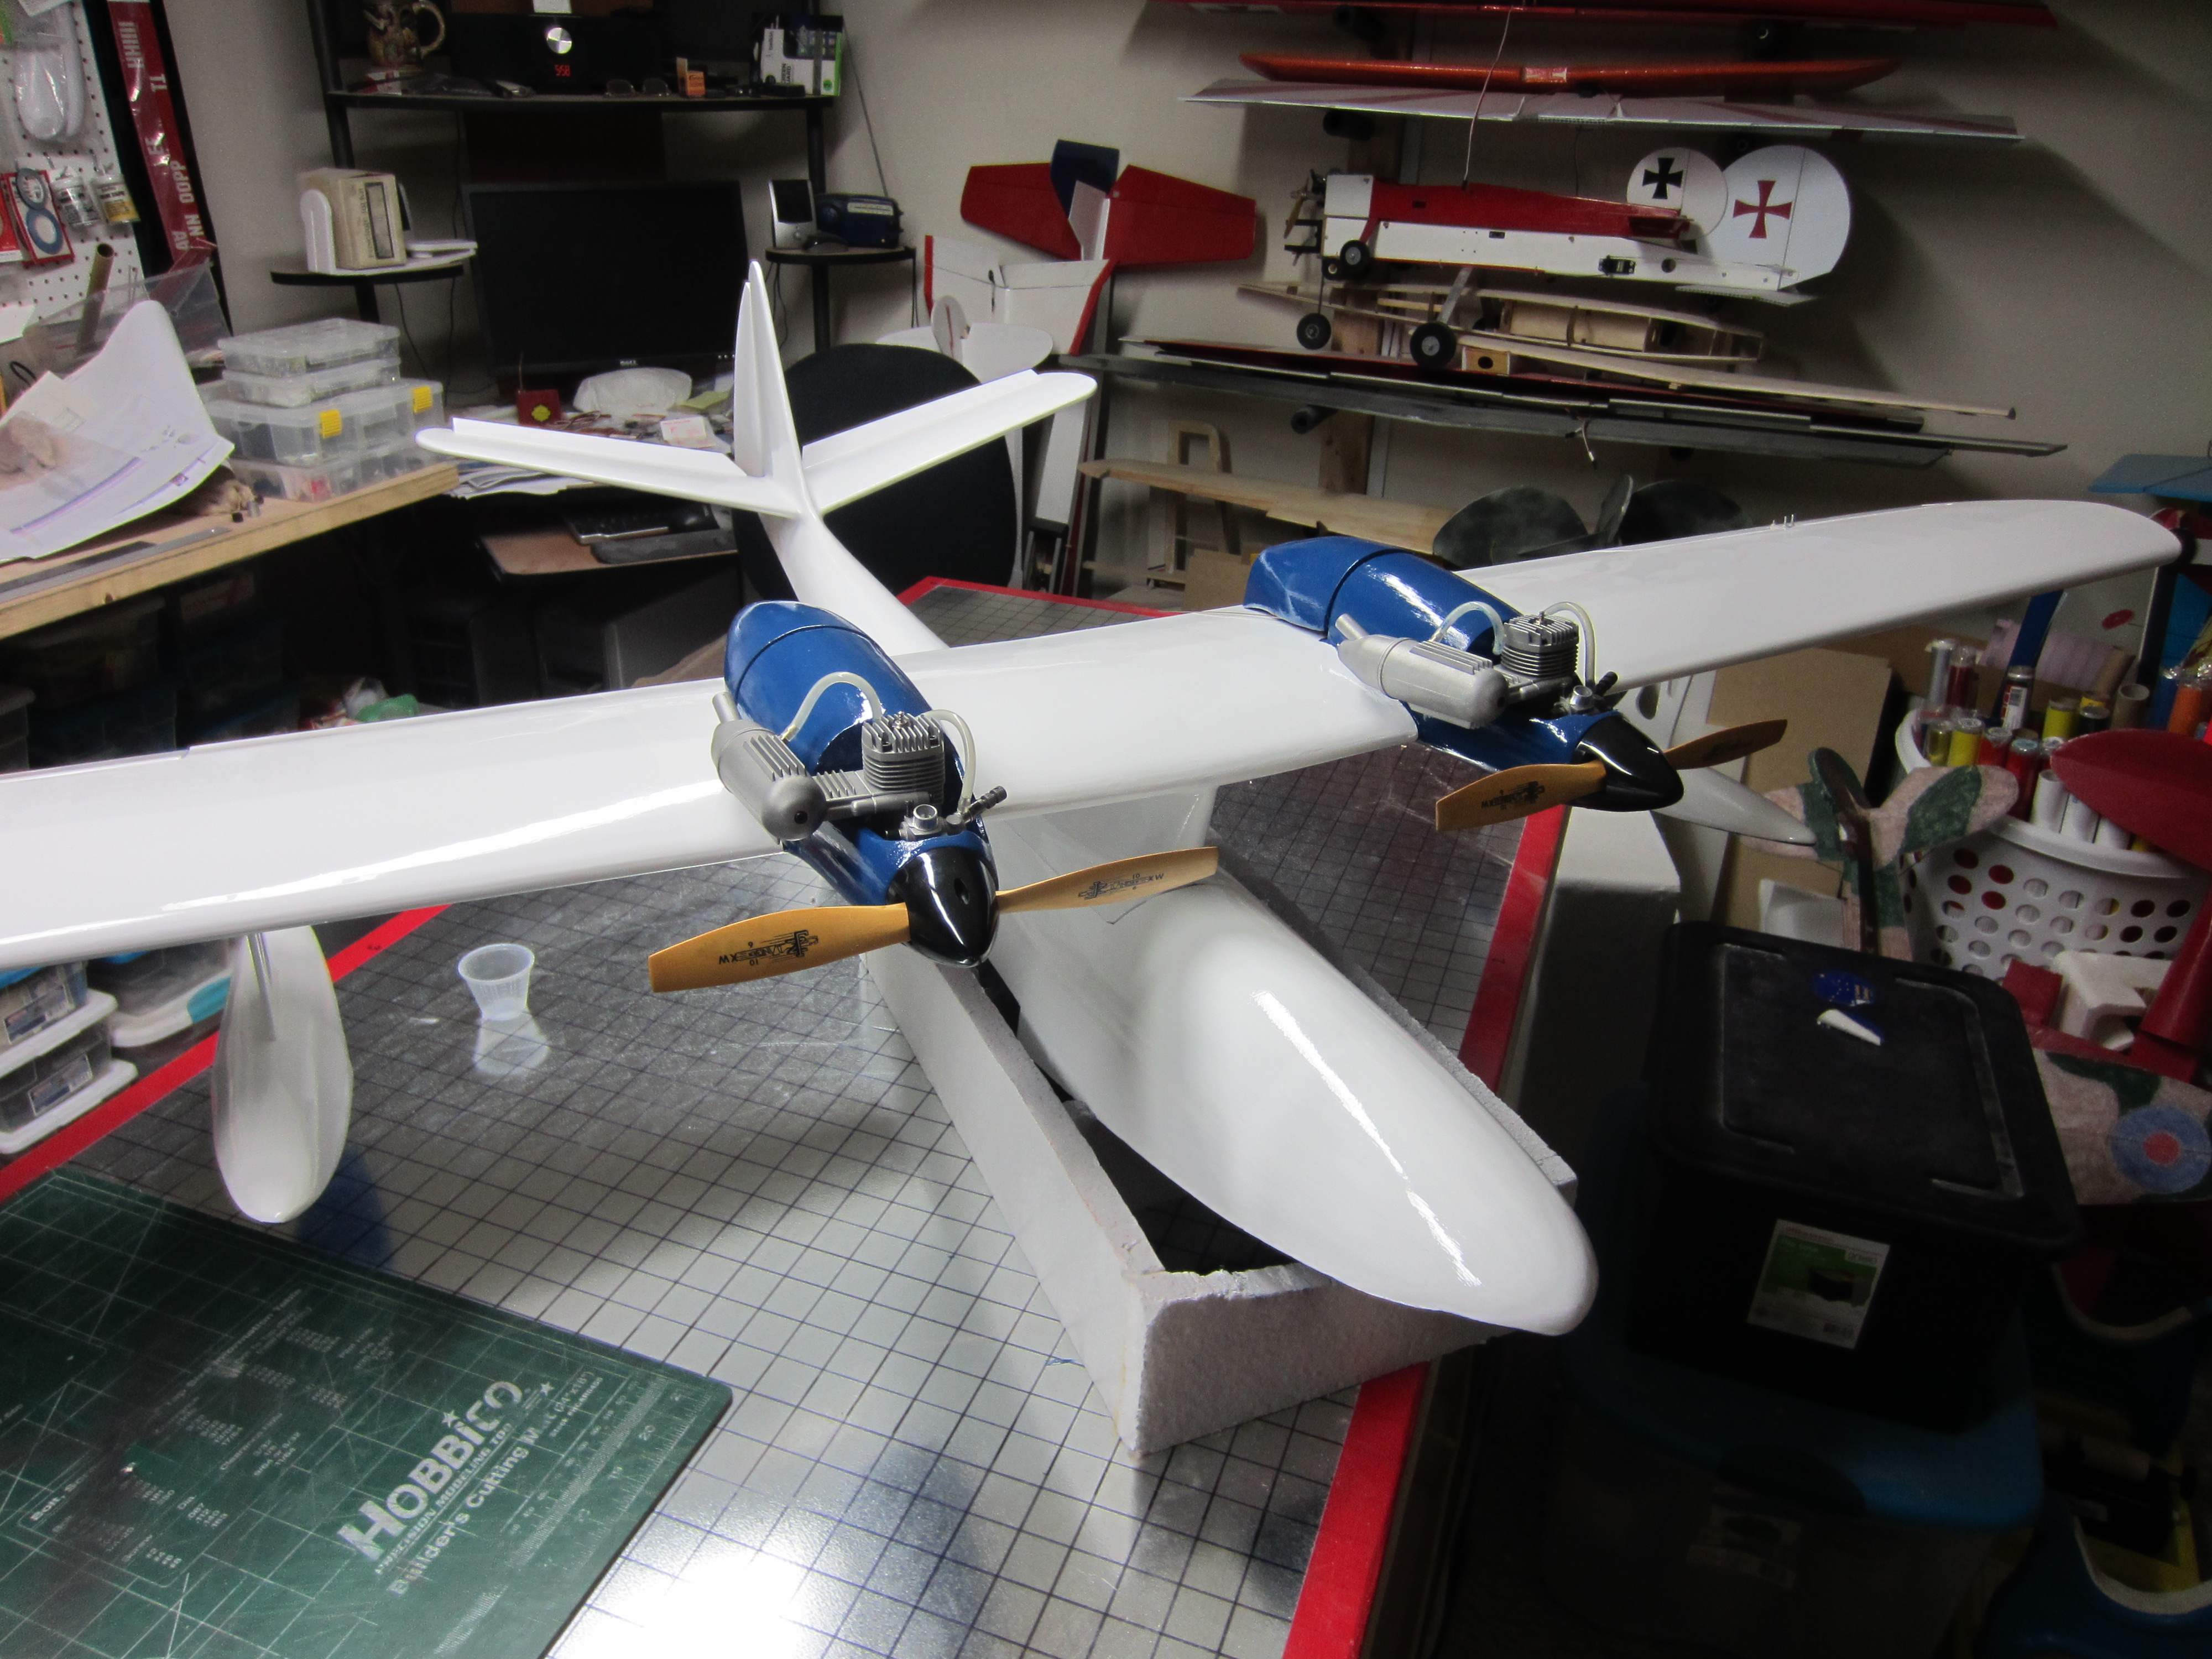
Finally! I'm getting started on the big Kaos, after building 7 or 8 other planes in the past year. The flying boat is a Royal Marine, a Japanese design from 1970 that I plans built, cut all the pieces by hand, balsa sheeted and fiberglassed hull, Nelson paint on the hull and tail, and chinacote on the wings. Power is a pair of Thunder Tiger GP42s. Wingspan is 70", and 7 lbs. 9 oz. finished weight.
I'm also just on the finishing stages of a Top Flite DC-3 I'm building for a clubmate.
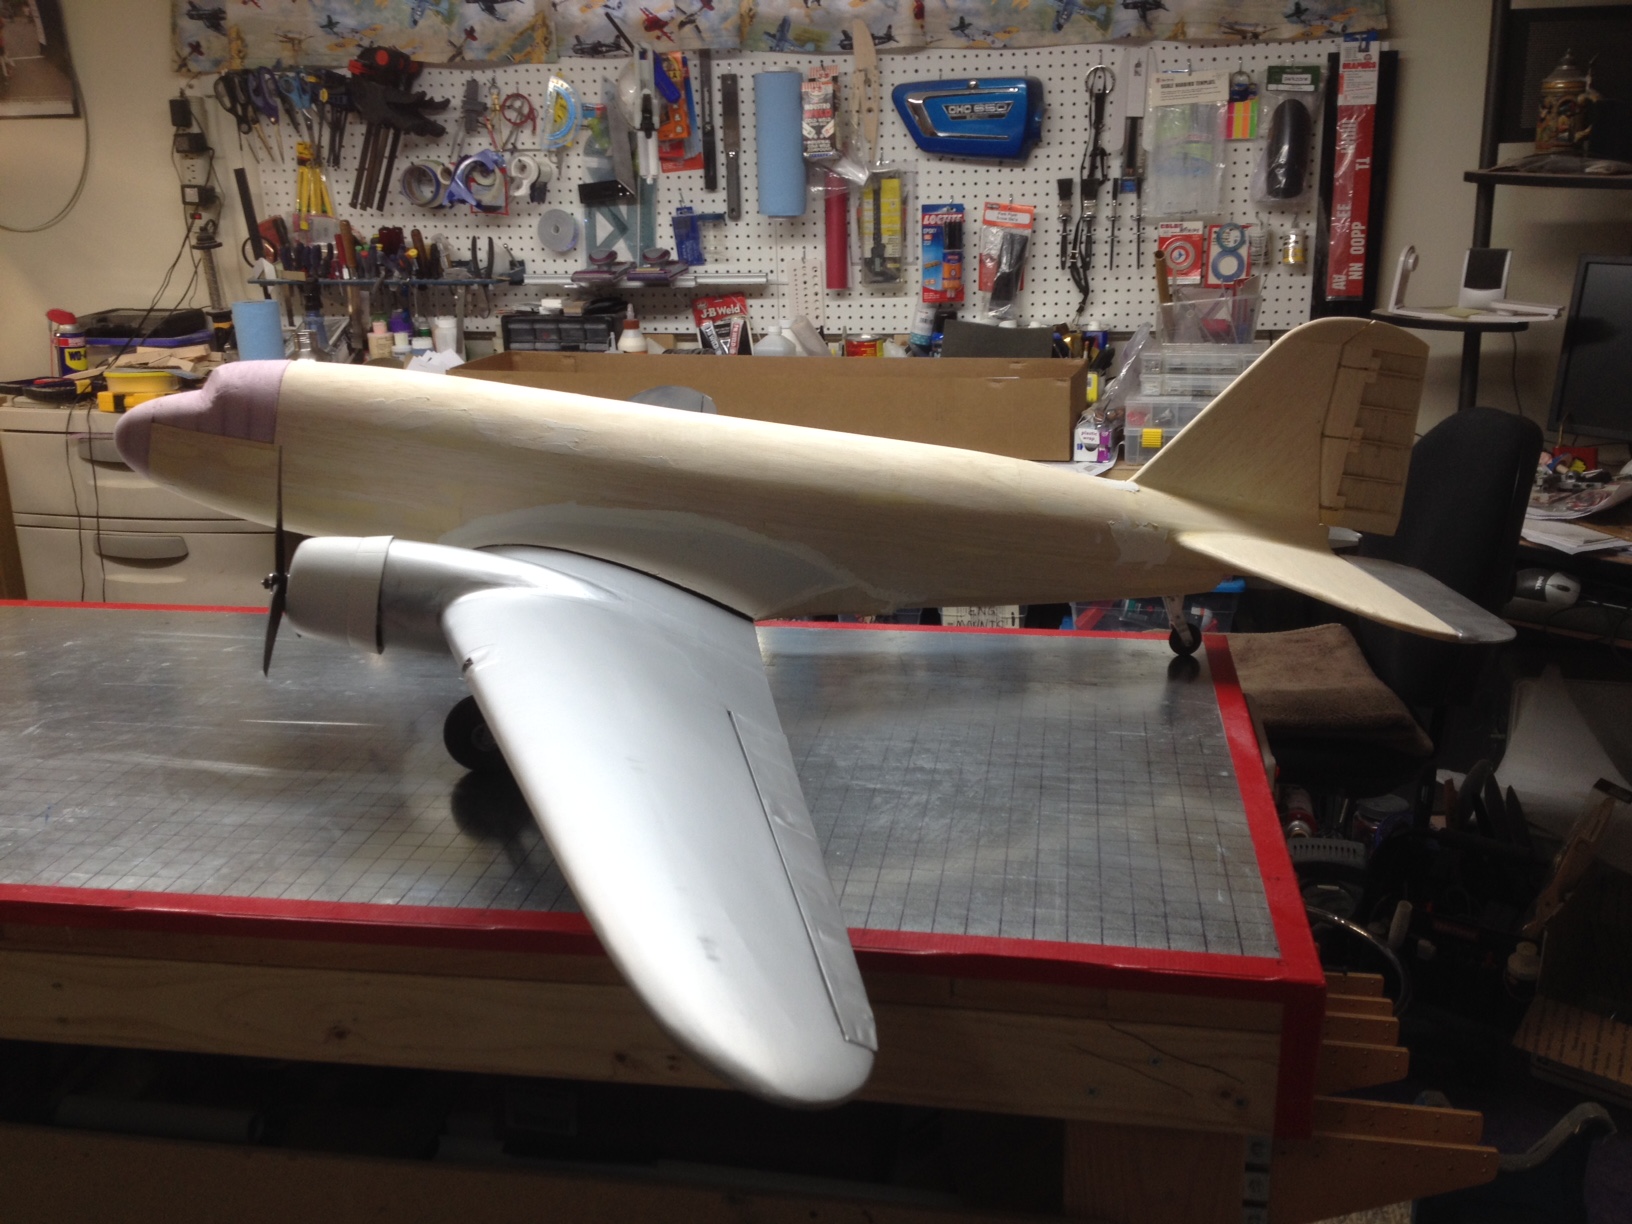
I'm also just on the finishing stages of a Top Flite DC-3 I'm building for a clubmate.
Last edited by RDJeff; 02-26-2016 at 09:44 AM.
02-26-2016 | 09:57 AM
#13
Thread Starter
My Feedback: (11)
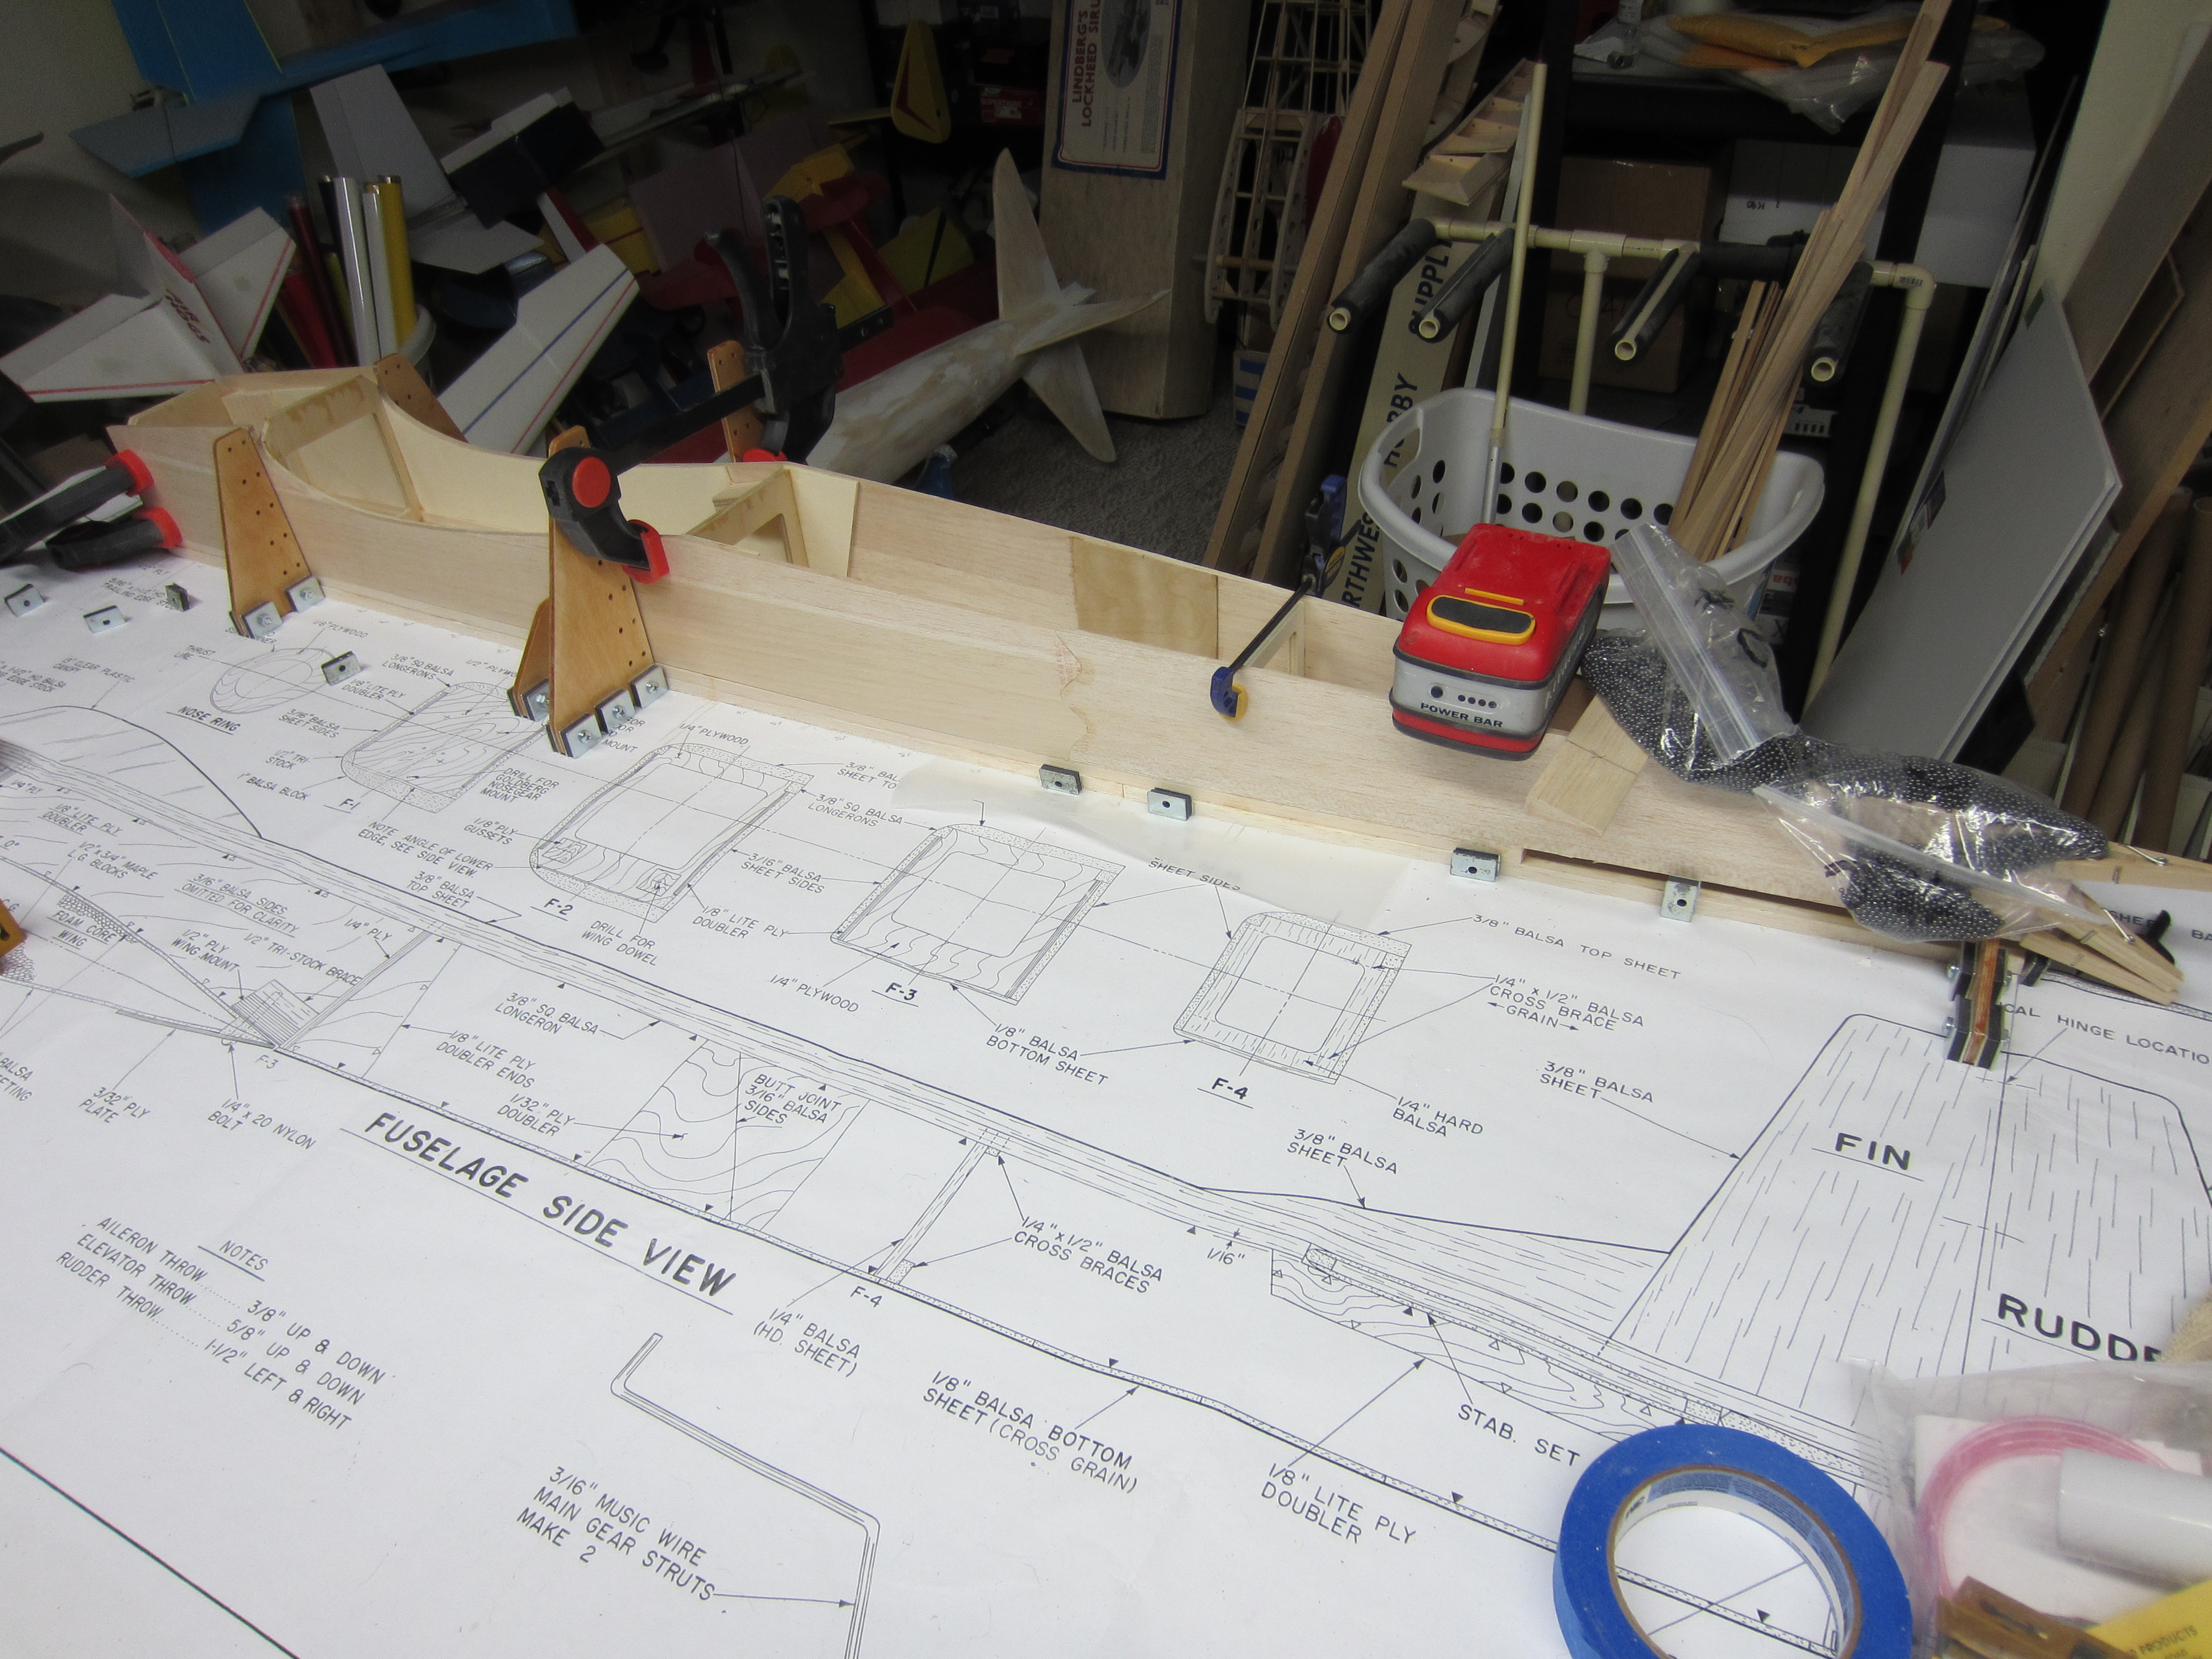
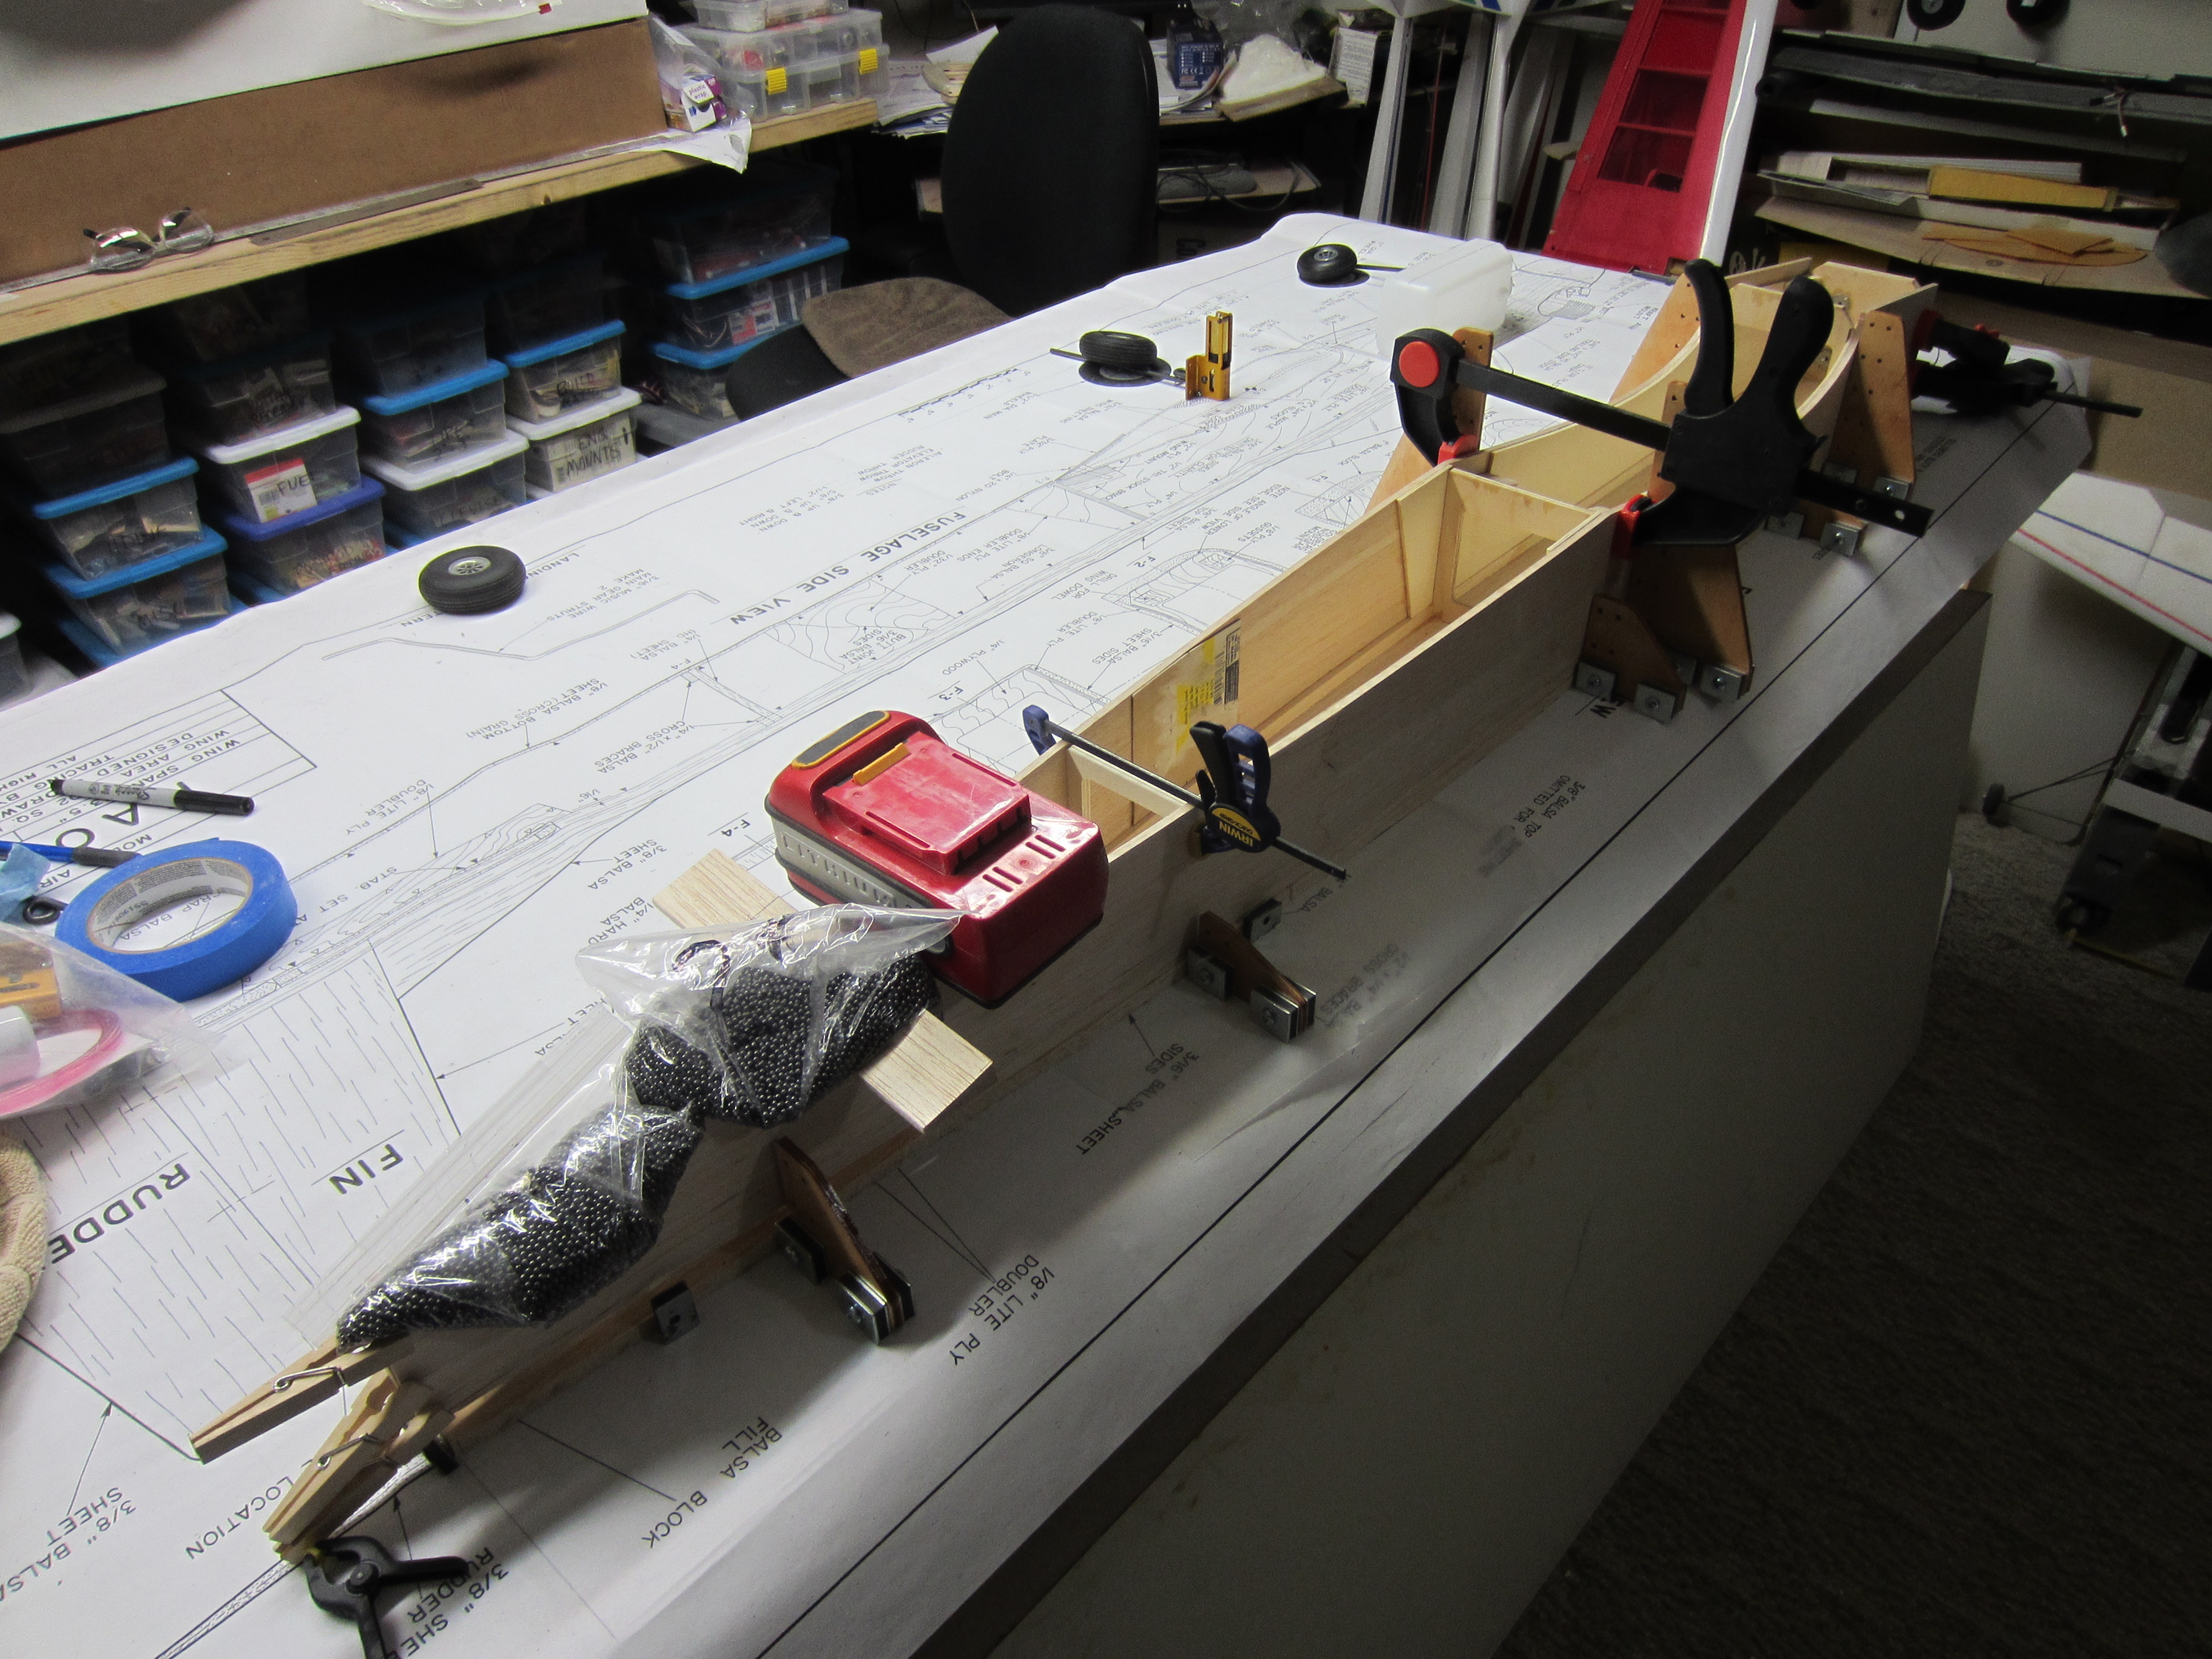
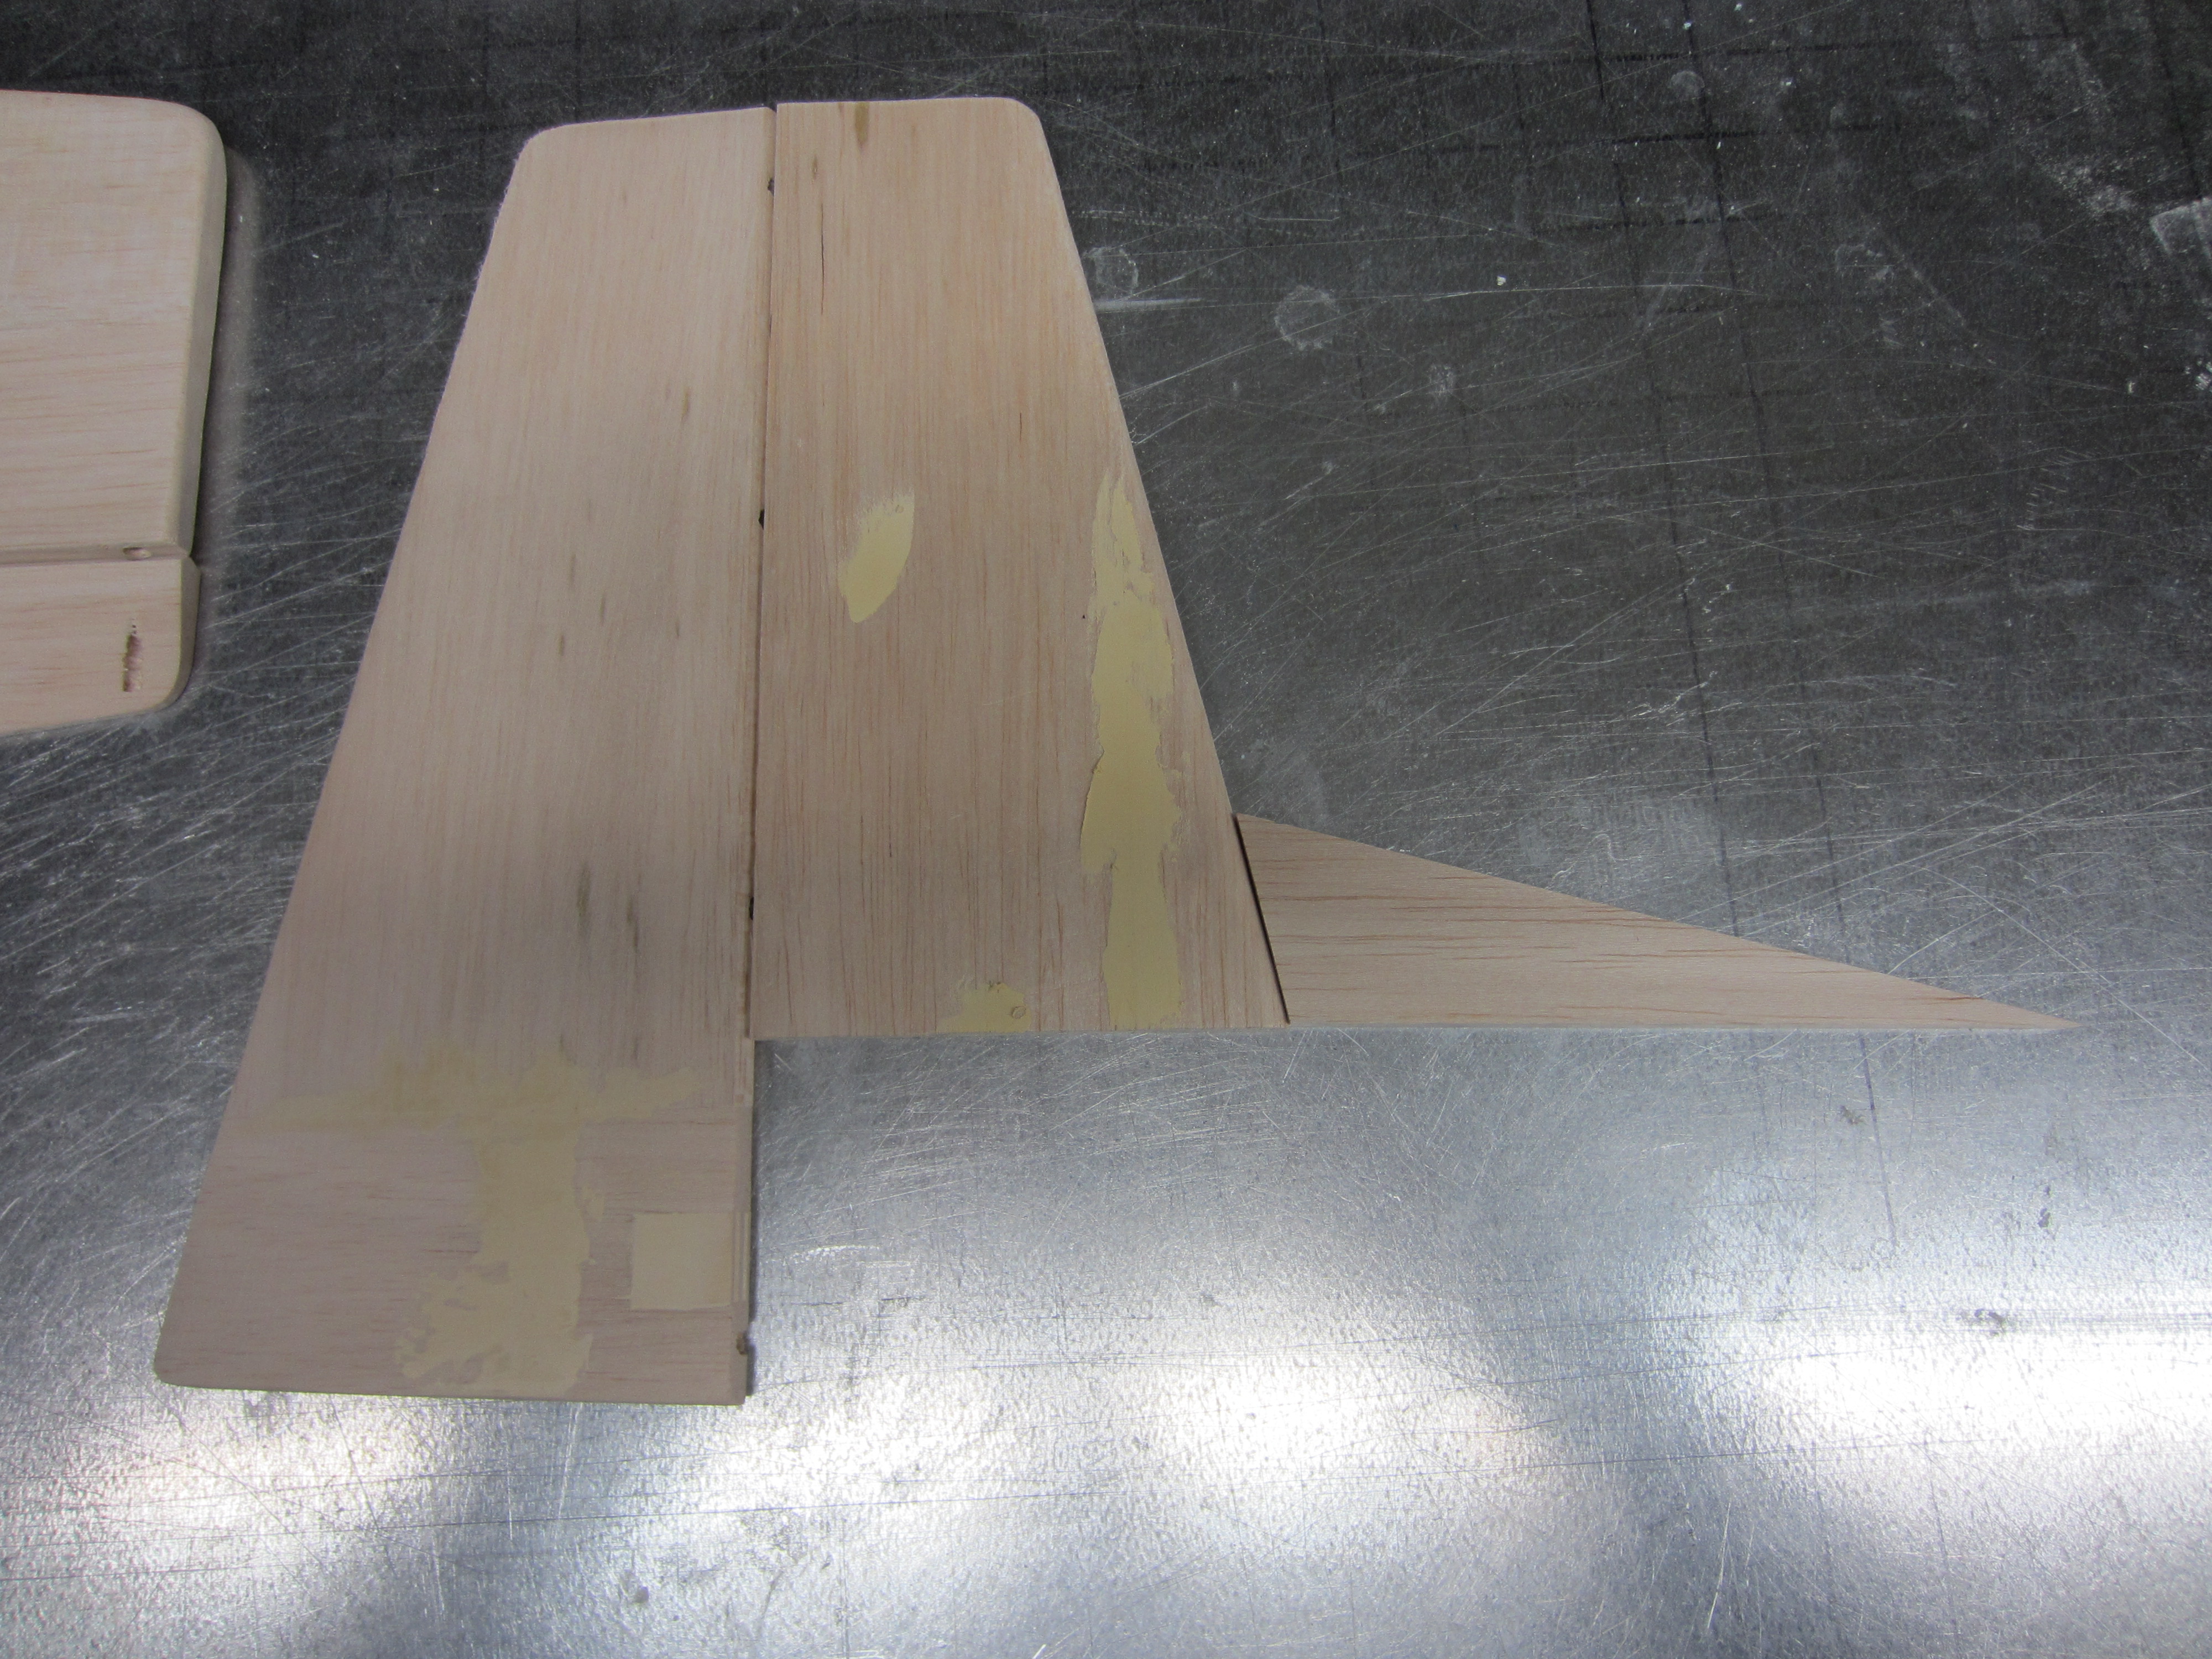
Now, onto the Kaos build!
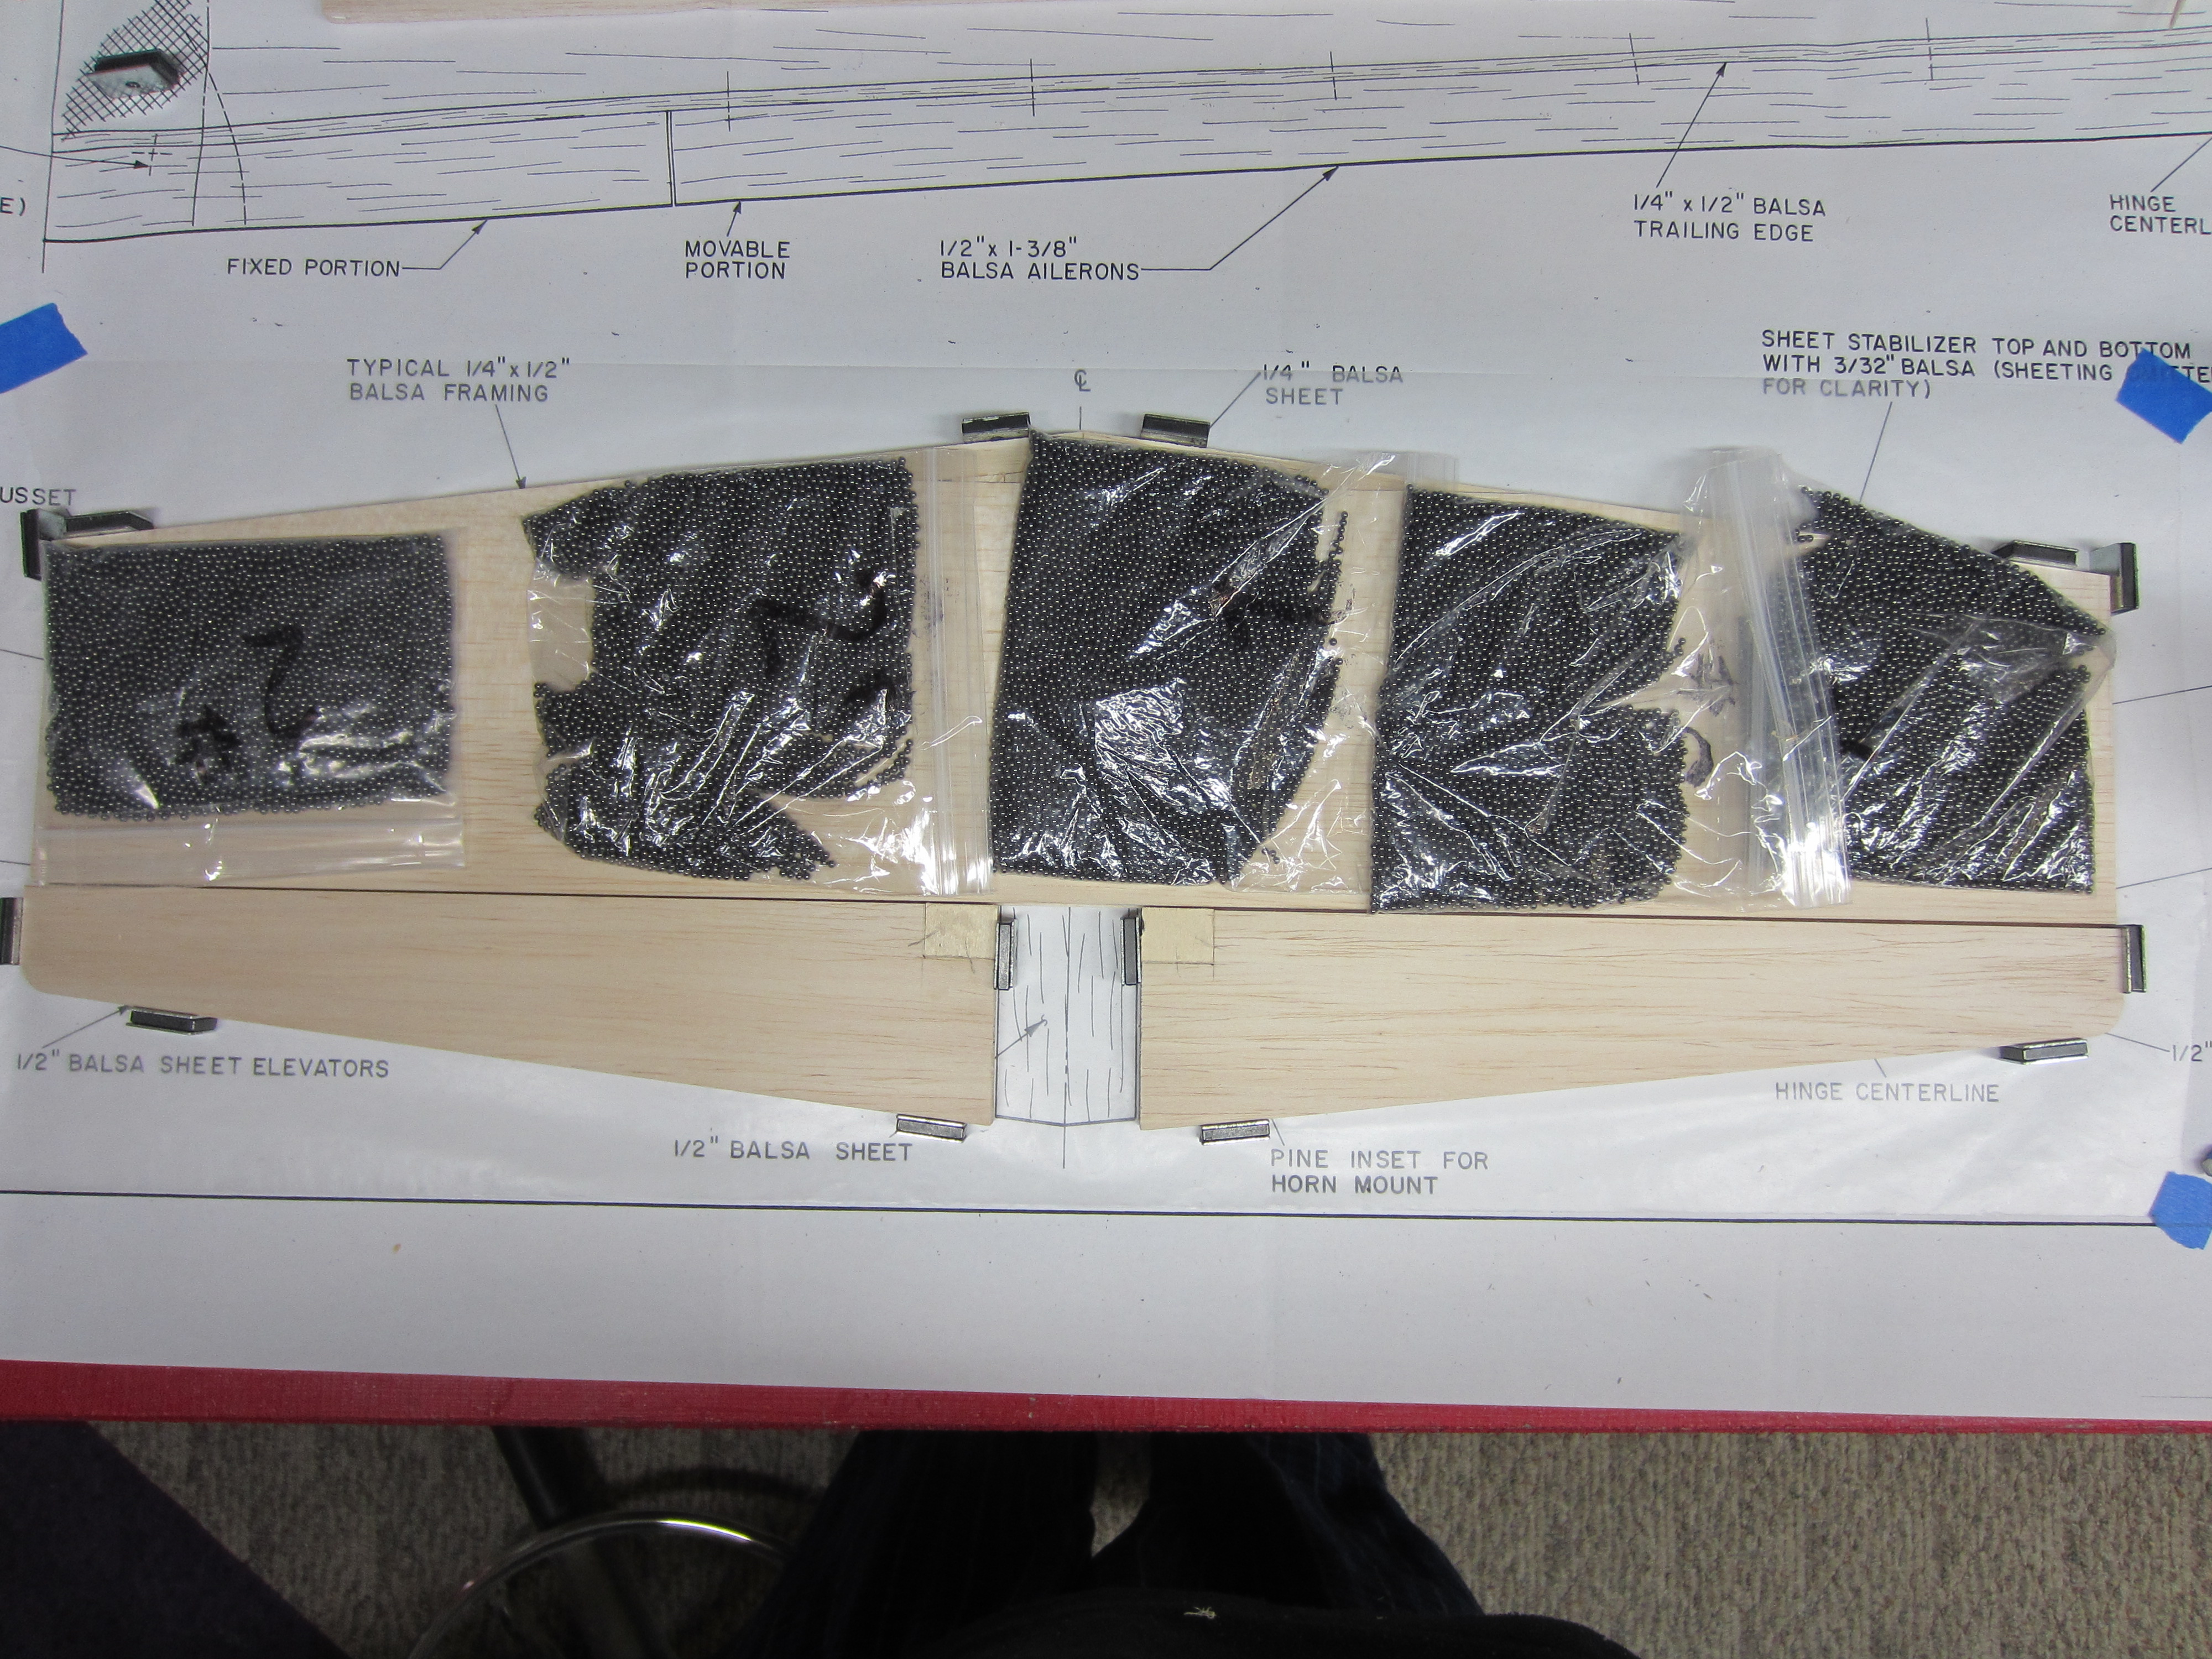
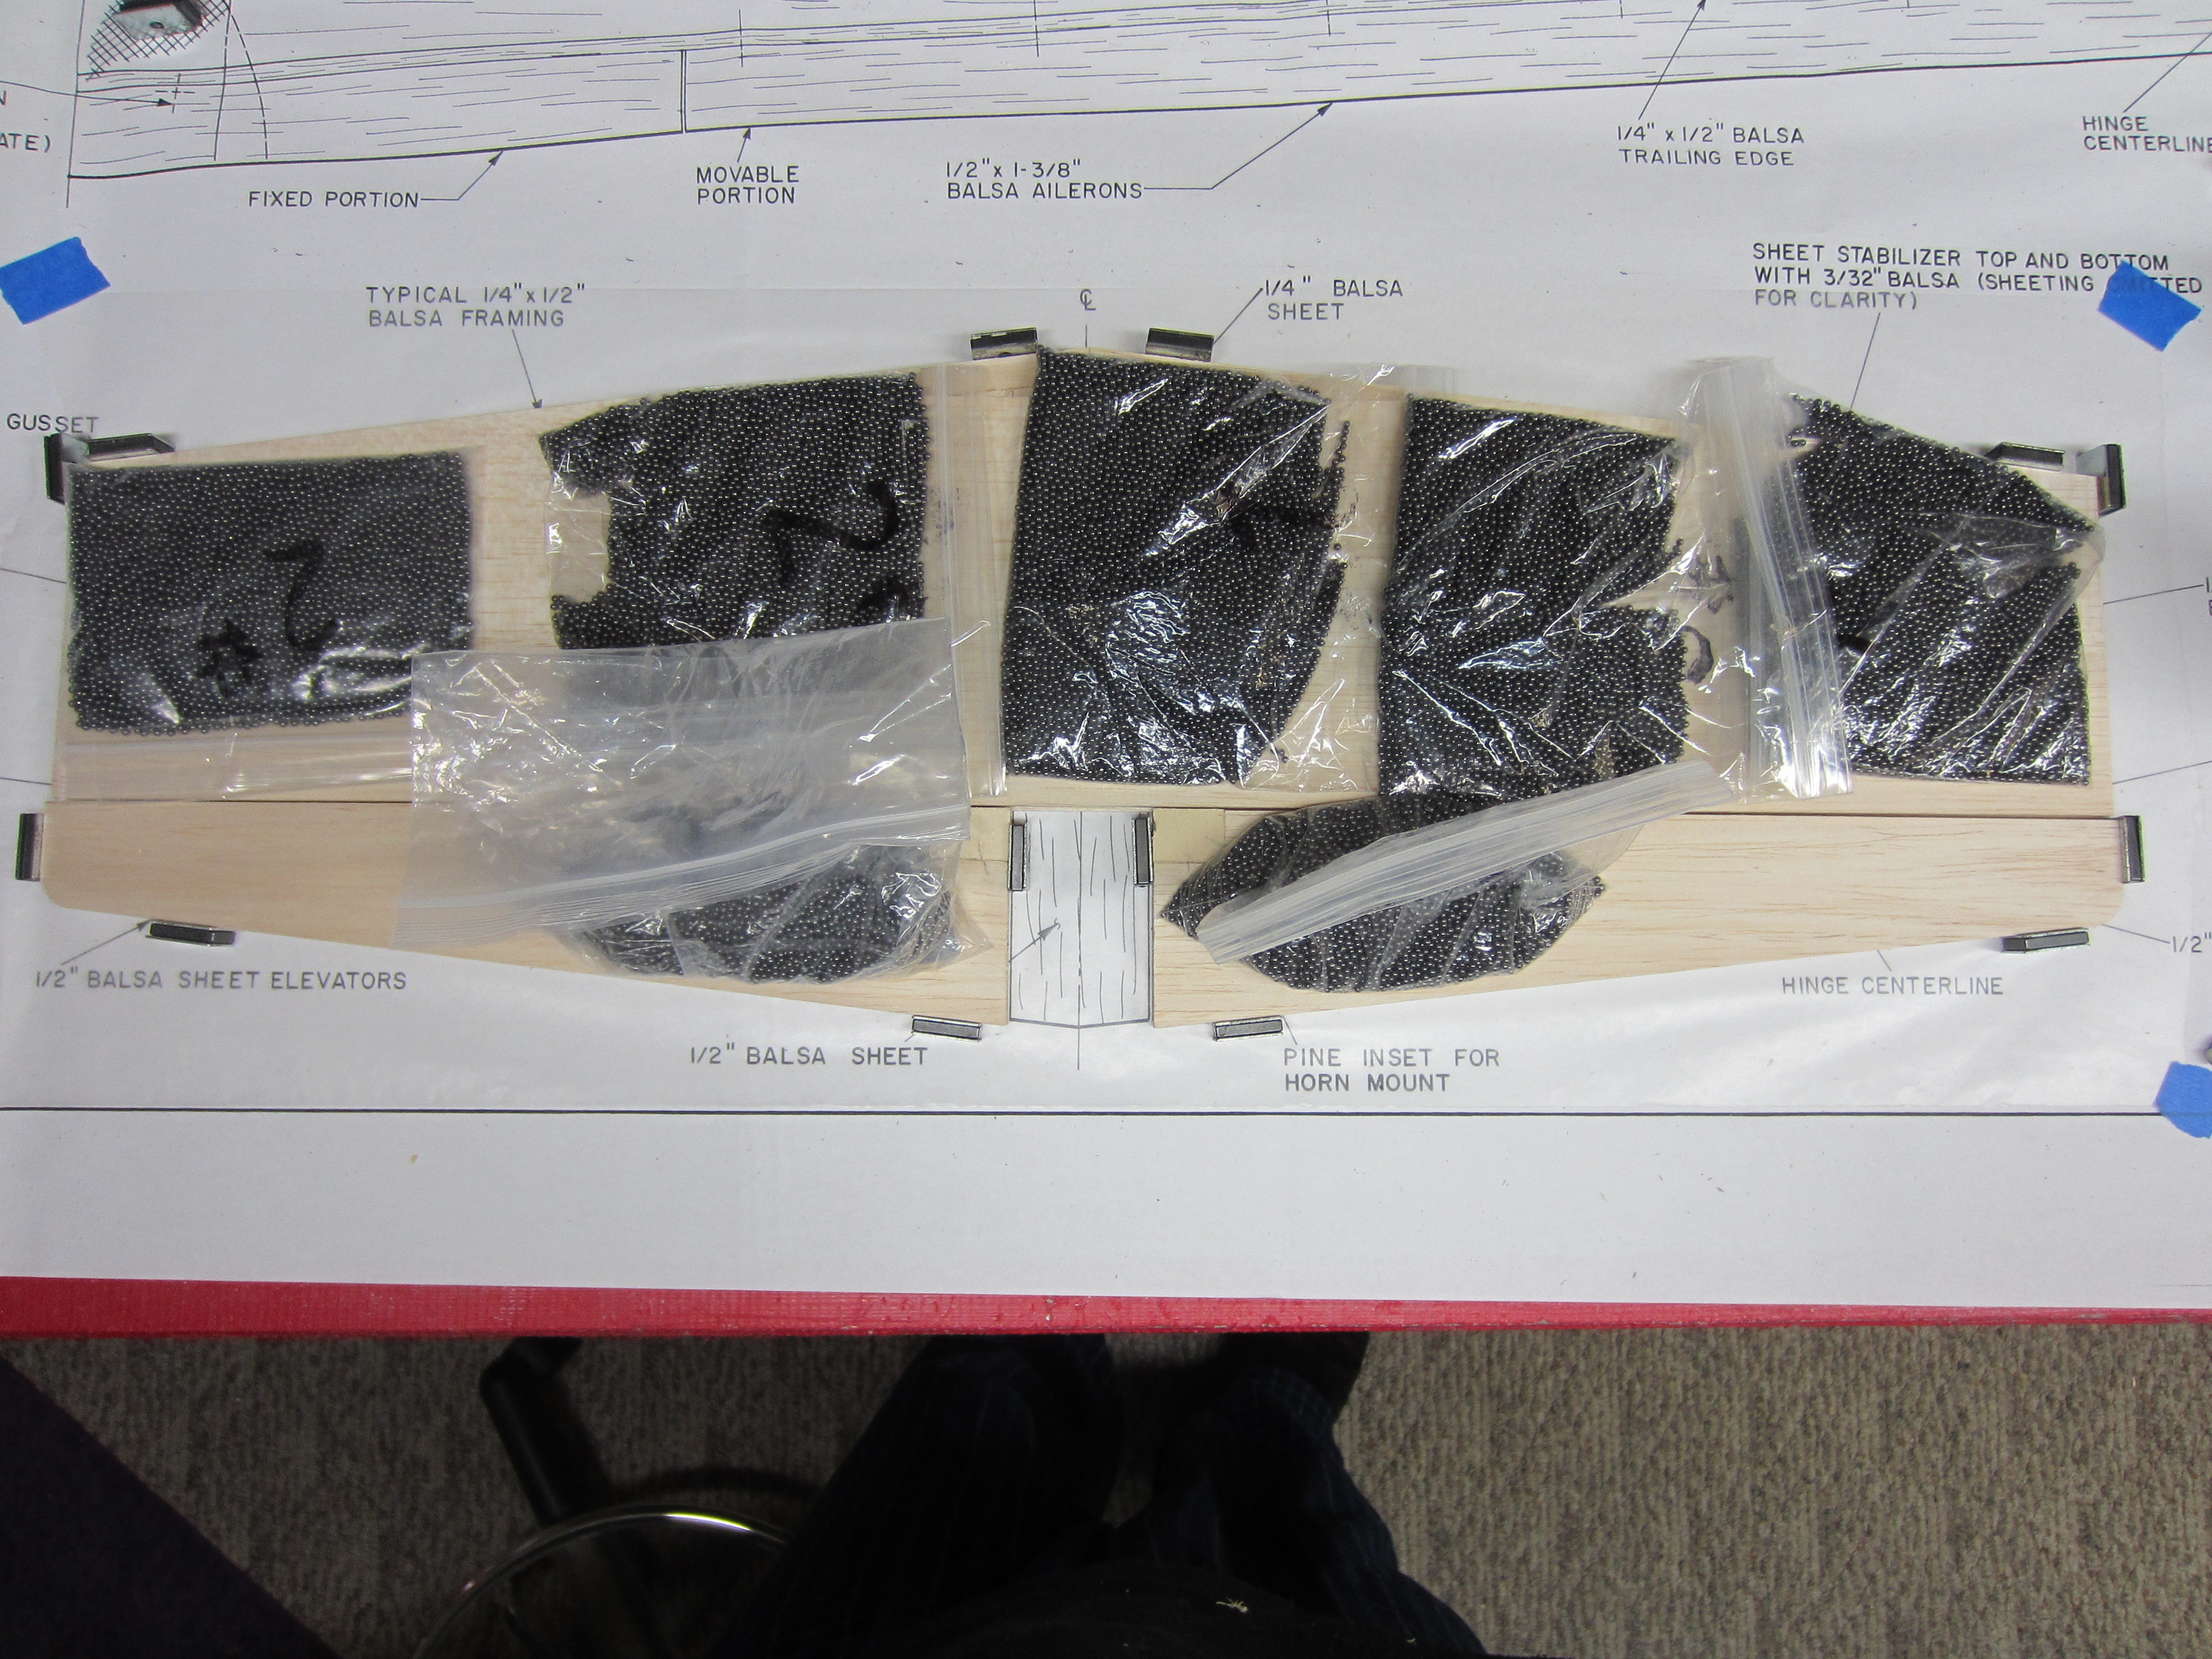
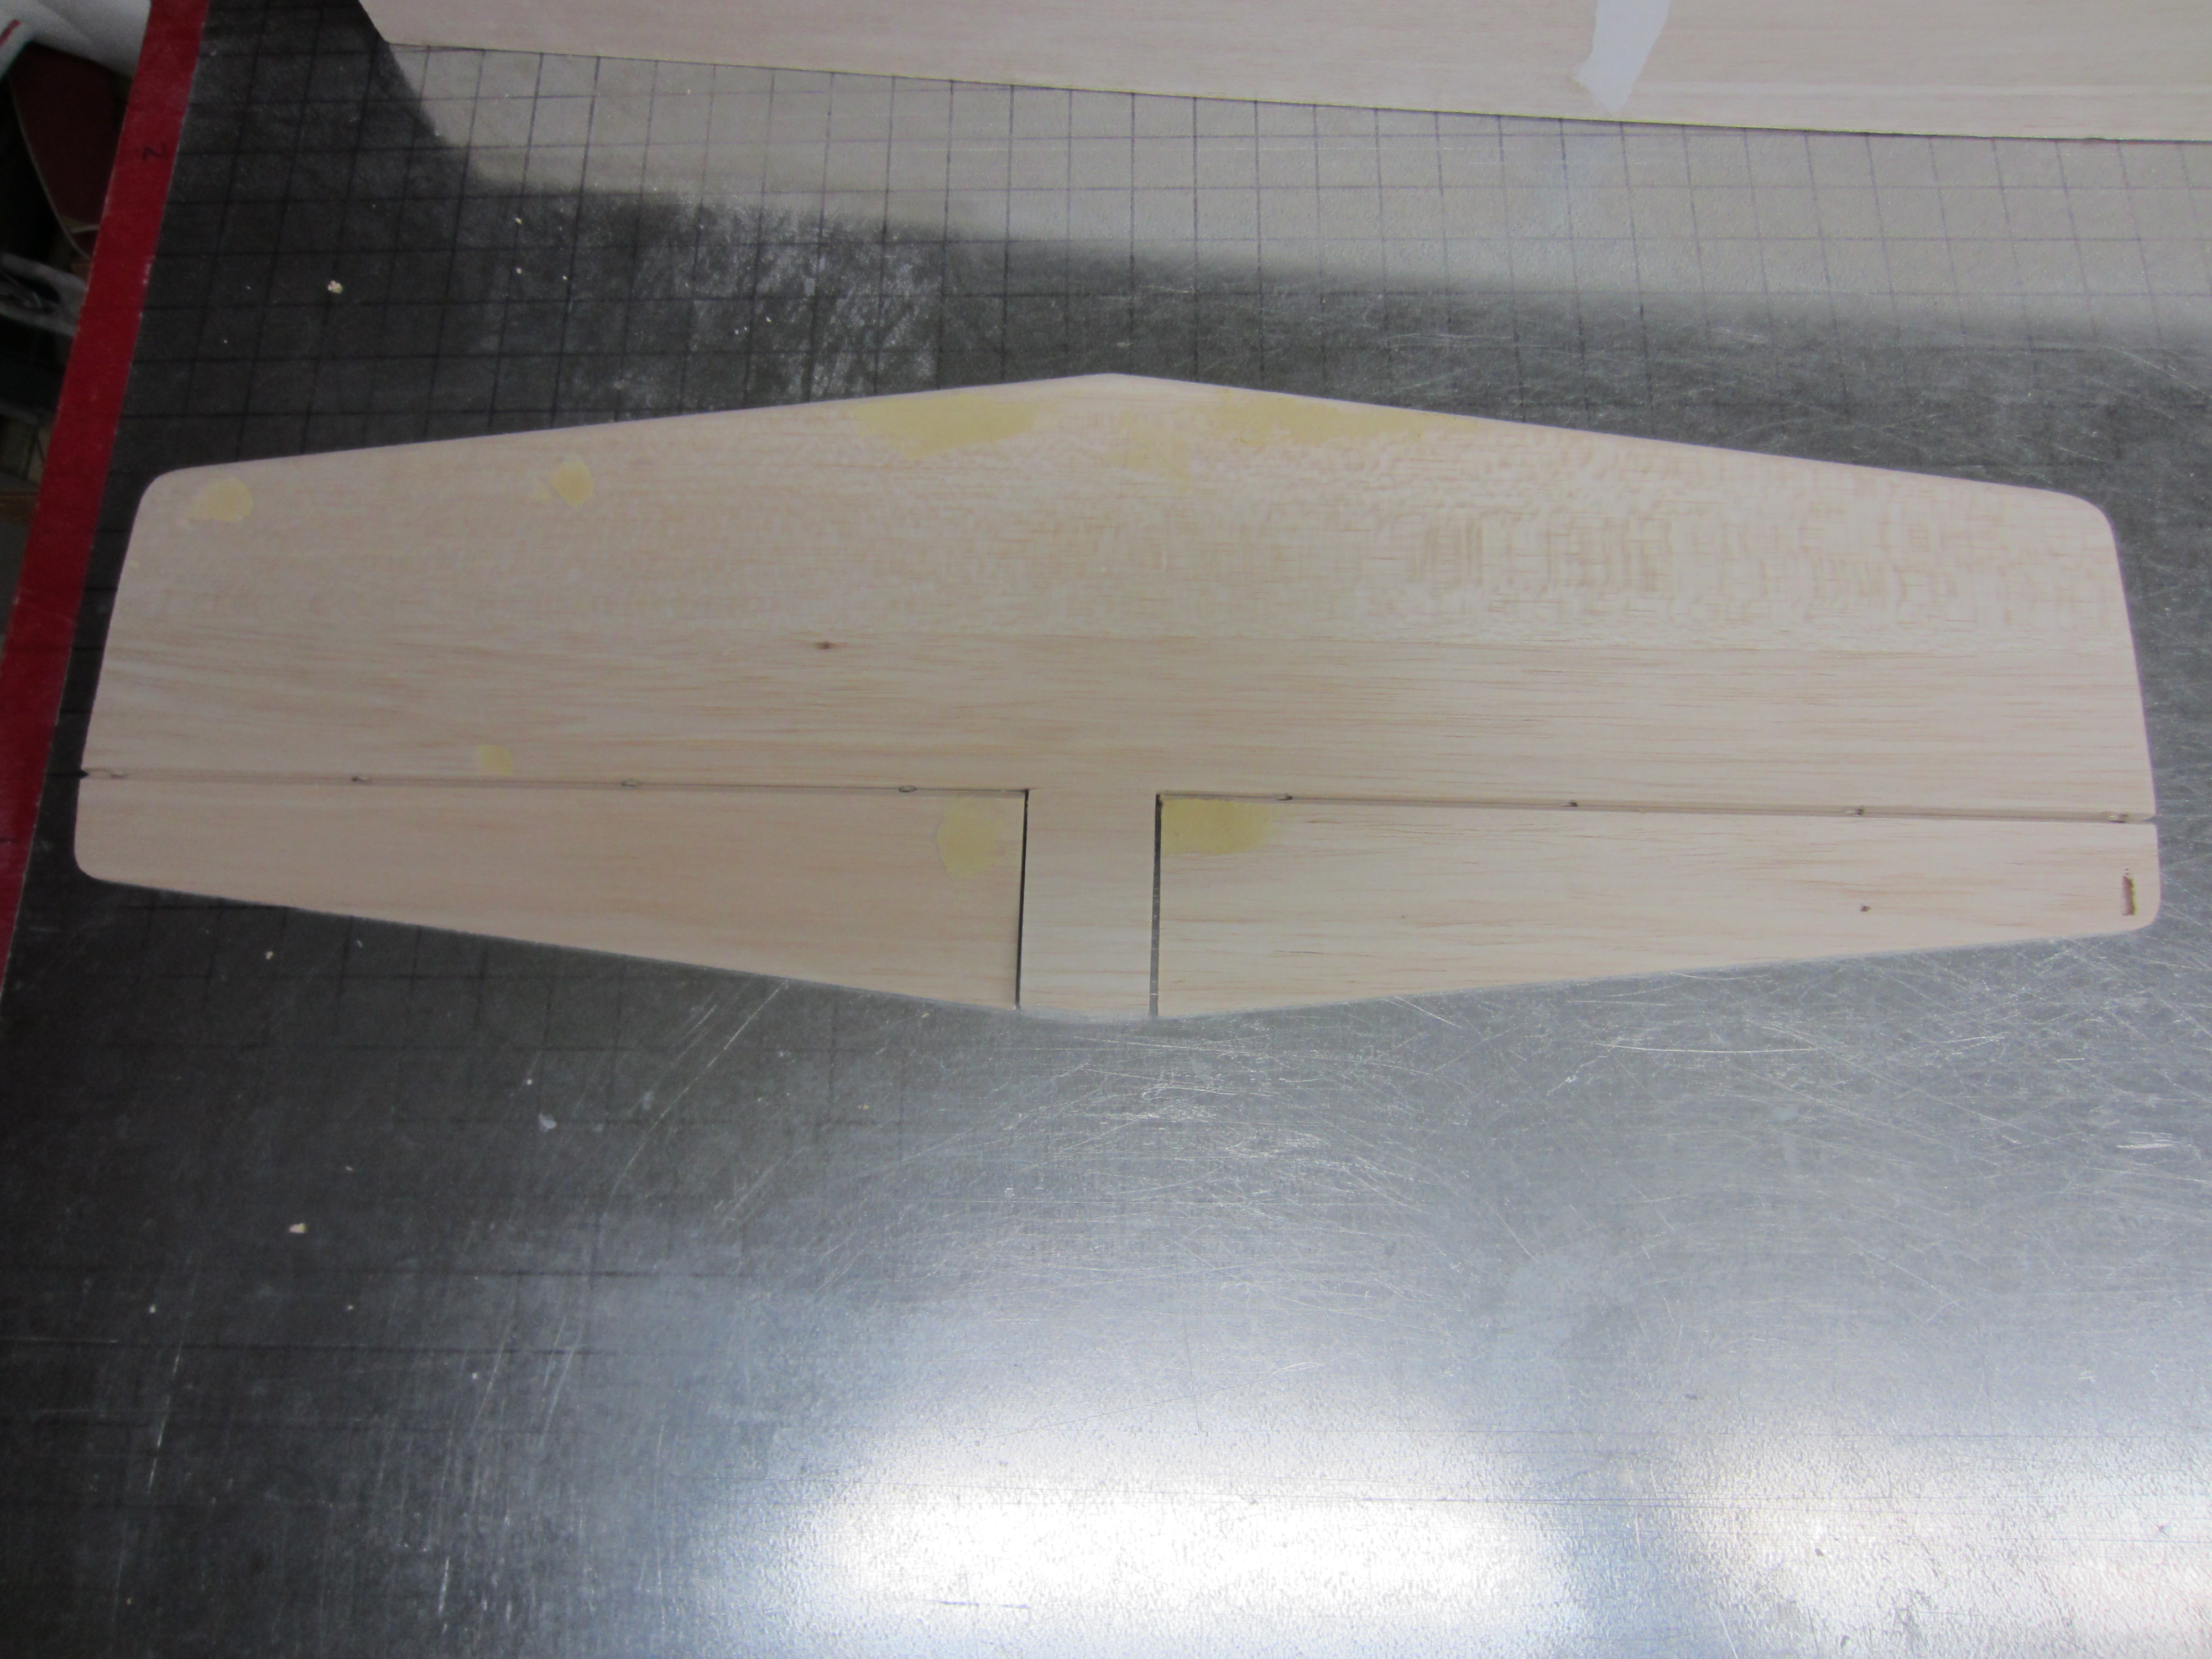
I started with the horizontal stabilizer, standard stick framing. Did I mention how much I like using a magnetic building board setup? It's the greatest thing ever! Anyway, got the 1/4 x 1/2 framing done, sheeted both sides with 3/32 balsa, then weighted it all down with bags of lead shot.
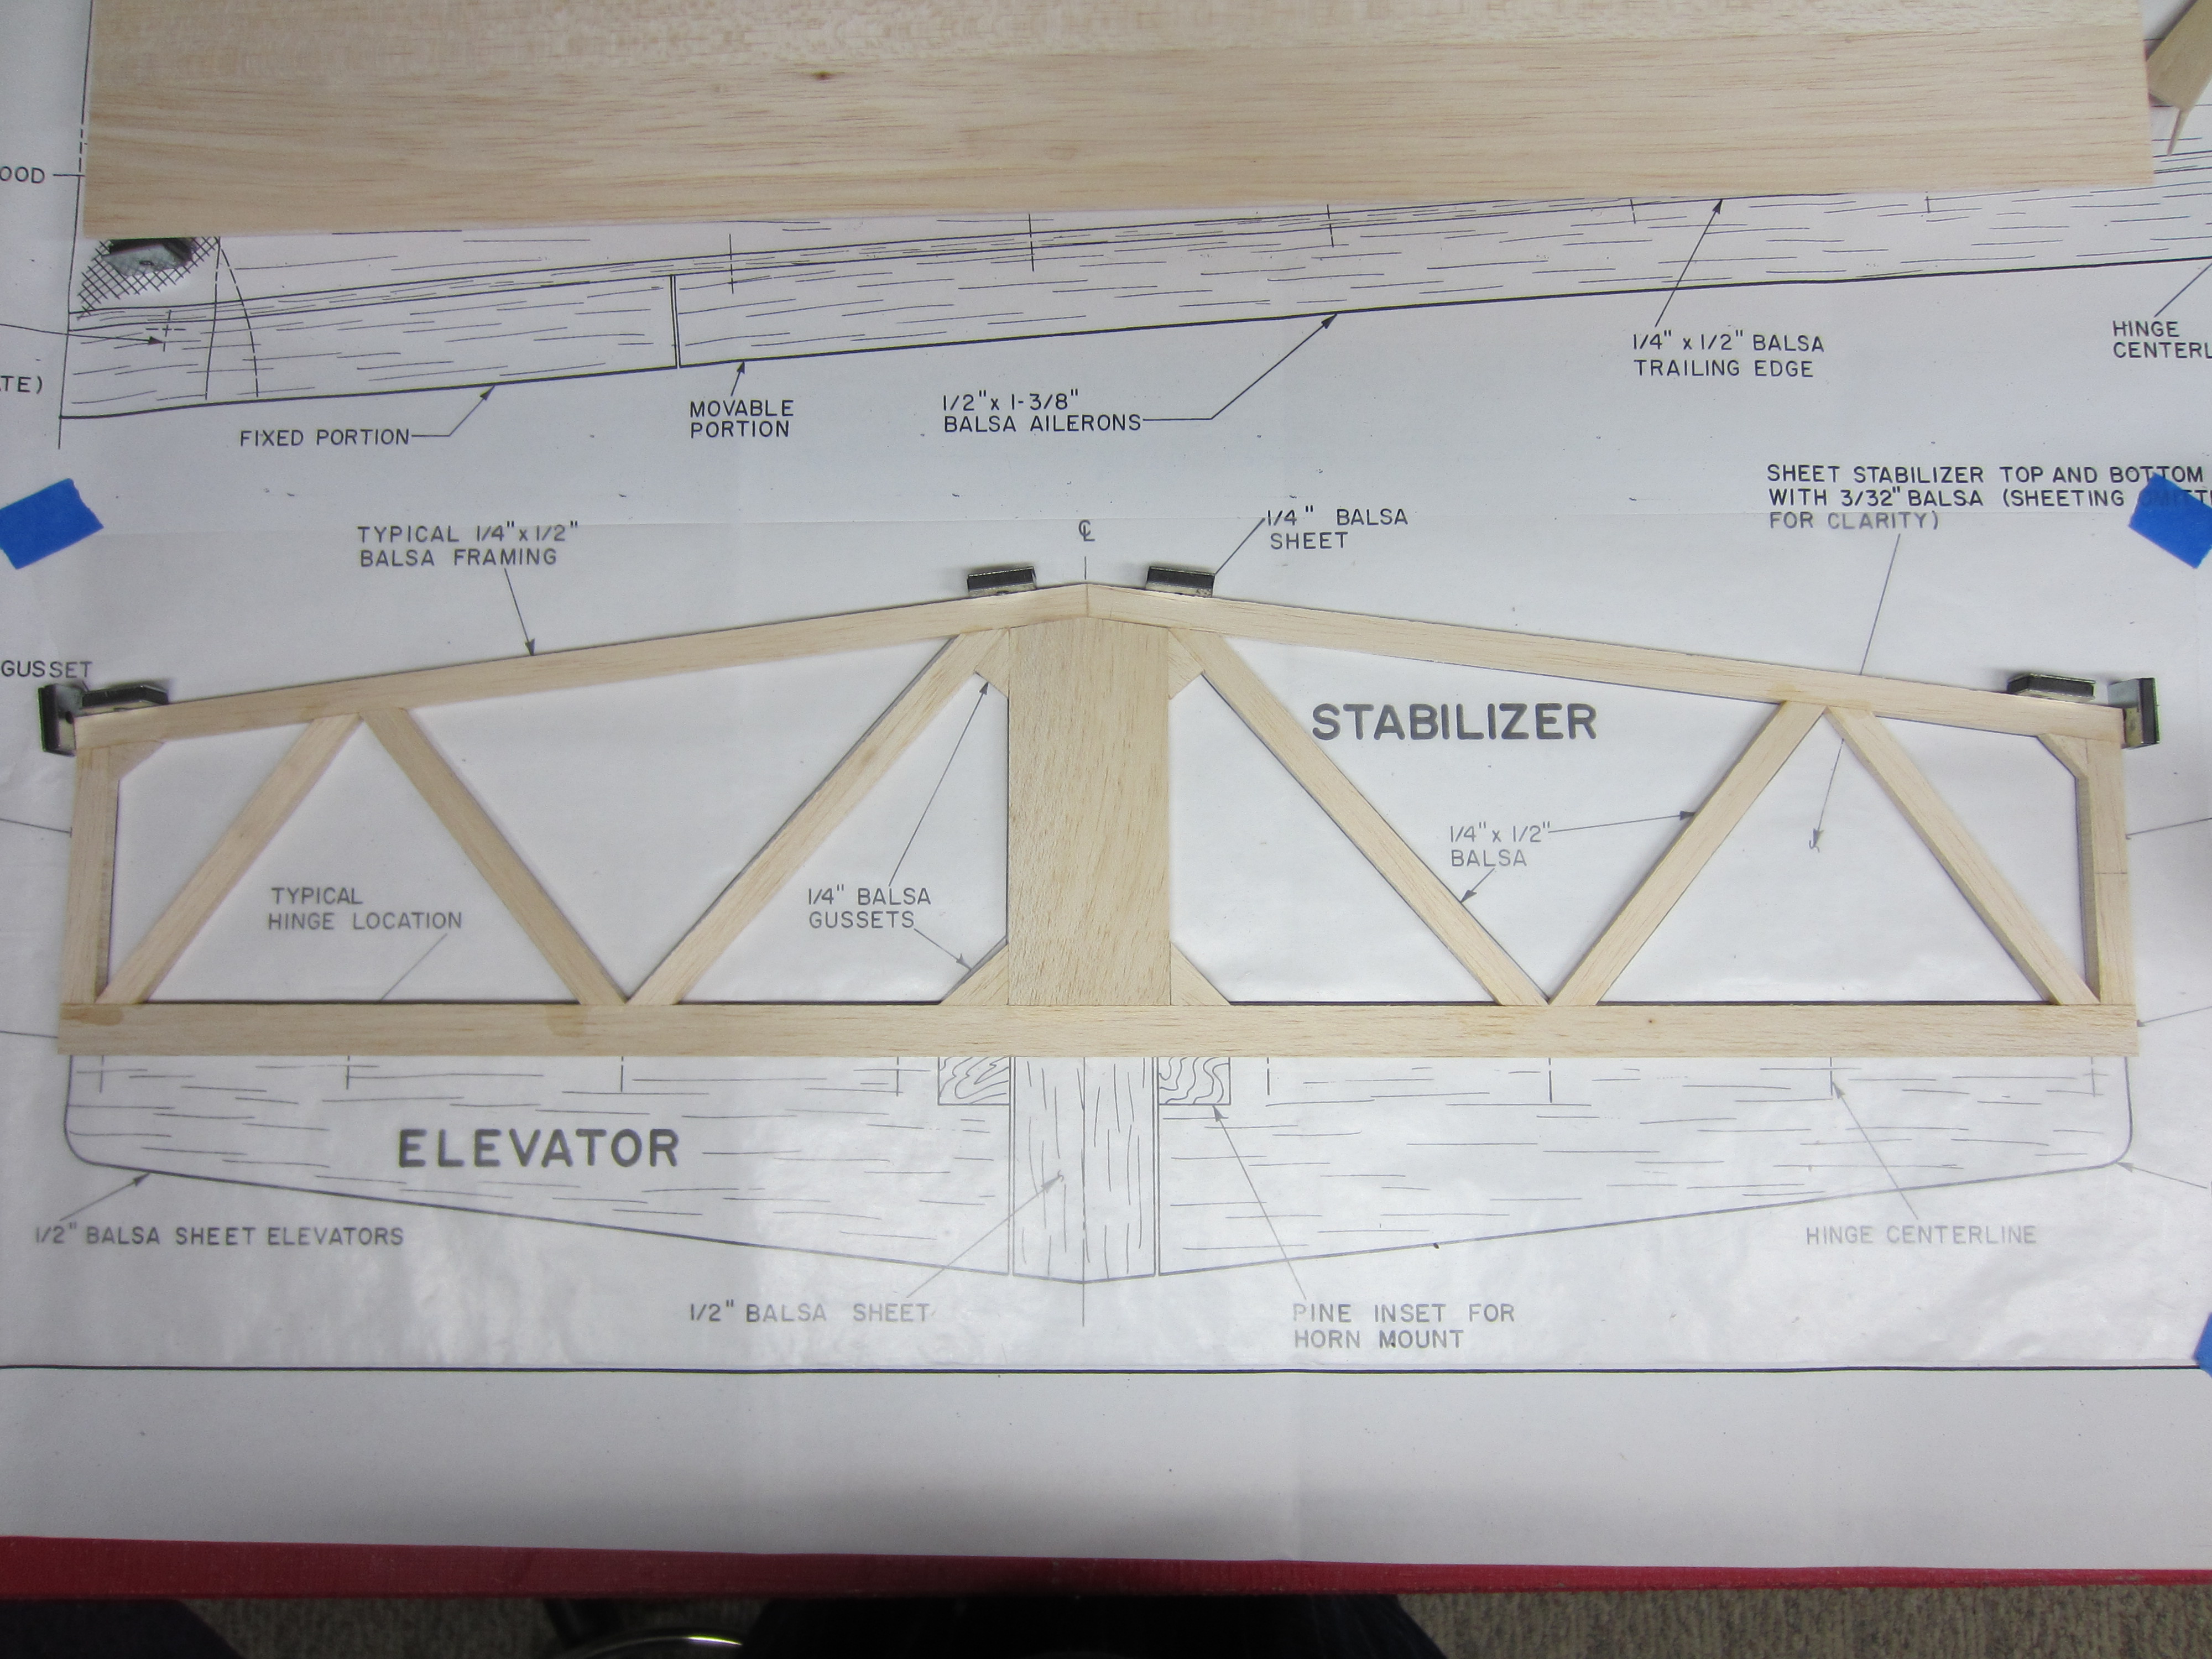
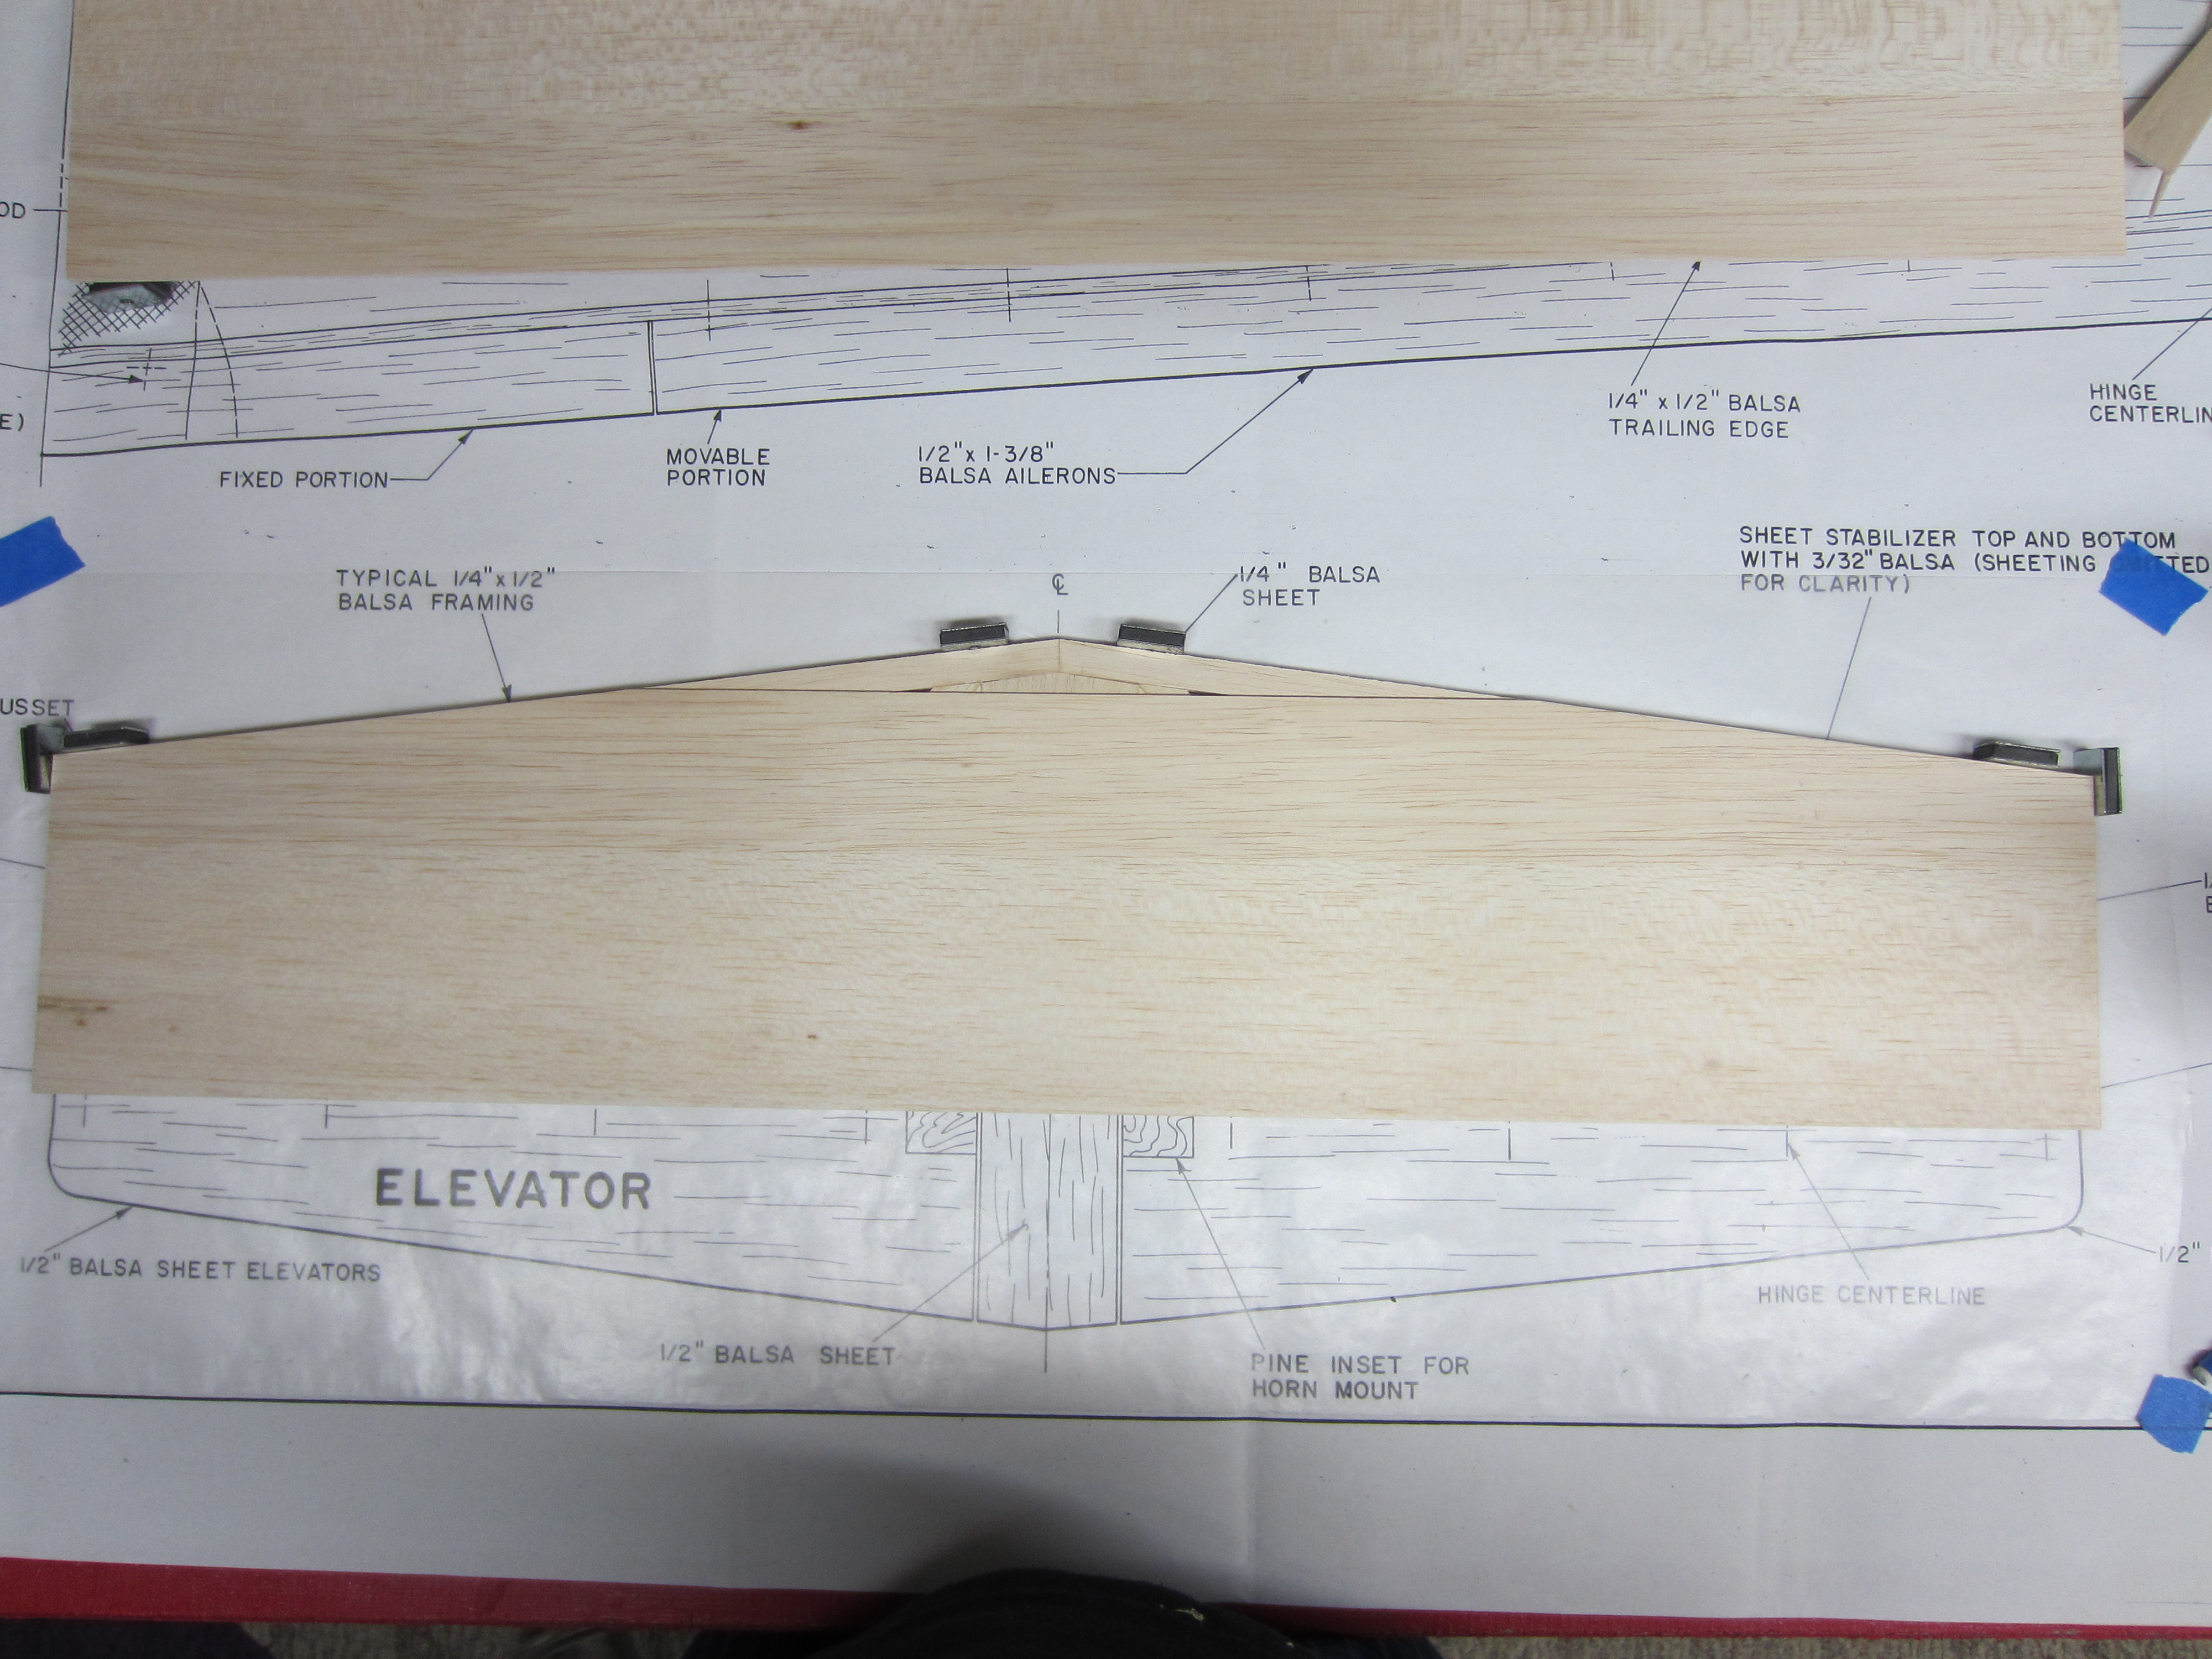
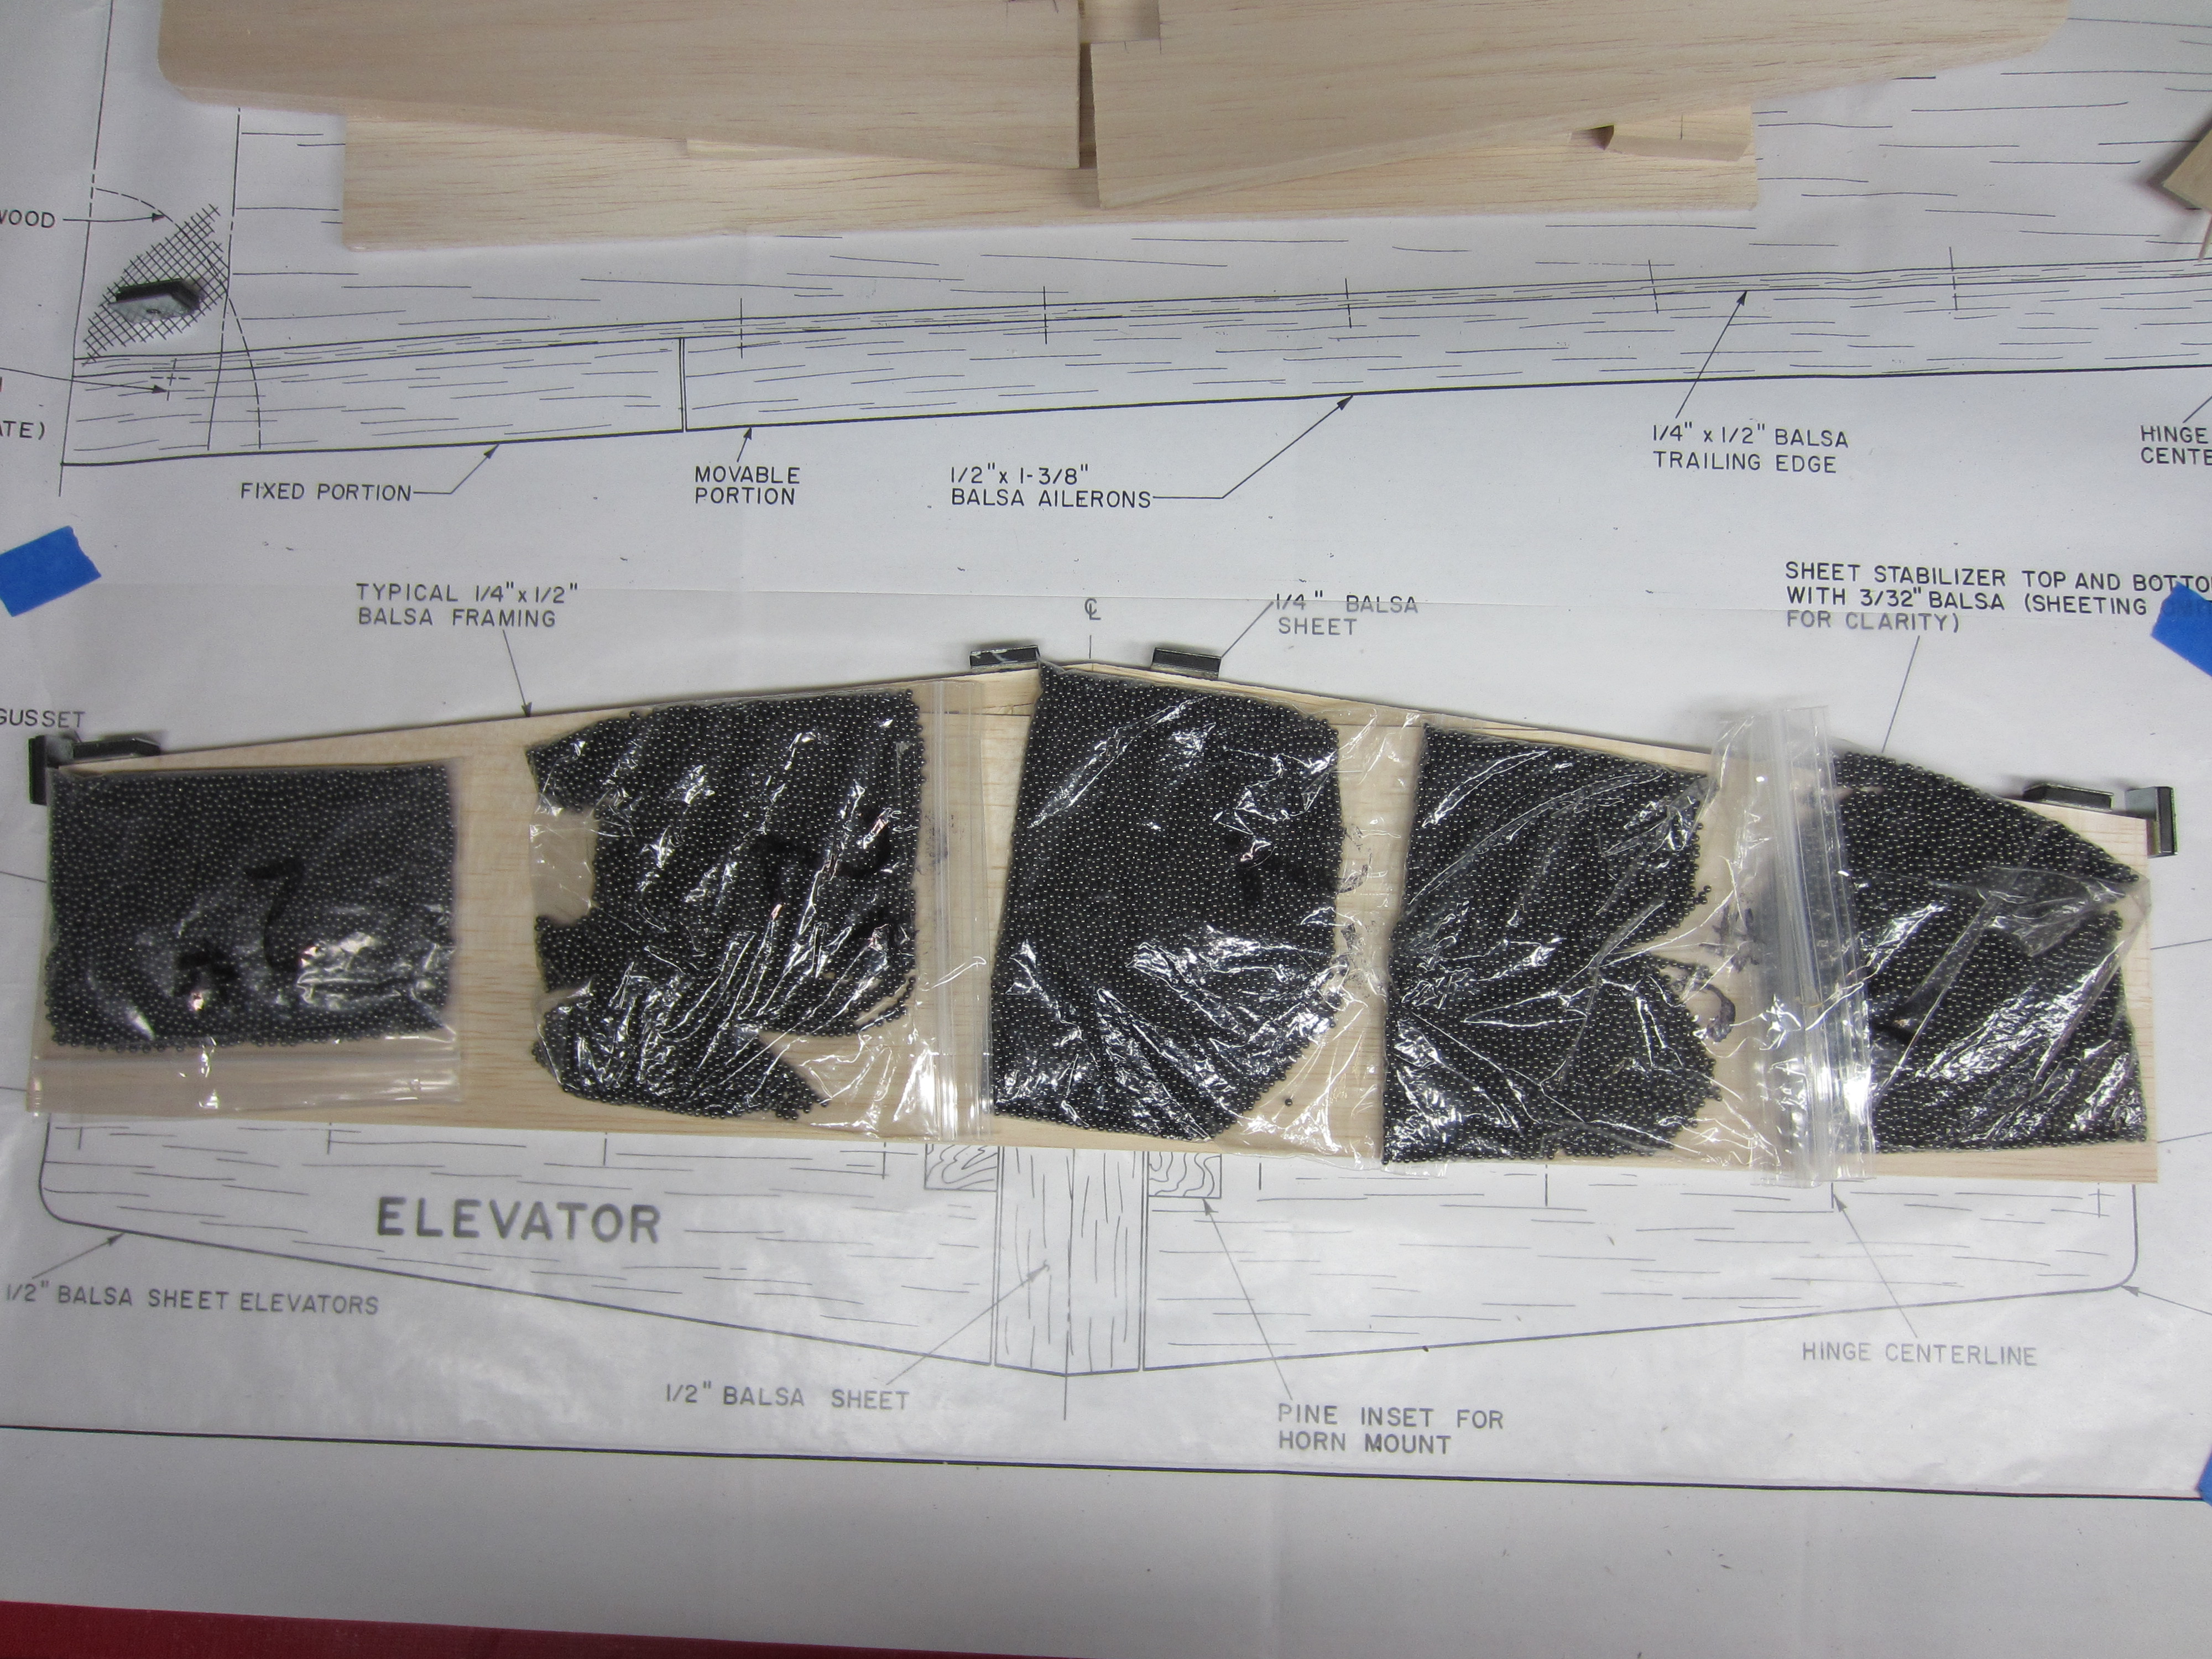
Next, I moved onto gluing in the reinforcements for the elevator halves. The plans call out pine inserts, but I just doubled up 1/4" ply, and glued them in. More lead shot to keep things flat on the board.
 .
.
Next is the vertical stabilizer and rudder, both are 3/8 balsa sheet from the short kit, each built of several pieces. All glued up and weighted down.
Not bad for an evening's work!
I started with the horizontal stabilizer, standard stick framing. Did I mention how much I like using a magnetic building board setup? It's the greatest thing ever! Anyway, got the 1/4 x 1/2 framing done, sheeted both sides with 3/32 balsa, then weighted it all down with bags of lead shot.
Next, I moved onto gluing in the reinforcements for the elevator halves. The plans call out pine inserts, but I just doubled up 1/4" ply, and glued them in. More lead shot to keep things flat on the board.
Next is the vertical stabilizer and rudder, both are 3/8 balsa sheet from the short kit, each built of several pieces. All glued up and weighted down.
Not bad for an evening's work!
Last edited by RDJeff; 02-26-2016 at 09:59 AM.
03-02-2016 | 08:38 PM
#14
Thread Starter
My Feedback: (11)
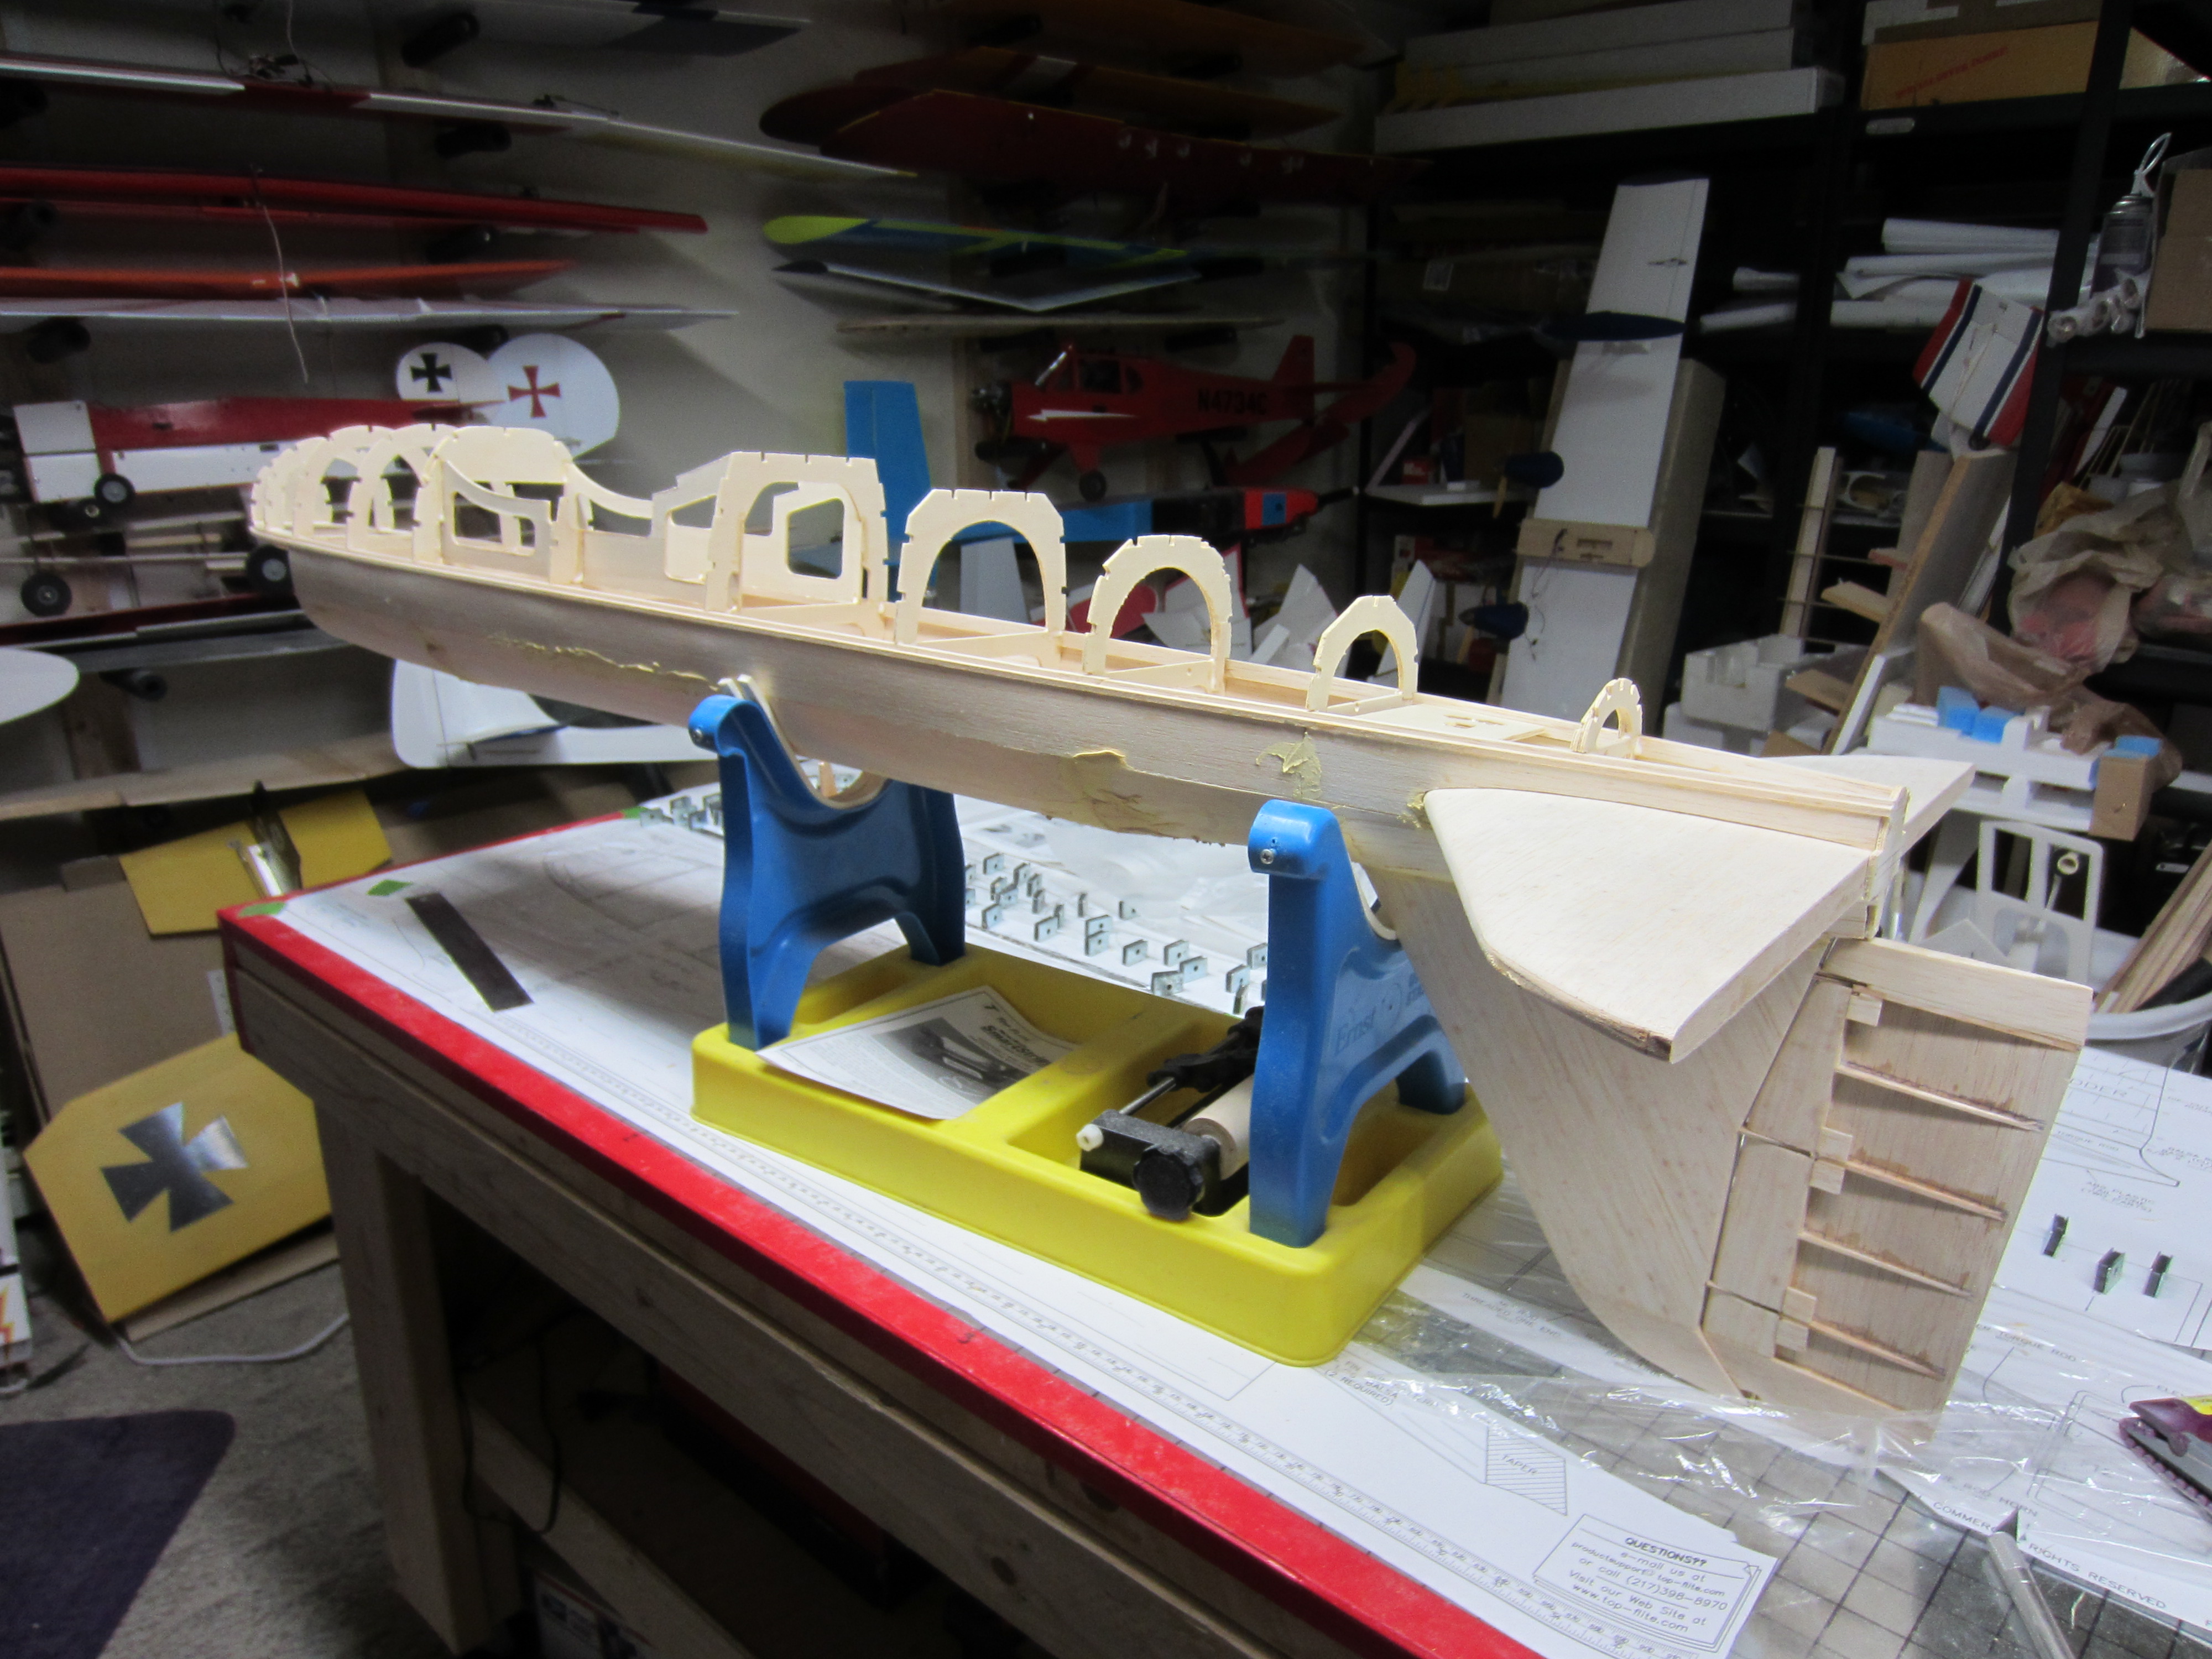
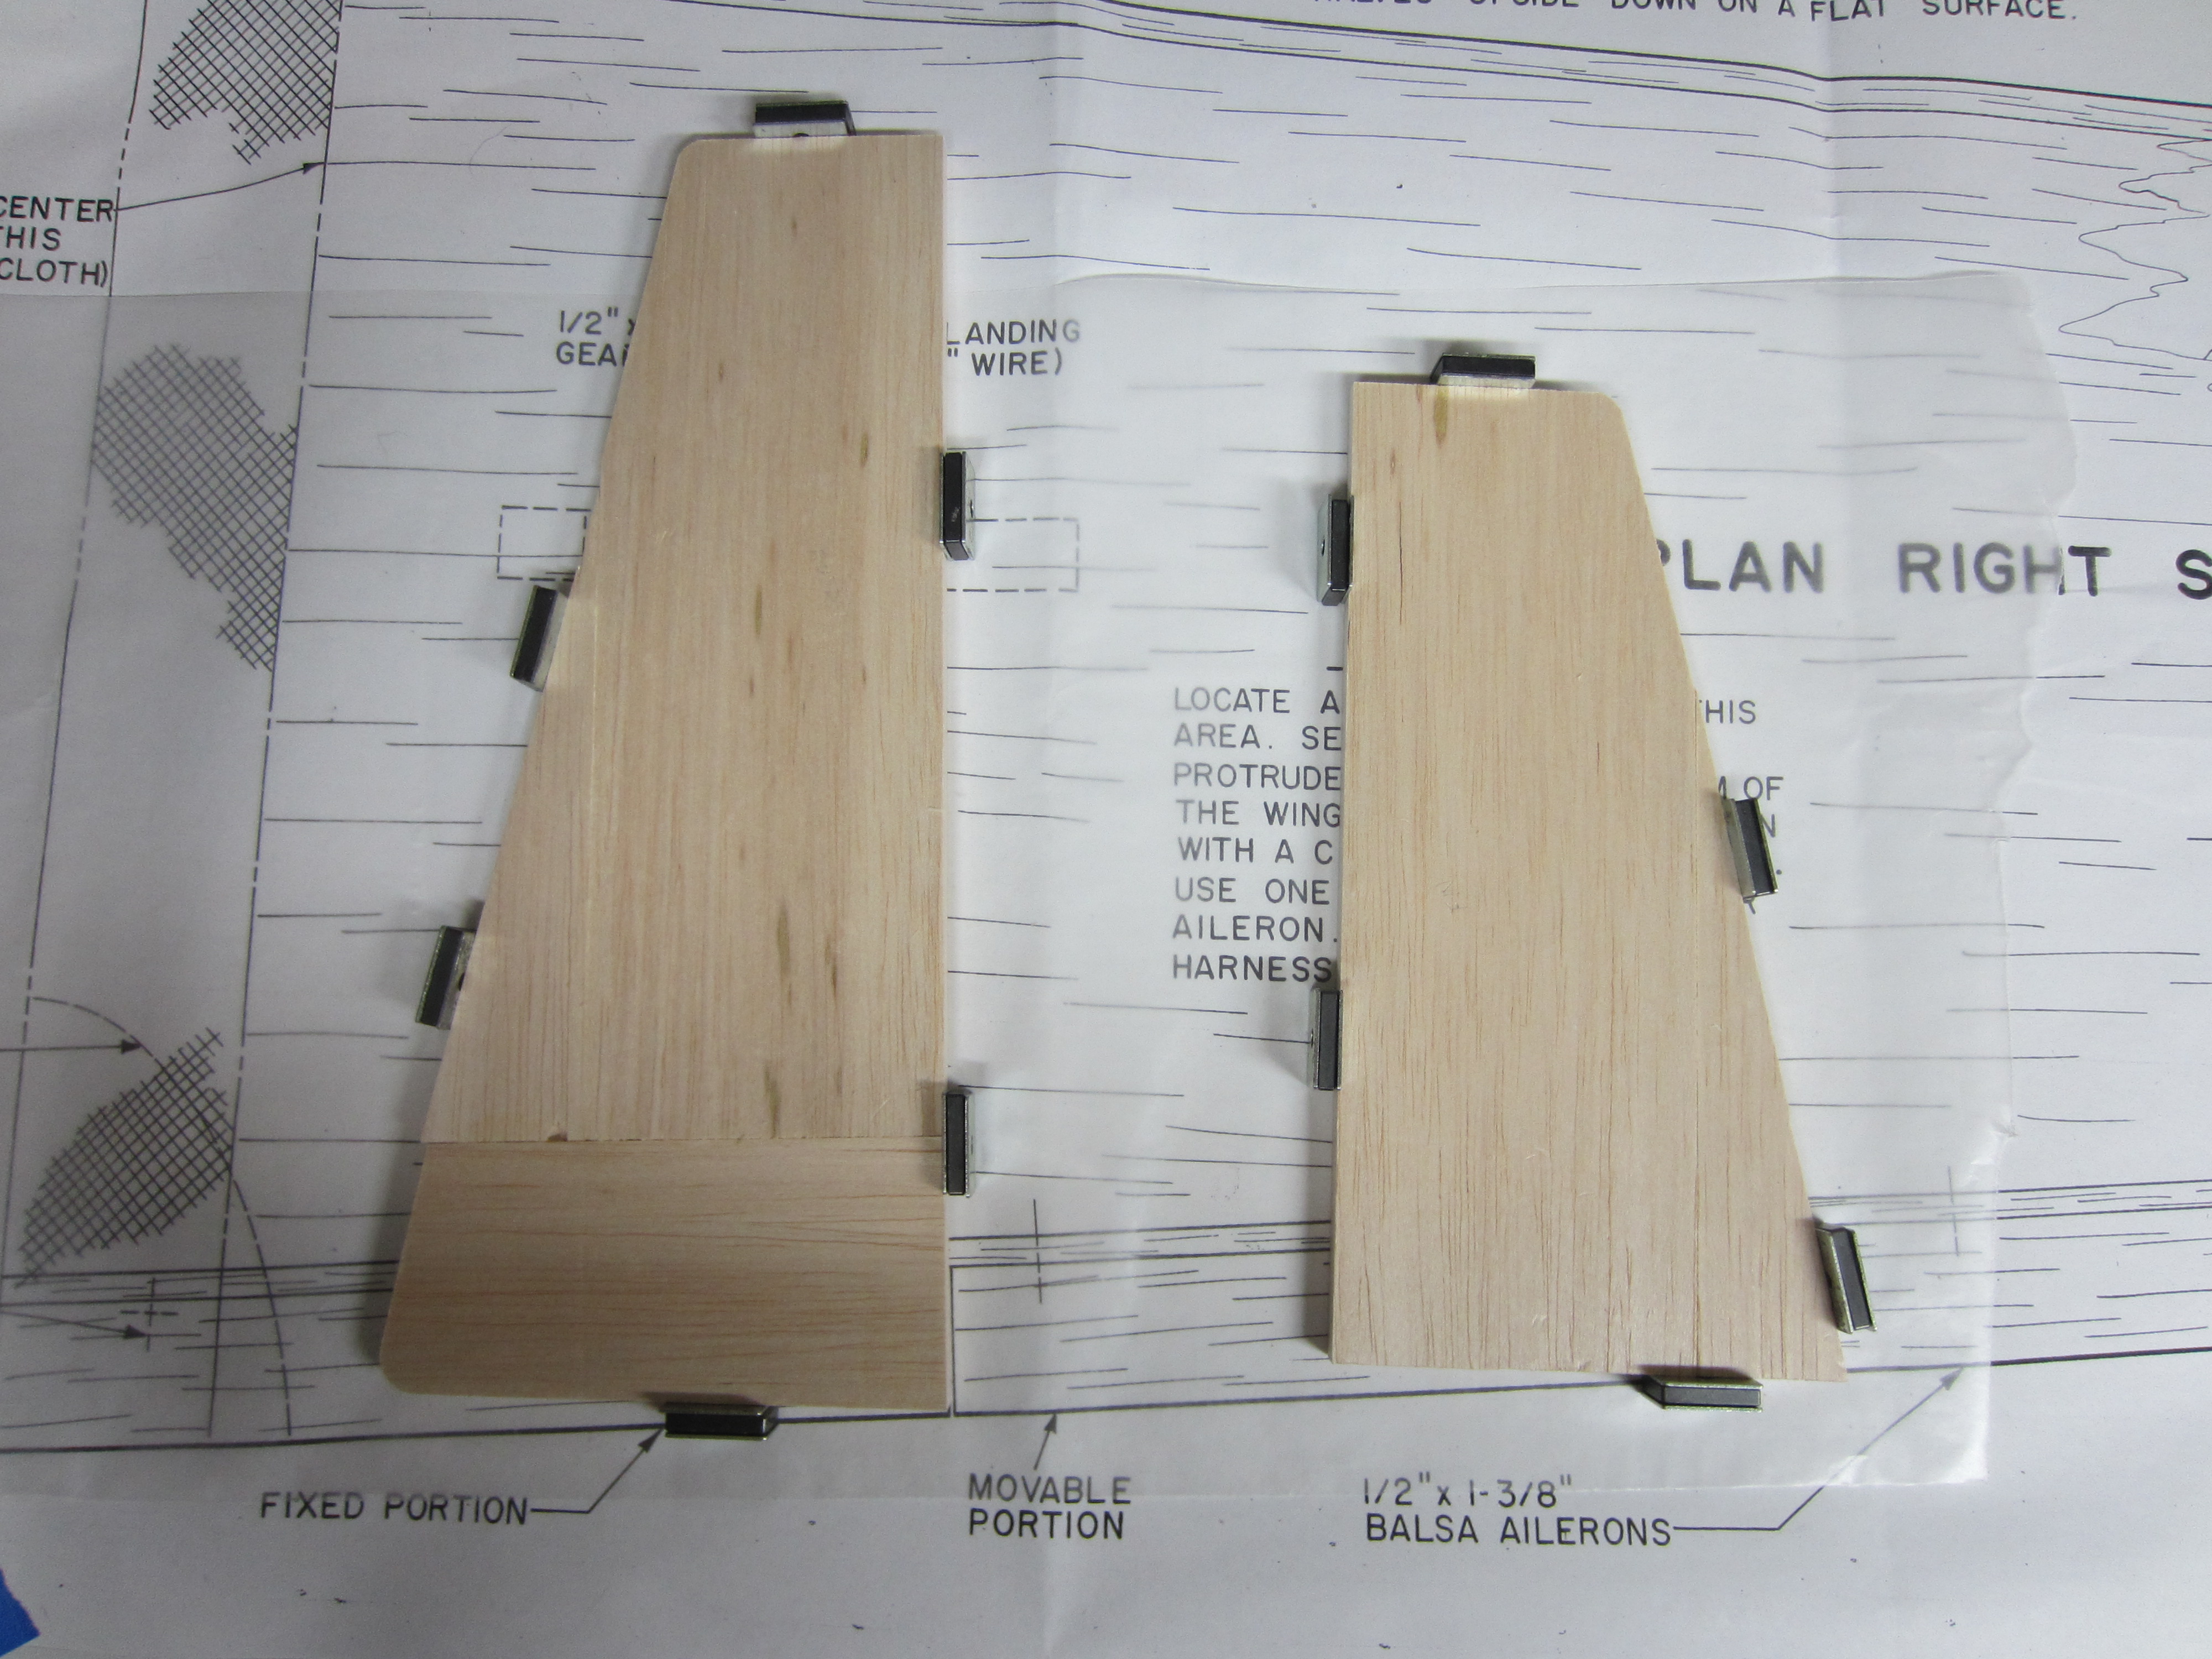
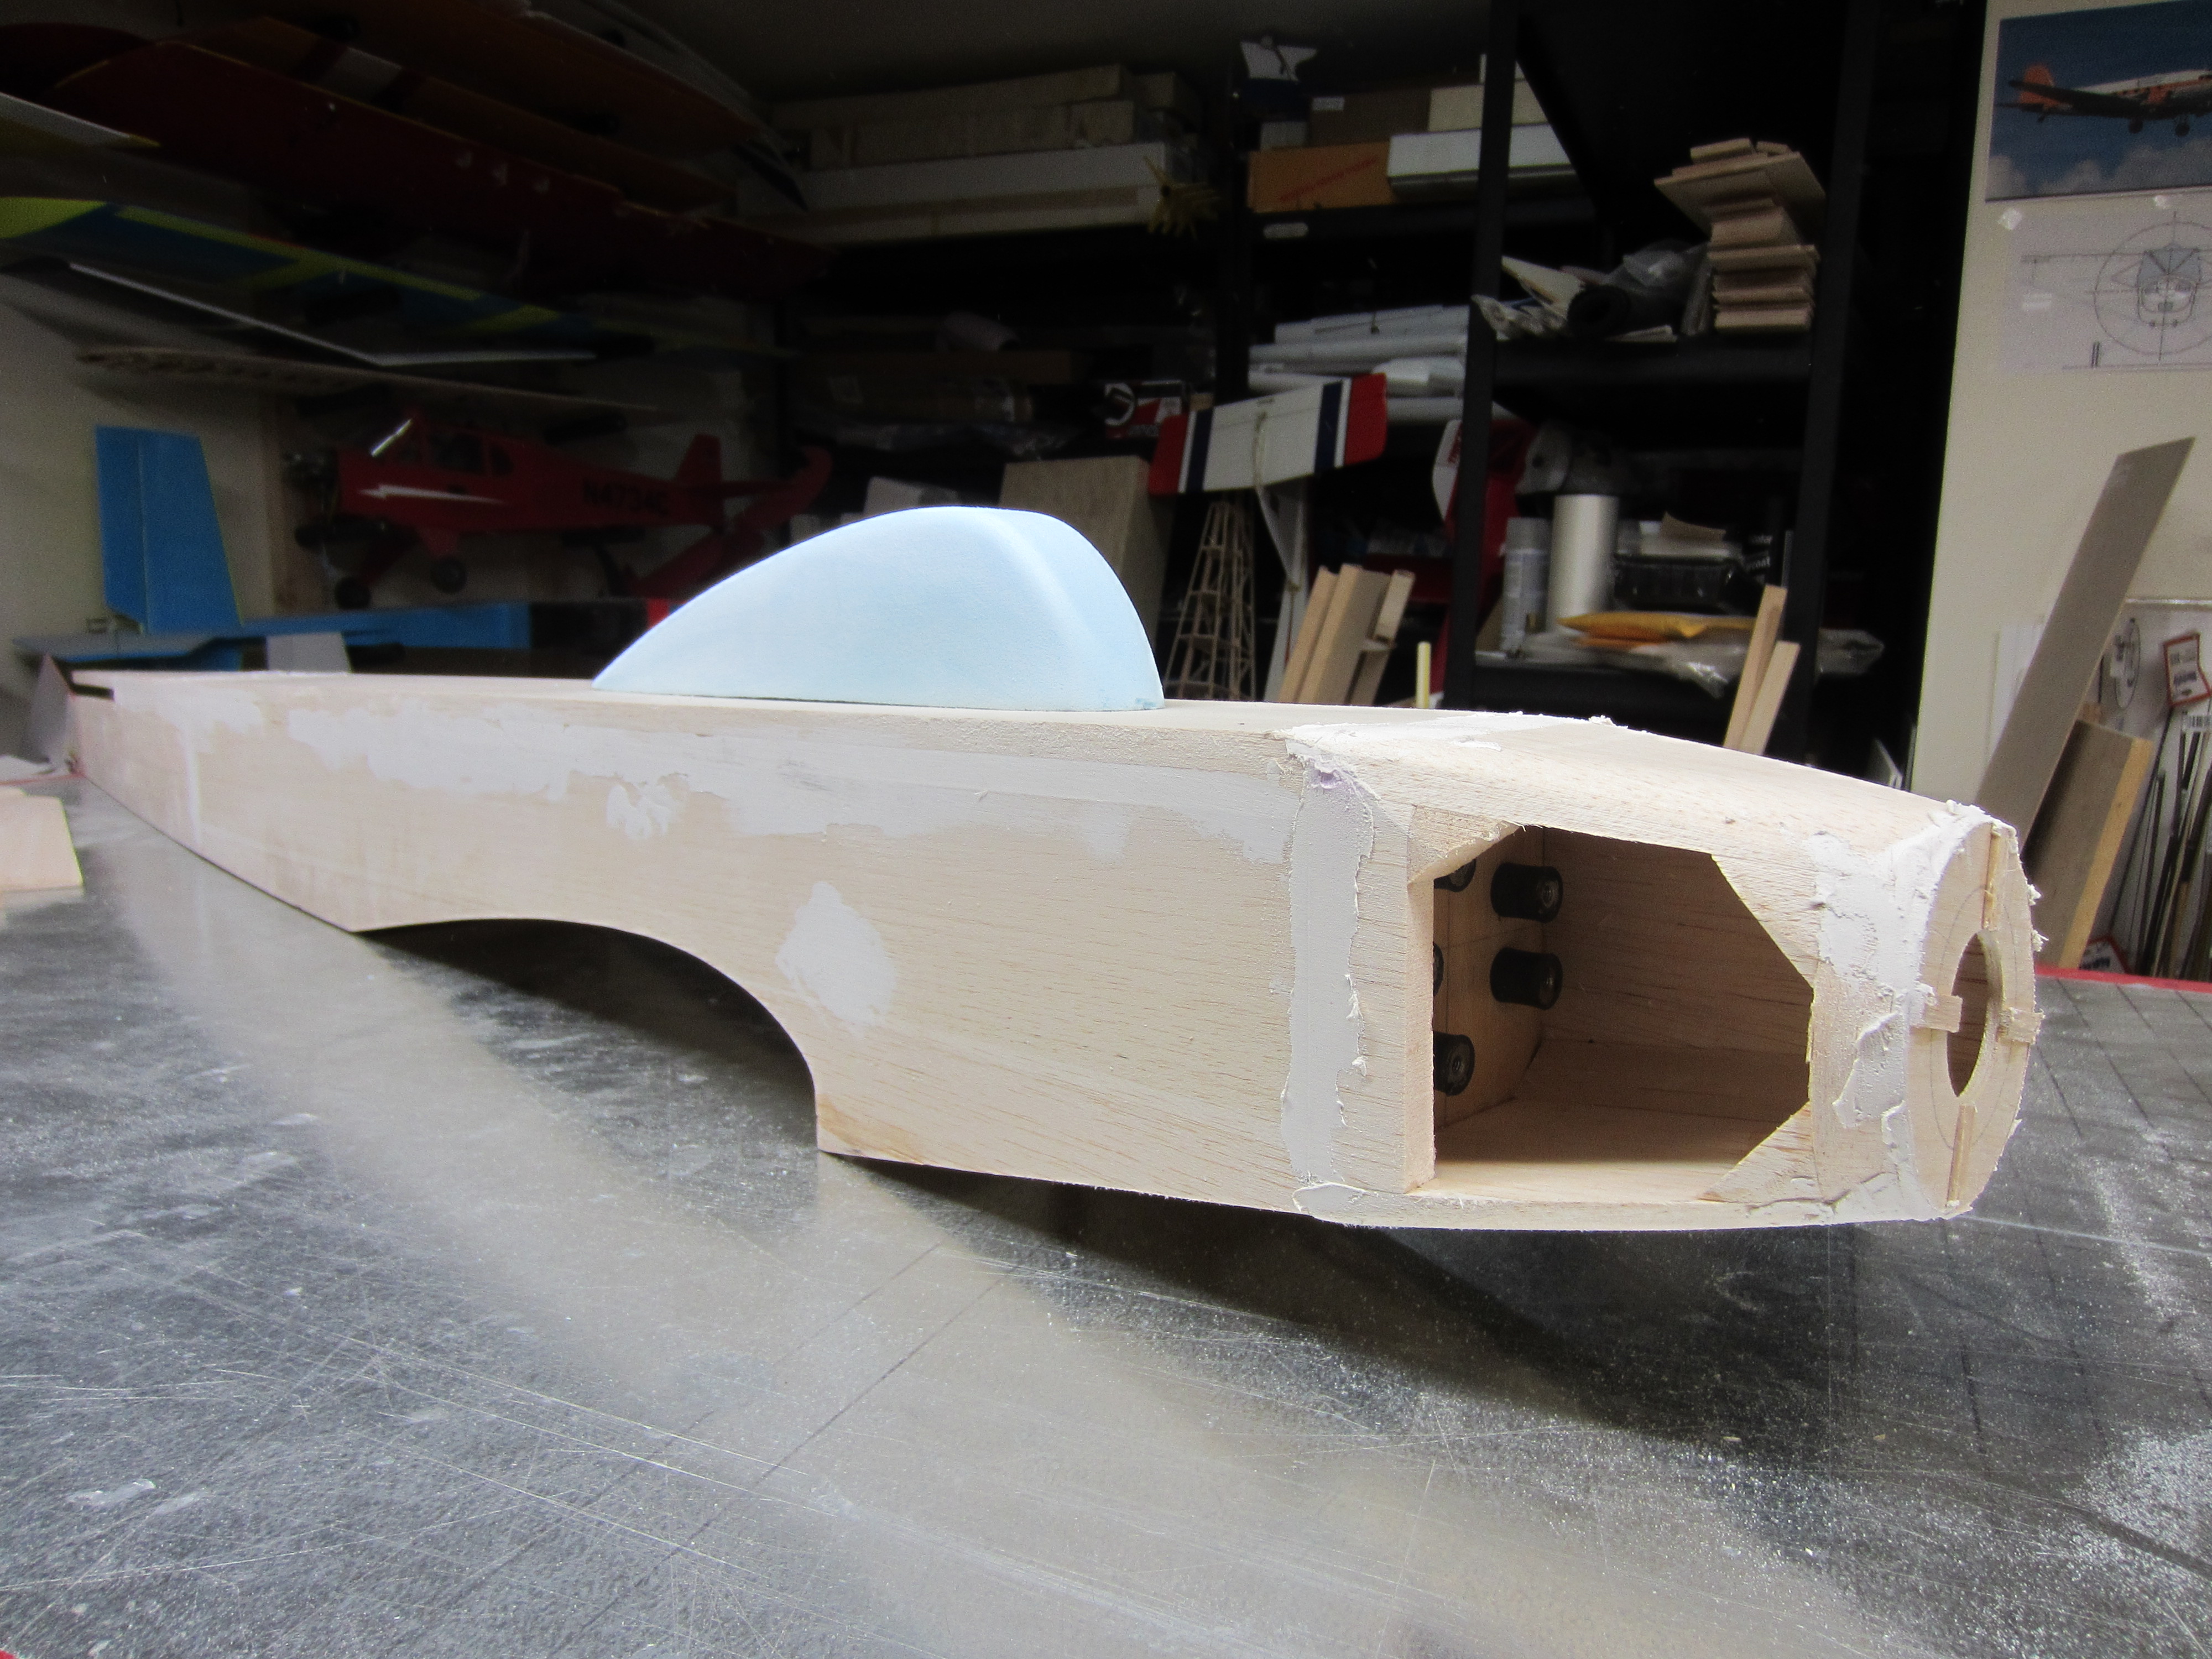
A bit more progress to report. I glued up the fuselage sides, making sure I built a right and a left, cut the fuse top, then glued it all together. The tail feathers have all been hinged and tapered, and are ready for their final sanding. I boxed in the nose after installing the engine, and spent a couple of minutes on the belt sander getting them to their final shape. I even decided to build a canopy out of blue foam, and it only took 10 minutes to get it to this point.
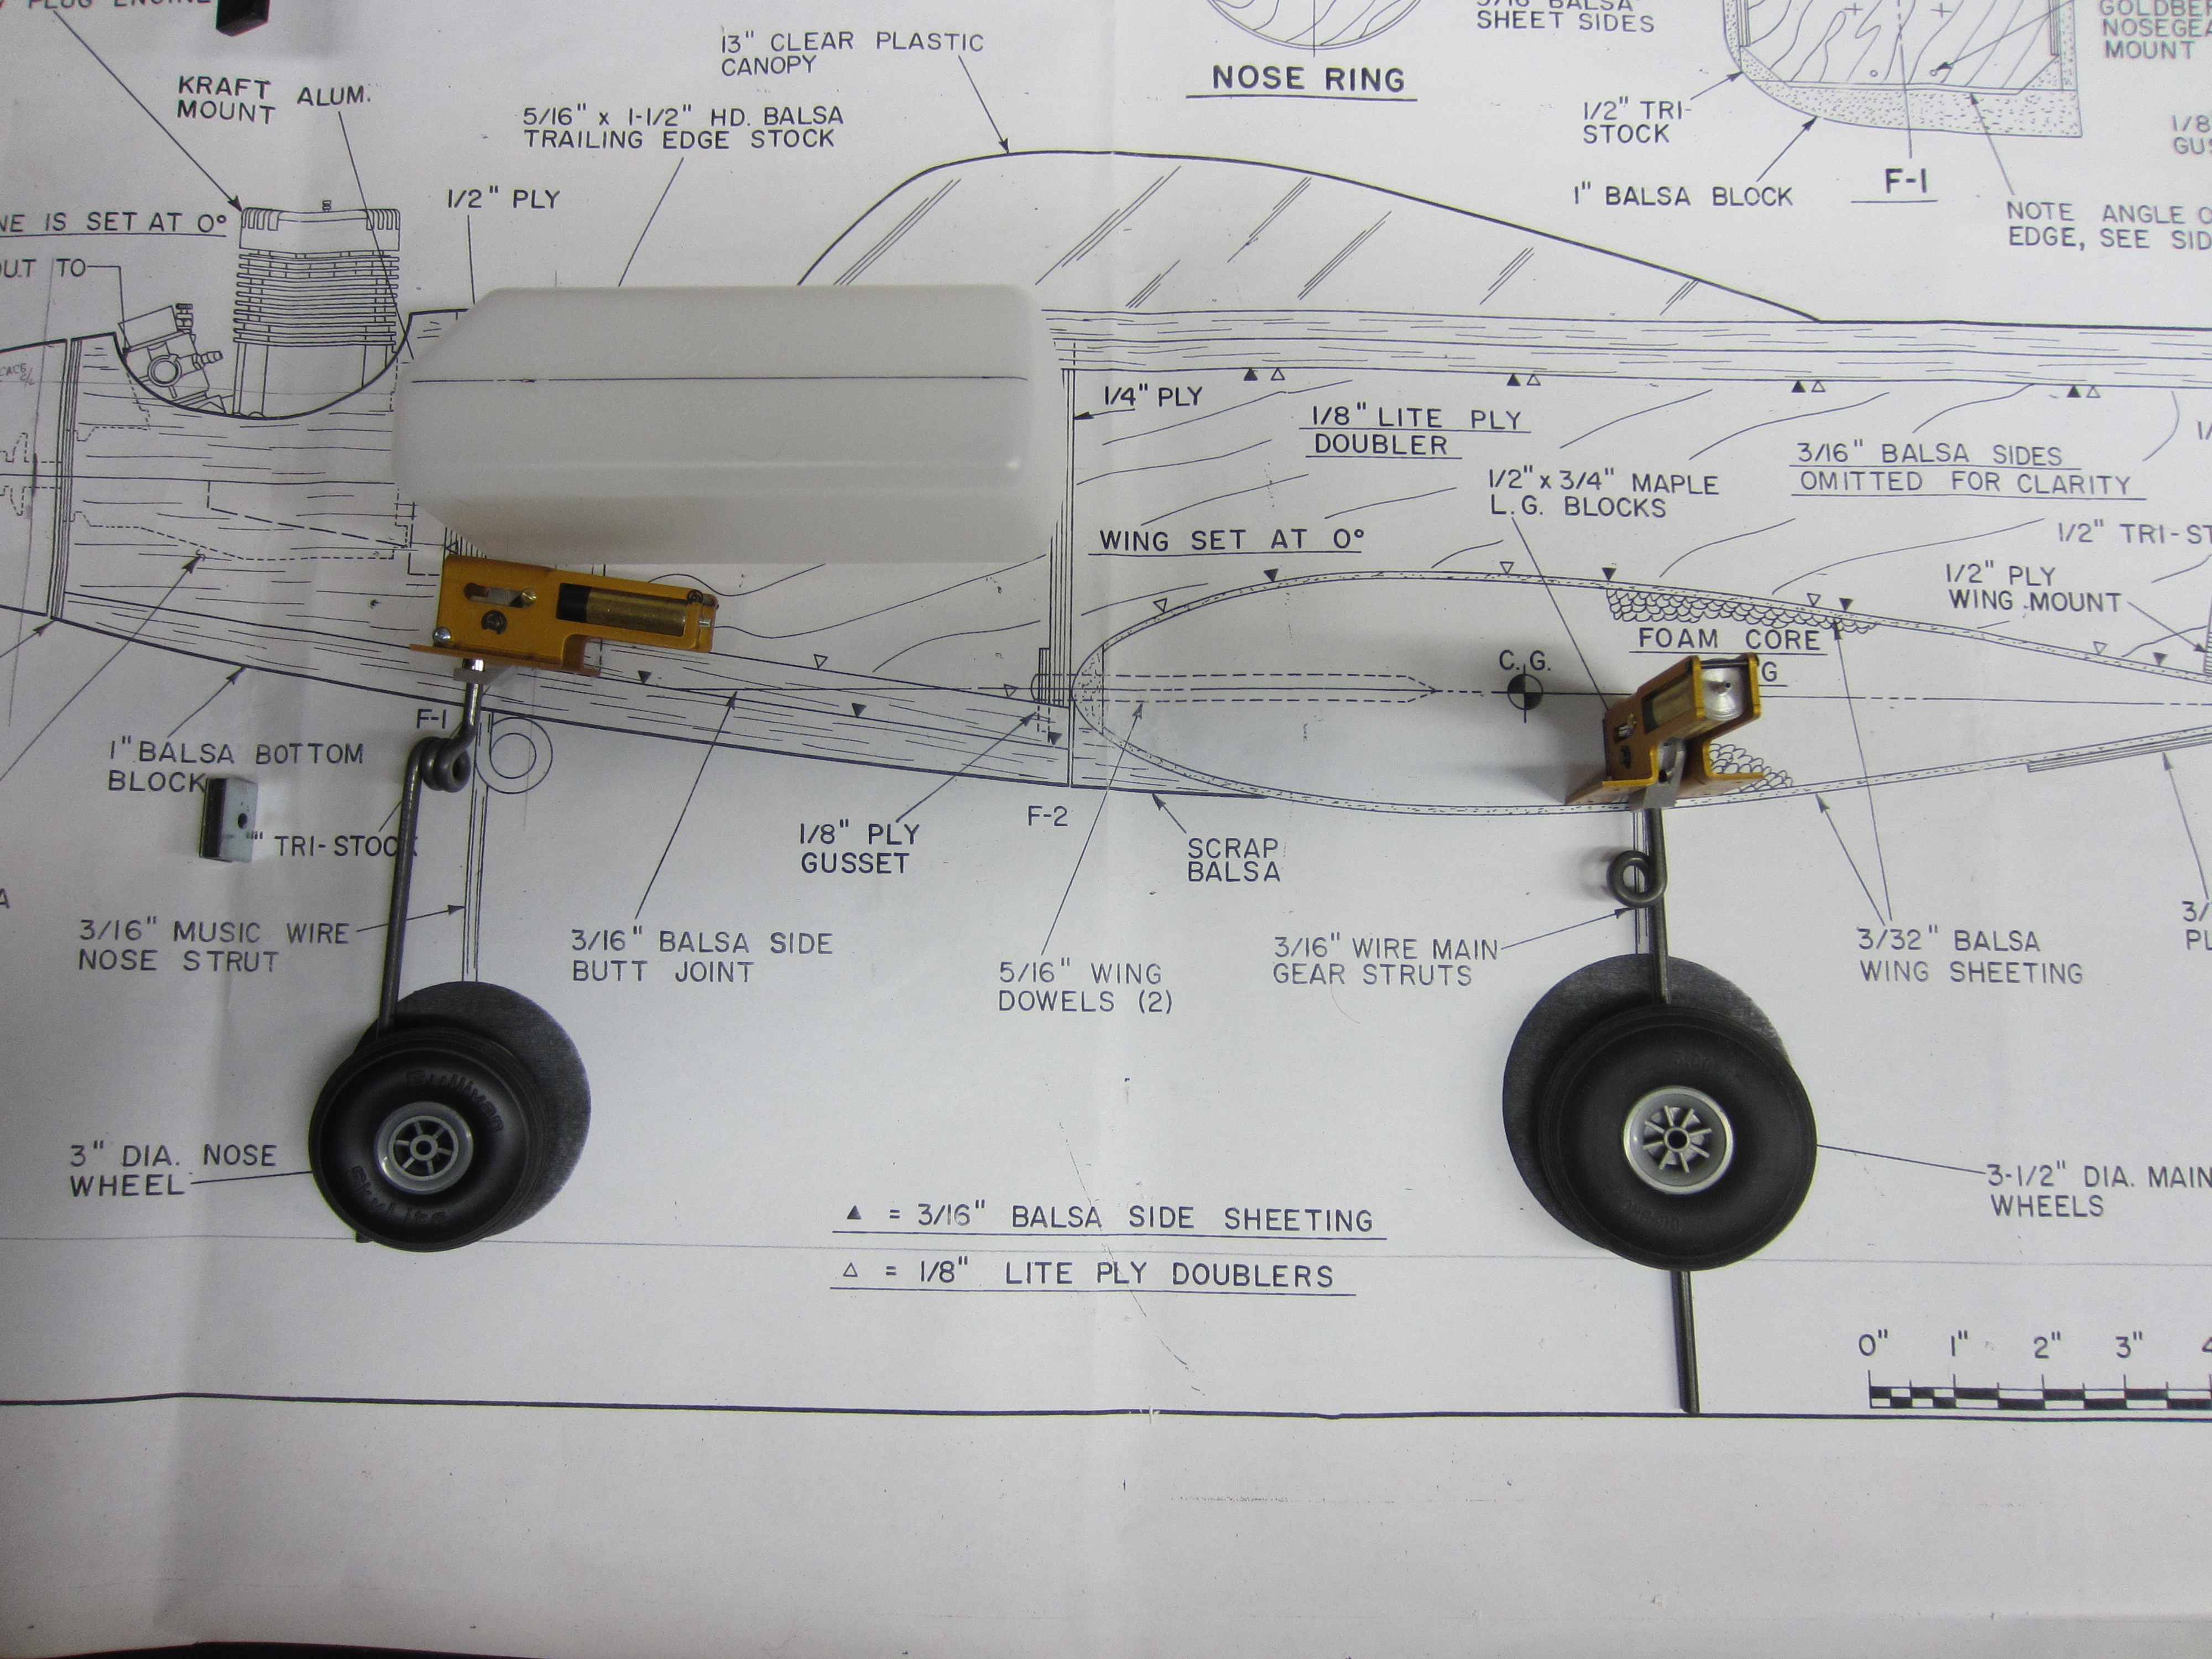
I altered my course just a bit, and will use a Super Tigre S90K with a Davis Diesel conversion head as opposed to using the OS 91, mostly because I sold it.") I'm going to break with tradition and mount the engine on it's side, this seemed like the only way to get the fuel tank height correct in relation to the carb.
I'm going to break with tradition and mount the engine on it's side, this seemed like the only way to get the fuel tank height correct in relation to the carb.
I started playing with the mountings for the retracts, and have the nose gear mount taken care of, and have done a rough layout on the wing cores for the mains. One thing I didn't get with the Spring Air gear was a steering tiller. I went on their site the other night and ordered one, but it might be a while before I see it in my mailbox.
All in all, I'm happy with the short kit, and the progress so far.
I altered my course just a bit, and will use a Super Tigre S90K with a Davis Diesel conversion head as opposed to using the OS 91, mostly because I sold it.
I'm going to break with tradition and mount the engine on it's side, this seemed like the only way to get the fuel tank height correct in relation to the carb.I started playing with the mountings for the retracts, and have the nose gear mount taken care of, and have done a rough layout on the wing cores for the mains. One thing I didn't get with the Spring Air gear was a steering tiller. I went on their site the other night and ordered one, but it might be a while before I see it in my mailbox.
All in all, I'm happy with the short kit, and the progress so far.
03-04-2016 | 10:14 AM
#15
Thread Starter
My Feedback: (11)
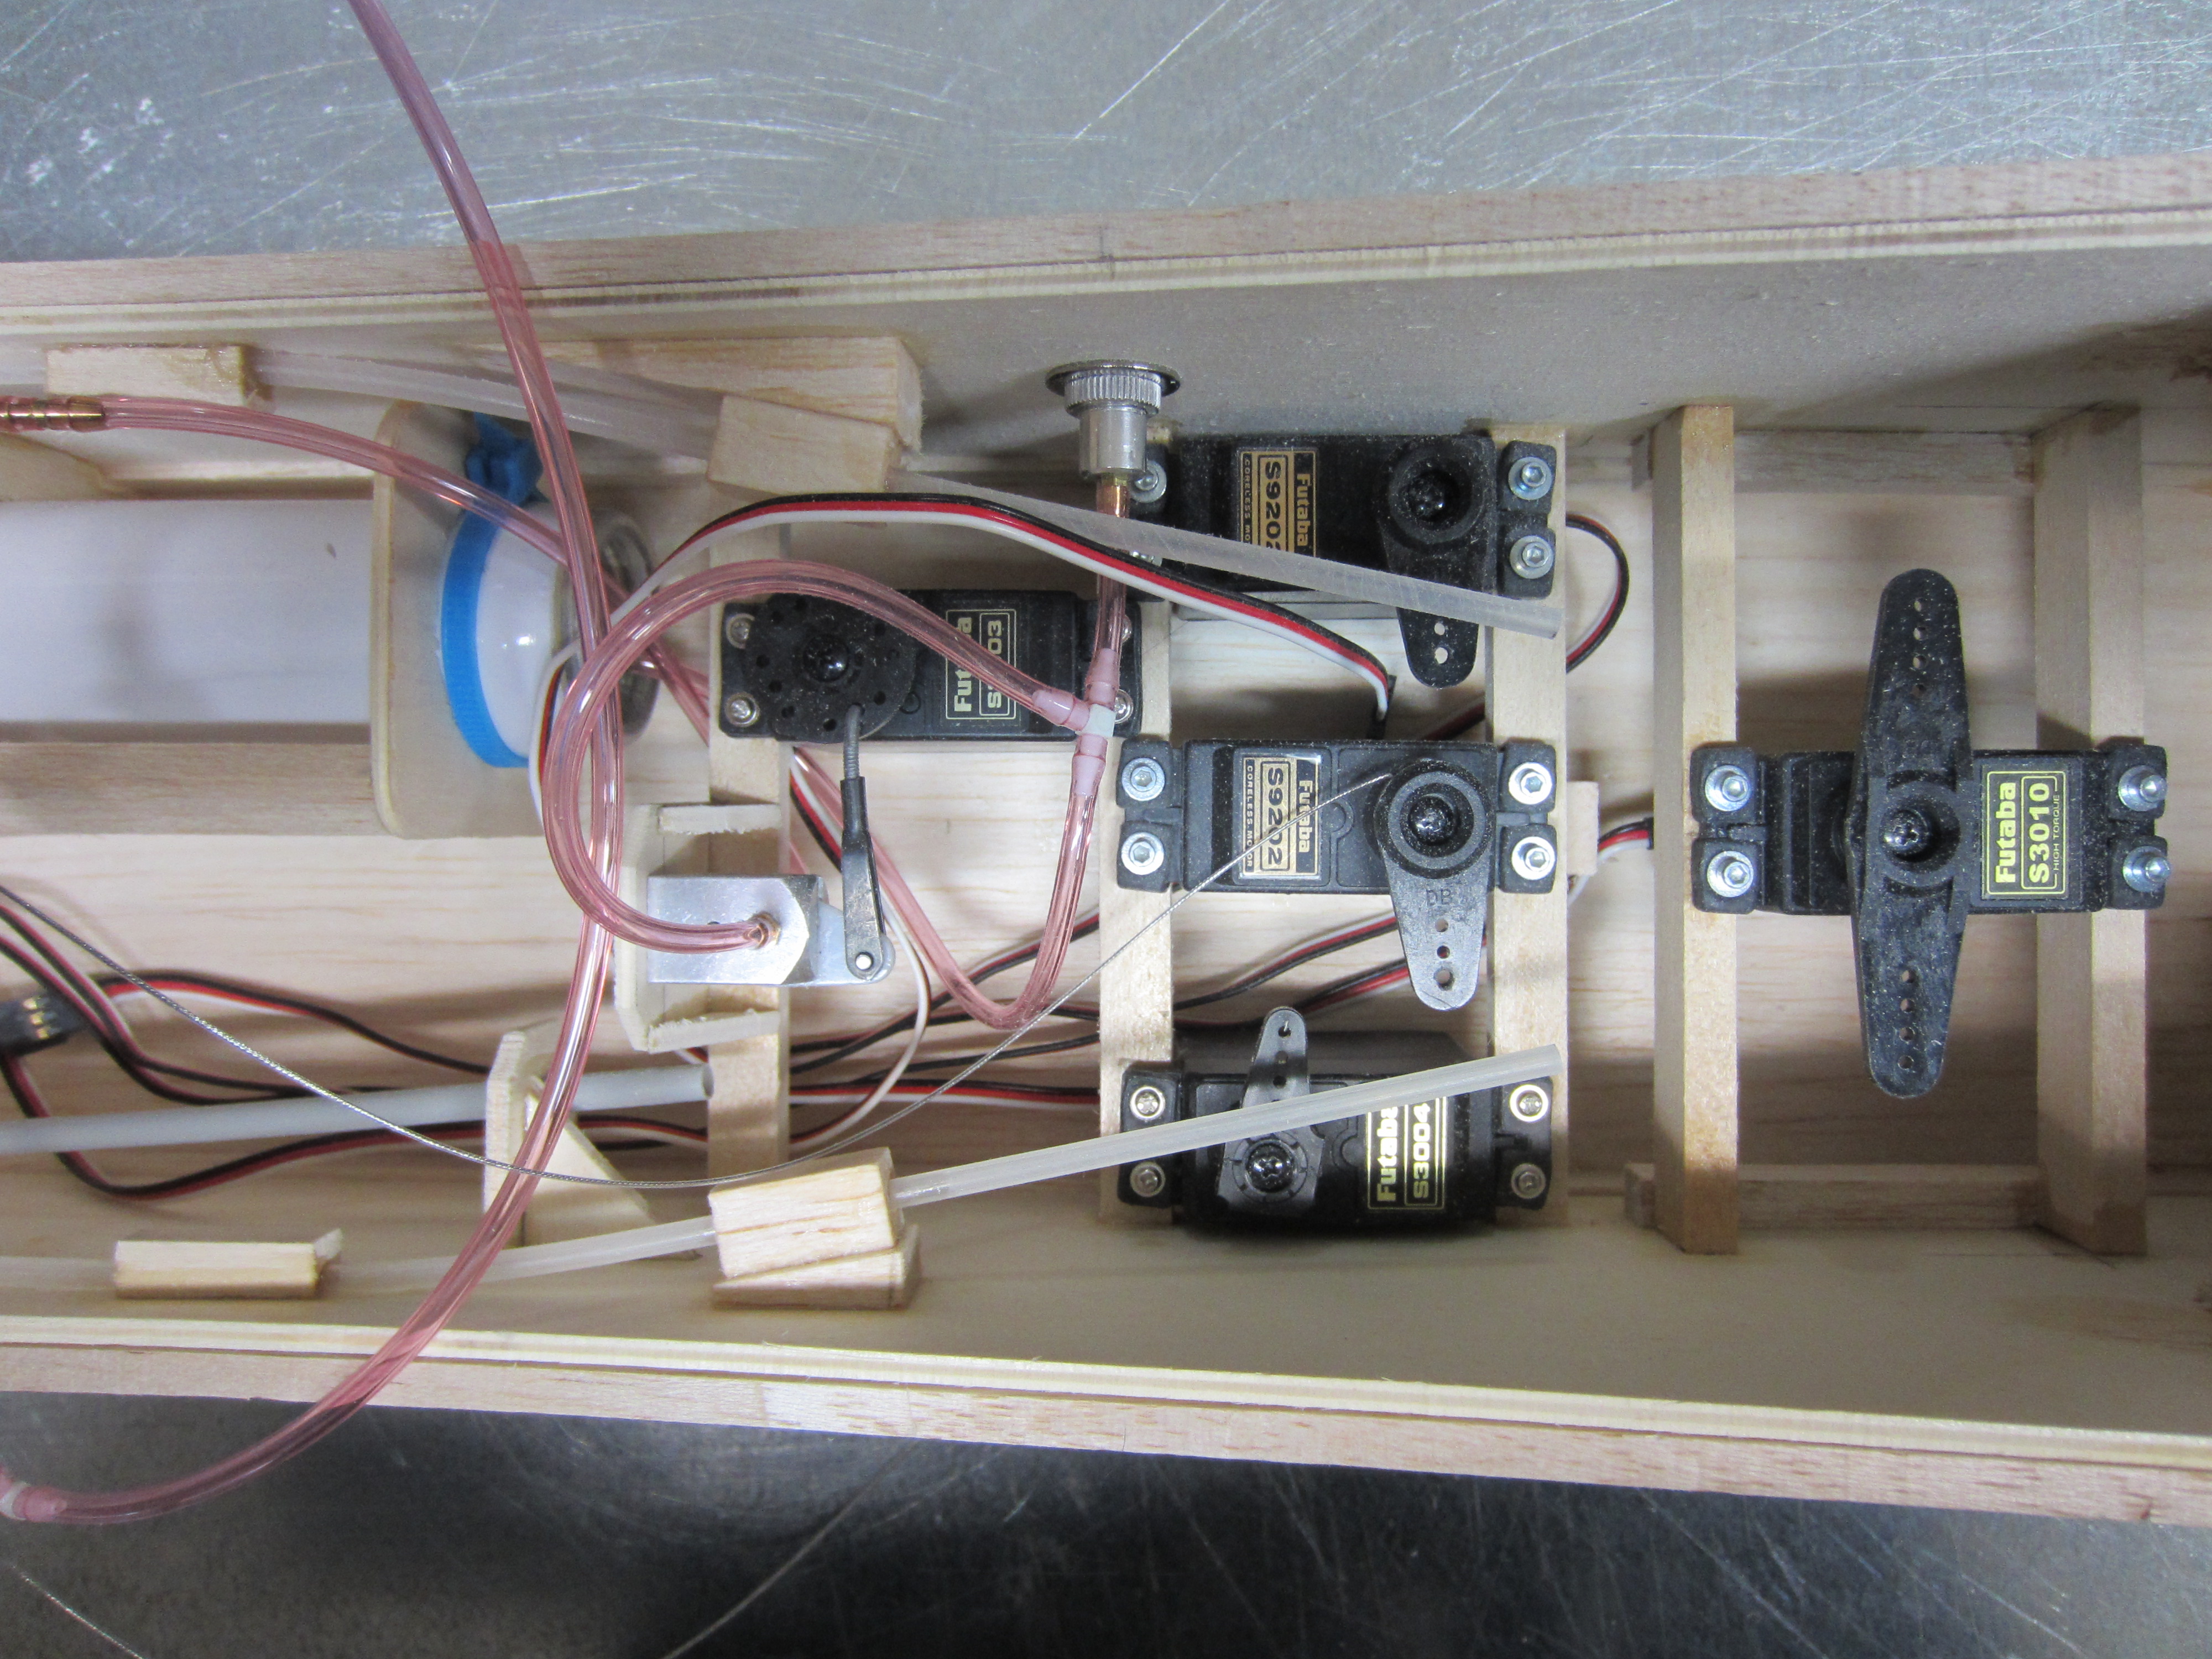
I got a bit more done on the K90. Placement of the rudder and elevator servos has been done. I'm using pull/pull on the rudder, and carbon fiber tubes on the elevators, one servo for each half. Speaking of dual elevator servos, what is the best method to connect up the two servos? With dual servos there, and dual servos on the ailerons, plus the retract servo, and possibly a steering servo, I'll be out of slots in the receiver.
Anyway, I placed guide tubes in the exit holes for both the elevator pushrods and the rudder cables. This should keep everything nice and straight, and operating smoothly. I can sight through both guides of each tube and see the end of each servo arm!
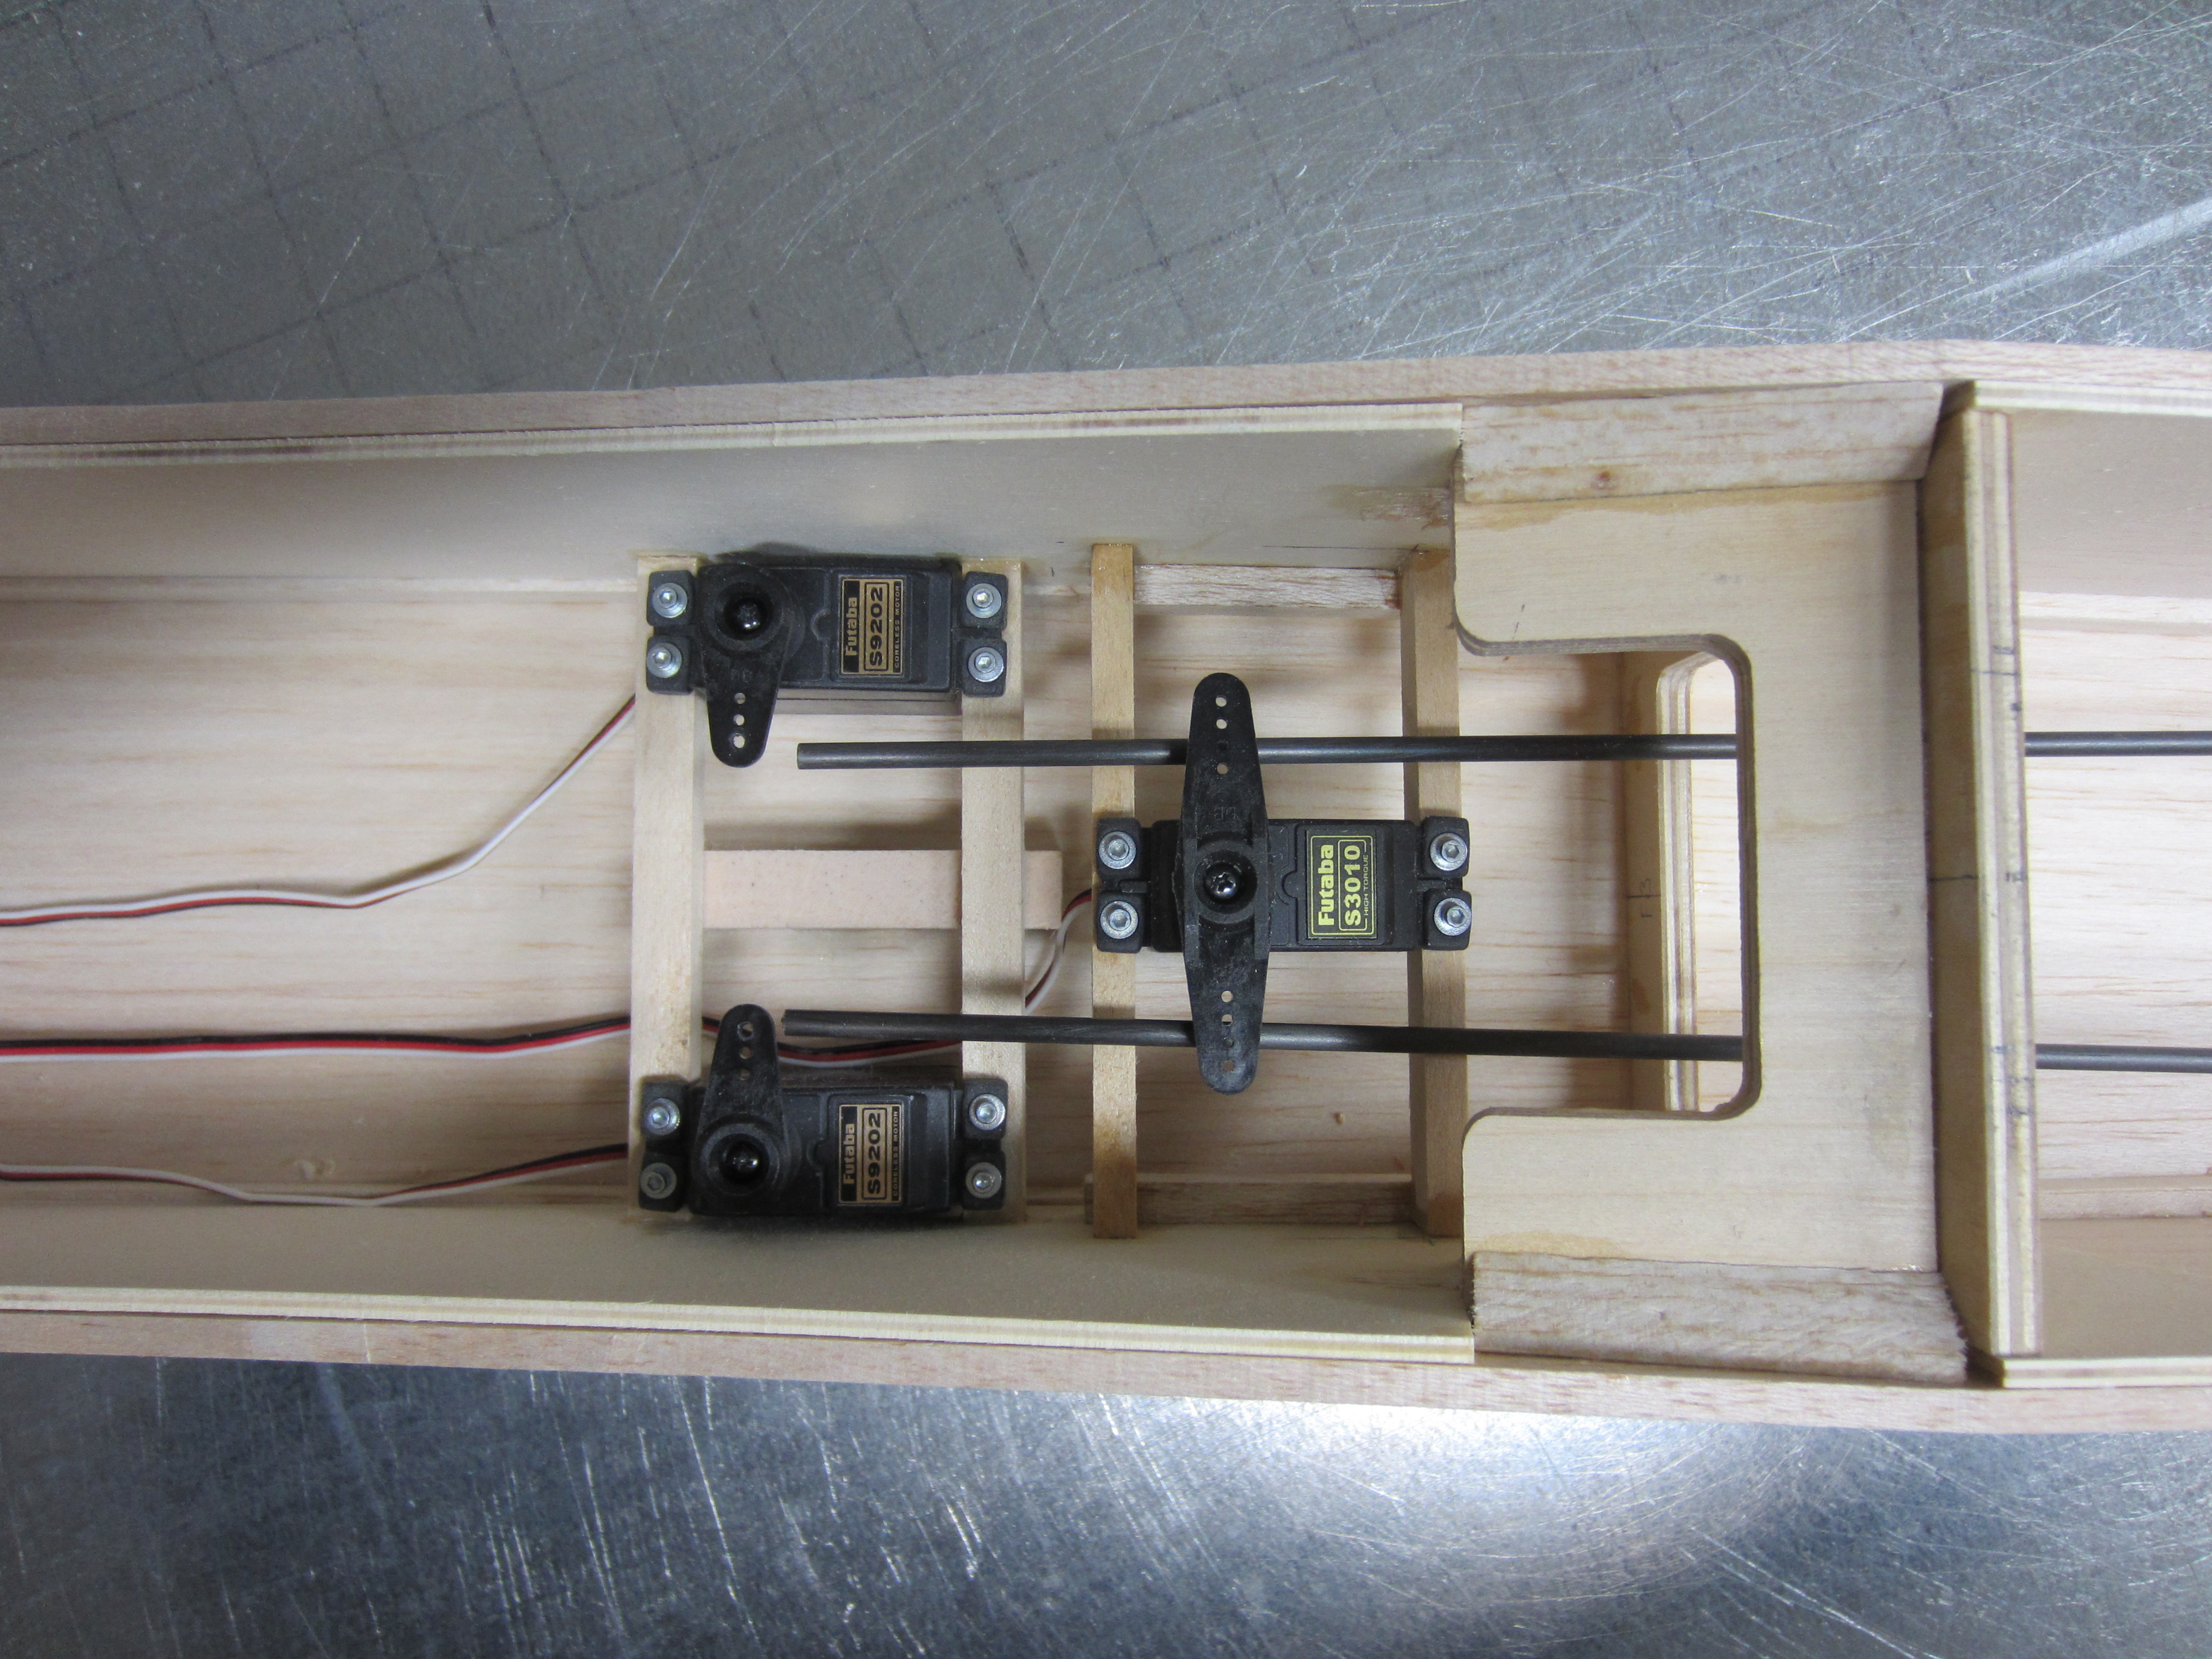
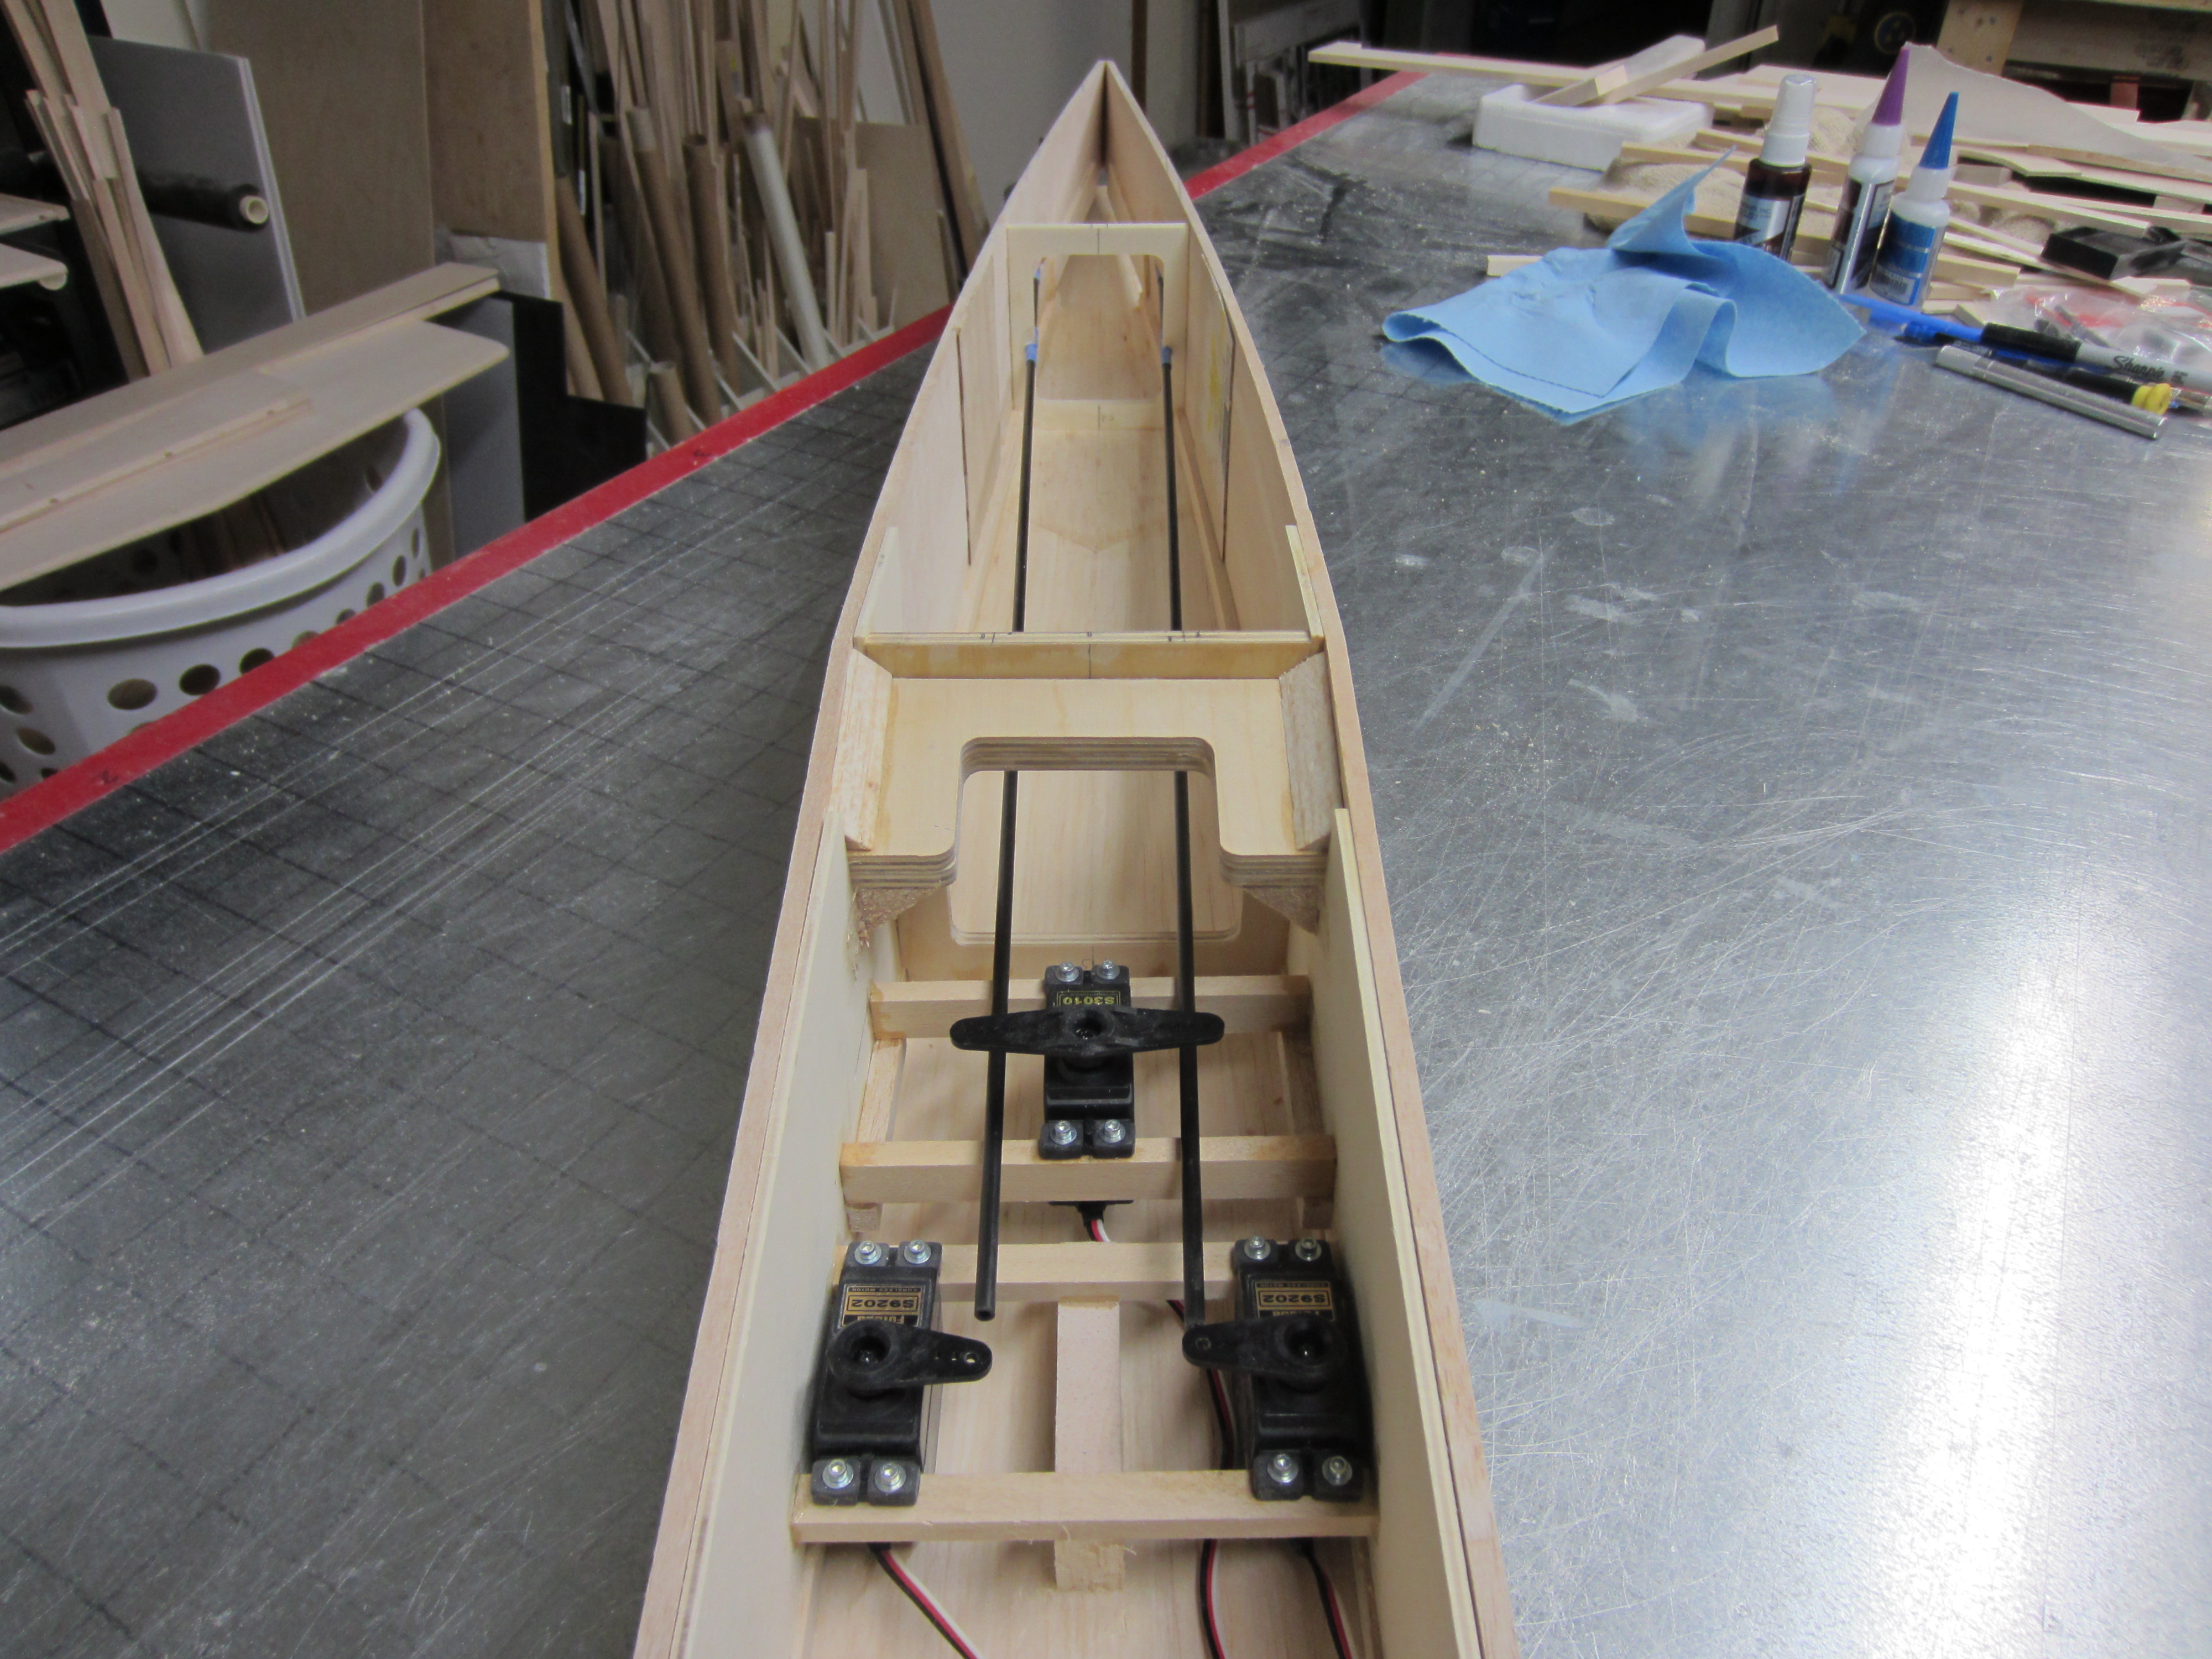
Anyway, I placed guide tubes in the exit holes for both the elevator pushrods and the rudder cables. This should keep everything nice and straight, and operating smoothly. I can sight through both guides of each tube and see the end of each servo arm!
03-15-2016 | 09:01 PM
#16
Thread Starter
My Feedback: (11)
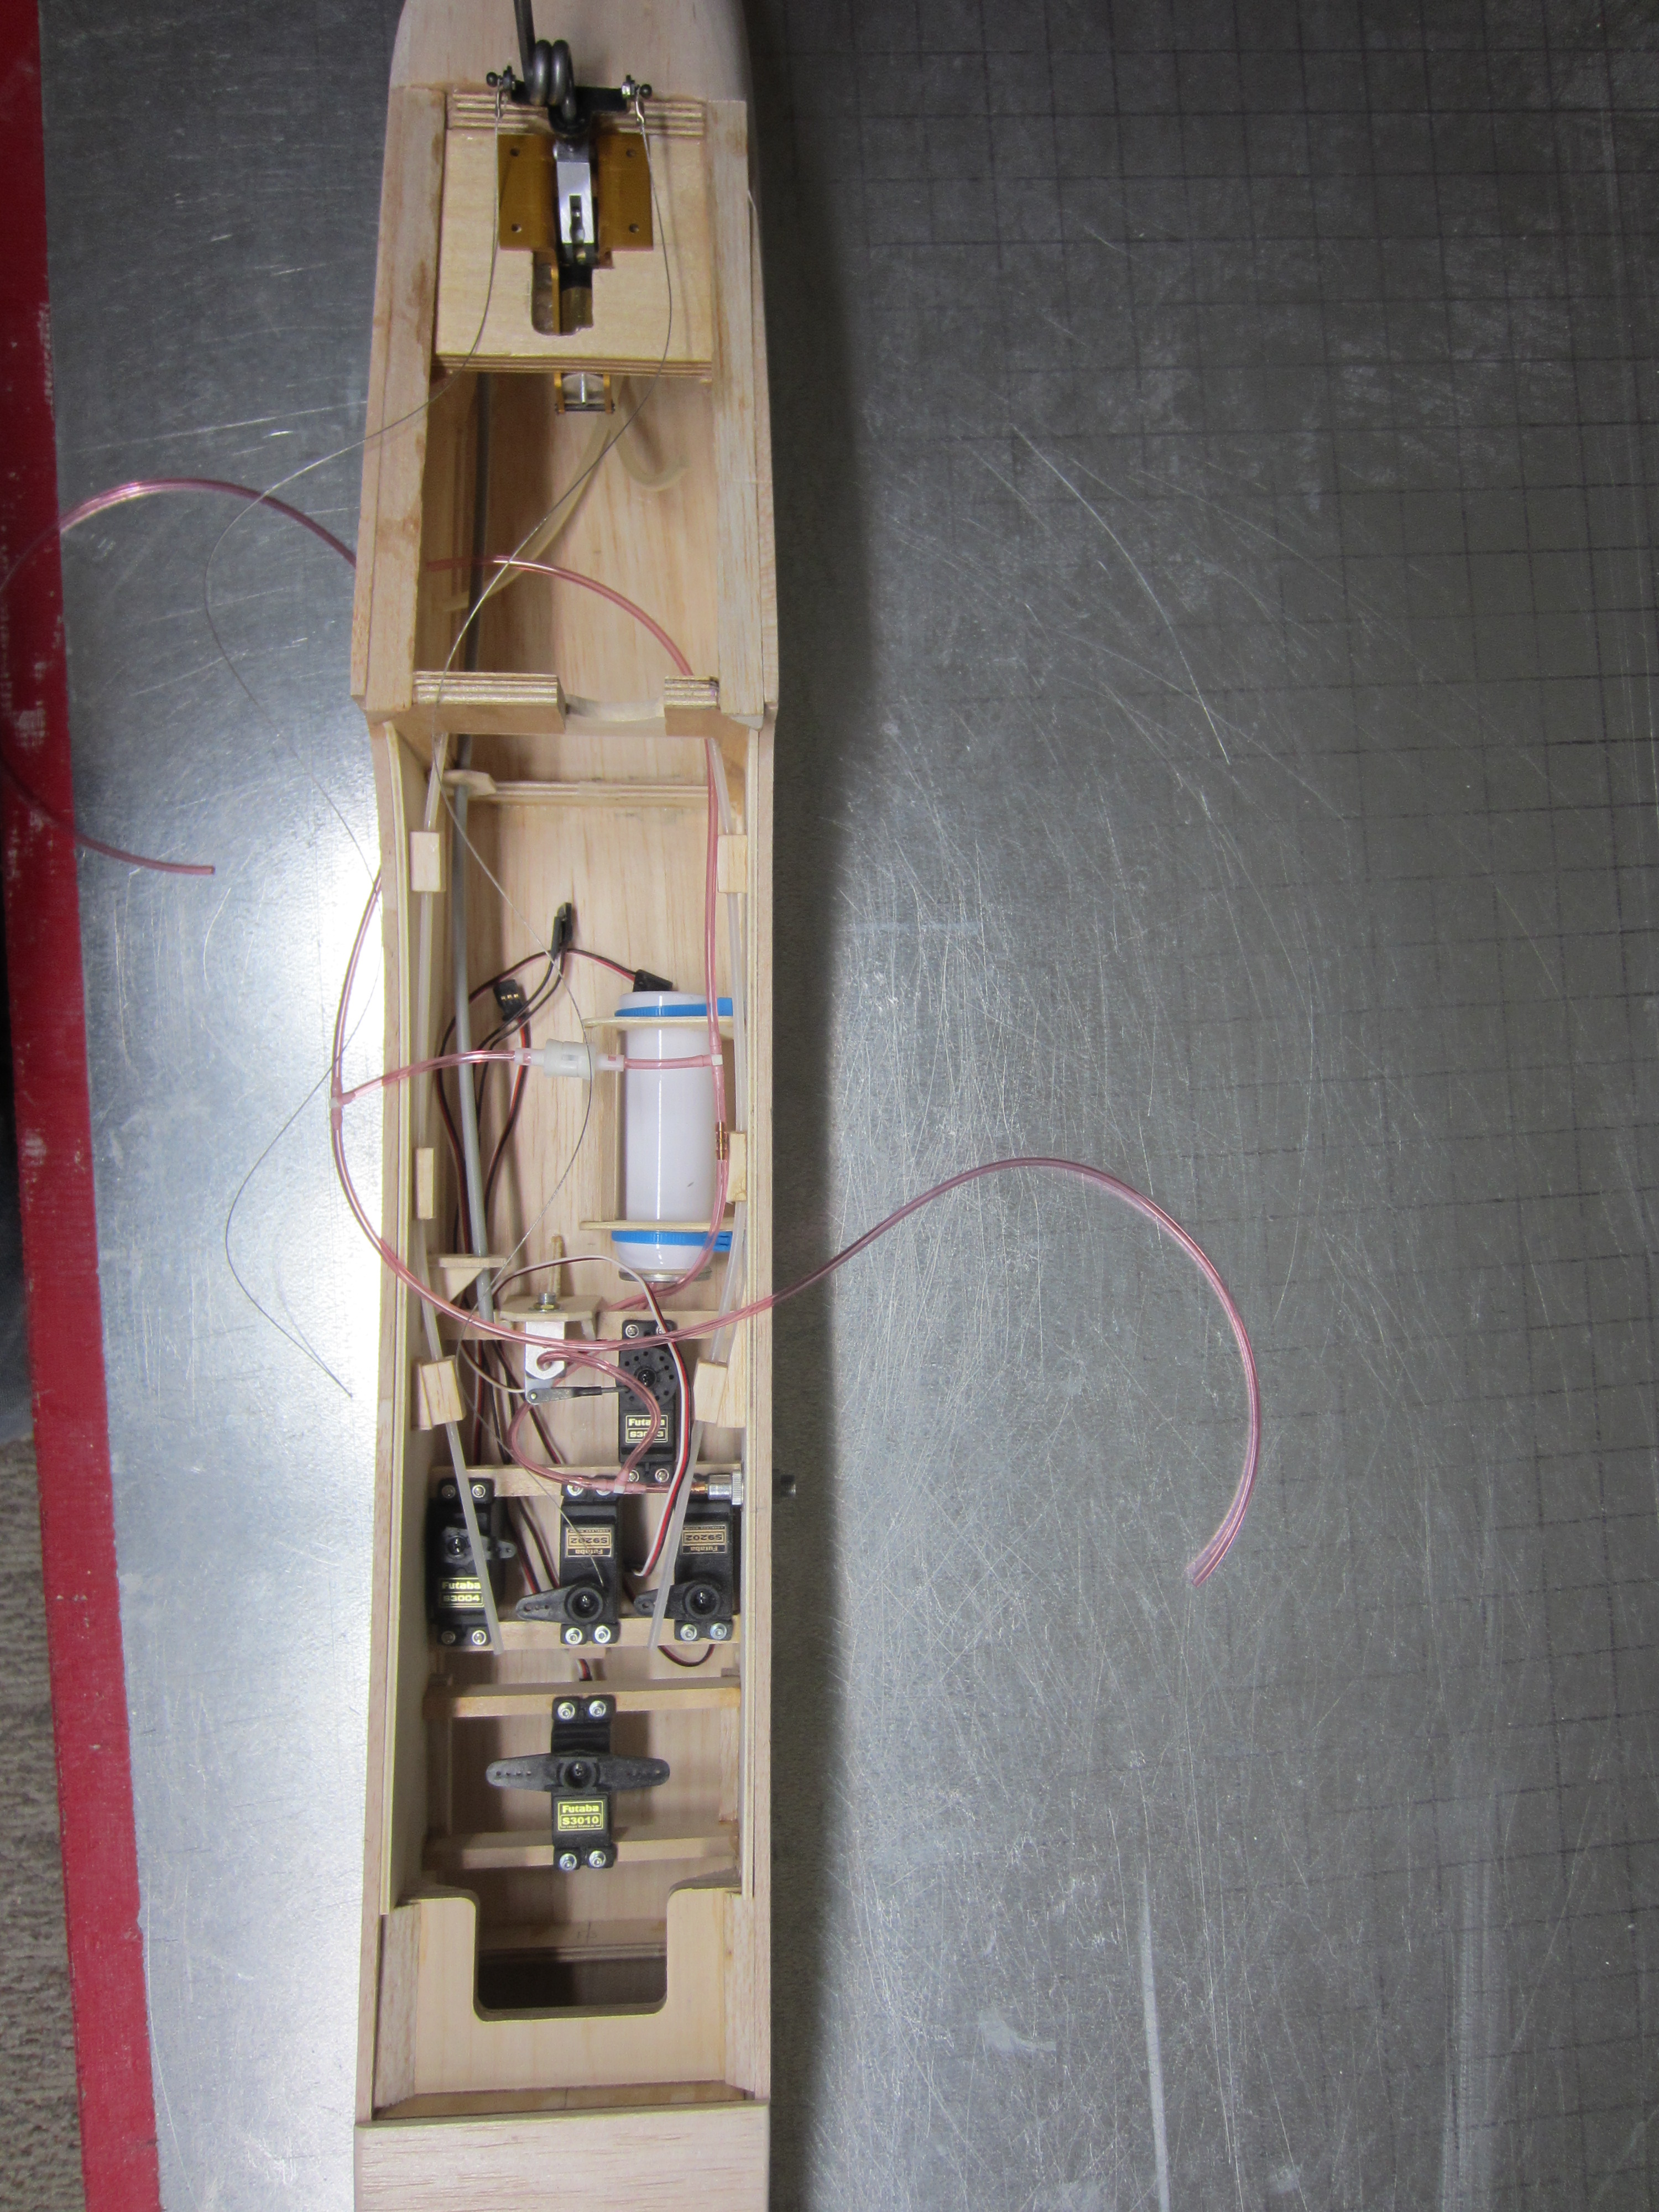
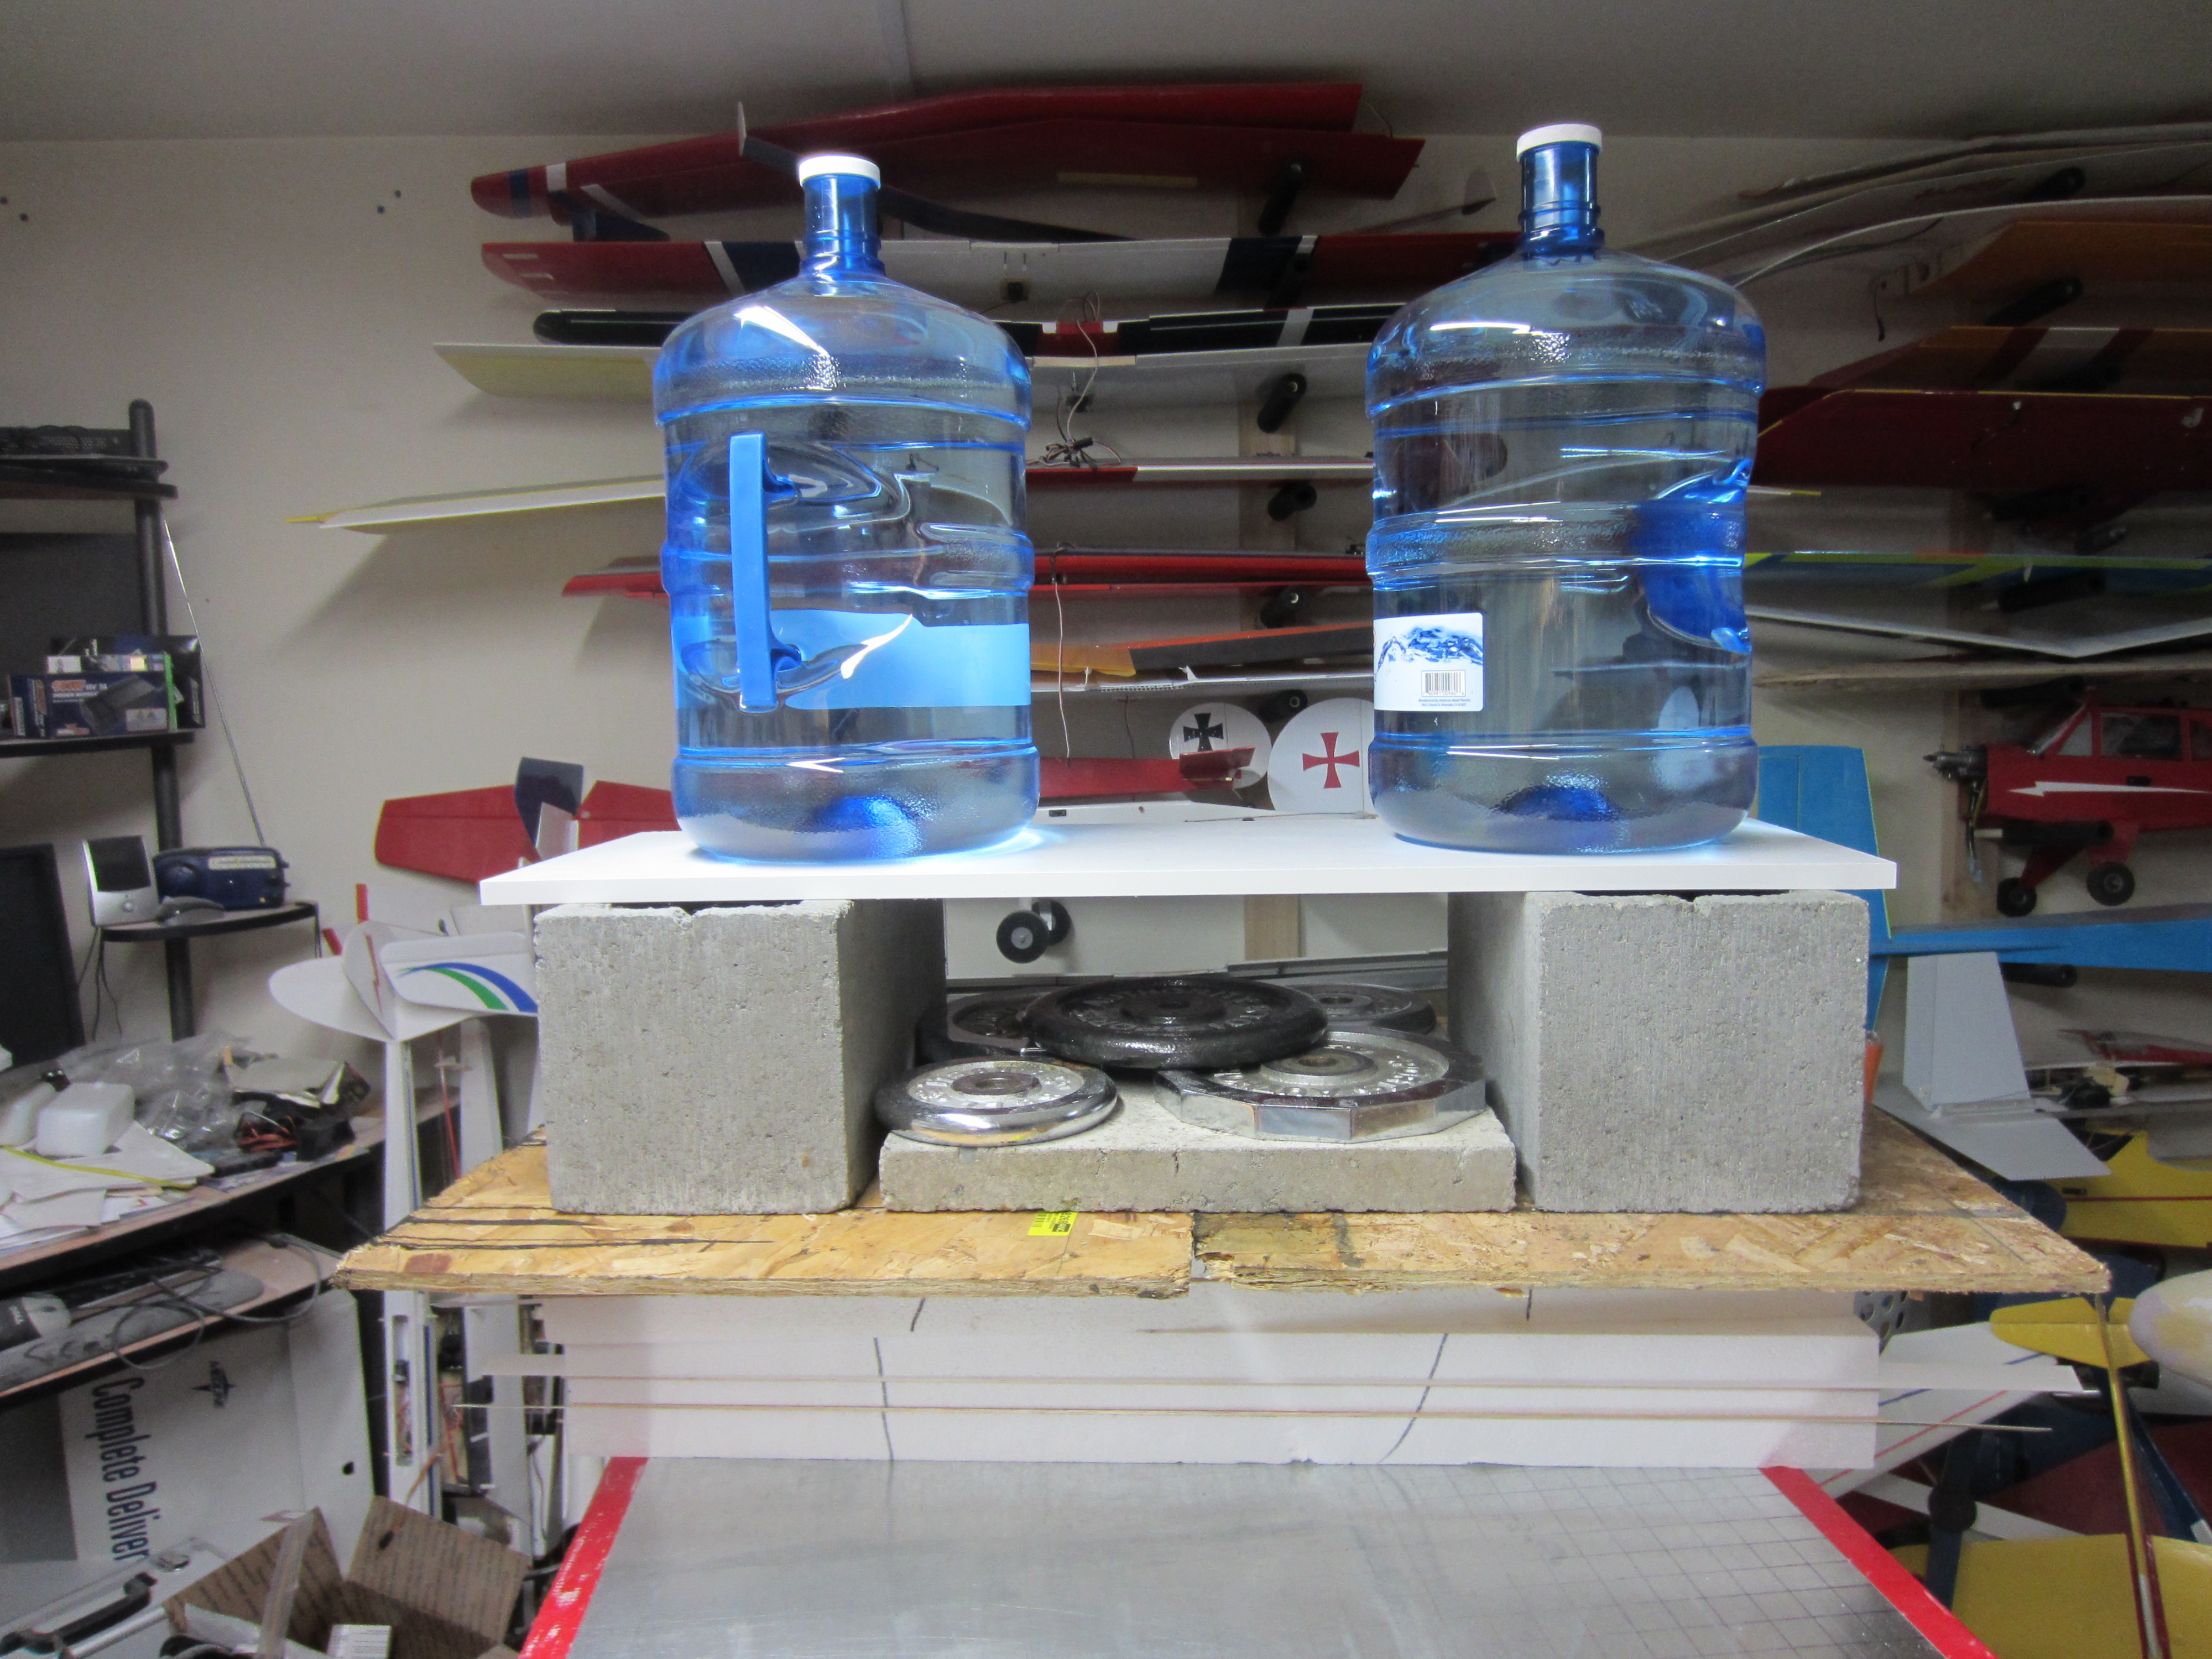
I got the servos all located along with the air system goodies. Next was to skin the wings, after getting the landing gear mountings and servo mountings in place. I gathered up all the weight I could to press the skins on, I hope its enough!
03-16-2016 | 08:59 AM
#17

Hey Jeff,
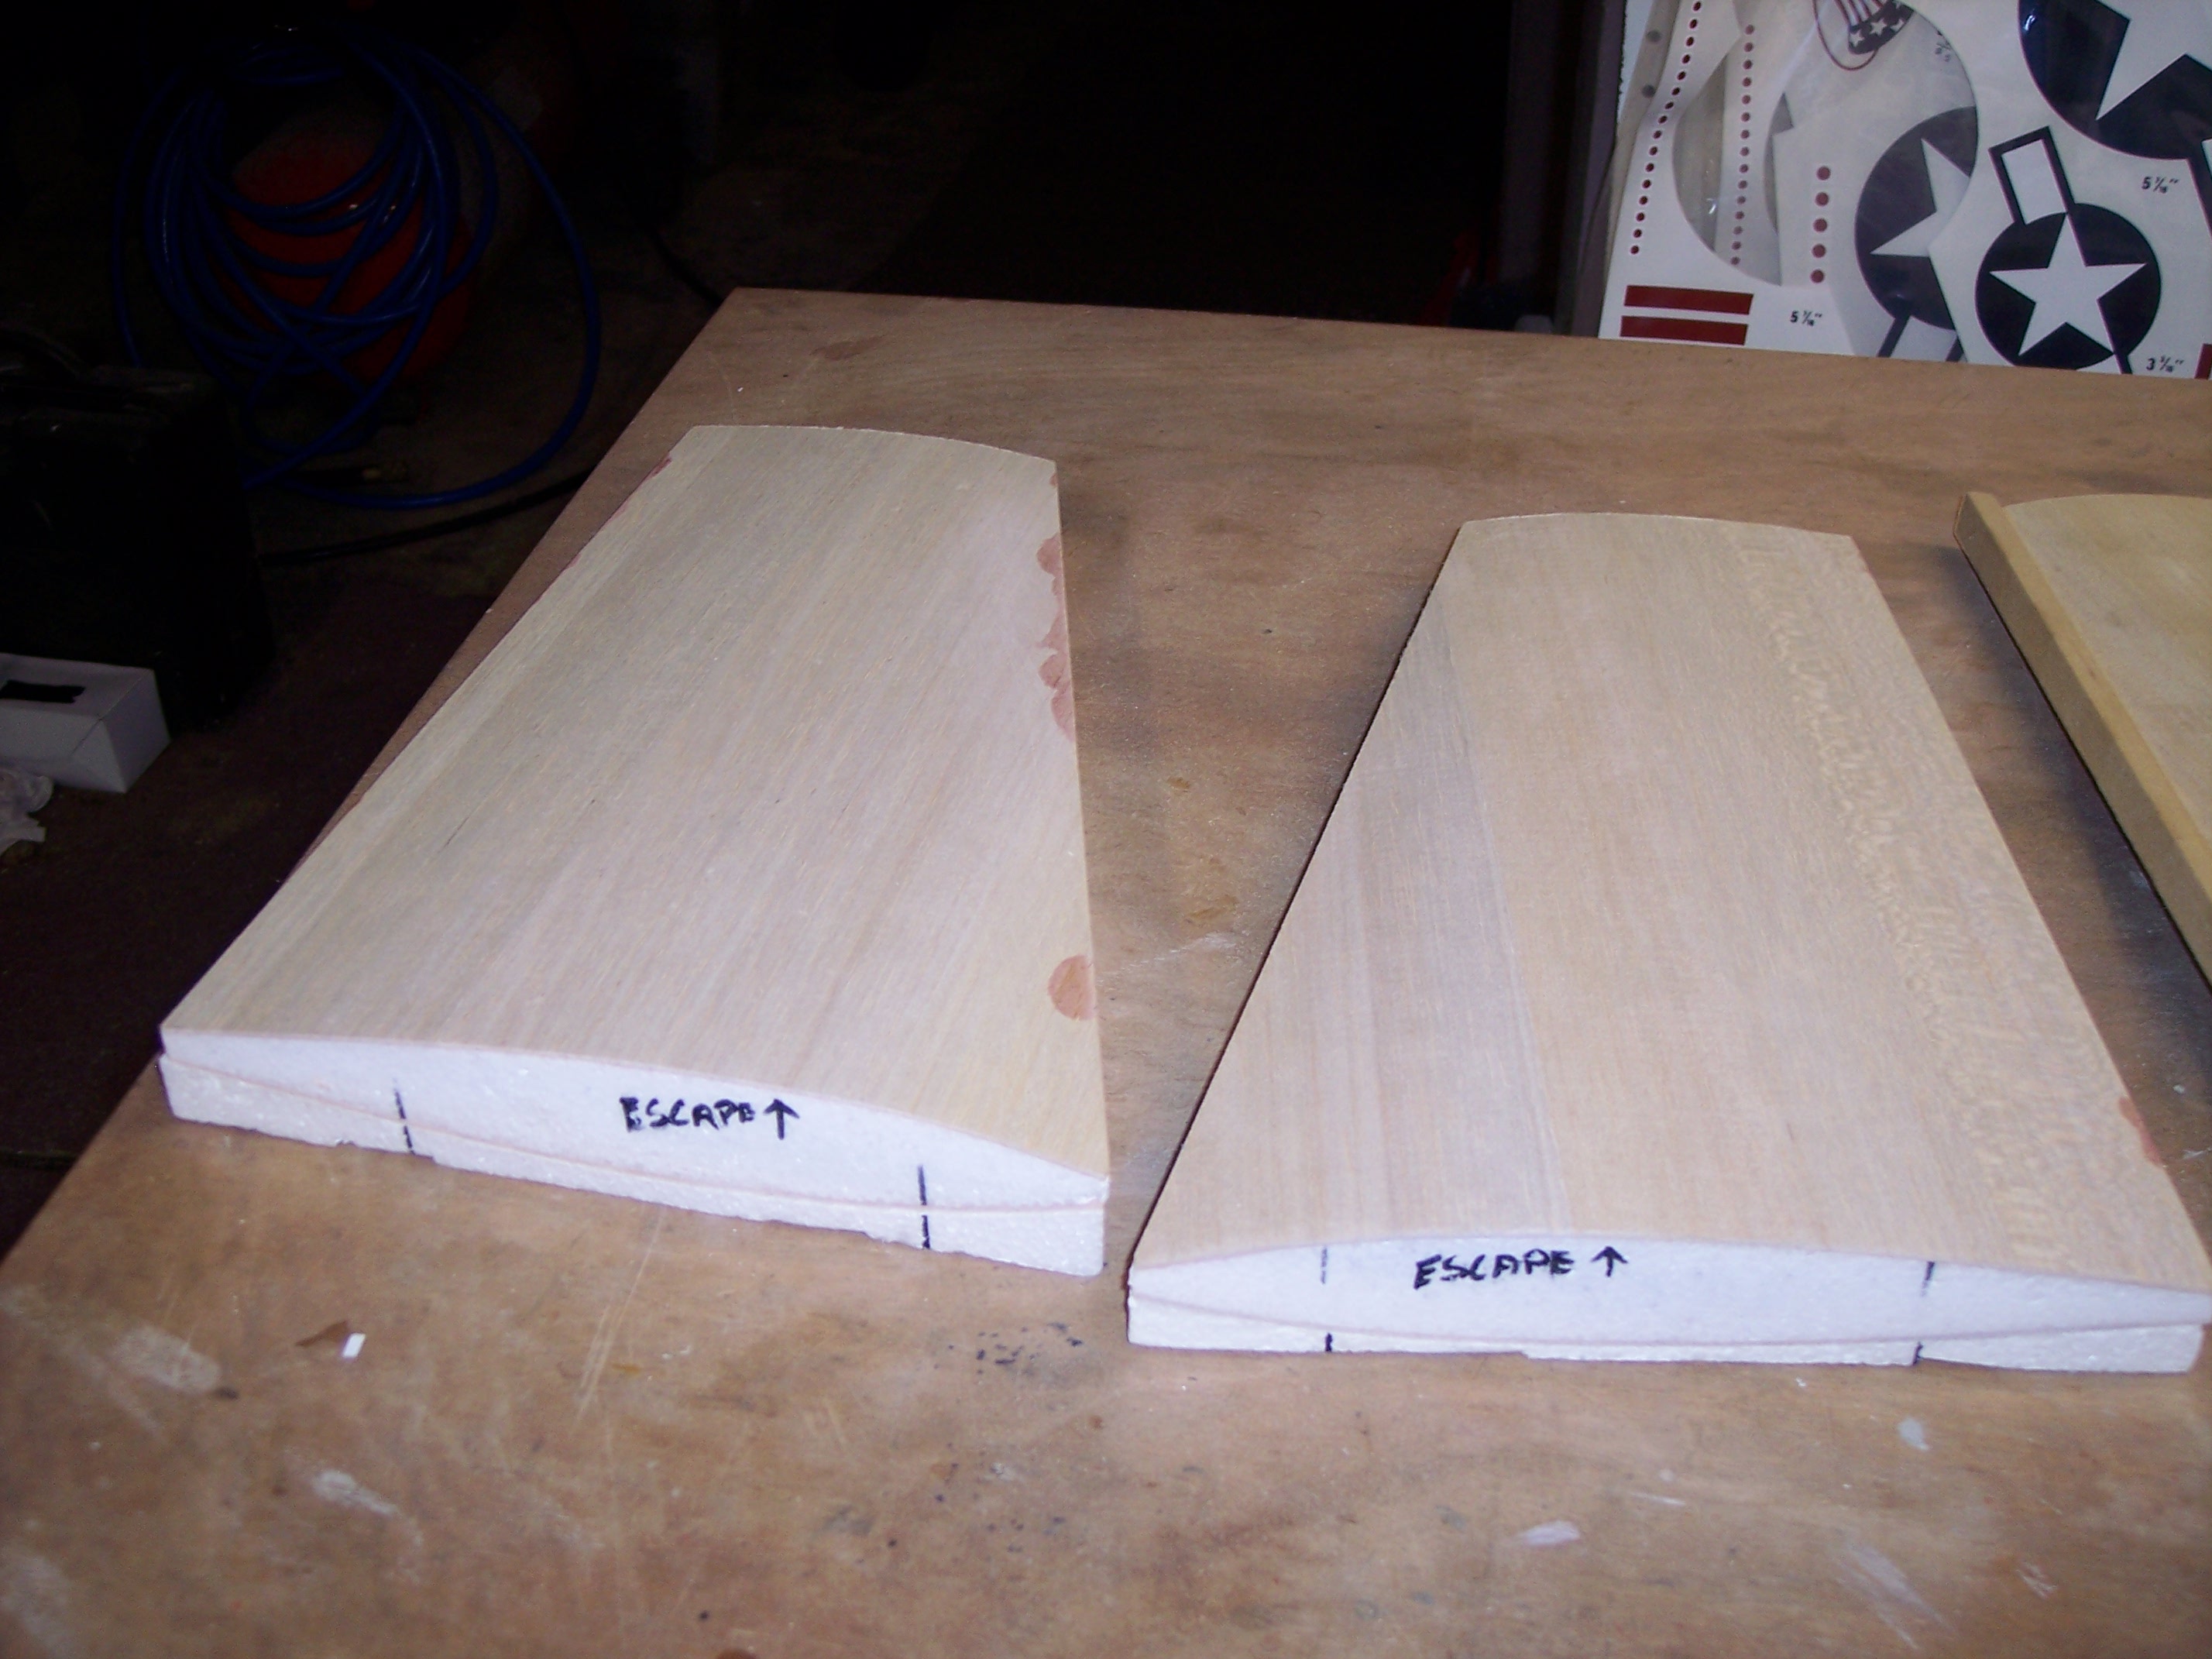
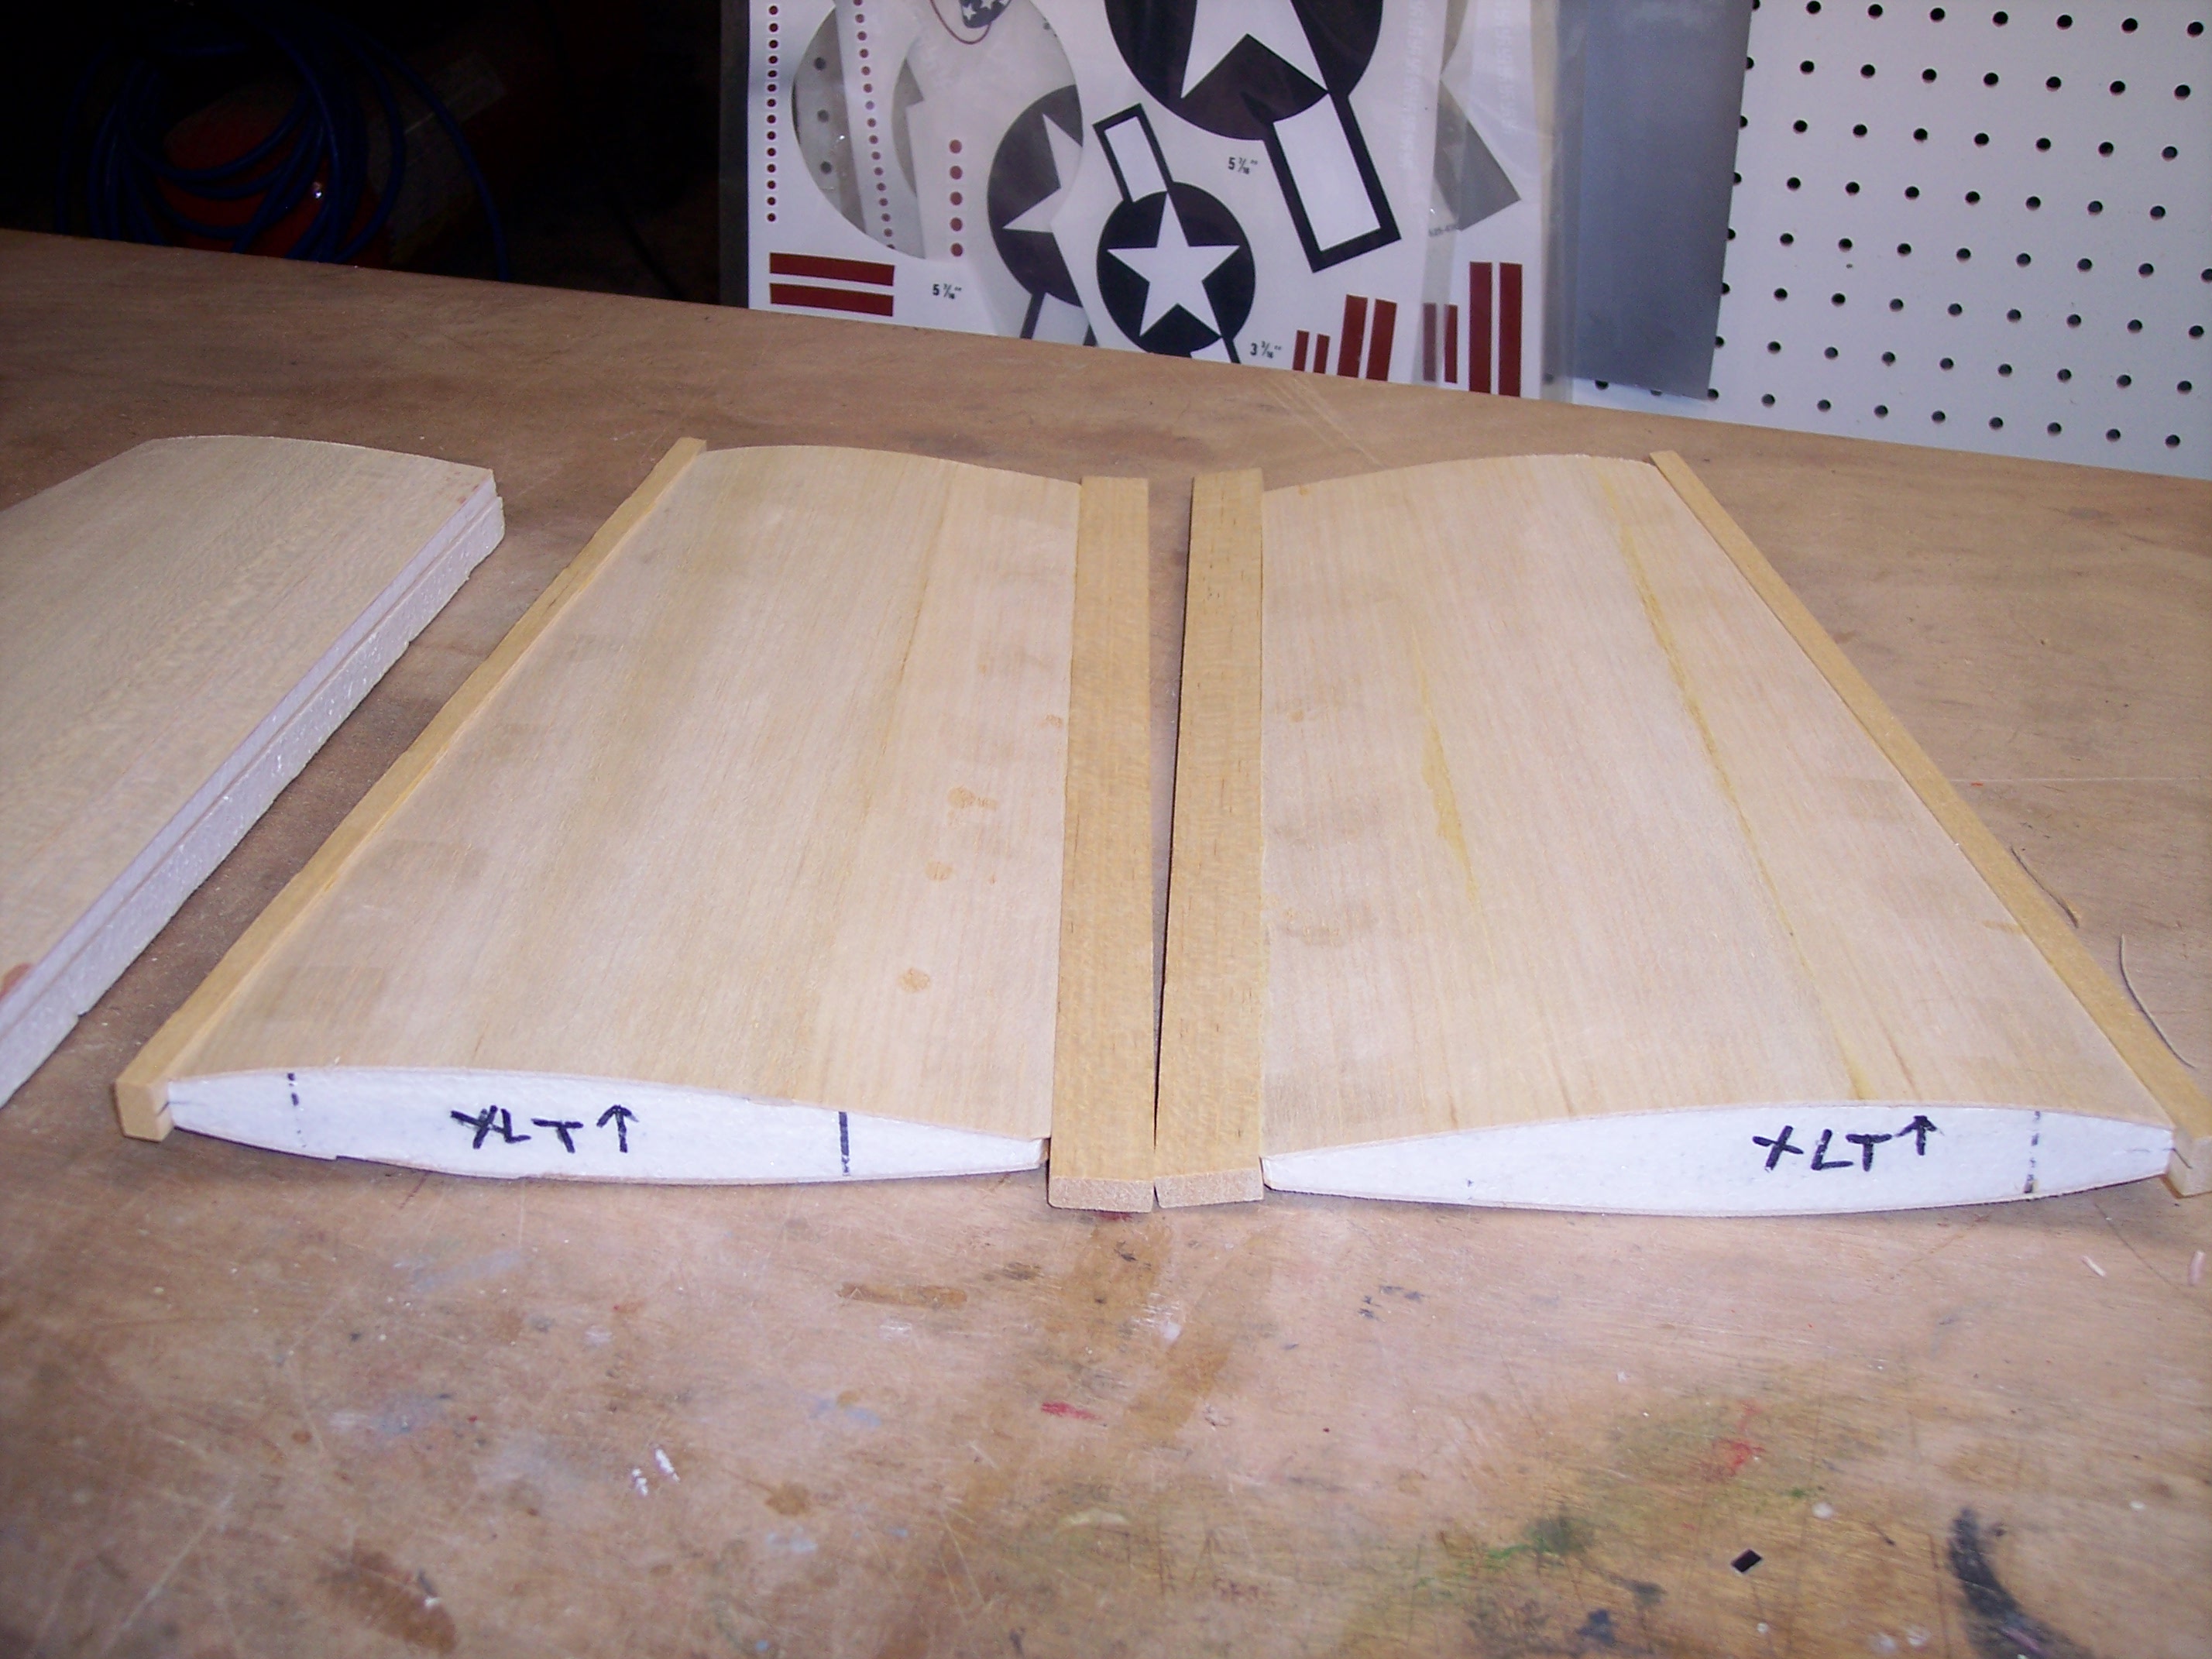 I used to do the weights on my cores until I had one core w/ a slight bend. I started vacuum bagging and now they are dead nuts on. These are for a Bridi XLT ans Escape
Just and idea and not a very expensive kit to buy.
I like the radio install. More room than my Deception!
Just and idea and not a very expensive kit to buy.
I like the radio install. More room than my Deception!
 03-17-2016 | 09:33 AM
#21
Hi Jeff,
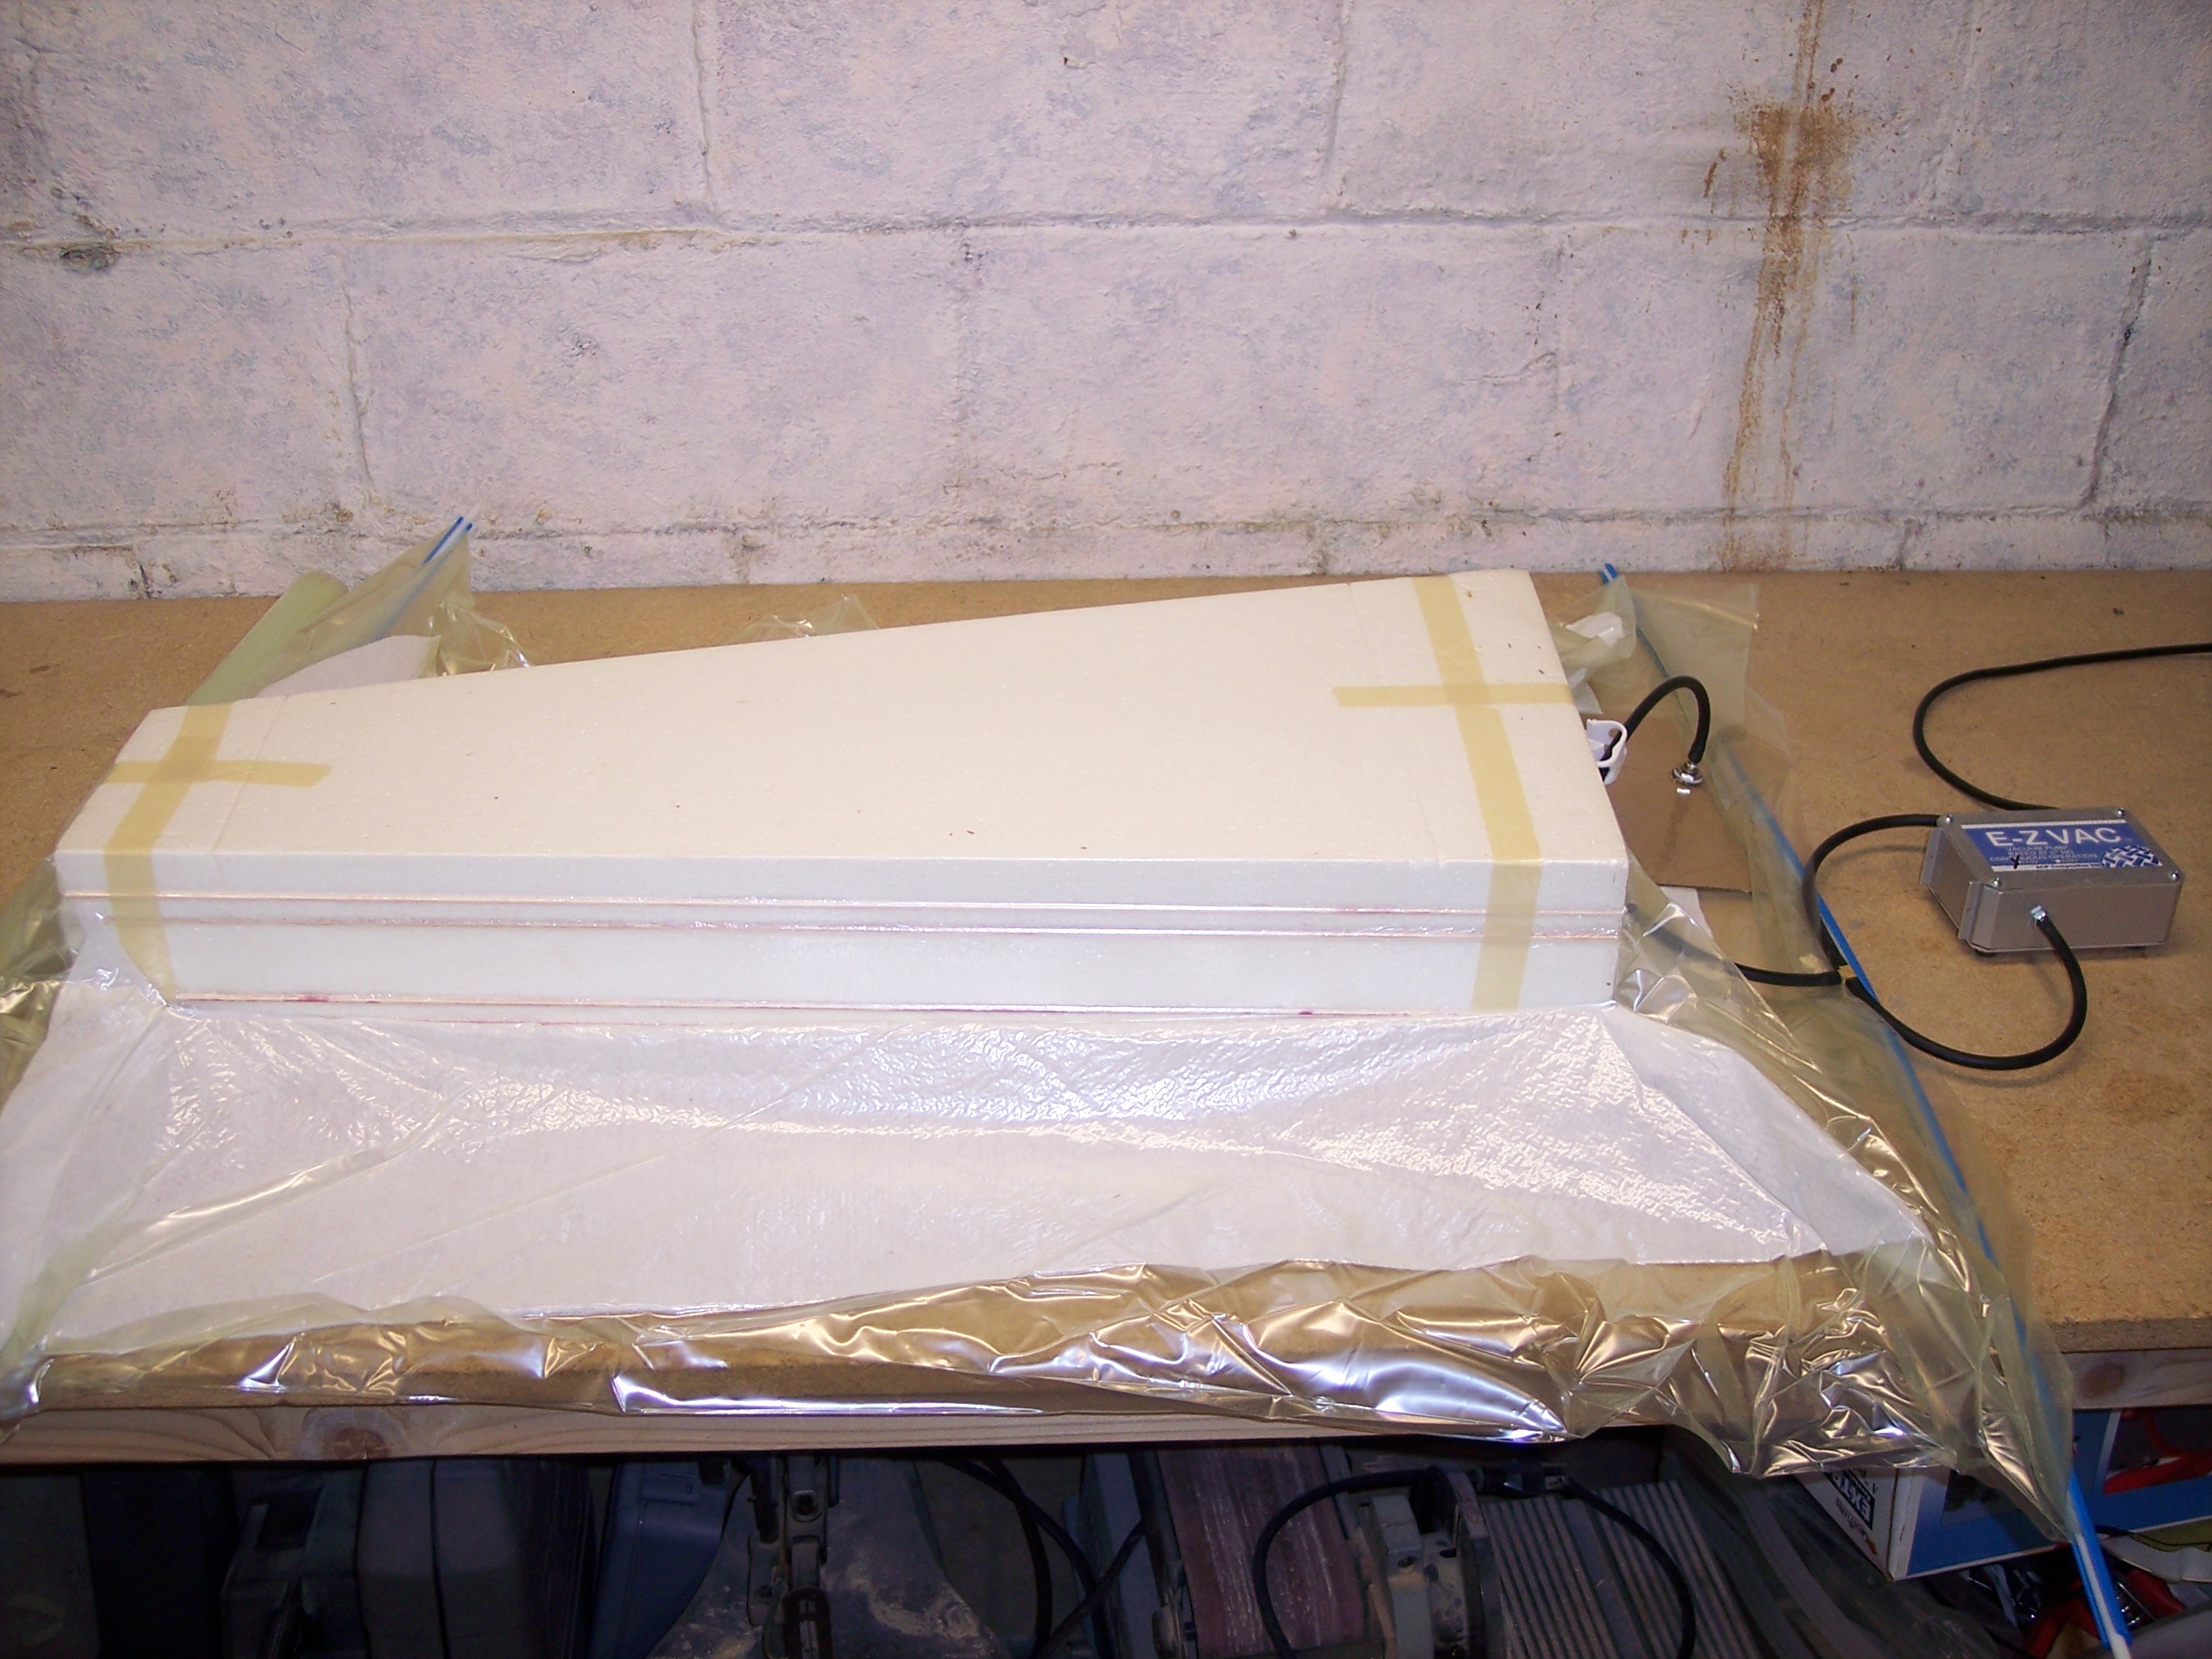
I thought the same thing until I ran across this system from APC called the EZ Vac system http://www.acpsales.com/Vacuum-Bagging-Systems.html.
Since I plan to do a lot of wings, and already have guys lined up to do theirs, I got one.
I use Z-Poxy finishing resin system and in three hours the cores are done. I can fit the wings and stabs in one bag.
I'm following your build as I would like to have a large Kaos w/ a O.S. .95 AX.
Ed

