ME 109 Scratch Build from Midwest Plans
 12-24-2021 | 01:23 AM
#1
Thread Starter
Senior Member
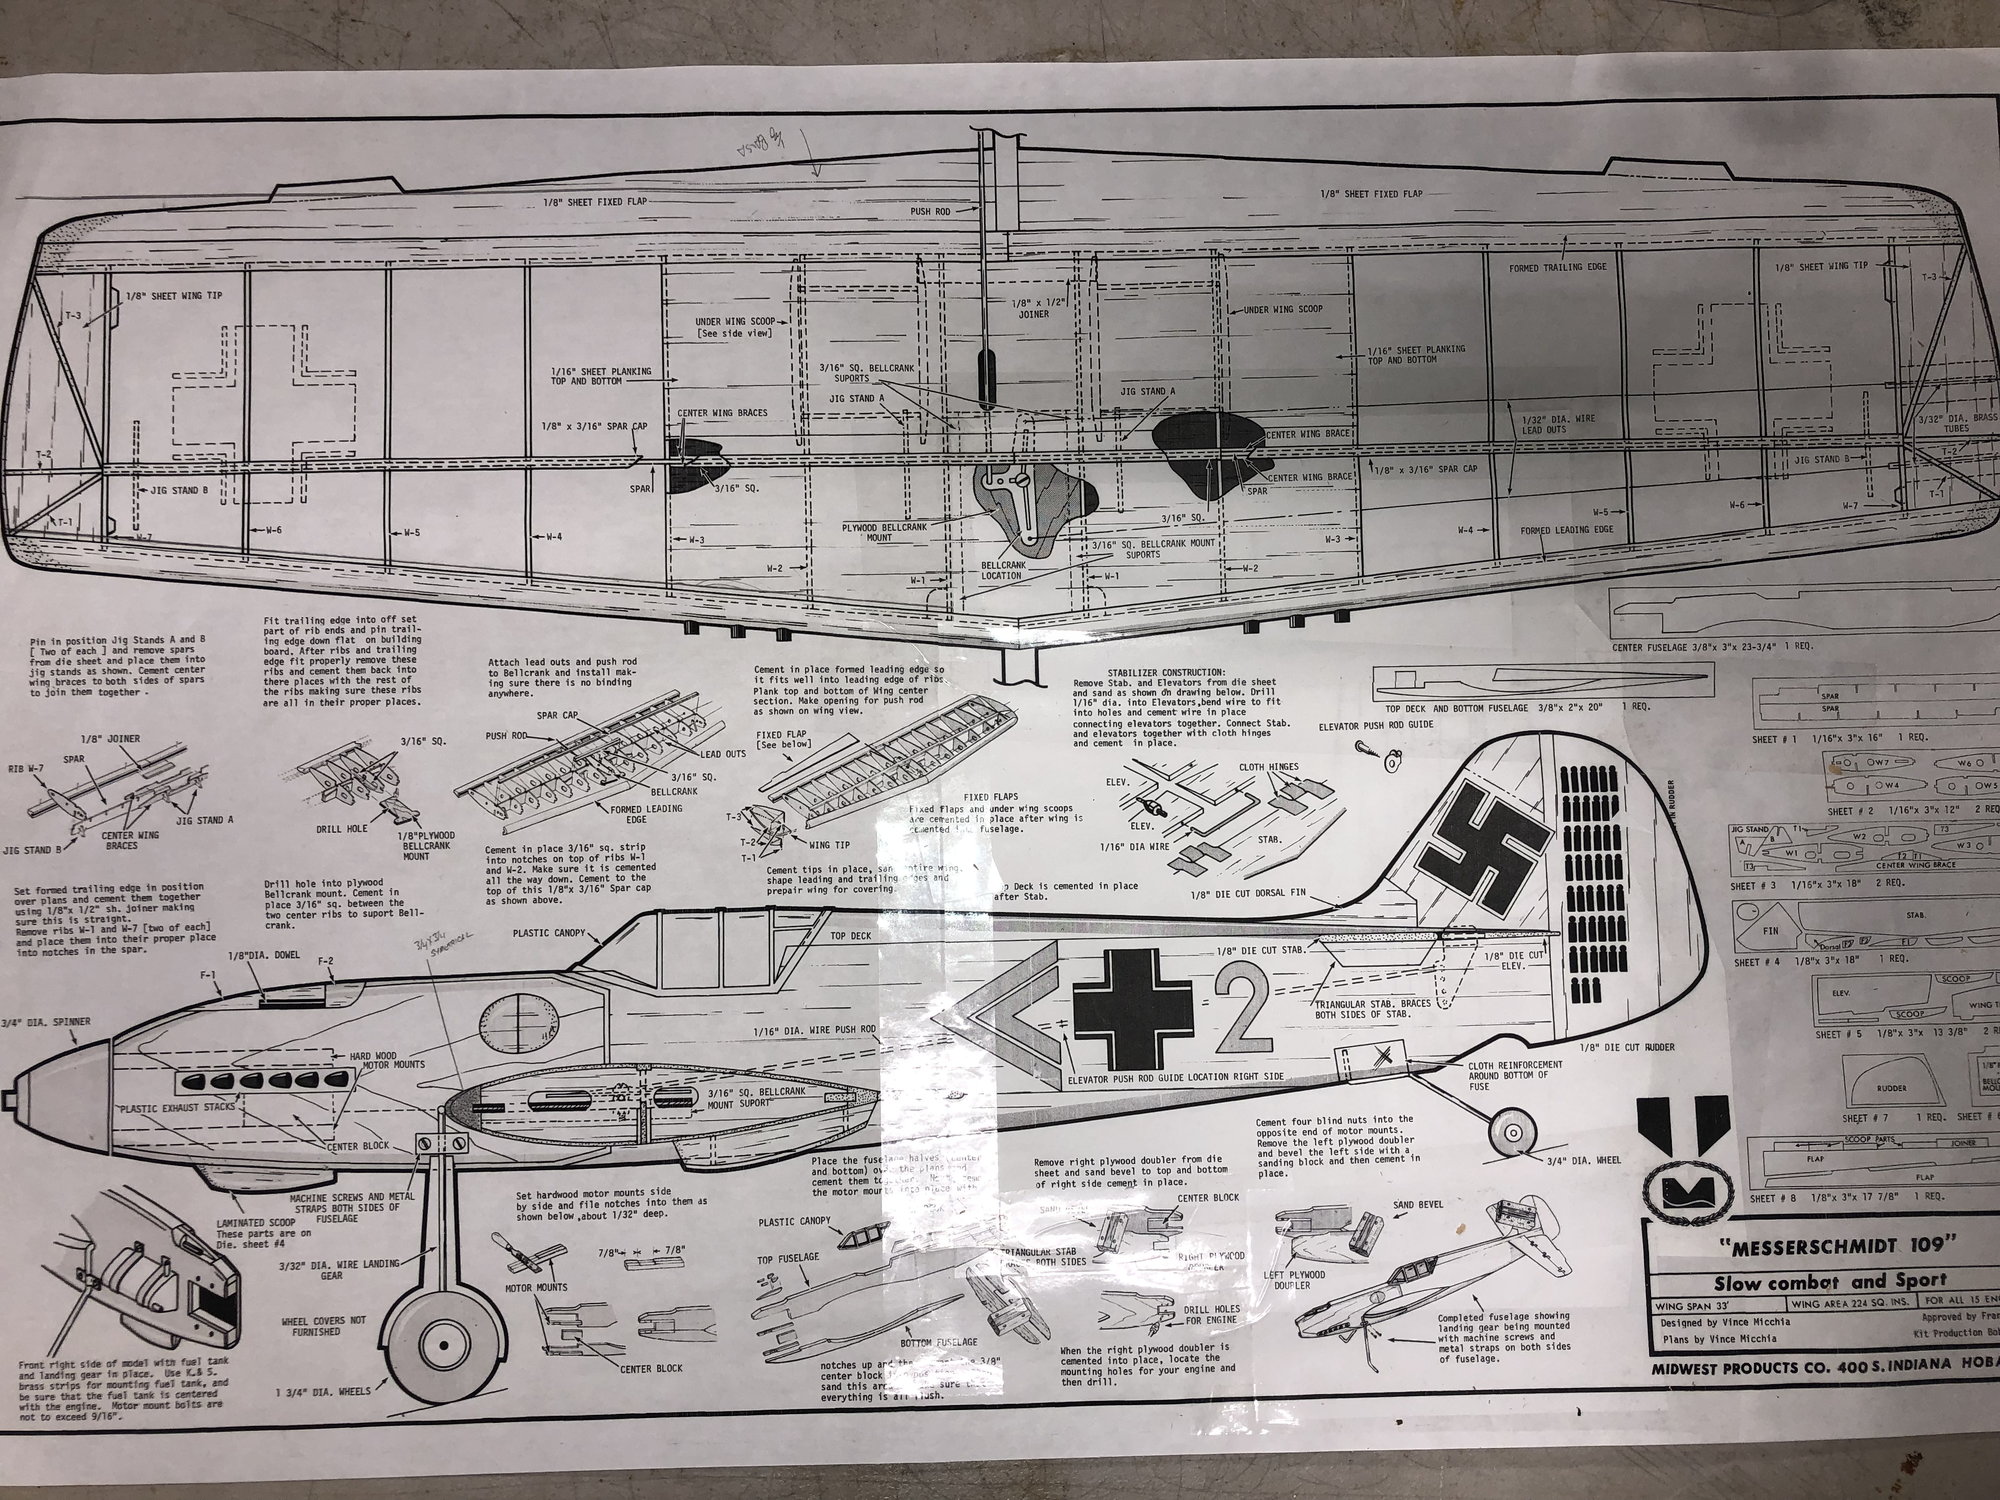
Just getting started on the ME 109. Downloaded the plans from OZ and cleaned up some scaling issues for ribs, stab, elev. etc. Now one sheet lays out the wing and fuse… the other provides all the cut and past templates for the balsa wood. Got everything ready to cut and will pick up this project after Christmas.
Made a few alterations … love tape. LOL.
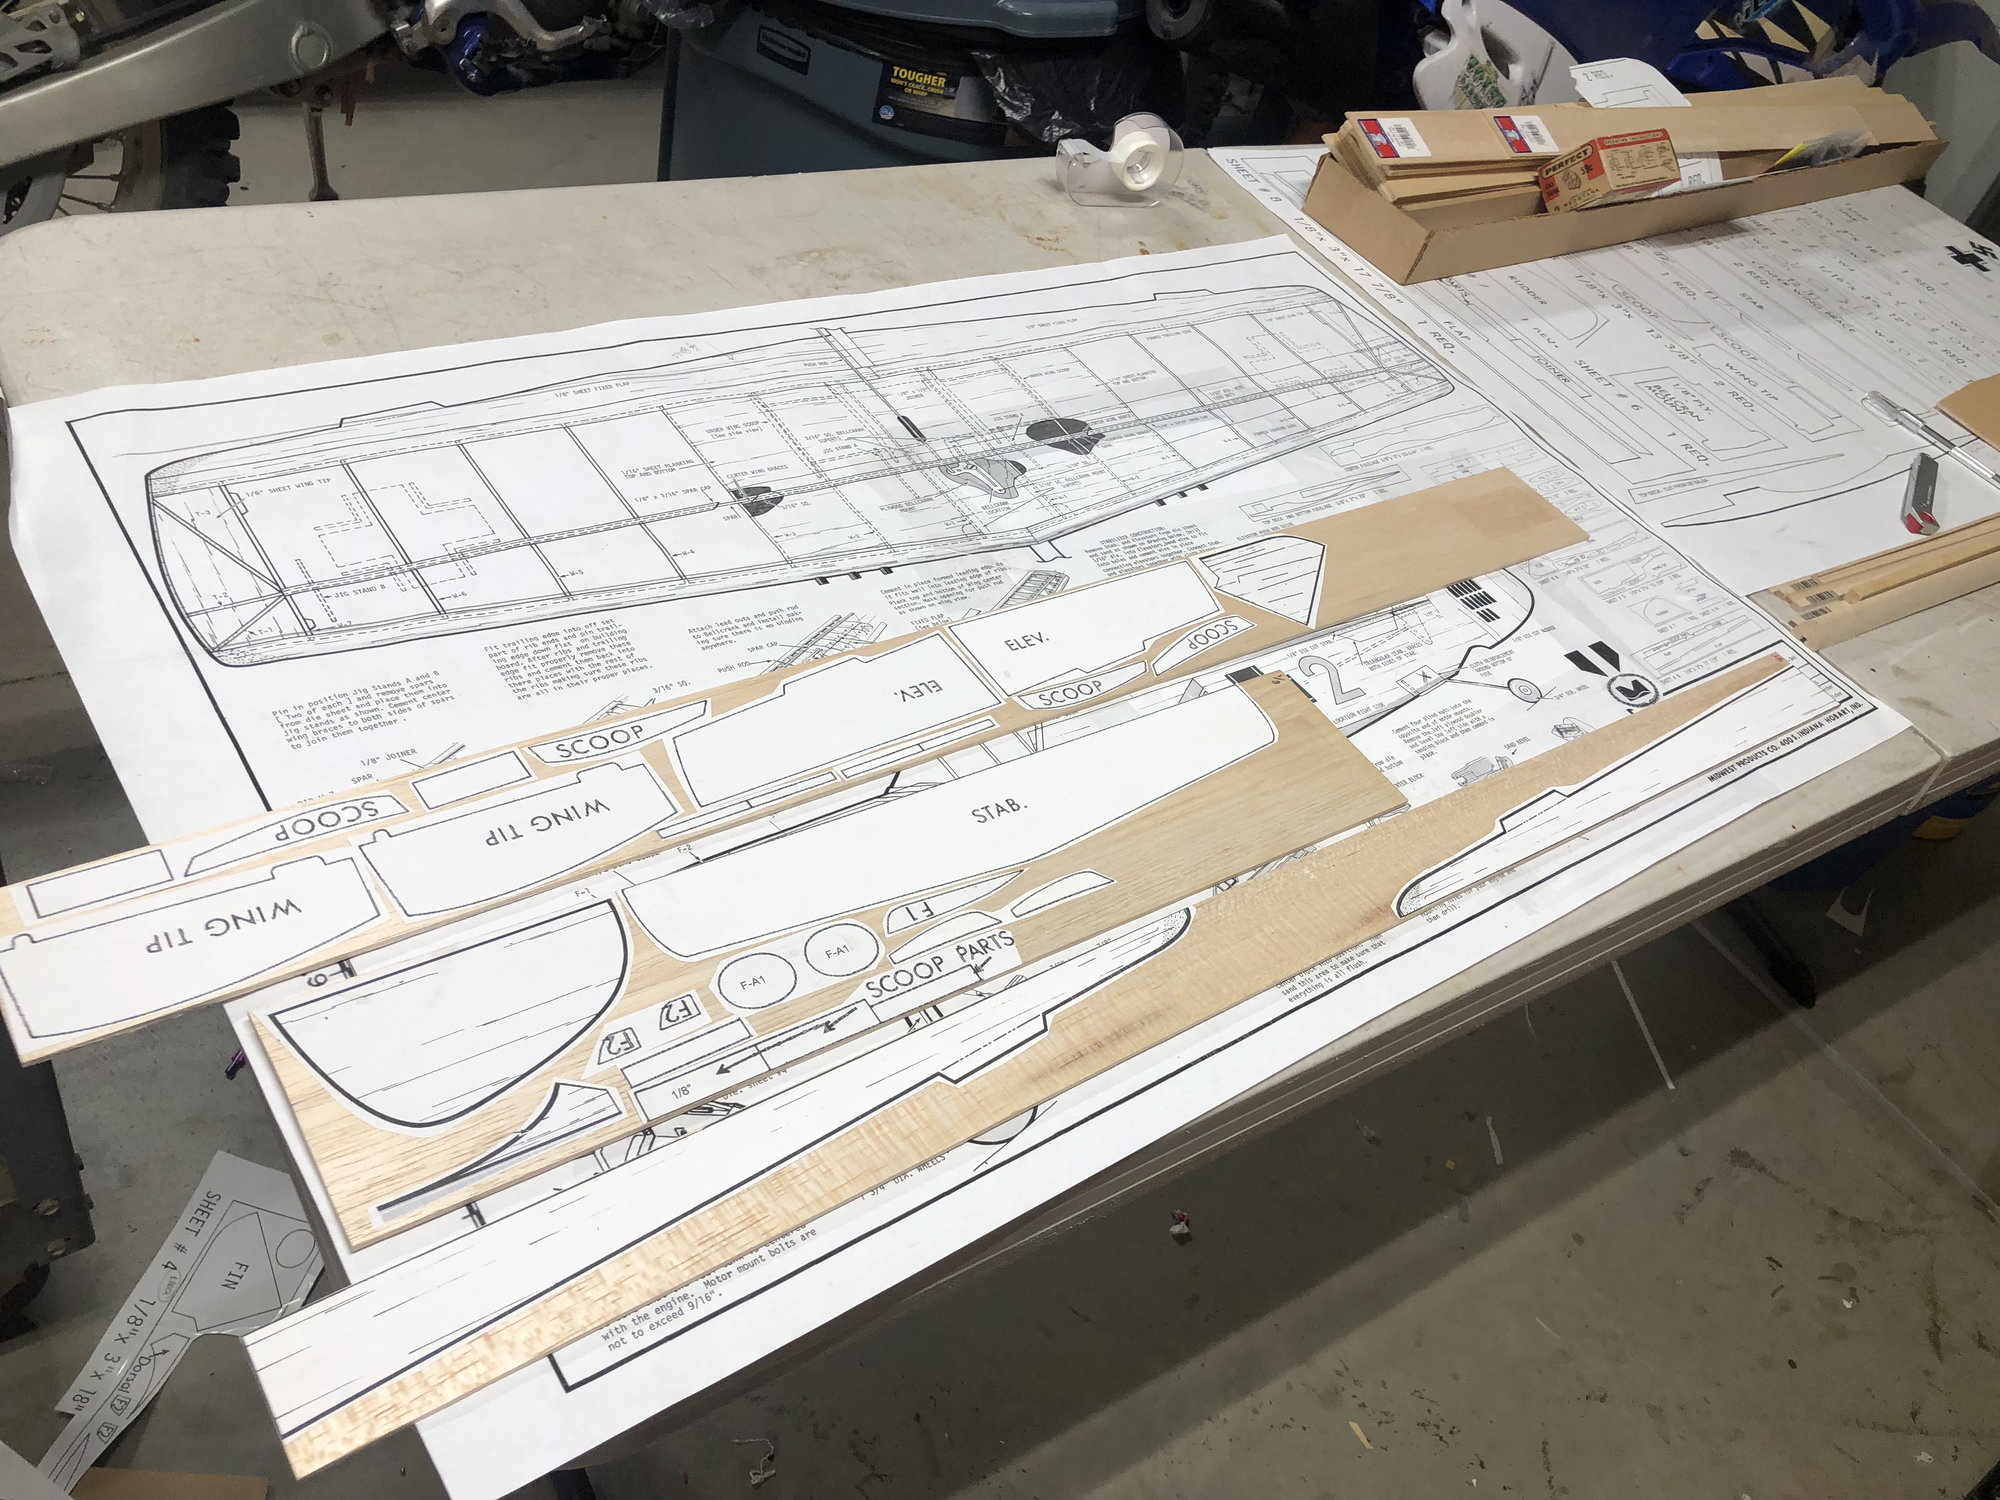
Cut and pasted all the templates onto the balsa
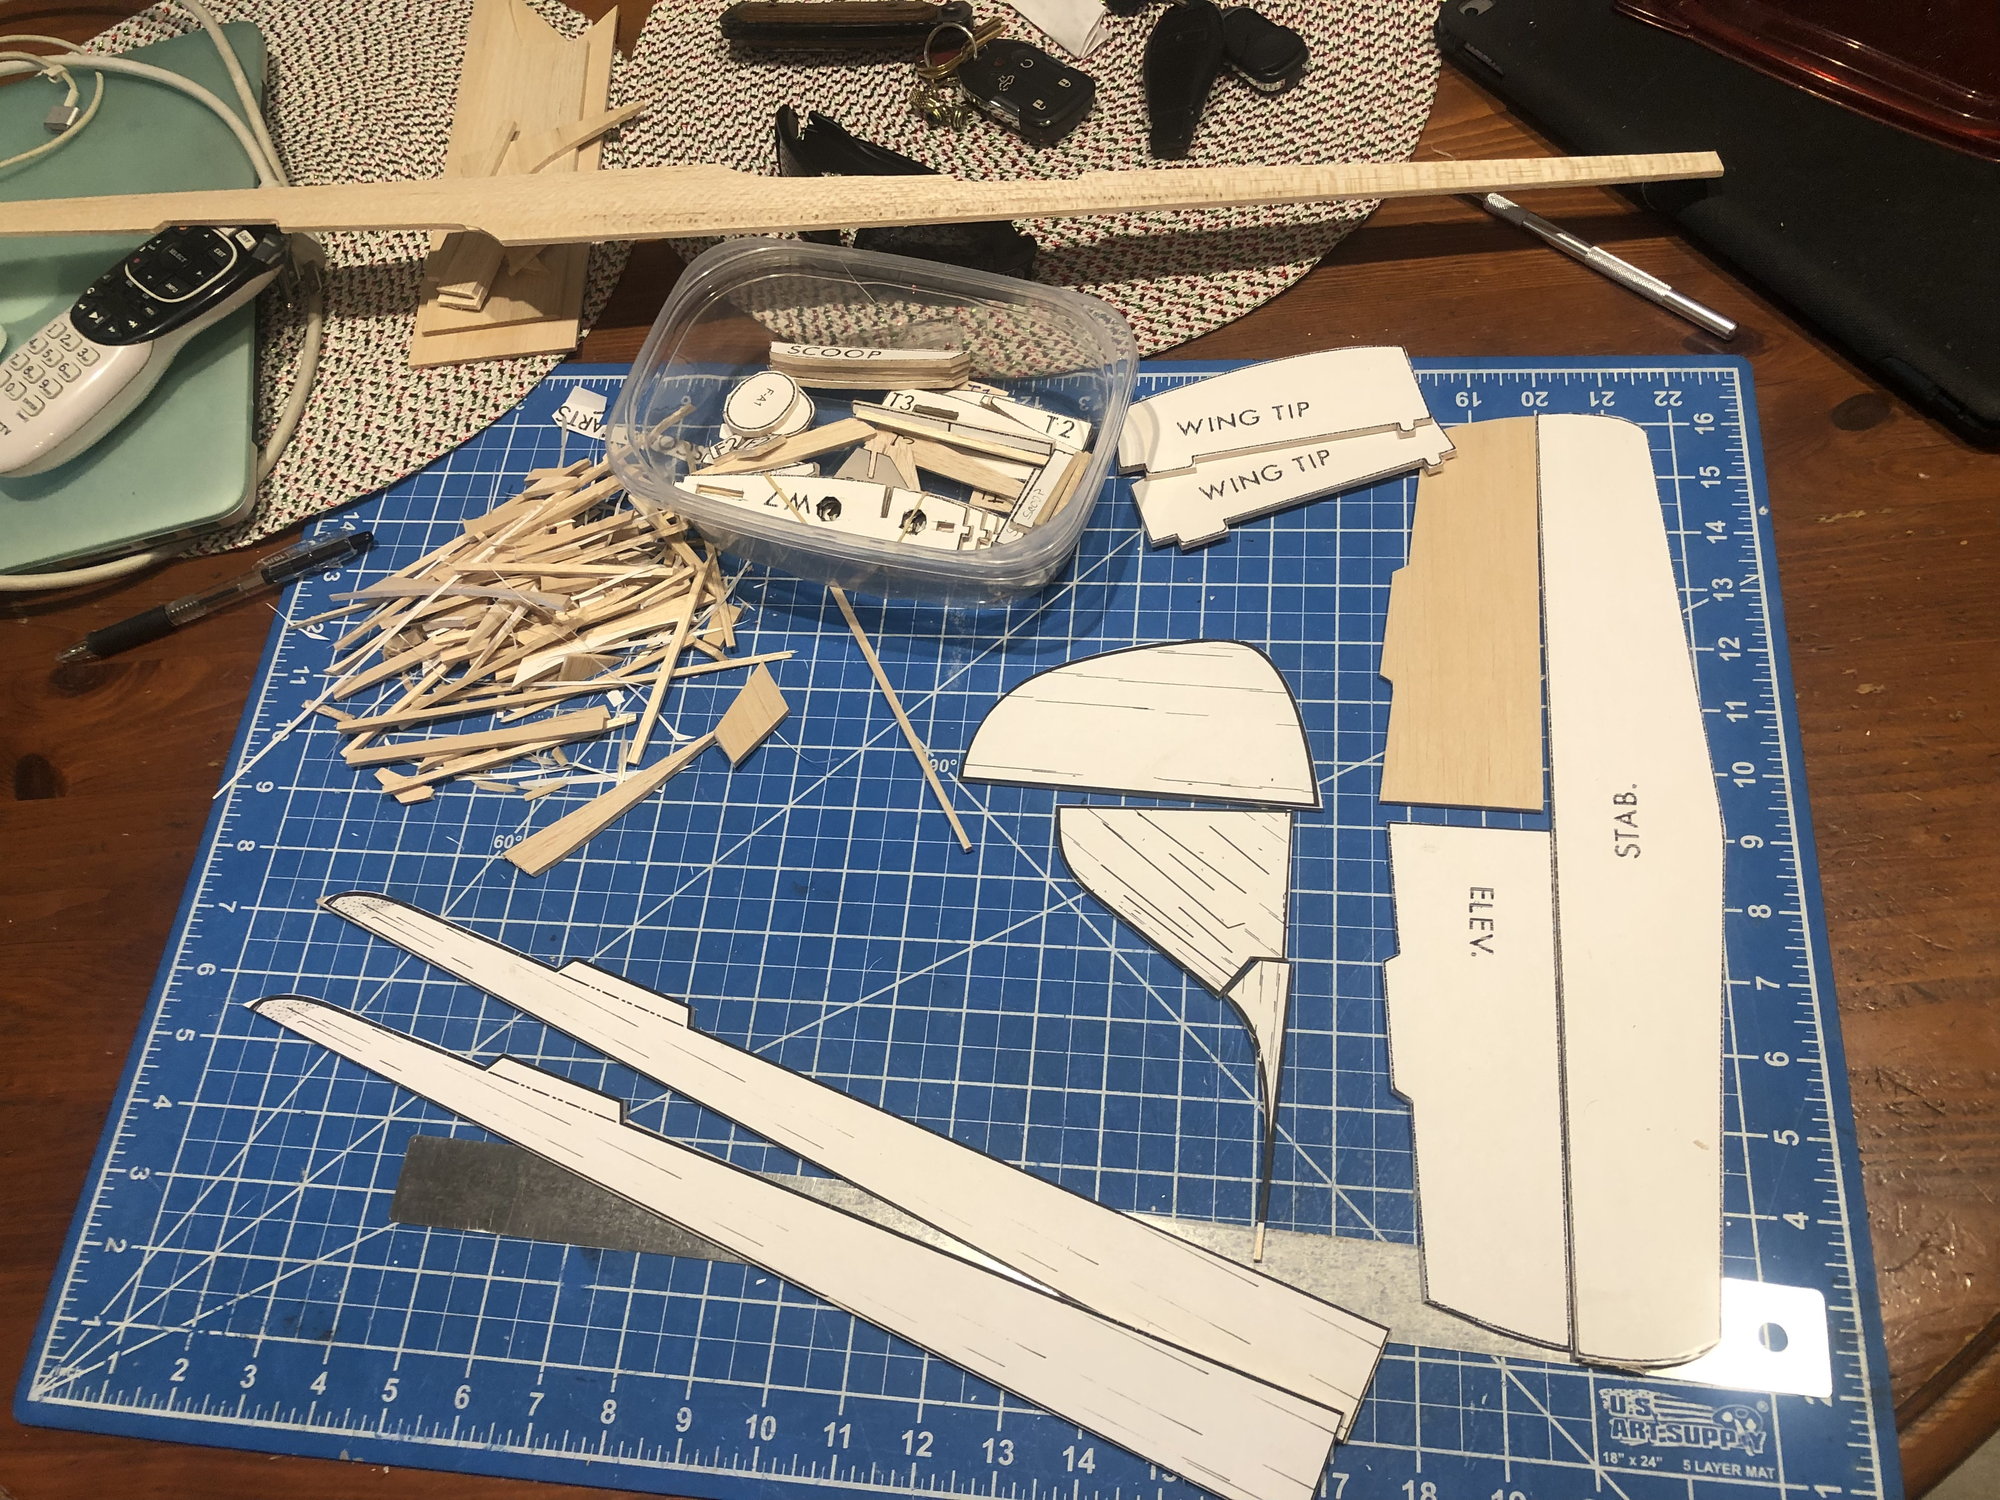
Managed to cut the wing ribs out before saying so long until after Christmas
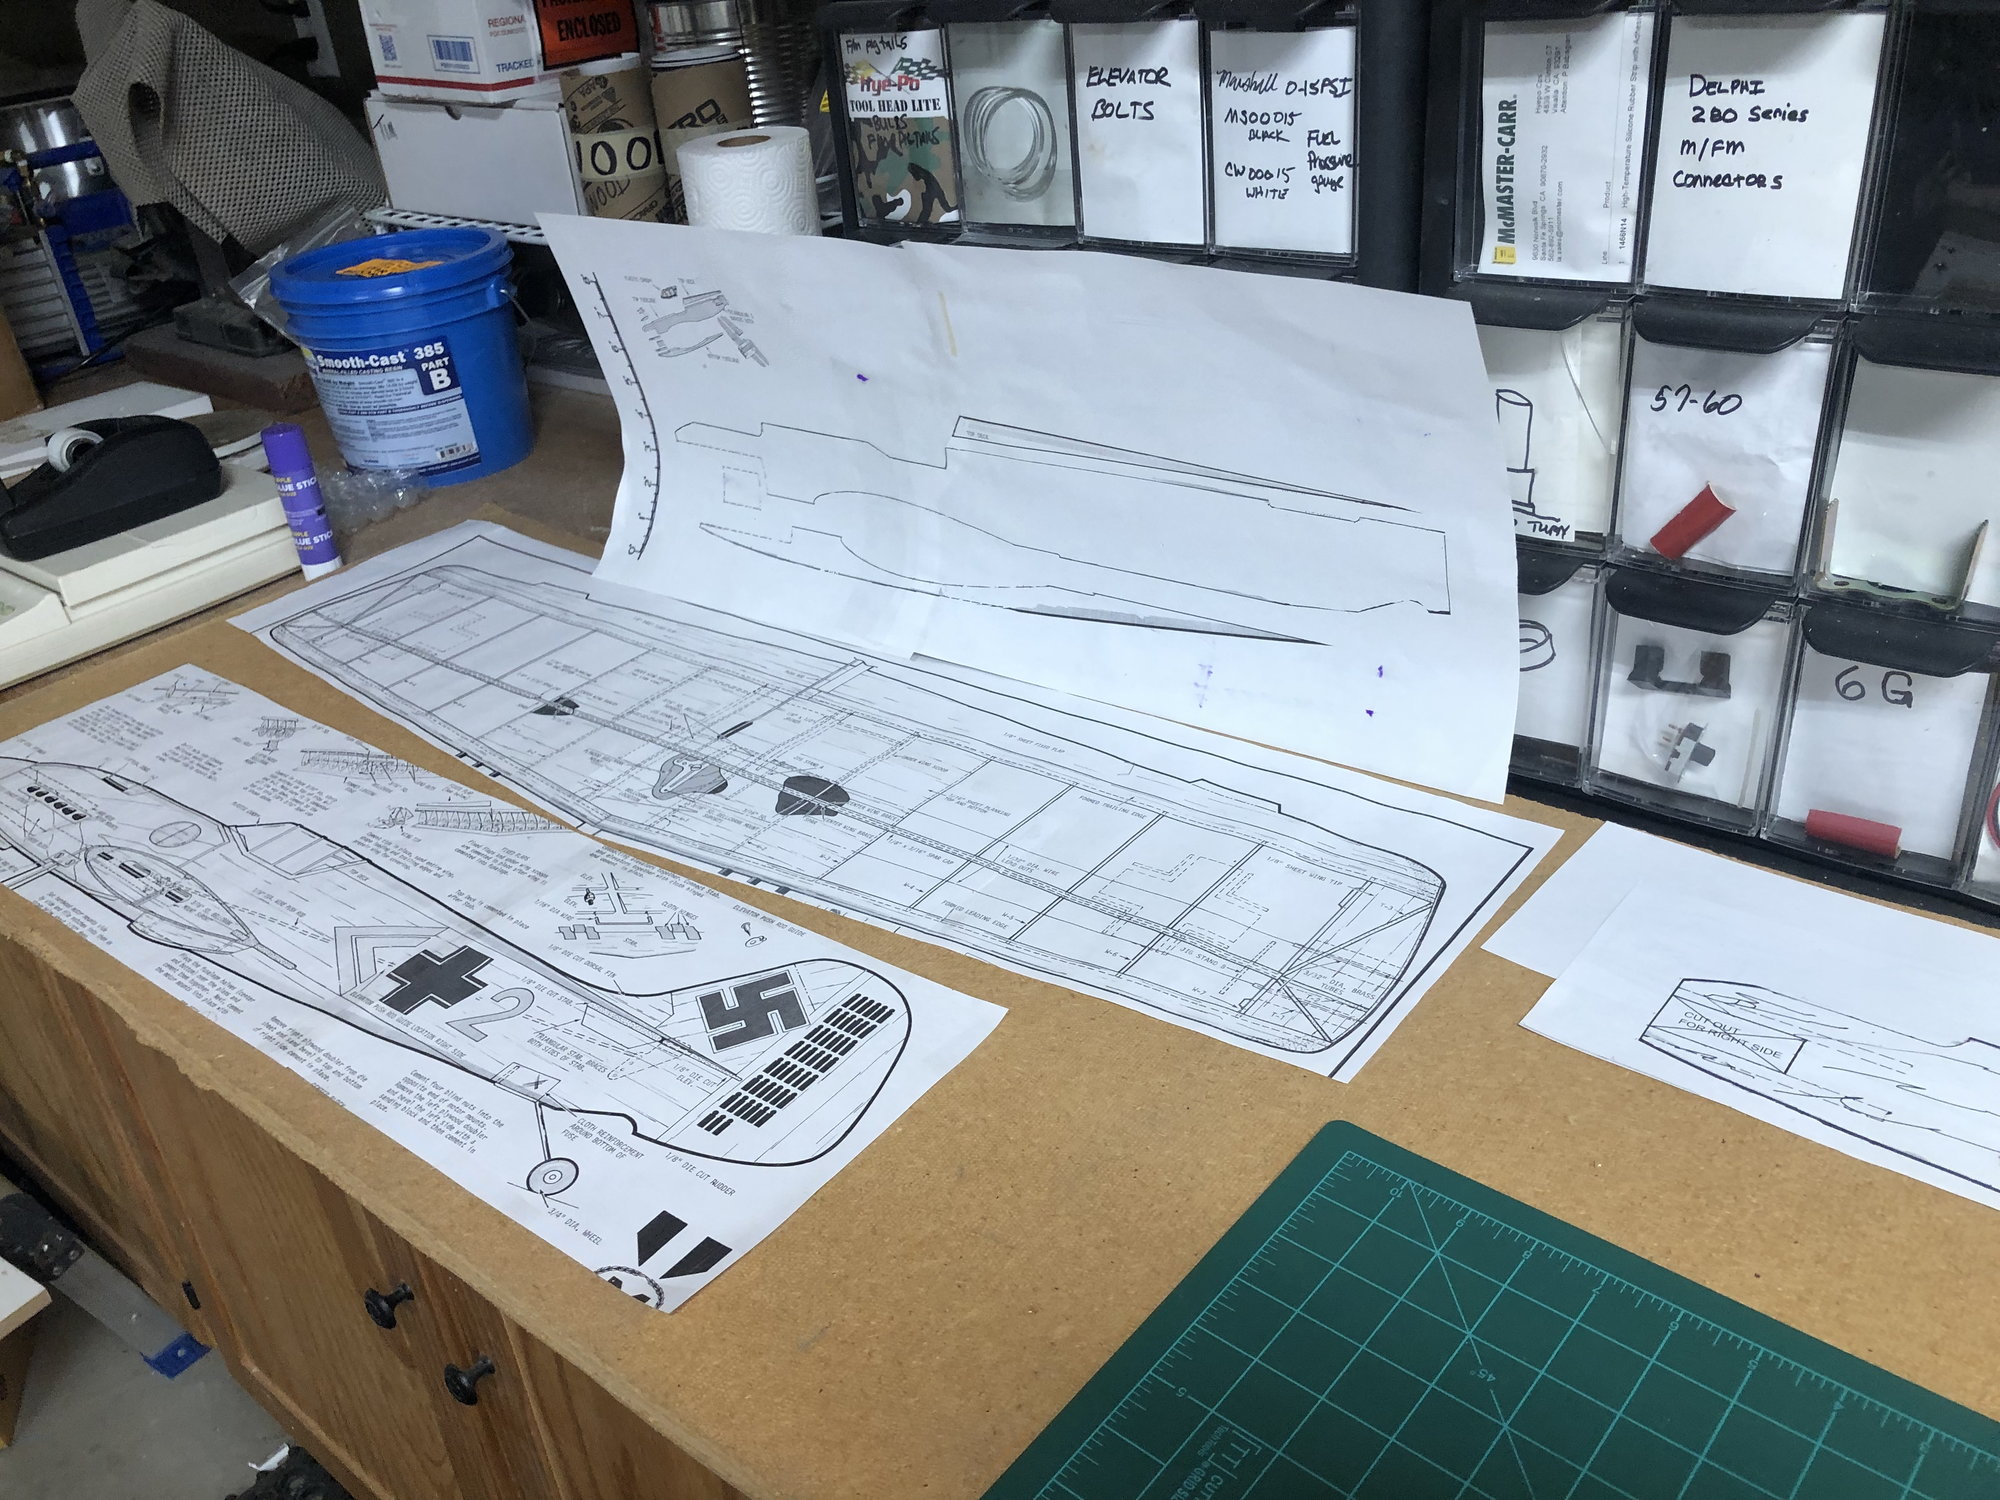
Affixed the wing sheet to the pin board and will assemble the wing when I get back… the 3/8” FUSE balsa is on its way from Balsa USA and should be here next week
Since the Control Line Forum is a bit quite….. figured y’all wouldn’t mind following a build in real-time (sort of)
Merry Christmas Y’all
Made a few alterations … love tape. LOL.
Cut and pasted all the templates onto the balsa
Managed to cut the wing ribs out before saying so long until after Christmas
Affixed the wing sheet to the pin board and will assemble the wing when I get back… the 3/8” FUSE balsa is on its way from Balsa USA and should be here next week
Since the Control Line Forum is a bit quite….. figured y’all wouldn’t mind following a build in real-time (sort of)
Merry Christmas Y’all

The following users liked this post:
2W0EPI (07-08-2022)
01-02-2022 | 11:17 AM
#2
Thread Starter
Senior Member
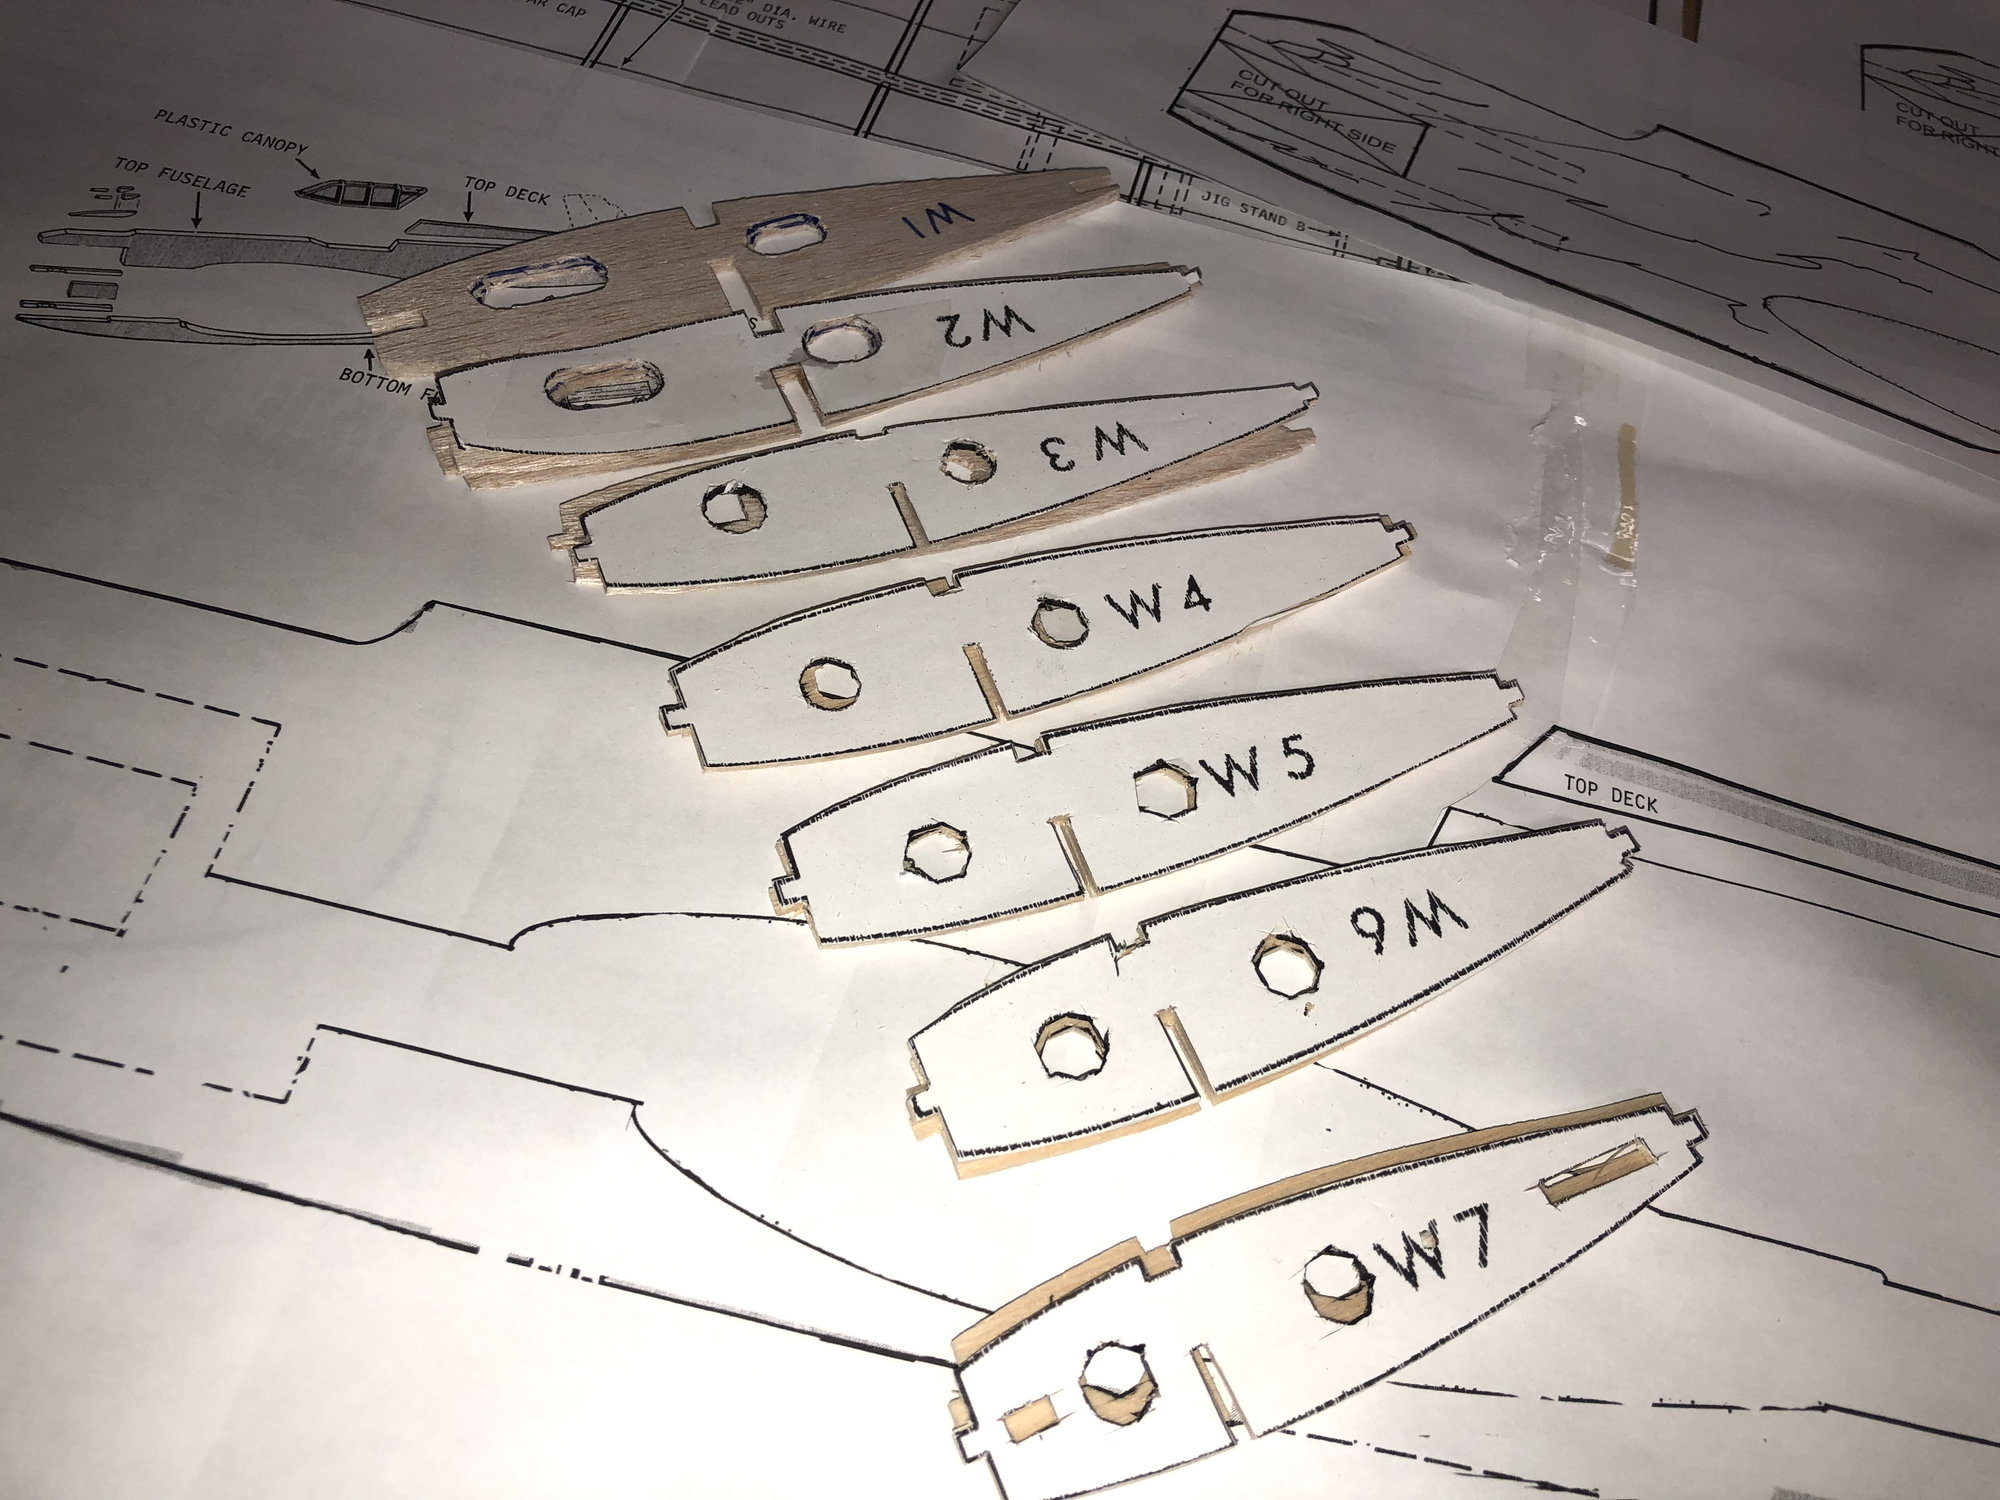
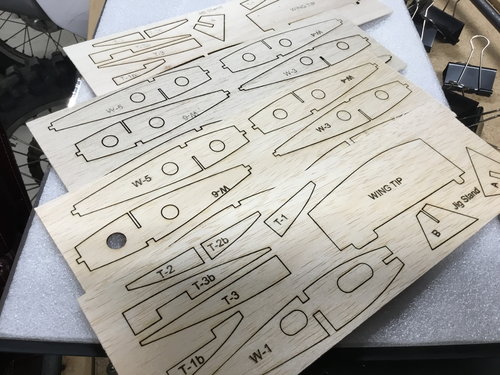
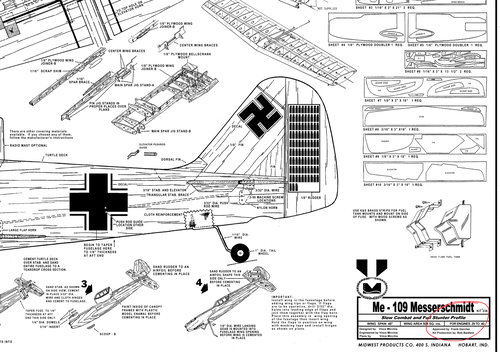
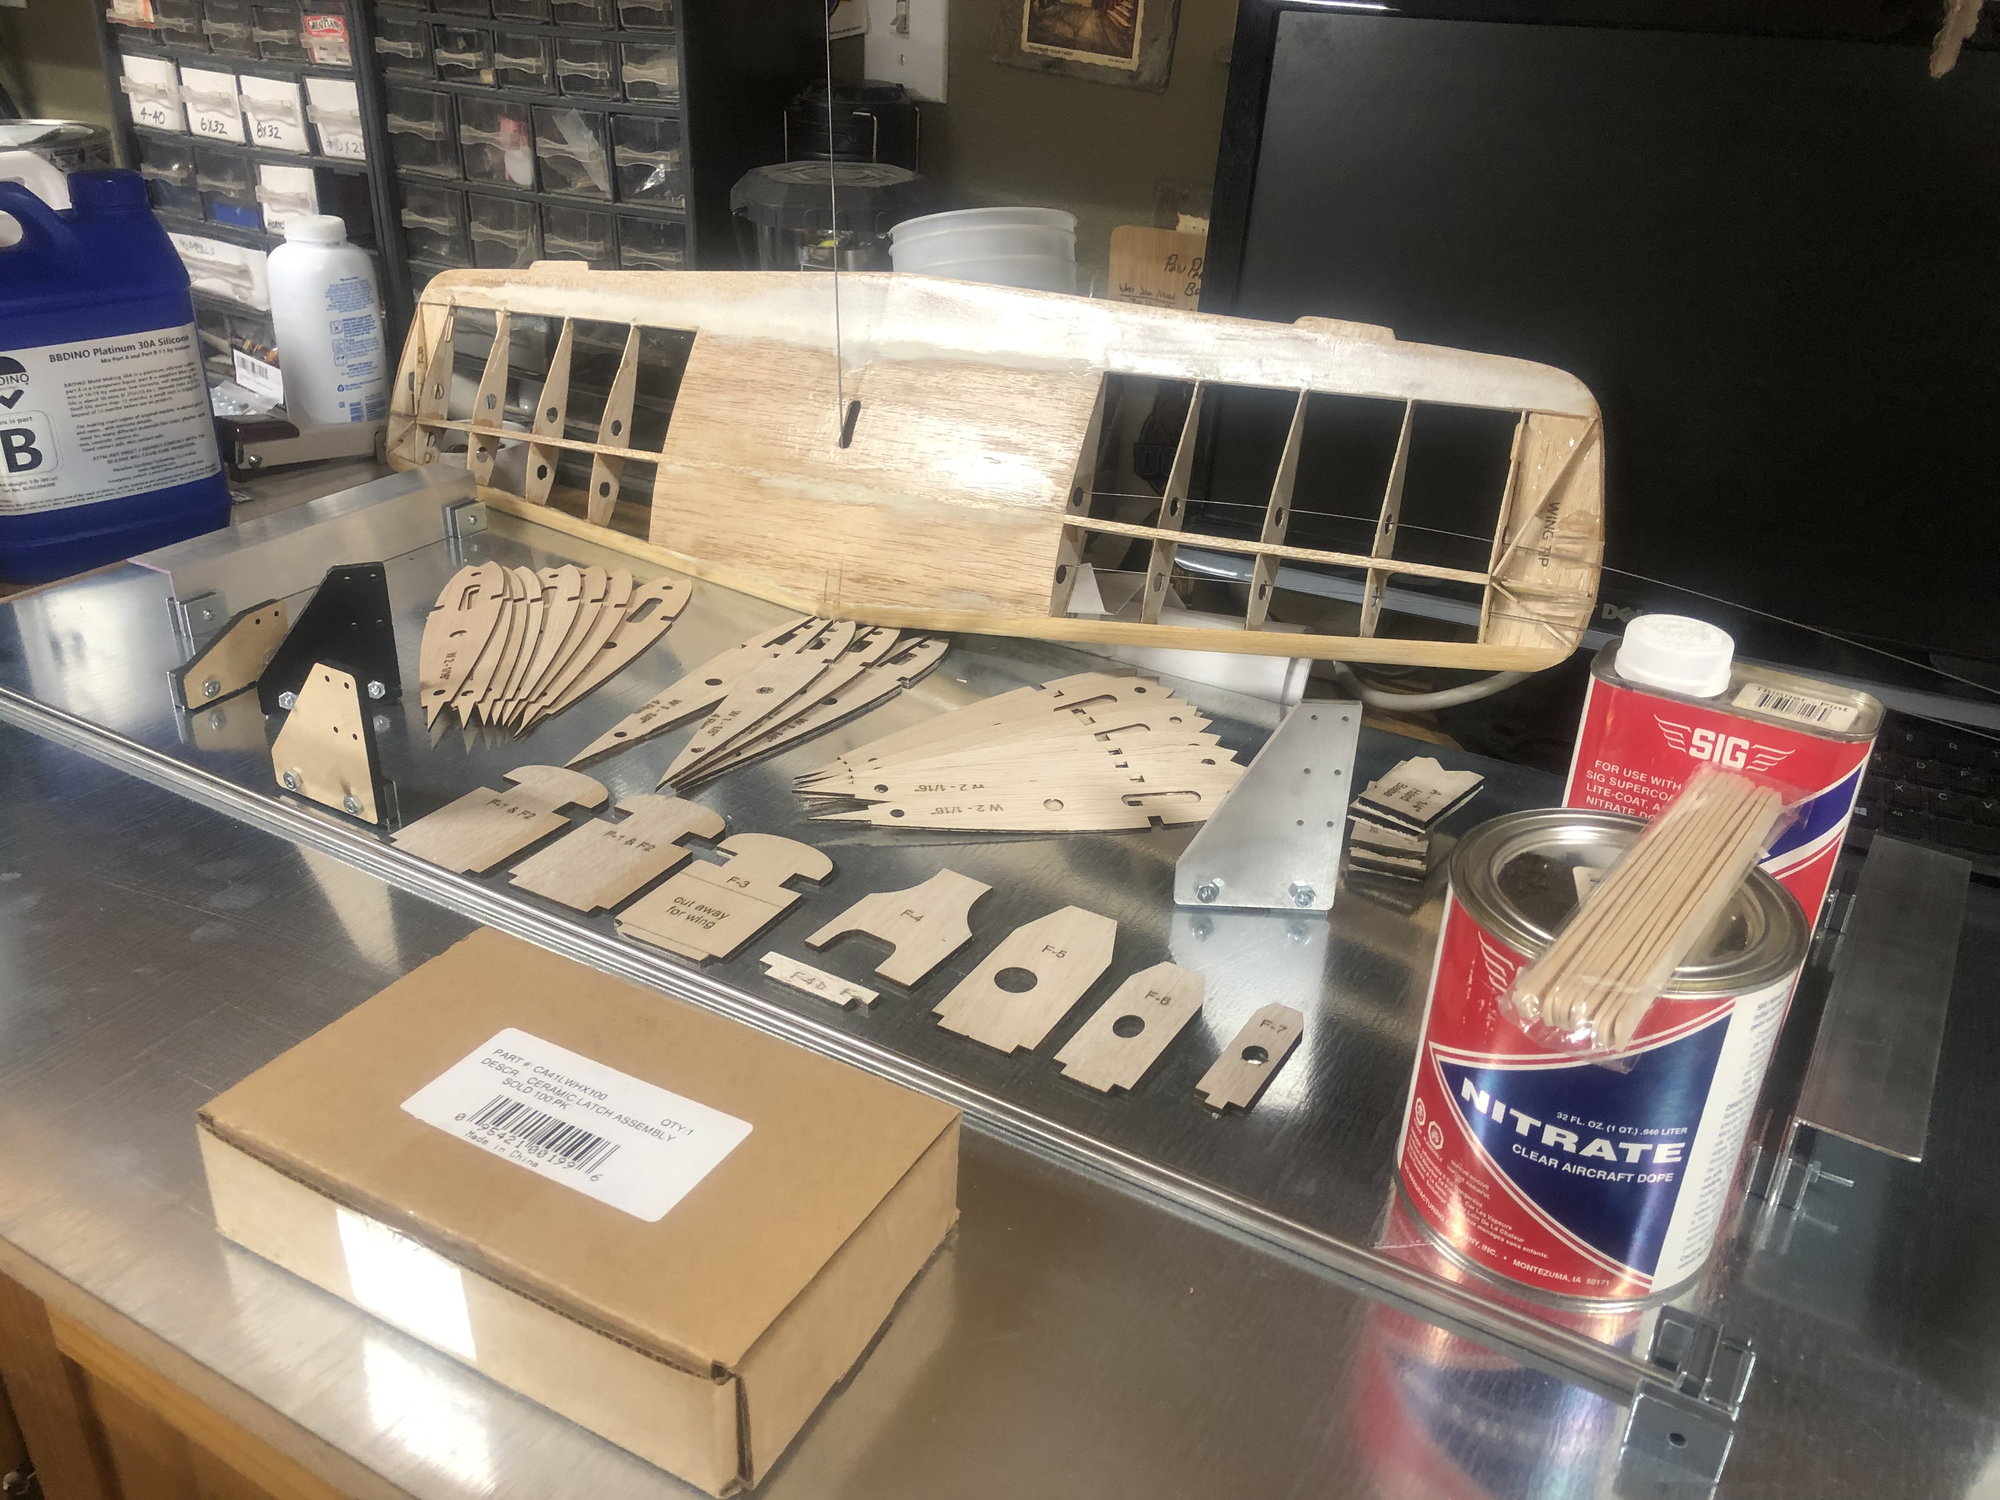
Update on the build: couldn’t get 3/8” balsa from local hobby shop (not really stocking anymore as everything has gone to RTF and cars). But I did have plenty of 3/16 laying around so i laminated two sheets with an even smear of Medium CA glue and cut out the Fuse. Also cut out the stab, elev, rudder and fin.
Then early last week I was cruisin’ around looking for another plan to scratch build… maybe a .15, maybe a .35 size warbird. And i was going though the motions in my mind, download plan, open pdf with photoshop, edit and clean up, make second sheet to cut and paste onto balsa, take to FedEx/kinks and have plans printed, cut out paper parts and glue to balsa and begin the meticulous task of cutting out the parts (as neatly as possible).
Then I thought it would be great if the kits were still being made… at least the ribs and unique parts uncommon to just stock balsa/ply, etc. like a short kit… like the parts one could order for a short block engine.
I began playing around with importing each rib into my photoshop program. Did a bit more research and found the correct software for scale vector graphics and began tracing each rib in vector format. Why? Because this is the format that a laser cutter needs to cut out the ribs. I thought I’d hire a freelancer to cut my ribs and unique parts.
Long story short, my new Laser cutter should arrive this week and after assembly I will attempt to cut my first set of ribs.
I tried uploading image of my rib i drew on the CAD program, i decided to measure and draw each rib from scratch rather than tracing to get a more accurate reproduction. Unfortunately there was an error each time i tried to upload.
Last edited by Hye Flyer; 01-02-2022 at 11:20 AM.
01-02-2022 | 11:31 AM
#3
Thread Starter
Senior Member
The scanned rib and the one drawn from scratch. I think this will be easier than I originally thought. Next will be to see how well the laser cuts through balsa…. My goal, to offer short kits to many C/L plans so the builder need only order the common balsa parts to assemble and fly, cutting down the time and adding to the accuracy.

More to come when the machine gets here… which will delay my build of course as I will need the ribs LOL
More to come when the machine gets here… which will delay my build of course as I will need the ribs LOL
01-02-2022 | 11:03 PM
#4

My Feedback: (1)
Joined: Nov 2011
Posts: 20
Likes: 0
Received 0 Likes
on
0 Posts
From: Greater Houston Area
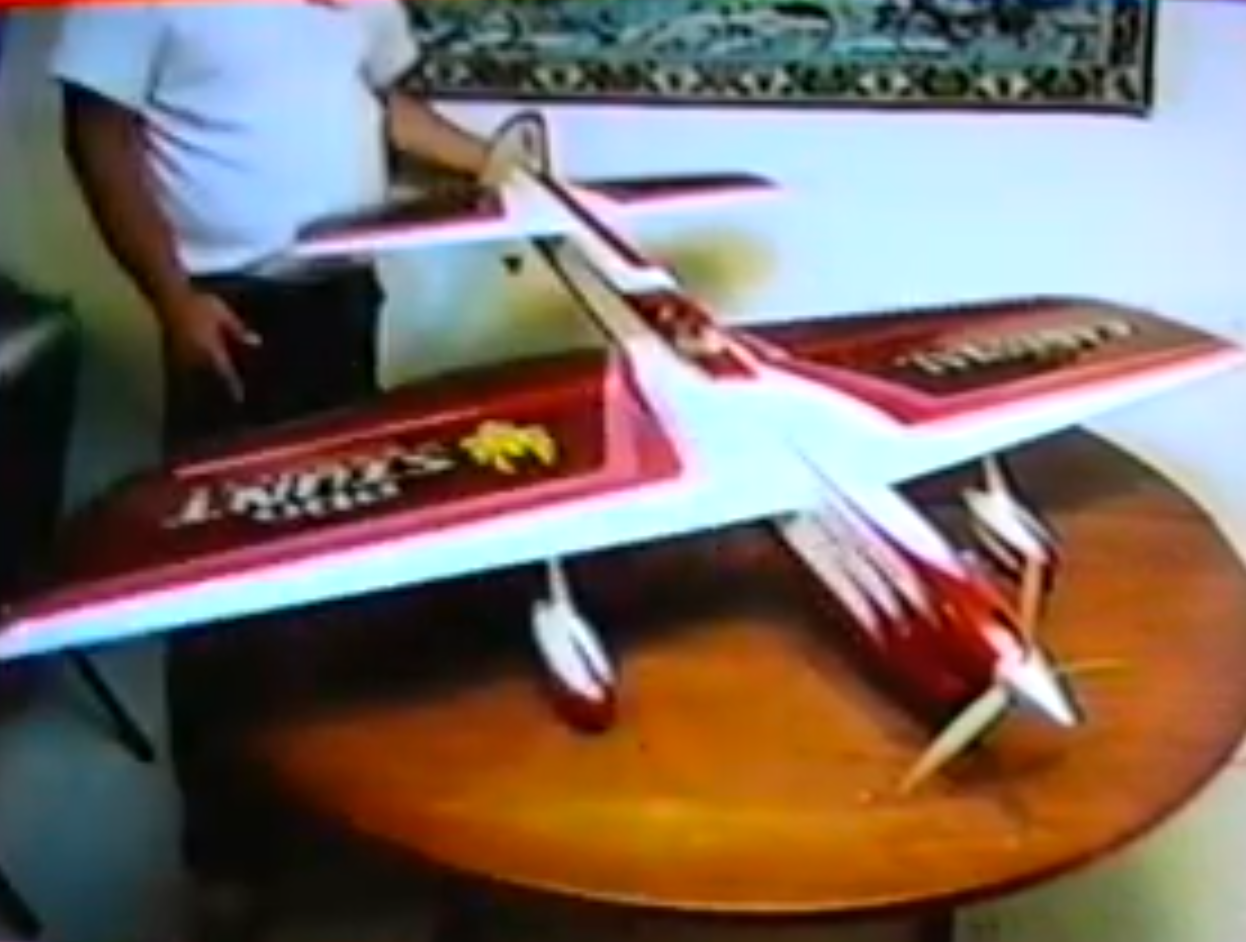
Great build. I had the Midwest Skyraider until my brother took it out one day and decided how many consecutive loops he could do. Of course he didn't stop until it hit the ground. I got another kit years later but after I framed it up a neighbor's kid destroyed all of the ribs. It's so old now that I'll probably have to scrap the entire plane and start from scratch. All of the Midwest C/L stunt planes are the same airplane with a different fuselage outline and minor changes to the outline of the wingtips and flaps. I was in college at the time. I'm now retired and still enjoy C/L even though I mostly fly R/C.
When I rebuild mine, I think I'm going to retain the same airfoil because it flies well but will redesign the ribs to take conventional spar caps top and bottom with shear webs between them. I may do away with the nibs on the leading ends of the ribs and butt glue them to rectangular stock; not decided for sure yet. I have a router table so it would be easy enough to make a rectangular leading edge with a groove down the back side and then shape it with a razor plane.
The trailing edge stock will still get the notches for the ribs as with the original design.
Last edited by David2011; 01-03-2022 at 02:34 PM.
01-04-2022 | 11:49 PM
#5
Thread Starter
Senior Member
I used a Dremel and a ‘router table’ for the Dremel on my bench to cut the 1/8” grove in the 3/4 formed leading edge… will do similar to the trailing (or I may just cut the notches off the back and butt-glue them as David2011 suggested.
The good news is today my laser cutter arrived. After a quick assembly, I managed to cut a single rib and matched it up to the scaled pdf and it seems a great match. Much better since i redrew everything vs trying to trace… turns out the images on the plans needed to be blown up to scale, and that caused exaggerations in the imperfections of the original drawings on the full size plans…i.e. shows the ribs on frame that says its supposed to be 3” long and 13” wide x 1/16” balsa… at first, i simply enlarged the image until it measured 3” when printed out on my printer… but it was cockeyed and not symmetrical as it should have been… cutting the ribs by hand using those images as a glue on templates further exasperated the defects. So thats why i had to redraw them all vs using tracing. After printing my first rib, i am more than HAPPY. They came out perfect even if they are not exact to the original - whatever that is because I never had the originals to compare. I cannot wait until my balsa wood order arrives so I can print out all the ribs..
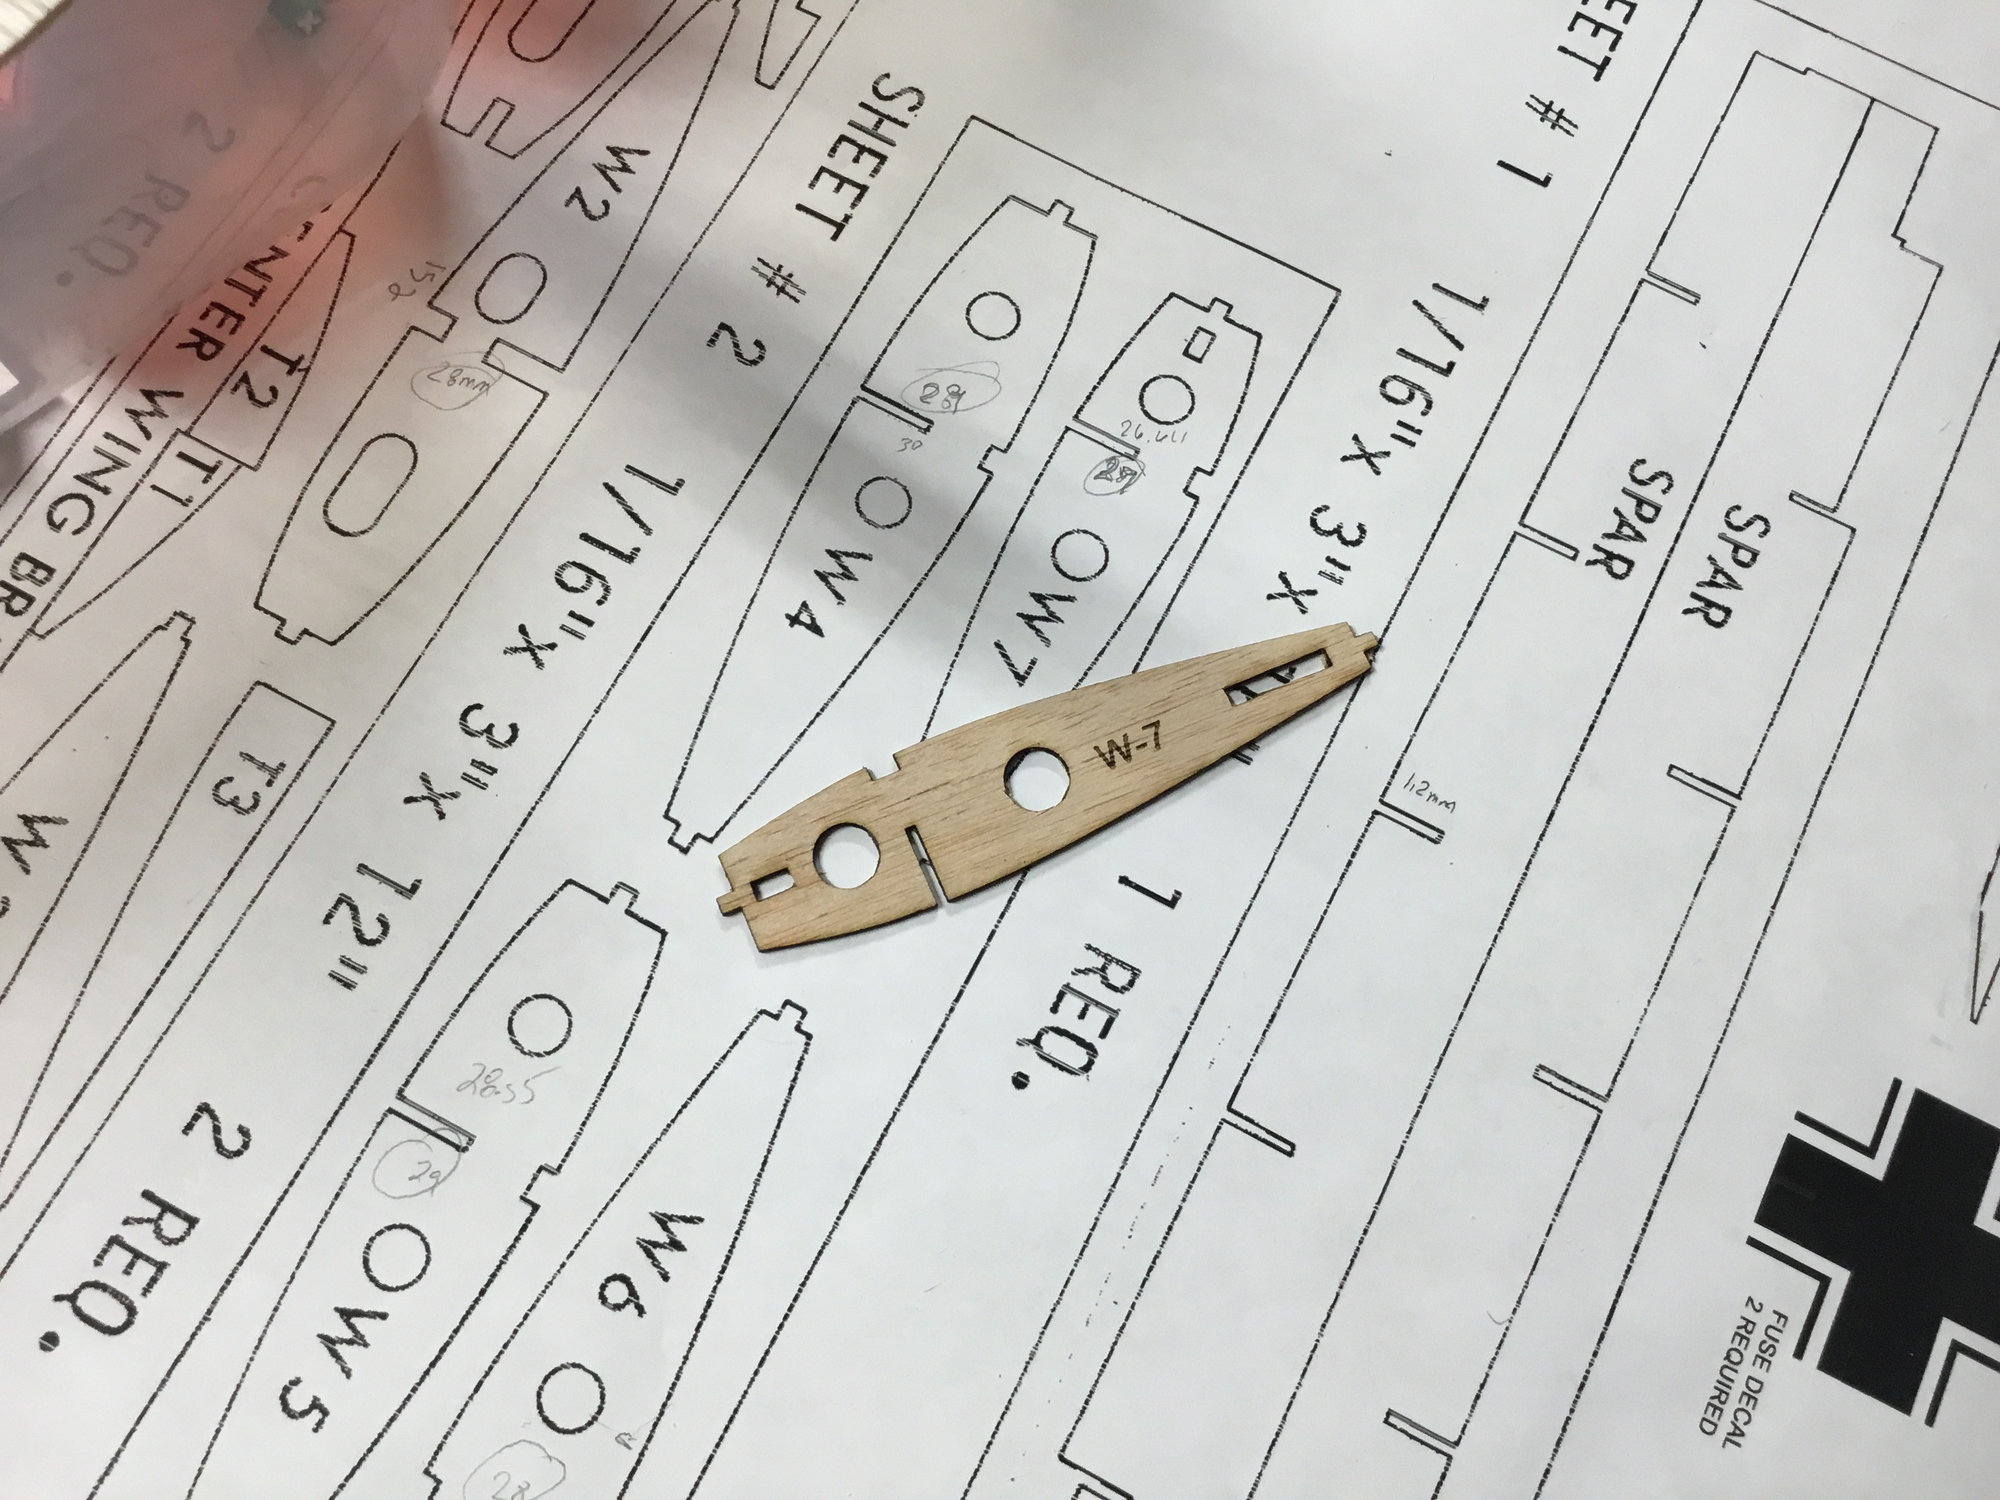
The good news is today my laser cutter arrived. After a quick assembly, I managed to cut a single rib and matched it up to the scaled pdf and it seems a great match. Much better since i redrew everything vs trying to trace… turns out the images on the plans needed to be blown up to scale, and that caused exaggerations in the imperfections of the original drawings on the full size plans…i.e. shows the ribs on frame that says its supposed to be 3” long and 13” wide x 1/16” balsa… at first, i simply enlarged the image until it measured 3” when printed out on my printer… but it was cockeyed and not symmetrical as it should have been… cutting the ribs by hand using those images as a glue on templates further exasperated the defects. So thats why i had to redraw them all vs using tracing. After printing my first rib, i am more than HAPPY. They came out perfect even if they are not exact to the original - whatever that is because I never had the originals to compare. I cannot wait until my balsa wood order arrives so I can print out all the ribs..
01-08-2022 | 07:23 PM
#6
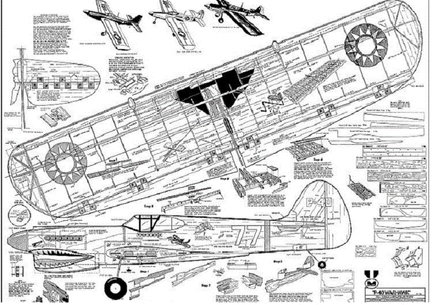
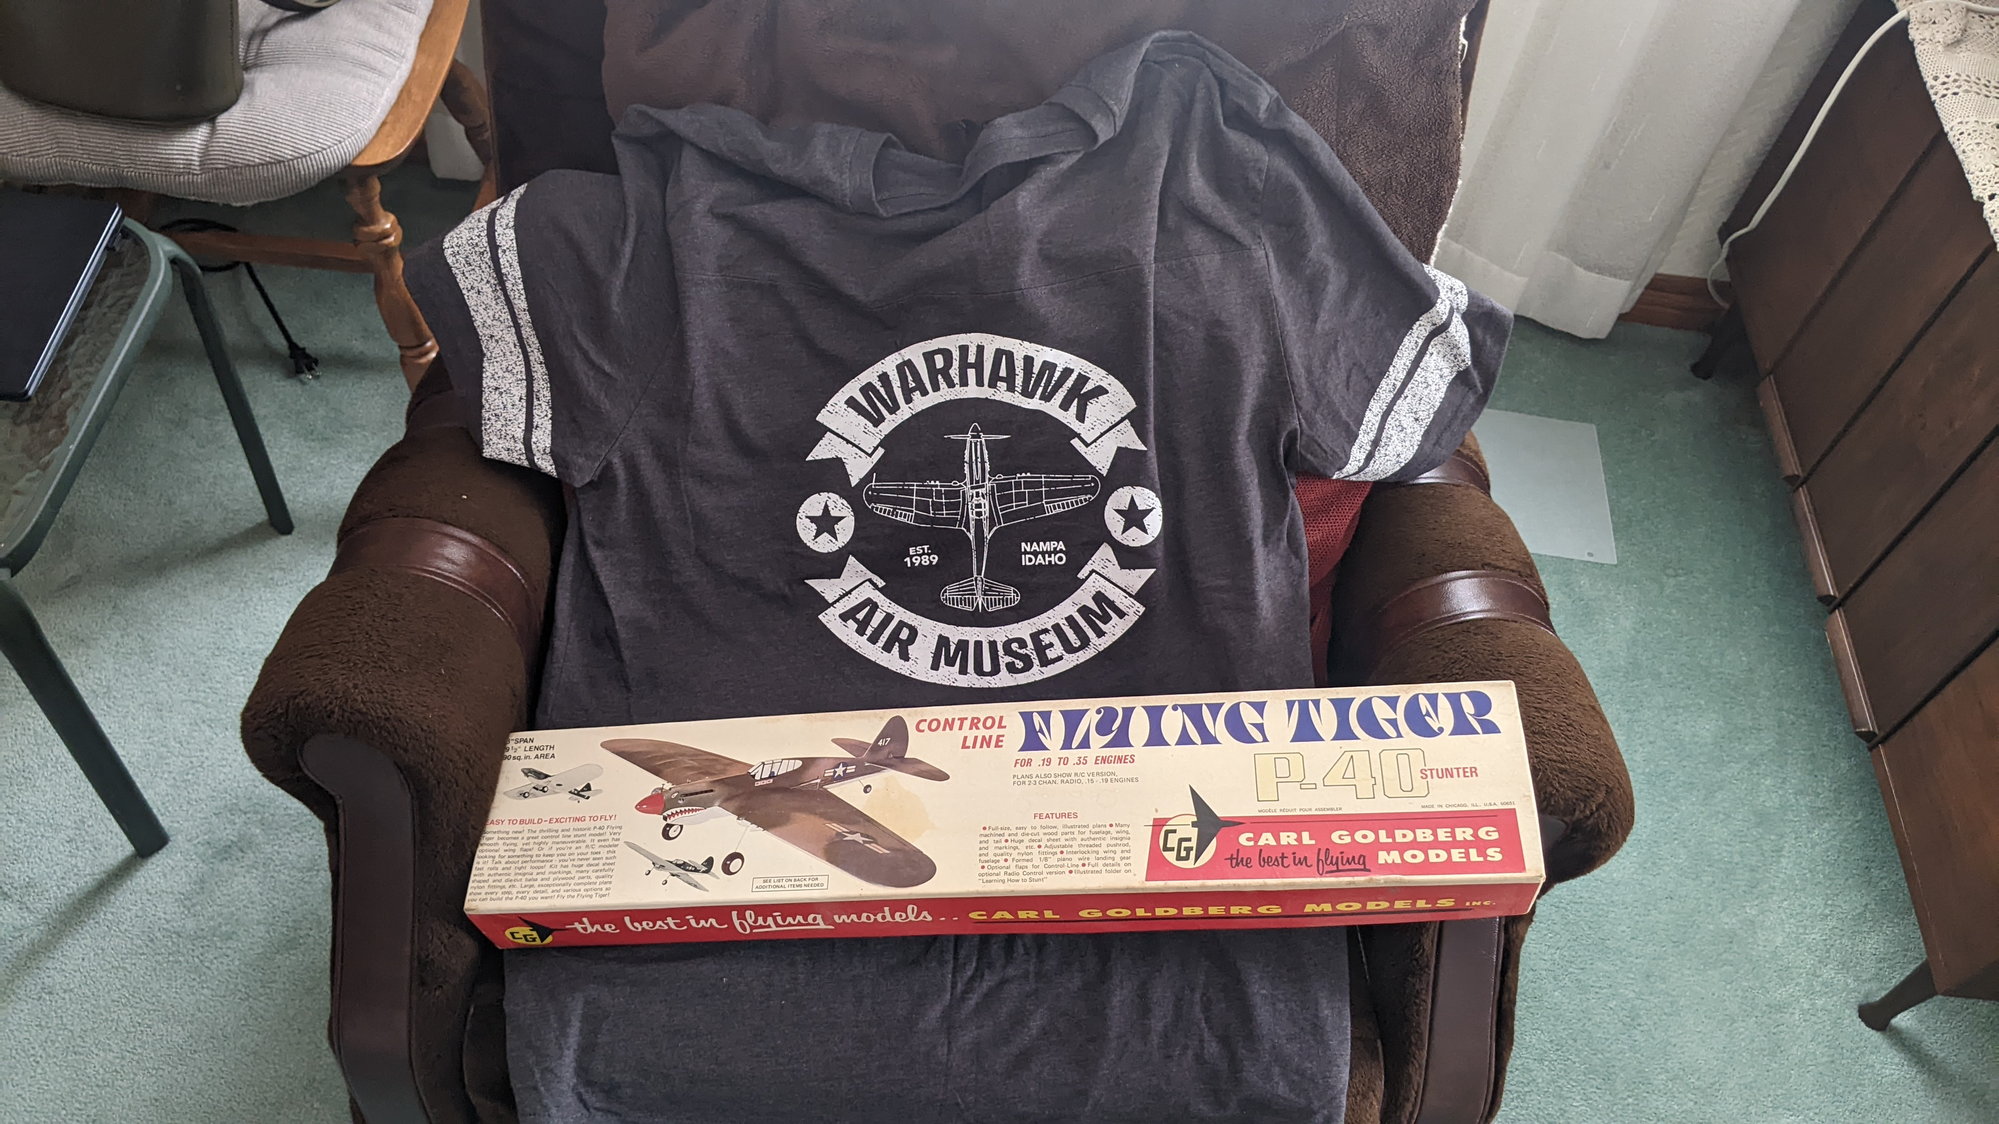
Back in the day I built a midwest P40 warhawk powered by a fox 35. It was the first big plane after all the Wizards and Satans. I did a recreation of the plane a few years ago. I did it up in the same color scheme but this time i used paint, and put a Randy Smith OS LA 46 on it. Pretty cool seeing the '77' on the side of the fuse on the end of the lines so many years later!
Kevin
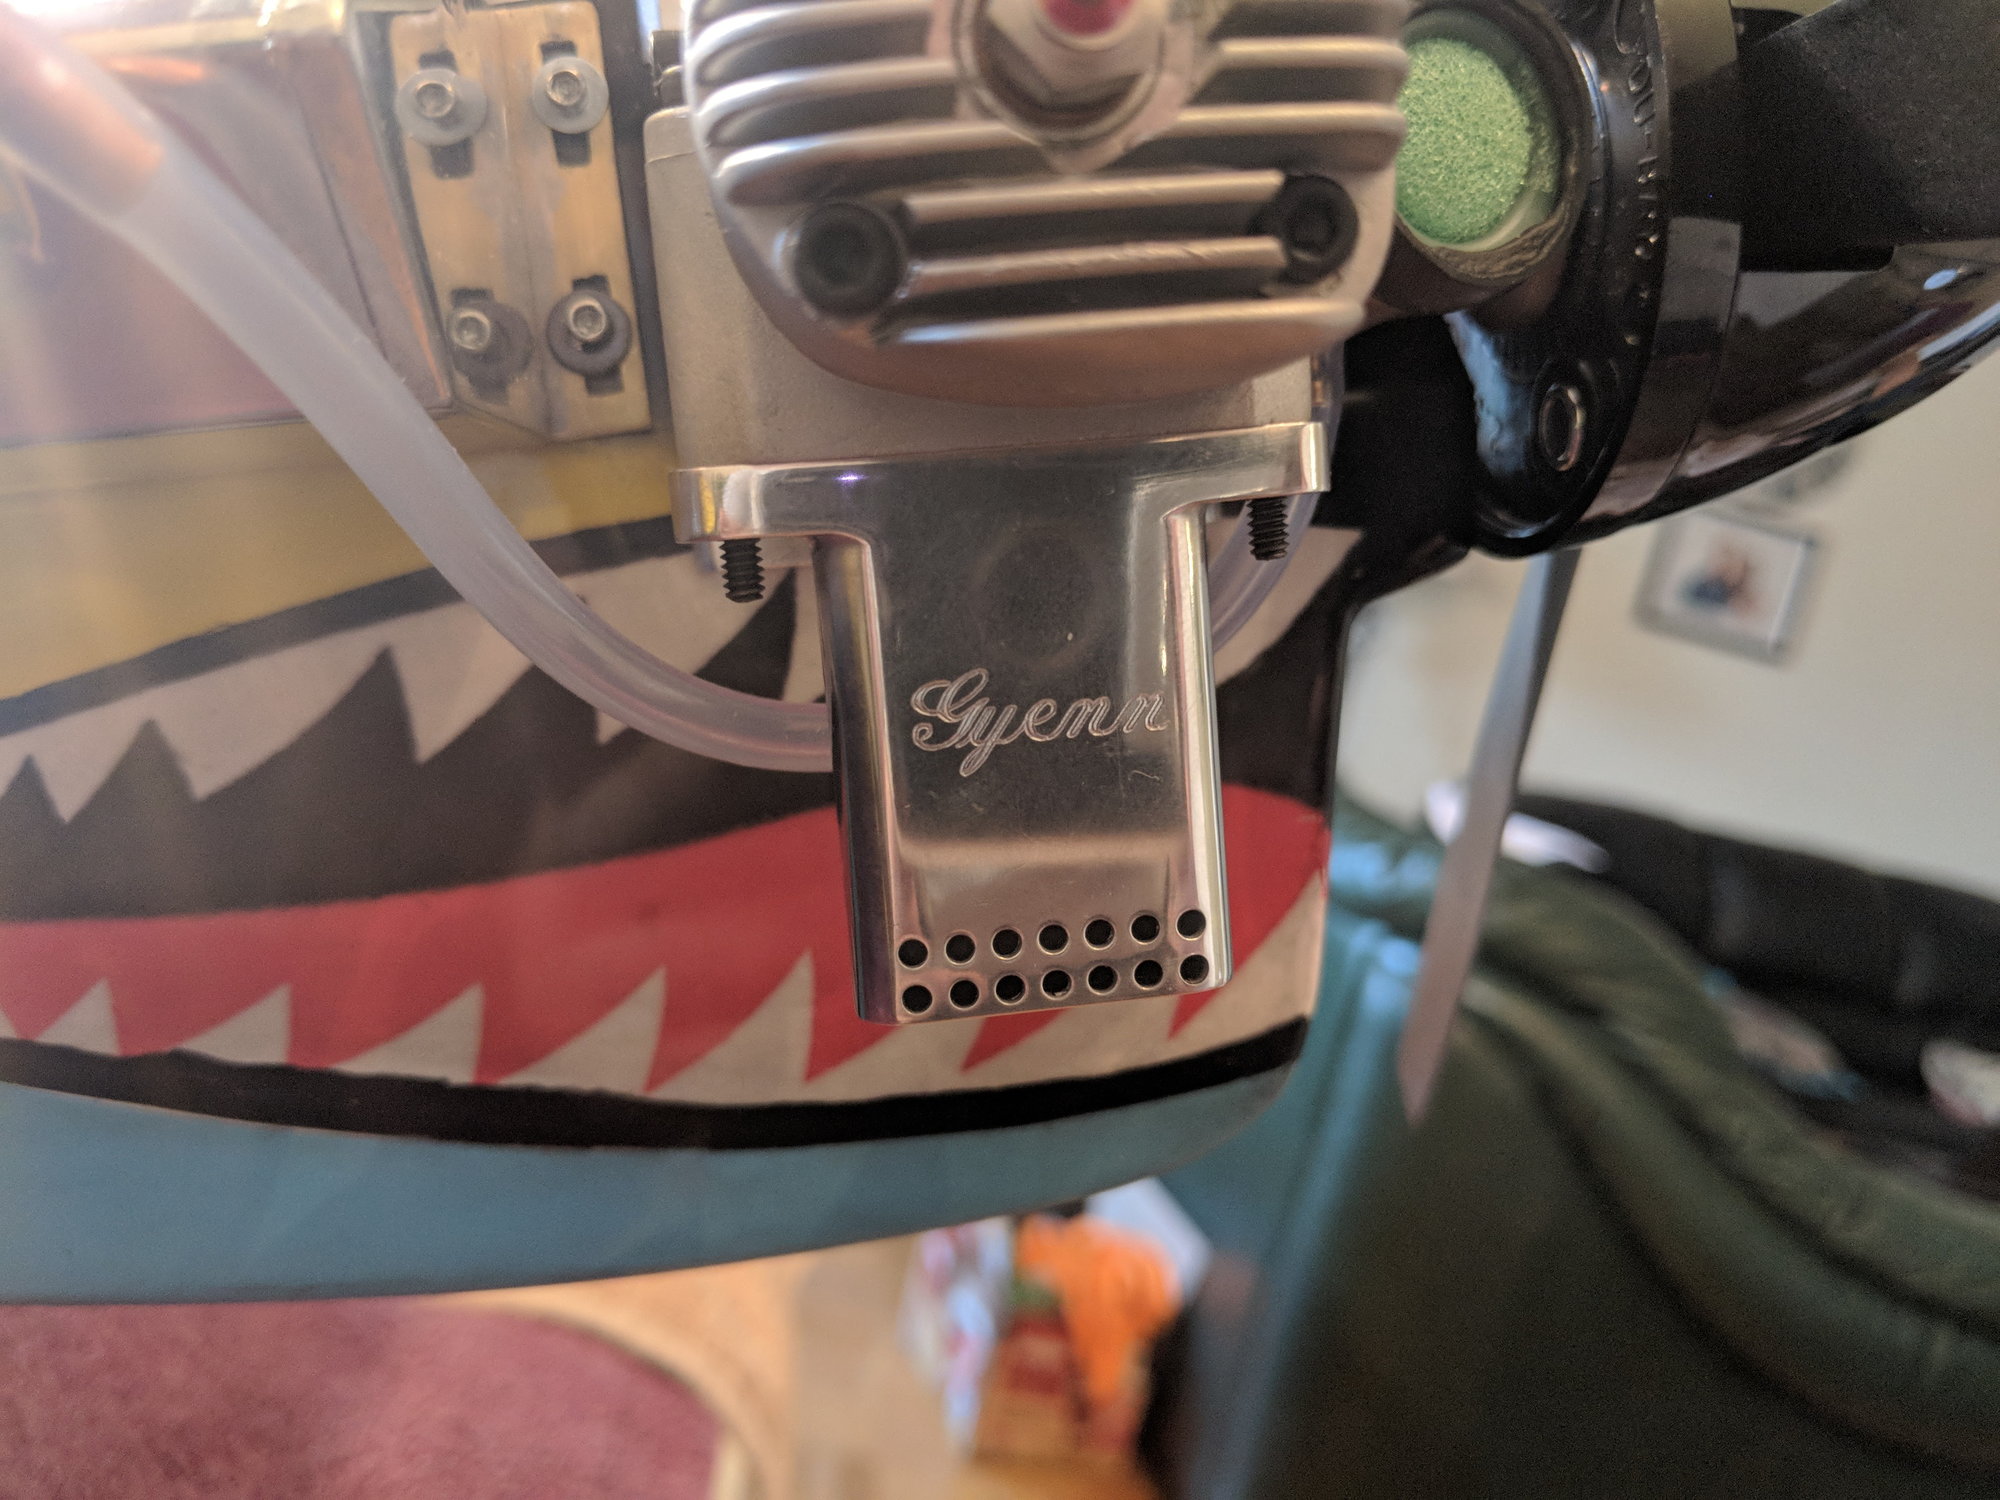
Custom engraved and polished tongue muffler on OS LA 46

Wife And P40
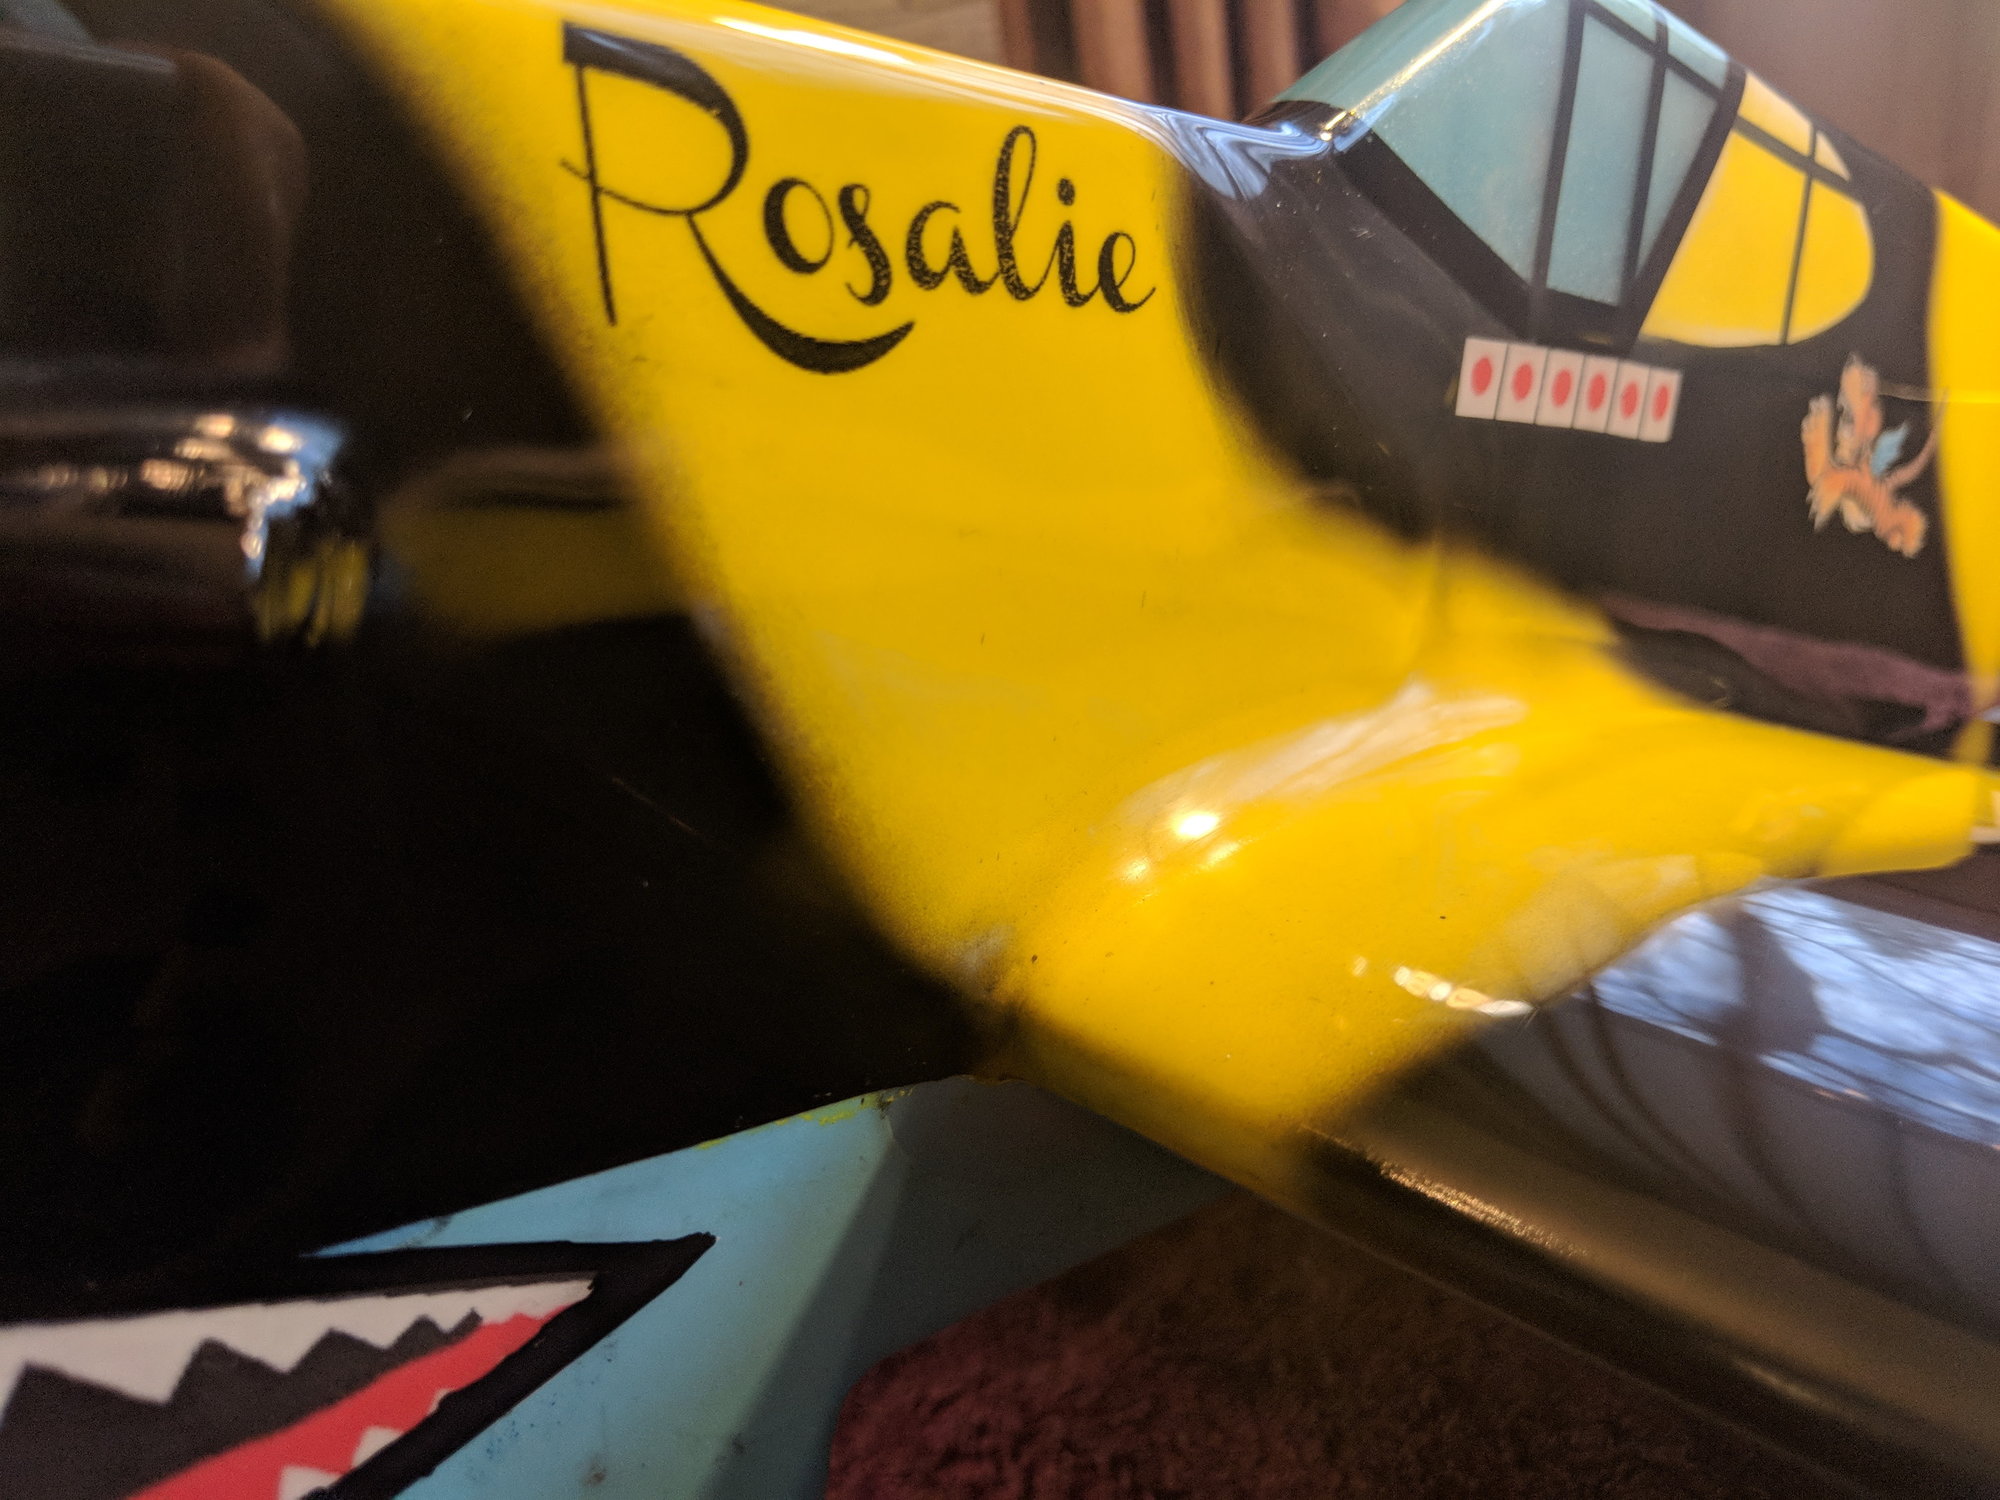
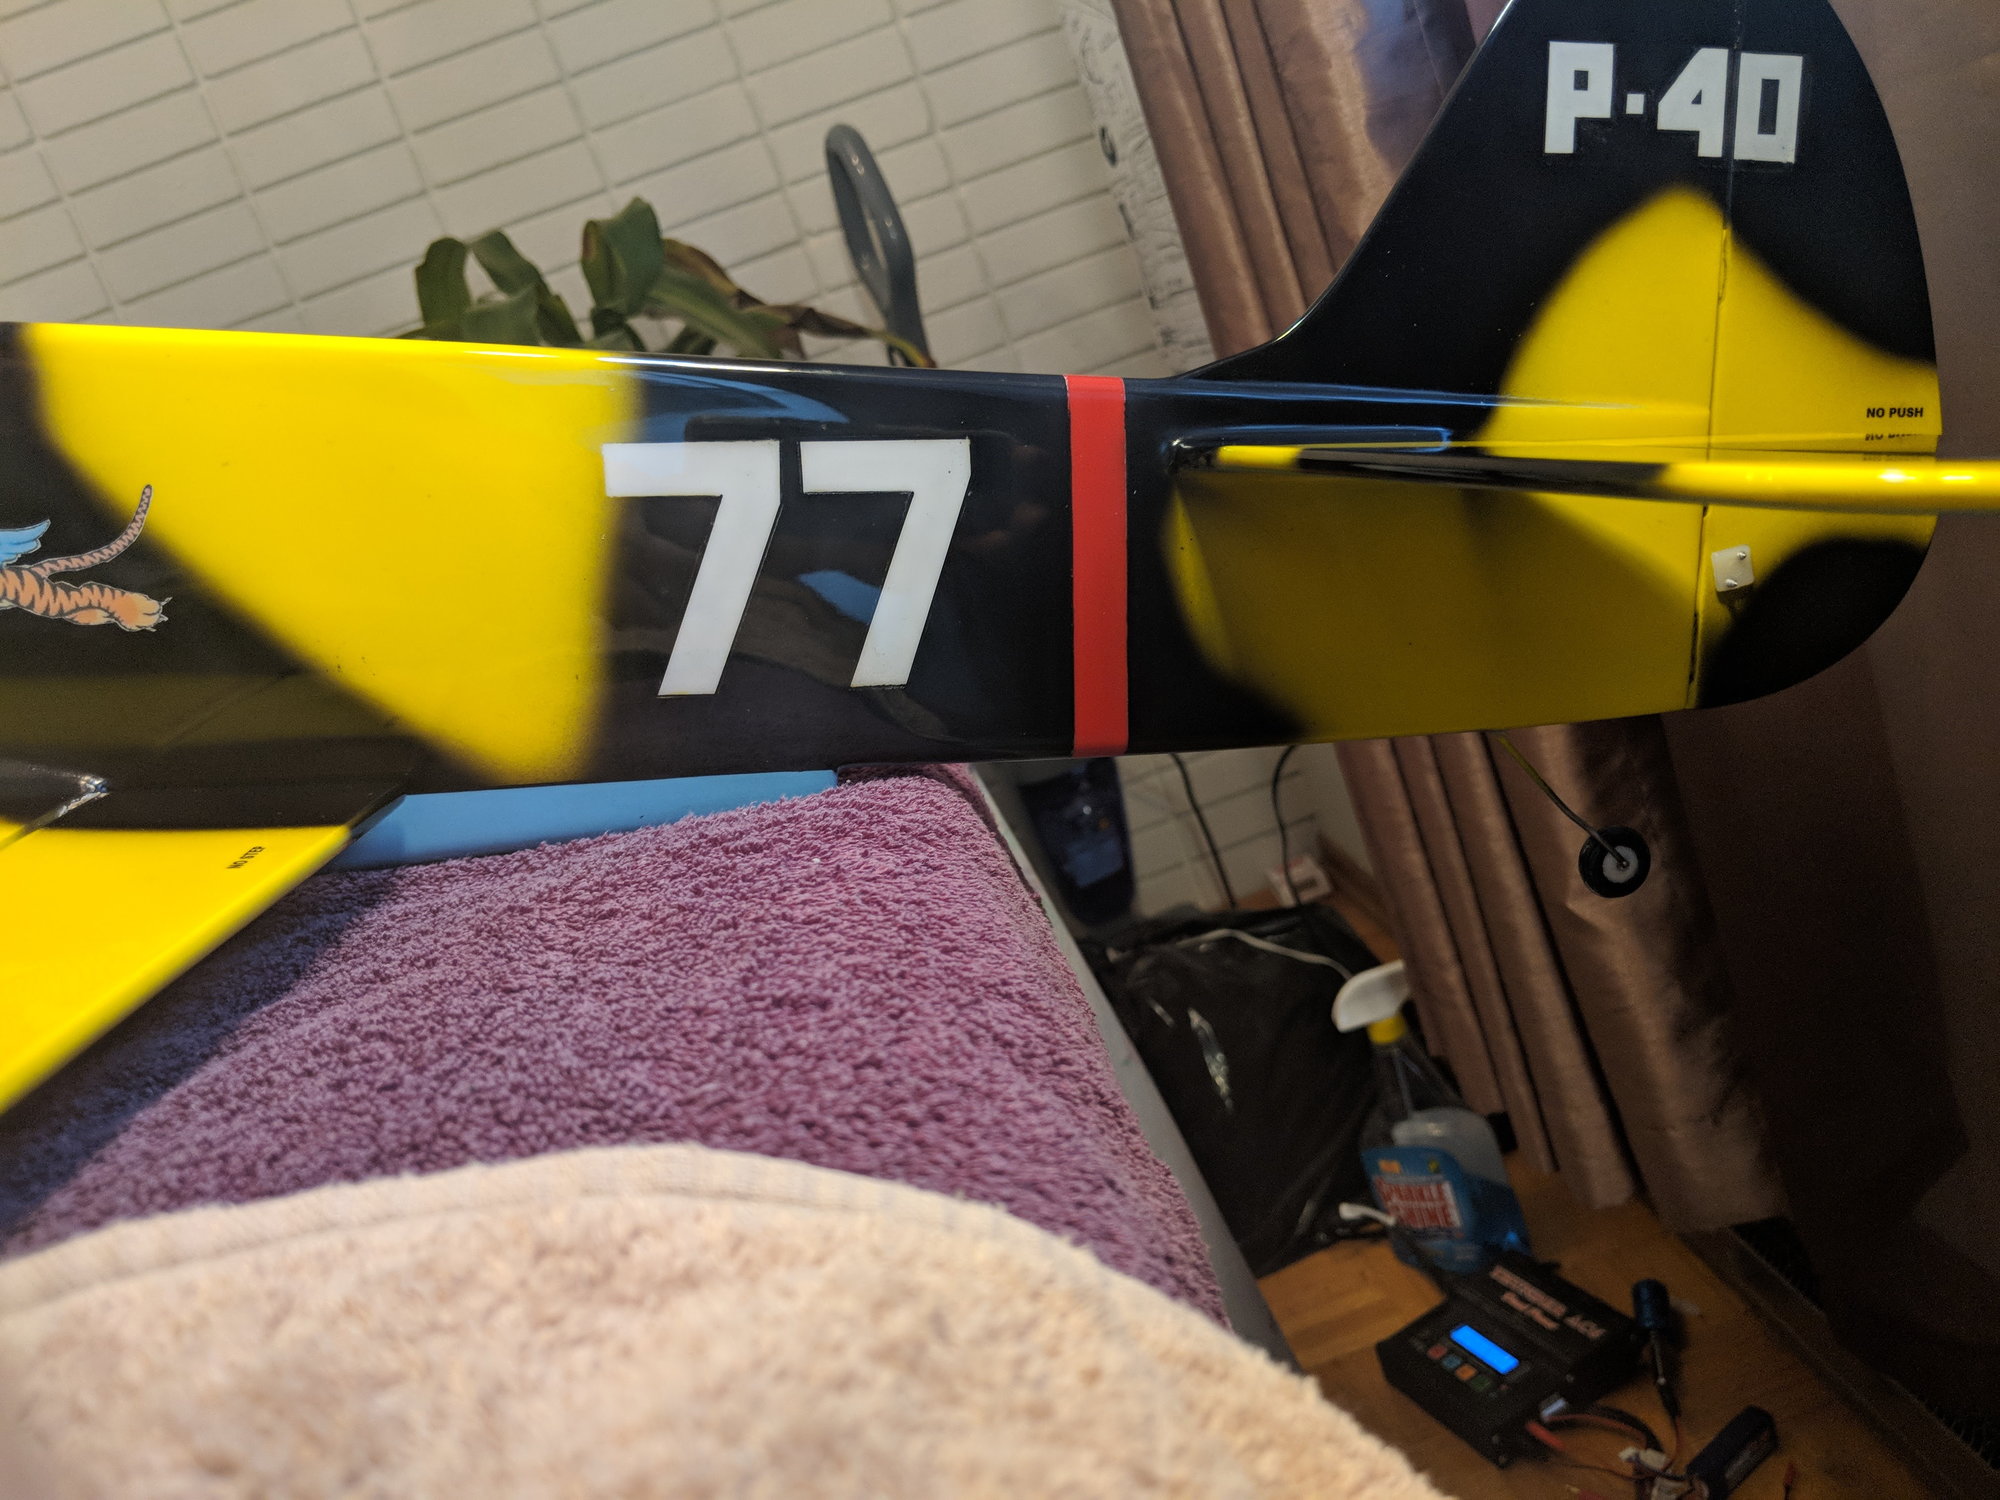
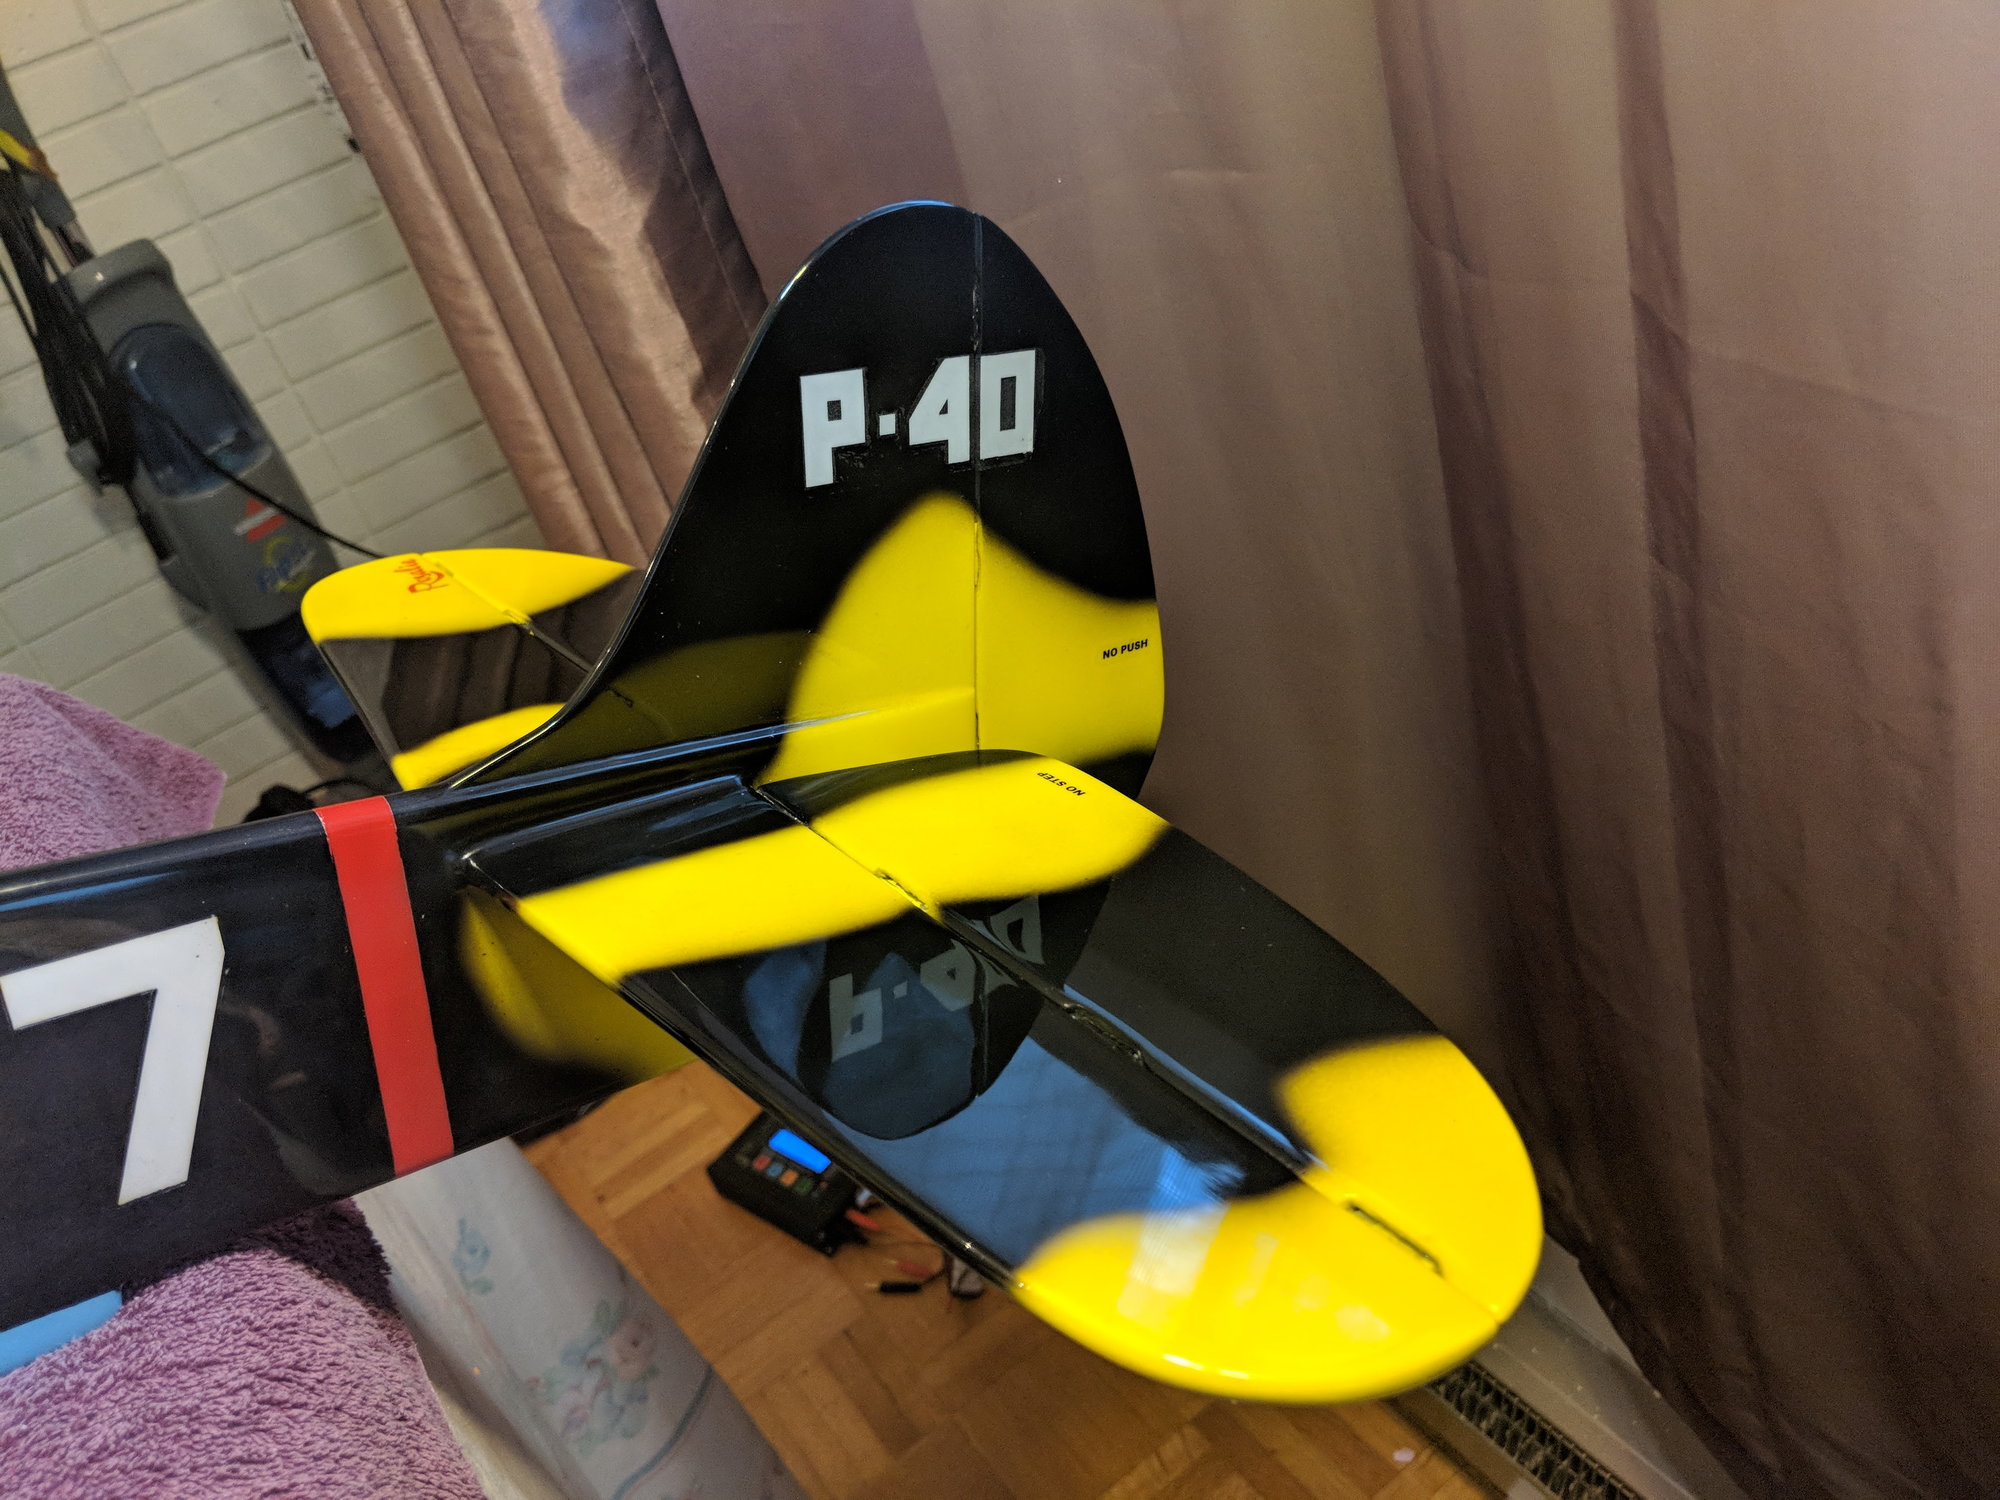

Midwest P40 Warhawk
Kevin
Custom engraved and polished tongue muffler on OS LA 46
Wife And P40
Midwest P40 Warhawk
The following 2 users liked this post by search-n-destroy:
Hye Flyer (07-13-2022),
straitnickel (10-08-2022)
01-12-2022 | 10:49 PM
#7
Thread Starter
Senior Member
That is a beautiful P40 you have there.
The P40 is my all time favorite… even as a kid in the 70’s. Then I was lucky enough when in college (80’s) our frat hired a cook… who happened to be one of the original flying tigers. He invited a few of us over to his house, his wife cooked us dinner and he got out his old flight jacket and photo album. I was very impressed. I have always had a P-40 (build a Guillows warhawk kit while at college even) and even scratch built the same only upsized the plans to accommodate a Fox .25 (vs. .049).
all that got me wanting to build profile war birds… so here i am today. LOL
I have all the ME109 ribs cut on my laser cutter… hopefully I’ll have some time this weekend to start assembly.
I am really impressed with the laser cutter… my plan is to have a library of old classic war birds from obsolete kits in my repertoire. Might even make the short kits available to others if there is an interest.
01-12-2022 | 11:42 PM
#8
That is a beautiful P40 you have there.
The P40 is my all time favorite… even as a kid in the 70’s. Then I was lucky enough when in college (80’s) our frat hired a cook… who happened to be one of the original flying tigers. He invited a few of us over to his house, his wife cooked us dinner and he got out his old flight jacket and photo album. I was very impressed. I have always had a P-40 (build a Guillows warhawk kit while at college even) and even scratch built the same only upsized the plans to accommodate a Fox .25 (vs. .049).
all that got me wanting to build profile war birds… so here i am today. LOL
I have all the ME109 ribs cut on my laser cutter… hopefully I’ll have some time this weekend to start assembly.
I am really impressed with the laser cutter… my plan is to have a library of old classic war birds from obsolete kits in my repertoire. Might even make the short kits available to others if there is an interest.
The P40 is my all time favorite… even as a kid in the 70’s. Then I was lucky enough when in college (80’s) our frat hired a cook… who happened to be one of the original flying tigers. He invited a few of us over to his house, his wife cooked us dinner and he got out his old flight jacket and photo album. I was very impressed. I have always had a P-40 (build a Guillows warhawk kit while at college even) and even scratch built the same only upsized the plans to accommodate a Fox .25 (vs. .049).
all that got me wanting to build profile war birds… so here i am today. LOL
I have all the ME109 ribs cut on my laser cutter… hopefully I’ll have some time this weekend to start assembly.
I am really impressed with the laser cutter… my plan is to have a library of old classic war birds from obsolete kits in my repertoire. Might even make the short kits available to others if there is an interest.
Kevin.
https://youtu.be/issFhJbiD1U
01-15-2022 | 10:14 AM
#9
Thread Starter
Senior Member
Don’t ever recall watching that but thanks for the link.. i will def check it out.
The family of Alban Sylvester did put a page on the web dedicated to his life. Unfortunately I can no longer locate it on the web. I believed he passed away in late 80’s or early 90’s
The family of Alban Sylvester did put a page on the web dedicated to his life. Unfortunately I can no longer locate it on the web. I believed he passed away in late 80’s or early 90’s
01-16-2022 | 03:17 AM
#10
Man, must be nice to have a laser cutter. Whole other hobby and learning curve. I picked up a desktop vinyl cutter a while back and it takes alot of time to make a mask. Looks like your using silver as a base coat on your P40. What finishing method do you use? I follow windy urtnowski's dope finishing program, have been looking into 2k automotive clear, but havent made the leap yet. Also if you want info on anything check out my you tube channel, I owe all my success to Windy videos. In the last 8 months Ive uploaded over 500 of them. Tonnes of great info! https://youtube.com/channel/UCQLZOloDrMlE4LDcTwc1wvw
Best regards,
Kevin.
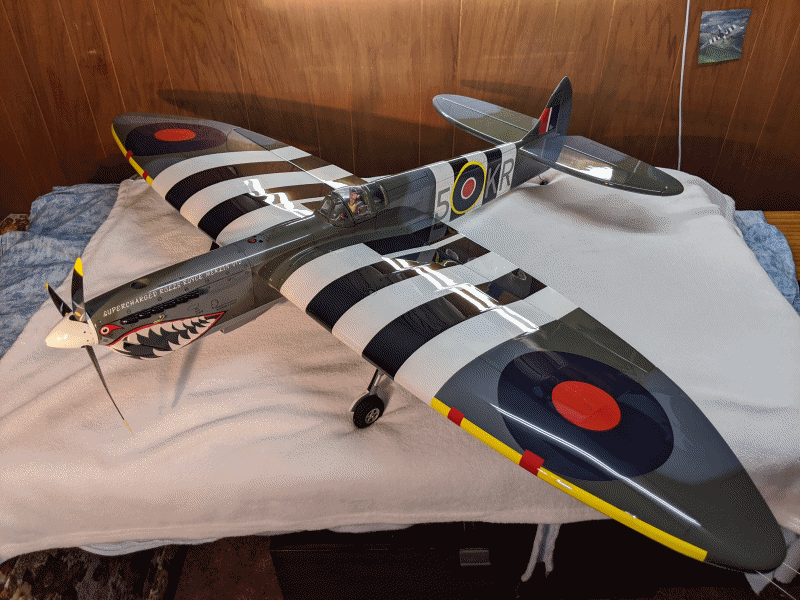
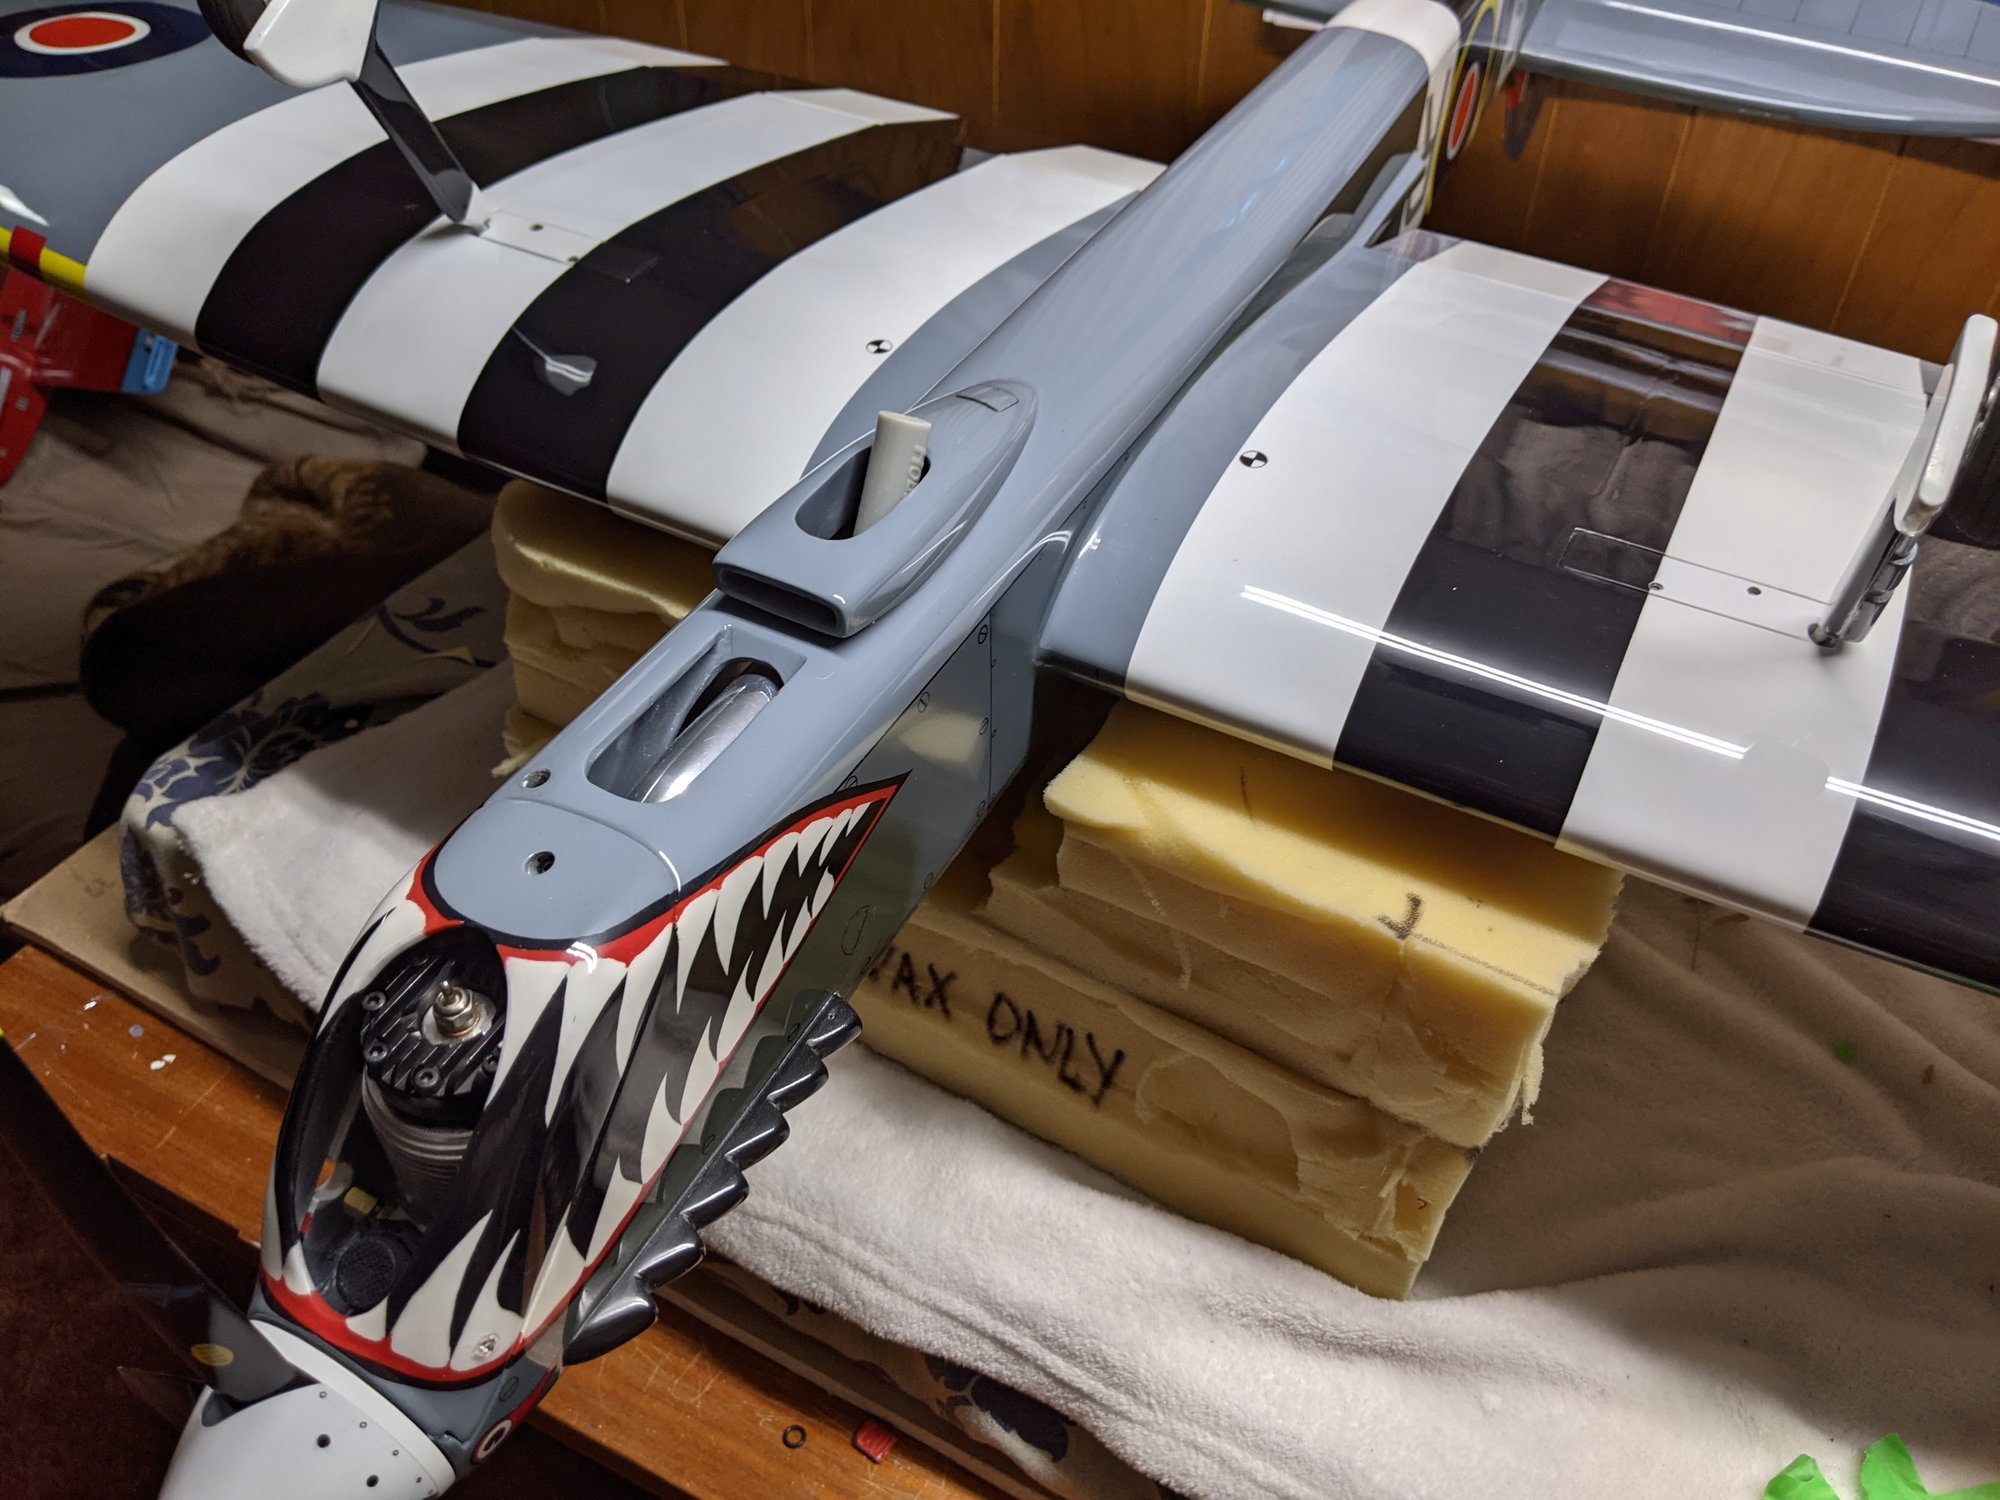
Windy Urtnowski / Joe Adamusko 1996 Spitfire. Ro jett 67 rear exhaust. All dope finish
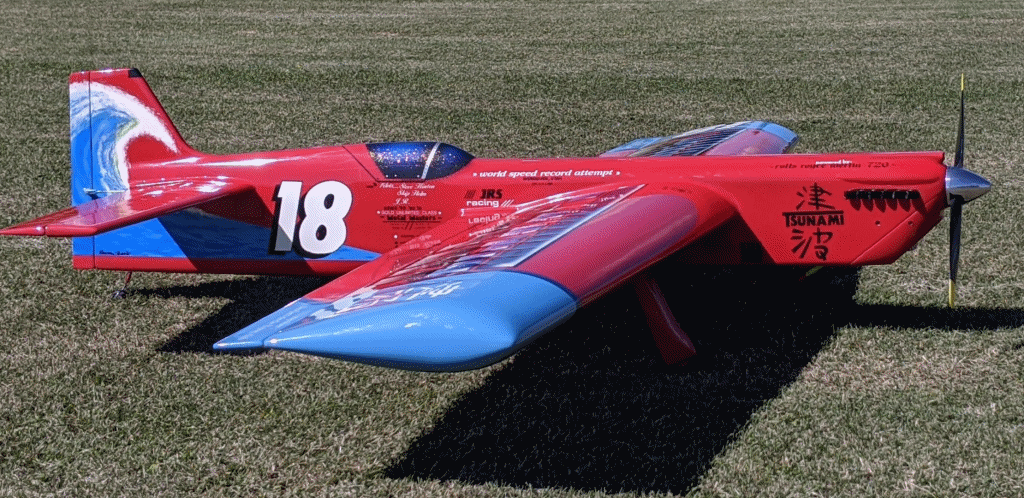
Windy Urtnowski designed Tsunami ST 60 Powered
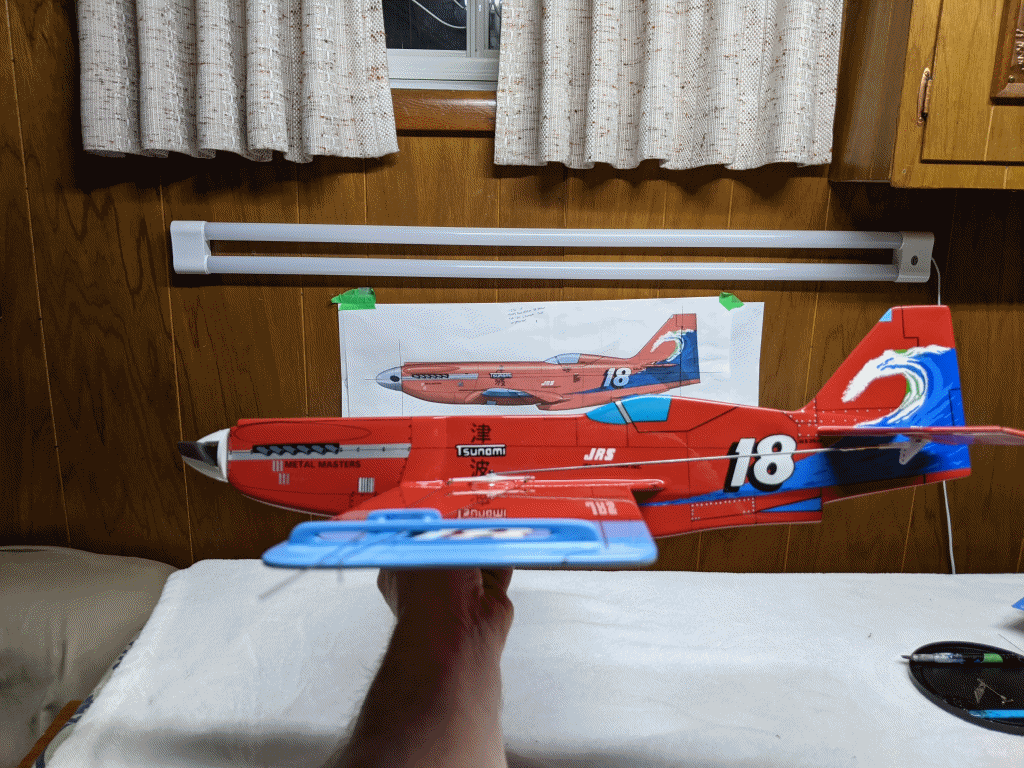
1/2a Tsunami Tee Dee 051 on bladder. No decals or stickers on anything i build, its all painted on.
Best regards,
Kevin.
Windy Urtnowski / Joe Adamusko 1996 Spitfire. Ro jett 67 rear exhaust. All dope finish
Windy Urtnowski designed Tsunami ST 60 Powered
1/2a Tsunami Tee Dee 051 on bladder. No decals or stickers on anything i build, its all painted on.
01-18-2022 | 09:55 AM
#11
Thread Starter
Senior Member
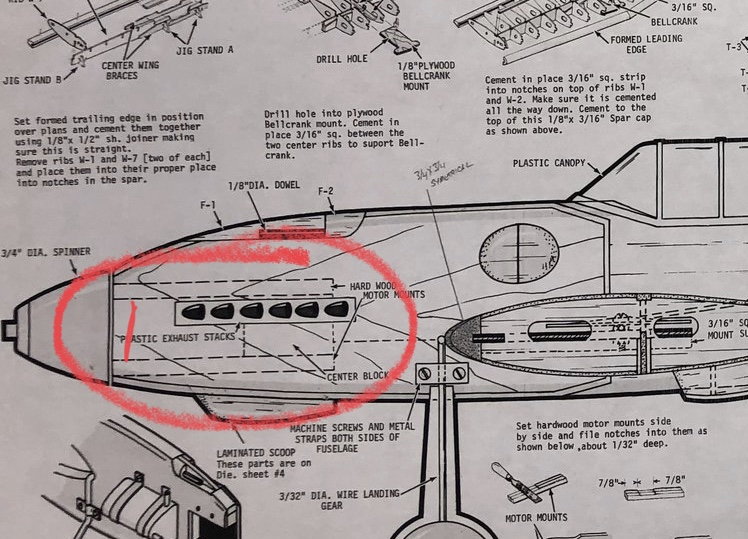
One thing i noticed on these scale plans is the space for the motor is not wide enough for the Fox 15. The hardwood motor mounts should be far enough apart to accommodate the .15. When I measured the width (or height) of the the hardwood as they were drawn on the plans, they were smaller than the 3/8” x 3/8” so I redrew the nose/mounting area in CAD to reflect real measurements of those. So now when I cut the fuse and plywood doublers, they should be true to scale in spite of the printed plans. I have also made the correction to the printed plans for future.
01-18-2022 | 11:43 AM
#12
One thing i noticed on these scale plans is the space for the motor is not wide enough for the Fox 15. The hardwood motor mounts should be far enough apart to accommodate the .15. When I measured the width (or height) of the the hardwood as they were drawn on the plans, they were smaller than the 3/8” x 3/8” so I redrew the nose/mounting area in CAD to reflect real measurements of those. So now when I cut the fuse and plywood doublers, they should be true to scale in spite of the printed plans. I have also made the correction to the printed plans for future.
01-20-2022 | 10:22 AM
#13
Thread Starter
Senior Member
No worries.. I’ll be tackling that next. Plan on building and flying these .15 warbirds, then move into larger .35 size.
Will likely start with the P-40 and ME 109. Both for .35s. Will redraw all unique parts in CAD and then cut on laser cutter.
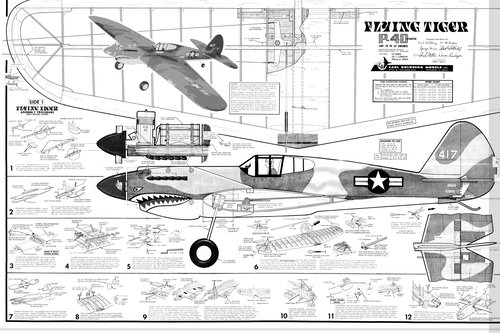
Will likely start with the P-40 and ME 109. Both for .35s. Will redraw all unique parts in CAD and then cut on laser cutter.
01-20-2022 | 11:55 AM
#14
For anyone that needs decals for the Midwest P40, i cleaned up the original ones.
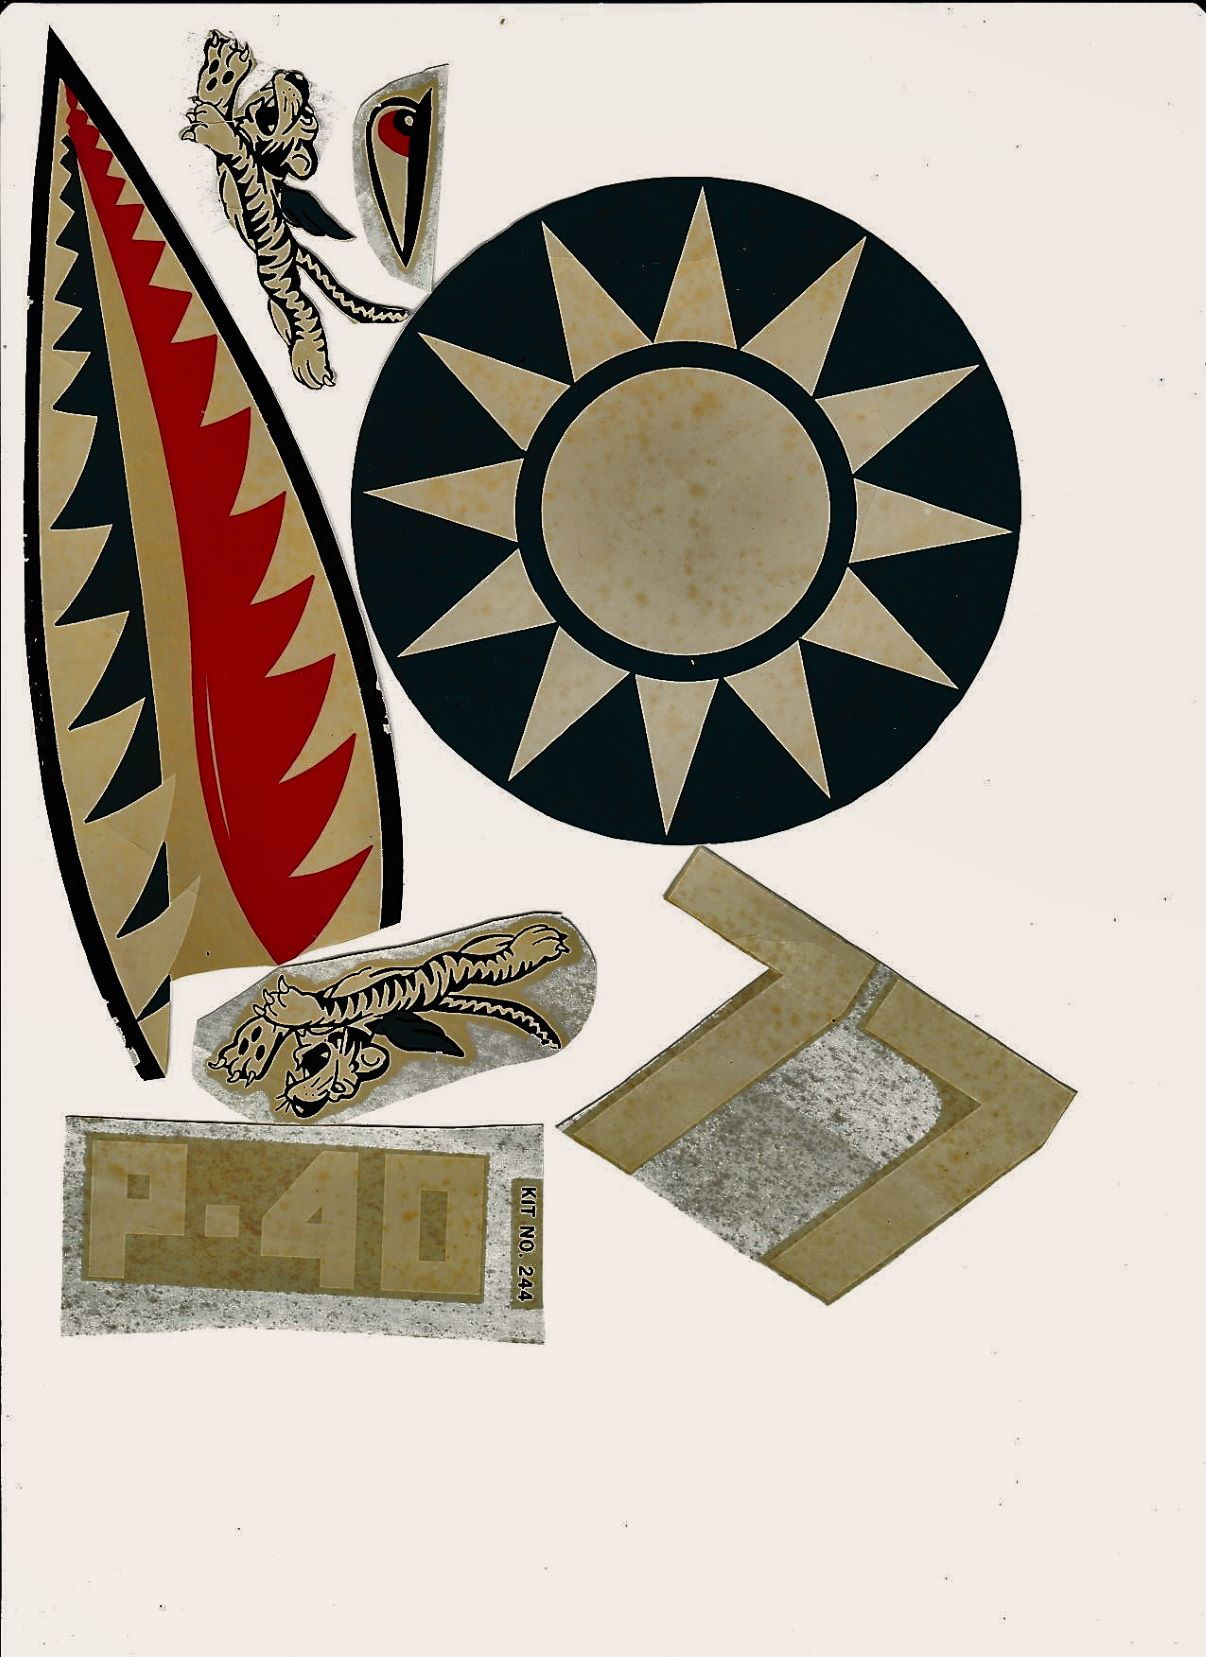
Original Midwest P40 decal

Touched up Midwest P40 decal. (I wont say how long this took to do.
 )
)
Original Midwest P40 decal
Touched up Midwest P40 decal. (I wont say how long this took to do.
)Last edited by search-n-destroy; 01-20-2022 at 11:58 AM.
01-21-2022 | 07:23 AM
#15
Thread Starter
Senior Member
AWESOME.... and I can imagine how many hours that took LOL what size wing is that for, the Midwest Profile Warbird Plans: 48" P-40 Warhawk for .29 to .40 Engines?
01-21-2022 | 09:34 AM
#16
Last edited by search-n-destroy; 01-21-2022 at 12:21 PM.
01-21-2022 | 09:43 AM
#17
Of course I had to have an onboard video camera on the plane. Long time ago I was waiting for them to come out with a camera small and light enough to get a view from the airplanes perspective.
The following users liked this post:
Dale C. (09-25-2022)
The following users liked this post:
Hye Flyer (06-27-2022)
06-27-2022 | 07:43 PM
#23
Thread Starter
Senior Member
Well i have been so busy just cutting and drawing I have had little to no progress on my ME109… but I did order silk and the wing is ready to cover. I ended up parting with the laser cutter this past weekend as it was a perfect machine for a buddy of mine’s wife who does crafts and such. I must have cut 30 different plane short kits. So much time in redrawing the parts on the ‘so called’ scale plans. LOL but i do have a nice library now of parts and plans. I was selling the short kits on eBay but it got too much…. Had no time to build. SOOOOO i will be without the machine for a few weeks. Hope to get back to my ME109 before I can’t stand it and build a bigger strong faster laser.
Before I parted with my laser, managed to cut out most of the parts to the 74 bill draper Kittyhawk…. And i recently built my own magnetic build table top. Now its time to get back to building.
Before I parted with my laser, managed to cut out most of the parts to the 74 bill draper Kittyhawk…. And i recently built my own magnetic build table top. Now its time to get back to building.
The following users liked this post:
2W0EPI (07-10-2022)
07-05-2022 | 10:36 PM
#25