Go Back  RCU Forums > RC Airplanes > Kit Building
Reload this Page >

TF Beechcraft Bonanza F33A Build

Community
Search
Notices
Kit Building If you're building a kit and have questions or want to discuss kit building post it here.

TF Beechcraft Bonanza F33A Build

Thread Tools
 
Search this Thread
 
Old 01-12-2020, 12:16 PM
  #651  
VincentJ
Thread Starter
 
VincentJ's Avatar
 
Join Date: Mar 2011
Location: Peterborough, NH
Posts: 4,582
Received 118 Likes on 107 Posts
Default

Thanks for those links Tony, very interesting and sooo much work!!!
Old 01-12-2020, 12:33 PM
  #652  
VincentJ
Thread Starter
 
VincentJ's Avatar
 
Join Date: Mar 2011
Location: Peterborough, NH
Posts: 4,582
Received 118 Likes on 107 Posts
Default

Work had interfered with progress of the Bonanza last week, which is why you didn't see any posts... I hate it when that happens!


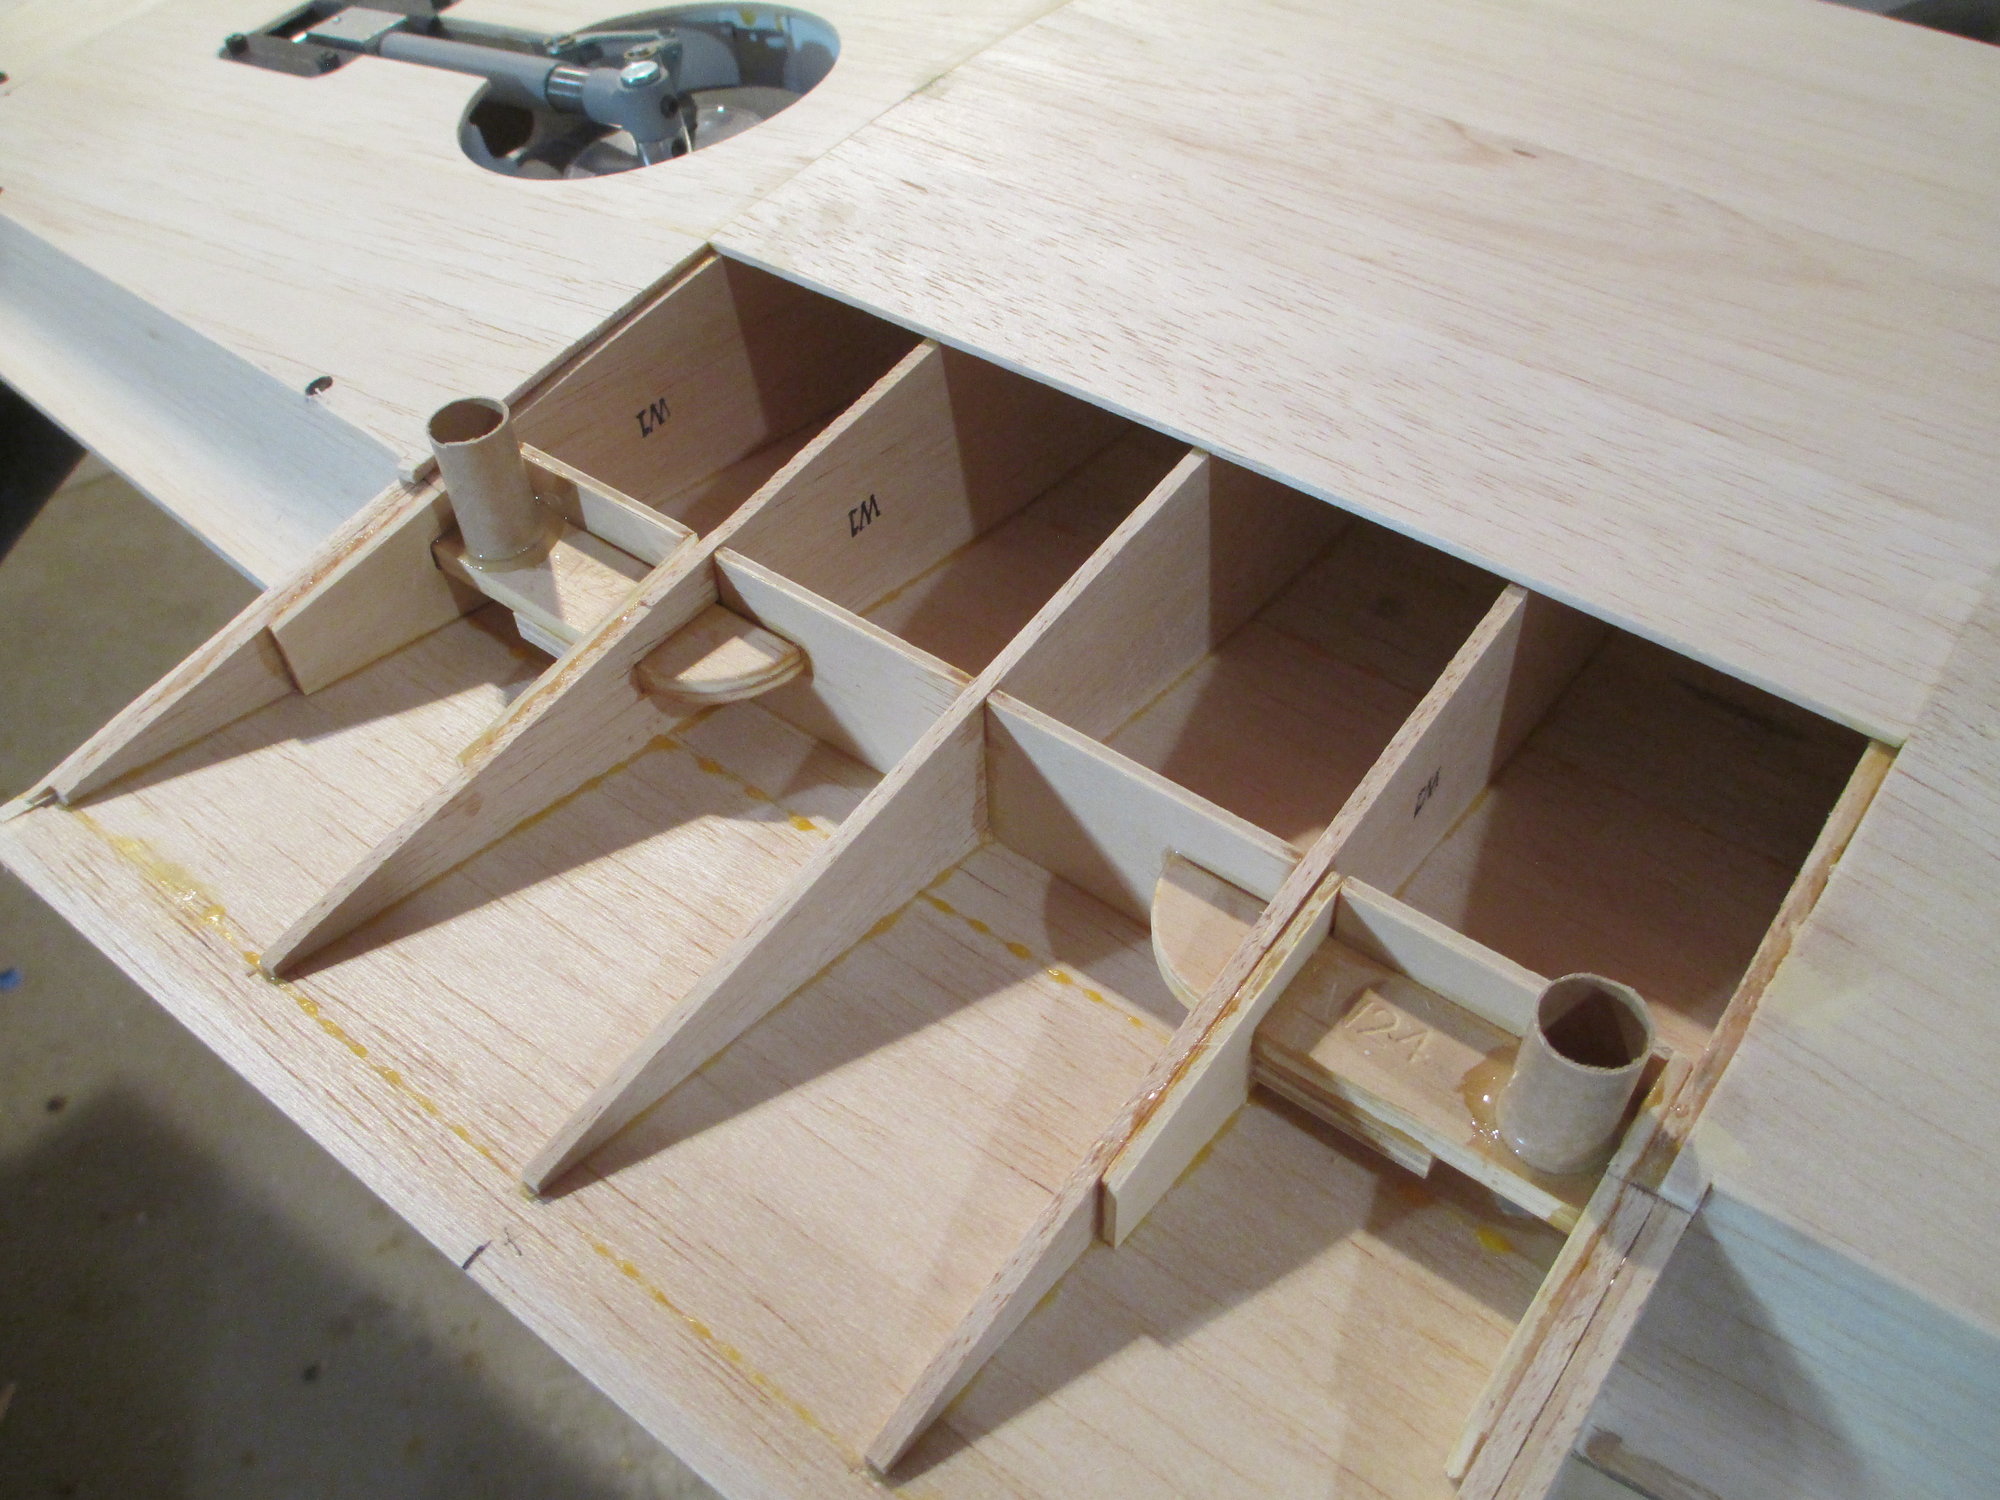
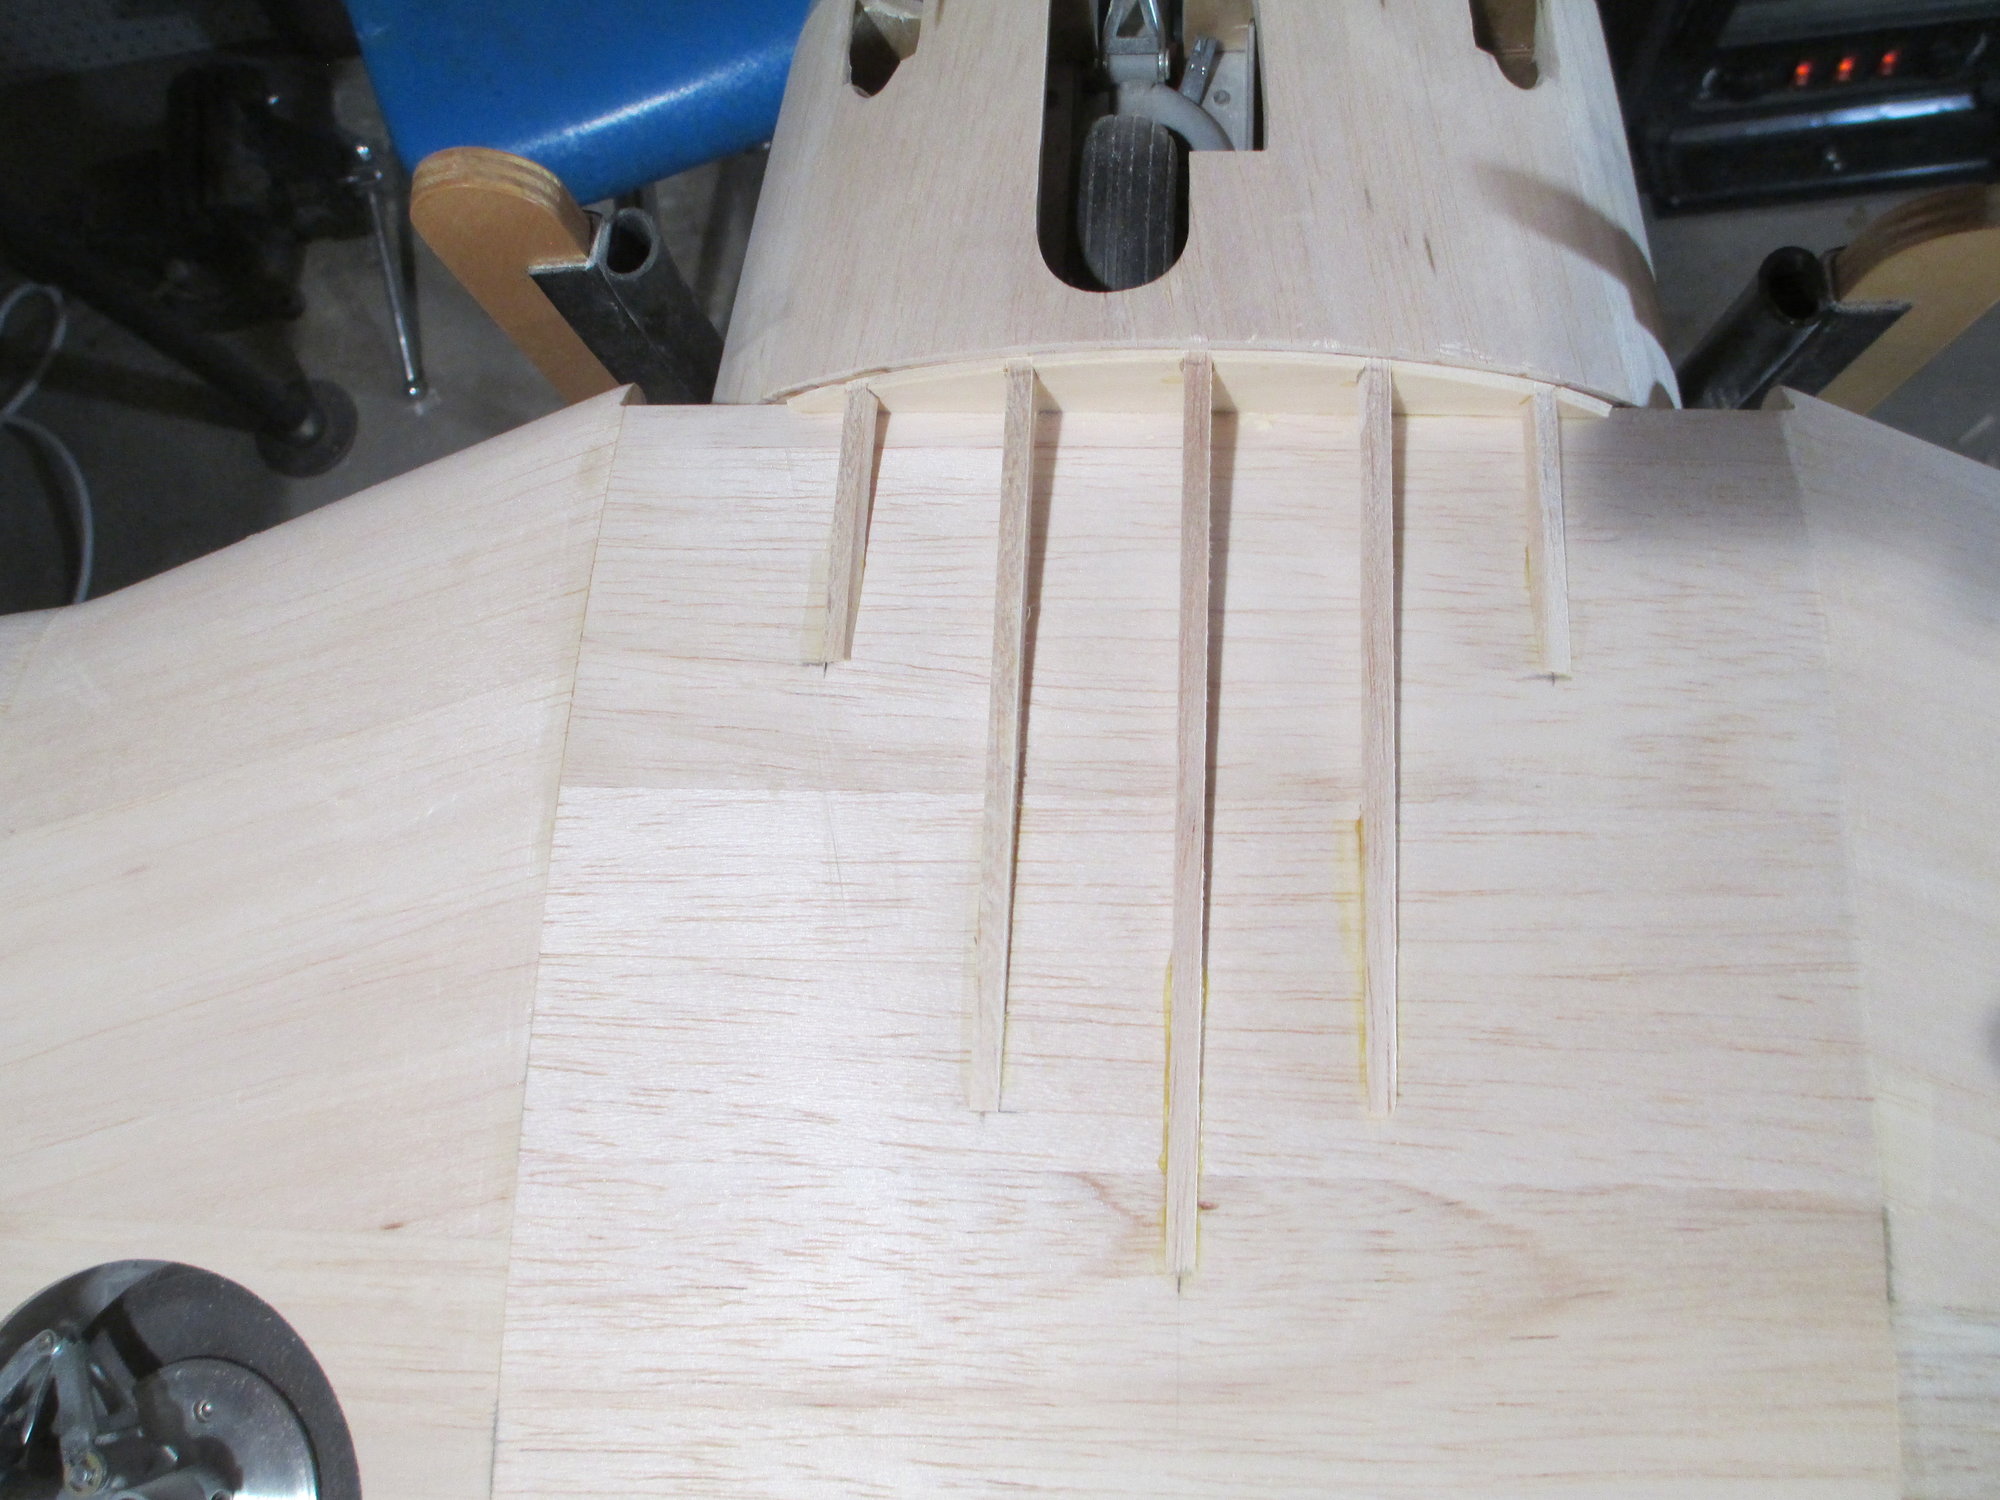
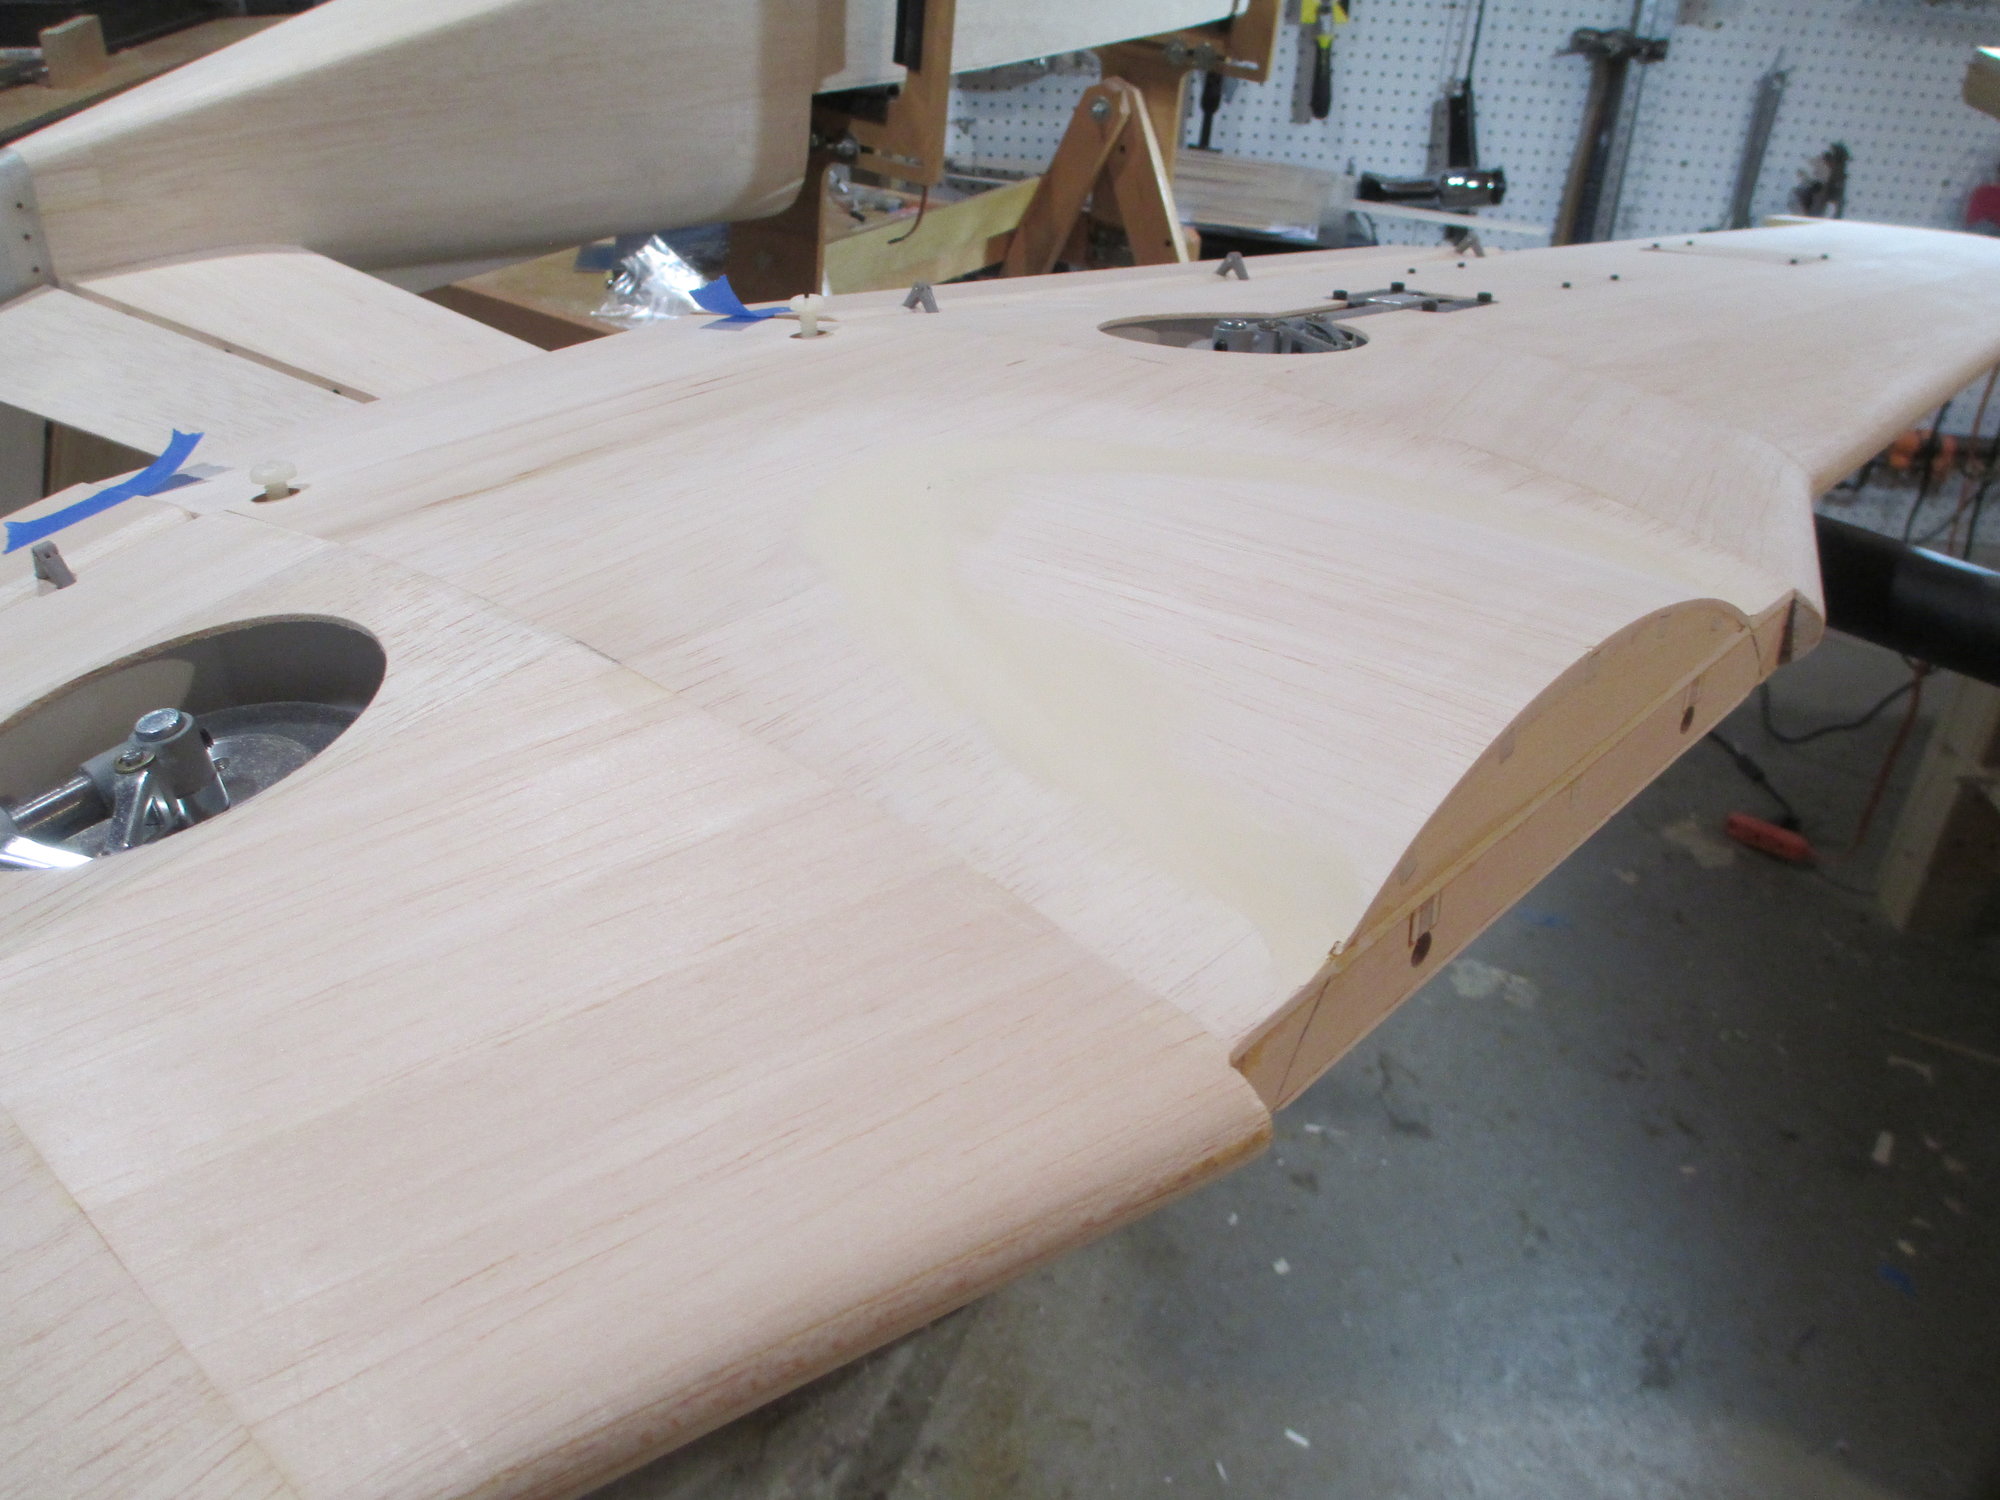
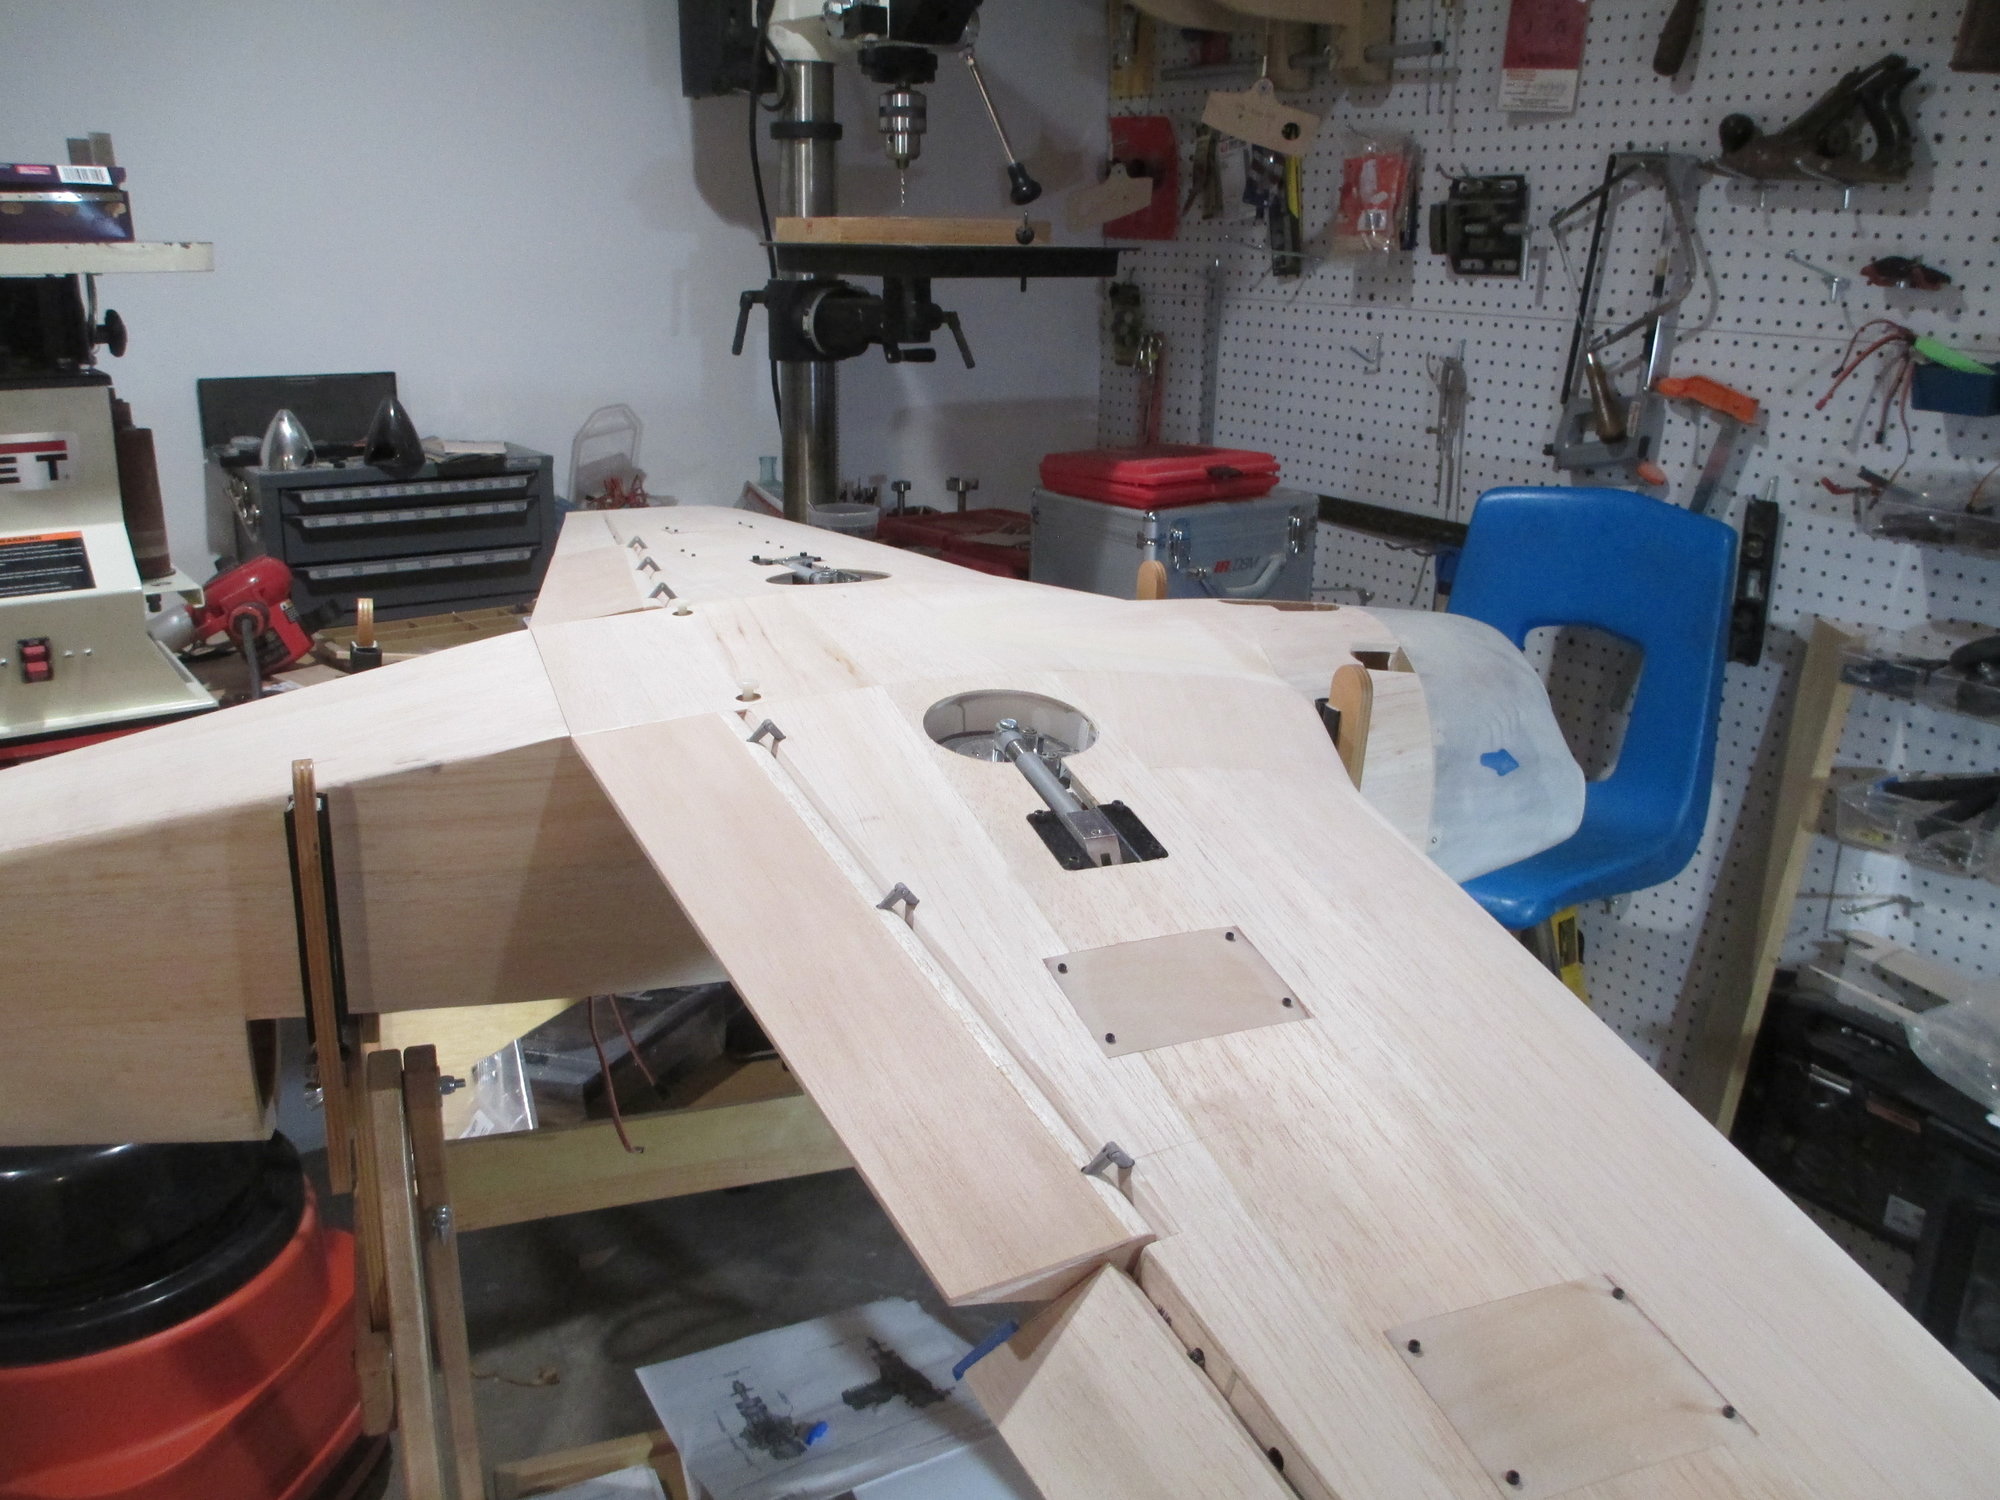
The bottom of the wing center section needs to be completed. Before it gets sheeted, two small lengths of 9/16" diameter rocket tubing were cut and epoxied onto the wing bolt plates. (These are the same rocket tubes that I used in the wing to run my servo leads through.)


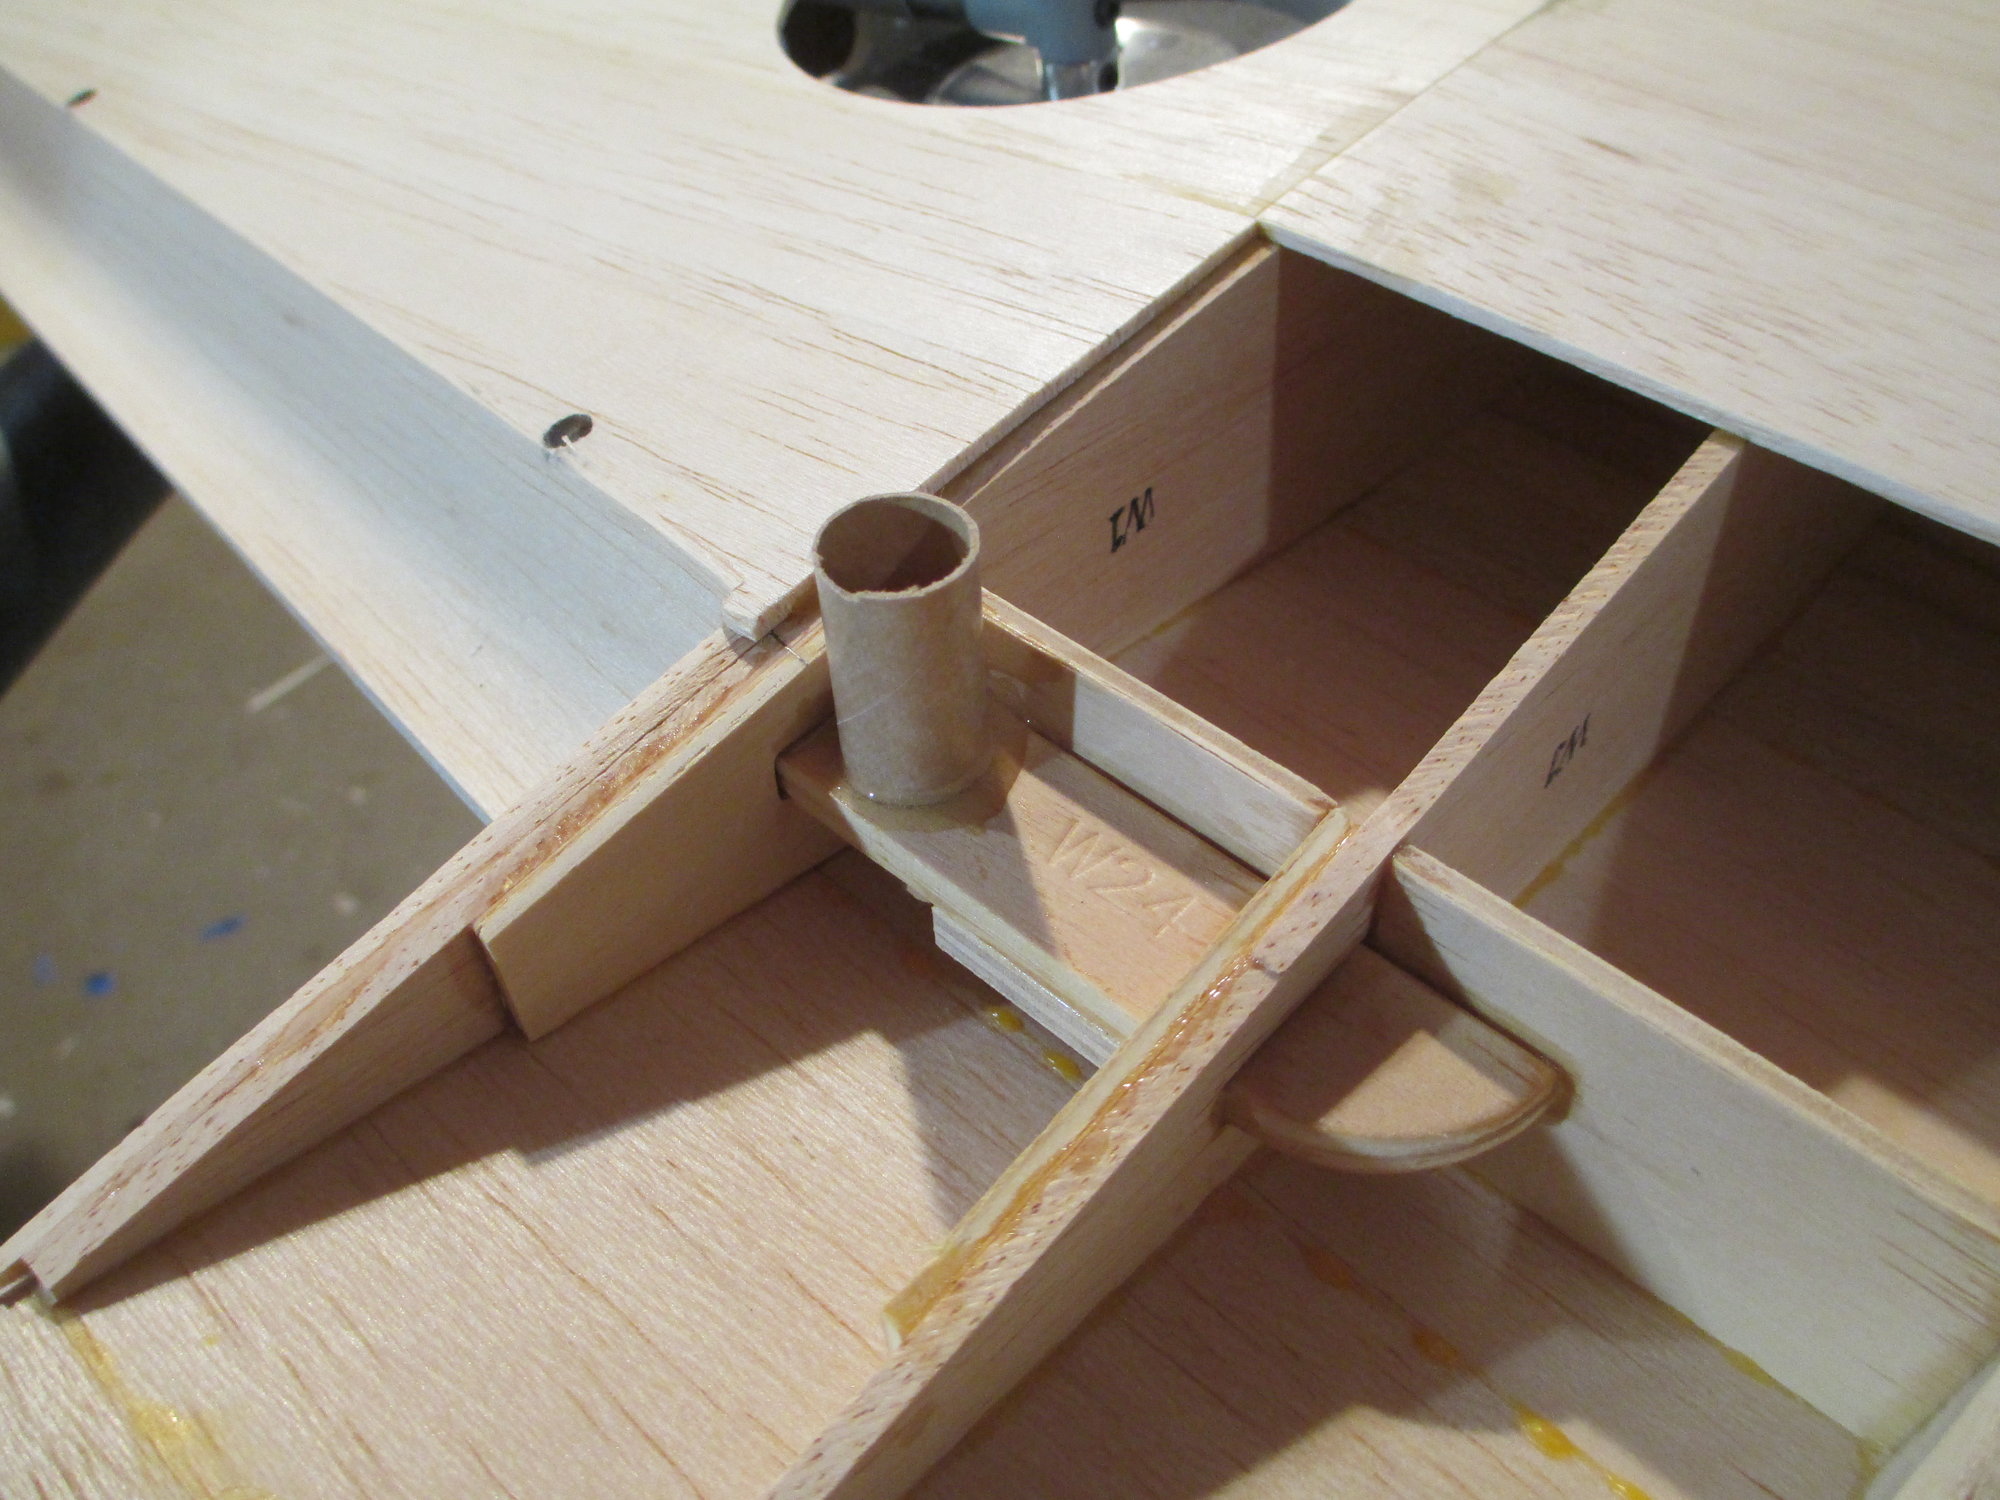
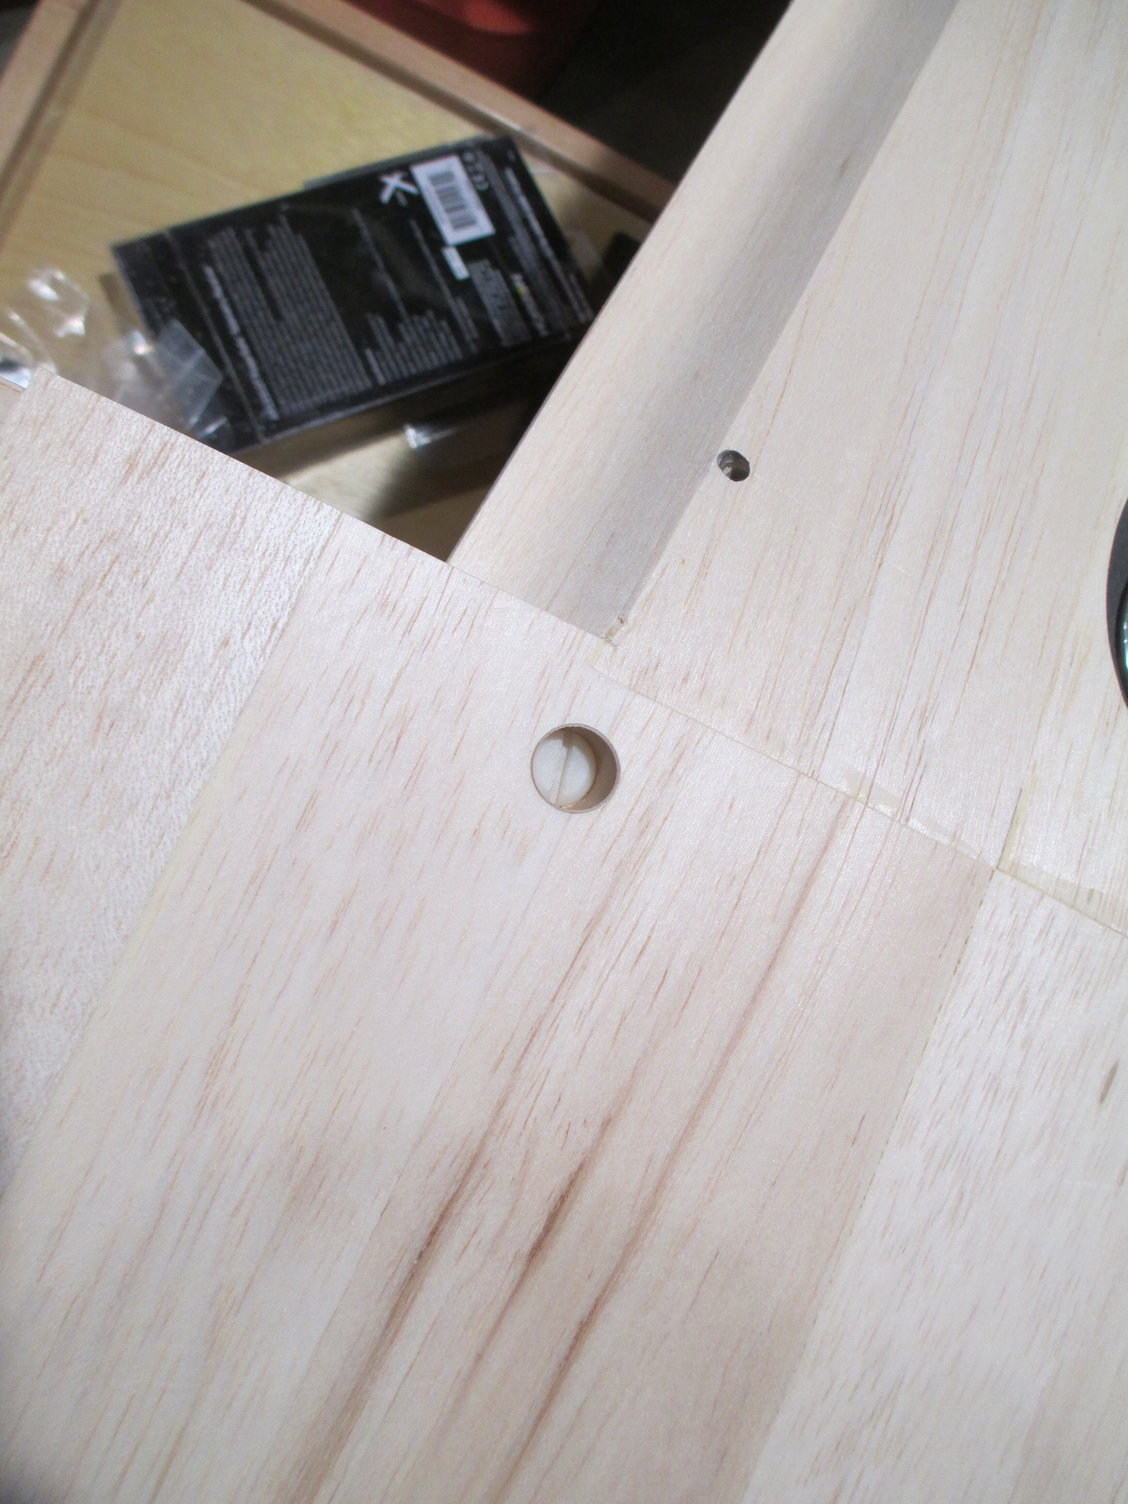
This "well" will serve to direct the nylon wing bolts through the wing and thread into the wing bolt block.


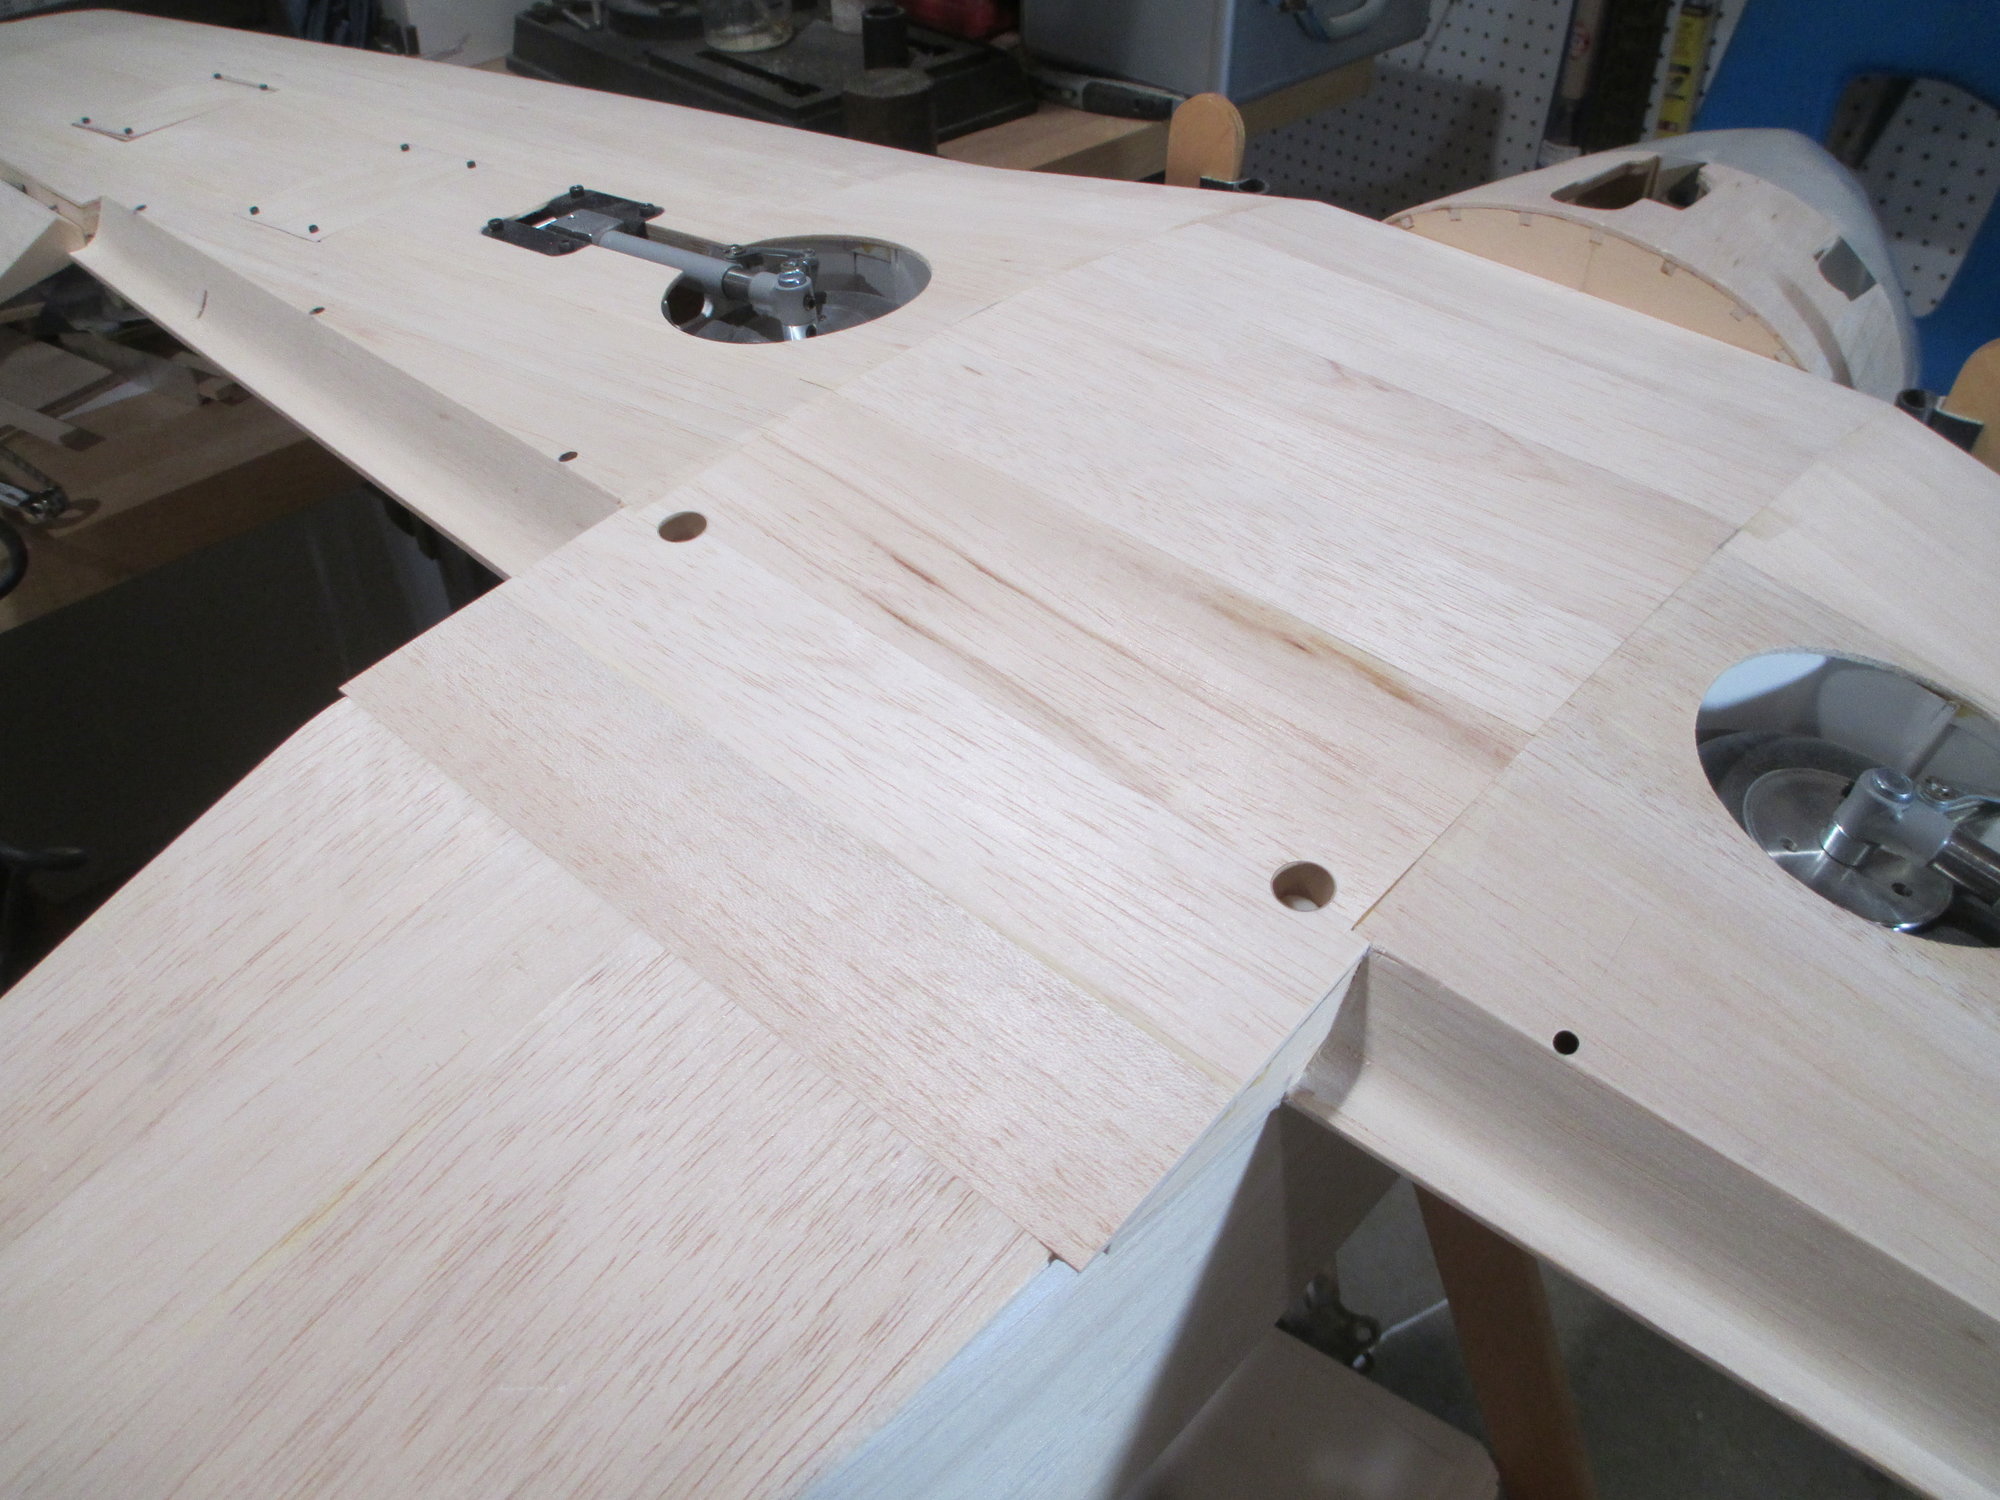
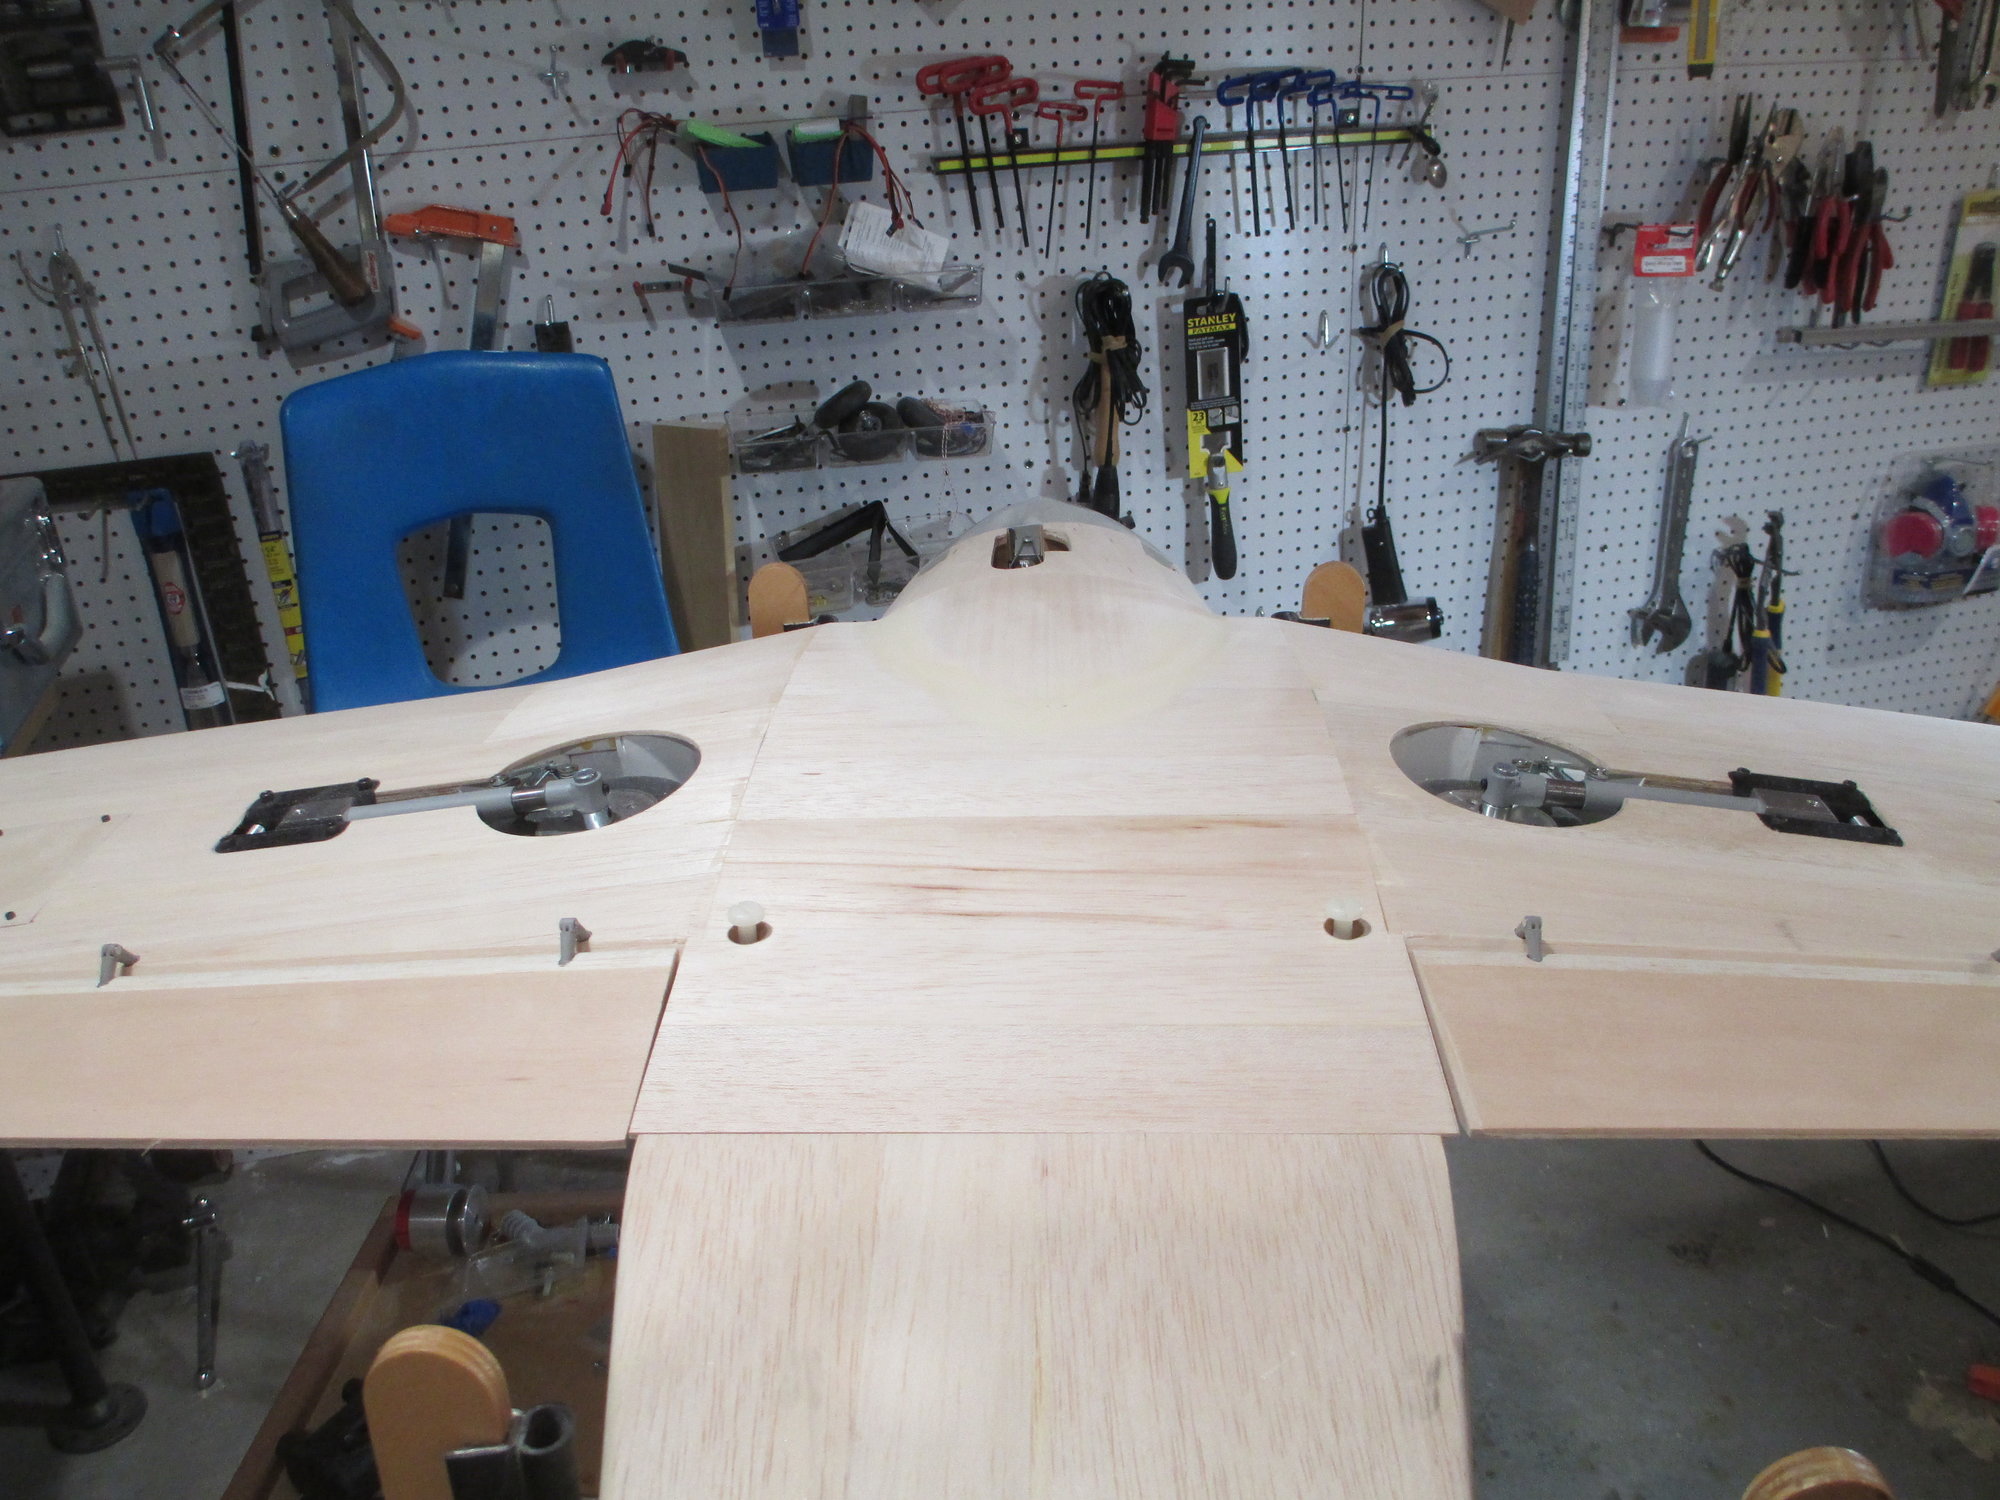
The wing is now secured to the fuselage with the nylon wing bolts.


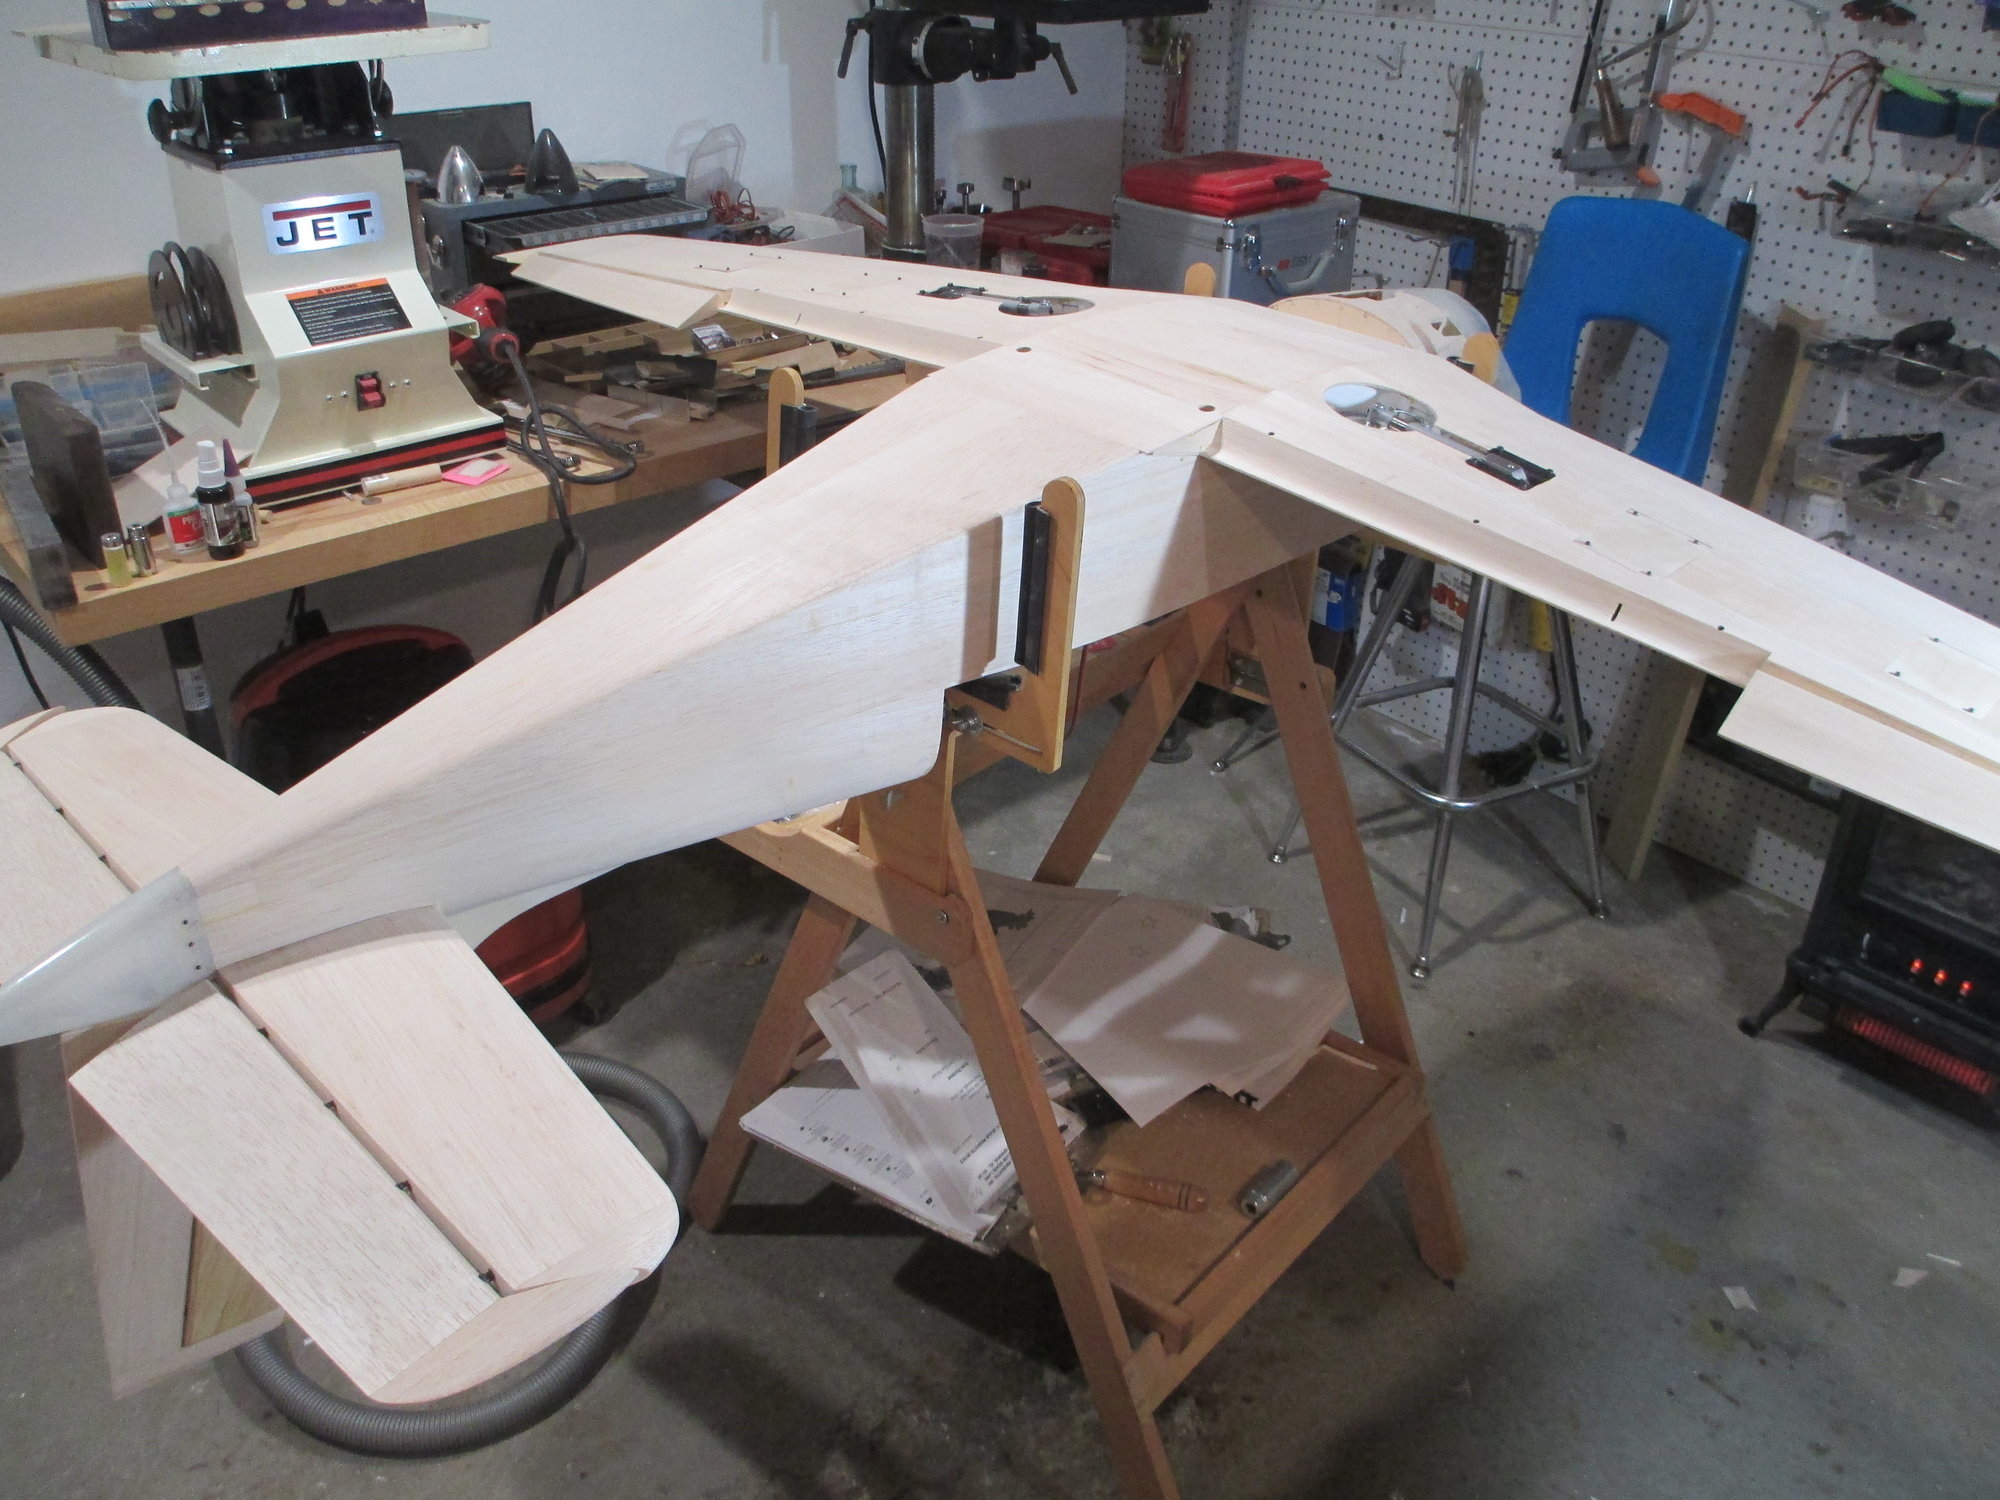
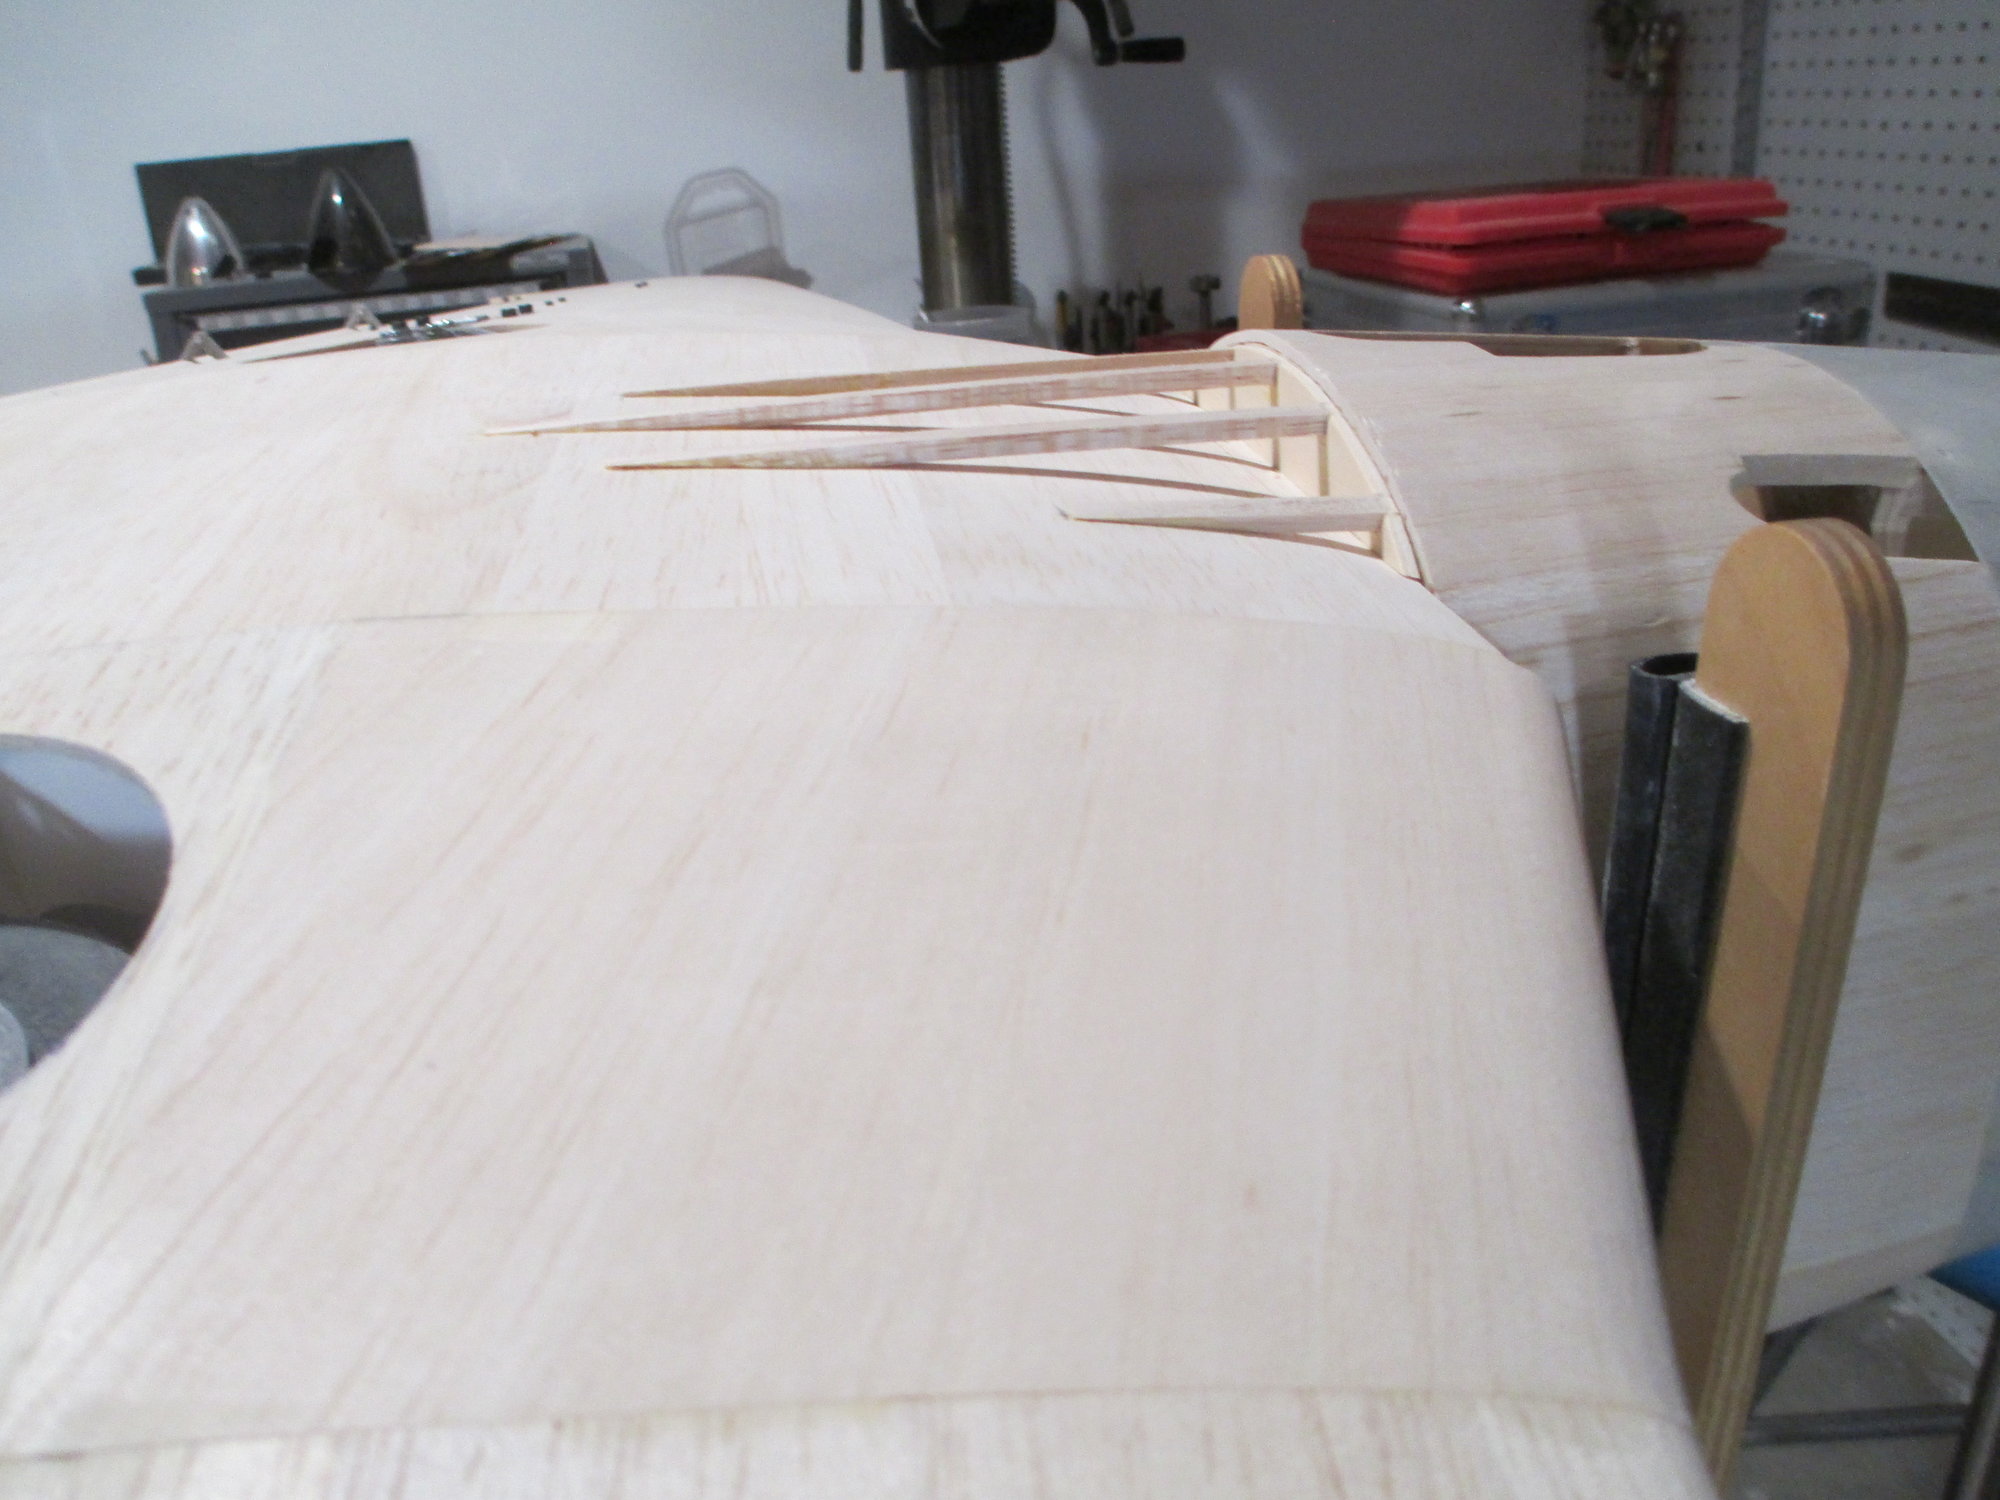
Time to make the belly pan! This will transition the front of the wing to the rounded bottom of the fuselage.

Last edited by VincentJ; 01-12-2020 at 12:39 PM.
Old 01-12-2020, 02:18 PM
  #653  
VincentJ
Thread Starter
 
VincentJ's Avatar
 
Join Date: Mar 2011
Location: Peterborough, NH
Posts: 4,582
Received 118 Likes on 107 Posts
Default


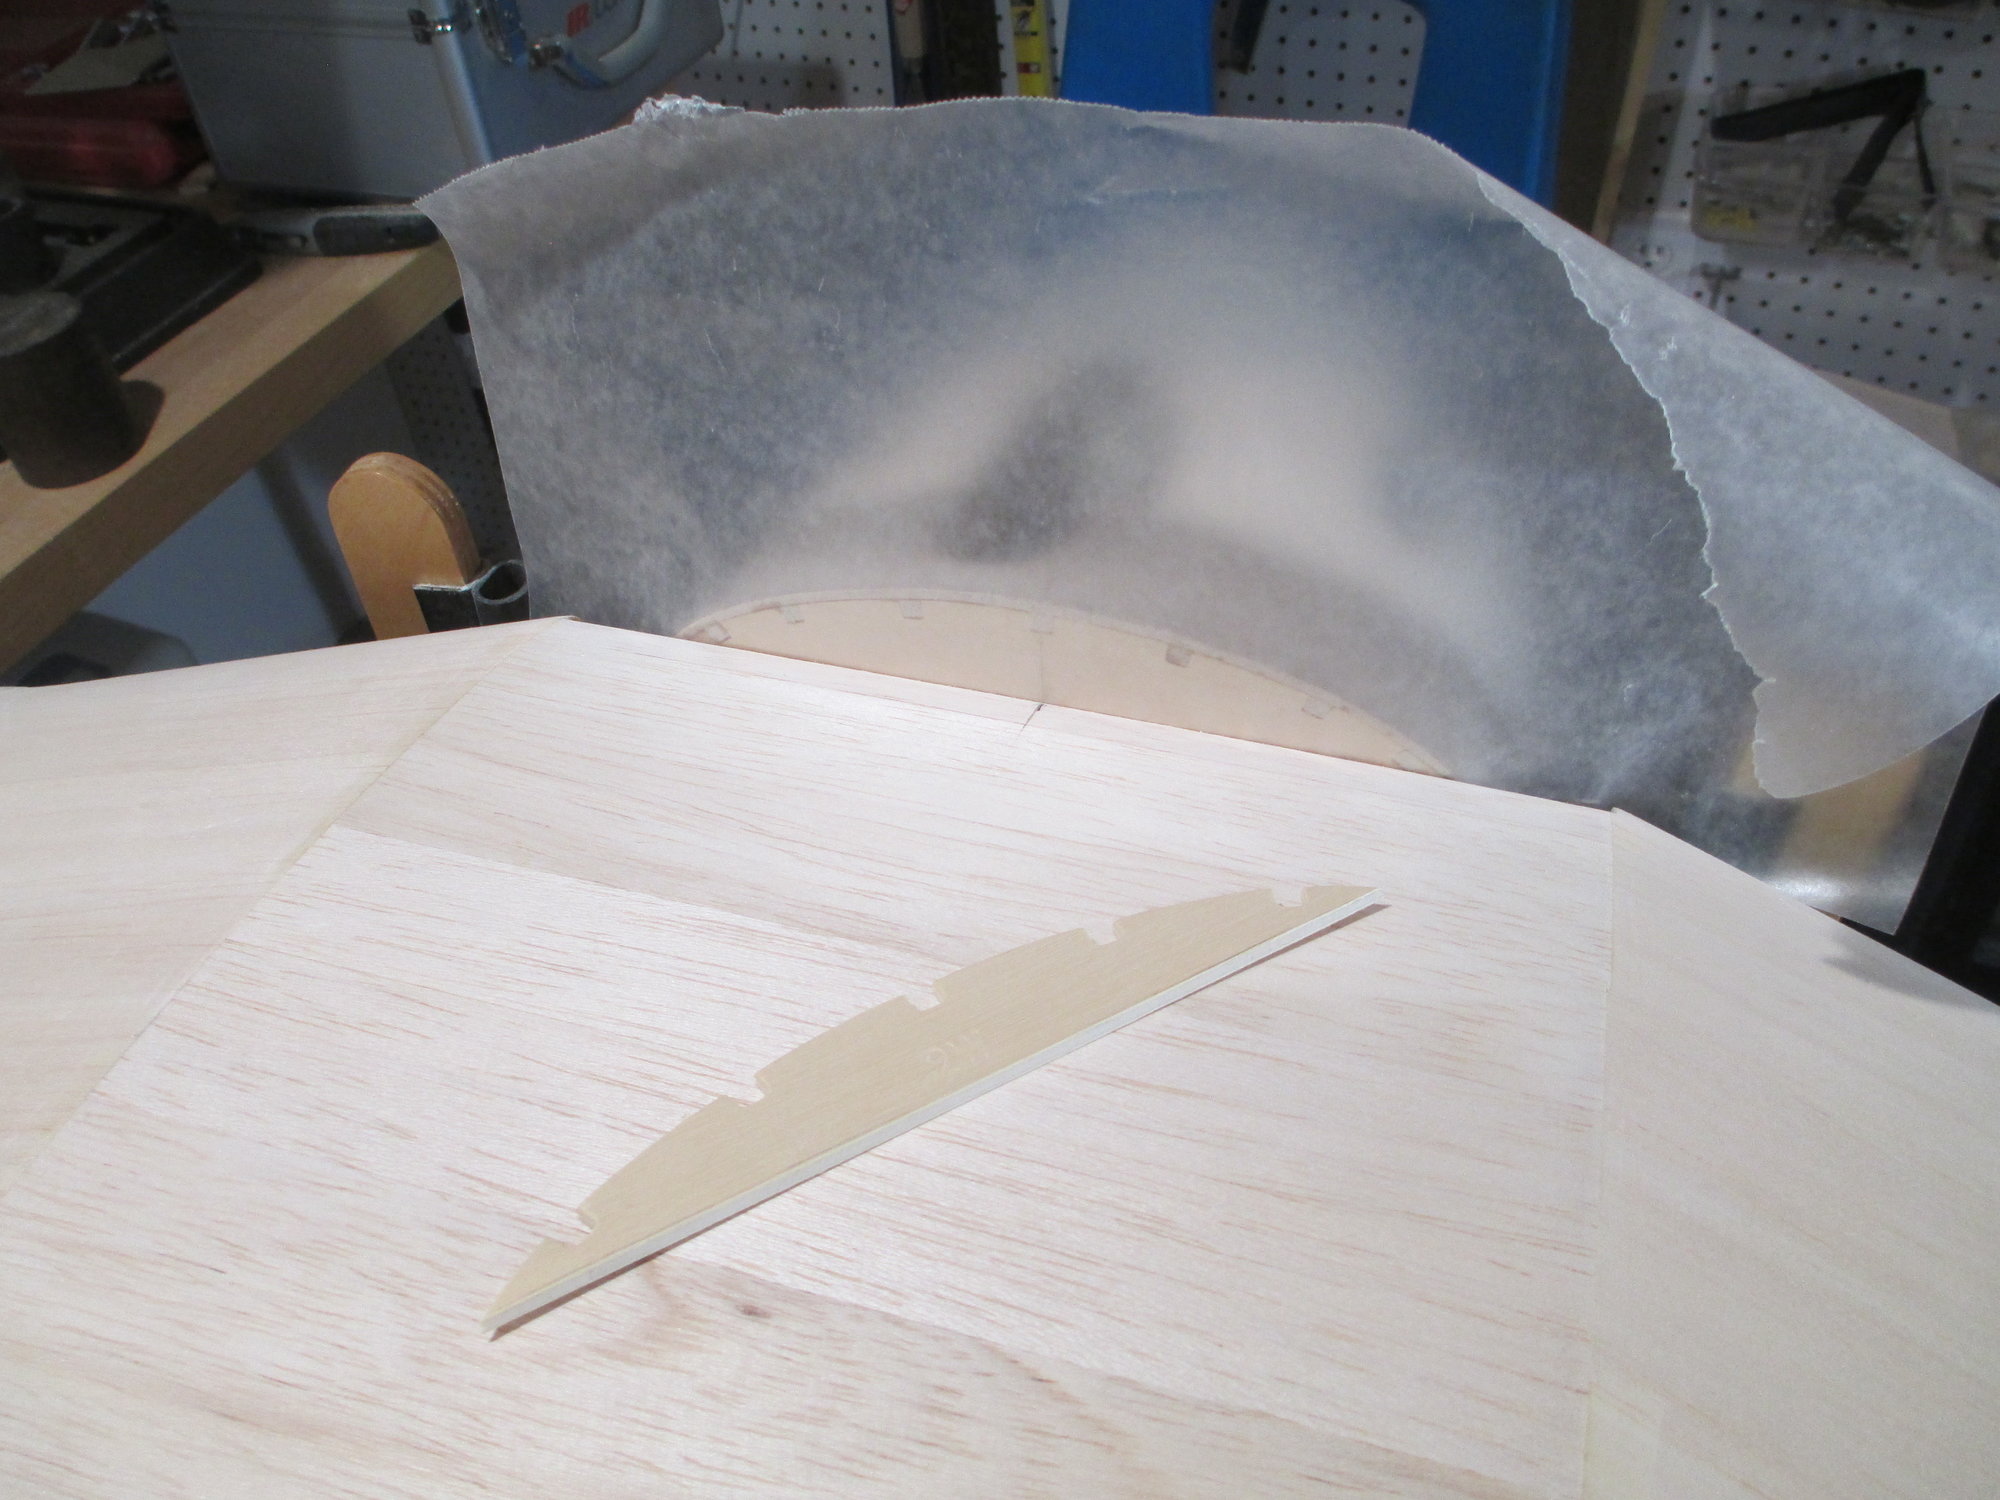
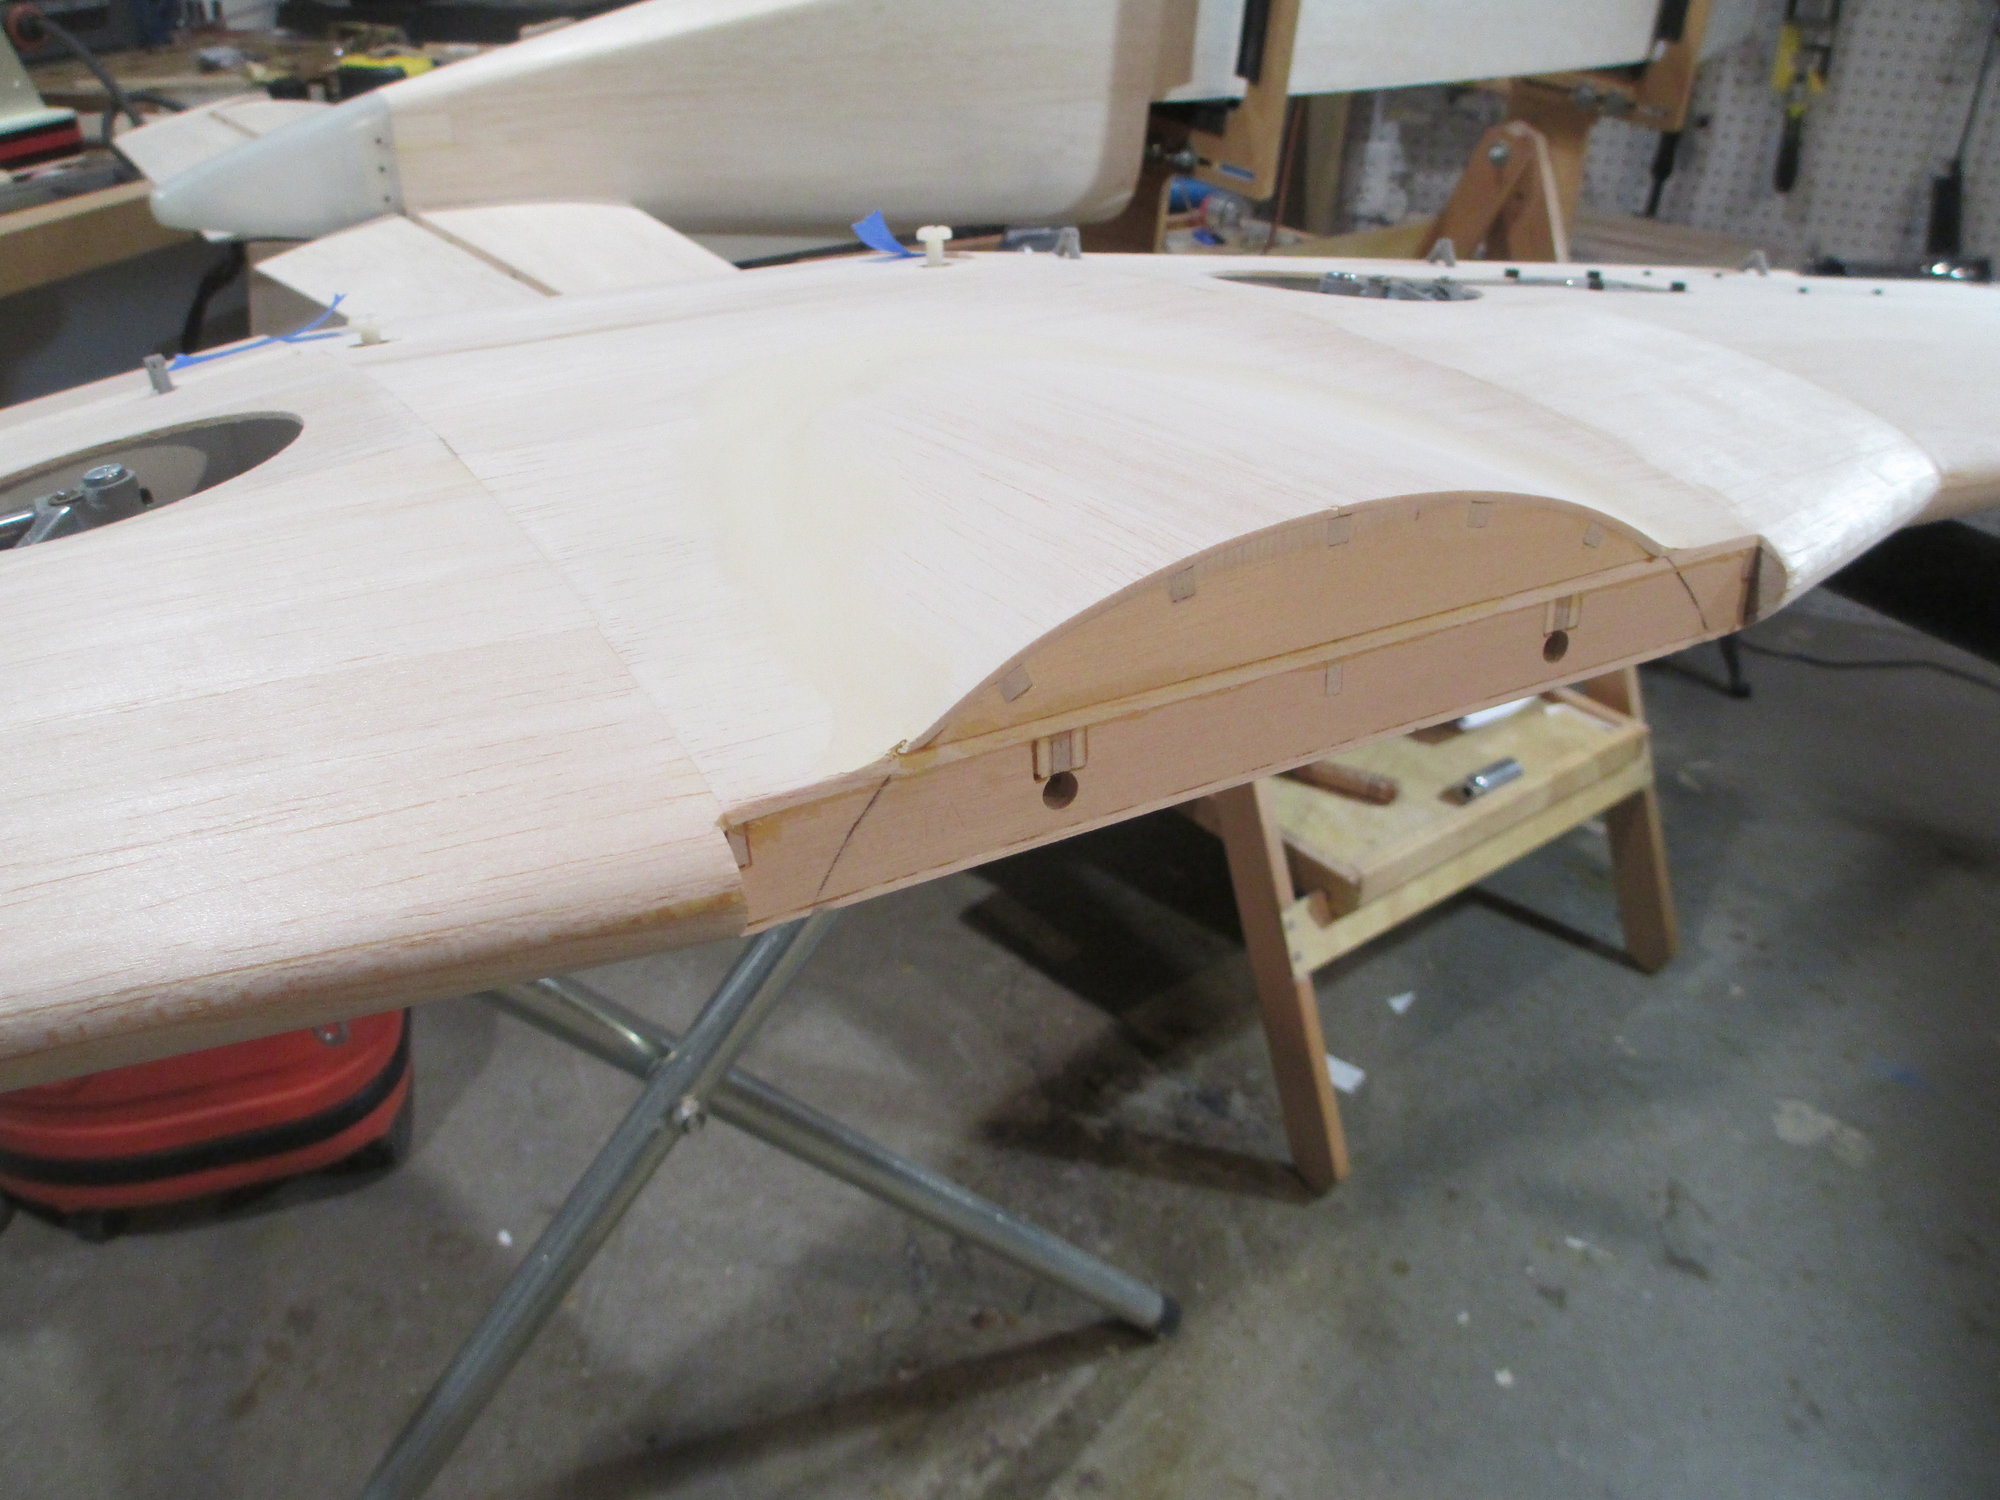
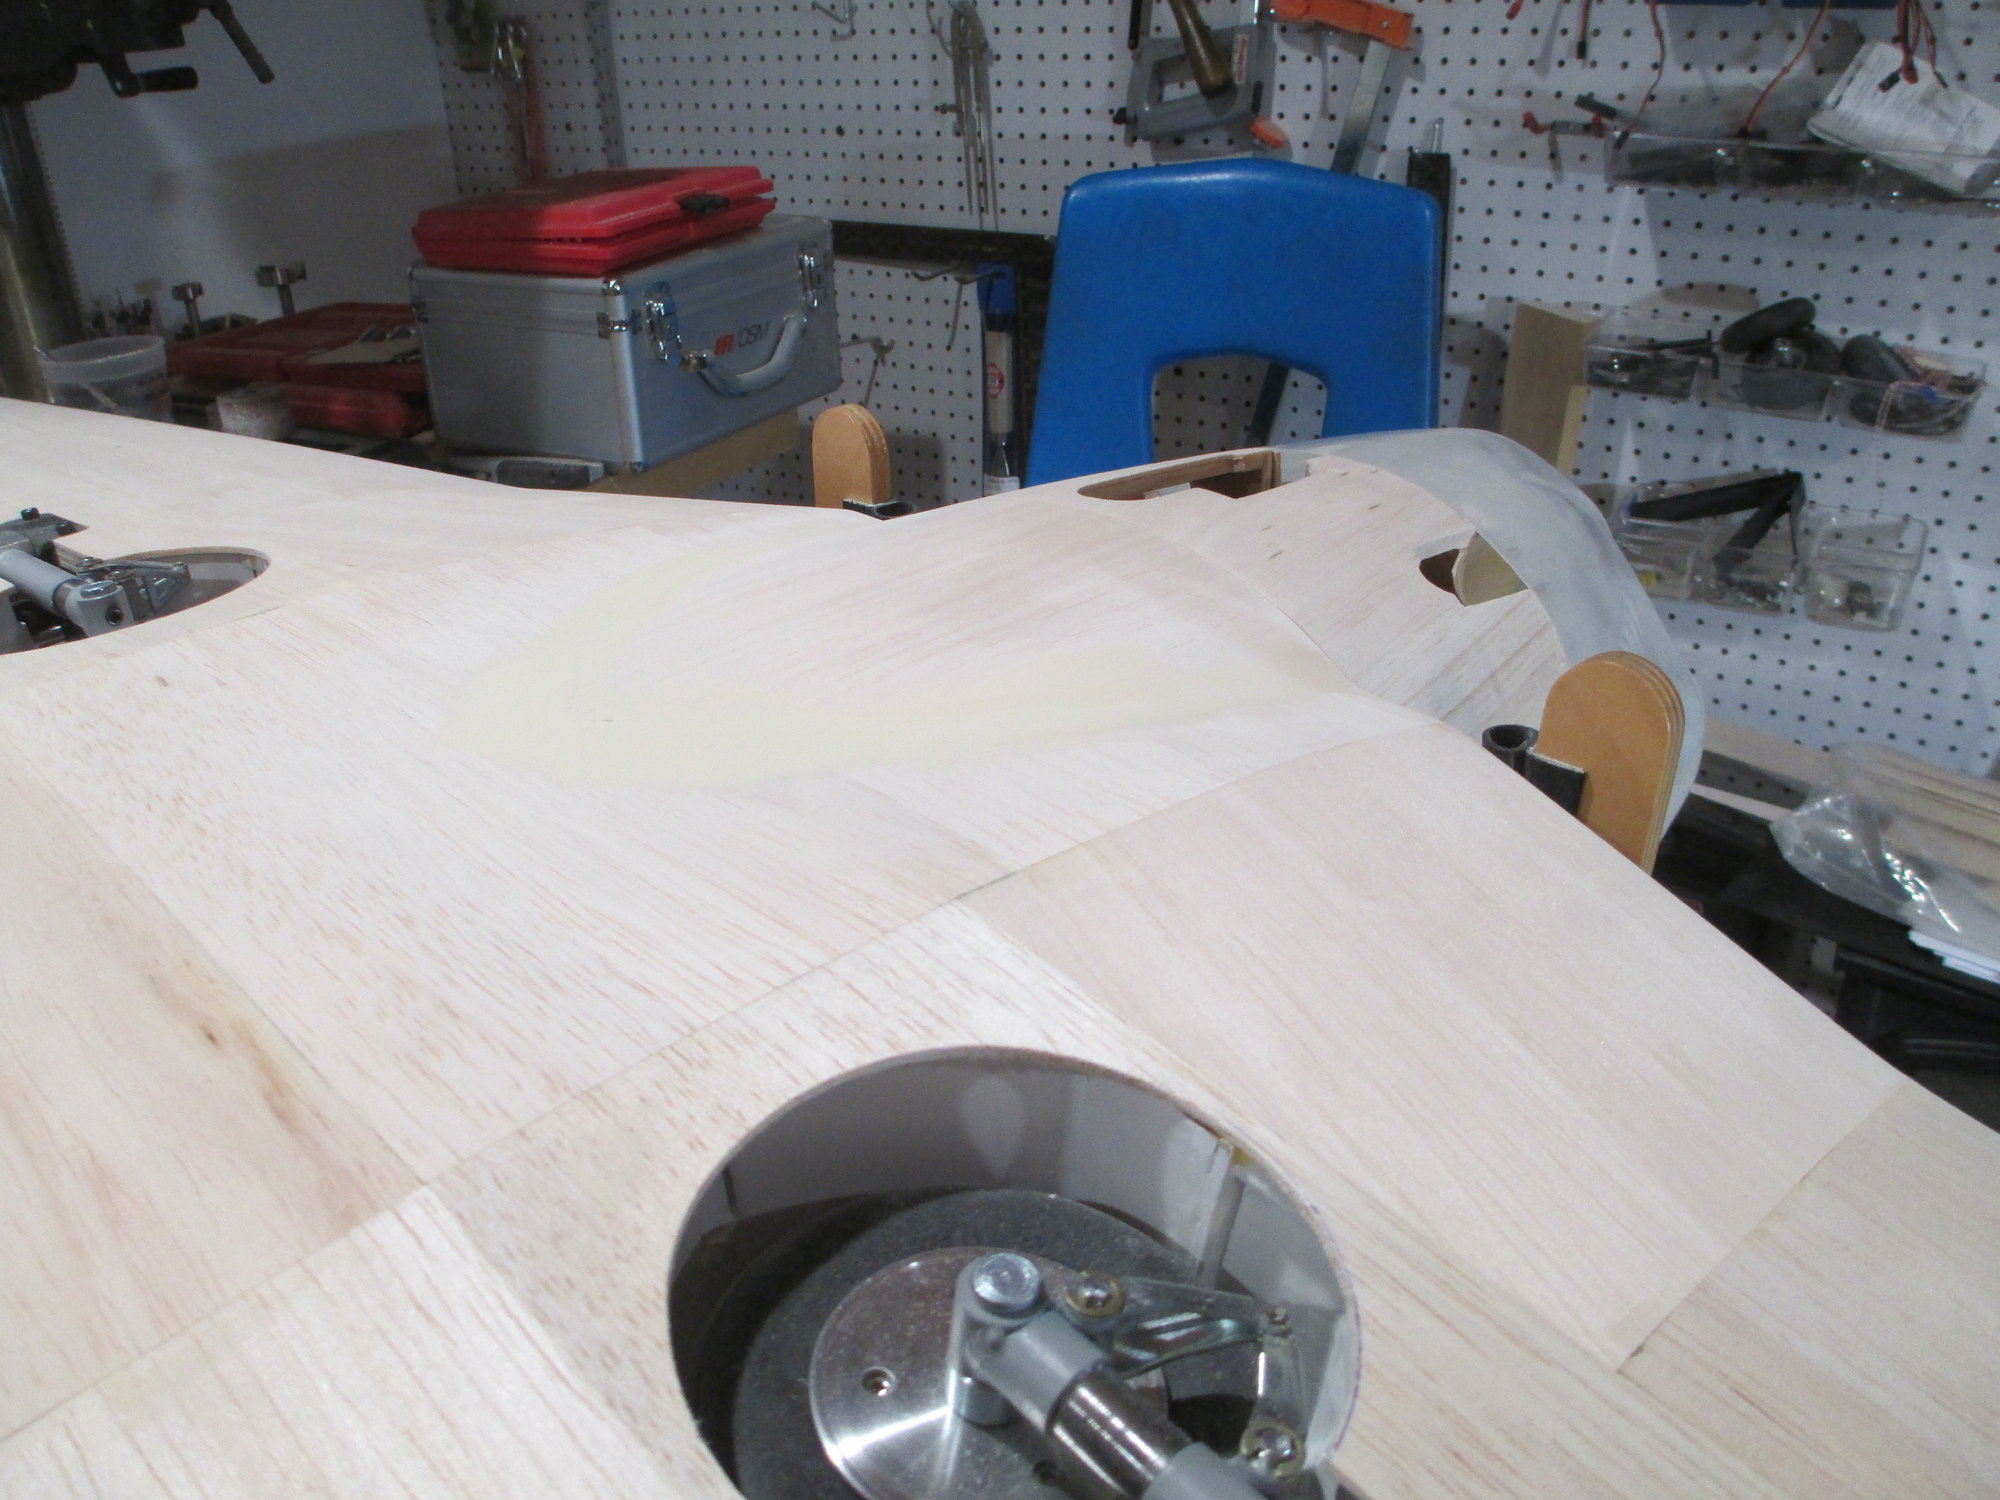
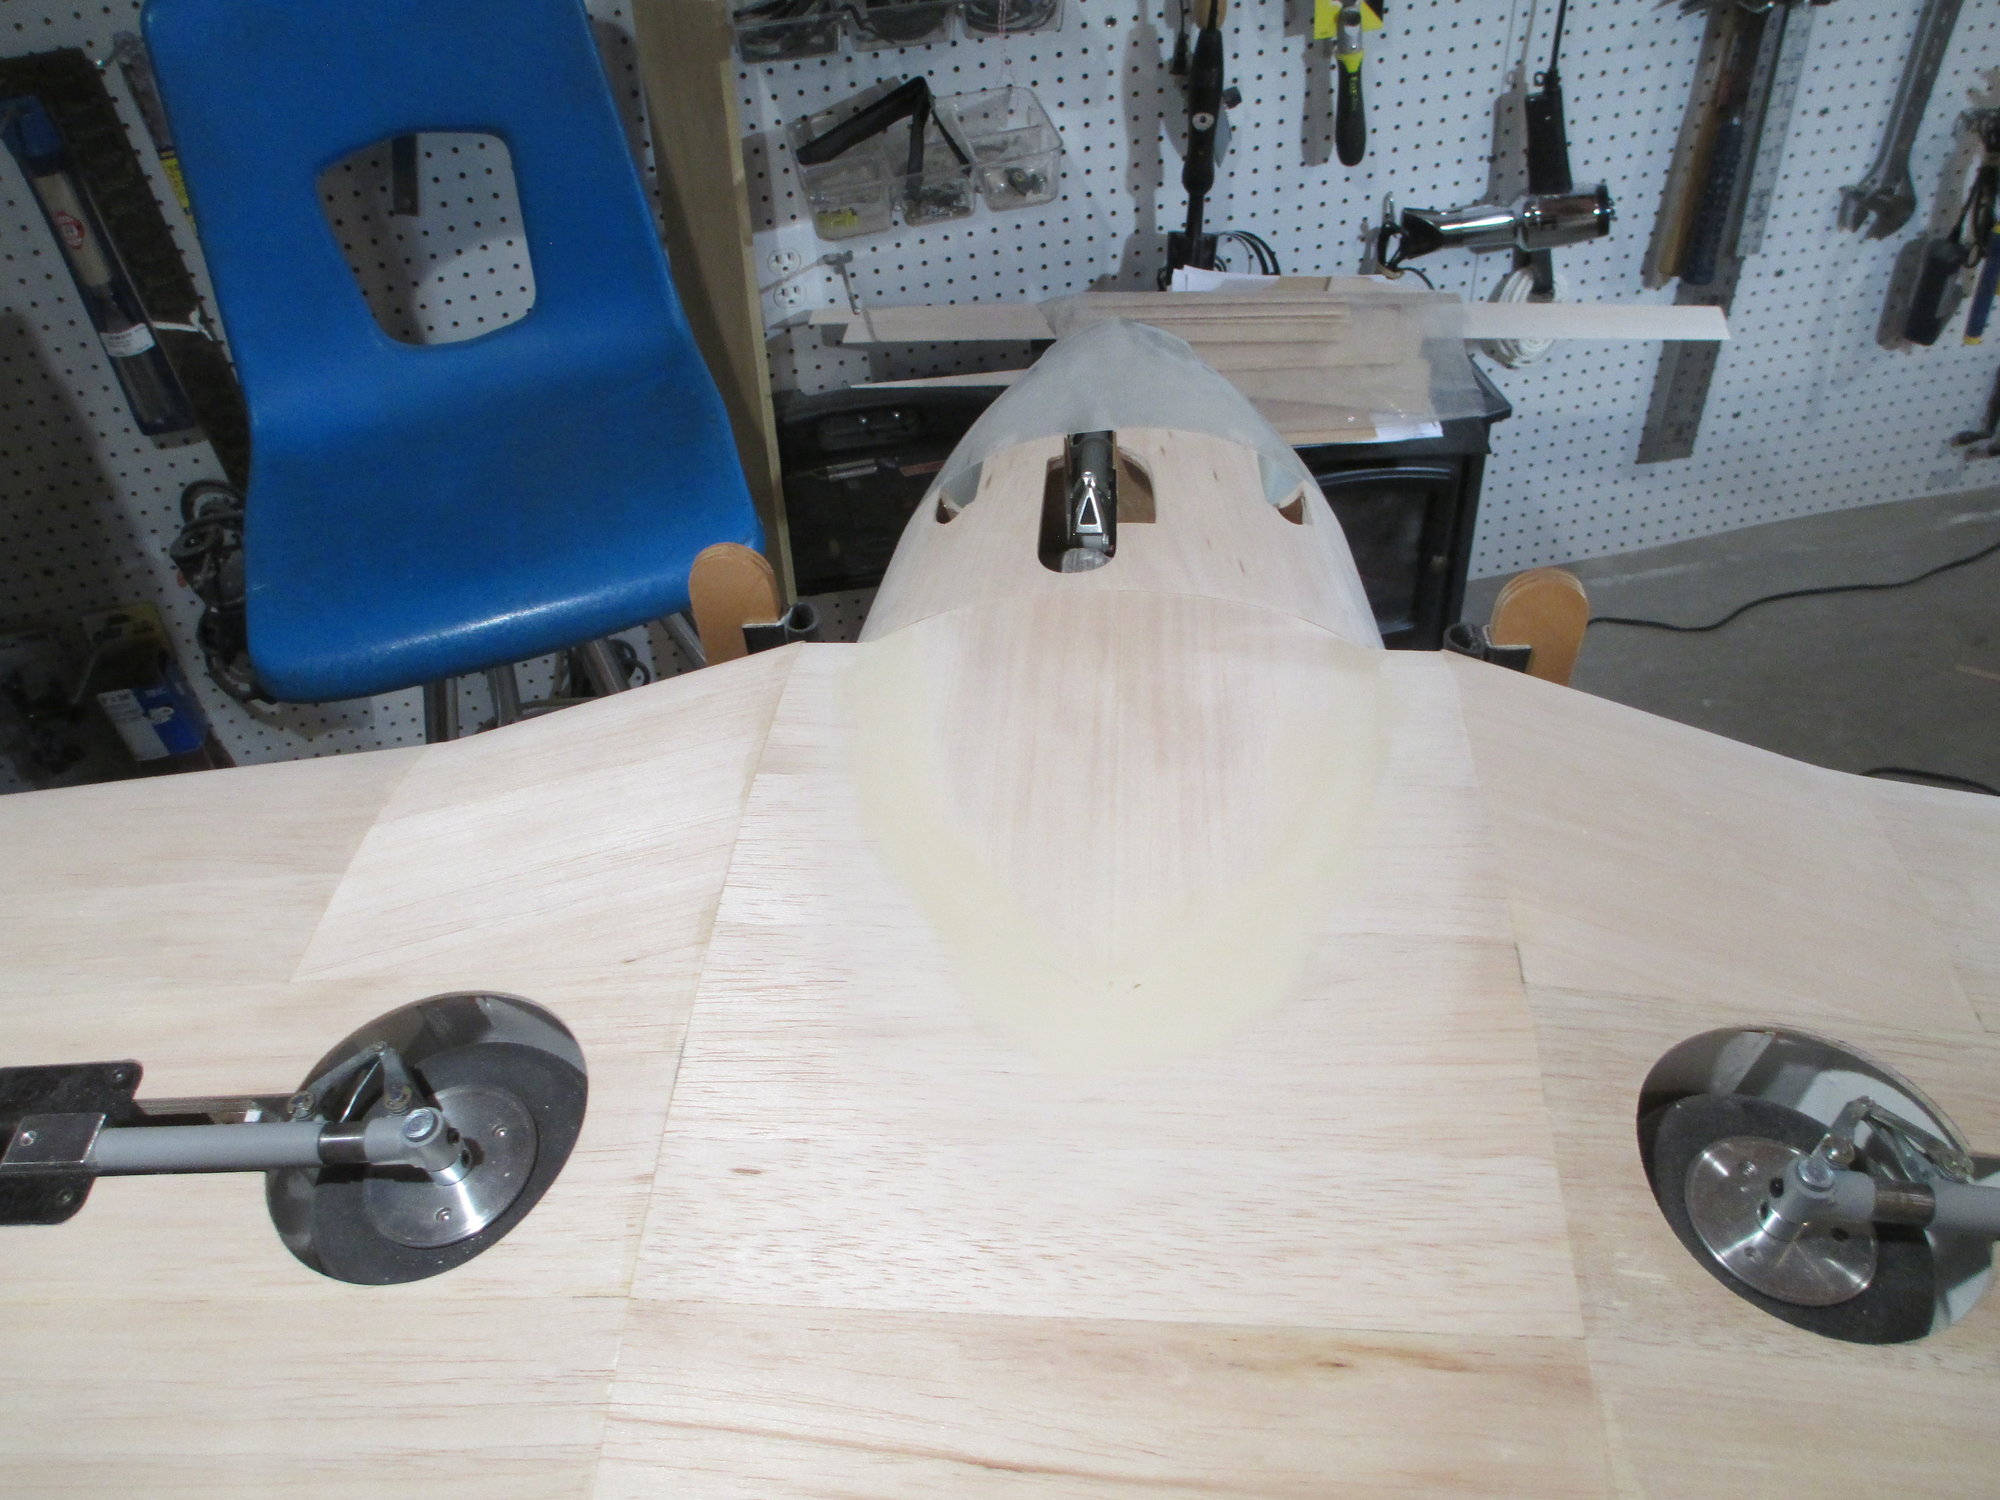
Sitting atop of the wing is the 1/8" plywood belly pan former. With the wing still secured to the fuselage with the two nylon wing bolts, the belly pan former will be edge glued to the wing while butted up against fuse former F2.


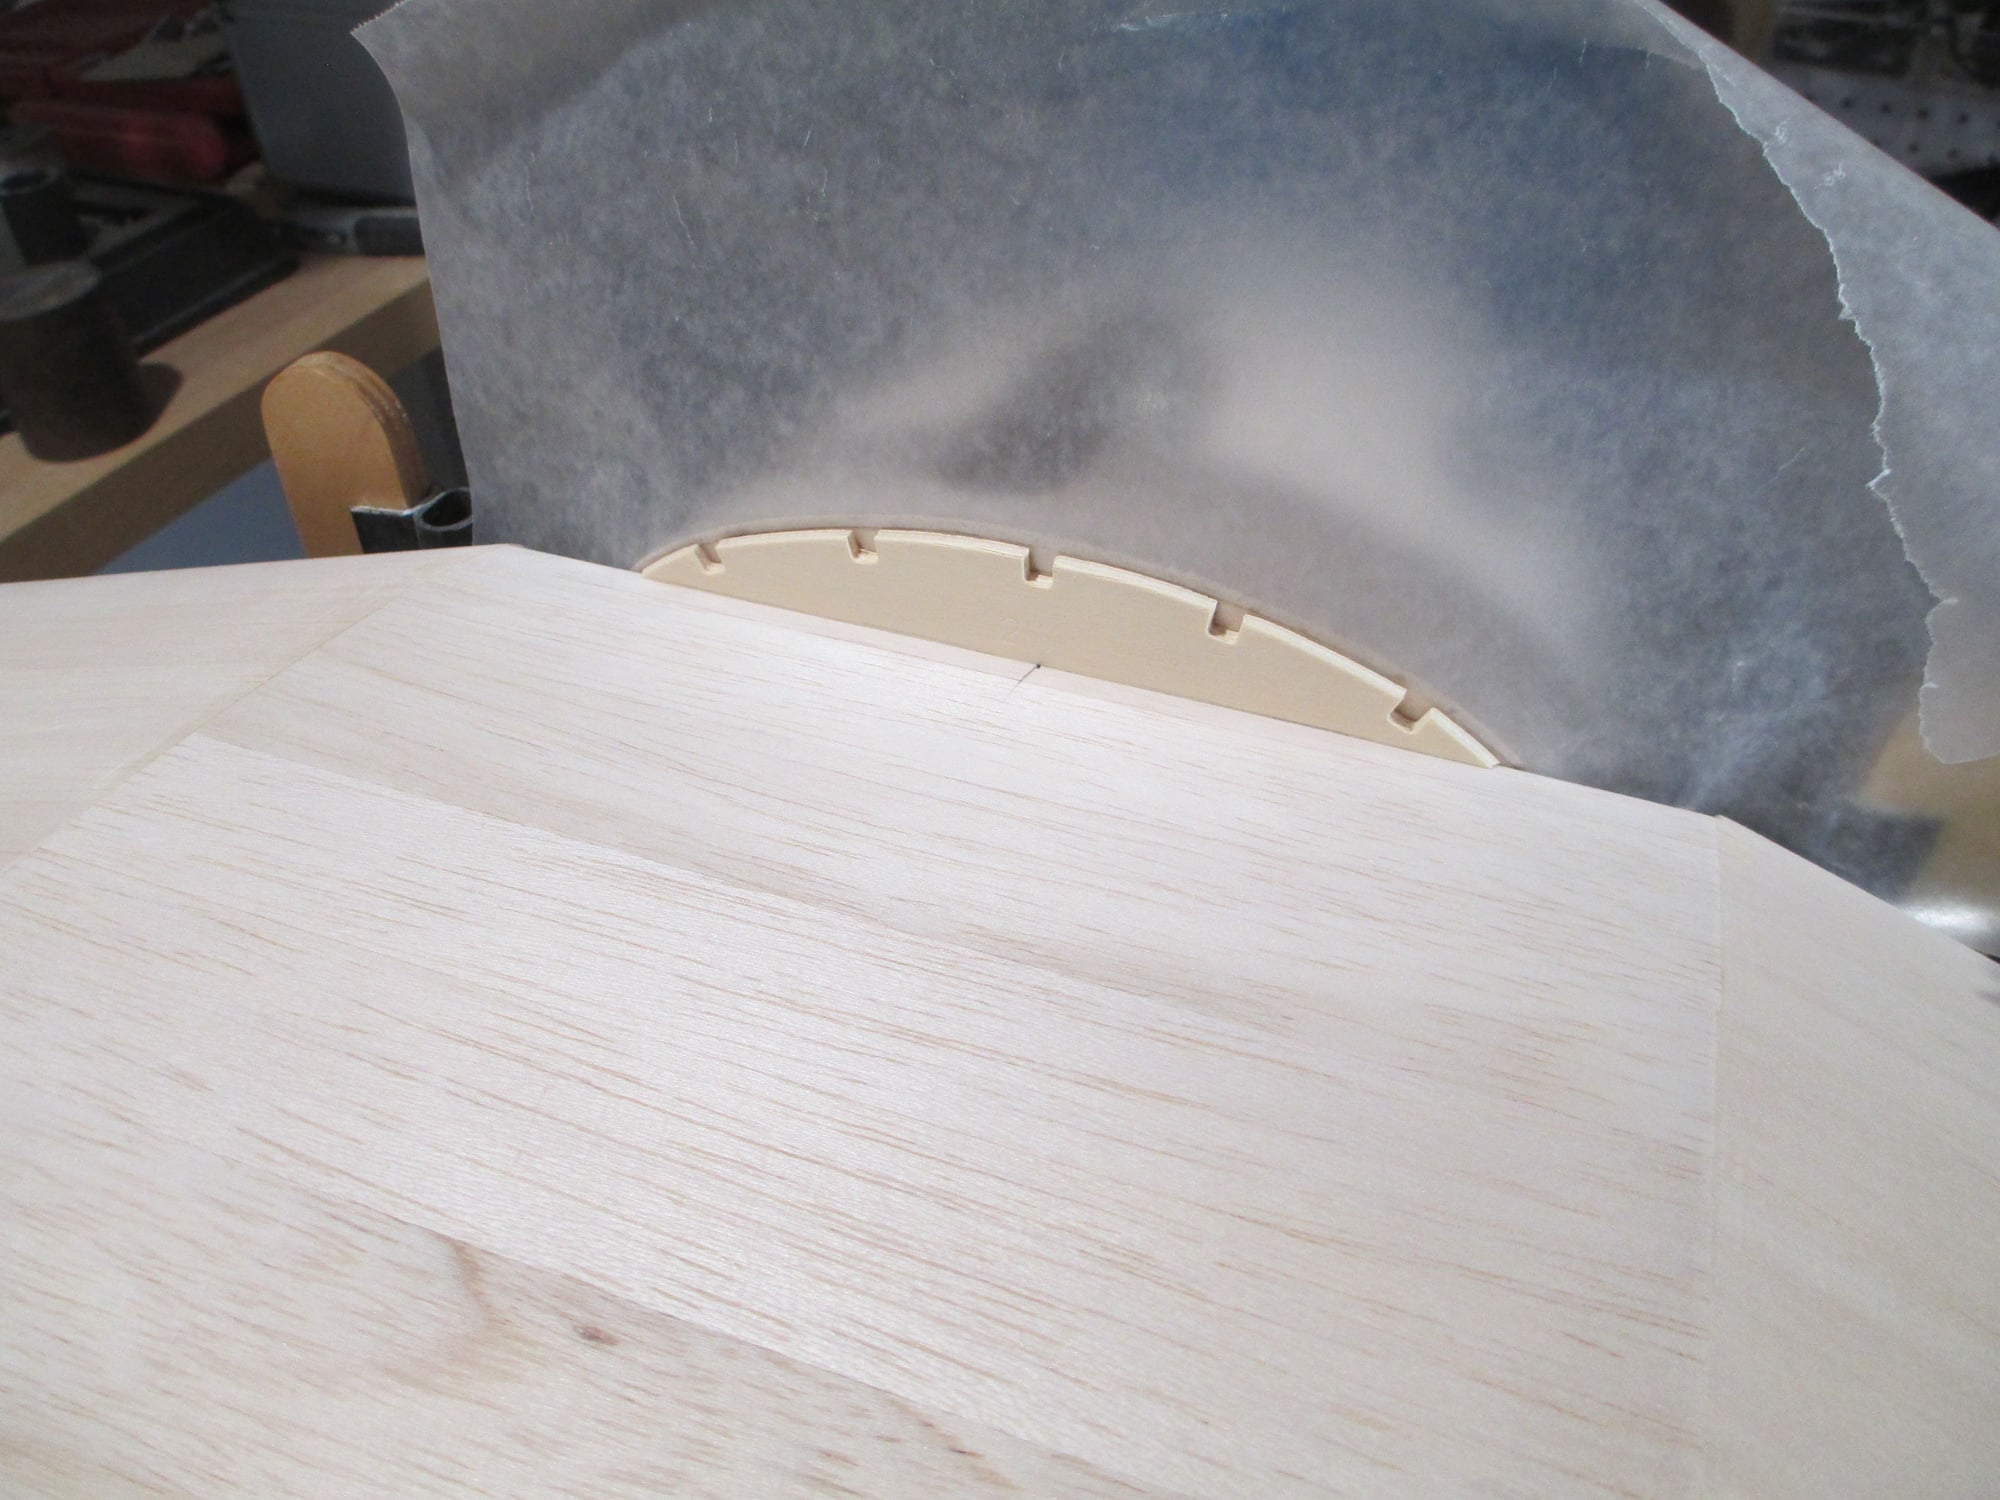
I thought it prudent to place waxed paper between the former's so as not to accidentally glue them together!

Last edited by VincentJ; 01-12-2020 at 02:22 PM.
Old 01-12-2020, 02:49 PM
  #654  
Tony Hallo
 
Join Date: Jan 2003
Location: Springdale, PA
Posts: 1,833
Received 50 Likes on 48 Posts
Default

Originally Posted by VincentJ
Thanks for those links Tony, very interesting and sooo much work!!!
Do you have a choice?
Old 01-12-2020, 02:57 PM
  #655  
speedracerntrixie
My Feedback: (29)
 
speedracerntrixie's Avatar
 
Join Date: Jun 2010
Location: Happy Valley, Oregon
Posts: 9,516
Received 176 Likes on 151 Posts
Default

It would be much easier to order another fiberglass canopy and use that to make a mold. Once Vincent has a mold he can pour a plaster plug and vacuum form his own canopies.
Old 01-12-2020, 02:59 PM
  #656  
VincentJ
Thread Starter
 
VincentJ's Avatar
 
Join Date: Mar 2011
Location: Peterborough, NH
Posts: 4,582
Received 118 Likes on 107 Posts
Default

Originally Posted by Tony Hallo
Do you have a choice?
No, not at this point. I'm not afraid of work! lol
Old 01-12-2020, 03:32 PM
  #657  
Hydro Junkie
 
Hydro Junkie's Avatar
 
Join Date: Nov 2004
Location: Marysville, WA
Posts: 10,527
Received 130 Likes on 123 Posts
Default

Originally Posted by speedracerntrixie
It would be much easier to order another fiberglass canopy and use that to make a mold. Once Vincent has a mold he can pour a plaster plug and vacuum form his own canopies.
IIRC, he hasn't been able to find a canopy that will work so ordering one isn't an option
Old 01-12-2020, 03:45 PM
  #658  
FlyerInOKC
My Feedback: (6)
 
FlyerInOKC's Avatar
 
Join Date: Nov 2004
Location: Oklahoma City, OK
Posts: 14,152
Received 272 Likes on 237 Posts
Default

Actually the cabin top is available from here: Fiberglass Specialties Inc Catalog

Its the windshield Vince can't find.
Old 01-12-2020, 04:26 PM
  #659  
speedracerntrixie
My Feedback: (29)
 
speedracerntrixie's Avatar
 
Join Date: Jun 2010
Location: Happy Valley, Oregon
Posts: 9,516
Received 176 Likes on 151 Posts
Default

Originally Posted by FlyerInOKC
Actually the cabin top is available from here: Fiberglass Specialties Inc Catalog

Its the windshield Vince can't find.

Exactly, since the canopy and cabin top are molded by Fiberglass Specialties as one peice, another one can be used to make a plaster plug to vacuum form a new windshield. I thought that the way I had explained it was clear for just about anyone to follow. Guess not.
Old 01-12-2020, 05:08 PM
  #660  
Tony Hallo
 
Join Date: Jan 2003
Location: Springdale, PA
Posts: 1,833
Received 50 Likes on 48 Posts
Default

If the Fiberglass Specialties cabin top includes the windshield than that would be a great start for sure, it's only $45.
Old 01-12-2020, 06:00 PM
  #661  
Hydro Junkie
 
Hydro Junkie's Avatar
 
Join Date: Nov 2004
Location: Marysville, WA
Posts: 10,527
Received 130 Likes on 123 Posts
Default

Originally Posted by speedracerntrixie
Exactly, since the canopy and cabin top are molded by Fiberglass Specialties as one peice, another one can be used to make a plaster plug to vacuum form a new windshield. I thought that the way I had explained it was clear for just about anyone to follow. Guess not.
You are one arrogant SOB, aren't you Speed. How about you tells us how to do a spin chain thru as well, since you seem to know everything else. BTW, I can follow directions for just about anything, when given all relevant information. Vincent needed a windshield, not a cabin top, hence my post. You were far from clear on what you were getting at as you NEVER mentioned the windshield
Old 01-12-2020, 06:17 PM
  #662  
speedracerntrixie
My Feedback: (29)
 
speedracerntrixie's Avatar
 
Join Date: Jun 2010
Location: Happy Valley, Oregon
Posts: 9,516
Received 176 Likes on 151 Posts
Default

Hydro, others had no issue following what I had suggested. Perhaps if your focus was not an attempt to prove me wrong ( trolling ) you may have been able to follow along. Personally I think you owe Vincent an apology for using his build thread as a means to attempt to get under my skin.

Vincent, I offer my apologies for bringing this into your otherwise fantastic build thread.

Last edited by speedracerntrixie; 01-12-2020 at 06:39 PM.
Old 01-13-2020, 02:15 AM
  #663  
VincentJ
Thread Starter
 
VincentJ's Avatar
 
Join Date: Mar 2011
Location: Peterborough, NH
Posts: 4,582
Received 118 Likes on 107 Posts
Default

Originally Posted by speedracerntrixie
Hydro, others had no issue following what I had suggested. Perhaps if your focus was not an attempt to prove me wrong ( trolling ) you may have been able to follow along. Personally I think you owe Vincent an apology for using his build thread as a means to attempt to get under my skin.

Vincent, I offer my apologies for bringing this into your otherwise fantastic build thread.
Speed, no apologies needed...

I will fabricate my own windscreen. This is just one small hurdle that one has to jump over and as builder's we all face these difficulties in our projects. I will come up with a solution and come out on the other end with not only a windscreen, but with the satisfaction knowing that I made it.
Old 01-13-2020, 05:51 AM
  #664  
FlyerInOKC
My Feedback: (6)
 
FlyerInOKC's Avatar
 
Join Date: Nov 2004
Location: Oklahoma City, OK
Posts: 14,152
Received 272 Likes on 237 Posts
Default

And hopefully Professor Vincent will show us how he does it and teach us a thing or three like always.
Old 01-13-2020, 08:05 AM
  #665  
SteveD-RCU
My Feedback: (2)
 
SteveD-RCU's Avatar
 
Join Date: Jan 2002
Location: Sault Ste Marieont, CANADA
Posts: 946
Likes: 0
Received 2 Likes on 2 Posts
Default

Subscribed...
Old 01-13-2020, 08:31 AM
  #666  
VincentJ
Thread Starter
 
VincentJ's Avatar
 
Join Date: Mar 2011
Location: Peterborough, NH
Posts: 4,582
Received 118 Likes on 107 Posts
Default

Originally Posted by SteveD-RCU
Subscribed...
Welcome Steve, glad you found us...
Old 01-13-2020, 09:04 AM
  #667  
VincentJ
Thread Starter
 
VincentJ's Avatar
 
Join Date: Mar 2011
Location: Peterborough, NH
Posts: 4,582
Received 118 Likes on 107 Posts
Default


Old 01-13-2020, 09:08 AM
  #668  
FlyerInOKC
My Feedback: (6)
 
FlyerInOKC's Avatar
 
Join Date: Nov 2004
Location: Oklahoma City, OK
Posts: 14,152
Received 272 Likes on 237 Posts
Default

It looks funny laying on its back. Good job fitting the sticks to the bottom of the wing.
Old 01-13-2020, 09:12 AM
  #669  
VincentJ
Thread Starter
 
VincentJ's Avatar
 
Join Date: Mar 2011
Location: Peterborough, NH
Posts: 4,582
Received 118 Likes on 107 Posts
Default

Originally Posted by FlyerInOKC
It looks funny laying on its back. Good job fitting the sticks to the bottom of the wing.
It really shows how much dihedral that's in the wing...
Old 01-13-2020, 09:20 AM
  #670  
FlyerInOKC
My Feedback: (6)
 
FlyerInOKC's Avatar
 
Join Date: Nov 2004
Location: Oklahoma City, OK
Posts: 14,152
Received 272 Likes on 237 Posts
Default

Yes it does.
Old 01-14-2020, 02:52 PM
  #671  
VincentJ
Thread Starter
 
VincentJ's Avatar
 
Join Date: Mar 2011
Location: Peterborough, NH
Posts: 4,582
Received 118 Likes on 107 Posts
Default


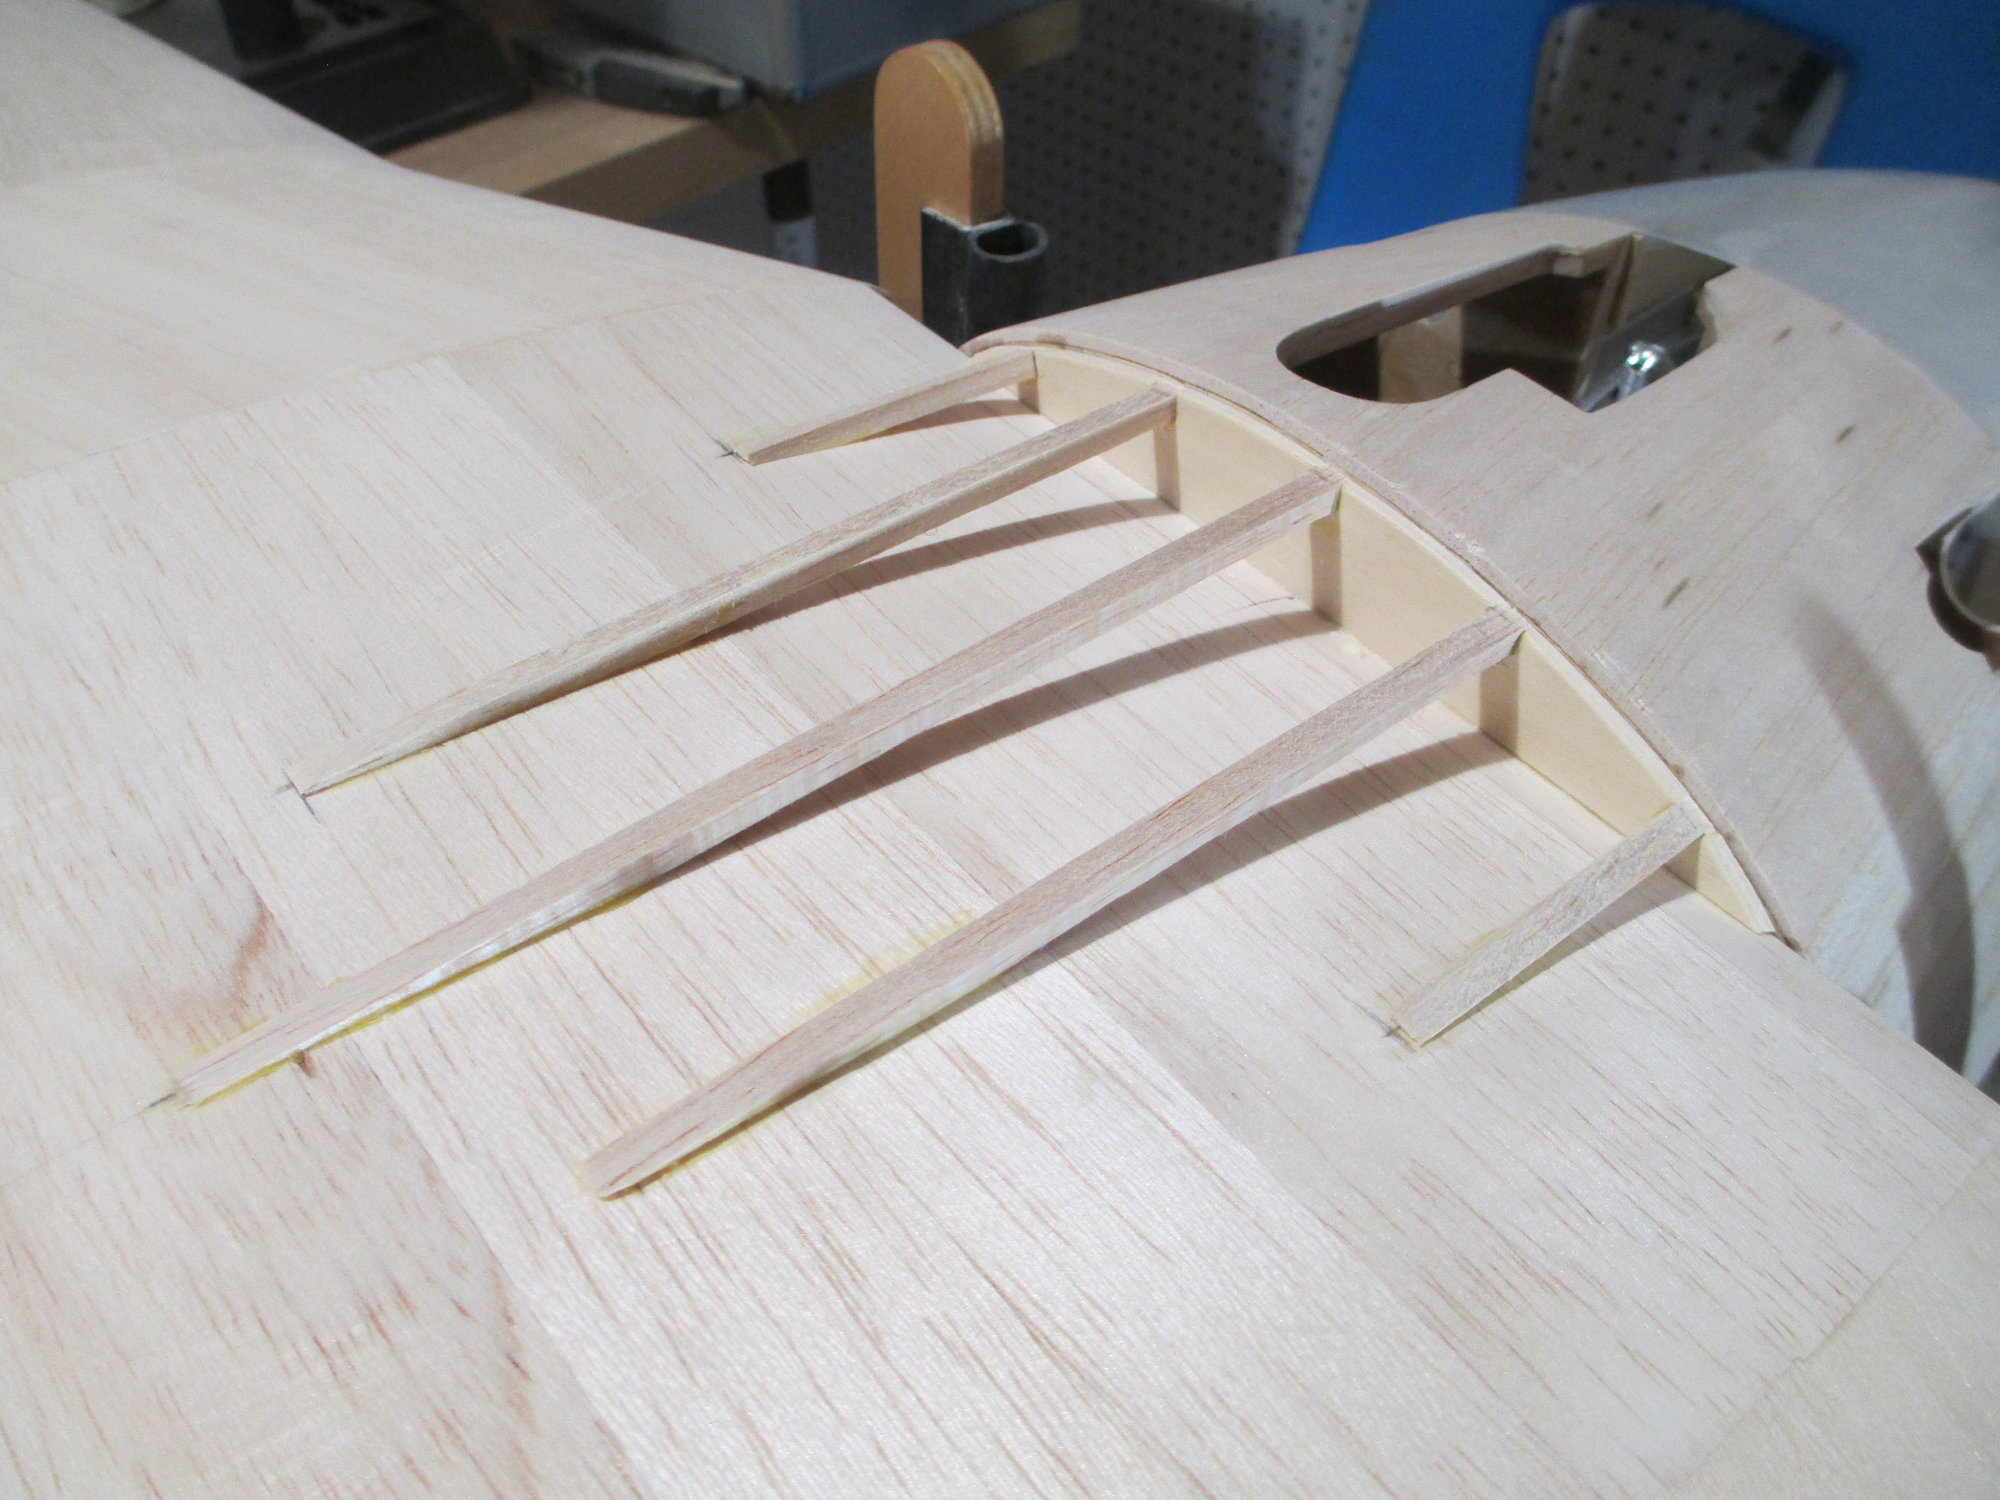
Belly pan is completed...now let's see how it fits!


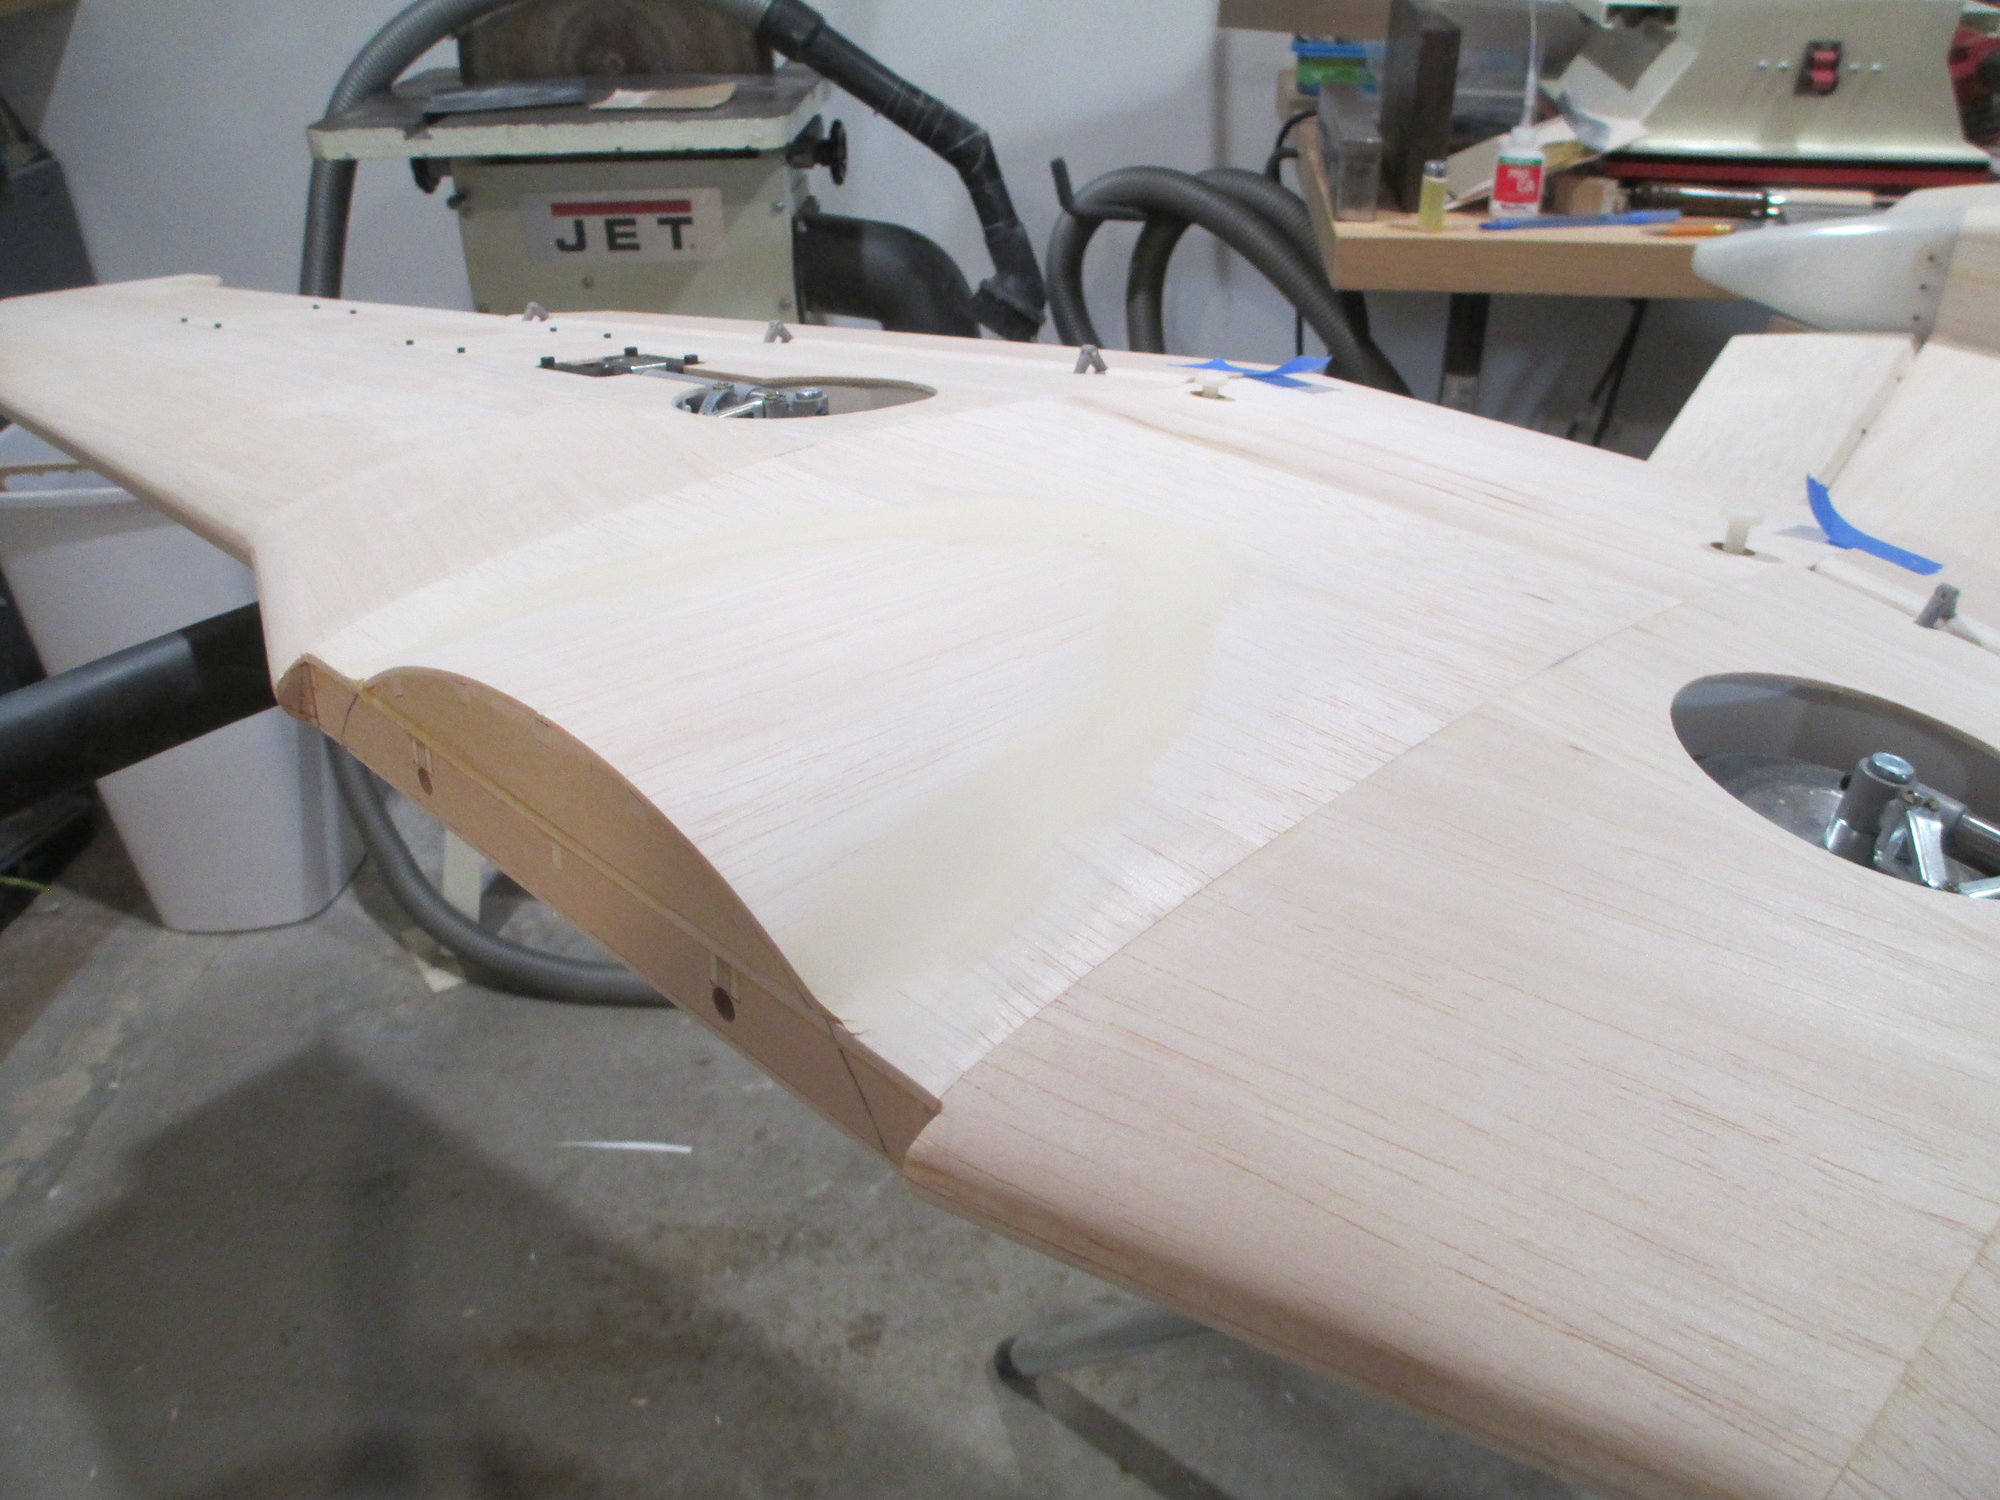
Notice that I'm in no hurry to glue in the wing dowels. If you do, they will just get in your way of sanding and covering. They can and should be installed after the wing is painted.


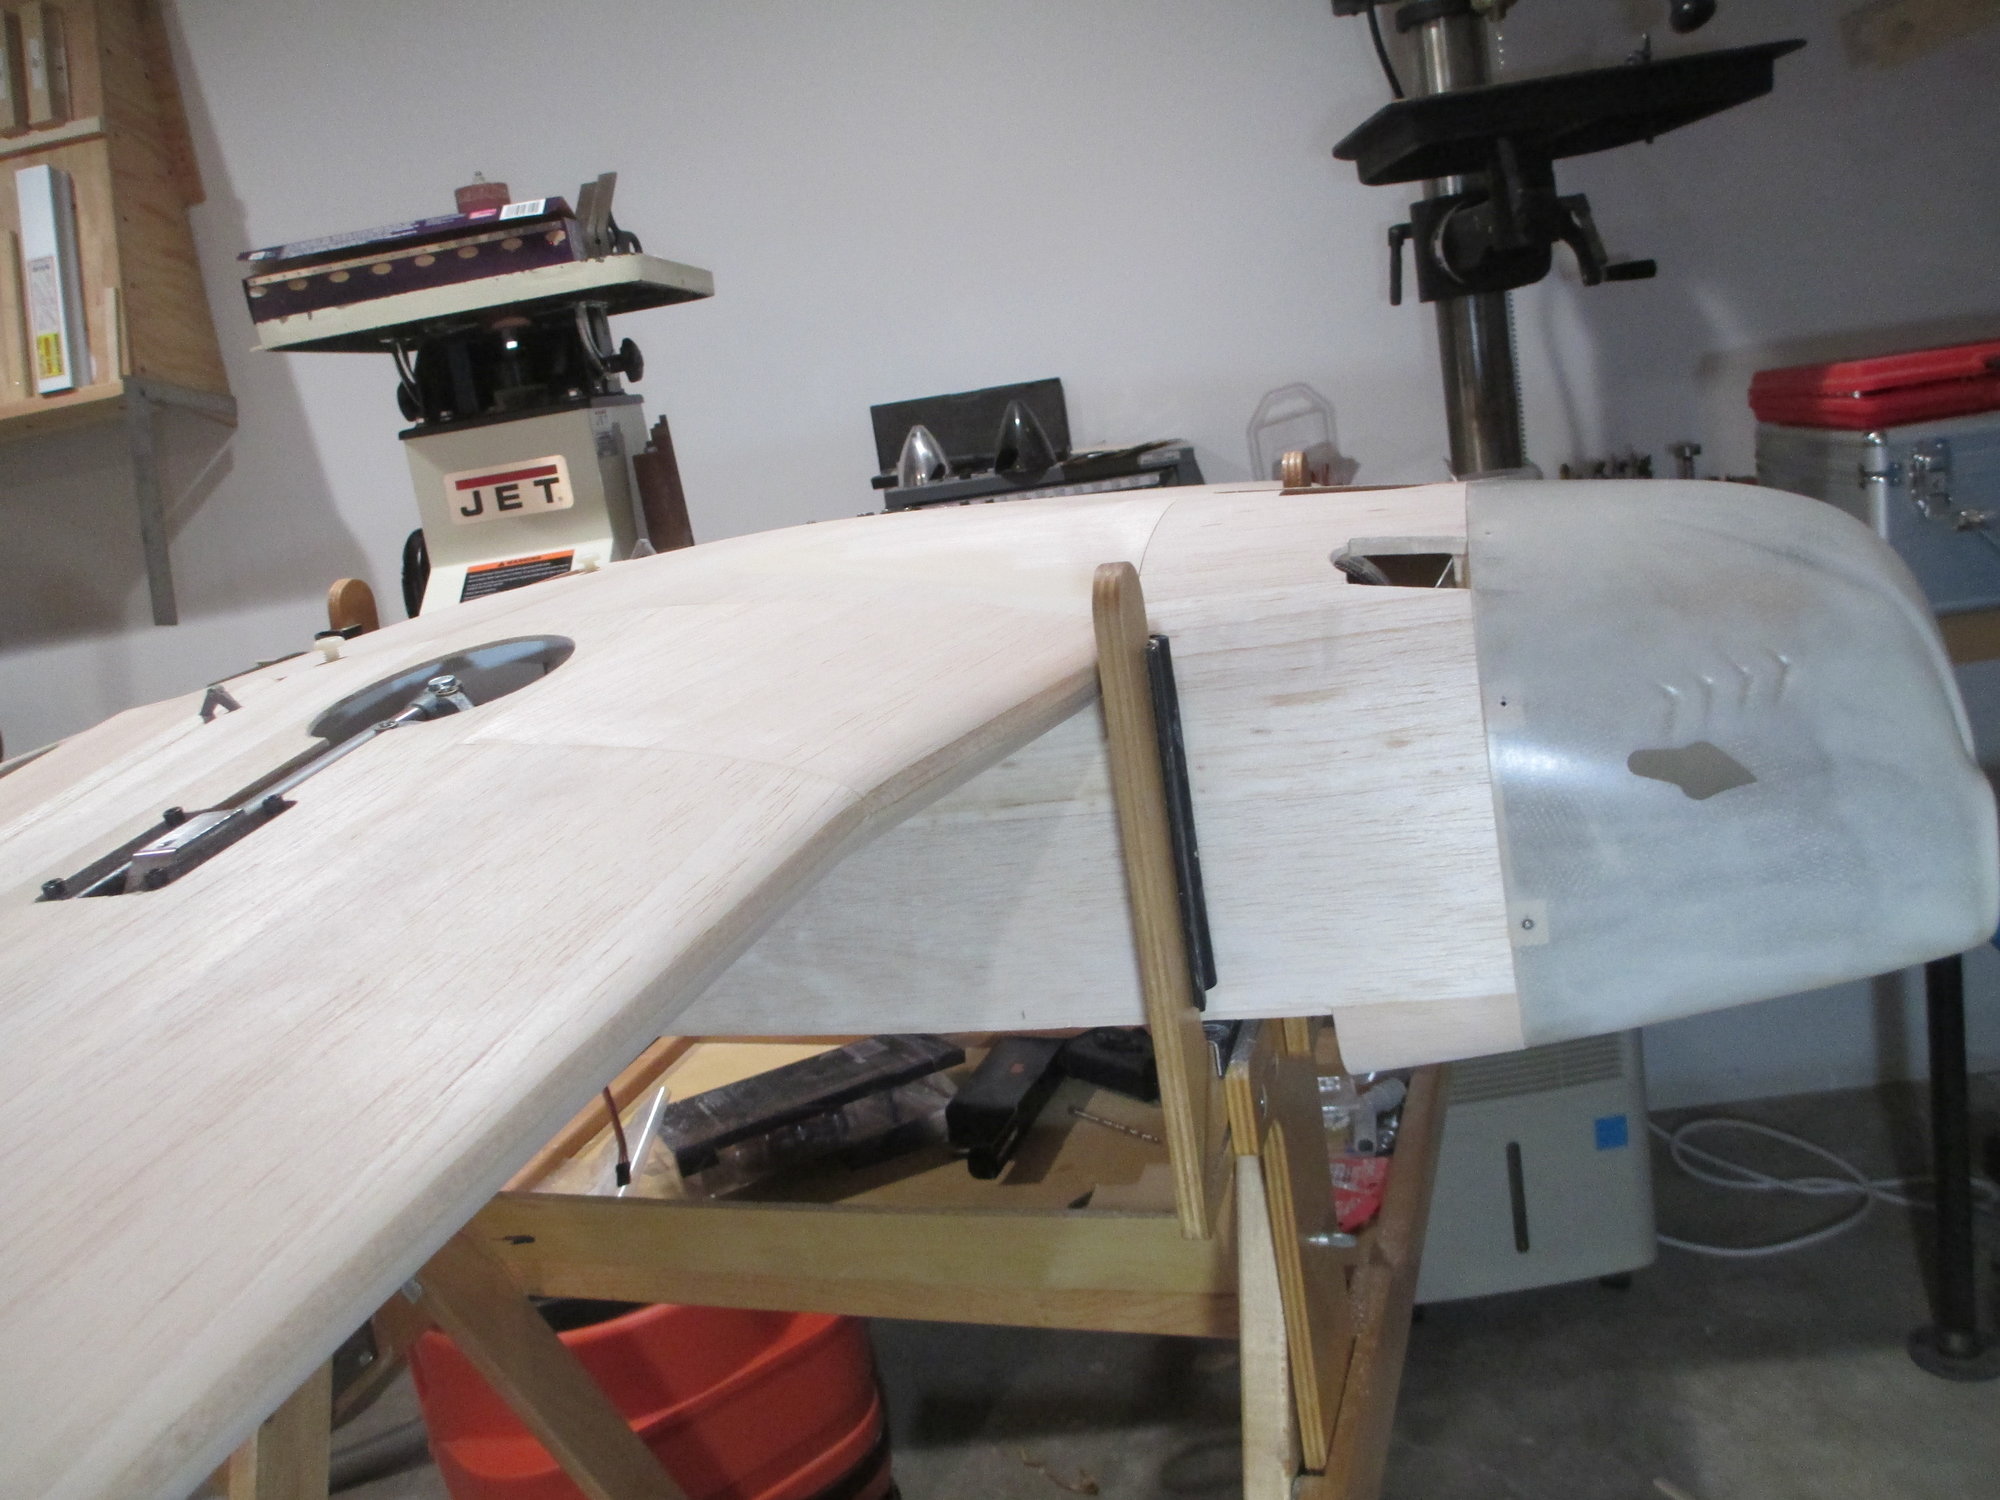
Just the transition that I was looking for...


Last edited by VincentJ; 01-14-2020 at 02:55 PM.
Old 01-14-2020, 03:16 PM
  #672  
FlyerInOKC
My Feedback: (6)
 
FlyerInOKC's Avatar
 
Join Date: Nov 2004
Location: Oklahoma City, OK
Posts: 14,152
Received 272 Likes on 237 Posts
Default

Beutiful job of blending the belly into the wing!
Old 01-14-2020, 05:32 PM
  #673  
fly24-7
 
fly24-7's Avatar
 
Join Date: Dec 2005
Location: Shrewsbury, MA
Posts: 391
Likes: 0
Received 0 Likes on 0 Posts
Default

Looks like you're ready to continue glassing.
Old 01-14-2020, 11:49 PM
  #674  
VincentJ
Thread Starter
 
VincentJ's Avatar
 
Join Date: Mar 2011
Location: Peterborough, NH
Posts: 4,582
Received 118 Likes on 107 Posts
Default

Originally Posted by fly24-7
Looks like you're ready to continue glassing.
Yes indeed, however there are many small items left on my punch list to complete first. First of which is completing the two exhaust flaps that exit the rear of the cowl. I can't complete that until I have the exhaust (which I am still waiting for)... All the gaps on items like flaps, ailerons, cowl , etc. will need to be tuned up a bit as well.

Last edited by VincentJ; 01-15-2020 at 03:11 AM.
Old 01-15-2020, 05:35 AM
  #675  
FlyerInOKC
My Feedback: (6)
 
FlyerInOKC's Avatar
 
Join Date: Nov 2004
Location: Oklahoma City, OK
Posts: 14,152
Received 272 Likes on 237 Posts
Default

You may have a list of details yet to address but you are still making great progress!


Contact Us - Archive - Advertising - Cookie Policy - Privacy Statement - Terms of Service -

Copyright © 2024 MH Sub I, LLC dba Internet Brands. All rights reserved. Use of this site indicates your consent to the Terms of Use.